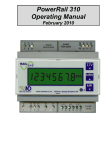
Download Quick Installation Installation Installation Guide of Solar Eye
Transcript
Quick Installation Guide of Solar Eye
The quick installation guide contains the essential steps for installing and operating the Solar Eye.Observe the detailed operating and installation manual.
This guide does not replace the user manual.Observe all national regulations.
1.Install Solar Bee
2.Install Solar Eye
1.1 Connect the Straight Networking Cable
a. Remove the square silica gel plug, and then insert network cable
a. Press the Solar Eye bottom groove into the convex of base
With a sound of clattering, installation will be finished.
c. Insert the two wall plugs
d. Wring two ST3×25 screws into wall plugs and keep
the screw head 5mm space outside
ev
b. Fix the accessories (waterproof seal sets) to Solar Bee
e. Hang the Solar Bee on the screws fixed to the wall
Tighten the screws with a screwdriver slightly
er
a. Use the ST2.7*6 screws to fix two wall mounting
plates onto the pillars of Solar Bee
f. Connect Solar Bee and the PV inverter together with
ar
ol
the straight networking cable
b. Use a φ6 mm bit and drill two holes to depth of 30-35mm.
press the base button and release connection.
-s
1.2 Wall Mounting
b. If want to remove Solar Eye from the base,
3.Set & Operation
Three keys “left” ( C ), “right” ( B ), and “enter” ( A ) are
d. Set Emission Coefficient
available as Fig, which can help achieve all functions
* Press “left” & “right” key to change coefficient, and then confirm it by “enter” key
All digits flash to indicate the setting is finished. At this time, press “right” key enter into main interface
3.1 Initial Setting
Initial setup is required for first time use. Users are allowed to change these parameters as following:
* Hold “Enter” key for 3 seconds for setting as Fig
* Press “left” & “right” key to change time, and switch to the next setting by “enter” key
* Press “right” key to enter into currency setting interface
ev
a. Set Time
Emission Coefficient indicate the decreased CO2 volume (kg) per 1Kwh
electricity generated from PV inverter
3.2 Wireless Connection
er
Solar Eye can be connected to Ever-solar inverter (up to 5 inverters) as following:
a. Set Up Wireless Connection
* Press the key of Solar Bee under normal working state for 15 seconds, until LED of Solar Bee flashes,
which indicates Solar Bee has been into connection state
-s
* Press “right” key of Solar Eye to go into connection state. At this time,
the channel Solar Bee stays in will show on top left corner on Solar Eye,
b. Set Currency
* Press “left” & “right” key to switch among “€、£、$、¥” and then choose the target one by “enter” key
ol
* When it’s finished, press “right” key to enter into yield coefficient setting interface
and press “left” & “right” key to choose channels Solar Bee stays in
For example, icon
indicates Solar Bee stays in channel 1
* Press “Enter” button on the Solar Eye to connect, while symbol
stop
flashing,
flashing after connection is ready, while LED is off,
* Solar Eye goes back to the main menu automatically after 1 minute
* Press “left” & “right” key to change coefficient, and then confirm it by “enter” key
* All digits flash to indicate the setting is finished. At this time,
ar
c. Set Yield Coefficient
press “right” key enter into emission coefficient setting interface
Please repeat operation process above again if the connection fails.
Yield coefficient indicates the yield per 1Kwh electricity generated from PV inverter


