1
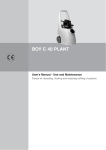
MIDIVOX ‘X’
=============================================================
ACCORDION MIDI CONTROLLER
OWNER’S MANUAL
Jan. 2003
"MIDIVOX X"
==============================================
MIDI VIRTUAL ACCORDIONS
The new Excelsior MIDIVOX ‘X’ midi controller for accordions has been designed to
provide a compact, lightweight and low-cost solution to all those accordionists who wish to
enter the wonderful world of electronic music.
Specially designed to be installed into a reedless accordion shell, it permits normal
bellows operation adding a realistic expression to all the electronic sounds.
A perfect companion for all those accordionists who are looking for a light-weight, versatile
“Virtual Accordion” with the traditional quality of an Excelsior.
The MIDIVOX ‘X’ models extend the range of Midi-equipped accordions manufactured by
Excelsior.
Accordion features
(mod. 20M) :41/120 , reedless, piano keyboard - weight Kg. 7.5
Power supply
AC wall adapter with on-board MIDI OUT outlet
Optional power box model MVX-S with embedded sound card - up to 296 sampled
sounds.
1
IMPORTANT SAFETY AND INSTALLATION INSTRUCTIONS
WARNING
When using electrical products, basic precautions must be taken, including the following:
1.
Read all instructions before using the product, particularly what described at par. “HOW TO
MAKE CONNECTIONS”.
2.
When the instrument is used by children, supervision by adults is advisable.
3.
Do not use the instrument near water, i.e. bath tub, washbowl, kitchen sink, or near a
swimming pool, or in a wet or damp basement.
4.
The instrument should never be positioned in direct sunlight and should always be kept away
from heat sources such as radiators, heaters or similar equipment.
5.
Do not use the instrument in extremely hot or damp environment or in dusty or dirty
conditions.
6.
Do not position the instrument where excessive vibrations may occur.
7.
Connect the instrument to the AC main power only through the supplied AC adapter.
8.
Connect the supplied AC wall adapter to an AC outlet of the same voltage as specified on the
adapter cabinet.
9.
The mains lead should be unplugged from the wall socket when the instrument is not in use.
Do not pull the wire: hold the plug when unplugging.
10. Care should be taken to avoid any object falling into or liquid being spilt into the inside of the
instrument and/or the AC adapter through any hole or opening of the grill and/or the cabinet.
11. Refer to an approved or qualified Service Center in case:
a. the mains lead or plug has been damaged;
b. objects have fallen into the instrument or liquid has been spilt onto or into ;
c. the instrument has been exposed to rain;
d. the instrument appears to operate incorrectly;
e. the instrument has been dropped and/or damaged.
WARNING:
A DAMAGED AC ADAPTER AND/OR MAIN CABLE MAY CAUSE HIGH
RISK OF FIRE OR ELECTRICAL SHOCK.
2
HOW TO MAKE CONNECTIONS
Warning: All connections must be made before turning all instruments on.
The package includes a specific AC power adapter with built-in MIDI OUT output and
adapter-to-accordion connecting cable, which is to be used to power the accordion.
First connect the cable to the accordion, plugging the 8-pin round connector to the socket
on the accordion grill.
The round connector has an insertion notch and can be plugged in one way only: be
careful not to force the connector in the wrong way.
Once the connector has been securely plugged, tighten the fastening ring, gently but
firmly.
Once the accordion has been connected to the AC adapter and to the power amplifier,
connect the adapter’s MIDI OUT output to a MIDI IN input of your sound module,
keyboard or Midi equipment, by means of the supplied Midi cable. Refer to the specific
User’s Manual to locate the right MIDI input.
Inspect all connections and once you are sure everything is all right, switch on all
equipment and power the accordion plugging the AC adapter to an AC power outlet.
Some of the lights on the accordion control panel must light up, signalling the accordion is
ready to work.
Warning: The AC adapter has no power switch: the accordion is powered as soon as the
AC adapter is plugged to an AC main outlet. To switch off power simply unplug the AC
adapter.
3
MIDI OPERATION
The MIDIVOX ‘X’ sends midi messages over three midi channels, each of those related to
an accordion section:
Treble keyboard (right hand), Chords (left buttons -chord rows), Bass (left buttons-bass
rows).
The transmitted midi messages are Note On/Note Off, Program Change messages to
select the desired sounds, Control Change messages depending on the bellows action
and position of the volume controls.
Sound programming, octave control, note transposer and on-off control for sections and
bellows action are also possible through the control buttons on the accordion panel.
Control Panel
19 main buttons are available for selecting sounds: 10 control the Treble section, 5 the
Chord section, and 4 the Bass section.
All buttons are programmable - the programming procedure is described below.
6 more buttons are used for control purposes and sound programming.
Some extra functions such as Main Reset, Bellows Response and Note Transposer are
available through the same sound selection buttons.
How To Program Sounds
1- Press the button you want to program (e.g. button #1 in the Treble Section) : the
relevant light must be on
2- Press EDIT to enter the “Edit Mode”- the three red lights of the EDIT, PROGRAM and
BANK buttons come on and at the same the previously selected button green light
starts blinking.
3- Dial the Midi program number of the sound you want to store into the selected button
using the 10 buttons of the Treble Section as a numeric pad (e.g. press 2 and then 0 if
the midi program number is 20, or press 1-2-0 if the midi program number is 120) : the
EDIT light starts blinking
4- Press PROGRAM: the PROGRAM light goes off.
5- Dial the Midi bank number of the sound you want to store into the selected button using
the 10 buttons of the Treble Section as a numeric pad (i.e. press 3 and then 2 if the
midi bank number is 32, or press 0 if the midi program number is 0) : the EDIT light
starts blinking
6- Press BANK: the BANK light goes off
NOTES:
4
• You don’t need to go through steps 5 and 6 if the bank number is not to be changed
from the last selection
• You can repeat steps 3-4 and 5-6 as many times as you want to test the sounds before
completing the programming operation.
7- Choose the octave range of the sound pressing the OCT button: when the 2 lights are
off the sound is set to the middle octave range; when the left light is on the sound is set
to the lower octave range, when the right light is on the sound is set to the higher
octave range
8- Switch on or off the bellows action on the electronic sounds pressing either BELLOWS
buttons: when both the TRBL and BASS green lights are on the bellows works as
expression control for both the right and the left hand sides. Any or both the lights off
mean that the bellows expression has been deactivated on the relative sections.
9- Press the EDIT button to complete the programming operation and exit the “Edit Mode”:
the EDIT light goes off. The accordion is ready to play.
Any of the sound selection buttons in any of sections can be programmed following the
above steps 1 to 9 .
Once all buttons are programmed, simply press any of them to retrieve the stored sound ,
octave and bellows set up.
NOTE: pressing the sound button twice, the light goes off and the relevant section is
silenced (no sound).
Bellows Operation
The bellows expression can be switched on or off at any time, even while playing,
regardless what was programmed onto the sound buttons.
Press the BELLOWS TRBL and BASS buttons to switch on and off the bellows expression
on the right and left hand sections.
When the green lights are off, the bellows has no effect on the electronic sounds.
Once a new sound is selected by means of the control panel, the stored bellows set-up is
recalled.
Volume Controls
The three slide volume controls allow you to set the right volume for each section.
They work only if the connected expander has been set to receive Midi Control Change
messages.
5
Advanced Features
Bellows Response
Two kinds of bellows function response are possible: linear and logarithmic.
To switch from one kind of response to the other keep the button #4 of the TREBLE
SECTION pressed while powering the accordion. Then switch the power off, wait a few
seconds and then switch it on again as usual.
Factory pre-set: logarithmic
Note:
“Linear” means that any increase of the air pressure or de-pressure inside the bellows
causes a proportional increase of the sound volume. Good for a plain, smooth way of
playing.
“Logarithmic” means that any increase of the air pressure or de-pressure inside the
bellows causes as increase of the sound volume which is more dramatic the more the air
pressure or de-pressure is high. Good for music requiring accents and bellows-shaking.
Key Velocity Control
Even if the accordion has no touch-sensitive keyboard, it is possible to modify the “KeyVelocity” value on each section separately to get a softer or brighter sound.
While in the “Edit mode”, the volume controls work as key-velocity controls.
The modified value will be stored together with all other information into the sound button.
Factory pre-set Key Velocity value = 100 (max 127)
Note:
“Key Velocity” is a Midi parameter which is used to simulate the “piano-forte” effect of a
piano keyboard. Midi keyboards providing a touch-sensitivity effect send to the expander a
“Key Velocity” value each time a key is pressed. The Key Velocity value changes
according to the pressure applied to the key.
Expanders and sound modules enabled to receive Key Velocity values change the sound
volume and its harmonic contents depending on the value of the Key Velocity parameter.
Thus a trumpet may sound “dark” and soft or “bright” and loud depending on the Key
Velocity value.
Note Transposer
The accordion pitch can be transposed by half-tones to match the key of another
instrument or to be in tune with a singer’s voice.
To change the accordion pitch press the BANK button first and then the key where you
want the C note to be transposed to.
E.g. : to set the key to D, press BANK and then A# - thus the keyboard will be transposed
2 half-tones to the left.
6
Main Reset
A Main Reset function is available to reset the accordion to the factory (default) set-up.
If you want to reset your accordion, switch the power off.
Then press button #5 in the Treble Section and at the same time switch power on.
Keep the button pressed until the green light turns on, signalling the reset procedure has
been completed.
WARNING: when resetting the accordion all stored sounds are lost and the factory pre-set
sounds are recalled.
Midi Transmitting Channels
The Midi Transmitting Channel numbers are factory pre-set and not alterable by the user.
Standard set-up:
- Treble :
- Chords :
- Bass :
Channel #1
Channel #2
Channel #3
CEMEX s.r.l.
Via Sardegna, 1
60022 Castelfidardo (AN)
ITALY
tel. +39-071-7820982
fax +39-071-7820104
http://www.excelsior-accordions.com
e-mail: [email protected]
mvox_X_e.doc
18/2/2003
7