1
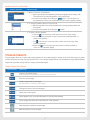
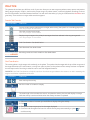
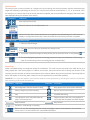
SmartPalate 2.0
USER MANUAL
CompleteSpeech is committed to supporting its customers.
If you have any questions or concerns about your SmartPalate System contact us at:
completespeech.com
[email protected]
[email protected]
(877) 710-6031
CONTENTS
3
SYSTEM REQUIREMENTS
3
INSTALLATION AND SETUP
3
OVERVIEW OF THE SMARTPALATE EQUIPMENT
4
SPEAKER
4
Speaker Tab Controls: Speaker, Palate Display, Configure Palate
4
Speaker
4
Palate Display
4
Configure Palate
4
Speaker How-To’s
4
Edit or Configure Sensors
5
Open a Speaker
5
TONGUE TARGETS
5
Tongue Targets Tab Controls
6
Tongue Target How-To’s
6
View Tongue Targets
6
Create a Tongue Target
7
Copy or Edit a Current Target
7
Send a Target File to Another Speaker or Computer
8
PRACTICE
8
Practice Tab Controls
8
Oral Coordination
8
Oral Coordination Controls
8
How to Use
9
Gold Standard
9
Gold Standard Controls
9
Use Gold Standard
9
Recordings
9
Recording Controls
10
Recording How-To’s
2
SYSTEM REQUIREMENTS
• Personal Computer running Windows 7 or 8
• Mac compatibility through virtualization multi boot utility such as Parallels™ or Bootcamp™ running Windows 7 or 8
• Ram: 4 GB
• I/O Ports: Minimum of two standard USB 2.0 or USB 1.0 ports
NOTE: Due to the real-time processing nature of the software, less powerful processors such as “Intel Atom” or “AMD E”
sometimes have a more difficult time processing the tongue to palate contact display. If you are experiencing this issue,
see additional details under the Recordings How-To’s section: “Change the Draw Count or Audio Options.”
INSTALLATION AND SETUP
1. Ensure your DataLink is NOT connected to the computer via USB port.
2. Place the SmartPalate installation CD into the computer CD or DVD drive.
3. If the installation does not begin automatically browse to the “SmartPalateSetup#.exe” file on the CD and double click to run it.
4. Follow the on screen prompts to finish the installation.
5. Your software is now installed and ready to go! The SmartPalate icon will display on your Desktop.
NOTE: When connecting a DataLink to a USB port for the first time, you may be prompted to setup the Driver for that
port. Follow the on-screen prompts.
OVERVIEW OF THE SMARTPALATE EQUIPMENT
The SmartPalate System consists of the following items:
D.
A.
B.
E.
C.
A. DataLink: A microprocessor I/O device that is worn by the user which connects the SmartPalate to the personal computer.
B. USB Cord: Connects the DataLink to a computer via USB port.
C. Lanyard: Allows the user to wear the DataLink.
D. SmartPalate 2.0 Software
E. SmartPalate: Custom-fit mouthpiece with 126 gold sensors to track tongue to palate contact. Case included.
F. Practice Palate: Acrylic ‘retainer’ that does not include sensors, but can be used as a first time trial fit, or a tool to de-sensitize
the user from a sensitive gag reflex.
3
SPEAKER
A speaker file allows you to customize the display to match each individual’s SmartPalate mouthpiece and preference. It also
gives you to the ability associate specific files, such as targets and recordings, with each user.
Speaker Tab Controls
TAB CONTROL
FUNCTION
TAB CONTROL
Change Speakers
(See details on opening speakers below)
FUNCTION
Create a new speaker
Edit the current speaker’s name
Delete the current speaker
PALATE DISPLAY
FUNCTION
Toggle between palate image options of Anatomical Palate, Standard Palate, or
Sensors Only (no palate image).
Uncheck the “Show Sensors” box to turn sensor dots on or off; this will only affect the
display in practice tab.
CONFIGURE PALATE
FUNCTION
Toggle between large and small palate sizes to customize the screen to your individual
palate and preference.
Customize the screen display to your SmartPalate by deselecting any sensors that were
trimmed off your custom fit mouthpiece.
(See details on editing sensors below)
Speaker How-To’s
EDIT OR CONFIGURE SENSORS
INSTRUCTIONS
1. Click “Edit Sensors.”
2. The sensors will now display with numbers behind them.
3. Click sensors to turn them “off” or “on.” When a sensor has been turned off it
will turn gray. To know which sensors should be deselected do one of the following:
a. Follow the guide shipped with your SmartPalate.
b. Compare the mouthpiece to the screen.
c. In the practice tab, hold your tongue against the roof of your mouth and
make all sensors light up with blue dots. If there are entire rows or columns of
dots that do not light up these sensors have been trimmed and should be
turned off.
4. After editing, you may choose to preview sensors as they will appear in the
practice tab.
4
Speaker How-To’s (Continued)
OPEN A SPEAKER
INSTRUCTIONS
1. When you launch SmartPalate:
a. Open a previously saved speaker by clicking to highlight, then clicking “OK”
This will launch the selected speaker in the practice tab.
b. Create a new speaker by clicking the
button. This will open into
the speaker tab, where you will be able to customize the speaker display.
2. To change speakers within an open panel:
a. Use the drop-down found in the speaker tab to change speakers within the
same panel.
b. Create a new speaker by clicking the
button.
3. To open a second speaker:
a. Click the
icon found in the top right-hand corner of the screen.
b. You will be given the option to open a previously created speaker, or
create a new speaker
c. The
button found in the top center of the screen will swap sides
between speakers.
d. Select the “x icon in the top right hand corner of either speaker to
return to a one-speaker display.
TONGUE TARGETS
Tongue targets allow you to place static target patterns on the palate display to clearly show where the tongue to palate
contact should be occurring during a specific sound. In the tongue targets tab we have provided some generalized default
targets which provide an easy basis for creating customized targets.
Tongue Targets Tab Controls
TAB CONTROL
FUNCTION
Create a new blank target
NOTE: New targets must be saved or will be automatically deleted
Save the current target
Create a copy of the current target
(See details below on customizing tongue targets)
Change the name of the current target
Delete the current target
Export targets to your computers file system for use with other speakers
Import targets that have been exported from other speakers
Clear all sensors marked on current target
Mark all sensors on current target
5
Tongue Target How-To’s
VIEW TONGUE TARGETS
INSTRUCTIONS
To preview a target in the tongue targets tab click its name so that the box
becomes a dark gray.
To select a target to display on the practice tab check its associated box in the
tongue targets tab.
You may also select or deselect all targets at once to display on the practice tab by
checking the “All target” box
QUICK TIP: The ability to choose which targets display and do not display in the practice tab allows you to store as many
targets as you would like. You may then focus on just one or two target sounds in the practice tab while not feeling limited
to a certain number of targets!
CREATE A TONGUE TARGET
INSTRUCTIONS
TO CAPTURE A TARGET DURING LIVE SPEECH:
1. In the practice tab, with their SmartPalate connected, have the speaker say the
target sound.
2. Capture the active sensors. Click the
button, OR simultaneously
press CTRL+1 for the first speaker or CTRL+2 for the second speaker.
3. Enter target name and click “Save and Edit.”
4. Verify the targets circles are correct.
5. Select or deselect sensors as necessary by clicking the dots on the palate.
6. Click
TO CAPTURE A TARGET FROM A RECORDING:
1. In the practice tab access a recording: Create Recording OR Load Recording
2. Select the correct place in the recording:
a. Playback recording and pause when the correct sensors are displayed for
the target sound OR
b. Use the slider bar to select the correct target sound within recording.
3. Capture the active sensors: Click the
button OR simultaneously press
CTRL+1 for the first speaker or CTRL+2 for the second speaker.
4. Enter target name and click “Save and Edit.”
5. Verify the targets circles are correct.
6. Select or deselect sensors as necessary by clicking on the dots.
7. Click
TO CREATE A TONGUE TARGET FROM SCRATCH:
1. In the tongue targets tab click
2. Enter target name and click “OK.”
3. Click on the sensor dots to be included in the target; to deselect, click again.
4. Click
NOTE: If you do not save a target you have created using this method, it will automatically be deleted.
6
COPY/EDIT CURRENT TARGET
INSTRUCTIONS
TO MAKE A COPY OF A TARGET:
1. In the tongue targets tab, select the target you wish to copy by clicking its name;
it should display on the palate.
2. Click “Save A
3. Enter the new target name and click “OK.”
4. Edit the target by clicking on dots to select or deselect sensors.
5. Click “Save”
QUICK TIP: Use this process to customize the default targets to create customized
and attainable target goals for your clients!
TO EDIT CURRENT TARGET:
1. In the tongue targets tab, select the target you wish to edit by clicking on its
name; it should display on the palate.
2. Click on the dots to select or deselect sensors to be included in the target.
3. Click “Save”
SEND FILE TO OTHER COMPUTER
INSTRUCTIONS
1. In the tongue targets tab click on the target you wish to move; target name will
be highlighted in dark gray, and the target will be displayed on the palate.
2. Click Export.
3. Browse to the location on your computer where you would like to save the target.
4. Name the target file and click Save
5. This target may now be transferred to another computer if desired.
6. Open the speaker you wish the target to be imported to.
7. On the tongue targets tab click the import button.
8. Browse to the location on your computer where the target file has been saved.
9. Select the target file and click Open.
10. The target file is now saved to the speaker.
7
PRACTICE
The practice tab is where you will focus much of your time. Here you can see tongue-to-palate contact, capture and practice
hitting tongue targets, model in real time the proper tongue to palate contact, make and playback recordings, and use
the Oral Coordination and Gold Standard activities. You will notice that when you plug in the DataLink the No Device text
goes away. There is also an orange audio wave that appears.
Practice Tab Controls
TAB CONTROL
FUNCTION
Capture current tongue placement as a target, either during live speech or a recording play-back
*See “Tongue Targets” for more details
Clear the current tongue target.
*See “Tongue Targets” for more details
Display a tongue target on the palate; these targets have been selected in the tongue targets tab
*See “Tongue Targets” for more details
Oral Coordination: See details below
Gold Standard: See details below
Recording controls and audio waveforms: See details below
Oral Coordination
This activity places a single target circle randomly on the palate. The speaker hits the target with the tip of their tongue and
the target advances to the next location, moving from place to place on the palate until the activity has been completed.
A timer keeps track of how long it takes the user to touch all targeted locations.
QUICK TIP: Use Oral Coordination to help the user learn how their tongue relates to the screen or to aid in assessing the
tongue coordination capabilities of the user.
CONTROLS
FUNCTION
Start and stop the activity
Set the number of contacts to display
The total length of time it takes the user to complete the activity; the time will display in orange
while the activity is active and white when the activity has been completed
HOW TO USE
INSTRUCTIONS
1. Select the number of contacts you would like to display during the activity.
2. Press
3. The speaker uses tongue tip to hit the target displayed.
4. Continue until all targets have been hit and the activity stops automatically, or press
end the activity.
8
to
Gold Standard
This activity scores a user’s production of a target sound by comparing the current production with the selected tongue
target and calculating a percentage of accuracy. You may choose to have the sound held for 1, 2, 5, or 10 seconds, or for
the activity to run continuously. Once the activity has been completed, the score will reflect the average of the scores which
were displayed during the duration of the activity.
CONTROLS
FUNCTION
Start and stop the activity
Select the duration for Gold Standard to run
Percent accuracy of the current production as compared to the selected target; the live score will
display in orange when the activity is active and white when the activity has been completed
HOW TO USE
INSTRUCTIONS
1. Select the desired target.
2. Select the amount of time you would like the activity to last.
3. Press
4. The speaker matches the target as closely as they can for the chosen time, or until pressing
5. The score displayed represents the average percent accuracy over the duration of the activity;
watch for overshooting as this is scored higher than undershooting.
Recordings
Audio is recorded through a microphone located in the DataLink. This audio can then be saved in the .WAV format, and
easily played with most media players. In addition to the audio, the sensors which were lit during the duration of the
recording are also recorded, as well as the waveforms which measure airflow during sound production. Recording files are
tied to the speaker in which they were created, but can be exported for use with other speakers.
QUICK TIP: You may find it helpful to document the student’s current production by recording them with the SmartPalate
while repeating probe words and sentences.
CONTROLS
FUNCTION
CONTROLS
FUNCTION
Record (appears in the same location as Stop)
Stop (appears in the same location as Record)
Move to beginning of the recording
Move to end of the recording
Play
Close/Exit Recording
Loop playback: audio and palate data will
play in a continuous loop
Playback Speed: slow down the playback to
more easily see the palate and audio displays
Step backward
Step forward
Scrub bar: scroll through a recording
Zoom in or out: click and drag with your mouse to highlight a section of the waveform, then click the
icon to zoom in on the waveform for more detailed evaluation
9
Recordings (Continued)
CONTROLS
FUNCTION
Save the recording that is currently in displayed to a file for later use within this speaker
Load a previously saved recording file for playback and review
Save the palate contact data to a text file (CSV) that can be loaded into Excel or other program for analysis
Export the recording file to your to your computer’s file system for use with other speakers
Import recordings that have been exported from other speakers to review
NOTE: You will need to SAVE the imported file to this speaker for future use without needing to import again
AUDIO OPTIONS
• Audio Refresh Rate (Hz): Adjusts the audio refresh rate; leave at 100 unless your computer’s performance
is slow
• Palate Refresh Rate (Hz): Adjusts the palate display refresh rate; leave at 100 unless your computer’s
performance is slow
Hide or display the audio waveform area; helpful if the user is being distracted
Resize the waveform by hovering your mouse over the edge of the waveform area; click and drag until it
is the desired size
Recording How-To’s
CREATE A RECORDING
INSTRUCTIONS
1. Press
2. Speaker says the sound, word, phrase, or other speech that you wish to record.
3. Press
4. Notice that both the audio and palate contact data has been recorded.
PLAYBACK A RECORDING
INSTRUCTIONS
1. Ensure the desired recording is loaded.
a. Create a recording.
b. Load a previously saved recording.
c. Import a previously exported recording.
2. Press
3. Listen to the duration of the recording, or press
SAVE A RECORDING TO SPEAKER
INSTRUCTIONS
1. Ensure that the desired recording is currently loaded.
2. Press
3. Name the recording file.
4. Press
10
Recording How-To’s (Continued)
LOAD A RECORDING SAVED TO
CURRENT SPEAKER
INSTRUCTIONS
1. Press
2. Select the desired recording from the list.
3. Press
SEND A RECORDING FILE TO
ANOTHER SPEAKER/COMPUTER
INSTRUCTIONS
1. Ensure the desired recording is loaded.
a. Create a recording.
b. Load a previously saved recording.
c. Import a previously exported recording.
2. Press
3. Browse to the location on your computer where you would like to save the recording.
4. Name the recording file and click
5. This recording may now be transferred to another computer if desired.
6. Open the speaker you wish the recording to be imported to.
7. On the practice tab click the
button.
8. Browse to the location on your computer where the recording file has been saved.
9. Select the recording file and click
10. The recording file is now loaded to the speaker.
11. To make the recording available for future use within that speaker, be sure to
save the recording to that speaker.
CHANGE THE DRAW COUNT
OR AUDIO OPTIONS
INSTRUCTIONS (FOR INADEQUATE TONGUE TO PALATE CONTACT)
1. Hold down the LEFT ‘Ctrl’ button and click the Audio Options to display the
“Change Draw Count” dialog.
2. You will notice the default is the number 1. Begin by changing to the number 2 and
click “OK” to test if this will be enough to provide adequate tongue to palate contact.
3. If changing to the number 2 did not adequately change the response time of
the tongue to palate contact, repeat the above steps testing 3, then, if necessary,
4 until adequate tongue-to-palate contact feedback has been achieved. In most
cases the highest recommended entry is 4.
You will notice that the waveform display is now drawn differently. This is normal,
and is designed to allow more processing power to be assigned to the tongue to
palate contact.
Alternatively, you may choose to change the Audio Options “Audio Refresh Rate” to
a number lower than 100 HZ. This will preserve the look of the waveform; however,
the change will not be applied to any recordings.
11