1
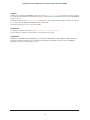
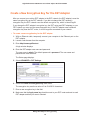
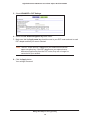
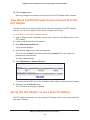
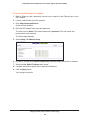
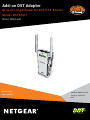
Add-on DST Adapter Re q u i re s N i g h t h a w k R 7 3 0 0 D S T Ro u te r Model DST6501 User Manual October 2015 202-11568-01 350 East Plumeria Drive San Jose, CA 95134 USA Nighthawk DST AC1900 DST Router and DST Adpater Model R7300DST Support Thank you for purchasing this NETGEAR product. You can visit www.netgear.com/support to register your product, get help, access the latest downloads and user manuals, and join our community. We recommend that you use only official NETGEAR support resources. For additional support, visit www.geeksquad.com to chat online or call 1-800-GeekSquad. Setup and support are included for one year from your Nighthawk R7300 DST router purchase date. Your Geek Squad support coupon code is GS1337EXB. Compliance For regulatory compliance information, visit http://www.netgear.com/about/regulatory. See the regulatory compliance document before connecting the power supply. Trademarks NETGEAR, Inc., NETGEAR and the NETGEAR Logo are trademarks of NETGEAR, Inc. GEEK SQUAD, the GEEK SQUAD logo, Dead Spot Terminator and the DST logo are trademarks of Best Buy and its affiliated companies. Any non.NETGEAR trademarks are used for reference purposes only. 2 Contents Chapter 1 Hardware Setup Unpack Your DST Adapter . . . . . . . . . . . . . . . . . . . . . . . . . . . . . . . . . . . . . . . . . . . . . DST Adapter Hardware Features. . . . . . . . . . . . . . . . . . . . . . . . . . . . . . . . . . . . . . . . DST Adapter LEDs. . . . . . . . . . . . . . . . . . . . . . . . . . . . . . . . . . . . . . . . . . . . . . . . . . DST Adapter Side Panel Hardware Features . . . . . . . . . . . . . . . . . . . . . . . . . . . . Connect Add-On DST Adapters to the DST Router . . . . . . . . . . . . . . . . . . . . . . . . Chapter 2 Connect to the DST Adapter Network and Access the DST Adapter Connect Devices to the DST Adapter Network . . . . . . . . . . . . . . . . . . . . . . . . . . Connect to the DST Adapter Network With an Ethernet Cable. . . . . . . . . . . Connect to the DST Adapter Network With a WiFi Connection . . . . . . . . . . Log In to the DST Adapter After Initial Setup . . . . . . . . . . . . . . . . . . . . . . . . . . . . Chapter 3 6 7 8 8 9 12 12 12 14 Manage DST Adapter’s Encryption Key Create a New Encryption Key for the DST Adapter . . . . . . . . . . . . . . . . . . . . . . . 16 Use the DST Adapter’s Default Encryption Key . . . . . . . . . . . . . . . . . . . . . . . . . . 17 Chapter 4 Specify Network Settings for the DST Adapter Specify Basic WiFi Settings for the DST Adapter . . . . . . . . . . . . . . . . . . . . . . . . . 20 Change the DST Adapter WiFi Password or Security Level. . . . . . . . . . . . . . . . . 21 Chapter 5 Manage the DST Adapter Network and Settings Update the DST Adapter’s Firmware . . . . . . . . . . . . . . . . . . . . . . . . . . . . . . . . . . . Update the DST Adapter’s Firmware From the DST Router . . . . . . . . . . . . . . Update the DST Adapter’s Firmware From the DST Adapter . . . . . . . . . . . . . Return the DST Adapter to Its Factory Settings . . . . . . . . . . . . . . . . . . . . . . . . . . Use the Factory Reset Button to Restore Factory Settings . . . . . . . . . . . . . . Erase the DST Adapter Settings . . . . . . . . . . . . . . . . . . . . . . . . . . . . . . . . . . . . . View the DST Adapter Status . . . . . . . . . . . . . . . . . . . . . . . . . . . . . . . . . . . . . . . . . View the DST Adapter ‘s Statistics . . . . . . . . . . . . . . . . . . . . . . . . . . . . . . . . . . . . . Back Up the DST Adapter Configuration . . . . . . . . . . . . . . . . . . . . . . . . . . . . . . . . Restore Saved Configuration Settings for the DST Adapter. . . . . . . . . . . . . . . . Update the DST Adapter’s WiFi Settings From the DST Router . . . . . . . . . . . . . View the DST Adapter’s WiFi Settings From the DST Router . . . . . . . . . . . . . . . Change the DST Adapter’s Device Name. . . . . . . . . . . . . . . . . . . . . . . . . . . . . . . . Change the DST Adapter’s Device Name From the DST Adapter . . . . . . . . . 3 24 24 24 25 26 26 27 28 29 30 31 32 33 33 Nighthawk DST AC1900 DST Router and DST Adpater Model R7300DST Change the DST Adapter’s Device Name From the DST Router . . . . . . . . . . Change the DST Adapter’s admin Password . . . . . . . . . . . . . . . . . . . . . . . . . . . . . Turn the LEDs on the DST Adapter On or Off . . . . . . . . . . . . . . . . . . . . . . . . . . . . Use WPS to Add a Device to the DST Adapter’s WiFi Network . . . . . . . . . . . . . Use WPS With the Push Button Method . . . . . . . . . . . . . . . . . . . . . . . . . . . . . . Use WPS With the PIN Method. . . . . . . . . . . . . . . . . . . . . . . . . . . . . . . . . . . . . . View or Change the DST Adapter’s WPS Settings . . . . . . . . . . . . . . . . . . . . . . . . View or Change DST Adapter Advanced WiFi Settings . . . . . . . . . . . . . . . . . . . . Set Up a WiFi Access List for the DST Adapter . . . . . . . . . . . . . . . . . . . . . . . . . . . View Wired and WiFi Network Devices Connected to the DST Adapter. . . . . . Set Up the DST Adapter to Use a Static IP Address . . . . . . . . . . . . . . . . . . . . . . . 34 35 36 36 37 38 39 40 41 43 43 Chapter 6 DST Adapter Troubleshooting LEDs Are Off When the DST Adapter Is Plugged In . . . . . . . . . . . . . . . . . . . . . . . Power LED Is Off . . . . . . . . . . . . . . . . . . . . . . . . . . . . . . . . . . . . . . . . . . . . . . . . . . . . DST LED Is Off, Amber, or Red . . . . . . . . . . . . . . . . . . . . . . . . . . . . . . . . . . . . . . . . Ethernet LED Is Off . . . . . . . . . . . . . . . . . . . . . . . . . . . . . . . . . . . . . . . . . . . . . . . . . . Contact Geek Squad . . . . . . . . . . . . . . . . . . . . . . . . . . . . . . . . . . . . . . . . . . . . . . . . . 46 46 46 46 47 Appendix A DST Adapter Supplemental Information Technical Specifications . . . . . . . . . . . . . . . . . . . . . . . . . . . . . . . . . . . . . . . . . . . . . . 50 Safety Information . . . . . . . . . . . . . . . . . . . . . . . . . . . . . . . . . . . . . . . . . . . . . . . . . . 51 4 1. 1 Hardware Setup You must install a Nighthawk R7300 DST router and the DST adapter that came with the DST router and set up a DST network before you can set up the add-on DST adapter. For more information, see the Nighthawk DST AC1900 DST Router and DST Adapter Model R7300DST User Manual, which is available online at downloadcenter.netgear.com or through a link in the product’s user interface. This chapter contains the following sections: • Unpack Your DST Adapter • DST Adapter Hardware Features • Connect Add-On DST Adapters to the DST Router For more information about the topics covered in this manual, visit the support website at support.netgear.com. 5 Nighthawk DST AC1900 DST Router and DST Adpater Model R7300DST Unpack Your DST Adapter Your package contains the following items. Ethernet cable DST adapter Figure 1. Package contents Hardware Setup 6 Nighthawk DST AC1900 DST Router and DST Adpater Model R7300DST DST Adapter Hardware Features The LEDs, buttons, and Ethernet port are shown in the following figure. WiFi LED DST LED Power On/Off switch Power LED WPS and DST Router Sync button Ethernet LED Factory Reset button Ethernet port Figure 2. DST adapter hardware features Hardware Setup 7 Nighthawk DST AC1900 DST Router and DST Adpater Model R7300DST DST Adapter LEDs The LEDs on the DST adapter light to indicate DST adapter activity: Table 1. DST adapter LED descriptions LED Description WiFi LED DST LED Power LED • • • Solid blue. The DST adapter is securely paired with a WiFi device. Blinking blue. The DST adapter is pairing with a WiFi device. Off. WiFi is disabled. This LED indicates when the DST adapter is connected to the electrical outlet with the strongest link performance, indicated by the color displayed by the LED: • Red. Link rate < 50 Mbps (good). • Amber. Link rate > 50 and < 80 Mbps (better). • Green. Link rate > 80 Mbps (best). • Off. The DST adapter did not find any other compatible DST devices using the same encryption key. • • • Solid green. The DST adapter is powered on. Blinking green. The DST adapter is pairing with another DST device. Off. The DST adapter is powered off. • • Solid green. A powered-on device is connected to the Ethernet port. Off. No device is connected to this Ethernet port. Ethernet LED DST Adapter Side Panel Hardware Features The side panel of the DST adapter contains the following: • Power On/Off switch. Slide the switch to the On position to provide power to the DST adapter. • WPS and DST Router Sync button. Press this button to connect a computer or WiFi device to the DST adapter’s network using WPS, or to or to connect to DST router. • Factory Reset button. Pressing the Factory Reset button restores the factory default settings. • Ethernet port. The DST adapter uses the Ethernet port to convert a standard electrical wall outlet into a high-speed wired network connection.You can use the wired network connection to bring Internet connectivity to any device with an Ethernet port, such as a computer, game console, Blu-ray player, smart TV, HD set-top box, or network DVR. Hardware Setup 8 Nighthawk DST AC1900 DST Router and DST Adpater Model R7300DST Connect Add-On DST Adapters to the DST Router After you set up your DST network, you can add up to eight DST adapters to extend your DST network to eight more locations. Room 1 Room 2 Room 3 DST router DST adapter DST adapter The following instructions assume that you already set up your DST network. If you did not set up your DST router yet, follow the instructions in the Nighthawk DST AC1900 DST Router and DST Adapter Model R7300DST User Manual, which is available online at downloadcenter.netgear.com or through a link in the product’s user interface. To connect additional DST adapters to the DST router: 1. In the room where you want to improve WiFi coverage or add Ethernet, plug your DST adapter into an electrical outlet and wait for the Power LED to light solid green. WARNING: Do not plug the DST adapter into extension cords, power strips, or surge protectors. 2. If the Power LED does not light, slide the Power On/Off switch to the On position. 3. Wait for the DST adapter to connect to the DST router. 4. Update the encryption key to secure the connection between the DST adapter and the DST router: a. Press the WPS and DST Adapter Sync button on the DST router. b. Within two minutes, press the WPS and DST Router Sync button on the DST adapter for two seconds. Hardware Setup 9 Nighthawk DST AC1900 DST Router and DST Adpater Model R7300DST The Power LED on the DST adapter blinks and the DST LED on the DST router blinks. Once the connection is made, the following LEDs light: • The DST LED on the DST adapter lights solid green or amber. • The DST LED on the DST router lights solid blue. This process takes between 5 and 80 seconds. If the DST LED on the DST adapter is red, the link performance is weak. You might want to move the DST adapter to another electrical outlet with a faster connection. 5. Log in to the DST router to update the DST adapter’s firmware and WiFi settings: a. Connect a computer or WiFi device to the DST router’s network. b. Launch a web browser from a computer or WiFi device that is connected to the network. c. Enter http://www.routerlogin.net. A login window displays. d. Enter the DST router user name and password. The user name is admin. The default password is password. The user name and password are case-sensitive. The BASIC Home page displays. e. Select Remote DST Management. f. In the Update DST Adapter Firmware and Update DST Adapter WiFi Settings columns, click the Update All buttons. You can only click the Update All buttons only if new firmware or WiFi settings are available. Hardware Setup 10 2. Connect to the DST Adapter Network and Access the DST Adapter 2 You can connect to the DST router’s network using a WiFi or wired Ethernet connection. This chapter contains the following sections: • Connect Devices to the DST Adapter Network • Log In to the DST Adapter After Initial Setup 11 Nighthawk DST AC1900 DST Router and DST Adpater Model R7300DST Connect Devices to the DST Adapter Network You can connect your computer or WiFi devices to the DST adapter using a wired Ethernet connection, a WPS connection, or a WiFi connection. For the best WiFi performance, make sure that your computer or WiFi device is in the same room as the DST adapter. Connect to the DST Adapter Network With an Ethernet Cable You can connect your computer to the DST adapter using an Ethernet cable. To connect your computer to the DST adapter with an Ethernet cable: 1. Make sure that the DST adapter is receiving power (its Power LED is lit). 2. Connect an Ethernet cable to an Ethernet port on your computer. 3. Connect the other end of the Ethernet cable to the Ethernet port on the DST adapter. Your computer connects to the local area network (LAN). A message might display on your computer page to notify you that an Ethernet cable is connected. Connect to the DST Adapter Network With a WiFi Connection If you updated the DST adapter’s WiFi settings using the DST router’s installation assistant, the DST adapter’s WiFi settings are based on the DST router’s WiFi settings. If you did not update the DST adapter’s WiFi settings yet, launch a web brower to display the DST router’s and DST adapter’s WiFi settings. If you want to manually update the DST adapter’s WiFi settings, log in to the DST router. For more information, see Update the DST Adapter’s WiFi Settings From the DST Router on page 31. The following table shows examples of what multiple DST adapters’ SSIDs and passwords are, based on the DST router’s SSID and password. Table 2. DST adapter WiFi network name and password examples Product 2.4 GHz WiFi Settings 5 GHz WiFi Settings DST router • • SSID. NETGEAR4 Password. Coconut234 • • SSID. NETGEAR4-5G Password. Coconut234 DST adapter 1 • • SSID. NETGEAR4_EXT Password. Coconut234 • • SSID. NETGEAR4-5G_EXT Password. Coconut234 DST adapter 2 • • SSID. NETGEAR41_EXT Password. Coconut234 • • SSID. NETGEAR4-5G1_EXT Password. Coconut234 DST adapter 3 • • SSID. NETGEAR42_EXT Password. Coconut234 • • SSID. NETGEAR4-5G2_EXT Password. Coconut234 Connect to the DST Adapter Network and Access the DST Adapter 12 Nighthawk DST AC1900 DST Router and DST Adpater Model R7300DST To manually find and select the DST adapter WiFi network: 1. Make sure that the DST adapter is receiving power (its Power LED is lit). 2. On the WiFi device that you want to connect to your DST adapter, open the software application that manages your WiFi connections. This software scans for all WiFi networks in your area. 3. Look for the DST adapter’s WiFi network name (SSID) and select it. The DST adapter’s WiFi network name is based on the DST router’s SSID with _EXT added at the end of the name. If more than one DST adapter is connected to the DST router, for every additional DST adapter after the first, a number is added before _EXT. 4. Enter the DST adapter’s WiFi password. The DST adapter’s WiFi password is the same as the DST router’s WiFi password. Your WiFi device connects to the WiFi network. Connect to the DST Adapter Network With a WPS Connection Wi-Fi Protected Setup (WPS) is a standard for easily adding computers and other devices to a home network while maintaining security. To use WPS (Push 'N' Connect), make sure that all WiFi devices to be connected to the network are Wi-Fi certified and support WPS. During the connection process, the client gets the security settings from the DST router so that every device in the network supports the same security settings. To use WPS to connect to the DST adapter’s WiFi network: 1. Make sure that the DST router is receiving power (its Power LED is lit). 2. Check the WPS instructions for your computer or WiFi device. 3. Press and hold the WPS and DST Router Sync button on the DST adapter for two seconds. The WiFi LED on the DST adapter blinks. 4. Within two minutes, press the WPS button on your WiFi device (such as a computer, tablet, or smartphone). When the WiFi LED stops blinking, your computer or WiFi device is automatically connected to the DST adapter and you can access the Internet from your computer or WiFi device. Note: Make sure that your WiFi device is in the same room as the DST adapter that you are connecting to. Connect to the DST Adapter Network and Access the DST Adapter 13 Nighthawk DST AC1900 DST Router and DST Adpater Model R7300DST Log In to the DST Adapter After Initial Setup After you connect the DST adapter to the DST router’s network, you can log in to the DST adapter to view or change its settings. To log in to the DST adapter after the initial setup: 1. With an Ethernet cable, temporarily connect your computer to the Ethernet port on the DST adapter. 2. Launch a web browser from the computer. 3. Enter http://www.mywifiext.net. A login window displays. 4. Enter the DST adapter user name and password. The user name is admin. The default password is password. The user name and password are case-sensitive. The Status page displays. Connect to the DST Adapter Network and Access the DST Adapter 14 3. Manage DST Adapter’s Encryption Key This chapter contains the following sections: • Create a New Encryption Key for the DST Adapter • Use the DST Adapter’s Default Encryption Key 15 3 Nighthawk DST AC1900 DST Router and DST Adpater Model R7300DST Create a New Encryption Key for the DST Adapter After you connect your add-on DST adapter to the DST network, the DST adapter’s uses the same encryption key as the DST network. If you did not change the DST network’s encryption key, the DST network uses the default encryption key, which is HomePlugAV If you change the DST adapter’s encryption key, the DST router and DST adapters on your DST network you must use the same encryption key. If the DST adapter uses a different encryption key than the DST router, it will no longer be connected to your network. To create a new encryption key for the DST adapter: 1. With an Ethernet cable, temporarily connect your computer to the Ethernet port on the DST adapter. 2. Launch a web browser from the computer. 3. Enter http://www.mywifiext.net. A login window displays. 4. Enter the DST adapter user name and password. The user name is admin. The default password is password. The user name and password are case-sensitive. The Status page displays. 5. Select ADVANCED > DST Settings. 6. Select the Create new encryption key radio button. The encryption key must be a value of 8 to 63 ACSCII characters. 7. Enter a new encryption key in the field. 8. Make sure that the Apply same key check box next to your DST router and next to each DST adapter and that your own is selected. Manage DST Adapter’s Encryption Key 16 Nighthawk DST AC1900 DST Router and DST Adpater Model R7300DST Note: The DST router and DST adapters on your network must use the same encryption key. If the DST adapters on your network use a different encryption key than the DST router, they will no longer be connected to your network. 9. Click the Apply button. Your settings are saved. Use the DST Adapter’s Default Encryption Key The DST adapter’s default encryption key is HomePlugAV. If you do not change the default encryption key, after you connect your DST adapter to the DST network, the DST adapter use the same default encryption key. Note: The No change to the encryption key radio button is automatically selected when you visit the DST Settings page. This is the default option. If you select this option and click the Apply button, the encryption key does not change the DST network encryption key and the DST network is not disconnected. To change the DST adapter’s encryption key back to the default encryption key: 1. With an Ethernet cable, temporarily connect your computer to the Ethernet port on the DST adapter. 2. Launch a web browser from the computer. 3. Enter http://www.mywifiext.net. A login window displays. 4. Enter the DST adapter user name and password. The user name is admin. The default password is password. The user name and password are case-sensitive. The Status page displays. Manage DST Adapter’s Encryption Key 17 Nighthawk DST AC1900 DST Router and DST Adpater Model R7300DST 5. Select ADVANCED > DST Settings. 6. Select the Use default encryption key radio button. 7. Make sure that the Apply same key check box next to your DST router and next to each DST adapter and that your own is selected. Note: The DST router and DST adapters on your network must use the same encryption key. If the DST adapters on your network use a different encryption key than the DST router, they will no longer be connected to your network. 8. Click the Apply button. Your settings are saved. Manage DST Adapter’s Encryption Key 18 4. Specify Network Settings for the DST Adapter This chapter includes the following sections: • Specify Basic WiFi Settings for the DST Adapter • Change the DST Adapter WiFi Password or Security Level 19 4 Nighthawk DST AC1900 DST Router and DST Adpater Model R7300DST Specify Basic WiFi Settings for the DST Adapter To specify basic WiFi settings for the DST adapter: 1. With an Ethernet cable, temporarily connect your computer to the Ethernet port on the DST adapter. 2. Launch a web browser from the computer. 3. Enter http://www.mywifiext.net. A login window displays. 4. Enter the DST adapter user name and password. The user name is admin. The default password is password. The user name and password are case-sensitive. The Status page displays. 5. Select Setup > Wireless Settings. 6. To change the network name (SSID), type a new name in the Name (SSID) field. 7. The name can be up to 32 characters long and it is case-sensitive.If you change the name, make sure to write down the new name and keep it in a safe place. 8. To change the WiFi channel, select a number in the Channel menu. In some regions, not all channels are available. Do not change the channel unless you experience interference (shown by lost connections or slow data transfers). If this happens, experiment with different channels to see which is the best. When you use multiple access points, it is better if adjacent access points use different channels to reduce interference. The recommended channel spacing between adjacent access points is four channels (for example, use Channels 1 and 5, or 6 and 10). 9. To change the mode, select it from the Mode menu. Specify Network Settings for the DST Adapter 20 Nighthawk DST AC1900 DST Router and DST Adpater Model R7300DST For 2.4 GHz, Up to 200 Mbps is the default setting. The other settings are Up to 65 Mbps and Up to 54 Mbps. For 5 GHz, Up to 433 Mbps is the default setting, which allows 802.11ac and 802.11a WiFi devices to join the network. The other settings are Up to 200 Mbps, Up to 87 Mbps, and Up to 54 Mbps. 10. Click the Apply button. Your settings are saved. If you connected wirelessly to the network and you changed the SSID, you are disconnected from the network. 11. Make sure that you can connect wirelessly to the network with its new settings. If you cannot connect wirelessly, check the following: • Is your computer or WiFi device connected to another WiFi network in your area? Some WiFi devices automatically connect to the first open network without WiFi security that they discover. • Is your computer or WiFi device trying to connect to your network with its old settings (before you changed the settings)? If so, update the WiFi network selection in your computer or WiFi device to match the current settings for your network. Change the DST Adapter WiFi Password or Security Level To change the DST adapter WiFi password or security level: 1. With an Ethernet cable, temporarily connect your computer to the Ethernet port on the DST adapter. 2. Launch a web browser from the computer. 3. Enter http://www.mywifiext.net. A login window displays. 4. Enter the DST adapter user name and password. The user name is admin. The default password is password. The user name and password are case-sensitive. The Status page displays. Specify Network Settings for the DST Adapter 21 Nighthawk DST AC1900 DST Router and DST Adpater Model R7300DST 5. Select Setup > Wireless Settings. 6. Under Security Options, select a WPA options. The WPA2 options use the newest standard for the strongest security, but some older computers and WiFi devices cannot use WPA2. By default, the WPA2-PSK [AES] radio button is selected. The Password field displays. 7. In the Password field, enter the network key (password) that you want to use. It is a text string from 8 to 63 characters. 8. Write down the new password and keep it in a secure place for future reference. 9. Click the Apply button. Your settings are saved. Specify Network Settings for the DST Adapter 22 5. Manage the DST Adapter Network and Settings This chapter covers the following topics: • Update the DST Adapter’s Firmware • Return the DST Adapter to Its Factory Settings • View the DST Adapter Status • View the DST Adapter ‘s Statistics • Back Up the DST Adapter Configuration • Restore Saved Configuration Settings for the DST Adapter • Update the DST Adapter’s WiFi Settings From the DST Router • View the DST Adapter’s WiFi Settings From the DST Router • Change the DST Adapter’s Device Name • Change the DST Adapter’s admin Password • Turn the LEDs on the DST Adapter On or Off • Use WPS to Add a Device to the DST Adapter’s WiFi Network • View or Change the DST Adapter’s WPS Settings • View or Change DST Adapter Advanced WiFi Settings • Set Up a WiFi Access List for the DST Adapter • View Wired and WiFi Network Devices Connected to the DST Adapter • Set Up the DST Adapter to Use a Static IP Address 23 5 Nighthawk DST AC1900 DST Router and DST Adpater Model R7300DST Update the DST Adapter’s Firmware You can update the DST adapter’s firmware by from the DST router or the DST adapter. Update the DST Adapter’s Firmware From the DST Router To update the DST adapter’s firmware by logging in to the DST router: 1. Launch a web browser from a computer or WiFi device that is connected to the network. 2. Enter http://www.routerlogin.net. A login window displays. 3. Enter the DST router user name and password. The user name is admin. The default password is password. The user name and password are case-sensitive. The BASIC Home page displays. 4. Select Remote DST Management. 5. In the Update DST Adapter Firmware column, click the Update All button. You can only click on the Update All button only if new firmware is available. The firmware is updated. WARNING: To avoid the risk of corrupting the firmware, do not interrupt the upgrade. For example, do not close the browser, click a link, or load a new page. Do not turn off the DST adapter and the DST router. Update the DST Adapter’s Firmware From the DST Adapter Unless you changed the settings on the Firmware Update page previously, the DST adapter is set up to check for new firmware automatically when you log in. You can also check for new firmware. Manage the DST Adapter Network and Settings 24 Nighthawk DST AC1900 DST Router and DST Adpater Model R7300DST To log in to the DST adapter and check to see if new firmware is available and update the DST adapter’s firmware: 1. With an Ethernet cable, temporarily connect your computer to the Ethernet port on the DST adapter. 2. Launch a web browser from the computer. 3. Enter http://www.mywifiext.net. A login window displays. 4. Enter the DST adapter user name and password. The user name is admin. The default password is password. The user name and password are case-sensitive. The Status page displays. 5. Select Maintenance > Firmware Update. 6. Click the Check button. The DST adapter finds new firmware information if any is available and displays a message asking if you want to download and install it. 7. Click the Yes button. The DST adapter locates and downloads the firmware and begins the update. 8. Click the Browse button. 9. Locate and select the new firmware file. WARNING: To avoid the risk of corrupting the firmware, do not interrupt the upgrade. For example, do not close the browser, click a link, or load a new page. Do not turn off the DST adapter. Return the DST Adapter to Its Factory Settings To reset the DST adapter to its factory settings, you can use the Factory Reset button or the Erase feature. Manage the DST Adapter Network and Settings 25 Nighthawk DST AC1900 DST Router and DST Adpater Model R7300DST Use the Factory Reset Button to Restore Factory Settings CAUTION: This process erases any settings that you have configured in the DST adapter. To restore factory settings: 1. Insert a paper clip into the Factory Reset hole and hold it for two seconds, and then release the button. The Power LED blinks green. All the LEDs turn off after 3 seconds, and then the Power LED lights solid green for about 30 seconds. Factory Reset hole and button 2. Check the DST adapter status. The other LEDs show the DST adapter’s status: • WiFi LED. The WiFi LED lights sold blue if WiFi is enabled. • DST LED. The DST LED lights if a compatible DST device is connected to the DST adapter. • Ethernet LED. The Ethernet LED lights if a powered-on device is connected to the DST adapter’s Ethernet port. Erase the DST Adapter Settings You can erase the current configuration and restore the factory default settings. CAUTION: This process erases any settings that you configured in the DST adapter. To erase the DST adapter’s current settings: 1. With an Ethernet cable, temporarily connect your computer to the Ethernet port on the DST adapter. 2. Launch a web browser from the computer. 3. Enter http://www.mywifiext.net. A login window displays. 4. Enter the DST adapter user name and password. Manage the DST Adapter Network and Settings 26 Nighthawk DST AC1900 DST Router and DST Adpater Model R7300DST The user name is admin. The default password is password. The user name and password are case-sensitive. The Status page displays. 5. Select Maintenance > Backup Settings. CAUTION: After you click the Erase button, do not try to go online, turn off the DST adapter, shut down the computer, or do anything else to the DST adapter until it finishes restarting. 6. Click the Erase button. A confirmation pop-up window displays. 7. Confirm your decision. The DST adapter restarts. This process takes about one minute. View the DST Adapter Status To view the status of the DST adapter: 1. With an Ethernet cable, temporarily connect your computer to the Ethernet port on the DST adapter. 2. Launch a web browser from the computer. 3. Enter http://www.mywifiext.net. A login window displays. 4. Enter the DST adapter user name and password. Manage the DST Adapter Network and Settings 27 Nighthawk DST AC1900 DST Router and DST Adpater Model R7300DST The user name is admin. The default password is password. The user name and password are case-sensitive. View the DST Adapter ‘s Statistics To view the DST adapter’s statistics: 1. With an Ethernet cable, temporarily connect your computer to the Ethernet port on the DST adapter. 2. Launch a web browser from the computer. 3. Enter http://www.mywifiext.net. A login window displays. 4. Enter the DST adapter user name and password. Manage the DST Adapter Network and Settings 28 Nighthawk DST AC1900 DST Router and DST Adpater Model R7300DST The user name is admin. The default password is password. The user name and password are case-sensitive. 5. Click the Show Statistics button. 6. To change the polling frequency, enter a time in seconds in the Poll Interval field and click the Set Interval button. To stop the polling entirely, click the Stop button. Back Up the DST Adapter Configuration When the DST adapter works correctly after initial setup, we recommend that you back up the DST adapter configuration settings. After you back up the settings, if you change the DST adapter settings but are not content with the new settings, you can restore the backed-up DST adapter configuration settings. To back up the DST adapter configuration settings: 1. With an Ethernet cable, temporarily connect your computer to the Ethernet port on the DST adapter. Manage the DST Adapter Network and Settings 29 Nighthawk DST AC1900 DST Router and DST Adpater Model R7300DST 2. Launch a web browser from the computer. 3. Enter http://www.mywifiext.net. A login window displays. 4. Enter the DST adapter user name and password. The user name is admin. The default password is password. The user name and password are case-sensitive. The Status page displays. 5. Select Maintenance > Backup Settings. 6. Click the Backup button. 7. If your web browser is not set up to save downloaded files automatically, locate where you want to save the file. The configuration settings file downloads to your computer. The name of the file is NETGEAR_DST6501.cfg. Restore Saved Configuration Settings for the DST Adapter You can restore the configuration settings file of the DST adapter to a previously saved configuration settings file. To restore the DST adapter configuration settings: 1. With an Ethernet cable, temporarily connect your computer to the Ethernet port on the DST adapter. 2. Launch a web browser from the computer. 3. Enter http://www.mywifiext.net. A login window displays. 4. Enter the DST adapter user name and password. Manage the DST Adapter Network and Settings 30 Nighthawk DST AC1900 DST Router and DST Adpater Model R7300DST The user name is admin. The default password is password. The user name and password are case-sensitive. The Status page displays. 5. Select Maintenance > Backup Settings. 6. Click the Choose File button. 7. Locate and select the previously saved configuration settings file. The name of the file is NETGEAR_DST6501.cfg. CAUTION: After you click the Restore button, do not try to go online, turn off the DST adapter, shut down the computer, or do anything else to the DST adapter until it finishes restarting. 8. Click the Restore button. A confirmation pop-up window displays. 9. Confirm your decision. The DST adapter restarts. This process takes about one minute. Update the DST Adapter’s WiFi Settings From the DST Router The DST adapter’s WiFi settings are based on the DST router’s WiFi settings. If you changed the DST router’s WiFi settings, log in to the DST router to update the DST adapter’s WiFi settings. When you update the DST adapter’s WiFi settings, the DST adapter’s SSID is set to the DST router’s SSID with _EXT added at the end. The DST adapter’s WiFi password is the same as the DST router’s WiFi password. If you change the DST router’s WiFi settings, you must update the DST adapter’s WiFi settings again. Manage the DST Adapter Network and Settings 31 Nighthawk DST AC1900 DST Router and DST Adpater Model R7300DST To update the DST adapter’s WiFi settings by logging in to the DST router: 1. Launch a web browser from a computer or WiFi device that is connected to the network. 2. Enter http://www.routerlogin.net. A login window displays. 3. Enter the DST router user name and password. The user name is admin. The default password is password. The user name and password are case-sensitive. The BASIC Home page displays. 4. Select Remote DST Management. 5. In the Update DST Adapter WiFi Settings column, click the Update All button. You can click on the Update All button only if the WiFi settings must be updated. The DST adapter’s WiFi settings are updated. View the DST Adapter’s WiFi Settings From the DST Router You can view the IP address, model name, and MAC address for each DST adapter in your network. To view the DST adapter settings: 1. Launch a web browser from a computer or WiFi device that is connected to the network. 2. Enter http://www.routerlogin.net. A login window displays. 3. Enter the DST router user name and password. The user name is admin. The default password is password. The user name and password are case-sensitive. The BASIC Home page displays. Manage the DST Adapter Network and Settings 32 Nighthawk DST AC1900 DST Router and DST Adpater Model R7300DST 4. Select Remote DST Management. The following information about your DST adapters display: • Device name.The DST adapter’s name. You can change the DST adapter’s name on the DST settings page. For more information, see Change the DST Adapter’s Device Name on page 33. • IP address. The IP address of the DST adapter. • Model name. The model number of the DST adapter. • MAC address. The MAC address for the DST adapter. This is also on the product label, which might not be visible when the device is plugged in. Change the DST Adapter’s Device Name You can change the DST adapter’s device name that displays on the DST router’s and DST adapter’s DST Settings pages by logging in to the DST adapter or DST router. Change the DST Adapter’s Device Name From the DST Adapter To change the DST adapter’s device name by logging into the DST adapter: 1. With an Ethernet cable, temporarily connect your computer to the Ethernet port on the DST adapter. 2. Launch a web browser from the computer. 3. Enter http://www.mywifiext.net. A login window displays. 4. Enter the DST adapter user name and password. The user name is admin. The default password is password. The user name and password are case-sensitive. The Status page displays. Manage the DST Adapter Network and Settings 33 Nighthawk DST AC1900 DST Router and DST Adpater Model R7300DST 5. Select Advanced > DST Settings. 6. In the DST Adapter Name field, enter a new device name for the DST adapter. 7. Click the Apply button. Your settings are saved. Change the DST Adapter’s Device Name From the DST Router You can change the DST adapter’s device name if you are logged in to the DST router. To change the DST adapter’s device name by logging in to the DST router: 1. Launch a web browser from a computer or WiFi device that is connected to the network. 2. Enter http://www.routerlogin.net. A login window displays. 3. Enter the DST router user name and password. The user name is admin. The default password is password. The user name and password are case-sensitive. The BASIC Home page displays. 4. Select ADVANCED > Advanced Setup > DST Settings. 5. In the table, find your DST adapter and enter a new device name in the Device Name field. 6. Click the Apply button. Your settings are saved. Manage the DST Adapter Network and Settings 34 Nighthawk DST AC1900 DST Router and DST Adpater Model R7300DST Change the DST Adapter’s admin Password The user name to access the DST adapter is admin, and its default password is password. We strongly recommend that you set a more secure password. To change the password for the DST adapter: 1. With an Ethernet cable, temporarily connect your computer to the Ethernet port on the DST adapter. 2. Launch a web browser from the computer. 3. Enter http://www.mywifiext.net. A login window displays. 4. Enter the DST adapter user name and password. The user name is admin. The default password is password. The user name and password are case-sensitive. The Status page displays. 5. Select Maintenance > Set Password. 6. Type the old password. 7. Type the new password twice. 8. Click the Apply button. Your changes are saved. Note: If you forget your new admin password, use the Factory Reset button to factory reset the DST adapter. The password resets to the default password, which is password. The user name remains as admin. The user name and password are case-sensitive. For more information about how to factory reset your DST adapter, see Use the Factory Reset Button to Restore Factory Settings on page 26. Manage the DST Adapter Network and Settings 35 Nighthawk DST AC1900 DST Router and DST Adpater Model R7300DST Turn the LEDs on the DST Adapter On or Off You can turn the WiFi LED, DST LED, and Ethernet LED on or off. The default value is ON. Note that the Power LED remains on if you turn the LEDs off. To turn the LEDs on the DST adapter on or off: 1. With an Ethernet cable, temporarily connect your computer to the Ethernet port on the DST adapter. 2. Launch a web browser from the computer. 3. Enter http://www.mywifiext.net. A login window displays. 4. Enter the DST adapter user name and password. The user name is admin. The default password is password. The user name and password are case-sensitive. The Status page displays. 5. Select Advanced > DST Settings. 6. From the LED Status menu, select an option: • ON. Turns on the WiFi LED, DST LED, and Ethernet LED. • OFF. Turns off the WiFi LED, DST LED, and Ethernet LED. 7. Click the Apply button. Your settings are saved. Use WPS to Add a Device to the DST Adapter’s WiFi Network WPS (Wi-Fi Protected Setup) lets you connect a computer or WiFi device to the DST adapter’s network without entering the WiFi network passphrase or key. Instead, you use a WPS button or enter a PIN to connect. Manage the DST Adapter Network and Settings 36 Nighthawk DST AC1900 DST Router and DST Adpater Model R7300DST Note: For instructions about how to use the physical WPS button on the DST adapter, see Connect to the DST Adapter Network With a WPS Connection on page 13. Use WPS With the Push Button Method For you to use the push button method to connect a WiFi device to the DST adapter’s WiFi network, the WiFi device that you are trying to connect must provide either a physical button or a software button. You can use the physical button and software button to let a WiFi device join only the main WiFi network, not the guest WiFi network. To use WPS with the push button method to join the DST adapter’s main WiFi network: 1. With an Ethernet cable, temporarily connect your computer to the Ethernet port on the DST adapter. 2. Launch a web browser from the computer. 3. Enter http://www.mywifiext.net. A login window displays. 4. Enter the DST adapter user name and password. The user name is admin. The default password is password. The user name and password are case-sensitive. The Status page displays. 5. Select Add WPS Client. The Add WPS Client page displays. 6. Click the Next button. By default, the Push Button (recommended) radio button is selected. 7. Either click the button onscreen or press the WPS button on the DST adapter. For two minutes, the DST adapter attempts to find the WiFi device (that is, the client) that you want to join the DST adapter’s main WiFi network. 8. Within two minutes, go to the WiFi device and use its WPS button to connect to the DST adapter’s WiFi network. Manage the DST Adapter Network and Settings 37 Nighthawk DST AC1900 DST Router and DST Adpater Model R7300DST The WPS process automatically sets up your WiFi device with the network password when it connects. The DST adapter WPS page displays a confirmation message. Use WPS With the PIN Method To use the PIN method to connect a WiFi device to the DST adapter’s WiFi network, you must know the PIN of the WiFi device that you are trying to connect. To using WPS with the PIN method to join the DST adapter’s WiFi network: 1. With an Ethernet cable, temporarily connect your computer to the Ethernet port on the DST adapter. 2. Launch a web browser from the computer. 3. Enter http://www.mywifiext.net. A login window displays. 4. Enter the DST adapter user name and password. The user name is admin. The default password is password. The user name and password are case-sensitive. The Status page displays. 5. Select Add WPS Client. The Add WPS Client page displays. 6. Click the Next button. By default, the Push Button (recommended) radio button is selected. 7. Select the PIN Number radio button. 8. In the Enter Clients’ PIN field, enter the PIN number of the WiFi device. 9. Click the Continue button. Manage the DST Adapter Network and Settings 38 Nighthawk DST AC1900 DST Router and DST Adpater Model R7300DST The DST adapter attempts to find the WiFi device (that is, the client) that you want to join the DST adapter’s WiFi network. 10. Within two minutes, go to the WiFi device and use its WPS software to join the network without entering a password The WPS process automatically sets up your WiFi device with the network password when it connects. The DST adapter WPS page displays a confirmation message. View or Change the DST Adapter’s WPS Settings To view or change the DST adapter’s WPS settings: 1. With an Ethernet cable, temporarily connect your computer to the Ethernet port on the DST adapter. 2. Launch a web browser from the computer. 3. Enter http://www.mywifiext.net. A login window displays. 4. Enter the DST adapter user name and password. The user name is admin. The default password is password. The user name and password are case-sensitive. The Status page displays. 5. Select Advanced > Wireless Settings. In the WPS Settings section displays the DST adapter’s PIN. You cannot change this number. 6. In the WPS Settings section, change the settings as needed: • Enable Device’s PIN. By default, this check box is selected so that it is possible to use the WPS PIN method to connect to the DST adapter’s network. Manage the DST Adapter Network and Settings 39 Nighthawk DST AC1900 DST Router and DST Adpater Model R7300DST • To prevent PIN compromise... By default, this check box is selected. This feature lets you specify the maximum number of times someone can try to enter the DST adapter’s PIN to connect with WPS before the DST adapter disables its PIN. • Keep Existing Wireless Settings (2.4 GHz b/g/n). By default, this check box is selected so that the SSID and passphrase stay the same when you use WPS to connect to the 2.4 GHz band. We recommend that you leave this check box selected. • Keep Existing Wireless Settings (5 GHz a/n/ac). By default, this check box is selected so that the SSID and passphrase stay the same when you use WPS to connect to the 5 GHz band. We recommend that you leave this check box selected. 7. Click the Apply button. Your settings are saved. View or Change DST Adapter Advanced WiFi Settings Use care when changing the WiFi settings. Incorrect settings might disable the DST adapter’s WiFi networks unexpectedly. To view or change the advanced WiFi settings: 1. With an Ethernet cable, temporarily connect your computer to the Ethernet port on the DST adapter. 2. Launch a web browser from the computer. 3. Enter http://www.mywifiext.net. A login window displays. 4. Enter the DST adapter user name and password. The user name is admin. The default password is password. The user name and password are case-sensitive. The Status page displays. 5. Select Advanced > Wireless Settings. Manage the DST Adapter Network and Settings 40 Nighthawk DST AC1900 DST Router and DST Adpater Model R7300DST All the check boxes are selected by default. 6. Select or clear the check boxes: • Enable Wireless Access Point (2.4 GHz). When this check box is selected, the DST adapter allows WiFi connections in the 2.4 GHz band. Clearing this check box prevents WiFi devices from connecting to the DST adapter in the 2.4 GHz band. LAN devices can still connect to the DST adapter over an Ethernet cable. • Enable SSID Broadcast (2.4 GHz). When this check box is selected, the DST adapter broadcasts its WiFi network name (SSID) for the 2.4 GHz band. Clearing this check box hides the DST adapter’s 2.4 GHz network name. In such a situation, this network name does not display in a WiFi network manager. A user who wants to join this hidden network must know its network name. • Enable 20/40 MHz Coexistence (2.4 GHz). The DST adapter 2.4 GHz WiFi network can run in either 40 MHz mode or 20 MHz mode. When this check box is selected, the DST adapter uses 40 MHz mode unless a nearby WiFi network is using 20 MHz mode. If that happens, the DST adapter uses 20 MHz mode to coexist with that network. • Enable Wireless Access Point (5 GHz). When this check box is selected, the DST adapter allows WiFi connections in the 5 GHz band. Clearing this check box prevents WiFi devices from connecting to the DST adapter in the 5 GHz band. LAN devices can still connect to the DST adapter over an Ethernet cable. • Enable SSID Broadcast (5 GHz). When this check box is selected, the DST adapter broadcasts its WiFi network name (SSID) for the 5 GHz band. Clearing this check box hides the DST adapter’s 5 GHz network name. In such a situation, this network name does not display in a WiFi network manager. A user who wants to join this hidden network must know its network name. 7. Click the Apply button. Your changes are saved. Set Up a WiFi Access List for the DST Adapter By default, any WiFi device that is configured with the correct network name (SSID) can access the DST adapter’s WiFi networks. For increased security, you can restrict access to the DST adapter’s WiFi networks so that only WiFi devices with the MAC addresses that you add to an access list can connect. Each network device owns a MAC address, which is a unique 12-character physical address, containing the hexadecimal characters 0–9, a–f, or A–F only, separated by colons (for example, 00:09:AB:CD:EF:01). Typically, the MAC address is on the label of the WiFi device. If you cannot access the label, you can display the MAC address using the network configuration utilities of the computer. You might also find the MAC addresses on the Attached Devices page (see View Wired and WiFi Network Devices Connected to the DST Adapter on page 43). Manage the DST Adapter Network and Settings 41 Nighthawk DST AC1900 DST Router and DST Adpater Model R7300DST CAUTION: If you use a WiFi device to set up the access list, add your WiFi device to the access list. Otherwise, you are disconnected when you click the Apply button. To avoid this situation, use a computer with a wired connection to access the DST adapter. Before you enable the access list, you must add the MAC addresses of the WiFi devices that you want to grant access to the WiFi network of the DST adapter. To set up and enable the DST adapter’s access list: 1. With an Ethernet cable, temporarily connect your computer to the Ethernet port on the DST adapter. 2. Launch a web browser from the computer. 3. Enter http://www.mywifiext.net. A login window displays. 4. Enter the DST adapter user name and password. The user name is admin. The default password is password. The user name and password are case-sensitive. The Status page displays. 5. Select Advanced > Wireless Settings. The Advanced Wireless Settings page displays. 6. Click the Setup Access List button. 7. Click the Add button. 8. In the Device Name field, type a name for the WiFi device. 9. In the MAC Address field, type the MAC address of the WiFi device. 10. Click the Apply button. 11. Above the Wireless Card Access list, select the Turn Access Control On check box. Manage the DST Adapter Network and Settings 42 Nighthawk DST AC1900 DST Router and DST Adpater Model R7300DST 12. Click the Apply button. Now only computers and devices in the list can join the DST adapters WiFi networks. View Wired and WiFi Network Devices Connected to the DST Adapter You can view the active wired and WiFi devices that are connected to the DST adapter’s network. If you do not recognize a WiFi device, it might be an intruder. To view devices on the DST adapter network: 1. With an Ethernet cable, temporarily connect your computer to the Ethernet port on the DST adapter. 2. Launch a web browser from the computer. 3. Enter http://www.mywifiext.net. A login window displays. 4. Enter the DST adapter user name and password. The user name is admin. The default password is password. The user name and password are case-sensitive. The Status page displays. 5. Select Maintenance > Attached Devices. For each wired and WiFi device, the IP address, MAC address, and device name display. 6. (Optional) Click the Refresh button. The information on the page is updated. Set Up the DST Adapter to Use a Static IP Address The DST adapter comes set up to use a dynamic IP address, which is the correct setting for most home networks. Manage the DST Adapter Network and Settings 43 Nighthawk DST AC1900 DST Router and DST Adpater Model R7300DST To set up the DST adapter’s IP address: 1. With an Ethernet cable, temporarily connect your computer to the Ethernet port on the DST adapter. 2. Launch a web browser from the computer. 3. Enter http://www.mywifiext.net. A login window displays. 4. Enter the DST adapter user name and password. The user name is admin. The default password is password. The user name and password are case-sensitive. The Status page displays. 5. Select Setup > IP Address Setup. 6. By default, the Get an IP address dynamically from the router radio button is selected. 7. Select the Use Static IP Address radio button. 8. Complete the fields to specify the IP network IP addresses. 9. Click the Apply button. Your settings are saved. Manage the DST Adapter Network and Settings 44 6. DST Adapter Troubleshooting 6 You can take various steps to diagnose and solve problems that you might encounter. The first step in troubleshooting your DST adapter is to check the LEDs. After you plug in the DST adapter, the following sequence of events occurs: 1. The Power LED lights. 2. After approximately 10 seconds, verify the following: • The Power LED is solid green. The device is powered on. • If the device is connected to a Powerline network, the Pick A Plug LED is lit. • If the Powerline device is connected through the Ethernet port to a powered-on Ethernet device, the Ethernet LED is lit. If no LEDs are lit, see LEDs Are Off When the DST Adapter Is Plugged In . If the Power LED is not lit, see Power LED Is Off . If the Pick A Plug LED is not lit, see DST LED Is Off, Amber, or Red . If the Ethernet LED is not lit, see Ethernet LED Is Off . If you do not find the solution here, visit the NETGEAR support site at support.netgear.com for product and contact information, or contact Geek Squad. For more information, see Contact Geek Squad . 45 Nighthawk DST AC1900 DST Router and DST Adpater Model R7300DST LEDs Are Off When the DST Adapter Is Plugged In A common reason the LEDs are off is that power is not being provided to the DST adapter. Make sure that power is supplied to the electrical outlet, and that the DST adapter is not plugged into an extension cord, power strip, or surge protector. Power LED Is Off If the Power LED is off, the adapter is not receiving electrical power. You can try various troubleshooting tips: • Make sure that power is supplied to the electrical outlet. • Press the Factory Reset button on the DST adapter for two seconds to return the device to its factory default settings. DST LED Is Off, Amber, or Red If the DST LED is off, you can try various troubleshooting tips. If the DST LED is off, the DST adapters cannot find the DST router or other DST adapters. Try these troubleshooting tips: • Make sure that the DST adapters and DST router are plugged into wall outlets with power and that they use the same network encryption key. • Move a DST adapter to an outlet that is closer to the computer or other devices. • If you set a private encryption key, make sure that all DST adapters and the DST router are using the same encryption key. • If the problem occurred after you set the encryption key, reset each device to its factory default settings. Then try setting the encryption key again. • If the LED is amber or red, move the DST adapter to another electrical outlet with a faster connection. Ethernet LED Is Off If the Ethernet LED is off, the Ethernet port on the DST adapter is not linked. You can try various troubleshooting tips. If your DST adapter is connected to a computer, game console, Blu-ray player, or other peripheral device, check the following: • The peripheral device is turned on. • The DST adapter is securely connected to the peripheral device using an Ethernet cable. DST Adapter Troubleshooting 46 Nighthawk DST AC1900 DST Router and DST Adpater Model R7300DST Press the Factory Reset button on each DST adapter for two seconds to return the device to its factory default settings. Contact Geek Squad Setup and support are included with your DST adapter for one year from your Nighthawk R7300 DST router purchase date. If needed, agents are available 24/7/365 to help you do the following: • Set up your network. • Connect your WiFi devices such as computers, tablets, gaming consoles, and mobile phones. • Make sure that your network is secure. Geek Squad Agents use remote access to assist with setup and support. The Geek Squad Setup and Support button on the DST router paired with the DST router’s Geek Squad support ID, which is on the product label on the bottom of the DST router, is used to authenticate the connection for remote access. The Agent will provide direction regarding the use of the Geek Squad Setup and Support button. Be sure to reference your coupon code, which is GS1337EXB, when you are on the phone or chatting with an Agent. To contact Geek Squad: 1. Contact Geek Squad using online chat or phone: • To contact Geek Squad using the online chat: a. Visit geeksquad.com. b. Click the CHAT WITH AN AGENT link. The CHAT WITH AN AGENT page displays. c. Click the START CHAT NOW button. A sign-in window displays. If you do not see a sign-in window, disable your pop-up blocker. • d. Enter your email address and click the CHAT NOW button to begin the chat. To contact Geek Squad using the phone, call 1-800-GeekSquad. 2. Reference your coupon code, which is GS1337EXB, when you are on the phone or chatting with an Agent. 3. When prompted by the agent, do the following: a. Give the Agent your Geek Squad Support ID, which is on the product label. DST Adapter Troubleshooting 47 Nighthawk DST AC1900 DST Router and DST Adpater Model R7300DST The product label is on the bottom of the DST router. b. Press the Geek Squad Setup and Support button allow the Agent temporary access to your DST router. on the DST router to The state of the Geek Squad Setup and Support LED indicates the status of the connection with the Geek Squad Agent: • Solid white. The DST router is connected to Geek Squad Support. • Blinking white. The connection is being established. • Off. Geek Squad Support is not connected. DST Adapter Troubleshooting 48 7. DST Adapter Supplemental Information 7 This appendix provides technical specifications and safety information for the DST adapter. The appendix includes the following sections: • Technical Specifications • Safety Information 49 Nighthawk DST AC1900 DST Router and DST Adpater Model R7300DST Technical Specifications Table 3. DST6501 DST adapter specifications Feature Specification Data and routing protocols IEEE 802.3 (10BASE-T), IEEE 802.3u (100BASE-Tx) AC input 100–240V, 0.3A (max.) Power consumption Normal: 9.3W Dimensions 127 x 107 x 57 mm (5.0 x 4.42 x 2.26 in.) Weight 0.241 kg (0.45 lb) Operating temperature 0 to 40C Operating humidity 10–90% maximum relative humidity, noncondensing Storage humidity 5–95% maximum relative humidity, noncondensing Security encryption type 128-bit AES MAC addresses 64: number of nodes that can be added to a single network Bandwidth 1000 Mbps Compatibility Not HomePlug v1.0 or HomePlug v1.0 Turbo compatible Data transfer rate Up to 1000 Mbps with real throughput greater than 80 Mbps Frequency band 2–30 Mbps Modulation type OFDM symbol modulation Electromagnetic emissions FCC Part 15 Class B; 3-home FCC Certificate Safety agency approvals UL Listed (UL60950-01) / cULIEC-60950-1;LCIE CB Wireless communication Enabled Transmission speed Auto1 Country/Region United States (varies by region) Operating mode IEEE 802.11 b/g/n 2.4GHz 256QAM Support IEEE 802.11 a/n/ac 5GHz Data rate 200 Mbps @ 2.4GHz -256QAM 433 Mbps @ 5GHz (32º to 104ºF) 1. Maximum wireless signal rate (IEEE Standard 802.11). Actual throughput will vary. Network conditions and environmental factors, including volume of network traffic, building materials and construction, and network overhead, lower actual data throughput rate. DST Adapter Supplemental Information 50 Nighthawk DST AC1900 DST Router and DST Adpater Model R7300DST Safety Information Follow these safety guidelines to ensure your own personal safety and to help protect your system from potential damage. • AC input: 100–240V, 0.3A (max.) • Operating temperature: 0C–40 degrees C. • Maximum wireless signal rate derived from IEEE Standard 802.11 specifications. • Actual data throughput will vary. Network conditions and environmental factors, including volume of network traffic, building materials and construction, and network overhead, lower actual data throughput rate. • Do not service any product except as explained in your system documentation. • Opening or removing covers that are marked with the triangular symbol with a lightning bolt can expose you to electrical shock. Only a trained service technician should service components inside these compartments. • Use the product only with approved equipment. • Allow the product to cool before removing covers or touching internal components. • To help avoid damaging your system, be sure that the voltage selection switch (if provided) on the power supply is set to match the power available at your location: - 110 volts (V), 60 hertz (Hz) in most of North and South America and some Far Eastern countries such as South Korea and Taiwan. - 100V, 50 Hz in eastern Japan and 100V, 60 Hz in western Japan. - 230V, 50 Hz in most of Europe, the Middle East, and the Far East. • Do not plug the DST adapter into extension cords, power strips, or surge protectors. • To help protect your system from sudden, transient increases and decreases in electrical power, use a surge suppressor, line conditioner, or uninterruptible power supply (UPS). DST Adapter Supplemental Information 51