1
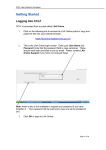
JuryStar User Manual
A NEW ERA
The tablet PC is the latest innovation in this amazing Era of Technology. However, as
revolutionary as the tablet may be, litigators must keep in mind that it is but a tool to help them
achieve their greater goals. JuryStar has the capability to completely replace every document
and paper resource you would otherwise take to the podium for jury selection. As exciting as
that capability may be, your ultimate goal is to identify helpful and harmful jurors while building
rapport with all of them. Whether you use an iPad or pen and paper for jury selection, do not
feel that you have to document every scrap of information discussed with potential jurors,
especially if doing so disrupts the flow of dialogue or creates long, awkward pauses. Document
what you can and remember what you must. Similarly, do not feel that you must utilize a
JuryStar feature just because it is available. You are the most important factor in the case and
everything else, including this app, should be utilized to the extent that it helps you achieve your
goals for voir dire.
Tip: you can quickly become familiar with JuryStar by using it when observing voir dire
conducted by other attorneys.
PURPOSE OF VOIR DIRE
You first need to identify the topics you wish to explore with the jury. A potential juror’s prior jury
service, arrest history, management experience, familiarity with the trucking industry, etc., could
all be relevant topics that have some bearing on your particular trial. The questions that pertain
to a single topic are grouped together into a sub-set, called a “line of questioning” for that topic.
For example, the topic Prior Jury Service could have a line of questioning comprised of the
following set of questions:
1) “Who here has served on a jury before?”
2) “Was it a civil or criminal case?”
3) “Did you arrive at a verdict?”
4) “What is one word that describes your experience as a juror?”
5) “Explain that for me, please.”
In this fashion, you construct sets of questions for each topic.
Some topics may have a few questions at most. Some topics may require several questions.
Some topics, such as Prior Jury Service and Law Enforcement Background, might be
important to explore in every trial. Some topics might be highly case-specific. For example, if
you were litigating a wrongful termination lawsuit in which the defendant was a local
1
businessman, you would want to cover a general Work History topic with potential jurors,
perhaps followed by a more specific Business Lawsuit topic, with a line of questioning such as:
"Has anyone ever been involved in a lawsuit related to their employment?"
“What was the lawsuit about?”
"Were you a witness or a party to the lawsuit?"
“Did you have to be deposed?”
“Did you have to pay anything?”
"What are your feelings about that experience?"
Finally, contrary to popular belief, jury selection is not about selection. You will never be able to
tell the judge “On behalf of my client, I select Juror #26 to be on the jury.” You can only deselect
potential jurors, the idea being that if both sides deselect the potentially biased jurors, the case
will be evaluated by the fairest group of people. Accordingly, one of the most important functions
of jury selection is to identify the people that you do not want on your jury, so that you may
intelligently exercise your peremptory strikes.
PRETRIAL PREPARATION
GETTING STARTED WITH JURYSTAR
Tap the JuryStar icon on your iPad main screen. The initial JuryStar screen will appear. Tap the
“Trials” icon on the bottom left of your screen. A window displaying “Saved Trials” will appear on
the lower right of your screen.
Tap “Create New Trial.” A textbox will appear, asking you to “Enter name for new trial:” Tap in
the textbox; the iPad keyboard will appear. Enter the name of your trial (Jackson v. Big Industry,
State v. Burke, etc.). Select the number of seats per row in the jury box your potential jurors will
occupy during voir dire (6, 7 or 8). If the rows in your jury box have differing numbers of seats
(ex: back row has eight seats while the front row has six seats), select the greater number.
Tap “Done." Your Trial File will now appear in the “Saved Trials” window.
DRAFTING VOIR DIRE QUESTIONS
You can prepare your lines of questioning in numerous ways. Generally, you can:
1) Draft them on your iPad, using JuryStar;
2) Draft them on your iPad, using the “Notes" application that comes standard on iPads, then
cut/copy/paste them into JuryStar;
3) Draft them on your laptop or desktop, email them to your iPad (in the body of the email
2
seems to work best), then cut/copy/paste them into JuryStar.
For all methods, once you are ready to start loading the questions into JuryStar:
Step 1: Name the Topic
Tap the “Load Questions” button at the bottom of your screen. It is the second button from the
left. A view will appear that has “Topics" on the lower left of your screen, and “Questions” on the
lower right of your screen.
Tap the “Add” button just above the Topics heading. A window titled “Add Topic” will appear.
There are two text fields in that window. One text field is titled “Symbol.” The other text field is
titled “Title.”
Tap in the text field next to “Title.” The iPad keyboard will appear.
Type in a topic you wish to discuss with potential jurors in voir dire. Ex: type Prior Jury Service,
Law Enforcement Perceptions, Attitude about big corporations, etc.
When finished with the title, tap in the text field next to “Symbol.” Chose a letter, number or
symbol to associate with that particular Topic. Ex: for Prior Jury Service, you could select a
capital “J.” For Law Enforcement, you might choose a capital “L.” After you both a title and
symbol associated with a line of questioning, tap “Done.” You will see that the topic and its
symbol are now in the Topics menu, on the lower left of your screen.
Step 2: Create questions for that Topic
Tap the particular topic to which you wish to add questions. A blue and white icon will appear on
the right side of that particular topic, indicating that questions can now be added to it.
To add specific questions to the selected topic, tap the “Add” button just above the Questions
heading, which is on the lower right side of your screen. A large text field will appear. Tap within
that text field, causing the iPad keyboard to appear. At this point you can 1) type one or more
questions in the text field or 2) paste previously typed questions, copied from either your notes
or an email. Questions typed in ALL CAPITAL LETTERS are easier to read for most lawyers
standing at the podium. Tip: even though the text field is designed to handle large amounts of
text, we recommend that you start out by entering only one question in each text field. Once you
become more familiar with JuryStar, you can expand on the number of questions per field, if you
choose.
Once you have your question(s) in that text box, tap the “Done” button under the text box. You
will see that the question you typed is now visible in the “Questions” field on your screen. If you
typed or pasted more than two questions in a single text box, you can scroll down within the
question field to see the additional questions.
3
To add another question, tap the “Add” button again and repeat the above instructions.
Continue adding questions to that line of questioning, until you feel that particular Topic is
covered.
If you wish to rearrange the order of your questions, tap the “Edit Table” button directly above
the Questions heading. On the right side of each individual question’s field, a small, box-shaped
icon comprised of three, short horizontal bars will appear. By touching that icon, you can drag
and drop that text box to a different spot in your order of questions. The red and white icon on
the left side of each question’s field can be used to delete the question by tapping that icon and
then tapping the “Delete” button that appears next.
Additional topics are created by tapping the “Add” button just above the Topics title and
following the instructions above.
If you wish to rearrange the order of your topics, tap the “Edit Table” button directly above the
Topics heading. Again, on the right side of each topic's field, the small, box-shaped icon
comprised of three, short horizontal bars will appear. By touching that icon, you can drag and
drop that topic's text box to a different spot in your order of Topics. The red and white icon on
the left side of the field can be used to delete the entire Topic by tapping it and then tapping the
“Delete” button that appears next.
Continue creating and reordering your topics and questions, until you are prepared for voir dire.
Tip: for some topics, a Topic title with no supporting questions will suffice. For example, if you
simply want to know if any of your jurors went to graduate school, you can create a topic titled
“Graduate School" and forego entering any specific questions. You can also create topics that
pertain to your personal impressions of jurors. For example, if you want to note a juror's body
language, attentiveness, likability, etc., you could name such a topic and assign it a symbol. The
symbol can be a letter, number, keyboard symbol, exclamation point or anything memorable.
Again, no questions are necessary for such topics. Keep such personal impression topics
grouped together at either the top or bottom of the Topics column. During voir dire, you can
easily document your personal impressions of jurors (interested/disinterested, personable/not
personable, etc.) at any point by tapping into that topic and rating them (ratings explained
below). If you do, be sure to tap back into the Topic you were discussing, to prevent crossing up
your juror ratings.
Tip: some litigators like to ask jurors to give a single word answer to a question, then explain
their single word, i.e., “What one word would describe your opinion of the justice system?” You
could type such a question either 1) as a separate Topic or 2) in the questions field of an
existing, related Topic. You could then record significant responses in the jurors’ “Notes” field,
explained further below.
Tip: some Topics are designed to make a point, or to prepare the jurors for your theory of the
case. You need not plan on assigning a value to every juror you dialogue with on these topics.
Only a few extreme jurors will answer such topics in ways that merit your attention and,
4
typically, you and your opponent would remember those jurors quite easily during the
deselection phase.
LOADING JUROR DEMOGRAPHIC INFORMATION
Most jurisdictions provide attorneys some basic juror demographic information, usually via
pretrial questionnaires. If you have the time and the inclination, you can preload into JuryStar
whatever juror information you wish. If possible, you should certainly enter the juror’s last name
in the cell box that has their juror number.
Tap “Enter Cells” at the bottom of your screen. It is the middle button. A field with boxes
numbered from 1-144 will appear in the lower left of your screen.
If you tap box “1” and then tap the “Enter Demographic Info” button, juror #1's individual
information box appears. In this field, you can enter juror #1's name and whatever demographic
information you think is important to your case, including area of residence, spousal information,
employer and criminal histories, if you have time to run them. This box will be available to you
during voir dire, so that you can easily add additional information in the “Notes” text field during
voir dire.
TRIAL DAY
JURY SELECTION OVERVIEW
Trial day in most jurisdictions starts with dozens of potential jurors being led into the courtroom,
seated in the courtroom gallery and given some preliminary instructions. Then, a small number
of potential jurors are randomly picked from the courtroom gallery and seated in and around the
jury box. The lawyers take turns questioning that smaller group in and around the jury box, then
strike (deselect) potential jurors from that group. If enough potential jurors get deselected,
additional potential jurors are taken from the courtroom gallery and used to repopulate the jury
box. The lawyers continue asking questions of the potential jurors in and around the jury box,
who continue to be deselected until the lawyers quit striking them. The small group left in and
around the jury box will comprise the jury and alternates.
SEATING THE JURORS
Tap “Enter Cells” at the bottom of your screen. A grid of the jurors’ numbers will appear in the
lower right of your screen. The grid at the top of your screen represents the jury box and an
additional group/row of seats in front of or around the jury box.
The judge will call certain potential jurors from the large group in the courtroom gallery and seat
them in and around the jury box. As the judge calls the name and number of each juror to take
5
his/her place in or around the jury box, tap that juror’s number box on the lower right side of
your screen. The box around that number will turn red, indicating that it has been selected. Ex: if
the judge starts with Juror #25, you tap box “25.” Box 25 will turn red, indicating that it has been
selected. Wherever Juror #25 gets seated in the actual jury box, you tap the corresponding area
on the seating grid at the top of the screen. Juror #25's number box will now appear in that
corresponding area on the seating grid. Juror #25's last name will appear in the seating grid as
well. As the judge seats the jurors, tap each juror’s number box, then tap the spot in the seating
grid that corresponds to the actual juror’s seat in the actual jury box.
Continue until the judge fills the jury box and surrounding areas, if any.
Tip: if you find yourself in a jurisdiction where the potential jurors are not questioned while
seated in the jury box as described above, you can ask your preloaded questions from the “Voir
Dire” screen and then record the answers by tapping the “Enter Cells” button and using the
“Enter Demographic Info” to access all 144 jurors’ text boxes.
CONDUCTING VOIR DIRE
Tap the “Voir Dire” button on the bottom of your screen. It is the second button from the right.
The Voir Dire screen will appear. On it you will see:
- Your Topics on the lower left of your screen. Tap the Topic you wish to start off with, which will
cause the blue and white arrow-icon to appear. The icon indicates which Topic is active.
-The questions associated with the active Topic are visible in the lower right of your screen.
-The seating grid at the top of the screen corresponds to the jurors’ positions in the jury box.
-In middle area of your screen, there are: three buttons on the left, a button on the right, and a
slider in between them. Their functions will be explained shortly.
If your opponent goes first
If your opponent gets to question the jurors first, you can record significant answers in each
individual juror’s text box. Ex: if your opponent elicits relevant information from Juror #21, you
tap on Juror #21’s cell box. The cell box will become highlighted, indicating that it has been
selected.
Then, tap the “Notes” button, which is one of the three buttons in the middle of your screen.
Juror #21’s individual text box will appear on your screen, into which you can enter whatever
information you find significant to your position.
When finished entering the information, tap “Done” to return to the Voir Dire screen.
Your turn
Tap the Topic with which you wish to begin. The questions associated with that Topic will
6
appear on the right.
Introduce yourself and your client to the potential jurors. Provide some contextual background if
it will facilitate the process and if the judge allows it.
Ask the first question, which will probably be addressed to the group. Ex: “Who here has been
on a jury before?” A number of hands may go up.
In the seating grid, tap on every juror who answers affirmatively. Each corresponding spot on
the seating grid will become highlighted. Tip: when asking a group question, ask the jurors to
keep their hands raised for you. Once you have their cell box highlighted, then thank them and
let them put their hands down.
Tap the “Rate Boxes” button, which is the large button on the right side of your screen. You will
see that the symbol associated with that line of questioning now appears in each highlighted
juror’s cell box. The number zero will initially appear next to the symbol. Ex: if you assigned the
letter “J” to the “Prior Jury Service” topic, you will see “J+0” in every jurors’ cell box that you
highlighted. Thus, you simultaneously mark every juror with a connection to that particular topic.
Now, a word of explanation about the slider in the middle of your screen and how it can help you
during voir dire. No litigator ever needs to write down every word that every juror utters in voir
dire. You simply need to 1) identify the jurors who would be particularly receptive or opposed to
your position and 2) make a note of significant responses. So, when you ask questions about
any topic, the goal is to assess jurors' answers for indications that they would tend to favor
either your position or your opponent's position.
Let's use the topic of Prior Jury Experience as an example. If you represent a group of
fishermen suing a big company for dumping toxic waste off the Oregon coastline and Juror #11
states that his prior jury experience involved giving a widow millions of dollars because the
corporate defendant in that case undoubtedly had insurance, he is good for you. If you
represent the corporation in that case, Juror #11 is bad for you. So:
Using the above example, with the Prior Jury Experience topic active, tap Juror #11’s cell box,
which will become highlighted. If you represent the fishermen, slide the slider toward the right to
a positive number (probably +5) and tap the “Rate Boxes” button. You will see that Juror #11’s
“J+0” is now “J+5." If you represent the corporation, you would give that juror a negative rating,
perhaps -5.
Continue with this topic, until you have discussed it with everyone else who raised their hand.
Thus, you will have covered an important issue with the entire group of potential jurors, and
identified and marked potential problem jurors, without pausing to scribble on Post its. The flow
of the conversation can continue almost completely uninterrupted.
If you wish to make a brief note of any juror’s specific answer (which is what litigators currently
7
have to do anyway), highlight that juror's cell box by tapping it, then tap “Notes.” That juror's
individual text box will appear. In the toxic waste example above, you could enter a few words
that will remind you later of Juror #11’s prior jury experience. Ex: “prior j, insurance.” Tip: when
typing anything, our tendency is to use proper sentence structure, punctuation, etc. Resist this
urge when using JuryStar. Just as you would perhaps jot “J, ins” on a Post it note to
memorialize Juror #11's response, so too type "J ins" (or some other BRIEF note) in the text
box, to minimize the disruptions in the flow of dialogue.
Continue with your other Topics. Assess jurors' answers for indications that they would tend to
favor one side or the other and score them accordingly. In the final analysis, whether you score
a juror’s response as a -3 or -4 matters less than your ability to simply assign a negative value
to the potential jurors who tend to favor your opponent.
Tip: if you can keep your iPad connected to the Internet, you can receive feedback emails from
your team during voir dire. You absolutely must test out this capability before trial, to ensure that
your courtroom’s wireless capabilities are compatible and sufficient.
At the end of voir dire, all potential jurors will have several ratings, which means several positive
and/or negative numbers. If you have done your best to identify the answers that indicate a
tendency to side with your opponent, you will easily identify the jurors with the greatest number
of individual negative ratings. Again, in this endeavor, a +5 does not necessarily balance out a 5. You cannot sum the values and arrive at a single score that tells you definitively whether or
not you want that person on your jury. Identify the jurors with the greater number of negative
scores and let that be your primary guide for deselection.
STRIKING JURORS
JuryStar was designed to facilitate the deselection process, allowing litigators to quickly identify
potential jurors with multiple negative ratings. So, when the questioning concludes and the
deselection process begins, keep the “Voir Dire” screen displayed. From this single screen you
can view the symbols associated with all topics, view all jurors’ ratings for those topics and
access each juror’s notes with a touch of the “Notes” button.
After reviewing your notes and identifying who you wish to deselect, tap the “Strike Jurors”
button on the bottom of your screen. It is the button on the far right. You will see the seating grid
at the top of your screen and three buttons in the lower half of your screen. The buttons are
labeled “Peremptory Us,” “Peremptory Them,” and “Court.”
Highlight the potential juror you wish to deselect by tapping their cell box. Then, tap “Peremptory
Us.” The deselected juror’s cell box is removed from the seating grid and appears underneath
the “Peremptory Us” button.
Once you learn who your opponent has deselected, highlight that deselected juror and then tap
“Peremptory Them.” The deselected juror will be taken from the seating grid and will appear
8
underneath the “Peremptory Them” button. If any juror is stricken by the judge for cause,
highlight that juror by tapping on their cell box, then tap “Court.” The deselected juror will be
taken from the seating grid and will appear underneath the “Court” button.
The deselected jurors’ cell boxes will remain visible underneath their respective buttons, which
will help you keep track of how many remaining strikes you and your opponent have.
CONTINUING VOIR DIRE
After enough potential jurors are deselected, additional jurors will likely be needed to repopulate
the jury box. Tap the “Enter Cells” button on the bottom of your screen. As the judge calls
additional jurors out of the gallery and seats them in and around the jury box, repeat the juror
seating process described above.
If a juror that survived the first round of deselection needs to change seats in the jury box to
more easily accommodate the additional jurors, go to the “Voir Dire” screen. Tap the surviving
juror’s cell box in the seating grid, highlighting it. Tap the “Move Cell” button. Tap the spot in the
seating grid that corresponds to the surviving juror’s new seating position. The juror’s cell box
will appear in that corresponding position.
If the additional jurors need additional questioning, you can conduct voir dire using the same
procedures as described above. Eventually, you will have your jury.
POST TRIAL
You can easily save your voir dire questions in JuryStar as reference materials for future trials. If
you choose not to delete the trial file you created, you can later go into it and cut/copy/paste the
questions into a new trial file. You can also copy the questions from JuryStar and paste them
into the iPad “Notes” program, where they can be saved. Finally, you can copy/paste the
questions into your iPad email service and send them to the computer where you keep your
questions on file.
9