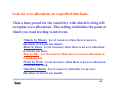
1
®
PERCEPTION PERT-PAC
Using Microsoft Project 2000
to Plan & Schedule
A Training Tutorial
(Sample Hull Block Construction)
1
This training tutorial outlines the basic features
of the Microsoft Project 2000 system for planning
and scheduling shipyard engineering and
production activities.
It is a supplement to the user manual entitled
“PERCEPTION Integrated Planning &
Scheduling,” which provides more planning and
scheduling details for the user.
2
For details on the operation of Microsoft Project
2000 not covered by this tutorial, the user is
urged to use Microsoft’s “User Guide for
Microsoft Project 2000.”
3
Additional detailed instructions for planning and scheduling
using PERCEPTION are provided in the following tutorial:
PERCEPTION PERT-PAC
Integrated Planning & Scheduling
4
Training Directory
Continue
Planning the Project
Copying Excel Tasks to Project
The Project Calendar
Sequencing Tasks
Scheduling Options
Engineering and Material Control
Project Settings
Project Schedule
The Worksheet Columns
Schedule Adjustments
Defining Resources
Resource Loading
Defining Tasks
Resource Leveling
Budgeting Labor
Task Priorities
Task Durations
Transfer to PERCEPTION
5
This tutorial describes the process for using Microsoft Project
2000 to plan and schedule shipyard production activities
(“tasks”).
This process includes sequencing tasks with all necessary
inter-dependencies. What results is a project schedule
developed using the Critical Path Method (CPM).
6
CPM develops not only the start and finish dates for each
task, but also determines how much free time is available
to each task to accommodate delays before these delays
impact the overall project schedule.
Those tasks that have no free time, called float or slack
time, are called critical.
7
This tutorial uses the new construction project of building
a barge as an example of how to go about the planning
and scheduling process.
The plan is based on modern hull block construction
methods of work organization.
This includes the outfitting of hull blocks prior to
erection, followed by a zone-oriented organization of the
final on-board work efforts that ultimately lead to tests,
trials and delivery.
An example of scheduling a Grand Block also is included.
8
Group Technology Manufacturing: This sample project does
not include an example of group technology manufacturing
activities, per se, although these methods also can be
accommodated by the procedures described in the
scheduling process.
Material Scheduling: While this sample does not address the
planning and scheduling of material requirements, their
schedules (via PERCEPTION) can be driven directly from
the production schedules and the latter’s Need Dates.
Cash Flow Scheduling: While not addressed by this sample
project, Microsoft Project 2000 also can model the cash flow
requirements resulting from the project plan and schedule.
9
Planning The Project
A project plan requires a good overall organization of the
work. For new construction, this means the following basic
items need to be defined:
1. The project work breakdown structure (WBS) that
will provide a good overview of costs and schedules
above the details. This avoids missing the “forest
for the trees” when the project gets under way.
2. The organization structure of all who will be
responsible for doing the work. PERCEPTION
requires that all work be formally assigned to
specific work centers.
10
The Project WBS can be a combination of ship systems
(SWBS) and interim products (PWBS).
Each type of WBS has its value in the development of the new
build project.
For this sample project, however, the plan will be based on the
organization of work by interim products:
• Manufactured Parts
• Sub-Assemblies
• Hull Blocks
• Hull Grand Blocks
• Ship Zones
11
Sample New Build Barge Project
Zone STERN
Zone MID
Zone BOW
Stern
Mid-Body
Bow
B01
B02
B03
B04
B06
Construction Hull Blocks
B05
B01
B02
B03
B04
B06
Construction Grand Block
GB01
12
The same planning principles can apply to
any ship construction project.
Construction Grand Block
GB01
B06
B05
B01
B02
B03
B04
Construction Hull Blocks
13
Setting Up Project Calendar
Before working on the project, select Tools/Options from
the main menu.
The Options tab window will appear. There are many
different options to select, but the following are most
important:
14
Select the
Calendar tab and
set the calendar
and working week
specifications for
the project.
Microsoft Project
allows the use of
multiple
calendars, but this
one will be used as
a default when
The standard Microsoft Project Calendar
project tasks are
is a 5-day week, 8 hours per day.
defined.
15
To set up an alternate calendar for the project (for
example, a 4-day work week, 10 hours per day, with
specific holidays, click on Tools/Changing Working Time
from the main menu.
16
Click on the New button to define the alternative calendar
for the project:
17
Click on the Friday title heading in the calendar display,
then set selected dates to Non-Working time.
This procedure makes all Fridays non-working.
However, other days including holidays can be set in
similar fashion.
Finally, to set the
number of hours
per week, etc.,
click on the
Options button.
18
Set the options
parameters as
required.
Click OK when
finished.
19
Setting Up Scheduling Options
Click on Tools/Options from the main menu.
20
When the Options
window is displayed,
click on the Schedule tab
and make the following
changes to the default
specifications:
•Show (resource)
assignment units as a
Decimal.
•Default task type:
Fixed Work
Click on the Set as
Default button.
21
Showing the resource assignment units as
decimals, rather than as percentages, means that
resources will be allocated in terms of men, for
example, and not as percentages of total available
men.
22
Default Task Type Options:
1. Fix Duration: The Duration stays constant regardless of
either resource Units or Work effort changes. Change
the Duration and the Work effort will change.
2. Fixed Units: The number of resource Units stays
constant regardless if either Duration or Work effort
changes. Change the resource units and the Duration
will change.
3. Fixed Work: The Work effort stays constant regardless
if either Duration or resource Units are changed.
Change the Work and the Duration will change.
For production work, Fixed Work should be used. It means that regardless of
how many people are assigned to do the job and regardless of the planned time
duration, the scope of Work should remain the same.
23
Project Settings
To set the project start date, select Project/Project Information
from the main menu.
24
The project
information window
will appear where the
project start date or
finish date can be
entered.
25
• Choose whether you want the project to be scheduled
from the start date or the finish date.
• Enter the start date for a project to be scheduled from the
start date.
• Enter the finish date for a project to be scheduled from
the finish date.
• Specify which base calendar is to be used as the project
calendar.
• Obtain overall project statistics for start and finish dates,
duration, work, and cost.
26
The following are details about the default base calendars in
the Calendar list.
If you create additional base calendars, or if you modify the
working times in the existing base calendars, these become
available in the Calendar list as well.
27
Standard
The base calendar that has a standard work day and work week of
Monday through Friday, 8:00 A.M. to 5:00 P.M., with 12:00 P.M. to
1:00 P.M. of nonworking time for a break.
24 Hours
The base calendar that has no nonworking time. All time, from Sunday
through Saturday, 12:00 A.M. to 12:00 P.M., is set as working time.
Night Shift
The base calendar that is set up for a graveyard shift. Working times
are Monday night through Saturday morning, 11:00 P.M. to 8:00 A.M.,
with 3:00 A.M. to 4:00 A.M. of nonworking time for a break.
28
If an alternative calendar is to be used, select it from the
drop-down list.
Click OK when the Project Information window is
complete.
29
Set Up Project Task Worksheet
Columns
The Gantt Chart view provides not only a graphical
display of task schedules and interdependencies, but also
columns of task information.
Standard Gantt chart columns
30
Additional columns will be required to integrate with
PERCEPTION.
31
To create additional columns, click on the column header to
the right of where you want to insert a new column.
Click on Insert/Column on the main menu. The Column
Definition window will appear.
Select the Field name
from the drop-down list
and enter your own
Title. Click OK to finish.
32
Insert the following four (4) columns into the worksheet
in order to the left of the default column “Duration”
"Field Name"
Microsoft Project
Column Name
"Title"
PERCEPTION
Column Name
Text7
Text5
Work
Text 15
Block
Zone
Budget Hours
Center
33
New columns inserted for Block, Zone, Budget Hours & Center.
34
Defining Resources
In order to refine project schedules so
that they can be performed without
exceeding the available supply of
resources, the project resources must be
defined.
Select View/Resource Sheet from the
main menu.
35
Define all resources with maximum available.
This sample sets up resource maximums (manpower) for each
work center.
Work Center
Max. Men, Incl. Multiple Sites
36
Defining Project Tasks
Project tasks can be entered directly into Microsoft Project.
This process can be done task by task or by using the copy
and paste features.
However, this sample project is first developed in Microsoft
Excel and the results copied and pasted into Project.
The reason for this approach is that each task must have its
time duration identified in Project. Excel can be used to
compute these durations from labor hours estimates
(budgets) and estimate man loadings per task.
37
The basic master plan for new construction can be
outlined as follows:
1.
Estimating
2.
Planning & Scheduling
3.
Engineering
4.
Requisitioning Materials
5.
Purchasing
6.
Work Order Development
7.
Hull Block Fabrication
8.
Hull Block Assembly & Outfit
9.
Hull Block Erection
10. Zone Outfit
11. Tests & Trials
38
The basic master plan for new construction :
39
The following slides display the project tasks as set up
in Excel.
40
41
42
43
The tasks are identified by ship zone and by shipyard
work center.
44
Budgeting Labor
Budgeting labor hours may be done in a number of
different ways:
1. Use a cost estimating relationship (CER)
2. Use the estimated hours (often deducting a
percentage for management reserves)
45
CERs are often used to develop budgets for hull block
construction. The following are examples:
Stage of Construction
Steel Prep
Steel Parts Fab
Block Sub-Assembly
Block Assembly
Block Erection - Tack & Fit
Block Erection Welding
Total:
Hrs/Ton
0.75
1.50
3.50
8.50
6.25
3.50
24.00
To compute the budget hours,
Labor Hours = Tons x (Hours/Ton)
46
Task Durations
An important piece of information for scheduling is to
estimate how long a task will require from start to
finish.
The labor hours provide the scope of work, but the time
frame in which these hours can be performed depends
upon the number of resources (manpower) that will be
made available.
47
To compute the task duration, the following
information needs to be defined:
1. The total labor hours
2. The number of hours per man-day
3. The number of shifts per man-day
From this, the days duration can be determined as
an Excel calculation:
Days Duration = Labor Hours / (8 Hours/Day) / (Shifts/Day)
48
Copying Excel Tasks To Project
After the basic schedule data has been developed in
Excel, it must be copied into Project.
Special Note: The column order of the Excel data must
be the same column order set up in Project.
49
In Excel, highlight the data to copy into Project. click on the
Copy button
on the Excel tool bar.
50
Re-open Microsoft Project and open the Gantt Chart
worksheet.
Select View/Gantt Chart from the main menu.
51
In Project, click on the upper left corner of columns where the
data is to be copied (Task Name).
Then click on the Paste button
in the Project tool bar.
The selected tasks will be put into Project directly.
Tasks copied from Excel initially will have the same start date.
Their finish dates will vary depending on their days durations.
52
Summary Tasks
In this example, the top row of block data is a summary of the
detail breakdown of block tasks.
Highlight all of the block tasks below the block summary row
and click on the Indent button
on the tool bar.
The summary row will turn bold and its schedule bar will be
displayed in color black and span the overall duration of the
block tasks.
53
Sequencing Tasks
Tasks copied from Excel initially will have the same start
date. Their finish dates will vary depending on their
days durations.
The next step is to link these tasks according to their
normal inter-dependencies and sequence order.
This sequencing is needed to develop the production
schedule.
54
To link tasks, highlight first the preceding task, then highlight
the succeeding task and click on the Link Tasks button
on
the tool bar.
Project will link the two tasks in predecessor-successor order.
Link all tasks as they should occur in time sequence.
55
Sequence tasks for all blocks
56
Using Lag and Lead
If a link needs to be adjusted to account for either lead or lag,
highlight the task then click on the Task Information button
on the tool bar.
57
Lag means that there is a specified amount of time that
must pass before the succeeding task can start.
Lead (negative lag) means that the succeeding task can
start before the preceding task has finished.
When the Task
Information window
appears, click on the
Predecessors tab.
Enter the number of
days lag or lead as
required. Then click
on the OK button.
Example of task starting 2 days before finish of preceding task.
58
Project will respond by applying the lead or lag to the
task.
59
Defining Erection Sequence
After each set of block tasks has been linked and sequenced,
the blocks must be linked by their required erection
sequence.
Use the same procedure for linking block erection tasks as
for linking block tasks.
• First, highlight the erection task that needs to be
sequenced first;
• Then highlight the following erection task.
• Click on the Link Task button to make the link.
60
The first block set down has
no erection task other than
block transport.
Subsequent blocks linked to finish of erection
tasks of blocks to which they are to be placed.
61
Sequencing On-Board
Outfit & Test Tasks
To complete the production schedule, the block erection
and on-board weld-out tasks need to be linked for the final
on-board outfit, launch and tests and trials.
Link each on-board block weld-out task to the on-board
outfit task. This link must be done for each weld-out task
individually.
For large ship construction, the on-board tasks should be
broken down by ship zone.
62
63
Completing the on-board block weld-out tasks to the final
on-board outfit tasks, leading to delivery.
All on-board weldout tasks link to the
start of final onboard outfit tasks
64
Another view that can be helpful in ensuring that erection
tasks link properly to on-board outfit tasks is the Relationship
Diagram
First, highlight the rows of tasks to display.
Then, click on View/More Views from the main menu.
65
Relationship Diagram
66
Engineering & Material Control
After all production tasks have been defined and
linked, the tasks for engineering, planning &
purchasing that are required to support the production
plan must be defined and then linked into the project.
67
68
Project Schedule
After all tasks have been defined and linked, the system
will have developed the project schedule from start to
finish.
69
To view the resulting overall project schedule, select
Project/Project Information from the main menu.
The project
information window
will appear where the
project schedule will
be displayed.
70
By clicking on the Statistics button in the Project
Information window, the system will display a summary
of the project schedule and its statistics.
71
When Microsoft Project schedules tasks, it calculates the
schedule based on the requirements of the task, not the
availability of resources assigned.
For example, the panel line may have a manpower
availability of 10 men a day; however, Microsoft Project
might still schedule tasks such that there may be required
15 men for any given day.
It's not until you level the panel line’s over-allocation that
this conflict is resolved.
72
The project tasks are now all linked and sequenced.
They also have been developed with start and finish
dates.
However, at this point, non-critical tasks have
schedules that are based on early start and finish
dates.
These dates are not likely to be practical as many
have the same start dates and would require an overload of resources to complete as scheduled.
73
The following figure displays the manufacturing and
assembly tasks for several blocks, all starting about the
same time (note steel prep tasks).
With limited resources, manpower for example, this
schedule is not realistic.
Resource limitations will cause these tasks to become
staggered in time to accommodate resource availabilities.
74
75
Schedule Adjustments
The schedules at this point are the result only of
sequenced (linked) tasks and their durations.
There usually are other considerations that affect
schedules:
• Fixed Time Date Requirements
• Task Priorities
• Limited Resources
76
When entering information about task scheduling, keep
the following in mind:
• If tasks occur in a sequence, enter task dependencies
to create that sequence.
• Use date constraints (such as Must Start On and Must
Finish On) only when required. Constraints limit the
adjustments that Microsoft Project can make when
determining which tasks to level.
• Use priorities sparingly. Use a task priority 1000
(meaning do not level this task) only when a task
absolutely cannot be delayed or split or when you have
other tasks that you definitely prefer to delay or split if
leveling is necessary.
77
Date Constraints
There are various types of date constraints:
1. As Soon As Possible (Default)
2. As Late As Possible
3. Finish No Earlier Than mm/dd/yyyy
4. Finish no Later Than mm/dd/yyyy
5. Must Finish On mm/dd/yyyy
6. Must Start On mm/dd/yyyy
7. Start No Earlier Than mm/dd/yyyy
8. Finish No Earlier Than mm/dd/yyyy
78
Highlight the task, then click on the Task Information
button
on the toolbar.
Open the Advanced tab of the Task Information data
window.
Select the data
constraint. ASAP is the
system default that
schedules tasks at their
earliest start dates.
79
Resource Loading
Except for the linking of block erection tasks and the block
weld-out with the on-board outfit tasks, the schedule thus far
does not consider any limitations of resources.
To modify the schedules so that they honor times of limited
resources, a scheduling process called resource leveling is
available.
80
In order to schedule within available resources, the
following steps must be done:
1. Define available Resources.
2. Assign resources to Tasks.
3. Initiate schedule changes (Resource Leveling)
where and when resources are over-allocated.
81
Defining Resources
Define the list of critical resources and how many are
available per work day.
82
Open the Resource Sheet from the main menu.
Where manpower is a critical resource:
1. Define each of the work centers (Resource Name)
2. These resources are of Type “Work”
3. Enter the Max Units (maximum number of Men
across all shifts per day in the work center)
83
Allocate Resources To Tasks
Where manpower resources are limited per work center,
copy the task work centers to the column titled Resource
Names.
84
As you paste in the work centers into the Resource Names columns, the system
will display warnings to the user if over-allocations have been detected.
By selecting Skip All, the leveling process will be performed and tasks will be
rescheduled so that they have schedules during times when their resources
are available.
85
What is an Over-Allocated
Resource?
An over-allocated resource has more work assigned
than can be done in the resource's available time.
86
Over-allocations can result from the following:
• A resource being assigned to work full-time on
more than one task.
• Increased duration of tasks.
• Increased assignment units to resources.
• Decreased unit availability for resources.
• A resource being assigned to a summary task as
well as one or more of the subtasks.
87
What is Resource Leveling?
Resource leveling is a way to resolve having too much
work assigned to resources, which is known as “resource
over-allocation.”
One way to level is to delay a task until the assigned
resource has time to work on it.
Another method is to split a task, so that part of a task is
done when planned, and the rest of it is done later when
the assigned resource has time.
88
You can level resources yourself or have Microsoft
Project level for you. The Microsoft Project leveling
feature examines the following factors to determine
which tasks should be delayed or split:
• Task ID
• Available slack time
• Task priority
• Task dependencies
• Task constraints
• Scheduling dates
89
When and Why Should
Resources Be Leveled?
Level resources when you know you have over-allocations
and only after you have entered all information about task
scheduling and resource availability.
Don't rely on resource leveling to schedule your project.
You know you have over-allocations when you review a
resource view (Resource Usage view, Resource Sheet, or
Resource Graph) and see resources highlighted in red.
You can also level resources shared across multiple
projects.
90
You can also use the Resource Allocation view to help
find and review detailed task and assignment
information about over-allocated resources.
91
Select View/Resource Sheet from the main menu to see what
resources are over-allocated.
92
Select View/Resource Graph from the main menu for graphical
presentation of the over-allocation.
Maximum
Resources
Available.
93
You can quickly find over-allocated resources in any
resource view, in which the names of over-allocated
resources are highlighted in red.
The Resource Usage view in particular can show the
amount of time that the resource is over-allocated
within a selected time period.
94
Select View/Resource Usage to see resource allocations as scheduled.
95
Leveling Options
The easiest way to get started with Microsoft Project's
leveling feature is to use the defaults provided in the
Resource Leveling dialog box.
As you become more familiar with the details of how
leveling affects your schedule, you can fine-tune the options
available in the dialog box.
96
To open the Resource Leveling dialog box, click on
Tools/Resource Leveling from the main menu.
97
Microsoft Project levels over-allocated resources by delaying
and splitting tasks, based on criteria you set in this dialog
box. You can:
• Specify whether you want Microsoft Project to level
automatically (as soon as it detects an over-allocation) or
manually (only when you click Level Now).
• Indicate how much a resource needs to be overallocated (for example, by an hour, day, or week) before
they should be leveled.
• Set the criteria for the order that tasks should be
reviewed for over-allocations and leveling.
98
Automatic:
Automatic leveling levels resources instantaneously when you
change a task or resource.
• If your project is large, automatic leveling might slow
down your work in the schedule.
• If you choose this option, unselect the Clear leveling values
before leveling check box. This check box is selected by
default, but when leveling automatically, clearing values can
significantly affect schedule performance.
Manual:
Manual leveling allows you to control when Microsoft Project
levels resources. It levels only when you open the Resource
Leveling dialog box and click Level Now. This is the default
option.
99
Look for over-allocations on a specified time basis:
Click a time period for the sensitivity with which leveling will
recognize over-allocations. This setting establishes the point at
which you want leveling to intervene.
•Minute by Minute Level resources when there is an overallocation of at least one minute.
•Hour by Hour Level resources when there is an over-allocation
of at least one hour.
•Day by Day Level resources when there is an over-allocation of
at least one day.
•Week by Week Level resources when there is an over-allocation
of at least one week.
•Month by Month Level resources when there is an overallocation of at least one month.
100
Clear leveling values before leveling:
Selecting this check box indicates that any delays previously entered as a
result of leveling, or as a result of manually entering leveling delay, are to
be cleared before the next leveling operation is done. This is selected by
default.
Leveling range:
Specify whether you want the entire project leveled or only those tasks
falling within a specific time range.
Leveling order:
Specify the order in which you want Microsoft Project to delay or split
tasks that have over-allocations. After Microsoft Project determines which
tasks are causing the over-allocation and which tasks it can delay, it uses
the order you specify.
101
ID Only
Microsoft Project delays tasks as needed with the higher ID
numbers before considering other criteria.
Standard
Microsoft Project looks at predecessor relationships, slack (a
task with more total slack time is delayed first), dates (a task
with a later start date is delayed first), priorities, and
constraints to determine whether and how tasks should be
leveled. This is the default.
Priority, Standard
Microsoft Project looks first at priorities and then at
predecessor relationships, slack, dates, and constraints to
determine whether and how tasks should be leveled.
102
Level only within available slack
Select this check box if you want to prevent the finish date of your
project from being delayed.
In many projects, however, unless there is a lot of built-in slack, with
this setting you might not see a significant change after leveling.
By default, this check box is cleared.
103
Leveling can adjust individual assignments on a task
Select this check box to allow leveling to adjust when a resource
works on a task independent of the other resources working on the
same task.
This is a global setting for all tasks and is selected by default.
If you want to selectively allow leveling on individual assignments
for specific tasks, you can add the Level Assignments field to a task
sheet, and then set the field to “Yes” or “No.”
104
Leveling can create splits in remaining work
Select this check box if you want leveling to interrupt tasks by
creating splits in the remaining work on tasks or assignments.
This is a global setting for all tasks, and is selected by default.
If you want to selectively allow leveling to split remaining work for
specific tasks, you can add the Leveling Can Split field to a task
sheet, and then set the field to “Yes” or “No.”
105
When you use leveling, Microsoft Project
checks each of the resources in turn.
106
If a resource is over-allocated, Microsoft Project searches for
the tasks that are causing the over-allocation and identifies
which of those tasks can be delayed.
Microsoft Project does not delay tasks that:
• Have a constraint of Must Start On or Must Finish On.
• Have a constraint of As Late As Possible, if this project is being
scheduled from the start date.
• Have a constraint of As Soon As Possible, if this project is being
scheduled from the finish date.
• Have a priority of 1000, meaning Do Not Level.
• Have an actual start date. However, as long as the Leveling can
create splits in remaining work check box is selected, any remaining
work can be split for leveling.
107
After determining which tasks can be delayed, Microsoft
Project picks the task to delay based on its task
dependencies, start date, priority, and constraints.
To review the changes leveling made to tasks:
1. On the View menu, click More Views.
2. Click Leveling Gantt, and then
3. Click Apply.
Review your tasks in the Leveling Gantt view to see the
results of leveling and to see how much delay leveling has
added to tasks.
108
Typically, when you delay a task, either by using
resource leveling or by adding delay manually, if you
click Clear Leveling in the Resource Leveling dialog box,
this delay is removed.
However, suppose a task is split or delayed as a result of
leveling, and then that task is subsequently set with a
priority 1000 (Do Not Level).
If you click Clear Leveling in the Resource Leveling
dialog box, the leveling delay or split is not removed.
109
When Microsoft Project levels resources, it does not change
resource assignments, and it does not change task
information. It only delays or splits tasks.
When you level resources yourself, you can look at the same
factors, and then adjust the task or resource to resolve overallocations. For example, you can delay a task, or assign
additional resources.
The methods you choose to reduce over-allocations depend on
the limitations of your project, including budget, resource
availability, finish date, and the amount of flexibility available
for scheduling tasks.
110
Gantt Chart View After Leveling
111
Leveling Gantt View Showing Before & After Leveling
112
Detail Gantt View Showing After Leveling
Baseline
Delay
(Red)
Critical
Task
Free Slack
Time
Available
113
Task Priorities
Resource Leveling can be adjusted by assigning priority levels
to selected tasks. Higher priority numbers indicate tasks that
cannot be rescheduled as easily as tasks with low priorities.
• Highlight the
task, then
• Click on the
Task Information
button
on the
tool bar.
114
Click the General tab, and then enter a value in the
Priority box.
Choices are 0–1000, with 0 being the lowest priority, and
1000 being the highest priority, having the effect of "Do
Not Level."
The default priority is 500.
115
If you are working with resources in multiple
projects, you can also set priorities for projects in the
Project Information dialog box.
On the Project menu, click Project Information, and
then enter a value in the Priority box.
116
Transfer Tasks To PERCEPTION
When the tasks in Microsoft Project 2000 have all been
scheduled, they can be transferred to PERCEPTION as
project Planning Activities.
117
1. Identify the project
in the
PERCEPTION
database
2. Turn on the
Transfer To
PERCEPTION
option
3. Identify the
Microsoft Project
2000 file
4. Click on the OK
button.
118
When the Project Synchronizer has finished
the transfer, all Microsoft Project 2000 tasks
have been transferred as Planning Activities
onto the PERCEPTION database.
119
Planning Activities Created (Transferred) From Microsoft
Project 2000
120