1
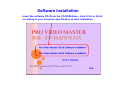
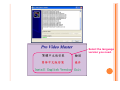
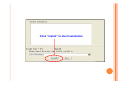
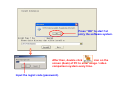
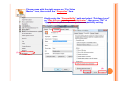
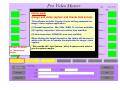
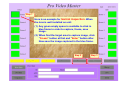
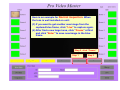
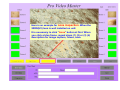
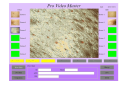
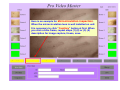
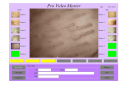
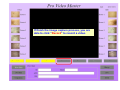
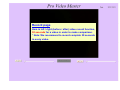
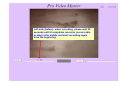
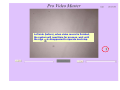
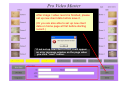
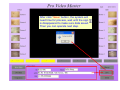
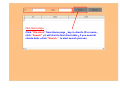
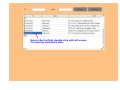
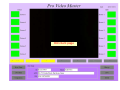
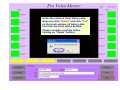
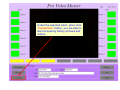
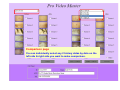
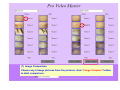
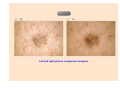
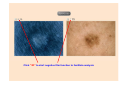
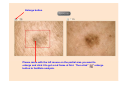
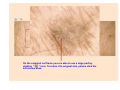
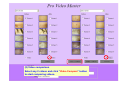
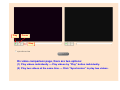
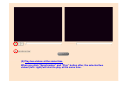
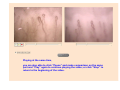
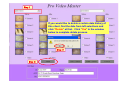
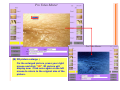
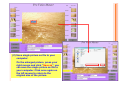
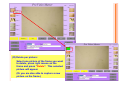
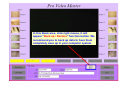
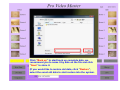
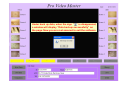
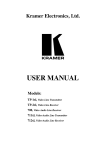
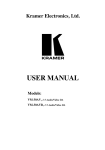
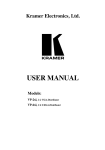
PRO VIDEO MASTER
Image / Video Comparison System
User’s Manual
System requirement: a. IBM compatible PC
b. CPU: P4;HDD: 500G or up
c. RAM: 1G or above
d. VGA memory: 1G or above
Required OS: Windows XP, VISTA, 7 & 8
Software Installation
Insert the software CD-R into the CD-ROM drive,click 32 bit or 64 bit
according to your computer specification to start installation.
Select the language
version you need.
Click “Install” to start installation
Press “OK” to start 1st
entry the software system.
After then, double click
icon on the
screen (desk) of PC to enter image / video
comparison system every time.
Input the regist code (password).
Please press with the right mouse on “Pro Video
Master” icon, then select the “Properties” item.
Kindly entry the “Compatibility” path and select “Privilege Level”
as “Run this program as an administrator”, then press “OK” &
“Apply” to complete software system compatibility setting.
(2)
(1)
(3)
(4)
(5)
Home page
(Image and video capture and clients data set up)
This software includes 3 types of color setting parameter for
image / video capture application:
(1) Normal inspection: 50x, 200x, 50RN, 1x, Iris lens available.
(2) Capillary inspection: microcirculation lens available.
(3) Acne inspection: 50RN(UV) acne lens available
When clicking the target inspection, the letters will become in
white color for you to operate the application to image / video
capture.
On start, it's default
on “Normal Lens”
button.
* We provide left / right (before / after) 6 spaces each side for
you to capture images.
Step 1
Here is an example for Normal inspection. When
the lens is well installed on unit:
(1) Any green empty space is available to click in
blue frame in order to capture, freeze, save
image.
(2) When find the target area to capture image, click
“Freeze” button at first and “Enter” button after.
Now save the image captured in the blue frame.
Step 2
Step 3
Here is an example for Normal inspection. When
the lens is well installed on unit:
(3) If you want to get another new image from the
captured blue frame, click “Live” to capture again.
(4) After find a new target area, click “Freeze” at first
and click “Enter” to save new image in the blue
frame.
Step 2, click “Freeze”
Step 1
Step 3
Here is an example for Acne inspection. When the
50RN(UV) lens is well installed on unit:
It is necessary to click “Acne” button at first. When
you click a blue frame, repeat steps (1) (2) or (3) (4)
description for image capture, freeze, save.
Here is an example for Microcirculation inspection.
When the microcirculation lens is well installed on unit:
It is necessary to click “Capillary” button at first. When
you click a blue frame, repeat steps (1) (2) or (3) (4)
description for image capture, freeze, save.
If finish the image capture process, you are
able to click “Record” to record a video.
Record page
Here is left / right (before / after) video record function,
30 seconds for a video in order to make comparison.
* Note: We recommend to record complete 30 seconds
in every video.
Left side (before), when recording, please wait 30
seconds until it completes record or you are able
to stop in the middle and start recording again
from the beginning.
Left side (before), when video record is finished,
the system will need time for process, wait until
the sign is disappeared to operate next step.
Right side (after), when recording, please wait 30
seconds until it completes record or you are able
to stop in the middle and start recording again
from the beginning.
Right side (after), when video record is finished, the
system will need time for process, wait until the
sign is disappeared, now click “Back and Save”
button to return to home page.
After image / video record is finished, please
set up new client data before save it.
(Or you are also able to set up new client
data on home page at first before starting
record.)
* If not set up new client at first, it will appear
an error message window on the page when
you click “save” button.
After click “Save” button, the system will
need time for process, wait until the sign
is disappeared to make sure data saved.
Then you can operate next step.
Old client page
Click “Old client” from Home page,key in client’s ID or name,
click “Search”,it will start to find client data;if you need all
clients data,click “Search ” to start search process.
Select client at first, double click with left mouse
for entering old client’s data.
Old client page
Under the selected client history data,
when you click “Delete” and click “Yes”
on the small window, all history data
from this old client will be deleted.
(Please consider carefully before
clicking on “Delete” button.)
Under the selected client, when click “History”
button you can find all history data of this client.
Select the exact date to get history pictures.
(Double click on any picture with the left mouse to enlarge
image of the picture.)
Under the selected client, when click
“Comparison” button, you are able to
start comparing history pictures and
videos.
Comparison page
You can individually select any 2 history datas by date on the
left side & right side you want to make comparison.
(1) Image Comparison
Choose any 2 image pictures from the pictures, click “Image Compare” button
to start comparison.
Left and right picture comparison analysis.
Click ”3D” to start negative film function to facilitate analysis
Enlarge button
Please move with the left mouse on the partial area you want to
enlarge and click it to get a red frame at first. Then click”
“ enlarge
button to facilitate analysis.
On the selected red frame you are able to see a large part by
clicking “
“ icon. To return it to original size, please click the
left mouse once.
(2) Video comparison
Select any 2 videos and click “Video Compare” button
to start comparing videos.
Play
Pause
Stop
On video comparison page, there are two options:
(1) Play videos individually --- Play videos by “Play” button individually.
(2) Play two videos at the same time --- Click “Synchronize” to play two videos.
(1) Play videos individually
You can play videos by click “Play” button, click “Pause” button when need it
and “Play” button again to continue playing the video; or click “Stop” to return
to the beginning of the video.
(2) Play two videos at the same time
When you click “Synchronize” and “Play” button after, the selected two
videos (left / right) will start to play at the same time.
Playing at the same time,
you are also able to click “Pause” and make comparison on the same
part and “Play” again to continue playing the video; or click “Stop” to
return to the beginning of the video.
Step 1
If you would like to delete a certain date history of
this client, find the date from left selections and
click “Delete” at first. Click “Yes” in the window
below to complete delete process.
Step 3
Step 2
Some specific functions for captured pictures:
(A) Picture enlarge:
Select one of the picture you would like to enlarge,
double click on the frame with the left mouse and the
enlarged picture will display on central page. Click once
on the enlarged picture with the left mouse to return to
the original size of the picture.
(B) 3D picture enlarge:
On the enlarged picture, press your right
mouse and click “3D”, 3D picture will
display now. Click once again on the left
mouse to return to the original size of the
picture.
(C) Save single picture as file to your
computer:
On the enlarged picture, press your
right mouse and click “Save as”, you
can save the single picture as file to
your computer. Click once again on
the left mouse to return to the
original size of the picture.
(D) Delete per picture:
Select one picture of the frame you want
to delete, press right mouse on the
frame and press “Delete”. This selected
picture will appear.
(Or you are also able to capture a new
picture on the frame.)
In this blank area, click right mouse, it will
appear “Back up / Restore” function button. We
recommend you to back up data to have them
completely save up in your computer system.
Click “Back up” to start back up complete data, we
recommend you to name it by date on the file and click
“Save” to store it.
(If you would like to restore old data, click “Restore”,
select the exact old data to start restore into the system.
Under back up data, when the sign “ ” is disappeared,
a window will display “Data backup successfully” on
the page. Now you are rest assured to exit the software.