1
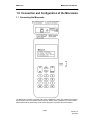
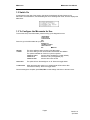
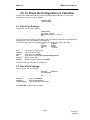
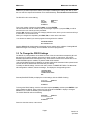
Microcoin
Micromate User Manual
Microcoin
Micromate User Manual
Table of Contents
Page
Essential Information
2
1.0 Connection and Configuration
3
1.1
1.2
1.3
Connection
Switch On
Configuration for Use
3
4
4
2.0 Check the Configuration of a Validator
2.1
2.2
Check Coin Settings
Check Price Settings
5
5
3.0 Change the Settings in a Validator
3.1
3.2
3.3
Change the Coin Settings
Change the Price Settings
Change the Operator Settings
4.0 Program a Validator
4.1
Program with Coins
10
Transfer a Config
Upload and Store a Config
To Program a Stored Config into a Validator
To Update a Factory Config
5.0 Diagnostics
5.1
5.2
5.2.1
5.2.2
5.3
6
6
7
8
10
4.1.1 Program New Coins and Tokens
4.1.2 Reprogram an Existing Coin
4.2
4.2.1
4.2.2
4.2.3
5
10
11
12
12
13
13
14
Micromate Diagnostics
Validator Diagnostics
Testing Outputs
Hardware Tests
Software Verification
14
14
15
15
15
6.0 Battery Changing
16
7.0 Glossary
17
Page 1
Version 1.0
April 2001
Microcoin
Micromate User Manual
Essential Information
Before you use the Micromate, a few essential concepts and comments. It is strongly recommended
that if you read nothing else, you at least read this page in conjunction with the Glossary and the
Micromate Menu Tree.
Introduction
The Micromate allows a user to check and modify the coin and programming settings in QL. It will
also enable the programming of new coins and tokens, and allow diagnostic tests to be done.
It is provided in a sturdy case to protect against everyday knocks and bumps.
Validator Power.
QL needs to be connected to a 12Vdc power source via its parallel port to work with the Micromate.
Micromate Power.
The Micromate is powered by an internal battery. It also has an input for an external 9Vdc power
source which should be used during extended programming sessions to preserve the battery.
Similarly, when working from the battery it is recommended that the Backlight be turned off and that
the Power Saving feature be turned on.
Initial Setup.
When you first use your Micromate, set up the operating modes using the DIAGNOSTICS;
MICROMATE menu (see section 1.3).
Menus and Navigation.
The menu structure of the Micromate is self explanatory and designed to prompt the user for the next
entry. Take time to read each screen.
A flashing field indicates that the Micromate is requesting data input. Key in the data and press Enter.
For multiple field entry screens, pressing ENTER will skip to the next field without changing the
existing value.
Navigating the menus is accomplished by pressing the appropriate number key for the option listed
or pressing ESC to return to the previous menu. Pressing ESC multiple times will step back through
the menu tree and eventually return you to the main menu.
Where there are arrows at the bottom of the screen, use the scroll (arrow) buttons to access
additional options and information.
The keypad responds best to slow deliberate presses on the individual keys. Listen for the
confirmation beep.
QL Configuration Data.
Configuration data is downloaded from QL into the Micromate where it is edited. Any changes made
to the configuration are not saved until the end of the editing session. Immediately prior to returning
to the Main Menu, you will be asked “Save Changes to the Validator Y/N? Pressing NO at this point
will leave the existing QL Config unchanged. Pressing YES will save your changes by returning the
modified Config to QL
Coins and Tokens.
Throughout this manual, the term coin is used to cover both coins and tokens.
Micromate Display
This manual shows Micromate screen text as “BOLD “Capitals.
Flashing text is shown as “NORMAL “Capitals.
Page 2
Version 1.0
April 2001
Microcoin
Micromate User Manual
1.0 Connection and Configuration of the Micromate
1.1 Connecting the Micromate
Off
On
The Micromate is normally connected to QL via the supplied RJ11 cable. The validator also needs to
be connected 12Vdc via its parallel output connector. Where power is available, it is recommended
that the Micromate be powered by a 9Vdc 300mA plug-pack, to preserve the internal battery.
Page 3
Version 1.0
April 2001
Microcoin
Micromate User Manual
1.2 Switch On
A small switch on the right of the housing, just above the keyboard, will switch power to the
Micromate. Once switched on, the Micromate goes into a self-diagnostic mode, and then displays the
Main Menu:
1.3 To Configure the Micromate for Use
To check the set-up of the Micromate, press 4 to bring up the diagnostics menu.
1-MICROMATE
2-VALIDATOR
3-VERIFICATION
ESC
Press 1 to go to the Micromate set-up options.
VERSION=X.X
1-COMMS VIA CABLE
2-BACKLIGHT ON
ESC
È SCROLL
VERSION=
1-COMMS
This is the software version number of the Micromate
This is the setting for the communication method with the validator
The options available are: Press 1 to cycle thru options
COMMS VIA CABLE
Comms via the supplied RJ11 cable (default)
COMMS VIA PC
Comms to a PC (not supported yet)
COMMS VIA I/RED
Comms via an Infra-red link
2-BACKLIGHT
The option will turn the backlight on or off. Press 2 to toggle states
.3-POWER SAVE
When the power save option is on, the Micromate will shut down after
5 minutes of inactivity. Press 3 to toggle states.
Once the settings are complete, press ESC, ESC to save settings and return to the main menu.
Page 4
Version 1.0
April 2001
Microcoin
Micromate User Manual
2.0 To Check the Configuration of a Validator
Pressing 1 at the Main Menu will bring up the View Settings Menu and allow you to check the
configuration information in the QL validator.
1-COIN SETTINGS
2-PRICE SETTINGS
2.1 Check Coin Settings
To check the coin information, press 1 .
COIN SETTINGS
O/P ON=100 OFF=100
ENTER COIN CATEGORY - (*FLASHING*)
ESC
The O/P shows the ON and OFF pulse widths of the coin and price output lines in milliseconds (ms).
Allowable range is any value between 0 and 65000ms.
To check the settings for a coin category, enter the coin channel No. Refer to QL Label
CAT=1
VAL=XXX
OUTPUT=1
ESC
CAT=1
ENABLED=Y
VAL=XXX
MED
OUTPUT=1
PULSES=1
ENABLED=Y
MEDIUM
PULSES=1
ÇÈ SCROLL
Coin category number (1-12)
Coin is enabled (Y or N)
Value of the coin (0-9999)
Discrimination window (narrow/medium/wide/special)
Output number (1-6)
Number of pulses for each coin (0-9999)
Use the scroll keys to check other coin categories.
2.2 Check Price Settings
Press 2 to go to the Price Settings.
PRICE=XXX
ENABLED=Y
CLEAR EXCESS=N
ESC
PRICE=XXX
ENABLED=Y
CLEAR EXCESS=N
Price value (0-65000)
Price Enabled/Disabled
Clear excess after price reached
Press ESC, ESC to return to the main menu.
Page 5
Version 1.0
April 2001
Microcoin
Micromate User Manual
3.0 To Change the Settings in the Validator
At the main menu, press 2 to bring up the Change Settings Menu. The Micromate will then download
all of the settings from QL into its memory system.
1-COIN SETTINGS
2-PRICE SETTINGS
3-OPERATOR SETTINGS
ESC
3.1 To Change the Coin Settings
To change the settings of a Coin Press1 and enter the Coin Channel No. Refer QL Label.
ENTER COIN CATEGORY
NUMBER 1 TO 12
ESC
To check Coin Category 1 for example, press 1, ENTER
CAT=1
VAL=XXX
OUTPUT=1
CHANGE Y/N
ENABLED=Y
MEDIUM
PULSES=1
ÇÈ SCROLL
Use the scroll keys to view other coin channels. Once you have found the channel you want to
change, press YES. Press Esc to return to the Change Settings Menu.
ENABLED=YES
1=YES, 0=NO
Press 1 to enable the category, 2 to disable it.
The display will now return to the coin category display, with the VAL setting flashing, and a
CHANGE TO at the bottom.
CAT=1
VAL=XXX
OUTPUT=1
CHANGE TO
ENABLED=Y
WIDE
PULSES=1
Type in the new value, and then press ENTER Allowable Range 0-9999
The options for the discrimination band will now be displayed, with the current setting flashing at the
top.
DISC BAND=MEDIUM
1-NARROW
2-MEDIUM
3-WIDE
4-SPECIAL
ESC
SELECT BAND
Warning: Changing this setting may result in changes to the acceptance of genuine coins and frauds.
It is recommended that you do not change these settings without consulting Microcoin, or one of their
authorised distributors.
To change the current band, press the number of the new band required.
The OUTPUT= field will now be flashing.
CAT=1
VAL=XXX
OUTPUT=1
CHANGE TO
ENABLED=Y
WIDE
PULSES=1
Press the appropriate number for the output line from 1-5 (if using the PRICE option), or 1-6 if the
PRICE is disabled, and ENTER to set. Refer QL label.
Page 6
Version 1.0
April 2001
Microcoin
Micromate User Manual
Note that if you select output line 6 and the price output is enabled (price setting other than 0), both
the Coin and Price outputs will be issued on line 6 simultaneously. This situation must be avoided.
The PULSES= will now be flashing.
CAT=1
VAL=XXX
OUTPUT=1
CHANGE TO
ENABLED=Y
WIDE
PULSES=1
Type in the number of pulses required (1-9999). and press ENTER.
The Micromate will now ask if there are any more changes required. If you press YES, you will be
returned to the coin channel you have just edited.
Pressing NO, will return you to the Coin Category selection menu, where you can use the scroll keys
to select other coin channels to edit.
When your changes are completed, press ESC, ESC, to return to the main menu.
You will then be asked if you want to program the changes into the validator.
PROGRAM CHANGES
INTO VALIDATOR Y/N
Pressing YES will tell the Micromate to download the new settings to the validator. Pressing NO will
delete all changes to the settings, and the validator will not be reprogrammed.
3.2 To Change the PRICE Settings
The PRICE or( Credit) totalizer accumulates the value of the coins and tokens accepted by QL until
the set Price (or credit) is reached, where upon it issues a pulse on output line 6. The CLEAR
EXCESS option determines what happens to any stored credit in excess of the PRICE value. If the
CLEAR EXCESS option is enabled, any stored credits will be cleared.
If the CLEAR EXCESS option is disabled, any stored credits will be saved and further pulses issued
until the value of the stored credit is less than the price setting.
To modify the PRICE settings, from the main menu press 2 -CHANGE SETTINGS. The Micromate
will interrogate the validator, retrieve the settings , and display the change settings menu.
1-COIN SETTINGS
2-PRICE SETTINGS
3-OPERATOR SETTINGS
ESC
Press 2 (PRICE SETTINGS) to display the current settings, with the PRICE= flashing.
PRICE=XXX
ENABLE=Y
CLEAR EXCESS=NO
CHANGE TO
To change the PRICE setting, enter the new value required (0-65000), and then press ENTER. If you
wish to disable the PRICE, enter a value of 0. This will cause the ENABLE= display to change to
ENABLE=N, to confirm the disabling of the PRICE option.
The CLEAR EXCESS will now be flashing.
PRICE=XXX
ENABLE=Y
CLEAR EXCESS=NO
1=YES, 0=NO
CHANGE TO
Press 1 to clear the excess, or 0 to save it.
Page 7
Version 1.0
April 2001
Microcoin
Micromate User Manual
The settings you have selected will now be displayed, and you will be asked whether you want to
make any changes to the settings as displayed, or to accept them and program them into the
validator.
PRICE=XXX
ENABLE=Y
CLEAR EXCESS=NO
ANY MORE CHANGES Y/N?
If you press YES, you will be taken back to the price setting Menu.
If you press NO, the changes will be programmed into the validator, and you will be returned to the
settings menu.
3.3 To Change the Operator Settings
1-COIN SETTINGS
2-PRICE SETTINGS
3-OPERATOR SETTINGS
ESC
From the Change Settings Menu, press 3 to go to the Operator Settings Menu.
1-OUTPUT PULSE TIME
2-SET VAL CODE
3-CLEAR ALL SETTINGS
ESC
Setting 1 allows you to change the output pulse width and spacing for the coin and PRICE outputs.
Press 1 to bring up the pulse time menu. The ONTIME setting will be flashing.
ONTIME = 100
OFFTIME = 100
CHANGE TO
To change the pulse on time, key in the new value, (eg, 50) then press ENTER.
The ONTIME setting will now show your new setting, and the OFFTIME setting will be flashing.
ONTIME = 50
OFFTIME = 100
CHANGE TO
Key in the new value for the OFFTIME, or spacing between the output pulses (eg 50) then press
ENTER. The new settings will be displayed and you will be asked if you want to make any more
changes to the new settings.
ONTIME = 50
OFFTIME = 50
ANY MORE CHANGES Y/N?
Press YES if you want to go back and change the settings. Press NO to keep the new settings and
return to the operator settings menu.
1-OUTPUT PULSE TIME
2-SET VAL CODE
3-CLEAR ALL SETTINGS
ESC
To secure a validator against unauthorised changes, you can enter a user or VAL CODE. The VAL
CODE is chosen to allow an authorised user to access the change settings menus, but prevent
Page 8
Version 1.0
April 2001
Microcoin
Micromate User Manual
unauthorised changes. When enabled, the Micromate can access only read only functions and the
diagnostic modes with the exception of the output line test which is also denied.
To set a VAL CODE, press 2.
SECURITY
ENTER NEW VALCODE
ESC
Enter a number that you would like to use as the VALCODE (1-99999), for example 1 2 3.
Note: If you want to disable the VALECODE feature, set the number to 0.
As you type an asterisk will appear for each number. Press ENTER to set.
SECURITY
ENTER NEW VALCODE
***
ESC
You will now be asked to confirm the new code. Enter the number again, and press ENTER to finish.
CONFIRM NEW CODE
***
ESC
If the code is entered correctly, you will be returned to the operator setting menu.
If you wish to clear all the config settings from the validator, you can use option 3.
WARNING
THIS OPTION WILL
ERASE THE CONFIG
CONTINUE Y/N?
WARNING!!! This option WILL erase all coin settings, price settings, and operator settings! It
should not be used unless under instruction from a Microcoin Service representative.
Pressing YES will cause the Micromate to clear all the config information from QL requiring it to be
completely reprogrammed Press NO to return to the setting menu.
When you have finished making all the required changes through the setting menus, press ESC to
return to the main menu. The Micromate will ask you if you want to program the changes you have
made to the config into the validator.
PROGRAM CHANGES
INTO VALIDATOR Y/N?
If you select NO, you will be returned to the main settings menu, and all changes that have been
made to the config will be discarded. If you select YES, the changes will be downloaded QL
Page 9
Version 1.0
April 2001
Microcoin
Micromate User Manual
4.0 Program a Validator
To program new coins into a validator, press 3 (program new coins) from the main menu.
The Micromate then shows the Program New Coins Menu.
1-PROGRAM WITH COINS
2-EXTRACT VAL CONFIG
ESC TO EXIT AND SAVE È
(Scroll to see the other options)
3-UPDATE FACTORY CFG
4-PROGRAM A NEW CONFIG
ESC
Ç BACK
4.1 To Program a Validator Using Coins
To program new coins or tokens into a validator, you need to have available a minimum of 10 coins
or tokens of each denomination selected from a population at random. The 10 coins are used to
teach QL the average coin signature and acceptance limits for that coin.
Passing more coins (up to say 25), or the same 10 coins a number of times during programming will
increase the discrimination accuracy.
Note: During this explanation the term coin will be used to cover both coins and tokens.
Press 1 to start the programming procedure. The Micromate then downloads the QL configuration
and displays the following message while this is being done.
IDENTIFYING
VALIDATOR!
Once the Micromate gets the information it needs, it shows the programming using coins menu.
1-PROGRAM A NEW COIN
2-REPROGRAM AN
EXISTING COIN
ESC
SELECT 1 OR 2
PROGRAM A NEW COIN is used to add a new coin to an existing QL configuration.
REPROGRAM AN EXISTING COIN is used only to renew the average coin signature data of a coin
that is already programmed into QL. No other settings are changed.
4.1.1 Program a New Coin
Select 1, Program a new coin from the Program with coin menu.
ENTER COIN CATEGORY
NUMBER 1 TO 12
ESC
Enter the coin channel for the new coin. Refer to the QL label to ensure you do not inadvertently
program over (and therefore delete) an existing coin channel. Use the scroll keys to move to a
vacant coin channel.
Page 10
Version 1.0
April 2001
Microcoin
Micromate User Manual
CAT =11
VAL=0
OUTPUT=1
CHANGE Y/N
ENABLED=NO
MEDIUM
PULSES = 0
ÇÈ SCROLL
Configure the selected coin channel by pressing YES and proceed as per instructions for Changing
Coin Settings (section 3.1). Choose MEDIUM discrimination band, this can be adjusted later for
greater coin acceptance or elimination of frauds if required.
When the coin channel settings are correct, press NO
PASS 10 OR MORE
SAMPLE COINS
ESC
ROLL COIN
After you roll the first of the coins, the display will change to show the number of coins that have
been passed.
CAT=1 VALUE=xxx
COIN SAMPLE=1
ESC
ENTER AFTER 10
The coin sample number will count the number of coins as they are passed. The minimum required is
10 samples, but to increase discrimination precision, more coins can be passed.
Press ENTER to finish the programming sequence for that coin.
ENTER COIN CATEGORY
NUMBER 1 TO 12
ESC
The display will return to the coin category selection menu, to allow you to start programming another
coin, or to exit by pressing ESC. Pressing Esc again will bring up the save changes? Option.
Choose Yes to save the new coin programming.
4.1.2 To Reprogram the Coin Signature of an Existing Coin
Category
From the Main menu, press 3 then select 1, to get to the Program with Coins Menu
1-PROGRAM A NEW COIN
2-REPROGRAM AN
EXISTING COIN
ESC
SELECT 1 OR 2
Select 2 to start the procedure.
Note that this option only resets the average coin signature of an existing coin and assumes you
know in which channel the target coin is located. If you are unsure, refer to the QL label or better still
use the Check settings option in the Micromate.
THIS OPTION RESETS
THE COIN SIGNATURE
ONLY
ESC
CONTINUE Y/N?
Press YES to continue.
Page 11
Version 1.0
April 2001
Microcoin
Micromate User Manual
ENTER COIN CATEGORY
NUMBER 1 TO 12
ESC
Enter the number of the category you wish to refresh ie 1
PASS 10 OR MORE
SAMPLE COINS
ESC
ROLL COIN
Coin selection and accuracy is as discussed above.
After the first coin is rolled, the display will show the category information, and the number of coins
rolled.
CAT=5
VALUE=100
COIN SAMPLE=1
ESC
ENTER AFTER 10
The coin sample number will count the number of coins as they are passed. The minimum required is
10 samples, but to increase discrimination precision, more coins can be passed. After sufficient coins
have been passed, press ENTER to finish the programming sequence for that coin.
The display will return to the coin category selection menu, to allow you to reprogram another coin, or
to exit by pressing ESC. Press Esc again to save changes.
4.2 To Transfer a Config from One Validator to Another
There may be times when you want to copy the config from one validator to another. This can be
done by extracting the config from the source validator, and then downloading it to the target
validator. This will usually take less time than setting up the target validator using the settings menus,
particularly if there are a number of coin categories configured. The transfer will bring all the coin
category and user settings to the target validator, but new average coin signatures will need to be
programmed in for each coin channel in the target validator.
From the main menu, select 3 to get to the Program New Coins Menu.
1-PROGRAM WITH COINS
2-EXTRACT VAL CONFIG
ESC TO EXIT AND SAVE È
Scroll down to see the other options
3-UPDATE FACTORY CFG
4-PROGRAM A NEW CONFIG
ESC
Ç BACK
Page 12
Version 1.0
April 2001
Microcoin
Micromate User Manual
4.2.1 Upload and Store a Config from a Programmed Validator
To start the process, connect the Micromate to the source validator.
From the Program New Coins Menu, select 2- EXTRACT VAL CONFIG.
PULL CONFIG=XXXXX-XX
FROM VAL= XXXX
CONTINUE Y/N?
ESC
The display shows the config designator and serial number and from the source validator, and asks if
you want to continue. Press YES to upload the config into the Micromate.
EXTRACTING DATA!
If the config in the target validator has been changed from the factory settings, the display will show:
If the source QL is configured as required ignore this warning and press YES
THIS CONFIG HAS BEEN
CHANGED FROM THE
FACTORY SETTINGS.
YES
TO CONTINUE
Once the data is uploaded, the display returns to the Program New Coins Menu
The uploaded config is stored in memory in the Micromate, and can be used to reconfigure any
number of QLs. Note that the source Config is secure in the Micromate (even after power off).
4.2.2 To Program a Stored Config into a Validator
Once you have a config uploaded to your Micromate, you can program it into a target QL.
Connect the Micromate to the target QL and from the Program New Coins Menu, select 4-PGM A
NEW CONFIG
The Micromate checks the compatibility of the source and target QLs to make sure the configuration
is suitable for that QL. If the second last digit of the Configs are different the process is aborted. If the
last digit of the configs are different a warning is displayed. In this case it is safe to proceed.
THIS CONFIG CANNOT
BE USED WITH THIS
VALIDATOR.
ESC
The display shows the current config in the target QL and the config in the Micromate that is to be
downloaded. If the details are correct, press YES.
CHANGE VAL CONFIG
FROM
XXXXX—XX
TO
XXXXX—XX
ESC
YES/NO
You will be asked to program the coin signatures for the new config. The Micromate does not
distinguish whether a coin category is used or not, and so it cycles through each category, showing
you the settings, and asking if you want to program that coin.
PROGRAM COIN SIG FOR
CAT=1 VALUE=0
ESC
YES/NO
Page 13
Version 1.0
April 2001
Microcoin
Micromate User Manual
If a coin category has no value, press NO to go to the next category.
PROGRAM COIN SIG FOR
CAT=5 VALUE=100
ESC
YES/NO
Once you reach a category that does have a value set up, press YES to start programming the coins.
PASS 10 OR MORE
SAMPLE COINS
ESC
ROLL COIN
Pass 10 (or more) of the appropriate coins for that category, and then press ENTER to store the
values. The details of the next category will then come up. Continue to program the coins in to the
categories until you have finished all 12.
Once all of the coins have been programmed (you will need to index up to and including Cat 12), the
config will then be downloaded into QL.
TRANSFERING CONFIG
PLEASE WAIT
After the config is downloaded, the display returns to the main programming menu. Press ESC to
return to the Program New Coins Menu
4.2.3 To Update a Factory Config
Occasionally, a new version of a factory config will be issued with updated coin data. If you are using
validators with the same config, and you have not modified the config in any way, you can update
your validators with the new version of the config without having to roll coins. The updating process
will transfer the new information into the validator, without modifying the coin signature data.
Note: This operation should only be performed to update the config of a QL with an unmodified
factory config and having a Config No. exactly the same as the Config being uploaded.
Connect the Micromate to a QL having the revised Factory Config and extract the Config as
described above.
Connect the Micromate to the target QL and select option 3, update a Factory Config from the
Program New Coins Menu
TRANSFERING CONFIG
PLEASE WAIT!
After the config has been transferred, you will be returned to the programming menu.
Page 14
Version 1.0
April 2001
Microcoin
Micromate User Manual
5.0 Diagnostics
Select option 4 from the Main Menu
1-MICROMATE
2-VALIDATOR
3-VERIFICATION
ESC
5.1 Micromate Diagnostics
The Micromate performs a self diagnostic routine every time it is powered up, to ensure that it is
functioning correctly. The diagnostics menu for the Micromate is used to set the Micromate user
options, as explained in section 1.3 of this user guide.
5.2 Validator Diagnostics
From the main diagnostics menu, press 2 to bring up the validator diagnostics menu.
1-SELF DIAGNOSTICS
2-TEST OUTPUTS
3-TEST HARDWARE
ESC
Press 1 to start the self diagnostics routine in the validator.
TESTING!
OPTO’S ARE OK
ESC
The validator checks the operation of the 3 coin detection opto-coupler devices, and then reports
back their condition. If an error message comes up, indicating that one or more of the optos are
faulty, you should check the QL coin path for obstructions
If there are no obvious signs of obstruction, contact your nearest Microcoin Service Centre for
advice.
Press ESC to return to the main diagnostics menu.
5.2.1 Test the Outputs of the Validator
Press 2 from the main diagnostics menu to start the output test sequence. This test will allow you to
turn each of the outputs on, and ensure that they are functioning correctly with your equipment.
TEST OUTPUT LINE 1-6
PUSH 0 FOR ALARM O/P
PUSH CE FOR GATE
ESC
•
To test the output lines, you will need to monitor the voltage on each line. See your QL user
guide for the pin numbers and voltage levels that correspond to each output for your Model
Note: Some models of the QL have different numbers of output connection pins, and not all lines
may be available on these models.
To signal each line to switch, press and release button 1 to activate line 1, button 2 for line 2, and
continue until all required channels are tested. The outputs will pulse at the time set in the pulse
width options for QL. Note that the pulse widths may require temporary change to be monitored
• To test the alarm line, press the 0 button.
Page 15
Version 1.0
April 2001
Microcoin
•
•
Micromate User Manual
To test the operation of the gate, press the CE button. A double “click” will be heard from the
validator, indicating that the gate has activated.
Once you have completed the output tests, press ESC to return to the diagnostic main menu.
5.2.2 Validator Hardware Tests
The QL validator comes equipped with a multi-coloured LED and a switch to aid in diagnosis and on
board programming. There is also the option of a 7 segment display. To test these devices, press 3.
1-TEST 7SEG DISPLAY
2-TEST LED
3-TEST SWITCH
ESC
•
To test the operation of the 7 segment display, press 1. This will signal the validator to display
the numbers 0 to 9 on the display. Watching the display during this time will allow you to see if
the display is working, and if any segments are not working.
• To test the multi-coloured LED on the side of the validator, press 2.
This will cause the validator to pulse the LED, first green, then red, then orange, before returning the
display to the normal green.
• To test the operation of the programming switch, press 3.
PRESS THE SWITCH ON
THE VALIDATOR.
Press the programming switch within 30 seconds, and the display will show that the switch is OK.
SWITCH OK.
If the switch fails, or you don’t press it within 30 seconds, a warning display comes up.
SWITCH FAILED TO
OPERATE.
If the switch is faulty, contact a Microcoin Authorised Service Centre.
Once you have concluded the hardware tests, press ESC until you return to the diagnostics main
menu.
5.3 Software Verification
The Micromate can perform a comparative verification of the program that is used to operate the
validator, and the configuration data loaded in to customise the validator for a specific job. Note:
This feature has been included primarily for the regulated Gaming Industry. Use in other
applications may be limited.
As part of the verification procedures, a ‘seed’ number is entered, and this is used, with a CRC
check, to generate a number. This number can then be compared to the verification numbers
generated by other validators of the same type, to check whether anything is different or changed.
To verify the validator, press 3 from the diagnostics main menu.
SERIAL NO= XXXX
SOFTWARE REV= X.XX
CONFIG NO= XXXXX-XX
VERIFY Y/N?
The serial number of the validator will be displayed, along with the software revision number, and the
config number. To proceed with the verification, press YES.
Page 16
Version 1.0
April 2001
Microcoin
Micromate User Manual
VAL S/N= XXXX
ENTER SEED
ESC
Enter a seed number, for example 1, 2, 3, ENTER.
CALCULATING
PLEASE WAIT!
SEED=123
The display will now show the results of the verification.
VAL S/N= XXXX
CONFIG CRC= XXXXX
ROM CRC= XXXXX
ESC
The Config CRC is the checksum of the seed number, and the config data stored in the validator.
This number can be compared to a previous reading taken from the same validator, or from another
validator with the same config, to see if there are any changes in the code.
The ROM CRC is the checksum of the seed number and the program software in the validator, and
can be used to verify that there haven’t been any changes to the operation of the validator.
6.0 To Change the Battery:
Ensure the micromate is turned off, and disconnect all cables. Unscrew the 4 screws on the back
cover of the Micromate. Holding the Micromate horizontally, face down, CAREFULLY lift the back
cover off the unit. Unplug the existing battery, and replace it. Check the PCB and end cover to
ensure they are in position, and then replace the back cover, screwing up the 4 screws.
Always use an Alkaline 9V battery as a replacement.
Note: Please dispose of used batteries carefully.
Page 17
Version 1.0
April 2001
Microcoin
Micromate User Manual
7.0 Glossary
ALARM
BACKLIGHT
CATEGORY No.
CHECKSUM
EXCESS CREDIT
AVERAGE COIN
SIGNATURE
COMMS
CONFIG
DISCRIMINATION
DISPLAY
ENABLE
GATE
OUTPUT LINE
QL has an alarm output, can be configured to pulse in the event of various
conditions. The Micromate can switch this output during diagnostic testing, to
ensure correct operation. Refer Micromate Diagnostics
The Micromate has a display which can be turned On / Off.
Refer Micromate diagnostics.
QL has 12 Coin Categories (or Coin Channels) which can be programmed for
individual coins or tokens. Each of the 12 Coin Channels has the following
information associated with it: Coin Value, Output Line, No. of pulses, Enabled
or Disabled status and Discrimination Band. Refer Check Coin Settings.
This is a number generated by an algorithm within QL that uses both the seed
number, chosen by the user, and the CRC number, which is calculated from
the software code. The checksum can be used to verify that the code and
configuration in a validator hasn’t changed, or that the code in different
validators is the same. Refer Software Verification
Excess credit is generated when the accumulated value of coins accepted
exceeds the pre set totalised price (or credit) value. Excess credits can be
retained or cleared after the accumulated price output. Any retained excess
credits will stored in QL as long as it has power. Refer Change Price Setting
The Coin Signature is a set of values generated within QL for a particular coin
when a coin passes through the detect area. The Average Coin Signature is a
set of numbers stored within QL which represents the average of the coin
signatures for a population of those coins. The average coin signature is used
to form a window of acceptance that a coin signature must fall within to be
considered valid. Both of these values are specific to any particular QL.
This setting refers to the physical mode of communication between the
Micromate and QL Refer Configuration For Use
The CONFIG, or configuration file, contains all the information programmed
into QL. This includes all coin category information, and user specified
settings, as well as other factory specific settings not accessible with a
Micromate
The discrimination band determines how wide the acceptance window will be
for a particular coin or token Typical factory setting is MEDIUM band.
NARROW, WIDE and SPECIAL can also be selected.
Refer Change the Coin Settings
1. Micromate: The Micromate display consists of a 20 character x 4 line LCD
fitted with software selectable backlight option.
2. QL:
Some QL versions are fitted with a single digit LED display.
For use with Quick Learn on board programming facility.
Each coin category may be enabled( turned on to accept) or disabled (turned
off, sometimes referred to as Inhibited) by the Micromate.
Refer Change Coin Settings.
The validator has a gate which opens to allow valid coins to pass through to
the accept chute. The Micromate can test the operation of this gate.
Refer Hardware Tests
The QL validator has 6 parallel output lines. Output lines 1-5 are specific coin
output lines. Output line 6 is shared with coin output line 6 and the PRICE (or
credit) output line. Note that if you select output line 6 and the price output is
enabled (price setting other than 0), both the Coin and Price outputs will be
issued on line 6 simultaneously. This situation must be avoided.
Refer Change Coin Settings
The Micromate can also be used to turn on each of the outputs during
diagnostic testing. Refer Hardware Tests.
Page 18
Version 1.0
April 2001
Microcoin
OUTPUT PULSE
WIDTH
POWER SAVING
PRICE
PULSES
VALUE
VAL CODE
VERIFICATION
Micromate User Manual
The output pulse width is the duration of the pulses issued on coin lines 1-6.
Both the ON time and the OFF time (time between multiple pulses) can be
specified in mSec. Range 0-9999 Refer Change Operator Settings
When the power save option is turned ON, the Micromate switches itself off
after 5 minutes of inactivity. Refer Micromate Diagnostics
The PRICE (Credit) totalizer accumulates the value of the coins and tokens
accepted by QL until the set Price (Credit) is reached, where upon it issues a
pulse on output line 6. Range 0-65000 Refer Change the Price Settings
The number of pulses issued on a coin output line for each of the Coin
Channels can be programmed by the Micromate. Range 0-9999
Refer Change Coin Settings
Value of the coin or token in a particular Coin Channel. Used in conjunction
with the Price setting. Generally specified in decimal value ie $1=100
Range 0-9999. Refer Change Coin Settings
The VAL CODE is a user defined access code stored within QL to prevent un
authorized changes to QL. As the code is stored in QL it is validator specific
and independent of the Micromate.
Note: If you are going to use the VALCODE feature, it is very important to
keep records of the code used. Once a VALCODE is set, the only way the
validator can be reprogrammed is with the correct VAL CODE for that
validator, or by returning the validator to a Microcoin authorised Service
Centre to have the code reset.
Refer Change Operator Settings
The verification feature is used to check that the code and config data in the
validator have not changed. A seed number is chosen by the user, and this is
applied to an algorithm that calculates a number from the config data, and
from the ROM code. These numbers can then be compared to previous
readings, or other validators of the same type. Refer Software Verification
Page 19
Version 1.0
April 2001