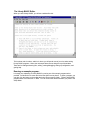
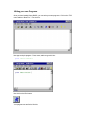
1
Contents
Liberty BASIC v4.0 Help Document
Copyright 1992-2003 Shoptalk Systems - http://www.libertybasic.com/
"Windows is a registered trademark of Microsoft Corporation in the United States and other countries."
What's New!
What's new in version 4.
Overview
An overview of Liberty BASIC.
The Liberty BASIC Language
Syntax and Usage for the Liberty BASIC Language.
Gui Programming
Creating and using Graphical User Interfaces.
Command Reference
Detailed Listing of Liberty BASIC Commands.
API and DLL
Making API and DLL calls in Liberty BASIC.
Graphical Sprites
Sprites for Games and Graphics.
Port I/O
Controlling Hardware Ports.
File Operations
Accessing Disk Files.
Mathematics
Mathematical Operators and Functions.
Text
Text Manipulation and Functions.
Graphics
Using Color and Drawing Commands.
Troubleshooting
Solving Problems.
Registering Liberty BASIC
Why and how to register Liberty BASIC.
http://www.libertybasic.com/
The official Liberty BASIC web site.
Installing Liberty BASIC
Installing and uninstalling Liberty BASIC.
What's New!
What's new in Liberty BASIC 4 - additions and modifications that make Liberty BASIC 4
different from previous versions of Liberty BASIC.
Improvements to DIM
TAB( n )
Printing columns with commas
Handle Variables
Subs for Event Handlers
Global Variables
BYREF - Passing by reference
MAPHANDLE - changing the handle of open devices
Graphics window scrollbar changes
EVAL(code$)
EVAL$(code$)
Breakpoints for debugging
DO LOOP
Printerfont$
Printer Graphics Now Scaled
Debugger Improvements
ON ERROR GOTO and RESUME
ENABLE, DISABLE, SHOW AND HIDE
Groupboxes Accept New Commands
PLAYMIDI, MIDIPOS(), STOPMIDI
Named Drawing Segments
Joystick Support
STYLEBITS
New Sprite Commands
centersprite
removesprite
spriteoffset
spritetravelxy
spritetofront
spritetoback
spriteround
Glossary
Glossary of General Computer and Programming Terms
Alphanumeric
Any letter of the alphabet or any digit from 0 to 9.
Application
A completed program that can be executed (the term program is often used).
Application Programming Interface (API)
A set of definitions of the ways in which one piece of software communicates with another. One of
the primary purposes of an API is to provide a set of commonly-used functions. For more, see
What are APIs.
ASCII
ASCII (pronounced as-key) is short for American Standard Code for Information Interchange. It is
a standard code that assigns a binary number to all the alphanumeric characters (upper and
lower case), all the symbols on the keyboard, and some other symbols not on the keyboard
(such as the cents symbol: ¢). It is also known as "plain text".
Associated File
A file type that has been identified as belonging to a certain program, such as .TXT with Notepad,
.BMP with Paint, or .DOC with Word.
Binary
An alternative number system which works very well for computers. It is easiest for a computer to
use only two digits (0 and 1) in its number system. A byte is a group of eight bits, and it is the
standard unit by which data is stored. There are 256 different combinations of zeros and ones you
can make with one byte, from 00000000 to 11111111. This is enough to cover all the ASCII
characters.
Binary Access
The name given to the method of accessing the data in a file byte by byte.
Bit
The smallest amount of information that can be transmitted. Bit is short for binary digit. A bit can
be a zero or a one.
Bitmap
An image stored in a disk file. Bitmaps must be loaded into memory from the disk before they
can be displayed.
Boot
Starting your computer by turning on the power.
Border
The edge of a window is called the border. You can resize a window by clicking and dragging the
border with the mouse.
Branch
A conditional jump or departure from the implicit or declared order in which instructions are being
executed.
Bug
An error in a computer program.
Byte
Consists of eight binary digits. It is the smallest unit a computer works with at once. The bits of a
byte can be individually modified, but a computer still works with at least one byte at a time.
Click
The act of pushing down and releasing the mouse button.
Clipboard
A temporary storage area inside the computer. It is used to copy or move data from one program
to another, or from one area of a document to another.
Close
To close a program means to end a program. Click the X button in the top right corner of a
window to close that program. When you close a program, it is no longer active.
Command
The programming term for an instruction to the computer.
Computer Program
A computer program tells a computer what the computer should do. It is a sequence of
instructions to be executed in order. A computer program consists of a set of instructions that the
computer understands.
Controls
Tools that appear on the user interface that let the user respond to the program, enter data, and
view images and other kinds of output data. Buttons, textboxes and menus are examples of
controls.
Database
An organized collection of information.
Data
Data is information. There are many types of data, including sound, graphics, and text. Most
data on a computer is stored in files on the hard disk, which are made up of bytes. Computer
programs are also data, though many people may use the word data to mean information stored
on the computer by the end user.
Data File
A file that consists of data that has been created in a program, such as a text file typed in
Notepad.
Default
The standard settings in a program.
Desktop
The opening screen in Windows that contains a few objects, the startbutton and the taskbar. This
is what you see on your computer screen when you have no windows open. It may be a solid
color, or it may be graphics. On the desktop, there will be icons, including one called "My
Computer" and one called "The Recycle Bin."
Dialog Box
A special kind of window that asks you a question or presents controls that you can choose
from.
Directory
The term "folder" has largely replaced this term. They mean the same thing.
Disk
The permanent storage area for your programs and documents.
Disk Drive
Hardware capable of reading and writing data stored on a disk.
Document
Any data you create with a program.
DPI
Dots Per Inch, a unit of measure describing printer resolution.
Double-Click
Pressing and releasing the left-mouse button two times in quick succession (without moving the
mouse between clicks).
Drag (mouse)
Move the pointer on an item, hold down the left button, slide the pointer to a new location, and
release the button.
Drive
Any data storage device. This includes your CD-ROM drive, floppy disk drive, and hard disk drive.
Event
An activity that occurs during an application's execution. The user normally triggers many events,
such as keypresses, mouse clicks, or mouse movements. The Windows operating environment
can also trigger events such as timer clicks and data transferred from other running programs.
Event-Driven Programming
The process of writing programs that respond to triggered events, as opposed to older text-based
programs that were sequential in nature and followed a predetermined flow. Events can come from
many sources, and your program must know which events to respond to and which to ignore.
Explorer
The Windows program that you can use to explore your disk.
Expression
A combination of variables, literals and functions that can be evaluated to a single string or
numeric value.
File
A named collection of information stored on a disk. A file is a long sequence of bytes which
represent data. Each file has a name and an extension which are separated by a dot (a period).
The name identifies the file. The extension tells the computer what type of data is contained
within the file.
Filename
The name assigned to a collection of data that is stored on a disk.
Filename Extension
The optional "period" and up to three characters at the end of a filename.
Focus
Only one of the items in a window can be accepting input from the keyboard at a time. The active
item is said to be the item with the focus.
Folder
A folder can be thought of as a location on your hard disk or floppy disk. Folders used to be
called directories/subdirectories. A folder contains files and can contain nested folders
(subfolders). Folders and subfolders are used to organize your hard disk.
Gigabyte
Roughly a billion bytes or characters. Abbreviated G or GB.
GUI
Graphical User Interface, used to describe windows and controls that use pictures to help you
interact with the computer.
Hard Disk
A large capacity storage area that offers fast access to information.
Hardware
The physical parts of your computer, as opposed to software.
Highlight
To select something by clicking or dragging with the mouse. Once selected, an item usually
turns a different color or becomes outlined.
Icon
An icon is a tiny, clickable picture used to provide a startup link to a program or a file.
Identifier
A lexical unit that names a language object, such as a variable, array, record, label, or procedure.
Literal
A hard-coded text or numeric value that is written in programming source code.
Maximize Button
The button in the middle of three button at the right end of the titlebar which enlarges the window
to its greatest possible size.
MB
Abbreviation for megabyte. One MB is approximately one million bytes.
Menu
A list of items from which you may choose.
Menu Bar
The bar located under the titlebar that list the available menus.
Minimize Button
A button located at the right side of the titlebar that you can click to reduce a window to a task
button on the taskbar.
Monitor
The computer's visual output device, similar to a television.
Mouse
A device you can move to select items on the computer screen. On the screen, you will see a
mouse cursor which you can move by moving the mouse.
Multitasking
The ability of an operating system to run more than one program at one time.
My Computer
A program; the obvious, quick way to the files and folders on your computer.
Operating System (OS)
The software responsible for the direct control and management of hardware and basic system
operations.
Parallel Port
A connector through which a computer communicates with a peripheral along parallel wires.
Printers are the most common peripheral to use parallel ports.
Path
The route to a folder or file; it consists of the drive name, a folder and/or subfolder (if any), and the
filename.
Pixel
A "picture element" or dot that the monitor (screen) can display to create the image you see.
Pointer
The arrow-shaped cursor on the screen that moves when you move the mouse.
Programming Language
A standardized communication technique for expressing instructions to a computer. It is a set of
syntax and semantic rules used to define computer programs. A language enables a programmer
to precisely specify what kinds of data a computer will act upon, and precisely what actions to
take under various circumstances.
RAM
Random Access Memory, the computer's electronic memory; your work area.
Random Access
The name given to the method of accessing the data in a file by using fixed-length records that
can be written to or read from in any order.
Reboot
The computer term for restarting your computer.
Reserved Word
A word which, in some computer languages, cannot be used as an identifier because it is already
used for some grammatical purpose.
Resolution
The number of pixels the monitor (screen) can use to display an image, or dots your printer can
print.
Restore Button
The button in the middle of three buttons located at the right end of the titlebar on a maximized
window; it returns the window to its previous size and location.
Right-Click
Quickly press and release the right mouse button.
Right-Click Menu
An easy-to-use menu that opens when you right-click an object. Also called a "shortcut menu",
"object menu" or "context menu."
Right-Drag
A mouse action in which you move the pointer on an item, hold down the right mouse button,
drag the pointer to a new location, and release the right mouse button.
ROM
Read Only Memory, the computer's pre-programmed memory.
Save
The command that saves changes to a previously named document.
Save As
A command that opens a dialog that permits you to save a new (unnamed) document or rename
a previously saved one.
Scroll Arrows
The arrows at each end of the scroll bar, used to scroll through the contents of the window.
Scroll Bar
A bar that appears at the right and/or bottom edge of a window whose contents are not
completely visible; termed "horizontal" and "vertical" scroll bars.
Sequential Access
The name given to the method of accessing the data in a file in the order from beginning to end of
file.
Shell
The most generic sense of the term shell means any program that users use to type commands;
it is called a "shell" because it hides the details of the underlying operating system behind the
shell's interface.
Short Filename
A filename that is no longer than eight characters, and a three character extension.
Sizing Handle
An area in the bottom right corner of a window that can be sized; it is used to size the window.
You can, however, size a window from any corner.
Software
Computer program written to perform specific tasks, such as a word processor or spreadsheet.
Spreadsheet
A program that automates an accountant's worksheet.
.
Status Bar
The bar at the bottom of a program window; it displays information about the program.
Statement
A meaningful expression or generalized instruction in a computer programming language.
String
The programming term for a series (string) of text characters.
Subfolder
A folder that is within another folder. Traditionally called a subdirectory.
Subprogram, also called Subroutine
A set of instructions in a computer program which is separated from other code to reduce
reduncancey, and called by other subprograms or other parts of the program.
Taskbar
The portion of your screen including the Start button, the time display, and everything in-between.
Title Bar
The horizontal bar at the top of a window that displays the window's name. The window's name is
usually the name of the program running in the window.
Toolbar
A row of buttons that provide quick access to commonly used commands.
Unzip
To decompress, or expand a file that has been made smaller using a compression utility.
Variable
A name given to a piece of data in a computer program whose value may vary as the program
executes.
.WAV
The extension used on some types of audio file.
Window
A rectangle portion of the display which is being used for a specific program.
Word Processor
A computer program that helps you create, change, format and print documents such as letters
and reports.
WYSIWYG
Stands for What You See Is What You Get. It is pronounced "wizzy-wig". It means that what you
see on your screen while you edit your file, looks the same as what you get when you print the
file.
Zipped file
A file that has been made smaller using a compression utility.
Overview of Liberty BASIC v 4
Welcome to our Liberty BASIC overview. In this section we will introduce you to:
Installing and Uninstalling
How to install Liberty BASIC and how to remove it from your system.
Registering Liberty BASIC
Why and how to register this software.
The Liberty BASIC Editor
This is the place where BASIC programs are written and compiled.
Editor Preferences
How to configure the Liberty BASIC editor.
The Liberty BASIC INI file
How editor preferences are stored.
Writing Programs
Getting started!
Freeform
Creating windows with the visual designer called Freeform.
GUI Programming
Using windows and controls such as buttons, textboxes, etc.
Using the Debugger
How to debug (find errors) in Liberty BASIC programs.
Lite Debug
Run programs normally, and pop up the debugger when there is an error.
Compiler Reporting
The Liberty BASIC Editor looks for potential problems in code.
Creating a Tokenized File
Converting code to a TKN format to be used by the runtime engine.
Using the Runtime Engine
How to create programs for distribution.
Icon Editor
How to create an icon to incorporate into the runtime engine.
Lesson Browser
Using the lesson browser to learn and to teach.
Using a Different Code Editor
Running Liberty BASIC from the command line.
Using Inkey$
Trapping and evaluating keyboard input.
Using Virtual Key Constants with Inkey$
A more advanced method for evaluating keyboard input.
Reserved Word List
A list of keywords, commands, functions and variables used by Liberty BASIC.
Error Messages
Understanding the errors that halt program execution.
Error Log Explained
How to use the error log file.
Port I/O
Controlling hardware ports.
Making API and DLL Calls
Extending the language with Dynamic Link Libraries.
TroubleShooting
What to do when a program misbehaves.
Installing and Uninstalling Liberty BASIC
To install Liberty BASIC, simply run the setup program. Either accept the default installation
directory (folder), or specify another directory (folder). Liberty BASIC will be installed in this
folder. Subfolders containing files needed by Liberty BASIC will be installed in the main Liberty
BASIC directory. Do not modify these subfolders or the files contained in them.
To uninstall Liberty BASIC, run "uninstall.exe" which is found in the folder containing Liberty
BASIC. This folder also contains a file called "uninstall.ini". Be careful not to delete or modify
"uninstall.ini", because it contains the information about the installation that will be used by the
uninstall program.
Registering Liberty BASIC
Liberty BASIC v 4 can be registered with two different licenses:
The SILVER license - $29.95
- Remove the size limitation on compiling so you can create large programs.
- Turn off the reminder popups that appear when using Liberty BASIC.
- Receive tech support
The GOLD license - $49.95
With this license you get all these features that come with the SILVER license:
- Remove the size limitation on compiling so you can create large programs.
- Turn off the reminder popups that appear when using Liberty BASIC.
- Receive tech support
PLUS...
- Create applications that run standalone using the runtime engine. This special
mechanism lets you create programs you can share freely or sell.
Note to registered users of Liberty BASIC v1x and v2.x and 3.x: We also have low upgrade
prices.
What is the runtime engine? It is a program named RUN400.EXE which comes with the
shareware version of Liberty BASIC. It lets you and others run applications that you write in
Liberty BASIC without giving away your painstakingly written BASIC code, and without needing to
distribute the Liberty BASIC development tools. The runtime engine will only run applications
compiled by the registered version of Liberty BASIC.
To order by postal mail, print a copy of "register.txt", which can be found in the directory that
contains your copy of Liberty BASIC.
To order online, visit http://www.libertybasic.com/
The Liberty BASIC Editor
When you start Liberty BASIC, you will see a window like this:
This is where code is written, and this is where you will spend most of your time when writing
Liberty BASIC programs. Notice the various pull-down menus along the top of the window.
These are for loading and saving files, editing, running/debugging, setting up configuration, and
getting help.
Running an example program:
Let's begin our exploration of Liberty BASIC by running one of the sample programs we've
provided. Pull down the File menu and select the Open item as shown. To open a program, you
can also click the button on the toolbar that looks like an open file folder. Typical Liberty BASIC
programs have a file extension of *.BAS. You can choose the default extension you prefer in the
Setup Menu.
You will see a dialog box similar to the one displayed below. Here you will find a list of files that
you can load. These are text files containing our example BASIC programs. Select the item
named draw1.bas and click on OK.
Liberty BASIC will load the draw1.bas program you selected. The result will look like this
window. This is BASIC code for a Windows drawing program. As you learn to program in Liberty
BASIC you will be able to extend this program and the other included samples to do what you
want. But right now let's see how it runs!
Running a Liberty BASIC program is easy. Select the Run menu and mouse click on the Run
item, as illustrated below. You can also run a program by clicking the button on the toolbar that
looks like a blue, running man, or by pressing the "Shift" key and leaving it down while pressing
the "F5" key.
Now Liberty BASIC will take a few seconds to compile and run the drawing program (some
computers will take longer than others). When it is finished compiling, a window belonging to the
drawing program will appear:
Let's try drawing a little something with Liberty Draw!
Feel free to play with Liberty Draw, and, when you're done close its window.
Customizing the Liberty BASIC Editor
Make the Liberty BASIC editor work the way you want it to work. Select the Set Up menu to
configure Liberty BASIC to your preferences.
The Preferences Dialog:
The Preferences Dialog is described in detail in the section on Editor Preferences.
From the Set Up menu, you can also:
- set the font face and size that will appear in the editor
- set the printer font face and size that will be used to print code from the editor, and also for lprint
commands.
- set up external programs to run from the Run menu. These can be executables, or Liberty
BASIC TKNs.
- run the Icon Editor
Editor Preferences
Liberty BASIC Preferences
See also: The Liberty BASIC Editor
Notification:
Confirm on exit of Liberty BASIC - This causes Liberty BASIC to ask "Are you sure?" when
you try to close down the Liberty BASIC editor.
Display execution notice - This causes Liberty BASIC to display an execution complete notice
in a program's main window (if it has one) when it is finished running.
Starting up:
Start Liberty BASIC Editor full-screen - This causes Liberty BASIC to open the editor so that it
fills the whole screen whenever Liberty BASIC is started up.
Load on startup:
No file - This causes Liberty BASIC to start with no text in the editor, and a filename of
untitled.bas.
Most recent file - This causes Liberty BASIC to start with the file the user was editing when it
was last shut down.
This file - This causes Liberty BASIC to start with the file specified in the text field.
Compiling:
Show Compile Progress Dialog - This causes a popup dialog to appear when compiling for
Run, Debug, Lite Debug, or Make TKN file. The user can press a cancel button on the dialog
to abort the compile action.
Enable Compiler Reporting - This tells the compiler to apply certain compile checks and list
any interesting results at the bottom of the Liberty BASIC editor window. See Compiler
Reporting.
Create *.BAK File On Run/Debug - This activates a backup mechanism so that every time a
program is run, it is also backed up into a file of the same name, but with a BAK extension.
The user can also specify where to save these files by typing the location into the textbox
provided. As an example, a path to a different hard drive could be specified as protection
against hard drive failure.
Environment:
Use Syntax Coloring - This toggles the editor's syntax coloring mechanism. Check this box
to see color syntax in the editor, or uncheck it to use the system default colors for text.
Enable Auto Indenting - This feature causes the Liberty BASIC editor to copy the level of
indenting of the current line to a new line when Enter is pressed. It also has some support for
back-tabbing.
Add 'Kill BASIC Apps' to all Windows - This adds a special menu item to the system menu of
each window in the Liberty BASIC environment (this menu item can also be found in the
Liberty BASIC editor Run menu). This feature is useful if your BASIC program will not close or
shut down, because it allows you to kill any BASIC program started from the Liberty BASIC
editor.
Main window columns/rows - This sets the default size of the main window for any BASIC
program started from the Liberty BASIC editor.
Source filename extension - This specifies the filename extension to use for BASIC programs.
The default is BAS, but the user can change it to something else if desired. This is
especially useful to prevent filename collision if the programmer also uses other versions of
BASIC or other applications that use BAS as a filename extension.
Reload File on Activate - When this option is set, Liberty BASIC will check to see if a newer
version of the currently loaded file exists and load it into the editor, replacing what is there.
This only happens on activation of the editor, meaning that some window other than the
Liberty BASIC editor was made active (another editor or GUI drawing program perhaps), and
then the editor is made the active window again by clicking on it or by bringing it to the front in
some other fashion (pressing Alt-Tab for example). Why this is useful: Some programmers
may prefer to use their favorite text editor to write code, saving the code when they are ready
to try running or debugging it. Liberty BASIC will be open on that file, so after they save in the
other editor and switch to Liberty BASIC, with Reload File on Activate the newest saved
version of the file is automatically reloaded into Liberty BASIC, and all that is needed to run it
is to use the Run menu or to press Shift+F5.
The Liberty BASIC INI file
Liberty BASIC uses a file called lbasic4.ini to store preferences. Even the application runtime
engine uses some of the information in this file (if it finds the file on startup). Here is a detailed
description of its format (descriptive comments are not part of the file information):
editfont courier_new 9
printfont courier_new 11
preferences
true
false
true
system menus
true
false
true
run/debug
true
welcome.bas
true
64
24
false
F:\bak\
true
bas
2 externals
Notepad
notepad.exe
Error Log
notepad.exe error.log
1 recent files
welcome.lba
EOF
- editor font
- printer font
- confirm exit of Liberty BASIC
- display execution complete notice
- put Kill BASIC Programs in all
- show compile progress
- start full screen
- make backup of source code when
-
open with initial file
initial file to load
use syntax coloring
mainwindow columns
mainwindow rows
reload more recent file
backup pathname
enable compiler reporting
source file extension
say how many externals there are
name of first external program
external program specification
name of second external program
external program specification
say how many recent files there are
first recent file
end of file marker
The runtime engine will use the default values for editfont, printfont, and for the mainwin columns
and rows.
Writing your own Programs
Once you have loaded Liberty BASIC, you can write your own programs. Click on the "File"
menu and then "New File." You see this:
Now type a simple program. Press enter, and then type this line:
print "Hello World!"
Now click on the Run button.
Your program runs and looks like this:
FreeForm
The Gui Designer, FreeForm, has been an important part of Liberty BASIC for a long time. It is a
utility that allows you to lay out your program windows in a graphical way. You can simply click
and drag with the mouse to add controls to a window, move them, and size them. GUI stands for
Graphical User Interface. This interface is all of the controls that appear on a window that allow
the user to interact with the program.
When the look of the window is satisfactory, you may save the template for future use. You may
also choose to produce the code to create this window, or choose to produce the code to create
the window, plus an outline that includes stubs for all of the controls included in the window.
FreeForm is included in code form as well as in tokenized form. You can run the tokenized
version from the RUN menu. FreeForm is open source software. Feel free to modify it to suit
your own needs and preferences. Many enthusiastic Liberty BASIC programmers have written
modified versions of FreeForm over the years and many of these modifications are part of the
version of FreeForm that is included with Liberty BASIC.
Using the Debugger
HOW THE DEBUGGER HELPS
You can use the debugger when a program doesn't behave the way you expect, or when there
are errors that prevent it from running. You can watch as each line of code is executed to see if
the variables contain the correct values.
The TRACE command is used in conjunction with the debugger. It allows you to mark places in
code that will cause the debugger to change modes between "step", "animate" and "run." This
allows you to use the "run" button to debug a program, and when it hits a "TRACE 2" command
in the code, it will automatically drop down into "step" mode.
USING THE DEBUGGER
You can write a short program that shows how to use the debugger. In the Liberty BASIC
editor, click on the "File" menu and select "New File." You'll see:
Type in the following simple program:
for x = 1 to 1000
print x
next x
Now click on the debug button.
The program runs and a special "Debugging" window
also appears. Position the two windows so that you can see them both. Now focus on the
debugger:
Notice the pane on the top. This lists your program's variables. There's a lot of information in
there already because each program comes with some special variables already declared.
Scroll down to the bottom of the list where the variable named x is located. Focus on this
variable for this example:
There are buttons for the possible debugging modes:
-Resume runs your program at full speed in the debugger. While in this mode, you won't see
variables change or program source code highlighted.
-Stop will cause your program to stop, and it will highlight the line where it stopped, and it will
show the current variable contents
-Step Into will execute the next line of code. If the next line is inside a subroutine or function it will
follow execution into the subroutine or function.
-Step Over will execute the next line of code. It will not step into subroutines or functions, but
skips over them.
-Step Out will run until the current subroutine or function exits, and then stops to show the next
line of code and variables.
-Animate runs your program, showing each line as it executes, and also updating variables as it
runs.
Click on the "Step Into" button. You'll see that the first line of code is executed. The the
variable x is no longer 0, but 1. Also the next line of code is highlighted:
Now click on the "Step Into" button again. Notice that the value of x gets printed to the program
window, and also the next line of code is highlighted in the debugger:
Click a few more times on the "Step Into" button until the value of x is 3 or maybe 4. The "Step
Into" button must be pressed each time you want the program to execute a new line of code.
Now click on the "Animate" button. This mode causes the program to execute, while still
documenting the current line of code and the values of variables in the debugging window. This
time you'll see the program running really fast, and printing lots of numbers. Quickly press the
"Step Into" button again to stop the program. The program will stop executing and you can see
the current values for variables and the line that is to be executed next:
Press the "Resume" button but get ready to press the "Step Into" button again. "Resume"
mode executes the code at normal speed and it doesn't document anything in the panes of the
debugging window. The numbers will start printing really quickly in the program window, but the
debugger doesn't show any activity at all. You should still be able to click on the "Step Into"
button again before the count reaches 1000. The debugger again shows you the current state of
the program.
Close the debugger. This will also close the program window.
EXECUTING CODE AGAINST A RUNNING PROGRAM
The combobox in the center of the debug window allows you to type commands to your program
while it is being run for debug. Clicking the "Execute" button will cause the code you have typed
to be executed. In the example above, you might want to change the value of "x". Type into the
code combobox:
x = 50
Start stepping though the code by clicking the Step Into button several times, then click the
"Execute" button. Click the "Step Into" button again. See what happens to the printout in the
mainwindow. It looks like this:
1
2
3
4
50
The combobox contains a list of all code that you've typed into it during the course of debugging.
To go back to a previous line of code, simply choose it from the drop-down list of the combobox
and then click the "Execute" button.
BREAKPOINTS
Liberty BASIC 4 adds the ability to add a breakpoint to your program so that when you are
debugging the program will stop at the breakpoint when it reaches it. To add a breakpoint, point
with your mouse at the breakpoint bar on the left side of the editor and double click. A
breakpoint marker will appear. If you double-click there again, the breakpoint will disappear.
Add as many breakpoints as you like, but keep in mind that adding a breakpoint to a blank line
or a remark will not have any effect during debugging. You can also right click on the breakpoint
bar for a little popup menu.
When you launch the debugger it also has a breakpoint bar which will contain all the breakpoints
you added in the editor. You can add and remove breakpoints in the debugger. Note: Changes
you make to the breakpoints in the debugger are not automatically made to the breakpoint bar in
the editor.
Breakpoint in the Debugger
You can also click on a line of code in the debugging window to set the cursor, right-click to pop
up a menu and then select "Run to Cursor" to make your program run at full speed until it
reaches that line of code, just as if you added a breakpoint to that line. This method functions as
a "just once" breakpoint.
Lite Debug
"Lite Debug" is an option available in the "Run" menu. When run with Lite Debug, a program will
run as usual and you will not see the Debug window. If the program encounters an error during
execution, the Debug window will pop up with the problem line of code highlighted! This incredibly
handy feature allows you to isolate errors quickly.
Lite Debug in Action
To see it in action, type the following code into the Liberty BASIC editor:
for x = 10 to 0 step -1
print 10/x
next x
Now, choose "Lite Debug" from the RUN menu. The program will run normally at first, and print
the following in the main window:
1
1.11111111
1.25
1.42857143
1.66666667
2
2.5
3.33333333
5
10
When the value of x gets to "0", the program halts with an error. The Debug window will pop up
with the title, "Debugging - a ZeroDivide". The problem line of code will be highlighted in the code
pane of the debugger:
print 10/x
A quick check of the variable list in the top pane shows that x is equal to 0. Substituting the
value of x in the highlighted line of code, shows that it is:
print 10/0
It is not possible to divide by 0, so the expression "10 / 0" has caused the program to stop
running. You now know that you can fix the problem by preventing the value of x from reaching 0
by changing the loop target from "0" to "1":
for x = 10 to 1 step -1
print 10/x
next x
Running the corrected code by choosing Lite Debug, will cause the program to run, and since
there is no longer an error, the Debug window will not pop up. The main window will display the
following results and the program will terminate without an error.
1
1.11111111
1.25
1.42857143
1.66666667
2
2.5
3.33333333
5
10
Compiler Reporting
Liberty BASIC includes compiler reporting. This means that the compiler has a mechanism for
reporting interesting things it finds while compiling. For example, if a program has two variable
names which are the same except for their capitalization, the reporter will find this. Here is an
example:
maxnum = 200
MaxNum = 300
Running a program containing the lines above anywhere in the code causes the compiler
reporting pane to appear at the bottom of the Liberty BASIC editor. It reports:
similar variables:
maxnum, MaxNum
Another example is variables with similar names. If one variable is called names$, but there is
another string variable name$ (no letter 's', a common mistake), the reporter will mention it.
name$ = "Carl"
names$ = "Gundel"
If the lines above are contained in a program, the compiler reports:
string variable warning:
name$, names$
Here is a picture of the compiler report pane:
Hiding the Compiler Report Pane
The compiler report pane takes up a significant amount of workspace at the bottom of the Liberty
BASIC editor. It can be hidden by right-clicking the mouse within the report pane and choosing
"Hide" from the menu.
Creating a tokenized file
Creating a *.tkn file from a *.bas source file, makes a file that:
- starts up much faster (very important for large files)
- can be distributed royalty-free using Liberty BASIC's runtime engine (gold license only)
- can be added to the Liberty BASIC's Run menu as an external program (and run instantly by
selecting it from that menu).
How to Tokenize a Source Code File
You can create a *.tkn file from one of the sample programs. Reopen the drawing program used
in The Liberty BASIC Editor section of this document.
Now pull down the "Run" menu and select "Make *.TKN File", for instance:
When the file is ready, Liberty BASIC will prompt you to enter a filename in place of the default
(draw1.tkn in this case):
Once the file has been saved to disk, you run the .TKN file from within Liberty BASIC. Pull down
the "Run" menu and select "Run *.TKN File" as shown:
A file dialog will be displayed containing a list of .TKN files. Select the draw1.tkn file as shown
and click on Ok.
Now the .TKN application will run:
Programmers who have registered with the Gold License can also run the TKN file with the
Runtime Engine.
Using the Runtime Engine
Notice: This part of the help file describes a feature of the registered version of Liberty BASIC.
Although the runtime engine described below does come with the shareware version, it is only
usable by registered users of Liberty BASIC who have purchased the Gold License. When you
register Liberty BASIC, Shoptalk Systems will provide you with a password to upgrade your copy
of Liberty BASIC to the registered version.
The RUN400.EXE runtime engine will allow you to create standalone programs from your Liberty
BASIC *.TKN files. This means that your programs can be run on computers that do not have the
Liberty BASIC language installed. To use the runtime engine, you must have the gold license
registered version of Liberty BASIC.
The runtime engine will automatically run a *.TKN file of the same filename as the runtime engine.
If you make a copy of RUN400.EXE named MYPROG.EXE, then you must name your *.TKN file
as MYPROG.TKN.
Using RUN400.EXE
First make a *.TKN file from your *.BAS file (see Creating a Tokenized File).
Preparing for distribution
You can share or sell programs that you write in Liberty BASIC. No fee or royalty payment is
necessary. The only requirements are:
a) That you limit the files that you distribute to the list below. These files can be found in the
directory in which you have installed Liberty BASIC. If you cannot see all of these files in "My
Computer" or "Windows Explorer", it is likely that your folder options are configured to hide
system files. Go to the TOOLS menu of Explorer and choose FOLDER OPTIONS. Click the
VIEW tab and look for the option to "Show all files" in the "Hidden Files" section. Be sure that
this option is checked. Here is a list of the files:
vbas31w.sll
vgui31w.sll
voflr31w.sll
vthk31w.dll
vtk1631w.dll
vtk3231w.dll
vvm31w.dll
vvmt31w.dll
run400.exe
b)You must rename a copy of RUN400.EXE to your liking. This is recommended. Try to create a
unique name so that it will be unlikely for any File Manager associations to conflict. If you rename
RUN400.EXE to MYPROG.EXE, then renaming your *.TKN file to MYPROG.TKN will cause it to
be automatically run when the runtime engine starts.
c) You can also replace the icon for RUN400.EXE with one of your own design. Use the icon
editor from the Setup menu in the Liberty BASIC editor. This step is optional. Icons for use with
the Liberty BASIC runtime engine can contain only 16 colors.
Important: Make sure that when your program is finished running that it terminates
properly with an END statement. Otherwise your program's windows may all be closed,
giving the illusion that it has stopped running.
Your Distribution Packet
Your program's TKN file, plus run400.exe (rename to match your TKN), and all of the other files in
the list above must be included in your distribution. You must also include any other files used by
your program, such as data files, text files and bitmaps. If all of these files are distributed
together, then someone who does not have the Liberty BASIC language installed on his computer
can run your program by clicking on its icon, or by double clicking on the EXE name in the list in
"My Computer" or "Windows Explorer."
Additional Distribution Information for Port I/O
If your application uses INP() and/or OUT to control hardware ports, you will need to distribute and
install certain files on your user's system. For detailed information, see Port I/O.
The LBASIC4.INI File
Liberty BASIC stores default information in a very small text file named LBASIC4.INI. This file is
also read by the runtime engine (RUN400.EXE) if it is present. One of the things that
LBASIC4.INI manages is the default font used for the the Liberty BASIC development environment
and for the runtime engine. If you want your distributed application to use the same font that is
set for the Liberty BASIC development environment, then include the LBASIC4.INI file with your
application. If you want text printed to the printer to use the same printer font that is in use by
the Liberty BASIC development environment, then include the LBASIC4.INI file with the
distribution.
Installing a Liberty BASIC Program
You can distribute your programs on a set of disks or on a CDROM and ask the user to copy
them to his hard drive. You can also place all of the files into a zip archive. This makes the
distribution smaller and insures that all needed program files stay together. The user then simply
unzips the files into the folder of his choice. There are freeware and commercial installation
programs that can be used to install programs created with Liberty BASIC. Search the internet
and software download sites to find these programs.
Icon Editor
The Icon Editor can be found in the "Setup" menu. Use it to create or modify icons and embed
them into the runtime engine for your programs.
The icon editor can make new icons or open existing icon files. It can save icons as icon files, or
it can replace the icon in the runtime engine with the icon viewed in the icon editor.
Making Icons
Liberty BASIC requires 16-color icons. Use the Icon Editor to create new icons or to modify
existing icons. To start from an existing icon, choose "Open Icon" from the "File" menu. To start
a new icon, either start drawing with the mouse by holding down the left mouse button and
dragging, or choose "New Icon" from the "File" menu to clear the Icon Editor and begin a new
icon. If the <Paint> radiobutton is checked, drawing will be opaque. If the <Mask> radiobutton
is checked, drawing will will mark transparent areas of the icon. These appear in the color cyan
on the grid in the editor. To change the color of the drawing, choose the desired color from the
"Color" menu.
Icons may be saved by choosing "Save Icon" from the "File" menu.
Changing the Runtime Icon
The runtime engine is a copy of run.exe that has been renamed to match the TKN for the program
created with Liberty BASIC. When you are finshed editing the icon in the icon editor,you can
insert it into the runtime engine by choosing "Save to Runtime EXE" from the "File" menu. You
don't need to save it as an icon file first. When an icon has been embedded within the runtime
engine, it will display in file lists in Windows Explorer, it will appear if a desktop shortcut is
created, and it will appear in the titlebar of the running program.
Here is an example that starts with a copy of the runtime engine called freeform.exe. To install
an icon which already been created:
- Start Liberty BASIC if needed
- Click on the "Setup" menu and choose "Icon Editor"
- Click on the "File" menu in the Icon Editor and open the icon file, named freeform.ico
- To install the icon in the freeform.exe file, Click on "File" and then choose "Write Icon To
Module"
- Find the freeform.exe file in the file dialog that appears, select it, and click on Ok
See also: Using the Runtime Engine
Lesson Browser
Lesson Browser Setup
Liberty BASIC includes a lesson browser. The lesson browser has the ability to link tutorials and
comments with executable code, making it a perfect venue for creating lessons and
demonstration programs. If a file selected with OPEN from the FILE menu has an extension of
"lsn", it will open in the lesson browser.
Here is the Liberty BASIC lesson browser in action:
The left side of the lesson browser has a Table Of Contents (TOC). There are chapters, and
sections inside the chapters. Clicking on one of the names in the TOC causes that part of the
lesson to display. The text or comments for the lesson will display in the upper right pane. The
comments can be scrolled if the text doesn't all fit in the pane. Any accompanying code goes in
the bottom right pane. Choosing RUN, either with the RUN button on the toolbar, or the RUN
command in the RUN menu, causes the code in the code pane to be executed. The code can be
modified as desired, and run multiple times.
Writing Lessons
A new lesson can be created by selecting NEW from the FILE menu, which offers the choice of
creating a new BASIC program, or a new LESSON. If LESSON is chosen, a default empty lesson
displays in the lesson browser. It looks like this:
A right-click in the TOC pane on the left pops up a menu with choices to give the lesson a name,
or to add a chapter. If "Rename" is chosen from this menu, an input box will pop up. The desired
name should be entered there. If "New Chapter" is chosen from the menu, an input box will pop
up to input name the chapter.
Once a chapter has been added, a right-click activates a new menu with choices to rename the
chapter, delete it, or add a section.
A click on the lesson name, chapter name, or section name in the TOC causes the comments for
that item to display in the comment pane and the code to display in the code pane. It is easy to
add to or edit the comments and code.
The lesson is saved by choosing SAVE from the FILE menu. It will be saved with the extension
"lsn."
Using a different code editor
You may use a third-party editor to create and modify Liberty BASIC code. You can even write
your own code editor in Liberty BASIC! In order to run the code with Liberty BASIC from another
program, use the following startup options to LIBERTY.EXE:
-R Run a BAS file on startup
-D Debug a BAS file on startup
--------the following three are in the registered version only--------T Make a TKN file from a BAS file on startup
-A Automatically Exit LB on completion of BAS file
-M Minimize the Liberty BASIC editor on startup
Examples:
LIBERTY -R -M PROG.BAS
LIBERTY -T -A PROG.BAS
exit
LIBERTY -D PROG.BAS
'run PROG.BAS with editor minimized
'create a TKN file from PROG.BAS then
'run the debugger on PROG.BAS
As it appears when used in a code editor written in Liberty BASIC:
RUN "LIBERTY -R -M PROG.BAS"
RUN "LIBERTY -T -A PROG.BAS"
then exit
RUN "LIBERTY -D PROG.BAS"
'run PROG.BAS with editor minimized
'create a TKN file from PROG.BAS
'run the debugger on PROG.BAS
Using Inkey$
Liberty BASIC has a special variable named Inkey$ which can be used to fetch keys pressed.
This only works with the graphicbox and with windows opened for graphics. Graphics controls
handle an event called characterInput, which copies pressed-key codes into the Inkey$ variable.
See Graphics Commands, Inkey$ , Reading Mouse Events and Keystrokes, and Using Virtual
Key Contants with Inkey$ for more details. Here is a very short program demonstrating Inkey$:
'Inkey$ example
print "Keys pressed:"
open "Inkey$ example" for graphics as #graph
print #graph, "when characterInput [keyPressed]"
print #graph, "trapclose [quit]"
[loopHere]
'make sure #graph has input focus
print #graph, "setfocus"
'scan for events
scan
goto [loopHere]
[keyPressed]
key$ = Inkey$
if len(key$) < 2 then
print "pressed: "; key$
else
print "Unhandled special key"
end if
goto [loopHere]
[quit]
print "Quitting"
close #graph
end
Using virtual key constants with Inkey$
Keyboard input can only be trapped in graphics windows or graphicboxes. When a key is
pressed, the information is stored in the variable Inkey$. To check for keypresses, send the
command "when characterInput [branchLabel]" to the graphics window or graphicbox and
evaluate Inkey$ at the designated branch label.
Special keys like Alt, Ctrl, Shift, the Arrow keys, etc. are not coded like the letters, numbers
and other symbols. They have special values, and are preceded by a value of 32 (or less) when
they are trapped by Inkey$. Windows has values defined for these special keys, which are
expressed in virtual key constants. You can use these constants (and other special Windows
constants) in your Liberty BASIC programs. See also: Graphics Commands Inkey$, Reading
Mouse and Keyboard Input, and Using Inkey$. (See Inkey$ for a discussion of the meaning of
the first character of Inkey$ when it is longer than one character.)
Key Up and Key Down
Special keys trigger a new value for Inkey$ when they are pressed and again when they are
released.
Virtual Keys
A virtual key is the key that is actually pressed on the keyboard. The VK value for a letter, say
'a' is the same for lower case 'a' and upper case 'A' because it refers to the key pressed on the
keyboard, not to the ASCII value of the input. Most keys have a graphical representation.
Pressing the 'a' key in a text window causes the letter 'a' to be displayed in the window. There
are some keys that do not have a graphical representation. It is necessary to use Virtual Key
Codes to discover which of these keys has been pressed. They include the arrow keys, the
F-keys, Shift, Ctrl, Alt, Del, etc.
Here is a program that gives a quick example:
'Inkey$ example, part two
ctrl$ = chr$(_VK_CONTROL)
print "Keys pressed:"
open "Inkey$ example" for graphics as #graph
print #graph, "when characterInput [keyPressed]"
print #graph, "trapclose [quit]"
[loopHere]
'make sure #graph has input focus
print #graph, "setfocus"
'scan for events
scan
goto [loopHere]
[keyPressed]
key$ = left$(Inkey$, 2)
if len(key$) < 2 then
print "pressed: "; key$
else
if right$(key$, 1) = ctrl$ then
print "CTRL was pressed"
else
print "Unhandled special key"
end if
end if
goto [loopHere]
[quit]
print "Quitting"
close #graph
end
Some other virtual key code constants:
F1 through F16
_VK_F1 through _VK_F16
0 through 9 on regular keyboard _VK_0 through _VK_9
0 through 0 on number pad
_VK_NUMPAD0 through _VK_NUMPAD9
a through z
_VK_A through _VK_Z
Alt
_VK_MENU
Shift
_VK_SHIFT
Home
_VK_HOME
End
_VK_END
Insert
_VK_INSERT
Delete
_VK_DELETE
NumLock
_VK_NUMLOCK
Arrow Up
_VK_UP
Arrow Down
_VK_DOWN
Arrow Left
_VK_LEFT
Arrow Right
_VK_RIGHT
Error Messages
Sometimes when using Liberty BASIC, there are error messages presented while compiling
(called compile-time errors) and while running a program (called run-time errors).
Here are some compile-time errors:
Syntax error - This means that some error was made while typing in a BASIC statement. You
should examine the line and look for typing mistake.
Type mismatch error - This means that you tried to use a string where a number should be
used, or a number where a string should be used.
Here are some run-time errors:
Branch label [exampleLabel] not found - The program tried to GOTO or GOSUB to a label that
doesn't exist.
Float divide by zero exception - The program tried to divide a number by zero, which is not
possible to do.
File filename not found - This error can occur when attempting to load a bitmap image from a
disk file into memory using the LOADBMP statement, and when no file of the specified filename
is found to exist.
Bitmap named bitmapname not found - This error can occur when attempting to save a bitmap
from memory to a disk file using the BMPSAVE statement, or when attempting to use the
DRAWBMP command, and a bitmap name is specified which doesn't exist in the program's
memory.
Control type fonts are set with: !FONT face_Name width height - An error was made specifying
the font for a control (controls which return this error include button, textbox, radiobutton,
checkbox).
undefined struct: structname - An expression referred to the name of an undefined struct (see
the help file for information about the STRUCT statement).
root.field.struct undefined - An expression referred to a field which is undefined for a struct which
is defined (named root in this example).
Errors when using serial communications - There are a handful of run-time error messages which
terminate program execution. These usually correlate to API function call failures that occur
when attempting different operations. In this case, the error is reported by Windows, but the
description of the reported error is generated by Liberty BASIC. Here is a list of the error
messages:
Port must be open
SetCommState failed
Unable to get DCB
Output queue full
Unable to send RTS
Unable to clear RTS
Unable to clear DTR
Unable to set DTR
Byte size too small
Byte size too large
Invalid port, or port not open
Unable to get max port
Unable to set break
The device is already open
The device identifier is invalid or unsupported
The device's baud rate is unsupported
The specified byte size is invalid
The default parameters are in error
The hardware is not available (is locked by another device)
The function cannot allocate the queues
The device is not open
The following run-time errors are indications of more subtle problems in Liberty BASIC. If you
see one of these errors, send email to [email protected] describing in as much detail how
the error happened. If you have BASIC code that can reproduce the error, please include it in
your message.
Index: n is outside collection bounds
The collection is empty
Object is not in the collection
Error Log Explained
Sometimes the Liberty BASIC compiler finds a problem with your code, and it will stop and give
you an error message of some kind. Usually this will appear on the status line at the bottom of
the Liberty BASIC editor window. At other times you may see a popup error notice when running
a program that you've written. There are a variety of programmer errors which can give rise to
such error messages. For example, perhaps a program tries to divide a number by zero (which is
mathematically impossible to do), or maybe a program closes a file, and then tries to close it
again (it isn't possible to close a file that isn't open). These kinds of programmer bugs result in a
popup error message.
However, sometimes you will get a popup error notice that mentions the ERROR.LOG file. This
means that you have stumbled across a nastier sort of bug in Liberty BASIC itself, and Liberty
BASIC has written something about that bug in the ERROR.LOG file.
What should you do with the information in the ERROR.LOG file? Some people have contacted
us more than a little confused after looking at the contents of the this file. Don't worry. This
information is much more useful to us, since it contains details about the internals of Liberty
BASIC. We have a pretty good idea what it means. If you are so inclined, you can send it to us
and we'll take a look at it and try to help you with the bug, and also use the information to fix
bugs in new releases of Liberty BASIC.
To do this, send email to [email protected] and explain in as much detail as you can
how the error happened. If you aren't sure how it happened, see if you can make the error happen
again. It can be very hard, or nearly impossible to fix bugs when they cannot be recreated.
Sometimes it helps us to figure out the cause of the error when we have access to the source
code and other files that you were using when the error happened. If you can, please provide us
with these things so that we can serve you best. We realize of course that sometimes you may
not want to share your code and files for privacy reasons or because your company policy may
forbid it, and this is perfectly understandable.
Now that you have a better understanding of what ERROR.LOG is and how to make use of it, you
will be able to help us improve the quality of the Liberty BASIC programming language!
Port I/O
Distributing your application using INP() and/or OUT to control hardware ports.
Because 32-bit versions of Windows do not have a built-in API for doing hardware I/O, you will
need to distribute driver files with your Liberty BASIC application if it requires the use of INP() and
OUT. You can find all runtime files you need to distribute in the ntport subdirectory of your
Liberty BASIC v3.0 install.
They are:
ntport.dll (Application Dynamic Link Library)
zntport.sys (Windows NT/2000/XP driver)
For Windows 95/98/ME
When you install your application to a Windows 95/98/ME system, you should install ntport.dll to
your client's Windows\System directory. You need not distribute the zntport.sys.
For Windows NT/2000/XP
When you install your application to a Windows NT/2000/XP system, you have two choices:
1) If all the users have administrative rights (which is usually the case unless someone in your IT
department has not given you administrative rights) you can install ntport.dll and zntport.sys to
your client's WinNT\System32 directory. In this case, you need not do any other configuration.
2) If some users don't have administrative rights, you need to create an installation program to
install the NTPort Library driver. The installation program should do following steps:
- Install ntport.dll to WinNT\System32 directory
- Install zntport.sys to WinNT\System32\drivers directory
- Import the registry settings from ntport2.reg - this file is in the ntport directory
- Restart Windows
In this case, you still need administrative rights to run the installation program, but after the
reboot, any normal user can use your program.
Making API and DLL Calls
Liberty BASIC can make 32-bit Windows API calls and also bind to third party
Dynamic-Link-Libraries. Liberty BASIC programmers now have access to hundreds of functions
provided in Windows and from third-party sources that can greatly increase productivity.
Calling APIs and DLLs
Informational resources about APIs/DLLs
What are APIs/DLLs?
How to make API/DLL calls
Example Programs
Using hexadecimal values
Using Types with STRUCT and CALLDLL
Passing Strings into API Calls
Caveats
TroubleShooting
Low memory situtations
Most computers today have enough memory to run Liberty BASIC. If you find that you are
getting low memory errors, try the following:
- Close other running Windows and DOS applications.
- Reduce the size of your Smartdrive disk cache or eliminate it.
- Increase the size of your Windows swapfile.
General Protection Faults
Most general protection faults in Liberty BASIC are caused by:
- Video drivers. A major problem with environments like Windows and OS/2, video drivers are
often immature and/or incompletely implemented according to spec. Try to get the most recent
version of the Windows drivers for your video card. If it isn't a showstopper for you, try the
standard 16 color drivers that come with Windows.
- Low memory (see above). If you are getting a general protection fault in VSTUB.EXE, you
need either a bigger swapfile, more physical RAM, or both.
Liberty BASIC Language
This section of the help system deals with the the structure, syntax and usage of the Liberty
BASIC language. It contains information on the following topics:
Logic and Structure
Arrays and Variables
File Operations
Mathematics
Text Usage
Graphics
Sprites
API and DLL Calls
Logical Line Extension
Liberty BASIC supports a technique called logical-line-extension, which allows one line of code
to be split over several lines of text in the editor. For example:
open "user32" for dll as #u
calldll #u, "GetWindowRect", hMain as long, Rect as struct, result as long
close #u
A line can get long and difficult to read! Consider the following equivalent.
Open "user32" For DLL As #u
CallDLL #u, "GetWindowRect",_
hMain As long,_
Rect As struct,_
result As long
Close #u
When the line is broken up with the _ character, the code is more readable.
The NOMAINWIN command
When a Liberty BASIC program is run, a simple text window called the mainwin appears. It can
be used to display text and to ask the user for input. To suppress the mainwin, a nomainwin
statement is used:
nomainwin
'don't open a mainwin
menu #draw, "Draw", "Draw now", [drawNow]
open "No man's land, er... nomainwin" for graphics as #draw
print #draw, "trapclose [quit]"
wait
[drawNow]
print #draw, "cls ; home ; down ; north"
for x = 1 to 100
print #draw, "turn 122 ; go "; str$(x*2)
next x
print #draw, "flush"
wait
[quit]
confirm "Do you want to quit Buttons?"; quit$
if quit$ = "no" then wait
close #draw
end
The mainwin can be used when a program is under development. If a program locks up or
crashes, it can still be closed by clsoing the mainwin. It is important that a program have
trapclose handlers for all of its windows when the nomainwin command is used, otherwise the
program may still be running with no way to close it. All programs should finish executing with
an END statement (like the example above) to ensure that programs actually do clean up by
themselves.
If a program continues running with no way to close it, it may be ended by clicking on the Run
menu on the Liberty BASIC editor and selecting Kill BASIC Programs.
Functions and Subroutines
See also: Function, Sub, Branch Labels, GOTO and GOSUB, GOSUB, RETURN, GOTO,
GLOBAL, BYREF
Liberty BASIC supports user defined functions and subroutines. They look similar to their
QBASIC equivalents:
'define a function for returning a square root
function squareRoot(value)
squareRoot = value ^ 0.5
end function
and...
'create a subroutine for logging to an event log
sub logToFile logString$
open "c:\logdir\event.log" for append as #event
print #event, time$()
print #event, logString$
close #event
end sub
A user-defined function such as the one above can be treated like any built-in function:
print "The square root of 5 is "; squareRoot(5)
Subroutines in Liberty BASIC are accessed using the CALL statement. For example:
'Now log some info to disk
call logToFile "The square root of 5 is " + squareRoot(5)
The variable scoping in subroutines and functions is local. This means that by default, the
names given to variables inside the definition of a subroutine or function are only meaningful
inside that definition. For example, a variable named "counter" can exist in the main program
code. The program can use a function which also contains a variable named "counter" in its
code. When the function is used, the "counter" variable in the calling code doesn't lose its value
when the function changes the value of its variable named "counter". They are in fact different
variables, although they share the same name. Variables passed into subroutines may be
passed by reference, which allows them to be changed in the subroutine or function, and the
change is reflected in the main program. For more on passing byref, please see below.
Here is an example that uses a function:
'set my variable counter
for counter = 1 to 10
print loop(counter)
next counter
end
function loop(limit)
for counter = 1 to limit
next counter
loop = counter
end function
Exceptions to the variable scoping mechanism include the following things which are globally
visible everywhere in a Liberty BASIC program:
- Arrays
- Things with handles (files, windows, DLLs, communications ports)
- Structs
GLOBAL
In general, variables used in the main program code are not visible inside functions and
subroutines. Variables inside functions and subroutines are not visible in the main program.
Liberty BASIC 4 introduces the GLOBAL statement to create global variables. Variables
declared as GLOBAL can be seen everywhere in a program. See GLOBAL. The special system
variables lWindowWidth, WindowHeight, UpperLeftX, UpperLeftY, ForegroundColor$,
BackgroundColor$, ListboxColor$, TextboxColor$, ComboboxColor$, TexteditorColor$,
DefaultDir$, Joy1x, Joy1y, Joy1z, Joy1button1, Joy1button2, Joy2x, Joy2y, Joy2z, Joy2button1,
Joy2button2, and Com now have true global status. GLOBALS are specified and used like this:
'define a global string variable:
global title$
title$ = "Great Program!"
'Special system variables don't
'need to be declared as global,
'since they have that status automatically
BackgroundColor$ = "darkgray"
ForegroundColor$ = "darkblue"
'call my subroutine to open a window
call openIt
wait
sub openIt
statictext #it.stext, "Look Mom!", 10, 10, 70, 24
textbox #it.tbox, 90, 10, 200, 24
open title$ for window as #it
print #it.tbox, "No hands!"
end sub
NOTE: Branch labels inside functions and subroutines are not visible to code outside those
functions and subroutines. If code in the main program tries to access a branch label inside a
function or subroutine, this will cause get an error. Likewise, functions and subroutines cannot
use branch labels defined outside their scope.
Passing Arguments into Subroutines and Fuctions - by value and BYREF
Through Liberty BASIC 3, values can only be passed into a user subroutine or function by value.
"Passing by value" is a common term meaning that once a value is passed into a subroutine or
function, it is just a copy of the passed value and has no relationship to the original value. If the
value is changed in the called subroutine or function, it does not change in the main program.
Now Liberty BASIC 4 allows us to pass variables by reference. This means that if a subroutine or
function so declares, it can modify the value of a variable passed in, and when the subroutine or
function ends and execution returns to the caller the change will be reflected in the variable that
was used as a parameter in the call.
By default and without any direct instruction by the programmer, parameters passed into user
defined functions and subroutines in QBasic and Visual Basic are passed by reference. That is
not true in Liberty BASIC, where values are passed by value as the default. Passing by reference
is only done when the BYREF keyword is used.
Example of passing by value
This example shows how passing by value works. The only value that comes back from the
function is the one assigned to result$ when the function call returns.
'this is the way it always worked
x = 5.3
y = 7.2
result$ = formatAndTruncateXandY$(x, y)
print "x = "; x
print "y = "; y
print result$
end
function formatAndTruncateXandY$(a, b)
a = int(a)
b = int(b)
formatAndTruncateXandY$ = str$(a)+", "+str$(b)
end function
Example of passing by reference
In contrast to the "passing by value" example, each of the parameters in the function in this
example are to be byref (pass by reference). This means that when the value of a and b are
changed in the function that the variables used to make the call (x and y) will also be changed to
reflect a and b when the function returns. Try stepping through this example in the debugger.
'now you can pass by reference
x = 5.3
y = 7.2
result$ = formatAndTruncateXandY$(x, y)
print "x = "; x
print "y = "; y
print result$
'and it works with subroutines too
wizard$ = "gandalf"
call capitalize wizard$
print wizard$
end
function formatAndTruncateXandY$(byref a, byref b)
a = int(a)
b = int(b)
formatAndTruncateXandY$ = str$(a)+", "+str$(b)
end function
sub capitalize byref word$
word$ = upper$(left$(word$, 1))+mid$(word$, 2)
end sub
More about pass by reference
Passing by reference is only supported using string and numeric variables as parameters. You
can pass a numeric or string literal, or a computed number or string, or even a value from an
array, but the values will not come back from the call in any of these cases. Step through the
example in the debugger to see how it works!
'you can also call without variables, but the changes
'don't come back
result$ = formatAndTruncateXandY$(7.2, 5.3)
print result$
'and it works with subroutines too
call capitalize "gandalf"
a$(0) = "snoopy"
call capitalize a$(0)
end
function formatAndTruncateXandY$(byref a, byref b)
a = int(a)
b = int(b)
formatAndTruncateXandY$ = str$(a)+", "+str$(b)
end function
sub capitalize byref word$
word$ = upper$(left$(word$, 1))+mid$(word$, 2)
end sub
Branch Labels, GOTO and GOSUB
See also: GOSUB, RETURN, GOTO, Functions and Subroutines, Function, Sub
Branch Labels
Liberty BASIC will accept numbers as branch labels. This is useful when using old BASIC code.
The numbers don't change the order of the code. The following two short programs are
essentially the same:
10
20
30
40
50
REM count to ten
for x = 1 to 10
print x
next x
end
20
40
10
30
50
REM count to ten
for x = 1 to 10
print x
next x
end
Instead of using numeric branch labels, it is better to use alphanumeric ones, because they are
descriptive and help the programmer remember what is happening in a block of code. In Liberty
BASIC, alphanumeric branch labels are surrounded by square braces: [myBranchLabel] Spaces
and numbers are not allowed as part of branch label names, and names may not start with a
numeral.
Here are some valid branch labels: [mainMenu] [enterLimits] [repeatHere]
Here are some invalid branch labels: [enter limits] mainMenu [1moreTime]
In QBASIC, branch labels end with a colon and looks like this: myBranchLabel:
The above program doesn't really need branch labels. It looks like this without them:
'count to ten
for x = 1 to 10
print x
next x
end
A program to count without a for/next loop looks like this:
'count to ten
[startLoop]
x = x + 1
print x
if x < 10 then [startLoop]
end
Just for comparison, in QBASIC it looks like this:
'count to ten
startLoop:
x = x + 1
print x
if x < 10 then goto startLoop
end
NOTE: Branch labels inside functions and subroutines are not visible to code outside those
functions and subroutines. Likewise, functions and subroutines cannot use branch labels defined
outside their scope.
GOTO
To continue program execution at a specified branch lable, issue a GOTO command. See
GOTO.
GOTO [startLoop]
Do not use GOTO to exit a FOR/NEXT or WHILE/WEND loop prematurely.
GOSUB
To continue program execution at a specifed GOSUB routine, issue a GOSUB command. The
GOSUB routine ends with a RETURN statement that returns program execution to the line of
code following the GOSUB command. See GOSUB, RETURN.
GOSUB [initialize]
Conditional Statements
Conditional statements are implemented with the IF...THEN...ELSE...END IF structure.
See also: Boolean Evaluations, IF...THEN, Select Case
IF test expression THEN expression(s)
IF test expression THEN expression(s)1 ELSE expression(s)2
IF test expression THEN
expression(s)1
END IF
IF test expression THEN
expression(s)1
ELSE
expression(s)2
END IF
Description:
The IF...THEN statement provides a way to change program flow based on a test expression. For
example, the following line directs program execution to branch label [soundAlarm] if fuel runs
low.
if fuel < 5 then [soundAlarm]
Another way to control program flow is to use the IF...THEN...ELSE statement. This extended
form of IF...THEN adds expressiveness and simplifies coding of some logical decision-making
software. Here is an example of its usefulness.
Consider:
[retry]
input "Please choose mode, (N)ovice or e(X)pert?"; mode$
if len(mode$) = 0 then print "Invalid entry! Retry" : goto [retry]
mode$ = left$(mode$, 1)
if instr("NnXx", mode$) = 0 then print "Invalid entry! Retry" : goto [retry]
if instr("Nn", mode$) > 0 then print "Novice mode" : goto [main]
print "eXpert mode"
[main]
print "Main Selection Menu"
The conditional lines can be shortened to one line as follows:
if instr("Nn",mode$)> 0 then print "Novice mode" else print "eXpert mode"
Some permitted forms are as follows:
if a <
if a <
if a <
if a <
if a <
b then statement else statement
b then [label] else statement
b then statement else [label]
b then statement : statement else statement
b then statement else statement : statement
if a < b then statement : goto [label] else statement
if a < b then gosub [label1] else gosub [label2]
Any number of variations on these formats are permissible. The (a < b) BOOLEAN expression is
of course only a simple example chosen for convenience. It must be replaced with the correct
expression to suit the problem.
IF...THEN...END IF is another form using what are called conditional blocks. This allows great
control over the flow of program decision making. Here is an example of code using blocks.
if qtySubdirs = 0 then
print "None."
goto [noSubs]
end if
A block is merely one or more lines of code that are executed as a result of a conditional test.
There is one block in the example above, and it is executed if qtySubdirs = 0.
It is also possible to use the ELSE keyword as well with blocks:
if qtySubdirs = 0 then
print "None."
else
print "Count of subdirectories: "; qtySubdirs
end if
This type of coding is easy to read and understand. There are two blocks in this example. One
is executed if qtySubdirs = 0, and one is executed if qtySubdirs is not equal to 0. Only one of
the two blocks will be executed (never both as a result of the same test).
These conditional blocks can be nested inside each other:
if verbose = 1 then
if qtySubdirs = 0 then
print "None."
else
print "Count of subdirectories: "; qtySubdirs
end if
end if
In the example above, if the verbose flag is set to 1 (true), then display something, or else skip
the display code entirely.
Comparison to QBasic Conditional Statements
Liberty BASIC supports conditional blocks very similar to those in QBasic. The format looks like
the following silly example:
if blah blah blah then
some code here
end if
or like:
if blah blah blah then
some code here
else
some other code here
end if
Blocks may be nested:
if sis boom bah then
if blah blah blah then
some code here
end if
else
some other code here
end if
The elseif keyword is not supported. Here is an example using elseif (QBasic):
'QBasic only
if sis boom bah then
print "Yippie!"
elseif la dee da then
print "So what!"
end if
Instead in Liberty BASIC, it looks like this:
'Liberty BASIC - no elseif
if sis boom bah then
print "Yippie!"
else
if la dee da then
print "So what!"
end if
end if
Select Case Statement
Many BASICs have a Select Case statement, and Liberty BASIC 3 adds that capability also. It
is a good alternative when many possible conditions must be evaluated and acted upon. The
Select Case construction also provides a Case Else statement for implementing a routine when
the evaluated condition meets none of the cases listed. For more, see SELECT CASE.
SELECT CASE is a construction for evaluating and acting on sets of conditions. The syntax for
Select Case is:
SELECT CASE var
CASE x
'basic code
'goes here
CASE y
'basic code
'goes here
CASE z
'basic code
'goes here
CASE else
'basic code
'goes here
END SELECT
Details:
SELECT CASE var - defines the beginning of the construct. It is followed by the name variable
that will be evaluated. The variable can be a numeric variable or a string variable, or an
expression such as "a+b".
CASE value - following the SELECT CASE statement, are individual CASE statements,
specifying the conditions to evaluate for the selected variable. Code after the "case" statement is
executed if that particular case evaluates to TRUE. There is no limit to the number of conditions
that can be used for evaluation.
CASE ELSE - defines a block of code to be executed if the selected value does not fulfil any other
CASE statements.
END SELECT - signals the end of the SELECT CASE construct.
Example usage:
num = 3
select case num
case 1
print "one"
case 2
print "two"
case 3
print "three"
case else
print "other number"
end select
The example above results in output in the mainwin of:
three
Strings
SELECT CASE can also evaluate string expressions in a similar way to numeric expressions.
String example:
var$="blue"
select case var$
case "red"
do stuff
case "green","yellow"
do stuff
case else
do stuff
end select
MULTIPLE CASES - may be evaluated when separated by commas.
For example:
select case a+b
case 4,5
do stuff
case 6,7,8
do other stuff
end select
Once one of the CASEs has been met, no other case statements are evaluated. In the following
example, since the value meets the condition of the first CASE statement, the second CASE
statement isn't considered, even though the value meets that condition also.
num = 3
select case num
case 3, 5, 10
print "3, 5, 10"
case 3, 12, 14, 18
print "3, 12, 14, 18"
case else
print "Not evaluated."
end select
The example above results in output in the mainwin of:
3, 5, 10
Evaluating multiple conditions in the CASE statement
Omitting the expression (or variable) in the SELECT CASE statement causes the conditions in
the CASE statements to be evaluated in their entirety. To omit the expression, simply type
"select case" with no variable or expression after it. In the following example, since "value"
evaluates to the first CASE statement, the printout says "First case"
'correct:
value = 58
select case
case (value < 10) or (value > 50 and value < 60)
print "First case"
case (value > 100) and (value < 200)
print "Second case"
case (value = 300) or (value = 400)
print "Third case"
case else
print "Not evaluated"
end select
If the expression "value" is placed after "select case", then none of the CASE statements is met,
so CASE ELSE is triggered, which prints "Not evaluated". The expression must be omitted to
evaluate multiple values in a SELECT CASE statement:
'wrong:
select case value
'correct:
select case
Nested statements
Nested select case statements may be used. Example:
select case a+b
case 4,5
select case c*d
case 100
do stuff
end select
do stuff
case 6,7
do other stuff
end select
Bitwise Operations
What are bitwise operations?
Bitwise operations modify the pattern of bits in an object. Computers use binary numbers. A
binary number consists of one or more digits, which represent two different states, such as on/off.
An example of a binary number looks like this:
10010
The first digit on the RIGHT side of the number is in the one's column. The second digit from the
right is in the two's column, then comes the four's column, the eight's column, the sixteen's
column and so on. Each column contains a "bit", or binary digit.
16
8
4
2
1
This example binary number, "10010", converted to a decimal number, evaluates like this.
16
1
8
0
4
0
2
1
1
0
16 * 1
= 16
8 * 0
= 0
4 * 0
= 0
2 * 1
= 2
1 * 0
= 0
_________________________________
total
= 18 in decimal numbers
It is possible to operate on the bits using BOOLEAN operators.
AND
The AND operator will set a bit only if both input bits are set.
'Bitwise AND
'This operation sets a bit only if
'both inputs have the bit set.
print 7 and 11
'16 8 4 2 1
'-------------' 0 0 1 1 1
' 0 1 0 1 1
'
'
^ ^
numbers are 1.
'
' yields 3
'
'
' 7 in binary
' 11 in binary
' These are the place values where both
' Hence, 2 + 1 = 3
OR
The OR operator will set a bit if either input bit is set.
'Bitwise OR
'This operation sets a bit if
'either input has the bit set.
print 7 or 11
' yields 15
'16 8 4 2 1
'-------------' 0 0 1 1 1
' 0 1 0 1 1
'
'
^ ^ ^ ^
number has a 1.
'
'
'
' 7 in binary
' 11 in binary
' These are the place values where either
' Hence, 8 + 4 + 2 + 1 = 15
XOR
The Bitwise XOR operation sets a bit only if exactly one of the inputs has the bit set.
'Bitwise XOR
'This operation sets a bit only if
'exactly one of the inputs has the bit set.
print 7 xor 11
' yields 12
'16 8 4 2 1
'-------------' 0 0 1 1 1
' 0 1 0 1 1
'
'
^ ^
of the
'
See also: BOOLEAN
'
'
' 7 in binary
' 11 in binary
' These are the place values where exactly one
' numbers has a 1. Hence, 8 + 4 = 12
Boolean Evaluations
What are booleans evaluations?
A boolean value is either true or false. When used as types in CallDLL, booleans evaluate to (0 =
false), (nonzero = true). A true value is any value not zero, but is usually considered to be either
"1" or "-1".
Boolean Conditions
Tests that are placed into conditional clauses like IF/THEN, WHILE/WEND, and CASE
statements return a boolean value. Here is an evaluation:
if x < 3 then [doSomething]
The code is evaluating the condition (x < 3) and branching to the [doSomething] label if the
condition is TRUE. If the value of x is 1, then the condition evaluates to TRUE and the program
branches to [doSomething]. If the value of x is 7, then the condition evaluates to FALSE and the
program does NOT branch to [doSomething].
Boolean Operators
=
a = b
a is equal to b
<
a < b
a is less than b
<= a <= b
a is less than or equal to b
>
a > b
a is less than b
>= a >= b
a is less than or equal to b
<> a <> b
a is not equal to b
Multiple Conditions
When evaluating multiple conditions, each condition must be placed inside parentheses, as in the
examples below.
AND - both conditions must be met for the test to evaluate to TRUE.
a = 2 : b = 5
If (a<4) and (b=5) then [doSomething]
In this code, (a must be less than 4) AND (b must be equal to 5) for the program to branch to
[doSomething]. Since both of these conditions are true, the program will advance to
[doSomething]
a = 14 : b = 5
If (a<4) and (b=5) then [doSomething]
This similar example evaluates to FALSE because (a is not less than 4), so the program will not
advance to [doSomething]
OR - at least one of the conditions must be met for the test to evaluate to TRUE.
a = 14 : b = 5
If (a<4) OR (b=5) then [doSomething]
In this code, at least one of the conditions (a must be less than 4) OR (b must be equal to 5)
must evaluate to TRUE for the program to branch to [doSomething]. Since the example shows
that (b is equal to 5), the program will advance to [doSomething], because at least one of the
conditions evaluates to TRUE.
XOR - only one of the conditions must be met for the test to evaluate to TRUE.
a = 14 : b = 5
If (a<4) XOR (b=5) then [doSomething]
In this code, only one of the conditions (a is less than 4) OR (b is to 5) must evaluate to TRUE for
the program to branch to [doSomething]. In the example, only the second condition evaluates to
true, so the program will advance to [doSomething].
a = 2 : b = 5
If (a<4) XOR (b=5) then [doSomething]
In the second XOR example, both conditions evaluate to true, so the program will NOT advance to
[doSomething].
NOT - reverses the value.
If NOT((a<4) AND (b=5)) then [doSomething]
In this code, both of the conditions (a must NOT be less than 4) AND (b must be equal to 5) must
evaluate to TRUE for the program to branch to [doSomething].
BOOLEAN TRUTH TABLE
Input1
OP
Input2
= Result
0
0
1
1
AND
AND
AND
AND
0
1
0
1
=
=
=
=
0
0
0
1
0
0
1
1
OR
OR
OR
OR
0
1
0
1
=
=
=
=
0
1
1
1
0
0
1
1
XOR
XOR
XOR
XOR
0
1
0
1
=
=
=
=
0
1
1
0
See also: Bitwise Operations
Looping
Liberty BASIC provides three constructions for looping. One is FOR/NEXT another is
WHILE/WEND, and the third is DO LOOP.
FOR/NEXT executes a loop a set number of times, which is determined by the starting and
ending values in the FOR statement and by the size of the STEP. For more on For...Next loops,
click here.
WHILE/WEND executes a loop as long as a specified condition evaluates to TRUE. For more on
While...Wend loops, click here.
DO LOOP provides a loop that always executes once and then only loops back as long as a
condition is met. For more on DO LOOPs, click here.
WARNING: In loops, an "exit" statement is provided for instances where it is necessary to exit
the loop before the counter variable has reached its max, or the "while" condition evaluates to
false. Do not attempt to exit a loop prematurely by issuing a "goto" statement.
FOR/NEXT
The FOR . . . NEXT looping construct provides a way to execute code a specific amount of times.
A starting and ending value are specified:
for var = 1 to 10
{BASIC code}
next var
In this case, the {BASIC code} is executed 10 times, with var being 1 the first time, 2 the second,
and on through 10 the tenth time. Optionally (and usually) var is used in some calculation(s) in
the {BASIC code}. For example if the {BASIC code} is print var ^ 2, then a list of squares for var
will be displayed upon execution.
The specified range could just as easily be 2 TO 20, instead of 1 TO 10, but since the loop
always counts +1 at a time, the first number must be less than the second. The way around this
limitation is to place STEP n at the end of for FOR statement:
for index = 20 to 2 step -1
{BASIC code}
next index
This loops 19 times returning values for index that start with 20 and end with 2. STEP can be
used with both positive and and negative numbers and it is not limited to integer values. For
example:
for x = 0 to 1 step .01
print "The sine of "; x; " is "; sin(x)
next x
For more on For...Next loops, click here.
WHILE/WEND
As shown above, Liberty BASIC includes a for/next looping construct. It also has a while/wend
looping construct. Here is the above program rewritten using while/wend.
'count to ten
x = 0
while x < 10
x = x + 1
print x
wend
end
One useful thing that can be done with while/wend is to wrap the boolean expression in a NOT()
function, which effectively turns while/wend into a "while condition is false" do construct:
'count to ten
while not(x = 10)
x = x + 1
print x
wend
end
For more on While...Wend loops, click here.
DO LOOP
Liberty BASIC also provides a DO LOOP structure for cases when you want a loop that always
executes once and then only loops back as long as a condition is met. It will continue looping
back and executing the code as long as the booleanExpr evaluates to true. Here is the routine
that counts to 10 using DO LOOP with while and DO LOOP with until.
'count to 10 using "loop while" and "loop until"
do
print a
a = a + 1
loop while a < 11
print
do
print b
b = b + 1
loop until b = 11
For more on DO LOOPs, click here.
Recursion
Liberty BASIC supports recursive subroutine and function calls. This means that a function can
call itself. When it does this it makes a copy of itself, reusing its variable names. The values
are not overwritten. It is important to place an evaluation statement inside a recursive function
that causes the function to finish and return to the main code. Care should be taken to avoid
creating an endlessly looping recursive function. The two examples below contains an
"IF...THEN" evaluation that, when met, causes the function to stop calling itself and return
control to the main program.
Here is an example of a subroutine which counts down from a number.
'countdown
print "Let's count down from three."
call countDown 3
end
sub countDown number
print number
if number > 1 then call countDown number-1
end sub
Now here's an example of a recursive function that returns the factorial of a number. A factorial
is obtained by taking a number and multiplying it in turn by each integer less than itself. The
factorial of 5 is 5x4x3x2x1=120. The factorial of 7 is 7x6x5x4x3x2x1=5040. The numbers get
big in a hurry after this. For example, the factorial of 15 is 1307674368000!!
'factorial
input "Compute factorial for?"; n
print factorial(n)
end
function factorial(a)
factorial = 1
if a > 1 then factorial = a*factorial(a-1)
end function
The Timer Statement
Liberty BASIC includes a timer statement which uses the computer's hardware timer. Most
PCs have a timer with a resolution of approximately 56 milliseconds which ticks 18 times a
second. The timer allows the addition of a clock to a program, or or it allows the program to
wake up every few seconds to check for some condition, or it can be used to control the rate of
animation of a game. There are other uses as well.
The TIMER command specifies how many milliseconds to wait between timer signals. One
second is 1000 milliseconds. It also specifies a routine to serve as an event handler. The timer
may be turned off and then back on.
Here is a short example:
timer 3000, [threeSeconds]
wait
[threeSeconds]
timer 0
confirm "Three seconds have passed.
if repeat then
timer 3000, [threeSeconds]
wait
end if
end
See also: TIMER
Do it again?"; repeat
Callbacks for API Functions
Liberty BASIC 3 supports the use of a callback address that can be passed into an API function
so that a function within a program can be called by an API function. The syntax:
callback address, functionNameProc(type, ...type), return type
For more, see CALLBACK.
Variables
See also: Numeric Variables, String Literals and Variables, GLOBAL
LITERALS
A literal value is hard-coded into a program. Here are two literals, printed to the mainwin. The
first is a number. The second is a string of text characters.
print 57
print "Hello World"
produces
57
Hello World
VARIABLES
A variable is a name used in the code that represents a string or numeric value. The value
assigned to the variable name may change as the program runs. The program can always
access the current value of the variable by refering to its name. In this example, a value of "3" is
assigned to a variable called myNumber:
myNumber=3
print myNumber
produces
3
If a different value is later assigned to the variable called myNumber:
myNumber=17
print myNumber
produces
17
In Liberty BASIC variables are either string or numeric. A variable name can start with any letter
and it can contain both letters and numerals, as well as dots (for example: user.firstname).
There is no practical limit to the length of a variable name. The variable names are uppercase
and lowercase sensitive, so these are not the same variable:
supercalifragilisticexpialadocious
superCaliFragilisticExpialaDocious
As in most versions of BASIC, string variable names end in a "$" character for example:
boast$ = "String variables can contain 2 million characters!"
The boast above is correct. In Liberty BASIC, string variables can be huge, containing as many
as 2 million characters.
Unlike some BASICs, Liberty BASIC does not require variables to be declared before they may
be used in code. It is importatnt to check the spelling/capitalization of variables, because
variable names are case sensitive. If 'Compiler Reporting' is enabled in the options dialog,
Liberty BASIC will give an alert in a special pane at the bottom of the editor when a program
contains variables with similar names, like (name$ and names$) or (name$ and Name$.)
GLOBAL
In general, variables used in the main program code are not visible inside functions and
subroutines. Variables inside functions and subroutines are not visible in the main program.
Liberty BASIC 4 introduces the GLOBAL statement to create global variables. Variables
declared as GLOBAL can be seen everywhere in a program. The special system variables like
WindowWidth, WindowHeight, etc. now have true global status. GLOBALS are specified and
used like this:
global true, false, filename$
true=1
false=0
filaname$ = "readme.txt"
Arrays
Liberty BASIC supports single and double dimensioned arrays. These can be defined as string
or numeric arrays. The extents of the dimensions can be in excess of 2 million elements, if
there is enough RAM available.
Arrays that contain more than 10 elements must be dimensioned before they can be used.
Arrays are dimensioned with the DIM statement.
DIM students$(20)
DIM ages(100)
Resizing is done to any array with the REDIM statement, but doing so will erase the contents of
the array.
REDIM students$(30)
Double dimensioned arrays must always be dimensioned with the DIM statement before use.
DIM scores$(20, 10)
The equal sign ( = ) is used to assign a value to an element in an array. The element is referred
to by its index number. The index may be expressed as a literal number or as a numeric
variable. The element at index 2 in the following example is filled with "John." The element at
index 7 is filled with the number 12.
students$(2) = "John"
ages(7) = 12
Arrays can be used in most places where a variable or literal value can be used. To access the
value of an element in an array, the index for that element is placed inside the parentheses. In
this example, the value at index 4 is retrieved from the array:
thisKid$ = students$(4)
or
print students$(4)
Using Arrays in Loops
One of the great advantages of arrays is their ability to be accessed in loops, as in the following
example, which prints the names of elements 1 - 30 that are contained in the array.
for i = 1 to 30
print students$(i)
next
Input to Arrays
In earlier versions of Liberty BASIC, it wasn't possible to input directly into arrays. That limitation
no longer exists in Liberty BASIC 3. It is now possible to use both Input and Line Input to read
data from opened files directly into arrays.
'now works:
open "myfile.dat" for input as #f
input #f, itemArray$(1)
close #f
It is still necessary to READ data into a variable, then fill an array element, however:
'wrong:
read numericArray(1)
'correct:
read num1
numericArray(1) = num1
For more, see ARRAYS, DIM, SORT, and Sorting Arrays.
Sorting Arrays
Liberty BASIC provides a built-in sorting command for arrays. Here is an example:
'sort 100 numbers
dim numbers(100)
for x = 0 to 99
numbers(x) = int(rnd(1)*100)
next x
sort numbers(), 0, 99 'sort items 0 through 99
for x = 0 to 99
print numbers(x)
next x
end
Double dimensioned arrays can also be sorted. To do so, it is necessary to add an extra
parameter to the command to specify the column:
'sort by the value in column 2
sort numbers(), 0, 99, 2
See also: SORT
Arrays with More than Two Dimensions
Although Liberty BASIC only allows arrays with one or two dimensions, arrays with three or
more dimensions can be easily simulated. To simulate an array of 10 by 10 by 10, it is possible
to stack the third dimension on top of the second:
'create an array big enough to hold 10x10x10 elements
dim myArray$(10, 100)
'set a value in the array in 3 dimensions
call setMyArray$ 5, 6, 7, "Here I am!"
'now fetch and print out the value
print getMyArray$(5, 6, 7)
end
sub setMyArray$ x, y, z, value$
myArray$(x, y + z * 10) = value$
end sub
function getMyArray$(x, y, z)
getMyArray$ = myArray$(x, y + z * 10)
end function
READ and DATA
DATA statements can be embedded in Liberty BASIC programs to make access to string and
numeric data easier. DATA is accessed by the program with the READ statement, which reads
the DATA items in sequence. The RESTORE statement causes the next READ statement to
start at the first DATA statement listed, or at the first DATA statement following a specified
branch label if one is included in the RESTORE statement. These methods can be used to put
data into arrays, thus providing an easy method for filling arrays.
DATA
The DATA statement provides a convenient way to insert data into programs. The DATA can be
read once or many times using the READ statement. A DATA statement doesn't actually
perform an action when it is encountered in the program's code.
data "one", 1, "two", 2, "three", 3, "end", 0
One or more DATA statements form the whole set of data elements. For example, the data
represented in the example above can also be listed in more than one DATA statement:
'here is our data in two lines instead of one
data "one", 1, "two", 2
data "three", 3, "end", 0
DATA is local to the subroutine or function in which it is defined.
READ
This fetches the next strings and/or numeric values from DATA statements in a program. The
READ statement will fetch enough items to fill the variable names that the programmer
specifies. The values fetched will be converted to fit the variables listed (string or numeric).
Example:
'read the numbers and their descriptions
while desc$ <> "end"
read desc$, value
print desc$; " is the name for "; value
wend
'here is our data
data "one hundred", 100, "two", 2, "three", 3, "end", 0
end
You can also read numeric items:
'read the numbers and their descriptions
while desc$ <> "end"
read desc$, value$
print desc$; " is the name for "; value$; ", length="; len(value$)
wend
'here is our data
data "one hundred", 100, "two", 2, "three", 3, "end", 0
end
RESTORE
RESTORE will reset the reading of DATA statements so that the next READ will get information
from the first DATA statement in the program (or the first DATA statement in a function or
subprogram, if this is where the RESTORE is executed).
Example:
'show me my data in all uppercase
while string$ <> "end"
read string$
print upper$(string$)
wend
string$ = "" 'clear this for next while/wend loop
'now reset the data reading to the beginning
restore
'show me my data in all lowercase
while string$ <> "end"
read string$
print lower$(string$)
wend
data "The", "Quick", "Brown", "Fox", "Jumped"
data "Over", "The", "Lazy", "Dog", "end"
end
RESTORE [branchLabel]
Optionally, you can choose to include a branch label:
'show me my data in all uppercase
while string$ <> "end"
read string$
print upper$(string$)
wend
string$ = "" 'clear this for next while/wend loop
'now reset the data reading to the second part
restore [partTwo]
'show me my data in all lowercase
while string$ <> "end"
read string$
print lower$(string$)
wend
data "Sally", "Sells", "Sea", "Shells", "By", "The", "Sea", "Shore"
[partTwo]
data "Let's", "Do", "Only", "This", "A", "Second", "Time", "end"
end
Reading DATA into Arrays
DATA is READ into variables. It cannot be READ directly into arrays. To fill arrays with DATA
items, first READ the item into a variable, then use that variable to fill an index of the array.
'wrong
read numericArray(1)
'correct:
read num1
numericArray(1) = num1
Error Handling
An attempt to read more DATA items than are contained in the DATA lists causes the program
to halt with an error. Notice that in the examples above, an "end" tag is placed in the DATA and
when it is reached, the program stops READing DATA. This is an excellent way to prevent
errors from occuring. If an end tag or flag of some sort is not used, be sure that other checks
are in place to prevent the READ statement from trying to access more DATA items than are
contained in the DATA statements.
See also: READ, RESTORE, DATA
File Operations
Liberty BASIC supports sequential, binary and random access file operations.
See also: OPEN, Sequential Files, Binary Files, Random Access Files, CLOSE, INPUT,
INPUT$, INPUTTO$, LINE INPUT, PRINT
Files can be created with the OPEN command.
Files can be renamed with the NAME command.
Files can be removed with the KILL command.
When a file is being read, the EOF function returns 0 if the end of the file has been reached,
otherwise it returns -1.
The length of a file can be retrieved with the LOF function.
The drive specifications for the computer on which a program is running are contained in the
special variable Drives$.
The directory in which a program resides on disk is contained in the special variable DefaultDir$.
Folders, also called Directories, can be created with the MKDIR command.
Folders, also called Directories, can be removed with the RMDIR command.
Different Methods of File Access
Sequential Files
Sequential Files are accessed from beginning to end, sequentially. It is not possible to read
or write a piece of data to the center of the file. Files opened for INPUT can only be read.
Files opened for OUTPUT or APPEND can only be written. For more, see Sequential Files.
Binary Files
Files opened for binary access may be read or written, beginning at any location within the
file. For detailed information on using binary files, see Binary Files.
Random Files
Files opened for random access are read or written one record at a time. The length of
records in the file is determined in the OPEN statement. For detailed information on using
random files see Random Access Files.
String and Numeric Data
All data, whether strings of text or numbers, is printed as ASCII text characters in files, as the
following example illustrates:
open "test.txt" for output as #f
print #f, "12345"
print #f, 12345
close #f
open "test.txt" for input as #g
txt$ = input$(#g, lof(#g))
close #g
print txt$
end
'produces
12345
12345
Sequential Files
Sequential files are opened with the OPEN statement. When they are no longer needed, or when
the program ends, they must be closed with the CLOSE statement.
Sequential file access allows data to be read from a file or written to a file from beginning to end.
It is not possible to read data starting in the middle of the file, nor is it possible to write data to
the file starting in the middle using sequential methods.
Data is read from a file opened for INPUT starting at the beginning of the file. Each subsequent
input statement reads the next piece of data in the file. Data is written to a file opened for
OUTPUT with a PRINT statement starting at the beginning of the file, and each subsequent
PRINT statement writes data to the end of the open file. When a file is opened for APPEND,
each PRINT statement writes data to the end of the open file.
Sequential File Access
INPUT
Files opened for INPUT can be read from. They cannot be written to. A file opened for INPUT
must exist on disk, or the program will halt with an error. See Testing For File Existence.
The INPUT statement reads a piece of data up to the next comma or carriage return. The
LINE INPUT statement reads a piece of data that contains commas that are not delimiters,
and stops reading data at the next carriage return. The INPUT$ statement reads data of a
specified length from a file. the INPUTTO$ statement reads data up to a specified delimiter.
Here is an illustration of the differences between the various forms of INPUT statements.
Example Program:
'create a sample file
open "test.txt" for output as #1
print #1, "123 Sesame Street, New York, NY"
close #1
'INPUT
open "test.txt" for input as #1
INPUT #1, txt$
print "INPUT item is: ";txt$
close #1
'LINE INPUT
open "test.txt" for input as #1
LINE INPUT #1, txt$
print "LINE INPUT item is: ";txt$
close #1
'INPUT$
open "test.txt" for input as #1
txt$ = INPUT$(#1, 10)
'read 10 characters
print "INPUT$ item is: ";txt$
close #1
'INPUTTO$
open "test.txt" for input as #1
txt$ = INPUTTO$(#1, " ") 'use a blank space as delimiter
print "INPUTTO$ item is: ";txt$
close #1
Produces:
INPUT item is: 123 Sesame Street
LINE INPUT item is: 123 Sesame Street, New York, NY
INPUT$ item is: 123 Sesame
INPUTTO$ item is: 123
INPUT Multiple Items
Here is a short program which opens a text file and reads a line at a time, printing each line to
the mainwin.
filedialog "Open ","*.txt", file$
if file$="" then end
open file$ for input as #1
while eof(#1) = 0
line input #1, text$
print text$
wend
close #1
'print a notice that the end of file is reached:
print:print:print "EOF"
OUTPUT
Files opened for OUTPUT can be written to sequentially. If a file opened for OUTPUT does not
exist, it will be created. If the file does exist on disk, the previous contents will be overwritten,
and therefore lost. Care should be taken when opening files for OUTPUT so that critical data
is not accidentally erased. See Testing For File Existence.
Data is written to a file opened for OUTPUT with a PRINT statement. A line delimiter or
carriage return is written to the file with each PRINT statement. The carriage return may be
suppressed by ending the line of code with a semi-colon.
Example Program:
'create a sample file
open "test.txt" for output as #1
'write some data with line delimiters
print #1, "line one "
print #1, "line two "
'write some data without line delimiters
print #1, "item three ";
print #1, "item four ";
'more
print
print
close
data with line delimiters added
#1, "item five"
#1, "done"
#1
'INPUT to see what we wrote
open "test.txt" for input as #1
txt$ = input$(#1, lof(#1))
print "Contents of file: "
print
print txt$
close #1
Contents of file:
line one
line two
item three item four item five
done
APPEND
Files opened for APPEND can be written to sequentially. If a file opened for APPEND does
not exist, it will be created. If the file does exist on disk, any data written to the file with a
PRINT statement will be added to the end. Writing data to the file works in the same way
when a file is opened for APPEND as when it is opened for OUTPUT, but rather than
overwriting data contained in the file, the new data is appended to the end of the file, but does
not overwrite data previously written to the file the last time it was opened as open for OUTPUT
does.
.
Example Program:
open "test.txt" for append as #1
'write some data with line delimiters
print #1, "line one "
print #1, "line two "
'write some data without line delimiters
print #1, "item three ";
print #1, "item four ";
'more
print
print
close
data with line delimiters added
#1, "item five"
#1, "done"
#1
File Copy
A file may be copied using sequential file operations. The file to be copied is opened for INPUT.
The file that is to be a copy is then opened for OUTPUT. The contents of the original file are
retrieved with the INPUT$ statement and written to the copy with the PRINT statement. Both files
are then closed. Here is an example:
open "mybytes.bin" for input as #original
open "copybyte.bin" for output as #copy
print #copy, input$(#original, lof(#original));
close #original
close #copy
end
Binary Files
To access a file in binary mode, it must be opened with the OPEN statement. When it is no
longer needed, and before the program ends, it must be closed with the CLOSE statement.
See also: Filedialog, File Operations, Path and Filename.
In binary access mode, bytes are written to the file or read from the file as characters. See
Chr$( n ). Use the SEEK command to seek to the desired point in the file for reading or
writing. This sets the file pointer to the location specified. Use the LOC(#handle) function to
retrieve the current position of the file pointer. The current position of the file pointer is used
when reading or writing data to a binary file.
Data is read from the file with the INPUT statement.
Data is written to the file with the PRINT statement. Binary mode never writes line delimiters
when printing to the file. Line delimiters include carriage returns, which are chr$(13) and line
feeds, which are chr$(10).
Usage:
'binary file access
open "myfile.ext" for binary as #handle
'seek to file position
seek #handle, fpos
'get the current file position
fpos = loc(#handle)
'write a byte to the file
print #handle, chr$(143)
'read the data at the current location
input #myfile, txt$
Example Program:
'binary file example
open "myfile.bin" for binary as #myfile
txt$ = "I like programming with Liberty BASIC."
print "Original data in file is: ";txt$
'write some data to the file
print #myfile, txt$
'retrieve the position of the file pointer
nowPos = LOC(#myfile)
'move the filepointer
nowPos = nowPos - 14
seek #myfile, nowPos
'read the data at the current location
input #myfile, txt$
'print txt$ in mainwin
print "Data at ";nowPos;" is: ";txt$
'move the filepointer
seek #myfile, 2
'write some data to the middle of the file
print #myfile, "love"
print str$(loc(#myfile) - 2); " bytes written"
'move the file pointer to the beginning
seek #myfile, 0
'read the data
input #myfile, txt$
'print data in mainwin
print "New Data is: ";txt$
'close the file
close #myfile
end
Random Access Files
OPEN filename FOR RANDOM AS #handle LEN=n
To access a file in random access mode, it must be opened with the OPEN statement. When it
is no longer needed, and before the program ends, it must be closed with the CLOSE statement.
See also: Filedialog, File Operations, Path and Filename , PUT, FIELD, GET, GETTRIM
Random Access files consist of RECORDS. The entire file is divided into many records. Each
record has the same length. The length is specified when the file is opened with the LEN
parameter. The example below opens a file called "members.dat" and sets the record length to
256:
OPEN "members.dat" FOR RANDOM AS #1 LEN=256
Reading and writing to a file opened for random access is done one record at a time. A record
may be read or written anywhere in the file. A record is read with either the GET statement, or
with the GETTRIM statement. A record is written to the file with the PUT statement. These
statements are explained in more detail below.
FIELD Statement
Each record is subdivided into "fields", each with a given length. The FIELD statement must be
included after the OPEN statement to set up the size of each of the fields. Each field is
designated by a variable name and given a specified length. When the lengths of all fields are
added together, their sum must be equal to the length that was set with the LEN parameter in
the OPEN statement. In the above case, the field lengths must total 256. A "$" character
indicates that a field holds data that will be accessed as a string. If there is no "$" character,
the field will be accessed as a number. The fields for "members.dat" might look like this:
OPEN "members.dat" FOR RANDOM AS #1 LEN=256
FIELD #1,_
' set
90 AS Name$,_ ' 1st
110 AS Address$,_
50 AS Rank$,_
6 AS IDnumber
up the fields for file opened as #1
90 bytes contains Name$, string
' 2nd 110 bytes contains Address$, string
' 3rd 50 bytes contains Rank$, string
' 4th 6 bytes contains IDnumber, numeric
The value after "LEN=" is 256, which is obtained by adding 90 + 110 + 50 + 6 or the total length
of all the fields in FIELD#. The FIELD statement must follow the OPEN statement and must be
used before trying to read or write data to the file with GET or PUT.
PUT
PUT #handle, number
This statement is used to write the data that is contained in the variables listed in the FIELD
statement to the specified record number. Records in RANDOM files are numbered beginning at
1, not 0. If the length of a variable in a given field is shorter than the field length specified, blank
spaces are added to pad it. If the length of the variable is larger, it will be truncated to the length
specified in the FIELD statement. To add this data as RECORD number 3 to the file referenced
above:
Name$ = "John Q. Public"
Address$ = "456 Maple Street, Anytown, USA"
Rank$ = "Expert Programmer"
IDnumber = 99
PUT #1, 3
GET
GET #handle, number
This statement reads an entire record and fills the variables listed in the FIELD statement.
GET #1,3
Print Name$ would produce "John Q. Public
"
Print Address$ would produce "456 Maple Street, Anytown, USA
"
Print Rank$ would produce "Expert Programmer
"
print IDnumber would produce "99"
and so on.
GETTRIM
GETTRIM #handle, number
This command retrieves the record in the same manner as GET, but it removes any blank
leading or trailing spaces in the record:
GETTRIM #1,3
Print Name$ would produce "John Q. Public"
' no blank spaces are included
Testing for File Existence
Here is a short user-defined function which can be used to test if a file exists on disk. It is
important to know if a file exists because attempting to access a nonexistent file can cause a
program to crash.
function fileExists(path$, filename$)
'dimension the array info$( at the beginning of your program
files path$, filename$, info$()
fileExists = val(info$(0, 0)) 'non zero is true
end function
If the file is to be in the default directory, and named users.dat this example shows how to test
for its existence with the fileExists function:
dim info$(10, 10)
if fileExists(DefaultDir$, "users.dat") then
notice "It's alive!"
else
notice "Igor! I need more power!"
end if
The dim info$(10, 10) statement is important because the files command in the function needs
to have a double dimensioned array ready to accept its list of files and their information. See
FILES.
Path and Filename
Complete Path and Filename
References to a complete path and filename indicate that the drive letter and all folders and sub
folders are included in the file specification. A complete path and filename is returned by the
FILEDIALOG. An example of a complete path and filename is as follows:
C:\My Documents\My Programs\Games\mygame.bas
Filename Alone
References to a filename without path information indicate that the disk filename is used with no
drive or folder information. In Liberty BASIC, use of a filename without path information assumes
that the file exists on disk in the DefaultDir$. An example is as follows:
mygame.bas
Sub Folder
A file that exists in a subfolder of the DefaultDir$ is written by first identifying the sub folder(s),
each followed by a backslash, then the filename, like this:
images\background.bmp
gamefiles\images\badguy.bmp
Relative Path
Relative paths to files that exist in folders at the same level in the directory tree, (or in a higher
level), use the ".." designation to indicate "go up one level from the DefaultDir$". Filenames are
usually designated by including a dot and a file extension that specifies the type of file.
Filenames ending in ".txt" are text files, (for instance), while filenames ending in ".bmp" are
bitmaps. Folders do not typically have extensions. The names below with extensions indicate
files, while the names without extensions indicate folders. Here are some examples of relative
paths:
..\smiley.bmp
..\images\redbox.bmp
images folder
..\..\customer.txt
..\..\data\names.dat
folder
'go up one level to access the file
'go up one level to access the file in the
'go up two levels to access the file
'go up two levels to access the file in the data
Hard-coding Path and Filename
The phrase "hard-coding" when referring to path and filename information indicates that the
pathname specified in the progarm code contains the entire file specification, including the drive
letter and all folder information as well as the filename. If a program is meant for use by the
programmer alone, on a single computer, this method works, as long as no changes are made to
the directory structure. When any changes are made to the directory structure or filename, the
program code must be changed as well.
Caveat
It is very unlikely that other users of a program will have the same directory structure on their
computers as the programmer who writes the code. For this reason, it is best to use one of the
other path naming options listed above that does not depend upon all users having the same
directory structure on their computers.
Filenames Used in Code
Some commands that use path and filename specifications are:
LOADBMP
OPEN
PLAYWAVE
BMPBUTTON
Mathematics
See also Numeric Variables, Mathematical Operations, Trigonometry, Numbers and
Strings
Numbers and Numeric Expressions
Most mathematical operations in Liberty BASIC can be performed on literal numbers, numeric
variables, or numeric expressions that consist of literal numbers, numeric variables, or both.
Functions that require a numeric input can also use any of these forms, as long as the
expression evaluates to a number. Here is the ABS function used as an example:
print ABS(-2)
'a literal number
x = 13
print ABS(x)
'a numeric variable
print ABS(7-233)
'a literal numeric expression
print ABS( x/13 )
'a numeric expression containing a variable
Arithmetic
Arithmetic operators are as follows:
+
*
/
^
addition
subtraction
multiplication
division
power
Examples:
print 2 + 3
'addition
print 6 - 2
'subtraction
print 4 * 7
'multiplication
print 9 / 3
'division
print 2 ^ 3
'power - (two to the third power)
print (4+2)*6^2
'multiple expressions are evaluated according to
the following rules of order:
Order
Expressions are evaluated in this order:
()
expressions within parentheses are evaluated first
^
exponents are evaluated next
* /
multiplication and division are evaluated next
+-
addition and subtraction are evaluated last
See also:
SIN
COS
TAN
ASN
ACS
ATN
ABS
EXP
LOG
HEXDEC
DECHEX$
INT
MAX
MIN
RND
SQR
VAL
STR$
USING
Numeric variables
In Liberty BASIC, numeric variables hold either a double-precision floating point value, or an
integer. A floating point value will be converted to an integer if its fractional part is zero when it
is assigned to a variable. Integers in Liberty BASIC can be huge.
Only nine digits are displayed when floating point values are printed, unless the USING() function
is used to force the display of the number of digits desired after the decimal point.
When first referenced, numeric variables equal 0. Values are assigned to variables with the
equals sign "=".
myVar = 42
In the following code, the variable "totalNum" is 0 to begin, so adding 3 to it gives it a value of 3.
Adding 8 to it in the next line gives it a value of 11.
totalNum = totalNum + 3
'totalNum now contains the value 3
totalNum = totalNum + 8
'totalNum now contains the value 11
NOTE: Liberty BASIC does not support the CONST keyword that is common in some other
forms of BASIC such as QBASIC.
Negative numbers.
Liberty BASIC does not support changing the sign of a variable directly by preceding it with a
negative sign "-". Instead the variable must be multiplied by -1
'WILL NOT WORK!
num1 = 7
num2 = -num1
print num2
'USE THIS METHOD
num1 = 7
num2 = -1 * num1
print num2
GLOBAL
In general, variables used in the main program code are not visible inside functions and
subroutines. Variables inside functions and subroutines are not visible in the main program.
Liberty BASIC 4 introduces the GLOBAL statement to create global variables. Variables
declared as GLOBAL can be seen everywhere in a program. See GLOBAL. The special system
variables like WindowWidth, WindowHeight, etc. now have true global status. GLOBALS are
specified and used like this:
global true, false, maxNum
true=1
false=0
maxNum = 128
Mathematical Operations
ABS( n )
Description:
This function returns | n | (the absolute value of n). "n" can be a number or any numeric
expression.
Usage:
print abs( -5 )
produces: 5
print abs( 6 - 13 )
produces: 7
print abs( 2 + 4 )
produces: 6
print abs( 3 )
produces: 3
print abs( 3/2 )
produces: 1.5
print abs( 5.75 )
produces:
5.75
SQR(n)
Description:
This function returns the square root of the number or numeric expressioin n.
Usage:
print "The square root of 2 is: ";
print SQR(2)
EXP( n )
Description:
This function returns e ^ n, with e being 2.7182818 . . .
Usage:
print exp( 5 )
produces:
148.41315
LOG( n )
Description:
This function returns the natural log of n.
Usage:
print log( 7 )
produces:
1.9459101
INT( n )
Description:
This function removes the fractional part of number, which is the part of the number after the
decimal point, leaving only the whole number part behind.
Usage:
[retry]
input "Enter an integer number>"; i
if i<>int(i) then
print i; " isn't an integer! Re-enter."
goto [retry]
end if
MAX( expr1, expr2 )
Description:
This function returns the greater of two numeric values.
Usage:
input "Enter a number?"; a
input "Enter another number?"; b
print "The greater value is "; max(a, b)
MIN( expr1, expr2 )
Description:
This function returns the smaller of two numeric values.
Usage:
input "Enter a number?"; a
input "Enter another number?"; b
print "The smaller value is "; min(a, b)
RND(number)
Description:
This function returns a random number between 0 and 1. The number parameter is usually set to
1, but the value is unimportant because it is not actually used by the functoin. The function will
always return an arbitrary number between 0 and 1.
Usage:
' print ten numbers between one and ten
for a = 1 to 10
print int(rnd(1)*10) + 1
next a
RANDOMIZE n
Description:
This function seeds the random number generator in a predictable way. The seed numbers must
be greater than 0 and less than 1. Numbers such as 0.01 and 0.95 are used with RANDOMIZE.
Usage:
'this will always produce the same 10 numbers
randomize 0.5
for x = 1 to 10
print int(rnd(1)*100)
next x
Trigonometry
Tip: There are 2 * pi radians in a full circle of 360 degrees. A formula to convert degrees to
radians is: radians = degrees divided by 57.29577951 Here are some helpful functions to
convert degrees to radians, radians to degrees and to calculate PI.
function pi()
pi = asn(1) * 2
end function
function rad2deg(num)
rad2deg = 90 / asn(1) * num
end function
function deg2rad(num)
deg2rad = asn(1) / 90 * num
end function
ACS( n )
Description:
This function returns the arc cosine of the number or numeric expression n. The return value
is expressed in radians.
Usage:
print "The arc cosine of 0.2 is "; acs(0.2)
ASN( n )
Description:
This function returns the arc sine of the number or numeric expression n. The return value is
expressed in radians.
Usage:
print "The arc sine of 0.2 is "; asn(0.2)
ATN( n )
Description:
This function returns the arc tangent of the number or numeric expression n. The return value
is expressed in radians.
Usage:
print "The arc tangent of 0.2 is "; atn(0.2)
COS( n )
Description:
This function returns the cosine of the angle n. The angle n should be expressed in radians.
Usage:
for c = 1 to 45
print "The cosine of "; c; " is "; cos(c)
next c
SIN( n )
Description:
This function returns the sine of the angle n. The angle n should be expressed in radians.
Usage:
for t = 1 to 45
print "The sine of "; t; " is "; sin(t)
next t
TAN( n )
This function returns the tangent of the angle n. The angle n should be expressed in radians
Usage:
for t = 1 to 45
print "The tangent of "; t; " is "; tan(t)
next t
Numbers and Strings
Liberty BASIC has several functions that convert numeric values and strings.
VAL(stringExpression)
Description:
This function returns a numeric value for stringExpression if stringExpression represents a valid
numeric value or if it begins with a valid numeric value. If not, then zero is returned.
Usage:
print 2 * val("3.14")
Produces:
6.28
print val("hello")
Produces:
0
print val("3 blind mice")
Produces:
3
STR$( numericExpression )
Description:
This function returns a string expressing the result of numericExpression.
Usage:
age = 23
age$ = str$(age)
price = 2.99
price$ = str$(price)
totalApples = 37
print "Total number of apples is " + str$(totalApples)
USING(templateString, numericExpression)
Description:
This function formats numericExpression as a string using templateString. The rules for the
format are similar to those in Microsoft BASIC's PRINT USING statement, but since using( ) is a
function, it can be used as part of a larger BASIC expression instead of immediate output only.
The template string consists of the character "#" to indicate placement for numerals, and a single
dot "." to indicate placement for the decimal point. The template string must be contained within
double quotation marks. If there are more digits contained in a number than allowed for by the
template string, the digits will be truncated to match the template.
A template string looks like this:
amount$ = using("######.##", 1234.56)
As part of a larger expression:
notice "Your total is $" + using("####.##", 1234.5)
A template string can be expressed as a string variable:
template$ = "######.##"
amount$ = using(template$, 1234.56)
Using() may be used in conjunction with 'print'. The following two examples produce the same
result:
amount$ = using("######.##", 123456.78)
print amount$
print using("######.##", 123456.78)
The using() function for Liberty BASIC 3 has been modified so that it rounds its output like
PRINT USING does in other BASICs.
Usage:
' print a column of ten justified numbers
for a = 1 to 10
print using("####.##", rnd(1)*1000)
next a
'sample output from the routine above:
72.06
244.28
133.74
99.64
813.50
529.65
601.19
697.91
5.82
619.22
HEXDEC( "value" )
Description:
Returns a numeric decimal from a hexadecimal number expressed in a string. Hexadecimal
values are represented by digits 0 - F. the hexadecimal number can be preceded by the
characters "&H". The hexadecimal string must be enclosed in quote marks.
Usage:
print hexdec( "FF" )
or:
print hexdec( "&HFF")
DECHEX$( number )
Description:
Returns a string representation of a decimal number converted to hexadecimal (base 16)
Usage:
print dechex$( 255 )
prints...
FF
EVAL$(code$) and EVAL(code$)
Description:
Liberty BASIC now has two functions for evaluating BASIC code inside a running program. The
eval() function evaluates the code and returns a numeric value, and the eval$() function works the
same way but returns a string value. Both will execute the very same code, but the string
function converts the result to a string if it isn't already one, and the numeric version of the
function converts it to numeric values.
Evaluating to a string
Here we show how to evaluate code to a string, and what happens if you try to evaluate it to be a
number.
'Let's evaluate some code that produces a non-numeric result
a$(0) = "zero"
a$(1) = "one"
a$(2) = "two"
code$ = "a$(int("+str$(rnd(1))+"*3))"
print "We will evaluate the code: "; code$
result$ = eval$(code$)
print result$
'Now let's use the eval function, which effectively does a
'val() to the result of the calculation. Converting a non
'numeric string to a numeric value results in zero.
result = eval(code$)
print result
Evaluating to a number
Here's an example of the most common type of code evaluation users will want to do: Numeric
computation. Let's just make a short example that asks you to type an expression to evaluate.
'ask for an expression
input "Type a numeric expression>"; code$
answer = eval(code$)
print answer
Date and Time Functions
Liberty BASIC provides several ways to retrieve date and time information. Date$() and Time$()
are functions that return values that can be used in mathematical operations. See also Date$
and Time$
Date$()
'This form of date$()
print date$()
print date$("mm/dd/yyyy")
print date$("mm/dd/yy")
print date$("yyyy/mm/dd")
print date$("days")
print date$("4/1/2002")
given date
print date$(36980)
'
'
'
'
'
'
produces this
Nov 30, 1999
11/30/1999
11/30/99
1999/11/30
36127
36980
' 04/01/2002
'
format
for sorting
days since Jan 1, 1901
days since Jan 1, 1901 for
mm/dd/yyyy string returned
when given days since Jan
1, 1901
Date$() Math
Here is a small program that demonstrates one way that Date$() can be used with math
operators.
today = date$("days")
target = date$("1/1/2004") 'subsititute value for next year
print "Days until the new year: ";
print target - today
Time$()
'this form of time$()
print time$()
print time$("seconds")
print time$("milliseconds")
33221342
print time$("ms")
33221342
produces this format
'time now as string "16:21:44"
'seconds since midnight as number 32314
'milliseconds since midnight as number
'milliseconds since midnight as number
Time$() Math
Here is a small program that demonstrates one way that Time$() can be used with math
operators.
'get start time
startTime = time$("ms")
'do some computations
for i = 1 to 40000
x = x + i
next
'get end time
endTime=time$("ms")
print "Computations took ";
print endTime-startTime; " milliseconds"
end
Text and Characters
This section of the help system explains the use and manipulation of text as literal strings of
characters or as string variables. It also details commands for text windows and text editors.
String Literals and Variables
Manipulating Characters
Text Mode Display in the Mainwin
Text Commands
See also:
Sending text to the Printer with LPRINT
String Literals and Variables
Literal Strings
A string literal always starts with a quotation mark and always ends with a quotation mark. No
quotation marks are allowed in between the starting and ending quotation marks. Here is an
example that prints a string literal in the mainwin.
print "Hello World"
The program above would produce this in the mainwin:
Hello World
String Variables
There are special variables for holding words and other non-numeric character combinations.
These variables are called string variables (they hold strings of characters*).
*Characters are:
Letters of the alphabet ; abcdefghijklmnopqrstuvwxyz ABCDEFGHIJKLMNOPQRSTUVWXYZ
Digits 0123456789 ;
Any other special symbols like: , . < > / ? ; : ' " [ ] { } ` ~ ! @ # $ % ^ & * ( ) + - \ |
etc . . .
String variable names must end with a $ (dollar sign). Text is assigned to a string variable using
the equals sign ( = ). This example assigns "Hello World" to the string variable hello$ and then
prints it in the mainwin.
hello$ = "Hello World"
print hello$
The program above produces this in the mainwin:
Hello World
NOTE - A string can have zero characters. Such a string is often called an empty string. In
BASIC, an empty string can be expressed in a string literal as two quotation marks without any
characters between them. For example (noCharactersHere$ is the name of our string variable):
let noCharactersHere$ = ""
Concatenation
Two strings of text can be joined together (concatenated), either as variables, literals or both.
This is accomplished by use of the plus sign ( + ).
varOne$ = "Hello"
varTwo$ = "World"
varThree$ = varOne$ + " " + varTwo$
print varThree$
The program above produces this in the mainwin:
Hello World
It is also possible to use the semi-colon ( ; ) to add, or concatenate strings.
varOne$ = "Hello"
varTwo$ = "World"
varThree$ = varOne$ ; " " ; varTwo$
print varThree$
NON-PRINTING CHARACTERS
Some characters do not display on the screen, but instead they format the text output. A
combination of carriage return and line feed causes text printed after it to display on the next line
down. These non-keyboard characters can be accessed with the CHR$(n) function. "n" is be the
ascii value of the desired character. In the case of a CRLF as described here, the character for
"carriage return" is chr$(13). The character for "line feed" is chr$(10). The following code inserts
a carriage return, forcing the text to print on two lines.
print "Hello" + chr$(13) + chr$(10) + "World"
Produces:
Hello
World
PRINTING DOUBLE QUOTATION MARKS
The double quotation mark is represented by CHR$(34). To cause a double quotation mark to
print, the character 34 is included, like this:
print chr$(34) + "Hello World" + chr$(34)
Produces:
"Hello World"
GLOBAL
In general, variables used in the main program code are not visible inside functions and
subroutines. Variables inside functions and subroutines are not visible in the main program.
Liberty BASIC 4 introduces the GLOBAL statement to create global variables. Variables
declared as GLOBAL can be seen everywhere in a program. See GLOBAL. The special system
variables like WindowWidth, WindowHeight, etc. now have true global status. GLOBALS are
specified and used like this:
global filename$, author$, title$
filename$ = "readme.txt"
author$ = "John Q. Programmer"
title$ = "Great Idea"
Manipulating Characters
CHR$( n )
Description:
This function returns a one character long string, consisting of the character represented on the
ASCII table by the value n (0 - 255).
Usage:
print chr$(77)
print chr$(34)
print chr$(155)
Produces:
M
"
›
INSTR(string1, string2, starting)
Description:
This function returns the position of string2 within string1. If string2 occurs more than once in
string1, then only the position of the leftmost occurance will be returned. If the starting parameter
is included, then the search for string2 will begin at the position specified by starting.
Usage:
print instr("hello there", "lo")
produces:
4
print instr("greetings and meetings", "eetin")
produces:
3
print instr("greetings and meetings", "eetin", 5)
produces:
16
If string2 is not found in string1, or if string2 is not found after starting, then INSTR( ) will return 0.
print instr("hello", "el", 3)
produces:
0
and so does:
print instr("hello", "bye")
LEN( string )
Description:
This function returns the length in characters of string, which can be any valid string expression.
Usage:
prompt "What is your name?"; yourName$
print "Your name is "; len(yourName$); " letters long"
LEFT$(string, number)
Description:
This function returns from string the specified number of characters starting from the left. If string
is "hello there", and number is 5, then "hello" is the result.
Usage:
[retry]
input "Please enter a sentence>"; sentence$
if sentence$ = "" then [retry]
for i = 1 to len(sentence$)
print left$(sentence$, i)
next i
Produces:
Please enter a sentence>That's all folks!
T
Th
Tha
That
That'
That's
That's_
That's a
That's al
That's all
That's all_
That's all f
That's all fo
That's all fol
That's all folk
That's all folks
That's all folks!
Note: If number is zero or less, then "" (an empty string) will be returned. If number is greater
than or equal to the number of characters in string, then string will be returned.
RIGHT$(string, number)
Description:
This function returns a sequence of characters from the right hand side of string using number to
determine how many characters to return. If number is 0, then "" (an empty string) is returned. If
number is greater than or equal to the number of characters in string, then string will itself be
returned.
Usage:
print right$("I'm right handed", 12)
Produces:
right handed
And:
print right$("hello world", 50)
Produces:
hello world
MID$(string, index, [number])
Description:
This function permits the extraction of a sequence of characters from string starting at index.
[number] is optional. If number is not specified, then all the characters from index to the end of
the string are returned. If number is specified, then only as many characters as number specifies
will be returned, starting from index.
Usage:
print mid$("greeting Earth creature", 10, 5)
Produces:
Earth
And:
string$ = "The quick brown fox jumped over the lazy dog"
for i = 1 to len(string$) step 5
print mid$(string$, i, 5)
next i
Produces:
The_q
uick_
brown
_fox_
jumpe_
d_ove
r_the
_lazy
_dog
LOWER$( string )
Description:
This function returns a copy of the contents of string, but with all letters converted to lowercase.
Usage:
print lower$( "The Taj Mahal" )
Produces:
the taj mahal
UPPER$( string )
Description:
This function returns a copy of the contents of string, but with all letters converted to uppercase.
Usage:
print upper$( "The Taj Mahal" )
Produces:
THE TAJ MAHAL
TRIM$( string )
Description:
This function removes any spaces from the start and end of string. This can be useful for
cleaning up data entry among other things.
Usage:
sentence$ = " Greetings "
print len(trim$(sentence$))
Produces: 9
SPACE$( n )
Description:
This function will a return a string of n space characters (ASCII 32). It is useful when producing
formatted output to a file or printer.
Usage:
for x = 1 to 10
print space$(x); "*"
next x
Produces:
*
*
*
*
*
*
*
*
*
*
Text mode display
TEXT DISPLAY IN THE MAINWIN
Liberty BASIC is designed for building Windows programs. It is also possible to write
rudimentary text mode programs.
By default, each Liberty BASIC program has a main window, called the "mainwin." This is a
simple text display with scrollbars.
Displaying Text
The standard PRINT command causes text to be displayed in the mainwin.
print "Hello World"
produces
Hello World
After the expressions are displayed, the cursor (that blinking vertical bar | ) will move down to the
next line, and the next time information is sent to the window, it will be placed on the next line
down. To prevent the cursor from moving immediately to the next line, add an additional
semicolon to the end of the list of expressions. This prevents the cursor from being moved down
a line when the expressions are displayed. The next time data is displayed, it will be added onto
the end of the line of data displayed previously.
Usage:
Produces:
print "hello world"
hello world
print "hello ";
print "world"
hello world
age = 23
print "Ed is "; age; " years old"
Ed is 23 years old
Getting User Input
User input is obtained by use of the INPUT command in the mainwin. Here is a simple
example:
'Ask the user a question
input "Hi! What's your name?"; yourName$
print "Nice to meet you "; yourName$
end
The prompt may be expressed as a string variable, as well as a literal string:
prompt$ = "Please enter the upper limit:"
input prompt$; limit
Most versions of Microsoft BASIC implement INPUT to automatically place a question mark on
the display in front of the cursor when the user is prompted for information:
input "Please enter the upper limit"; limit
produces:
Please enter the upper limit ? |
Liberty BASIC makes the appearance of a question mark optional.
input "Please enter the upper limit :"; limit
produces:
Please enter the upper limit: |
and:
input limit
produces simply:
?|
In the simple form input limit, the question mark is inserted automatically, but if a prompt is
specified, as in the above example, only the contents of the prompt are displayed, and nothing
more. If it is necessary to obtain input without a prompt and without a question mark, then the
following will achieve the desired effect:
input ""; limit
Additionally, in most Microsoft BASICs, if INPUT expects a numeric value and a non numeric or
string value is entered, the user will be faced with a comment (something like 'Redo From Start'),
and be expected to reenter. Liberty BASIC does not automatically do this, but converts the entry
to a zero value and sets the variable accordingly.
Mainwin Size
It is possible to set the number of columns and rows in the mainwindow using the MAINWIN
statement. Here is how to set 40 columns and 20 rows:
'Set a custom size!
mainwin 40 20
for x = 1 to 4 : for y = 0 to 9
print y;
next y : next x
print
print "1 This screen is forty columns"
print "2 and twenty lines."
for x = 3 to 19
print x
next x
Clearing the Mainwin
The CLS statement clears previous text from the mainwin:
'show a range of values
for x = 0 to 4
cls
print "The sine of "; x + 0.1; " to "; x + 1
for y = 0.1 to 1 step 0.1
print "sine("; x + y; ") = "; sin(x + y)
next y
input "Press enter for more..."; go$
next x
end
Locating Text
Using LOCATE in the mainwin causes text to be printed at the x, y location specified. These
coordinates refer to the column and row of text, not to screen pixels. This command functions in
the same way as the QBasic LOCATE command and is used to position text on the mainwin.
Here is a short demo:
'plot a wave
for x = 1 to 50
i = i + 0.15
locate x, 12 + int(cos(i)*10)
print "*";
next x
Print TAB(n)
Liberty BASIC 4 has the ability to use the TAB function for formatting output. "n" is the character
location where the next output will be printed. "tab(7)" causes the next output to print beginning
at column (character) 7, while "tab(21)" causes the next output to print beginning at column 21.
'show how tab() works
print "x"; tab(7); "sine"; tab(21); "cosine"
for x = 1 to 10
print x; tab(7); sin(x); tab(21); cos(x)
next x
end
Printing columns with commas
A new feature of Liberty BASIC 4 is the use of commas for columnar printing in the main window.
Commas placed between outputs signal the starts of new columns. Commas contained within
quotation marks do not signal new columns.
'a demonstration of printing columns using commas
print "x", "sine", "cosine"
for x = 1 to 10
print x, sin(x), cos(x)
next x
end
Text Window Commands
The commands in this topic work with the text window and texteditor control. Anything printed to
a text window is displayed exactly as sent. To distinguish commands sent to a text window from
text that is to be diplayed in the window, the ! character should be the first character in the string.
It is no longer necessary to add a semicolon to the end of a printed command line to suppress a
carriage return. The semicolon at the end of a printed command is now optional. When printing
text, rather than commands, a carriage return is added to the text with each print statement,
unless the statement ends with a semicolon.
Note: for instructions on sending text to the printer, see LPRINT.
Using variables in text commands:
Literal values are placed inside the quotation marks:
print #handle, "!line 3 string$"
Variables must be places outside the quotation marks, with blank spaces preserved:
lineNum=3
print #handle, "!line ";lineNum;" string$"
See also: Understanding Syntax - how to use literals and variables in commands.
For example:
'open a text window
open "Example" for text as #1
'print Hello World in the window
print #1, "Hello World"
'change the text window's font
print #1, "!font helv 16 37"
'read line 1
print #1, "!line 1"
input #1, string$
print "The first line is:"
print string$
input "Press 'Return'"; r$
'close the window
close #1
Proper use of semicolons and the 'print' command.
In the following example, semicolons are omitted in printed commands. They are used to force
carriage returns when printing text. It is also possible to omit the word "print" and to omit the
comma after the handle when printing to a text window or texteditor. This means that the word
"print" and the comma following the handle are optional.
nomainwin
open "Example" for text as #1
print #1, "!trapclose [quit]"
'carriage return suppressed by semicolon:
print #1, "Hello";
'this line will have a carriage return:
#1 " World"
'this command omits the word 'print'
#1 "!font courier_new 12"
'print some more text into the window, no carriage return:
print #1, "This is a font called ";
'print text with carriage returns:
print #1, "courier_new."
'blank line:
print #1, ""
#1 "Done!"
wait
[quit]
close #1 : end
Note: Most of the commands listed below work with windows of type "text" and also with the
"texteditor" control except where noted.
Here are the text window commands:
print #handle, "!cls" ;
This command clears the text window of all text.
print #handle, "!contents varname$";
print #handle, "!contents #handle";
This command has two forms as described above. The first form causes the contents of the text
window to be replaced with the contents of varname$, and the second form causes the contents
of the text window to be replaced with the contents of the stream referenced by #handle. This
second form is useful for reading large text files quickly into the window.
Here is an example of the second form:
open "Contents of AUTOEXEC.BAT" for text as #aetext
open "C:\AUTOEXEC.BAT" for input as #autoexec
print #aetext, "!contents #autoexec";
close #autoexec
'stop here
input a$
print #handle, "!contents? string$";
This command returns the entire text of the window. After this command is issued, the entire
text is contained in the variable string$.
print #handle, "!copy" ;
This command causes the currently selected text to be copied to the WINDOWS clipboard.
print #handle, "!cut" ;
This command causes the currently selected text to be cut out of the text window and copied to
the WINDOWS clipboard.
print #handle, "!font fontName pointsize" ;
This command sets the font of the text window to the specified name and size. If an exact match
cannot be found, then Liberty BASIC will try to match as closely as possible, with size taking
precedence over name in the match. Note that a font with more than one word in its name is
specified by joining each word with an underscore _ character. For example, the font Times New
Roman becomes Times_New_Roman, and the font Courier New becomes Courier_New.
Example:
print #handle, "!font Times_New_Roman 10";
For more on specifying fonts read How to Specify Fonts
print #handle, "!insert varname$";
This command inserts the contents of the variable at the current caret (text cursor) position,
leaving the selection highlighted.
print #handle, "!line n string$" ;
Returns the text at line n. In the code above, n is standing in for a literal number. If n is less than
1 or greater than the number of lines the text window contains, then "" (an empty string) is
returned. After this command is issued, the line's text is contained in the variable string$.
This sample code retrieves the contents of line number 7 and places them into a variable called
string$:
print #textwindow, "!line 7 string$"
print #h, "!lines countVar" ;
This command returns the number of lines in the text window, placing the value into the variable
countVar.
print #handle, "!modified? answer$" ;
This command returns a string (either "true" or "false") that indicates whether any data in the text
window has been modified. The variable answer$ holds this returned string. This is useful for
checking to see whether to save the contents of the window before closing it.
print #h, "!origin? columnVar rowVar" ;
This command causes the current text window origin to be returned. The origin is the upper left
corner of the texteditor or textwindow. When a text window is first opened, the result would be
row 1, column 1. The result is contained in the variables rowVar and columnVar.
print #handle, "!origin column row" ;
This command forces the origin of the window to be row and column. This means that the row
and column specified will appear in the upper left corner of the texteditor or text window. Row and
column must be literal numbers. To use variables for these values, place them outside the
quotation marks, preserving the blank spaces, like this:
print #handle, "!origin ";column;" ";row
print #handle, "!paste" ;
This causes the text in the WINDOWS clipboard (if there is any) to be pasted into the text
window at the current cursor position.
print #handle, "!select column row" ;
This command puts the blinking cursor at column row. Column and row must be literal numbers.
To express them as variables, place the variables outside the quotation marks and preserve the
blank spaces, like this:
print #handle, "!select ";column;" ";row
print #handle, "!selectall" ;
This causes everything in the text window to be selected (highlighted).
print #handle, "!selection? selected$" ;
This command returns the highlighted text from the window. The result will be contained in the
variable selected$.
print #handle, "!setfocus";
This causes Windows to give input focus to this control. This means that, ifsome other control in
the same window was highlighted and active, this control now becomes the highlighted and active
control, receiving keyboard input.
print #handle, "!trapclose branchLabel" ;
This command tells Liberty BASIC to continue execution of the program at branchLabel if the
user double clicks on the system menu box or pulls down the system menu and selects "close."
Graphics
See also: graphics commands
Liberty BASIC supports drawing operations. There are two kinds of controls that accept drawing
commands; one is a kind of window, and the other is a control called a graphicbox. They both
support the same drawing operations. Here is an example of a graphics window:
open "I'm
print #g,
print #g,
print #g,
wait
a graphics window!" for graphics as #g
"home ; down"
"fill green"
"circle 100"
And here's the same drawing operation in a graphicbox which has been inserted into a window.
graphicbox #w.g, 5, 5, 250, 250
open "I'm a window!" for window as #w
print #w.g, "home ; down"
print #w.g, "fill green"
print #w.g, "circle 100"
wait
The graphics operations are performed by a pen. The pen can be up or down. If the pen is up,
the drawing operations will not appear. The pen moves, but does not draw. The pen defaults to
the up position.
Possible drawing operations include:
Turtle Graphics
Turtle graphics are drawn by a pen that moves about the screen from one location to
another, drawing if is in the DOWN position. Turtle graphics are good for drawing graphics
and iterative objects.
Drawn Objects
Objects such as boxes, lines and circles may be drawn, and they may be either filled with
an opaque color, or they may be drawn as an outline only.
Drawn Text
Graphics commands include the ability to place text on the graphics control at the location
desired.
Color and Size
The size (width) of the drawing pen may be set. The color that covers the control may be
set, as well as the outline color of drawn objects, and the color that fills drawn objects.
Drawing Segments and FLUSH
Drawing happens in segments. Drawing operations are queued up into the current drawing
segment. A FLUSH command closes the current segment and opens a new one. The
segments which have been closed will be used to redraw the drawn graphics when the window
needs to be repainted. Any drawing that does not exist in a closed segment will not be redrawn
when the window is repainted.
FLUSH
Drawing commands can be made to persist, or "stick" when the FLUSH command is used:
graphicbox #w.g, 5, 5, 250, 250
open "I'm a window!" for window as #w
print #w.g, "home ; down"
print #w.g, "fill green"
print #w.g, "circle 100"
print #w.g, "flush"
wait
Deleting Drawing Segments
If a graphics window or graphicbox has received many drawing commands, it is advisable to
delete unwanted segments. If drawing segments are not deleted, the computer's RAM will
eventually fill with drawing commands. There are two ways to delete these unwanted drawing
commands.
CLS
The simplest way to delete drawing commands is to issue the CLS command before new
graphics drawing commands are issued:
print #w.g, "cls"
When this method is used, the screen goes blank for an instant before new drawn items are
displayed, causing a flickering or blinking effect.
Segment and Delsegment
It is possible to delete any segments that are no longer needed. This method will not clear the
graphics, so no flickering effect will be visible. Each segment has a number, and each time a
segment is closed with a FLUSH command, the next segment has a number that is 1 greater
than the last. The first segment ID is 1, the second flushed segment ID is 2, the third is 3 and
so on.
The number of the currently active segment is retrieved with the segment command:
print #w.g, "segment drawSegment"
This gets the segment number of the current segment and places it into the variable
drawSegment. Subtracting 1 from the current segment number will reference the last segment
that has been FLUSHed. It can then be deleted with the DELSEGMENT command, as in this
example:
print #w.g, "delsegment "; drawSegment - 1
DISCARD
The DISCARD command will remove any unflushed drawing commands. An example is as
follows:
'demonstrate discard
open "Sine wave" for graphics as #sine
print #sine, "home ; down ; posxy x y"
print #sine, "place 0 "; y
width = x * 2
for x = 0 to width
print #sine, "goto "; x; " "; y + (y * sin(x/40))
next x
print #sine, "discard" 'no redraw info kept
wait
end
The program above draws a sine wave, discarding drawn graphics. If the graphics window is
maximized after the drawing is complete, it is possible to see that the graphics are not redrawn.
This is similar to the effect achieved when FLUSH is not used, but in fact it throws away the
graphics instructions so memory does not get filled up.
When a window is closed, all graphics drawing operations are deleted from memory.
See also: graphics commands
Reading Mouse Events and Keystrokes
A graphics window or graphicbox is able to read mouse and keyboard input. Here is the world's
smallest painting program!
open "Paint something!" for graphics as #w
print #w, "when leftButtonMove [paint]"
print #w, "when characterInput [letter]"
print #w, "down ; size 3"
wait
[paint]
print #w, "set "; MouseX; " "; MouseY
wait
[letter]
print #w, "\"; Inkey$
wait
The mouse location within the graphics area can be retrieved from the MouseX and MouseY
variables. The Inkey$ variable holds the character of the key pressed. In order to capture
keyboard input the graphics device must have focus. Sometimes it is necessary to force the
input focus using the setfocus command:
print #w.g, "setfocus"
Mouse actions example with subroutine event handler
Here's a really simple illustrative example of a paint program. When the leftButtonDown event
happens the draw subroutine gets called, and the graphicbox handle and mouse x and y values
get passed in.
'a simple drawing program
open "drawing example" for graphics_nsb as #draw
#draw "vertscrollbar on 0 "; DisplayHeight
#draw "horizscrollbar on 0 "; DisplayWidth
#draw "down"
#draw "size 2"
#draw "when leftButtonMove draw"
wait
sub draw handle$, x, y
#handle$, "set "; x; " "; y
end sub
Mouse actions example with branch label event handler
Here's a really simple illustrative example of a paint program. When the leftButtonDown event
happens the program branches to the [draw] routine. Mouse coordinates are contained in
MouseX and MouseY.
'a simple drawing program
open "drawing example" for graphics_nsb as #draw
#draw "vertscrollbar on 0 "; DisplayHeight
#draw "horizscrollbar on 0 "; DisplayWidth
#draw "down"
#draw "size 2"
#draw "when leftButtonMove [draw]"
wait
[draw]
#draw, "set "; MouseX; " "; MouseY
wait
Keyboard input example with subroutine event handler
Here's a simple program that monitors user keypresses. When the characterInput event happens
the keyCheck subroutine gets called, and the graphicbox handle and Inkey$ values get passed
in.
'a simple keycheck program
open "Press some keys!" for graphics_nsb as #draw
#draw "setfocus;place 10 20"
#draw "when characterInput keyCheck"
wait
sub keyCheck handle$, key$
#handle$, "\";key$
end sub
Keyboard input example with branch label event handler
Here's a simple program that monitors user keypresses. When the characterInput event happens
the program branches to the [keyCheck] routine, and Inkey$ contains the information about the
key(s) pressed by the user.
'a simple keycheck program
open "Press some keys!" for graphics_nsb as #draw
#draw "setfocus;place 10 20"
#draw "when characterInput [keyCheck]"
wait
[keyCheck]
#draw, "\";Inkey$
wait
See also: graphics commands, Inkey$, and Using Virtual Key Contants with Inkey$ for more
details.
Graphics Commands
See also: Understanding Syntax - how to use literals and variables in commands.
New for Liberty BASIC 4: scrollbars may be turned on and off, and the scroll range may be set.
See HORIZSCROLLBAR and VERTSCROLLBAR commands below. The slider on the scrollbar
now opens at the top for vertical scrollbars and at the left for horizontal scrollbars, rather than in
the middle as they did in previous versions of Liberty BASIC. Also new: drawing segments can be
given names. In previous versions of Liberty BASIC, segment ID's were numbers assigned by
Liberty BASIC. For more on using named drawing segments, see the FLUSH command, below.
Most of these commands work only with windows of type graphics and with the graphicbox
control.
It should be noted that graphics windows and graphicboxes are intended for drawing graphics. It
is not advisable to place controls within them, since some controls do not work properly when
placed in graphicboxes or graphics windows. If there is a need for text display within a
graphicbox or graphics window, use the graphics text capabilities rather than a statictext control.
IMPORTANT NOTE: In order to draw, you must make sure that the drawing pen in down, and not
up. See below for more information.
Here is an example using a graphics window:
open "Drawing"
print #handle,
print #handle,
print #handle,
print #handle,
print #handle,
wait
for graphics
"home"
"down"
"fill red"
"circle 50"
"flush"
as #handle
'center the pen
'ready to draw
'fill the window with red
'draw a circle
'make the graphics stick
And here is an example using a graphicbox:
graphicbox #handle.gbox, 10, 10, 150, 150
open "Drawing" for window as #handle
print #handle.gbox, "home"
'center the pen
print #handle.gbox, "down"
'ready to draw
print #handle.gbox, "fill red"
'fill the graphics area red
print #handle.gbox, "circle 50" 'draw a circle
print #handle.gbox, "flush"
'make the graphics stick
wait
Because graphics can involve many detailed drawing operations, Liberty BASIC allows mutliple
commands to be listed in a single command statement if they are separated by semicolons. The
following example shows several graphics commands, each on its own line:
print
print
print
print
print
#handle,
#handle,
#handle,
#handle,
#handle,
"up"
"home"
"down"
"north"
"go 50"
The same commands can be issued on a single line, and will execute slightly faster:
print #handle, "up ; home ; down ; north ; go 50"
If text is displayed using graphics commands, a semicolon may not be used after the command
to display the text. When graphictext is designated by the use of the ( \ ) or ( | ) character, any
semicolons that follow in the same line are considered to be part of the text string to display.
Important: When drawing to a graphics window or graphic box, the operations that are performed
are stored in memory by Liberty BASIC so that lightning fast redraws can be performed. This
storage function uses memory. If an application continually draws raphics, the system will
eventually run out of memory and even potentially crash the computer. To prevent this, the
application should only store those drawing operations which are needed to display its current
state. The cls, delsegment, discard and flush commands help to manage graphics memory.
See also: Graphics
Liberty BASIC supports sprites in graphic windows and in graphicbox controls. Only one
graphicbox or graphics window in a program may use sprites. To learn more about using
sprites, see Sprites.
Using variables in commands:
To use literal values, place them inside the quotation marks:
print #handle, "box 12 57"
To use variables, place them outside the quotation marks, preserving spaces:
x=12 : y = 57
print #handle, "box ";x;" ";y
For more, see Understanding Syntax.
GRAPHICBOX COMMANDS
The following commands are sent to a graphicbox. When a graphicbox is disabled, it can no
longer capture keyboard and mouse events.
print #handle.ext, "setfocus"
This causes the control to receive the input focus. This means that any keypresses will be
directed to the control.
print #handle.ext, "enable"
This causes the control to be enabled.
print #handle.ext, "disable"
This causes the control to be inactive. It can no longer capture mouse and keyboard events.
print #handle.ext, "show"
This causes the control to be visible.
print #handle.ext, "hide"
This causes the control to be hidden or invisible.
print #handle, "autoresize"
This causes the edges of the control to maintain their distance from the edges of the overall
window. If the user resizes the window, the graphicbox control also resizes.
Graphics commands (in alphabetical order):
print #handle, "backcolor COLOR"
This command sets the color used when drawn figures are filled with a color. The same colors
are available as with the COLOR command below.
print #handle, "backcolor red(0-255) green(0-255) blue(0-255)"
The second form of backcolor specifies a pure RGB color. This only works with display modes
greater than 256 colors. To create a green blue color for example, mix green and blue:
print #handle, "backcolor 0 127 200"
print #handle, "box x y"
This command draws a box using the pen position as one corner, and x, y as the other corner.
print #handle, "boxfilled x y"
This command draws a box using the pen position as one corner, and x, y as the other corner.
The box is filled with the color specified using the other BACKCOLOR command.
print #handle, "circle r"
This command draws a circle with radius r at the current pen position.
print #handle, "circlefilled r"
This command draws a circle with radius r, and filled with the color specified using the
BACKCOLOR command.
print #handle, "cls"
This command clears the graphics window, erasing all drawn elements and flushed segments
(and releasing all the memory they used).
print #handle, "color COLOR"
This command sets the pen's color to be COLOR
Here is a list of valid colors (in alphabetical order):
black, blue, brown, buttonface, cyan, darkblue, darkcyan, darkgray, darkgreen, darkpink, darkred,
green, lightgray, palegray, pink, red, white, yellow
Palegray and Lightgray are different names for the same color. Buttonface is the default
background color currently set on a user's system, so it will vary according to the desktop color
scheme. Here is a graphical representation of the named colors:
print #handle, "color red(0-255) green(0-255) blue(0-255)"
The second form of color specifies a pure RGB color. This only works with display modes
greater than 256 colors. To create a violet color for example, mix red and blue:
print #handle, "color 127 0 127"
print #handle, "delsegment n"
This causes the drawn segment with segment ID number "n" to be removed from the window's list
of drawn items. The memory that was used by the drawn segment is reclaimed by the operating
system. When the window is redrawn the deleted segment will not be included in the redraw.
See the SEGMENT command for instructions on retrieving a segment ID number.
print #handle, "delsegment segmentName"
This causes the drawn segment that has been assigned "segmentName" to be removed from the
window's list of drawn items. The memory that was used by the drawn segment is reclaimed by
the operating system. When the window is redrawn the deleted segment will not be included in
the redraw. See the FLUSH command for instructions on assigning segment names.
print #handle, "discard"
This causes all drawn items since the last flush to be discarded (this also reclaims memory used
by the discarded drawn items). Discard does not force an immediate redraw, so the items that
have been discarded will still be displayed until a redraw (see redraw).
print #handle, "down"
This command is the opposite of UP. This command reactivates the drawing process. The pen
must be DOWN to cause graphics to be displayed.
print #handle, "drawbmp bmpname x y"
This command draws a bitmap named bmpname (loaded beforehand with the LOADBMP
statement, see command reference) at the location x y.
print #handle, "ellipse w h"
This command draws an ellipse centered at the pen position of width w and height h.
print #handle, "ellipsefilled w h"
This command draws an ellipse centered at the pen position of width w and height h. The ellipse
is filled with the color specified using the command backcolor (see above).
print #handle, "fill COLOR"
or...
print #handle, "fill red(0-255) green(0-255) blue(0-255)"
This command fills the window with COLOR. For a list of accepted colors see the COLOR
command above. The second form specifies a pure RGB color. This only works with display
modes greater than 256 colors.
print #handle, "flush"
This command ensures that drawn graphics 'stick'. Each time a flush command is issued after
one or more drawing operations, a new group (called a segment) is created. Each segment of
drawn items has an ID number. The segment command retrieves the ID number of the current
segment. Each time a segment is flushed, a new empty segment is created, and the ID number
increases by one. See also the commands cls, delsegment, discard, redraw, and segment.
print #handle, "flush segmentName"
This command ensures that drawn graphics 'stick', and assigns a name to the flushed segment.
Each time a flush command is issued after one or more drawing operations, a new group (called a
segment) is created. This assigned name can be used in later commands to manipulate the
segment. See also the commands cls, delsegment, discard, redraw, and segment.
print #handle, "font facename pointSize"
This command sets the pen's font to the specified face and point size. If an exact match cannot
be found, then Liberty BASIC will try to find a close match, with size taking precedence over face.
For more on specifying fonts read How to Specify Fonts
Example:
print #handle, "font Times_New_Roman 10"
print #handle, "getbmp bmpName x y width height"
This command will make a bitmap copied from the graphics window at x, y and using width and
height. It resides in memory. This bitmap can be drawn using the DRAWBMP command, just as
a bitmap loaded with LOADBMP. It is also possible to get a Windows handle to this bitmap with
the HBMP() function.
print #handle, "go D"
This causes the drawing pen to move forward D distance from the current position, moving in the
current direction.
print #handle, "goto X Y"
This command moves the pen to position X Y. A line will be drawn if the pen is down.
print #handle, "home"
This command centers the pen in the graphics window.
print #handle "horizscrollbar on/off [min max]"
This command manages the horizontal scrollbar. If the value is "on", the scrollbar is visible. If
the value is "off", the scrollbar is not displayed. If the optional paramters for min and max are
used, they set the minimum scrollbar range and the maximum scrollbar range in pixels. A large
scrollbar range allows the graphics window to scroll a long distance, while a short range allows it
to scroll a short distance.
print #handle, "line X1 Y1 X2 Y2"
This command draws a line from point X1 Y1 to point X2 Y2. If the pen is up, then no line will be
drawn, but the pen will be positioned at X2 Y2.
print #handle, "locate x y width height"
This command is for a graphicbox, not a graphics window, and it repositions the control in its
window. This is effective when the control is placed inside a window of type "window". The
control will not update its size and location until a refresh command is sent to the window. See
the included RESIZE.BAS example program.
print #handle, "north"
This command sets the current direction to 270 (north). Zero degrees points to the right (east),
90 points down (south), and 180 points left (west).
print #handle, "pie w h angle1 angle2"
This command draws a pie slice inside an ellipse of width w and height h. The pie slice will begin
at angle1, and sweep clockwise angle2 degrees if angle2 is positive, or sweep counter-clockwise
angle2 degrees if angle2 is negative.
print #handle, "piefilled w h angle1 angle2"
This command draws a pie slice inside an ellipse of width w and height h. The pie slice will begin
at angle1, and sweep clockwise angle2 degrees if angle2 is positive, or sweep counter-clockwise
angle2 degrees if angle2 is negative. The pie slice is fillled with the color specified using the
BACKCOLOR command.
print #handle, "place X Y"
This command positions the pen at X Y. No graphics will be drawn, even if the pen is DOWN.
print #handle, "posxy xVar yVar"
This command assigns the pen's current position to xVar & yVar.
print #handle, "print"
This command sends the plotted image to the Windows Print Manager for output. Liberty BASIC
4 now scales graphics when sending them to a printer. Until version 4.0, Liberty BASIC printed
the contents of graphics windows at 1:1, which resulted in tiny printed versions of what was
visible on the screen. Now it will scale the graphics based on the size they appear on the display
monitor, and the resolution of the printed page. Only TrueType fonts scale when printing. Bitmap
fonts stay at their native resolution when printing. When printing a graphics window which has had
the fill command applied, it will cause an entire printed page to be filled with that color, which may
be highly undesireable. When graphics will be sent to the printer, consider using the boxfilled
command rather than the fill command so that the absolute size of the filled area can be
specified.
print #handle, "redraw"
or
print #handle, "redraw "; idNum
or
print #handle, "redraw "; segmentName
This command causes the window to redraw all flushed drawn segments, or a specific drawn
segment. The specific segment can be identified by the ID number assigned by Liberty BASIC
and retrieved with a SEGMENT command, or it can be a segment name assigned by the program
when the FLUSH command is issued. Any deleted segments will not be redrawn (see
DELSEGMENT). Any items drawn since the last flush will not be redrawn either, and will be lost.
print #handle, "rule rulename"
or
print #handle, "rule "; _R2_NOTXORPEN
This command specifies whether drawing overwrites (rulename OVER) graphics already on the
screen or uses the exclusive-OR technique (rulename XOR). It is also possible to use Windows
constants to select a drawing rule (as shown above). Here are the constants that Windows
defines:
_R2_BLACK
_R2_WHITE
_R2_NOP
_R2_NOT
_R2_COPYPEN
<- the default LB drawing rule
_R2_NOTCOPYPEN
_R2_MERGEPENNOT
_R2_MASKPENNOT
_R2_MERGENOTPEN
_R2_MASKNOTPEN
_R2_MERGEPEN
_R2_NOTMERGEPEN
_R2_MASKPEN
_R2_NOTMASKPEN
_R2_XORPEN
_R2_NOTXORPEN
<- the xor LB drawing rule
print #handle, "segment variableName"
This causes the window to set variableName to the segment ID of the currently open drawing
segment. To get the segment ID of the last segment flushed, subtract one. Segment ID
numbers are useful for manipulating different parts of a drawing.
print #handle, "set x y"
This command draws a point at x, y using the current pen color and size.
print #handle, "setfocus"
This causes Windows to give input focus to this control. This means that, ifsome other control in
the same window was highlighted and active, this control now becomes the highlighted and
active control, receiving mouse and keyboard input.
print #handle, "size S"
This command sets the size of the pen to S. The default is 1. This will affect the thickness of
lines and figures plotted with most of the commands listed in this section.
print #handle, "stringwidth? varToMeasure$ widthInPixels"
This command retrieves the width in pixels of a string, based on the current font of the graphicbox
or graphic window.
open "my stringwidth" for graphics as #g
name$ = "Carl Gundel"
print #g, "stringwidth? name$ width"
print width
print #g, "font courier_new 30"
print #g, "stringwidth? name$ width"
print width
close #g
end
print #handle, "\text"
This command displays the specified text at the current pen position. The text is located with its
lower left corner at the pen position.
Each additional \ in the text will cause a carriage return and line feed. For example, print
#handle, "\text1\text2" will cause text1 to be printed at the pen position, and then text2 will be
displayed directly under text1.
also... print #handle, "|text"
This command works like print #handle, "\text" above, but uses the | character instead of the \
character, which allows display of the character a ( \ ).
print #handle, "trapclose branchLabel"
This will tell Liberty BASIC to continue execution of the program at branchLabel if the user double
clicks on the system menu box or pulls down the system menu and selects close (this command
does not work with graphicbox controls).
print #handle, "turn A"
This command causes the drawing pen to turn from the current direction, using angle A and
adding it to the current direction. A can be positive or negative.
print #handle, "up"
This command lifts up the pen. All GO or GOTO commands will now only move the pen to its
new position without drawing. Any other drawing commands will simply be ignored until the pen
is put back down.
print #handle "vertscrollbar on/off [min max]"
This command manages the vertical scrollbar. If the value is "on", the scrollbar is visible. If the
value is "off", the scrollbar is not displayed. If the optional paramters for min and max are used,
they set the minimum scrollbar range and the maximum scrollbar range in pixels. A large
scrollbar range allows the graphics window to scroll a long distance, while a short range allows it
to scroll a short distance.
print #handle, "when event eventHandler"
This tells the window to process mouse and keyboard events. These events occur when a user
clicks, double-clicks, drags, or just moves the mouse inside the graphics window. An event can
also be the user pressing a key while the graphics window or graphicbox has the input focus (see
the setfocus command, above). This provides a really simple mechanism for controlling flow of a
program which uses the graphics window.
The eventHandler can be a valid branch label or the name of a subroutine. See also: Controls
and Events
Sending print #handle, "when leftButtonDown [startDraw]" to a graphicbox or graphics window will
tell that window to force a goto [startDraw] if the mouse is inside that window when the user
presses the left mouse button. Sending "when leftButtonDown startDraw" to a graphics window
or graphicbox tells the window to call the subroutine startDraw if the mouse is inside that window
when the user presses the left mouse button. The graphicbox handle, MouseX and MouseY
variables are passed into the designated subroutine. If keyboard input is trapped, the graphicbox
handle and the value of the key pressed are passed into the designated subroutine. See Reading
Mouse Events and Keystrokes.
Whenever a mouse event is trapped, Liberty BASIC places the x and y position of the mouse in
the variables MouseX, and MouseY. The values represent the number of pixels in x and y the
mouse was from the upper left corner of the graphic window display pane.
Whenever a keyboard event is trapped, Liberty BASIC places the value of the key(s) pressed into
the special variable, Inkey$. See Using Inkey$.
If the expression print #handle, "when event" is used with no branch label designation, then
trapping for that event is discontinued. It can however be reinstated at any time. Example of
turning off the leftButtonDown event handler:
print #handle, "when leftButtonDown"
Events that can be trapped:
leftButtonDown - the left mouse button is now down
leftButtonUp
- the left mouse button has been released
leftButtonMove - the mouse moved while the left button is down
leftButtonDouble - the left button has been double-clicked
rightButtonDown - the right mouse button is now down
rightButtonUp - the right mouse button has been released
rightButtonMove - the mouse moved while the right button is down
rightButtonDouble - the right button has been double-clicked
mouseMove - the mouse moved when no button was down
characterInput - a key was pressed while the graphics window has
input focus (see the setfocus command, above)
WARNING: using graphicboxes in dialog-type windows is fine, but they do not properly accept
the input focus for keyboard input. If a program needs graphicboxes that trap keyboard events,
then a window of type "window" must be used.
See also: Graphics, Inkey$, Using Virtual Key Contants wiht Inkey$., Using Inkey$, Reading
Mouse Events and Keystrokes
Sprite Table of Contents
Only one graphicbox or graphics window in a program may use sprites.
Sprite Commands
What is a Sprite?
How Do Sprites Work?
Start with the Background
Designate Sprites
Sprite Properties
Drawing and Collision Detection
Flushing Sprite Graphics
Pauses and Timing
Add a Mask
Step by Step
Simple Demo Program
Lander.bas
Sprite images used in some demos are by Ari Feldman.
User License: 209.83.123.9-971442511
http://www.arifeldman.com
Sprite Commands
Only one graphicbox or graphics window in a program may use sprites.
ADDSPRITE
print #w.g, "addsprite SpriteName BmpName";
This adds a sprite with name SpriteName from loaded bitmap called BmpName.
print #w.g, "addsprite SpriteName bmp1 bmp2 bmp3 ... bmpLast";
This adds a sprite with name SpriteName from loaded bitmaps - may include any number of
bitmaps.
BACKGROUND
print #w.g, "background BmpName";
This sets the background for sprites to be the loaded bitmap called BmpName.
BACKGROUNDXY
print #w.g, "backgroundxy 25 20";
OR
x=25:y=20
print #w.g, "backgroundxy ";x;" ";y
This places the point x, y from the background bitmap at location 0, 0 of the sprite graphicbox or
graphics window.
CENTERSPRITE
print #w.g, "centersprite SpriteName"
This causes a sprite's x, y location to refer to the center of the sprite, rather than the default
upper left corner.
CYCLESPRITE
print #w.g, "cyclesprite SpriteName 1"
print #w.g, "cyclesprite SpriteName -1"
print #w.g, "cyclesprite SpriteName 1 once"
This causes a sprite to cycle through its image list automatically. Using "1" will cause the list to
cycle forward. Using "-1" will cause the list to cycle backwards. Using the optional "once"
parameter will cause the sprite to cycle through its image list only one time, other wise it cycles
continuously.
DRAWSPRITES
print #w.g, "drawsprites";
This causes all visible sprites to be drawn on the background and it updates the display.
REMOVESPRITE
print #w.g, "removesprite SpriteName";
This causes the named sprite to be removed from the collection of sprites.
SPRITECOLLIDES
print #w.g, "spritecollides SpriteName";
input #w.g, list$
OR
print #w.g, "spritecollides SpriteName list$";
This causes a list of all sprites that collided with the sprite named SpriteName to be contained in
the variable called "list$".
SPRITEIMAGE
print #w.g, "spriteimage SpriteName BmpNameX";
This causes the sprite called SpriteName to be shown as the image from its image list called
BmpNameX.
SPRITEMOVEXY
print #w.g, "spritemovexy SpriteName 5 5";
OR
x=5:y=5
print #w.g, "spritemovxy SpriteName ";x;" ";y
This causes a sprite called SpriteName to move x pixels in the x direction, and y pixels in the y
direction each time a DRAWSPRITES command is issued to update the display.
SPRITEOFFSET
print #w.g, "spriteoffset SpriteName 20 20";
OR
x=20:y=20
print #w.g, "spriteoffset SpriteName ";x;" ";y
This causes the sprite x, y display location to be offset by the values indicated in x and y from its
coded x, y location.
SPRITEORIENT
print #w.g, "spriteorient SpriteName normal";
print #w.g, "spriteorient SpriteName flip";
print #w.g, "spriteorient SpriteName mirror";
print #w.g, "spriteorient SpriteName rotate180";
This causes the sprite called SpriteName to be oriented in one of the four directions: normal, flip,
mirror, rotate180.
SPRITEROUND
print #w.g, "spriteround SpriteName";
This causes the sprite called SpriteName to be assumed to be a rounded area within the
rectangular bitmap when collisions are evaluated.
SPRITESCALE
print #w.g, "spritescale SpriteName 150";
OR
percent=150
print #w.g, "spritescale SpriteName ";percent
This causes the sprite called SpriteName to be scaled by the percentage designated in both
width and height.
SPRITETOBACK
print #w.g, "spritetoback SpriteName ";
This causes the sprite called SpriteName to be drawn first, so that it appears underneath other
sprites
SPRITETOFRONT
print #w.g, "spritetofront SpriteName ";
This causes the sprite called SpriteName to be drawn last, so that it appears on top of other
sprites
SPRITETRAVELXY
#w.g "spritetravelxy SpriteName 200 250 5 [landed]"
or
#w.g "spritetravelxy SpriteName " ;X; " " ;Y; " " ;speed; "
[branchHandler]"
or
#w.g "spritetravelxy SpriteName " ;X; " " ;Y; " " ;speed; "
subHandler"
This causes the sprite called SpriteName to travel to the x, y location specified at the speed
indicated, and to fire an event when it reaches the destination. The event can be handled at a
[branchLabel] or a sub.
SPRITEVISIBLE
print #w.g, "spritevisible SpriteName on";
print #w.g, "spritevisible SpriteName off";
This causes the sprite called SpriteName to be visible if "on" is used, or to be invisible if "off" is
designated.
SPRITEXY
print #w.g, "spritexy SpriteName 100 137";
OR
x=100:y=137
print #w.g, "spritexy SpriteName ";x;" ";y
This causes the sprite called SpriteName to be drawn at position x, y the next time the display is
updated with the DRAWSPRITES command.
SPRITEXY?
print #w.g, "spritexy? SpriteName"
input #w.g, x, y
OR
print #2.g "spritexy? SpriteName x y"
This obtains the coordinates of the sprite called SpriteName and places them into the variables x
and y.
What is a Sprite?
Here is a background image:
Bitmaps are rectangular images, like the one above.
A program might need to put a picture of a hopping frog onto this background.
Here is the picture of a frog:
The frog is a bitmap also, and bitmaps are rectangular.
Here is the bitmap of the frog, drawn onto the background:
That doesn't look very convincing!
It is possible to make it look like the frog is part of the picture by using sprites. When done with
sprites, the picture looks like this:
How Do Sprites Work?
As was explained in the previous section, bitmaps are rectangular. Realistic graphics require a
way to place the image from a bitmap onto a background without including the image's own
background. If this were to be done with an actual picture on a piece of paper, desired parts of
the image could be cut out, and the remaining parts of the picture could be discarded. This
cutout could then be pasted onto the background. This can be done with bitmaps.
MASKS
Images are added to a background in layers. There are two versions of the image, which are
called a mask and a sprite. The mask is put on first. A mask has a white background. The
shape of the image is the actual mask, and it is all black. A mask is a black and white image.
Here is a mask for the frog image:
SPRITES
The sprite is the image as it will appear, with a completely black background:
SPRITES WITH MASKS
Here is the bitmap for the frog sprite. The mask is directly above the sprite, and together these
will be used to draw sprites in Liberty BASIC. This is a single bitmap:
It is possible to add a mask to the sprite image using Paint, PaintBrush, or any other painting
utility, but the easiest way to add the mask is to use the Liberty BASIC program provided as part
of this help file. Add a mask here.
LAYERING
Sprites are displayed by combining the pixels of the background with the pixels of the mask and
sprite bitmaps, using bitwise operations. The programmer does not need to deal with these
operations, because they are done by Liberty BASIC. A Liberty BASIC sprite bitmap contains
the mask above the sprite. The mask is placed on the background bitmap in memory. It is not
displayed on the screen in this form:
The mask is now in place. The next layer adds the sprite, and results in this picture, which is
displayed on the screen when a DRAWSPRITES command is issued:
IMPORTANT!
To avoid flickering, sprite animation is done invisibly, in memory. When an entire frame of
animation is built, it is then transferred to the screen. IT WILL COVER ANY PREVIOUS
GRAPHICS IN THE GRAPHICBOX OR ON THE GRAPHICWINDOW. See the section on
Drawing and Collision Detection for information about adding graphics to a window with Liberty
BASIC graphic commands during sprite animation.
SPRITES MAY BE PLACED IN ONLY ONE GRAPHICS WINDOW OR GRAPHICBOX IN A
PROGRAM.
Start with the Background
WindowHeight = 320
WindowWidth = 400
graphicbox #w.g, 0, 0, 400, 300
open "sprite test" for window_nf as #w
A window that contains sprites must include a graphicbox, or it must be a graphics window.
Only one graphicbox or graphics window in a program may use sprites.
BACKGROUND FROM LOADED BITMAP
There are several ways to designate a background image. One way is to use a loaded bitmap as
the background. The bitmap must first be loaded with the LOADBMP command:
loadbmp "landscape", "bg1.bmp"
The BACKGROUND command sets the bitmap called "landscape" to be the background:
print #w.g, "background landscape";
Note that simply setting the background bitmap does not cause the background image to display
on the screen. See the section on Drawing and Collision Detection to find out about updating the
display.
NOTE ABOUT BACKGROUND BITMAP SIZE
If the loaded bitmap is the same width and height as the graphicbox, or the client area of the
graphics window, it is used just as it is. If the width of the bitmap is less than the width of the
graphicbox or graphics window, then it is stretched to fit. If the height of the bitmap is less than
the height of the graphicbox or graphics window, then it is stretched to fit.
Here is an example. The width of the following bitmap is greater than the width of the graphicbox,
so it remains unchanged. The height of the bitmap is less than the height of the graphicbox, so it
is stretched to fit.
IMPORTANT NOTE ABOUT BACKGROUND SIZE
The background bitmap image will be stretched to fit the width of the graphicbox if the width is
smaller than the width of the graphicbox, and the height is stretched if the height of the bitmap is
smaller than the height of the graphicbox. THESE NUMBERS REFERS TO THE HEIGHT AND
WIDTH INDICATED WHEN THE GRAPHICBOX IS CREATED, NOT THE VISIBLE PORTION OF
THE GRAPHICBOX. It is possible to create a graphicbox whose dimensions are much larger
than the window that contains it. The background image will be stretched to fit the given
dimensions, not the visible dimensions of the graphicbox.
BACKGROUND FROM SCREEN
The background may be drawn into the graphicbox or graphics window with Liberty BASIC
graphics commands, such as FILL, LINE, BOXFILLED, DRAWBMP, etc. This bitmap is loaded
into memory and given a name with the GETBMP command. This example uses a graphicbox
whose width is 400 and height is 300. The example gets the bitmap from the graphicbox at 0,0
and with a width of 399 pixels and a height of 299 pixels, and gives it the name "landscape".
(Note that the width and height appear to be less than the width and height of the graphicbox, but
the graphicbox dimensions include the frame, and the background bitmap should only include the
inside area.) It can then be used as the designated background bitmap in the same way as a
bitmap loaded with the LOADBMP command:
print #w.g, "getbmp landscape 0 0 399 299";
print #w.g, "background landscape";
DEFAULT BACKGROUND
If no BACKGROUND command is issued, a plain white background will be used.
CHANGING THE BACKGROUND
The background can be changed at any time. It may be changed to a bitmap that has been
loaded into memory with the LOADBMP command, or with the GETBMP command. It is also
possible to draw on the screen to create a new GETBMP bitmap during program execution, and
then designate it to be the background.
To set a new bitmap called "mountains" as the background, just use the BACKGROUND
command after loading the bitmap:
loadbmp "mountains", "mts.bmp"
print #w.g, "background mountains";
IMPORTANT!
The background will not appear in the graphicbox or graphics window until the DRAWSPRITES
command is given. This command updates the display. Even if there are no sprites in use, or if
no sprites are visible, the DRAWSPRITES command must be issued to display the background
onscreen. Whenever the BACKGROUND command is issued, it must be followed by a
DRAWSPRITES command to cause it to show on the screen.
SCROLLING THE BACKGROUND
The background image can be moved within the graphicbox or graphics window with the
BACKGROUNDXY command. The x, y location specified on the background image will be
placed at point 0, 0 of the graphicbox or graphics window. Positive and negative numbers are
acceptable for the x and y locations.
print #handle.ext, "backgroundxy 25 20"
OR
x=25:y=20
print #handle.ext, "backgroundxy ";x;" ";y
OR
x=x+5:y=y-10
print #handle.ext, "backgroundxy ";x;" ";y
See how to set up the sprites in Designate Sprites.
Here is a small program that uses GETBMP to get a background, and then scrolls it. Notice that
no sprites have been added to the program, but to update the background a DRAWSPRITES
command is issued.
nomainwin
WindowWidth=410
WindowHeight=340
graphicbox #w.g, 0,0,400,300
open "Window" for window_nf as #w
print #w.g, "down;fill blue"
print #w.g, "color red;backcolor red"
print
print
print
print
#w.g, "boxfilled 200 150"
#w.g, "getbmp landscape 0 0 399 299";
#w.g, "background landscape";
#w, "trapclose [quit]"
timer 100,[scroll]
wait
[scroll]
x=x+5:y=y+5
print #w.g, "backgroundxy ";x;" ";y
print #w.g, "drawsprites"
[loop]
wait
[quit]
close #w:end
Designate Sprites
A sprite bitmap must include a mask above and a sprite below, like this:
The bitmap must be loaded with the LOADBMP command:
loadbmp "smiley", "smiley.bmp"
NAME
The command to add the sprite to the program is ADDSPRITE. It designates the NAME to give
this sprite, and then the name for the sprite bitmap that was given with LOADBMP. These names
can be the same, as in this example:
print #w.g, "addsprite smiley smiley";
Or, the designated sprite NAME can be different from the LOADBMP name. Below, the bitmap is
named "smiley" when it is loaded, and it is given the spritename, "guy".
loadbmp "smiley", "smiley.bmp"
print #w.g, "addsprite guy smiley";
The spritename is used to refer to this sprite when setting its properties, or issuing commands to
it. The image for a designated sprite can be changed by issuing the ADDSPRITE command
again:
loadbmp "frown", "frown.bmp"
print #w.g, "addsprite guy frown";
None of the properties of the "guy" sprite change when the image is changed.
VISIBILITY
All added sprites will be drawn in each frame of animation. The SPRITEVISIBLE command is
used to specify whether a sprite is visible or not.
A sprite is hidden by issuing SPRITEVISIBLE, the sprite name, and "off".
print #w.g, "spritevisible guy off";
A sprite is shown by issuing SPRITEVISIBLE, the sprite name, and "on".
print #w.g, "spritevisible guy on";
INVISIBLE SPRITES AND COLLISIONS
Invisible sprites still trigger collisions. For more, see the section on Drawing and Collision
Detection.
MULTIPLE VERSIONS OF A SPRITE
It is possible to have several different versions of a sprite image. When the image moves, it
cycles through these versions to create the illusion of real movement. The versions might look
like this:
The individual bitmaps for the sprite images must be loaded with LOADBMP. The bitmaps for the
frog look like this:
The code to load them looks like this:
loadbmp "frog1", "frog1.bmp"
loadbmp "frog2", "frog2.bmp"
loadbmp "frog3", "frog3.bmp"
print #w.g, "addsprite frog frog1 frog2 frog3";
Now the sprite with the NAME of "frog" contains three individual frog images. To see how to
make Liberty BASIC cycle through these images when drawing the frog sprite, see the section on
Sprite Properties. Bitmaps can be used multiple times within one sprite designation. Note that
"frog2" is used twice here:
print #w.g, "addsprite frog frog1 frog2 frog3 frog2";
ACCESSING INDIVIDUAL IMAGES FROM SPRITE LIST
In the example above, the "frog" sprite consists of three separate frog images. By default, the
first image is shown when the sprite is drawn. To show any image from the list, the
SPRITEIMAGE command is issued, specifying the image name to be used. In the following
example, when the sprite is drawn after this command, it will be drawn as the "frog2" image. In
this manner, the image can be changed at any time.
print #w.g, "spriteimage frog frog2";
The individual images of a sprite can be cycled automatically by issuing a CYCLE command,
which is discussed along with other sprite properties in Sprite Properties.
IMPORTANT!
To avoid flickering, sprite animation is done invisibly, in memory. A frame of animation is built
entirely off-screen. A frame of animation is displayed on the screen only when the command
DRAWSPRITES is called. For each frame of animation, perform all functions to set the
background image, and to set or change a sprite's properties, then call the DRAWSPRITES
command. Learn about updating the display in Drawing adn Collision Detection.
Sprite Properties
Sprite properties include NAME, VISIBLE, SCALE, ORIENTATION, CYCLE, LOCATION,
MOTION, TRAVEL, Z ORDER.
The properties VISIBLE and NAME are discussed in Designating Sprites. Sprites have several
other properties that can be set by the programmer.
CYCLE
Liberty BASIC will automatically cycle through the image list for a sprite, if given the
CYCLESPRITE command. The command also requires the sprite's NAME and a value for the
frame count. A value of "1" will cause the sprite to cycle through all images in its list from first
listed to last listed. A value of "-1" will cause the sprite to cycle through all of its images in the
reverse order from which they were listed. A value equal to one of the images in the list will
cause the sprite to cycle to that image. To cycle forward through all images:
print #w.g, "cyclesprite smiley 1"
or backwards:
print #w.g, "cyclesprite smiley -1"
For the example with three frogs, Liberty BASIC will cycle through these three images when
drawing frames of animation:
loadbmp "frog1", "frog1.bmp"
loadbmp "frog2", "frog2.bmp"
loadbmp "frog3", "frog3.bmp"
print #w.g, "addsprite frog frog1 frog2 frog3";
print #w.g, "cyclesprite frog 1"
CYCLE ONCE
Adding ONCE to the CYCLESPRITE command causes the sprite to cycle through its frames of
animation, either forward, or backward, only one time, and then stop at the last (or first) frame.
After the single cycle through frames, the sprite will appear as the last (or first) frame until a
different cycle command is issued. This is useful for animations such as explosions.
print #w.g, "cyclesprite frog 1 once"
SCALE
A sprite may be scaled to a percentage of its original width and height with the SPRITESCALE
command. A percentage of 200 will cause the sprite to appear twice the original width and
height, while a percentage of 50 will cause it to be half as large as the width and height of the
loaded bitmap. To change the size of a sprite to be one and one-half times the width and height
of the loaded bitmap:
print #w.g, "spritescale smiley 150";
ORIENTATION
By default, sprites are shown just as they appear in the loaded bitmap. It is easy to cause them
to appear as a mirror image of the loaded bitmap, or flipped, or rotated 180 degrees. It is not
possible to rotate 90 or 270 degrees, so these rotations will require separate sprites/bitmaps.
Sprites can have alterations in both scale and orientation at one time.
print
print
print
print
#w.g,
#w.g,
#w.g,
#w.g,
"spriteorient
"spriteorient
"spriteorient
"spriteorient
smiley
smiley
smiley
smiley
normal";
flip";
mirror";
rotate180";
POSITION AND MOVEMENT
A sprite can be moved to the x, y position indicated in the SPRITEXY command. The following
example places the sprite named "smiley" at x=100, y=137:
print #w.g, "spritexy smiley 100 137";
Liberty BASIC will automatically move a sprite each time a new frame is drawn, if the
SPRITEMOVEXY command is issued. The following command moves the sprite named "smiley"
5 pixels in the x direction and 2 pixels in the y direction each time a new animation frame is
drawn.
print #w.g, "spritemovexy smiley 5 2";
A sprite is stopped from moving automatically by the SPRITEMOVEXY command and values of 0
for the x and y movement:
print #w.g, "spritemovexy smiley 0 0";
The spritetravelxy command sets up a condition where a sprite moveS to a given location at a
certain speed. Each time a drawsprites command is issued, the sprite moves the appropriate
amount towards its goal. When it reaches its destination, it will fire an event using the handler
specified, and it will stop moving.
print #w.g, "spritetravelxy smiley 300 200 5 [landed]";
The centersprite command causes any commands that refer to the sprite's location to use the
center of the sprite as the x, y location, rather than using the default upper left corner of the sprite
as the x, y location.
print #w.g, "centersprite smiley";
The spriteoffset command causes the displayed location of the sprite to be offset by the values
indicated from the actual coded x, y location. If a sprite is given a spritexy command that calls for
it to be located at 100, 100, but the spriteoffset command is in force, giving offsets of 20x and
50y, the sprite appears at 120, 150. This alters the display coordinates of the sprite, but not its
actual coordinates, which remain 100,100 in this example.
print #w.g, "spriteoffset smiley 20 50";
Z ORDER
Z order means the order in which the sprites are drawn. A sprite on the bottom of the z order is
drawn first, so sprites drawn after it will appear to be on top of it. A sprite at the top of the z order
is drawn last, so other sprites appear underneath it. To bring a sprite to the top of the z order:
print #w.g "spritetofront smiley";
To send a sprite to the bottom of the z order:
print #w.g "spritetoback smiley";
IMPORTANT!
To avoid flickering, sprite animation is done invisibly, in memory. A frame of animation is built
entirely off-screen. A frame of animation is displayed on the screen only when the command
DRAWSPRITES is called. For each frame of animation, perform all functions to set the
background image, and to set or change a sprite's properties, then call the DRAWSPRITES
command. Now, we're ready to start drawing the animated sprites! See the section on Drawing
and Collision Detection!
Drawing and Collision Detection
UPDATING THE DISPLAY
The DRAWSPRITES command updates the display, causing all VISIBLE sprites to be drawn at
their current LOCATIONS, moving them if the SPRITEMOVEXY command has been issued.
They will display in their current SCALE and ORIENTATION. This command must be given each
time it is necessary to draw another frame of animation. Sprite attributes may be changed in
between the DRAWSPRITES commands, including their location, orientation, and scale. If the
background image is to be moved, the BACKGROUNDXY command must be issued before the
DRAWSPRITES command.
print #w.g, "drawsprites";
DRAWING WITH GRAPHICS COMMANDS
After the display has been updated with the DRAWSPRITES command, graphics may be drawn
with regular Liberty BASIC graphics commands, like LINE, CIRCLE, BOXFILLED, etc. These
commands must be reissued after each DRAWSPRITES command. Liberty BASIC graphics
commands should be used sparingly, because this may result in flickering images.
To cause Liberty BASIC graphic entities to become a permanent part of the background the
program must use the GETBMP command, and then the BACKGROUND command to reset the
background. See the section on backgrounds for more information.
COLLISION DETECTION
Most games require some form of collision detection, to ascertain when two sprites have touched.
Liberty BASIC does this automatically! The SPRITECOLLIDES command is used with INPUT to
get a string with names of sprites that overlap the current frame of the sprite named. The INPUT
statement can be avoided if the list receiver variable is placed inside the quotation marks for the
SPRITECOLLIDES command. The sprite names are returned in a single string with spaces
between them.
print #w.g, "spritecollides smiley";
input #w.g, list$
OR
print #w.g, "spritecollides smiley list$";
In the following example, the first line reports that "smiley" collided with "smiler", "smiled", and
"smiles" during that frame of animation. The second line reports that "smiley" collided with
"smiler" and "smiles" during that frame of animation. The third line reports that "smiley" collided
only with the sprite named "smiler" during that frame of animation. The fourth line reports that
"smiley" did not collide with any other sprites during that frame of animation.
list$
list$
list$
list$
=
=
=
=
"smiler smiled smiles"
"smiler smiles"
"smiler"
""
Here is a picture of a sprite collision. The frog sprite has touched one of the bug sprites.
Knowing this, the program would probably change the bug sprite's visibility property to OFF and
move it away from the active playing field, or simply reset the location of the bug so that it
appeared to be a new bug. If this were a game, a point would probably be added to the score
here also.
Collision detection provided by Liberty BASIC uses the entire sprite image, all the way to the
corners, to determine collisions,unless a SPRITEROUND command is issued.
ROUNDED SPRITES AND COLLISIONS
Sprite collisions are triggered when two sprites touch one another. If a sprite image fills the
rectangle that contains it, the collision is triggered properly. Many sprite images do not fill the
corners of the rectangles containing them, but are actually more rounded shapes. If a
SPRITEROUND command is issued to a sprite and it collides with another sprite that has
received the SPRITEROUND command, collisions are detected in an area that rounds off the
corners, assuming that the actual sprite images are generally elliptical or round in shape. A
SPRITEROUND command is issued like this:
print #w.g, "spriteround smiley"
INVISIBLE SPRITES AND COLLISIONS
Invisible sprites still trigger collisions. If a sprite is to be out of action for a time, in addition to
being made invisible, it should also be located to a spot outside the active viewing area. Invisible
sprites may be used to set up a screen area for collision detection. For instance, if it is
necessary to know when a sprite is touching a doorway, an invisible sprite can be placed at that
spot on the screen so that it can be checked for collisions.
REMOVING SPRITES
It is sometimes necessary to remove sprites from the collection of sprites so that they no longer
appear and so that they no longer trigger collisions. This might be done after a sprite collides with
another sprite, so that it is no longer in play in the game. Remove sprites with the
REMOVESPRITE command.
print #w.g, "removeSprite smiley"
DETECT SPRITE LOCATION
The SPRITEXY? command retrieves the current location of a sprite. If a CENTERSPRITE
command has been issued, the x, y location returned indicate the center of the sprite, otherwise
they indicate the upper left corner. Just like the SPRITECOLLIDES command, it can have two
forms. It can be followed by an input statement, with two receiver variables for the x and y
coordinates of the sprite, or the receiver variables can be included inside the quotation marks of
the SPRITEXY? command:
print #w.g, "spritexy? smiley"
input #w.g, x, y
OR
print #w.g, "spritexy? smiley x y"
IMPORTANT REMINDER!
To avoid flickering, sprite animation is done invisibly, in memory. A frame of animation is built
entirely off-screen. A frame of animation is displayed on the screen only when the command
DRAWSPRITES is called. For each frame of animation, perform all functions to set the
background image, and to set or change a sprite's properties, then call the DRAWSPRITES
command.
Sprite graphics are temporary. To learn about making sprite graphics remain in a graphicbox or
graphics window, even if the window is covered or minized, read Flushing Sprite Graphics.
Flushing Sprite Graphics
FLUSHING GRAPHICS
In Liberty BASIC graphicboxes and graphics windows, the drawings are lost if the window is
covered by another window, or if the window is minimized. To make drawings "stick", use the
FLUSH command. The FLUSH command is used in conjunction with DELSEGMENT, DISCARD,
REDRAW, and CLS.
In the following example, the graphicbox is filled with yellow. The second line commands Liberty
BASIC to remember this drawing operation, and to repaint the graphicbox when needed, so that it
is always filled with yellow. Without the FLUSH command, the graphicbox reverts to its default
color in any areas that were covered by another window, and the entire graphicbox reverts to its
default color when the window was minimized. The FLUSH command insures that it will always
be yellow.
print #w.g, "down; fill yellow";
print #w.g, "flush";
FLUSHING SPRITE GRAPHICS
A simple FLUSH command will not work to flush graphics drawn with sprite commands. It is
possible to flush a sprite-filled graphicsbox or graphic window. It first requires a command to:
GETBMP BMPNAME X Y WIDTH HEIGHT
The GETBMP comand must be followed by a DRAWBMP command that draws the named
bitmap on the window or graphicbox in the same location. It can then be FLUSHed. It looks like
this in a program:
print #w.g, "getbmp KeepIt 0 0 300 200";
print #w.g, "drawbmp KeepIt 0 0; flush";
DON'T FLUSH EVERY FRAME OF A SPRITE ANIMATION! The "flush" command consumes
memory.
The graphicbox can be updated easily when needed with the DRAWSPRITES command. If the
sprites are part of an animated display, each frame of animation can be flushed, but it is
important to remove old segments from memory. It is rarely necessary to flush animated
graphics, because the display can be refreshed easily, and the operations to flush and delete
segments will slow down the animation.
Pauses and Timing
CONTROLLING THE ANIMATION
If the frames of animation are drawn with no pause, the action may be too fast to see or control
on faster computers. A program can control the speed by drawing frames of animation at a set
time interval with the TIMER, or with a simple PAUSE SUBROUTINE.
A REAL TIMER!
The new Liberty BASIC TIMER is perfect for use with animation. It will cause the branch label
specified to be executed at the time interval specified in milliseconds. There are 1,000
milliseconds in one second. A half second interval would require the milliseconds parameter to
be 500. A one-quarter second interval would require a milliseconds parameter of 250 and a
one-tenth of a second interval would use a milliseconds parameter of 100. The following example
causes a frame to be drawn every one-tenth of a second:
TIMER 100, [DrawFrame]
To turn off the TIMER, use this:
TIMER 0
The TIMER can be activated or reactivated in the code as desired by repeating the TIMER
command. The time interval can be changed, as can the branch label to execute when the timer
fires. Here is an example that could occur in the same program as the TIMER example above:
TIMER 250, [DrawExplosion]
AN IMPORTANT NOTE ABOUT THE TIMER!
The cpu clock "ticks" 18 times per second. This means that it "ticks" roughly every 56
milliseconds. If the time interval is set to 56 milliseconds or less, the resulting animation will run
at a top speed of 18 frames per second. If a program stops for any reason, the timer ticks
accumulate and the accumulated ticks fire off rapidly when the program action resumes. This
might happen when the program gives the user a notice message, for instance. If action is to
stop for any reason, it is necessary to issue a TIMER 0 command to stop the timer. When the
action is to resume, then the timer is restarted with a TIMER ms, [BranchLabel] command.
A SIMPLE PAUSE SUBROUTINE
On a fast computer, the frames of animation may run too quickly to be useful. It is easy to code
a simple pause between frames of animation. The following little subroutine called "Pause"
requires a parameter for the number of milliseconds to pause between frames. There are 1,000
milliseconds in one second. A half second pause requires the mil parameter to be 500. A
one-quarter second pause requires a mil parameter of 250 and a one-tenth of a second pause
uses a mil parameter of 100.
sub Pause mil
t=time$("milliseconds")
while time$("milliseconds")<t+mil
wend
end sub
This code will activate a one-tenth of a second pause between frames, when used after each
DRAWSPRITES command:
call Pause 100
A processing loop for a sprite animation with pauses between frames might look like this:
[loop]
scan
call Pause 100
print #w.g, "setfocus; when characterInput [quit]"
print #w.g, "when leftButtonDown [left]"
print #w.g, "when rightButtonDown [right]"
gosub [drawFrame]
goto [loop]
TIMER VS PAUSE
The TIMER causes a branch label to be executed at a set interval, which is measured in
milliseconds. Setting this interval to 250 (for example) will cause the branch label to be executed
each one-quarter second. A PAUSE is just that. It causes the action to pause for the set
interval. Pausing for one-quarter second BETWEEN frames of animation will not be the same as
drawing a frame of animation every one-quarter second, because in addition to the one-quarter
second pause, time is taken while the code at the branch label is executed. Using the TIMER
results in much smoother and more accurate timing for animation.
See how to Add a Mask to sprites.
Add a Mask
The code provided below opens a sprite image and automatically adds a proper mask. If the
resulting image is correct, it can be saved to disk.
A sprite starts with a drawn image that has a black background, like this:
This image can be opened in the mask maker and a proper mask is added. It will look like this
while processing:
If the mask/sprite image above is saved, it will look like this:
Here is the code. Copy and paste into the Liberty BASIC Editor to run the "Add Masks to
Sprites" program. See a Step by Step sprite coding explanation.
'small utility to add masks to the
'top of sprite images for use in LB3
if val(Version$)<3 then
notice "This program is for LB3 only!"
end
end if
nomainwin
bmpheight=0
bmpwidth=0
bitmap$=""
'bitmap height
'bitmap width
'bitmap file name
savefile$=""
hBitmap=0
hWindow=0
'save file name
'handle for loaded bitmap
'window handle
menu #1, "&File", "&Open Sprite",[openSprite],_
"&Save As...",[saveAs],|,"E&xit",[quit]
open "Add Masks to Sprites" for graphics_fs_nsb as #1
print #1, "trapclose [quit]"
print #1, "down;place 20 40"
print #1, "|Open the desired sprite image."
print #1, "|A mask will be added to the sprite "
print #1, "|as you watch."
print #1, "|This might take time for large images."
print #1, "|Images larger than the window "
print #1, "|will be cut off."
print #1, "|If it is satisfactory, choose "
print #1, "|'Save As...' from the File menu."
hWindow=hwnd(#1)
[loop]
input aVar$
[quit]
close #1:end
[openSprite]
if hBitmap<>0 then
unloadbmp ("bm")
print #1, "cls"
end if
filedialog "Open Sprite","*.bmp",bitmap$
if bitmap$="" then
notice "No bitmap chosen!"
goto [loop]
end if
print #1, "cls"
loadbmp "bm" , bitmap$
hBitmap=hbmp("bm")
print #1, "down;drawbmp bm 0 0"
bmpheight=HeightBitmap(bitmap$)
bmpwidth=WidthBitmap(bitmap$)
print #1, "drawbmp bm 0 ";bmpheight
call MakeMask bmpwidth, bmpheight, hWindow
goto [loop]
[saveAs]
print #1, "getbmp SpriteMask 0 0 ";bmpwidth;" ";2*bmpheight
filedialog "Save As... ","*.bmp",savefile$
if savefile$="" then
notice "No filename specified!"
goto [loop]
end if
bmpsave "SpriteMask",savefile$
notice "Sprite and mask saved as ";savefile$
goto [loop]
'************FUNCTIONS******************
function WidthBitmap(name$)
open name$ for input as #pic
pic$=input$(#pic,29)
close #pic
WidthBitmap = asc(mid$(pic$,19,1)) + _
(asc(mid$(pic$,20,1)) * 256)
end function
function HeightBitmap(name$)
open name$ for input as #pic
pic$=input$(#pic,29)
close #pic
HeightBitmap = asc(mid$(pic$,23,1)) + _
(asc(mid$(pic$,24,1)) * 256)
end function
sub MakeMask wide, high, hWnd
cursor hourglass
white=(255*256*256)+(255*256)+255
black=0
open "user32" for dll as #user
Open "gdi32"for DLL as #gdi
CallDll #user, "GetDC",_
hWnd as long,_
hDC as long
for i = 0 to wide-1
for j = 0 to high-1
CallDll #gdi, "GetPixel",_
hDC as long,_
i as long,_
j as long,_
pColor as long
if pColor=black then
newColor=white
else
newColor=black
end if
CallDll #gdi, "SetPixel",_
hDC as long,_
i as long, _
j as long, _
newColor as long, _
r as long
next j
next i
CallDll #user, "ReleaseDC",_
hWnd as long,_
hDC as long,_
r as long
close #user
close #gdi
cursor normal
end sub
Step by Step
Here is a step by step review of sprite animation. See a Simple Demo Program.
1. Open a window containing a graphicbox, or open a graphics window.
2. Load bitmaps for all sprites with the LOADBMP command. (Sprite bitmaps can also be
created at runtime. For an example, see the Simple Demo Program.)
3. Optional - Load bitmap for background(s) with the LOADBMP command.
OR
4. Optional - Load bitmap for background(s) by drawing desired background onscreen and saving
it to memory with the GETBMP command.
5. Set the background for animation with the BACKGROUND command.
6. Add all sprites with an ADDSPRITE command for each.
7. For all sprites that are to cycle through frames of animation, issue a CYCLESPRITE
command.
8. For all sprites that are to have a size different from the actual bitmap image size, issue a
SPRITESCALE command.
9. For all sprites that are to appear in a different orientation, issue SPRITEORIENT commands.
10. For all sprites that are to move automatically with each frame of animation, issue a
SPRITEMOVEXY command.
DURING ANIMATION:
11. Scroll background, if desired, with the BACKGROUNDXY command.
12. Move sprites individually, if desired with the SPRITEXY command.
13. Change scale, cycling, orientation and visibilty of sprites as required by the specifics of the
program with SPRITESCALE, SPRITEORIENT SPRITEVISIBLE, SPRITECYCLE.
14. Obtain current location of desired sprites with the SPRITEXY? command.
15. Retrieve lists of sprites that have collided with designated sprites with the SPRITECOLLIDES
command.
16. Place frames of animation on the screen with the DRAWSPRITES command.
Simple Demo Program
This simple demo draws a background and sprites on the screen, using GETBMP to set up the
bitmaps for sprite animation. The program scrolls the background, moves the sprites
automatically, checks for collisions and acts when the sprites collide.
nomainwin
WindowWidth=410
WindowHeight=450
UpperLeftX=50
UpperLeftY=5
graphicbox #w.g, 0,0,400,300
graphicbox #w.s, 0,301,100,100
open "Animation" for window_nf as #w
print #w, "trapclose [quit]"
'draw
print
print
print
print
background:
#w.g, "down;fill blue"
#w.g, "color red;backcolor red"
#w.g, "boxfilled 200 150"
#w.g, "getbmp landscape 0 0 399 299";
'set background:
print #w.g, "background landscape";
'draw
print
print
print
sprite and mask:
#w.s, "down; fill white;backcolor black"
#w.s, "color black;place 0 40"
#w.s, "boxfilled 80 80"
'masks:
print #w.s, "place 20 20;circlefilled 18"
print #w.s, "place 60 20;circlefilled 18"
'sprite 1:
print #w.s,
print #w.s,
print #w.s,
print #w.s,
print #w.s,
print #w.s,
print #w.s,
"color yellow;backcolor yellow"
"place 20 60;circlefilled 18"
"color black;backcolor black;size 4"
"set 12 55;set 28 55;size 1"
"place 20 67"
"ellipsefilled 20 5"
"Getbmp ball1 0 0 40 80"
'add sprite, set auto-move
print #w.g, "addsprite guy ball1"
print #w.g, "spritemovexy guy 3 2"
'sprite 2:
print #w.s, "color pink;backcolor pink"
print #w.s, "place 60 60;circlefilled 18"
print #w.s, "color blue;size 4"
print
print
print
print
print
#w.s,
#w.s,
#w.s,
#w.s,
#w.s,
"set 54 55;set 66 55"
"color darkpink;backcolor darkpink;size 1"
"place 60 67"
"ellipsefilled 20 7"
"Getbmp ball2 40 0 40 80"
'add sprite2, set auto-move
print #w.g, "addsprite girl ball2"
print #w.g, "spritexy girl 380 280"
print #w.g, "spritemovexy girl -2 -2"
'move sprites, scroll background,
'check for collisions:
ms = timerScroll(100)
wait
[scroll]
if ms = 0 then wait
'this causes any extra ticks to be ignored
x=x-5:y=y+5
print #w.g, "backgroundxy ";x;" ";y
print #w.g, "drawsprites"
print #w.g, "spritecollides guy list$"
if list$="girl" then
print #w.g, "color black;font arial 14"
print #w.g, "place 140 280;|Boy meets girl!"
ms = timerScroll(0)
end if
wait
function timerScroll(ms)
timer ms, [scroll]
timerScroll = ms
end function
[quit]
close #w:end
Lander.bas
Here is a more advanced game that uses sprite graphics. It is a clone of the arcade game Lunar
Lander.
'Lander.bas
'written by Carl Gundel
'[email protected]
'Needs at least Liberty BASIC v2.0
'This file is contributed to the public domain
'At this stage it is merely a prototype.
'Use the keys 0 through 9 to control thrust
'Use the [ and ] keys to rotate the ship!
'You must make a VERY gentle and level landing
'on one of the flat areas!
'open game window
nomainwin
UpperLeftX = 50
UpperLeftY = 50
WindowWidth = 500
WindowHeight = 340
dim terrain(500)
open "Lunar Lander" for graphics_nsb as #lander
print #lander, "when characterInput [userInput]"
print #lander, "trapclose [quit]"
WindowWidth = 640
call makeSprites
call setBackground
print #lander, "spritexy lem 50 50"
'print #lander, "spritescale lem 200"
[startGame] 'initialize
print #lander, "setfocus"
fuel = 10000
altitude = 0
attitude = 0
longitude = 10
thrust = 0
call setHorizSpeed 8
call setVertSpeed 0
call gravityAccelerate
timer 100, [timerTicked]
startTime = time$("milliseconds")
wait
[timerTicked]
'This is the main simulation routine!
frames = frames + 1
if altitude <= terrain(longitude+15) - 24 then
call setAttitude attitude
call applyThrust thrust, attitude
call gravityAccelerate
altitude = altitude + getVertSpeed()
longitude = max(0, min(485, longitude + getHorizSpeed()))
print #lander, "spritexy lem "; longitude; " "; altitude
print #lander, "drawsprites"
else
timer 0
if landerCrashed(longitude, attitude) then
notice "You crashed!"
else
notice "Successful landing!"
end if
confirm "Try again?"; answer
if answer then [startGame] else [quit]
end if
wait
[quit]
close #lander
end
[userInput]
char$ = Inkey$
if char$ = "[" then
attitude = attitude - 22.5
if attitude < -0.01 then attitude = 337.5
wait
end if
if char$ = "]" then
attitude = attitude + 22.5
if attitude > 337.51 then attitude = 0
wait
end if
thrustInput = instr("0123456789", char$)
if thrustInput then thrust = (thrustInput - 1) / 8 * 0.55 + 0.333
wait
function landerCrashed(xPosition, attitude)
landerCrashed = int(attitude+0.1) <> 90
landerCrashed = landerCrashed or getVertSpeed() > 2
landerCrashed = landerCrashed or getHorizSpeed() > 2
landerCrashed = landerCrashed or terrain(xPosition) <>
terrain(xPosition+30)
landerCrashed = landerCrashed or terrain(xPosition) <>
terrain(xPosition+15)
end function
sub makeSprites
open "lem" for graphics as #makeSprites
print #makeSprites, "down"
print #makeSprites, "place 0 31 ; backColor black ; boxfilled 640
73"
for x = 0 to 15
y = 1
call drawLEM x, y, 270 + x * 22.5, 2, "black"
y = 2
call drawLEM x, y, 270 + x * 22.5, 2, "darkgray"
call drawLEM x, y, 270 + x * 22.5, 1, "lightgray"
call getSprite x
next x
close #makeSprites
print #lander, "addsprite lem lem0 lem1 lem2 lem3 lem4 lem5 lem6
lem7 lem8 lem9 lem10 lem11 lem12 lem13 lem14 lem15"
end sub
sub drawLEM xPosition, yPosition, uncorrectedAngle, penSize, color$
angle = uncorrectedAngle
print #makeSprites, "north ; color "; color$; " ; up ; turn ";
angle
print #makeSprites, "place "; (xPosition)*30+15; " ";
(yPosition-1)*30+15
print #makeSprites, "size "; penSize
print #makeSprites, "up ; go 4 ; down ; circle 8"
print #makeSprites, "turn 75 ; go 4 ; turn 180 ; go 4"
print #makeSprites, "turn 30 ; go 4 ; turn 180 ; go 4 ; turn 255"
print #makeSprites, "up ; turn 160 ; go 8"
print #makeSprites, "down ; go 4 ; turn 110"
print #makeSprites, "go 8 ; turn 110 ; go 4"
print #makeSprites,
(yPosition-1)*30+15
print #makeSprites,
print #makeSprites,
8"
print #makeSprites,
(yPosition-1)*30+15
print #makeSprites,
print #makeSprites,
8"
"place "; (xPosition)*30+15; " ";
"north ; up ; turn "; angle
"go 4 ; turn 125 ; go 8 ; down ; turn 45 ; go
"place "; (xPosition)*30+15; " ";
"north ; up ; turn "; angle
"go 4 ; turn 235 ; go 8 ; down ; turn -45 ; go
end sub
sub setBackground
'loadbmp "stars", "bmp\stars.bmp"
print #lander, "fill black"
call drawTerrain
print #lander, "getbmp stars 0 0 488 310"
print #lander, "background stars"
end sub
sub getSprite spritNum
spriteX = spritNum * 30
print #makeSprites, "getbmp lem"; spritNum; " "; spriteX; " 1 30
60"
end sub
sub setHorizSpeed xSpeed
vars(0) = xSpeed
end sub
sub setVertSpeed ySpeed
vars(1) = ySpeed
end sub
function getHorizSpeed()
getHorizSpeed = vars(0)
end function
function getVertSpeed()
getVertSpeed = vars(1)
end function
sub setAttitude degrees
print #lander, "spriteimage lem lem"; int(degrees / 22.5)
end sub
sub gravityAccelerate
call setVertSpeed getVertSpeed() + 0.6'(6/18)
end sub
sub applyThrust qtyFuel, angle
angleXform = angle / 180 * 3.141592
call setHorizSpeed getHorizSpeed() - qtyFuel * cos(angleXform)
call setVertSpeed getVertSpeed() - qtyFuel * sin(angleXform)
end sub
sub drawTerrain
rate1 = rnd(1) / (rnd(1) * 17 + 10)
rate2 = rnd(1) / (rnd(1) * 10 + 10)
print #lander, "down ; size 1 ; color white"
for x = 0 to 499 step 1
if rnd(1) < 0.015 then gosub [makeLandingZone]
holder1 = holder1+rate1
holder2 = holder2+rate2
holder3 = holder3+sin(holder2)/20
y =
200+int(sin(holder1)*50)+int(cos(holder2)*50)+int(cos(holder3)*15)
terrain(x) = y
print #lander, "goto "; x; " "; y
next x
goto [endSub]
[makeLandingZone]
width = int((rnd(1)*4+2)/3)
for lz = x to min(499, x + 34 * width)
terrain(lz) = y
print #lander, "goto "; lz; " "; y
next lz
x = lz
return
[endSub]
end sub
Calling APIs and DLLs
Liberty BASIC can make 32-bit Windows API calls and also bind to third party
Dynamic-Link-Libraries. Liberty BASIC programmers now have access to hundreds of functions
provided in Windows and from third-party sources that can greatly increase productivity.
The following topics address many of the methods needed to make API calls.
Informational resources about APIs/DLLs
What are APIs/DLLs?
How to make API/DLL calls
Example Programs
Using hexadecimal values
Using Types with STRUCT and CALLDLL
Passing Strings into API Calls
Caveats
Informational resources about APIs/DLLs
This help fileis a basic introduction for using Windows APIs and DLLs in Liberty Basic. For a
detailed understanding of reasons and procedures for using APIs and DLLs, it is necessary to
study a separate volume that explains Windows programming in detail.
Microsoft includes detailed references with its C compilers, but it is usually good to supplement
these with other books. Here are some suggestions:
For a general understanding of Windows 95+ (32 bit Windows) programming:
Programming Windows, The Definitive Guide to the Win32 API
by Charles Petzold
Microsoft Press
ISBN 157231995X
For a catalog of Windows API calls and their function:
Windows 2000 API SuperBible
by Richard J. Simon
Sams
ISBN 0672319330
Microsoft Developer's Network Library:
http://msdn.microsoft.com/library/
What are APIs/DLLs?
API stands for Application Programming Interface. Windows APIs are the function calls that are
the fundamental building blocks of Windows programming. Although the term "API" actually
refers to the complete set of function calls, it is also often applied to just a single defined
function call of the entire API. So it is often said, "I made an API call," or, "I want my program
to call an API that does such and such..."
Each and every time Windows is loaded, or whenever Windows programs are run, many API
calls are made. There are API calls that manage memory, create and destroy windows, read
keyboard and mouse actions, draw graphics, and much more. Liberty BASIC makes many of
these API calls behind the scenes in programs.
However, in the context of the BASIC language, it would be a tall order (and largely
unnecessary) to create BASIC-like statements and functions to implement every Windows API
call. So for those who already have a working knowledge and for those willing to study and learn
about such things, Liberty BASIC has implemented a way to call most Windows APIs.
A complete reference of the Windows API set is not included with this copy of Liberty BASIC.
To supply this documentation would require the inclusion of a very thick book. Some example
programs are included with the Liberty BASIC distribution.
What are DLLs?
DLL stands for Dynamic-Link-Library. A DLL is a file containing executable code, like an EXE or
COM file. Instead of containing a complete program, a DLL contains functions that can be used
by other programs. These functions might contain code to provide services not built into
Windows, for example the ability to perform some kind of data compression. A Windows
program uses these functions after it begins executing. It does this by opening the DLL file and
calling functions from it. The programmer must already know what these functions are when the
program's code is written.
Each DLL has its own Application Programming Interface (again API) that specifies how to make
calls to its functions, and in fact, Windows APIs are functions within DLLs that are supplied with
Windows. When calling an API from within Liberty BASIC it is necessary to open the
appropriate DLL before making the call.
See also: CALLDLL, STRUCT, Using Types with CALLDLL
How to make API/DLL calls
Since making an API call is really the same as making a DLL call, the following applies to both.
In general, calling an API/DLL function works:
1) Open the desired DLL
2) Call the function or functions
3) Close the DLL
The desired DLL(s) can be opened when the program starts and closed when program execution
is completed, or the DLL(s) can be opened just before calling the functions and then closed
immediately afterward.
The following statements/functions are available for making API/DLL calls:
OPEN
OPEN "filename.dll" for dll as #handle
- This form of OPEN opens a desired DLL so that a program can call functions in it.
Liberty BASIC 3 has Enhanced DLL handle resolution so that if a program hasn't opened certain
default Windows DLLs, a reference to a like-named handle will still resolve to the desired DLL.
This will save on code to open and close DLLs. The old way still works. If a program OPENs a
DLL, then it must be CLOSEd before the program ends. If the default handles below are used,
then a CLOSE command should not be issued.
Here are the default handles.
#user32
#kernel32
#gdi32
#winmm
#shell32
#comdlg32
#comctl32
CALLDLL
CALLDLL #handle, "function", parm1 as type1[, parm2 as type2, ... ],
result as returnType
- This statement calls a named function in an OPENed DLL The list of parameters gives
information to the function that tells it how to perform its tasks.
See CallDLL.
HWND
HWND(#handle)
- This function returns a window handle for the Liberty BASIC #handle
STRUCT
STRUCT name, field1 as type1 [, field2 as type2, ... ]
The STRUCT statement builds a specified structure that is required when making some kinds of
API/DLL calls. There is an example below that shows how to build a rectangle structure often
used in making Windows API calls.
See also: Using types with STRUCT and CALLDLL
Constants
Liberty BASIC has a library of defined Windows constants (_SW_HIDE being one). This is
equivalent to the definitions made in the windows.h file that comes with most C compilers. The
way to inline a Windows constant is to take the name of the constant and place an underscore in
front of it. "_SW_HIDE" is the same as the Windows constant "SW_HIDE."
If Liberty BASIC does not know the value of a Windows Constant, it will generate an undefined
constant message when compiling program. In this case, the numeric value of that constant
must be determined from other sources.
SAMPLE PROGRAM
Here is a short code sample (but not a complete program) using all of the above
statements/functions:
NOMAINWIN
'create the structure winRect
struct winRect, _
orgX as long, _
orgY as long, _
cornerX as long, _
cornerY as long
'define sizes
openingWidth = 600
expandedHeight = 400
'open USER32.DLL
open "user32.dll" for dll as #user
button #main.showMore, "Hide Me", [hide], UL, 10, 10
open "An Example" for window as #main
#main "trapclose [quit]"
'get the window handle for #main (a standard Liberty BASIC window)
hMain = hwnd(#main)
'call the GetWindowRect API to load the window position/size into
winRect
calldll #user, "GetWindowRect", _
hMain as long, _
winRect as struct, _
result as boolean
'extract the position information out of our struct
xOrg = winRect.orgX.struct
yOrg = winRect.orgY.struct
'call the MoveWindow API to resize the window to a predefined size
calldll #user, "MoveWindow", _
hMain as long, _
xOrg as long, _
yOrg as long, _
openingWidth as long, _
expandedHeight as long, _
1 as boolean, _
result as boolean
WAIT
[hide]
'get the window handle to a button in our Liberty BASIC window
hndl = hwnd(#main.showMore)
'call the ShowWindow API, passing _SW_HIDE to hide the button
calldll #user, "ShowWindow", _
hndl as long, _
_SW_HIDE as long, _
result as boolean
WAIT
[quit]
close #main
'close USER.DLL
close #user
END
In the above example, the program calls three APIs from USER32.DLL, which is a standard
Windows dynamic link library.
Here's what the code does:
1) creates the structure winRect
2) opens USER32.DLL
3) gets the window handle for #main (a standard Liberty BASIC window)
4) calls the GetWindowRect API to load the window position/size into winRect
5) extracts the position information from the struct
6) calls the MoveWindow API to resize the window to a predefined size
7) gets the window handle to a button in the Liberty BASIC window
8) calls the ShowWindow API, passing _SW_HIDE to hide the button
9) closes USER32.DLL
See also: CALLDLL, STRUCT, Using Types with CALLDLL, What are APIs/DLLs?
Example Programs
For some examples showing how to call APIs, examine the programs named CALL32?.BAS
that are included with Liberty BASIC.
'CALL32-4.BAS - Make some API calls to play wave files and
'dynamically resize a window
open
open
open
open
"kernel32" for dll as #kernel
"user32" for dll as #user
"winmm" for dll as #mm
"Me" for window as #aWindow
print str$(playMode)
wavefile$ = "chimes.wav"
playMode = 4
calldll #mm, "sndPlaySoundA", _
wavefile$ as ptr,_
playMode as long,_
result as long
hndl = hwnd(#aWindow)
for x = 50 to 350 step 5
calldll #user, "MoveWindow", _
hndl as ulong, _
50 as long, _
50 as long, _
x as long, _
x as long, _
1 as long, _
result as boolean
next x
input r$
progname$ = "notepad.exe"
code = _SW_SHOWNA
notice str$(code)
calldll #kernel, "WinExec", _
progname$ as struct, _
code as ushort, _
result as ushort
print result
close #kernel
input r$
***********************************************
'CALL32-5.BAS - make various API calls to play
'wave files, track
'the mouse position, and move a window around
struct point, x as long, y as long
open "kernel32" for dll as #kernel
open "user32" for dll as #user
open "Me" for window as #aWindow
hndl = hwnd(#aWindow)
for i = 1 to 500
calldll #user, "GetCursorPos", _
point as struct, _
result as void
x = point.x.struct
y = point.y.struct
calldll #user, "MoveWindow", _
hndl as ulong, _
x as long, _
y as long, _
100 as long, _
100 as long, _
1 as long, _
result as boolean
next x
progname$ = "notepad.exe call32-5.bas"
code = _SW_NORMAL
notice str$(code)
calldll #kernel, "WinExec", _
progname$ as struct, _
code as long, _
result as long
print result
close #kernel
input r$
Using hexadecimal values
Liberty BASIC allows values to be expressed as hexadecimal numbers. This is especially
useful when calling API functions or using third party DLLs where the values specified in the
documentation are in hexadecimal (base 16). To convert a hexadecimal value, use the
HEXDEC( ) function. Here is an example:
print hexdec( "FF" )
To convert a decimal value into a hexadecimal string, use the DECHEX$( ) function:
print dechex$(255)
Back to Making API and DLL Calls
Using types with STRUCT and CALLDLL
The STRUCT statement requires that each field be typed to specify what type of data it will
contain. The CALLDLL statement also requires that each parameter passed be typed. The
types are common to both STRUCT and CALLDLL. Simple data TYPES in Windows
programming are often renamed versions of the types below. A program should specify the
TYPE according to the chart below.
TYPES
double (a double floating point)
ulong
(4 bytes, unsigned long integer)
long (4 bytes, signed long integer)
short
(2 bytes, signed short integer)
ushort, word (2 bytes, unsigned short integer)
ptr
(4 bytes, long pointer, for passing strings)
struct
(4 bytes, long pointer, for passing structs)
void, none (a return type only, used when a function doesn't return a value)
boolean
(true/false expression)
See also: CALLDLL, STRUCT
Passing strings into API/DLL calls
Liberty BASIC provides two ways to pass strings as parameters into API/DLL calls. By default
when passing a string as a parameter, Liberty BASIC copies the string and adds an ASCII
zero to the end of the copy. This ASCII zero is called a "null terminator." Most Windows API
calls expect this kind of zero-terminated string. This technique provides a copy of the original
string to be passed to the API function. If the function then modifies that string directly (as in
the kernel API function GetProfileString and a few others), then the Liberty BASIC application
calling the function cannot access the modified string because only the copy is modified.
The way to fix this is for the code to include the ASCII zero onto the end of the string that will
be used as a parameter in the API call. Liberty BASIC checks for the ASCII zero, and if it
finds it, passes the memory address of original string and does not make a copy. This is only
necessary if an application passes a string, expecting to get it back modified by the API or
DLL function called.
Here is a code segment to get printer info using the GetProfileString API call:
'getpstr.bas - Get information using the GetProfileString API call
open "kernel32.dll" for dll as #kernel
'Notice that no ASCII zero characters are added to these strings
'because the program will not need to read any results out of the call
'to GetProfileString.
appName$ = "windows"
keyName$ = "device"
default$ = ""
'add an ASCII zero so Liberty BASIC will not pass a copy of result$
'into the API call, but the actual contents of result$
result$ = space$(49)+chr$(0)
size = 50 '49 spaces plus 1 ASCII zero character
calldll #kernel, "GetProfileStringA",_
appName$ as ptr,_
keyName$ as ptr,_
default$ as ptr,_
result$ as ptr,_
size as long,_
result as long
close #kernel
'display the retrieved information up to but not including the
'terminating ASCII zero
print left$(result$, instr(result$, chr$(0)) - 1)
WAIT
Caveats
There are certain things to be aware of when making API calls and when calling external
functions from a DLL including:
- Care must be taken when calling APIs and DLLs because it is possible to cause Windows or
Liberty BASIC to become unstable or crash if API and/or DLL functions are called incorrectly,
out of order, or with incorrect parameter information.
- Shoptalk Systems does not provide technical support for the Windows API or for third party
DLLs that that may be purchased or otherwise obtained. We are happy to help you with any
questions about Liberty BASIC commands and features that are related to calling APIs and
DLLs, but we reserve the right to refuse to answer questions about other products (including
Windows).
Graphical User Interface
The term "graphical user interface" is often expressed as the acronym GUI. It refers to a window
and all of its controls. These are the graphical elements that interact with the user. The user
may click a button, or type into a textbox, for instance. The possible TYPES of windows
available in Liberty BASIC programs are listed in Window Types. The commands that can be
sent to windows are listed in Window and Dialog Commands. See also, Size and Placement of
Windows and Trapping the Close Event. The controls available for placement on windows are
listed in Controls - Menus, Buttons, etc. Information about handling user-generated events is
given in Controls and Events. Coloring of windows and controls is discussed in Colors and the
Graphical User Interface. An explanation of the methods for sending commands is discussed in
Understanding Syntax, as well as in Sending Commands. Changing the handle of a window
dynamically at runtime can be accomplished with the MAPHANDLE command.
Here is an image of a window that contains many controls:
Liberty BASIC leverages the familiar statements OPEN, CLOSE, PRINT (and optionally INPUT)
for working with graphical user interface elements. For example:
open "My Text Window" for text as #txtWin
print #txtWin, "The fox jumped over the dog."
print #txtWin, "!trapclose [quit]";
wait
[quit]
close #txtWin
end
The OPEN statement is used to open a window. The window can receive commands via the
PRINT statement, and it is closed with the CLOSE statement. The second print statement
above starts with an exclamation point. This is required when printing commands to text
controls in order to tell Liberty BASIC to execute a command instead of printing the text to the
control.
New to Liberty BASIC 3: it is no longer necessary to use the PRINT statement when issuing
commands to a window or control. The word "print" is optional, as is the comma after the
window or control handle. The following version of the code above functions identically, and
requires less typing:
open "My Text Window" for text as #txtWin
#txtWin "The fox jumped over the dog."
#txtWin "!trapclose [quit]";
wait
[quit]
close #txtWin
end
Printing "!trapclose [quit]" to the window tells it to use the event handler code at [quit] to decide
what action to take when the user tries to close the window. This is important. Each window
OPENed should also have a handler set up for trapping the close event.
Windows can have other user interface elements. Here is an example:
statictext #dialog.static, "What is your name?", 10, 10, 100, 20
textbox #dialog.tbox, 10, 30, 100, 20
button #dialog.accept, "Accept", [gotIt], UL, 10, 55
open "Name getter" for dialog as #dialog
print #dialog.tbox, "Type your names in here."
print #dialog, "trapclose [quit]"
wait
[gotIt]
print #dialog.tbox, "!contents? name$"
notice "Hi "; name$
wait
[quit]
close #dialog
end
The "trapclose [quit]" printed to the window in this example does not need an exclamation point
in front of it. This is because the window is a dialog box, and isn't a text widget that displays
text PRINTed to it. For this reason it accepts PRINTed commands that do not start with the
exclamation point.
The controls added to the window include a statictext (a non-editable label), a textbox (an
editable field), and a pushbutton. They are listed before the OPEN statement, which opens a
dialog window. The button statement's declaration includes the branch label [gotIt]. The code at
[gotIt] is the button's event handler. When the button is clicked it generates an event, and [gotIt]
is invoked. The code t [gotIt] prints a command to the textbox asking for its contents to be
assigned to the string variable name$. The program then pops up a notice window displaying a
greeting to the user.
The window in the example above receives a "trapclose" command. This sets a handler for the
window's close event to be the branch label designated by "trapclose". There, the window can be
closed, if appropriate, perhaps after querying the user about what to do, for example:
[quit]
confirm "Quit. Are you sure?"; yesOrNo$
if yesOrNo$ = "yes" then [quitForSure]
wait
[quitForSure]
close #dialog
end
Graphical elements which display text will accept and display text that is PRINTed directly into
them:
texteditor #main.txtEdit, 3, 3, 250, 300
open "Edit some text, man!" for window as #main
print #main, "trapclose [quit]"
print #main.txtEdit, "C'mon and edit me." ;
print #main.txtEdit, " I dare you!"
print #main.txtEdit, "Or just start typing to replace me."
print #main.txtEdit, "!selectall";
wait
[quit]
close #main
end
The text PRINTed to the texteditor control is displayed on the control. Because it accepts text
to display, it is necessary to prefix any commands with a ! when they are PRINTed to a text
control, as the "!selectall" command shows.
Sending Commands
See also: Understanding Syntax - how to use literals and variables in commands.
New to Liberty BASIC 3: it is no longer necessary to use the PRINT statement when issuing
commands to a window or control. The word "print" is optional, as is the comma after the
window or control handle. If these are omitted, Liberty BASIC adds them in the compiling
process.
The PRINT statement may only be omitted when sending commands to windows and
controls. It cannot be omitted when PRINTing to files or other devices.
Here are some examples of sending commands to a window.
The old way:
open "My Text Window" for text as #txtWin
print #txtWin, "The fox jumped over the dog."
print #txtWin, "!trapclose [quit]";
wait
[quit]
close #txtWin
end
The following version of the code above functions identically, and requires less typing:
open "My Text Window" for text as #txtWin
#txtWin "The fox jumped over the dog."
#txtWin "!trapclose [quit]";
wait
[quit]
close #txtWin
end
A Simple Example
In Liberty BASIC windows are treated like files, and anything in this class is refered to as a
BASIC 'Device'. The OPEN statement is used to OPEN a window and the CLOSE statement is
used to close it. The window is controled with PRINT statements, just as a file is controlled by
PRINT statements. (The Print statement may be omitted when sending commands. See
Sending Commands.) The commands are sent as strings to the device. The following simple
example, opens a graphics window, centers a pen (like a Logo turtle), and draws a simple spiral.
When the user attempts to CLOSE the window, he is asked to confirm the exit, and if he
agrees, the window is closed.
button #graph, "Exit", [exit], LR, 35, 20'window will have a button
open "Example" for graphics as #graph
'open graphics window
print #graph, "up"
'make sure pen is up
print #graph, "home"
'center the pen
print #graph, "down"
'make sure pen is down
for index = 1 to 30
'draw 30 spiral segments
print #graph, "go "; index
'go foreward 'index' places
print #graph, "turn 118"
next index
print #graph, "flush"
'turn 118 degrees
'loop back 30 times
'make the image 'stick'
[inputLoop]
input b$ : goto [inputLoop]
'wait for button press
[exit]
confirm "Close Window?"; answer$
if answer$ = "no" then [inputLoop]
'dialog to confirm exit
'if answer$ = "no" loop back
close #graph
end
Handle Variables
In versions of Liberty BASIC prior to version 4, the manipulation of files and windows was done
using statically declared handles for each file, window or GUI control. Now you can create more
reusable code because handle variables allow you to pass a handle using a string form. A handle
variable looks like the regular handle but it adds a "$" on the end, like a string variable.
Regular handle: #myHandle
Handle variable: #myHandleVariable$
The handle variable maps to the string variable of the same name, which contains the actual
handle. Here is a simple example that fills the variable called "var$" with a control handle, then
uses the associated handle variable called "#var$" to send a command to the checkbox.
'create a window with a checkbox and set it
checkbox #win.red, "Red", [redSet], [redReset], 10, 10, 400, 24
open "The new handle variable way" for window as #win
'fill a var with the handle of the checkbox:
var$ = "#win.red"
'now use the associated handle variable to set the checkbox
#var$ "set"
wait
The handle variables are most useful when accessed in FOR/NEXT loops, thus eliminating many
lines of code. They are also essential when using subroutines as event handlers, as in the
TRAPCLOSE statement. See the examples that follow.
The old way
Liberty BASIC 3 doesn't have handle variables. Here is an LB3 example where you have to define
identical code once for each item.
'create a window with a bunch of checkboxes and set them all
checkbox #win.red, "Red", [redSet], [redReset], 10, 10, 400, 24
checkbox #win.blue, "Blue", [blueSet], [blueReset], 10, 35, 400,
24
checkbox #win.green, "Green", [greenSet], [greenReset], 10, 60,
400, 24
checkbox #win.yellow, "Yellow", [yellowSet], [yellowReset], 10,
85, 400, 24
checkbox #win.cyan, "Cyan", [cyanSet], [cyanReset], 10, 110, 400,
24
open "The old handle way" for window as #win
'set each checkbox
#win.red "set"
#win.blue "set"
#win.green "set"
#win.yellow "set"
#win.cyan "set"
wait
The new way
In the code below, it is no longer necessary to issue individual "set" commands for each
checkbox as it was in the "old way" example above. The checkbox handles can be expressed as
variables and accessed in a FOR/NEXT loop. The variable "var$" is reset each time though the
loop. The first time through the loop, it has a value of "#win.red", the second time through the
loop it has a value of "#win.blue" and so on. To use it in place of a literal handle for a control, it is
written with the "#" character in front, so "#var$" is the handle variable associated with the string
variable "var$"
'create a window with a bunch of checkboxes and set them all
checkbox #win.red, "Red", [redSet], [redReset], 10, 10, 400, 24
checkbox #win.blue, "Blue", [blueSet], [blueReset], 10, 35, 400,
24
checkbox #win.green, "Green", [greenSet], [greenReset], 10, 60,
400, 24
checkbox #win.yellow, "Yellow", [yellowSet], [yellowReset], 10,
85, 400, 24
checkbox #win.cyan, "Cyan", [cyanSet], [cyanReset], 10, 110, 400,
24
open "The new handle variable way" for window as #win
'set each checkbox
for x = 1 to 5
var$ = "#win."+word$("red blue green yellow cyan", x)
#var$ "set"
next x
wait
Understanding Syntax
The documentation for Liberty BASIC commands includes command definitions in example
form. These are not to be taken literally. The language used attempts to give intuitive labels to
the command parameters. For example, finding an "x" within a command definition doesn't
meant that an actual "x" should appear there, but rather that the value desired for the x
placement should appear there. Here are some examples to explain the way it works.
Graphics Commands
In the following graphics command definition, the "x" and "y" are NOT variables, but placeholders
for hard-coded values.
print #handle, "box x y"
In an actual program, the values required would appear within the quotation marks for the
command:
print #win, "box 30 221"
To use the "x" and "y" as variables, they MUST be placed outside the quotation marks, with
blank spaces preserved within quotation marks:
x = 30
y = 221
print #main, "box ";x;" ";y
See also: Graphics Commands
Text Commands
print #handle, "!select column row";
Text commands must be preceded by the ! character. If not, they will simply be displayed in the
textbox, texteditor or text window as text. In the example above, "column" and "row" are
standing in for hard coded values.
As it might appear in a program:
print #win, "!select 3 4";
OR
a = 3 : b = 4
print #win, "!select ";a;" ";b
See also:
Text Commands
Control Commands
BUTTON #handle.ext, "label", [clickHandler], corner, x, y
In the above BUTTON command, "#handle" stands in for the window handle as it appears in your
program. The ".ext" stands in for the extension given to the control when it was created. "label"
stands in for the label desired on this button. "[clickHandler]" stands in for the desired branch
label for the event handler for this button. "corner" stands in for the desired anchor corner, and
"x, y" stand in for the actual locations. These can be hard coded, or they can be variables.
Here are some possible BUTTON commands as they appear in a program:
BUTTON #main.okay, "Okay", [doOkay], UL, 10, 20
BUTTON #win.1, "Cancel", [quitMe], UL, 43, 112
x = 112 : y = 34
BUTTON #1.2, "Print", [printClick], UL, x, y
Here is another example that shows the syntax for CHECKBOX:
CHECKBOX #handle.ext, "label", [set], [reset], x, y, wide, high
As it appears in a program:
CHECKBOX #win.check1, "Make Backup", [setBackup],_
[resetBackup], 300, 22, 100, 24
See also: Controls
Size and Placement of Windows
NOTE: Beginning with Liberty BASIC v2.0 the placement of windows and dialog boxes is more
or less the same. Previous versions had two different helpfile sections to describe how window
and dialog placement worked.
The size and placement of any window can be set before it is opened. If no size and placement
statements are specified before a statement to OPEN a window, Liberty BASIC will pick default
sizes.
There are four special variables that can be set to select the size and placement of windows:
UpperLeftX
UpperLeftY
WindowWidth
WindowHeight
The width and the height of the display screen can be retrieved with these variables:
DisplayWidth
DisplayHeight
The values set for UpperLeftX and UpperLeftY determine the number of pixels from the upper-left
corner of the screen to position the window. Often determining the distance from the upper-left
corner of the screen is not as important as determining the size of the window. If UpperLeftX
and UpperLeftY values are not set, the window will appear at a default location determined by
Windows.
WindowWidth and WindowHeight can be set to the number of pixels wide and high desired for
window. These must be set before the OPEN statement for the window. Once the size and
placement of a window are set, the window may be opened with an OPEN statement. Here is an
example:
[openStatus]
UpperLeftX = 32
UpperLeftY = 52
WindowWidth = 190
WindowHeight = 160
open "Status Window" for window as #stats
print "Screen width is ";DisplayWidth
print "Screen height is ";DisplayHeight
This will open a window 32 pixels from the left side of the screen and 52 pixels from the top of the
screen, and with a width of 190 pixels, and a height of 160 pixels.
The screen resolution is contained in the special variables DisplayWidth and DisplayHeight. A
screen resolution of 800x600 pixels returns values of 800 and 600 respectively for DisplayWidth
and DisplayHeight. The sample code below prints the current screen resolution:
print "Screen width is ";DisplayWidth
print "Screen height is ";DisplayHeight
DisplayWidth and DisplayHeight can be used to compute values for WindowWidth and
WindowHeight, as in these examples:
WindowWidth = DisplayWidth
WindowHeight = DisplayHeight - 100
Window Types
Liberty BASIC provides different kinds of window types. Controls can be added to these windows
as needed (see help section Controls - Menus, Buttons, Etc.). Here are the kinds of windows
and the commands associated with them:
The way to specify what kind of window to open is as follows:
open "Window Title" for type as #handle
where type would be one of the descriptors below.
Style suffixes for window types (not all suffixes are supported for each window type):
_fs
_nf
_nsb
_ins
_popup
_modal
window is sized to fill the screen
window has no frame and cannot be resized by user
window doesn't contain scroll bars
contains inset texteditor
window contains no titlebar or sizing frame
window must be closed before another window can gain focus
Liberty BASIC Window Types
There are four types of windows available.These four types include style variations as specified
above. The styles of these windows can be changed if the STYLEBITS command is issued
before the command to open the window.
Here are the descriptions of the four window types.
Window
Windows of type "window" are the most used and useful windows used by Liberty BASIC
programmers. They can contain any of the controls. They can have a sizing frame, or omit it.
They can have a titlebar, or they can appear with no titlebar. They can include a menu, but they
do not have to have a menu. It is also possible for the user to hit the TAB key to move focus
from one control to the next in a window of type "window."
Graphics
Windows of type "graphics" are especially suited to displaying graphics and graphical sprites.
They are not intended to contain controls, and some controls do not work properly when placed
in a graphics window. A sizing frame and scrollbars are optional in a graphics window.
Dialog
Windows of type "dialog" are similar to windows of type "window" in that they can contain all of
the other controls except menus. Menus cannot be placed on a dialog window. Dialog windows
allow the user to hit the TAB key to move focus from one control to the next. A dialog can have
a default button that is activated when the user hits the ENTER key. For this reason, texteditors
do not work well in dialog windows, because hitting ENTER is trapped by the window and the
user cannot add a carriage return to text in a texteditor. Dialog windows are best suited for
getting information from a user, although it is possible to have applications that are dialog-based.
Dialog windows may display as "modal." This means that they receive the input focus for the
program until they are closed. Other program windows cannot be accessed by a user while a
modal dialog is displayed.
Text
Windows of type "text" are quite limited in their functionality. They are not meant to contain
other controls. They are useful for displaying text to a user, or for allowing a user to write and
edit text. Text windows always have a menubar that contains a ready-made File Menu and a
ready-made Edit Menu.
Window types:
graphics open a graphics window
graphics_fs open a graphics window full screen (size of the screen)
graphics_nsb
open a graphics window w/no scroll bars
graphics_fs_nsb
open a graphics window full screen, w/no scroll bars
graphics_nf_nsb
open a graphics window with no sizing frame or scroll bars
Graphics Commands
text
open a text window
text_fs
open a text window full screen
text_nsb open a text window w/no scroll bars
text_nsb_ins
open a text window w/no scroll bars, with inset editor
Text Commands
window
open a basic window type
window_nf
open a basic window type without a sizing frame
window_popup open a window without a titlebar
Window and Dialog Commands
dialog
open a dialog box
dialog_modal
open a modal dialog box
dialog_nf
open a dialog box without a frame
dialog_nf_modal
open a modal dialog box without a frame
dialog_fs
open a dialog box the size of the screen
dialog_nf_fs
open a dialog box without a frame the size of the screen
dialog_popup
open a dialog box without a titlebar
Window and Dialog Commands
Controls - Menus, Buttons, Etc.
Here are the details for Liberty BASIC commands that add menus, buttons, listboxes, and more.
See also: Understanding Syntax and Controls and Events and STYLEBITS
Bmpbutton
Button
Checkbox
Combobox
Graphicbox
Groupbox
Listbox
Menu
Popupmenu
Radiobutton
Statictext
Textbox
Texteditor
Control Descriptions
A BMPBUTTON is a clickable button that displays an image. Bmpbuttons allow users to give a
command to a program.
A BUTTON is a clickable button with a text label. Buttons allow users to give a command to a
program.
A CHECKBOX is a small box that can be checked or unchecked by the user, or by the
programmer. It displays a text label. A checkbox is used when giving a user options from which
to choose.
A COMBOBOX is a form of list. It displays on the window as a small textbox with an arrow at the
side. When the user clicks the arrow, the list drops down and the user can make a selection. A
combobox is appropriate when a program must give the user a list of choices, but there isn't
much room on the window to display a list.
A GRAPHICBOX is a box that displays graphics, such as bitmap images, or drawn objects like
circles and lines, or even text. A graphicbox is used to give the user a graphic display, such as
showing a bitmap image, drawing a graph or chart, or simply to add visual interest to a program.
A GROUPBOX consists of a label and a box. The box can contain other controls, so that they
may be grouped for easy identification. Radiobuttons within a groupbox function as a set. To
have multiple sets of radiobuttons in a window, each set must be placed in its own groupbox.
A LISTBOX is a form of list. It appears as a list of items in a box on the window. The user may
make a choice by clicking on an item in the list with the mouse. If there are more items in the
list than there is room in the listbox, the listbox will automatically add scrollbars. A listbox is a
good choice when it is necessary to give the user a list of choices.
A MENU is a dropdown list of user commands that appears on a bar below the titlebar of a
window. The user clicks on an item contained in the dropdown list to give the window a
command.
A POPUPMENU is a dropdown list of user commands that appears where the mouse is located
when the popupmenu command is issued. The user clicks on an item contained in the dropdown
list to give the window a command.
A RADIOBUTTON is a small round box that can be clicked by the user. It has a text label.
Radiobuttons function in groups. When the user clicks a radiobutton, that button's circle is filled
in and all other radiobuttons are cleared. The programmer may set or unset a radiobutton in code
also. A radiobutton is used when a user must choose only one possibility from a group of
possibilities.
A STATICTEXT is a simple text label used to give information to the user. The user cannot
interact with a statictext control.
A TEXTBOX is a small box that contains text. Text can be placed in the textbox by the
programmer, or the user can type into the textbox. A textbox is used to get a small amount of
text input from the user, or to display a small amount of text.
A TEXTEDITOR is a large box with both horizontal and vertical scrollbars. Text can be placed in
the texteditor by the programmer, or the user can type into the texteditor. A texteditor is used to
get a large amount of text input from the user, or to display a large amount of text.
Controls and Events
The commands to create a controls must specify event handlers that are associated with user
actions made on those controls (clicking, double-clicking, selecting, etc.). There are two ways to
set up event handlers. A branch label may be specified as an event handler, or a subroutine may
be specified as an event handler. A program may use either subroutines or branchlabels or a
combination as event handers. Both ways are discussed below.
Branch Label Event Handlers
button #main.accept, "Accept", [userAccepts], UL, 10, 10
This adds a button to the window (#main) labeled "Accept". When the program is run, and the
user clicks on this button, then execution branches to the event handler routine at the label
[userAccepts]. When the user clicks on the button, it generates an event. This is generally how
branch label arguments are used in Liberty BASIC windows and controls.
Liberty BASIC can only respond to events when execution is halted at in INPUT or WAIT
statement, or when a SCAN command is issued. Here is a short program:
'This code demonstrates how to use checkboxes in
'Liberty BASIC programs
nomainwin
button #1, " &Ok ", [quit], UL, 120, 90
checkbox #1.cb, "I am a checkbox", [set], [reset], 10, 10, 130, 20
button #1, " Set ", [setCheckBox], UL, 10, 50, 40, 25
button #1, " Reset ", [resetCheckBox], UL, 60, 50, 50, 25
textbox #1.text, 10, 90, 100, 24
WindowWidth = 190
WindowHeight = 160
open "Checkbox test" for dialog as #1
print #1, "trapclose [quit]"
'wait here for user actions
wait
[setCheckBox]
print #1.cb, "set"
[set]
print #1.cb, "value? t$"
print #1.text, "I am "; t$
wait
[resetCheckBox]
print #1.cb, "reset"
[reset]
print #1.cb, "value? t$"
print #1.text, "Checkbox is "; t$
wait
[quit]
close #1
end
In the above code, Liberty BASIC opens a small window with a checkbox, a textbox, and a few
buttons. After that, it stops at the WAIT statement just after the branch label [waitHere]. At this
time, if the user clicks one of the buttons or the checkbox, Liberty BASIC can handle the event
and go to the appropriate branch label. The code can be observed in action by stepping through it
with the debugger.
Subroutine Event Handlers
button #main.accept, "Accept", userAcceptsSub, UL, 10, 10
This adds a button to the window (#main) labeled "Accept". When the program is run, and the
user clicks on this button, then execution calls the subroutine userAcceptsSub, passing the
handle of the button as an argument to the subroutine.
Liberty BASIC 3 only lets you handle events using branch labels. This works well for simple
programs, but it since code executed after a branch label does not know how it was called, each
control must have its own branch labels for each event it can trigger. Now with LB4 you can
specify a subroutine to handle events, and when an event gets triggered the subroutine is called
and information about the origins of that event, such as the handle of the control that triggered the
event, get passed into the subroutine.
The old way
See in this example how each listbox needs its own handler for selection.
gosub [loadData]
listbox #win.pets, pet$(), [selectPet], 10, 10, 140, 150
listbox #win.vehicles, vehicle$(), [selectVehicle], 150, 10, 150,
150
statictext #win.label, "", 10, 170, 300, 25
open "Branch label handler" for window as #win
#win.pets "singleclickselect [selectPet]"
#win.vehicles "singleclickselect [selectVehicle]"
wait
[selectPet]
#win.pets "selection? item$"
print #win.label, "Pet -> "; item$
wait
[selectVehicle]
#win.vehicles "selection? item$"
print #win.label, "Vehicle -> "; item$
wait
[loadData]
for x = 0 to 2
read a$
pet$(x) = a$
next x
for x = 0 to 2
read a$
vehicle$(x) = a$
next x
return
data "dog", "cat", "bird"
data "car", "bike", "boat"
end
The new way - subroutines for event handlers
In the example the code specifies the selectionMade subroutine to handle the user actions for the
two listboxes in the window. When the event handler is called, it passes the window handle into
the event handler.
gosub [loadData]
listbox #win.pets, pet$(), selectionMade, 10, 10, 140, 150
listbox #win.vehicles, vehicle$(), selectionMade, 150, 10, 150,
150
statictext #win.label, "", 10, 170, 300, 25
open "Branch label handler" for window as #win
#win.pets "singleclickselect selectionMade"
#win.vehicles "singleclickselect selectionMade"
wait
sub selectionMade handle$
#handle$ "selection? item$"
select case
case handle$ = "#win.pets"
print #win.label, "Pet -> "; item$
case handle$ = "#win.vehicles"
print #win.label, "Vehicle -> "; item$
end select
end sub
[loadData]
for x = 0 to 2
read a$
pet$(x) = a$
next x
for x = 0 to 2
read a$
vehicle$(x) = a$
next x
return
data "dog", "cat", "bird"
data "car", "bike", "boat"
end
Window and Dialog Commands
Note that Liberty BASIC 3 allows tabbing through controls in windows of type "window" as well as
in windows of type "dialog." "Tabbing through the controls" means that controls will be
highlighted and receive the input focus, in turn each time the user hits the "TAB" key. When the
user presses the "TAB" key, the next control listed will receive the input focus.
Changing the handle of a window dynamically at runtime can be accomplished with the
MAPHANDLE command.
Dialog Default Button
In a dialog window, one button may be given the extension "default". If the user presses the
ENTER key while in the dialog window, it will be the same as if the button whose extension is
"default" is pressed and program execution will continue at the event handler [branchLabel] for
that button. In the example below, the program branches to the [okay] routine when the user
presses ENTER.
button #win.default, "Okay",[okay],UL,200,100
open "Test" for dialog as #win
The "default" extension only works this way for regular buttons, not for bmpbuttons.
Change in behavior for LB3: If any button has focus, it becomes the default button in a dialog
window. If any other kind of control has the focus, the button designated with the ".default"
extension is the default button.
CURSOR
The mouse pointer, also called the cursor may be changed with the CURSOR command.
GENERAL WINDOW AND CONTROL COMMANDS:
TRAPCLOSE - This command sets a close event handler for a window or dialog. When a user
decide to close a window, it branches to a routine specified by the "trapclose" command that
confirms or does some sort of cleanup, etc.
Branch Label for Close
'trapclose example using a branch label event handler
statictext #example.label, "Now close the window!!", 10, 10, 200, 25
open "Demonstrate trapclose" for window as #example
print #example, "trapclose [branch]"
wait
[branch]
confirm "Really close?"; answer$
if answer$ = "no" then wait
close #example
end
Subroutine for Close
'trapclose example using a subroutine event handler
statictext #example.label, "Now close the window!!", 10, 10, 200, 25
open "Demonstrate trapclose" for window as #example
print #example, "trapclose Branch"
wait
sub Branch handle$
confirm "Really close?"; answer$
if answer$ = "no" then wait
close #handle$
end
end sub
To send a trapclose command to text window, precede the command with the ! character.
'trapclose example in text window
open "Demonstrate trapclose" for text as #example
print #example, "!trapclose [branch]"
wait
See also: Trapping the close event
FONT - This command sets the font of all of the controls in a window.
'set the font of all the controls in a
'window to courier new 8pt italic
print #handle, "font courier_new 8 italic"
When using a text window, precede the command with a ! character:
open "Font Test" for text as #handle
print #handle, "!font courier_new 8 italic"
wait
For more on specifying fonts read How to Specify Fonts
To override this general font command, font commands may be sent to individual controls after
this command is issued. See the command listss for individual controls for control-specific
documentation. If a control can accept a new text string such as a caption, the font command
must be preceded by a ! character. Examples:
'some controls require !font
print #h.button, "!font courier_new 8 italic"
print #h.textbox, "!font courier_new 8 italic"
'some controls do not require a ! character:
print #h.graphicbox, "font courier_new 8 italic"
print #h.radiobutton, "font courier_new 8 italic"
RESIZEHANDLER - This command sets up an event handler that is activated when the user
resizes a window of type "window". This command is not useful for dialog windows or for windows
without a sizing frame. See also the REFRESH and LOCATE commands below.
'set up a handler for when the user resizes a window
print #handle, "resizehandler [branch]"
or...
'clear the resizing handler
print #handle, "resizehandler"
See the example program RESIZE.BAS.
LOCATE - This command is useful when the RESIZEHANDLER command is used (see above).
After a user resizes a window and the resizehandler is invoked, the controls in that window can
be resized and positioned using the locate command. It is necessary to precede the command
with a ! character for controls such as buttons and textboxes that can accept a new text string or
caption. See the command lists for individual controls for control-specific documentation. After
this, the REFRESH command is used to redraw the entire window.
'move and size controls
print #handle.ext, "locate x y w h"
'move and size buttons, textboxes, etc.
print #handle.ext, "!locate x y w h"
In the example above, "x y w h" are standing in for literal values. To use variables, place them
outside the quotation marks and be sure to preserve the blank spaces.
'literals
print #handle.ext, "locate 12 20 100 24"
'variables
x=12 : y=20 : w=100 : h=24
print #handle.ext, "locate ";x;" ";y;" ";w;" ";h
See the example program RESIZE.BAS.
REFRESH - This command is useful when the RESIZEHANDLER command is used (see above).
After a user resizes a window and the resize handler is invoked, the controls in that window may
be resized and positioned using the locate command. After this, the REFRESH command is
used to redraw the entire window.
'update the window
print #handle, "refresh"
See the example program RESIZE.BAS.
SETFOCUS - Input focus can be set to a control, or to a window with this command. This means
that keyboard input will be directed to the specified control or window. Begin the command with
the ! character for all windows and controls that can accept new text strings, or the command will
simply be displayed on the control. See the topics for individual controls for control-specific
documentation.
'texteditor
print #handle.texteditor, "!setfocus"
'graphics window
print #graph, "setfocus"
'button
print #handle.button, "!setfocus"
'graphicbox
print #handle.graphicbox, "setfocus"
ENABLE, DISABLE
These two commands cause a control to be enabled and active, or disabled and inactive. When a
control is disabled it appears to be grayed-out. Begin the command with the ! character for all
windows and controls that can accept new text strings, or the command will simply be displayed
on the control. See the topics for individual controls for control-specific documentation.
nomainwin
button #win.bttn, "Hello",[hello],UL,10,70
checkbox #win.cbox, "Goodbye",[quit],[quit],10,160,120,24
menu #win, "&Main","&Enable",[doEnable],_
"&Disable",[doDisable],"E&xit",[quit]
open "Enable and Disable" for window as #win
wait
[quit] close #win:end
[doEnable]
#win.bttn "!Enable"
#win.cbox "Enable"
wait
[doDisable]
#win.bttn "!Disable"
#win.cbox "Disable"
wait
[hello] wait
SHOW, HIDE
These two commands cause a control to be visible or hidden. Begin the command with the !
character for all windows and controls that can accept new text strings, or the command will
simply be displayed on the control. See the topics for individual controls for control-specific
documentation.
nomainwin
button #win.bttn, "Hello",[hello],UL,10,70
checkbox #win.cbox, "Goodbye",[quit],[quit],10,160,120,24
menu #win, "&Main","&Show",[doShow],_
"&Hide",[doHide],"E&xit",[quit]
open "Show and Hide" for window as #win
wait
[quit] close #win:end
[doShow]
#win.bttn "!Show"
#win.cbox "Show"
wait
[doHide]
#win.bttn "!Hide"
#win.cbox "Hide"
wait
[hello] wait
Trapping the Close Event
It is important for Liberty BASIC program windows to trap the close event. Then when a user
tries to close a window, program flow is directed to an event handler that the program specifies.
At that place the program can ask for verification that the window should be closed, and/or
perform some sort of cleanup (close files, write ini data, set a flag that the window is open or
closed, etc.). There may be a menu item or button that a user can click to close the window,
but the user might also click the X closing button or the system close button, and that is the
event trapped by the trapclose statement.
The trapclose command works with all window types.
Here is the format for trapclose:
print #myWindow, "trapclose [branchLabel]"
print #myWindow, "trapclose subLabel"
#myWindow "trapclose [branchLabel"
This will tell Liberty BASIC to use the code at [branchLabel] as an event handler for the window
with the handle #myWindow, continuing execution of the program there if the user tries to close
the window (see buttons1.bas example below). If the subroutine, subLabel is designated as the
event handler, rather than a branch label, the named subroutine is executed when the close
event is triggered. The handle of the window is passed into the subroutine by Liberty BASIC.
Usage with branch label handler:
The trapclose code in buttons1.bas looks like this:
open "This is a turtle graphics window!" for graphics_nsb as #1
print #1, "trapclose [quit]"
' stop and wait for buttons to be pressed
wait
And then the code that is executed when the window is closed looks like this:
[quit]
confirm "Do you want to quit Buttons?"; quit$
if quit$ = "no" then wait
close #1
end
Usage with subroutine handler:
The trapclose code in buttons1.bas would look like this if a subroutine was used as the handler:
open "This is a turtle graphics window!" for graphics_nsb as #1
print #1, "trapclose Quit"
' stop and wait for buttons to be pressed
wait
And then the code that is executed when the window is closed looks like this:
sub Quit handle$
confirm "Do you want to quit Buttons?"; quit$
if quit$ = "no" then wait
close #handle$
end
end sub
Colors and the Graphical User Interface
By default, Liberty BASIC gives windows and controls standard colors from the user's Windows
Control Panel settings. Several special variables are provided to change the colors of certain
windows and controls. These variables are case sensitive, and must be typed in the proper
case. For example, "backgroundcolor$" is not the same as "BackgroundColor$". The following
code creates a window with a dark blue background and light gray text. It does this by setting
the BackgroundColor$ and ForegroundColor$ variables BEFORE OPENING THE WINDOW:
'set the foreground and background colors
BackgroundColor$ = "darkblue"
ForegroundColor$ = "lightgray"
statictext #dialog.static, "What is your name?", 10, 10, 100, 20
textbox #dialog.tbox, 10, 30, 100, 20
button #dialog.accept, "Accept", [gotIt], UL, 10, 55
open "Name getter" for dialog as #dialog
print #dialog.tbox, "Type your names in here."
print #dialog, "trapclose [quit]"
wait
[gotIt]
print #dialog.tbox, "!contents? name$"
notice "Hi "; name$
wait
[quit]
close #dialog
end
Setting BackgroundColor$ sets the color of the background of the window, and of groupboxes,
checkboxes, radiobuttons and statictext controls. Setting the ForegroundColor$ sets the color of
text displayed in all controls. Only the last ForegroundColor$ and BackgroundColor$ values set
before a window is opened are valid for that window. Other special color variables exist for setting
the background color of several widgets:
TextboxColor$
ComboboxColor$
ListboxColor$
TexteditorColor$
The value of the TextboxColor$, TexteditorColor$, ListboxColor$ or ComboboxColor$ variable can
be changed in between each control statement. A control will be colored according to the last
color statement listed before the command to create the control. Below is a short example:
WindowWidth = 550
WindowHeight = 410
TextboxColor$ = "red"
textbox #main.textbox1, 26, 16, 100, 25
TextboxColor$ = "blue"
textbox #main.textbox2, 30, 61, 100, 25
TextboxColor$ = "yellow"
textbox #main.textbox3, 30, 121, 100, 25
open "untitled" for dialog as #main
[main.inputLoop]
wait
'wait here for input event
Here is a list of valid colors (in alphabetical order):
black, blue, brown, buttonface, cyan, darkblue, darkcyan, darkgray, darkgreen, darkpink,
darkred, green, lightgray,
palegray, pink, red, white, yellow
"Palegray" and "Lightgray" are different names for the same color. "Buttonface" is the default
background color currently set on a user's system, so it will vary according to the desktop color
scheme. The colornames are not case sensitive, so "WHITE" is the same as "white." Here is a
graphical representation of the available colors:
How to Specify Fonts
"Font FaceName size attributes"
In Liberty BASIC there are many places to specify fonts. This is done using a font command
string containing:
The font facename
The size of the font
Optional modifiers: italic, bold, strikeout, underscore
Here is an example:
'Draw in a graphics
open "Font example"
print #fontExample,
print #fontExample,
print #fontExample,
print #fontExample,
wait
[quit]
close #fontExample
end
window using the font Arial 14 point italic
for graphics as #fontExample
"trapclose [quit]"
"down"
"font arial 14 italic"
"\\This is Arial 14 point italic"
In the above example, the line print #fontExample, "font arial 14 italic" contains a font
specification. Everything after the word font is the specifier: arial 14 italic.
Sending Font Commands to Text Controls
The "font" command is preceded by an exclamation point character ( ! ) when sent to controls
that allow text to be printed to them, such as a textbox control or statictext control. The ( ! )
character signals Liberty BASIC to send a command to the control, rather than print a new
text string on it.
Font Specifications
FaceName
The facename is case insensitive, so "Arial" is the same as "ARIAL" and "arial." To specify a
font which has spaces in its name, use underscores like this:
Courier New
becomes...
Courier_New (or ignore the uppercase letters and type courier_new).
Size in Points
Specify a point size as above by using a single size parameter. A "point" is 1/72 of an inch,
so there are 72 points in an inch. A font that is 14 points high is not the same size as a font
that is 14 pixels high.
Size in Pixels
To specify font size by pixel rather than by point, include parameters for both width and height
in the font command. If the width parameter is set to 0, the default width for that font face and
height will be used.
Here are some examples that set font size by point and by pixel:
'specify just a point size with a single size parameter
print #fontExample, "font Arial 14"
'specify a width and height in pixels
' with two size parameters
print #fontExample, "font Arial 8 15"
'specify a height, and let Windows pick the width
'(for compatibility with earlier versions of Liberty BASIC)
print #fontExample, "font Arial 0 15"
Attributes
Any or all of these attributes (modifiers) can be added - italic, bold, strikeout, and underscore:
'go nuts and add ALL the modifiers
print #fontExample, "font arial 8 italic bold strikeout underscore"
Built-in Dialogs
Liberty BASIC has several built-in dialogs that allow the program's user to make choices or to
enter a small amount of text. They are as follows:
COLORDIALOG
This dialog allows the user to select a color from the Windows Common Color Dialog.
CONFIRM
This dialog gives the user a short message and allows him to choose "yes" or "no" in response
by clicking the YES or NO button to dismiss the dialog. It is often used to ask a user if he would
like to save his work before exiting a program.
FILEDIALOG
This dialog activates the Windows Common File Dialog that allows a user to select a disk
filename to open or save.
FONTDIALOG
This dialog allows a user to select a font face, size and attributes.
NOTICE
This dialog gives the user a message and it includes an OK button. It stays onscreen until the
user clicks the OK button.
PRINTERDIALOG
This dialog allows the user to select a printer and the number of copies of a document to print.
PROMPT
This dialog has a brief text message and a textbox that allows a user to enter a small amount of
text. It also contains an OK button and a CANCEL button.
Please see the topics for the individual dialogs for pictures and details on their use.
Sounds
There are several ways to play sounds using Liberty BASIC.
BEEP
The BEEP command plays the system default wav file. This is often a DING sound. See BEEP.
PLAYWAVE
The PLAYWAVE command plays a wav sound file on disk. See PLAYWAVE.
PLAYMIDI
The PLAYMIDI command plays a midi sound file on disk. See PLAYMIDI.
Mouse, Keyboard and Joystick
Liberty BASIC can read mouse events and keyboard input when a graphics window or graphicbox
is used. See Reading Mouse Events and Keystrokes.
Liberty BASIC can read the x, y, and z coordinates of up to two joysticks, and it can read the
status of the joystick buttons. See READJOYSTICK.
Command Reference A-C
Commands and Keywords
A-C D-F G-K L-M N-P R-S T-Z
ABS( n )
absolute value of n
ACS( n )
arc-cosine of n
"addsprite"
sprite command to add a sprite
AND
bitwise, boolean AND operator
APPEND purpose parameter in fileopen statement
AS
used in calldll and struct, as well as in OPEN statements
ASC( s$ )
ascii value of s$
ASN( n )
arc-sine of n
ATN( n )
arc-tangent of n
"!autoresize"
texteditor command to relocate control automatically
"autoresize" graphics command to relocate control automatically
"backcolor"
graphics command to set background color
"background"
sprite command to set background image
"backgroundxy" sprite command to set background position
BackgroundColor$ sets or returns background color for window
BEEP
play the default system wave file
BINARY
purpose parameter in fileopen statement
Bitwise Operations modify bit patterns in an object
BMPBUTTON
add a bitmap button to a window
BMPSAVE
save a bitmap to a disk file
BOOLEAN
evaluates to true or false
"box"
graphics command to draw box
"boxfilled"
graphics command to draw filled box
BUTTON
add a button to a window
BYREF
passes an argument to a subroutine or function by reference
CALL
call a user defined subroutine
CALLBACK
address of a callback function
CALLDLL call an API or DLL function
CASE specifies a value for select case statement
"centersprite"
causes the x, y location of a sprite to be its center
CHECKBOX
add a checkbox to a window
CHR$( n )
return character of ascii value n
"circle"
graphics command to draw circle
"circlefilled"
graphics command to draw filled circle
CLOSE #h
close a file or window with handle #h
CLS
clear a program's mainwindow
"cls"
graphics command to clear drawing area
"!cls"
text command to clear texteditor
"color" graphics command to set pen color
COLORDIALOG activates the windows common color dialog
COMBOBOX
add a combobox to a window
ComboboxColor$ sets or returns combobox color
CommandLine$ contains any command line switches used on startup
CONFIRM
opens a confirm dialog box
"!contents"
text command to replace contents of texteditor
"!contents?" text command returns contents of texteditor
"!copy"
text command to copy text to clipboard
COS( n )
cosine of n
CURSOR changes the mouse cursor
"!cut"
text command to cut text and copy to clipboard
"cyclesprite"
sprite command to cause animation to cycle
COMMAND REFERENCE:
A-C D-F G-K L-M N-P R-S T-Z
Command Reference D-F
Commands and Keywords
A-C D-F G-K L-M N-P R-S T-Z
DATA
adds data to a program that can be read with the READ statement
DATE$( ) return string with today's date
DECHEX$( ) return a decimal number converted to a hexadecimal string
DefaultDir$
a variable containing the default directory
"delsegment"
graphics command to delete drawing segment
Dialog window type
DIM array( )
set the maximum size of a data array
DISABLE
make a control disabled and grayed-out
"discard"
graphics command to discard unflushed drawing
DisplayWidth
a variable containing the width of the display
DisplayHeight
a variable containing the height of the display
DLL
device open mode for calldll
"down"
graphics command to lower pen
"drawbmp"
graphics command to display a bitmap
"drawsprites"
sprite command to update animation
Drives$
special variable, holds drive letters
DO LOOP
performs a looping action until/while a condition is met
Double
data type for CALLDLL
DUMP force the LPRINT buffer to print
DWORD
data type for calldll and structs
"ellipse"
graphics command to draw an ellipse
"ellipsefilled"
graphics command to draw a filled ellipse
ELSE
used in block conditional statements with IF/THEN
ENABLE
make a control active
END
marks end of program execution
END FUNCTION signifies the end of a function
END IF
used in block conditional statements with IF/THEN
END SELECT
signals end of SELECT CASE construct
END SUB
signifies the end of a subroutine
EOF( #h )
returns the end-of-file status for #h
EVAL(code$)
evaluate an expression to a numeric value
EVAL$(code$) evaluate an expression to a string
EXIT FOR
terminate a for/next loop before itcompletes
EXIT WHILE terminate a while/wend loop before itcompletes
EXP( n )
returns e^n
FIELD #h, list... sets random access fields for #h
FILEDIALOG
opens a file selection dialog box
FILES returns file and subdirectory info
"fill"
graphics command to fill with color
"font"
set font as specified
FONTDIALOG
opens a font selection dialog box
ForegroundColor$ sets or returns foreground color for window
FOR...NEXT
performs looping action
FUNCTION
define a user function
COMMAND REFERENCE:
A-C D-F G-K L-M N-P R-S T-Z
Command Reference G-K
Commands and Keywords
A-C D-F G-K L-M N-P R-S T-Z
GET #h, n
get random access record n for #h
"getbmp" graphics command to capture drawing area
GETTRIM #h, n get a random access record n for #h, with blanks trimmed
GLOBAL
creates a global variable
"go"
graphics command to move pen
GOSUB label
call subroutine label
"goto"
graphics command to move pen
GOTO label
branch to label
GRAPHICBOX add a graphics region to a window
GROUPBOX
add a groupbox to a window
Graphics
window type
Graphics Commands a detailed summary of graphics commands in Liberty BASIC
HBMP( "name" ) return the Windows handle for a bitmap
HEXDEC( "value" ) convert a hexadecimal string to a decimal value
HIDE
make a control invisible
HWND( #handle) return the Windows handle for a window
"home"
graphics command to center pen
IF THEN
perform conditional action(s)
Inkey$ contains a character or keycode from a graphics window
INP(port)
get a byte value from an I/O port
INPUT get data from keyboard, file or button
INPUT$( #h, n ) get n chars from handle #h, or from the keyboard
INPUTTO#( #h,c$) reads from file up to char specified
INPUT purpose parameter in fileopen statement
"!insert"
text command to insert text at caret position
INSTR(a$,b$,n) search for b$ in a$, with optional start n
INT( n )
integer portion of n
JOY-
global variables containing joystick information read by readjoystick command
Joy1x, Joy1y, Joy1z, Joy1button1, Joy1button2
Joy2x, Joy2y, Joy2z, Joy2button1, Joy2button2
KILL s$
delete file named s$
A-C D-F G-K L-M N-P R-S T-Z
Command Reference L-M
Commands and Keywords
A-C D-F G-K L-M N-P R-S T-Z
LEFT$( s$, n )
first n characters of s$
LEN( s$ ) length of s$
LET var = expr assign value of expr to var
"line"
graphics command to draw line
"!line"
text command to return text from specified line in texteditor control
"!lines?"
text command to return number of lines in texteditor control
LINE INPUT
get next line of text from file
LISTBOX
add a listbox to a window
ListboxColor$
sets or returns listbox color
LOADBMP
load a bitmap into memory
LOC(#handle)
return current binary file position
"locate"
locate a control
LOF( #h ) returns length of open file #h or bytes in serial buffer
LOG( n )
returns the natural logarithm of n
LONG data type for calldll and structs
LOWER$( s$ ) s$ converted to all lowercase
LPRINT
print to hard copy
MAINWIN
set the width of the main window in columns and rows
MAPHANDLE
change window handles dynamically
MAX( ) return the greater of two values
MENU adds a pull-down menu to a window
MID$( )
return a substring from a string
MIDIPOS( )
return position of play in a MIDI file
MIN( )
return the smaller of two values
MKDIR( ) make a new subdirectory
"!modified?"
text command to return modified status
Command Reference:
A-C D-F G-K L-M N-P R-S T-Z
Command Reference N-P
Commands and Keywords
A-C D-F G-K L-M N-P R-S T-Z
NAME a$ AS b$ rename file named a$ to b$
NEXT
used with FOR
NOMAINWIN
keep a program's main window from opening
"north" graphics command to set the current drawing direction
NOT
logical and bitwise NOT operator
NOTICE
open a notice dialog box
ONCOMERROR set an error handler for serial communications
ON ERROR
set an error handler for general program errors
OPEN open a file or window
OPEN "COMn:..." open a communications port for reading/writing
OR
logical and bitwise OR operator
"!origin"
text command to set origin
"!origin?"
text command to return origin
OUT port, byte send a byte to a port
OUTPUT
purpose parameter in fileopen statement
"!paste"
text command to paste text from clipboard
"pie"
graphics command to draw pie section
"piefilled" graphics command to draw filled pie section
"place"
graphics command to locate pen
Platform$ special variable containing platform name
PLAYWAVE
plays a *.wav sound file
PLAYMIDI
plays a *.midi sound file
POPUPMENU pops up a menu
"posxy"
graphics command to return pen position
"print"
graphics command to print hard copy
PRINT print to a file or window
PrintCollate
user choice in printerdialog
PrintCopies
number of copies chosen in printerdialog
PRINTERDIALOG open a printer selection dialog box
PrinterFont$ returns or sets the font used with LPRINT
PrinterName$
name of printer
PROMPT open a prompter dialog box
PTR
data type for calldll and structs
PUT #h, n
puts a random access record n for #h
Command Reference:
A-C D-F G-K L-M N-P R-S T-Z
Command Reference R-S
Commands and Keywords
A-C D-F G-K L-M N-P R-S T-Z
RADIOBUTTON adds a radiobutton to a window
RANDOM
purpose parameter in fileopen statement
RANDOMIZE
seed the random number generator
READ reads information from DATA statements
REDIM
redimensions an array and resets its contents
"redraw"
graphics command to redraw segment
"refresh"
redraw a window
REM
adds a remark to a program
"removesprite"
remove a sprite
"resizehandler" set up a routine to handle window resize by user
RESTORE
sets the position of the next DATA statement to read
RETURN
return from a subroutine call
RIGHT$( s$, n ) n rightmost characters of s$
RMDIR( ) remove a subdirectory
RND( n )
returns a random number
"rule"
graphics command to set drawing rule
RUN s$, mode run external program s$, with optional mode
SCAN checks for and dispatches user actions
SEEK #h, fpos set the position in a file opened for binary access
"segment"
graphics command to return segment ID
SELECT CASE performs conditional actions
"!select"
text command to place caret
"!selectall"
text command to highlight all text
"!selection?" text command to return highlighted text
"set"
graphics command to draw a point
"setfocus"
set input focus to control or window
SHORT
data type for calldll and structs
SHOW
make a control visible
SIN( n )
sine of n
"size"
graphics command to set pen size
SORT
sorts single and double dim'd arrays
SPACE$( n )
returns a string of n spaces
Sprites
all about using sprites in Liberty BASIC
"spritecollides" sprite command to discover collisions
"spriteimage"
sprite command to set sprite image
"spritemovexy" sprite command to auto-move sprite
"spriteoffset"
sprite command to offset x,y location of sprite
"spriteorient"
sprite command to orient sprite
"spriteround"
sprite command to change method of collision detection
"spritescale"
sprite command to set sprite's scale
"spritetoback"
sprite command to put sprite at bottom of z order
"spritetofront"
sprite command to put sprite at top of z order
"spritetravelxy" sprite command to move sprite to desired position
"spritevisible"
sprite command to set visibility of sprite
"spritexy" sprite command to set location of sprite
"spritexy?"
sprite command to return location of sprite
SQR(n)
details about getting the square root of a number
STATICTEXT
add a statictext control to a window
STOP
marks end of program execution
STOPMIDI
stops a MIDI file from playing
STR$( n ) returns string equivalent of n
"stringwidth?"
graphics command to return width of text string
STRUCT
builds a structure used in calling of APIs and DLL functions
STYLEBITS
add or remove style bits from a control
SUB
defines a subroutine
Command Reference:
A-C D-F G-K L-M N-P R-S T-Z
Command Reference T-Z
Commands and Keywords
A-C D-F G-K L-M N-P R-S T-Z
TAB( n )
cause tabular printing in mainwin
TAN( n )
tangent of n
Text
window type
Text Commands a detailed summary of text window commands in Liberty BASIC
TEXTBOX add a textbox (entryfield) to a window
TextboxColor$
sets or returns textbox color
TEXTEDITOR
add a texteditor widget to a window
TexteditorColor$ sets or returns texteditor color
TIME$( )
returns current time as string
TIMER manage a Windows timer
TITLEBAR
sets the title bar of the main window
TRACE n sets debug trace level to n
"!trapclose"
text command to trap closing of text window
"trapclose"
trap closing of window
TRIM$( s$ )
returns s$ without leading/trailing spaces
"turn"
graphics command to reset drawing direction
TXCOUNT(#handle) gets number of bytes in serial communications queue
ULONG
data type for calldll and structs
UNLOADBMP
unloads a bitmap from memory
"up"
graphics command to lift pen
UPPER$( s$ )
s$ converted to all uppercase
USHORT data type for calldll and structs
USING( )
performs numeric formatting
UpperLeftX
specifies the x part of the position where the next window will open
UpperLeftY
specifies the y part of the position where the next window will open
VAL( s$ )
Version$
Void
returns numeric equivalent of s$
special variable containing LB version info
data type for CALLDLL
WAIT
stop and wait for user interaction
"when"
graphics command to trap mouse and keyboard events
WHILE...WEND performs looping action
Window
window type
WindowWidth
specifies the width of the next window to open
WindowHeight
specifies the height of the next window to open
WINSTRING(ptr) returns string from ptr
WORD
data type for calldll and structs
WORD$( s$, n ) returns nth word from s$
XOR
logical and bitwise XOR operator
Command Reference:
A-C D-F G-K L-M N-P R-S T-Z
Additional Commands
Text Commands a detailed summary of text window commands in Liberty BASIC
Graphics Commands a detailed summary of graphics commands in Liberty BASIC
Sprite Commands a detailed summary of sprite commands in Liberty BASIC
Reserved Word List
The names of commands and functions are called reserved words. These include familiar
commands and functions like PRINT, INPUT, CHR$( and many others. Function names include
the opening parenthesis. You cannot use reserved words to name variables, subroutines or
functions. When you write software using Liberty BASIC, you are not required to capitalize
reserved words.
There are some built-in variables that are recognized by Liberty BASIC. These are listed at the
bottom of the page. Do not use these variable names for your own purposes. Reserve their use
as intended by Liberty BASIC.
The list of reserved words in Liberty BASIC:
COMMANDS:
AND, APPEND, AS, BEEP, BMPBUTTON, BMPSAVE, BOOLEAN, BUTTON, BYREF, CALL,
CALLBACK, CALLDLL, CALLFN, CASE, CHECKBOX, CLOSE, CLS, COLORDIALOG,
COMBOBOX, CONFIRM, CURSOR, DATA, DIALOG, DIM, DLL, DO, DOUBLE, DUMP,
DWORD, ELSE, END, ERROR, EXIT, FIELD, FILEDIALOG, FILES, FONTDIALOG, FOR,
FUNCTION, GET, GETTRIM, GLOBAL, GOSUB, GOTO, GRAPHICBOX, GRAPHICS,
GROUPBOX, IF, INPUT, KILL, LET, LINE, LISTBOX, LOADBMP, LONG, LOOP, LPRINT,
MAINWIN, MAPHANDLE, MENU, NAME, NEXT, NOMAINWIN, NONE, NOTICE, ON,
ONCOMERROR, OR, OPEN, OUT, OUTPUT, PASSWORD, PLAYMIDI, PLAYWAVE,
POPUPMENU, PRINT, PRINTERDIALOG, PROMPT, PTR, PUT, RADIOBUTTON, RANDOM,
RANDOMIZE, READ, READJOYSTICK, REDIM, REM, RESTORE, RESUME, RETURN, RUN,
SCAN, SELECT, SHORT, SORT, STATICTEXT, STOP, STOPMIDI, STRUCT, SUB, TEXT,
TEXTBOX, TEXTEDITOR, THEN, TIMER, TITLEBAR, TRACE, ULONG, UNLOADBMP, UNTIL,
USHORT, VOID, WAIT, WINDOW, WEND, WHILE, WORD, XOR
FUNCTIONS:
Note that the opening parenthisis is part of the function name:
ABS(, ACS(, ASC(, ASN(, ATN(, CHR$(, COS(, DATE$(, DECHEX$(, EOF(, EVAL(, EVAL$(,
EXP(, HBMP(, HEXDEC(, HWND(, INP(, INPUT$(, INPUTTO$(, INSTR(, INT(, LEFT$(, LEN(,
LOF(, LOG(, LOWER$(, MAX(, MIDIPOS(, MID$(, MIN(, MKDIR(, NOT(, RIGHT$(, RMDIR(,
RND(, SIN(, SPACE$(, SQR(, STR$(, TAB(, TAN(, TIME$(, TRIM$(, TXCOUNT(, UPPER$(,
USING(, VAL(, WINSTRING(, WORD$(
VARIABLES:
BackgroundColor$, ComboboxColor$, CommandLine$, DefaultDir$, DisplayHeight, DisplayWidth,
Drives$, Err, Err$, ForegroundColor$, Joy1x, Joy1y, Joy1z, Joy1button1, Joy1button2, Joy2x,
Joy2y, Joy2z, Joy2button1, Joy2button2, ListboxColor$, Platform$, PrintCollate, PrintCopies,
PrinterFont$, PrinterName$, TextboxColor$, TexteditorColor$, Version$, WindowHeight,
WindowWidth, UpperLeftX, UpperLeftY
ABS( n )
Description:
This function returns | n | (the absolute value of n). "n" can be a number or any numeric
expression.
Usage:
print abs( -5 )
produces: 5
print abs( 6 - 13 )
produces: 7
print abs( 2 + 4 )
produces: 6
print abs( 3 )
produces: 3
print abs( 3/2 )
produces: 1.5
print abs( 5.75 )
produces:
5.75
ACS( n )
Description:
This function returns the arc cosine of the number or numeric expression n. The return value is
expressed in radians.
Usage:
print "The arc cosine of 0.2 is "; acs(0.2)
Tip:
There are 2 * pi radians in a full circle of 360 degrees. A formula to convert degrees to radians is:
radians = degrees divided by 57.29577951
Note: See also COS( )
ASC( s$ )
Description:
This function returns the ASCII value of the first character of string s$. s$ can be a string
variable, or text enclosed in quotes. Text and formatting characters have ASCII values from 0 to
255. See also CHR$( n )
Usage:
print asc( "A" )
produces:
65
let name$ = "Tim"
firstLetter = asc(name$)
print firstLetter
produces:
84
print asc( "" )
produces:
0
ASCII Chart of Printable (Text) Characters
Chr$(33)
Chr$(34)
Chr$(35)
Chr$(36)
Chr$(37)
Chr$(38)
Chr$(39)
Chr$(40)
Chr$(41)
Chr$(42)
Chr$(43)
Chr$(44)
Chr$(45)
Chr$(46)
Chr$(47)
Chr$(48)
Chr$(49)
Chr$(50)
Chr$(51)
Chr$(52)
Chr$(53)
Chr$(54)
Chr$(55)
Chr$(56)
Chr$(57)
Chr$(58)
Chr$(59)
Chr$(60)
Chr$(61)
Chr$(62)
Chr$(63)
Chr$(64)
Chr$(65)
=
=
=
=
=
=
=
=
=
=
=
=
=
=
=
=
=
=
=
=
=
=
=
=
=
=
=
=
=
=
=
=
=
!
"
#
$
%
&
'
(
)
*
+
,
.
/
0
1
2
3
4
5
6
7
8
9
:
;
<
=
>
?
@
A
Chr$(66) = B
Chr$(67) = C
Chr$(68) = D
Chr$(69) = E
Chr$(70) = F
Chr$(71) = G
Chr$(72) = H
Chr$(73) = I
Chr$(74) = J
Chr$(75) = K
Chr$(76) = L
Chr$(77) = M
Chr$(78) = N
Chr$(79) = O
Chr$(80) = P
Chr$(81) = Q
Chr$(82) = R
Chr$(83) = S
Chr$(84) = T
Chr$(85) = U
Chr$(86) = V
Chr$(87) = W
Chr$(88) = X
Chr$(89) = Y
Chr$(90) = Z
Chr$(91) = [
Chr$(92) = \
Chr$(93) = ]
Chr$(94) = ^
Chr$(96) = `
Chr$(97) = a
Chr$(98) = b
Chr$(99) = c
Chr$(100) = d
Chr$(101) = e
Chr$(102) = f
Chr$(103) = g
Chr$(104) = h
Chr$(105) = i
Chr$(106) = j
Chr$(107) = k
Chr$(108) = l
Chr$(109) = m
Chr$(110) = n
Chr$(111) = o
Chr$(112) = p
Chr$(113) = q
Chr$(114) = r
Chr$(115) = s
Chr$(116) = t
Chr$(117) = u
Chr$(118) = v
Chr$(119) = w
Chr$(120) = x
Chr$(121)
Chr$(122)
Chr$(123)
Chr$(124)
Chr$(125)
Chr$(126)
Chr$(127)
Chr$(128)
Chr$(129)
Chr$(130)
Chr$(131)
Chr$(132)
Chr$(133)
Chr$(134)
Chr$(135)
Chr$(136)
Chr$(137)
Chr$(138)
Chr$(139)
Chr$(140)
Chr$(142)
Chr$(145)
Chr$(146)
Chr$(147)
Chr$(148)
Chr$(149)
Chr$(150)
Chr$(151)
Chr$(152)
Chr$(153)
Chr$(154)
Chr$(155)
Chr$(156)
Chr$(158)
Chr$(159)
Chr$(161)
Chr$(162)
Chr$(163)
Chr$(164)
Chr$(165)
Chr$(166)
Chr$(167)
Chr$(168)
Chr$(169)
Chr$(170)
Chr$(171)
Chr$(172)
Chr$(173)
Chr$(174)
Chr$(175)
Chr$(176)
Chr$(177)
Chr$(178)
Chr$(179)
=
=
=
=
=
=
=
=
=
=
=
=
=
=
=
=
=
=
=
=
=
=
=
=
=
=
=
=
=
=
=
=
=
=
=
=
=
=
=
=
=
=
=
=
=
=
=
=
=
=
=
=
=
=
y
z
{
|
}
~
•
€
•
‚
ƒ
„
…
†
‡
ˆ
‰
Š
‹
Œ
Ž
'
'
“
”
–
–
˜
™
š
›
œ
ž
Ÿ
¡
¢
£
¤
¥
¦
§
¨
©
ª
«
¬
®
¯
°
±
²
³
Chr$(180)
Chr$(181)
Chr$(182)
Chr$(183)
Chr$(184)
Chr$(185)
Chr$(186)
Chr$(187)
Chr$(188)
Chr$(189)
Chr$(190)
Chr$(191)
Chr$(192)
Chr$(193)
Chr$(194)
Chr$(195)
Chr$(196)
Chr$(197)
Chr$(198)
Chr$(199)
Chr$(200)
Chr$(201)
Chr$(202)
Chr$(203)
Chr$(204)
Chr$(205)
Chr$(206)
Chr$(207)
Chr$(208)
Chr$(209)
Chr$(210)
Chr$(211)
Chr$(212)
Chr$(213)
Chr$(214)
Chr$(215)
Chr$(216)
Chr$(217)
Chr$(218)
Chr$(219)
Chr$(220)
Chr$(221)
Chr$(222)
Chr$(223)
Chr$(224)
Chr$(225)
Chr$(226)
Chr$(227)
Chr$(228)
Chr$(229)
Chr$(230)
Chr$(231)
Chr$(232)
Chr$(233)
=
=
=
=
=
=
=
=
=
=
=
=
=
=
=
=
=
=
=
=
=
=
=
=
=
=
=
=
=
=
=
=
=
=
=
=
=
=
=
=
=
=
=
=
=
=
=
=
=
=
=
=
=
=
´
µ
¶
·
¸
¹
º
»
¼
½
¾
¿
À
Á
Â
Ã
Ä
Å
Æ
Ç
È
É
Ê
Ë
Ì
Í
Î
Ï
Ð
Ñ
Ò
Ó
Ô
Õ
Ö
×
Ø
Ù
Ú
Û
Ü
Ý
Þ
ß
à
á
â
ã
ä
å
æ
ç
è
é
Chr$(234)
Chr$(235)
Chr$(236)
Chr$(237)
Chr$(238)
Chr$(239)
Chr$(240)
Chr$(241)
Chr$(242)
Chr$(243)
Chr$(244)
Chr$(245)
Chr$(246)
Chr$(247)
Chr$(248)
Chr$(249)
Chr$(250)
Chr$(251)
Chr$(252)
Chr$(253)
Chr$(254)
Chr$(255)
=
=
=
=
=
=
=
=
=
=
=
=
=
=
=
=
=
=
=
=
=
=
ê
ë
ì
í
î
ï
ð
ñ
ò
ó
ô
õ
ö
÷
ø
ù
ú
û
ü
ý
þ
ÿ
ASN( n )
Description:
This function returns the arc sine of the number or numeric expression n. The return value is
expressed in radians.
Usage:
print "The arc sine of 0.2 is "; asn(0.2)
Tip:
There are 2 * pi radians in a full circle of 360 degrees. A formula to convert degrees to radians is:
radians = degrees divided by 57.29577951
Note: See also SIN( )
ATN( n )
Description:
This function returns the arc tangent of the number or numeric expression n. The return value is
expressed in radians.
Usage:
print "The arc tangent of 0.2 is "; atn(0.2)
Tip:
There are 2 * pi radians in a full circle of 360 degrees. A formula to convert degrees to radians is:
radians = degrees divided by 57.29577951
Note: See also TAN( )
BEEP
Description:
This command will play the default system wave file. The actual sound played depends upon the
default sound scheme on the user's computer. This sound is best described as a 'ding'. Program
execution will stop until the wave file is finished playing.
Usage:
if warningVar = 1 then beep
Note: See also PLAYWAVE, PLAYMIDI
BMPBUTTON
BMPBUTTON #handle.ext, filespec, returnVar, corner, posx, posy
Description:
This statement adds a button that displays an image to a window created with the OPEN
command.
Usage:
The BMPBUTTON statement must be listed before the statement to OPEN the window that will
contain it. Here is a brief description for each parameter as listed above:
#handle.ext
The #handle must be identical to the handle of the window which will contain the bmpbutton. The
bmpbutton may have an optional, unique extension which allows it to receive commands during
program execution. The extension begins with a dot and may include any alpha-numeric
characters. A bmpbutton contained on a window whose handle is #win will have #win as the
first part of its handle. Examples of bmpbutton handles are as follows:
#win
#win.okay
#win.1
#win.cancel
#win.bmpbutton2
(no extension)
filespec
The filespec parameter contains the full or relative path and filename of the *.bmp file containing
the bitmap image that will appear on the button. There are no width or height parameters in the
bmpbutton statement, so the size of the button cannot be set by the program. It is determined
by the size of the bitmap image that will appear on it. See also Path and Filename.
returnVar
returnVar is expressed as one word and it is not enclosed in quotes. It cannot be expressed as a
string variable. It must begin with a letter, but it can contain numerals as well. If returnVar is set
to a valid branch label enclosed in square brackets, then a button click will cause program
execution to continue at the specified branch label. The code that follows the branch label will be
executed when the button is pressed. If returnVar is the name of a subroutine, then that
subroutine will be activated when the button is clicked, and the button handle will be passed into
the subroutine as an argument.
If returnVar is not a valid branch label or subroutine name, then the value of returnVar is available
to be read when the program is halted at an input var$ statement. The value will be placed into
the specified variable. An example appears below.
corner
This parameter must be one of the following: UL, UR, LL, or LR. It specifies which corner of the
window acts as an anchor for the button. For example, if LR is used, then the button will be
located relative to the lower right corner. If the window size is changed during execution of the
program, the button will always appear at the same position, relative to the corner specified as
the anchor.
UL = upper left
UR = upper right
LL = lower left
LR = lower right
posx, posy
These parameters set the location for the button relative to the anchor corner. posx and posy are
expressed in pixels. Anchor values of less than one may also be used for posx and posy. For
example, if the anchor corner is UL, posx is .9, and posy is .9, then the button will be positioned
9/10ths of the distance of the window in both x and y from the upper left corner. This method of
positioning buttons places them in positions that are relative to the size of the window, rather than
anchoring them to a specified corner.
Images for Bmpbuttons
A collection of button images has been included with Liberty BASIC in the folder named "bmp".
The collection includes blank buttons. A drawing program such as MS Paint can be used to edit
and create button images for Liberty BASIC.
Detecting Button Presses
Button presses are read and acted upon when a SCAN statement is issued. If SCAN is not used,
then program execution must be halted at an INPUT or WAIT statement in order for a button
press to be read and acted upon.
SAMPLE PROGRAMS
An example that uses a branch label button handler:
bmpbutton #main.arrow, "bmp\arrwbttn.bmp", [arrowClicked], UL, 10, 10
open "Button Example" for window as #main
[loop]
wait
[arrowClicked]
notice "The arrow button was clicked.
close #main
end
Goodbye."
An example that uses a subroutine button handler:
bmpbutton #main.arrow, "bmp\arrwbttn.bmp", arrowClicked, UL, 10, 10
open "Button Example" for window as #main
[loop]
wait
sub arrowClicked bttnHandle$
notice bttnHandle$;" was clicked.
close #main
end
end sub
Goodbye."
An example that retrieves a value with an input statement:
bmpbutton #main.arrow, "bmp\arrwbttn.bmp", yes, UL, 10, 10
bmpbutton #main.button2, "bmp\bluebttn.bmp", no, UL, 70, 10
open "Use Input Example" for window as #main
#main "trapclose [quit]"
[loop]
input answer$
if answer$ = "yes" then notice "You clicked Okay."
if answer$ = "no" then notice "You clicked Cancel."
goto [loop]
[quit]
close #main
end
BMPBUTTON COMMANDS
print #handle.ext, "bitmap bitmapname"
This command sets the bitmap displayed on the button to be a that has been loaded previously
with the LOADBMP command. "bitmapname" is not the filename of the bitmap, but the name
given to it by the LOADBMP command. Here is a short program that demonstrates the bitmap
bmpbutton command.
'bitmap.bas
'demonstrate the bitmap command for bmpbuttons
'clicking the buttons causes the bitmap images
'displayed on the buttons to change
WindowWidth = 248
WindowHeight = 175
nomainwin
loadbmp "arrow", "bmp\arrwbttn.bmp"
loadbmp "blue", "bmp\bluebttn.bmp"
bmpbutton #main.button1, "bmp\blank4.bmp", [button1Click], UL, 22,
11
bmpbutton #main.button2, "bmp\blank4.bmp", [button2Click], UL, 22,
46
open "BmpButton Image Changer" for window as #main
print #main, "trapclose [quit]"
'wait here for user events
wait
[button1Click]
'Display arrow image on button 2
print #main.button2, "setfocus"
print #main.button2, "bitmap arrow"
print #main.button1, "bitmap blue"
wait
[button2Click]
'Display arrow image on button 1
print #main.button1, "setfocus"
print #main.button1, "bitmap arrow"
print #main.button2, "bitmap blue"
wait
[quit]
close #main
end
print #handle.ext, "locate x y width height"
This command repositions the control in its window. This is effective when the control is placed
inside a window of type window. The control will not update its size and location until a
REFRESH command is sent to the window. See RESIZER.BAS for an example program.
print #handle.ext, "setfocus"
This causes the control to receive the input focus. This means that any keypresses will be
directed to the control.
print #handle.ext, "enable"
This causes the control to be enabled.
print #handle.ext, "disable"
This causes the control to be inactive and grayed-out.
print #handle.ext, "show"
This causes the control to be visible.
print #handle.ext, "hide"
This causes the control to be hidden or invisible.
See also: BUTTON, MENU, Controls and Events
BMPSAVE
bmpsave "bmpName", "filename.bmp"
Description:
This saves a named bitmap to the specified filename. The named bitmap can be obtained either
from the LOADBMP command or the GETBMP graphics command. The bitmap will be saved to
disk in the same resolution as the user's display resolution. If the user's display is setup for
32-bit color, then the bitmap will be in 32-bit format, for instance. If a full path isn't given for the
saved bitmap, it will be saved in the program's DefaultDir$.
Usage:
'generate some graphics and save them to disk
nomainwin
open "Ellipses" for graphics as #1
print #1, "trapclose [quit]"
print #1, "down"
print #1, "place 130 130"
for x = 30 to 230 step 10
print #1, "ellipse "; x ; " "; 260 - x
next x
print #1, "flush"
print #1, "getbmp drawing 1 1 250 250"
bmpsave "drawing", "ellipses.bmp"
wait
[quit]
close #1
end
BUTTON
BUTTON #handle.ext, "label", returnVar, corner, x, y {, width, height}
Description:
This statement adds a button that has a text label to a window created with the OPEN command.
The width and height parameters are optional.
Usage:
The BUTTON statement must be listed before the statement to OPEN the window that will
contain it. Here is a brief description for each parameter as listed above:
#handle.ext
The #handle must be identical to the handle of the window which will contain the button. The
button may have an optional, unique extension which allows it to receive commands during
program execution. The extension begins with a dot and may include any alpha-numeric
characters. A button contained on a window whose handle is #win will have #win as the first
part of its handle. Examples of button handles are as follows:
#win
#win.okay
#win.1
#win.cancel
#win.bmpbutton2
(no extension)
"label"
This parameter specifies the caption that will appear on the button. It may be expressed as a
literal text string, or as a string variable. See String Literals and Variables.
returnVar
returnVar is expressed as one word and it is not enclosed in quotes. It cannot be expressed as a
string variable. It must begin with a letter, but it can contain numerals as well. If returnVar is set
to a valid branch label enclosed in square brackets, then a button click will cause program
execution to continue at the specified branch label. The code that follows the branch label will be
executed when the button is pressed. If returnVar is the name of a subroutine, then that
subroutine will be activated when the button is clicked, and the button handle will be passed into
the subroutine as an argument. See also: Controls and Events
If returnVar is not a valid branch label or subroutine name, then the value of returnVar is available
to be read when the program is halted at an input var$ statement. The value will be placed into
the specified variable. An example appears below.
corner
This parameter must be one of the following: UL, UR, LL, or LR. It specifies which corner of the
window acts as an anchor for the button. For example, if LR is used, then the button will be
located relative to the lower right corner. If the window size is changed during execution of the
program, the button will always appear at the same position, relative to the corner specified as
the anchor.
UL = upper left
UR = upper right
LL = lower left
LR = lower right
posx, posy
These parameters set the location for the button relative to the anchor corner. posx and posy are
expressed in pixels. Anchor values of less than one may also be used for posx and posy. For
example, if the anchor corner is UL, posx is .9, and posy is .9, then the button will be positioned
9/10ths of the distance of the window in both x and y from the upper left corner. This method of
positioning buttons places them in positions that are relative to the size of the window, rather than
anchoring them to a specified corner.
width, height
These optional parameters specify how wide and high the button will be, measured in pixels. If
these parameters are not used in the BUTTON statement, then Liberty BASIC will set the size of
the button to be large enough to display the text label specified.
Detecting Button Presses
Button presses are read and acted upon when a SCAN statement is issued. If SCAN is not used,
then program execution must be halted at an INPUT or WAIT statement in order for a button
press to be read and acted upon.
This example uses a branch label button handler:
button #main.exit, "Exit", [exitClicked], UL, 10, 10
open "Button Example" for window as #main
[loop]
wait
[exitClicked]
notice "The Exit button was clicked.
close #main
end
Goodbye."
This example uses a subroutine button handler:
button #main.exit, "Exit", exitClicked, UL, 10, 10
open "Button Example" for window as #main
[loop]
wait
sub exitClicked buttonhandle$
notice "The button handle is ";buttonhandle$;"
close #main
end
end sub
This example retrieves a value with an input statement:
button #main.ok, "Okay", yes, UL, 10, 10
button #main.cancel, "Cancel", no, UL, 70, 10
open "Use Input Example" for window as #main
#main "trapclose [quit]"
Goodbye."
[loop]
input answer$
if answer$ = "yes" then notice "You clicked Okay."
if answer$ = "no" then notice "You clicked Cancel."
goto [loop]
[quit]
close #main
end
Default Button
A window of type DIALOG can contain a button with the extension ".default". If the user presses
the ENTER key while the dialog window has focus, it is the same as if the button whose
extension is "default" is pressed and program execution will continue at the event handler
[branchLabel] for that button. In the example below, the program will branch to the [okay] routine
when the user presses ENTER.
button #win.default, "Okay",[okay],UL,200,100
open "Test" for dialog as #win
Change in behavior for LB3: If any button has focus, it acts as the default button in a DIALOG
window. If a control other than a button has the focus, the button whose extension is ".default" is
the default button, if such a button exists.
Button commands):
print #handle.ext, "string"
This command changes the text displayed on the caption of the button. "string" may be a literal
string of text enclosed in quotes, or a string variable.
print #handle.ext, "!setfocus"
This command causes the button to receive the input focus. This means that any keypresses
will be directed to the button.
print #handle.ext, "!locate x y width height"
This command repositions the button control in its window. This only works if the control is
placed inside window of type window or dialog. The control will not update its size and location
until a refresh command is sent to the window. See the RESIZE.BAS example program.
print #handle.ext, "!font facename pointSize"
This command sets the button's font to the specified face and point size. If an exact match for
the font face and size is not available on the user's system, then Liberty BASIC will try to find a
close match, with size taking precendence over face.
There is more information on specifying fonts here: How to Specify Fonts
Example:
print #handle.ext, "!font times_new_roman 10"
print #handle.ext, "!enable"
This causes the control to be enabled.
print #handle.ext, "!disable"
This causes the control to be inactive and grayed-out.
print #handle.ext, "!show"
This causes the control to be visible.
print #handle.ext, "!hide"
This causes the control to be hidden or invisible.
BYREF
Function functionName(byref var1, byref var2$...)
Description:
Variables passed as arguments into functions and subs are passed "by value" by default, which
means that a copy of the variable is passed into the function or sub. The value of the variable is
not changed in the main program if it is changed in the function. A variable may instead by
passed "byref" which means that a reference to the actual variable is passed and a change in the
value of this variable in the function or sub changes the value of the variable in the main program.
See also: Function, Sub, Functions and Subroutines
Usage:
Each of the parameters in the function and sub in this example use the "byref" specifier. This
means that when the value of a and b are changed in the function that the variables used to make
the call (x and y) will also be changed to reflect a and b when the function returns. Try stepping
through this example in the debugger.
'now you can pass by reference
x = 5.3
y = 7.2
result$ = formatAndTruncateXandY$(x, y)
print "x = "; x
print "y = "; y
print result$
'and it works with subroutines too
wizard$ = "gandalf"
call capitalize wizard$
print wizard$
end
function formatAndTruncateXandY$(byref a, byref b)
a = int(a)
b = int(b)
formatAndTruncateXandY$ = str$(a)+", "+str$(b)
end function
sub capitalize byref word$
word$ = upper$(left$(word$, 1))+mid$(word$, 2)
end sub
More about pass by reference
Passing by reference is only supported using string and numeric variables as parameters. You
can pass a numeric or string literal, or a computed number or string, or even a value from an
array, but the values will not come back from the call in any of these cases. Step through the
example in the debugger to see how it works!
'you can also call without variables, but the changes
'don't come back
result$ = formatAndTruncateXandY$(7.2, 5.3)
print result$
'and it works with subroutines too
call capitalize "gandalf"
a$(0) = "snoopy"
call capitalize a$(0)
end
function formatAndTruncateXandY$(byref a, byref b)
a = int(a)
b = int(b)
formatAndTruncateXandY$ = str$(a)+", "+str$(b)
end function
sub capitalize byref word$
word$ = upper$(left$(word$, 1))+mid$(word$, 2)
end sub
CALL
call subroutineName {list of zero or more comma separated values}
Description:
This command invokes a user defined subroutine. Call is followed by the name of the subroutine
and by zero or more string and/or numeric expressions.
For more information see SUB
CALLBACK
Description:
A Callback is the address of a program function that is used as a parameter in API call. The
syntax is:
callback addressPTR, functionName(type1, type2...), returnValue
(Note: Callbacks are an advanced programming technique. They should only be used by
programmers with a good, working knowledge of calling API functions with CALLDLL.)
A CALLBACK command sets up a memory address for the function specified in the command.
An API function can then use this address to call the specified function many times, hence the
term CALLBACK. Most API functions are called once, and return a single value. A CALLBACK
function interacts with the program many times. The parameters are explained in more detail
below.
Usage:
addressPTR
This parameter assigns a name to the memory address of the function. This name is used in the
API call that requires the memory address.
functionName
This parameter is the name of the function in the Liberty BASIC program that is called by the API
function.
(type1, type2...)
The CALLBACK statement requires a comma-separated list of parameters, is specific to the
function used. Most Windows API references contain documentation for the particular functions
available. The parameters must be valid data TYPES such as "ulong" and "long".
returnValue
The TYPE of the return value is listed after the closing parenthesis. The Liberty BASIC function
can return a value to the calling function.
In the following demo, the Liberty BASIC function keeps an internal count, and returns 1 if it is
continuing to process information and 0 when it returns control to the calling function. It prints the
names of the first 5 windows that are sent to it by the EnumWindows API, then returns control to
the calling function.
texteditor #win.te, 10, 10, 250, 250
open "Enum Windows Example" for window as #win
print #win, "trapclose [quit]"
'set the variable named address to be the memory address for
'enumWndProc() using TYPES handle and ulong, and set
'the return TYPE of enumWndProc() to be a boolean
callback address, enumWndProc(handle, ulong), boolean
'call EnumWindows, which in turn calls back into the
'BASIC function at address.
calldll #user32, "EnumWindows", _
address as ulong, _
0 as long, _
result as boolean
wait
[quit]
close #win
end
function enumWndProc(hwnd, lparam)
labelBuffer$ = space$(71)
calldll #user32, "GetWindowTextA", _
hwnd as ulong, _
labelBuffer$ as ptr, _
70 as long, _
result as long
if left$(labelBuffer$, 1) <> chr$(0) then
print #win.te, labelBuffer$
call setCount getCount()+1
end if
if getCount() = 5 then
enumWndProc = 0
'returning 0 causes EnumWindows to return
else
enumWndProc = 1
end if
end function
sub setCount value
count(0) = value
end sub
function getCount()
getCount = count(0)
end function
CALLDLL
CALLDLL #handle, "function", param1 as type1 [, param2 as type2 ], return as returnType
Description:
CALLDLL is used to call functions from the Windows API or from a third party DLL. A DLL is a
Dynamic Link Library, which is a module containing functions that can be called by a program
while it is running. The functions are specific to the DLL. The documentation for the DLL will
contain the information needed to call its functions.
#handle
This parameter is the handle that was given to the DLL when it was opened with the OPEN
statement.
"function"
This parameter is the name of the function, enclosed in quotes. It is case-sensitive.
param1 as type1 [, param2 as type2 ]
This is a list of input parameters required by the function. The number and TYPE of input
parameters is dependent upon the function being called. These parameters send information to
the function so that it knows how to perform its task as needed by the program. These
parameters must be passed AS TYPE. See Using Types with STRUCTS and CALLDLL for
details. The parameters will include information such as window or control handles, text strings to
display, and so on.
return as returnType
This parameter contains the value returned by the function. It must also be of the correct TYPE
expected by the function. If a function does not return a value, this parameter is passed AS
VOID.
Usage:
This example calls the WINDOWS API to minimize a window and change its caption.
open "An Example" for window as #main
h = hwnd(#main)
open "user32" for dll as #user
calldll #user, "CloseWindow", _
h as long, _
result as boolean
calldll #user, "SetWindowTextA", _
h as long, _
"I was minimized!" as ptr, _
result as void
close #user
Liberty BASIC 3 has Enhanced DLL handle resolution. If a program hasn't opened certain default
DLLs, a reference to a like-named handle will still resolve to the desired DLL. This saves on code
to open and close DLLs. DLLs can still be opened with the OPEN statement.
Here are the default handles.
#user32
#kernel32
#gdi32
#winmm
#shell32
#comdlg32
#comctl32
Examples:
'OPEN the DLL and give it a handle
Open "user32" for DLL as #u
Calldll #u, "CloseWindow", h as long, result as boolean
'CLOSE the DLL
close #u
or
'call the dll by its default handle.
'no need to OPEN it or CLOSE it
Calldll #user32, "CloseWindow", h as long, result as boolean
See also: STRUCT, Using Types with CALLDLL, What are APIs/DLLs?, How to Make API Calls
CHECKBOX
CHECKBOX #handle.ext, "label", setHandler, resetHandler, x, y, wide, high
Description:
This command adds a checkbox control to the window referenced by #handle.ext. Checkboxes
have two states, set and reset. They are useful for getting input of on/off type information.
Here is a description of the parameters of the CHECKBOX statement:
#handle.ext
This parameter specifies the handle for this control. The #handle part should be the same as the
handle of the window containing the checkbox, and the .ext part names the checkbox uniquely in
the window.
"label"
This parameter contains the visible text of the checkbox
setHandler
This is the branch label or subroutine to go to when the user sets the checkbox by clicking on it.
When the checkbox is "set" it displays a checkmark. See also: Controls and Events
resetHandler
This is the branch label or subroutine to goto when the user resets the checkbox by clicking on it.
When the checkbox is "reset", the checkmark is removed. See also: Controls and Events
x
This is the x position of the checkbox relative to the upper left corner of the window it belongs to.
y
This is the y position of the checkbox relative to the upper left corner of the window it belongs to.
wide
This is the width of the checkbox control.
high
This is the height of the checkbox control.
Checkbox Commands
Checkboxes understand these commands:
print #handle.ext, "set"
This sets the checkbox, causing a checkmark to appear within it.
print #handle.ext, "reset"
This resets the checkbox, clearing it.
print #handle.ext, "value? result$"
The result$ variable is set to the status of the checkbox (either "set" or "reset").
print #handle.ext, "setfocus"
This causes the checkbox to receive the input focus. This means that any keypresses are
directed to the checkbox.
print #handle,ext, "locate x y width height"
This repositions the checkbox in its window. This is effective when the checkbox is placed inside
window of type "window". The checkbox will not update its size and location until a REFRESH
command is sent to the window. See the RESIZE.BAS example program.
print #handle, "font facename pointSize"
This sets the font to the specified face and point size. If an exact match cannot be found, then
Liberty BASIC will try to find a close match, with size taking precedence over face. For more on
specifying fonts read How to Specify Fonts
Example:
print #handle.ext, "font times_new_roman 10"
print #handle.ext, "enable"
This causes the control to be enabled.
print #handle.ext, "disable"
This causes the control to be inactive and grayed-out.
print #handle.ext, "show"
This causes the control to be visible.
print #handle.ext, "hide"
This causes the control to be hidden or invisible.
For information on creating controls with different background colors, see Colors and the
Graphical User Interface.
Usage
Here are sample programs that use checkboxes.
' This code demonstrates how to use checkboxes in
' Liberty BASIC programs with branch label handlers
nomainwin
button #1, "&Ok", [quit], UL, 120, 90, 40, 25
checkbox #1.cb, "I am a checkbox", [set], [reset], 10, 10, 130, 20
button #1, "Set", [set], UL, 10, 50
button #1, "Reset", [reset], UL, 50, 50
textbox #1.text, 10, 90, 100, 24
WindowWidth = 180
WindowHeight = 160
open "Checkbox test" for dialog as #1
print #1, "trapclose [quit]"
[inputLoop]
input r$
[set]
print #1.cb, "set"
goto [readCb]
[reset]
print #1.cb, "reset"
goto [readCb]
end
[readCb]
print #1.cb, "value?"
input #1.cb, t$
print #1.text, "I am "; t$
goto [inputLoop]
[quit] close #1 : end
' This code demonstrates how to use checkboxes in
' Liberty BASIC programs with subroutine handlers
nomainwin
button #1, "&Ok", [quit], UL, 120, 90, 40, 25
checkbox #1.cb, "I am a checkbox", checkSet, checkReSet, 10, 10,
130, 20
textbox #1.text, 10, 90, 100, 24
WindowWidth = 180
WindowHeight = 160
open "Checkbox test" for dialog as #1
print #1, "trapclose [quit]"
[inputLoop]
input r$
sub checkSet cbHandle$
print #cbHandle$, "value? v$"
print #1.text, "I am ";v$
end Sub
sub checkReSet cbHandle$
print #cbHandle$, "value? v$"
print #1.text, "I am ";v$
end Sub
[quit] close #1 : end
CHR$( n )
Description:
This function returns a one-character-long string, consisting of the character represented on the
ASCII table by the value n (0 - 255).
Usage:
print chr$(77)
print chr$(34)
print chr$(155)
Produces:
M
"
›
CLOSE #h
Description:
This command is used to close files and devices. This is the last step of a file "read" and/or
"write" operation, and it is also used to close windows or DLLs that have been opened. When
execution of a program is complete, if there are any files or devices left open, Liberty BASIC
displays a dialog explaining that it was necessary to close the opened files or devices. This is
designed as an aid so that the programmer can correct the problem. If for some reason the
programmer chooses to terminate the program early (this is done by closing the program's main
window before the program finishes), then Liberty BASIC will close any open files or devices
without posting a notice to that effect.
Usage:
open "Graphic" for graphics as #gWin
print #gWin, "home"
print #gWin, "down"
for index = 1 to 100
print #gWin, "go "; index
print #gWin, "turn 63"
next index
input "Press 'Return'."; r$
close #gWin
'
'
'
'
'
'
open a graphics window
center the pen
put the pen down
loop 100 times
move the pen foreward
turn 63 degrees
' this appears in main window
' close graphic window
CLS
Description:
This command clears the mainwin of text and sets the cursor back at the upper left hand corner.
It is useful for providing a visual break to separate different functional sections of a program.
Additionally, since the main window doesn't actually discard past information on its own, the CLS
command can be used to reclaim memory from a program by forcing the main window to dump
old text.
Usage:
print "The total is: "; grandTotal
input "Press 'Return' to continue."; r$
cls
print "*** Enter Next Round of Figures ***"
COLORDIALOG
COLORDIALOG color$, chosen$
Description:
This command displays the Windows Common Color Dialog to allow a user to select a color. It
returns the red, green, and blue components of the color chosen, plus the Liberty BASIC name, if
it happens to correlate to one of the 16 named LB colors.
Usage:
color$
This is a string containing the starting color for the dialog. It can be an empty string, but it must
be included. It may be in one of two forms. It can be a named Liberty BASIC color, or a string
containing the red, green, blue values of the desired color with which to seed the colordialog.
chosen$
When the dialog is closed, this variable contains the color chosen by the user.
Examples:
colordialog "red", chosen$
print "Color chosen is ";chosen$
or
colordialog "255 0 0", chosen$
print "Color chosen is ";chosen$
Red, green and blue values must each be in the range of 0 to 255. 0 is the absence of a color,
and 255 is total saturation.
After the dialog closes, the receiver variable contains the red, green, blue values for the color
chosen by the user. If these values correlate to a named Liberty BASIC color, that color name
will be appended to the returned string.
'Returned string: RGB and name for a named color
255 255 0 yellow
'Returned string: RGB only for a non-named color:
250 230 190
Full Opening of Dialog
The colordialog opens a small dialog with a grid of typical colors displayed. The user can choose
to click the "Define Custom Colors" button to open a full RGB color spectrum from which to
choose. The full dialog looks like this:
Combobox
COMBOBOX #handle.ext, array$(), eventHandler, xPos, yPos, wide, high
Description:
Comboboxes are a lot like listboxes, but they are designed to save space. Instead of showing an
entire list of items, they show only the selected one. When the user clicks on the checkbox
arrow button (to the right), a list appears (drops down). It is then possible to browse the possible
selections, and pick one if so desired. When the selection is made, the new selection is
highlighted. The user can type into the textbox part on top of the combobox, rather than
choosing an item from the dropdown list. The program can get the contents of this field. The
combobox is loaded with a collection of strings from a specified string array, and a reload
command updates the contents of the combobox from the array when the contents of array
change.
#handle.ext
The #handle part of this item needs to be the same as the handle of the window containing the
combobox. The .ext part needs to be unique so that the program can send commands to the
combobox and get information from it later.
array$()
This is the name of the array (must be a string array) that contains the contents of the combobox.
Be sure to load the array with strings before opening the window. If some time later it becomes
necessary to change the contents of the combobox, simply change the contents of the array and
send a RELOAD command to the combobox. The index numbers of items in the array may not
match the index numbers of the same items in the control. The control is loaded from the array,
and the first index used in the control is "1". No empty strings are loaded into the control, so only
array items that contain text are loaded.
eventHandler
This is the branch label or subroutine where execution begins when the user selects an item from
the combobox by clicking it. See also: Controls and Events
xPos & yPos
These coordinates specify the the distance in x and y (in pixels) of the combobox from the
upper-left corner of the window.
wide & high
These parameters determine the width and height (in pixels) of the combobox. "Height" in this
case refers to the length of the selection listwhen the combobox's button is clicked, not to the
size of the initial selection window, which is dependant upon the size of the font.
Here are the commands for combobox:
print #handle.ext, "!contents"
This command sets the contents of the field part of the combobox to the string after the !.
print #handle.ext, "contents? text$"
This retrieves the contents of the text field of the combobox into the variable called text$.
print #handle.ext, "locate x y width height"
This respositions the combobox in its window. This is effective when the combobox is placed
inside window of type "window" or "dialog". The combobox will not update its size and location
until a REFRESH command is sent to the window. See the RESIZE.BAS example program.
print #handle.ext, "font facename pointSize"
This sets the control's font to the specified face and point size. If an exact match cannot be
found, then Liberty BASIC will try to find a close match, with size taking precedence over face.
For more on specifying fonts read How to Specify Fonts
Example:
print #handle.ext, "font times_new_roman 10"
print #handle.ext, "select string"
This selects the item the same as "string" and updates the display. Note that "string" must be a
valid item from the combobox array. If a variable is to be used in this command, it must be
located outside the quotation marks, with the blank space preserved:
print #handle.ext, "select "; string$
print #handle.ext, "selectindex i"
This selects the item at index position i and updates the display. Note that "i" must be a valid
index number for the combobox array. If a variable is to be used in this command, it must be
located outside the quotation marks, with the blank space preserved:
print #handle.ext, "selectindex "; i
print #handle.ext, "selection? selected$"
This places the selected string into the variable selected$. If there is no selected item, then
selected$ will be a string of zero length (a null string).
print #handle.ext, "selectionindex? index"
This places the index of the selected string into the variable called index. If there is no selected
item, then index will be set to 0.
print #handle.ext, "reload"
This reloads the combobox with the current contents of its array and updates the display.
print #handle.ext, "setfocus"
This causes the combobox to receive the input focus. This means that any keypresses are
directed to the combobox.
print #handle,ext, "locate x y width height"
This repositions the combobox control in its window. This only works if the control is placed
inside window of type "window". The control will not update its size and location until a
REFRESH command is sent to the window. See the RESIZER.BAS example program.
print #handle.ext, "font facename pointSize"
This sets the combox's font to the specified face and point size. If an exact match cannot be
found, then Liberty BASIC will try to find a close match, with size taking precedence over face.
For more on specifying fonts read How to Specify Fonts
Example:
print #handle.ext, "!font times_new_roman 10"
print #handle.ext, "enable"
This causes the control to be enabled.
print #handle.ext, "disable"
This causes the control to be inactive and grayed-out.
print #handle.ext, "show"
This causes the control to be visible.
print #handle.ext, "hide"
This causes the control to be hidden or invisible.
Usage:
'combobox demo with branch label event handler
nomainwin
a$(1) = "one"
a$(2) = "two"
a$(3) = "three"
a$(4) = "four"
combobox #win.combo, a$(),[doCombo],10,10,120,200
open "Combobox Demo" for window as #win
#win "trapclose [Quit]"
#win.combo "selectindex 1"
wait
[Quit] close #win:end
[doCombo]
#win.combo "selection? sel$"
notice "You chose ";sel$
wait
'combobox demo with subroutine event handler
nomainwin
a$(1) = "one"
a$(2) = "two"
a$(3) = "three"
a$(4) = "four"
combobox #win.combo, a$(),doCombo,10,10,120,200
open "Combobox Demo" for window as #win
#win "trapclose Quit"
#win.combo "selectindex 1"
wait
sub Quit handle$
close #handle$
end
end sub
sub doCombo handle$
#handle$ "selection? sel$"
notice "You chose ";sel$
end sub
For information on creating controls with different background colors, see Colors and the
Graphical User Interface.
CommandLine$
CommandLine$
Description:
This special variable contains any switches that were added when Liberty BASIC was started.
This is especially useful in applications executing under the runtime engine. It allows a
tokenized program to receive information upon startup and act upon that information. The
CommandLine$ variable can be parsed in the same way as other strings to retrieve the
information. One way to extract information from the CommandLine$ is with INSTR(). The
WORD$() and VAL() functions can also be used to evaluate the contents of CommandLine$.
See the examples and explanations below.
Usage:
In this example the program checks CommandLine$ for the existence of the word "red" and if it
is there, the program executes a color command:
'commandlinetest1.bas
'
'program to be tokenized
'to commandlinetest1.tkn
'and used with runtime engine
'commandlinetest1.exe
open "CommandLine$ Test" for graphics as #win
print #win, "trapclose [quit]"
'convert to lower case for evaluation:
CommandLine$ = lower$(CommandLine$)
if instr(CommandLine$, "red") > 0 then
print #win, "fill red; flush"
end if
wait
[quit]
close #win : end
To call this program from another program as a TKN or EXE, or to run the EXE by using the RUN
button in Windows:
run "commandlinetest1.tkn red"
or
run "commandlinetest1.exe red"
'the CommandLine$ variable will contain "red"
Multiple parameters in CommandLine$
The CommandLine$ may be parsed using the WORD$() function as well. In the following
example, the program checks for three colors to use in a graphics window.
'commandlinetest2.bas
'
'program to be tokenized
'to commandlinetest2.tkn
'and used with runtime engine
'commandlinetest2.exe
open "CommandLine$ Test" for graphics as #win
print #win, "trapclose [quit]"
print #win, "down"
if word$(CommandLine$, 1) <> "" then
fillColor$ = word$(CommandLine$,1)
print #win, "fill ";fillColor$
end if
if word$(CommandLine$, 2) <> "" then
backColor$ = word$(CommandLine$,2)
print #win, "backcolor ";backColor$
end if
if word$(CommandLine$, 3) <> "" then
Color$ = word$(CommandLine$,3)
print #win, "color ";Color$
end if
print
print
print
print
wait
#win,
#win,
#win,
#win,
"size 5"
"place 10 20"
"boxfilled 100 110"
"flush"
[quit]
close #win : end
To call this program from another program as a TKN or EXE, or to run the EXE by using the RUN
button in Windows:
run "commandlinetest2.tkn red yellow blue"
or
run "commandlinetest1.exe red yellow blue"
'the CommandLine$ variable will contain "red yellow blue"
Numbers and CommandLine$
The information contained and used in CommandLine$ can be anything that can be contained in
a string. If numbers are required, then use the VAL() function to extract them.
first$ = word$(CommandLine$,1)
firstval = val(first$)
Suggestions for using CommandLine$
The CommandLine$ could contain a filename which the program would open and load into a
texteditor. The CommandLine$ could contain numbers to be used in calculations. As in the
examples above, it could contain colors that determine the look of a window.
CONFIRM
CONFIRM string; responseVar
Description:
This statement opens a dialog box displaying the contents of string and presenting two
buttons marked 'Yes' and 'No'. When the selection is made, the string "yes" is returned if the
'Yes' button is pressed, and the string "no" is returned if the 'No' button is pressed by the user.
The result is placed in responseVar.
Usage:
[quit]
' bring up a confirmation box to be sure that
' the user wants to quit
confirm "Are you sure you want to QUIT?"; answer$
if answer$ = "no" then [mainLoop]
end
Multiline Message
If line breaks are inserted into the message, it appears as a multiline message. Line breaks
are represented by chr$(13). The CONFIRM dialog window is sized to accomodate the
message.
c$ = "This operation will reset defaults" + chr$(13)
c$ = c$ + "All changes will be lost." + chr$(13)
c$ = c$ + "This operation is not reversable." + chr$(13)
c$ = c$ + "Continue anyway?"
confirm c$; answer$
COS( n )
COS( n )
Description:
This function returns the cosine of the angle n. The angle n should be expressed in radians.
Usage:
for c = 1 to 45
print "The cosine of "; c; " is "; cos(c)
next c
Tip:
There are 2 * pi radians in a full circle of 360 degrees. A formula to convert degrees to radians is:
radians = degrees divided by 57.29577951
Note: See also SIN( ) and TAN( )
CURSOR
Description:
The CURSOR command makes it easy to change the mouse pointer to be one of 5 predefined
shapes.
NORMAL
= the default pointer
ARROW = the standard Windows arrow
CROSSHAIR
= a + shaped pointer
HOURGLASS = the Windows hourglass
TEXT
= the text insertion I-beam
Example:
cursor hourglass
for i = 1 to n
'perform some work
next i
cursor normal
The program's code is responsible for setting the cursor back to the default (normal) when
appropriate. If a runtime error halts a program, the cursor will automatically revert to normal.
DATA
Description:
The DATA statement provides a convenient way to insert data into programs. The DATA can be
read once or many times using the READ statement. A DATA statement doesn't actually
perform an action when it is encountered in the program's code.
Example:
'read the numbers and their descriptions
while desc$ <> "end"
read desc$, value
print desc$; " is the name for "; value
wend
'here is our data
data "one", 1, "two", 2, "three", 3, "end", 0
end
One or more DATA statements form the whole set of data elements. For example, the data
represented in the example above can also be listed in more than one DATA statement:
'here is our data in two lines instead of one
data "one", 1, "two", 2
data "three", 3, "end", 0
DATA is local to the subroutine or function it is defined in.
Error Handling
An attempt to read more DATA items than are contained in the DATA lists causes the program
to halt with an error. Notice that in the examples above, an "end" tag is placed in the DATA and
when it is reached, the program stops READing DATA. This is an excellent way to prevent
errors from occuring. If an end tag or flag of some sort is not used, be sure that other checks
are in place to prevent the READ statement from trying to access more DATA items than are
contained in the DATA statements.
See also: READ, RESTORE, READ and DATA
DATE$( )
Description:
Instead of adopting the date$ variable from QBasic, Liberty BASIC uses a function instead. This
approach gives some additional flexibility. Unless otherwise indicated, the function returns
today's date in the format specified. See also TIME$( ), Date and Time Functions
Usage:
'This form of date$()
print date$()
print date$("mm/dd/yyyy")
print date$("mm/dd/yy")
print date$("yyyy/mm/dd")
print date$("days")
print date$("4/1/2002")
given date
print date$(36980)
produces this
Nov 30, 1999
11/30/1999
11/30/99
1999/11/30
36127
36980
'
'
'
'
'
'
' 04/01/2002
'
format
for sorting
days since Jan 1, 1901
days since Jan 1, 1901 for
mm/dd/yyyy string returned
when given days since Jan
1, 1901
You can assign a variable to the result:
d$ = date$( )
NOTE: All the above forms return a string except for date$("days"), and
date$("4/1/02")
Using the date$("4/1/02") function:
This function returns the number of days since Jan 1, 1901 for the given date. Any of the
following formats are acceptable. Please notice that if the first two digits of the year are omitted,
20xx is assumed.
'some
print
print
print
print
examples
date$("4/1/02")
date$("1/1/1901")
date$("April 1, 2002")
date$("Apr 1, 2002")
'this assumes 4/1/2002
Here is a small program that demonstrates the last two implementations of the date$ function. It
determines the number of shopping days until the holiday season:
today = date$("days")
target = date$("12/25/2003") 'subsititute current year and desired
holiday
print "Shopping days left: ";
print target - today
Dechex$( )
DECHEX$( number )
Description:
Returns a string representation of a decimal number converted to hexadecimal (base 16)
Usage:
print dechex$( 255 )
prints...
FF
See also: HEXDEC( )
DefaultDir$
Description:
A string variable that contains the default directory for the running Liberty BASIC program. The
format is "drive:\dir1", or "drive:\dir1\dir2" etc. There is no backslash appended to the DefaultDir$
variable.
Usage:
print DefaultDir$
As used with a FILES statement:
files DefaultDir$, "*.txt", info$(
As used to access a text file in the same directory as the program. Notice that the backslash
must be added to the beginning of the filename:
open DefaultDir$ + "\readme.txt" for append as #f
print #f, "Sample"
close #f
DIM array( )
DIM array(size)
-or-
DIM array(size, size)
DIM array1(size1), array2(size2), array3(size3), etc.
Description:
DIM sets the maximum size of an array. Any array can be dimensioned to have as many
elements as memory allows. If an array is not DIMensioned explicitly, then the array will be
limited to 11 elements, 0 to 10. Non DIMensioned double subscript arrays will be limited to 100
elements 0 to 9 by 0 to 9. The DIM statement can be followed by a list of arrays to be
dimensioned, separated by commas.
Usage:
'Example 1
print "Please enter 10 names."
for index = 0 to 10
input names$ : name$(index) = name$
next index
'Example 2
'Dimension three arrays at once
dim arrayOne(100), arrayTwo$(100, 5), arrayThree(100, 100)
The FOR . . . NEXT loop in the example above is limited to a maximum value of 10 because the
array names$( ) is not dimensioned, and therefore is limited to 11 elements, numbered 0 - 10. To
remedy this problem, add a DIM statement, as in the example below. Notice that it is not
necessary to use all available index numbers. In the example the array is filled beginning at
index 1, ignoring index 0.
dim names$(20)
print "Please enter 20 names."
for index = 1 to 20
input names$ : names$(index) = name$
next index
Double subscripted arrays can store information more flexibly:
dim customerInfo$(10, 5)
print "Please enter information for 10 customers."
for index = 0 to 9
input "Customer name >"; info$ : customerInfo$(index, 0) = info$
input "Address >"; info$ : customerInfo$(index, 1) = info$
input "City >"; info$ : customerInfo$(index, 2) = info$
input "State >"; info$ : customerInfo$(index, 3) = info$
input "Zip >"; info$ : customerInfo$(index, 4) = info$
next index
DisplayWidth
Description:
The special variable DisplayWidth contains the width of the display screen in pixels.
DisplayHeight
Description:
The special variable DisplayHeight contains the height of the display screen in pixels.
DO LOOP
do
'code in here
loop while booleanExpr
'execute the code inside this loop at least once
do
'code in here
loop until booleanExpr
do while expr
'some code
loop
do until expr
'some code
loop
Description:
DO and LOOP cause code to be executed while a certain condition evaluates to true, or until a
certain condition evaluates to true. The "while" and "until" parts of this expression can be located
either in the "DO" statement or the "LOOP" statement. The following form is good for cases when
you want a loop that always executes once and then only loops back as long as a condition is
met. It will continue looping back and executing the code as long as the booleanExpr evaluates to
true.
'execute the code inside this loop at least once
do
'code in here
loop while booleanExpr
You can also use the UNTIL keyword to reverse the logic of the expression:
'execute the code inside this loop at least once
do
'code in here
loop until booleanExpr
Usage:
'examples using "loop while" and "loop until"
print "print a zero"
do
print a
a = a + 1
loop while a > 10
print
print "print 1 to 9"
do
print a
a = a + 1
loop while a < 10
print
'examples using loop until
print "print a zero"
do
print b
b = b + 1
loop until b = 1
print
print "print 1 to 9"
do
print b
b = b + 1
loop until b = 10
'examples using loop while
print "print 1 to 3"
a = 1
do while a <= 3
print a
a = a + 1
loop
print
print "print 9 to 7"
b = 9
do until b = 6
print b
b = b - 1
loop
print
print "don't print anything"
do while c = 10
print c
c = c + 1
loop
end
Drives$
Description:
Drives$ is a system variable. It can be used like any other variable. Use it in expressions, print
it, perform functions on it, etc. It is special in that it contains the drive letters for all the drives
installed in the computer in use.
For example:
print Drives$
Will in many cases produce:
a: b: c:
It can be used to provide a way to select a drive like this:
'a simple example illustrating the use of the Drives$ variable
dim letters$(25)
index = 0
while word$(Drives$, index + 1) <> ""
letters$(index) = word$(Drives$, index + 1)
index = index + 1
wend
statictext #win, "Double-click to pick a drive:", 10, 10, 200, 20
listbox #win.list, letters$(, [selectionMade], 10, 35, 100, 150
open "Scan drive" for dialog as #win
input r$
[selectionMade]
close #win
end
DUMP
Description:
This statement forces anything that has been LPRINTed to be sent to the Print Manager to
commence printing immediately. If DUMP is not issued, the LPRINTed text will be printed, but it
might not be printed right away.
Usage:
'sample program using LPRINT and DUMP
open "c:\autoexec.bat" for input as #source
while eof( #source ) = 0
line input #source, text$
'print each line
lprint text$
wend
close #source
dump
'force the print job
end
Note: see also LPRINT
EOF( #h )
Description:
This function is used to determine when reading from a sequential file whether the end of the file
has been reached. If so, -1 is returned, otherwise 0 is returned.
Usage:
open "testfile" for input as #1
if eof(#1) < 0 then [skipIt]
[loop]
input #1, text$
print text$
if eof(#1) = 0 then [loop]
[skipIt]
close #1
END
Description:
This statement is used to immediately terminate execution of a program. If any files or devices
are still open (see CLOSE) when execution is terminated, then Liberty BASIC will close them and
present a dialog expressing this fact. It is good programming practice to close files and devices
before terminating execution.
Note: The STOP statement is functionally identical to END and is interchangable. Also, make
sure that when a program is finished running that it terminates properly with an END statement.
Otherwise the program's windows may all be closed, giving the illusion that it has stopped
running, but it will still be resident in memory and may still consume processor resources.
Usage:
print "Preliminary Tests Complete."
[askAgain]
input "Would you like to continue (Y/N) ?"; yesOrNo$
yesOrNo$ = left$(yesOrNo$, 1)
if yesOrNo$ = "y" or yesOrNo$ = "Y" then [continueA]
ifYesOrNo$ = 'n" or yesOrNo$ = "N" then end
print "Please answer Y or N."
goto [askAgain]
[continueA]
...some more code here...
end
'more than one end statement is allowed
EXP( n )
Description:
This function returns e ^ n, with e being 2.7182818 . . .
Usage:
print exp( 5 )
produces:
148.41315
EVAL( code$ )
Description:
Liberty BASIC now has two functions for evaluating BASIC code inside a running program. The
eval() function evaluates the code and returns a numeric value, and the eval$() function works the
same way but returns a string value. Both will execute the very same code, but the string
function converts the result to a string if it isn't already one, and the numeric version of the
function converts it to numeric values.
Evaluating to a string
Here we show how to evaluate code to a string, and what happens if you try to evaluate it to be a
number.
'Let's evaluate some code that produces a non-numeric result
a$(0) = "zero"
a$(1) = "one"
a$(2) = "two"
code$ = "a$(int("+str$(rnd(1))+"*3))"
print "We will evaluate the code: "; code$
result$ = eval$(code$)
print result$
'Now let's use the eval function, which effectively does a
'val() to the result of the calculation. Converting a non
'numeric string to a numeric value results in zero.
result = eval(code$)
print result
Evaluating to a number
Here's an example of the most common type of code evaluation users will want to do: Numeric
computation. Let's just make a short example that asks you to type an expression to evaluate.
'ask for an expression
input "Type a numeric expression>"; code$
answer = eval(code$)
print answer
EVAL$( code$ )
Description:
Liberty BASIC now has two functions for evaluating BASIC code inside a running program. The
eval() function evaluates the code and returns a numeric value, and the eval$() function works the
same way but returns a string value. Both will execute the very same code, but the string
function converts the result to a string if it isn't already one, and the numeric version of the
function converts it to numeric values.
Evaluating to a string
Here we show how to evaluate code to a string, and what happens if you try to evaluate it to be a
number.
'Let's evaluate some code that produces a non-numeric result
a$(0) = "zero"
a$(1) = "one"
a$(2) = "two"
code$ = "a$(int("+str$(rnd(1))+"*3))"
print "We will evaluate the code: "; code$
result$ = eval$(code$)
print result$
'Now let's use the eval function, which effectively does a
'val() to the result of the calculation. Converting a non
'numeric string to a numeric value results in zero.
result = eval(code$)
print result
Evaluating to a number
Here's an example of the most common type of code evaluation users will want to do: Numeric
computation. Let's just make a short example that asks you to type an expression to evaluate.
'ask for an expression
input "Type a numeric expression>"; code$
answer = eval(code$)
print answer
FIELD #h, list...
FIELD #handle, length1 as varName, lenght2 as varName, . . .
Description:
FIELD is used with an OPEN "filename.ext" for random as #handle statement to specify the fields
of data in each record of the opened file. For example in this program FIELD sets up 6 fields of
data, each with an appropriate length, and associates each with a string variable that holds the
data to be stored in that field:
open "custdata.001" for random as #cust len = 70 ' open as random access
field #cust, 20 as name$, 20 as street$, 15 as city$, 2 as state$, 10 as zip$, 3 as age
[inputLoop]
input "Name >"; name$
input "Street >"; street$
input "City >"; city$
input "State >"; state$
input "Zip Code >"; zip$
input "Age >"; age
confirm "Is this entry correct?"; yesNo$ ' ask if the data is
' entered correctly
if yesNo$ = "no" then [inputLoop]
recNumber = recNumber + 1
put #cust, recNumber
' add 1 to the record # and put the record
confirm "Enter more records?"; yesNo$
if yesNo$ = "yes" then [inputLoop]
close #cust
end
' ask whether to enter more records
' end of program, close file
Notice that Liberty BASIC permits the use of numeric variables in FIELD (eg. age), and it allows
you to PUT and GET with both string and numeric variables, automatically, without needing
LSET, RSET, MKI$, MKS$, MKD$, CVI, CVS, & CVD that are required with Microsoft BASICs.
Note: See also Random Files, PUT and GET
FILEDIALOG
FILEDIALOG titleString, templateString, receiverVar$
Description:
This command opens a Windows Common Filedialog. Liberty BASIC 3+ uses long filenames
and an explorer-type filedialog. The dialog lets a user navigate around the directory structure,
looking at filenames that have a specific extension and selecting one.
titleString
This parameter is used to label the Filedialog window. It appears in the titlebar of the window. If
the window label specified has the word "save" in it, then the save style of the dialog will be used
instead of the open style. This means that the button to approve the file selection will say "save"
rather than "open".
'will have buttons that say OPEN and CANCEL:
filedialog "Open text file", "*.txt", fileName$
print "File chosen is ";fileName$
'will have buttons that say SAVE and CANCEL:
filedialog "Save As...", "*.txt", fileName$
print "File chosen is ";fileName$
templateString
This parameter is used as a filter so that only files matching a wildcard are listed. To view all file
types, the templateString is " *.* " To access multiple extensions in a filedialog, separate the
desired extensions with a semicolon character, like this example, which displays files with
extensions of both BAS and BAK files in the dialog.
filedialog "Open code file", "*.bas;*.bak", fileName$
receiverVar$
When the user selects a filename, the resulting full path specification will be placed into
receiverVar$. This parameter contains an empty string if the user canceled the Filedialog.
Usage
The following example produces a dialog box asking the user to select a text file to open:
filedialog "Open text file", "*.txt", fileName$
If a file named "c:\liberty\summary.txt' was selected, and "Open" was clicked, then program
execution would resume after placing the string "c:\liberty\summary.txt" into fileName$. If on the
other hand "Cancel" was clicked, then an empty string would be placed into fileName$. Program
execution would then resume. Be sure to trap this possibility in your programs, or an error could
occur.
filedialog "Open text file", "*.txt", fileName$
if fileName$<>"" then
open fileName$ for input as #f
'do stuff
close #f
else
notice "No file chosen!"
end if
FILES
Description:
The FILES statement collects file and directory information from any disk and or directory and fills
a double-dimensioned array with the information. It is also good for determining if a specific file
exists (see below).
Usage:
dim arrayName$(10, 10)
files pathSpec$, arrayName$(
or
files pathSpec$, arrayName$()
'you must predimension the array info$(),
'even though FILES will
'redimension it to fit the information it provides.
dim info$(10, 10)
files "c:\", info$()
The above FILES statement will fill info$( ) in this fashion:
info$(0, 0) - a string specifying the qty of files found
info$(0, 1) - a string specifying the qty of subdirectories found
info$(0, 2) - the drive spec
info$(0, 3) - the directory path
Starting at info$(1, x) you will have file information:
info$(1, 0) - the file name
info$(1, 1) - the file size
info$(1, 2) - the file date/time stamp
Knowing from info$(0, 0) how many files we have (call it n), we know that our subdirectory
information starts at n + 1, so:
info$(n + 1, 0) - the complete path of a directory entry (ie. \work\math)
info$(n + 1, 1) - the name of the directory in specified (ie. math)
You can optionally specify a wildcard. This lets you get a list of all *.ini files, for example. This is
how you do it:
files DefaultDir$, "*.ini", info$(
This also makes it practical to use to check for file existence. If you want to know if a file
c:\config.bak exists, you could try...
files "c:\", "config.bak", info$(
If val(info$(0, 0)) > 0, then the file exists.
FONTDIALOG
FONTDIALOG fontSpec, fontSpecVar$
Description:
This command opens a Windows Common Fontdialog. It allows a user to select a font face,
size and attributes. After the user closes the dialog, the font chosen is contained in the receiver
variable fontSpecVar$.
fontSpec
This parameter describes a font by name, size and other attributes. The font dialog opens with
a best fit to this specification. The user can then accept or adjust the font selection.
fontSpecVar$
This variable holds a font specification chosen by the user after the Fontdialog is closed. If the
user clicked the "Cancel" button, this variable contains an empty string "". The string variable
contains this information: "facename size attributes"
"arial 14 italic"
"courier_new 12 bold"
FONT SPECIFICATIONS
FaceName
The facename is case insensitive, so "Arial" is the same as "ARIAL" and "arial." To specify a
font which has spaces in its name, use underscores in place of the spaces, like this:
Courier New
becomes...
Courier_New (or ignore the uppercase letters and type courier_new).
Size in Points
Specify a point size as above by using a single size parameter. A "point" is 1/72 of an inch,
so there are 72 points in an inch. A font that is 14 points high is not the same size as a font
that is 14 pixels high.
Size in Pixels
To specify font size by pixel rather than by point, include parameters for both width and height
in the font command. If the width parameter is set to 0, the default width for that font face and
height is used.
Here are some examples that set font size by point and by pixel:
'specify just a point size with a single size parameter
print #fontExample, "font Arial 14"
'specify a width and height in pixels
' with two size parameters
print #fontExample, "font Arial 8 15"
'specify a height, and let Windows pick the width
'(for compatibility with earlier versions of Liberty BASIC)
print #fontExample, "font Arial 0 15"
Attributes
Any or all of these attributes (modifiers) can be added - italic, bold, strikeout, and underscore.
Usage:
'open a font dialog
fontdialog "arial 10 italic", chosenFont$
if chosenFont$ <> "" then
open "Font sample" for graphics as #font
print #font, "down ; font "; chosenFont$
print #font, "\\AaBbCcDdEeFfGgHhIiJj"
print #font, "trapclose [closeFont]"
wait
end if
end
[closeFont]
close #font
end
See also: How to Specify Fonts
FOR...[EXIT FOR]...NEXT
Description:
The FOR . . . NEXT looping construct provides a way to execute code a specific amount of
times. See the section below on the proper way to exit a loop before the counter variable
reaches the limit. A starting and ending value are specified:
for var = 1 to 10
{BASIC code}
next var
In this case, the {BASIC code} is executed 10 times, with var being 1 the first time, 2 the second,
and on through 10 the tenth time. Optionally (and usually) var is used in some calculation(s) in
the {BASIC code}. For example if the {BASIC code} is print var ^ 2, then a list of squares for var
will be displayed upon execution.
The specified range could just as easily be 2 TO 20, instead of 1 TO 10, but since the loop
always counts +1 at a time, the first number must be less than the second. The way around this
limitation is to place STEP n at the end of for FOR statement:
for index = 20 to 2 step -1
{BASIC code}
next index
This loops 19 times returning values for index that start with 20 and end with 2. STEP can be
used with both positive and and negative numbers and it is not limited to integer values. For
example:
for x = 0 to 1 step .01
print "The sine of "; x; " is "; sin(x)
next x
Optional variable with "next"
Liberty BASIC 3 makes the use of a variable after "next" optional, but if one is designated, it
must match the variable use with "for". Example:
Correct:
for x = 0 to 1 step .01
print "The sine of "; x; " is "; sin(x)
next
Incorrect:
for x = 0 to 1 step .01
print "The sine of "; x; " is "; sin(x)
next y
Exiting a loop prematurely
GOSUB, FUNCTION and SUB may be used within a FOR/NEXT loop because they only
temporarily redirect program flow or call on other parts of the program. Program execution
resumes within the FOR/NEXT loop in these instances. Program execution does not return to the
FOR/NEXT loop if GOTO is used within the loop. GOTO should not be used to exit a
FOR/NEXTloop. "EXIT FOR" will correctly exit the loop before it would have terminated normally.
for index = 1 to 10
print "Enter Customer # "; index
input customer$
if customer$ = "" then [quitEntry] 1
'don't cut out of a for/next loop like this
cust$(index) = customer$
next index
[quitEntry]
. . . is not allowed! Rather use while ... wend:
index = 1
while customer$ <> "" and index <= 10
print "Enter Customer # "; index
input customer$
cust$(index) = customer$•
index = index + 1
wend
EXIT FOR
If it is necessary to exit a loop before the counter variable has reached its final value, use the
EXIT FOR statement. This allows the program to exit the loop properly and to preserve the
current value of the counter variable. Use it like this:
for x = 1 to 20
y=x*3
if y>40 then EXIT FOR
next x
print "Final x value ";x
print "Final y value ";y
'Output
Final x value 14
Final y value 42
FUNCTION
See also: Functions and Subroutines, BYREF
function functionName(zero or more parameter variable names)
'code for the function goes in here
functionName = returnValueExpression
end function
Description:
This statement defines a function. The function can return a string value, or a numeric value. A
function that returns a string value must have a name that ends with the "$" character. A function
that returns a numeric value must not include a "$" in its name. Zero or more parameters may be
passed into the function. A function cannot contain another function definition, nor a subroutine
definition. Note that the opening parenthesis is actually part of the function name. Do not include
a space between the name and the opening parenthesis, or the code generates an error.
Right:
function functionName(var1, var2)
Wrong:
function functionName (var1, var2)
Returning a Value
To return a value from the function, assign the value to be returned to a variable of the same name
as the function. If no return value is specified, then numeric and string functions will return 0 and
empty string respectively.
functionName = returnValueExpression
Local Variables
The variable names inside a function are scoped locally, meaning that the value of any variable
inside a function is different from the value of a variable of the same name outside the function.
Passing by Reference
Variables passed as arguments into functions are passed "by value" which means that a copy of
the variable is passed into the function. The value of the variable is not changed in the main
program if it is changed in the function. A variable may instead by passed "byref" which means
that a reference to the actual variable is passed and a change in the value of this variable in the
function changes the value of the variable in the main program.
Global Variables and Devices
Variables declared with the GLOBAL statement are available in the main program and in
subroutines and functions.
Arrays, structs and handles of files, DLLs and windows are global to a Liberty BASIC program,
and visible inside a function without needing to be passed in.
Special global status is given to certain default variables used for sizing, positioning, and coloring
windows and controls. These include variables WindowWidth, WindowHeight, UpperLeftX,
UpperLeftY, ForegroundColor$, BackgroundColor$, ListboxColor$, TextboxColor$,
ComboboxColor$, TexteditorColor$. The value of these variables, as well as DefaultDir$ and com
can be seen and modified in any subroutine/function.
Branch Labels
Branch labels are locally scoped. Code inside a function cannot see branch labels outside the
subroutine, and code outside a function cannot see branch labels inside any subroutine.
End Function
The function definition must end with the expression "end function."
Executing Functions
Be sure that a program doesn't accidentally flow into a function. A function should only execute
when it is called by command in the program.
wrong:
for i = 1 to 10
'do some stuff
next i
Function MyFunction(param1, param2)
'do some stuff
MyFunction=value
End Function
correct:
for i = 1 to 10
'do some stuff
next i
WAIT
Function MyFunction(param1, param2)
'do some stuff
MyFunction=value
End Function
Example Usage:
'count the words
input "Type a sentence>"; sentence$
print "There are "; wordCount(sentence$); " words in the sentence."
end
function wordCount(aString$)
index = 1
while word$(aString$, index) <> ""
index = index + 1
wend
wordCount = index - 1
end function
See also: SUB , Recursion, Functions and subroutines
GET #h, n
GET #handle, recordNumber
Description:
GET is used after a random access file is opened to get a record of information (see FIELD) from
a specified position.
Usage:
open "custdata.001" for random as #cust len = 70
' open random
access file
field #cust, 20 as name$, 20 as street$, 15 as city$, 2 as state$,
10 as zip$, 3 as age
' get the data from record 1
get #cust, 1
print
print
print
print
print
print
name$
street$
city$
state$
zip$
age
close #cust
end
Note: See also Random Files, PUT, FIELD
GETTRIM #h, n
GETTRIM #handle, recordNumber
Description:
The GETTRIM command is exactly like the GET command, but when data is retrieved, all
leading and trailing blank space is removed from all data fields before being committed to
variables.
Note: see also GET
GOSUB label
Description:
GOSUB causes execution to proceed to the program code following the label using the form
'GOSUB label'. The label can be either a traditional line number or a branch label name
enclosed in square brackets, like this: [branchLabel]. Spaces and numbers are not allowed
as part of branch label names..
Here are some valid branch labels: [mainMenu] [enterLimits] [repeatHere]
Here are some invalid branch labels: [enter limits] mainMenu [1moreTime]
After execution is transferred to the point of the branch label, then each statement will be
executed in normal fashion until a RETURN is encountered. When this happens, execution is
transferred back to the statement immediately after the GOSUB. The section of code between
a GOSUB and its RETURN is known as a 'subroutine.' One purpose of a subroutine is to save
memory by having only one copy of code that is used many times throughout a program.
Usage:
print "Do you want to
gosub [yesOrNo]
if answer$ = "N" then
print "Would you like
gosub [yesOrNo]
if answer$ = "Y" then
goto [generateNew]
continue?"
[quit]
to repeat the last sequence?"
[repeat]
[yesOrNo]
input answer$
answer$ = left$(answer$, 1)
if answer$ = "y" then answer$ = "Y"
if answer$ = "n" then answer$ = "N"
if answer$ = "Y" or answer$ = "N" then return
print "Please answer Y or N."
goto [yesOrNo]
Using GOSUB [yesOrNo] in this case saves many lines of code in this example. The
subroutine [yesOrNo] could easily be used many other times in such a hypothetical program,
saving memory and reducing typing time and effort. This reduces errors and increases
productivity.
Note: see also GOTO
GLOBAL
GLOBAL var1, var2$...,varN
Description:
This statement specifies that the variables listed are global in scope. They are visible inside
functions and subroutines as well as in the main program code. Global variables can be modified
inside functions and subroutines as well, so care must be taken not to alter them accidentally,
because this can easily cause errors in the program that are difficult to isolate. Use global
variables for things like values for true and false, file paths, user preferences etc. See also:
Function, Sub
Usage:
global true, false, font$
true = 1
false = 0
font$ = "times_new_roman 10"
Special Globals
The special capitalized globals (like WindowWidth, DefaultDir$, the color setting variables, etc.)
that Liberty BASIC has supported since globals were first introduced in LB2, are now promoted to
true global variables. Until now, these could only be set in the main part of the program, not in
functions and subroutines. That limitation has now been lifted. See the code below for examples
of this.
Example one:
global true, false, font$
true = 1
false = 0
font$ = "times_new_roman 10"
call makeWindow
print "WindowWidth was changed: "; WindowWidth
wait
sub makeWindow
if true <> false then
notice "Hey, true isn't the same as false. Whatta ya know?"
end if
WindowWidth = 350
texteditor #main.te1, 8, 8, 250, 152
textbox #main.tb1, 16, 192, 112, 24
statictext #main.Statictext4, "Font_Name w h", 8, 168, 100, 18
button #main.apply1, "Apply", [applyFont1], UL, 136, 192, 67,
24
radiobutton #main.rb1, "Radiobutton 1", [set], [clear], 16, 226,
190, 20
checkbox #main.cb1, "Checkbox 1", [set], [clear], 16, 256, 190, 20
open "Untitled" for window as #main
#main "font "; font$
#main.te1 "The font is: "; font$
end sub
Example two:
'define a global string variable:
global title$
title$ = "Great Program!"
'Special system variables don't
'need to be declared as global,
'since they have that status automatically
BackgroundColor$ = "darkgray"
ForegroundColor$ = "darkblue"
'call my subroutine to open a window
call openIt
wait
sub openIt
statictext #it.stext, "Look Mom!", 10, 10, 70, 24
textbox #it.tbox, 90, 10, 200, 24
open title$ for window as #it
print #it.tbox, "No hands!"
end sub
GOTO label
Description:
GOTO causes Liberty BASIC to proceed to the program code following the label, using the form
'GOTO label'. The label can be either a traditional line number or a branch label in the format
[branchLabel] where the branch label name can be any upper/lowercase letter combination.
Spaces and digits are not allowed.
Here are some valid branch labels: [mainMenu] [enterLimits] [repeatHere]
Here are some invalid branch labels: [enter limits] mainMenu [1moreTime]
Usage:
.
.
[repeat]
.
.
[askAgain]
print "Make your selection (m, r, x)."
input selection$
if selection$ = "M" then goto [menu]
if selection$ = "R" then goto [repeat]
if selection$ = "X" then goto [exit]
goto [askAgain]
.
.
[menu]
print "Here is the main menu."
.
.
[exit]
print "Okay, bye."
end
Notes:
In the lines containing IF . . . THEN GOTO, the GOTO is optional.
The expression IF . . . THEN [menu] is just as valid as
IF . . . THEN GOTO [menu]. But in the line GOTO [askAgain], the GOTO
is required.
See also GOSUB
Graphicbox
graphicbox #handle.ext, xOrg, yOrg, width, height
Description:
The graphicbox is a control that can be added to any window type. It understands all of the
commands of that are used in a window of type "graphics."
#handle.ext
The #handle part must be the same as the window that will contain the graphicbox. The .ext part
must be unique for the graphicbox.
xOrg & yOrg
These specify the position of the graphicbox as measured in pixels in x and y from the upper-left
corner of the window.
width & height
These specify the width and height of the textbox in pixels.
It should be noted that graphics windows and graphicboxes are intended for drawing graphics. It
is not advisable to place controls within them, since some controls do not work properly when
placed in graphicboxes or graphics windows. If there is a need for text display within a
graphicbox or graphics window, use the graphics text capabilities rather than a statictext control.
Jump to commands for graphics commands
GRAPHICBOX COMMANDS
The following commands are sent to a graphicbox. When a graphicbox is disabled, it can no
longer capture keyboard and mouse events.
print #handle.ext, "setfocus"
This causes the control to receive the input focus. This means that any keypresses will be
directed to the control.
print #handle.ext, "enable"
This causes the control to be enabled.
print #handle.ext, "disable"
This causes the control to be inactive. It can no longer capture mouse and keyboard events.
print #handle.ext, "show"
This causes the control to be visible.
print #handle.ext, "hide"
This causes the control to be hidden or invisible.
GROUPBOX
GROUPBOX #handle.ext, "label", x, y, wide, high
Description:
This command adds a groupbox to a window or dialog box. Other controls added to the owning
window which overlap the displayed area of the groupbox will be nested inside the groupbox. This
is particularly useful for radiobuttons. It is possible for only one radiobutton in a radio-set to be
"set" at one time. The groupbox allows the window to have multiple radio-sets of radiobuttons.
Only one of all radiobuttons in a groupbox will be allowed to be in a set state. Click on one to set
it, and all the others will be reset.
#handle.ext
This must be the same #handle as the window that contains the groupbox. ".ext" is an optional
unique extension unique to the groupbox.
"label"
This is the caption or text label that appears on the groupbox.
x, y
These parameters determine where to position the groupbox relative to the upper left corner of the
window workspace.
wide, high
These parameters specify how wide and high the groupbox will be in pixels.
For information on creating controls with different background colors, see Colors and the
Graphical User Interface.
print #handle.ext, "a string"
This changes the text displayed on the control. This command sets the contents (the visible
label) to be "a string". The handle must be of form #handle.ext that includes a unique extension
so that commands can be printed to the control.
print #handle.ext, "!locate x y width height"
This repositions the control in its window. This only works if the control is placed inside window
of type "window". The control will not update its size and location until a REFRESH command is
sent to the window. See the RESIZE.BAS example program.
print #handle.ext, "!font facename pointSize"
This sets the control's font to the specified face and point size. If an exact match cannot be
found, then Liberty BASIC will try to find a close match, with size taking precedence over face.
For more on specifying fonts read How to Specify Fonts
Example:
print #handle.ext, "!font times_new_roman 10"
print #handle.ext, "!enable"
This causes the control to be enabled.
print #handle.ext, "!disable"
This causes the control to be inactive and grayed-out.
print #handle.ext, "!show"
This causes the control to be visible.
print #handle.ext, "!hide"
This causes the control to be hidden or invisible.
HBMP( "name" )
HBMP("string expression")
Description:
Returns the Windows handle (a numeric value) for the bitmap whose name is specified by "string
expression". This is often useful in different kinds of Windows API function calls and for use with
third party DLLs.
Usage:
loadbmp "title", "bmp\titlettt.bmp"
tttHandle = hbmp("title")
print tttHandle
See also: LOADBMP, UNLOADBMP
HEXDEC( "value" )
HEXDEC( "value" )
Description:
This function returns a numeric decimal from a hexadecimal number expressed in a string.
Hexadecimal values are represented by digits 0 - F. The hexadecimal number can be preceded
by the characters "&H". The hexadecimal string must be enclosed in quote marks.
Usage:
print hexdec( "FF" )
or:
print hexdec( "&HFF")
See also: DECHEX$( )
HWND( #handle )
Description:
This function returns the Windows handle (a numeric value) for the window referred to by the
Liberty BASIC #handle. This is very useful for making many different kinds of Windows API calls,
and many third-party DLLs will require that this value be provided for their own purposes.
Usage:
open "Example" for window as #1
h1 = hwnd(#1)
IF...THEN...[ELSE]...[END IF]
IF test expression THEN expression(s)
IF test expression THEN expression(s)1 ELSE expression(s)2
IF test expression THEN
expression(s)1
END IF
IF test expression THEN
expression(s)1
ELSE
expression(s)2
END IF
Description:
The IF...THEN statement provides a way to change program flow based on a test expression. For
example, the following line directs program execution to branch label [soundAlarm] if fuel runs
low.
if fuel < 5 then [soundAlarm]
Another way to control program flow is to use the IF...THEN...ELSE statement. This extended
form of IF...THEN adds expressiveness and simplifies coding of some logical decision-making
software. Here is an example of its usefulness.
Consider:
[retry]
input "Please choose mode, (N)ovice or e(X)pert?"; mode$
if len(mode$) = 0 then print "Invalid entry! Retry" : goto [retry]
mode$ = left$(mode$, 1)
if instr("NnXx", mode$) = 0 then print "Invalid entry! Retry" : goto [retry]
if instr("Nn", mode$) > 0 then print "Novice mode" : goto [main]
print "eXpert mode"
[main]
print "Main Selection Menu"
The conditional lines can be shortened to one line as follows:
if instr("Nn",mode$)> 0 then print "Novice mode" else print "eXpert mode"
Some permitted forms are as follows:
if a <
if a <
if a <
if a <
if a <
if a <
if a <
b then statement else statement
b then [label] else statement
b then statement else [label]
b then statement : statement else statement
b then statement else statement : statement
b then statement : goto [label] else statement
b then gosub [label1] else gosub [label2]
Any number of variations on these formats are permissible. The (a < b) BOOLEAN expression is
of course only a simple example chosen for convenience. It must be replaced with the correct
expression to suit the problem.
IF...THEN...END IF is another form using what are called conditional blocks. This allows great
control over the flow of program decision making. Here is an example of code using blocks.
if qtySubdirs = 0 then
print "None."
goto [noSubs]
end if
A block is merely one or more lines of code that are executed as a result of a conditional test.
There is one block in the example above, and it is executed if qtySubdirs = 0.
It is also possible to use the ELSE keyword as well with blocks:
if qtySubdirs = 0 then
print "None."
else
print "Count of subdirectories: "; qtySubdirs
end if
This type of coding is easy to read and understand. There are two blocks in this example. One
is executed if qtySubdirs = 0, and one is executed if qtySubdirs is not equal to 0. Only one of
the two blocks will be executed (never both as a result of the same test).
These conditional blocks can be nested inside each other:
if verbose = 1 then
if qtySubdirs = 0 then
print "None."
else
print "Count of subdirectories: "; qtySubdirs
end if
end if
In the example above, if the verbose flag is set to 1 (true), then display something, or else skip
the display code entirely.
See also: Select Case, Conditional Statements, Boolean Evaluations
Inkey$
Keyboard input can only be trapped in graphics windows or graphicboxes. When a key is
pressed, the information is stored in the variable Inkey$
Description:
This special variable holds either a single typed character or multiple characters including a
Windows virtual keycode. Notice that because Inkey$ is a variable, it is case sensitive.
Remember that at this time, only the graphics window and graphicbox controls can scan for
keyboard input. The virtual keycodes are standard Windows constants, and include arrow keys,
function keys, the ALT, SHIFT, and CTRL keys, etc.
If Inkey$ is a single character, that character will be the key pressed. See the section below for a
description of Inkey$ when len(Inkey$) is greater than 1.
'INKEY.BAS
- how to use the Inkey$ variable
open "Inkey$ example" for graphics as #graph
print #graph, "when characterInput [fetch]"
[mainLoop]
print #graph, "setfocus"
input r$
[fetch]
'a character was typed!
key$ = Inkey$
if len(key$) = 1 then
notice key$+" was pressed!"
else
keyValue = asc(right$(key$, 1))
if keyValue = _VK_SHIFT then
notice "Shift was pressed"
else
if keyValue = _VK_CONTROL then
notice "Ctrl was pressed"
else
notice "Unhandled key pressed"
end if
end if
end if
WAIT
Inkey$ holds multiple key information:
If Inkey$ holds more than one character, the first character will indicate whether the Shift, Ctrl, or
Alt keys was depressed when the key was pressed. These keys have the following ASCII values:
Shift = 4
Ctrl = 8
Alt = 16
They can be used in any combination. If Inkey$ contains more than one character, you can
check to see which (if any) of the three special keys was also pressed by using the bitwise AND
operator. If shift alone was pressed, then the ASCII value of the first character will be 4. If Shift
and Alt were both pressed, then the ASCII value of the first character will be 20, and so on.
Special keys trigger a new value for Inkey$ when they are pressed and again when they are
released. Here is an example that uses bitwise AND to determine which special keys were
pressed.
open
#1
#1
#1
#1
#1
#1
#1
#1
"Inkey$ with Shift" for graphics_nf_nsb as #1
"setfocus; when characterInput [check]"
"down; place 10 30"
"\Make the mainwindow visible,"
"\then click this window and"
"\begin pressing key combinations."
"\Watch the printout in the mainwindow."
"flush"
"trapclose [quit]"
wait
[check]
shift=4
ctrl=8
alt=16
a=asc(left$(Inkey$,1))
if len(Inkey$)>1 then
m$=""
if a and shift then m$="shift "
if a and ctrl then m$=m$+"ctrl "
if a and alt then m$=m$+"alt "
print "Special keys pressed: " + m$
else
print "Key pressed: " + Inkey$
end if
wait
[quit]
close #1:end
See also, Using virtual key constants with Inkey$, Using Inkey$, Reading Mouse Events and
Keystrokes.
INP( )
returnedByte = INP(port)
Description:
This function polls the specified machine I/O port for its byte value.
If you will be distributing your application, and it uses INP() and/or OUT to control hardware ports,
you will need to distribute and install certain files on your user's system. For detailed information,
see Port I/O.
See also: OUT port,byte
INPUT
INPUT #handle "string expression"; variableName
Description:
This command has several possible forms:
input var
This form causes a program to stop and wait for user to enter data in the program's mainwin and
press the 'Return' key. It will then assign the data entered to var.
input "enter data"; var
This form will display the string "enter data" and then stop and wait for user to enter data in the
program's mainwin and press 'Return'. It will then assign the data entered to var.
input #name, var
This form will get the next data item from the open file or device using handle named #handle and
assign the data to var. If no device or file exists that uses the handle named #handle, then INPUT
returns an error.
input #name, var1, var2
This form causes the next two data items to be fetched and assigned to var1 and var2.
line input #name, var$
The LINE INPUT statement will read from the file, ignoring commas in the input stream and
completing the data item only at the next carriage return or at the end of file. This is useful for
reading text with embedded commas
Usage:
'Display a text file
filedialog "Open..." , "*.txt", filename$
open filename$ for input as #text
[loop]
if eof(#text) <> 0 then [quit]
input #text, item$
print item$
goto [loop]
[quit]
close #text
print "Done."
end
Arrays
In earlier versions of Liberty BASIC, INPUT could not be used to input data directly into arrays,
only into the simpler variables. For Liberty BASIC 3, that limitation no longer exists. It is now
possible to use Input and Line Input to fill arrays directly. To input directly to an array:
input array$(x)
It is also possible to use this method:
input array$(x), string$, stuff(i)
Question Mark
Most versions of Microsoft BASIC implement INPUT to automatically place a question mark on
the display in front of the cursor when the user is prompted for information:
input "Please enter the upper limit"; limit
produces:
Please enter the upper limit ? |
Liberty BASIC makes the appearance of a question mark optional.
input "Please enter the upper limit :"; limit
produces:
Please enter the upper limit: |
and:
input limit
produces simply:
?|
In the simple form input limit, the question mark is inserted automatically, but if a prompt is
specified, as in the above example, only the contents of the prompt are displayed, and nothing
more. If it is necessary to obtain input without a prompt and without a question mark, then the
following will achieve the desired effect:
input ""; limit
Additionally, in most Microsoft BASICs, if INPUT expects a numeric value and a non numeric or
string value is entered, the user will be faced with a comment something like 'Redo From Start',
and be expected to reenter. Liberty BASIC does not automatically do this, but converts the entry
to a zero value and sets the variable accordingly.
The prompt may be expressed as a string variable, as well as a literal string:
prompt$ = "Please enter the upper limit:"
input prompt$; limit
See also: INPUT$(#h, n), INPUTTO$(#h, c$), Line Input
INPUT$( #h, n )
INPUT$(#handle, items)
Description:
This permits the retrieval of a specified number of items from an open file or device using
#handle. If #handle does not refer to an open file or device then an error will be reported. It
can also be used to read a character at a time from the mainwindow (see example below).
Usage:
'read and display a file one character at a time
open "c:\autoexec.bat" for input as #1
[loop]
if eof(#1) <> 0 then [quit]
print input$(#1, 1);
goto [loop]
[quit]
close #1
end
For most devices (unlike disk files), one item does not refer a single character, but INPUT$( )
may return items more than one character in length. In most cases, use of INPUT #handle,
varName works just as well or better for reading devices.
Here is another example which shows reading keypresses in the mainwindow.
'accept characters and display them until Enter is pressed
text$ = ""
while c$ <> chr$(13)
c$ = input$(1)
print c$;
if c$ <> chr$(13) then text$ = text$ + c$
wend
print "You typed:"; text$
end
File input directly to an array.
Previous versions of Liberty BSIC required you to input to a variable, then filll an array with the
variable. Liberty BASIC 3 removes that limitation and allows you to input from a file directly
into an array. Example:
'input from a file, directly into an array
open "myfile.txt" for input as #handle
while EOF(#handle)=0
input #handle, array$(total)
total=total+1
wend
close #handle
for i = 0 to total
print array$(i)
next
See also INPUTTO$(#h, c$), Line Input, Input
INPUTTO$(#h, c$)
INPUTTO$(#handle, delim$))
Description:
This function reads from the file #handle up to the character specified in delim$ or to the end of
the line, whichever comes first. This is handy for reading files which contain comma, tab, pipe, or
other delimited items.
'display each comma delimited item in a file on its own line
open "inputto test.txt" for input as #test
while eof(#test) = 0
print inputto$(#test, ",")
wend
close #test
Inputto$ directly to an array
You can use inputto$() to fill an array directly:
dim array$(500)
filedialog "Open","*.txt",file$
open file$ for input as #test
while eof(#test) = 0
array$(total)=inputto$(#test,",")
print array$(total)
total=total+1
if total>=500 then exit while
wend
close #test
for i = 0 to total
print array$(i)
next
end
See also: INPUT, INPUT$(#h,n), Line Input
INSTR(a$,b$,n)
INSTR(string1, string2, starting)
Description:
This function returns the position of string2 within string1. If string2 occurs more than once in
string1, then only the position of the leftmost occurance will be returned. If the starting
parameter is included, then the search for string2 will begin at the position specified by
starting.
Usage:
print instr("hello there", "lo")
produces:
4
print instr("greetings and meetings", "eetin")
produces:
3
print instr("greetings and meetings", "eetin", 5)
produces:
16
If string2 is not found in string1, or if string2 is not found after starting, then INSTR( ) will return
0.
print instr("hello", "el", 3)
produces:
0
and so does:
print instr("hello", "bye")
INT( n )
Description:
This function removes the fractional part of "n" (a number), leaving only the whole number part
behind. The fractional part is the part of the number after the decimal point.
Usage:
[retry]
input "Enter an integer number>"; i
if i<>int(i) then bell: print i; " isn't an integer! Re-enter.":
goto [retry]
KILL s$
KILL "filename.ext"
Description:
This command deletes the file specified by filename.ext. The filename can include a complete
path specification.
LEFT$( s$, n )
LEFT$(string, number)
Description:
This function returns from the string, string variable, or string expression string the specified
number of characters starting from the left. If string is "hello there", and number is 5, then
"hello" is the result.
Usage:
[retry]
input "Please enter a sentence>"; sentence$
if sentence$ = "" then [retry]
for i = 1 to len(sentence$)
print left$(sentence$, i)
next i
Produces:
Please enter a sentence>That's all folks!
T
Th
Tha
That
That'
That's
That's_
That's a
That's al
That's all
That's all_
That's all f
That's all fo
That's all fol
That's all folk
That's all folks
That's all folks!
Note: If number is zero or less, then "" (an empty string) will be returned. If number is greater
than or equal to the number of characters in string, then string will be returned.
See also MID$( ) and RIGHT$( )
LEN( s$ )
LEN( string )
LEN( structName.struct )
Description:
This function returns the length in characters of string, which can be any valid string
expression. It also returns the size of a struct.
Usage:
prompt "What is your name?"; yourName$
print "Your name is "; len(yourName$); " letters long"
struct person, name$ as ptr, age as long
print len(person.struct)
LET var = expression
Description:
LET is an optional prefix for any BASIC assignment expression. Most programmers leave the
word out of their programs, but some prefer to use it.
Usage:
Either is acceptable:
let name$ = "John"
or
name$ = "John"
Another example:
let c = sqr(a^2 + b^2)
or
c = sqr(a^2 + b^2)
LINE INPUT
line input #handle, var$
Description:
This gets the next data line from the open file or device using handle #handle and assigns the
data to var$. If no device or file exists that uses the handle named #handle, then it returns an
error. The line input statement reads from the file, ignoring commas in the input stream and
completing the data item only at the next carriage return or at the end of file. This is useful for
reading text with embedded commas
Usage:
'Display each line of a text file
input "Please type a filename >";
open filename$ for input as #text
[loop]
if eof(#text) <> 0 then [quit]
line input #text, item$
print item$
goto [loop]
[quit]
close #text
print "Done."
filename$
Arrays:
Line Input now allows input directly multiple variables and arrays.
filedialog "Open","*.txt",file$
if file$="" then end
dim a$(3000)
open file$ for input as #f
while not(eof(#f))
line input #f, a$(i)
i=i+1
wend
close #f
for j=0 to i
print a$(j)
next
end
See also: INPUT, Input (#h, n), INPUTTO$(#h, c$)
Listbox
LISTBOX #handle.ext, array$(), eventHandler, x, y, wide, high
Description:
Listboxes are added to windows to provide a list selection capability in programs. The listbox is
loaded with a collection of strings from a specified string array, and a RELOAD command
updates the contents of the listbox from the array when the contents of the array change.
#handle.ext
The #handle part of this statement must be the same as the #handle of the window that contains
the listbox. The ".ext" part must be unique so that the program can send commands to the
listbox and get information from it later.
array$()
This is the name of the array (must be a string array) that contains the contents of the listbox.
Be sure to load the array with strings before opening the window. If some time later it is
necessary to change the contents of the listbox, simply change the contents of the array and
send a RELOAD command. The index numbers of items in the array may not match the index
numbers of the same items in the control. The control is loaded from the array, and the first index
used in the control is "1". No empty strings are loaded into the control, so only array items that
contain text are loaded.
eventHandler
This is the branch label or subroutine where execution begins when the user selects an item from
the listbox by double-clicking. Selection by only single clicking does not cause branching to
occur unless a "singleclickselect" command is issued to the listbox. See also: Controls and
Events
x, y
This is the distance in x and y (in pixels) of the listbox from the upper-left corner of the window.
wide, high
This specifies the width and height (in pixels) of the listbox.
Here are the commands for listbox:
print #handle.ext, "select string"
This selects the item the same as "string" and updates the display. If a variable is to be used in
this command, it must be located outside the quotation marks, with the blank space preserved:
print #handle.ext, "select "; string$
print #handle.ext, "selectindex i"
This selects the item at index position i and updates the display. Note that "i" must be a valid
index number for the listbox array. If a variable is to be used in this command, it must be located
outside the quotation marks, with the blank space preserved:
print #handle.ext, "selectindex "; i
print #handle.ext, "selection? selected$"
This will place the string of the item currently selected into selected$. If there is no selected
item, then selected$ will be a string of zero length (a null string).
print #handle.ext, "selectionindex? index"
This will place the index of the currently selected string into index. If there is no selected item,
then index will be set to 0.
print #handle.ext, "reload"
This will reload the listbox with the current contents of its array and will update the display.
print #handle.ext, "locate x y width height"
This repositions the listbox control in its window. This only works if the control is placed inside
window of type "window". The control will not update its size and location until a REFRESH
command is sent to the window. See the RESIZE.BAS example program.
print #handle.ext, "font facename pointSize"
This sets the listbox's font to the specified face and point size. If an exact match cannot be
found, then Liberty BASIC will try to find a close match, with size taking precedence over face.
For more on specifying fonts read How to Specify Fonts
Example:
print #handle.ext, "font times_new_roman 10"
print #handle.ext, "singleclickselect"
This tells Liberty BASIC to jump to the control's branch label on a single click, instead of the
default double click.
print #handle.ext, "setfocus"
This causes the control to receive the input focus. This means that any keypresses will be
directed to the control.
print #handle.ext, "enable"
This causes the control to be enabled.
print #handle.ext, "disable"
This causes the control to be inactive and grayed-out.
print #handle.ext, "show"
This causes the control to be visible.
print #handle.ext, "hide"
This causes the control to be hidden or invisible.
Sample Program
'Branch Label Event Handler
' Sample program. Pick a contact status
options$(0) = "Cold Contact Phone Call"
options$(1) = "Send Literature"
options$(2) = "Follow Up Call"
options$(3) = "Send Promotional"
options$(4) = "Final Call"
listbox #status.list, options$(), [selectionMade], 5, 35, 250, 90
button #status, "Continue", [selectionMade], UL, 5, 5
button #status, "Cancel", [cancelStatusSelection], UR, 15, 5
WindowWidth = 270 : WindowHeight = 180
open "Select a contact status" for window as #status
wait
[selectionMade]
print #status.list, "selection? selection$"
notice selection$ + " was chosen"
close #status
end
[cancelStatusSelection]
notice "Status selection cancelled"
close #status
end
Control of the listbox in the sample program above is provided by printing commands to the
listbox, just as with general window types in Liberty BASIC. The listbox has the handle
#status.list, so to find out what was selected, use the statement print #status.list, "selection?
selection$". If the result is a string of length zero (a null string), this means that there is no item
selected.
Subroutine Event Handler:
' Sample program. Pick a contact status
options$(0) = "Cold Contact Phone Call"
options$(1) = "Send Literature"
options$(2) = "Follow Up Call"
options$(3) = "Send Promotional"
options$(4) = "Final Call"
listbox #status.list, options$(), selectionMade, 5, 35, 250, 90
button #status, "Cancel", [cancelStatusSelection], UR, 15, 5
WindowWidth = 270 : WindowHeight = 180
open "Select a contact status" for window as #status
#status.list "singleclickselect"
wait
sub selectionMade handle$
print #status.list, "selection? selection$"
notice selection$ + " was chosen with listbox ";handle$
end sub
[cancelStatusSelection]
notice "Status selection cancelled"
close #status
end
For information on creating controls with different background colors, see Colors and the
Graphical User Interface.
LOADBMP
LOADBMP "name", "filename.bmp"
and
LOADBMP "name", hbmp
Description:
The first version of this command loads a standard Windows *.BMP bitmap file on disk into
Liberty BASIC. The "name" is a string chosen to describe the bitmap being loaded and the
"filename.bmp" is the actual name of the bitmap disk file. Once loaded, the bitmap can then be
displayed in a graphics window type using the DRAWBMP command (see Graphics Window
Commands).
Usage:
loadbmp "copyimage", "bmp\copy.bmp"
open "Drawbmp Test" for graphics as #main
print #main, "drawbmp copyimage 10 10"
wait
'when program exits:
unloadbmp("copyimage")
The second version of the command loads the bitmap whose handle is referenced by "hbmp".
This handle can be obtained from an add-on DLL that loads images, such as the nviewlib.dll, or
by creating a bitmap using API calls, or by loading a bitmap with the API function LoadImageA.
Add-on DLLs allow you to access images in other formats, such as jpg or gif, and then load them
with the LOADBMP command so that they can be displayed with the DRAWBMP command.
Usage:
open "NViewLib.dll"for DLL as #nv
file$="test.jpg"
calldll #nv, "NViewLibLoad",_
file$ AS ptr,1 as short,_
hImage AS short 'handle of loaded image
close #nv
loadbmp "newimage", hImage
open "Drawbmp Test" for graphics as #main
print #main, "drawbmp newimage 10 10"
wait
'when program exits:
unloadbmp("newimage")
See also: BMPSAVE, UNLOADBMP
LOCATE
LOCATE has two uses. The first usage listed here locates a control on its parent window. The
second usage is for the mainwin only.
LOCATE CONTROLS
print #handle.ext, "locate x y width height"
or
print #handle.ext, "!locate x y width height"
Description
This command for windows of type "window" causes a control to be moved and/or resized.
Always issue a REFRESH command after the LOCATE command to cause the window to be
repainted to reflect the control's new position and size. For a demonstration, see Resize.bas.
Usage:
print #handle.ext, "locate 20 12 300 200"
or
x = 20 : y = 12 : width = 300 : height = 200
print #handle.ext, "locate ";x;" ";y;" ";width;" ";height"
See also: RESIZEHANDLER, REFRESH Window and Dialog Commands
LOCATE IN MAINWINDOW
locate x, y
Description:
Using LOCATE in the mainwin causes text to be printed at the x, y location specified. These
coordinates refer to the column and row of text, not to screen pixels. This command functions in
the same was as the Qbasic LOCATE command and is used to position text on the mainwin.
Here is a short demo:
'plot a wave
for x = 1 to 50
i = i + 0.15
locate x, 12 + int(cos(i)*10)
print "*";
next x
LOF( #h )
LOF(#handle)
Description:
This function returns the number of bytes contained in the open file referenced by #handle.
Usage:
open "\autoexec.bat" for input as #1
qtyBytes = lof(#1)
for x = 1 to qtyBytes
print input$(#1, 1) ;
next x
close #1
end
LOC( #h )
LOC( #handle )
Description:
The LOC( #handle ) function retrieves the current position of the file pointer when a file whose
handle is specified has been opened for BINARY access. The current position of the file
pointer is used when reading or writing data to a binary file. See also: SEEK
Usage:
open "myfile.ext" for binary as #handle
'get the current file position
fpos = loc(#handle)
LOG( n )
Description:
This function returns the natural logarithm of n.
Usage:
print log( 7 )
produces:
1.9459101
LOWER$( s$ )
LOWER$(s$)
Description:
This function returns a copy of the contents of the string, string variable, or string expression s$,
but with all letters converted to lowercase.
Usage:
print lower$( "The Taj Mahal" )
Produces:
the taj mahal
LPRINT
LPRINT expr
Description:
This statement is used to send data to the default printer (as determined by the Windows Print
Manager). A series of expressions can follow LPRINT (there does not need to be any expression
at all), each separated by a semicolon. Each expression is sent in sequence. Printing can be
formatted into columns with the TAB(n) function. When you are finished sending data to the
printer, you should commit the print job by using the DUMP statement. Liberty BASIC will
eventually send your print job, but DUMP forces the job to finish.
Usage:
lprint "hello world"
dump
'This prints hello world
lprint "hello ";
lprint "world"
dump
'This also prints hello world
age = 23
lprint "Ed is "; age; " years old"
'This prints Ed is 23 years old
dump
Note: see also PRINT, DUMP, PRINTERDIALOG, TAB(n)
MAINWIN
MAINWIN columns rows
Description:
This sets the width or width and height of a program's main window. This is specified in colums
and rows of text according the font of the mainwindow. This statement is usually placed at the
beginning of the program code.
Usage:
'set a width of 40 columns
mainwin 40
or...
'set the width to 40 columns and height to 12 lines
mainwin 40 12
See also: NOMAINWIN
MAX( )
MAX( expr1, expr2 )
Description:
This function returns the greater of two numeric values.
Usage:
input "Enter a number?"; a
input "Enter another number?"; b
print "The greater value is "; max(a, b)
See also: MIN( )
MAPHANDLE
maphandle #oldHandle, #newHandle
maphandle #oldHandle, "#newHandle"
Description:
Maphandle assigns a new handle to a device after it is open. Now it is possible to reuse code
that is used to open windows, files, etc. For example a window can be opened as follows:
open "Maphandle example" for window as #renameMe
Once this window is open, the code cannot execute this line again because the handle
#renameMe is in use by that window. Opening another one is not allowed because a given
handle can only be in use by one device at a time.
The maphandle command provides a way around this problem. You can change the handle of the
window after you open it.
Usage:
Maphandle Examples
maphandle #renameMe, #newHandle
maphandle #renameMe, "#newHandle"
a$ = "#new" + "Handle"
maphandle #renameMe, a$
With this example you see how to create handles dynamically on the fly if desired:
winName$ = "first second third"
for x = 1 to 3
call createWindow word$(winName$, x)
next x
wait
sub createWindow title$
texteditor #1.te, 10, 10, 200, 200
open "text "+title$ for window as #1
#1.te "this is the "+title$+" window"
#1 "trapclose aboutToClose"
handle$ = "#"+title$
maphandle #1, handle$
end sub
sub aboutToClose handle$
confirm "Close "+handle$+"?"; answer
if answer = 1 then close #handle$
end sub
The old way
Here is the old way of opening three windows without using maphandle and variable handles. In
some ways this is easier to read, but it is a lot more code, and you can only open another
window by adding a lot more code.
texteditor #1.te, 10, 10, 200, 200
open "text first" for window as #1
#1.te "this is the first window"
#1 "trapclose [aboutToClose1]"
texteditor #2.te, 10, 10, 200, 200
open "text second" for window as #2
#2.te "this is the second window"
#2 "trapclose [aboutToClose2]"
texteditor #3.te, 10, 10, 200, 200
open "text third" for window as #3
#3.te "this is the third window"
#3 "trapclose [aboutToClose3]"
wait
[aboutToClose1]
confirm "Close first?"; answer
if answer = 1 then close #1
wait
[aboutToClose2]
confirm "Close second?"; answer
if answer = 1 then close #2
wait
[aboutToClose3]
confirm "Close third?"; answer
if answer = 1 then close #3
wait
MENU
MENU #handle, "title", "text", [branchLabel], "text2", [branchLabel2], | , . . .
or
MENU #handle, "title", "text", subName1, "text2", subName2, |, ...
Description:
This command adds a pull down menu to the window at #handle. The item "title" specifies the
title of the menu, as seen on the menu bar of the window, and each "text", [branchLabel] pair
after the title adds a menu item to the menu, and tells Liberty BASIC where to branch to when the
menu item is chosen. A sub can be used as a menu event handler.
The " | " character can optionally be placed between menu items, to cause a separating line to be
added between the items when the menu is pulled down.
The " & " character placed in the title and text items for the menu specifies the accelerator
placement for each item. The letter directly following the " & " character will act as a hotkey for
that menu item, when it is pressed while the user presses and holds down the ALT key. The
hotkey appears underlined in the menu display.
The menu command must be contained on one line. To break the line for viewing in the Liberty
BASIC editor, use the line continuation character, " _ ".
Usage:
Here is an example that adds a menu to a graphics window:
menu #geo, "&Colors", "&Red", [setRed], "&Green", [setGreen],_
"&Blue", [setBlue]
menu #geo, "&Shapes", "&Rectangle", [asRect], "&Circle",_
[asCircle], "&Line", [asLine]
open "Geometric White-board" for graphics_nsb as #geo
wait ' stop and wait for a menu item to be chosen
Notice that the MENU commands must go before the OPEN statement, and must use the same
handle as the window (#geo in this case.
Here is an example that uses subs as event handlers:
menu #main.testing, "Testing", "one", one, "two", two
button #main.close, "Close", quit, UL, 10, 10
open "example" for window as #main
#main "trapclose quit"
wait
sub one
notice "One!"
end sub
sub two
notice "Two!"
end sub
sub quit handle$
if instr(handle$, ".") then
handle$ = left$(handle$, instr(handle$, ".")-1)
end if
close #handle$
end
end sub
Textboxes and texteditors cause an automatic EDIT menu to be added to the menu bar. To
locate this automatic menu, use the menu command with a menu name of "edit" and no items.
Do not include the " & " character in this dummy "edit" menu title. If the location for the
automatic "edit" menu is not specified, it will appear at the right end of the menu bar.
Example, locate the edit menu in the second position on the menu bar:
menu #1, "&File", "E&xit", [quit]
menu #1, "edit"
menu #1, "&Help", "&About", [about]
See also POPUPMENU
MID$( )
MID$(string, index, [number])
Description:
This function permits the extraction of a sequence of characters from the string, string variable, or
string expression string starting at index. [number] is optional. If number is not specified, then
all the characters from index to the end of the string are returned. If number is specified, then
only as many characters as number specifies will be returned, starting from index.
Usage:
print mid$("greeting Earth creature", 10, 5)
Produces:
Earth
And:
string$ = "The quick brown fox jumped over the lazy dog"
for i = 1 to len(string$) step 5
print mid$(string$, i, 5)
next i
Produces:
The_q
uick_
brown
_fox_
jumpe_
d_ove
r_the
_lazy
_dog
Note:
See also LEFT$( ) and RIGHT$( )
MIDIPOS( )
var = MIDIPOS( )
Description:
This function returns the current position of play in a file being played with PLAYMIDI.
See also: PLAYMIDI, STOPMIDI
MIN( )
MIN( expr1, expr2 )
Description:
This function returns the smaller of two numeric values.
Usage:
input "Enter a number?"; a
input "Enter another number?"; b
print "The smaller value is "; min(a, b)
See also: MAX( )
MKDIR( )
Description:
The MKDIR( ) function attempts to create the directory specified. If the directory creation is
successful the returned value is 0. If the directory creation was unsuccessful, a value indicating a
DOS error is returned.
Usage:
'create a subdirectory named temp in the current directory
result = mkdir( "temp")
if result <> 0 then notice "Temporary directory not created!"
Note: See also RMDIR( )
NAME a$ AS b$
NAME StringExpr1 AS StringExpr2
Description:
This command renames the file specified in the string expression StringExpr1 to StringExpr2.
StringExpr1 can represent any valid filename that is not a read-only file, and StringExpr2 can be
any valid filename as long as it doesn't specify a file that already exists.
Usage:
'rename the old file
name rootFileName$ +
'open a new file and
open rootFileName$ +
as a backup
".fre" as rootFileName$ + ".bak"
write data
".fre" for output as #disk
NOMAINWIN
Description:
This command instructs Liberty BASIC not to open a main window (the mainwin) for the program
that includes this statement. Some simple programs which do not use separate windows for
graphics or text may use only the mainwin. Other programs may not need the mainwin to do
their thing. If the mainwin is not needed, including NOMAINWIN somewhere in the program
source code prevents the window from opening.
If NOMAINWIN is used, when all other windows owned by that program are closed, then the
program terminates execution automatically.
It is often better to place a NOMAINWIN statement in a program after it is completed and
debugged, so that you can easily terminate an errant program just by closing its mainwin.
Usage:
NOMAINWIN
Open "Test" for window as #win
wait
NOTICE
NOTICE "string expression"
Description:
This command pops up a dialog box which displays "string expression" and includes an OK
button, which the user presses after the message is read. Pressing the ENTER key also closes
the notice dialog box.
"string expression"
Two forms are allowed. If "string expression" has no carriage return character (ASCII 13), then
the title of the dialog box is 'Notice' and "string expression" is the message displayed inside the
dialog box. If "string expression" does have a Chr$(13), then the part of "string expression" before
Chr$(13) is used as the title for the dialog box, and the part of "string expression" after Chr$(13) is
displayed as the message inside. Further Chr$(13) will force line breaks into the text contained
in the message.
Usage:
notice "Super Stats is Copyright 2001, Mathware"
Or:
notice "Fatal Error!" + chr$(13) + "The entry buffer is full!"
ON ERROR
ON ERROR GOTO [branchLabel]
Description:
Liberty BASIC 4 adds support for ON ERROR GOTO. Several of the QBasic error codes are
supported, but some are not relevant, and there are some new ones. When an error occurs, the
special variables Err and Err$ hold numeric and string values describing what sort of error
happened. Some kinds of errors do not have a numeric value, in which case Err will be zero.
If an error occurs in a user function or subroutine, Liberty BASIC will exit the current function or
subroutine and continue to exit functions and subroutines until it finds ON ERROR handler.
If an error is encountered, a program can attempt to resume execution with the RESUME
statement.
Here is a short list of error codes:
3
4
8
9
11
53
58
55
52
62
RETURN without GOSUB
Read past end of data
Branch label not found
Subscript out of range
Division by zero
OS Error: The system cannot find the file specified.
OS Error: Cannot create a file when that file already exists.
Error opening file
Bad file handle
Input past end of file
Usage:
on error goto [errorHandler]
open "sillyfilename.txt" for input as #f
close #f
end
[errorHandler]
print "Error string is " + chr$(34) + Err$ + chr$(34)
print "Error number is ";Err
end
The program above will print the following in the mainwin:
Error string is "OS Error: The system cannot find the file specified."
Error number is 53
'demonstrate the use of RESUME
on error goto [whoops]
global divideBy
call causeWhoops
end
[whoops]
print "whoops!"
print "Error "; Err$; " "; " code "; Err
divideBy = 2
resume
sub causeWhoops
print 10 / divideBy
end sub
ONCOMERROR
ONCOMERROR [branchLabel]
Description:
This sets or clears a branch label for handling errors when doing serial communications.
'to set a branch label for error handling
oncomerror [myComErrorHandler]
'to disable com error handling
oncomerror
When an error does occur, three special variables will be set:
ComError$
This holds a description of the error
ComPortNumber This holds the port number of the error
ComErrorNumber In the case of Win 95/98/ME this var is set to one of the Win16 com error
codes, and in the case of Win NT/2K/XP OS error codes.
Usage:
'open com2
open "COM2:9600,n,8,1" for random as #1
'enable the com error handler
oncomerror [handleIt]
'try to open com2 again, triggering handler
open "COM2:9600,n,8,1" for random as #2
'we never get this far because of the error
print "we never get this far because of the error"
input r$
[handleIt]
'disable the com error handler
oncomerror
'print out the error and port
print "Error: "; ComError$
print "Port number: "; ComPortNumber
print "Error code: ";ComErrorNumber
'close com2
close #1
end
See also: OPEN "COMn:..."
OPEN
OPEN device FOR purpose AS #handle {LEN = n}
Description:
The OPEN command opens communication with a device, which can be a disk file, a window, a
dynamic link library or a serial communications port. The command must be told what to open,
for what purpose, and a descriptive, unique name or "handle" must be assigned to it so that other
functions can access the open device. Handles must always begin with "#" to identify them as
such and to distinguish them from other variables. The details for using the OPEN statement are
shown below. It will be necessary to refer to the individual topics for complete explanations for
using OPEN with the various devices.
Note: Any device that is opened during the normal operation of the program must be closed
before program execution is finished. See CLOSE Changing the handle of a device dynamically
at runtime can be accomplished with the MAPHANDLE command.
device
The device to be opened may be one of the following:
file
If the device to be opened is a file, the device parameter must be a valid disk filename. This
may be expressed as a string variable, or as a literal text expression enclosed in quotes. For
more on coding file specifications, see Path and Filename.
purpose
Files may be opened for the purpose of INPUT, OUTPUT, APPEND, RANDOM or BINARY
access. The final {LEN=n} parameter applies to files opened for RANDOM access. For more
on opening files, please see File Operations.
usage:
open "c:\readme.txt" for input as #f
window
If the device to be opened is a window, the device parameter will become the caption of the
window. The caption is the text contained on the titlebar of the window.
purpose
When the device is a window, the purpose parameter is the window type. There are many
possibilities for window types and these are explained in: Window Types, Window and Dialog
Commands, Graphical User Interface.
usage:
open "My Cool Program" for window_nf as #main
dynamic link library
A DLL (dynamic link library) must be opened before any calls can be made to the functions. If
the device is a DLL the device parameter will be the disk filename of the DLL, enclosed in
quotes. See CALLDLL.
purpose
The purpose is always "for DLL" when using OPEN with a dynamic link library.
usage:
open "c:\myprog\sample.dll" for DLL as #sample
or for Windows API calls:
open "user32" for DLL as #user32
serial communications port
The OPEN statement opens a serial communications port for reading and writing. The device
parameter is the name of the port enclosed in quotes. The syntax looks like this:
OPEN "COMn:baud,parity,data stop{,options}" for random as #handle
purpose
The purpose is always "for random" when using OPEN to open a communications port. See "
Open "Comn..."
Usage:
To open com port 2 at 9600 baud, 8 data bits, 1 stop bit, and no parity, use this line of code:
open "com2:9600,n,8,1" for random as #commHandle
#handle
The #handle is a unique name given to the device so that it can be accessed by functions in the
program. Use a descriptive word for the handle. It must start with a # and may contain any
alpha-numeric characters, but no spaces. This special handle is used to identify the open device
in later program statements. Some possible handles are as follows:
#commHandle
#newfile
#main
#win
#gdi32
#2
Changing the handle of a device dynamically at runtime can be accomplished with the
MAPHANDLE command.
OPEN "COMn:..."
OPEN "COMn:baud,parity,data stop{,options}" for random as #handle
Description:
The OPEN "COMn:" statement opens a serial communications port for reading and writing. This
feature uses Microsoft Windows' own built-in communications API, so if you have a multiport
communications card and a WIndows driver to support that card, you should be able to use any
port on the card.
The simplest form for this command is:
OPEN "COMn:baud,parity,data,stop" for random as #handle
Allowable choices for baud are:
75 110 150 300 600 1200 2400 1800 2400 4800 9600 19200 38400 57600 115200
Allowable choices are parity are:
N
E
O
S
M
No parity
Even parity
Odd parity
Space parity
Mark parity
Allowable choices for data are:
5
6
7
8
bits long
bits long
bits long
bits long
Allowable choices for stop are:
1 stop bit
2 stop bits
Additional optional parameters can be included after the baud, parity, data and stop information:
CSn
DSn
PE
RS
Set CTS timeout in milliseconds (default 1000 milliseconds)
Set DSR timeout in milliseconds (default 1000 milliseconds)
Enable parity checking
Disable detection of RTS (request to send)
Other defaults:
DTR detection is disabled
XON/XOFF is disabled
binary mode is the default
To set the in and out communications buffers (each port has its own), set the variable Com
(notice the uppercase C) to the desired size before opening the port. Changing the variable after
opening a port does not affect the size of the buffers for that port while it is open.
'set the size of the communications buffers
'(in and out) to 16K each
Com = 16384
Usage Notes:
To open com port 2 at 9600 baud, 8 data bits, 1 stop bit, and no parity, use this line of code:
open "com2:9600,n,8,1" for random as #commHandle
It is recommended that you set the the timeout on the DSR line to 0 so that your program doesn't
just freeze when waiting for data to come in. To do this, we can add a ds0 (for DSR 0 timeout) as
below. Notice we use a different communications speed in this example.
open "com2:19200,n,8,1,ds0" for random as #commHandle
Remember that when a modem dials and connects to another modem, it negotiates a
cpnnectopm speed. In the case of 14400 speed modems, you need to specify 19200 as the
connection speed and let the modems work it out between themselves during the connect. This
is because 14400 is not a baud rate supported by Windows (and you'll find that QBASIC doesn't
directly support 14400 baud either).
Once the port is open, sending data is accomplished by printing to the port (ATZ resets modems
that understand the Hayes command set):
print #commHandle, "ATZ"
To read from the port you should first check to see if there is anything to read. This is
accomplished in this fashion:
numBytes = lof(#commHandle)
Then read the data using the input$() function.
dataRead$ = input$(#commHandle, numBytes)
Putting the lof( ) and input$( ) functions together on one line, it looks like this:
dataRead$ = input$(#commHandle, lof(#commHandle))
When you're all done, close the port:
close #commHandle
Liberty BASIC 3 has added the ability to disable DSR checking by specifying a zero or non value
using the DS switch:
open "com1:9600,n,8,1,ds0" for random as #com
or
open "com1:9600,n,8,1,ds" for random as #com
Liberty BASIC 3.02 has also added the txcount(#handle) function to get a count of bytes in a
serial communications transmit queue.
count = txcount(#com)
See also: ONCOMMERROR , TXCOUNT(#handle)
OUT port, byte
OUT port, byte
Description:
This command sends a byte value to the specified machine I/O port. The use of this command
inside Windows is considered to be only for those in the know. Windows provides no method of
ensuring that more than one application will not access any I/O port at a time, so use this
command with care (you know who you are).
If you will be distributing your application, and it uses INP() and/or OUT to control hardware ports,
you will need to distribute and install certain files on your user's system. For detailed information,
see Port I/O.
See also: INP(port)
Platform$
Description:
This variable holds the string "Windows". When programming with Liberty BASIC for OS/2, the
same variable holds "OS/2".
This is useful so that you can take advantage of whatever differences there are between the two
platforms and between the versions of Liberty BASIC.
Note: see also Version$
PLAYMIDI
PLAYMIDI filename, length
Description:
This plays a *.MIDI sound from a file on disk as specified in filename. The length variable will hold
the length of the MIDI file (not in seconds). You can only play one file at a time. Periodically, you
will need to use the MIDIPOS( ) function to see if you've reached the end of the music:
Finally, use the STOPMIDI command to close the music file before you can play a different one.
Usage:
'the playmidi command returns the length of the midi in
' the variable howLong
playmidi "c:\somedir\mymusic.midi", howLong
timer 1000, [checkPlay]
wait
[checkPlay]
if howLong = midipos( ) then [musicEnded]
wait
[musicEnded]
stopmidi
timer 0
wait
See also: STOPMIDI, MIDIPOS()
PLAYWAVE
PLAYWAVE "filename" [, mode ]
Description:
This plays a *.wav sound from a file on disk as specified in filename. If mode is specified, it must
be one of the modes described below:
sync (or synch) - wait for the wave file to finish playing (the default)
async (or asynch) - don't wait for the wave file to finish playing
loop
- play the wave file over and over (cancel with: playwave "")
Usage
playwave
playwave
playwave
playwave
"ding.wav", async
"tada.wav"
"hello.wav", loop
""
'to stop previous wav from playing
POPUPMENU
POPUPMENU "text", [branchLabel], "text2", [branchLabel2], | , . . .
Description:
This command pops up a Windows menu. The upper left corner of the menu will be positioned
where the cursor is located when the command is issued. Each "text", [branchLabel] pair after
the title adds a menu item to the menu, and tells Liberty BASIC where to branch to when the
menu item is chosen. The " | " character can optionally be placed between menu items to cause
a separating line to be added between the items when the menu is popped up.
The " & " character placed in the text items for the menu specifies the accelerator placement for
each item. The letter directly following the " & " character will act as a hotkey for that menu item,
when it is pressed while the user presses and holds down the ALT key. The hotkey appears
underlined in the menu display.
The menu command is written on a single line. It may be displayed in multiple lines for viewing if
the continuation character ( _ ) is used.
Here is an example of a graphics window with a popupmenu:
nomainwin
open "Geometric White-board" for graphics_nsb as #geo
print #geo, "trapclose [quit]"
print #geo, "when rightButtonUp [popupMenu]"
wait ' stop and wait for a menu item to be chosen
[popupMenu]
popupmenu "&Square Spiral", [asSquare], _
"&Triangular Spiral", [asTriangle]
wait
[asSquare]
print #geo, "cls ; home ; down ; color red"
for x = 1 to 120
print #geo, "go "; x; " ; turn 87"
next x
wait
[asTriangle]
print #geo, "cls ; home ; down ; color blue"
for x = 1 to 120
print #geo, "go "; x; " ; turn 117"
next x
wait
[quit]
close #geo
end
Notice that the & character placed in the title and text items for the menu determines the
accelerator placement for each menu item.
See also MENU
PRINT
PRINT #handle, expression ; expression(s) ;
Description:
This statement is used to send data to the mainwin, to a disk file, or to other windows. A series
of expressions can follow PRINT, each separated by a semicolon. Each expression is displayed
in sequence. If the data is being sent to a disk file, or to a window, then #handle must be
present.
PRINTing to the mainwin:
After the expressions are displayed, the cursor (that blinking vertical bar | ) will move down to the
next line, and the next time information is sent to the window, it will be placed on the next line
down. To prevent the cursor from moving immediately to the next line, add an additional
semicolon to the end of the list of expressions. This prevents the cursor from being moved down
a line when the expressions are displayed. The next time data is displayed, it will be added onto
the end of the line of data displayed previously.
Usage:
Produces:
print "hello world"
hello world
print "hello ";
print "world"
hello world
age = 23
print "Ed is "; age; " years old"
Ed is 23 years old
When sending data to a disk file and in regard to the use of the semicolon at the end of the
expression list, the rules are similar, although the result is not displayed on the screen. Use of a
semicolon at the end of a line suppresses the carriage return/line feed that causes text to be
printed on the next line. When printing to a window, the expressions sent are usually commands
to the window (or requests for information from the window). For more information, see GUI
Programming.
PRINTERDIALOG
PRINTERDIALOG
Description
This command opens the standard Windows Common Printer Dialog. If the user chooses a
printer and accepts, the next print job will go to this printer. Accepting a printer also sets the
global variables PrinterName$, PrintCollate and PrintCopies to reflect what the user chose for
the Printer Name, Collate and Copies. If no printer is accepted, then PrinterName$ is set to an
empty string.
PrinterFont$
To set the font used when LPRINTing text use the PrinterFont$ variable. See also PrinterFont$
PrintCopies
If the printer driver can handle printing multiple copies, PrintCopies will be set to "1" and the
program only needs to lprint the text one time. If the printer driver cannot handle multiple copy
printing, then PrintCopies will contain the number of copies chosen by the user in the
printerdialog, and the program must print these copies in a loop. An example follows.
Usage:
'choose a file to print
filedialog "Print a BAS file", "*.bas", fileToPrint$
if fileToPrint$ <> "" then
printerdialog
print "PrinterName$ is ";PrinterName$
print "PrintCopies is ";PrintCopies
print "PrintCollate is ";PrintCollate
print "PrinterFont$ is ";PrinterFont$
if PrinterName$ <> "" then
open fileToPrint$ for input as #readMe
while not(eof(#readMe))
line input #readMe, line$
lprint line$
wend
close #readMe
dump
end if
end if
end
Multiple Copies:
txt$ = "Some text to print."
printerdialog
for i = 1 to PrintCopies
lprint txt$
dump
next i
PrinterFont$
PrinterFont$ = fontSpec
Description:
Liberty BASIC 4 now lets you set the font used for LPRINTing text to the printer. The format used
for specifying the font is the same as for specifying the font in a graphics window. See also How
to Specify Fonts, LPRINT.
'set a courier 10 italic font
PrinterFont$ = "courier_new 10 italic"
The last font set before a page is printed is used for all the text on that page.
Usage:
'show the current printer font$
print PrinterFont$
lprint "This text will appear in "; PrinterFont$
dump
'set a courier 10 italic font
PrinterFont$ = "courier_new 10 italic"
lprint "This text will appear in "; PrinterFont$
dump
PROMPT
PROMPT "string expression"; responseVar$
Description:
The PROMPT statement opens a dialog box, displays the message contained in "string
expression", and waits for the user to type a response in the textbox and press the ENTER key,
or press the OK or Cancel button on the dialog. The entered information is placed in
responseVar$. If Cancel is pressed, then a string of zero length is returned. If responseVar$ is
set to some string value before PROMPT is executed, then that value will become the "default" or
suggested response that is displayed in the textbox contained in the PROMPT dialog. This
means that when the dialog is opened, the contents of responseVar$ will already be entered as a
response for the user, who then has the option to either type over that 'default' response, or to
press 'Return' and accept it.
Caption for the Prompt Window
"string expression"
Two forms are allowed. If "string expression" has no carriage return character (ASCII 13), then
the caption or title on the dialog box is blank and "string expression" is the message displayed
inside the dialog box. If "string expression" does have a Chr$(13), then the part of "string
expression" before Chr$(13) is used as the title for the dialog box, and the part of "string
expression" after Chr$(13) is displayed as the message inside.
Usage:
response$ = "C:"
prompt "Search on which Drive? A:, B:, or C:"; response$
[testResponse]
if response$ = "" then [cancelSearch]
if len(response$) = 2 and instr("A:B:C:", response$) > 0 then [search]
response$="C:"
prompt "Unacceptable response. Please try again. A:, B:, or C:"; response$
goto [testResponse]
[search]
print "Starting search . . . "
Specify a Caption:
response$ = "C:"
prompt "Please Specify" + chr$(13) + "Search on which Drive? A:, B:, or C:";
response$
.
.
PUT #h, n
PUT #handle, n
Description:
PUT is used after a random access file is opened to place a record of information (see FIELD)
into the file #handle at the record numbered n. For example:
' open a random access file
open "custdata.001" for random as #cust len = 70
field #cust, 20 as name$, 20 as street$, 15 as city$,_
2 as state$, 10 as zip$, 3 as age
' enter data into customer variables
input name$
.
.
' put the data into record 1
put #cust, 1
close #cust
end
Note: See also GET, FIELD, Random Files
RADIOBUTTON
RADIOBUTTON #handle.ext, "label", setHandler, resetHandler, x, y, wide, high
Description
This command adds a radiobutton control to the window referenced by #handle. Radiobuttons
have two states, set and reset. They are useful for getting input of on/off type information.
All radiobuttons on a given window are linked together, so that if one is set by clicking on it, all
the others will be reset (cleared). The exception to this rule occurs when radiobuttons are placed
within the confines of groupboxes. In this case, only radiobuttons contained within the same
groupbox act as a radio-set. Clicking (setting) a radiobutton within one groupbox has no effect on
radiobuttons that are placed within other groupboxes. See the demo below.
#handle.ext
This specifies handle for this control. The #handle part must be the same as the #handle of the
window that contains the radiobutton, and the ".ext" part names the radiobutton uniquely in the
window.
"label"
This specifies the visible text of the radiobutton
setHandler
This is the branch label or subroutine executed by the program when the user sets the
radiobutton by clicking on it. See also: Controls and Events
resetHandler
This is the branch label or subroutine executed when the user resets the radiobutton by clicking
on it. (this doesn't actually do anything because radiobuttons can't be reset by clicking on them).
xOrigin
This is the x position of the radiobutton relative to the upper left corner of the window it belongs to.
yOrigin
This is the y position of the radiobutton relative to the upper left corner of the window it belongs to.
width
This is the width of the radiobutton control
height
This is the height of the radiobutton control
Radiobuttons understand these commands:
print #handle.ext, "set"
This sets the radiobutton.
print #handle.ext, "reset"
This resets the radiobutton.
print #handle.ext, "value? result$"
The result$ variable will be set to the status of the radiobutton (either "set" or "reset").
print #handle.ext, "setfocus"
This causes the radiobutton to receive the input focus. This means that any keypresses will be
directed to the radiobutton.
print #handle,ext, "locate x y width height"
This repositions the radiobutton in its window. This is effective when the radiobutton is placed
inside window of type "window". The button will not update its size and location until a REFRESH
command is sent to the window. See the included RESIZE.BAS example program.
print #handle.ext, "font facename pointSize"
This sets the font to the specified face and point size. If an exact match cannot be found, then
Liberty BASIC will try to find a close match, with size taking precedence over face. For more on
specifying fonts read How to Specify Fonts
Example:
print #handle.ext, "font times_new_roman 10"
print #handle.ext, "enable"
This causes the control to be enabled.
print #handle.ext, "disable"
This causes the control to be inactive and grayed-out.
print #handle.ext, "show"
This causes the control to be visible.
print #handle.ext, "hide"
This causes the control to be hidden or invisible.
Usage:
There are two demo programs below.
'demonstrates radiobuttons with branch label event handlers
nomainwin
WindowWidth = 520
WindowHeight = 220
groupbox #cfg, "Confirm File Operations:", 240, 20, 200, 140
radiobutton #cfg.Aalways, "Always", [alwaysConfirm], [nil], _
260, 45, 130, 20
radiobutton #cfg.AwhenReplacing, "When Replacing", _
[whenReplacingConfirm], [nil], 260, 70, 130, 20
radiobutton #cfg.Anever, "Never", [neverConfirm], [nil],_
260, 95, 130, 20
groupbox #cfg, "Confirm Close Operations:", 20, 20, 200, 140
radiobutton #cfg.always, "Always", [alwaysClose], [nil],_
40, 45, 130, 20
radiobutton #cfg.whenReplacing, "When Replacing", _
[whenReplacingClose], [nil], 40, 70, 130, 20
radiobutton #cfg.never, "Never", [neverClose], [nil], _
40, 95, 130, 20
button #cfg, " &OK ", [cfgOk], UL, 450, 30
open "Action Confirmation - Setup" for dialog as #cfg
print #cfg, "trapclose [cfgOk]"
print #cfg.Anever, "set"
print #cfg.never, "set"
[inputLoop]
wait
[alwaysConfirm]
status$ = "Always Confirm"
wait
[whenReplacingConfirm]
status$ = "When Replacing Confirm"
wait
[neverConfirm]
status$ = "Never Confirm"
wait
[alwaysClose]
cstatus$ = "Always Close"
wait
[whenReplacingClose]
cstatus$ = "When Replacing Close"
wait
[neverClose]
cstatus$ = "Never Close"
wait
[cfgOk]
msg$ = status$ + chr$(13) + cstatus$ + chr$(13)
msg$ = msg$ + "Save this configuration?"
confirm msg$ ; answer$
'perform some sort of save for config here
close #cfg
end
[nil]
wait
'demonstrates radiobuttons with subroutine event handler
nomainwin
global status$
radiobutton #win.yes, "Yes", doRadio, dummy,10,45,130,20
radiobutton #win.no, "No", doRadio,dummy,10,70,130,20
open "Make a Choice" for window as #win
print #win, "trapclose Quit"
print #win.yes, "set"
wait
sub doRadio handle$
notice "You selected ";handle$
if handle$ = "#win.yes" then status$="yes"
if handle$ = "#win.no" then status$="no"
end sub
sub Quit handle$
close #handle$
end
end sub
Note: see also CHECKBOX
For information on creating controls with different background colors, see Colors and the
Graphical User Interface.
RANDOMIZE
RANDOMIZE n
Description:
This function seeds the random number generator in a predictable way. The seed numbers must
be greater than 0 and less than 1. Numbers such as 0.01 and 0.95 are used with RANDOMIZE.
Usage:
'this will always produce the same 10 numbers
randomize 0.5
for x = 1 to 10
print int(rnd(1)*100)
next x
READ
Description:
This fetches the next strings and/or numeric values from DATA statements in a program. The
READ statement will fetch enough items to fill the variable names the programmer specifies.
The values fetched will be converted to fit the variables listed (string or numeric).
Example:
'read the numbers and their descriptions
while desc$ <> "end"
read desc$, value
print desc$; " is the name for "; value
wend
'here is our data
data "one hundred", 100, "two", 2, "three", 3, "end", 0
end
You can also read numeric items:
'read the numbers and their descriptions
while desc$ <> "end"
read desc$, value$
print desc$; " is the name for "; value$; ", length="; len(value$)
wend
'here is our data
data "one hundred", 100, "two", 2, "three", 3, "end", 0
end
Error Handling
If you try to read more DATA items than are contained in the DATA lists, the program will halt
with an error. Notice that in the examples above, an "end" tag is placed in the DATA and when
it is reached, the program stops READing DATA. This is an excellent way to prevent errors from
occurring. If an end tag or flag of some sort is not used, be sure that other checks are in place
to prevent the READ statement from trying to access more DATA items than are contained in
the DATA statements.
See also DATA, RESTORE, READ and DATA
READJOYSTICK
READJOYSTICK 1
or
READJOYSTICK 2
Description:
You can read the position of up to two joysticks and their buttons. The readjoystick command
reads the x, y, and z of an installed joystick (proper drivers must also be installed) and also their
buttons. The variables are visible everywhere because they are global.
Usage:
readjoystick 1
The command above reads the current status of joystick 1 and places the values into these global
variables:
Joy1x, Joy1y, Joy1z, Joy1button1, Joy1button2
readjoystick 2
The command above reads the current status of joystick 2 and places the values into these global
variables:
Joy2x, Joy2y, Joy2z, Joy2button1, Joy2button2
REDIM
Description:
This redimensions an already dimensioned array and clears all elements to zero (or to an empty
string in the case of string arrays). This can be very useful for writing applications that have data
sets of unknown size. If you dimension arrays that are extra large to make sure you can hold
data, but only have a small set of data, then all the space you reserved is wasted. This hurts
performance, because memory is set aside for the number of elements in the DIM statement.
Usage:
dim cust$(10) 'dimension the array
.
.
.
'now we know there are 510 customers on file
redim cust$(510)
'now read in the customer records
REM
REM comment
Description:
The REM statement is used to place comments inside code to clearly explain the purpose of
each section of code. This is useful to both the programmer who writes the code or to anyone
who might later need to modify the program. Use REM statements liberally. There is a
shorthand way of using REM, which is to use the ' (apostrophe) character in place of the word
REM. This is cleaner to look at, but you can use whichever you prefer. Unlike other BASIC
statements, with REM you cannot add another statement after it on the same line using a colon (
: ) to separate the statements. The rest of the line becomes part of the REM statement.
Usage:
rem let's pretend that this is a comment for the next line
print "The mean average is "; meanAverage
Or:
' let's pretend that this is a comment for the next line
print "The strength of the quake was "; magnitude
This doesn't work:
rem thank the user : print "Thank you for using Super Stats!"
(even the print statement becomes part of the REM statement)
Note:
When using ' instead of REM at the end of a line, the statement separator : (colon) is not required
to separate the statement on that line from its comment.
For example:
print "Total dollar value: "; dollarValue : rem
print the dollar value
Can also be stated:
print "Total dollar value: "; dollarValue
' print the dollar value
Notice that the : (colon) is not required in the second form.
REFRESH
print #handle, "refresh"
Description:
This command is issued to a window of type "WINDOW" after the LOCATE command is used to
move or resize controls. It causes the window to be repainted. For a demonstration, see
Resize.bas.
See also: RESIZEHANDLER, LOCATE, Window and Dialog Commands
RESIZEHANDLER
RESIZEHANDLER [branch]
or
RESIZEHANDLER subName
Description:
This command sets up an event handler for the instance when the user resizes a window of type
"window". This command is not useful for dialog windows, graphics windows, text windows, or for
windows without a sizing frame. The resize event can be handled in a named branch, or in a
subroutine. If a sub is used as the event handler, the handle of the window being resized is
passed into the sub.
'set up a handler for when the user resizes a window
print #handle, "resizehandler [branch]"
or...
'clear the resizing handler
print #handle, "resizehandler"
The [branch] that is activated for the resize event should contain the code to LOCATE the desired
controls. After all controls have been given a LOCATE command, the window must be given a
REFRESH command to cause it to be repainted.
New dimensions:
After the resizehandler has been activated, the new dimensions of the window workspace are
contained in the variables WindowWidth and WindowHeight. Use these dimensions to
calculate the desired size and placement for the controls in the window. See also: LOCATE ,
REFRESH Window and Dialog Commands
Usage:
See the example program RESIZE.BAS and the demo below:
'resizehandler using a sub
button #main.close, "Close", quit, UL, 10, 10
open "example" for window as #main
#main "resizehandler resized"
#main "trapclose quit"
wait
sub resized handle$
notice str$(WindowWidth)+","+str$(WindowHeight)
end sub
sub quit handle$
if instr(handle$, ".") then
handle$ = left$(handle$, instr(handle$, ".")-1)
end if
close #handle$
end
end sub
RESTORE
RESTORE
RESTORE [branchLabel]
Description:
RESTORE will reset the reading of DATA statements so that the next READ will get information
from the first DATA statement in the program (or the first DATA statement in a function or
subroutine, if this is where the RESTORE is executed).
Example:
'show me my data in all uppercase
while string$ <> "end"
read string$
print upper$(string$)
wend
string$ = "" 'clear this for next while/wend loop
'now reset the data reading to the beginning
restore
'show me my data in all lowercase
while string$ <> "end"
read string$
print lower$(string$)
wend
data "The", "Quick", "Brown", "Fox", "Jumped"
data "Over", "The", "Lazy", "Dog", "end"
end
Optionally, you can choose to include a branch label:
'show me my data in all uppercase
while string$ <> "end"
read string$
print upper$(string$)
wend
string$ = "" 'clear this for next while/wend loop
'now reset the data reading to the second part
restore [partTwo]
'show me my data in all lowercase
while string$ <> "end"
read string$
print lower$(string$)
wend
data "Sally", "Sells", "Sea", "Shells", "By", "The", "Sea", "Shore"
[partTwo]
data "Let's", "Do", "Only", "This", "A", "Second", "Time", "end"
end
See also DATA, READ, READ and DATA
RESUME
RESUME
Description:
The RESUME command can be used to attempt a retry when an error is handled using the ON
ERROR GOTO statement. There is no way to specify an alternative
If the error is handled in a sub or function, RESUME must be attempted before the sub or function
ends or else you will get an error when attempting to RESUME.
Usage:
'demonstrate the use of RESUME
on error goto [whoops]
global divideBy
call causeWhoops
end
[whoops]
print "whoops!"
print "Error "; Err$; " "; " code "; Err
divideBy = 2
resume
sub causeWhoops
print 10 / divideBy
end sub
RETURN
RETURN
Description:
This statement causes program execution to continue at the next statement after a GOSUB
command was issued. RETURN is the last statement in a block of code that is called by the
GOSUB command.
See GOSUB
RIGHT$( s$, n )
RIGHT$(string, number)
Description:
This function returns a sequence of characters from the right hand side of the string, string
variable, or string expression string using number to determine how many characters to return. If
number is 0, then "" (an empty string) is returned. If number is greater than or equal to the
number of characters in string, then string will itself be returned.
Usage:
print right$("I'm right handed", 12)
Produces:
right handed
And:
print right$("hello world", 50)
Produces:
hello world
Note: See also LEFT$( ) and MID$( )
RMDIR( )
Description:
The RMDIR( ) function attempts to remove the directory specified. If the directory removal is
successful the returned value will be 0. If the directory removal was unsuccessful, a value
indicating a DOS error will be returned.
Usage:
'remove a subdirectory named "pigseye" in the current root
directory
result = rmdir( "\pigseye")
if result <> 0 then notice "Temporary directory not removed!"
Note: See also MKDIR( )
RND( n )
Description:
This function returns a random number between 0 and 1. The number parameter is usually set to
1, but the value is unimportant because it is not actually used by the functoin. The function will
always return an arbitrary number between 0 and 1.
Usage:
' print ten numbers between one and ten
for a = 1 to 10
print int(rnd(1)*10) + 1
next a
RUN s$, mode
RUN StringExpr1 [, mode ]
Description:
This command runs external programs. StringExpr1 should represent the full path and filename
of a Windows or DOS executable program, a Liberty BASIC *.TKN file, or a *.BAT file. This is not
a SHELL command, so you must provide the name of a program or batch file, not a DOS
command (like DIR, for example). Execution of an external program does not cause the calling
Liberty BASIC program to cease executing.
Here are two examples:
RUN "QBASIC.EXE"
' run Microsoft's QBASIC
RUN "WINFILE.EXE", SHOWMAXIMIZED
' run the File Manager maximized
RUN "WINHLP32 LIBERTY3.HLP"
'run winhlp32 with the Liberty BASIC helpfile loaded
RUN "NOTEPAD NEWFOR302.TXT", MINIMIZE
'run notepad minimized with a textfile loaded
Notice in the second example you can include an additional parameter. This is because it runs a
Windows program. Here is a list of the valid parameters we can include when running Windows
programs:
HIDE
SHOWNORMAL (this is the default)
SHOWMINIMIZED
SHOWMAXIMIZED
SHOWNOACTIVE
SHOW
MINIMIZE
SHOWMINNOACTIVE
SHOWNA
RESTORE
SCAN
Description:
The SCAN statement causes Liberty BASIC to stop what it is doing for a moment and process
Windows keyboard and mouse messages. This is useful for any kind of routine that needs to run
continuously but which still needs to process button clicks and other actions. In this way, SCAN
can be used as an INPUT statement that doesn't stop and wait.
Example:
'scan example - digital clock
nomainwin
WindowWidth = 120
WindowHeight = 95
statictext #clock.time, "xx:xx:xx", 15, 10, 90, 20
button #clock.12hour, "12 Hour", [twelveHour], UL,_
15, 40, 40, 20
button #clock.24hour, "24 Hour", [twentyfourHour], UL,_
60, 40, 40, 20
open "Clock" for window_nf as #clock
print #clock, "trapclose [quit]"
print #clock.time, "!font courier_new 8 15"
print #clock.12hour, "!font ariel 5 11"
print #clock.24hour, "!font ariel 5 11"
goto [twelveHour]
[timeLoop]
if time$ <> time$() then
time$ = time$()
gosub [formatTime]
print #clock.time, formattedTime$
end if
scan
'check for user input
goto [timeLoop]
[formatTime]
hours = val(left$(time$, 2))
if twelveHourFormat = 1 then
if hours > 12 then
hours = hours - 12
suffix$ = " PM"
else
if hours = 0 then hours = 12
suffix$ = " AM"
end if
else
suffix$ = ""
end if
formattedTime$ = prefix$+right$("0"+str$(hours), 2)
formattedTime$ = formattedTime$+mid$(time$, 3)+suffix$
return
[twelveHour]
'set up twelve-hour mode
twelveHourFormat = 1
time$ = ""
prefix$ = ""
goto [timeLoop]
[twentyfourHour]
'set up twentyfour-hour mode
twelveHourFormat = 0
time$ = ""
prefix$ = " "
goto [timeLoop]
[quit]
'exit our clock
close #clock
end
SEEK
SEEK #handle, position
Description:
This command seeks to the desired point in the file for reading or writing in a file opened for
BINARY access. SEEK sets the file pointer to the location specified. Data will be read from or
written to the file at the location of the file pointer. See also: LOC( #h )
#handle
This parameter is the handle of a file opened for binary access.
position
This is the new location for the file pointer.
Usage:
open "myfile.ext" for binary as #handle
'seek to file position
seek #handle, fpos
SELECT CASE
Description:
SELECT CASE is a construction for evaluating and acting on sets of conditions. The syntax for
Select Case is:
SELECT CASE var
CASE x
'basic code
'goes here
CASE y
'basic code
'goes here
CASE z
'basic code
'goes here
CASE else
'basic code
'goes here
END SELECT
Details:
SELECT CASE var - defines the beginning of the construct. It is followed by the name variable
that will be evaluated. The variable can be a numeric variable or a string variable, or an
expression such as "a+b".
CASE value - following the SELECT CASE statement, are individual CASE statements,
specifying the conditions to evaluate for the selected variable. Code after the "case" statement is
executed if that particular case evaluates to TRUE. There is no limit to the number of conditions
that can be used for evaluation.
CASE ELSE - defines a block of code to be executed if the selected value does not fulfil any other
CASE statements.
END SELECT - signals the end of the SELECT CASE construct.
Example usage:
num = 3
select case num
case 1
print "one"
case 2
print "two"
case 3
print "three"
case else
print "other number"
end select
The example above results in output in the mainwin of:
three
Strings
SELECT CASE can also evaluate string expressions in a similar way to numeric expressions.
String example:
var$="blue"
select case var$
case "red"
print "red"
case "green","yellow"
print "green or yellow"
case else
print "color unknown"
end select
MULTIPLE CASES - may be evaluated when separated by a comma.
For example:
select case a+b
case 4,5
do stuff
case 6,7
do other stuff
end select
Once one of the CASEs has been met, no other case statements are evaluated. In the following
example, since the value meets the condition of the first CASE statement, the second CASE
statement isn't considered, even though the value meets that condition also.
num = 3
select case num
case 3, 5, 10
print "3, 5, 10"
case 3, 12, 14, 18
print "3, 12, 14, 18"
case else
print "Not evaluated."
end select
The example above results in output in the mainwin of:
3, 5, 10
Evaluating multiple conditions in the CASE statement
Omitting the expression (or variable) in the SELECT CASE statement causes the conditions in
the CASE statements to be evaluated in their entirety. To omit the expression, simply type
"select case" with no variable or expression after it. In the following example, since "value"
evaluates to the first CASE statement, the printout says "First case"
'correct:
value = 58
select case
case (value < 10) or (value > 50 and value < 60)
print "First case"
case (value > 100) and (value < 200)
print "Second case"
case (value = 300) or (value = 400)
print "Third case"
case else
print "Not evaluated"
end select
If the expression "value" is placed after "select case", then none of the CASE statements is met,
so CASE ELSE is triggered, which prints "Not evaluated".
'incorrect usage if multiple cases must be evaluated:
select case value
Nested statements
Nested select case statements may be used. Example:
select case a+b
case 4,5
select case c*d
case 100
do stuff
end select
do stuff
case 6,7
do other stuff
end select
See also: if...then
SIN( n )
Description:
This function returns the sine of the angle n. The angle n should be expressed in radians.
Usage:
for t = 1 to 45
print "The sine of "; t; " is "; sin(t)
next t
Tip:
There are 2 * pi radians in a full circle of 360 degrees. A formula to convert degrees to radians is:
radians = degrees divided by 57.29577951
Note: See also COS( ) and TAN( )
SORT
SORT arrayName(), start, end, [column]
Description:
This command sorts both double and single dimensioned arrays. The start parameter specifies
the element with which to begin the sort and the end parameter specifies the element where
sorting should stop. Arrays can be sorted in part or in whole, and with double dimensioned
arrays, the specific column to sort by can be declared. When this option is used, all the rows are
sorted against each other according to the items in the specified column.
Usage:
Here is the syntax for the sort command:
sort arrayName$(), i, j, [,n]
This sorts the array named arrayName$( starting with element i, and ending with element j. If it is
a double dimensioned array then the column parameter tells which nth element to use as a sort
key. Each WHOLE row moves with its corresponding key as it moves during the sort. If you
have a double dimensioned array holding sales rep activity:
repActivity$(x, y)
It can be holding data, one record per x position, and the record keys are in y. So for example:
repActivity$(1,1) = "Tom Maloney" : repActivity(1,2) = "01-09-93"
repActivity$(2,1) = "Mary Burns" : repActivity(2,2) = "01-10-93"
.
.
.
repActivity$(100,1) = "Ed Dole" : repActivity(100,2) = "01-08-93"
To sort the whole 100 items by the date field this is how the command would look:
sort repActivity$(), 1, 100, 2
To sort by name instead, then change the 2 to a 1, like this:
sort repActivity$(), 1, 100, 1
Sort Reversed
Reverse the order of the sort by reversing the order of the range of rows to sort.
'sort from row 1 to 50
sort array$(), 1, 50
'sort reversed from row 1 to 50
sort array$(), 50, 1
SPACE$( n )
Description:
This function will a return a string of n space characters " ", or (ASCII 32). It is useful when
producing formatted output to a file or printer.
Usage:
for x = 1 to 10
print space$(x); "*"
next x
SQR( n )
SQR(n)
Description:
This function returns the square root of the number or numeric expressioin n.
Usage:
print "The square root of 2 is: ";
print SQR(2)
Statictext
The syntax of this command is:
STATICTEXT #handle, "string", xpos, ypos, wide, high
or
STATICTEXT #handle.ext, "string", xpos, ypos, wide, high
Description
Statictext lets you place instructions or labels into your windows. This is most often used with a
textbox to describe what to type into it. The text contained in a statictext control is alligned to
the left. If the text is too long to fit the width of the control, it will automatically wrap lines to fit.
#handle
This must be the same as the #handle of the window that contains the statictext control. If
#handle.ext is used, the program can PRINT commands to the statictext control. If the control
has no extension, then it cannot receive commands to change the text label, font or location.
"string"
This is the text displayed on the statictext.
xpos & ypos
This is the distance of the statictext in x and y (in pixels) from the upper-left corner of the screen.
wide & high
This is the width and height of the statictext. Be sure to specify enough width and height to
accomodate the text in "string".
Statictext Commands
print #handle.ext, "a string"
This changes the text displayed on a statictext control. This command sets the contents (the
visible label) of the statictext to be "a string". The handle must be of form #handle.ext that
includes a unique extension so that commands can be printed to the control.
print #handle.ext, "!locate x y width height"
This repositions the statictext control in its window. This only works if the control is placed inside
window of type "window". The control will not update its size and location until a REFRESH
command is sent to the window. See the RESIZE.BAS example program.
print #handle.ext, "!font facename pointSize"
This sets the control's font to the specified face and point size. If an exact match cannot be
found, then Liberty BASIC will try to find a close match, with size taking precedence over face.
For more on specifying fonts read How to Specify Fonts
Example:
print #handle.ext, "!font times_new_roman 10"
print #handle.ext, "!enable"
This causes the control to be enabled.
print #handle.ext, "!disable"
This causes the control to be inactive and grayed-out.
print #handle.ext, "!show"
This causes the control to be visible.
print #handle.ext, "!hide"
This causes the control to be hidden or invisible.
Sample Program
'sample program
statictext
statictext
statictext
statictext
statictext
textbox
textbox
textbox
textbox
textbox
#member,
#member,
#member,
#member,
#member,
"Name", 10, 10, 40, 18
"Address", 10, 40, 70, 18
"City", 10, 70, 60, 18
"State", 10, 100, 50, 18
"Zip", 10, 130, 30, 18
#member.name, 90, 10, 180, 25
#member.address, 90, 40, 180, 25
#member.city, 90, 70, 180, 25
#member.state, 90, 100, 30, 25
#member.zip, 90, 130, 100, 25
button #member, "&OK", [memberOK], UL, 10, 160
WindowWidth = 300 : WindowHeight = 230
open "Enter Member Info" for dialog as #member
print #member, "trapclose [quit]"
wait
[memberOK]
print #member.name, "!contents? name$"
print #member.address, "!contents? address$"
print #member.city, "!contents? city$"
print #member.state, "!contents? state$"
print #member.zip, "!contents? zip$"
cr$ = chr$(13)
note$ = name$ + cr$ + address$ + cr$ + city$ + cr$ + _
state$ + cr$ + zip$
notice "Member Info" + cr$ + note$
[quit]
close #member
end
For information on creating controls with different background colors, see Colors and the
Graphical User Interface.
Stop
Description:
Identical to END and used interchangeably.
STOPMIDI
STOPMIDI
Description:
This command stops a MIDI file that is being played with the PLAYMIDI command. It must be
issued before a new PLAYMIDI command can be issued, and to stop MIDI files from playing when
a program ends.
See also: PLAYMIDI, MIDIPOS()
STR$( n )
STR$(numericExpression)
Description:
This function returns a string expressing the result of numericExpression.
Usage:
age = 23
age$ = str$(age)
price = 2.99
price$ = str$(price)
totalApples = 37
print "Total number of apples is " + str$(totalApples)
STRUCT
STRUCT name, field1 as type1 [, field2 as type2, ... ]
Description:
This statement builds an single instance of a specified structure thatis required when making
some kinds of API/DLL calls. This does not declare a type of structure, but it creates a single
structure.
Here is an example STRUCT statement that builds a Windows rect structure, used in many
Windows API calls:
'create the structure winRect
struct winRect, _
orgX as long, _
orgY as long, _
extentX as long, _
extentY as long
A value is assigned to a field of a structure in a similar way to variable assignements. The name
of the struct is used first. followed by a dot, then by the name of the field being accessed, then by
another dot, and last by the word "struct." This example assigns a value of "100" to the "orgX"
field of the struct "winRect":
winRect.orgX.struct = 100
The structure's fields may be used in the same manner as any other variable:
print winRect.orgX.struct
or:
newOriginX = offsetX + winRect.orgX.struct
Some API calls require the size of a struct to be passed as a parameter. Determine the length
(size) of a struct with the LEN() function.
sizeStruct = len(winRect.struct)
When passing a structure in a CALLDLL statement, specify type "as struct", as is done in this
example:
'WINRECT.BAS - show how to get window position and size
'and demonstrate how to use the struct statement
struct winRect, _
orgX as long, _
orgY as long, _
crnrX as long, _
crnrY as long
open "test me" for window as #win
open "user32.dll" for dll as #user
hndl =
hwnd(#win)
calldll #user, "GetWindowRect", _
hndl as ulong, _
winRect as struct, _
result as long
print
print
print
print
print
"Upper Left x, y of 'test me': "
winRect.orgX.struct; ", "; winRect.orgY.struct
"Lower Right x, y of 'test me': "
winRect.crnrX.struct; ", "; winRect.crnrY.struct
close #user
close #win
wait
end
See also: CALLDLL, Using Types with STRUCT, Understanding Syntax
STYLEBITS
stylebits #handle, addBits, removeBits, addExtendedBits, removeExtendedBits
Description:
STYLEBITS allows you to change the style of a Liberty BASIC window or control. It accepts a
handle and four parameters. When the window is opened it checks to see if there are style bits
for the window or for any controls. If there is a STYLEBITS command it applies the remove bits
first, then applies the add bits. In this way the control is created from the get-go with the desired
style. The STYLEBITS command must be issued before the command to open the window.
This command works on all Liberty BASIC windows and controls, but since the texteditor is not a
native Windows control you will only be able to do things like tweak it's border and perhaps a few
other things.
Some common window and control styles are listed below. To find all possible style bits used to
create controls in Windows, refer to API references online or in books for the functions to
CreateWindow and CreateWindowEx.
#handle
This must be a handle of handle variable that refers to a control. See the code below for a
demonstration.
addBits
This contains all style bits that should be added to the control. If there are more than one, they
must be put together with the bitwise OR operator, like this: _ES_AUTOVSCROLL or
_ES_MULTILINE
removeBits
This removes style bits from the control. To remove a border from a control, this value would be
_WS_BORDER.
addExtendedBits
This adds bits to the extended style. Windows created with an extended style have extended
style bits, like _WS_EX_CLIENTEDGE.
removeExtendedBits
This removes bits from the extended style. Windows created with an extended style have
extended style bits, like _WS_EX_TOOLWINDOW .
Usage:
'here is a textbox with a password setting
stylebits #main.pw, _ES_PASSWORD, _ES_AUTOVSCROLL or _ES_MULTILINE,
0, 0
textbox #main.pw, 10, 10, 250, 25
'here is one right justified, and we use a handle variable
justHandle$ = "#main.rjust"
stylebits #justHandle$, _ES_RIGHT, 0, 0, 0
textbox #main.rjust, 10, 40, 250, 25
'here's a silly example of twiddling style bits for a window
stylebits #main, _WS_SYSMENU, _WS_POPUP, _WS_EX_CONTEXTHELP, 0
open "STYLEBITS demo" for window_popup as #main
#main.pw "please"
#main.rjust "on the right"
wait
WINDOW AND CONTROL STYLE CONSTANTS
window styles - some also work for controls:
_WS_BORDER
Creates a window that has a thin-line border.
_WS_CAPTION
Creates a window that has a title bar (includes the WS_BORDER style).
_WS_HSCROLL
Creates a window that has a horizontal scroll bar.
_WS_MAXIMIZE
Creates a window that is initially maximized.
_WS_MAXIMIZEBOX
Creates a window that has a Maximize button.
_WS_MINIMIZE
Creates a window that is initially minimized. Same as the WS_ICONIC
style.
_WS_MINIMIZEBOX
Creates a window that has a Minimize button.
_WS_VSCROLL
Creates a window that has a vertical scroll bar.
button styles:
_BS_LEFT
Left-justifies the text in the button rectangle.
_BS_RIGHT
Right-justifies text in the button rectangle.
_BS_RIGHTBUTTON
Positions a radio button's circle or a check box's square on the right
side of the button rectangle.
editbox (textbox) styles:
_ES_CENTER
Centers text in a multiline edit control.
_ES_PASSWORD
Displays an asterisk (*) for each character typed into the edit control.
_ES_RIGHT
Right-aligns text in a multiline edit control.
listbox styles:
_LBS_MULTICOLUMN
Specifies a multicolumn list box that is scrolled horizontally.
_LBS_SORT
Sorts strings in the list box alphabetically.
statictext styles:
_SS_CENTER
Specifies a simple rectangle and centers the text in the rectangle.
_SS_RIGHT
Specifies a simple rectangle and right-aligns the given text in the rectangle.
SUB
See also: Functions and Subroutines, BYREF
sub subName zero or more comma separated parameter variable names
'code for the sub goes in here
end sub
Description:
This statement defines a subroutine. Zero or more parameters may be passed into the
subroutine. A subroutine cannot contain another subroutine definition, nor a function definition.
The CALL statement is used to access the SUBROUTINE and to pass values into it. The values
must be the same type as the SUB statement defines them to be. So the following example:
sub mySubName string$, number, string2$
is called like this:
call mySubName "string value", 123, str$("321")
Local Variables
The variable names inside a subroutine are scoped locally, meaning that the value of any variable
inside a subroutine is different from the value of a variable of the same name outside the
subroutine.
Passing by Reference
Variables passed as arguments into subroutines are passed "by value" which means that a copy
of the variable is passed into the subroutine. The value of the variable is not changed in the main
program if it is changed in the subroutine. A variable may instead by passed "byref" which
means that a reference to the actual variable is passed and a change in the value of this variable
in the subroutine affects the value of the variable in the main program.
Global Variables and Devices
Variables declared with the GLOBAL statement are available in the main program and in
subroutines and functions.
Arrays, structs and handles of files, DLLs and windows are global to a Liberty BASIC program,
and visible inside a subroutine without needing to be passed in.
Special global status is given to certain default variables used for sizing, positioning, and coloring
windows and controls. These include variables WindowWidth, WindowHeight, UpperLeftX,
UpperLeftY, ForegroundColor$, BackgroundColor$, ListboxColor$, TextboxColor$,
ComboboxColor$, TexteditorColor$. The value of these variables, as well as DefaultDir$ and com
can be seen and modified in any subroutine/function.
Branch Labels
Branch labels are locally scoped. Code inside a subroutine cannot see branch labels outside the
subroutine, and code outside a subroutine cannot see branch labels inside any subroutine.
Ending a Subroutine:
The sub definition must end with the expression: end sub
Executing Subroutines
Be sure that a program doesn't accidentally flow into a subroutine. A subroutine should only
execute when it is called by command in the program.
wrong:
for i = 1 to 10
'do some stuff
next i
Sub MySub param1, param2
'do some stuff
End Sub
correct:
for i = 1 to 10
'do some stuff
next i
WAIT
Sub MySub param1, param2
'do some stuff
End Sub
Example:
Usage:
'copy two files into one
fileOne$ = "first.txt"
fileTwo$ = "second.txt"
combined$ = "together.txt"
call mergeFiles fileOne$, fileTwo$, combined$
end
sub mergeFiles firstFile$, secondFile$, merged$
open merged$ for output as #merged
open firstFile$ for input as #first
print #merged, input$(#first, lof(#first));
close #first
open secondFile$ for input as #second
print #merged, input$(#second, lof(#second));
close #second
close #merged
end sub
See also: FUNCTION, Recursion, Functions and Subroutines
TAB( n )
Print TAB(n)
Liberty BASIC 4 has the ability to use the TAB function for formatting output to the mainwin and
to the printer. "n" is the character location where the next output will be printed. "tab(7)" causes
the next output to print beginning at column (character) 7, while "tab(21)" causes the next output
to print beginning at column 21. TAB(n) works with both the mainwin PRINT command and with
LPRINT.
'show how tab() works
print "x"; tab(7); "sine"; tab(21); "cosine"
for x = 1 to 10
print x; tab(7); sin(x); tab(21); cos(x)
next x
end
TAN( n )
Description:
This function returns the tangent of the angle n. The angle n should be expressed in radians
Usage:
for t = 1 to 45
print "The tangent of "; t; " is "; tan(t)
next t
Tip:
There are 2 * pi radians in a full circle of 360 degrees. A formula to convert degrees to radians is:
radians = degrees divided by 57.29577951
Note: See also SIN( ) and COS( )
Textbox
TEXTBOX #handle.ext, xpos, ypos, wide, high
Description
The textbox command adds a single item, single line text entry control to a window. It is useful
for generating forms and getting small amounts of user input in the form of text. Liberty BASIC 4
adds PASSWORD and RIGHTJUSTIFY commands. See below.
#handle.ext
The #handle part must be the same as for the window that contains the textbox control. The
".ext" part must be unique for the textbox.
xpos & ypos
This is the position of the textbox in x and y from the upper-left corner of the window.
wide & high
This is the width and height of the textbox in pixels.
Textbox commands:
print #handle.ext, "a string"
This sets the contents of the textbox to be "a string". Any previous contents of the textbox are
overwritten. To clear a textbox of text, print a blank string to it:
print #handle.ext, ""
print #handle.ext, "!contents? varName$";
This retrieves the contents of the textbox and places them into the variable, varName$.
print #handle, "!font fontName pointsize" ;
Tihs sets the font of the textbox to the specified name and size. If an exact match cannot be
found, then Liberty BASIC will
try to match as closely as possible, with size taking precedence over the facename in the match.
Note that a font sized too large to fit in the textbox will not allow the text it contains to be
displayed. For more on specifying fonts read How to Specify Fonts Also, see below for Dead
Textbox Problem.
Example:
print #handle, "!font Times_New_Roman 10";
print #handle.ext, "!locate x y width height";
This repositions the control in its window. This is effective when the control is placed inside
window of type "window". The control will not update its size and location until a REFRESH
command is sent to the window. See the RESIZE.BAS example program.
print #handle.ext, "!setfocus";
This causes the textbox to receive the input focus. This means that any keypresses will be
directed to the textbox.
print #handle.ext, "!enable"
This causes the control to be enabled.
print #handle.ext, "!disable"
This causes the control to be inactive and grayed-out.
print #handle.ext, "!show"
This causes the control to be visible.
print #handle.ext, "!hide"
This causes the control to be hidden or invisible.
Dead Textbox Problem
If it appears that no text can be typed into a textbox, it may be that the textbox is not high
enough to display the current font. Try making the textbox higher, or giving it a font command for
a smaller font. Textboxes can also appear to be dead if too many controls are placed on a
window.
Sample Program
' sample program
textbox #name.txt, 20, 10, 260, 25
button #name, "OK", [titleGraph], LR, 5, 0
WindowWidth = 350 : WindowHeight = 90
open "What do you want to name this graph?" for window_nf as #name
print #name.txt, "untitled"
[mainLoop]
wait
[titleGraph]
print #name.txt, "!contents?"
input #name.txt, graphTitle$
notice "The title for your graph is: "; graphTitle$
close #name
end
For information on creating controls with different background colors, see Colors and the
Graphical User Interface.
Texteditor
TEXTEDITOR #handle.ext, xpos, ypos, wide, high
Description
Texteditor is a control similar to textbox, but with scroll bars, and with an enhanced command
set. The commands are essentially the same as that of a window of type "text." NOTICE that
texteditor commands start with an exclamation point, because the control will simply display
anything printed to it if it doesn't start with an exclamation point. The texteditor provides a method
for the user to create and edit large amounts of text. The addition of a texteditor control to a
window automatically causes the menubar to contain an EDIT menu. Right-clicking within a
texteditor control pops up an automatic EDIT menu.
#handle.ext
The #handle part must be the same as for the window that contains the texteditor control. The
".ext" part must be unique for the texteditor.
xpos & ypos
This is the position of the texteditor in x and y from the upper-left corner of the window.
wide & high
This is the width and height of the texteditor in pixels.
Here are the texteditor commands:
print #handle, "!autoresize";
This works with texteditor controls, but not with textbox controls or text windows.
This causes the edges of the control to maintain their distance from the edges of the overall
window. If the user resizes the window, the texteditor control also resizes.
print #handle, "!cls" ;
This clears the texteditor of all text.
print #handle, "!contents varname$";
print #handle, "!contents #handle";
This has two forms as described above. The first form causes the contents of the text window to
be replaced with the contents of varname$, and the second form causes the contents of the text
window to be replaced with the contents of the stream referenced by #handle (this is the handle of
a file opened for INPUT). This second form is useful for reading large text files quickly into the
window.
Here is an example of the second form:
open "Contents of AUTOEXEC.BAT" for text as #aetext
open "C:\AUTOEXEC.BAT" for input as #autoexec
print #aetext, "!contents #autoexec";
close #autoexec
'stop here
input a$
print #handle, "!contents? string$";
This returns the entire text contained in the control. After this command is issued, the entire text
is contained in the variable string$.
print #handle, "!copy" ;
This causes the currently selected text to be copied to the WINDOWS clipboard.
print #handle, "!cut" ;
This causes the currently selected text to be cut out of the text window and copied to the
WINDOWS clipboard.
print #handle, "!font fontName pointsize" ;
This sets the font of the text window to the specified name and size. If an exact match cannot be
found, then Liberty BASIC will try to match as closely as possible, with size taking precedence
over facename in the match. For more on specifying fonts read How to Specify Fonts
Example:
print #handle, "!font Times_New_Roman 10";
print #handle, "!insert varname$";
This inserts the contents of the variable at the current caret (text cursor) position, leaving the
selection highlighted.
print #handle, "!line n string$" ;
This returns the text at line n. n is standing in for a literal number. If n is less than 1 or greater
than the number of lines the texteditor contains, then "" (an empty string) is returned. After this
command is issued, the specified line's text is contained in the variable string$.
print #h, "!lines countVar" ;
This returns the number of lines of text contained in the texteditor, placing the value into the
variable countVar.
print #handle.ext, "!locate x y width height"
This repositions the control in its window. This is effective when the control is placed inside
window of type "window". The control will not update its size and location until a REFRESH
command is sent to the window. See the RESIZE.BAS example program.
print #handle, "!modified? answer$" ;
This returns a string (either "true" or "false") that indicates whether any data in the texteditor has
been modified. The variable answer$ holds this returned string. This is useful for checking to see
whether to save the contents of the texteditor before ending a program.
print #h, "!origin? columnVar rowVar " ;
This causes the current texteditor origin to be returned. When a texteditor is first opened, the
result would be column 1, row 1. The result is contained in the variables columnVar and rowVar.
print #handle, "!origin column row" ;
This forces the origin of the texteditor to be column and row. Row and column must be literal
numbers. To use variables for these values, place them outside the quotation marks, preserving
the blank spaces, like this:
print #handle, "!origin ";column;" ";row
print #handle, "!paste" ;
This causes the text in the WINDOWS clipboard (if there is any) to be pasted into the texteditor
at the current caret position.
print #handle, "!select column row" ;
This will put the blinking cursor (caret) at column row. Column and row must be literal numbers.
To express them as variables, place the variables outside the quotation marks and preserve the
blank spaces, like this:
print #handle, "!select ";column;" ";row
print #handle, "!selectall" ;
This causes everything in the texteditor to be selected.
print #handle, "!selection? selected$" ;
This returns the highlighted text from the texteditor. The result will be contained in the variable
selected$.
print #handle, "!setfocus";
This causes Windows to give input focus to this control. This means that if some other control in
the same windows was highlighted and active, that this control now becomes the highlighted and
active control, receiving keyboard input.
print #handle.ext, "!enable"
This causes the control to be enabled.
print #handle.ext, "!disable"
This causes the control to be inactive and grayed-out.
print #handle.ext, "!show"
This causes the control to be visible.
print #handle.ext, "!hide"
This causes the control to be hidden or invisible.
See also: Text Commands
For information on creating controls with different background colors, see Colors and the
Graphical User Interface.
TIME$( )
Description:
This function returns a string representing the current time of the system clock in 24 hour format.
This function replaces the time$ variable used in QBasic. See also DATE$( ), Date and Time
Functions
'this
print
print
print
print
form of time$()
time$()
time$("seconds")
time$("milliseconds")
time$("ms")
produces this format
'time now as string "16:21:44"
'seconds since midnight as number 32314
'milliseconds since midnight as number 33221342
'milliseconds since midnight as number 33221342
Usage:
' display the opening screen
print "Main selection screen
print
print "1. Add new record"
print "2. Modify existing record"
print "3. Delete record"
Time now: "; time$()
TIMER
TIMER milliseconds, [branchLabel]
Timer milliseconds subName
Description:
This commands manages a Windows timer. This is useful for controlling the rate of software
execution (games or animation perhaps), or for creating a program or program feature which
activates periodically (a clock perhaps, or an email client which checks for new messages). The
TIMER is deactivated by setting a time value of 0, and no branch label. There is only one
timer. The elapsed time value and/or branch label to execute can be changed at any time by
issuing a new TIMER command. There are 1000 milliseconds in one second. A value of 1000
causes the timer to fire every one second. A value of 500 causes the timer to fire every half
second, and so on.
Usage:
Branch Label Handler:
'set a timer to fire in 3 seconds
'using branch label event handler
timer 3000, [itHappened]
'wait here
wait
[itHappened]
'deactivate the timer
timer 0
confirm "It happened! Do it again?"; answer
if answer then
'reactivate the timer
timer 3000, [itHappened]
wait
end if
end
Subroutine handler:
'set a timer to fire in 3 seconds
'using subroutine event handler
timer 3000, itHappened
'wait here
wait
sub itHappened
'deactivate the timer
timer 0
confirm "It happened! Do it again?"; answer
if answer then
'reactivate the timer
timer 3000, itHappened
end if
end sub
Be Careful!
If the program attempts to execute more code within a timer routine than can be executed in the
timer interval, the timer ticks build up and the program will keep executing them as quickly as it
can. This might make the program appear to have locked up. To avoid a lock-up, place a SCAN
command within the timer routine, so that the program knows when the user activates other
controls, or closes a window.
Titlebar
Description:
This command changes the titlebar of the main window. It doesn't change the title of any other
window.
Here's a real small clock program!
'ittyclok
[loop]
if time$ <> time$() then
time$ = time$()
titlebar time$
end if
scan
goto [loop]
TRACE n
TRACE number
Description:
This statement sets the trace level for its application program. This is only effective if the program
is run using the Debug menu selection (instead of RUN). If Run is used, then any TRACE
statements are ignored. It allows you to mark places in code that will cause the debugger to
change modes between "step", "animate" and "run." This allows you to use the "run" button to
debug a program, and when it hits a "TRACE 2" command in the code, it will automatically drop
down into "step" mode. See Using the Debugger.
There are three trace levels: 0, 1, and 2. Here are the effects of these levels:
0 = full speed no trace or RUN
1 = animated trace or ANIMATE, logs variables and highlights current line
2 = single step mode or STEP, requires programmer to click STEP button to continue to next
line of code to execute, logs variables
When any Liberty BASIC program first starts under Debug mode, the trace level is always initially
2 (STEP). You can then click on any of the buttons to determine what mode to continue in.
When a TRACE statement is encountered, the trace level is set accordingly, but you can recover
from this new trace level by clicking again on the desired button.
If you are having trouble debugging code at a certain spot, then you can add a TRACE statement
(usually level 2) just before that location, run in Debug mode and then click on the RUN button in
the debugger. When the TRACE statement is reached, the debugger will kick in at that point,
slowing the debugging process to STEP mode.
Usage:
open "wave" for graphics as #graph
print #graph, "down"
for index = 1 to 200
if index = 20 then trace 2 'Here is the trouble spot
print #graph, "goto "; index ; " "; 100+int(100*sin(index/20))
next index
wait
TRIM$( s$ )
TRIM$(stringExpression)
Description:
This function removes any spaces from the start and end of the string in stringExpression. This
can be useful for cleaning up data entry among other things.
Usage:
sentence$ = " Greetings "
print len(trim$(sentence$))
Produces: 9
TXCOUNT
txcount(#handle)
Description:
This function gets a count of bytes in a serial communications transmit queue.
count = txcount(#com)
See also Open "Comn:...", ONCOMERROR
UNLOADBMP
UNLOADBMP "name"
Description:
This command removes from Liberty BASIC the bitmap specified by "name". It also frees the
Windows memory resources associated with that bitmap. This is useful for freeing bitmap
resources when many bitmaps are used in a program. Unload all bitmaps loaded with
LOADBMP when a program closes to insure that system resources are freed.
See also: LOADBMP, HBMP( )
UPPER$( s$ )
UPPER$(s$)
Description:
This function returns a copy of the contents of the string, string variable, or string expression s$,
but with all letters converted to uppercase.
Usage:
print upper$( "The Taj Mahal" )
Produces:
THE TAJ MAHAL
USING( )
USING(templateString, numericExpression)
Description:
This function formats numericExpression as a string using templateString. The rules for the
format are similar to those in Microsoft BASIC's PRINT USING statement, but since using( ) is a
function, it can be used as part of a larger BASIC expression instead of being useful only for
display output directly. The template string consists of the character "#" to indicate placement
for numerals, and a single dot "." to indicate placement for the decimal point. The template string
must be contained within double quotation marks. If there are more digits contained in a number
than allowed for by the template string, the digits will be truncated to match the template.
A template string looks like this:
amount$ = using("######.##", 1234.56)
As part of a larger expression:
notice "Your total is $" + using("####.##", 1234.5)
A template string can be expressed as a string variable:
template$ = "######.##"
amount$ = using(template$, 1234.56)
Using() may be used in conjunction with 'print'. The following two examples produce the same
result:
amount$ = using("######.##", 123456.78)
print amount$
print using("######.##", 123456.78)
The using() function for Liberty BASIC 3 has been modified so that it rounds its output like
PRINT USING does in other BASICs.
Usage:
' print a column of ten justified numbers
for a = 1 to 10
print using("####.##", rnd(1)*1000)
next a
'sample output from the routine above:
72.06
244.28
133.74
99.64
813.50
529.65
601.19
697.91
5.82
619.22
UpperLeftX
Description:
The special variables UpperLeftX and UpperLeftY specify the distance, in pixels, from the top-left
of the display for the next-opened window. For example, the following code will open a graphics
window whose upper left corner is located 50 pixels from the left of the display, and 25 pixels from
the top of the display:
UpperLeftX = 50
UpperLeftY = 25
open "test window" for graphics as #testHandle
input r$
See also: WindowWidth, Window Height
UpperLeftY
Description:
The special variables UpperLeftX and UpperLeftY specify the distance, in pixels, from the top-left
of the display for the next-opened window. For example, the following code will open a graphics
window whose upper left corner is located 50 pixels from the left of the display, and 25 pixels from
the top of the display:
UpperLeftX = 50
UpperLeftY = 25
open "test window" for graphics as #testHandle
input r$
See also: WindowWidth, Window Height
VAL( s$ )
VAL(stringExpression)
Description:
This function returns a numeric value for stringExpression if stringExpression represents a
valid numeric value or if it begins with a valid numeric value. If not, then zero is returned.
Usage:
print 2 * val("3.14")
Produces:
6.28
print val("hello")
Produces:
0
print val("3 blind mice")
Produces:
3
Version$
Version$
Description:
This variable holds the version of Liberty BASIC, in this case "4.0".
This is useful so that you can take advantage of whatever differences there are between the
different versions of Liberty BASIC.
Note: see also Platform$
WAIT
Description:
This simple statement causes program execution to stop and wait for user input events. When
the user interacts with a window or other control owned by the program and generates an event,
program execution resumes at the event handler appropriate for their interaction.
Usage:
'demonstrate the wait command (in three places)
nomainwin
open "Geometric wite-board" for graphics_nsb as #geo
print #geo, "trapclose [quit]"
print #geo, "when rightButtonUp [popupMenu]"
wait ' stop and wait for a menu item to be chosen
[popupMenu]
popupmenu "&Square Spiral", [asSquare], "&Triangular Spiral",
[asTriangle]
wait
[asSquare]
print #geo, "cls ; home ; down ; color red"
for x = 1 to 120
print #geo, "go "; x; " ; turn 87"
next x
wait
[asTriangle]
print #geo, "cls ; home ; down ; color blue"
for x = 1 to 120
print #geo, "go "; x; " ; turn 117"
next x
wait
[quit]
close #geo
end
Note: In general, Liberty BASIC encourages the use of wait over the previous practice of
using input.
WHILE...[EXIT WHILE]...WEND
WHILE expression
{some code}
WEND
Description:
These two statements comprise the start and end of a control loop. Between the WHILE and
WEND code is placed (optionally) that is executed repeatedly while expression evaluates to true.
The code between any WHILE statement and its associated WEND statement will not execute
even once if the WHILE expression initially evaluates to false. Once execution reaches the
WEND statement, for as long as the WHILE expression evaluates to true, then execution will
jump back to the WHILE statement. "Expression" can be a boolean, numeric, or string
expression or combination of expressions.
Usage:
' loop until midnight (go read a good book)
while time$ <> "00:00:00"
' some action performing code might be placed here
wend
Or:
' loop until a valid response is solicited
while val(age$) = 0
input "How old are you?"; age$
if val(age$) = 0 then print "Invalid response.
wend
Try again."
Note: A program SHOULD NOT exit a WHILE...WEND loop using GOTO. It may cause the
program to behave unpredictably. (See EXIT WHILE, below.)
GOSUB, FUNCTION and SUB may be used within a WHILE...WEND loop because they only
temporarily redirect program flow or call on other parts of the program. Program execution
resumes within the WHILE/WEND loop in these instances. Program execution does not return to
the WHILE/WEND loop if GOTO is used within the loop. GOTO should not be used to exit a
WHILE/WEND loop. EXIT WHILE will correctly exit the loop before it would have terminated
normally.
The following example is an example of a WHILE...WEND loop exited improperly:
while count < 10
input "Enter a name (or a blank line to quit) ?"; n$
if n$ = "" then [exitLoop]
list$(count) = n$
count = count + 1
wend
[exitLoop]
Instead, use the EXIT WHILE statement:
while count < 10
input "Enter a name (or a blank line to quit) ?"; n$
if n$ = "" then EXIT WHILE
wend
[exitLoop]
print "Done!"
WindowWidth
Description:
The special variables WindowWidth and WindowHeight specify the width and height of the next
window to be opened. If the program's code does not specify the values for these special
variables, their defaults will be 320 and 360 respectively. After a resize event that is trapped by
the resizehandler command, these variables contain the width and height of the client area of the
window. the client area is the workspace of the window that is contained within the sizing frame,
border or titlebar. See resize.bas for an example of this usage.
Usage:
The following example will open a graphics window 250 pixels wide and 100 pixels high.
WindowWidth = 250
WindowHeight = 100
open "test window" for graphics as #testHandle
input r$
See also: UpperLeftX , UpperLeftY, Resizehandler
WORD$( s$, n )
WORD$( stringExpression, n [,string delimiter] )
Description:
This function returns the nth word in the string, string variable or string expression,
stringExpression. The leading and trailing spaces are stripped from stringExpression and then by
default it is broken down into 'words' at the remaining spaces inside. If n is less than 1 or greater
than the number of words in stringExpression, then "" is returned. The string delimiter is optional.
When it is not used, the space character is the delimiter.
Usage:
print word$("The quick brown fox jumped over the lazy dog", 5)
Produces:
jumped
And:
' display each word of sentence$ on its own line
sentence$ = "and many miles to go before I sleep."
token$ = "?"
while token$ <> ""
index = index + 1
token$ = word$(sentence$, index)
print token$
wend
Produces:
and
many
miles
to
go
before
I
sleep.
Using the optional string delimiter:
You can now specify the delimiter string of one or more characters, so optionally you can read
comma delimited or other strings:
token$ = "*"
parseMe$ = "this,is,,a,test"
idx = 0
while token$<>""
idx = idx + 1
token$ = word$(parseMe$, idx, ",")
if token$ <> "" then print token$
wend
Also, notice the doubled up comma in the test string. This will be returned as a comma. This is
useful for detecting empty delimited fields in a string. Try substituting the following lines:
parseMe$ = "thisarfisarfarfaarftest"
and:
token$ = word$(parseMe$, idx, "arf")
Resize.bas
'resize.bas
'This is an example of a program which resizes several
'controls in a window depending on how the user changes
'the size of the window.
nomainwin
WindowWidth = 550
WindowHeight = 410
listbox #resizer.lbox1, array$(), [lbox1DClick], 1, 0, 256, 186
listbox #resizer.lbox2, array$(), [lbox2DClick], 257, 0, 284, 164
combobox #resizer.cbox3, array$(), [cbox3DoubleClick], 257, 164, 283, 150
texteditor #resizer.tedit4, 1, 186, 540, 195
open "Resizing example" for window as #resizer
print #resizer, "trapclose [quit]"
[loop]
print #resizer, "resizehandler [resized]"
input r$
goto [loop]
[resized]
'new sizes for width and height are now contained
'in the variables WindowWidth and WindowHeight
wWid = WindowWidth
wHig = WindowHeight
upperVert = int(256/550*wWid) 'upper middle vertical edge
midHoriz = int(186/410*wHig) 'middle horizontal edge
urWid = upperVert - wWid
print #resizer.lbox1, "locate 0 0 "; upperVert; " "; int(186/410*wHig)
print #resizer.lbox2, "locate "; upperVert; " 0 "; wWid-upperVert; " ";
int(186/410*wHig)-23
print #resizer.cbox3, "locate "; upperVert; " "; midHoriz-23; " "; wWid upperVert; " "; 100
print #resizer.tedit4, "!locate 0 "; midHoriz; " "; wWid; " ";
wHig-midHoriz;
print #resizer, "refresh"
goto [loop]
[quit] 'quit the program
close #resizer
end
WindowHeight
Description:
The special variables WindowWidth and WindowHeight specify the width and height of the next
window to be opened. If the program's code does not specify the values for these special
variables, their defaults will be 320 and 360 respectively. After a resize event that is trapped by
the resizehandler command, these variables contain the width and height of the client area of the
window. the client area is the workspace of the window that is contained within the sizing frame,
border or titlebar. See resize.bas for an example of this usage.
Usage:
The following example will open a graphics window 250 pixels wide and 100 pixels high.
WindowWidth = 250
WindowHeight = 100
open "test window" for graphics as #testHandle
input r$
See also: UpperLeftX , UpperLeftY, Resizehandler
Winstring(Ptr)
Winstring(structName.pointer$.struct)
Winstring(pointer)
Description:
The WINSTRING( ) function returns a string when a function returns a pointer to a string. This
function is especially useful when retrieving the text string from a STRUCT that has been altered
by a function, or when an API function returns a pointer to a text string in memory.
Usage:
struct demo,_
name$ as ptr,_
length as long
call DoDemo "hello"
print
print
print
print
"Uppercase string is"
winstring(demo.name$.struct)
"Length of string is"
demo.length.struct
sub DoDemo avar$
demo.name$.struct=upper$(avar$)
demo.length.struct=len(avar$)
end sub
'OUTPUT
Uppercase string is
HELLO
Length of string is
5
Index
Keyboard and Joystick
103
PrinterName$
209
(
(View Graphics Window
Commands)
64
(View Text Window
Commands)
61
A
A Simple Example
ACS( n )
114
addition
51
Algebra
53
API
3
Application
90
3
Arithmetic
51
Arrays with more than
two dimensions
43
ASCII
3
Associated File
3
autoresize
64
ABS( n )
113
Add a Mask
75
Additional Commands
111
Alphanumeric
3
APPEND
201
Application Programming
Interface
3
Arrays
41
ASC( s$ )
115
ASN( n )
ATN( n )
116
117
B
backcolor
64
Binary
3
Binary Files
47
Bitmap
3
Block Conditionals
BMPSAVE
120
Boot
3
box
64
Branch
3
Bug
3
BUTTON
121
Byte
3
32
BEEP
118, 102
Binary Access
3
Bit
3
Bitwise Operations
34
BMPBUTTON
119
BOOLEAN
35
Border
3
boxfilled
64
Branch Labels
31
Built-in Dialogs
101
BYREF
122
C
CALL
123
Callbacks for API
Functions
39
Calling APIs and DLLs
79
CHECKBOX
126
circle
64
Callback
124
CALLDLL
125
Caveats
87
CHR$( n )
127
circlefilled
64
Click
3
Close
3
cls
64, 129
COLORDIALOG
130
Combobox
131
Command Reference A-C
104
Command Reference G-K-2
106
Command Reference N-P
108
Command Reference T-Z
110
compile progress
8
Computer Program
3
CONFIRM
133
Controls
3
Controls and Events
96
Creating a tokenized
file
15
Clipboard
3
CLOSE #h
128
color
64
Colors and the Graphical
User Interface
99
Command
3
Command Reference D-F
105
Command Reference L-M
107
Command Reference R-S
109
CommandLine$
132
Compiler Reporting
CONCATENATION
58
Contents
1
Controls - Menus,
Buttons, Etc.
95
COS( n )
134
CURSOR
135
14
D
DATA
3, 136
Database
3
DATE$( )
137
Default
3
delsegment
64
Desktop
3
DIM array( )
140
discard
64
Disk Drive
3
DisplayWidth and
DisplayHeight
141
DO LOOP
36, 143
DOUBLE QUOTE
58
down
64
Drag (mouse)
3
Drawing and Collision
Detection
72
Drives$
144
Data File
3
Date and Time Functions
56
Dechex$( )
138
DefaultDir$
139
Designate Sprites
70
Dialog Box
3
Directory
3
Disk
3
DisplayHeight
142
division
51
Document
3
Double-Click
DPI
3
drawbmp
64
Drive
3
DUMP
3
145
E
edit menu
191
ellipsefilled
64
EOF( #h )
146
Error Messages
22
EVAL$
150
Event-Driven
Programming
3
EXP( n )
148
Expression
3
ellipse
64
END
147
Error Log Explained
23
EVAL
149
Event
3
Example Programs
83
Explorer
Extension
3
3
F
field
151
File Operations
Filename
3
Files
153
flush
64
Focus
3
font
64
FOR...NEXT
FUNCTION
156
File
3
FILEDIALOG
152
Filename Extension
3
fill
64
Flushing Sprite Graphics
73
Folder
3
FONTDIALOG
154
FreeForm
11
Functions and subroutines
30
45
155
G
GET #h, n
157
GETTRIM #h, n
158
GLOBAL
160
go
64
goto
64
Graphical User Interface
88
Graphics
62
GUI
3
getbmp
64
Gigabyte
3
Glossary
3
GOSUB label
159
GOTO label
161
Graphicbox
162
GROUPBOX
163
H
Handle Variables
91
Hardware
3
HEXDEC( "value" )
165
home
64
How Do Sprites Work?
68
How to Specify Fonts
100
Hard Disk
3
HBMP( "name" )
164
Highlight
3
horizscrollbar
64
How to make API/DLL
calls
82
HWND( #handle )
166
I
Icon
3
Identifier
indent
8
3
INI file
9
INP( )
169
INPUT$( #h, n )
171
Installing Liberty BASIC
5
INT( n )
174
Icon Editor
17
IF...THEN
167
Informational resources
about APIs/DLLs
80
Inkey$
168
INPUT
170, 201
INPUTTO$
172
INSTR(a$,b$,n)
173
K
Kill BASIC Programs
8
KILL s$
175
L
Lander.bas
78
LEN( s$ )
177
lesson browser
18
Liberty BASIC Editor
7
line
64
Listbox
180
Literal
3
LOC( #h)
184
LOF( #h )
183
Logical Line Extension
28
LOWER$( s$ )
186
LEFT$( s$, n )
176
Lesson
18
LET var = expr
178
Liberty BASIC Language
27
line input
170, 179
Lite Debug
13
LOADBMP
181
locate
64, 182
LOG( n )
185
Looping
36
LPRINT
187
M
MAINWIN
188
Manipulating Characters
59
Mathematics
51
Maximize Button
3
MENU
3, 191
MID$( )
192
MIN( )
194
MKDIR( )
195
Mouse
3
MouseY
64
Multitasking
3
Making API and DLL
Calls
25
MAPHANDLE
190
MAX( )
189
MB
3
Menu Bar
3
MIDIPOS
193
Minimize Button
3
Monitor
3
MouseX
64
multiplication
51
My Computer
3
N
NAME a$ AS b$
196
north
64
ntport.dll
24
Numbers and Strings
55
NOMAINWIN
29, 197
NOTICE
198
ntport2.reg
24
Numeric variables
52
O
ON ERROR
199
OPEN
201
Operating System
3
OUT port, byte
203
Overview
4
ONCOMERROR
200
OPEN "COMn: ...open a
communications port for
reading/writing
202
OS
3
OUTPUT
201
P
Parallel Port
Path
3
3
Passing strings into
API/DLL calls
86
Path and Filenames
50
Pauses and Timing
74
piefilled
64
place
64
PLAYMIDI
205, 102
Pointer
3
Port I/O
24
power
51
PrintCollate
209
PRINTERDIALOG
209
Programming Language
3
PUT #h, n
212
pie
64
Pixel
3
Platform$
204
PLAYWAVE
206, 102
POPUPMENU
207
posxy
64
print
64, 208
PrintCopies
209
PrinterFont$
210
PROMPT
211
R
RADIOBUTTON
213
RANDOM
201
Random Access Files
48
READ
215
Reading Mouse Events and
Keystrokes
63
Reboot
3
REDIM
217
REFRESH
97, 219
REM
218
Reserved Word List
112
RESIZEHANDLER
97, 220
Resolution
3
Restore Button
3
RETURN
223
Right-Click
3
Right-Drag
3
RND( n )
226
rule
64
RAM
3
Random Access
3
RANDOMIZE
214
READ and DATA
44
READJOYSTICK
216
Recursion
37
redraw
64
Registering Liberty BASIC
6
Reserved Word
3
Resize.bas
RESIZEHANDLER
220
RESTORE
221
RESUME
222
RIGHT$( s$, n )
224
Right-Click Menu
3
RMDIR( )
225
ROM
3
RUN s$, mode
227
S
Save
3
SCAN
228
Scroll Bar
3
segment
64
Select Case Statement
Sequential Access
3
set
64
Shell
3
Simple Demo Program
size
64
Sizing Handle
SORT
232
Sounds
102
3
Spreadsheet
3
Sprite Properties
Save As
3
Scroll Arrows
3
SEEK
229
SELECT CASE
230
33 Sending Commands
89
Sequential Files
46
setfocus
64
Short Filename
3
77 SIN( n )
231
Size and Placement of
Windows
93
Software
3
Sorting Arrays
42
SPACE$( n )returns a
string of n spaces
233
Sprite Commands
66
71
Sprite Table of Contents
65
spriteoffset
71
SQR( n )
234
Statement
3
Status Bar
3
Stop
236
STR$( n )
238
Strings and Text
STRUCT
239
SUB
241
Subprogram
3
subtraction
51
spriteoffset
66
Start with the
Background
69
Statictext
235
Step by Step
76
STOPMIDI
237
String
3
stringwidth?
64
STYLEBITS
240
Subfolder
3
Subroutine
3
syntax coloring
8
58
T
TAB( n )
Taskbar
242
3
TAN( n )
243
Testing for file
existence
49
Text and Characters
57 Text mode display
60
Textbox
244
Texteditor
245
The Liberty BASIC Editor TIME$( )
246
8
TIMER
247, 38
Title Bar
3
Titlebar
248
Toolbar
3
TRACE n
249
trapclose
64, 97
Trapping the close event Trigonometry
54
98
TRIM$( s$ )
250
TroubleShooting
26
turn
64
TXCOUNT
251
U
Understanding Syntax
92 Uninstalling Liberty BASIC
5
Unzip
3
UPPER$( s$ )
253
UpperLeftY
256
UNLOADBMP
252
up
64
UpperLeftX and
UpperLeftY
255
Using a different code
editor
19
Using Inkey$
20
Using the Runtime Engine
16
Using virtual key
constants with Inkey$
21
Using hexadecimal
values
84
Using the Debugger
12
Using types with STRUCT
and CALLDLL
85
USING( )
254
V
VAL( s$ )
257
Variables
40
vertscrollbar
64
Variable
Version$
W
WAIT
259
WAV
3
3
258
What are APIs/DLLs?
What's New!
2
Window
3
Window Types
94
WindowWidth and
WindowHeight
WORD$( s$, n )
WYSIWYG
81 What is a Sprite?
WHILE...WEND
260
Window and Dialog
Commands
97
WindowHeight
Winstring
Writing your own
Programs
10
3
Z
Zipped file
3
zntport.sys
24
67