Download Dual-Band Wireless Network Extender
Transcript
Dual-Band
Wireless Network
Extender
Model #: WCB3000N
User Manual
Ver 1.0
Table of Contents
Table of Contents
1
Introduction
3
Features
4
Getting to Know the WCB3000N
5
Front Panel
5
Back Panel
5
Accessing the Extender’s GUI
7
System Preferences
9
Status
9
Wireless Setup
10
Advanced Setup
15
Specifications
18
Notices
21
1
Wireless Network Extender
Warranty
21
GPL Info
21
EU CE Declaration of Conformity
22
Technical Support
22
2
Introduction
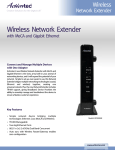
The WCB3000N is a Wireless Extender with dual concurrent radios
supporting both 2.4GHz and 5GHz operation. This allows the WECB to
connect to everything from legacy wireless laptops, computers and
gaming platforms up to the most current Apple and Android tablets,
laptops, media platforms and smart
phones.
!
The WCB works by being placed in
a central location of the home, or
in a location where the existing
wireless signal is weak, and then
being physically connected directly
to your Telus gateway/modem.
This physical connection not only
extends the signal, but allows the
WCB3000 to import and
automatically configure itself with
the same network ID/SSID and password that is currently in use and
configured on your existing gateway/modem. This means that wherever
you are in your house, your WiFi tablet, laptop or phone will
automatically connect to Internet without you having to find a new
network name or enter security keys.
!
For users with newer mobile devices, tablets and laptops, connections
through the 5GHz radio can markedly increase the performance and
speed of your WiFi connection while freeing up the 2.4GHz band for
legacy or older devices.
3
Wireless Network Extender
!
Features
• 2.4 and 5 gigahertz dual concurrent WiFi radios
• Two Gigabit Ethernet ports
• Integrated wireless networking with 2x2 802.11n access point
• Multiple security offerings: MAC address filtering, WEP, and WPA
• Other options: WMM and IP address management
4
Getting to Know the
WCB3000N
Front Panel
The front panel features LEDs that illuminate in green when the
operation of power, available ports and wireless bands are functioning
and in use.
!
!
!
!
Back Panel
• The WCB3000N has a 2 Port Gigabit Ethernet Switch utilized for
Ethernet installation of the device.
5
Wireless Network Extender
• The Coax/MoCA connector is not used nor supported for Telus
installation.
• Reset Button: Holding the reset button down for 10 seconds will restore
the unit back to the original factory default settings.
• The Power port is used to connect the Power Cord to the WCB3000N.
• The label indicates the factory default GUI access username, password,
Network SSID names and security keys.
!
!
6
Accessing the Extender’s GUI
!
To configure the settings of your WCB3000N Wireless Extender:
1. Ensure that your WCB3000 WiFi Extender is connected to your
Actiontec or Zyxel gateway/modem, and that both units are powered
on.
2. Log in to your Actiontec or Zyxel gateway/modem by entering
192.168.1.254 into the address bar of your Internet browser. The IP
address of your WCB3000N should be displayed on the main or
Home page of the Actiontec and on the Status page of the Zyxel.
3. The Extender’s GUI “Status” screen appears, as shown below.
!
7
Wireless Network Extender
!4. When you determine the IP address assigned to your WCB3000 and then enter that IP address into the address bar of your browser, you will be led to the WCB3000N graphical user interface (GUI) Login page.
5. Enter “admin” (all lower case) for the User Name and for the Password, enter the password indicated on the label located on the back of the WCB3000N.
8
System Preferences
System Preferences
The Wireless Network Extender features an onboard graphical user
interface (GUI) that includes user-configurable settings. Some of these
settings should be accessed by experienced users only.
Status
The first GUI screen that appears is the “Status” screen. This screen
contains basic information about the Extender’s wireless connection,
network status, MoCA status, and information about the Extender’s
firmware. There are no configurable settings available in this screen.
9
Wireless Network Extender
Wireless Setup
Selecting “Wireless Setup” from the menu bar of any of the Extender’s
GUI screens generates the “Wireless Network List” screen. Additional
wireless settings can be accessed from the menu on the left side of the
screen. These settings configure various aspects of the Extender’s wireless
network, and the majority of them should be adjusted by an experienced
user only. The exceptions are the settings contained in the “Wireless
Security” screen.
!
Wireless Network List
Selecting Wireless Network List from any GUI screen generates a
“Wireless Network List” screen (above). This screen displays various
characteristics of the Extender’s wireless networks. Clicking “Edit”
generates the “Wireless Security” screen.
!
10
System Preferences
Wireless Security
The “Wireless Security” wireless network screen contains various settings
regarding the Extender’s wireless network security.
Note: The Extender is automatically configured with the router/
gateway’s wireless settings (including security settings) after
being connected to the Ethernet network. We recommend that all
wireless security changes be performed on the router/gateway as
its wireless settings will update automatically to the WCB3000N.
!
11
Wireless Network Extender
To change the wireless security settings on the Extender’s network:
(Note: to manually configure the wireless settings on the Extender, the "Auto
Configure" check-box on the Advanced Set Up GUI page must be empty.)
!1.
Select a wireless operating frequency (2.4 or 5 GHz).
2. Select an SSID.
3. Enter a “Wireless Network Name.”
4. Select a wireless frequency band from the “Wireless Band” dropdown menu.
5. Choose "Wireless Data Rate" (“Auto” is recommended), and enable
SSID Broadcast.
6. Select a security type. If WEP is chosen, enter one or more keys in the
“Key” text boxes. If WPA is chosen, select a “MODE,” “CYPHER,”
and “Authentication Mode,” then enter a “PSK Key.”
Note: WEP security is only available if the router/gateway is
configured for WEP.
7. Click Apply.
Multiple SSID
The “Multiple SSID” wireless network screen allows the Extender to form
two different wireless networks, with one on each frequency. To do this,
select the “Wireless Operation Frequency” (2.4 or 5 GHz), enable the
“SSID State” and enter a name for the network. Finally, click Apply.
12
System Preferences
WPS
The “WPS” wireless network screen allows the Extender to accept wireless
clients via Wi-Fi Protected Setup (WPS), an automatic wireless network
connection protocol. Only experienced users should configure the
settings in this screen.
!
!
13
Wireless Network Extender
Wireless Access Control
The “Advanced Wireless Setup” wireless network screen contains a
number of advanced settings regarding the Extender’s wireless network.
Only experienced users should configure these settings.
!
!
14
System Preferences
Advanced Setup
Selecting “Advanced Setup” from any of the Extender’s GUI screens
generates the “Management” screen, along with other advanced settings
accessed through the menu on the left side of the screen. These settings
configure various administrative aspects of the Extender and its GUI.
They should be adjusted by experienced users only.
If the box next to Auto Configure is checked, then the Extender will
always reflect and import SSID and security settings from the gateway. If
you wish to configure the Extender manually with different settings than
your gateway/modem, then uncheck this box.
Management
The “Management” advanced setup screen (above) allows the Extender’s
IP address settings to be modified. Only experienced users should change
these settings.
!
15
Wireless Network Extender
Change Password
The “Change Password” screen allows the user to change the password
that allows access to the GUI. To change, enter the current password,
enter and re-enter the new password, then click Apply. Be sure to write
the password down and keep it somewhere safe, as it will be needed to
access the Extender’s GUI.
!
Factory Default
The “Factory Default” advanced setup screen allows the Extender’s
factory default settings to be reapplied, erasing all current settings. Click
Restore Default Settings to restore the Extender to it's original factory
settings.
!
!
16
System Preferences
Language Settings
The “Language Settings” advanced setup screen allows the Extender’s GUI
language to be changed. Options include Auto-detect, English, and
French. Selecting “Auto-detect” causes the Extender to automatically
select the language (English or French) based on the language being used
on the connected computer. To save changes, click Apply.
!
17
Specifications
Model Number
WCB3000N
Wireless Security
• Wi-Fi Protected Access (WPA, WPA2)
• WEP, TKIP, AES Encryption
• Pre-Shared Key (PSK)
• MAC Address Filtering
!Wireless
• 802.11 a/b/g/n
• 2x2 antenna
• Wireless 2.4 GHz and 5 GHz Certified
• WPS Certified
!LAN Interfaces
• Two 10/100/1000
!Physical Specifications
LED Indicators
• 1 Power
• 2 Wireless
• 1 Coax (not in use for Telus installations)
18
Specifications
• 2 Ethernet
• 1 WPS Button and LED
!
External Connectors
• 2 RJ-45
• 1 Coax F Connector (not used for Telus installations)
• 1 DC Power Input
• 1 Factory Default Reset Button
!
Hardware
• FlashRom 16 MB
• SDRAM: 64 MB
!!
Power Requirements
• Supply Voltage Range: 100VAC - 240 VAC (50/60 Hz)
• Power Consumption: Less than 7.2W +/- 5%
• Maximum Current: 1.5A
!
19
Wireless Network Extender
Power
External, 5V DC, 2A
Regulatory
FCC Part 15 & IC ICES-003 Class B
FCC Part 15C & IC RSS210
UL 60065
!
Environmental
Operating temperature - 0º C to 40º C (32ºF to 104ºF)
Storage temperature - 0ºC to 70ºC (32ºF to 158ºF)
Operating humidity - 10% to 85% non-condensing
Storage humidity - 5% to 90% non-condensing
Note: Specifications are subject to change without notice.
!
20
Notices
Warranty
This product has a one-year Limited Hardware Warranty and 90-day free
software updates from date of purchase.
Local Law
This Limited Warranty Statement gives the customer specific legal rights.
The customer may also have other rights which vary from state to state in
the United States, from province to province in Canada, and from
country to country elsewhere in the world.
To the extent that this Limited Warranty Statement is inconsistent with
local law, this Statement shall be deemed modified to be consistent with
such local law. Under such local law, certain disclaimers and limitations
of this Warranty Statement may not apply to the customer.
Go to http://www.actiontec.com/products/warranty.php for more
information.
GPL Info
For GNU General Public License (GPL) related information, go to http://
opensource.actiontec.com
!
21
ScreenBeam Pro Wireless Display Receiver
EU CE Declaration of Conformity
To obtain the complete Declaration of Conformity form in softcopy, go to
the Actiontec Electronics Declarations of Conformity EU/EEA website at
http://international.actiontec.com/support/doc
The symbol below is placed in accordance with the European Union
Directive 2002/96 on the Waste Electrical and Electronic Equipment (the
WEEE Directive). If disposed of within the European Union, this product
should be treated and recycled in accordance with the laws of your
jurisdiction implementing the WEEE Directive.
Technical Support
Go to http://international.actiontec.com/support for product support,
updates, and more information including:
• Firmware updates
• Troubleshooting
• Registration
• FAQs
Technical Support Phone Number
United States: 1-888-436-0657
22


