1
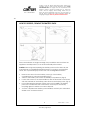
Fax +1 305 430 9692
Copies of the I/B. Please reproduce them without any
changes except under special instruction from Team
International USA. The pages must be reproduced and folded
in order to obtain a booklet A5 (+/- 148.5 mm width x 210 mm
height). When folding, make sure you keep the good
numbering when you turn the pages of the I/B. Don’t change
the page numbering. Keep the language integrity. Print only
what is inside the frame.
Wet and Dry Handheld Vacuum Cleaner
CMN KS 36731
14.4V DC – 100W (Adapter 18V – 150mA)
Front cover page (first page)
Assembly page 1/12
Fax +1 305 430 9692
Copies of the I/B. Please reproduce them without any
changes except under special instruction from Team
International USA. The pages must be reproduced and
folded in order to obtain a booklet A5 (+/- 148.5 mm
width x 210 mm height). When folding, make sure you
keep the good numbering when you turn the pages of
the I/B. Don’t change the page numbering. Keep the
language integrity. Print only what is inside the frame.
IMPORTANT SAFEGUARDS
When using your appliance, basic safety precautions should always be
followed, including the following.
WARNING
: To reduce the risk of fire, electric shock or personal
injury:
1. Read all instructions prior to using
2. Check that your mains voltage corresponds to that stated on the
adapter.
3. Do not use outdoors and do not charge the unit outdoors. Do not
expose to rain. Always store indoors.
4. Locate the adaptor indoors in a cool, dry area, not exposed to the
severe weather, to avoid electrical shock and/or damage.
5. To avoid excessive heat and damage to the unit or batteries, do not
operate the vacuum cleaner while charging the unit.
6. Do not allow to be used as a toy. Close attention is necessary when
used by or near children.
7. Use only as described in this manual. Use only manufacturer's
recommended attachments.
8. Do not use with extension cords.
9. Do not place the nozzle or unit near eyes or ears when operating.
10. For best performance, keep the unit and filters clean and always repair
or replace a damaged filter.
11. Do not use with damaged adapter, cord or plug. If appliance is not
working as it should, has been dropped, damaged, left outdoors, or
dropped into water, return it to the service center.
12. Do not abuse the cord. Never carry the adapter by the cord or yank to
disconnect from an outlet; instead grasp the adapter and pull to
disconnect.
13. Never unplug the recharging unit by pulling on the supply cord.
14. Keep cord away from heated surfaces. Do not pull cord around sharp
edges or corners. Do not close door on the charger cord.
15. Do not handle plug or appliance with wet hands.
16. Unplug the charger from the outlet before any routine cleaning or
maintenance.
17. Use only the charger supplied by the manufacturer to recharge this
appliance.
2
Assembly page 2/12
CMN 36731 - 111215
Fax +1 305 430 9692
Copies of the I/B. Please reproduce them without any
changes except under special instruction from Team
International USA. The pages must be reproduced and
folded in order to obtain a booklet A5 (+/- 148.5 mm
width x 210 mm height). When folding, make sure you
keep the good numbering when you turn the pages of
the I/B. Don’t change the page numbering. Keep the
language integrity. Print only what is inside the frame.
18. Do not put any object into openings. Do not use with any opening
blocked; keep free of dust, lint, hair, and anything that may reduce the
airflow.
19. Keep hair, loose clothing, fingers, and all parts of body away from
openings and moving parts.
20. Do not incinerate or mutilate batteries as they will explode at high
temperature.
21. Leaks from battery cells can occur in case of extreme usage or
temperature conditions. If the liquid gets on the skin wash quickly with
soap and water or neutralizer with a mild acid such as lemon juice or
vinegar. If the liquid gets into the eyes, flush them immediately with
clean water as quickly as possible.
22. Do not pick up anything that is burning or smoking such as cigarettes,
matches or hot materials.
23. Do not use without a filter in place.
24. Do not use to pick up flammable or combustible liquids such as
gasoline, or use in areas where they may present.
25. Do not pick up large or small pieces of sharp-edge debris such as glass.
26. Repair or replacing the battery should be only done by the
manufacturer or its service, to avoid electric shock, fire hazard or
personal injury.
27. Should you notice any kind of damage on the appliance, please
unplug it immediately and contact Customer Service.
28. All repairs should be made by the qualified service indicated by the
Customer Service.
29. Unplug the unit when not in use for a long period of time.
30. Do NOT immerse the appliance, its cord or its adapter, in water, or any
other liquid.
31. This appliance designed for domestic use only, not for a commercial
application.
SAVE THESE INSTRUCTIONS
HOUSEHOLD USE ONLY
3
Assembly page 3/12
CMN KS 36731 - 111215
Fax +1 305 430 9692
Copies of the I/B. Please reproduce them without any
changes except under special instruction from Team
International USA. The pages must be reproduced and
folded in order to obtain a booklet A5 (+/- 148.5 mm
width x 210 mm height). When folding, make sure you
keep the good numbering when you turn the pages of
the I/B. Don’t change the page numbering. Keep the
language integrity. Print only what is inside the frame.
PART DESCRIPTION
(10) Charging base/socket
(11) Adapter
(12) Charging pin
(13) Wet nozzle
(14) Crevice tool
(15) Screw, washer and anchors
(16) Long tube
on wall-mount bracket
(17) Wall mount screws (not shown)
(1) Handle
(2) Battery compartment
(3) On/off switch (0: Off; 1: On)
(4) Lighted charging indicator
(5) Dust compartment release button
(6) Filter
(7) Filter bracket
(8) Dust compartment
(9) Battery compartment cover
4
Assembly page 4/12
CMN KS 36731 - 111215
Fax +1 305 430 9692
Copies of the I/B. Please reproduce them without any
changes except under special instruction from Team
International USA. The pages must be reproduced and
folded in order to obtain a booklet A5 (+/- 148.5 mm
width x 210 mm height). When folding, make sure you
keep the good numbering when you turn the pages of
the I/B. Don’t change the page numbering. Keep the
language integrity. Print only what is inside the frame.
PRODUCT DESCRIPTION
•
•
•
•
This unit is equipped with a 14.4V battery pack (12 rechargeable
batteries of 1.2V, Ni-Mh type, 1200mA).
This unit is equipped with an overcharge protection circuit, that protects
the battery pack of discharging completely or from overcharging
The adapter supplied is rated 18V, 150mA. Only use with the adapter
supplied.
This unit is suitable for wet and dry use (you can vacuum dust, debris or
liquids with it)
CHARGING THE VACUUM CLEANER
•
•
•
•
Place the vacuum cleaner on the charging base (10)
Ensure that the socket on the base fits correctly around the charging pin
(12).
Plug the adapter (11) into the wall socket. The charge indicator (4) on
the unit lights up.
The required charging time for this appliance is 14 hours when batteries
are fully depleted or for the first use.
HOW TO MOUNT THE CHARGING BASE
Your vacuum cleaner comes with a charging socket (10), where to place
the unit for it to recharge, and which holds the nozzles. A special bracket is
also included, to hold the long tubes (16) (Fig 1).
•
•
To mount the bracket, place it against the wall in the desired position,
and then trace the mounting holes of the bracket, by using a sharp
pencil, on the wall or the mounting surface. Make sure the wall bracket
is positioned so that the tubes can hang vertically (the 2 marks shall be
drawn along a horizontal line).
Drill a hole at each of the marked positions, with a diameter adapted to
the anchors and screws used. Insert an anchor into each hole.
Note: please make sure to use anchors adapted to the wall you are
mounting the bracket onto. The anchors supplied may not be adapted
to the wall material you are mounting the bracket onto.
•
Place the bracket (16) at the back of the charging socket (10), by
aligning and inserting the pins on the bracket into the back of the
charging socket. Drive one screw into each anchor, leaving the end of
the crew exposed (do not drive the screw all the way into the anchor)
5
Assembly page 5/12
CMN KS 36731 - 111215
Fax +1 305 430 9692
Copies of the I/B. Please reproduce them without any
changes except under special instruction from Team
International USA. The pages must be reproduced and
folded in order to obtain a booklet A5 (+/- 148.5 mm
width x 210 mm height). When folding, make sure you
keep the good numbering when you turn the pages of
the I/B. Don’t change the page numbering. Keep the
language integrity. Print only what is inside the frame.
•
•
Place the bracket and socket assembly on the exposed portion of the
screw, and then slide the assembly downward to let the screw go into
the slot.
Tighten both screws (but not too much) to secure the assembly in place.
HOW TO USE YOUR VACUUM CLEANER
•
•
•
•
•
•
•
Push the On/off switch (3) forward to start vacuuming. The vacuum
cleaner will pick up dirt from any surface.
If you find the suction power is becoming weak or if appliance stops,
then you need to recharge the unit again.
For vacuuming dirt or dust from small gaps/cracks or other places
difficult to reach, it is recommended to use the crevice tool (14) for best
results. Just insert the crevice tool in front of the dust compartment (8).
For vacuuming liquids from a smooth floor, it is best to use the wet nozzle
(liquid scraper) accessory (13). Just insert the nozzle in front of the dust
compartment (8). Make sure the dust compartment is empty prior to
vacuuming liquids.
Verify regularly the dust level by holding the appliance vertically, the
nozzle towards the ground. Make sure to empty the dust compartment
before dust and debris reach the maximum level indicated.
Use with the long Tube: put the two parts together and attach the long
tube to the vacuum cleaner. Use the long tube for difficult to reach
areas like an air conditioner (Fig. 2)
Please empty the dust compartment after each use. For this, detach the
dust compartment (8) from the main housing, by pressing the release
button (5), and remove the filter (6) and filter bracket (7) from the dust
compartment. Dry the compartment and the filter thoroughly before
reassembling the unit. See below for complete details.
6
Assembly page 6/12
CMN KS 36731 - 111215
Fax +1 305 430 9692
Copies of the I/B. Please reproduce them without any
changes except under special instruction from Team
International USA. The pages must be reproduced and
folded in order to obtain a booklet A5 (+/- 148.5 mm
width x 210 mm height). When folding, make sure you
keep the good numbering when you turn the pages of
the I/B. Don’t change the page numbering. Keep the
language integrity. Print only what is inside the frame.
Caution:
• Do NOT pick up anything that is burning or smoking such as cigarettes,
matches or hot materials.
• Do NOT use without a filter in place.
• Do NOT use to pick up flammable or combustible liquids such as
gasoline, or use in areas where they may present.
• Do NOT pick up large or small pieces of sharp-edge debris such as glass.
HOW TO EMPTY YOUR VACUUM CLEANER
•
•
•
•
•
•
•
Always switch off the unit before opening the vacuum cleaner.
Press the release button (5) down and detach the dust compartment.
(Fig.3)
Remove the filter bracket from the dust compartment and remove the
filter from the filter bracket. Empty the container (Fig. 4, 5, 6)
Brush away any dirt and dust from the filter. A damp cloth can be used
to clean inside the dust compartment.
To clean the filter more thoroughly, rinse it with cold or lukewarm water.
Caution! The filter should be dry, before replacing it into the dust
compartment.
Ensure the filter is correctly fitted into the bracket before replacing into
the dust compartment.
Maximum performance will only be reached with a clean filter and
empty dust compartment.
Caution: Do NOT immerse the appliance, its cord or its adapter, in
water, or any other liquid.
7
Assembly page 7/12
CMN KS 36731 - 111215
Fax +1 305 430 9692
Copies of the I/B. Please reproduce them without any
changes except under special instruction from Team
International USA. The pages must be reproduced and
folded in order to obtain a booklet A5 (+/- 148.5 mm
width x 210 mm height). When folding, make sure you
keep the good numbering when you turn the pages of
the I/B. Don’t change the page numbering. Keep the
language integrity. Print only what is inside the frame.
HOW TO DISPOSE / REMOVE THE BATTERY PACK
When the batteries no longer recharge, they should be removed from the
appliance and disposed of, in an environmentally safe manner.
Caution: Removing and replacing the battery pack must be done by the
manufacturer or a qualified electrician/service, in order to avoid electric
shock, fire or personal injury! Do NOT use non-rechargeable batteries.
•
•
•
•
•
Remove the screw from the battery cover (9) of the battery
compartment (2), using a screwdriver (Fig 7).
Take out the battery cover from the battery compartment. (Fig. 8)
Loosen the screws on the terminal block, with the lead wires connected
with the terminals of the battery pack. Remove the battery pack. (Fig. 9)
Do not discard with domestic waste; when put in landfills, the battery
pack can contaminate the environment. Consult your community
recycling agent for advice on correct disposal.
To have a replacement battery pack installed, contact your authorized
dealer or the Customer Service.
8
Assembly page 8/12
CMN KS 36731 - 111215
Fax +1 305 430 9692
Copies of the I/B. Please reproduce them without any
changes except under special instruction from Team
International USA. The pages must be reproduced and
folded in order to obtain a booklet A5 (+/- 148.5 mm
width x 210 mm height). When folding, make sure you
keep the good numbering when you turn the pages of
the I/B. Don’t change the page numbering. Keep the
language integrity. Print only what is inside the frame.
WARRANTY
We suggest that you complete and return the enclosed Product
Registration Card promptly to facilitate verification of the date of
original purchase. However, return of the Product Registration Card is
not a condition of these warranties. You can also fill this warranty
card online, at the following address: www.KALORIK.com
This CAIMAN product is warranted in the U.S.A. for 1 year from the
date of purchase against defects in material and workmanship. This
warranty is not transferable. Keep the original sales receipt. Proof of
purchase is required to obtain warranty performance.
During this period, the CAIMAN product that, upon inspection by
CAIMAN is proved defective, will be repaired or replaced, at
Caiman’s option, without charge to the customer. If a replacement
product is sent, it will carry the remaining warranty of the original
product.
This warranty does not apply to any defect arising from a buyer's or
user's misuse of the product, negligence, failure to follow CAIMAN
instructions noted in the user’s manual, use on current or voltage
other than that stamped on the product, wear and tear, alteration
or repair not authorized by CAIMAN, or use for commercial purposes.
There is no warranty for glass parts, glass containers, filter basket,
blades and agitators, and accessories in general. There is also no
warranty for parts lost by the user.
ANY WARRANTY OF MERCHANTABILITY OR FITNESS WITH RESPECT TO
THIS PRODUCT IS ALSO LIMITED TO THE ONE YEAR LIMITED WARRANTY
PERIOD.
Some states do not allow limitation on how long an implied warranty
lasts or do not allow the exclusion of incidental or consequential
damages, so the above limitations may not apply to you. This
warranty gives you specific legal rights, and you may also have other
rights which vary from state to state.
9
Assembly page 9/12
CMN KS 36731 - 111215
Fax +1 305 430 9692
Copies of the I/B. Please reproduce them without any
changes except under special instruction from Team
International USA. The pages must be reproduced and
folded in order to obtain a booklet A5 (+/- 148.5 mm
width x 210 mm height). When folding, make sure you
keep the good numbering when you turn the pages of
the I/B. Don’t change the page numbering. Keep the
language integrity. Print only what is inside the frame.
If the appliance should become defective within the warranty
period and more than 30 days after date of purchase, do not return
the appliance to the store: often, our Consumer Service
Representatives can help solve the problem without having the
product serviced. If servicing is needed, a Representative can
confirm whether the product is under warranty and direct you to the
nearest service location.
If this is the case, bring the product, or send it, postage prepaid by
the user (all Kalorik customers are responsible for the initial shipment
back to the warranty center), along with proof of purchase and
indicating a return authorization number given by our Consumer
Service Representatives, to the authorized CAIMAN Service Center
(please visit our website at www.KALORIK.com or call our Customer
Service Department for the address of our authorized CAIMAN
Service Center).
If you send the product, please include a letter explaining the nature
of the claimed defect.
If you have additional questions, please call our Consumer Service
Department (please see below for complete contact information),
Monday through Friday from 9:00am - 6:00pm (EST). Please note
hours are subject to change.
If you would like to write, please send your letter to:
Caiman Consumer Service Department
Team International Group of America Inc.
1400 N.W 159th Street, Suite 102
Miami Gardens, FL 33169 USA
Or call:
Toll Free: +1 888-521-TEAM / +1 888-KALORIK
Only letters can be accepted at this address above. Shipments and
packages that do not have a return authorization number will be
refused.
10
Assembly page 10/12
CMN KS 36731 - 111215
Fax +1 305 430 9692
Copies of the I/B. Please reproduce them without any
changes except under special instruction from Team
International USA. The pages must be reproduced and
folded in order to obtain a booklet A5 (+/- 148.5 mm
width x 210 mm height). When folding, make sure you
keep the good numbering when you turn the pages of
the I/B. Don’t change the page numbering. Keep the
language integrity. Print only what is inside the frame.
11
Assembly page 11/12
CMN KS 36731 - 111215
Fax +1 305 430 9692
Copies of the I/B. Please reproduce them without any
changes except under special instruction from Team
International USA. The pages must be reproduced and
folded in order to obtain a booklet A5 (+/- 148.5 mm
width x 210 mm height). When folding, make sure you
keep the good numbering when you turn the pages of
the I/B. Don’t change the page numbering. Keep the
language integrity. Print only what is inside the frame.
I/B Version
111215
www.KALORIK.com
Back cover page (last page)
Assembly page 12/12