1
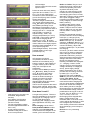
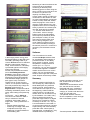
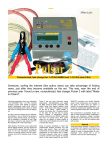
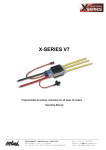
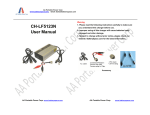
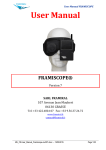
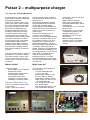
Pulsar 2 – multipurpose charger
Test 9/2006 RC - Przegląd Modelarski
After few emails and phone calls I've
got Pulsar 2 in my hands. I need to
say, that I've Pulsar 1 (which I like
very much) since few years. This
made me more curious, what Pulsar
2 will show.
There's a sticker saying „version 2”.
Except that detail, both Pulsar's are
identical (Pic.1)
After careful inspection I've found
few other differences like different
cover finish, smoother edges,
thicker cables and little bit different
clamps with small cutout in the front
making them easier to put on the
power supply.
Pulsar 2 isn't a large device. It
measures 130x120x60mm
(5.1x4.7x2.3 inch) and weights 890g
(ab. 2 lbs). It makes it easier to put
into modeler's tool box. Top cover
contains 2 row, 16 position LCD
display with enlightens, 4 buttons
below and battery connection socket
on the right. On the left side, an
RS232, cooling fan and temperature
sensor sockets are installed (Pic. 2).
On the right side (Pic. 3) you'll find a
clean, laser cut internal fan exit.
Inside of charger looks very
professional too (Pic. 4): Clean
components placement, large heat
sink, big, step up-step down voltage
converter coil.
What's inside?
What it can do?
- Pulsar 2 charger
− RS232 cable for PC connection
− printed user manual
− CD with software and colorful,
multilanguage manuals
− temperature sensor (with
neodymium magnet to make
installation on the pack easier)
It can do a lot. A list of features is
very impressive:
− 1 to 32 Ni-Cd/Ni-MH cells
− 1 to 12 Li-xxx cells
− power supply voltage 10-16V
DC (min. 30Ah car battery 70Ah recommended or mains
power supply 14V with min. 5A
– recommended 30A)
− max. charging current: 9.9A
− max. power: 250W
− max. discharging current: 9.9A
(up to 250W when Reverse
On the beginning, there were nickel
and cadmium. After that, NiMH and
other types became real.
Today, a lot of many battery types
exist on the market. How to charge
them? For most home applications,
any ordinary charger can be used.
What about so specialized and
demanding applications (like RC
modeling)? The choice isn't easy.
To meet modeler's needs, many
manufacturers have created their
multi purpose devices. Mostly, these
were from the Western countries.
Not so long time ago, a few Polish
manufacturers introduced their
chargers. One of them is Pulsar 2
manufactured by Elprog Company
from Rzeszów. Company founder
and chargers designer is Sławomir
Krymski.
−
−
−
−
−
mode used – return of energy to
the car battery)
Reflex mode for charging
Inflex mode (charging will be
interrupted before battery will be
overcharged)
Fast mode (for Li-Ion, Li-Pol and
Pb up to 9.9A
for Pb, RAM, Li-Ion, Li-Pol and
Li-Manganoxid (tadiran) cells
charging voltage can be
adjusted down ab. 0.2V with
10mV steps
battery's internal resistance
measuring (Ri) for comparison
purposes (up to 4A of control
current)
Pic. 2
First look on Pulsar 2 and.... hey,
come on! I've had to receive Pulsar
2, not Pulsar 1...
Luckily, it was just an illusion.
Pic. 1
Pic. 4
Pic. 3
−
−
Pic. 5
Pic. 6
Pic. 7
Pic. 8
LCD backlight
internal cooling fan with smooth
speed control
Pulsar can work with many battery
types like: Ni-Cd, Ni-MH, Li-Ion, LiPol, Li-Ta, Pb-bar, RAM (at the
moment this review was written, I've
got info from Elprog, that Li-FePO4
support was added).
Just after charger is switched on,
you can set general parameters
using „M” button (Pic.5) like sound
alert, Tmax (controlling of max.
temperature of the battery), T-on –
max. battery temperature for start of
charging (30-45°C – charger will
wait for battery cool down to
adjusted temp.), T-off – stop
charging temperature (50 - 65°C)
and V-off – power supply voltage
below which charging will be
stopped (10-11.5V). „E” button
starts a work modes, +/- buttons are
used to select one of eight program
memories (freely adjustable) or one
of two special programs
(Format/Regeneration). There's also
possible display of last, eight
processes (Pic. 6).
User manual
Pic. 9
Pic.10
Pic. 11
−
−
−
−
−
cells format up to 4A (with user
switchable „Regeneration”
function)
Car's battery overcharging
protection (when Reverse
function is used)
Too low car's battery voltage
threshold (adjusted between 10
and 11.5V)
wrong polarity protection
external cooling fan socket is
short circuit protected
At first glance it looks bit
complicated, because so many
features are controlled by only 4
buttons. However, after reading of
12 page manual you'll be able to
freely use of all options and
parameters.
In short: Choose what you want to
do („M” button), how you want to
do it („E” button) and change
values using +/- buttons. The
manual is divided according to
charger's functions (charging,
discharging etc.). There are
diagrams describing all functions
and possible parameters.
There's a nice surprise at the end of
this tiny book: sample, step by step
description of programming process.
How does it work?
Let's get to the practice. There are
few tools available for the user like:
charging Ni-Xx, charging Li-Xx, LiTa, Pb, RAM, discharging,
discharging and charging, format
(with regeneration function), cells
test.
Ni-Xx charging can be done in
Delta peak/Inflex/Reflex modes.
Although you'll find Delta peak
mode in almost all chargers on the
market, you'll not find the last two:
Reflex and Inflex. They're not so
frequently found in chargers (the
second one probably isn't used
anywhere else at all). Inflex
charging is a fast charging mode,
however, there's no possibility of
overcharging (as it exist in normal,
ΔP mode). Charging will be stopped
at the point of biggest voltage
increment (just before battery pack
is fully charged). It avoids too high
battery warming.
In Reflex mode, there's a short
discharging (balancing) impulse
added. It helps to avoid so called
memory effect (you can say after
manual „Reflex – always gives a
profits”).
Here's how the sample charging
process looks like: Choose charging
mode (Pic.7), cell type (Pic.8),
switch Inflex mode on (Pic.9), add
Reflex mode (Pic.10), as manual
suggests, set Delta to low (Pic. 11)
and charging current (Pic.12). Now,
connect the battery, adjust cells
number if needed (Pic. 13) and start
the charging.
Of course, you don't need to do that
every time you want to charge the
same cells type or with the same
parameters. Next time, you'll just
select that program with all previous
settings and connect the battery.
During the charging process,
following information are displayed:
„C” - charging, number of cells,
charging current, actual charging
voltage, raise/drop of voltage (an
arrow), power supply voltage,
battery temperature (Pic.14) and
process time and energy received
by battery (Pic. 15). For the
remaining cell types (Li-Xx, Pb,
RAM etc.) we can choose following
model: Fast, Reflex, V-end.
The Fast mode is a pulse charge
mode which makes charging time
over two times shorter. V-end mode
let the user set the final voltage to
which battery has to be charged.
Discharging let's you discharge cells
to their threshold voltage, which is
predefined for each type of cell: NiXx 0.9V, Pb 1.8V, RAM 1V, Li-Ion
2.7V, Li-Pol 3V, Li-Ta 2.4V.
Discharging will be stopped after
battery voltage drops to the
threshold value. In the Auto mode,
current will be decreased by ¼ each
time voltage drops to threshold
value. Entire process will be finished
when discharging current drops to
200mA.
Reverse is a very interesting
function
Pic. 12
Pic. 13
Pic. 14
Measuring of internal resistance has
to be meant as a comparison
measuring of different packs.
Measuring gas to be done using the
same cord and current has to be set
to close of 1C (where C is a
capacity of a battery pack).
In each mode, charger is waiting for
confirmation of the number of cells
(to correct automatically recognized
number of cells). After that, Pulsar
starts the program. In the case of
charging, Pulsar doesn't use, max,
adjusted current, but is increasing it
slowly in period of one minute (user
can skip „slow start” by pressing
„+”). Another useful function is
„forced start”. It let's to charge
battery packs in the transmitters,
where input is protected by diode
(like Graupner or Hitec), so user
don't need to remove pack each
time it's being charged. In this
mode, Reflex is switched off and
max. recommended (according to
the manual) current is 1.2A which is
caused by wire thickness in these
packs.
Pic. 16
Pic. 17
Pic.18
Software
Pic. 15
in discharging mode. Energy from
discharged battery is directed to the
car battery powering Pulsar 2 (of
course, Reverse has to be switched
off when mains power supply is
used). At the same time, car battery
is protected against overcharging
when using Reverse.
Another very essential and useful
tool is Format/Regeneration.
Format is a loop of few cycles (1 to
8) of discharge/charge processes.
Discharging is done automatically
until threshold voltage (proper for
each type of cell) is reached.
Thanks to that, we don't have to
„watch” on new packs to discharge
them fully and then fully charge etc.
Pulsar 2 will do that for us.
Regeneration is a special mode for
formatting used battery backs. It can
repair „bad” battery pack (balancing
etc.).
You'll find it ... only in Pulsar 2!
The last tool of Pulsar2 is Test. It
lets you measure of internal
resistance of the battery pack or
single cells. Test is performed in 3
stages:
- precise voltage measuring
- measuring of voltage under load
of adjusted current (for 10s)
- measuring of internal resistance
of the battery pack
The CD mentioned on earlier,
contains PCGraph software used
for visualization and managing of
processes results. It can clearly
show graphs of voltage, current,
temperature, voltage increase in
mV/min (Pic. 16 - 18). For
comparison, you can put few graphs
on the screen together. In addition:
results can be shown on a column
graphs. You can change display
mode to show single cell or full pack
result. Graphs can be freely scaled.
Summary
After few months using Pulsar 2 I
can honestly say, that except few
small details (like non protected
cooling cut-outs, which makes it
more difficult to use open air, or at
the beginning, a little bit difficult
usage) Pulsar 2 is a really great
device, which can be used not only
by the modelers. I've used it many
times to charge other than RC
packs like single cells for my digital
camera (I've „invented” a special
accessory to do that – Pic. 19), but
is recommended to not exceed 1A
of current when using that. I've been
experimenting with unusual battery
packs like video camera pack (it
required some „combinations”). Very
valuable feature is possibility of
Pic. 19
Pic. 20
firmware upgrade. However, to do
that, Pulsar 2 has to be send to
manufacturer.
Additional recommendation can be
fact, that this device has been
rewarded with many, prestigious
awards like „Golden Euro” in the
category of „Product with the future
2006” (Pic.20) and have
„conquested” Western markets,
where competition is much stronger
than on domestic ground.
Text and pictures: MAREK SZULEN