1
Physicians’ Office Computer® is the registered trademark of Professional Systems Corporation.
©Professional Systems Corporation
All Rights Reserved
Printed in U.S.A.
Professional Systems Corporation • 1250 233rd Street, Suite 116, Carson, CA 90745
Sales (800) 782-5214 • Support & Business (310) 233-7370 • Fax (310) 233-7373
www/pocusa.com
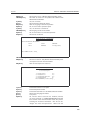
TABLE OF CONTENTS
Section A - Introduction
License Agreement ............................................ 5
Pre-Installation ................................................... 7
Installation ......................................................... 8
Recent Enhancements ....................................... 10
Support Policy ................................................... 17
Introduction to POC ........................................... 19
System Conventions........................................... 22
POC Function Keys ........................................... 23
Data Entry Conventions ..................................... 26
Don’ts - The Important Ones ............................. 33
Converting to POC............................................. 34
Section B - Using POC
Starting POC ...................................................... 36
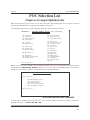
POC Selection List - Alphabetical Order
Accounts Receivable .......................................... 40
Add Charges .................................................. 45
Alphabetize Patients........................................... 53
Appointment Schedules ..................................... 54
Batch Add Charges ............................................ 56
Bill Insurance ..................................................... 57
Billings/Collections Report ................................ 67
Clinical Data ...................................................... 70
Cross Posting Report.......................................... 71
Data Search ........................................................ 72
Doctor Information ............................................ 77
Drug List ............................................................ 79
Encounter Forms ................................................ 80
First Report of Work Injury ............................... 82
ICD Code List .................................................... 83
Insurance Company List .................................... 84
Mailing Labels ................................................... 85
New Patients ...................................................... 86
Patient Information ............................................ 93
Patient Ledgers .................................................. 96
Patient Statements .............................................. 100
Post Payments .................................................... 105
Procedure Code List ........................................... 112
Production Report .............................................. 115
Provider List ...................................................... 118
Recall Notices .................................................... 119
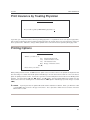
Referring Physicians Report............................... 120
Retired Ledgers .................................................. 121
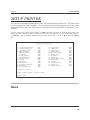
Set Up Printer .................................................... 122
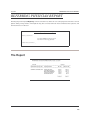
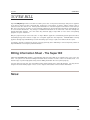
Super Bill ........................................................... 123
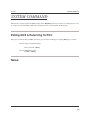
System Command .............................................. 124
Transaction Report ............................................. 125
Zip Code List ..................................................... 128
Section C - Custom Reports
Preface ............................................................. 130
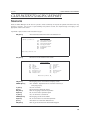
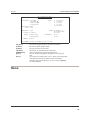
Cash Patients/Aging Report ............................. 131
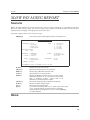
Slow Pay Aging Report.................................... 133
Aging Report/Past /Due Notices ...................... 134
Under $1/Over 90 Days Report ........................ 138
$0 Balance/No Visits For 4 Years .................... 140
Over 2 Years Aging Report.............................. 142
Claim Deadline/Rebilling Report ..................... 144
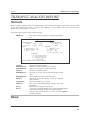
Therapist Analysis Report ................................ 146
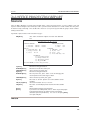
2nd Office Production Report .......................... 147
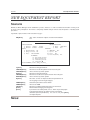
New Equipment Report .................................... 148
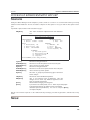
Insurance Reimbursement Report .................... 149
Referred Patients Report .................................. 150
Bi-Annual Checkup Report/Recalls ................. 151
OB-GYN — Delivery/Admission Report ........ 153
New Drug/Cure Report/Labels......................... 156
Birthday Report/Labels .................................... 158
100th Birthday Report...................................... 160
Section D - Appendix
System Requirements ......................................... 162
System Configuration ........................................ 164
Microsoft Windows Installation ......................... 165
Backing Up ........................................................ 168
Housecleaning.................................................... 170
Making Reports Balance .................................... 172
Troubleshooting ................................................. 173
PocDoc .............................................................. 176
Insurance Form Generator.................................. 215
Standard Insurance Form ................................... 222
Medicare HCFA 1500 Form .............................. 227
Section E - Index
Index .................................................................. 230
Section A
Introduction
Section A
LICENSE AGREEMENT
LICENSE AGREEMENT
This legal document is an agreement between you, the end user, (“LICENSEE”), and Professional Systems
Corporation, (“PSC”), BY OPENING THE SEALED DISK PACKAGE, YOU ARE AGREEING TO BECOME BOUND
BY THE TERMS OF THIS AGREEMENT, WHICH INCLUDES THE SOFTWARE LICENSE AND THE SOFTWARE
WARRANTY (collectively the “AGREEMENT”).
THIS AGREEMENT CONSTITUTES THE COMPLETE
AGREEMENT BETWEEN YOU AND PSC.
PSC SOFTWARE LICENSE
1. GRANT OF LICENSE. In consideration of payment of the License fee, which is a part of the price you
paid for this product, PSC, as Licensor, grants to you, the LICENSEE, a nonexclusive right to use and display one
(1) copy of this PSC software program (hereinafter the “SOFTWARE”) on a single COMPUTER (i.e., with a single
CPU) at a single location. If the single COMPUTER on which you use the SOFTWARE is a multi-user system with
a single computer file-sever attached to a Local Area Network, (“LAN”), the license covers all users on that single
LAN. LICENSEE shall allow POC software to only reside on a single central processing unit or a single LAN. PSC
reserves all rights not expressly granted to LICENSEE.
2. OWNERSHIP OF SOFTWARE. As the LICENSEE, you own the magnetic or other physical media on
which the SOFTWARE is originally or subsequently recorded or fixed, but PSC retains title and ownership of the
SOFTWARE recorded on the original disk copy(ies) and all subsequent copies of the SOFTWARE, regardless of
the form or media in or on which the original and other copies may exist. This License is not a sale of the original
SOFTWARE or any copy.
3. COPY RESTRICTIONS. This SOFTWARE and the accompanying written material are copyrighted.
Unauthorized copying of the SOFTWARE, including SOFTWARE that has been modified, merged, or included with
other software, or of the written materials is expressly forbidden. You may be held legally responsible for any
copyright infringement that is caused or encouraged by your failure to abide by the terms of this License. Subject to
these restrictions, and if the SOFTWARE is not copy-protected, you may make copies of the SOFTWARE solely for
backup purposes in accordance with PSC's recommended backup procedures. You must reproduce and include
the copyright notice on the backup copy.
4. USE RESTRICTIONS. As the LICENSEE, you may physically transfer the SOFTWARE from one
COMPUTER to another provided that the SOFTWARE is used and resides on only one COMPUTER at a time. You
may not distribute copies of the SOFTWARE or accompanying written materials to others. You may not modify,
adapt, translate, reverse engineer, decompile, disassemble, or create derivative works based on the SOFTWARE.
You may not modify, adapt, translate, or create derivative works based on the written materials without the prior
written consent of PSC.
5. TRANSFER RESTRICTIONS. This SOFTWARE is licensed only to you, the LICENSEE, and may not
be transferred to anyone without the prior written consent and payment of LICENSE TRANSFER FEES and
UPDATE CHARGES, if any, to PSC. Any authorized transferee of the SOFTWARE shall be bound by the terms
and conditions of this Agreement. In no event may you transfer, assign, rent lease, sell, or otherwise dispose of the
SOFTWARE on a temporary or permanent basis except as expressly provided herein.
6. TERMINATION. This License is effective until terminated. This License will terminate automatically
without notice from PSC if you fail to comply with any provision of this License AGREEMENT. Upon termination you
shall destroy the written materials and all copies of the SOFTWARE, including modified copies, if any, without
expectation of any refund.
7. UPDATE POLICY. PSC may create, from time to time, updated versions of the SOFTWARE. At its
option, PSC will make such updates available to the LICENSEE and transferees who have a PSC software lease or
maintenance agreement or paid the update fee.
8. Miscellaneous. This AGREEMENT is governed by the laws of the State of California.
5
Section A
LICENSE AGREEMENT
LIMITED WARRANTY
PSC WARRANTS THAT NEW SOFTWARE PURCHASES SHALL BE FREE OF PROGRAM PROBLEMS
AND/OR ERRORS FOR A PERIOD OF NINETY (90) DAYS AFTER DATE OF DELIVERY. PSC WARRANTS
THAT UPDATE SOFTWARE PURCHASES SHALL BE FREE OF PROGRAM PROBLEMS AND/OR ERRORS
FOR A PERIOD OF THIRTY (30) DAYS AFTER DATE OF DELIVERY. At LICENSEE’S request, PSC shall
investigate suspected problems and will, if necessary, design, code, test, document, and deliver promptly any
amendments or alterations to the delivered items that may be required to correct errors which were present at the
time of delivery and which resulted in failure to perform in accordance with SOFTWARE specifications. This
warranty shall be contingent upon LICENSEE’s full payment for SOFTWARE. In order for this warranty to remain
active throughout the warranty period, the SOFTWARE must not include any changes made by anyone other than
an authorized representative of PSC, since changes are not part of the warranty provision. However, if PSC
determines that the reported problem is not an error as defined above, or may have resulted from improper use of
the SOFTWARE, Equipment or Network, then LICENSEE agrees to reimburse PSC for all labor time and materials
in accordance with the PSC’s then currently applicable rates.
PSC warrants to the original LICENSEE that the disk(s) on which the SOFTWARE is recorded is free from
defects in materials and workmanship under normal use and service for a period of ninety (90) days from the date of
delivery as evidenced by a copy of the receipt. Further, PSC hereby limits the duration of any implied warranty(ies)
on the disk to the respective periods stated above. Some states do not allow limitations on duration of an implied
warranty, so the above limitation may not apply to you.
PSC’s entire liability and your exclusive remedy as to the SOFTWARE and/or disk(s) shall be, at PSC’s
option, either (a) return of the purchase price or (b) replacement of the SOFTWARE and/or disk that does not meet
PSC’s Limited Warranty and which is returned to PSC with a copy of the Payment Check.
If failure of the
SOFTWARE and/or disk has resulted from accident, abuse, or misapplication, PSC shall have no responsibility to
replace the SOFTWARE and/or disk or refund the purchase price. Any replacement disk will be warranted for the
remainder of the original warranty period or thirty (30) days, which ever is longer.
THE ABOVE ARE THE ONLY WARRANTIES OF ANY KIND, EITHER EXPRESSED OR IMPLIED,
INCLUDING BUT NOT LIMITED TO THE IMPLIED WARRANTIES OF MERCHANTABILITY AND FITNESS FOR A
PARTICULAR PURPOSE, THAT ARE MADE BY PSC ON THIS PSC PRODUCT. NO ORAL OR WRITTEN
INFORMATION OR ADVICE GIVEN BY PSC, ITS DEALER, DISTRIBUTORS, AGENTS, OR EMPLOYEES SHALL
CREATE A WARRANTY OR IN ANY WAY INCREASE THE SCOPE OF THIS WARRANTY, AND YOU MAY NOT
RELY ON ANY SUCH INFORMATION OR ADVICE. THIS WARRANTY GIVES YOU SPECIFIC LEGAL RIGHTS.
YOU MAY HAVE OTHER RIGHTS, WHICH VARY FROM STATE TO STATE.
NEITHER PSC NOR ANYONE ELSE WHO HAS BEEN INVOLVED IN THE CREATION, PRODUCTION,
OR DELIVERY OF THIS PRODUCT SHALL BE LIABLE FOR ANY DIRECT, INDIRECT, CONSEQUENTIAL, OR
INCIDENTAL DAMAGES (INCLUDING DAMAGES FOR LOSS OF BUSINESS PROFITS, BUSINESS
INTERRUPTION, LOSS OF BUSINESS INFORMATION, AND THE LIKE) ARISING OUT OF THE USE OF OR
INABILITY TO USE SUCH PRODUCT EVEN IF PSC HAS BEEN ADVISED OF THE POSSIBILITY OF SUCH
DAMAGES. BECAUSE SOME STATES DO NOT ALLOW THE EXCLUSION OR LIMITATION OF LIABILITY FOR
CONSEQUENTIAL OR INCIDENTAL DAMAGES, THE ABOVE LIMITATION MAY NOT APPLY TO YOU.
This Disclaimer of Warranty and Limited Warranty is governed by the laws of the State of California.
U.S. GOVERNMENT RESTRICTED RIGHTS
The SOFTWARE and documentation is provided with RESTRICTED RIGHTS. Use, duplication, or
disclosure is subject to restrictions as set forth in subdivision (b)(3)(ii) of The Rights in Technical Data and
COMPUTER SOFTWARE clause at 252.227-7013. Contractor/manufacturer is: PSC / 1250 E. 223rd Street, #116 /
Carson, CA 90745.
Should you have any questions concerning this Agreement, or if you desire to contact PSC for any reason,
please contact in writing:
PSC Customer Sales and Service / 1250 E. 223rd Street, Suite 116 / Carson, Ca 90745.
6
Section A
PRE-INSTALLATION
PRE-INSTALLATION
STOP!
BEFORE PROCEDING ANY FURTHER, PLEASE READ
ALL INSTALLATION INSTURCTIONS THAT CAME
WITH YOUR SOFTWARE!
The installation instructions and security procedures have been
sent to the registered Licensee of the software. (Doctor #1 as recorded
for your office or, in the case of a billing service, the owner of the billing
service.)
Because of the new security features, and to assure complete
compliance with the new HIPAA regulations, the software should be
installed by your authorized system administrator. Your authorized
system administrator will have been designated, in writing to Professional
Systems Corporation, by the registered Licensee of the software.
If this information is not on file with our office, we may not be able to assist your office
in loading the software until such a time as this information is properly provided. Professional
Systems Corporation has made every effort to put unto place the procedures necessary to
maintain the confidentiality of the system administrator information. We also have established
procedures for the proper handling by our technical support department of system
administration issues. However, Professional Systems Corporation can not be held liable for
any improper handling of the information by the Licensee, or any agent, employee, etc.
employed by the Licensee which may have compromised the security features of the software
or improperly divulged this confidential information.
7
Section A
INSTALLATION
STOP!
INSTALLATION
If you are updating an
existing POC data base,
please read all
installation instructions
that came with your
software!
These instructions are for NEW installations only. Updates to previous versions of POC have their own instructions.
To install your new POC software, place the disk labeled 1 of # , or CD, in the appropriate drive and type:
A:INSTALL [Enter]
or
B:INSTALL [Enter]
or
D:INSTALL [Enter]
(If the floppy drive is A:)
(If the floppy drive is B:)
(If the CD drive is D:)
Follow the instructions in the installation program.
Your password for the Billings/Collections Report: S E C U R I T Y
(UPPER CASE and don’t hit
[Enter].)
Create POC Icon:
1.
2.
3.
4.
5.
6.
7.
8.
9.
10.
11.
12.
13.
14.
15.
16.
17.
18.
19.
20.
21.
On your Windows Desktop, point to where you want the POC Icon to be, then right-click once.
Point to NEW, then click on Shortcut.
Location of item: C:\POC\POC.EXE , click Next.
Name for shortcut: POC Click Next.
Choose an Icon: Pick the one you want, then click Finish.
Open POC by clicking on the new POC Icon. DO NOT LOG INTO POC.
Right-click on “POC.EXE” in the Title Bar at the top of the POC window.
Click on Properties.
Click on the Full Screen check box in the Options tab.
Click on the Layout tab.
Change the Screen Buffer Size to: Width 80, Height 25.
Change the Window Size to: Width 80, Height 25.
Click the OK button.
Click on Save Properties for future windows with same title.
Click the OK button.
Press [Enter] to exit out of POC.
Right-click on the new POC Icon.
Click on Properties.
Click on the Screen tab.
Click on the Full Screen check box.
Click the OK button.
8
Section A
INSTALLATION
Billing Services and Multiple Groups
POC is designed to bill for one group of doctors (“group billing,” “bill as a group”) per set of data files. You cannot
use POC to bill a solo practice(s) and a group practice(s) with the same data set, nor should you. All financially
independent practices MUST be given their own data set in different subdirectories. This prevents the possibility of
financial transactions from inadvertently being posted to the wrong practice.
POC has available, at minimal cost, a set of batch files designed to create new doctor/group data directories, copy
master list files to the new directories, and simplify user transition from one practice to another. The setup
procedure for multiple data sets requires the assistance of POC or your dealer. You MUST call to receive the latest
configuration instructions. Failure to do so will likely result in crossed financial data.
Please remember, your software license authorizes you “to use and display one (1) copy of this software on a single
COMPUTER at a single location.” You may install as many data directories as you need (at additional expense for
software support to defray the additional support required).
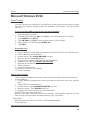
Windows 95/98, NT, 2000, 2003 & XP Installation
Please read the appropriate chapters in Section D, the Appendix.
Notes:
9
Section A
RECENT ENHANCEMENTS
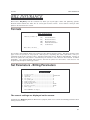
RECENT ENHANCEMENTS
Security Version
•
Security software to enable administrative control over user access. The System Administrator can now
assign user numbers and passwords to each operator, along with controlling their level of access to the
operating of the POC software. This feature is fully HIPAA compliant.
•
Additional security features that will allows a user to place their terminal in a “locked” mode with a simple
key stroke when it is necessary to step away for a few moments. The screen is blanked out until the user
enters their personal password to proceed, thus preventing any confidential information from being seen
by a casual viewer.
System Wide
•
Full field editing capabilities throughout POC. Correct a single character or an entire word without having
to retype an entire line.
•
Search for a patient by their first name, social security number, phone number, Medical Record Number,
Other ID, responsible party(ies) or policy number (s) by hitting the [F4] hot-key.
•
The [F5] key will now show a list of POC System doctors at all prompts that ask for a doctor number.
•
The System’s doctor capacity has been increased from 99 to 999.
•
The [F8] has been activated for the insurance claim editor. This makes claims editing even faster.
•
Defaults are displayed at all prompts. POC will tell you what it will do in advance when you hit the [Enter]
key.
•
Pop-up window lists, the [F5] key, are now sorted alphabetically by their full description.
•
The alpha lookup routine displays patients’ medical record number in addition to their account number,
name and birth date at the “Enter patient name or number” prompt. This lookup routine has been
incorporated throughout POC.
•
User selectable option will delay appending transactions to the master files.
•
The {Esc] key stop-printing feature has been added to Data Search and Production Report.
•
Electronic Claims
•
Re-billing features for Electronic Claims files. Ability to Rebill Medi-Cal type 5 claims electronically.
10
Section A
•
RECENT ENHANCEMENTS
Available for purchase, additional software modules of ECS programs for direct submission to private
carriers who accept the ANSI 4010 A1 format.
Patient Ledgers
•
All new ENHANCED PATIENT LEDGER! Users will now have the ability to call up complete details
pertaining to a particular charge simply by highlighting that charge line in the patient’s ledger. The charge
line is highlighted using the up and down arrow keys, then by pressing the [F9] key the System will
display a window containing: date of charge, procedure code, description and amount of charge; ICD
code(s) pertaining to the charge; detailed breakdown of payment(s) and adjustment(s) by carrier (or other
type of payment) and remaining open balance (if any) of the selected charge; treating physician; location
where procedure was administered; claim number; statement status; aging date of the selected charge,
and if the charge was added as a YNIF (Yes No Insurance Form) charge. (Can return to Patient’s Ledger
by simply pressing [Enter] .)
•
The system will now retain statement and insurance print lines and remarks on the Patient’s Ledger after
Housecleaning if they fall within the user designated retention criteria.
•
The [PgUp], [PgDn], [Home] and [End] keys have been activated in Patient Ledgers.
•
A new Patient Ledger option screen for viewing and printing has been added.
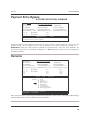
Posting Payments
•
You can now choose whether you want to set the default in Posting Payments to automatically adjust
remaining balance or not.
•
The Check Register now has full editing capabilities. You can view the Register on screen, scroll up and
down, select the appropriate line and edit any of the previously entered information, prior to printing and
clearing the Transaction Report.
.
•
You can now post a co-payment while in Add Charges.
•
Ability to past a “G” option (Unapplied Credit) type payment after posting other types of payments.
•
Compute and display unapplied credit total in Posting Payments.
•
In Posting Payments, date of payment will default to that of the last date of payment entered for the
current patient.
•
Four more payment and adjustment categories will be available to the user. This will provide even more
control and information for payment analysis.
•
New options for the handling of “Unapplied Credit” which allows the user to post payment/credit, with a
user defined description of credit, to a patient’s account without disbursing it until a later date by the user.
•
With the all new unapplied credit feature, the payment(s) or adjustment(s) will appear on the patient’s
ledger and credit will be correctly reflected in the running balance, however it will not close any charge(s)
or get applied directly to any charge(s) until the end user designates the charge(s) to which it gets applied.
11
Section A
RECENT ENHANCEMENTS
At such time as when the user wishes to disburse the unapplied credit, charge(s) is/are selected by line
number as in a “B Option” type of payment. This feature provides many additional advantages and new
variations of controlling the application of credit to an account
•
Ability to enter Remarks directly in Post Payments.
•
Patient Ledger notes are now displayed in Posting Payments.
•
Payment reversals can now be entered from ALL terminals.
•
The “Out of Balance” report doesn’t print if there isn’t a Deposit Slip.
New Patient/Patient Information
•
You can now escape
•
Ability to enter a patient’s name and responsible party’s name as three separate fields. This will prevent
problems that might have previously been encountered in processing ECS billing.
•
Automatic formatting of phone numbers and social security numbers. Data for these fields can be entered
without any spaces or dashes and the System will automatically put the entry in the appropriate format.
•
In insured's information, the System automatically defaults to patient’s last name. This will save
keystrokes by allowing the user to accept the default and go on to the the insured’s first name.
•
An additional address line for the patient in Patient Information and in the Insured’s Information.
•
The full insurance address and contact name has been added to the Patient Information screen. This
makes finding this information much quicker.
•
Both insurance street address and the zip code now show in the [F5] pop-up insurance list. This makes it
much easier to tell which insurance to select when there are several with the same name.
•
A new question appears in the New Patient and Patient Information screens that asks for the other
insurance coverage category when the insurance is Medicare. All possible special codes are shown.
This prevents code selection from being skipped and makes it more accurate. This new question
replaces the old method of placing a special code in the group number.
•
Referring physicians are now entered with their first name, last name, middle initial and degree in
separate fields. This prevents users from inadvertently using the wrong data entry format.
•
Ability to duplicate a patient and his/her associated demographics to a new account number.
•
Each patient can now have up to four insurance companies.
•
The insurance company phone number is now displayed in Patient Information. This feature makes
insurance follow-up much easier.
•
You can now add the referring physician in New Patients and Patient Information.
(New Patient Information) by pressing the
keys simultaneously.
12
Section A
RECENT ENHANCEMENTS
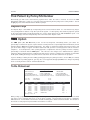
Appointment Scheduler
•
Ability to enter and view additional information, i.e., insurance, DOB, reason for appointment, in
the Appointment Scheduler.
•
Simple keystrokes make it easy to shift the view of the Daily Schedule by day, week or month.
•
All workstations may simultaneously enter appoints.
•
An improved Appointment Scheduler now makes it easier to move from day-to-day, week-to-week, and
month-to-month.
•
The Appointment Scheduler now allows all terminal to simultaneously enter appointments.
•
It is now much easier to book consecutive appointment slots for a patient.
•
If the patient is the insured, the System will also default to the patient’s social security number as the
policy number. This will save hundreds of key strokes plus significantly reduce the possibility of data entry
errors.
•
Displays insurance company address in New Patient screen so you can double check your data entry
before making it permanent.
•
New fields for Emergency Contact and Emergency Contact’s Phone Number providing additionally
valuable and easily accessible information at a glance.
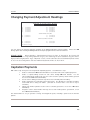
Procedure Codes
•
Ability to change procedure code prices simply by entering the amount of the desired increase as a
percentage. You can do “what if” scenarios and printout a report to review before making the changes
permanent.
ICD Codes
•
Longer description fields for ICD codes giving the user more latitude and flexibility.
Clinical Data
•
Allergies and drug treatments can now be deleted.
Patient Statements
•
Plain Paper Statements has a formatted area for the patient to enter their credit card information including
the authorization of amount to be charged to their credit card.
13
Section A
RECENT ENHANCEMENTS
•
All new Patient Statement feature makes the statement Balance Due properly reflect a true Patient’s
Responsibility portion.
•
A new formula makes the statement Balance Due properly reflect a true Patient’s Responsibility portion.
•
New handling of Finance Charges whereby no finance charge will be added to any charge(s) designated
as pending carrier payment.
•
One-part and plain-paper statements have a new option to print a place on the statement for patients to fill
out their credit card information as a way to make their payment.
•
A new feature in Patient Statements allows for the easy selection of three different statement programs.
Super Bills/Encounter Forms
•
If the user chooses to implement the new “Superbill Mode,” it gives the Superbill program all the
expanded functionality of New Patients, Add Charges and Post Payments.
•
The Encounter Form has a new option that allows the user to not print the patient’s account balance.
Mailing Labels
•
Added
•
New format program removes an unused address line thus avoiding any blank lines on mailing labels.
(Date of Birth) and Primary Doctor name to mailing labels.
Printers
•
Ability to select between multiple local printers from within POC at the Main Selection List.
•
Integrated support for HP LaserJet Series 3, 4 and 5 printers, and HP DeskJet printers. Now it is much
easier to make adjustments to the margin settings for these printers.
Aged Accounts Receivable
•
Print an Aged Accounts Receivable report by insurance company within the AR User Options. Note that
this can also be accomplished in older versions of POC but must be set up within Data Search using the
Set Criteria option.
•
Added Medical Record Number to
•
When selecting the slow pay option of the Aged Accounts Receivable report, the date of service is
used to calculate the aging when the user has selected date of statement for normal aging.
•
Insurance company’s phone number now prints out on the Accounts Receivable Report.
(Accounts Receivable) printout.
14
Section A
RECENT ENHANCEMENTS
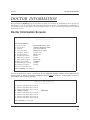
Doctor Information
•
The fields in Doctor Information have been labeled. This replaces the previous letter designation and
makes if easier to identify the proper field(s) for data entry, etc.
•
Prompts for a
•
Pagination of printed Doctor Information has been properly formatted.
•
Contact name, Fax number, and additional address line for referring physician and for facilities.
•
The ability to add four (4) more provider numbers for each doctor.
•
Doctor Information is now available from all terminals.
or
response when recording Doctor Information.
Adding Charges
•
Ability to select a patient on any alpha look-up screen in Batch Add Charges. In earlier versions of POC it
was necessary to scroll to the end of the search list.
•
Attach all of the diagnoses on the current claim to all charges added in Batch Add Charges.
•
AC (Adding Charges) editing feature of being able to delete a facility or referring physician from a claim
simply by typing “DEL.” This makes editing simple and intuitive.
•
You can now post a co-payment while in Add Charges.
•
Ability to edit charges before making a permanent record in Add Charges.
•
Add Charges displays a procedure’s corresponding diagnosis code(s) before making a permanent record.
•
Charge reversals can now be entered from ALL terminals.
•
Add Charges routine now checks for bad dates in the “21 Questions”.
•
In Add Charges, procedure code entry makes any date and/or location of service entered the new default
until changed (for the current patient).
•
A change to the “Date of First Symptom” in Add Charges allows for the entry of spaces (rather than
question marks) for compatibility with electronic claims.
•
The Ø “One Time Only” diagnosis has been re-activated.
•
The System allows the user to override a patient’s YP partial statement flag (hold charges from the
statement until the insurance company has paid) by entering a five-zero procedure code (ØØØØØ). This
allows the user to immediately bill the patient for charges that are not covered by the insurance company.
15
Section A
RECENT ENHANCEMENTS
Bill Insurance
•
New program logic that allows you to leave “date able to return to work” blank if not known but still check
work related on insurance form.
•
Medicare ECS files have been updated to meet all new ANSI specifications.
•
Tar # length increased.
•
Railroad and DME charges screened from ECS files. This will greatly facilitate processing of claims to
multiple carriers.
•
Asks for alignment form immediatly instead of waiting to find the first patient to print.
•
Required Medicare change for physicians that bill for laboratory service by including the CLIA certificate
number on your claims for both paper and electronic submitters.
•
The System will now enter the provider’s P.I.N. number or California State License or Certificate number
in block 24K and/or block 33 as required by Blue Shield. This capability will also be required if you are
submitting your claims electronically.
•
Electronically bills Medicare claims in the new “direct submission” ANSI format.
•
Rebills rejected ANSI electronic claims after corrections are made, again and again. Rebilling options
include: rebill an entire claim file; rebill a single claim by claim number or range of dates; and rebill
multiple claims by range of dates.
•
Automatic crossover logic in POC that prevents the printing of paper claims for carriers to which Medicare
automatically crosses over. You will no longer have to pull crossover claims from print-runs and throw
them away.
•
Blue Shield, Champus, and additional provider numbers have been expanded to twenty characters to
meet the new specifications.
•
POC now records an insurance “rebilled” line on the patient’s ledger when an insurance is rebilled either
on paper or electronically. The claim number or range-of-dates is also recorded. This allows you to
quickly look at the ledger to see if and when rebilling occurred.
•
Paper claims can be permanently excluded for selected procedure codes.
carriers from being billed for “patient’s responsibility” procedure(s).
•
You no longer need to print and clear all current insurance forms before Housecleaning.
This prevents insurance
Data Search/Sort List
•
Seven fields added to the mail merge file created by sort list.
16
Section A
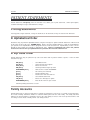
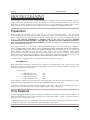
SUPPORT POLICY
PSC’s SUPPORT POLICY
If you purchased your POC software directly from the designers, Professional Systems Corporation (PSC), it is
important you read the information contained in this chapter. Doing so will help to ensure your satisfaction,
eliminate any misunderstandings, and make the installation and continuing support of your System everything you
wish.
If you purchased your POC software from a POC dealer, you should review the support policy of
you dealer.
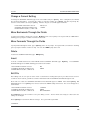
Support Policy
Support is available from 7:00AM to 5:00PM (PST), Monday, Wednesday, Friday and 10:30AM to 5:00PM (PST) on
Tuesdays and Thursdays. Please have your serial number ready. You can find it on the upper right corner of any
POC disk label. If your call is not taken immediately, our policy is to return your call within 60 minutes and our
average response time is 20-25 minutes. This policy is modified to 3 hours during new update periods. Calls
received after 4:45PM will likely be returned the following day. Our Customer Support numbers are:
Voice:
Fax:
Modem:
(310) 603-0555
(310) 603-0581
by prior arrangement
We encourage you to call Customer Support for any POC related question. We strongly encourage you to
explore POC’s on-line help screen, tutorial and, of course, this manual. Clients who purchased their software
through a POC dealer must call their dealer for support.
It is also possible to schedule an “appointment call” by making arrangements with our support department 24 to 48
hours in advance. This type of arrangement is strongly recommended when you know you are going to have
your computer consultant on site and want them to talk directly with our support department. All support calls are
equally important. For this reason, it is not our policy to take a support call out of order based simply on a client’s
request.
Since 1979, our experience is this: Clients who regularly use Customer Support are far more knowledgeable
about POC. These clients consistently rate their satisfaction with POC higher than clients who rarely
contact us. So if you don’t know, give us a call.
POC Software Support
Software is what comes on floppy disks and gets loaded onto your computer’s hard disk. Software is a computer
term for the applications you use, including POC. Hardware is the computer, printer, modem, tape drive, etc.
IF YOU ARE A LEASE CLIENT OR YOU HAVE A PSC SOFTWARE MAINTENANCE AGREEMENT, YOU ARE
ENTITLED TO: 1) ALL POC SOFTWARE UPGRADES AND ENHANCEMENTS (appropriate to your geographic
area); 2) PHONE SUPPORT AT NO EXTRA CHARGE; AND 3) A SUBSCRIPTION TO POC Talk, THE POC
USER NEWSLETTER. MAINTENANCE AND LEASE CLIENTS: Please see your PSC software maintenance/lease
agreement for complete details.
17
Section A
SUPPORT POLICY
Software and Hardware Not Purchased From PSC
You may have purchased computers, modems, printers, tape drives, operating systems and software from a source
other than PSC. Of course, it makes the most sense to receive support from the place of purchase. But , it you
request us to, we will help you with these items. Help may consist of, but is not limited to: configuring; phone
support; training; and diagnostic time. These services are available at our current billing rates.
If you are unsure whether a problem is POC related, we suggest you look in the Troubleshooting chapter first. If
you’re unable to find your answer there, call and ask for a PSC customer support technician. He/she will be happy
to answer your questions.
Support Billing
Our policy regarding discussion of phone support billing is as follows: we are happy to discuss billing, WHEN
ASKED. Otherwise, we will assume you and your staff know the call will be billable if not covered by a PSC
warranty, a monthly lease, or a maintenance agreement. It is your responsibility to advise your staff of PSC support
policies.
In the past, a majority of our clients became irritated and complained when technicians were required to inform them
repeatedly, each time they made a billable call. The clients knew when their calls were billable; they just wanted
their problems fixed. We feel this policy is in line with the same policies followed by the medical community.
We can, upon your request, flag your account so the technician will inform you every time a call is billable. This
notification is done as a courtesy and we will make every effort to follow your request. However, it still remains the
responsibility of the person calling for support to ASK if the call is billable.
18
Section A
INTRODUCTION TO POC
INTRODUCTION TO POC
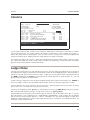
Physicians’ Office Computer is a complete in-office medical software system for patient financial information, clinical
data management and appointment scheduling. This System has been designed by physicians to handle the vast
bulk of paperwork related to medical office management.
Years of programming, testing and documentation have gone into POC software, which is now used by thousands
of physicians in medical offices throughout the Country. The true quality and power of the System will become
increasingly evident to you over the years to come.
Physicians’ Office Computer, “POC,” operates entirely by the question and answer method, making it simple to learn
and easy to use. This System has been designed to eliminate all unnecessary keystrokes.
Medical Billing
POC handles just about every aspect of patient financial management, automatically, at the command of the user.
Only three simple tasks are performed before POC can do all the work associated with patient billing. These three
tasks are: ENTERING PATIENTS, ADDING CHARGES and POSTING PAYMENTS.
After performing these tasks, each of which takes about a minute for experienced users, POC will produce your
Encounter Forms, Patient Ledger, Super Bills, Insurance Forms, Patient Statements, Day Sheets (Transaction
Reports), Recall Notices, Aged Receivable, Billings/Collections Reports, Alphabetized Patient Lists, Production
Reports, Mailing Labels, and an unlimited number of Data Searches of patient records by user defined criteria.
Clinical Data
In addition to billing, POC provides you with many clinical information functions. Some Clinical Data is entered for
billing purposes, such as: diagnosis, procedures, referring physicians, hospitals, outside laboratories and
patient demographic information.
Additional features allow you to maintain patient medications, allergies and free form Patient Notes.
The Data Search feature of POC allows you to print a report of all patients who meet any specific criteria you select.
For example, if you wish to have a list of all male patients between 30 and 35 years of age who are hypertensive
and for whom you have prescribed Vasotec, you need only press a few keys and a customized report will be printed
by POC.
Using POC in Your Office
The first step in getting started involves converting your current billing system or outside billing service to
Physicians' Office Computer. The details of this process are covered in a separate chapter in this manual. Be
certain to read and carefully follow the instructions in the chapter on “Converting To POC.” Once you have
converted, the daily work to maintain the computer database is relatively minimal.
19
Section A
INTRODUCTION TO POC
New Patient Entry
The information from your new patient information form is entered into the System during or immediately after the
first visit. Generally, your new patient information form should have patient information in the same order POC asks
for it. This makes new patient entry considerable faster.
After a new patient is entered into POC, all financial and clinical information for this patient is maintained by the
System. When it becomes necessary to update a patient’s demographic information, such as a change of address
or telephone number, it is easily accomplished in a few seconds.
Add Charges & Post Payments
Charges are entered on the same day services are rendered, or, alternately, on the following day. With POC, there
is no reason to ever get behind in billing. In practices seeing relatively few patients, charges may be entered only
once or twice a week.
Payments are entered on the day they arrive at the office from any source.
Super Bills
Using the Super Bill feature, all patient information, charges and payments may be added to the patient’s ledger
before the patient leaves the office. The entire process take one to two minutes for experienced users. The system
then prints a Billing Information sheet for the patient. From this Super Bill entry, the System automatically updates
all management reports.
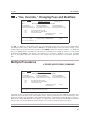
Mixing & Matching Data Entry
With POC, you may perform most operations in almost any order or combination after patients have been entered
on the System. Super Bill patients may be entered along with patients for whom you will be doing insurance billing.
POC lets you do it nearly any way you wish.
Unless you do very little insurance billing, we suggest grouping activities together for efficiency. Thus you would
normally enter groups of New Patients into the System at one time. Similarly, you would Add Charges or Post
Payments for a group of patients. To save additional time during data entry, similar charges for multiple patients
may be batched using Batch Add Charges. Insurance billing may be printed at any time for all charges, current
charges or for a range of patients. A simple option allows for rebilling of any insurance charges at a later time. An
optional Electronic Claims Submission program also is available in most areas.
Getting to Know Your POC System
You will really begin to enjoy working with the System after you have had a full week of actual “hands-on”
experience with POC’s many time-saving features. You’ll be surprised at how easy POC is to operate. We can say
with confidence: Within a very short time you’ll wonder how you ever got along without it!
20
Section A
INTRODUCTION TO POC
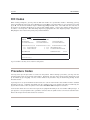
Daily Procedures
At the end of the day the System prints a daily Transaction Report which lists each patient seen during the day with
all charges and/or payments entered since the last Transaction Report. As part of the daily Transaction Report, the
System creates a Deposit Slip to aid in filling out your regular bank deposit slip(s). Many banks will accept the
Deposit Slip attached to your regular deposit slip without having to fill in the detail. While this is normally a daily
procedure, you should print the Transaction Report at least weekly. If you suddenly have a hardware failure that
results in corrupted data and you have not printed and cleared the report, reconstructing patient ledgers and
calculating the doctors’ totals could be extremely difficult, if not impossible.
Another management tool, the Billings/Collections Report, is printed, optionally, at the end of each day. This report
must be printed on the last business day of each month. The Billings/Collections Report lists the day’s, month-todate’s and year-to-date’s totals of billings and collections by doctor, with a detailed breakdown of collections and
adjustments into fourteen pre-defined categories and 20 User-defined categories.
Finally, at the end of the day or some other regularly scheduled time each day, you must BACK UP all POC data
files. This back up is essential to the successful use of any computer billing system. PLEASE NOTE: BE
CERTAIN TO READ THE CHAPTER “BACKING UP” AND FOLLOW THE PROCEDURES LISTED. WITHOUT
REGULAR BACK UPS, YOU WILL EVENTUALLY LOSE PART OR ALL OF YOUR DATA.
Weekly Procedures
Once per week, or more often if you choose, you should: alphabetize your patients; print insurance forms (or
generate the ECS file); print patient recall notices and follow up on patients who have not responded to the previous
week’s recalls; and optionally, print statements.
If you don’t re-alphabetize on a weekly basis, the temporary file area that holds new patients becomes so large that
patient searches by name become painfully slow. Also, patients who have had their names changed will not be
found by name until re-alphabetized.
You should print and update insurance forms (or generate the Electronic Claims Submission, “ECS,” file) on a
regular basis. By not updating claims, Add Charges will become very slow.
Monthly Procedures
Once per month and in the following order, you should: perform a “full system backup” (see “Backing Up” in the
Appendix); print the Transaction Report; optionally, add finance charges and print another “finance charge”
Transaction Report; print the Accounts Receivable Report (you may change “User-Selected Category” number 2 to
exclude zero balance patients, otherwise, do not change any categories); print the Cross Posting Report; print
Patient Statements; and then print the Billings/Collections Report.
You should print an Accounts Receivable Report (it can be a “totals only” report) at least once per month. The A/R
program has built in data integrity and error checking. This will alert you to accounts that may have suffered a data
problem.
21
Section A
SYSTEM CONVENTIONS
SYSTEM CONVENTIONS
Using This Manual
POC’s on-line Help Window (the [F1] key) is the primary reference source. This manual is an additional reference
source and contains important information about POC. The manual is global in nature while the help screens are
specific to the current question on the screen. If you have a question on how to do something (print Accounts
Receivable alphabetically or generate a mail merge list), look in the manual. If you want to know what your options
are at any question (prompt) on the screen, hit the [F1] help key. By utilizing the help screens and this manual, you
will be able to get almost all your POC questions answered.
The manual has been divided into four sections: the Introduction; POC’s Selection List, whose chapters are in
alphabetical order; the Appendix; and the Index.
Page numbers are at the bottom of each page. The top of each page identifies the section and chapter.
If you discover we have missed something, PLEASE let us know. We will be very grateful!
Call us at 1-310-233-7370.
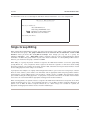
Shortcuts
A POWER USER BYPASS COMMAND
When you see the above phrase, “A POWER USER BYPASS COMMAND,” this means you are reading about one
of many shortcuts built into the System. POC’s great versatility allows the beginner to be guided through data entry
step-by-step, and the experienced user to enter data in the fastest manner possible. Take the time to learn these
shortcuts — you will be well rewarded in the time you’ll save using POC.
Keystroke Examples
Throughout this manual, commands are in UPPER CASE BOLD with any special keys in a key cap box. Example:
REVERSE [Enter] means you would type the letters REVERSE followed immediately by pressing the “Enter” key.
However, you may use lower case for the actual data entry, i.e.: reverse [Enter].
Spaces in data entry are shown as: [Space], or, when space is limited, as a dark ( n ) space: FORMATzA: .
A key sequence containing a “+” such as [Shift] + [Tab] means you hold the shift key down while pressing the tab
key.
The Help Windows and Tutorial Mode keystroke examples show the command in UPPER case and use the left and
right bracket “[“ and “]” to enclose special keys.
Example: REVERSE [Enter]
22
Section A
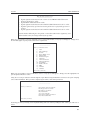
SYSTEM CONVENTIONS
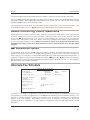
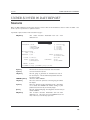
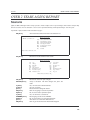
POC’s FUNCTION KEYS
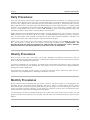
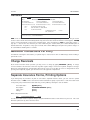
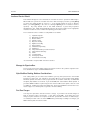
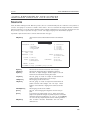
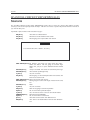
Help Windows — [F1]
PT.#
1-3
Patient
Information
POC HELP SCREEN
1) MITCHELL
Here you enter a zip code or press the [F5} key.
2) 6281 HAW
3) MANHATT
If you enter a zip code that is not in the permanent list, the system
will prompt you for the city and state. You will then be given the option
-----------of adding to the permanent list or simply recording it as a One Time Only
11) SSA or ID
zip code.
12) Other ID
Press Esc to exit
13) Send Stam
14) Finance Ch
-----------18) Rel of Info. :Yes
20) Dr. #1 PHYSICIANS’ OFFICE COMPUTER
19) Fee Schedule:
21) Ref Phy:
PATIENT’S Zip Code: ___________
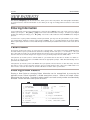
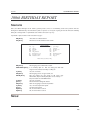
At all POC questions (prompts), you may hit [F1] to pull up a help window that contains question-specific
information. In other words, the help screen that comes up when you press [F1] was written for the particular
question currently on the screen. We recommend you pull up the help screens and read them, particularly in Add
Charges and Post Payments. You will find many options and shortcuts available to you.
Using the Help Windows
After hitting the [F1] Help Key, the following six keys control the information that appears in the help window:
[PgUp], [PgDn]
[Enter], [Home] and [End]
- Controls movement of the help text in the window if the text
exceeds the size of the window. This is indicated by arrows
on the right border of a help screen. See the previous screen.
[Esc]
- Used to exit the help window.
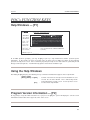
Program Version Information — [F2]
At any prompt, except the Main Selection List, if you press the [F2] the system will display the current version
information for that module in the upper left corner of the screen.
23
Section A
SYSTEM CONVENTIONS
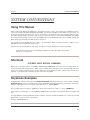
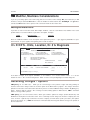
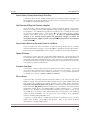
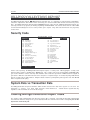
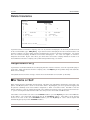
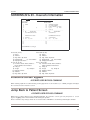
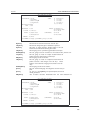
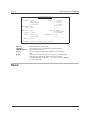
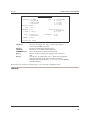
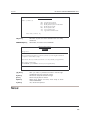
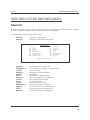
Patient Search — [F4]
Patient
Search for patient by:
1)
2)
3)
4)
5)
6)
7)
8)
Search
Social security number
Telephone number
Other ID
Medical record number
Patient’s first name
Responsible party name
Policy number
Patient’s date of birth
Please enter your choice: __
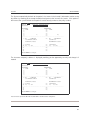
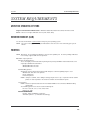
At any prompt that asks you for a patient’s name or number, you can press [F4] to access the Patient Search
screen. Patient Search will continue to find patients who match your search criteria until you find the correct patient
or there are no more patients who match the criteria. If no match is found, you will be returned to the “enter patient
name or number” prompt. This feature is also a handy way to find patients who have changed their last name or for
finding family members by searching all patients under the same policy number.
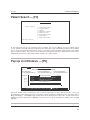
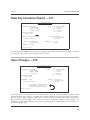
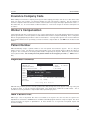
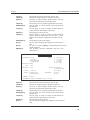
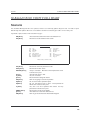
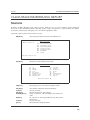
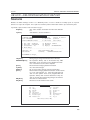
Pop Up List Windows — [F5]
1-3
Patient #
M.R. #
Adding
Insured #1:
SARA MITCHELL
6281 HAWTHORNE BLVD.
300.21
381.1
383.0
PgUp
Patient Age: 37
Insured #2:
CARLTON MITCHELL
6281 HAWTHORNE BLVD.
CARLTON MITCHELL
6281 HAWTHORNE BLVD.
DIAGNOSIS CODES
MANHATT
1)
2)
3)
Charges
865.04
131.01
385.0
633.1
PgDn
, CA 90266
TRAUMATIC SPLENIC RUPTURE
TRICHOMONAL VAGINITIS
TYMPANOSCLEROSIS
TUBAL PREGNANCY
Home
End
Search
Next
Enter
Esc
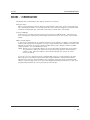
Pop up list windows can be used wherever you are asked for input from one of the System’s list files. These pop
up list windows include Doctors, Zip Codes, Providers, Insurance Companies, Diagnosis Codes, Procedure Codes,
Drugs and Allergies. Just hit [F5] at any question that asks for input from one of these lists. Use the arrow keys to
highlight your choice and then press [Enter]. It you are not sure a pop up list window is available, press the [F1]
Help Key.
24
Section A
SYSTEM CONVENTIONS
When you enter a pop up list window, you will see instructions listed at the bottom of the screen. The letters
in
search, in next, in exit, the arrows and cursor control key labels are highlighted. (If these letters do not appear
brighter on your screen, you should adjust the brightness and contrast controls on your monitor.)
The [ ] and [ ] keys scroll backward and forward through the lists that appear in the pop up list windows. [PgDn]
advances through the list one page at a time while [PgUp] backs up one page at a time. [Home] jumps to the
beginning of the pop up list and [End] will jump to the end of the list. If you enter an (for search), the System will
ask you to enter a search phrase. This phrase is a partial description, name, company, or city you are searching for
in the pop up list. If the search does not find the item you are looking for on the first try, enter an to find the next
occurrence. Pressing the [Enter] key selects the line that you are currently on as the accepted input and exits from
the pop up list window. To exit the pop up list window without making a choice, hit [Esc].
Pop Up Ledgers— [F6]
If you want to view a Patient Ledger within POC (except from the main Selection List), press [F6] at any question
and the System will instantly go to the beginning of the Patient Ledger program and display the current patient’s
number (if any), or, alternately, you may enter another patient’s number. You may perform all functions of patient
ledgers: view, print or change ledger notes. When finished, just press [Enter] until the System returns to the
precise point where you pressed [F6] with no loss of data.
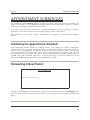
Pop Up Appointment Scheduler— [F7]
At any time (except at the main Selection List), you may hit [F7] and the System will bring up the Appointment
Schedule program. You may perform all functions of appointment scheduling. When finished, just press [Enter]
until the System returns to the precise point where you pressed [F7] with no loss of data.
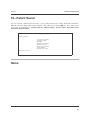
Claim Editor— [F8]
Edit
Claims
Enter claim number to edit: 1234
At any prompt, except the main Selection List, you may press the [F8] key to instantly access the Claim Editor. For
more information on how to use the Claim Editor, see the Bill Insurance chapter.
25
Section A
SYSTEM CONVENTIONS
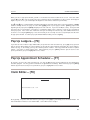
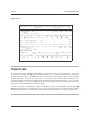
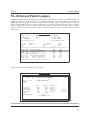
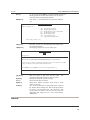
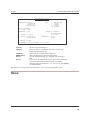
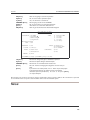
Enhanced Patient Ledger — [F9]
Patient
04/15/95
ICD #1:
ICD #2:
ICD #3:
92551
386.0
1st Insurance:
2nd Insurance:
3rd Insurance:
4th Insurance:
Remaining Balance:
Dr. #: 1
Ledger
AUDIOMETRY, SCREENING TEST
32.50
MENIERE’S DISEASE
Paid
19.60
0.00
0.00
0.00
Location: 3
Adjusted
4.90
0.00
0.00
0.00
8.00
Claim #: 1234
Aging Date: 04/01/2005
Press ENTER to return
At any charge line on a patient’s ledger, you can view complete details pertaining to that charge by press the [F9]
key. The System will display a pop-up window containing: date of charge; procedure code; description and amount
of charge; ICD code(s) pertaining to the charge; detailed breakdown of payment(s) and adjustment(s) by carrier (or
other type of payment) and remaining open balance of the selected charge; treating physician; locaiton where
procedure was administered; claim number (if submitted to carrier); and aging date of the selected charge. You can
return to patient ledger by simply pressing the [Enter].
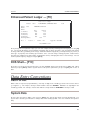
DOS Shell— [F10]
At any time (except at the main Selection List), you may hit [F10] and the System will exit to a DOS shell. When
finished, just press [Enter] until the System returns to the precise point where you pressed [F10] with no loss of
data.
Data Entry Conventions
Date Format
When a date is requested (except birthdates), enter only six digits in the “mmddccyy” format. Do not enter slashes
(/) or hyphens (-). For example, January 9, 2005 would be entered as
. Birthdates are eight digits in the
“mmddccyy” format. For example, enter the date with the century included:
is January 9, 1895.
System Date
At most “date” questions in POC, if you just press [Enter], the System date will be inserted automatically. The
System date is the date you indicated as “Today’s Date” when starting up POC. This saves hundreds of keystrokes
daily.
26
Section A
SYSTEM CONVENTIONS
Entering CPT and ICD Descriptions
It is recommended that the description be entered with the most general word first (i.e.- HERNIA, HIATAL rather
than HIATAL HERNIA, or OFFICE VISIT, INTERMEDIATE rather than INTERMEDIATE OFFICE VISIT). By
entering the descriptions this way, the codes will be grouped together alphabetically in the pop up list windows [F5]
key, making it easier to choose the correct code.
One-Time-Only or Permanent
1-3
Patient #
M.R. #
Adding
SARA MITCHELL
6281 HAWTHORNE BLVD.
MANHATTAN BCH, CA 90266
1)
2)
300.21
381.1
Charges
Insured #1:
Patient Age: 37
Insured #2:
CARLTON MITCHELL
6281 HAWTHORNE BLVD.
MANHATTAN BCH, CA 90266
CHOLESTEATOME, EXT EAR
CHRONIC SEROUS OTITIS MEDIA
CARLTON MITCHELL
6281 HAWTHORNE BLVD.
MANHATTAN BCH, CA 90266
CURRENT BALANCE:
FEE SCHEDULE
$125.00
===================================================
90040
Is this Procedure Code:
1
Office Visit, Brief
$45.00
A) A ONE-TIME-ONLY Charge
B) To be PERMANENTLY added to system
C) Incorrect, Please DELETE
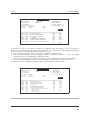
New Procedure Codes, Diagnosis Codes and Zip Codes may be recorded as One-Time-Only’s (OTO’s) if you feel
you will never use that code again and you do not wish to have it appear as part of your permanent list. The code
will be recorded as part of the one (current) patient’s ledger. “PERMANENTLY,” the recommended method, makes
the code part of the permanent list with an index number assigned to it by the System. After recording the new
code, it will appear in the list boxes for CPT’s, Dx’s and Zips throughout POC.
Index Numbers For Procedure & Dx’s
1-3
Patient #
M.R. #
Adding
SARA MITCHELL
6281 HAWTHORNE BLVD.
MANHATTAN BCH, CA 90266
1)
2)
300.21
381.1
Charges
Insured #1:
Patient Age: 37
Insured #2:
CARLTON MITCHELL
6281 HAWTHORNE BLVD.
MANHATTAN BCH, CA 90266
CHOLESTEATOME, EXT EAR
CHRONIC SEROUS OTITIS MEDIA
CARLTON MITCHELL
6281 HAWTHORNE BLVD.
MANHATTAN BCH, CA 90266
CURRENT BALANCE:
FEE SCHEDULE
$125.00
===================================================
THE INDEX NUMBER FOR THIS CODE IS: 89
Please enter you choice: _
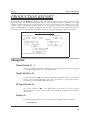
When entering a procedure or diagnosis, you may enter the actual procedure or diagnosis code or, alternately, a
unique index number assigned to each procedure and diagnosis by the System. This special index number must
27
Section A
SYSTEM CONVENTIONS
be preceded by the letter “ ” for all diagnosis codes. The list of index numbers may be obtained by printing out the
list of procedure and/or diagnosis codes. Experienced users will almost always use the index number. The benefit
is fewer keystrokes and faster System response. Index numbers are assigned sequentially in the order the codes
are entered.
With proper preparation and an existing Super Bill that already has the CPT and ICD codes numbered sequentially,
“1.”, “2.”, “3.”, etc., it is possible to have the System’s index numbers correspond to the order of the procedure and
diagnosis codes on your Super Bill. This will allow you to enter, for example, “3” rather than “90040” when entering
an office visit charge (if a brief office visit was third in the list of office visits). To have your index numbers arranged
in POC in the same order as your Super Bill (you must not have previously entered any codes), go into the
Procedure Code or ICD Code List program, CHANGE index number 1 to your Super Bill's code number 1 (your
System was shipped with CPT and ICD index number 1’s “TO BE CHANGED”) and the ADD the rest of the list in
the corresponding order.
PLEASE BE ADVISED: ONCE THE CODES HAVE BEEN ASSIGNED AN INDEX NUMBER, THERE IS NO WAY
TO RE-INDEX THE CODES. YOU CAN CHANGE THE INDEX NUMBER ON YOUR SUPER BILL, BUT NOT IN
THE SYSTEM DATA.
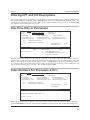
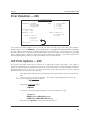
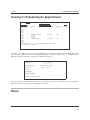
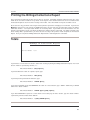
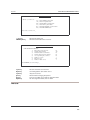
Tutorial Mode
SELECTION LIST
Tutorial
TERMINAL #1
Date: 04/15/95
The Physician’s Office Computer Tutorial System is now active. The
system will now proceed prompts with a help screen such as this until the
Tutorial is deactivated from the main selection list by typing TUTOR
again. Active keys: [Enter] [Page Down] [Page Up] and [Esc].
NP)
AC)
BA)
PP)
SB)
N
A
B
P
S
PL)
RL)
TR)
BR)
BI)
FR)
P
R
T
Billing/Collection Report
Bill Insurance
First Report of Work Injury
Small arrows on the right side of the tutorial
DL)
Drug List
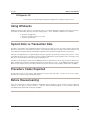
The System may be placed in TUTORIAL MODE by typing
[Enter] at the main Selection List. Once in the
tutorial mode, POC will precede all questions with a help screen. We recommend the new user take advantage of
the tutorial mode until familiar with the use of POC. You may turn the tutorial mode off by returning to the main
Selection List and type
[Enter] again. After turning off the tutor, you may pull up the same help screens by
hitting [F1].
28
Section A
SYSTEM CONVENTIONS
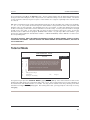
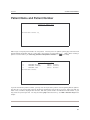
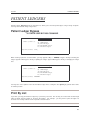
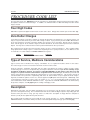
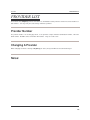
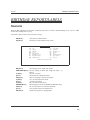
Patient Name and Patient Number
A d d i n g
C h a r g e s
Enter Patient Name or Number: 999_
POC assigns a two part patient number to each patient. The first part is the patient’s primary physician from New
Patients/Patient Information and the second part is the patient’s account number, i.e.: 1-999. When entering a
patient’s account number, you enter only part two of the patient’s number, i.e.:
(not 1-999).
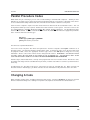
A d d i n g
1-4
1-2
1-3
MITCHELL JR, CARL
MITCHELL, CARLTON
MITCHELL, SARA
C h a r g e s
10/05/79
01/01/54
09/22/57
342554876
8764432987
564345876
Enter Patient Name or Number:
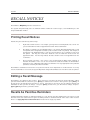
If you do not know the patient’s number, you may enter all or part of the patient’s name beginning with the patient’s
last name first. The System will search for all patients matching the letter or letters you enter, and if more that one
match exists, all will be displayed with full name, birth date, patient number and Medical Record Number so you
may choose the patient you wish. You may also hit the [F4] Patient Search key. See POC’s Function Keys in this
chapter.
29
Section A
SYSTEM CONVENTIONS
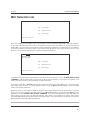
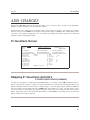
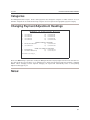
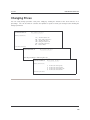
Mini Selection List
PP)
Post Payments
PI)
Patient Information
PL)
Patient Ledger
Please enter your choice:
Since 80% of what you do in POC is done in New Patients, Patient Information, Add Charges and Post Payments,
we give you a Mini Selection List for these four options to help you work more quickly. If you have just finished
working with a specific patient in New Patients, Patient Information, Add Charges or Post Payments, that patient’s
account and medical record number will be carried forward and will appear in the upper left corner of the screen
when you select any of the remaining three options in the Mini Selection List.
Patient # 1-3
MITCHELL, SARA
M.R. # 564345876
PP)
Post Payments
PI)
Patient Information
PL)
Patient Ledger
Please enter your choice:
The Mini Selection List with the patient number in the upper left corner allows the use of a POWER USER BYPASS
COMMAND to skip the patient name question and go directly into the program, accessing the same patient. This
feature is for those who like to enter all activity, one patient at a time.
If you wish to work with a different patient using the Mini Selection List, just hit the [Esc] key. The patient name
and number will be cleared. To exit the Mini Selection List, just hit [Enter] without making a choice and POC
returns to the main Selection List.
Alternately, if you are in the Mini Selection List and you want to go to another part of the System that is not shown
on the screen and you know the two letter mnemonic (i.e.- for Bill Insurance), just type it and hit [Enter] to take
advantage of another POWER USER BYPASS COMMAND. Even though the Mini Selection List only shows four
choices (three at any one time), any main Selection List choice may be entered with the exceptions of the System
Command, Billings/Collections Report and the Transaction Report. The System will take you directly to your choice
without having to return to the Main Selection List.
30
Section A
SYSTEM CONVENTIONS
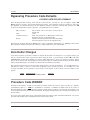
Parallel Procedure Codes
The purpose of parallel procedure codes is to automatically translate a CPT code (or whatever codes you
customarily use for procedures) to an alternate code for the same procedure (required by some insurance carriers/
HMO’s). Parallel Procedure Codes are available for all procedures in POC if you need them (most office don’t). If
your System is set up for parallel procedure codes, the code or index number entered will be from the standard
(CPT) procedure code list. Automatic translation from the standard code to any alternate code will be handled by
the System when insurance forms are printed. If the procedure code does not exist on the System, the System will
allow you to enter it during Add Charges. If your System is set up with parallel codes, you will be asked to enter the
parallel codes as well as the standard code each time you enter a new procedure code permanently into the
System. Refer to the chapter on Procedure Codes for assistance.
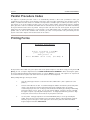
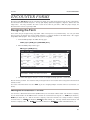
Printing Forms
Printing
Statements
Adjust printhead to LIGHT
place paper in printer.
Turn printer on
Press ENTER when ready
(X to Exit):
N
At all questions where POC asks you to place forms in the printer and press enter when ready, you may answer
[Enter], for “No” to skip the alignment form, a POWER USER BYPASS COMMAND. When choosing this option,
the System will immediately begin printing all forms as soon as [Enter] is pressed. This option is for experienced
users who know where to place each of the forms in the printer for correct alignment.
When printing ANY type of form you should:
1.
Have the printer paper tractors set to PULL the forms, NOT PUSH. (This is optional on some
printers.)
2.
Take the forms OUT of the box. Feed them through the bottom slot under the printer and printer
stand. If you do not have a printer stand and plan to print multi-part forms, we strongly
recommend you purchase one. It will pay for itself almost immediately by reducing or eliminating
paper jams which occur if forms are not fed from the bottom. The idea is to have a straight
line paper feed path, especially with multi-part forms. A straight path will make your forms align
better, print cleaner and save wear and tear on your printer feed motor.
3.
Set the printer head gap adjustment lever AS FAR BACK (wide) as it can go and still print
legibly. Don’t decrease the head gap because the printer ribbon is old and should be replaced.
This only squeezes the paper, causes paper jams and reduces printer life. When the ribbon
begins to lighten noticeable, REPLACE IT.
31
Section A
SYSTEM CONVENTIONS
4.
After aligning, we suggest you put pencil or grease pencil marks on your printer to mark proper
alignment for each form in the future. This will enable you to pre-align the forms the next time you
print. Then use the option to skip the alignment form.
Hint: Use blue marks for statement forms, red for insurance, etc.
5.
Let the printed forms fall in a nice, neat stack.
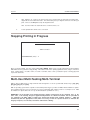
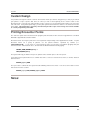
Stopping Printing In Progress
Accounts
Receivable
--PRINTING--
STOP PRINTING (Y/N)? Y
Once you begin printing, you may stop by hitting [Esc] ONCE. WAIT for the current patient/form to finish printing.
POC will then ask if you wish to stop printing. This feature works when printing alphabetical lists, ledgers, insurance
forms, mailing labels, encounter forms, accounts receivable, data search, production report, referring physician
report and statements.
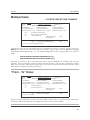
Multi-User/Multi-Tasking/Multi-Terminal
POC is able to “Multi-Task” in single terminal mode through the use of the special POC function keys [F2], [F4],
[F6], [F7], [F8], [F9] and [F10].
With an operating system that is capable of concurrent processing, it is possible for POC, with the Multi-User option,
to be printing under one processor and the user to be performing daily activities under a second processor. With
the “Multi-User” option, POC can serve up to 99 workstations (terminals or users).
HOWEVER, it is not possible to be printing Insurance Forms or Statements on one terminal and, at the
same time, to be entering charges or payments/adjustments on a different terminal. Nor is it possible to
use terminals 2-99 while POC is printing the Transaction Report from terminal number 1. POC will
automatically take the appropriate action, when necessary, to lock out specific functions to maintain the
integrity of reports, account data, statements and insurance billing.
32
Section A
SYSTEM CONVENTIONS
Don’ts - The Important Ones:
Don’t skip the daily and monthly backup routine. Don’t skip the restoration procedure that tests your backups. See
the chapter on Backing Up, in Section D, the Appendix.
Don’t “see if more data will fit” on backup tape/disk number 1 and leave it in the drive when the backup program
says to insert tape/disk number 2. The backup program will simply erase tape/disk number 1 to make room for the
additional data.
Don’t hit the reset button on your computer to stop a bad entry. This interrupts the recording of information and can
cause complete loss of all of your data.
Don’t turn off the computer before entering
efrom the Main Selection List. If you do, you will receive the
“TERMINAL IN USE” message the next time you start POC.
Don’t try to outsmart POC with the SETFILE program. You cannot use SETFILE to gain access to terminal #1 on
more than one workstation at a time or use it to unlock files during a statement run, etc.
Don’t leave your computer turned on when your electricity has gone out. You should immediately turn the computer
switch off so the computer isn’t damaged from the large voltage surge generated when the power comes back on.
33
Section A
CONVERTING TO POC
CONVERTING TO POC
Step 1 - Prepare
Converting to POC can be done efficiently with proper preparation. Before you begin the conversion process, first
enter the doctor’s name, address and associated numbers in Doctor Information ( from the Selection List) and in
Set Parameters within Bill Insurance ( from the Selection List.)
Step 2 - Enter Today’s Patients Using
You are now ready to begin using POC for daily work. First, pull the files for all patients who will be seen by the
doctor today and enter those patients into the System via the New Patient program.
If you are not concerned with maintaining detailed records of all previous open charges, you may add the total
outstanding balance for each patient at this time. POC will allow you to enter one balance forward figure for each
new patient at the time you first enter the patient into the System under New Patients. However, only one date will
be requested for this previous balance, which will be assigned to the patient’s primary physician. Therefore, if you
wish to enter multiple outstanding balances in different aging categories and/or for more than one doctor, you
should NOT enter the previous balance through the New Patient program. These balances should be entered
under the Add Charges or Super Bill Programs using the 00000 procedure code which indicates a balance forward
amount. Procedure code 00000 is used for balance forward amounts and can be either a positive or a negative
credit balance figure (i.e.: -100 for a credit balance of $100.00).
NOTE: If you wish to maintain a record of each individual transaction rather than
convert to POC with only a balance forward amount, you may do so. We don’t
recommend it, since your old system already contains this information. The
individual transaction method takes a great deal of time with little additional
benefit, since the detail already exists elsewhere.
Before you begin entering New Patients with existing balances into the System, please be sure you ran an adding
machine tape of the ledger totals for each patient to be entered. Attach the adding machine tape(s) to the patient’s
old ledger(s) so you will know the exact amount of billing you are transferring to the System. This extra step will
ensure that your POC receivables balance to your previous receivables.
When payments are received for patients who are not yet entered into the System, pull each patient’s old ledger and
enter the patient through New Patients and the payment through Post Payments. You should again take the same
balancing precautions explained above to ensure the data is correctly entered into the computer.
Finally, when time permits, you may enter all other patients with outstanding balances who have not yet been
recorded into the System. There is no reason to enter patients with zero balance accounts into POC until their next
office/hospital visit.
The old, pre-POC ledger for patients who have been entered into the System should be clearly marked with the new
POC patient number assigned by the System. These old ledger cards should be kept separate from the ledger
cards of patients who have not yet been entered into the computer.
34
Section B
Using POC
Section B
STARTING POC
STARTING SECURITY POC
Security POC software enables the System Administrator to fully control user access. The System Administrator
can now assign user numbers and passwords to each operator, along with controlling their level of access to the
operating of the POC software. This feature is fully HIPAA compliant.
To start POC from a DOS prompt, type:
[Enter]
[Enter]
(or your POC directory name if other then POC)
OR
If you have created a POC Icon on your Desktop, click on that.
The “User I.D. #” will be assigned by your system administrator. The password will be unique to each user, a
maximum of 9 characters, and is case sensitive. It will be encrypted to maintain confidentiality. This should be
known only to the user, who’s password it is, and the system administrator.
P.O.C. log-in.
Enter user i.d. #: 2
Password: #########
Once you have successfully log-in, you will be prompted for the Terminal Number. On Multi-user systems, the
system administrator should be the only one to use the designation of Terminal #1. All other users can choose a
terminal number from 2 to 99. Although any available terminal number, other than Terminal Number One, could
be entered here, for ease of use and to avoid confusion, it is strongly recommended that each user’s Terminal
Number be the same as their User ID Number.
What terminal do you wish to use?
POC Multi-User has the capability of running up to 99 terminals. Generally, each person/workstation is assigned a
terminal number. Under everyday, normal usage, POC prevents more than one person from using the same
terminal number. However, a user can intentionally ignore SETFILE’s warning message and run SETFILE while a
terminal is active. See running SETFILE in the Troubleshooting chapter.
DO NOT IGNORE SETFILE’S WARNING MESSAGE AND ALLOW MORE THAN ONE PERSON TO USE THE
SAME TERMINAL NUMBER AT THE SAME TIME! DOING SO WILL CREATE SERIOUS ERRORS IN YOUR
DATA AND VOID YOUR WARRANTY AND/OR MAINTENANCE COVERAGE!
36
Section B
STARTING POC
Security POC features will allow a user to place their terminal in a “locked” mode with a simple key stroke when it is
necessary to step away for a few moments. Just press the [F12] key at any screen, other than the Main Selection
List, and the screen is blanked out until the user enters their personal password to proceed, thus preventing any
confidential information from being seen by a casual viewer. Enter your password and press [Enter] and you will be
returned to the exact screen you were previously viewing.
Enter password:
Yesterday’s Transactions
Start of Day
PLEASE NOTE: Yesterday’s Transaction Report has not been cleared.
Press ENTER to continue _
If you restart POC and have not printed the Transaction Report, a message appears to remind you. You may or
may not want to print the report. If you don’t, new transactions will be appended to the existing Transaction Report
and both groups of transactions will be included the next time you print the Transaction Report.
First Work Day of a New Month
Start of Day
Is this the first work day of a new month?
This message appears when you start POC and enter a date that begins a new month. If you answer
[Enter],
you will clear the month to date totals for all doctors in the Billings/Collections Report. If you have added any type
of transactions since the last time you printed the Billings/Collections Report, POC will not allow you to cross into
the new month until the report is printed.
37
Section B
STARTING POC
New Fiscal Year
Start of Day
Is this the first work day of a new FISCAL year?
This message appears after you enter a date that is the first work day of a new month. If you answer
[Enter], you
will clear the year to date totals for selected doctors in the Billings/Collections Report. If you have added any type
of transactions since the last time you printed the Billings/Collections Report, POC will not allow you to cross into
the new year until the report is printed.
Notes:
38
Section B
POC SELECTION LIST
POC Selection List
Chapters Arranged Alphabetically
POC’s main Selection List is the “menu” of user choices that make up the POC System. Each selection is prefaced
by a two letter abbreviation for selecting the part of POC you wish to use.
The following Section provides specific information about each of the Selection List choices.
TERMINAL#1
SELECTION
LIST
Date: 04/15/2005
Ver. 8.0 - S/N PS10000
NP)
AC)
BA)
PP)
New Patients
Add Charges
Batch Add Charges
Post Payments
DI) Doctor Information
PI) Patient Information
AS) Appointment Schedules
IC)
IL)
PC)
PV)
ZC)
DL)
SB) Super Bill
EN) Encounter Forms
PL) Patient Ledgers
RL) Retired Ledgers
TR) Transaction Report
ICD Code List
Insurance Company List
Procedure Code List
Provider List
Zip Code List
Drug List
CD) Clinical Data
DS) Data Search
RN) Recall Notices
ML) Mailing Labels
AL) Alphabetize Patients
SP) Setup Printer
SC) System Command
EX) Exit
MR) Monthly Reports
BI) Bill Insurance
FR) First Report of Work Injury
PS) Patient Statements
Choose one of the above: _
NOTE: In the latest version of POC, all of the standard monthly reports are now located under the Main Selection
List designation of
! " #$ % &. When the user selects “MR”, the following Sub-Menu Selection List
will appear. Access to these reports is usually limited to the System Administrator.
SELECTION
TERMINAL#1
L I S T Date: 04/15/2005
What do you wish to do:
BR)
CP)
PR)
AR)
RP)
Billing/Collections Report
Cross Posting Report
Production Report
Accounts Receivable Report
Referring Physician Report
Please enter your choice: _
A POWER USER BYPASS COMMAND
All of the above monthly reports may also been accessed from the Main Selection List simply by entering the
applicable mnemonic, i.e.,
,
,
,
or
'
39
Section B
ACCOUNTS RECEIVABLE
ACCOUNTS RECEIVABLE
( Screen
Remember that this report is accessed through the Main Selection List option of : “MR) Monthly Reports.”
Accounts Receivable
USER-SELECTED CATEGORIES
BALANCE DUE: 1)
2)
3)
4)
Credits
Zero Balance
Balance Owing
Unapplied Credit
AGING:
AMOUNT OF BALANCE
OVER:
5) N/A
INSURANCE: 11) N/A
DOCTOR: 12) All Doctors
TOTALS: 16) Patient’s Totals
17) Primary Physician
6)
7)
8)
9)
10)
Current and over
over 30 days
over 60 days
over 90 days
over 120 days
RANGE: 13) First Patient #: 1
14) Last Patient #: END
15) List: N/A
OUTPUT LISTS:
18) Incl:
19) Excl:
PRINT TO: 20) Printer
Enter NUMBER to be changes or press ENTER to print report (X to Exit):
The Accounts Receivable report,
[Enter] from the Selection List, is a versatile, user-defined report to assist the
practice in improving cash flow and reducing bad debts.
PLEASE NOTE: You MUST use option B type payments/adjustments when posting payments to generate accurate
“open charge” type of A/R reports.
Accounts Receivable Report Data
The Accounts Receivable report shows each patient’s name, number, telephone, insurance carriers, policy and
group numbers as well as the date, charge (optional), amount, source of payment (optional) and form of last
payment on each account.
Amounts due for each patient are aged into five specific categories: current, over 30, over 60, over 90 and over 120
days. POC’s aging routine calculates aging by date, rather than days and the aging date is controlled by user
defined criteria (see System Configuration, Section D). This resolves some inconsistencies created by months with
different numbers of days. For aging category purposes, the 1st to the 1st is 30 days (one month) regardless of
how many actual days have passed.
Family members are listed individually under the “Head of Account” and family account total, with corresponding
aging, is provided.
The Accounts Receivable program provides an option to print all patients with individual account balance lines or a
summary report of the practice totals. The “Accounts Receivable - Totals Only” summary report is a one page
report by either primary or treating doctor number broken down into five aging categories. PLEASE NOTE: When
printing a DETAILED A/R Report (#16) with TOTALS by TREATING physician (#17), the DETAILED part of the
report will be by PRIMARY physician and the TOTALS will be by TREATING physician.
40
Section B
ACCOUNTS RECEIVABLE
Printing the Accounts Receivable Report
This report can be printed at any time and by any number or combination of user-defined options such as: primary
and treating physician; insurance company; aging category; credit, zero or balance-due accounts; amount of
balance and patient range.
The
should be run at least once every month at the end of the month, using the System’s preset criteria: all
patients, all aging categories, all balance categories (you may wish to exclude zero balance patients), all insurance
and all physicians. This month-end report should be used for immediate follow-up of slow pay accounts and then
filed away for future reference. This is a “hard copy” picture of the practice totals as of a specific month-end.
You may print the
“by list” from lists generated and saved by Data Search, providing you with very selective
reports. For example, if your practice purchased very expensive, specialized equipment, you could search for all
patients who had procedures related to this equipment. The list of patients could then be merged into an
report
for a comparative analysis against the entire patient database. Please see Data Search and Section C, Custom
Reports, for additional information.
If you wish the
report to be printed in alphabetical order, change category number 15, the “list” option, and type
) * and press [Enter] for the list name. NOTE: You must re-alphabetize before using the ALPHA list.
Forgetting to re-alphabetize will place newly entered patients at the end of your report (it will still be accurate,
however).
Unapplied Credit Report— #4
Accounts Receivable
USER-SELECTED CATEGORIES
BALANCE DUE: 1)
2)
3)
4)
Credits
Zero Balance
Balance Owing
Unapplied Credits
AGING:
AMOUNT OF BALANCE
OVER: 5) N/A
INSURANCE: 11) MEDICARE
DOCTOR:
12) All Doctors
TOTALS:
16) Patient’s Totals
17) Primary Physician
6)
7)
8)
9)
10)
Current and over
over 30 days
over 60 days
over 0 days
over 20 days
RANGE: 13) First Patient #: 1
14) Last Patient #: END
15) List: N/A
OUTPUT LISTS:
18) Incl:
19) Excl:
PRINT TO: 20) Printer
Enter NUMBER to be changes or press ENTER to print report (X to Exit):
By selecting Balance Due option # 4, you can run an AR Report that shows all unapplied credits. This provides an
easy method of balancing accounts and allows you full control over how and when a credit is applied on a
patient’s account
41
Section B
ACCOUNTS RECEIVABLE
Slow Pay Insurance Report — #11
Accounts Receivable
USER-SELECTED CATEGORIES
BALANCE DUE: 1)
2)
3)
4)
Credits
Zero Balance
Balance Owing
Unapplied Credit
AGING:
AMOUNT OF BALANCE
OVER:
5) N/A
INSURANCE: 11) Medicare
6)
7)
8)
9)
10)
Current and over
over 30 days
over 60 days
over 90 days
over 120 days
RANGE: 13) First Patient #: 1
14) Last Patient #: END
15) List: N/A
DOCTOR: 12) All Doctors
TOTALS: 16) Patient’s Totals
17) Primary Physician
OUTPUT LISTS:
18) Incl:
19) Excl:
PRINT TO: 20) Printer
What do you wish to do?
The System will print an
for category #11 and say
report of all charges pending insurance payment if you choose an insurance company
es to the slow pay insurance question.
Open Charges — #16
Accounts Receivable
USER-SELECTED CATEGORIES
BALANCE DUE: 1)
2)
3)
4)
Credits
Zero Balance
Balance Owing
Unapplied Credit
AGING:
AMOUNT OF BALANCE
OVER:
5) N/A
INSURANCE: 11) N/A
DOCTOR: 12) All Doctors
1)
2)
3)
6)
7)
8)
9)
10)
Current and over
over 30 days
over 60 days
over 90 days
over 120 days
RANGE: 13) First Patient #: 1
14) Last Patient #: END
15) List: N/A
Print detailed report listing balances only
Print detailed report listing open charges
Print doctor’s aged account totals only
What do you wish to do?
By selecting choice 2) of option #16, the Accounts Receivable report can be made to produce a detailed report
showing all unpaid “open” charges. In addition to the standard detailed report, this report shows each charge’s:
date of service (the aging category may not match the date of service if you age by date-of-entry or by statement
date); procedure code; description; units; extended amount (base amount times number of units); insurance one
through four’s payment and adjustment; other payment and adjustment the remaining balance of the charge. See
the following sample report:
42
Section B
ACCOUNTS RECEIVABLE
Sample report:
USER SELECTED CATEGORIES
AGED-ACCOUNTS RECEIVABLE AS OF 04/15/05
BALANCE: CREDITS / ZERO BALANCE / BALANCE OWING AGING: CURRENT AND OVER
INSURANCE: N/A
DOCTOR: All doctors
PAGE 1
1-1
STEVENS, JODIE
BAL DUE
CURRENT
31 - 60
61 - 90
91 - 120 OVER 120
LAST PMT AMOUNT FORM
PHONE: 703 259-8704
241.80
-------241.80
12/08/04
200.00
Per CK
703 332-6378
BC
6534435423
AE
879234453
------------------------------------------------------------------------------------------------------SVC DATE CODE DESCRIPTION
UNITS EXT AMT INS 1 PMT INS 2 PMT INS 3 PMT INS 4 PMT OTHER AMT BALANCE
ADJ
ADJ
ADJ
ADJ
ADJ
12/08/95
00000 BALANCE FWD
1
336.80
------- - - *** 136.80
----------136.80
12/08/95
90215 INT HOSP EXAM INT 1
50.00
--------------------50.00
12/08/95
76850 DIAG ULTRASOUND 1
55.00
--------------------55.00
+++++++++++++++++++++++++++++++++++++++++++++++++++++++++++++++++++++++++++++++++++++++++++++++++++++++++++++++++++++++++++++
1-2
MITCHEL, CARLTON
BAL DUE
CURRENT
31 - 60
61 - 90
91 - 120 OVER 120
LAST PMT
AMOUNT FORM
PHONE: 213 456-3341
0
----------12/08/95
88.16
Per CK
213 316-5578
PR 984367123
BS 76531290
MITCHELL FAMILY MEMBERS
1-3
MITCHELL, SARA
BAL DUE
CURRENT
31 - 60
61 - 90
91 - 120
OVER 120 LAST PMT AMOUNT FORM
125.00
--------125.00
----------------------------------------------------------------------------------------------------SVC DAT CODE DESCRIPTION
UNITS EXT AMT INS 1 PMT INS 2 PMT INS 3 PMT INS 4 PMT OTHER AMT BALANCE
ADJ
ADJ
ADJ
ADJ
ADJ
— — — — — — — — — — — — — — — — — — — — — — — — — — — — — — — — — —
Output Lists
The Accounts Receivable “Output List” option allows you to name and create a special computer file. This special
file contains the patients your
criteria included (category #17) or excluded (category #18) by running your
Accounts Receivable report. This
report can be customized by any allowable (group of) choice(s) within
Accounts Receivable. At a later time, the list can be used and reused in Patient Ledgers, Encounter Forms,
Accounts Receivable, Recall Notices, Mailing Labels, Production Report and Patient Statements. These Accounts
Receivable Output Lists can be used throughout POC wherever the System allows you to print “By List”. These lists
may also be sorted by Data Search’s “Sort by List” option.
The same Accounts Receivable Output List option described above may be used by the Data Search program (
[Enter] from the Selection List). Data Search can use the special list created in the Accounts Receivable program
to further manipulate the list of patients who meet the Accounts Receivable criteria you selected to create the list.
43
Section B
ACCOUNTS RECEIVABLE
Error Detection — #20
Accounts Receivable
USER-SELECTED CATEGORIES
BALANCE DUE: 1)
2)
3)
4)
Credits
Zero Balance
Balance Owing
Unapplied Credit
AGING:
AMOUNT OF BALANCE
OVER:
5) N/A
INSURANCE: 11) N/A
Current and over
over 30 days
over 60 days
over 90 days
over 120 days
RANGE: 13) First Patient #: 1
14) Last Patient #: END
15) List: N/A
DOCTOR: 12) All Doctors
1)
2)
3)
6)
7)
8)
9)
10)
Print to printer
Print to file
Check for errors
What do you wish to do?
The Accounts Receivable program detects some types of data errors that may be caused by power problems,
hardware failures, etc. If an “
” is detected, POC will give an “ACCOUNT OUT OF BALANCE” or “ERROR”
message. POC is designed with two files that maintain patient account balances. If a discrepancy exists, Accounts
Receivable will tell you so you may repair the data with the assistance of POC Customer Support or your POC
dealer. Printing either a “detailed” or “totals only” report will provide this detection. If you wish to perform error
detection without printing a report, you may choose Option 3) of user parameter #20.
A/R Print Options — #20
The Accounts Receivable report may be redirected to a computer file instead of your printer. This enables a
terminal on a multi-terminal system to quickly generate the report (printing to a file is much quicker than printing to a
printer), thereby reducing the demands on the system’s file server. This enables the other workstations to return to
normal performance levels much sooner. The user can then print a hard copy report after the System is finished
generating the print file. This can be done two ways:
1.
Immediately, upon completion, the System will ask if you want to print the report. If you do, answer
es.
2.
You may desire to print the report later. The System automatically names the file for you.
The file name, if printed by Terminal #1, will be:
'
If printed by Terminal #2, it will be:
+'
To print the report generated by Terminal #1, at the main Selection List, type:
[Enter]
[Space]
When finished, hit
'
[Enter] OR
[Space]
'
,)
[Enter]
#% to return to the main Selection List.
44
Section B
ADD CHARGES
ADD CHARGES
Add Charges,
[Enter] from the Selection List, allows you to enter procedures, insurance claim information,
diagnosis, charges and charge reversals to patients’ ledgers.
In Add Charges, when POC asks for the patient number, enter only the last portion. For example, if the patient
number is 1-345, you enter -. when asked for the patient number and press [Enter]. After verifying that you have
selected the correct patient, Add Charges asks or re-verifies the following 21 insurance questions if an insurance
company is shown on the patient’s ledger.
21 Questions Screen
Patient #
M.R. #
1-3
Adding
Charges
Insured #1:
Patient Age: 37
Insured #2:
SARA MITCHELL
CARLTON MITCHELL
CARLTON MITCHELL
6281 HAWTHORNE BLVD.
6281 HAWTHORNE BLVD.
6281 HAWTHORNE BLVD.
MANHATTAN BCH, CA 90266
MANHATTAN BCH, CA 90266 MANHATTAN BCH, CA 90266
1) First Sympton:
12/01/94
11) Illness
2) First Consult:
12/01/94
12) Certif:
Doctor
3) Return to Work:
13) Emergency:
No
4) Disability:
14) Prior #:
Disability Type:
15) Document:
No
5) Ref. Physician:
16) Opinion:
1st
6) Ref. Phy. Exam:
17) Surgery:
No
7) Other Facility:
18) Payro:
8) Admit - Disch:
19) Program:
9) Outside Lab:
MEDICAL LAB, INC.
20)
Skipping 21 Questions and ICD’s
A POWER USER BYPASS COMMAND
You may enter the patient’s account number with a for bypass or, alternately, answer
(Yes Bypass) at the “Is
this the correct patient?” question. In both cases, bypassing allows you to skip directly to entering procedure codes
without reviewing previously entered insurance related questions. To use this bypass option, add the letter to the
end of the patient’s account number like this: +-. (if the patient number is 1-1234). This will skip the “Is This
correct?” question, the 21 Questions, the diagnosis questions, and put you at the “Enter procedure code” question.
NOTE: Using either of these two commands will not bypass the first time you add charges to the account if the
patient’s ledger has insurance registered.
45
Section B
ADD CHARGES
ICD Codes
When entering a diagnosis, you may enter the ICD code number or a special index number. Alternately, you may
choose the ICD Code from a pop up list window by pressing [F5]. If an index number is used, it must be preceded
by an “ ”. The list of index numbers may be obtained by printing the ICD codes. If the ICD code does not exist on
the System, the program will allow you to enter it while adding charges. Refer to the chapter on ICD codes for
assistance. You may enter a One-Time-Only diagnosis by typing Ø at the enter diagnosis prompt. A One-TimeOnly diagnosis does not become part of your permanent ICD list.
Patient #
Insured
1-3
#1:
Adding
Charges
Insured #2:
Patient Age: 37 M.R. #
SARA MITCHELL
6281 HAWTHORNE BLVD.
CARLTON MITCHELL
6281 HAWTHORNE BLVD.
CARLTON MITCHELL
6281 HAWTHORNE BLVD.
MANHATTAN BCH, CA 90266
MANHATTAN BCH, CA 90266
MANHATTAN BCH, CA 90266
1)
2)
413.9
395.0
ANGINA PECTORIS
AORTIC STENOSIS
FEE SCHEDULE:
3)
4)
427.31
428.0
ATRIAL FIBRILLATION
CONGESTIVE HEART FAILURE
CURRENT BALANCE:
$244.95
Enter Procedure Code (s):
Up to four ICD codes may be recorded for each patient.
Procedure Codes
You may enter up to 25 procedures at a time for each patient. When entering a procedure, you may enter the
actual Procedure Code or the System index number. Alternately, you may choose the Procedure Code from a pop
up list window by pressing [F5]. The list of index numbers for procedures may be obtained by printing out the
Procedure Codes.
If your System is set up for Parallel Procedure Codes, the code or index number entered will be from the standard
Procedure Code list. Automatic translation from the standard code to any parallel code will be handled by the
System when insurance forms are printed. Refer to the Procedure Codes chapter for assistance.
If a Procedure Code does not exist on the System, the program will allow you to enter it while adding charges. If
your System is set up for parallel codes, you will be asked to enter the parallel codes as well as the standard code.
Refer to the chapter on Procedure Codes for assistance.
46
Section B
ADD CHARGES
/ “Yes, Override,” Changing Fees and Modifiers
Patient #
M.R. #
1-3
Adding
Insured #1:
SARA MITCHELL
6281 HAWTHORNE BLVD.
MANHATTAN BCH, CA 90266
1)
2)
3)
300.21
381.1
383.0
Charges
Patient Age: 37
Insured #2:
CARLTON MITCHELL
6281 HAWTHORNE BLVD.
MANHATTAN BCH, CA 90266
CARLTON MITCHELL
6281 HAWTHORNE BLVD.
MANHATTAN BCH, CA 90266
CHOLESTEATOME, EXT, EAR
CHRONIC SEROUS OTITIS MEDIA
ACUTE MASTOIDITIS
CURRENT BALANCE:
FEE SCHEDULE:
90620
CONSULTATION, COMPREHENSIVE
Is this correct? (Y/N/YB/YO) YO
$189.00
$65.00
The
, “Yes Override,” option allows you to use your standard procedure codes as the basis for modified OneTime-Only procedure codes. When using the
option, an arrow will appear next to the field to change. In the
example above, the arrow points to the procedure code
0+ to which you may add a modifier. To change the
price, press [Enter] and the arrow will next move to the fee and allow you to change the amount. To leave a field
unchanged, just hit [Enter]. This option's most common use is to change a modifier or a fee on an occasional
basis. If you modify a procedure code with the same changes often, you should make a “permanent” procedure
code.
Multiple Procedures
Patient #
M.R. #
1-3
Adding
Insured #1:
SARA MITCHELL
6281 HAWTHORNE BLVD.
MANHATTAN BCH, CA 90266
1)
2)
3)
300.21
381.1
383.0
A POWER USER BYPASS COMMAND
Charges
Patient Age: 37
Insured #2:
CARLTON MITCHELL
6281 HAWTHORNE BLVD.
MANHATTAN BCH, CA 90266
CARLTON MITCHELL
6281 HAWTHORNE BLVD.
MANHATTAN BCH, CA 90266
CHOLESTEATOME, EXT, EAR
CHRONIC SEROUS OTITIS MEDIA
ACUTE MASTOIDITIS
CURRENT BALANCE:
FEE SCHEDULE:
$125.00
Enter Procedure Code(s): 90040, 85022, 91030, 84132, 85650_
If you wish to add several Procedure Codes (up to five on one line) at the same time AND the procedures were
performed on the same date, for the same number of units, and were performed in the same location by the same
doctor, you may do so by entering the codes and/or index numbers separated by commas OR plus (+) signs (i.e.:
90620,45,33,2,90292 OR 90620+45+33+2+90292). It is OK to mix codes and indexes but DO NOT mix commas
and plus signs. The System will beep and truncate the excess if you exceed the limit of five procedures.
47
Section B
ADD CHARGES
Multiple Dates
1-3
Patient #
M.R. #
A POWER USER BYPASS COMMAND
Adding
Insured #1:
SARA MITCHELL
6281 HAWTHORNE BLVD.
MANHATTAN BCH, CA 90266
1)
2)
3)
300.21
381.1
383.0
Charges
Patient Age: 37
Insured #2:
CARLTON MITCHELL
6281 HAWTHORNE BLVD.
MANHATTAN BCH, CA 90266
CARLTON MITCHELL
6281 HAWTHORNE BLVD.
MANHATTAN BCH, CA 90266
CHOLESTEATOME, EXT, EAR
CHRONIC SEROUS OTITIS MEDIA
ACUTE MASTOIDITIS
CURRENT BALANCE:
FEE SCHEDULE:
90620
CONSULTATION, COMPREHENSIVE
$189.00
$65.00
Enter date(s): 040195,040295,040495,040695,040795
If you want to enter the same Procedure Code for several dates (up to five on one line), enter the code, press
#% and when you are asked for the date(s) of charges, enter the dates in the six digit format (mmddyy)
separated by commas OR plus signs (+). For example, multiple dates for the same procedure(s) are entered as
follows:
.
.
1.
.
1. 2 1.
. 2
.
1 .+
.+
[Enter]or
[Enter]
Alternately, if you wish to enter several Procedure Codes, each one performed on a different date, enter the
Procedure Codes separated by commas and when asked for the dates, enter the dates separated by commas.
Make sure you enter the dates in their respective order. If you enter more dates than Procedure Codes, the system
will assign the extra dates to the last code in the list.
“From - To” Dates
Patient #
M.R. #
1-3
Adding
Insured #1:
SARA MITCHELL
6281 HAWTHORNE BLVD.
MANHATTAN BCH, CA 90266
1)
2)
V22.2
114.9
Patient Age: 37
Insured #2:
CARLTON MITCHELL
6281 HAWTHORNE BLVD.
MANHATTAN BCH, CA 90266
NORMAL PREGANCY
COCCIDIODOMYCOSIS
90250
Enter date(s): 040105 040505
Charges
CARLTON MITCHELL
6281 HAWTHORNE BLVD.
MANHATTAN BCH, CA 90266
CURENT BALANCE:
FEE SCHEDULE:
HOSPITAL VISIT, LIMITED
$189.00
$22.50
Charges entered in Add Charges may be entered for multiple “from-to” dates. If you wish to enter from-to dates,
enter the first date and the final date separated by a blank space as in the above example.
48
Section B
ADD CHARGES
Bypassing Procedure Code Defaults
A POWER USER BYPASS COMMAND
After entering Procedure Code(s), when asked “Is This Correct?”, you may use the “Yes Bypass” option,
[Enter], to bypass the date, unit, location and doctor questions. If the patient has insurance and there is more than
one diagnosis, the System will ask you for the diagnosis number(s), otherwise it will skip that question, too.
assumes the default values of these questions. The default values are as follows:
Date of Service Units Location of Service Doctor -
System Date until a new date is entered, current
patient only.
1 unit.
From Set Parameters in Bill Insurance until a new
location is entered, current patient only.
Patient’s Primary Physician from Patient Information
until a new doctor is entered, current patient only.
Answering the question with only an [Enter] is the same as typing the default value (i.e. - [Enter] at most “Enter
Date” questions defaults to the date you entered as “Today’s Date” when you started POC).
Zero Dollar Charges
If you wish to indicate a procedure, notation or surgical sub-procedure for which there is no separate charge, you
may use any Procedure Code of your choice with a charge of $0.00. If you previously answered o to the SET
PARAMETERS question about printing zero charges within Bill Insurance, these zero charge procedures will not
print on the insurance form, but will appear on the Patient Ledger, the Patient Statement, the Transaction Report
and the Production Report. You may also use Data Search to find these procedures.
We recommend you design your own Procedure Codes for these special circumstances. The example below uses
alphanumeric coding. If you use a letter at the beginning of these special procedures, be sure NOT to use the
reserved letter “ ” in the first position of the procedure code number as this indicates an index number to the
System.
CODE
SUR01
DESCRIPTION
INCIDENTAL APPENDECTOMY
CHARGE
$0.00
Procedure Code ØØØØØ
Procedure Code 00000 is usually used for balance forward amounts and can be either a positive or a negative
(credit balance) figure (i.e.: /
for a credit balance of $100.00). In addition, the 00000 code can be used as a
One-Time-Only procedure code to override a patient’s partial statement setting. If your System has patients set to
receive partial statements (YP in Patient Information), the 00000 code will print on the next statement regardless of
the YP setting.
The 5-zero code, 00000, prints on the Transaction Report, the Patient Ledger and Patient Statement. The 5-zero
procedure will not print on the Production Report nor on insurance forms.
49
Section B
ADD CHARGES
Remarks
Patient #
M.R. #
1-3
Adding
Insured #1:
SARA MITCHELL
6281 HAWTHORNE BLVD.
MANHATTAN BCH, CA 90266
1)
2)
3)
300.21
381.1
383.0
Charges
Patient Age: 37
Insured #2:
CARLTON MITCHELL
6281 HAWTHORNE BLVD.
MANHATTAN BCH, CA 90266
CARLTON MITCHELL
6281 HAWTHORNE BLVD.
MANHATTAN BCH, CA 90266
CHOLESTEATOME, EXT, EAR
CHRONIC SEROUS OTITIS MEDIA
ACUTE MASTOIDITIS
CURRENT BALANCE:
FEE SCHEDULE:
$125.00
Enter Procedure Code(s): 90040, REM,REM,REM
can be used as a Procedure Code to add remarks to a patient’s ledger. Multiple REM codes may be used if
needed. Such remarks must immediately follow entry of the Procedure Code for which the remark applies.
3
can be used to add remarks on the newer red HCFA-1500. If the description of a REM line starts with a minus “-”
sign (the “-” must be the first character you enter followed by the actual remark), the remark will NOT print on
Patient Statements. Regardless of any style of remark, ALL remarks will appear and print on a patient’s ledger, so
be careful with the wording of these remarks.
Maximum Transactions Per Entry
A maximum of twenty-five transactions per patient may be entered at one time in Add Charges before making a
permanent record.
Charge Reversals
At the “Enter Procedure Code” question, you may reverse a charge by typing
4
[Enter]. A charge
reversal cannot be entered at the same time any other regular charge is entered for a patient. Only those charges
which have not had payments posted against them may be reversed. If you wish to reverse a charge that has been
posted (paid or adjusted) against, you must first reverse the payment or adjustment.
Separate Insurance Forms, Printing Options
If you want groups of procedures to print on consecutive, separate insurance forms, you can enter the special
Procedure Code, zz
, to force an insurance form break between groups of procedures. If this Procedure Code
is not part of your permanent Procedure Code list, you may add it by entering the code as follows:
Procedure Code Description Type of Svc Charge -
pp
[Enter]
5 [Enter]
[Enter]
[Enter]
When completed it looks like:
INS
INSURANCE BREAK
$0.00
Use this Procedure Code to separate charges and print individual insurance forms whenever you need. This code
will not be printed on any of the insurance forms.
50
Section B
ADD CHARGES
Modifier, Medicare Considerations
If you are preventing alpha codes form being printed on insurance forms through
Insurance, and you still want
modifiers, enter the modifier in lower case like this:
converted to
when the form is printed. This conversion works for other letters also.
(Set Parameters) in Bill
/"6. The "6 will be
Multiple Modifiers
If you wish to enter a Procedure Code with multiple modifiers, enter the code with the first modifier in the usual
position and the rest of the modifiers as part of the description. Example:
CODE
99999-66
DESCRIPTION
-77-88-99 Description
CHARGE
$0.00
Enter the additional modifiers in the description field separated by minus “-” signs (hyphens) WITHOUT a space
between them. A space signifies the beginning of the actual description.
U L D DX’S - Units, Location, Dr. # & Diagnosis
Patient #
M.R. #
1-3
Adding
Insured #1:
SARA MITCHELL
6281 HAWTHORNE BLVD.
MANHATTAN BCH, CA 90266
1)
2)
3)
300.21
381.1
383.0
DATE
1)
04/15/95
Charges
Patient Age: 37
Insured #2:
CARLTON MITCHELL
6281 HAWTHORNE BLVD.
MANHATTAN BCH, CA 90266
CARLTON MITCHELL
6281 HAWTHORNE BLVD.
MANHATTAN BCH, CA 90266
CHOLESTEATOME, EXT, EAR
CHRONIC SEROUS OTITIS MEDIA
ACUTE MASTOIDITIS
CURRENT BALANCE:
FEE SCHEDULE:
CODE
90250
DESCRIPTION
HOSPITAL VISIT, LIMITED
Enter NUMBER of charge to be changed: _
CHARGE
$22.50
-------$22.50
$125.00
U
L
D
1
1
2
DX’S
123
In the above example, to the right of “CHARGE”, is “U L D DX’S.” “U” is for the number of units. “L” is for the
location of service. “D” is for the treating doctor. “DX’S” is for the corresponding diagnosis of that charge line.
Recording Charges - Options
) [Enter], for “Yes Bill Later,” allows you to record charges to the patient’s ledger and delay printing an
insurance form for the charges under the “Current” option of the Bill Insurance program. The charges will not be
printed on an insurance form until a future date when you have recorded additional charges with the
[Enter] (Yes)
option. However, with the “Single,” “All” or “Range” insurance billing options in Bill Insurance,
) is overridden
and these charges will be printed.
7 [Enter], for “Yes No Insurance Form,” allows you to bill the patient for charges (Patient Statements) and
NEVER have them print on an insurance form. This is commonly used for charges the insurance company does not
cover or where a patient may not wish the insurance company to know about specific procedures (well patient
physical, HIV testing, etc.).
7 will override the YP Patient Statement flag and allow the charge to be printed on
the next statement.
51
Section B
ADD CHARGES
Recall and Drug Question
At your option, the System can ask if you would like to enter a patient Recall Notice or a Drug Treatment when you
finish adding charges to each patient. To change your setup, see Section D, System Configuration.
Notes:
52
Section B
ALPHABETIZE PATIENTS
ALPHABETIZE PATIENTS
Alphabetize Patients, ) [Enter] from the Selection List, allows you to view and print a variety of patient lists. Its
primary function, however, is to create the alphabetical patient files used throughout POC.
Printing or viewing the alphabetical patient list without first alphabetizing will cause the list to appear as it
was when last alphabetized. It will NOT contain any newly entered patients.
If you have changed a patient’s name, you must re-alphabetize the patient list in order to find the patient by their
new name.
CAUTION: If patients are not alphabetized periodically, it will cause the System to run slower. Therefore, it
is recommended that alphabetizing be run at least weekly.
Notes:
53
Section B
APPOINTMENT SCHEDULES
APPOINTMENT SCHEDULES
[Enter] from the Selection List, functions independently from the rest of POC. This
The Appointment Schedule,
enables one operator to use the Appointment Schedule without interfering with another operator on a different
terminal who is entering other appointments or transactions.
At any time (except at the main Selection List), by simply hitting [F7], the System will allow you to make an
appointment or, if one has already been made, to confirm, change or delete an appointment.
Daily appointments can be viewed or printed. After printing for the final time, the appointment data must be
cleared.
Initializing the Appointment Schedule
In the Appointment Schedule program, the “Initialize Schedule” choice allows you to tailor the Appointment
Schedule to the needs of your office. Appointments may be scheduled for any number of hours in the 24 hour day.
In the rare event of schedules that cross into the next day, the office may set up two schedules, one for the late
evening, and the other for the early morning. Time slots may be allocated for any desired length of time. Days off
and regular break times are always user defined. When entering midnight as a starting or ending time, use
12:00AM. Enter noon as 12:00PM. Please note: The doctor (or therapist, etc.) must have already been entered
into the System ( Doctor Information) before you can initialize their schedule.
Scheduling A New Patient
Appointments
Enter Patient Name or Number: NP
You may enter an appointment for a patient who is not part of the regular POC System by typing
[Enter] at the
name or number prompt. This patient will be designated as “-NP-” where their account number would normally
appear.
54
Section B
APPOINTMENT SCHEDULES
Viewing Or Scheduling An Appointment
Patient #
1-3
Appointsments
AM
Tuesday August 15, 2005
DOCTOR #1
TIME
PT #
NAME
TELEPHONE
LENGTH
# BOOKED
----------------------------------------------------------------------------8:00
8:15
8:30
8:45
9:00
1-4
MITCHELL JR, CARL
213 456-3341
60 min
1
9:15
see above
1
9:30
see above
1
9:45
see above
1
10:00
1-1
STEVENS, JODIE
703 259-8704
15 min
1
10:15
10:30
10:45
Enter appointment time, date press V, W, CTRL V, CTRL W, ALTV, ALTW or
press ENTER to continue (X to Exit):
The above screen appears when either viewing appointments or entering an appointment and hitting [Enter] at the
“time” question. POC allows you to easily navigate through the schedule: a day, a week, or a month at a time.
POC will skip days (usually weekends) that were initialized as days off.
PATIENT# 1-1
Appointments
-----------------------
STEVENS, JODIE
Tuesday August 2, 2005
703 259-8704
9:30 am
15 min
12/10/1946
BLUE CROSS
INITIAL OFC VISIT
Is this the correct appointment? N
You can enter and view additional information such as Insurance Company, Date of Birth, reason for appointment
and time and date of appointment in the Appointment Scheduler.
Notes:
55
Section B
BATCH ADD CHARGES
BATCH ADD CHARGES
Under the Batch method of Add Charges,
[Enter] from the Selection List, you may enter charges for more than
one patient at a time. The same procedures and charges will automatically be applied to all patients selected.
In general, the same data entry methods apply to Batch Add Charges as in Add Charges. Press [F1] while in Batch
Add Charges for more specific instructions at each question.
All procedures entered under Batch Add Charges will post to each patient’s account with the same location of
service and the same doctor. In all cases, the Batch Add Charges program will designate Diagnosis #1 on each
patient’s ledger for the charge(s) entered. For this reason, be certain the correct DX is in position #1 for each of
these patients.
Maximum Transactions and Patients
A maximum of 14 transactions for up to 20 patients may be entered and recorded at one time in Batch Add
Charges.
Transaction Summary
Batch Posting of Patients: 07/01/05
1) STEVENS, JODIE
1-1-1
BIRTH DATE: 12/10/46
2) MITCHELL, CARLTON 1-1-2
BIRTH DATE: 01/01/54
3) MITCHELL, SARA
1-1-3
BIRTH DATE: 09/22/57
4) MITCHELL, CARL JR.
1-1-4
BIRTH DATE: 10/05/79
5) BOWER, MARYANNE
1-1-5
BIRTH DATE: 06/22/60
- - - - -- - - - - - - - - - - - - - - - - - - - - - - - - - - - - - - - - - - - - - - - - - - - - - - - - - - - - - - - - - - - - - - - - - - - - PROCEDURES
1)
2)
3)
DATE
07/01/05
07/01/05
07/01/05
CODE
90500
85022
81000
DESCRIPTION
BRIEF EXAM, E.R., NEW PT.
CBC
URINALYSIS
A d d i n g
CHARGE
$28.00
$12.50
$11.50
U
1
1
1
L D
14 1
14 1
14 1
C h a r g e s
Please Check the Printed List VERY CAREFULLY before proceeding.
DO YOU WANT TO RECORD ALL CHARGES TO ALL PATIENTS ON THE PRINTED LIST?
Before permanently recording charges for multiple patients in Batch Add Charges, the System will print a summary
of all patients and all charges entered. Make sure you verify that all the information entered is correct BEFORE
permanently recording charges under the batch method.
56
Section B
BILL INSURANCE
BILL INSURANCE
Bill Insurance,
[Enter] from the Selection List, allows you to print paper claims and, optionally, generate
Electronic Claims Submission, “ECS”, files to send to your insurance carriers. It also controls a variety of claim
options in the Set Parameters section.
Formats
Bill
What do you wish to do:
Insurance
ST)
M)
MC)
ED)
SP)
Standard Insurance
Medicare Insurance
Medicaid Insurance
Edit Claim Information
Set Parameters
Please enter your choice: _
The insurance form program allows you to print up to five different insurance forms. Not all five insurance form
types need to be present on every System. Most Systems, depending upon State requirements, come preconfigured for two or three insurance forms: Standard (commercial carriers), Medicare and Medicaid. The type of
form to be printed for each patient is determined by the insurance code entered in New Patients or Patient
Information. The universal HCFA-1500 insurance form will be printed for all insurance codes that are not
designated specifically for another type of form.
Set Parameters - Billing Parameters
Bill
Insurance
Billing Parameters
1)
2)
3)
4)
5)
6)
7)
8)
9)
10)
Location of service ................................................................. 3
Signature box ......................................................................... SIGNATURE
Alpha mask ............................................................................ N
Zero charges ........................................................................... N
Zero primary paid .................................................................. N
Hold secondary forms ............................................................ N
Blank secondary balance........................................................ Y
Spooler file name ................................................................... NONE
Procedure code mask ............................................................. NONE
Bill as a group ........................................................................ N
Enter NUMBER to be changed: _
!# 89%%#
&# : ;& <%# :&$ <"#
!# &8%## '
Set Parameters (
[Enter] within the Bill Insurance program) allows users to define the following parameters when
running insurance forms:
57
Section B
BILL INSURANCE
Location of Service Default:
This number will appear as the default at the “Location of Service” question in Add Charges.
When POC asks you for the “Location of Service” while entering a procedure, just hit [Enter]
to choose the default location of service (i.e.: - If the default location of service is “Doctor’s
Office”, just hitting [Enter] is the same as entering - [Enter] at the “Location of Service”
question). By using defaults such as this, POC eliminates a great many keystrokes
throughout the day. POC will automatically translate the System number to the appropriate
insurance location of service number when printing your insurance forms.
The “Location of Service” numbers used by POC are as follows:
1)
2)
3)
4)
5)
6)
7)
8)
9)
10)
11)
12)
13)
14)
15
Inpatient Hospital
Outpatient Hospital
Doctor’s Office
Patient’s Home
Day Care Facility
Night Care Facility
Nursing Home
Skilled Nursing Facility
Ambulance
Independent Kidney Treatment Center
Independent Laboratory
*Clinic
*Surgical Clinic
*Emergency Room
*Extended Care Facility
*User definable. Requires POC or dealer assistance.
Message for Signature Box:
The message entered here will be printed on insurance forms in the “patient’s signature” box.
The standard message is “SIGNATURE ON FILE.”
Alpha Modifiers Masking, Medicare Considerations:
This setting allows you to remove letter modifiers you may have placed in the 7th and 8th
positions of a CPT code. For example, if you answer es here, the Procedure Code 90060YB will be printed on insurance forms (or generated in an electronic claims file) as 90060 with
the alpha (YB) modifier screened out. If you answer o, ALL letter modifiers will be printed. If
you want SOME modifiers to print and you have answered es to this option, enter the code
as 90060-yb. It will then be printed as 90060-YB. The System ALWAYS converts lower case
letters to upper case when it prints or generates insurance billing.
Print Zero Charges:
You may have procedures that do not have a charge, If you want zero amount charges to
print on insurance forms, answer es. If you don’t, answer o. If you want some zero
charges to print and others to not print, answer this question es and then, in Add Charges,
use 00000 procedure codes or answer
7 when permanently recording zero charges you
DON’T want to print on insurance forms.
58
Section B
BILL INSURANCE
Amount Paid on Primary Forms Always Show Zero:
If you answer es, the box showing “amount paid” on the primary insurance will always be
$0.00 regardless of whether the patient or another source has paid on those charges. If you
answer o, the amount paid will be printed.
Hold Secondary Billing Until Payment is Applied:
If you answer es, only the primary insurance carrier’s form will be printed. The insurance
form for the secondary carrier(s) will be withheld pending an applied payment or adjustment in
Post Payments. The withheld charges will then be printed on the secondary insurance form
the next time you Bill Insurance. If you answer o, both the primary and the secondary
insurance forms will be printed at the same time. In order for payment/adjustment
amounts to be correctly posted against the appropriate charges to release the
secondary billing, we suggest you ONLY use option type payments in Post Payments
if you answer es.
Amount Paid & Balance on Secondary Forms be Left Blank:
If you answer es, the boxes showing the amount paid and the balance due on secondary
insurance billing will be left empty. If you answer o, the appropriate amounts will be filled in.
This only affects the SECONDARY carriers, insurance companies (Insured) two through four.
Spooler File Name:
This feature is used for some types of Electronic Claims Submission. The System allows you
to redirect ALL claims output to a computer disk file rather than print to paper. When the file is
viewed with a text editor, it will appear just as if it were printed. The System writes the claims
to a temporary file and then coverts the temporary file to the spooler file when you answer es
to “prepare these claims for transmission.”
Procedure Code Mask:
You may have certain procedures that are never billed to an insurance company. You can set
up the Procedure Code Mask to exclude these codes from ALL claim forms. You should
create these excluded codes with a common characteristic, i.e.: They could all start with “X”
or end with “X” for eXclude - XCODE or CODEX or CODE-9X.
Bill as a Group:
If you answer es, you will be asked for your group numbers in each carrier category. When
billing as a group, the insurance forms will be printed under the group’s billing number with
each charge line identifying the treating physician's PIN number where appropriate.
Payments received will be paid to the group. The PIN # is the Provider ID you entered in
Doctor Information (
[Enter] from the Selection List). The UPIN # is the Unique Provider
Identification number and is used EXCLUSIVELY in POC’s Provider List (i.e. - Referring
Physicians, etc). Do NOT confuse the PIN# and the UPIN#. They are NOT the same. If you
answer o here, the insurance forms will be billed under each physician’s own identifying
number in Doctor Information. Be sure you put the correct numbers in the appropriate
locations, including leading and trailing zeros.
If you bill as a group and have multiple group numbers for Medicare because you have
multiple office locations, answer o to this question. Refer to the section on Doctor
Information for setting up multiple groups.
59
Section B
BILL INSURANCE
Print Insurance by Treating Physician
Insurance Forms
Do you wish to print by TREATING physicians? N
If you wish, you can print insurance forms by treating physicians. If a patient has been seen by three physicians,
and you have indicated you wish to print by treating physician, the System will screen each physician’s charges to
three separate forms. Otherwise, charges will be printed on the same form under the patient’s primary physician.
Printing Options
Insurance Forms
What do you wish to do:
SI)
CU)
AL)
RA)
Single insurance form
Current insurance forms
All insurance forms
Range of insurance forms
( )
Please enter your choice:
When printing insurance forms, the
“Current” option causes insurance forms to be printed for all patients who
have had charges recorded under the option in Add Charges since the last insurance form run. This is the fastest
option for printing insurance forms. Current also generates a list that will print insurance labels in the Mailing Label
program. The other options, ) “All,”
“Range,” and
“Single,” print and update all charges added since the
last insurance form run, including those recorded with the
) option in Add Charges (but not charges recorded
7).
= If your System has the optional Electronic Claims Submission software, “ECS”, you will have a fifth
selection,
, after you choose the type of insurance. These procedures will be discussed at the end of this
Bill Insurance section.
60
Section B
BILL INSURANCE
Updating Insurance Forms Previously Printed
Insurance Forms
What do you wish to do:
SI)
CU)
AL)
RA)
Single insurance form
Current insurance forms
All insurance forms
Range of insurance forms
Please enter your choice: UP
Updating happens as a normal function of printing the forms. There may be times, however, when you need to
update without printing the forms. Not shown on the screen, but available, is the special
“Update” option. This
unlisted option allows you to update current, or a range of, insurance forms as if you had actually printed them. This
option can be useful for a variety of reasons, including updating forms that DID get properly printed and you
answered o to the update question at the end of the insurance print run. BE CAREFUL WITH THIS OPTION!
Once you update, you can only reprint the charges one form at a time with the
“Single” option.
Entering Remarks On Insurance Forms
If you wish to enter last minute remarks on an insurance form and the insurance form is set up for it, you may enter
the remark when printing a single insurance form under the
“Single” option. To activate this option, the insurance
format file must be set up to allow for remarks. POC or your dealer can assist you with this.
Claim Editor and Rebilling
POC will allow you to edit any previously submitted rejected claim. It accomplishes this task by assigning a claim
number to every claim processed. The claim may be edited and resubmitted, when necessary, using this claim
number. Once edited, reprint the claim under the
“Single” option. See the following example:
61
Section B
BILL INSURANCE
Patient # 1-3
M.R. # 3488765482
Patient Ledgers
Phone: 703 259-8704
SAME
DWIGHT STEVENS
554 12TH STREET
FALLS CHURCH, VA 22042
Insured #1:
JODIE STEVENS
554 12TH STREET
FALLS CHURCH, VA 22042
Ins #1: BC
- BLUE CROSS
Ins #2: AE
- AETNA
Ins #3:
Ins #4:
Insured #2:
Page 1
==============================================
12/08/94
00000 BALANCE FORWARD
04/15/98 90620
CONSULTATION COMPREHENSIVE
Patient
04/15/98
ICD #1:
ICD #2:
ICD #3:
90620
300.21
1st Insurance:
2nd Insurance:
3rd Insurance:
4th Insurance:
Other:
Remaining Balance:
236.00
65.00
==========
336 .00*
65.00
o
2
Ledger
CONSULTATION COMPREHENSIVE
65.00
CHOLESTEATOME, EXT, EAR
Paid
0.00
0.00
0.00
0.00
0.00
Adjusted
Treating Dr. #:
0.00
Location #
0.00
Claim #:
0.00
Aging Date:
0.00
Statement:
0.00
65.00
Press ENTER to return
2
3
2
04/15/98
Updated
The above screen is a page from Jodie Stevens’ Enhanced Ledger. The above example demonstrates how POC
assigns a unique claim number to each claim it produces.
Edit Claims
Enter claim number to edit: 2_
You may access the Claim Editor in Bill Insurance or by hitting the [F8] key. To edit a claim, enter the claim number
and hit [Enter].
1-3
M.R. #
JODIE STEVENS
554 12TH STREET
FALLS CHURCH, VA 22042
1) First Sympton:
2) First Consult:
3) Return to Work:
4) Disability:
Disability Type:
5) Ref. Physician:
6) Ref. Phy. Exam:
7) Other Facility:
8) Admit - Disch:
9) Outside Lab:
10) Same/Similar:
Is this the correct claim?
Patient #
SAME
Edit Claims
Insured #1:
12/01/94
12/01/94
NORMAN JOHNSON, MD
12/05/94
MEDICAL LAB, INC.
12/05/94
11)
12)
13)
14)
15)
16)
17)
18)
19)
20)
21)
Insured #2:
Illness
Certif:
Emergency:
Prior #:
Document:
Opinion: 1st
Surgery:
Payro:
Program:
CLAIM #
2
Doctor
No
No
1st
No
Medi. Stat:
When editing a claim, you can change the “21 Questions” screen from Add Charges.
62
Section B
BILL INSURANCE
Patient # 1-3
M.R. #
JODIE STEVENS
554 12TH STREET
FALLS CHURCH, VA 22042
1)
386.0
Edit
Insured #1:
SAME
Claims
CLAIM # 2
Insured #2:
DWIGHT STEVENS
554 12TH STREET
FALLS CHURCH, VA 22042
MENIERE’S DISEASE
Enter NUMBER or diagnosis to be changed:
You may change the diagnosis, too.
If the doctor’s or group’s information is incorrect, change the doctor information in Doctor Information and the group
numbers within Set Parameters in Bill Insurance.
For the sake of maintaining accurate financial totals, the System does not allow you to edit the charge itself. If the
charge is incorrect, you need to re-enter the charge in Add Charges. Remember to REVERSE the original charge if
you re-enter it.
Electronic Claims Submission
Medicare Forms
What do you wish to do:
SI)
CU)
AL)
RA)
EC)
Please enter your choice: _
Single insurance form
Current insurance forms
All insurance forms
Range of insurance forms
Generate ECS file
If your System has optional Electronic Claims Submission, “ECS,” you will have a fifth selection, EC, after you
choose the type of insurance.
ECS requirements vary
dealer. In addition to
(hyperterminal will work
carriers via the internet.
greatly from state to state and its implementation requires the assistance of POC or your
a POC ECS module, you will also need a modem and telecommunications software
in most cases) to complete your ECS setup. It may also be possible to transmit to some
Please check with your carrier.
A general overview to produce and transmit an electronic claims file:
1.
2.
Choose the
option.
The ECS file is generated by the System and a pre-submission report is
printed showing the patients’ claims, charges, and any erroneous data
that would cause claims to be rejected.
63
Section B
BILL INSURANCE
3.
4.
Correct the erroneous data, if necessary. This may require you to
change information in Patient Information, Add Charges, and/or Doctor
Information. Regenerate the ECS file until it comes out error free.
Transmit the file when convenient. The file stays on the System until you
delete it.
POC currently has ECS available for most major commercial carriers using the ANSI 4010 A1 fortmant, Medicare
and most states’ Medicaid.
Medicare Claims
----------------------------What do you wish to do:
GE) Generate electronic claim file
PE) Pregeneration error check
PR) Print reports and lists
RB) Rebill claims
VU) View a claim file
CH) Change submitter information
DE) Delete old ECS files
Please enter your choice:
The procedures for processing Electronic Claims can vary depending on the carrier to which you will be transmitting
your claims. These variations could be subtle or significant. For the purposes to provide a general overview, we will
use Medicare as our sample carrier.
ECS Information
----------------------------1)
2)
3)
4)
5)
6)
7)
8)
9)
10)
11)
12)
13)
14)
15)
16)
17)
Submitter code ..................... 1
Submitter name ..................... PROFESSIONAL SYSTEMS CORPORATION
Submitter type ..................... Business
Contact name ....................... TECHNICAL SUPPORT
Contact phone number ............... 3102337370
Contact fax number ................. 3102337373
Contact email address ..............
Test / Production .................. T
Bill as a group .................... No
Provider signature on file ......... Yes
Procedure code 'Mask' .............. NONE
Authorization form for HCFA-1500 block 13 on file
Claim drive\path ................... C:
Transmission command line ..........
Carrier name ....................... National Heritage
Submission number .................. 1
Railroad Medicare insurance code ...
Enter the number to be changed:
The first time you use the Electronic Claims software, you will have to enter the applicable submitter information by
selecting *, Change submitter information. This only needs to be done once. However, if your submitter
information should change, this is where you would edit and update the information.
64
Section B
BILL INSURANCE
1)
2)
3)
4)
5)
ECS Information
----------------------------Signed signature authorization form or forms for both HCFA-1500 Claim Form
block 12 and block 13 on file.
Signed HCFA-1500 Claim Form on file.
Signed signature authorization form for HCFA-1500 Claim Form block 13 on file.
Signature generated by provider because the patient was not physically present for
services.
Signed signature authorization form for HCFA-1500 Claim Form block 12 on file.
Enter the number indicating how the patient or subscriber authorization signature(s) were
obtained and how they are being retained by the provider:
When you select number 12 for the applicable form of signed authorization, a Pop Up List will appear. Simply select
the item that applies to your practice and carrier requirements.
ECS Information
----------------------------Who is your medicare carrier:
1)
2)
3)
4)
5)
6)
7)
8)
9)
10)
11)
12)
13)
14)
Aetna
National Heritage
Noridian
Empire BC/BS of NY
Palmetto GBA
Trailblazer Virginia
AdminStar
AdminaStar Federal
Mississippi Medicare
GA Medicare
BC/BS of Florida
NHIC
ASK INC
ASK INC
Please enter your choice:
When you select number 15 for your Medicare carrier, a Pop Up List will appear. Simply select the appropriate for
your designated Medicare carrier.
It may be necessary to contact Technical Support or your Dealer and your Medicare carrier to assist you in verifying
some of this information. Once you have completed your entries, make them permanent.
Medicare Claims
----------------------------What do you wish to do:
GE) Generate electronic claim file
PE) Pregeneration error check
PR) Print reports and lists
RB) Rebill claims
VU) View a claim file
CH) Change submitter information
DE) Delete old ECS files
Please enter your choice:
Assuming you have previously entered patient billing and have claims pending for this carrier, you will have a
choice.
65
Section B
1.
BILL INSURANCE
You can next select
, for a pre-generation error checking report. You will be prompted to have your printer
ready. You can make any necessary corrections before generating the file. Once this report has been printed,
you will return to the Medicare forms screen, refer to sample screen on page 63.
Or
2. You can next select > , Generate electronic claim file. You will be prompted to have your printer ready. A
pre-submission report will be printed out. This list will indicate any incorrect or missing billing information and
provide you the opportunity to make the necessary corrections before transmitting your claim file. Thus limiting
the possible of having the claim rejected.
ELECTRONIC CLAIMS PRE-SUBMISSION REPORT
--------------------------------------TEST ECS FILE NAME:
TEST TRANSMISSION FILE NAME:
C:M080106.M
C:M080106.XMT
08/01/06
PAT #
LAST NAME/CLAIM *
MESSAGE/WRANING
======================================================
9
BROWN
Invalid or missing Medicare policy number.
Missing provider number.
CLAIM # 9
- - -> Total charge $173.00
10
WALLAMAKER
Invalid or missing Medicare policy number.
CLAIM # 10
- - > Total charge $92.50
Missing referring physician.
Missing specialty code.
DOCTOR NUMBER
NO. OF CLAIMS
BILLED AMOUNT
======================================================
1
2
$265.50
===============================================
TOTAL CLAIMS SUBMITTED:
2
FROMS TO BE PRINTED:
0
TOTAL AMOUNT BILLED:
$265.50
Next, you will be prompted, “Do you wish to update these charges?”. Then you will be prompted, “Should this file
be prepared for transmission?”. Answering will generate the file in preparation for transmission to your carrier.
NOTE: A file name, i.e., =
0' , will be displayed at the top of the screen. This file name is a combination
of the insurance code of the carrier you will be transmitting to and the system date. You will need this information
when you connect to the carrier’s bulletin board at the time of the transmission of your claims file.
Each carrier’s bulletin board or method of receipt of electronic claims can differ widely and are constantly
changing. You will have to contact that carrier for assistance in transmitting the claim file you have just
generated.
If there were any secondary carriers for the patients in this file, and depending on the options you selected in Patient
Information and Add Charges, you will next be prompted to print paper claim forms for those charges.
Medicare Claims
----------------------------Place paper in printer.
Turn printer on.
P r e s s E N T E R w h e n r e a d y (X to Exit):
66
Section B
BILLINGS/COLLECTIONS REPORT
BILLINGS/COLLECTIONS REPORT
The Billings/Collections Report,
[Enter] from the Selection List, is a summary of each physician’s total billings,
collections, adjustments and refunds for the current day, the current month-to-date and the current fiscal year-todate. The Billings/Collections Report print by treating physician. One full year of Billings/Collections Reports are
stored by Version 5.0 (or greater) for viewing or printing. PLEASE NOTE: You cannot convert from an earlier POC
version and immediately have access to the previous year’s reports. They don’t exist until Version 5.0 (or greater)
creates them.
Security Code
SELECTION
LIST
TERMINAL #1
Date: 04/15/98
NP)
AC)
BA)
PP)
SB)
EF)
New Patients
Add Charges
Batch Add Charges
Post Payments
Super Bill
Encounter Form
PL)
RL)
TR)
BR)
BI)
FR)
Patient Ledgers
Retired Ledgers
Transaction Report
Billings/Collections Report
Bill Insurance
First Report of Work Injury
CP)
PR)
AR)
RP)
PS)
Cross Posting Report
Production Report
Accounts Receivable
Referring Physician Report
Patient Statement
Security
DI) Doctor Information
PI) Patient Information
AS) Appointment Schedules
IC)
IL)
PC)
PV)
ZC)
DL)
ICD Code List
Insurance Company List
Procedure Code List
Provider List
Zip Code List
Drug List
CD)
DS)
RN)
ML)
AL)
SP)
SC)
EX)
Clinical Data
Data Search
Recall Notices
Mailing Labels
Alphabetize Patients
Setup Printer
System Command
Exit
C o d e:
For the sake of privacy, the Billings/Collections Report requires a security code. When typing the security code
(which is case sensitive), do NOT hit the [Enter] key. This security code can be changed with a POCDOC utility
(you need to know the current code first) and should be done under the supervision of POC Customer Support or
your dealer. Write the code down and store it in a safe place. People do forget. As a matter of policy, POC will not
give the security code to staff members. Only the doctor or business principal may call to get the code. We do not
make exceptions to this policy.
System Date vs Transaction Date
The Billings/Collections Report accumulates dollar amounts based on the date of the System at the time the
transaction is entered. The daily totals, therefore, reflect all transactions entered into the System that day,
regardless of the actual date of service for the charges.
Clearing Billings/Collections Report Totals
The “Today’s” totals automatically clear when the System date is changed. The month-to-date totals automatically
clear when the month is changed. The year-to-date totals will also clear when the month is changed if you tell the
System it is a new fiscal year.
67
Section B
BILLINGS/COLLECTIONS REPORT
Printing the Billings/Collections Report
This report may be printed at any time and as often as you wish. It definitely should be printed at least once every
month at the end of the month for every doctor on the System, after all transactions have been recorded and the
Transaction Report has been run on the last day of the month. These final month-end reports should be saved.
At the start of a day, you will be asked if you want to print the report when changing to a new month. If you answer
[Enter], and you have not entered any NEW transactions since the last time you printed the report, you will be
allowed to continue. Your report totals will then be cleared by POC. If you HAVE entered transactions since the
last time you printed the report, you will not be allowed to continue into the new month. You will be returned to the
“Enter Today’s Date” question where you must enter the last day of the previous month and print the Transaction
Report. Then you can print the Billings/Collections Report before continuing into the new month.
Totals
Billings
& Collections Report
Enter Doctor Number: 1,3,5,7
If you want to see more than one doctor’s totals when viewing or printing the Billings/Collections Report, enter each
doctor’s numbers separated by commas, i.e.:
Enter Doctor Number:
1-1 12 [Enter]
If you want all doctors’ totals on separate reports, type:
Enter Doctor Number:
)) [Enter]
If you want just the grand total of all doctors, type:
Enter Doctor Number:
) [Enter]
If you want a SINGLE report that COMBINES the totals of selected doctors, type “TOTAL” followed by a SPACE
and then the doctor numbers:
Enter Doctor Number:
) [Space] 1-1 12 [Enter]
If you want SEPARATE reports for several doctors and a total page for those doctors, type the doctor numbers
separated by commas and the word “TOTAL”:
Enter Doctor Number:
1-1 121
) [Enter]
68
Section B
BILLINGS/COLLECTIONS REPORT
Categories
The Billings/Collections Report breaks down payments into twenty-two categories of which fourteen are user
definable. Adjustments are divided into twenty categories and correspond to the appropriate payment category.
Changing Payment/Adjustment Headings
Billings
& Collections Report
CHECK PAYMENT CATEGORIES
20) Usr Def Pmt #6
21) Usr Def Pmt #7
22) Usr Def Pmt #8
23) Usr Def Pmt #9
24) Usr Def Pmt #10
15)
16)
17)
18)
19)
Usr Def Pmt #1
Usr Def Pmt #2
Usr Def Pmt #3
Usr Def Pmt #4
Usr Def Pmt #5
35)
36)
OTHER PAYMENT CATEGORIES
TRANS OF FUNDS Pmt
37) Usr Def Pmt #12
Usr Def Pmt #12
38) Usr Def Pmt #13
39)
40)
OTHER ADJUSTMENT CATEGORIES
BAD DEBT Adj.
41) Usr Def Adj #13
COLLECT AGENCY Adj
42) Usr Def Adj #14
Enter number to be changed: _
Choose the * “Change” option after entering the Billings/Collections Report program from the main Selection List.
The System will present you with a screen allowing you to change Check Payment Category headings. PLEASE
NOTE: When changing a Check Payment Category, the System will automatically create a corresponding
Adjustment Category for you.
Notes:
69
Section B
CLINICAL DATA
CLINICAL DATA
Clinical Data,
[Enter] from the Selection List, includes Drug Treatments, Allergies and Patient Notes. Drug
Treatments and Allergies are retrievable with Data Search. The date a Drug Treatment is discontinued may be
recorded.
Drug Codes
The System will allow you to designate a unique code for each drug you wish to permanently store in the System.
Your office should carefully consider whether to record the GENERIC or BRAND name for a drug. The System will
not know, for example, the LANOXIN is the same as DIGOXIN, or that DYAZIDE is a combination of
TRIAMTERENE and HYDROCHLORITHIAZIDE. This is a most important consideration when contemplating the
use of Data Search to identify patients for whom a particular drug has been prescribed. These drugs and their
codes are maintained in the Drug List.
Allergies
Once you have entered allergies for a patient, the System will give a warning if you attempt to enter a Drug
Treatment for a drug which has previously been listed as an allergy for the patient. Note: When recording allergies,
if a person is allergic to PENICILLIN, the System will not recognize that AMPICILLIN is a type of PENICILLIN.
However, the complete list of allergies will appear at the top of the Screen for review whenever the operator enters a
new Drug Treatment.
Patient Notes
Patient Notes can be used for any type of information you wish to keep in the System for any patient. This may
include medical record notations, billing information or any other desired use. Patient Notes are not retrievable by
Data Search.
Since Patient Notes take up an enormous amount of disk space, the System allows you to delete Patient Notes
once the need for them has passed. You should print Patient Notes before deleting them to be sure of having a
permanent “hard copy” record. Do not delete notes for any patient unless you are absolutely sure you want to
delete the entire note, from day one to present, for that patient. If you wish to create a letter or a report with a word
processor and merge it with patient notes, you must use DOS’s EDIT program or a word processor in ASCII mode
so it does not put control sequences into the file. Contact POC Customer Support or your dealer for more
information.
Notes:
70
Section B
CROSS POSTING REPORT
CROSS POSTING REPORT
The Cross Posting Report,
[Enter] from the Selection List, is a total of all charges, payments and adjustments
between a patient’s primary and treating physician(s). Cross posting happens when a patient has doctor #1 as his/
her primary physician and is then seen (charged) by doctor #2. A similar (but not the same) report is printed by the
System as part of the Transaction Report at the end of every day.
Printing the Cross Posting Report
The Cross Posting Report prints by primary physician and may be run at any time. This report should be printed at
the end of every month and safely filed for reference.
Clearing Report Totals
The Cross Posting Report does not clear automatically. It is designed to be cleared only by the operator. Although
this report can be printed any number of times, the report totals should not be cleared until you have run the monthend report and are ready to begin a new month.
PLEASE NOTE: If this report is not cleared periodically, it will slow down System performance.
Notes:
71
Section B
DATA SEARCH
DATA SEARCH
Data Search,
[Enter] from the Selection List, allows you to search through all, or a range of, patient files by any
combination of criteria.
Data
What do you wish to do:
Please enter your choice:
VU)
SC)
SP)
RA)
LP)
RI)
SL)
Search
View search list criteria
Set criteria for search
Search & print patients
Set range for search
Load previous search
Re-initialize
Sort List
Search Criteria Includes: age or range of ages; allergy; birth date(s) by range; doctor (primary physician); drug
treatment; ICD code(s) (permanent and one-time-only); insurance; medical record number; open charges; other ID;
procedure code(s) by range of dates (permanent and one-time-only): provider number (referring physicians,
hospitals, labs, etc.); sex; treating physician by range of dates; type of service by range of dates; and zip code. You
may enter any number of search criteria to produce your report.
Data Search generates and/or prints a list of all patients who match all the selected search criteria. That is, the
search categories are inclusive. You may also “save” the search list in the form of a computer file containing all
patients “included” and/or “excluded” in the search. Up to 20 Data Search lists may be saved on the System at one
time. Once saved, you can use the “By List” option in Patient Ledgers, Encounter Forms, Accounts Receivable,
Recall Notices, Mailing Labels, Production Report and Patient Statements.
Deleting a Saved List
You may delete a previously saved list through the load previous search option in Data Search. Enter the name of
the list you wish to delete. When asked “Is this correct (DEL to delete))” type:
) [Enter].
Set Criteria
Data
Search
SEARCH CRITERIA
AG)
AL)
BD)
DR)
DT)
IC)
IN)
MR)
Age
Allergy
Birth date
Doctor
Drug treatment
ICD diagnosis code
Insurance company
Medical record #
OP)
OI)
PC)
PV)
SX)
TR)
TS)
ZC)
Open charges
Other ID
Procedure code
Provider
Sex
Treating physician
Type of service
Zip code
Please enter you choice: _
You may not use more than one entry for sex, zip code, range of birth dates, medical record number or doctor; nor
more than three entries for provider (remember, a provider can be a referring physician, a location of service or an
outside lab); nor more than four entries for insurance company; nor more than four ICD codes; but you may enter as
many Procedure Codes, allergies or drug treatments as you wish.
72
Section B
DATA SEARCH
The System will, optionally, print the list of search criteria, the name and number of all patients who satisfy the
search criteria, and the percentage of patients who fulfill the search criteria. The list of patients fulfilling the criteria
may be saved and used later when using POC’s “By List” option. It is important at this point to make a note of the
name you assign and the criteria used for that search. The list name can be up to 8 characters in length. Note:
You cannot use punctuation as part of the name.
Open Charges
Data Search allows a user to search for unpaid charges that occurred prior to a specified date. This feature’s main
purpose is to find old, unpaid insurance charges before the carrier’s claim submission date expires. To use this
feature, you first set the criteria to generate a report of Open Charges and then any other criteria of your choosing.
Once the report is run, you must save it so that you can use the data in Accounts Receivable. Run the A/R report
“By List,” using your newly generated Data Search report, with TOTALS set to “Print detailed report listing open
charges.” See Accounts Receivable for further details.
Wildcards
“Wildcards” are special characters that can perform matches much like a wildcard in a card game (“Jokers are
wild”). Wildcard characters can be used when searching by Procedure Code, by Medical Record Number, by Other
ID, Allergy, Drug Treatment, Insurance Company and Zip Code. These wildcard characters are as follows:
# - matches any digit (0-9)
! - matches any upper or lower case letter
?- matches any character
A “\” immediately preceding the wildcard character will allow a literal search for that character.
For example: Let’s say you have coded your patients in the Medical Record Number with
for Smoker in the
FIRST position and
* for the cash only patients. If you wanted to find the Smokers, you would need to use
wildcards so that you wouldn’t find the
in
* as follows:
??????????????????? This field is 20
characters long, so you need to pad the extra spaces with the question mark wildcard to limit the search to finding
an in the FIRST position. If you do NOT pad the spaces, you will find an in ANY position, including the third
position in
*.
Data Search’s “OR” Logic
You may search for patients who have one Procedure Code OR another Procedure Code(s) on their Patient
Ledgers. You may search for patients who have one Zip Code OR another Zip Code(s). To use the
logic,
simply enter a Procedure Code number followed by a space and the word
and the System will immediately ask
you for another Procedure Code. For example, enter
0 [Space]
[Enter] and the System will ask for
another code; enter 90620[Space]
[Enter] and the System will again ask you for another code, and so on; enter
90630[Enter] and the System will return to the Set Criteria menu. Using this example, patients will be selected if
they have any one of the three Procedure Codes on their Patient Ledger. You may enter up to 100 “
’s.” You
will also be asked for a range of dates for these codes.
73
Section B
DATA SEARCH
Data Search’s “NOT” Logic
Data Search allows you to search for patients who do NOT have a Procedure Code or Insurance Company. Enter
followed by a space and the code, i.e.:
[Space]
$<8#
[Enter] (Not a Procedure Code - 90060.)
or
[Enter] (Not an Insurance Company - Medicare.)
0
You cannot use wildcards when using “NOT” logic. If you want to use wildcards for “NOT” logic, you can search for
codes with wildcards (900??) and then use the EXCLUDE list. See below.
Insurance Company Criteria
Data Search will allow you to search for patients who have a certain Insurance Company by searching for the code.
You can use wildcards to search for patients who match a group of companies, i.e.:
??? to find all Aetnas. If
you want to find patients who don’t have any insurance, you can enter the code, “NONE” (in upper case letters).
Exclude List
Data Search will ask if you want to save a list of excluded patients once it completes its search. This list contains all
patients who did NOT match any of your search criteria. For example, if you searched for patients with Medicaid,
the excluded list will contain all other patients. The exclude feature is useful because it provides “NOT” logic
abilities to ALL Data Search criteria. The exclude list is saved in a format compatible with all programs in POC that
have a “By List” option.
Sort List
Data Search will allow you to sort lists that have been generated in Data Search and Accounts Receivable by the
following sort categories; patient name patient zip; responsible party zip; medical record number; and doctor. You
have the option of printing the list and including the patient’s address, phone number, medical record number and
birth date. Once printed, you can save the patients and their respective information to a comma delimited ASCII file
for merging. See the ASCII information that follows.
Generate an ASCII Mail Merge File
With the “Sort List” option of Data Search, you may generate a comma delimited ASCII file for use with your favorite
word processing or database software. After printing the sorted list, answer es to the “Save this list?” question.
There are 35 fields (categories) per record. You may select one or any com bination of the for each list you wish to
create. The fields for each record, in their respective order are:
1234567-
Patient’s Number
Patient’s Last Name
Patient’s First Name
Patient’s Middle Initial
Patient’s Street Address
Patient’s City, St and Zip
Patient’s Phone Number
74
Section B
DATA SEARCH
8 - Patient’s Medical Record Number
9 - Patient’s Sex
10 - Patient’s Other ID
11 - *Account Balance Due
12 - *Amount Current
13 - *Amount Over 30 Days
14 - *Amount Over 60 Days
15 - *Amount Over 90 Days
16 - *Amount Over 120 Days
17 - Responsible Party #1’s Last Name
18 - Responsible Party #1’s First Name
19 - Responsible Party #1’s Middle Initial
20 - Insurance Company #1’s Name
21 - Insurance Company #1’s Address
22 - Insurance Company #1’s Address Line #2
23 - Insurance Company #1’s City, St and Zip
24 - Insured #1’s Policy Number
25 - Insured #1’s Group Number
26 - Referring Physician’s First Name
27 - Referring Physician’s Middle Initial
28 - Referring Physician’s Last Name
29 - Refeffing Physician’s Address #1
30 - Referring Physician’s City, State and Zip Code
31 - Patient’s Birth Date
32 - Patient’s Social Security Number
33 - Patient’s Relationship to Insured
34 - Patient’s Address Line #2
35 - Referring Physician’s Address Line #2
*Fields 11 - 16, the account balance and aging information, are filled in when “include” or “exclude” lists are
generated by the Accounts Receivable program. These lists are the same type of lists generated by Data
Search and are fully compatible and interchangeable. Generally speaking, the account balance and aging
information fields are potentially needed when creating some form of aging report in Accounts Receivable and are
not needed when creating Data Search lists. Therefore, for the sake of System speed, Data Search alone does not
include the aging information in fields 11 - 16. If you wish to include aging information based on a Data Search list,
“save” your Data Search list, generate an Accounts Receivable report “by list” using your Data Search list and, at
the same time, create a new “include” or “exclude” list. Use this newly created list to generate your ASCII Mail
Merge File in the “Sort List” option of Data Search.
NOTE: Your word processing and database software must be able to merge comma delimited
ASCII files. Most do.
Notes:
75
Section B
DATA SEARCH
Saving or Printing Data Search Lists
You have several options available once a Data Search List has been created. You can PRINT out the file, print
the list to the SCREEN (display the list on your computer screen without having to print it out as a hard copy on
paper), print the list to FILE (save it to your hard drive for later reference or additional sorting, etc.), or CREATE
a list of patient numbers which matched your search criteria (this list can then be used in other reports that have the
option of printing by list such as the Aged Accounts Receivables Report).
Data Search
---------------------What do you wish to do:
P) Print list to PRINTER
S) Print list to SCREEN
F) Print list to FILE
C) Create list of patient numbers
Please enter your choice: __
Notes:
76
Section B
DOCTOR INFORMATION
DOCTOR INFORMATION
Doctor Information,
[Enter] from the Selection List, allows you to manage up to 999 doctors in the System (per
data directory). You can change all of the information entered for all doctors except DOCTOR #1’s NAME which is
permanently entered on your System for your protection and ours as well. The data entry fields have been divided
between two screens.
Doctor Information Screens
Doctor Information
----------------------------------DOCTOR NUMBER: 1
1)
2)
3)
4)
5)
6)
7)
8)
9)
10)
11)
12)
13)
Doctor's name:
Group name:
Address:
City, state & zip:
Telephone number:
Social security #:
Standard provider #:
Medicare provider #:
Medi-Cal Provider #:
Employer tax ID #:
Blue Shield provider #:
Champus provider #:
Doctor's specialty code:
WILLIAM HUDSON, M.D.
ALBANY HEALTH CLINIC
1246 ASH AVENUE
ARMONK, NY 10504
212 333-4444
000-11-2222
A12345
A12345
00A123450
95-000000
9999999
8888888
Enter NUMBER to be changed:
You can customize the “labels” of the fields for the additional provider numbers which appear on the
second screen of Doctor Information, except for the field label of number 4, CLIA provider #, which is
“hard coded” and can not be changed.
Doctor Information
-----------------------------------1)
2)
3)
4)
5)
6)
7)
8)
Add. Provider Num. #1 provider #:
Add. Provider Num. #2 provider #:
Add. Provider Num. #3 provider #:
CLIA provider #:
Add. Provider Num. #5 provider #:
Add. Provider Num. #6 provider #:
Add. Provider Num. #7 provider #:
Add. Provider Num. #8 provider #:
05D012345
Enter NUMBER to be changed:
77
Section B
DOCTOR INFORMATION
The edit feature can be accessed through the Sub-Menu of Doctor Information. See screen sample below.
Doctor Information
----------------------------------What do you wish to do:
AD) Add NEW doctor
CH) Change EXISTING doctor
ED) Edit provider number labels
PR) Print doctor information
Please enter your choice:
Single Group Billing
When entering doctor information for a group, you only need to enter the name, address, phone number, CLIA # and
Tax ID number of the group. The group’s numbers are to be entered in the Set Parameters section of Bill
Insurance where you answer es to 10) Bill as a Group. Even though you may bill as a group, the
individual DOCTORS’ PIN (NOT UPIN) numbers should be entered as part of their information in Doctor
Information. Do NOT enter group numbers as part of the doctor’s information. See Group Billing in Bill Insurance.
However, you should enter the group’s CLIA # in field @..
When billing as a group, all patients should be assigned to the POC Doctor Number used for the group billing
(usually Doctor #1). Thus, all patients will be registered to Doctor #1 regardless of who their actual treating
physician(s) might be. The members of the group, doctors 2-999, should have their System doctor numbers entered
as the treating physicians when charges are recorded.
If your practice has multiple sets of group and treating provider numbers, you need to enter each group as a doctor.
Enter the name, address, phone number, Tax ID number and the appropriate CLIA and group provider numbers.
Set Parameters section of Bill Insurance, field 10), Bill as a Group, must be set to o. After entering the groups,
proceed with entering the treating physicians. If a physician sees patients at more than one location he/she must be
entered once for each location with the appropriate treating provider and CLIA numbers.
When entering patients, the patients must be assigned to the POC Doctor Number that corresponds to the office
location at which they were seen. Thus all patients who were seen at “Office A” will be assigned to Doctor #1, all
patients seen at “Office B” will be assigned to Doctor #2, etc. When charges are recorded for a patient, the
appropriate treating physician number must be entered in Add Charges.
78
Section B
DRUG LIST
DRUG LIST
Drug List, ) [Enter] from the Selection List, allows you to view, print, add, change and delete drugs. The System
will hold 32,000 drug codes.
If you wish to CHANGE a drug code, ALL patients who currently use the same code will have the change made to
them, too.
Changing A Code
When changing a code, entering an
[Enter] (for Same) in any field will leave that field unchanged.
Notes:
79
Section B
ENCOUNTER FORMS
ENCOUNTER FORMS
Encounter Form, 7 [Enter] from the Selection List, allows you to print an Encounter Form for any or all patients.
The Encounter Form contains two parts. The top part displays patient demographics, diagnosis, balance due and
ledger notes. You may customize the lower section of the form for your office. With the proper design, the
Encounter Form can act as your Super Bill.
Designing the Form
These forms may be designed using any ASCII editor or word processor (in ASCII mode). Be sure your word
processor does not include any special control characters, a common situation in non-ASCII mode. We suggest
using DOS’s EDIT program. Here’s what you do if you are using EDIT:
1. From the DOS prompt in the POC directory, type:
[Space]
7
[Space]
7 '
4 [Enter]
2. When the DOS prompt returns, type:
[Space]
File Edit
Search
7
[Enter]
Help
Options
MISCELLANEOUS PROCEDURES:
1.
2.
CPT CODE
•z
MS-DOS Editor <F1=Help> Press ALT to activate menus
yy
n
TETANUS TOXOID IMM. [ __: | ARTHROCENTESIS M. LG[ __: | BLOOD GLUCOSE
[ __: |
8831D
#12
93: | 20610
#35
13: | 82943
#10
21: |
------------------------------------------------------------------------------EXT. CARE FACILITY
[ __: | ARTHROCENTESIS SM
[ __: | GAMMA GLOBULIN
[ __: |
9037
#45
88: | 20600
#20
14: | 8811D
#20
83: |
------------------------------------------------------------------------------EFC-ONLY PATIENT
[ __; | FLU VACCINE
[ __: | SPIROMETRY
[ __: |
90470
#50
89: | 88180
#10
15: | 94010
#50
91: |
------------------------------------------------------------------------------OV-LIMITED
[ __: | ER INT
[ __: | EAR LAVAGE
[ __: |
90050
#30
8: | 90560
#45
16: | 69210
#20
78: |
AMOUNT
•
3. The form that appears may be used as a template to design your own custom form.
Bear in mind as you work: the encounter form you design must be no more than 35 lines long and no more than 80
characters wide.
The name of the finished file must be:
below.)
7
(If you are designing multiple encounter forms for each doctor, see
Multiple Encounter Forms
You can have a different Encounter Form (EFM filename) for each doctor number and/or each insurance company.
Use the doctor number for the DOS filename extension for each doctor in the System, i.e.: 7 ' (for doctor #1).
7 '+ (for doctor #2), etc. Add the insurance company code to the filename for a unique insurance company
encounter form, i.e.: 7
(for Medicare), 7
(for Blue Shield), etc. You may combine doctor numbers and
insurance company codes, i.e.: 7
' (for Medicare-Doctor #1), 7
'+ (for Blue Shield-Doctor #2), etc.
80
Section B
ENCOUNTER FORMS
Custom Design
It is possible to design the custom section of an Encounter Form up to 50 lines long (8 lines per inch) if you embed
your printer’s escape sequence that turns on 8 lines per inch at the beginning of the custom section of the
Encounter Form. You must also embed another escape sequence to set your printer back to 6 lines per inch at the
end of the form. Using similar printer logic, you may alter your Encounter Form to condense 136 characters into the
form’s width. This knowledge is generally considered beyond the scope of the average user and is available
as custom programming from POC.
Printing Encounter Forms
The “Current” option of the Encounter Form program prints Encounter Forms based on appointments scheduled
with POC’s Appointment Schedule module.
Encounter Forms also may be printed for selected patients independently of the Appointment Schedule. To print
Encounter Forms for a group of patients, use the patient numbers separated by commas (i.e.:
+ 1 2 1 221-1. ). If you wish to select patients by name, you can choose your patients by typing all or part
of their last name. Patients Sam Jones, Jim Sun and Sue Brown would be found by typing:
A
A
1
1
1
1
B
[Enter]
[Enter] or
The System will help you find the first person, print the form, and then process the next person.
If you wish to find a patient who has a common last name, it is best to enter their last name, a comma, and then
their first name:
*1[Space]
The space after a comma tells the System that the following word is a first name. You can use this feature to enter
more than one name at a time:
*1[Space]
1)
C1[Space] A
Notes:
81
Section B
FIRST REPORT OF WORK INJURY
FIRST REPORT OF WORK INJURY
STANDARD FORM
(Custom First Reports are required in some states)
First Report of work injury, 7 [Enter] from the Selection List, is designed to complete the necessary information for
the submission of “First Reports.”
Information for the First Report of Work Injury is obtained from three sources:
1. Patient Information (or New Patients) provides employer name and social
security number.
2. Add Charges provides the diagnosis, treating doctors, hospital name and
address (if any).
3. The additional information not obtained from the first two sources is entered
using the First Report’s data entry section.
Therefore, BEFORE running First Reports, you should be certain the Add Charges “21 Questions,” diagnosis and
procedures section has been completed for First Report patients. Failure to run Add Charges first will result in
incomplete information on the First Report.
The additional information entered on the First Report of Work Injury is not permanently maintained by the System.
Once the report is printed, the information is erased to conserve disk space.
Notes:
82
Section B
ICD CODE LIST
ICD CODE LIST
ICD Code List,
[Enter] from the Selection List, will store up to 32,000 diagnoses and their associated codes. In
addition, an unlimited number of One-Time-Only ICD codes and descriptions may be entered during the Add
Charges program. We do not recommend using the One-Time-Only feature unless you are reasonable certain you
will not be using the code more that once a year. Both permanent and One-Time-Only ICD codes are retrievable
using Data Search.
It is recommended that the description be entered with the most general word first (i.e.:-HERNIA, HIATAL rather
than HIATAL HERNIA.) By entering the descriptions this way, the ICD codes will be grouped together in the pop up
list windows, making it easier to choose the correct variation of the diagnosis.
Changing A Code
When changing a code, entering an
[Enter] (for Same) in any field will leave that field unchanged.
Notes:
83
Section B
INSURANCE COMPANY LIST
INSURANCE COMPANY LIST
Insurance Company List, ) [Enter] from the Selection List, will maintain up to 32,000 insurance companies and
their associated information.
Insurance Codes
You must choose a unique code for each insurance company that you enter into POC. Up to five UPPER CASE or
lower case alphanumeric characters of your choosing can be used for every insurance company code you add to
the System. Codes are case sensitive. AETNA is not the same code as Aetna or aetna. These are three unique
codes to POC.
POC requires that you make unique codes for insurance companies with more than one location, i.e.: AE1, AE2,
AE3, etc. for several Aetnas at different addresses.
POC does NOT allow the use of these reserved characters in a code:
*
?
.
:
!
#
\
/
>
Please note: There are six restricted UPPER CASE codes. These six restricted groups of characters are
preassigned by POC and must not be changed; otherwise the System will fail to work properly. These six codes
and their names are:
*
-
Medicare
Medicaid
Blue Shield
Champus/Champva
Responsible Party
Other
Medigap ID Number’s
In order for Medicare claims to crossover to the appropriate carrier, you must include the carrier’s Medigap ID
number when creating a new insurance code. The carrier’s code is available from your Medicare carrier.
Changing A Code
When changing an insurance code, entering an
[Enter] (for Same) in any field will leave that field unchanged.
84
Section B
MAILING LABELS
MAILING LABELS
The Mailing Label program, ) [Enter] from the Selection List, will print selected patient’s: name(s), address(es)
and zip code(s); and insurance company’s or provider’s: name(s), address(es) and zip code(s). You may also
include a patient’s medical record number and/or telephone number, if desired.
PLEASE NOTE: use standard kinch X 32 inches labels, one to three across; or,
1 inch X 4 inches, two across for laser or deskjet printers.
Insurance Mailing Labels
POC can print insurance mailing labels to simplify the handling of paper claims. To print insurance mailing labels,
you need to print your current insurance forms first. This allows POC to build a list of labels to print. After your
insurance forms are completed, you can print the corresponding insurance labels in POC’s Mailing Labels program
with the
option.
Notes:
85
Section B
NEW PATIENTS
NEW PATIENTS
New Patients,
[Enter] from the Selection List, allows you to enter new patients, their demographic information,
associated insurance and other information. It also allows you to copy an existing patient account to a new account
number.
Entering Information
If you inadvertently enter incorrect information in a field and press [Enter] before you realize you have made a
or [Shift] + [Tab] to move back to the field to make a change. To return to your original
mistake, you can press
position after making the change, press or [Tab]. You can also edit a field at the “Enter NUMBER to be changed”
question.
If a field such as a policy number ordinarily contains punctuation, you may leave the punctuation in, if you so wish.
You should always duplicate a patient’s policy number exactly. This is especially important for electronic billing.
When required by the insurance carrier, POC will strip out unwanted punctuation from insurance forms at the time of
billing.
Patient Name
The patient’s and insured’s names are entered as three separate fields: Last Name, First Name and Middle Initial.
The total number of spaces provided for the total name, including commas and spaces, is 27 characters. After you
have entered the last name, the system will compute the number of spaces left for the first name. Once the first and
last name have been entered and you have any spaces left, you will be prompted for the middle initial.
If the patient’s (or insured’s) name is John Q. Public Jr., you should enter the last name as “Public Jr” or Public Jr.”
then go on to enter the first name and middle initial at the appropriate prompts. POC will automatically enter a
period after the middle initial.
If the patient’s (or insured’s) name is M. William Jones (the patient or insured doesn’t use their first name) enter the
last name as usual. For the first name enter the “M” (no peroid) and then enter a “W” as the middle initial. The
name must be entered in this fashion to conform to Medicare electronic claims specifications.
Entering a New Patient
Entering a New Patient or changing Patient Information can be accomplished by accessing the
applicable screen, Patient Information is divided among three screens. Refer to the sample screens
below and on the next page. The patient’s phone numbers and social security number are automatically
formatted. You do not have to enter spaces or dashes.
Patient #
1)
2)
3)
4)
1-3
Patient
DOBBS, FRED C.
554 12TH STREET
FALLS CHURCH, VA 22042
Information
5)
6)
7)
8)
12/10/1946
703 259-8704
703 332-6378
9)
10)
11)
12)
Male
13) Unknown
-------------------------------------------------------------14)
15)
16)
17)
SSA or ID#: 222-11-3333
Other ID#:
VA545454544
Send Statements: Yes
Finance Charges:
18)
19)
20)
21)
22)
Rel. of Info. : Yes
Fee Schedule:
23)
24)
Med. Rcd. #: 3488765402
Fam Head:
Employer: STATIONERS INT.
--------------------------------------------------------------
Dr. #1 WILLIAM HUDSON, M.D.
Ref Phy: JOHNSON M.D., NORMAN
Enter NUMBER to be changed:
86
Section B
NEW PATIENTS
The System automatically defaults to the patient’s last name in the Insured’s Information section saving
keystrokes by allowing you to accept the default and go on to the Insured’s first name. If the patient is
the Insured, the system defaults to the patient’s social security number as the policy number.
1-3
Patient #
Dobbs,Fred C
Patient
Insured #1:
Information
Insured #2:
1)
2)
3)
4)
5)
7)
SAME
8)
HL
- HOME LIFE
3433 ARLINGTON BLVD.
6)
15)
16)
17)
18)
19)
21)
SAME
22)
PR
- PRUDENTIAL
3654 WILLOW
20)
--------------------------------------------------------------
TORRANCE, CA 90503
9)
10)
RUTHERFORD, NJ 07070
987654321
Yes
11) 4321
23)
24)
3256823568253
Yes
25) 2463
-------------------------------------------------------------12)
13)
14)
26)
27)
28)
Enter NUMBER to be changed:
The insurance company’s address is displayed providing you the opportunity to verify and change it if
needed.
1-3
Patient #
Dobbs,Fred C
Patient
Insured #3:
Information
Insured #4:
1)
2)
3)
4)
5)
7)
SAME
8)
HL
- HOME LIFE
3433 ARLINGTON BLVD.
6)
15)
16)
17)
18)
19)
21)
SAME
22)
PR
- PRUDENTIAL
3654 WILLOW
20)
--------------------------------------------------------------
TORRANCE, CA 90503
9)
10)
987654321
Yes
11) 4321
RUTHERFORD, NJ 07070
23)
24)
3256823568253
Yes
25) 2463
-------------------------------------------------------------12)
13)
14)
26)
27)
28)
Enter NUMBER to be changed:
You can enter up to four different Insured Names and insurance companies.
87
Section B
NEW PATIENTS
Copying/Duplicating A Patient
There are times when it is more convenient to copy the demographics of an existing patient rather than entering all
new information. This is easily done by entering the existing patient’s account number and hitting [Enter]. All of the
information, including the insurance information, of this existing patient is displayed on the New Patient screen. At
this point you can edit the information as needed and assign a new patient number for this account This feature will
greatly expedite the setting up of a family account, refer to Family Accounts further in this section. If you do not
know the account number, you can find the patient by hitting the [F4] key. (Refer to the Patient Information section
page 95 regarding patient search options.)
Adding New Patient
----------------------------------======================================================================
Enter Patient's Last Name: 1-451
MAXIMUM LENGTH FOR COMPLETE NAME IS 27 CHARACTERS
Telephone Numbers
When entering telephone numbers, any of the following formats, with or without the hyphens, is acceptable (the
System will automatically format the phone number):
### - #### or
### - ### - #### or
##########
The System will automatically put the telephone number into the correct format. If you enter all ten digits, the first
three must be the area code.
Medical Record Number
The Medical Record number is a user defined field of information up to twenty characters in length. The Medical
Record number is a good place to store information on patients because it is always shown on the Patient Ledger,
in Post Payments and in Add Charges. Most important, Data Search can look for any occurrence of a character or
group of characters as specified in the Medical Record number. Typical uses of the Medical Record number include
payment problems and medical information codes for the doctor.
Family Accounts
Setting up patients as family accounts has the advantage of consolidating all family members under one “Head of
Account.” This allows you to look at the Head of Family’s ledger and see activity of all family members. The system
will also print only one statement for the entire family, with one balance due for the family.
88
Section B
NEW PATIENTS
The patient designated as Head of Family determines whether a statement is prepared for the entire family.
If you are adding patients who will be billed as a family account, enter the Head of the Family first, before entering
other family members. When adding other family members to the System, you can search for their Head of Family
by hitting the [F4] key at the “Head of Family” prompt.
If you change the head of the family, the System will request the patient number of the new Head of Family. If you
do not know the number, just press [Enter] and the System will display the next available family member.
Details Concerning Patient Statements
Patient Statements are always sent to Insured #1 or, if there is no Insured #1, to the patient. If the statement is not
to go to the primary insured, enter the name and address of the person who is to receive the statement as Insured
#1 and enter
(Responsible Party) as the code for “Insurance Company #1.” Then proceed to enter the actual
insured’s name and insurances in the next columns. In the case of family account members, Patient Statements
are sent to the “Head of Family” account. Whoever is entered as Insured #1 for the Head of Family will receive
the Patient Statement(s) for the whole family regardless of who is listed as Insured #1 for the other family
members.
Statements Option
In New Patients, when you select the
option for the patient’s statement, the System will only print charges on a
Patient Statement if the charge has been partially paid (typically by insurance) and/or is beyond a cutoff date (or
number of days). The cutoff date is set through the “Dunning Message” option of the Patient Statement program. If
a payment or adjustment was posted in Post Payments with the
option ( es, o tatement), then the charge
will not appear on a statement until another payment is applied using the option to record. See Post Payments
and Patient Statements for further information.
Alternate Fee Schedule
Adding
New
Patient
Dobbs, Fred C.
04/11/1895
Male
Unknown
123 Gold Duct Lane
310-603-0555
Unknown
Gold Fever, NV 89999
800-782-5214
Not a student
-------------------------------------------------------------SSA or ID#: 123-45-6789
Med. Rec. #:
Other ID#:
Fam Head:
Send Statements: Yes
Employer:
Finance Charges: Yes
-------------------------------------------------------------Release of Info.: Yes
Dr. #2 John Stevens, M.D.
Bal Fwd:
Ref Phy:
Alternate Fee Schedule: M_
The alternate fee schedule is designed to be used when you need to bill patients an amount that is different from
your standard fee schedule on a regular basis (use the
option in Add Charges for occasional fee changes). The
alternate fee schedule designates a patient to use procedure codes other than the standard codes (codes with no
character in the sixth position). By identifying a patient to use an alternate fee schedule, the System will
automatically look for a procedure code that contains the designated code in the sixth position when entering
procedures.
89
Section B
NEW PATIENTS
For example: When recording a 90060 office visit for a patient designated with the fee schedule , the System will
automatically look for procedure code 90060M. If 90060M is found, that procedure code will be used. If 90060M is
not found, the System will then look for the code 90060 in the standard fee schedule. If found, it will use 90060, the
standard code.
Acceptable codes are any upper and lower case character on your keyboard, except for these three reserved
characters: ~, -, and [Space]. Remember, UPPER and lower case codes are not the same code. Additionally, we
do not recommend using !, #, ? or *. These are wildcard symbols and make using Data Search and Production
Report more difficult. For more information on Alternate Fee Schedules, press [F1] at the Alternate Fee question.
Insured’s Name
If the insured (policyholder) is someone other than the patient, and the statement is not to go to the primary insured,
enter the name and address of the person who is to receive the statement as Insured #1 and enter
(Responsible Party) as the code for “Insurance Company #1. Then proceed to enter the actual Insured’s name and
insurances in the next columns.
If Insured #1 is the same as the patient, then enter (for same). If the policyholder designated as insured #2 is the
same as insured #1, enter (Same) for “Insured #2’s name.” However, if the patient is designated as insured #2
and is not also insured #1, you will need to re-enter the patient’s full name when asked for Insured #2’s name. If the
patient is a child covered by two or more policies and is not the insured on any, the primary policy for the patient is
the policy belonging to the subscriber whose birth date falls earliest in the year and who MUST be entered as
Insured #1. Insured #1 will also receive the patient statement.
Deleting an Insured
Patient # 1-3
Dobbs, Fred C
Patient
Insured #1:
Information
Insured #2:
1)
2)
3)
4)
6)
SAME
7)
HL
8)
9)
987654321
Yes
10) 4321
5)
14)
15)
16)
17)
19)
SAME
20)
PR
21)
22)
3256823568253
Yes
23) 2463
18)
-------------------------------------------------------------- HOME LIFE
- PRUDENTIAL
-------------------------------------------------------------11)
12)
13)
24)
25)
26)
Insured #2’s Name: DEL_____________________
When asked which number you wish to change, enter the number corresponding to the Insured you wish to delete
and the type
) [Enter].
90
Section B
NEW PATIENTS
Delete Insurance
Patient # 1-3
Dobbs, Fred C
Patient
Insured #1:
Information
Insured #2:
1)
2)
3)
4)
6)
SAME
7)
HL
8)
9)
987654321
Yes
10) 4321
5)
14)
15)
16)
17)
19)
SAME
20)
PR
21)
22)
3256823568253
Yes
23) 2463
18)
-------------------------------------------------------------- HOME LIFE
- PRUDENTIAL
-------------------------------------------------------------11)
12)
13)
24)
25)
26)
Enter CODE of Ins. Co. #2: DEL________________
If you wish to delete an insurance company, enter 7 or 20 (Insurance Company #1, #2, #3 or #4), and when asked
for the new information, type:
) [Enter]. If you delete Insurance Company #1 and do not intend to add a new
insurance company, you must change Insurance Company #2 (if it exists) to Insurance Company #1. You cannot
have an Insurance Company #2 without an Insurance Company #1. The same rule applies to Insurance
Companies #3 and #4. By the same token, you cannot have an insurance company without an insured or an
insured without an insurance company code (or RP for Responsible Party). See below.
Responsible Party
If you want to send Patient Statements to a third party who does not have insurance, enter this responsible party as
“Insured #1”. When asked for the insurance company code, enter
[Enter] for “Responsible Party” and statements
will be sent accordingly.
If the patient also has insurance overage, enter the insured’s information as “Insured #2” (or #3 or #4).
for Same or Self
When entering insurance information in New Patients, remember, if the policyholder designated as Insured #1 is the
patient, enter (Same) when asked for “Insured #1’s Name.” By doing this, you save a great deal of typing and
the patient’s relationship to the insured will be designated as “SELF” on insurance forms. Do NOT re-enter the
patient’s full name. If you are entering insured #2, 3 or 4 and this insured is the same as the last insured entered; i.
e.: you are entering insured #3 and insured #3 is the same person as insured #2; enter for Same.
If the address of Insured #1 is the same as the PATIENT’S address, just enter [Enter] for “same” when POC asks
for the address. The System will automatically pick up the PATIENT’S address. If the address of the previous
Insured is the same as the current INSURED’S address, just enter
[Enter] for “same” and the System will
automatically pick up the previous INSURED’S address.
91
Section B
NEW PATIENTS
Insurance Company Code
When adding a new insurance company to the System and assigning your unique code to access this carrier in the
future, you must enter a unique 1-5 character identifier for each new insurance company. This also applies to
insurance companies with more than one location. Each location must carry it own unique alphanumeric code, i.e.:
AE1, AE2, AE3, etc., for several Aetnas at different addresses. Refer to the chapter on Insurance Companies for
assistance.
Worker’s Compensation
If this patient already exists on the System as one of your regular patients, you should add this patient to the System
again to give him/her a new and separate account number for the worker’s compensation billing. This is easily done
with the “Copying/Duplicating A Patient” feature in New Patients. You may wish to give the new account a different
doctor number that has been specifically set aside for worker’s compensation or enter B in the medical record
number.
Patient Number
POC automatically assigns a patient number to each new patient entered into the System. This is a two part
number such as 1-543. The first part of the patient number refers to the primary doctor to whom the patient is
assigned. The second part is the unique patient number assigned by the System. Whenever you are asked to
enter a patient number, the second part of the patient number is the only part you enter (i.e.: .- and not 1543).
Duplicate Patients
Adding
New
Patient
1) Mitchell, Sara
4) 04/11/1953
7) Female
10) Unknown
2) 6201 Hawthorne Blvd.
5)
8) Unknown
3) Huntington Beach, CA 92647
6)
9) Not a student
-----------This duplicate patient already exists:
11) SSA or
12) Other
1-3
MITCHELL, SARA
09/22/57
13) Send S
14) Finance Do you wish to record anyway?
-----------18) Rel of Info. : Yes
21) Dr. #1 PHYSICIANS’ OFFICE COMPUTER
19) Bal Fwd:
22) Ref Phy:
20) Fee Schedule
Recording New Patient
POC will alert you when you have entered a patient name that already exists in the System. This may or may not
be what you want. If you do record the patient again, (s)he will be given a different account number. This is
sometimes necessary for worker’s compensation and/or personal injury cases.
New Patient List
POC keeps a list of all patients who have been added to the System since the last time the System was
alphabetized. Its filename is NEWPAT and is available to all POC programs that have a “By List” option. This list is
cleared each time the System is alphabetized. Its most common use is to generate new patient reports and
“welcome” mailings.
92
Section B
PATIENT INFORMATION
PATIENT INFORMATION
The Patient Information program,
[Enter] from the Selection List, allows you to change demographic information
for any patient in the System. It follows the same conventions as the New Patient program. Please refer to the New
Patients chapter for additional information common to both programs.
SCREEN #1 - Patient Demographics
PT.#
Patient
1-3
Information
1) Mitchell, Sara
2) 6201 Hawthorne Blvd.
3) Huntington Beach, CA 92647
4) 04/11/1953
8) Female
12) Unknown
5) 703 259-0704
9 ) Unknown
6) 703 332-6378
10) Not a student
7)
11)
-------------------------------------------------------------13) SSA or ID#: 245-66-5521
17) Med. Rec.#:
3488765402
14) Other ID#:
VA454545342
18) Fam Head:
15) Send Statements: Yes
19) Employer: STATIONERS INT.
16) Finance Charges:
------------------------------------------------------------20) Rel of Info. : Yes
22 ) Dr. #1 PHYSICIANS’ OFFICE COMPUTER
21) Fee Schedule
23) Ref Phy:
Enter NUMBER to be changed: _
1) Name
2) Address
3) City, State, Zip Code
4)
5)
6)
7)
Date of Birth
Home Telephone #
Other Telephone #
Emergeny Phone #
8)
9)
10)
11)
Sex
12) Marital Status
Employment Status
Student Status
Emergency Contact Name
13)
14)
15)
16)
SSA or ID
Other ID
Send Statements
Finance Charges
17) Medical Record Number
18) Head of Family Account
19) Employer
20)
21)
Release of Information
Fee Schedule
22) Doctor # (Primary)
23) Referring Physician
93
Section B
PATIENT INFORMATION
SCREENS #2 & #3 - Insured’s Information
Patient # 1-3
Dobbs, Fred C
Patient
Insured #1:
Information
Insured #2:
1)
2)
3)
4)
6)
SAME
7)
HL
- HOME LIFE
3433 ARLINGTON BLVD.
5)
14)
15)
16)
17)
19)
STEVENS, DWIGHT
554 12TH STREET
FALLS CHURCH, VA 22042
Spouse
18) Male
Unknown
20)
PR
- PRUDENTIAL
3654 WILLOW
--------------------------------------------------------------
TORRANCE, CA 90503
8)
9)
987654321
Yes
10) 4321
RUTHERFORD, NJ 07070
21)
22)
3256823568253
Yes
23) 2463
-------------------------------------------------------------11)
12)
13)
24)
25)
26)
Enter NUMBER to be changed:
Insured #1 (or #3):
Insured #2 (or #4):
1) Name
14) Name
2) Address
15) Address
3) City, State, Zip Code
16) City, State, Zip Code
4) Relationship
5) Sex & Bdate
17) Relationship 18) Sex & Bdate
6) Employment Status
19) Employment Status
Ins. Co. #1 (or #3)
Ins. Co. #2 (or #4)
7) Insurance Code, Name, Address,
20) Insurance Code, Name, Address
Phone Number and Contact
Phone Number and Contact
8) Policy #
21) Policy #
9) Assign
10) Group #
22) Assign
23) Group #
11) Employer Name
24) Employer Name
12) Address
25) Address
13) City, State, Zip Code
26) City, State, Zip Code
Insurance Screen Bypass
A POWER USER BYPASS COMMAND
When entering a patient’s account number, you may append an “ ”, for Insurance (i.e.: - 9999 ), to bypass directly to
the second screen, the insurance screen.
Jump Back to Patient Screen
A POWER USER BYPASS COMMAND
When in the second or third screen of Patient Information, the “insured's” screens, you can jump back a screen
by pressing [Esc] at the “Enter Number To Be Changed” question.
Please remember, any changes made on screen two or three will NOT be saved when performing this function.
94
Section B
PATIENT INFORMATION
F4—Patient Search
You can search for a patient by their first name, social security number, phone number, Medical Record Number,
Other ID, responsible party, Policy number or patient’s date of birth by pressing the 7. key. This function can be
accessed at the Sub-Menus in Posting Payments, Adding Charges, Patient Ledger, Super Bill, Patient
Information and Clinical Data.
Patient Search
--------------------------Search for patient by:
1) Social security number
2) Telephone number
3) Other ID
4) Medical record number
5) Patient's first name
6) Responsible party name
7) Policy number
8) Patient's date of birth
Please enter your choice: __
Notes:
95
Section B
PATIENT LEDGERS
PATIENT LEDGERS
Patient Ledgers, ) [Enter] from the Selection List, allows you to view and print ledgers using a variety of options.
You may also add and change ledger notes.
Patient Ledger Bypass
A POWER USER BYPASS COMMAND
Patient Ledger
What do you wish to do:
Please enter your choice:
SI)
AL)
RA)
LS)
SINGLE ledger.
Print ALL ledgers.
Print RANGE of ledgers.
Print LIST of ledgers.
9999V_
When entering a patient’s account number, you may append a 4 (i.e.: 4) to bypass directly to viewing the
ledger; append a
to bypass directly to printing the ledger; append
to bypass directly to changing the ledger
note.
Patient Ledger
What do you wish to do:
Please enter your choice:
SI)
AL)
RA)
LS)
SINGLE ledger.
Print ALL ledgers.
Print RANGE of ledgers.
Print LIST of ledgers.
MITCHELL
You may also enter a patient’s name at the Patient Ledger menu, saving the extra [Enter] to get back to the name
or number question.
Print By List
If you wish, you may print Patient Ledgers by a previously saved list. This list may be created and saved through
either the Data Search program or Accounts Receivable. For example: you may wish to print all ledgers for
accounts over 120 days old for review of possible collection action.
96
Section B
PATIENT LEDGERS
Additional Print Options
Patient Ledger
USER—SELECTED CATEGORIES
RANGES:
1)
2)
Range of Dates:
Range of Patients
N/A
PRINT/VIEW OPTIONS:
3)
List Name:
4)
Include Payments:
5)
Start with First Open Charge:
N/A
Yes
No
PRINT ONLY OPTIONS:
6)
By Primary Doctor:
7)
Print Doctor Information:
8)
Disable Pagination:
9)
Start with most recent zero balance:
10)
Number of copies:
N/A
No
No
No
1
Enter number to be changed (X to Exit) :
Disable Pagination
Patient Ledger
USER-SELECTED CATEGORIES
RANGES:
1) Range of Dates:
2) Range of Patients:
N/A
PRINT/VIEW OPTIONS:
3) List Name:
4) Include Payments
5) Start with First Open Charge:
N/A
Yes
Yes
PRINT ONLY OPTIONS:
6) Doctor
7) Print Doctor Invormaiton:
8) Disable Pagination:
Enter number to be changed (X to Exit): _
No
No
Yes
If you want to print multiple ledgers and you want to conserve paper, you can change user option 8 to Yes. When
set to Yes, the System does not send a form-feed to the printer at the end of each ledger.
Print or View By Range of Dates
If you print or view ledger by a range of dates, the aging and total shown at the end of the ledger is only for the
range of dates selected.
97
Section B
PATIENT LEDGERS
Columns
Patient # 1-3
M.R. # 3488765482
Patient
Insured #1:
Ledgers
Phone: 703 259-8704
Insured #2:
JODIE STEVENS
SAME
DWIGHT STEVENS
554 12TH STREET
554 12TH STREET
FALLS CHURCH, VA 22042
FALLS CHURCH, VA 22042
Ins #1: BC
- BLUE CROSS
Ins #3:
Ins #2: AE
- AETNA
Ins #4:
Page 1
======================================================================
12/08/94 00000
BALANCE FORWARD
236.00
336.00
*
12/08/94 90215
INT. HOSP. EXAM, INTERMED.
50.00
386.00
o
12/08/94 76850
DIAGNOSTIC ULTRASOUND
55.00
441.00
o
12/08/94
PMT
Personal CK
-200.00
241.00
04/15/95 90020
COMPREHENSIVE EXAM, NEW PT.
40.00
281.00
o
04/15/95 92533
CALORIC VESTIBULAR TESTING
24.00
305.00
o
2
Have patient bring their insurance info on next visit
-CASH ONLY!!! NO CHECKS!!!
Press ENTER to continue: _
As you view the Patient Ledger, you will see two columns of dollar amounts on the right. The first of these columns
is the transaction amount. The second column is the patient’s running balance. Lines ending in and asterisk, “*”,
indicate the charge has been partially paid. If the line ends in an “o”, no payment has been posted against that
charge and it remains open. Nothing next to the charge indicates the charge is fully paid.
The column to the right of the “o” and “*” shows the treating physician (System doctor number) for the procedure.
This column will contain the doctor’s number if the procedure was provided by a doctor other than the primary
physician entered in New Patient or Patient Information.
Ledger Notes
You may enter a ledger note(s) for each patient in the System. The same ledger note will appear on every page of
the ledger when the ledger is viewed in the Post Payment selection list and in Adding Charges. When the ledger is
printed, the note will appear at the end of the ledger. Ledger notes are for global remarks regarding the patient.
Use
in Add Charges or Remarks in Post Payments for remarks that refer to specific charges, etc. See Add
Charges and Post Payments for further details.
To add or change a ledger note, you may append a (for Change) to the patient account number (i.e.:
choose the “Single” selection, enter the patient number and then choose the “Change Ledger Note” selection.
) or
You have two lines of up to 70 characters each for your note(s). When changing a note you may wish to change
just one of the lines. To change a line, just type your new note.
To leave a line unchanged, just hit [Enter]. To delete both lines of a note, type
) [Enter] on line #1 (if you type
DEL on line #2, it will only delete line #2). To only delete line #1, press [Space] [Enter].
If you do NOT want a note to print on the patient’s ledger or statement, start the line with a minus sign, “-”, as in line
two of the previous screen example that says “-CASH ONLY!!! NO CHECKS!!!” In this example, line one will print
and line two, the line that begins with the “-”, will not. Remember, you must have the printing of ledger notes
enabled in Patient Statements in order for ANY ledger note to print on a statement. See Patient Statements, Set
Parameters section, for more details.
98
Section B
PATIENT LEDGERS
F9—Enhanced Patient Ledgers
Additional information can be displayed on any charge when viewing a patient’s ledger. Use the and keys to
highlight the charge line on which you wish to see additional information. Then press the [F9]. This will pop-up a
window that displays the date of service; procedure code; description; charge amount; the diagnoses that this
charge was billed with; the amounts paid and adjusted by each insurance company and other source; remaining
balance; treating doctor number; location of service; claim number; aging date; whether the charge is pending,
released or has already been printed on a statement; and if the charge was added as an YNIF (Yes No Insurance
Form) charge.
Patient # 1-3
M.R. # 3488765482
Patient Ledger
JODIE STEVENS
554 12TH STREET
Phone: 703 259-8704
Insured #1:
Insured #2:
SAME
DWIGHT STEVENS
554 12TH STREET
FALLS CHURCH, VA 22042
FALLS CHURCH, VA 22042
Ins #1: BC
- BLUE CROSS
Pol #: 655331111
Assign:
Ins #2: AE
- AETNA
Pol #: 8999999
Assign:
Ins #3:
Pol #:
Assign:
Ins #4:
Pol #:
Assign:
================================================================Page 1===========
12/08/04 00000
BALANCE FORWARD
236.00
336.00
*
12/08/04 90215
INT. HOSP. EXAM, INTERMED.
50.00
386.00
12/08/04 76850
DIAGNOSTIC ULTRASOUND
55.00
441.00
o
12/08/04
PMT
Personal CK
-200.00
241.00
04/15/05 FINCHG FINANCE CHG. 18% BAL >30 DAYS
3.63
3.63
o
04/15/05 92533
CALORIC VESTIBULAR TESTING
24.00
245.43
o
2
04/19/05
PMT
Ins #1 Pmt. 12/08/01 90215
-40.00
205.43
04/19/05
ADJ
Ins #1 Adj. 12/08/01 90215
-10.00
195.43
Enter page number, , , F9, PgUp, PgDn, Home or End (X to Exit) _
Sample of Patient Ledger with 7 key pop-up window.
Patient #
M
J
5
F
I
I
I
I
=
1
1
1
1
0
0
0
0
1-3
Patient Ledger
12/08/04
ICD #1:
ICD #2:
ICD #3:
90215
V22.2
1st Insurance:
2nd Insurance:
3rd Insurance:
4th Insurance:
Other:
Remaining Balance:
Phone: 703 259-8704
INT. HOSP. EXAM, INTERMED.
50.00
NORMAL PREGNANCY
Paid
40.00
0.00
0.00
0.00
0.00
Adjusted
Treating Dr. #:
10.00
Location #
0.00
Claim #:
0.00
Aging Date:
0.00
Statement:
0.00
0.00
Press ENTER to return
1
1
1
12/08/04
Released
E
99
Section B
PATIENT STATEMENTS
PATIENT STATEMENTS
Patient Statements,
[Enter] from the Selection List, allows you to print statements, control print options,
customize dunning messages and add finance charges.
Printing Statements
You may print a single statement, a range of statements or all statements for any one doctor or for all doctors.
In Alphabetical Order
Statements may be printed in alphabetical order using the “Print by List” option in Patient Statements. When asked
for the name of the list file, type: ) * [Enter]. Before using the ALPHA option, be certain to first alphabetize
your patients in the Alphabetize Patients program from the main Selection List. Alphabetizing creates a “fresh”
ALPHA file that contains ALL patients in alphabetical order. Failure to alphabetize will cause new patients
entered since the last time you alphabetized to be printed at the end of the statement run.
In Zip Code Order
Patient Statements may be printed in zip code order rather than in patient number sequence. From the main
Selection List, type:
[Enter]
) [Enter]
)) [Enter]
C [Enter]
C
[Enter]
[Enter]
[Enter]
[Enter]
[Enter]
) [Enter]
C
[Enter]
-
Go to Data Search
Go into the Sort List program
Choose the ALL file
Sort Responsible Party in zip order
Name the file created “ZIP ORDER”
No next list (we’re finished)
Return to Data Search
Return to the main Selection List
Go to Patient Statements
Choose the “Print by List” option
Enter the file name we just created
Continue printing statements as usual.
Family Accounts
Patient Statements are prepared only for those patients designated to receive them. For family account members,
the “Head of Family” determines whether a statement will be printed for the entire family. The family statement
indicates the previous balance and balance due for the entire family account, as well as the previous balance and
new charges for the Head of Family and for each family member.
100
Section B
PATIENT STATEMENTS
Updating Patient Statements
Printing
What do you wish to do:
Please enter your choice:
SI)
AL)
RA)
LS)
SP)
FC)
Statements
Print SINGLE statements
Print ALL statements
Print RANGE of statements
Print statements by LIST
Set Parameters
Add Finance Charges
UP_
Updating occurs as a normal function of printing Patient Statements. There may be times, however, when you need
to update manually without printing the forms. Not shown on the Patient Statement screen is the special
“Update” option. This option allows you to update all or a range of Patient Statements as if you had actually printed
them. This update feature can be useful for a variety of reasons, including: Updating forms that DID get properly
printed and you answered “No” to “Did All Forms Print Correctly?” Also, you can update first and then send Patient
Statements with no detail, only a balance forward. BE CAREFUL WITH THIS OPTION! Once you update, you
can’t reprint the detail! You can, of course, print the patient’s ledger with full detail at any time.
Addressee
Patient Statements are sent to the person designated as Insured #1 in Patient Information. If there is no Insured #1,
the statement will be sent to the patient. Family members’ transactions are always sent to the “Head of
Family” (Insured #1).
Statement Parameters
Statement
1) Over 30-days message:
Please pay amount shown.
2) Over 60-days message:
Payment will be appreciated.
3) Over 90-days message:
This account is PAST DUE!
4) Over 120-days message:
PLEASE REMIT IMMEDIATELY
5) Insurance message:
NEW CHARGES HAVE BEEN SENT
TO YOUR INSURANCE CARRER(S)
6) Statement type: Speedi-mailer
Parameters
7) Last payment message:
Thank you for your payment.
8) Cut-off date;
04/15/95
9) Billing cycle:
5 days
10) Minimum balance:
$0.01
11) Partial statement criteria:
Hold charges pending payment
12) Print ledger notes: NO
13) Print stmt line in ledger: NO
Enter the NUMBER you wish to change:
Dunning Messages, #1-4
User-defined Dunning Messages for delinquent accounts may be up to 28 characters in length.
Insurance Messages, #5
User-defined insurance message of up to 3 lines of 30 characters each are available and will print on
appropriate Patient Statements.
101
Section B
PATIENT STATEMENTS
Statement Type, #6
The statement type allows you to choose between POC’s: 6-part Speedi-mailer; fold-and-stuff
preprinted statement; or the plain paper statement as well as which credit card(s)-if any- you will
accept as payment..
Last Payment Message, #7
A user-defined last payment message may be up to 28 characters in length.
Cutoff Date, #8
The cutoff date determines the charges and payments to be printed for patients who are designated
to receive partial statements under the
option in Patient Information and New Patients. Under
this option, patients receive statements only if all of the following conditions are met: 1) charges are
dated prior to and including the cutoff date; 2) the charge has been partially paid off; and 3) the
payment or adjustment was NOT recorded with the
option. See “Partial Statement Criteria”
below and the New Patients and the Post Payments chapters for further assistance.
Billing Cycle, #9
The billing cycle sets the frequency of how often a patient receives a Patient Statement. If your office
bills every day or week, and you want your patients to receive a Patient Statement only once a
month, set the billing cycle to 28 days. The System will look at the “Statement sent” date on the
Patient Ledger and determine if 28 days (or the specified number of days) have passed since the last
statement. If the number of days passed is greater than the billing cycle, the System will print a
Patient Statement. If not, it will skip the patient’s statement during the current print run. If new
charges have been added to the patient’s account, a statement will be printed during the next run
regardless of the number of days in the billing cycle.
Minimum Balance, #10
A Patient Statement will only be printed for a designated patient when the balance of the patient’s
account is equal to or greater than the minimum balance. You may wish to set the Patient Statement
minimum balance to at least 50 cents. It costs that much just for the paper and postage. If you want
credit balances to print, set the amount to a minus amount, i.e.: /
'
Partial Statement Criteria, #11
You can choose between two options when printing Patient Statements for patients designated
(Yes Partial statements) in New Patients or Patient Information. You can withhold charges that are
pending payment AND are dated prior to the cutoff date or, alternately, you can withhold charges by
cut-off-date only.
Print Ledger Notes, #12
You can choose whether or not to include Patient Ledger notes on a Patient Statement. If Yes, those
notes that begin with a “-” minus sign will STILL NOT be printed.
Print Statement Line in Ledger, #13
If you choose Yes, an entry (showing the date) will be made in the patient’s ledger every time you
print a statement for the account. If you choose No, the ledger will display only the LAST time the
patient received a statement.
102
Section B
PATIENT STATEMENTS
Special Messages
Printing
Statements
Enter special message: Holiday Greetings From All the Staff!!!_____________
A special message for office closings, holiday greetings, etc., up to 48 characters per line (two lines), may also be
printed on all Patient Statements. This user-defined message is entered just prior to printing Patient Statements.
Finance Charges
Finance Charges for delinquent accounts may be added to the Patient Statement for a range of patients or all
patients, for a single doctor or all doctors. In addition, you may exclude up to two insurance codes from incurring
finance charges or, optionally, by identifying individual patients in New Patients/Patient Information, question 14.
Finance Charges
Enter first insurance code to be excluded: MC
Enter second insurance code to be excluded: M _
The above example excludes patient with
- Medicaid OR
- Medicare from receiving finance charges.
Remember, code matches are UPPER and lower case sensitive. You may exclude groups of codes by matching
the codes with selected wildcards. For example: M???? excludes patients with ANY insurance code that begins
with “M”, i.e.: Mc, METRO, MASS, etc. (See Data Search for a complete description of wildcards.)
When adding Finance Charges, POC will request the annual percentage rate (enter 18% as
and NOT . ) and
the aging category for which finance charges are to apply. One month’s interest will automatically be calculated and
added to each qualifying Patient Ledger as a new charge with a Procedure Code of “Finchg.” Finance charges do
not print on insurance forms.
PLEASE NOTE: YOU MAY ADD FINANCE CHARGES AT ANY TIME AND ARE NOT REQUIRED TO PRINT
PATIENT STATEMENTS WHEN FINANCE CHARGES ARE ADDED. HOWEVER, SINCE THE SYSTEM WILL
CALCULATE INTEREST FOR ONE MONTH, YOU SHOULD NOT APPLY FINANCE CHARGES TO ANY GIVEN
ACCOUNT MORE OFTEN THAN ONCE PER MONTH.
Finance charges are included in both the Transaction Report and the Billings/Collections Report under the primary
physician, regardless of who the treating physician was for the unpaid charges.
103
Section B
PATIENT STATEMENTS
Changing Patient Statement Forms
POC comes with three statement programs: a 6-part, “Speedi-Mailer” statement program; a preprinted, 1-part, foldand-stuff statement program; and a plain paper program.
If you wish to change patient statement forms, select
option six to make your selection.
for Set Parameters in the statement program and choose
The 1-part statement will work in all good quality printers. The 6-part requires a wide carriage, commercial duty
printer rated for 6 thicknesses of heavy paper. The printer costs more initially, but is well worth the investment.
Please call us for a printer recommendation if you are considering 6-part forms.
Notes:
104
Section B
POST PAYMENTS
POST PAYMENTS
Post Payments,
[Enter] from the Selection List, allows you to post payments, adjustments, payment reversals,
refunds and enter remarks under a variety of options. The Posting Payments screen displays the patient’s full
four line address and all four insurance companies.
Patient # 1-3
M.R. # 564345876
{
Posting
SARA MITCHELL
6281 ASH STREET
APT. # 12
Ins #1:
Ins #2:
Ins #3:
Ins #4:
PR
BS
TBD=15.00
03/31/02
90220
80105-LI
74242
90620
03/01/02
03/01/02
03/01/02
03/01/02
Insured #2:
CARLTON MITCHELL
6281 ASH STREET
APT. # 12
- PRUDENTIAL
- BLUE SHIELD
1)
2)
3)
4)
Payments
Insured #1:
CARLTON MITCHELL
6281 ASH STREET
APT. # 12
Pol #: 999-11-4444
Pol #: 999-11-4444
Pol #:
Pol #:
$10.00
Personal CK
INIT. HOSP. EXAM, EXTENSIVE
LIVER PANEL (5 TESTS)
UPPER GI SERIES
CONSULTATION, COMPREHENSIVE
Enter range of dates, OR
Enter NUMBER(s) of the charge(s) you wish to post against: __
03/01/02
Assign: Y
Assign: Y
Assign:
Assign:
90220
8.75*
8.75*
21.25*
16.25*
4
4
4
4
* = Partially paid
Payment and Adjustment Types
Regular: This is the simplest style of posting payments. Payments entered are applied to
the oldest outstanding unpaid charges. This type is most useful for cash payments
(uninsured patients).
Open Item: This option (also called line item) allows you to select on an individual basis, or by range
of dates, the exact charges you wish to post against. It is most frequently used when
posting from an EOB (Explanation of Benefits). Open item allows you to enter the
amount of adjustment for each charge. When viewing a charge to post against that has
an “*”. the asterisk means the charge showing is the remaining balance not the full
charge. PLEASE NOTE: You MUST use this option when posting payment in
order to generate accurate reimbursement Production Reports and “open
charge” reports.
Manual Annotation: This works exactly like REGULAR, with the ability to type a short
payment.
Dates of Service:
note
about
the
This option is the quickest way to Post Payments to a group of charges determined by
the charges’ date(s) of service. This method is used typically for posting from an
insurance E.O.B. If the payment is not sufficient to cover the total of the charges,
the payment and then any adjustment(s) will be applied from oldest to most current
charge. When viewing a charge to post against that has an “*”, the asterisk means the
charge showing is the remaining balance, not the full charge.
Payment Reversal: Use this option to reverse payments and adjustments only. While it will reverse a
payment or adjustment on the Patient Ledger, this option will NOT reverse a p a y m e n t
out of the Deposit Slip.
105
Section B
POST PAYMENTS
Post Unapplied Credit: This option is used to post a payment without paying off (closing) any charges and
allows you to enter a description for the payment.
Disburse Unapplied
Credit: This option displays all of the unapplied payments on the patient’s ledger, allows you to
pick one and then lets you disburse it over the charges you have selected.
Delete Payment: This option does not appear as a selection until after you have entered a payment or
adjustment, are ready to record it, and then decide to make a change before
making a permanent record.
PLEASE NOTE: If you need to make an adjustment with no payment, select the appropriate option and enter the
adjustment amount when asked for the “AMOUNT OF PAYMENT.” Then select the desired adjustment category at
the “FORM OF PAYMENT” question.
Refunds
Use this option for refund checks only. Do not enter adjustments or reversals here. Doing so will cause serious
errors in your reports.
When using the REFUND option, only one refund per patient can be entered at a time. A refund or payment
reversal cannot be entered at the same time payments or adjustments are entered for a patient.
REFUNDS appear in a separate category in the Billings/Collections Report under the primary doctor or the treating
physician if the treating physician is indicated at the time the refund is entered. In the Transaction Report, refunds
are listed separately under the primary physician. Refunds will be noted as Procedure Code 00000 on the patient
ledger and statement.
You may enter a REFUND regardless of whether the outstanding balance on the patient’s ledger is positive or
negative. However, a refund is like a negative payment and the System treats all refunds as charges when it
calculates balances.
Payment Option Bypass
A POWER USER BYPASS COMMAND
When entering the patient’s account number, you may follow the patient number with the letter corresponding to the
payment option you wish to use and the System will immediately skip to that option. If you enter the patient number
followed by an , the System will go immediately to the REGULAR option of Post Payments (i.e.: +-. [Enter]
for patient # 1234). The patient number followed by a
will take you to OPEN ITEM; a
will take you into
MANUAL ANNOTATION; a
to RANGE OF DATES. You may also use these bypass letters appended to a
[Enter]).
response when asked “Is This The Correct Patient?” (i.e.:
Cross Posting Payments
Cross posting happens when you post a payment to a transaction that was performed by a doctor (treating
physician) that is different from the patient’s primary physician. Remember that under options
and
of Post
Payments, the payment is posted against the first open charge on the Patient Ledger, and in the case of option ,
against the first open charge for the selected range of dates. If you are entering a payment or adjustment for a
cross posted charge that is not the first open charge on the Patient Ledger you must use option in order for the
payment or adjustment to be correctly posted.
106
Section B
POST PAYMENTS
Find Patient by Policy/SS Number
Occasionally you will receive and insurance payment where either the name is incorrect or not on the EOB
(Explanation of Benefits). In this case, you may locate the patient by his/her policy/social security number. Just hit
the [F4] key at the “Enter Patient Name or Number” prompt.
Deposit Slip
The Deposit Slip is a transmittal slip for depositing checks and cash into the bank. It is not related in any way to
cross posting between doctors or any other part of the System. If a discrepancy exists between payments posted
on the Transaction Report and the Deposit Slip, the error(s) will be printed on an “out of balance” report. You
cannot edit/change an incorrect Deposit Slip, refer to the Transaction Report section.
Option
The
option ( es, o tatement) at the end of Post Payments, immediately before your entries are
permanently recorded to the System, requires that the current patient be set up through Patient Information (or New
Patients) with the
option for Printing Statements. This option is designed for patients who have insurance and
you do not want charges to appear on Patient Statements until you have received payments from the insurance
companies. To accomplish this, when posting payments or adjustments from the primary insurance company,
permanently record them with the
option. This will cause the charges to be withheld from the patient’s
statement. When posting payments or adjustments from the last insurance company, they should be recorded with
the option, allowing the charges to be printed on the statements the next time statements are prepared.
If you are holding secondary insurance billing pending payment by the primary insurance, or have
(Yes, Partial)
statements that are pending payment, you may enter a zero payment through option to free charges for printing
on the seconday insurance form or on Patient Statements.
To Be Disbursed
Patient # 1-3
M.R. # 564345876
Posting
SARA MITCHELL
6281 HAWTHORNE BLVD.
MANHATTAN BCH, CA 90266
CARLTON MITCHELL
6281 HAWTHORNE BLVD.
MANHATTAN BCH, CA 90266
Ins #1: PR
Ins #2: BS
TBD = 60.00
Payments
Insured #1:
- PRUDENTIAL
- BLUE SHIELD
04/15/95
1)
12/01/94
90060
2)
12/05/94
90060
3)
12/06/94
90060
4)
12/07/94
90060
5)
12/08/94
90060
6)
04/15/95
71020
7)
04/15/95
81000
Enter range of dates, OR
Insured #2:
CARLTON MITCHELL
6281 HAWTHORNE BLVD.
MANHATTAN BCH, CA 90266
Ins #3:
Ins #4:
$20.00
Insur. Pmt.
INTERMED. EXAM. EST. PT.
INTERMED. EXAM. EST. PT.
INTERMED. EXAM. EST. PT.
INTERMED. EXAM. EST. PT.
INTERMED. EXAM. EST. PT.
CHEST XRAY, 2 VIEWS
URINALYSIS
12/06/94
90060
5.00*
5.00*
5.00*
25.00
25.00
40.00
11.50
2
2
When posting a payment over multiple charges from a single E.O.B., you may find it useful to refer to the left hand
side of the reverse video bar mid-screen, as in the above example. Located in this bar you will see: tbd=60.00.
TBD stands for “ To Be Disbursed” and is the amount remaining to be disbursed from the E.O.B. This amount is
decreased as each payment is posted until a zero balance is reached.
107
Section B
POST PAYMENTS
Payment Entry Bypass
A POWER USER BYPASS COMMAND
1-3
Patient #
M.R. # 564345876
Insured #1:
SARA MITCHELL
6281 HAWTHORNE BLVD.
MANHATTAN BCH, CA 90266
CARLTON MITCHELL
6281 HAWTHORNE BLVD.
MANHATTAN BCH, CA 90266
Ins #1: PR
Ins #2: BS
Posting
- PRUDENTIAL
- BLUE SHIELD
Payments
Insured #2:
CARLTON MITCHELL
6281 HAWTHORNE BLVD.
MANHATTAN BCH, CA 90266
Ins #3:
Ins #4:
CURRENT BALANCE:
$189.00
Enter the TOTAL amount of payment: 50,041595,1_
To help speed up the entry of payments, when you are asked to enter the amount of payment, you may enter the
payment amount, date of payment and the form of payment on one line separated by commas (i.e.: 1.
1 would enter a $50 payment on 04/15/95 as a personal check). If the date of the payment is the
same as the System date, you can omit the six digit date (i.e. 11 would enter a $50 personal check payment on
the POC System date).
Remarks
Patient # 1-3
M.R. # 564345876
Posting
SARA MITCHELL
6281 HAWTHORNE BLVD.
MANHATTAN BCH, CA 90266
Ins #1:
Ins #2:
Ins #3:
Ins #4:
PR
BS
Payments
Insured #1:
CARLTON MITCHELL
6281 HAWTHORNE BLVD.
MANHATTAN BCH, CA 90266
- PRUDENTIAL
- BLUE SHIELD
Pol #:
Pol #:
Pol #:
Pol #:
04/15/95
POSTING:
Insured #2:
CARLTON MITCHELL
6281 HAWTHORNE BLVD.
MANHATTAN BCH, CA 90266
A)
B)
C)
D)
E)
F)
G)
H)
$10.00
Assign:
Assign:
Assign:
Assign:
Personal CK
Regular
Open Item
Manual Annotaiton
Dates of Service
Enter Remarks
Payment Reversal
Post Unapplied Credit
Dsiburse Unapplied Credit
Here patient bring their insurance info on next visit
-CASH ONLY!!!
NO CHECKS!!!
Once a payment has been entered, you can comment the entry with a remark. This is very handy for Option B type
payments/adjustments (and others) which don’t have annotations.
108
Section B
POST PAYMENTS
Changing Payment/Adjustment Headings
B i l l i n gs &
Collections Report
CHECK PAYMENT CATEGORIES
15)
16)
17)
18)
19)
Usr Def Pmt #1
Usr Def Pmt #2
Usr Def Pmt #3
Usr Def Pmt #4
Usr Def Pmt #5
35)
36)
Usr Def Pmt #11
Usr Def Pmt #12
20)
21)
22)
23)
24)
Usr Def Pmt #6
Usr Def Pmt #7
Usr Def Pmt #8
Usr Def Pmt #9
Usr Def Pmt #10
OTHER PAYMENT CATEGORIES
37)
38)
Usr Def Pmt #13
Usr Def Pmt #14
OTHER ADJUSTMENT CATEGORIES
39)
40)
Usr Def Adj #11
Usr Def Adj #12
41)
42)
Usr Def Adj #13
Usr Def Adj #14
Enter number to be changed: _
You can change the Payment Category headings in the Billings/Collections Report program. Choose the
Change option after entering the Billings/Collections Report program from the main Selection List.
*
PLEASE NOTE:
When changing a Check Payment Category in lines 15 through 24, the System will
automatically create a corresponding adjustment category, lines 25 through 34 (these adjustment categories will be
displayed in Posting Payments “Type of Payment” screen.) On the other hand, the User Defined Payments in lines
35, 36, 37 & 38 are independent of the User Defined Adjustments in lines 39, 40, 41 & 42.
Capitation Payments
With a little set up, the System can easily handle capitated payments. Just follow these steps:
1 Create a new doctor in
Doctor Information for each carrier who sends capitated payments.
2 Create a separate billing account for each carrier through
New Patients. Use the
corresponding doctor number from step one as this account’s “primary” doctor number (question
23, screen one of
Patient Information).
3 Use the carrier’s billing account from step two to enter a monthly “One-Time-Only”.
4 Create an Alternate Fee Schedule in Procedure Codes. The Alternate Fee Schedule should be
created with all fees being zero dollars. (Schedule “Z” for Zero makes sense and is easy to
remember.)
5 Identify each member patient to use the new fee schedule (question 21, screen one of
Patient
Information).
6 Assign the carrier’s doctor number from step one to each member patient (question 22, screen
one of
Patient Information).
This method makes it easy to generate a variety of management reports, including a quick list of the member
patients.
109
Section B
POST PAYMENTS
Unapplied Credit
The Unapplied Credit feature allows you to post a payment or credit to a patient’s account without
disbursing it until a later time. This feature provides many additional advantages and new variations of
controlling the application of credit to an account. Payments and adjustments appear on the patient’s
ledger but is not calculated in the Running Balance nor is it applied to any specific charge. When you
wish to apply the credit to specific charges, you will select option * (Disburse Unapplied Credit) in
Posting Payments. A list of all available unapplied credits, or a remaining balance of a partially posted
Unapplied Credit, will appear on the subsequent screen. You indicate which credit is to be applied by
selecting the applicable line number. Then you proceed, as you normally would when posting a
payment, by selecting the appropriate charge(s) to which you wish to apply the credit. You can post all
or any part of the Unapplied Credit. If there is a balance remaining, this will be displayed in parentheses
on the patient’s ledger.
Posting Payments
--------------------------------
Patient # 1-1
M.R.# 3488765402
JODIE STEVENS
554 12TH STREET
Ins #1: BC
Ins #2: AE
Ins #3:
Ins #4:
-
Insured #1:
DWIGHT STEVENS
SAME
Insured #2:
554 12TH STREET
BLUE CROSS
AETNA
Pol #: 6534435423
Pol #: 879234453
Pol #
Pol #:
CURRENT BALANCE:
Posting:
Enter the LETTER of your choice:
Patient # 1-1
M.R.# 3488765402
JODIE STEVENS
554 12TH STREET
FALLS CHURCH, VA 22042
Ins #1: BC - BLUE CROSS
Ins #2: AE - AETNA
Ins #3:
Ins #4:
$241.80
UNAPPLIED CREDIT:
A)
B)
C)
D)
E)
F)
G)
H)
Assign:
Assig
Assign:
Assign:
$0.00
Regular
Open Item
Manual Annotation
Dates of Service
Refund
Payment Reversal
Post Unapplied Credit
Disburse Unapplied Credit
Patient Ledger
--------------------------Insured #1:
SAME
Pol #: 6534435423
Pol #: 879234453
Pol #:
Pol #:
Phone: 703 259-8704
Insured #2:
DWIGHT STEVENS
554 12TH STREET
FALLS CHURCH, VA 22042
Assign:
Assign:
Assign:
Assign:
================================================================= Page 1 =====
01/09/04 00000
BALANCE FORWARD
336.80
336.80 *
01/09/04 90215
INIT. HOSP. EXAM, INTERMED.
50.00
386.80 o
01/09/04 76850
DIAGNOSTIC ULTRASOUND
55.00
441.80 o
01/09/04 PMT
Personal CK
-200.00
241.80
08/01/05 PMT
Per Ck # 10055 ($50.00)
( -50.00)
241.80
Running Balance: $241.80
Enter page number, , , F9, PgUp, PgDn, Home or End (X to Exit):
110
Section B
POST PAYMENTS
Patient # 1-3
M.R. # 3488765482
Patient Ledgers
Insured #1:
JODIE STEVENS
554 12TH STREET
FALLS CHURCH, VA 22042
Ins #1: BC
- BLUE CROSS
Ins #2: AE
- AETNA
SAME
Ins #3:
Ins #4:
Phone: 703 259-8704
Insured #2:
DWIGHT STEVENS
554 12TH STREET
FALLS CHURCH, VA 22042
Page 1
======================================================================
12/08/94 00000
BALANCE FORWARD
236.00
336.00
12/08/94 90215
INT. HOSP. EXAM, INTERMED.
50.00
386.00
12/08/94 76850
DIAGNOSTIC ULTRASOUND
55.00
441.00
12/08/94
PMT
Personal CK
-200.00
241.00
04/15/95 90020
COMPREHENSIVE EXAM, NEW PT.
40.00
281.00
04/15/95 92533
CALORIC VESTIBULAR TESTING
24.00
305.00
10/09/97
PMT
Blue Cross Payment- Ck #1001 ($100.00)
0.00
205.00
*
o
o
o
o
2
At such time as when the user wishes to disburse the unapplied credit, the charge(s) is/are selected by line
number, as in a “B Option” (or open charge) type of payment. This feature provides many additional advantages
and new variations of controlling application of credit to an account.
1 From the Posting Payments menu, select option “H” (Disburse Unapplied Credit).
2 Next you will be prompted for which unapplied credit the user wishes to disburse. If there are multiple
unapplied credits, select the applicable credit by line number.
3 The next screen will display all currently open charges. Select the appropriate charge(s) by line number(s).
4 The charges will be displayed one by one. Enter or to accept application of credit or to decline it.
The disbursement of the unapplied credit will be reflected on the Patient’s Ledger as follows:
Patient # 1-3
M.R. # 3488765482
JODIE STEVENS
554 12TH STREET
FALLS CHURCH, VA 22042
Ins #1: BC
- BLUE CROSS
Ins #2: AE
- AETNA
Patient
Insured #1:
Ledgers
SAME
Ins #3:
Ins #4:
Phone: 703 259-8704
Insured #2:
DWIGHT STEVENS
554 12TH STREET
FALLS CHURCH, VA 22042
Page 1
======================================================================
12/08/94
12/08/94
12/08/94
12/08/94
04/15/95
04/15/95
10/09/97
10/15/97
00000
90215
76850
PMT
90020
92533
PMT
PMT
PMT
BALANCE FORWARD
INT. HOSP. EXAM, INTERMED.
DIAGNOSTIC ULTRASOUND
Personal CK
COMPREHENSIVE EXAM, NEW PT.
CALORIC VESTIBULAR TESTING
Blue Cross Payment - Ck # 1001 ($100.00)
Una Cr. Dis. (10/09/97)
12/08/94 90215
Una Cr. Dis. (10/09/97)
236.00
50.00
55.00
-200.00
40.00
24.00
0.00
336.00
386.00
441.00
241.00
281.00
305.00
-50.00
255.00
*
*
o
o
2
111
Section B
PROCEDURE CODE LIST
PROCEDURE CODE LIST
The Procedure Code List,
[Enter] from the Selection List, will maintain 32,000 permanent Procedure Codes,
descriptions and their associated charges. In addition, an unlimited number of One-Time-Only Procedure Codes
may be entered.
Four Digit Codes
POC will accept the four-digit Procedure Codes used in some states. Simply enter a blank space for the “fifth” digit.
Zero Dollar Charges
If you wish to indicate a procedure, notation or surgical sub-procedure for which there is no separate charge, you
may use any Procedure Code of you choice with a charge of $0.00. If you previously answered NO in Bill Insurance
to the Set Parameters question concerning printing zero charges, these procedures will not print on insurance
forms, but will appear on the Patient Ledger, the Patient Statement, the Transaction Report and the Production
Report. You may also use Data Search to retrieve patient information on these procedures.
We recommend you design your own Procedure Codes for these special circumstances. One example follows
using alphanumeric coding. If you use a letter at the beginning of these special procedures, be sure NOT to use the
reserved letter “ ” as this indicates and index number to the System.
CODE:
SUR01
DESCRIPTION:
INCIDENTAL APPENDECTOMY
CHARGE:
$0.00
Type of Service, Medicare Considerations
Type of service refers to medical care, surgery, consultation, etc., as required on insurance forms in some states.
The codes for type of service are located on the back of some insurance forms.
From the operator’s standpoint, depending upon the State and whether the practice submits insurance claims
electronically, type of service is an optional entry and may be left blank. However, if you do not normally accept
assignment on Medicare patients, you must use TYPE OF SERVICE 5 for lab charges. This will screen lab
charges to a separate insurance form with the assignment block checked as yes, and will also prevent the lab
charges from printing on Patient Statements until payment is received from Medicare. This design is based on
current Medicare law (at the time of publishing) that states all doctors MUST accept assignment on lab charges.
Payments for Medicare patients, in this case, must be applied using option of Post Payments. Additionally, if the
second character of the type of service code is an asterisk (*) (i.e. - “2*”), the System will treat the procedure in the
same fashion that it treats TYPE OF SERVICE 5 codes. If you wish the TYPE OF SERVICE 5 to be unaffected by
the previous examples, enter [Space] when creating or changing a code.
Description
Although the procedure code description field allows up to 27 characters, not all insurance forms allow enough
space for a description this long. The red HCFA-1500 form doesn’t allow for any description. Depending upon the
insurance form your office is using, you may choose to shorten the description or simply allow the computer to
truncate (cut off) the description when it prints the forms.
We recommend the description be entered with the most general word first (i.e. - X-RAY, FOREARM rather than
FOREARM X-RAY). This allows similar procedures to be listed alphabetically in the pop up list window, [F5].
112
Section B
PROCEDURE CODE LIST
Parallel Procedure Codes
What follows may be confusing if you are new to medical billing or unfamiliar with computers. Should you have
difficulty, we encourage you to contact our Customer Support department or your dealer. Fortunately, most carriers
use the standard CPT coding method at this time, which means this feature is seldom used anymore.
Some insurance companies require Procedure Codes which are different from the standard CPT codes. This can
be implemented with up to four separate “Parallel” Procedure Code files on the System. The names of these files
are: RVSM (Medicare), RVSMC (Medicaid), RVSBS (Blue Shield), RVSCH (Champus). The Standard Procedure
Code file is named RVS. To create a Parallel Procedure Code file, COPY the file RVS to the appropriate parallel file
name. From the main Selection List, type:
[Enter]
[Space] 4 [Space] 4
[Enter] This returns you to POC.
This will create a parallel Medicaid file.
You need to create only those files which correspond to the insurance companies that require a different set of
Procedure Codes. The CPT lists will all be identical at this point. To change the codes, go to the Procedure Code
list program in POC, choose the appropriate insurance type and use the * option to change the necessary
information. ALL the codes in the new list must be changed in this manner. REMEMBER - THE PRICE IN EACH
LIST WILL (MUST) BE THE SAME AS THE PRICE IN THE STANDARD LIST. THIS OPTION IS ONLY TO BE
USED FOR DIFFERENT CODING SYSTEMS AND NOT FOR DIFFERENT FEE SCHEDULES.
Patient Ledgers, Patient Statements, and any other program that reference Procedure Codes, will take the code,
description and charge from the standard CPT list (file: RVS). Parallel codes will be used on the specified insurance
forms only.
In Add Charges, the Procedure Code that is entered must be from the standard CPT list. When entering new
Procedure Codes in Add Charges, you will be asked to enter the information for all parallel lists at the same time.
Changing A Code
When changing existing codes or adding Parallel Procedure Codes, entering an [Enter] (for Same) in any field
will leave that field unchanged or, if adding a new parallel code, duplicate the field from the standard CPT list.
113
Section B
PROCEDURE CODE LIST
Changing Prices
You can easily change procedure code prices simply by entering the amount of the desire increase as a
percentage. You can do “what if” scenarios and printout a report to review your changes before making the
changes permanent.
INSURANCE TYPE: ST
Procedure Codes
-----------------------------
What do you wish to do:
VU)
PR)
AD)
CH)
DE)
IP)
View Procedure Codes
Print-out Procedure Codes
Add Procedure Code
Change Procedure Code
Delete Procedure Code
Increase Prices
Please enter your choice:
INSURANCE TYPE: ST
Procedure Codes
-----------------------------
Enter the percentage to increase prices by: __
INSURANCE TYPE: ST
Procedure Codes
-----------------------------
What do you wish to do:
1)
2)
3)
4)
Round to the nearest penny.
Round to the nearest quarter.
Round to the nearest fifty cents.
Round to the nearest dollar.
Please enter your choice:
114
Section B
PRODUCTION REPORT
PRODUCTION REPORT
The Production Report,
[Enter] from the Selection List, shows the number of times each procedure has been
performed and the corresponding amount billed, collected, adjusted and percentage of adjustment. The report
compares any two periods of time. The time periods you choose may be in days, weeks. months or years. User
selectable options, including wildcard filters, allow the user to generate a wide variety of valuable management
reports. PLEASE NOTE: You MUST use option B type payments to generate accurate reimbursement reports.
You cannot generate reports with data entered prior to version 5.0 to include payment and adjustment amounts.
P r o d u c t i o n
R e p o r t
USER-SELECTED CATEGORIES
DATES OF SERVICE
PROCEDURE CODES
1) Period #1: 04/01/95 - 04/15/95
6) Range:
N/A
2) Period #2: 01/01/95 - 04/15/95
7) Filter:
N/A
TOTALS
PATIENTS
3) Grand Totals Only: NO
8) MR# Filter: N/A
4) By Type of Service: NO
9) By List: N/A
5) Doctor: ALL DOCTORS
10) Ins Co:
N/A
11) Ins Co Totals Only: NO
PAYMENTS
12) Don’t include payments
13) Primary insurance only
14) All insurance payments
15) All payments
Enter the NUMBER you wish to change (X to Exit): _
Categories
Dates of Service, #1 - 2
The System defaults to the current month-to-date and year-to-date. If you only wish to report
one period, set both periods to the same range of dates.
Grand Totals Only, #3
The System defaults to
. The default prints all detail on individual reports for each doctor
number, plus a detailed grand totals report of all selected doctors. If you change it to es,
you will only receive the detailed grand totals report.
By Type of Service, #4
The System defaults to
. The default allows all procedures to print in numeric
(alphabetical) order. If you change it to es, the report will sort and print the procedures by
type of service.
Doctors, #5
The System defaults to all doctors. You may choose one or multiple doctors as follows:
1-1 12 [Enter]
115
Section B
PRODUCTION REPORT
Range, #6
You can limit the report to only show a range of procedure codes.
Filter, #7
You can use wildcards to selectively filter procedure codes. If a code matches your filter, it will
be included in the report. See “Using Wildcards” below.
Medical Record Number Filter, #8
You can use wildcards to selectively filter Medical Record Numbers. If a MR# matches your
filter, it will be included in the report. See “Using Wildcards” below.
By List, #9
You can use lists generated by Data Search and Accounts Receivable.
Insurance Company, #10
The System defaults to all insurance companies and includes patients with no insurance. You
can limit the report to one insurance carrier or produce a report of multiple carriers by using
wildcards. For example: an insurance company filter of “AE???” will produce a Production
Report of “AETNA, AE1, AE2, etc.” insurance codes. See “Using Wildcards” below. If you
select an insurance company(ies), this user option will change the payments reported to
Primary Insurance Only, #13.
Insurance Company Totals Only, #11
This User-Selected Category works in conjunction with the above Insurance Company
category, #10, and defaults to
. If you designate an insurance company(ies) in #10 and
leave #11 as NO, the selected insurance carrier(s) will print with full procedure code detail
(grouped by insurance company). If you designate an insurance company(ies) in #10 and
change #11 to YES, the selected insurance carrier(s) will be printed as a one line subtotal
without the procedure code detail.
Don’t Include Payments, #12
The System defaults to this style of report.
reported.
If selected, only the charge amount will be
Primary Insurance Only, #13
If selected, the report will only include payments/adjustments from a patient’s primary
insurance company.
All Insurance Payments, #14
If selected, the report will include payments/adjustments from patient insurance companies #1
to #4.
116
Section B
PRODUCTION REPORT
All Payments, #15
If selected, the report will include all payments/adjustments, regardless of their source.
Using Wildcards
“Wildcard” characters (like Jokers in a card game) can be used when filtering the output by procedure code (#17),
by medical record number (#8) or by insurance company (#10). These “wildcard” characters are as follows:
# - matches any digit (0-9)
! - matches any upper or lower case letter
? - matches any character
System Date vs Transaction Date
The figures presented in the Production Report are based on the date of service for each procedure and not the
date these charges were entered into the System. A procedure performed in June (with a June date) which was not
entered into the computer until July, would still be reported on the Production Report under the June period.
Payments and adjustments are reported against charges regardless of the time period they were posted. A June
report will only show June’s procedures, but, the payments/adjustments reported against June’s procedures may
have been received and posted in July, August, September, etc.
This differs from the figures reported on the Billings/Collections Report which uses the System date to calculate the
daily, monthly and year-to-date amounts rather than the actual date of service. In the Billings/Collections Report,
which uses the System date, a procedure performed in June but entered in July would be shown in the July billing.
Procedure Codes Reported
All Procedure Codes in the System, both permanent and one-time-only codes, (except for the 5-zero, 00000,
procedures) are reported on the Production Report.
Before Housecleaning
If you are planning to run Housecleaning, the Production Report should be run first and the report permanently
stored in a safe place for future reference. After the House-Cleaning program is run, procedure detail for
consolidated transactions will no longer be available.
117
Section B
PROVIDER LIST
PROVIDER LIST
The Provider List, 4 [Enter] from the Selection List, will maintain 32,000 providers and their associated addresses
and numbers. You may view, print, add, change and delete providers.
Provider Number
The provider number for referring physicians, is the provider’s Unique Provider Identification Number, called the
UPIN number. Do NOT confuse it with their PIN number. They are not the same.
Changing A Provider
When changing a Provider, entering an
[Enter] (for Same) in any field will leave that field unchanged.
Notes:
118
Section B
RECALL NOTICES
RECALL NOTICES
Recall Notices,
[Enter] from the Selection List.
The System will permanently store an unlimited number of different recall messages, each identified by its own
unique identification number.
Printing Recall Notices
Patients may be recalled in any of three ways:
1
By the date of their last visit — for example, you may wish to recall all patients not seen for one
year to remind them to make an appointment for their annual examination.
2
By setting a recall date for an individual patient — the System will automatically print a recall
for a patient on the designated recall date (or the next time recalls are printed). For example, if
the patient’s next appointment date is June 20, you may wish to set a recall date of June 5 for
this patient. This way the recall notice would be sent out about two weeks before the
appointment date. You also may indicate the date and time of the next appointment on the
recall notice.
3
By a previously saved list — this can be a list saved through the Data Search program or
Accounts Receivable. In the case of a list created in Accounts Receivable, the Recall Notice
would be used as a Dunning Notice with a Recall Notice message appropriate to the particular
patient list created by Accounts Receivable.
Recall Notices should be run at least once every week in order to ensure all patients are recalled on time. If, for any
reason, Recall Notices are not run, the System will print the delayed Recall Notices the next time recalls are printed.
Editing a Recall Message
Recall Notices are edited one line at a time. Enter each line as you wish it to appear on the Recall Notice. When
you have finished with the current line, press [Enter] to continue to the next line. After you have press [Enter] on
the last line, the System will ask if your notice is correct. If the notice is not correct, you can edit it by entering new
information on lines you wish to change. Just press [Enter] on those lines you don’t want to change; and press
[Space] [Enter] on the lines you want to delete.
Recalls As Past-Due Reminders
Sending mid-month reminders to delinquent patients is a very effective past due follow-up tool. The idea is to send
them two weeks after statements have gone out, which provides a continual reminder of the status of their account.
Please see Aging Report/Past Due Reminders in Section C for step by step details.
119
Section B
REFERRING PHYSICIAN REPORT
REFERRING PHYSICIAN REPORT
Referring Physician Report,
[Enter] from the Selection List, allows the user to find physicians who have referred
patients during a range of dates, which patients they have referred, how much has been billed to those patients, and
how much has been collected.
Referring
Physician Report
What do you wish to do:
S I ) Print SINGLE referring physician
AL) Print ALL referring physicians
Please enter your choice: _
The Report
REFERRING PHYSICIAN REPORT FOR 01/01/95 - 03/31/95
------------------------------------------04/15/95
PAGE 1
=============================================
REFERRING PHYSICIAN PATIENT NAME
BILLED
COLLECTED
=============================================
NORMAN JOHNSON, MD JODIE STEVENS
505.00
505.00
CARLTON MITCHELL
152.16
101.28
MARYANNE BOWERS
325.19
325.19
CANDICE CLEAVER
319.94
0.00
DENNIS BRICKLIN
142.50
59.34
-------------1445.59
991.61
120
Section B
RETIRED LEDGERS
RETIRED LEDGERS
Retired Ledgers, ) [Enter] from the Selection List, works in conjunction with Housecleaning and allows you to
view the Retired Ledgers created by Housecleaning. You must have Retired Ledgers either on floppy disks or on
your hard drive to use this program.
Notes:
121
Section B
SETUP PRINTER
SETUP PRINTER
You can now select among multiple printers from within the POC Main Selection List. The printer setup
can be configured for each workstation. This provides you with the advantage of having one printer
dedicated to printing out forms while using a second printer to print out reports or Super Bills, as an
example.
To make changes to the above default settings, select
at the Main Selection List. Enter the line number of the
printing operation you wish to redirect. At the “Enter port to print to” prompt enter the desired printer port and press
the [Enter] key. When prompted, “Should changes be made permanent?”, enter
or
and press the [Enter]
key.
Printer Configuration
----------------------------------------1)
2)
3)
4)
5)
6)
7)
8)
9)
10)
11)
12)
13)
14)
15)
Accounts Receivable Report
Alphabetized Patient List
Appointment Schedules
Batch Add Charges
Billing and Collections
Clinical Data
Cross Posting Report
Data Search/Sort List
Doctor Information
Drug List
ECS Reports
Encounter Forms
First Report of Work Injury
ICD Code List
Insurance Company List
Enter number to be changed:
1) LPT1
2) LPT2
LPT1
LPT1
LPT1
LPT1
LPT1
LPT1
LPT1
LPT1
LPT1
LPT1
LPT1
LPT1
LPT1
LPT1
LPT1
16)
17)
18)
19)
20)
21)
22)
23)
24)
25)
26)
27)
28)
29)
Insurance Forms
Mailing Labels
Patient Ledgers
Patient Statements
Procedure Code List
Production Report
Provider List
Recall Notices
Referring Physician Report
Retired Ledgers
Superbill
Transaction Report
Zip Code List
Patient Information
LPT1
LPT1
LPT1
LPT1
LPT1
LPT1
LPT1
LPT1
LPT1
LPT1
LPT1
LPT1
LPT1
LPT1
1
3) LPT3
4) COM1
5) COM2
Enter port to print to:
Notes
122
Section B
SUPER BILL
SUPER BILL
Super Bill,
[Enter] from the Selection List, allows you to enter a new patient, add charges and post one payment
in the fastest manner possible. Super Bill was designed for cash patients so that the patient could be given a
statement at the time of their visit. Limited patient information is entered through the New Patient section of Super
Bill. Since no insurance questions are asked, patients added to the System through Super Bill are automatically set
to receive Patient Statements. Any changes or additional information can be entered at a later time through the
Patient Information program. The same data entry methods apply to Super Bill as in the other corresponding
programs except as noted here.
Only one payment may be entered at a time. In Super Bill, this payment is automatically posted against the oldest
outstanding charge on the Patient’s Ledger as in a “Regular” payment in Post Payments. PLEASE NOTE: Posting
payments through Super Bill will likely result in misleading “open charge” reports and “reimbursement” reports.
If a patient is already recorded in the System, you may go directly to the Add Charges or Post Payments portions of
Super Bill without re-entering the patient information.
Billing Information Sheet - The Super Bill
A BILLING INFORMATION SHEET is automatically printed by Super Bill for the patient before (s)he leaves the
office. The patient can submit this Billing Information Sheet to his/her insurance carrier for reimbursement. The
Patient Ledger is permanently updated only after the Billing Information Sheet has printed properly.
You may wish to design your own super-bill that works independently of the Super Bill program. You may do this
using the Encounter Form program. Please see the chapter on Encounter Forms for further information.
Notes:
123
Section B
SYSTEM COMMAND
SYSTEM COMMAND
POC includes a System Command (DOS prompt) option,
[Enter] from the Selection List. Although it can serve
as a way to execute other DOS commands, its primary function is the installation of POC updates.
Exiting DOS & Returning To POC
When you are finished with your DOS commands, you can return to POC by pressing the [Enter] key as follows:
From the System Command prompt:
“Enter command:” [Enter]
From the [F10] DOS prompt:
“C:\POC>” [Enter]
Notes:
124
Section B
TRANSACTION REPORT
TRANSACTION REPORT
The Transaction Report,
[Enter] from the Selection List, is the computer version of the day sheet. This report is
a printed copy of every charge, payment, adjustment, reversal, remark and refund entered into the System since the
last time the report was printed. The Transaction Report lists all patient transactions entered, regardless of the date
of service.
Printing the Transaction Report
The Transaction Report should always be printed at the end of every day or following morning. Prior to clearing the
report, you may reprint as many reports as you like without affecting any totals.
Storing the Transaction Reports
The Transaction Report provides”hard copy” backup of all transactions which, along with the daily backup, will be
required whenever it becomes necessary to recover lost data. They are the second safety net, should your backups
be defective. For this reason, the Transaction Reports should be filed safely away in chronological order.
A gentle nudge: If your hard drive failed today, would you have good backups?
Trial Transaction Report
The Trial Transaction Report allows the user to print a Transaction Report of ONLY their day’s activity (their terminal
#). You can print a “Trial Transaction Report” for your workstation only by selecting the TR) option. This provides
direct access to your data entries and provides an easy method of reconciling the entries made since the last time a
Transaction Report was printed. It is also possible to edit the Check Register by selecting the ED) option to make
any necessary corrections.
Refer to the sample screens on the following page.
125
Section B
TRANSACTION REPORT
Append Master Files
------------------------------------What do you wish to do:
PR) Print transaction report.
TR) Trial transaction report.
ED) Edit deposit slip.
Daily Transaction Report
Please enter your choice: __
CHECK# ABA#
AMOUNT DR# NAME
-------------------------------------------------------------------------1) 10054
90-1775
75.00 1
PRUDENTIAL
2) 005978 1-23
75.00 1
HOME LIFE
Enter number to be changed, ADD, PgUp, PgDn or Home (X to Exit):
1)
10054
Daily Transaction Report
----------------------------------------------4) 1 - MATHEW JOHNSON, M.D.
2)
90-1775
5) PRUDENTIAL
3)
75.00
Is this the one you wish to change? (Type DEL to Delete):
Transactions by Primary Physician
All transactions are reported under the primary physician. Procedures performed by a treating physician are
indicated by the presence of the treating physician’s number at the far right side of each listed transaction.
Cross Posting Report
When the Transaction Report is run, the System automatically prints a Cross Posting Report. This report indicates
charges, payments, adjustments and refunds for each treating physician. A periodic cross posting summary report
is available using
Cross Posting from the Selection List. The Transaction Report version of the Cross Posting
Report and the main Selection List
Cross Posting summary report are not the same. See the Cross Posting
chapter.
Report Totals
The Transaction Report shows, by primary physician, the total dollar amount of billings, collections, adjustments and
refunds; the total number of procedures performed; and the total number of patients seen for whom procedures
(excluding 00000) have been entered. Grand totals for all doctor are also printed.
126
Section B
TRANSACTION REPORT
System Date vs Transaction Date
The Cross Posting and Transaction Reports accumulate dollar amounts based on the date of the System at the time
the transaction is entered. The daily totals, therefore, reflect all transactions entered into the System that day,
regardless of the actual date of service for the transactions.
Net Change to the Accounts Receivable
A net change to receivables amount is calculated for each primary physician by summarizing all of the day’s
transactions.
Deposit Slip
The Deposit Slip, printed after the Transaction Report, shows the total number of checks, total amount for all
checks, total amount of cash received, total amount of credit card payments and a grand total of the day’s receipts.
A breakdown of all checks received indicates the check number, ABA number, check amount and the patient name
and number. The deposit slip may be used as an actual deposit slip for banking purposes by attaching it to your
bank’s regular deposit slip and simply writing the bottom line total on the bank deposit slip.
Clearing the Transaction Report
After the report has been run and the information verified, the Transaction Report must be cleared. By clearing the
report, you will purge all the charges, payments, adjustments, etc., that are contained in this report. You will not be
able to print them again. If you do NOT clear this report, these transactions will be printed again the next time you
print the Transaction Report, INCLUDING any new transactions. The new transactions will be appended to the
pervious uncleared transactions and one report with ALL transactions totaled together will be printed. For this
reason, it is important to clear the Transaction Report after it has been printed and verified.
Notes:
127
Section B
ZIP CODE LIST
ZIP CODES
The Zip Code program, C [Enter] from the Selection List, will maintain up to 32,000 Zip Codes. In addition, an
unlimited number of One-Time-Only Zip Codes may be entered at the time you are entering an address. One-TimeOnly Zip Codes are only to be used for patients far outside your normal geographic area. Normally, all Zip Codes
are permanently added to the System.
For cities that share the same zip code, you should use the sixth position to code the city, for example:
90220C
90220R
Compton, CA
Rancho Dominguez, CA
Both cities’ zip codes will be printed by the System as 90220.
If using “ZIP+4” addressing, the System will replace the letter code with a “-” hyphen in the place of the “C” or “R”
and print as follows:
Compton, CA 90220-5405
Rancho Dominguez, CA 90220-5405
Changing A Zip Code
When changing a Zip Code, entering an
[Enter] (for Same) in any field will leave that field unchanged.
Notes:
128
Section C
Custom Reports
129
Section C
PREFACE
PREFACE
You can use these reports just as we have them documented here, or you can use them as a basic foundation, with
variations, for your own reports. These reports are by no means a representation of every report POC is capable of
generating.
Please utilize them as a learning tool. You will soon discover how versatile POC is. In some cases, you’ll discover
POC is capable of producing the same report using different methods. Just choose the one that is right for you.
The nice thing about all this versatility is it can be quickly learned and you don’t have to pay extra for “custom”
reports.
Try some of our reports and try some of your own. Have fun. Remember, we’re always happy to help. If you
create a great report of your own, tell us about it — we may publish it in the next manual!
130
Section C
CASH PATIENTS/AGING REPORT
CASH PATIENTS/AGING REPORT
Scenario
Carol, the Office Manager for Dr. Stevens’ practice, wants to follow up on all past due patients who don’t have any
insurance coverage. She needs a report showing each patient account, the unpaid charges and aging so the
appropriate action can be taken.
To print this report, from the main Selection List, type:
[Enter]
This enters Data Search from the main Selection List.
What do you wish to do:
Data
VU)
SC)
SP)
RA)
LP)
RI)
SL)
Search
View search list criteria
Set criteria for search
Search & print patients
Set range for search
Load previous search
Re-initialize
Sort list
Please enter your choice: SC
[Enter]
We need to set the criteria for the search.
Data
AG)
AL)
BD)
DR)
DT)
IC)
IN)
MR)
Search
SEARCH CRITERA
Age
Allergy
Brith date
Doctor
Drug treatment
ICD diagnosis code
Insurance company
Medical record #
OC)
OI)
PC)
PV)
SX)
TR)
TS)
ZC)
Open charges
Other ID
Procedure code
Provider
Sex
Traeating physician
Type of service
Zip code
Please enter you choice: IN_
[Enter]
[Enter]
[Enter]
[Enter]
[Enter]
[Enter]
[Enter]
* [Enter]
[Enter]
[Enter]
[Enter]
We are going to use an insurance company search.
This identifies all patients who do not have insurance (a
third party payor).
Yes, this is correct.
We are finished setting the criteria.
Now we are going to search our patients.
No, we don’t need to print this report.
Yes, we do want to save the list.
We are going to call our list CASH.
No, we don’t want a list of excluded patients.
This returns us to the main Selection List.
Now we go into the Accounts Receivable Program.
131
Section C
CASH PATIENTS/AGING REPORT
Accounts Receivable
USER-SELECTED CATEGORIES
BALANCE DUE: 1)
2)
3)
4)
Credits
Zero Balance
Balance Owing
Unapplied Credit
AGING:
AMOUNT OF BALANCE
OVER:
5) N/A
INSURANCE: 11) N/A
DOCTOR: 12) All Doctors
TOTALS: 16) Patient’s Totals
17) Primary Physician
6)
7)
8)
9)
10)
Current and over
over 30 days
over 60 days
over 90 days
over 120 days
RANGE: 13) First Patient #: 1
14) Last Patient #: END
15) List: N/A
OUTPUT LISTS:
18) Incl:
19) Excl:
PRINT TO: 20) Printer
Enter NUMBER to be changed or press ENTER to print report (X to Exit):
[Enter]
+ [Enter]
0 [Enter]
. [Enter]
* [Enter]
[Enter]
[Enter]
We want to change the type of totals that are printed.
We want an Open Charges report.
We only want past due accounts.
We want to use our Data Search created list.
This is the filename we created in Data Search.
We are finished changing the categories and are ready to
print.
If you have a dot matrix printer, now is when we put wide paper
in the printer or change our printer to print at seventeen
characters per inch (condensed). As soon s we press [Enter],
our report will print.
Notes:
132
Section C
SLOW PAY AGING REPORT
SLOW PAY AGING REPORT
Scenario
Debbie, the Office Manager for a large group practice, has been asked to follow up on some Medicare payments
that seems a little slow in coming. She needs an aging report showing each Medicare patient account, the open
(unpaid) charges and aging so the appropriate action can be taken.
To print this report, from the main Selection List, type:
[Enter]
This enters Accounts Receivable from the main Selection List.
Accounts Receivable
USER-SELECTED CATEGORIES
BALANCE DUE: 1)
2)
3)
4)
Credits
Zero Balance
Balance Owing
Unapplied Credit
AGING:
AMOUNT OF BALANCE
OVER:
5) N/A
INSURANCE: 11) MEDICARE
(Slow Pays)
DOCTOR: 12) All Doctors
TOTALS: 16) Patient’s Totals
17) Primary Physician
RANGE:
OUTPUT LISTS:
6)
7)
8)
9)
10)
Current and over
over 30 days
over 60 days
over 90 days
over 120 days
13) First Patient #: 1
14) Last Patient #: END
15) List: N/A
18) Incl:
19) Excl:
PRINT TO: 20) Printer
Enter NUMBER to be changed or press ENTER to print report (X to Exit):
0 [Enter]
[Enter]
[Enter]
[Enter]
[Enter]
[Enter]
+ [Enter]
[Enter]
[Enter]
We only want past due accounts.
We want to limit the report to one insurance.
We are doing a Medicare report this time.
We do want to do a slow pay report.
We have all Medicare patients set up as YP (Yes, Partial
Statements) patients so we don’t need to search other
types of statement accounts. Please refer to YP
Statements in the New Patients chapter.
We want to change the type of totals that are printed.
We want an Open Charges report.
We are ready to print the report.
If you have a dot matrix printer, now is when we put wide paper
in the printer or change our printer to print at seventeen
characters per inch (condensed). As soon s we press [Enter],
our report will print.
Notes:
133
Section C
AGING REPORT/PAST DUE NOTICES
AGING REPORT/PAST DUE NOTICES
Scenario
Tania, the Office Manager for Dr. Morrow’s practice, likes to send mid-month past due reminders to her patients as
a means of keeping her accounts receivable under control. She has found that the bright mid-month reminders
(patient recall forms) receive the proper attention from her patients making them a very effective collection tool. She
has previously set up her past due messages, one for each aging category, in the Recall Notice program.
To print this report and the notices, from the main Selection List, type:
This enters Accounts Receivable from the main Selection
List.
[Enter]
Accounts Receivable
USER-SELECTED CATEGORIES
BALANCE DUE: 1)
2)
3)
4)
Credits
Zero Balance
Balance Owing
Unapplied Credit
AGING:
AMOUNT OF BALANCE
OVER:
5) N/A
INSURANCE: 11) N/A
DOCTOR: 12) All Doctors
TOTALS: 16) Patient’s Totals
17) Primary Physician
6)
7)
8)
9)
10)
Current and over
over 30 days
over 60 days
over 90 days
over 120 days
RANGE: 13) First Patient #: 1
14) Last Patient #: END
15) List: N/A
OUTPUT LISTS:
18) Incl: 120
19) Excl: 0TO90
PRINT TO: 20) Printer
Enter NUMBER to be changed or press ENTER to print report (X to Exit):
[Enter]
[Enter]
+ [Enter]
2 [Enter]
+ [Enter]
[Enter]
[Enter]
[Enter]
[Enter]
[Enter]
We want to first search all accounts over 120 days.
We want to change the type of detail that is printed.
We want an Open Charges detailed report so we can
review the account before sending the notice.
We are going to create an output list that includes all
patient accounts with charges over 120 days.
We are going to call our list “120.”
We are going to create an output list that excludes all
patient accounts with charges over 120 days. These
patients have balances ranging from current to over 90
days.
We are going to call our list “Oto90.”
We are done changing the categories and are ready to
print.
If you have a dot matrix printer, now is when we put wide
paper in the printer or change our printer to print at seventeen
characters per inch (condensed). As soon as we hit [Enter],
our over 120 days report will print and lists will be generated.
This re-enters Accounts Receivable from the main
Selection List.
134
Section C
AGING REPORT/PAST DUE NOTICES
Accounts Receivable
USER-SELECTED CATEGORIES
BALANCE DUE: 1)
2)
3)
4)
Credits
Zero Balance
Balance Owing
Unapplied Credit
AGING:
AMOUNT OF BALANCE
OVER:
5) N/A
INSURANCE: 11) N/A
6)
7)
8)
9)
10)
Current and over
over 30 days
over 60 days
over 90 days
over 120 days
RANGE: 13) First Patient #: 1
14) Last Patient #: END
15) List: 0TO90
DOCTOR: 12) All Doctors
TOTALS: 16) Patient’s Totals
17) Primary Physician
OUTPUT LISTS:
18) Incl: 90
19) Excl: 0TO60
PRINT TO: 20) Printer
Enter NUMBER to be changed or press ENTER to print report (X to Exit):
[Enter]
[Enter]
+ [Enter]
. [Enter]
[Enter]
2 [Enter]
[Enter]
[Enter]
0 [Enter]
[Enter]
[Enter]
[Enter]
We want to first search all accounts over 90 days.
We want to change the type of detail that is printed.
We want an Open Charges detailed report so we can
review the account before sending the notice.
We are going to use a previously generated list for input.
We are going to use the “exclude” list we created in the previous run.
We are going to create an output list that includes all
patient accounts with charges over 90 days.
We are going to call our list “90.”
We are going to create an output list that excludes all
patient accounts with charges over 90 days. These
patients have balances ranging from current to over 60
days.
We are going to call our list “0to60.”
We are finished changing the categories and are ready to
print.
As soon as we hit [Enter], our report will print and our list
will be generated.
This re-enters Accounts Receivable from the main Selection List
Accounts Receivable
USER-SELECTED CATEGORIES
BALANCE DUE: 1)
2)
3)
4)
Credits
Zero Balance
Balance Owing
Unapplied Credit
AGING:
AMOUNT OF BALANCE
OVER:
5) N/A
INSURANCE: 11) N/A
DOCTOR: 12) All Doctors
TOTALS: 16) Patient’s Totals
17) Primary Physician
6)
7)
8)
9)
10)
Current and over
over 30 days
over 60 days
over 90 days
over 120 days
RANGE: 13) First Patient #: 1
14) Last Patient #: END
15) List: 0TO60
OUTPUT LISTS:
18) Incl: 60
19) Excl: 0TO30
PRINT TO: 20) Printer
Enter NUMBER to be changed or press ENTER to print report (X to Exit):
135
Section C
AGING REPORT/PAST DUE NOTICES
2 [Enter]
[Enter]
+ [Enter]
. [Enter]
0 [Enter]
2 [Enter]
0 [Enter]
[Enter]
- [Enter]
[Enter]
[Enter]
[Enter]
We want to first search all accounts over 60 days.
We want to change the type of detail that is printed.
We want an Open Charges detailed report so we can
review the account before sending the notice.
We are going to use a previously generated list for input.
We are going to use the “exclude” list we created in the
previous run.
We are going to create an output list that includes all
patient accounts with charges over 60 days.
We are going to call our list “60.”
We are going to create an output list that excludes all
patient accounts with charges over 60 days. These
patients have balances ranging from current to over 30
days.
We are going to call our list “0to30.”
We are done changing the categories and are ready to
print.
As soon as we press [Enter], our report will print and our list
will be generated.
This re-enters Accounts Receivable from the main
Selection List.
Accounts Receivable
USER-SELECTED CATEGORIES
BALANCE DUE: 1)
2)
3)
4)
Credits
Zero Balance
Balance Owing
Unapplied Credit
AGING:
AMOUNT OF BALANCE
OVER:
5) N/A
INSURANCE: 11) N/A
DOCTOR: 12) All Doctors
TOTALS: 16) Patient’s Totals
17) Primary Physician
6)
7)
8)
9)
10)
Current and over
over 30 days
over 60 days
over 90 days
over 120 days
RANGE: 13) First Patient #: 1
14) Last Patient #: END
15) List: 0TO30
OUTPUT LISTS:
18) Incl: 30
19) Excl:
PRINT TO: 20) Printer
Enter NUMBER to be changed or press ENTER to print report (X to Exit):
0 [Enter]
[Enter]
+ [Enter]
. [Enter]
- [Enter]
2 [Enter]
- [Enter]
[Enter]
We want to first search all accounts over 30 days.
We want to change the type of detail that is printed.
We want an Open Charges detailed report so we can
review the account before sending the notice.
We are going to use a previously generated list for input.
We are going to use the “exclude” list we created in the
previous run..
We are going to create an output list that includes all
patient accounts with charges over 30 days.
We are going to call our list “30.”
We are finished changing the categories and are ready to
print.
136
Section C
AGING REPORT/PAST DUE NOTICES
As soon as we press [Enter], our report will print and our list
will be generated. We now have four lists, 30, 60, 90 and
120, that contain the appropriate patients.
This takes us to Recall Notices from the main Selection
List.
[Enter]
[Enter]
Recall Notices
What do you wish to do:
SR)
RD)
LV)
LS)
RE)
AC)
AS)
Set recall date for patient
Recall designated patients
Recall patients by date of LAST VISIT
Recall patients by LIST
Review patient recalls
Access recall messages
Appointment reminder recalls
Please enter your choice: LS_
) [Enter]
+ [Enter]
We want to print our mid-month past due notices from
our newly created lists.
We are going to print our 120 day notices first.
Recall Patients
Message #2 of 2
120
PLEASE CALL OUR BUSINESS OFFICE IMMEDIATELY AT (310) 603-0555
Your account is over 120 days old and is seriously past due. If we do not hear from you within
10 days, we will refer your account for further collection action.
Enter NUMBER or press ENTER to view next (A to Accept/X to Exit): A_
D+ [Enter]
[Enter]
[Enter]
[Enter]
[Enter]
Here you need to pick your 120 day notice. The
message number will vary from system to system.
We want to accept the current message.
We’re ready to print our notices.
When we’ve aligned our paper, we’re ready to do the
whole 120 day run.
Yes, all our notices printed. This prompt loops us back to
the Recall Notice selection list. We need to print notices
for each of the remaining lists - 90, 60 and 30. After
we’ve printed all notices, we will sort them with the
appropriate A/R report and do a final review before
mailing them.
Notes:
137
Section C
UNDER $1/OVER 90 DAYS REPORT
UNDER $1/OVER 90 DAYS REPORT
Scenario
Mary, the Office Manager for Dr. Kopp’s practice, wants to write off all old balances that are under one dollar. She
needs a precise report for these patient accounts.
To print this report, from the main Selection List, type:
This enters Accounts Receivable from
Selection List.
[Enter]
the
main
Accounts Receivable
USER-SELECTED CATEGORIES
BALANCE DUE: 1)
2)
3)
4)
Credits
Zero Balance
Balance Owing
Unapplied Credit
AGING:
AMOUNT OF BALANCE
OVER:
5) 1.00
INSURANCE: 11) N/A
DOCTOR: 12) All Doctors
TOTALS: 16) Patient’s Totals
17) Primary Physician
6)
7)
8)
9)
10)
Current and over
over 30 days
over 60 days
over 90 days
over 120 days
RANGE: 13) First Patient #: 1
14) Last Patient #: END
15) List: N/A
OUTPUT LISTS:
18) Incl:
19) Excl: UNDER1
PRINT TO: 20) Printer
Enter NUMBER to be changed or press ENTER to print report (X to Exit):
. [Enter]
[Enter]
[Enter]
[Enter]
[Enter]
- [Enter]
[Enter]
[Enter]
We want to first search all accounts over one dollar.
Our cut off amount is $1.00.
We are going to generate an excluded list to use on
the second pass. This list will hold all patients who owe
less than a dollar.
The list is called UNDER1.
We don’t need the print-out so we are going to redirect
the output.
We’ll use the test mode to generate our file. This allows
us to create the UNDER1 file without having to print
patients that owe over $1 (and waste paper).
We are finished changing the categories and are ready to
create UNDER1.
This re-enters Accounts Receivable from the main
Selection List. We want to use our UNDER1 list to see
who, in this list, is over 90 days past due.
138
Section C
UNDER $1/OVER 90 DAYS REPORT
Accounts Receivable
USER-SELECTED CATEGORIES
BALANCE DUE: 1)
2)
3)
4)
Credits
Zero Balance
Balance Owing
Unapplied Credit
AGING:
AMOUNT OF BALANCE
OVER:
5) N/A
INSURANCE: 11) N/A
DOCTOR: 12) All Doctors
TOTALS: 16) Patient’s Totals
17) Primary Physician
6)
7)
8)
9)
10)
Current and over
over 30 days
over 60 days
over 90 days
over 120 days
RANGE: 13) First Patient #: 1
14) Last Patient #: END
15) List: UNDER1
OUTPUT LISTS:
18) Incl:
19) Excl:
PRINT TO: 20) Printer
Enter NUMBER to be changed or press ENTER to print report (X to Exit):
[Enter]
. [Enter]
[Enter]
[Enter]
[Enter]
We want accounts over 90 days.
We are going to use our UNDER1 list to print our report.
This is the name our list.
We are finished changing the categories and are ready to
print.
If you have a dot matrix printer, now is when we put wide paper
in the printer or change our printer to print at seventeen
characters per inch (condensed). As soon as we press [Enter],
our report will print.
Notes:
139
Section C
$0 BALANCE/NO VISITS FOR 4 YEARS
$0 BALANCE/NO VISITS FOR 4 YEARS
Scenario
Van, the Office Manager for Dr. Leno’s practice, wants to see how many patients they have lost. He wants a report
that will only show patients who have a zero balance and have not had any procedures for over four years.
To print this report, from the main Selection List, type:
[Enter]
[Enter]
This enters Data Search from the main Selection List.
We need to set the criteria for the search.
Data
AG)
AL)
BD)
DR)
DT)
IC)
IN)
MR)
Search
SEARCH CRITERA
Age
Allergy
Brith date
Doctor
Drug treatment
ICD diagnosis code
Insurance company
Medical record #
OC)
OI)
PC)
PV)
SX)
TR)
TS)
ZC)
Open charges
Other ID
Procedure code
Provider
Sex
Traeating physician
Type of service
Zip code
Please enter you choice: PC_
[Enter]
)) [Enter]
.
[Enter]
[Enter]
[Enter]
[Enter]
[Enter]
[Enter]
[Enter]
[Enter]
[Enter]
[Enter]
[Enter]
We want to search for procedure codes.
We want to find ALL codes.
Today is 04/15/05. We want to find all procedures done
in the last four years.
This will enter today’s date.
Yes, this is correct.
We are finished setting the criteria.
Now we are going to search our patients.
No, we don’t need to print this report.
No, we don’t want to save it. This is a list of patients we
HAVE seen in the last four years.
Yes, this is our list of patients who haven’t had any
procedures in the last four years.
We are going to call our list NOPC.
This returns us to the main Selection List.
Now we go into the Accounts Receivable Program.
140
Section C
$0 BALANCE/NO VISITS FOR 4 YEARS
Accounts Receivable
USER-SELECTED CATEGORIES
BALANCE DUE: 1)
2)
3)
4)
Credits
Zero Balance
Balance Owing
Unapplied Credit
AGING:
AMOUNT OF BALANCE
OVER:
5) N/A
INSURANCE: 11) N/A
DOCTOR: 12) All Doctors
TOTALS: 16) Patient’s Totals
17) Primary Physician
6)
7)
8)
9)
10)
Current and over
over 30 days
over 60 days
over 90 days
over 120 days
RANGE: 13) First Patient #: 1
14) Last Patient #: END
15) List: NOPC
OUTPUT LISTS:
18) Incl:
19) Excl:
PRINT TO: 20) Printer
Enter NUMBER to be changed or press ENTER to print report (X to Exit):
[Enter]
- [Enter]
. [Enter]
[Enter]
[Enter]
[Enter]
We don’t want credit balances.
We don’t want to find patients who owe us money (this
leaves only Zero Balance #2).
We want to use our Data Search created list.
This is the filename we created in Data Search.
We are finished changing the categories and are ready to
print.
If you have a dot matrix printer, now is when we put wide paper
in the printer or change our printer to print at seventeen
characters per inch (condensed). As soon as we press [Enter],
our report will print.
We now have our report to review our old patients so we can take the appropriate action.
Notes:
141
Section C
OVER 2 YEARS AGING REPORT
OVER 2 YEARS AGING REPORT
Scenario
Lydia, the Office Manager for Dr. Henry’s practice, wants to adjust some very old charges off the books and possibly
turn the accounts over for collections. She needs a report that will only show unpaid charges over two years.
To print this report, from the main Selection List, type:
[Enter]
This enters Data Search from the main Selection List.
What do you wish to do:
Data
VU)
SC)
SP)
RA)
LP)
RI)
SL)
Search
View search list criteria
Set criteria for search
Search & print patients
Set range for search
Load previous search
Re-initialize
Sort list
Please enter your choice: SC
[Enter]
We need to set the criteria for the search.
Data
AG)
AL)
BD)
DR)
DT)
IC)
IN)
MR)
Search
SEARCH CRITERA
Age
Allergy
Brith date
Doctor
Drug treatment
ICD diagnosis code
Insurance company
Medical record #
OC)
OI)
PC)
PV)
SX)
TR)
TS)
ZC)
Open charges
Other ID
Procedure code
Provider
Sex
Traeating physician
Type of service
Zip code
Please enter you choice: OC_
.
[Enter]
- [Enter]
[Enter]
[Enter]
[Enter]
[Enter]
[Enter]
[Enter]
+
[Enter]
[Enter]
[Enter]
[Enter]
We want to search for open charges.
Today is 04/15/05. We want charges two years and
older.
Yes, we want to find all old balances.
Yes, this is correct.
We are finished setting the criteria.
Now we are going to search our patients.
No, we don’t need to print this report.
Yes, we do want to save the list.
We are going to call our list 2YEARS.
No, we don’t want a list of excluded patients.
This returns us to the main Selection List.
Now we go into the Accounts Receivable Program.
142
Section C
OVER 2 YEARS AGING REPORT
Accounts Receivable
USER-SELECTED CATEGORIES
BALANCE DUE: 1)
2)
3)
4)
Credits
Zero Balance
Balance Owing
Unapplied Credit
AGING:
AMOUNT OF BALANCE
OVER:
5) N/A
INSURANCE: 11) N/A
DOCTOR: 12) All Doctors
TOTALS: 16) Patient’s Totals
17) Primary Physician
6)
7)
8)
9)
10)
Current and over
over 30 days
over 60 days
over 90 days
over 120 days
RANGE: 13) First Patient #: 1
14) Last Patient #: END
15) List: 2 Years
OUTPUT LISTS:
18) Incl:
19) Excl:
PRINT TO: 20) Printer
Enter NAME of list file: 2YEARS
[Enter]
+ [Enter]
. [Enter]
+
[Enter]
[Enter]
[Enter]
We want to change the type of detail that is printed
so that we know what is past due.
We want a detailed Open Charges report.
We want to use our Data Search created list.
This is the filename we created in Data Search.
We are finished changing the categories and are ready to
print.
If you have a dot matrix printer, now is when we put wide paper
in the printer or change our printer to print at seventeen
characters per inch (condensed). As soon as we press [Enter],
our report will print.
We now have our report to review old charges so we can take the appropriate action.
Notes:
143
Section C
CLAIM DEADLINE/REBILLING REPORT
CLAIM DEADLINE/REBILLING REPORT
Scenario
Stephanie, the Office Manager for Dr. Holzer’s practice, knows she has one year to submit a claim for Medicaid.
She needs to find all Medicaid patients with long overdue charges and generate a report showing each patient
account, the unpaid charges and aging so she can rebill the appropriate claims.
To print this report, from the main Selection List, type:
[Enter]
This enters Data Search from the main Selection List.
What do you wish to do:
Data
VU)
SC)
SP)
RA)
LP)
RI)
SL)
Search
View search list criteria
Set criteria for search
Search & print patients
Set range for search
Load previous search
Re-initialize
Sort list
Please enter your choice: SC
[Enter]
We need to set the criteria for the search.
Data
AG)
AL)
BD)
DR)
DT)
IC)
IN)
MR)
Search
SEARCH CRITERA
Age
Allergy
Brith date
Doctor
Drug treatment
ICD diagnosis code
Insurance company
Medical record #
OC)
OI)
PC)
PV)
SX)
TR)
TS)
ZC)
Open charges
Other ID
Procedure code
Provider
Sex
Traeating physician
Type of service
Zip code
Please enter you choice: IN_
[Enter]
[Enter]
[Enter]
[Enter]
[Enter]
[Enter]
[Enter]
[Enter]
We are going to use an insurance company search.
This identifies all patients who have Medicaid.
Yes, this is correct.
We want to search for open charges.
Today is 09/01/05. We want charges nine months and
older.
No, we want to find charges Medicaid says they haven’t
received yet.
Yes, this is correct.
We are finished setting the criteria.
144
Section C
CLAIM DEADLINE/REBILLING REPORT
[Enter]
[Enter]
[Enter]
[Enter]
[Enter]
[Enter]
[Enter]
Now we are going to search our patients.
No, we don’t need to print this report.
Yes, we do want to save the list.
We are going to call our list OPENMC.
No, we don’t want a list of excluded patients.
This returns us to the main Selection List.
Now we go into the Accounts Receivable Program.
Accounts Receivable
USER-SELECTED CATEGORIES
BALANCE DUE: 1)
2)
3)
4)
Credits
Zero Balance
Balance Owing
Unapplied Credit
AGING:
AMOUNT OF BALANCE
OVER:
5) N/A
INSURANCE: 11) N/A
DOCTOR: 12) All Doctors
TOTALS: 16) Patient’s Totals
17) Primary Physician
6)
7)
8)
9)
10)
Current and over
over 30 days
over 60 days
over 90 days
over 120 days
RANGE: 13) First Patient #: 1
14) Last Patient #: END
15) List: OPENMC
OUTPUT LISTS:
18) Incl:
19) Excl:
PRINT TO: 20) Printer
Enter NUMBER to be changed or press ENTER to print report (X to Exit):
[Enter]
+ [Enter]
[Enter]
[Enter]
[Enter]
We want to change the type of detail that is printed.
We want an Open Charges detailed report.
We want to use our Data Search created list.
We are finished changing the categories and are ready to
print.
If you have a dot matrix printer, now is when we put wide paper
in the printer or change our printer to print at seventeen
characters per inch (condensed). As soon as we press [Enter],
our report will print.
We now have our report to review open charges and find those that need to be rebilled. We can take this report and
use it in Bill Insurance to reprint select Medicaid claims under the SINGLE option.
Notes:
145
Section C
THERAPIST ANALYSIS REPORT
THERAPIST ANALYSIS REPORT
Scenario
Margie, the Office Manager for Bay Area Medical Clinic, needs to submit a monthly and year-to-date report for each
of their three therapist’s procedures, collections and adjustments. The therapists have been entered into the
System under doctor numbers 7, 8 and 9.
To print this report, from the main Selection List, type:
[Enter]
This enters Production Report from the main Selection
List.
P r o d u c t i o n
R e p o r t
USER-SELECTED CATEGORIES
DATES OF SERVICE
PROCEDURE CODES
1) Period #1: 03/01/05 - 03/31/05
6) Range:
N/A
2) Period #2: 01/01/05 - 03/31/05
7) Filter:
N/A
TOTALS
PATIENTS
3) Grand Totals Only: NO
8) MR# Filter: N/A
4) By Type of Service: NO
9) By List: N/A
5) Doctor: 7,8,9
10) Ins Co:
N/A
11) Ins Co Totals Only: NO
PAYMENTS
12) Don’t include payments
13) Primary insurance only
14) All insurance payments
15) All payments
Enter the NUMBER you wish to change (X to Exit): _
[Enter]
[Enter]
-[Enter]
+ [Enter]
[Enter]
-[Enter]
[Enter]
21 1 [Enter]
[Enter]
[Enter]
[Enter]
We need to change Period #1.
We need to set the first period for one month.
This is the last day of the month-to-date totals.
We need to change Period #2.
We need to set the second period for the year-to-date
totals.
This is the last day of the year-to-date totals.
We need to tell the System to use the therapist'
s
doctor numbers
The doctor numbers are 7, 8 and 9.
We want to show all payments received from their
production..
We’re finished changing our categories.
If you have a dot matrix printer, now is when we put wide paper
in the printer or change our printer to print at seventeen
characters per inch (condensed). As soon as we press [Enter],
our reports will print.
Notes:
146
Section C
2ND OFFICE PRODUCTION REPORT
2nd OFFICE PRODUCTION REPORT
Scenario
John, the Office Manager for Great Plans Medical Clinic, a three physician practice, needs to submit a year-end
report for 1994 showing the total annual procedures performed and collections for a small satellite office they have
in another nearby community. This satellite office has been set up in the System with the group’s doctor numbers
starting at doctor #10.
To print this report, from the main Selection List, type:
This enters Production Report from the main Selection
List.
[Enter]
P r o d u c t i o n
R e p o r t
USER-SELECTED CATEGORIES
DATES OF SERVICE
PROCEDURE CODES
1) Period #1: 01/01/05 - 12/31/05
6) Range:
N/A
2) Period #2: 01/01/05 - 12/31/05
7) Filter:
N/A
TOTALS
PATIENTS
3) Grand Totals Only: NO
8) MR# Filter: N/A
4) By Type of Service: NO
9) By List: N/A
5) Doctor: 10,11,12
10) Ins Co:
N/A
11) Ins Co Totals Only: NO
PAYMENTS
12) Don’t include payments
13) Primary insurance only
14) All insurance payments
15) All payments
Enter the NUMBER you wish to change (X to Exit): _
[Enter]
. [Enter]
+- . [Enter]
+ [Enter]
. [Enter]
+- . [Enter]
[Enter]
1 1 + [Enter]
[Enter]
[Enter]
[Enter]
We need to change Period #1.
We need to set the first of the year.
This is the last day of the year.
We need to change Period #2.
We only want last year’s totals so we are changing the
second period to the same range of dates.
This is the last day of the year, again.
We need to tell the System to use the satellite’s doctor
numbers.
The doctor numbers are 10, 11 and 12.
We want to show all payments received from the satellite
office.
We’re finished changing our categories.
If you have a dot matrix printer, now is when we put wide paper
in the printer or change our printer to print at seventeen
characters per inch (condensed). As soon as we press [Enter],
our reports will print.
Notes
147
Section C
NEW EQUIPMENT REPORT
NEW EQUIPMENT REPORT
Scenario
Wanda, the Office Manager for Dr. Goldhamer’s practice, wants to see if the new ultrasound machine is being used
as much as they anticipated. She wants a completely detailed analysis from the last two quarters of all ultrasound
procedures.
To print this report, from the main Selection List, type:
[Enter]
This enters Production Report from the main Selection
List.
P r o d u c t i o n
R e p o r t
USER-SELECTED CATEGORIES
DATES OF SERVICE
PROCEDURE CODES
1) Period #1: 10/01/04 - 12/31/04
6) Range:
76500-76999
2) Period #2: 01/01/05 - 03/31/05
7) Filter:
N/A
TOTALS
PATIENTS
3) Grand Totals Only: NO
8) MR# Filter: N/A
4) By Type of Service: NO
9) By List: N/A
5) Doctor: ALL DOCTORS
10) Ins Co:
N/A
11) Ins Co Totals Only: NO
PAYMENTS
12) Don’t include payments
13) Primary insurance only
14) All insurance payments
15) All payments
Enter the NUMBER you wish to change (X to Exit): _
[Enter]
. [Enter]
+- . [Enter]
+ [Enter]
[Enter]
-[Enter]
0 [Enter]
[Enter]
[Enter]
[Enter]
[Enter]
[Enter]
20
20
We need to change Period #1.
We need to set the first period for the first of the year.
This is the last day of the quarter.
We need to change Period #2.
We need to set the second period for the first of the year.
This is the last day of the quarter.
We want to limit our report to ultrasound procedures so
we are going to use the range category.
Ultrasound procedures start at 76500.
And end at 76999.
We want a complete report that shows our income too.
We’re finished changing our categories.
If you have a dot matrix printer, now is when we put wide paper
in the printer or change our printer to print at seventeen
characters per inch (condensed). As soon as we press [Enter],
our report will print.
Notes:
148
Section C
INSURANCE REIMBURSEMENT REPORT
INSURANCE REIMBURSEMENT REPORT
Scenario
Sandy, the Office Manager for Dr. Punjabee’s practice, wants to see if there is a trend in how well they are being
reimbursed from Medicaid. She has decided to compare the first quarter of last year and the first quarter of this
year.
To print this report, from the main Selection List, type:
[Enter]
This enters Production Report from the main Selection
List.
P r o d u c t i o n
R e p o r t
USER-SELECTED CATEGORIES
DATES OF SERVICE
PROCEDURE CODES
1) Period #1: 01/01/04 - 03/31/04
6) Range:
N/A
2) Period #2: 01/01/05 - 03/31/05
7) Filter:
N/A
TOTALS
PATIENTS
3) Grand Totals Only: NO
8) MR# Filter: N/A
4) By Type of Service: YES
9) By List: N/A
5) Doctor: ALL DOCTORS
10) Ins Co:
MEDICAID
11) Ins Co Totals Only: NO
PAYMENTS
12) Don’t include payments
13) Primary insurance only
14) All insurance payments
15) All payments
Enter the NUMBER you wish to change (X to Exit): _
[Enter]
. [Enter]
-- . [Enter]
+ [Enter]
[Enter]
-[Enter]
. [Enter]
[Enter]
[Enter]
[Enter]
[Enter]
We need to change Period #1.
We need to set the first period for the first of the year.
This is the last day of the quarter.
We need to change Period #2.
We need to set the second period for the first of the year.
This is the last day of the quarter.
We want to group our procedures by type of service for
easier analysis.
We want to search all Medicaid patients.
This is our insurance code for Medicaid. This also
changes #13 to show only Medicaid payments so we
have an accurate comparison.
We’re finished changing our categories.
If you have a dot matrix printer, now is when we put wide paper
in the printer or change our printer to print at seventeen
characters per inch (condensed). As soon as we press [Enter],
our reports will print.
Now we can review the report to see the reimbursement percentage, procedure by procedure, and take note of any
trends.
Notes:
149
Section C
REFERRED PATIENTS REPORT
REFERRED PATIENTS REPORT
Scenario
Ben, the Office Manager for Dr. Cohen’s practice, wants to see how many patients have been referred to their
practice for the first quarter of this year, who referred them and how much they’ve collected year-to-date.
To print this report, from the main Selection List, type:
[Enter]
This enters Referring Physician Report from the main
Selection List.
Referring
What do you wish to do:
SI)
AL)
Physician
Report
Print SINGLE referring physician
Print ALL referring physicians
Please enter your choice: AL
) [Enter]
[Enter]
-[Enter]
[Enter]
[Enter]
[Enter]
We want to search all referring physicians.
We need to set the second period for the first of the year.
This is the last day of the quarter.
Yes, it’s correct.
No, we want all the detail.
As soon as we press [Enter], our report will print.
The Report
REFERRING PHYSICIAN REPORT FOR 01/01/95 - 03/31/05
-------------------------------------------04/15/05
PAGE 1
============================================
REFERRING PHYSICIAN
PATIENT NAME
BILLED
COLLECTED
============================================
NORMAN JOHNSON, MD
JODIE STEVENS
505.00
505.00
CARLTON MITCHELL
152.16
101.28
MARYANNE BOWERS
325.19
325.19
CANDICE CLEAVER
319.94
0.00
DENNIS BRICKLIN
142.50
59.34
----------------1445.59
991.61
150
Section C
BI-ANNUAL CHECKUP REPORT/RECALLS
BI-ANNUAL CHECKUP REPORT/RECALLS
Scenario
Sue, the Office Manager for Dr. Gold’s ophthalmology practice, likes to keep close track of their patients to make
sure they receive their required periodic checkups. This time she wants a report of all patients who have not had an
eye exam for two years.
To print this report, from the main Selection List, type:
[Enter]
[Enter]
[Enter]
This takes us to Data Search.
We need to set the criteria for the search.
We are going to do a procedure code search.
Data
Search
Enter PROCEDURE CODE or INDEX #: NOT 92012_
n +
+ [Enter] Dr. Steven’s eye exams are done under two codes 92012 and 92014. We are going to use NOT logic.
Make sure you put a space between the NOT and the
code.
.
- [Enter]
Today is 04/15/95. This starts our search two years ago.
.
[Enter]
And searches up through today.
[Enter]
Yes, this is correct.
[Enter]
We are going to do another procedure code search; this
time for our second code.
n + . [Enter] This is the second code we use.
.
- [Enter]
We’re going to use the same range of dates for this code,
too.
.
[Enter]
Ditto.
[Enter]
Yes, this is correct.
[Enter]
Now we are going to search our patients.
[Enter]
No, we don’t want to print this report.
[Enter]
Yes, we want to save it so we can send recall notices.
[Enter]
We’ll call our list NOEXAM.
[Enter]
No, we don’t want an exclude list.
[Enter]
This takes us back to the main Selection List.
[Enter]
This takes us to Recall Notices from the main Selection
List.
151
Section C
BI-ANNUAL CHECKUP REPORT/RECALLS
Recall Notices
What do you wish to do:
SR)
RD)
LV)
LS)
RE)
AC)
AS)
Set recall date for patient
Recall designated patients
Recall patients by date of LAST VISIT
Recall patients by LIST
Review patient recalls
Access recall messages
Appointment reminder recalls
Please enter your choice: LS_
) [Enter]
[Enter]
We want to print our exam reminder from our newly
created list.
Remember, we named our list NOEXAM.
Recall Patients
NOEXAM
Message #3 of 3
Our records indicate it has been two years since your last eye exam. Regular examinations
are required to ensure healthy eyesight.
Please call our office at your earliest convenience so we may schedule your apporintment.
8:00 to 5:00 at (310) 603-0555
Enter NUMBER or press ENTER to view next (A to Accept/X to Exit):
D- [Enter]
[Enter]
[Enter]
[Enter]
[Enter]
Here you need to pick the exam notice. The message
number will vary from system to system.
We want to accept the current message.
We’re ready to print our notices.
When we’ve aligned our forms, we’re ready to do the
whole NOEXAM list.
Yes, all our forms printed.
Notes:
152
Section C
OB-GYN—DELIVERY/ADMISSION REPORT
OB-GYN—DELIVERY/ADMISSION REPORT
Scenario
Barbara, the Office Manager for Dr. Lee’s OB-GYN practice, needs to submit the monthly report of expected
deliveries for July to the hospital. This report must show the patient’s information and the expected delivery date.
To print this report, from the main Selection List, type:
[Enter]
This enters Patient Information from the main Selection
List.
[Enter]
Jodie Steven’s account number is 1.
PT.# 3-1
Patient Information
1) STEVENS, JODIE
4) 12/10/1976
7) Female 10) Unknown
2) 554 12TH STREET
5) 703 259-8704
8) Unknown
3) FALLS CHURCH, VA 22042
6) 703 332-6378
9) Not a student
-------------------------------------------------------------11) SSA or ID#: 245-66-5521
15) Med. Rcd.#: 04JUL95
12) Other ID#:
VA454545342
16) Fam Head:
13) Send Statements: Yes
17) Employer: STATIONERS INT.
14) Finance Charges:
------------------------------------------------------------18) Rel of Info. : Yes
20) Dr. #3 Harold Barnes, M.D.
19) Fee Schedule:
21) Ref Phy:
NORMAN JOHNSON, M.D.
Enter NUMBER to be changed: _
[Enter]
.A )
[Enter]
[Enter]
[Enter]
[Enter]
[Enter]
[Enter]
[Enter]
We’re going to change her Medical Record Number.
Her expected delivery date is the Fourth of July, 1995.
Remember to be consistent in using UPPER and lower
case. 04JUL95 is not the same as 04jul95.
We are finished changing Patient Information.
Yes, record the changes.
No, we don’t need to change insurance information.
We’re finished changing Patient Information and this returns
us to the mini-selection list. These first eight steps are
done for each patient found to be pregnant when her
expected delivery date has been determined. They are
done at the time the corresponding charges are entered.
This takes us to Data Search.
We need to set the criteria for the search.
Data
AG)
AL)
BD)
DR)
DT)
IC)
IN)
MR)
Search
SEARCH CRITERA
Age
Allergy
Brith date
Doctor
Drug treatment
ICD diagnosis code
Insurance company
Medical record #
OC)
OI)
PC)
PV)
SX)
TR)
TS)
ZC)
Open charges
Other ID
Procedure code
Provider
Sex
Traeating physician
Type of service
Zip code
Please enter you choice: MR_
153
Section C
OB-GYN—DELIVERY/ADMISSION REPORT
[Enter]
A )
[Enter]
[Enter]
[Enter]
[Enter]
[Enter]
[Enter]
A )
[Enter]
[Enter]
)[Enter]
We are going to use a Medical Record Number search.
We want to search for ALL patients with JUL95 in their
Medical Record Number.
Yes, this is correct.
We are finished setting the criteria.
Now we are going to search our patients.
No, we don’t need to print this report.
Yes, we do want to save the list.
We are going to call our list JUL95.
No, we don’t want a list of excluded patients.
We want to sort the list.
Patient List
(sorted order)
LIST AVAILABLE TO BE SORTED:
ZZ ZZ
JUL95
CASH
BILLING
OPENMC
ALL (all patients)
Enter NAME of list file: JUL95_
A )
[Enter]
[Enter]
[Enter]
We need to tell it the name of our list.
We want it sorted in date (Medical Record Number) order
and expand it to show more information.
Now we want to print our sorted list.
Patient List
(sorted order)
User Selected Options:
1) Include Address
Yes
2) Include Phone #
Yes
3) Include Medical Record #
Yes
4) Include Birthdate
No
Enter NUMBER you wish to change: _
[Enter]
+ [Enter]
- [Enter]
[Enter]
[Enter]
[Enter]
Include the address on our report.
Include the phone number.
Include the date which is in the Medical Record Number.
We’re done changing the criteria.
Let’s print it.
No, we don’t want to save this list. However, if we did,
we would generate a COMMA DELIMITED ASCII FILE
that contains much more information about the patient
including the insurance information. This file can be
merged into most word processors. Please see the
154
Section C
OB-GYN—DELIVERY/ADMISSION REPORT
[Enter]
[Enter]
chapter on Data Search for more information about this
file and your word processing manual for information on
merging.
We don’t want to print anymore lists.
Let’s go back to the main Selection List.
The Report
PATIENT LIST
Date: 04/15/95
File: JUL95
Page 1
==================================================
STEVENS, JODIE
1-1
BOWERS, MARYANNE
1-5
554 12TH STREET
790 CREST #202
FALLS CHURCH, VA 22042
ARMONK, NY 10504
703 259-8704
914 767-2338
04JUL95
12JUL95
——————————————————————————————————
Notes:
155
Section C
NEW DRUG/CURE REPORT/LABELS
NEW DRUG/CURE REPORT/LABELS
Scenario
Dr. Chopra’s office has recently received many inquiries about a new drug that treats male baldness. He’s written a
newsletter regarding this topic and wants it sent to all male patients, 20 and older.
To print this report, from the main Selection List, type:
[Enter]
[Enter]
This takes us to Data Search.
We need to set the criteria for the search.
Data
AG)
AL)
BD)
DR)
DT)
IC)
IN)
MR)
Search
SEARCH CRITERA
Age
Allergy
Brith date
Doctor
Drug treatment
ICD diagnosis code
Insurance company
Medical record #
OC)
OI)
PC)
PV)
SX)
TR)
TS)
ZC)
Open charges
Other ID
Procedure code
Provider
Sex
Traeating physician
Type of service
Zip code
Please enter you choice: AG_
> [Enter]
+ /
[Enter]
[Enter]
[Enter]
[Enter]
[Enter]
[Enter]
[Enter]
[Enter]
[Enter]
*
[Enter]
[Enter]
[Enter]
) [Enter]
We are going to use an age search.
We are setting our age range, 20 to 199 years old.
Yes, this is correct.
We want to find only male patients.
“M” for Male.
We are finished setting the criteria.
Now we are going to search our patients.
Yes, we want to print this report.
Go ahead and print it.
Yes, we want to save the list.
We are going to call our list HAIRY.
No, we don’t want a list of excluded patients.
Let’s go back to the main Selection List.
We are ready to print our mailing labels.
156
Section C
NEW DRUG/CURE REPORT/LABELS
Mailing
What do you wish to do:
SI )
AL)
RA)
LS )
IN )
PV)
Labels
Print SINGLE patient labels
Print ALL patient labels
Print RANGE of patient labels
Print LIST of patient labels
Print INSURANCE companies labels
Print PROVIDER labels
Please enter you choice: LS_
LS [Enter]
*
[Enter]
We want to print by list.
We need to tell it the name of our list.
Patient List
(sorted order)
USER SELECTED OPTIONS:
1) Print patient’s last name first:
2) Include patient numbers:
3) Include medical record numbers:
4) Include patient telephone numbers:
5) Use responsible party’s address:
6) Number of copries:
7) Print by doctor:
8) Number of labels across:
No
Yes
No
No
No
1
No
1
Enter NUMBER you wish to change: _
[Enter]
[Enter]
[Enter]
[Enter]
[Enter]
[Enter]
We don’t want the last name first.
Our mailing labels aren’t three across.
They’re one across.
We’re finished changing the options.
Let’s put our labels in and print an alignment label.
No more alignment labels, lets run them.
Notes:
157
Section C
BIRTHDAY REPORT/LABELS
BIRTHDAY REPORT/LABELS
Scenario
Betty, the Office Manager for Dr. Child’s pediatric practice likes to send the children birthday cards. She uses POC
to make this monthly task very easy.
To print this report, from the main Selection List, type:
[Enter]
[Enter]
This takes us to Data Search.
We need to set the criteria for the search.
Data
AG)
AL)
BD)
DR)
DT)
IC)
IN)
MR)
Search
SEARCH CRITERA
Age
Allergy
Birth date
Doctor
Drug treatment
ICD diagnosis code
Insurance company
Medical record #
OC)
OI)
PC)
PV)
SX)
TR)
TS)
ZC)
Open charges
Other ID
Procedure code
Provider
Sex
Traeating physician
Type of service
Zip code
Please enter you choice: BD_
[Enter]
We are going to use a birth date search.
/ - [Enter] We are setting our birth date range from May 1 to
May 31.
[Enter]
Yes, this is correct.
[Enter]
We are finished setting the criteria.
[Enter]
Now we are going to search our patients.
[Enter]
Yes, we want to print this report.
[Enter]
Go ahead and print it.
[Enter]
Yes, we want to save the list.
[Enter]
We are going to call our list MAYBD for May Birth Days.
[Enter]
No, we don’t want a list of excluded patients.
[Enter]
Let’s go back to the main Selection List.
) [Enter]
We’re ready to print our mailing labels.
158
Section C
BIRTHDAY REPORT/LABELS
Mailing
What do you wish to do:
SI )
AL)
RA)
LS )
IN )
PV)
Labels
Print SINGLE patient labels
Print ALL patient labels
Print RANGE of patient labels
Print LIST of patient labels
Print INSURANCE companies labels
Print PROVIDER labels
Please enter you choice: LS_
) [Enter]
[Enter]
We want to print by list.
We need to tell it the name of our list.
Patient List
(sorted order)
USER SELECTED OPTIONS:
1) Print patient’s last name first:
2) Include patient numbers:
3) Include medical record numbers:
4) Include patient telephone numbers:
5) Use responsible party’s address:
6) Number of copries:
7) Print by doctor:
8) Number of labels across:
No
Yes
No
No
No
1
No
1
Enter NUMBER you wish to change: _
[Enter]
[Enter]
[Enter]
[Enter]
[Enter]
[Enter]
We don’t want the last name first.
Our mailing labels aren’t three across.
They’re one across.
We’re finished changing the options.
Let’s put our labels in and print an alignment label.
No more alignment labels, let’s run them.
Notes:
159
Section C
100TH BIRTHDAY REPORT
100th BIRTHDAY REPORT
Scenario
Grace, the Office Manager for Dr. Clark’s geriatric practice, likes to send birthday cards to the patients who are
having their 100th birthday. Each month she prints a report to see if anyone is going to have this milestone birthday
during the coming month. A quick Data Search makes this task very easy.
To print this report, from the main Selection List, type:
[Enter]
[Enter]
This takes us to Data Search.
We need to set the criteria for the search.
Data
AG)
AL)
BD)
DR)
DT)
IC)
IN)
MR)
Search
SEARCH CRITERA
Age
Allergy
Brith date
Doctor
Drug treatment
ICD diagnosis code
Insurance company
Medical record #
OC)
OI)
PC)
PV)
SX)
TR)
TS)
ZC)
Open charges
Other ID
Procedure code
Provider
Sex
Traeating physician
Type of service
Zip code
Please enter you choice: BD_
[Enter]
We are going to do a birth date search.
/ - [Enter] It is currently April 15. We are setting our birth date
range for next month, from May 1 to May 31.
[Enter]
Yes, this is correct.
> [Enter]
We are going to use an age search, too.
/
[Enter]
We are setting our age range to 99 years only.
Remember, they’re still only 99 years old as of today —
they won’t bee 100 until next month.
[Enter]
Yes, this is correct.
[Enter]
We are finished setting the criteria.
[Enter]
Now we are going to search our patients.
[Enter]
Yes, we want to print this report.
[Enter]
Go ahead and print it.
[Enter]
No, we don’t want to save it.
[Enter]
No, we don’t want to save it.
Notes:
160
Section D
Appendix
161
Section D
SYSTEM REQUIREMENTS
SYSTEM REQUIREMENTS
Single Terminal/Network Workstation: Windows 95/98, ME, 2000 Professional, XP Professional
Server: Novel 3.x or higher, Windows Server (NT4, 2000, 2003)
Use at least the minimum recommended memory for your operating system.
NOTE: The more memory you have in your workstations and server, the more efficiently your system
will run.
NOTE: All printers, laser and impact, MUST be connected via parallel port. As of this printing, POC does
not currently support USB connected printers.
Dot Matrix / Impact printers:
Commercial grade printers:
These are highly recommended when printing the 6-part Speedi-Mailer Patient Statements and
4-part Speedi-Mailer Recall Notices.
Okidata Microline 421, 491
Okidata Microline 521, 591
Standard Duty printers:
Alternately, any 80 column impact printer with Compressed Print capability may be used.
Okidata 300, 400, 500 series printers.
Epson LQ printers.
Panasonic printers.
NOTE: Compressed Print, or the ability to change the pitch to 17 cpi, is required on all 80 column
printers in order to print the Accounts Receivables and Production reports.
Laser Printers:
NOTE: Most laser printers that have HP-4 emulation AND are not considered “Windows Only”
should work.
The following printers have been tested and work great.
HP Laser Jet ll, lll, 4, 5, 6, 1150, 1300, 2300
Brother HL-1440
NOT RECOMMENDED:
Deskjet, Inkjet and Bubble Jet printers.
All-In-One printers. (i.e. Print/Fax/Scan/Copy)
162
Section D
SYSTEM REQUIREMENTS
56k Modem, DSL / Cable Modem, other high speed internet connections.
Electronic claims:
Carriers and clearinghouses all have different communication requirements. Some even provide their
own communication software. You should contact the carriers and/or clearinghouse to determine what
method of communication your system will need in order to submit claims electronically.
Insurance Eligibility:
Internet access is usually required if you wish to check insurance eligibility on-line. Customers have
been extremely pleased when they switch to high speed internet access such as DSL, instead of 56k
dial-up.
POC Technical Support:
In order to most efficiently help our support technicians resolve problems, it is highly recommended that
a 56k modem and Symentec pcAnywhere (a remote control communication software) be installed. This
will allow our technicians to remotely control your POC software and to diagnose and fix most POC
software problems. It is an invaluable time-saver.
NOTE: Remote access to your POC software can only be done with your knowledge and assistance.
The pcAnywhere software can only be turned on (activated) by you when needed during a
support session. When the software is turned off (deactivated) your system can not be
accessed remotely.
In very rare cases, the only way to repair a corrupted POC system is to send your data to our office.
Most of the time, a 56k modem connection will work using the Windows communication software,
Hyperterminal. However, when the database has grown large, it may take hours to transmit by 56k
modem. If you have high speed access, that same database would only take minutes to e-mail. Your
only other option would be to send us your back-up on disk or tape.
163
Section D
SYSTEM CONFIGURATION
SYSTEM CONFIGURATION
! "
#$
This program is only for the use of experienced computer users. You should always make a backup of the System
Parameters file, SYSPAR, before proceeding. This program allows you to:
Configure terminal settings.
Select the appropriate printer driver; this includes laser and DeskJet drivers.
Change the DRIVE/PATH.
Change System toggles for:
1.
Whether the add patient recall question appears at the end of Add Charges.
2.
Whether the add drug treatment question appears at the end of Add
Charges.
3.
Multi-Terminal only - Whether the System appends transactions
immediately to the master files (slower, but transactions appear on
Patient Ledgers immediately) or appends transactions when the
Transaction Report is run (faster, but transactions don’t appear on
Patient Ledgers until after the Transaction Report is run).
4.
Whether to age charges from the date of service, the date of
operator entry, or the date of first statement. Please be advised:
You should choose one method and stick with it. Changing aging
methods will NOT affect the aging of transactions that are already in
the System.
5.
Set the default for PRINTING ledgers to start with the first transaction
or with the first open transaction.
6.
Use the standard or the enhanced super bill.
7.
Print one or multiple diagnosis pointers on the charge line of
Medicare forms.
Before running VxINIT, you need to have all workstations
4
8.
Set the default for automatic adjustment.
9.
Set recall notice form type.
[Enter]
[Enter]
it POC if your System is multi-terminal.
Responds with: Enter command:
Respond appropriately to VxINIT’s questions and make your changes. When done, hit the [Enter] key to return to
POC’s Main Selection List. To activate your changes, you need to
it POC and then restart POC in order to load
your new System Parameters.
164
Section D
WINDOWS INSTALLATION
MICROSOFT WINDOWS®
INSTALLATION
Microsoft Windows XP, Windows 2000
Single Terminal
If you are transferring an existing POC installation from an old system to a new system, just copy
the existing POC folder or directory to your new computer’s C:\POC folder. Then go to Create
POC Icon.
If you are installing POC for the first time, then do the following:
1.
2.
3.
4.
5.
6.
Go to the command prompt. Click Start | All Programs | Command Prompt
At the Command Prompt type:
press [Enter]. You should now have a C:\> prompt.
press [Enter]
Type:
Type:
press [Enter] You should now have a C:\POC> prompt.
Copy each disk. For each disk type
=E'E
Type:
Create POC Icon=
1.
2.
3.
4.
5.
6.
7.
8.
9.
10.
11.
12.
13.
14.
15.
16.
17.
18.
19.
20.
21.
On your Windows Desktop, point to where you want the POC icon to be, then right-click once.
Point to NEW, then click on Shortcut.
'
click next.
Location of item: Type: =
Name for shortcut: Type:
click next.
Choose an icon: Choose the desired icon, then click FINISH.
Open POC by clicking on the new POC Icon. DO NOT LOG INTO POC.
Right-click on “POC.EXE” in the Title Bar at the top of the POC window.
Click on Properties.
Click on the Full Screen check box in the Options tab.
Click on the Layout tab.
Change the Screen Buffer Size to: Width 80, Height 25
Change the Window Size to: Width 80, Height 25
Click the OK button.
Click on Save Properties for future windows with same title.
Click the OK Button.
Press [Enter] to exit out of POC.
Right-click on the new POC icon.
Click on Properties.
Click on the Screen tab.
Click on the Full Screen check box.
Click the OK button.
165
Section D
WINDOWS INSTALLATION
Microsoft Windows 95/98
Single Terminal
If you are transferring an existing POC installation from an old system to a new system, just copy
the existing POC folder or directory to your new computer’s C:\POC folder. Then go to Create
POC Icon.
If you are installing POC for the first time, then do the following:
1.
2.
3.
4.
5.
6.
Access the MS DOS prompt.
At the MS DOS Prompt type:
press [Enter]. You should now have a C:\ prompt.
Type:
press [Enter]
Type:
press [Enter] You should now have a C:\POC> prompt.
=E'E
Copy each disk. For each disk type
Type:
Create POC Icon=
1.
2.
3.
4.
5.
6.
7.
8.
9.
10.
11.
On your Windows Desktop, point to where you want the POC icon to be, then right-click once.
Point to NEW, then click on Shortcut.
Location of item: Type: =
'
click next.
Name for shortcut: Type:
click next.
Choose an icon: Choose the desired icon, then click FINISH.
Click on the new POC Icon. DO NOT LOG INTO POC.
Right-click on the new POC icon.
Click on Properties.
Click on the Programs tab.
Click on the Close On Exit check box.
Click the OK button.
Peer to Peer Network
Follow installation instructions from Single Terminal installation above through Create POC Icon.
Create Setfile Icon
1. On your Windows Desktop, point to where you want the Setfile Icon to be, then right-click
once.
2. Point to NEW, the click on Shortcut.
3. Location of item: Type: =
7) '
click next.
4. Name for shortcut: Type:
7 ) click next.
5. Choose an icon: Choose desired icon, then click FINISH.
Run SETFILE to set number of terminals.
Make the POC folder shared with full access to everyone. (My Computer, “right-click” on POC
folder, click on sharing, everyone should have Access Type: Full Control.)
Workstations
Map drive letter to the server’s POC folder. (Network Neighborhood).
Create POC Icon.
166
Section D
WINDOWS INSTALLATION
Microsoft Windows 2000, 2003 Server Installation
Workstations
All POC workstations must be MS Windows 95/98, ME, 2000, XP Professional. POC will NOT
run properly in a network environment using Windows XP Home.
Map a network drive to the shared POC folder on the Server. Drive P (for POC) is a good choice,
i.e., =
'
.
Create POC Icon.
1.
2.
3.
4.
5.
6.
Go to the command prompt. Click Start | All Programs | Command Prompt
At the Command Prompt type:
press [Enter]. You should now have a C:\ prompt.
press [Enter]
Type:
Type:
press [Enter] You should now have a C:\POC> prompt.
=E'E
Copy each disk. For each disk type
Type:
Notes:
167
Section D
BACKING UP
BACKING UP
The MOST Important Daily Task
Everyday you risk losing ALL of your work back to your last GOOD backup. If you think backing up on a daily basis
is too much work, just think of how much work it will be to try to go back and re-enter everything. As MANY of our
clients have already found out, it is not a matter of IF you will ever need your backups, it is a matter of WHEN.
Imagine explaining to the doctor why you didn’t backup and now all the billing data is lost.
Please be certain you fully understand the specific backup procedures for your system and that you perform a
backup each and every workday without fail. You may go for a year or more without ever needing your backups.
But, when you need them, and sooner or later you will, the backups are the difference between an hour of work
or, very likely, starting over from scratch.
Specific step by step instructions on how to back up your system are beyond the scope of this manual. We suggest
you call the vendor of the back up system you have chosen.
Backing up each day the System is used is a necessary function of owning a computer. Its importance and
frequency are directly proportional to the amount of effort required to re-enter lost data. For example, if you lose a
computer game, you can reinstall it easily from the master disks. If you lose your word processor and its letters, you
can reload the program disks and maybe retype some letters. BUT, if you lose ALL of your practice billing
records, then you will have days, weeks, or even months of serious work ahead of you.
Our backup instructions are rigorous, but they are also reliable. Please follow them.
Different Ways of Backing Up
1
2
3
4
5
6
BACKUP TO TAPE. Pros: Convenient. Easy to use. Can be automated to run at anytime, for example
at midnight when system is not in use. Usually all data can be backed up onto one tape so it requires
much less effort. As a result, it gets done! You can backup whenever it is convenient during the day (i.
e. - while at lunch or just as you go home at night). You do not need to be there when the system is
doing the backup. It is perfectly OK to leave the computer running and pull the tape out the next
morning. The tape software can verify the data is accurate. Cons: a tape unit is an additional
purchase; the tape software may be slightly more involved to learn; different manufacturers use
incompatible formats and therefore the data cannot be read on different machines.
BACKUP TO FLOPPY DISKS. Pros: inexpensive, no additional equipment to purchase; semi-easy to
learn. Cons: Over half of the floppy disk backups we receive at POC have a major error in them;
backing up to floppy disks takes a tediously long time if you have a lot of patients, usually resulting in the
backup not being done daily or at all; it can work OK but may be unreliable. Not recommended if data
fills more than two (2) disks.
BACKUP TO A DIFFERENT DIRECTORY OR ANOTHER HARD DISK. This method is better than
never backing up at all, BUT NOT MUCH! We strongly recommend against this method! There are
many reasons this method will fail you at some time.
CD/DVD WRITER/RE-WRITR. Easy to use, reliable, inexpensive. Most new systems have a CD-RW
drive. CD-R can be read by any system with a CD drive. This is the preferred media for sending data to
our technical support department.
ZIP DRIVE. Easy to use, reliable. Additional hardware expense. Disks can only be ready by machines
with the same type zip drive.
MEMORY CARDS/JUMP DRIVES. Additional hardware required. Expensive media. Easy to use.
168
Section D
BACKING UP
Proper Backup Procedure
STEP 1 - DAILY:
Clearly label five tapes (or sets of floppies), one for each day of your work week (i.e. Monday, Tuesday, etc.). The reason for this many sets is that you will have a full week to
catch any errors if any of your backups are defective. The more sets you have, the more
secure your backup method. BACKUP EVERYDAY! Use the current day’s tape (or floppy)
without exception; that is, on Monday always use the backup labeled “Monday.” Carry your
latest backup home so it is off premises in case of fire or theft. A second and less secure
option is to store the backup in a fire resistant safe at your office. Your daily backup should
consist of POC data files only. POC data files do not have “extensions” in their filenames (i.
e., use the filename wildcard:”*.”). Backup ALL POC data files, not just the “modified” ones.
If you do not clearly understand these instructions, please contact POC Customer Support or
your dealer to discuss the step by step details for your practice.
STEP 2 - MONTHLY: At the end of the month, make a special “End of Month” backup
for storage, label it with the month and keep it in a safe place at home for one year before
recycling it.
STEP 3 - TEST:
The third step of a good backup procedure is to TEST the reliability of the backup procedure
and its media on a regular basis. Establish a schedule for your office to have a set of
backups tested for readability: Once a month to once a quarter is reasonable. Adhere to it!
Remember Murphy’s Law - if something can go wrong, it will. If you do not have the hard
disk capacity, time or inclination, this service is available from POC or your dealer. You may
call us for further information.
Proper Restore Procedure
We’ve seen many clients lose ALL their data by restoring what they THOUGHT was a good backup. Before you
restore any data, backup you current data, EVEN IF YOU SUSPECT IT IS BAD, onto a brand NEW, just out of the
cellophane wrapper, tape or disks! In other words, don’t cover up what might be your only (semi-) good data.
There have been times when a customer has called stating that they had a “System crash.” They had then
proceeded to do a back-up thinking this would save their data. Unfortunately, they had used one of their existing
back-up media. In actuality, they backed up corrupted data, over writing good data by using an existing back-up
disk. Again, we can not say this too often, only use brand NEW, just out of the cellophane wrapper, tape or disks!
In other words, don’t cover up what might be your only (semi-) good data.
Notes:
169
Section D
HOUSECLEANING
HOUSECLEANING
Housecleaning is a process by which outdated information is consolidated and/or removed from POC in order to
reclaim needed disk space or to improve System performance. All housecleaned information is saved “off-line” on
floppy disk(s) or another directory of your hard disk for future access by the POC Retired Ledger program. Retired
Ledgers contain the entire ledger as it existed when housecleaned, not just the consolidated transactions.
Preparation
Before running Housecleaning, you must print and clear the daily Transaction Report.
We recommend
Housecleaning at the end of the month, just before starting a new month. This way you will have all of the needed
reports and changing to the new month will be simplified. Following this, you must make a complete backup of your
System. THE BACKUP PROCEDURE IS CRITICAL AND IS AN ABSOLUTE NECESSITY BEFORE
PROCEEDING WITH HOUSE-CLEANING. CONFIRM THAT THE BACK-UP DATA COMPARES PERFECTLY
WITH THE HARD DISK DATA BEFORE CONTINUING. ARCHIVE THIS BACKUP IN CASE YOU SHOULD EVER
NEED TO RESTORE THIS DATA.
After making a backup, it is required that the following POCDOC utilities be run in the order listed: FXDATES,
FILLEF, FIXERR, OTOFX, ICDFX, DXFIX, RVSFX, TRACEFAM, FIXFAM, TRACEFAM, FIXINS, and CKBALDUE
(See the POCDOC chapter). Some States have additional POCDOC utilities that must be run. For this reason, you
should ALWAYS call POC and verify the utilities which must be run for your installation before starting
Housecleaning. We will also send you the latest version of the utilities if there have been changes. Running these
utilities will ensure the data on the hard disk is “error free,” which will prevent House-Cleaning from crashing. After
running these utilities, MAKE ANOTHER BACKUP AND STORE FOR A THIRTY DAY PERIOD.
To start the Housecleaning program, at a command prompt in the POC directory, type:
4F )
[Enter]
Before running Housecleaning, be certain you have a supply of new, formatted disks ready. If you are not sure how
many disks you will need, start the Housecleaning program and enter the formatted retired disk capacity when
asked at the beginning of housecleaning.
If backing up to:
5¼” DD 360K disks enter:
5¼” HD 1.2Mb disks enter:
3½” DD 740K disks enter:
3½” HD 1.44Mb disks enter:
320
1040
620
1240
After verifying the capacity, the System will tell you how many diskettes you will need. Before beginning, you should
number these disks sequentially, then label them with “RETIRED LEDGERS” and the date.
If you have any questions, call POC Customer Support or your dealer. Once the Housecleaning procedure is
complete, these disks will allow you to review an “original” Patient Ledger for all patients.
Time Required
Adequate time must be allowed for Housecleaning. The actual time is a function of the speed of your computer. A
Pentium machine will houseclean several times faster then an older 486 computer. Likewise, a Pentium IV machine
will be faster than a Pentium III machine.
To dramatically reduce the housecleaning time, you can use the hard drive to archive the retired ledgers instead of
saving them to floppy disks. Call our technical support department for assistance.
170
Section D
HOUSECLEANING
Clearing Patients and Transactions
Housecleaning will allow you to delete certain patients with a zero balance from your System depending upon how
long it has been since their last transaction. It will also allow you to consolidate all charges that have been fully paid
along with payments and adjustments beyond a date of your choice into a previous balance line. The purpose of
this procedure is to recover space on the hard disk. A previous balance line will be generated for each of the
standard aging categories (current, over 30 days, over 60 days, etc. ) wherever appropriate.
The System will print a hard copy of the Patient Ledger for all patients being deleted from the System at the time
Housecleaning is run.
After a patient has been deleted from the System, the patient number will be reassigned to a future patient.
Remember that after running Housecleaning and consolidating charges, the detailed procedures will no longer show
on the Patient’s Ledger, will not be retrievable with Data Search and will not show up on the Production Report.
For family accounts, if the Head of Family is deleted, the first family member will be designated as the new Head of
Family. Otherwise, deleting a family member will not disrupt the continuity of the family account.
For each patient deleted in Housecleaning, all information related to that patient is permanently erased from the
following sections of the System: Patient Ledger, Data Search list, Patient Notes, First Report of Work Injury and
Recall Notices. The Patient Ledger (patient name, address and transactions) are stored on the Retired Ledger
disks for archival purposes.
The standard Accounts Receivable aging categories and amounts are unchanged after consolidating charges. If
the last payment falls within the time frame to be consolidated, it will not appear on the Accounts Receivable report.
Errors In Housecleaning
If your System crashes during Pass 1 of Housecleaning, you can restart at the beginning of the disk it was working
on when it crashed. We suggest you call POC Customer Support or your dealer at this point. You will receive
instructions on how to fix the error that caused the crash; run SETFILE; and how to continue.
Last Step
After Housecleaning, you need to generate new patient alpha files by going into POC and re-alphabetizing in the
Alphabetize Patients section.
An Easier Method
Doing your own Housecleaning is not for the timid or the impatient. POC or your dealer can provide Housecleaning
services for you. Housecleaning services are not covered under PSC lease/maintenance agreements and are
offered for an additional fee. Call 1-800-782-5214 for details.
171
Section D
MAKING REPORTS BALANCE
MAKING REPORTS BALANCE
When your reports don’t balance and you have exhausted all the reasons why, it is human nature to suspect
something is wrong with the software. We can tell you from experience, accounting “bugs” are extremely rare.
Chances are we would know about any bugs long before you.
So, what do you do when you don’t know what went wrong? The first step is to begin running all of your reports on
a daily basis. Yes, all of them. The idea is to provide a set of data with no more than one 24 hour period to
reconcile. Trying to go back over a month’s worth of transactions is at best an exercise in frustration. When you
have recreated the error in a 24 hour period, you have something manageable to work with. We have found that
once the error is limited to a 24 hour period, most people find on their own what is causing the error (usually
operator input or procedure). Neither POC nor your dealer will be able to help you until you have the error limited to
a 24 hour period.
Here are some helpful hints when gathering accounting totals:
•
The Transaction Report should ALWAYS be printed FIRST.
•
The Accounts Receivable Report,
, CANNOT have any “user selected criteria” set except for Zero
Balance Patients. Credit balances are part of your accounts receivable and need to be included.
•
To get a grand total of all Billings/Collections Reports, type:
number.
•
When reconciling, use the GRAND TOTAL reports, not the individual Doctor reports.
•
The sequence for closing out the month is to run Finance Charges (from Patient Statements), if any,
then the Transaction Report, the Billings/Collections Report and, last, the Accounts Receivable.
•
The Production Report, is NOT an accounting tool. This report uses the date of transaction, not the date
of entry. For this reason, it is very easy to have a discrepancy between a Billings/Collections Report
and a Production Report.
•
Past errors in Patient Ledger files that have been repaired may be a cause of not balancing.
•
When trying to balance, NEVER enter transactions between the time of printing and clearing a
Transaction Report, Billings/Collections Report and changing the system date.
•
The formula for monthly balancing is:
•
•
•
•
•
•
Last
) [Enter] when asked for Doctor
total
+ MTD Billing
+MTD Refunds
- MTD Collections
- MTD Adjustments
= Current
172
Section D
TROUBLESHOOTING
TROUBLESHOOTING
Over the years we have compiled a short list of some of the most common client problems. Before you call, try the
following:
If your terminal doesn’t display anything, try adjusting the contrast and brightness controls. Also make sure all
cables are tightly connected. If the problem continues, contact your hardware dealer.
If your keyboard keys don’t work and the screen looks normal, make sure the keyboard plug is fully inserted. If
the problems persists, contact your hardware dealer.
If your printer doesn’t print, make sure the printer is on, on line, has paper and is not displaying any error
messages. Also check cable connections. If the problem persists, contact your hardware dealer.
If your modem doesn’t respond, check the connections and if it’s turned on. If this doesn’t work, call your
hardware dealer. If your modem responds but you don’t hear a dial tone, check the phone cord between the
modem and the wall outlet. If that fails, contact your phone company.
If the System locks up after entering POC, reboot your System. If you are running a network, don’t reboot the file
server unless you first contact your hardware dealer. Only reboot your workstation.
“Terminal Number Is In Use” Message
C:\POC>SETFILE
What do you wish to do:
1)
Reset a single user
2)
Reset all users
Enter your choice:
If you are running multi-terminal POC and the message “TERMINAL NUMBER # IS ALREADY IN USE” appears
after entering the terminal number, check to see if another screen is using that terminal number. If not, make sure
all terminals have exited POC ( F [Enter] from the Main Selection List), then type
7 ) [Enter]. The screen
above will appear. Enter the total number of terminals that are attached to your system. DO NOT RUN SETFILE
UNTIL YOU HAVE DETERMINED ALL POC USERS HAVE EXITED OUT OF POC! Make certain you are
consistent with the number of terminals. If you inadvertently reduce the number of terminals before the Transaction
Report has been printed, transactions will not be printed on the Transaction Report, resulting in lost transactions. If
this does happen accidentally, simply run SETFILE again with the correct number of terminals and reprint the
Transaction Report.
173
Section D
TROUBLESHOOTING
POC Error Messages
INSURANCE TYPE:
ST
Procedure Codes
CU ERROR IN LINE 754 - PC)
CAUTION - YOU HAVE ENCOUNTERED A SYSTEM ERROR!
DO NOT CONTINUE WITHOUT FIRST CONSULTING YOUR DEALER!
Enter Patient # and/or comment: _
The example above is the type of error message the System generates. The format is almost always the same, “XX
ERROR IN LINE XXX - XX.” these messages indicate a possibly serious error that needs attention. There is
space for you to type a short description of what you were doing. Do so and then answer to the “Is This Correct?”
question. Call POC Customer Support or your dealer and then continue with your work, if possible.
There are additional messages the System generates. The following are not considered to be errors in the System:
INVALID TERMINAL NUMBER
Restart POC and re-enter the terminal number. If this doesn’t
clear the problem, have all other terminals exit POC and the run
SETFILE.
TERMINAL NUMBER * IS ALREADY IN USE Check to see if another terminal is using that number.
have all other terminals exit POC and run SETFILE.
WAITING TO ACCESS PATIENT FILES
If
not,
Have all other terminals return to the main Selection List. If you
are still unable to access patient files, have all terminals exit
POC and run Setfile.
See the chapter on “Making Reports Balance” for accounting errors.
Hardware and Operating System Error Messages
If none of the previous POC error messages match your message, it is likely coming from your hardware or
operating system. Just because the message appears while you are using POC doesn't mean it is a POC error. If
the message does not look like a POC error message, you should call your hardware dealer first.
The following are just a few of the more common error messages generated by your operating system and may or
may not be serious. In either case, you should contact your hardware dealer:
DISK I/O ERROR
NO PAPER ERROR WRITING DEVICE PRN
ABORT, RETRY, IGNORE?
Contact your hardware dealer.
Make sure the printer is on, on-line and
has paper. Also check for any error
lights and make sure the printer cables
are tightly connected at both ends.
Then press
for retry. If the System
still won’t print, call your hardware
dealer.
174
Section D
NOT READY ERROR READING DRIVE *
ABORT, RETRY, FAIL?
GENERAL FAILURE READING DRIVE *
ABORT, RETRY, FAIL?
TROUBLESHOOTING
If you are trying to access a floppy disk,
remove and reinsert the disk. Close the
drive door. If this doesn’t work or you
were trying to access the hard disk, call
your hardware dealer.
If you were trying to access a floppy
disk, the disk is likely unformatted or the
wrong density. If you were accessing
the hard drive, you have a serious hard
disk failure. Call your hardware dealer.
Notes:
175
Poc Doc
DESIGNED EXCLUSIVELY FOR
PHYSICIANS’ OFFICE COMPUTER
176
Section D
POCDOC
PocDoc WARNING!
These instructions have been included for the benefit of Physicians’ Office Computer support staff, authorized
Physicians’ Office Computer dealers and, with prior POC approval, experienced computer technicians.
Professional Systems Corporation, “PSC”, shall not be held liable for the misuse of these utilities. Each
unauthorized use, which shall be determined solely by PSC, may constitute a violation of your PSC
maintenance agreement and result in expensive data repairs and lost data.
BEFORE RUNNING ANY POCDOC UTILITY, BACKUP
ALL POC DATA FILES AND CHECK THE BACK-UPS!!!
If things don’t go as planned, you can always restore the backup.
177
Section D
POCDOC
Brief Description - Alphabetical Order
ALLDOC1
CHGDOC
CHGINS
CHGSCRTY
CKBALDUE
CLRCROSS
CLRFAM
CLRICD
CLRINS
CLRLGR
CLRWRK
COUNTPR
DELICD
DELPAT
DELRVS
DTRFX
DXFIX
FILLEF
FINDTR
FIXERR
FIXFAM
FIXINS
FXDATES
ICDFX
OTOFX
PMASPAD
RANDREAD
RANDWRITE
RPLRCD
RVSFX
TRACEFAM
TRACELGR
UNXPOST
Convert to a one doctor system
Change patients from one doctor to another
Change an insurance code
Change security code
Balance ledger and accounts
Clear cross posting report
Clear family membership
Clear ICD codes
Clear insurance information
Clear a patient ledger
Clear workers comp information
Count records in a file
Delete unused ICD codes
Delete patients
Delete unused CPT codes
Correct bad records in DTR files
Trace and fix diagnoses
Patch bad ledger and responsible party records
Find patient transactions
Detect and fix ledger errors
Reconstruct family accounts
Detect & correct insurance errors
Correct the dates file
Ensure the integrity of the permanent diagnosis file
Ensure the integrity of the one-time-only diagnosis file
Pad a PMAS record
Read a record
Write a record
Replace a record
Ensure the integrity of the RVS file
Detect errors in family accounts
Detect errors in ledgers
Uncross posted transactions
Notes:
178
Section D
POCDOC
COVERING A PATIENT
If there are errors in a patient’s record, it may be necessary to re-enter the patient and write over the patient’s old
record using either the NUMBER or XNUMBER utility function.
Always try NUMBER first. If you encounter an error using NUMBER, then use XNUMBER.
If it is necessary to use XNUMBER on a family member, please note that you must run the FIXFAM utility
immediately after completing XNUMBER.
NOTE: Before covering a patient, carefully read the section called RE-ENTERING TRANSACTIONS.
How to use the NUMBER and XNUMBER functions:
WHAT’S ON THE SCREEN:
======================
(FROM
SELECTION
WHAT YOU DO:
=====================
LIST)
Enter
for New Patients [Enter]
Re-enter patient information the same
as with any new patient.
ENTER NUMBER TO BE CHANGED
(X TO EXIT):
Enter NUMBER or
press [Enter].
XNUMBER and
ENTER SPECIAL PATIENT NUMBER:
Enter the number of the patient to be
covered and press [Enter].
ARE YOU SURE?
Enter
ENTER NUMBER TO BE CHANGED
(X TO EXIT):
[Enter].
Continue as if
new patient.
you were entering a
RE-ENTERING TRANSACTIONS
When re-entering transactions on a patient whose original ledger has been covered up (see Covering a Patient), it is
essential to set aside the DOCTORS and ACCOUNTS files so that they remain unaltered during the reentry
process.
Before re-entering the charges and payments for any patient, be sure to follow the steps below:
Type:
from Main Selection List
COPY DOCTORS DOCTORS.XXX [Enter]
COPY ACCOUNTS ACCOUNTS.XXX [Enter]
(Should say 1 file copied. If you do not get this confirmation, maybe due to a typing error. If not, call tech support.)
179
Section D
POCDOC
Now re-enter on Terminal #1 all transactions for any patient that has been covered. After completion, follow the
steps below:
Type:
DEL DOCTORS [Enter]
DEL ACCOUNTS [Enter]
REN DOCTORS.XXX DOCTORS [Enter]
REN ACCOUNTS.XXX ACCOUNTS [Enter]
This procedure restores the original practice totals after the duplicate charges have been re-entered into the
System.
Notes:
180
Section D
POCDOC
ALLDOC1
The ALLDOC1 utility converts any system to a one doctor system. Remember to run all reports before running this
utility, i.e.: Insurance Forms and Billing & Collections, as this utility assigns all patients to doctor number 1. There
are five passes to the process.
WHAT’S ON THE SCREEN:
=======================
WHAT YOU DO:
=====================
From the System Command prompt type:
ALLDOC1 [Enter].
CHANGE SYSTEM TO A ONE DOCTOR
SYSTEM - ##/##/##
Numbers showing the pass and record
number will scroll on the screen.
0 #
0 #
.
.
.
1 #
1 #
.
.
.
2 #
2 #
.
.
.
3 #
3 #
.
.
.
BILLING TOTALS
DONE
WARNING: THIS PROGRAM EXECUTES WITH NO OPTION TO ABORT
Notes:
181
Section D
POCDOC
CHGDOC
The CHGDOC utility reassigns a patient or range of patients that belong to a particular doctor to a new doctor
number.
WHAT’S ON THE SCREEN
======================
WHAT YOU DO:
=====================
From the System Command prompt type:
CHGDOC [Enter].
CHANGE DOCTOR NUMBER FOR PATIENT
RANGE - ##/##/##
ENTER OLD DOCTOR NUMBER
Enter the doctor number you wish to
change or press [Enter] to exit.
ENTER NEW DOCTOR NUMBER:
Enter the new doctor number and
press [Enter].
ENTER FIRST PATIENT NUMBER:
Enter the number of the patient where
this utility is to begin and press [Enter].
ENTER LAST PATIENT NUMBER:
Enter the number of the patient where
this utility is to end and press [Enter].
HARD COPY?
Enter
or
[Enter].
The screen or printer will display the list
of patients which have been changed.
When finished, the program will loop back to:
ENTER OLD DOCTOR NUMBER:
To exit press [Enter].
Notes:
182
Section D
POCDOC
CHGINS
The CHGINS utility allows you to change an insurance code simultaneously for all patients in the data base. The
change will be reflected in Patient Information as well as in the Insurance List.
WHAT’S ON THE SCREEN:
=======================
WHAT YOU DO:
=====================
From the System Command prompt type:
CHGINS [Enter].
CHANGE INSURANCE CODES - ##/##/##
ENTER OLD INSURANCE CODE:
Enter the code or just press [Enter] to
exit.
ENTER NEW INSURANCE CODE:
Enter the new code and press [Enter].
CHANGING INSURANCE CODES
###
###
###
.
.
.
XX IS NOW ZZ
DONE
The numbers displayed on the screen are patients who are being changes as well as deleted patients who used to
have the old code.
Notes:
183
Section D
POCDOC
CHGSCRTY
CHGSCRTY allows you to change the security code used to access the Billings/Collections Report. If you change
the security code, please notify Physicians’ Office Computer or your dealer of the change.
WHAT’S ON THE SCREEN
======================
WHAT YOU DO:
=====================
Call POC Customer Support or your dealer for help running this utility.
Notes:
184
Section D
POCDOC
CKBALDUE
The CKBALDUE utility will show any discrepancy between the Patient’s Ledger, the accounts file and aging. If a
discrepancy does exist, this utility may be used to either adjust the Patient Ledger (by adding a modifying amount)
or to rewrite the accounts file to match the ledger. In the adjustment or rewrite process, the NET.BAL will always be
rewritten to match.
WHAT’S ON THE SCREEN:
======================
WHAT YOU DO:
=====================
From the System Command prompt type:
CKBALDUE [Enter].
CHECK BALANCE DUE & PAID WITH
ACCOUNTS FILE - ##/##/##
TURN PRINTER ON, PRESS ENTER
WHEN READY:
Press [Enter] when ready.
ENTER FIRST PATIENT NUMBER:
Enter the first patient number to be
checked or press [Enter] to exit.
ENTER LAST PATIENT NUMBER:
Enter the last patient number to be
checked and press [Enter].
REWRITE FILES?
Enter
or
[Enter].
If you answer N, the system will start
checking the range of patients
selected.
NOTE: Unless you are running this
program
prior
to
doing
a
Housecleaning, it is advisable to
answer N for the first run.
BALANCE TO:
1) LEDGER
2) ACCOUNTS
Enter a 1 or 2 [Enter].
If the BAL.DUE (ledger) amount is
correct, use 1 to balance to the ledger.
If the ACCOUNTS amount is correct,
use 2 to balance to accounts.
If
both BAL.DUE (ledger) and
ACCOUNTS are in balance but the
NET.BAL amount is not, use 1 to
rewrite the NET.BAL amount to equal
the ledger.
185
Section D
POCDOC
When finished, the program will loop back to:
ENTER FIRST PATIENT NUMBER:
Press [Enter] to exit.
All the patient numbers will list on the screen. If there is any difference between the BAL.DUE (total of all ledger
activity), ACCOUNTS (total balance owed) or NET.BAL (net amount of all unpaid charges), the information will be
listed on the printer. If BAL.DUE and ACCOUNTS are different, the system will put <> in the right margin of the
report.
Any error messages will be displayed on the screen. An error other than the ACCOUNTS file will cause termination
of the program. If this should happen, contact your dealer or Physicians’ Office Computer.
NOTE: It is possible to correct the accounts file one patient at a time in posting payments. Answer BALANCE to
the question “Is this the correct patient?”
NOTE: If the ACCOUNTS file is incorrect, it is possible that the doctor’s billing totals may also be wrong. These
may be corrected by the change billing function. To use this function, enter
[Enter] from the Selection List in
POC.
Notes:
186
Section D
POCDOC
CLRCROSS
The CLRCROSS utility clears out all the Cross Posting report information.
WHAT’S ON THE SCREEN
=======================
WHAT YOU DO:
=====================
From the System Command prompt type:
CLRCROSS [Enter].
CLEAR CROSS POSTING REPORT - ##/##/##
FUNCTION COMPLETE
WARNING: THIS PROGRAM EXECUTES WITH NO OPTION TO ABORT
Notes:
187
Section D
POCDOC
CLRFAM
The CLRFAM utility clears all family membership information. The individual Patient Ledgers are not altered, but
the linking of family members is eliminated. When choosing a range of patients, it is important not to exclude any
portion of a family account.
WHAT’S ON THE SCREEN:
=======================
WHAT YOU DO:
=====================
From the System Command prompt type:
CLRFAM [Enter].
CLEAR FAMILY ACCOUNTS - ##/##/##
ENTER FIRST PATIENT NUMBER:
Enter the number of the patient where
this utility is to begin or press [Enter] to
exit.
ENTER LAST PATIENT NUMBER:
Enter the number of the patient where
this utility is to end and press [Enter].
REWRITE PMAS FILE?
Enter
or
[Enter].
NOTE: It is advisable to use N for the
first run.
HARD COPY?
Enter
or
[Enter].
When finished, the program will loop back to:
ENTER FIRST PATIENT NUMBER:
To exit press [Enter].
The screen or printer will display the names and numbers of the patients who are/were family members in the range
specified. The head of the family will have an H beside his/her name.
Notes
188
Section D
POCDOC
CLRICD
The CLRICD utility will clear the ICD codes from a patient or range of patients. NOTE: A: designates the floppy
drive.
WHAT’S ON THE SCREEN:
=====================
WHAT YOU DO:
=====================
From the System Command prompt type:
CLRICD [Enter].
CLEAR ICD CODES FROM PATIENT
LEDGERS - ##/##/##
ENTER FIRST PATIENT NUMBER:
Enter the number of the patient where
this utility is to begin or press [Enter] to
exit.
ENTER LAST PATIENT NUMBER:
Enter the number of the patient where
this utility is to end and press [Enter].
When finished, the program will loop back to:
ENTER FIRST PATIENT NUMBER:
To exit press [Enter].
The patient numbers being processed will be listed on the screen after each range is specified.
Diagnosis must be re-entered through Add Charges for all patients listed.
Notes:
189
Section D
POCDOC
CLRINS
The CLRINS utility clears all insurance from a patient or range of patients.
WHAT’S ON THE SCREEN:
======================
WHAT YOU DO:
=====================
From the System Command prompt type:
CLRINS [Enter]
CLEAR INSURANCE INFORMATION - ##/##/##
ENTER FIRST PATIENT NUMBER:
Enter the number of the patient where
this utility is to begin or press [Enter] to
exit.
ENTER LAST PATIENT NUMBER:
Enter the number of the patient where
this utility is to end and press [Enter].
CLEARING INSURANCE INFO When finished, the program will loop back to:
ENTER FIRST PATIENT NUMBER:
To exit press [Enter].
The screen will display the names and numbers of patients in the range specified.
All insurance information for the patients listed must be re-entered through Patient Information.
Notes:
190
Section D
POCDOC
CLRLGR
The CLRLGR utility will clear all transactions from a single Patient Ledger or a range of Patient Ledgers. The
ACCOUNTS file, however, will still reflect the balance for any patient on which the CLRLGR utility had been run. To
correct this discrepancy, you must also run the CKBALDUE utility.
WHAT’S ON THE SCREEN:
======================
WHAT YOU DO:
=====================
From the System Command prompt type:
CLRLGR [Enter].
CLEAR LEDGER TRANSACTIONS - ##/##/##
ENTER FIRST PATIENT NUMBER:
Enter the number of the patient where
this utility is to begin or press [Enter] to
exit.
ENTER LAST PATIENT NUMBER:
Enter the number of the patient where
this utility is to end and press [Enter].
CLEARING TRANSACTIONS
When finished, the program will loop back to:
ENTER FIRST PATIENT NUMBER:
To exit press [Enter].
The screen will display the names and numbers of the patients in the range specified.
Notes:
191
Section D
POCDOC
CLRWRK
The CLRWRK utility clears all Worker’s Compensation information from the WORK and TWORK files.
WHAT’S ON THE SCREEN:
=====================
WHAT YOU DO:
=====================
From the System Command prompt type:
CLRWRK [Enter].
CLEARING WORK COMP INFO - ##/##/##
DONE
WARNING: THIS PROGRAM EXECUTES WITH NO OPTION TO ABORT
Notes:
192
Section D
POCDOC
COUNTPR
The COUNTPR utility counts the number of records in any POC file. The last number on the screen is the record
number of the first end of file mark encountered. This may or may not be the true EOF for that file.
WHAT’S ON THE SCREEN:
======================
WHAT YOU DO:
=====================
From the System Command prompt type:
COUNTPR [Enter].
RECORD COUNTER/VERIFIER - ##/##/##
ENTER FILE:
Enter the drive assignment plus the
name of the file (i.e.: A:TRANSREC)
or press [Enter] to exit.
ENTER RECL:
Enter the record length for the selected
file and press [Enter].
ENTER STARTING REC #:
Enter the number of the record where
this utility is to begin and press [Enter].
#
#
#
END OF FILE
When finished, the program will loop back to:
ENTER FILE:
To exit press [Enter].
Notes:
193
Section D
POCDOC
DELICD
The DELICD utility deletes all ICD codes not used by patients on the system.
WHAT’S ON THE SCREEN:
======================
WHAT YOU DO:
=====================
From the System Command prompt type:
DELICD [Enter].
DELETE UNUSED ICD CODES - ##/##/##
SHALL I DELETE THESE CODES
NOW?
Enter Y or N [Enter].
NOTE: It is advisable to answer N the
first time through.
#
#
#
A list of ICD codes to be deleted will be generated on the printer.
A second run through the program, and answering
codes from the permanent list.
to the delete question for the second time, will remove these
Notes:
194
Section D
POCDOC
DELPAT
The DELPAT utility allows you to delete patients by doctor number, list or patient number. Before deleting a patient,
the Patient Ledger should be printed and saved. This will be the only record of that patient once the patient is
deleted. Before running DELPAT on a family member, use Patient Information to remove family status.
WHAT’S ON THE SCREEN:
======================
WHAT YOU DO:
=====================
From the System Command prompt type:
DELPAT [Enter].
DELETE PATIENTS - ##/##/##
TURN PRINTER ON, PRESS ENTER
WHEN READY:
Press [Enter] when ready.
DO YOU WISH TO DELETE PATIENTS
BY DOCTOR?
Enter Y or N [Enter].
If you answered N, skip the next 2
questions.
ENTER DOCTOR NUMBER OR PATIENTS
TO BE DELETED:
ARE YOU SURE?
Enter the doctor number and press
[Enter].
Enter Y or N [Enter].
The system will not ask any further
questions.
DO YOU WISH TO DELETE PATIENTS
BY LIST?
Enter Y or N [Enter].
If you answered N, skip the next
question.
ENTER THE NAME OF YOUR LIST
FILE:
Enter the file name and press [Enter].
The System will not ask any further
questions.
ENTER NUMBER OF PATIENT TO BE
DELETED:
Enter the patient number and press
[Enter].
The program will loop back to:
ENTER NUMBER OF PATIENT
TO BE DELETED:
To exit press [Enter].
FUNCTION COMPLETE
A list of all deleted patients will be generated.
NOTE: DELPAT does not reconstruct family accounts if a family member is deleted. Please review CLRFAM,
FIXFAM and TRACEFAM for more details.
195
Section D
POCDOC
DELRVS
The DELRVS utility deletes all RVS codes not used by patients on the system.
WHAT’S ON THE SCREEN:
=======================
WHAT YOU DO:
=====================
From the System Command prompt type:
DELRVS [Enter].
UNUSED
P R O C E D U R E CODES - ##/##/##
TURN PRINTER ON, PRESS ENTER
WHEN READY:
Press [Enter] when ready.
SHALL I DELETE THESE CODES
FROM THE PERMANENT LIST?
Enter Y or N [Enter].
NOTE: It is advisable to answer N the
first time through.
READING RVS CODE LIST
#
#
#
READING TRANSREC FILE
#
#
#
PRINTING PROCEDURE CODES
DONE
A list of procedure codes to be deleted will be generated on the printer.
A second run through the program, and answering
codes from the permanent list.
to the delete question for a second time, will remove these
Notes
196
Section D
POCDOC
DTRFX
The DTRFX utility will fix errors in the daily transaction files that are used for appending files and printing the
transaction report.
WHAT’S ON THE SCREEN:
=======================
WHAT YOU DO:
=====================
From the System Command prompt type:
DTRFX [Enter].
FIX DAILY TRANSACTION FILES - ##/##/##
ENTER TERMINAL # TO BE FIXED:
ENTER PATIENT # TO CHANGE (IF
ANY):
Enter the desired terminal number or
press [Enter] to exit.
Enter the patient number that you wish
to change or press [Enter].
REWRITE?
Enter Y or N [Enter].
HARD COPY?
Enter Y or N [Enter].
CHECKING DTR# FILE CHECKING TRANSACTION FILES DONE
Notes:
197
Section D
POCDOC
DXFIX
The DXFIX utility will fix errors in a patient's list of diagnoses.
WHAT’S ON THE SCREEN:
=======================
WHAT YOU DO:
=====================
From the DOS System prompt type:
DXFIX [Enter].
TRACE Diagnosis & FIX ERRORS - ##/##/##
TURN PRINTER ON, PRESS ENTER
WHEN READY:
Press [Enter] when ready.
ENTER FIRST PATIENT NUMBER:
Enter the number of the patient where
this utility is to begin or press [Enter] to
exit.
ENTER LAST PATIENT NUMBER:
Enter the number of the patient where
this utility is to end and press [Enter].
REWRITE FILES?
Enter Y or N [Enter].
TRACING DIAGNOSIS
When finished, the program will loop back to:
ENTER FIRST PATIENT NUMBER:
To exit press [Enter].
All names and numbers of patients in the range specified will be listed on the screen. Any diagnoses that are
deleted will have to be re-entered through Adding Charges.
Notes:
198
Section D
POCDOC
FILLEF
The FILLEF utility writes a dummy record over a partial record. This utility should only be run before running
FIXERR or FIXINS.
WHAT’S ON THE SCREEN:
======================
WHAT YOU DO:
=====================
From the System Command prompt type:
FILLEF [Enter].
FILL EF’S - ##/##/##
1)
2)
3)
4)
5)
TRANSREC
TRANSRC2
PAYMENTS
RESPARTY
RESPART2
ENTER FILE NUMBER:
Enter a 1, 2, 3, 4 or 5 for the
appropriate file or press [Enter] to exit.
ENTER FIRST RECORD NUMBER:
Enter the number of the record where
this utility is to begin and press [Enter].
A 1 is recommended.
ENTER LAST RECORD NUMBER:
Enter the number of the record where
t h i s utility is to e n d (99999 is
recommended) and press [Enter].
REWRITE FILES?
Enter Y or N [Enter].
TURN PRINTER ON, PRESS ENTER
WHEN READY:
Press [Enter] when ready.
The screen will display each record number as it is processed.
The printer will print:
XXX ERROR CORRECTED IN XXX FILE, RECORD XXX
When finished, the program will loop back to:
ENTER FILE NUMBER:
To exit press [Enter].
Notes:
199
Section D
POCDOC
FINDTR
The FINDTR utility allows you to find all records in the transaction files (TRANSREC, TRANSRC2 and PAYMENTS)
that belong to a selected patient.
WHAT’S ON THE SCREEN:
======================
WHAT YOU DO:
=====================
From the System Command prompt type:
FINDTR [Enter].
FIND TRANSACTIONS - ##/##/##
0)
1)
2)
3)
TRANSREC
TRANSRC2
PAYMENTS
PT # 0
ENTER YOUR CHOICE:
Enter a 3 [Enter].
ENTER PATIENT NUMBER:
Enter the desired patient number and
press [Enter].
The System will display the selected patient number and return to:
ENTER YOUR CHOICE:
Enter a 0, 1 or 2 and press [Enter]. You
will need to run this program on all
three choices.
ENTER FIRST RECORD NUMBER:
Enter the number of the record where
this utility is to begin or press [Enter] to
exit. A 1 is recommended.
ENTER LAST RECORD NUMBER:
Enter the number of the record where
t h i s utility is to end (999999 is
recommended) and press [Enter].
TURN PRINTER ON, PRESS ENTER
WHEN READY:
Press [Enter] when ready.
The screen displays the record number being processed.
The printer will print:
PATIENT # XX
X - Y) DATE POINTER
The “X” represents the file number in which the record was found. The “Y” represents the record number in the file.
The data is the date of service for the transaction and the pointer is the pointer to the next transaction in the
patient’s ledger. The first digit in the pointer is the file number in which that record can be found.
When finished, the program will loop back to:
ENTER YOUR CHOICE:
To exit press [Enter].
200
Section D
POCDOC
FIXERR
The FIXERR utility detects and automatically corrects errors in patient’s transactions.
WHAT’S ON THE SCREEN:
=====================
WHAT YOU DO:
=====================
From the System Command prompt type:
FIXERR [Enter].
FIX ERRORS - ##/##/##
ENTER STARTING PATIENT #:
Enter the number of the patient where
this utility is to begin or press [Enter] to
exit.
ENTER ENDING PATIENT #:
Enter the number of the patient where
this utility is to end and press [Enter].
REWRITE FILES?
Enter a Y or N.
TURN PRINTER ON, PRESS ENTER
WHEN READY:
Press [Enter] when ready.
Patients will be listed on the screen in numerical order.
DONE
>
If there is a crossed ledger .......................................................... ..**CROSSED LEDGER**
If there is an end of file encountered .........................................................**END OF FILE**
If there is an end of record encountered............................................**END OF RECORD**
If there are any transactions lost ............................................ **LAST TRANS CHANGED**
If there is a short PMAS record ........................................................**RECORD LENGTH**
If an invalid insurance pointer exists ......................................... .**PRINT INS. CLEARED**
If a record number of zero is found ...................................................... **ZERO POINTER**
NOTE: “RECORD LENGTH” errors are not corrected by this program. In this case FIXERR will simply skip to the
next patient. To correct this error, run PMASPAD and then run FIXERR again on these patients.
NOTE: For patients listed with “LAST TRANSACTION CHANGES” errors, it may be necessary to re-enter
transactions. Follow the outline for Re-entering Transactions in Section 3. If transactions details are not important,
just run CKBALDUE and balance to ACCOUNTS which will write a dummy record to the patient ledger for the
missing transactions.
Notes:
201
Section D
POCDOC
FIXFAM
The FIXFAM utility reconstructs all family accounts. It is advisable to run TRACEFAM before and after running this
utility to show the changes made.
WHAT’S ON THE SCREEN: WHAT YOU DO:
==============================
. From the System Command prompt type:
. FIXFAM [Enter]
FIX FAMILY ACCOUNTS - ##/##/##
The names of heads of accounts will be listed first, followed by the patient account numbers of family members.
DONE
.WARNING: THIS PROGRAM EXECUTES WITH NO OPTION TO ABORT
Notes:
202
Section D
POCDOC
FIXINS
The FIXINS utility checks patient’s insurance company information.
detected, the insurance information for that patient is cleared.
WHAT’S ON THE SCREEN:
=======================
During the rewrite process, if errors are
WHAT YOU DO:
=====================
From the System Command prompt type:
FIXINS [Enter].
FIX INSURANCE INFORMATION - ##/##/##
ENTER FIRST PATIENT NUMBER:
Enter the number of the patient where
this utility is to begin or press [Enter] to
exit.
ENTER LAST PATIENT NUMBER:
Enter the number of the patient where
this utility is to end and press [Enter].
REWRITE FILES?
Enter Y or N [Enter].
HARD COPY?
Enter Y or N [Enter].
CHECKING INSURANCE INFO (or)
CLEARING INSURANCE INFO
The patient’s name and number will be printed if an error is detected.
BAD INSURANCE INFORMATION DETECTED FOR ## PATIENTS
(OR)
BAD INSURANCE INFORMATION CLEARED FOR ## PATIENTS
When finished, the program will loop back to:
ENTER FIRST PATIENT NUMBER:
To exit press [Enter].
Notes:
203
Section D
POCDOC
FXDATES
The FXDATES utility ensures that all patients have a good record in the DATES file.
The dates are those entered in Adding Charges (date of first symptom, date first consulted, etc.). Three fields in the
DATES record are the index numbers of the providers entered in adding charges. If any of these numbers point to a
bad section of the provider list, they will be set to zero.
WHAT’S ON THE SCREEN:
======================
WHAT YOU DO:
======================
From the System Command prompt type:
FXDATES [Enter].
FIX BAD RECORDS IN DATES FILE - ##/##/##
COUNTING PROVIDERS HARD COPY?
Enter Y or N [Enter].
CHECKING DATES FILE
DONE
Each record modified will be printed in its corrected form preceded by the patient number.
Notes:
204
Section D
POCDOC
ICDFX
The ICDFX utility ensures the integrity of the permanent diagnosis file.
WHAT’S ON THE SCREEN:
=======================
WHAT YOU DO:
=====================
From the System Command prompt type:
ICDFX [Enter].
FIX ICD FILE - ##/##/##
TURN PRINTER ON, PRESS ENTER
WHEN READY:
Press [Enter] when ready.
The index numbers will scroll on the screen.
Any errors detected will be printed as follows:
## DIAGNOSIS CODE ALTERED - XX ERROR CORRECTED
The program finishes with:
OLD ICD FILE DELETED
NEW ICD FILE RENAMED
Notes
205
Section D
POCDOC
OTOFX
The OTOFX utility ensures the integrity of the one-time-only diagnosis file.
WHAT’S ON THE SCREEN:
=======================
WHAT YOU DO:
=====================
From the System Command prompt type:
OTOFX [Enter].
FIX OTODX FILE - ##/##/##
TURN PRINTER ON, PRESS ENTER
WHEN READY:
Press [Enter] when ready.
The index numbers will scroll on the screen.
Any errors detected will be printed as follows:
## DIAGNOSIS CODE DELETED - XX ERROR CORRECTED
The program finishes with:
OLD OTODX FILE DELETED
NEW OTODX FILE RENAMED
Notes
206
Section D
POCDOC
PMASPAD
The PMASPAD utility will pad a PMAS record by entering additional zeros if it is found to be short. This utility is
usually run after running other utilities which detect bad record lengths.
WHAT’S ON THE SCREEN:
=======================
WHAT YOU DO:
=====================
From the System Command prompt type:
PMASPAD [Enter].
PAD PMAS FILE - ##/##/##
ENTER FIRST PATIENT NUMBER:
Enter the number of the patient where
this utility is to begin or press [Enter] to
exit.
ENTER LAST PATIENT NUMBER:
Enter the number of the patient where
this utility is to end and press [Enter].
REWRITE FILES?
Enter Y or N [Enter].
NOTE: It is advisable to use N for the
first run.
HARD COPY?
Enter Y or N [Enter].
Patient numbers will be listed on the screen.
If there is an error in a patient’s record, the following will be printed: Pt.name
Pt.number
RECL(###)
When finished, the program will loop back to:
ENTER FIRST PATIENT NUMBER:
To exit press [Enter].
PLEASE NOTE: Before using the rewrite option: If RECL is less than 100, it may be necessary to cover or delete
the patient.
To verify the corrections, run PMASPAD again.
Notes:
207
Section D
POCDOC
RANDREAD
RANDREAD allows you to read any specified record in a file.
WHAT’S ON THE SCREEN:
======================
WHAT YOU DO:
=====================
From the System Command prompt type:
RANDREAD [Enter].
RANDOM READ, ANY OL’ FILE - ##/##/##
ENTER FILE:
Enter the drive assignment plus the
name of the file (i.e.: A:TRANSREC)
or press [Enter] to exit.
ENTER RECL:
Enter the record length and press [Enter].
ENTER RCD#:
Enter the number of the record you
wish to read or press [Enter] to exit.
After displaying the record on the screen, the program will loop to:
ENTER RCD#:
Enter the number of the next record
you wish to read or press [Enter] to exit.
If you just pressed ENTER, the program will loop back to:
ENTER FILE:
Press [Enter] to exit.
Notes
208
Section D
POCDOC
RANDRITE
RANDRITE allows you to write to any specified record in a file. This is a powerful and dangerous utility which will
cause permanent damage to data files if not used correctly. Call POC Customer Support or your dealer before
using this utility.
WHAT’S ON THE SCREEN:
======================
WHAT YOU DO:
=====================
From the System Command prompt type:
RANDRITE [Enter].
RANDOM WRITE, ANY OL’ FILE - ##/##/##
WARNING: THIS PROGRAM IS
POTENTIALLY DANGEROUS! PLEASE
CONSULT PRODUCT SUPPORT.
ENTER FILE:
Enter the drive assignment plus the
name of the file (i.e.: A:TRANSREC)
or press [Enter] to exit.
ENTER RECL:
Enter the record length and press [Enter].
ENTER RCD#:
Enter the number of the record you
wish to change or press [Enter] to exit.
The screen will display the record. If an end-of-file is encountered, the System will loop back to:
ENTER RCD#:
If you wish to write over the end of file,
enter OVERRIDE [Enter.
ENTER NEW RECORD:
Enter t h e new record or just press
[Enter] to leave the record unchanged.
The program will loop back to:
ENTER RCD#:
Enter the number of the next record
you wish to change or press [Enter] to
exit.
If you just pressed ENTER, the program will loop back to:
ENTER FILE:
Press [Enter] to exit.
Notes:
209
Section D
POCDOC
RPLRCD
The RPLRCD utility allows you to change the record in any of the following designated files:
1)
2)
3)
4)
PMAS
TRANSREC
TRANSRC2
PAYMENTS
5)
6)
7)
8)
RESPARTY
RESPART2
DATES
ACCOUNTS
WHAT’S ON THE SCREEN:
======================
WHAT YOU DO:
=====================
From the System Command prompt type:
RPLRCD [Enter].
REPLACE RECORDS - ##/##/##
ALLOWS FOR INSERTION OF ANY
RECORD INTO THE APPROPRIATE
FILE.
ENTER YOUR CHOICE:
Enter one of the above numbers or
press [Enter] to exit.
FILENAME
ENTER RCD#:
Enter the record number or press
[Enter] to exit.
READ VERIFY?
Enter Y [Enter].
The screen will display the record.
IS THIS THE CORRECT RECORD?
The System will prompt for
new field entries.
Enter Y or N [Enter].
Enter the new field or press [Enter] to
leave unchanged.
The screen will display the modified record.
IS THIS CORRECT?
Enter Y or N [Enter].
-RECORDING INFORMATION
When finished, the program will loop back to:
ENTER RCD#:
To exit press [Enter] twice.
Notes:
210
Section D
POCDOC
RVSFX
The RVSFX utility ensures the integrity of the procedure code file.
WHAT’S ON THE SCREEN:
=======================
WHAT YOU DO:
=====================
From the System Command prompt type:
RVSFX [Enter].
FIX RVS FILE - ##/##/##
TURN PRINTER ON, PRESS ENTER
WHEN READY:
Press [Enter] when ready.
The screen will scroll the index numbers.
Any errors detected will be printed as follows:
## PROCEDURE CODE ALTERED - XX ERROR CORRECTED
The program finishes with:
OLD RVS FILE DELETED
NEW RVS FILE RENAMED
Notes:
211
Section D
POCDOC
TRACEFAM
The TRACEFAM utility traces through family accounts within a specified range, searching for errors.
WHAT’S ON THE SCREEN:
=======================
WHAT YOU DO:
=====================
From the System Command prompt type:
TRACEFAM [Enter].
TRACE FAMILY ACCOUNTS - ##/##/##
ENTER SIZE OF LARGEST FAMILY
ACCOUNT:
Enter the number of family members in
the largest family account (999 recommended
or press [Enter] to exit.
ENTER FIRST PATIENT NUMBER:
Enter the number of the patient where
this utility is to begin or press [Enter] to
exit.
ENTER LAST PATIENT NUMBER:
Enter the number of the patient where
this utility is to end and press [Enter].
HARD COPY?
Enter Y or N [Enter].
The screen or printer will display:
TRACING FAMILY ACCOUNTS Followed by family members and # FAMILY ACCOUNTS TRACED
# FAMILY ACCOUNT PATIENTS
# ERRORS DETECTED
When finished, the program will loop back to:
ENTER FIRST PATIENT NUMBER:
To exit press [Enter].
Notes:
212
Section D
POCDOC
TRACELGR
The TRACELGR utility can determine if there are errors in the ledger by tracing the ledger across the three
transaction files, one record at a time.
WHAT’S ON THE SCREEN:
=======================
WHAT YOU DO:
=====================
From the System Command prompt type:
TRACELGR .
TRACE LEDGER POINTERS - ##/##/##
PAUSE AFTER ERROR?
Enter N [Enter].
PRINT AFTER TRANSACTION?
Enter Y or N [Enter].
HARD COPY?
Enter Y or N [Enter].
ENTER FIRST PATIENT NUMBER:
Enter the number of the patient where
this utility is to begin or press [Enter] to
exit.
ENTER LAST PATIENT NUMBER:
Enter the number of the patient where
this utility is to end and press [Enter].
When finished, the program will loop back to:
ENTER FIRST PATIENT NUMBER:
To exit press [Enter].
>
If there is a crossed ledger .......................................................... **CROSSED LEDGER**
If there is an end of file encountered ...................................................... **END OF FILE**
If there is an end of record encountered..........................................**END OF RECORD**
If a record number of zero is found .................................................. **ZERO POINTER**
Notes:
213
Section D
POCDOC
UNXPOST
The UNXPOST utility changes cross posted transactions to the patient’s primary doctor.
WHAT’S ON THE SCREEN:
=======================
WHAT YOU DO:
======================
From the System Command prompt type:
UNXPOST [Enter].
UNCROSS CROSS POSTING - ##/##/##
PRINT EACH TRANSACTION?
Enter N [Enter].
HARD COPY?
Enter Y or N [Enter].
ENTER FIRST PATIENT:
Enter the number of the patient where
this utility is to begin or press [Enter] to
exit.
ENTER LAST PATIENT:
Enter the number of the patient where
this utility is to end and press [Enter].
The screen or printer will list all patients within the range. Any that are changed will have the message:
** X-POSTED TRANSACTIONS **
CORRECTED
When finished, the program will loop back to:
ENTER FIRST PATIENT NUMBER:
To exit press [Enter].
Notes:
214
Section D
INSURANCE FORM GENERATOR
INSURANCE FORM GENERATOR
WARNING!
These instructions have been included for the benefit of Physicians’ Office Computer support staff, authorized
Physicians’ Office Computer dealers and, with prior POC approval, experienced computer technicians.
Professional Systems Corporation, “PSC”, shall not be held liable for the misuse of this utility.
Unauthorized use, which shall be determined solely by PSC, may constitute a violation of your PSC
maintenance agreement and result in expensive format file repairs.
BEFORE RUNNING THE VxIFORM UTILITY, MAKE A COPY
OF ALL POC FORMAT FILES!!!
If things don’t go as planned, you can always restore the files.
215
Section D
INSURANCE FORM GENERATOR
INTRODUCTION
This program will allow generation of insurance format files under the headings Standard, Medicare, Medicaid, Blue
Shield and Champus (5 maximum). You can designate the insurance code for the form, any crossover insurance
code, and the variables for the form and layout. This program was designed as a programmer’s tool and is not
meant for the inexperienced. POC can offer format file design services. Please call Customer Support for further
information.
You will need a ruler with 1/10” and 1/6” markings, forms and plenty of perserverance.
Each form is divided into five logical segments: Parameters, Alignment Form, Top of Form, Charge Line and
Bottom of Form. Parameters essentially generates the logic, the alignment form configures the form alignment,
and the last three generate the format. The format for each form is developed by entering the variable names
together with a tab position in the order they are encountered on the form starting at the upper left corner, working
from left to right, top to bottom. At the end of each line a PRINT is entered to bring you to the next line. More
PRINTS (one for each line, measured in sixths of an inch) are sometimes needed to bring you to the next line of
actual printing. As variables are entered with their corresponding tab positions, the form begins to take shape on
the screen. A “P” from the mini menu will give you a hard copy of the layout showing the starting position of each
variable and its maximum length. There is also an option of having a hard copy for your editing session, which
makes subsequent corrections easier.
For each insurance form an associated format file must be created: IFFMT, MFMT, MCFMT, BSFMT, CHFMT. If
two forms have an identical layout but need to be kept separate for any reason (different color, or require separation
by insurance code), make a copy of the FMT file, change the name and edit the logic section.
GETTING STARTED
MAKE A COPY OF THE FORMAT FILE YOU PLAN TO MODIFY! From a prompt, copy the appropriate POC
format file, IFFMT, MFMT, MCFMT, BSFMT, CHFMT, to a “.SAV” or “.BAK” file. If you are not sure how to do this
step, you are not experienced enough with computers to continue.
At the System prompt type: 4F 7
[Enter].
Would you like to print a list of all variable names?
[Enter]
A list of all variables and their meanings will be printed on your printer.
What do you wish to do?
ST )
M )
MC)
BS )
CH)
Standard Form
Medicare Form
Medicaid Form
Blue Shield Form
Champus Form
Please enter your choice:
[Enter]
216
Section D
INSURANCE FORM GENERATOR
What do you wish to do?
S)
A)
T)
C)
B)
P)
Set Parameters
Format Alignment Form
Format Top of Form
Format Charge Line
Format Bottom of Form
Print Format
Please enter your choice:
[Enter]
Would you like to print a listing of this format?
[Enter]
A listing of the format provided with the System will be generated, followed by an alignment form and a sample
printout.
Using this as a cross reference will be the quickest way to familiarize yourself with the generator as you work
through the different sections.
EDITING A FILE
It is often easier to modify an existing format file than to create one from scratch. To make a copy of a file, call up
the existing file from the menu, i.e.:
[Enter]
The entries for the ST file will be present and can be picked up for your new file by pressing [Enter]. It is important
to default all the way through each section so that the whole file is created.
In the Set Parameters section, the existing setting is shown in parentheses. To leave the setting unchanged just
press [Enter]. To change the existing setting, type in the new parameter and press [Enter].
In the Alignment Form, Top of Form, Charge Line and Bottom of Form sections, the upper portion of the screen
displays entered variables in the position at which they will appear on the form. The bottom of the screen displays
the variables that you are currently editing as shown below. The “at” is the tab position and refers to the column
position measured in 1/10” from the left perforation.
LAST FIELD and Column entered:
CURRENT SETTING for NEXT Field:
ENTER NEXT Field, B, F, I, DEL or Q:
CARRIER$ at 2
1 PRINT
Enter a Field Unchanged
To re-enter a variable exactly as it appears in the CURRENT SETTING, just press [Enter].
SETTING will become the LAST FIELD and the NEXT FIELD will appear as shown:
LAST FIELD and Column entered:
CURRENT SETTING for NEXT Field:
ENTER NEXT Field, B, F, I, DEL or Q:
The CURRENT
1 PRINT
INS.A$ at 3
217
Section D
INSURANCE FORM GENERATOR
Change a Current Setting
To change the CURRENT SETTING, type in the new variable and press [Enter]. In the setting above, the INS.A$
has the wrong tab number. To change the setting, re-enter the variable, press [Enter[ and after the prompt “at”,
enter the correct number, 2, and press [Enter]. After the entry the screen will appear as follows:
LAST FIELD and Column entered:
CURRENT SETTING for NEXT Field:
ENTER NEXT Field, B, F, I, DEL or Q:
INS.A$ at 2
1 PRINT
Move Backwards Through the Fields
To go back to variables already passed, type:
[Enter] at the cursor prompt. The System will ask “HOW FAR?”
allowing you to specify the number of entries to move back.
Move Forwards Through the Fields
To jump forward through the fields, type: 7 [Enter] at the cursor prompt. The System will ask “How Far?” allowing
you to specify the number of entries to skip. You can enter
to jump to the end.
Delete
To delete the CURRENT SETTING, type:
) [Enter]
Insert
To insert a variable between the LAST FIELD and the CURRENT SETTING, type:
SETTING will appear as NONE, allowing you to add a new variable.
LAST FIELD and Column entered:
CURRENT SETTING for NEXT Field:
ENTER NEXT Field, B, F, I, DEL or Q:
[Enter].
The CURRENT
M$
NONE
Exit File
After editing a file, be sure you are at the end of a section before entering Q for quit. If you exit before the end of a
section has been reached, you will lose all of the information from the CURRENT SETTING through the end.
At the end of a section, the CURRENT SETTING for Next Field will appear as NONE. After another [Enter], NO
FIELD will appear. Press [Enter] once more to return to the NONE setting and enter Q. The screen will appear as
shown below.
LAST FIELD and Column entered:
CURRENT SETTING for NEXT Field:
ENTER NEXT Field, B, F, I, DEL or Q:
3 PRINTS
NONE
OK to RECORD?
Enter
[Enter] if you do not want to save your editing session. The file will be left exactly as it was before the
editing session began.
Enter
[Enter]to record the file with the changes. The system will respond with:
ENTER ID:
218
Section D
INSURANCE FORM GENERATOR
What you enter is for your own reference. An [Enter] will leave the ID as shown at the top of the screen. To
change the ID, just enter in your own remarks. It is customary to use the date.
NOTE: If you end your ID code with a [Space] , the form feed is suppressed. This is
useful if you have non-standard form lengths. In this case,
s will have to
be added to the end of the Bottom of Form section to bring you to the beginning
of the next form.
PRINTING THE FORMS
Be sure to Set Parameters in Bill Insurance before running insurance forms for the first time. This allows further
control of the insurance form printing. See the Bill Insurance chapter in the POC manual for assistance.
Difference between the standard form and the other forms.
The main difference between the standard form and the other forms is that the standard form prints all patients who
do not have an insurance code designated for a particular form, whereas the other forms print only for those
patients whose insurance code meets the criteria for that form
SET PARAMETERS
Form Code
The sequence of form printing is Standard (HCFA-1500), Medicare, Medicaid, Blue Shield and Champus. This
sequence logic only holds true in setting up the parameters in V6IFORM. Once you are ready to print the forms,
they can be printed in any order. The form code determines what patient gets what form, depending upon their
insurance company code. The question will be asked for the form that is being edited as well as the forms that
follow. If a code is set for a following form, then patients with that code will be skipped for the present printout and
charges for any patient with that code will not be updated. Normally an insurance code is 2 to 5 characters.
Box Code
Insurance box code sets an X to be printed wherever certain variables are encountered, namely M$ for Medicare,
MC$ for Medicaid, BS$ for Blue Shield and CH$ for Champus and triggers the printing of related provider numbers.
For example, MC is entered in response to: Enter the Medicaid insurance box code. During the printout of a form
for insurance code MC, an X will be printed wherever the MC$ (Medicaid) variable is set. Also, the provider number
printed will be the Medicaid provider number.
NOTE: Even if there is no box to be checked, it is still necessary to set the box code so that the correct provider
number will be printed. On the HCFA-1500 form, the OT$ variable will be checked for any insurance code that does
not have a box code set or has N/A entered as the box code.
219
Section D
INSURANCE FORM GENERATOR
Two insurance codes but only one form required
In the ST parameter section the prompts are:
Enter FIRST insurance company code for crossover claims (M
Enter SECOND insurance company code for crossover claims (MC
)
)
The codes entered here will ensure that only one form is printed for any patient with that combination of insurance
codes. The codes in parentheses are the settings from the last entry. If you want to leave them unchanged, just
press [Enter].
In the other forms, the crossover code refers to a patient’s second insurance that would normally be printed on a
form, lower in the printing sequence. Charges will be updated at the first insurance level for that patient. In the
subsequent form, the first insurance code would be set up as the skip code, meaning that if a patient that would
normally be printed on this level has the code designated as the skip code, then it won’t print.
For example: a patient has an M and a BS and only a Medicare form is required.
In the parameter section for the Medicare form:
Enter insurance company code for crossover claims (N/A):
Enter insurance company code to skip over (MC): N/A
[Enter]
In the parameter section for the Blue Shield form:
Enter insurance company code for crossover claims (CH): N/A
Enter insurance company code to skip over (N/A):
[Enter]
Left Margin
The margin on the standard HCFA-1500 is set at one. This assumes a margin of 1/2” for the tractor hole strip. If
your margin is wider, enter the difference in 1/10” between yours and the standard `1/2”. For example, if your
margin is 7/10”, i.e. 2/10 larger than the standard, enter your margin setting as 2. Tab settings on the sample format
are measured from the left perforation.
Number of charge lines
This refers to the logical lines, normally one to every second physical print line. Some forms have two lines of detail
for each charge. This is considered one charge line.
Number of lines from the first line in the charge section to the first
line in the bottom section
The first line in the charge section is the first possible print line, normally only used when doubling up.
The first line in the bottom section is the position at which the first variable is printed after the charge line section,
normally total charges. The lines are measured in 1/6” and are inclusive.
220
Section D
INSURANCE FORM GENERATOR
TOP OF FROM
Begin printing where another variable stops
If you need to start a variable at the end of another variable, i.e.: L.NAME$ F.NAME$, you use a “;” for the tab
setting. In this example L.NAME$ is started at 2, followed by a space, followed by F.NAME$. For each NEXT
FIELD prompt, enter the following sequence:
L.NAME$ at 2
at ;
F.NAME$ at ;
Literally
Whenever you enter a variable name that is not in the list, “literally?” will appear. On many occasions you will have
mistyped a variable. If you do, answer N and then re-enter the variable. Sometimes, however, you may want a
specific character, a space, string or number to be printed. If so, answer Y.
No matching variable
If there is no variable for what you want to print, the chances are that POC does not logically store that information.
When this is the case, decide on the most appropriate place to store the information (i.e.: PI, DI, or Provider List)
and print that variable.
When using the other telephone number field (PH2$) for this purpose, you have to enter 8 characters in patient
information. If, for example, you want AM or PM for a time of an accident, it would be necessary to enter AM or PM
followed by six spaces.
The advantage of using variables in this way is increased by the facility to split up fields. This can be implemented
by typing the variable name followed by a % sign. The System will first prompt for the print position “at” the FROM:
followed by TO:. These last two prompts are for the character positions in that field. This means that a field such
as ID2 can be used to hold totally unrelated information which can be split up in form printing.
Notes:
221
Section D
STANDARD INSURANCE FORM
STANDARD INSURANCE FORM
Many of our clients call us with questions about where they need to go in the POC software to change information
that appears in a specific box on the HCFA 1500 form. We thought it might be helpful to provide a list containing
this information. The following list is for the most typical information for a standard insurance claim form. Each
insurance company and/or state may vary.
Item on
HCFA 1500
Insurance Address at
top of from
Box 1
Insurance Classification
Option/Screen in POC
Field/
Question
Insurance Company List
Patient Insurance Information
#8
Box 1a
Insurance I.D. Number
Patient Insurance Information
#9
Box 2
Patient Name
Patient Information
#1
Box 3
Patient’s date of birth
Patient’s sex
Patient Information
Box 4
Insured Name
Patient Insurance Information
Box 5
Patient’s Address
City, State, Zip Code
Telephone
Patient Information
Box 6
Relation to Insured
Patient Insurance Information
Box 7
Insured’s Address
Insured’s City, ST, Zip
Patient Insurance Information
Box 8
Patient’s Marital Status
Employment Status
Patient Insurance Information
Box 9
Other Insured’s Name
Patient Insurance Information
Box 9a
Other Insured’s Policy
Or Group Number
Patient Insurance Information
#23
Box 9b
Other Insured’s
Date of Birth & Sex
Patient Insurance Information
#20
#5
#9
#1
#2
#4
#6
#5
#2
#4
#13
#10
#15
222
Section D
STANDARD INSURANCE FORM
STANDARD INSURANCE FORM
(Cont’d)
Item on
HCFA 1500
Option/Screen in POC
Field/
Question
Box 9c
Other Insured’s Employer
Name or school name
Patient Insurance Information
#26
Box 9d
Other Insured’s Plan
Or Program name
Patient Insurance Information
#22
Box 10a
Is condition related
To employment
Adding Charges
21 Questions section
#3
Box 10b
Is condition related
To auto accident
Adding Charges
21 Questions section
#11
Box 10c
In condition related
To other accident
Adding Charges
21 Questions section
#11
Box 11
Insured’s Policy Group
Or FECA Number
Patient Insurance Information
#11
Box 11a
Date of Birth & Sex
Patient Insurance information
#20
Box 11b
Employer’s Name
Or Group Name
Patient Insurance Information
#12
Box 11c
Insurance Plan name
Or Program Name
Patient Insurance Information
#8
Box 12
Patients Authorized
Signature
Bill Insurance
Set Parameters
#2
Box 13
Insured’s Authorized
Signature
Bill Insurance
Set Parameters
#2
223
Section D
STANDARD INSURANCE FORM
STANDARD INSURANCE FORM
(Cont’d)
Item on
HCFA 1500
Option/Screen in POC
Field/
Question
Box 14
First Symptom
Add Charges
21 Questions Section
#1
Box 15
Same/Similar
Illness
Add Charges
21 Questions Section
#10
Box 16
Dates patient unable
To Work
Add Charges
21 Questions Section
#4
Box 17
Name of Referring
Physician
Add Charges
21 Questions Section &
Patient Information
#5
Box 17a
ID number of
Referring Physician
Add Charges
21 Questions Section &
Patient Information
#5
Box 18
Hospitalization
Dates
Add Charges
21 Questions Section
#8
Box 20
Outside Lab
Add Charges
21 Questions Section
#9
Box 21
Diagnosis
Add Charges
Diagnosis Section
Box 23
Prior Authorization
Number
Add Charges
21 Questions Section
Box 24a-k
Date of Service
Place of Service
Procedure
Diagnosis code
Units
Treating Doctor Number
Add Charges
Procedure Code Section
#24
#24
#14
224
Section D
STANDARD INSURANCE FORM
STANDARD INSURANCE FORM
(Cont’d)
Item on
HCFA 1500
Option/Screen in POC
Field/
Question
Box 25
Federal Tax ID
Doctor Information
#10
Box 26
Patient Account
Number
Patient Information
Assigned by software
Box 27
Accept Assignment?
Patient Insurance Information
#10
Box 28
Total Charges
Calculated by software
Box 29
Amount Paid
Calculated by software
Box 30
Balance Due
Calculated by software
Box 32
Facility where
Services were
Rendered
Adding Charges
21 Questions Section
#7
Box 33
Physician’s name
And Address
Doctor Information
#1-5
PIN#
Doctor Information
#7
225
Section D
MEDICARE HCFA 1500 INSURANCE FORM
MEDICARE HCFA 1500 FORM
The following table is for a typical HCFA 1500 form printout for a patient’s primary insurance carrier with
a secondary insurance where both insurances are private companies. The last column list most
Medicare requirements that will differ from the private carriers. Each insurance company and/or state
may vary.
Item on
HCFA 1500
Insurance Address at
top of from
Box 1
Insurance Classification
Option/Screen in POC
Field/
Question
Insurance Company List
Medicare
Note
Not required
Patient Insurance Information
#8
Box 1a
Insurance I.D. Number
Patient Insurance Information
#9
Box 2
Patient Name
Patient Information
#1
Box 3
Patient’s date of birth
Patient’s sex
Patient Information
Box 4
Insured Name
Patient Insurance Information
Box 5
Patient’s Address
City, State, Zip Code
Telephone
Patient Information
Box 6
Relation to Insured
Patient Insurance Information
Box 7
Insured’s Address
Insured’s City, ST, Zip
Patient Insurance Information
Box 8
Patient’s Marital Status
Employment Status
Patient Insurance Information
Box 9
Other Insured’s Name
Patient Insurance Information
#15
Boxes 9-9d will only
be filled out if
Medigap benefits are
assigned
Box 9a
Other Insured’s Policy
Patient Insurance Information
#23
See Note for Box 9
#5
#9
#1
Left blank when
Medicare is
Primary
#2
#4
#6
#5
#2
#4
Left blank when
Medicare is
Primary
Left blank when
Medicare is
Primary
#13
#10
Or Group Number
226
Section D
MEDICARE HCFA 1500 INSURANCE FORM
MEDICARE HCFA 1500 FORM
(Cont’d)
Item on
HCFA 1500
Option/Screen in POC
Field/
Question
Medicare
Note
Box 9b
Other Insured’s
Date of Birth & Sex
Patient Insurance Information
#20
See Note for Box 9
Box 9c
Other Insured’s Employer
Name or school name
Patient Insurance Information
#26
See Note for Box 9
Box 9d
Other Insured’s Plane
Or Program Name
Patient Insurance Information
#22
See Note for Box 9
Box 10 a
Is condition related
To Employment?
Adding Charges
21 Questions Section
#3
Box 10b
Is condition related
To auto accident
Adding Charges
21 Qestions Section
#11
Box 10c
Is condition related
To other accident
Adding Charges
21 Question Section
#11
Box 11
Insured’s Policy Group
Or FECA Number
Patient Insurance Information
#11
If Medicare is
Primary, then
NONE will be
entered in box
11 and boxes
11a-d will be
left blank
Box 11a
Date of Birth & Sex
Patient Insurance Information
#20
See note in Box 11
Box 11b
Employer’s name
Or Group Name
Patient Insurance Information
#12
See note in Box 11
Box 11c
Insurance Plan name
Or Program Name
Patient Insurance Information
#8
See note in Box 11
Box 12
Patients Authorized
Signature
Bill Insurance
Set Parameters
#2
Box 13
Insured’s Authorized
Signature
Bill Insurance
Set Parameters
#2
Must be left
blank if there
are no Medigap
assigned
227
Section D
MEDICARE HCFA 1500 INSURANCE FORM
MEDICARE HCFA 1500 FORM
(Cont’d)
Item on
HCFA 1500
Option/Screen in POC
Box 14
First Symptom
Add Charges
21 Question Section
#1
Box 15
Same/Similar
Illness
Add Charges
21 Questions Section
#10
Box 16
Dates patient unable
To Work
Add Charges
21 Questions Section
#4
Box 17
Name of Referring
Physician
Add Charges
21 Questions Section &
Patient Information
#5
Box 17a
ID number of
Referring Physician
Add Charges
21 Questions Section &
Patient Information
Box 18
Hospitalization
Dates
Add Charges
21 Questions Section
#8
Box 20
Outside Lab
Add Charges
21 Questions Section
#9
Box 21
Diagnosis
Add Charges
Diagnosis Section
Box 23
Prior Authorization
Add Charges
21 Questions Section
Box 24a-k
Date of Service
Place of Service
Procedure
Diagnosis code
Units
Treating Doctor Number
Add Charges
Procedure Code Section
Box 25
Federal Tax ID
Doctor Information
#10
Box 26
Patient Account
Number
Patient Information
Assigned by
software
Number
Field/
Question
Medicare
Note
Left blank. Not
required by
Medicare
#24
#5
#24
#14
228
Section D
MEDICARE HCFA 1500 INSURANCE FORM
MEDICARE HCFA 1500 FORM
(Cont’d)
Item on
HCFA 1500
Option/Screen in POC
Field/
Question
Box 27
Accept Assignment?
Patient Insurance Information
#10
Box 28
Total Charges
Calculated by software
Box 29
Amount Paid
Calculated by software
Box 30
Balance Due
Calculated by software
Box 32
Facility where
Services were
Rendered
Adding Charges
21 Questions Section
#7
Box 33
Physician’s name
And Address
Doctor Information
#1-5
PIN#
Doctor Information
#7
Medicare
Note
229
Section E
Index
230
Section E
INDEX
%&
'
$0.00 Dollar Charges .............................................. 49
00000 procedure code............................................. 49
21 Questions ........................................................... 45
ABA number ........................................................ 127
ACCOUNTS RECEIVABLE................................. 40
Alphabetical order ......................................... 43
Error Detection .............................................. 44
Open Charges ................................................ 42
Output Lists ................................................... 43
Print to File .................................................... 44
Print Options .................................................. 44
Printing the Report ........................................ 41
Report Data.................................................... 40
Slow Pay Insurance Report ........................... 42
Unapplied Credit Report................................ 41
ADD CHARGES ........................................ 15, 20, 45
21 Questions .................................................. 45
Bypassing Procedure Code Defaults ............. 49
Changing Fees ............................................. 114
Changing Modifiers ....................................... 51
Charge Reversals ........................................... 50
From - To Dates............................................. 48
ICD Codes ............................................... 45, 46
Maximum Transaction Per Entry .................. 50
Multiple Dates ............................................... 48
Multiple Modifiers......................................... 51
Multiple Procedures....................................... 47
Permanent Record ......................................... 51
Procedure Code 00000 .................................. 49
Procedure Codes ............................................ 46
Recall and Drug Question ............................. 52
Recording Charges ........................................ 51
Remarks ......................................................... 50
Separate Insurance Forms.............................. 50
U L D DX’S................................................... 51
Skip 21 Questions .......................................... 45
YB Modifier .................................................. 51
YO - Yes, Override........................................ 47
Zero Dollar Charges ...................................... 49
Aged Accounts Receivables ................................... 14
Aging Charges ...................................................... 164
Allergies ................................................................. 70
Alpha Modifiers...................................................... 52
ALPHABETIZE PATIENTS ................................. 53
Alternate Fee Schedule ........................................... 89
Amount Paid Always Zero ..................................... 59
Appending Transactions ....................................... 164
APPOINTMENT SCHEDULES ...................... 13, 54
Initialize the Schedule ................................... 54
Pop Up Window ............................................ 25
Scheduling A New Patient............................. 54
Viewing An Appointment ............................. 55
ASCII...................................................................... 74
INDEX
(
BACKING UP ....................................... 21, 168 - 169
Balance forward...................................................... 34
BATCH ADD CHARGES ..................................... 56
Maximum Patients ......................................... 56
Maximum Transactions ................................. 56
Same location of service ................................ 56
Transaction Summary .................................... 56
BILL INSURANCE .................................. 16, 57 - 66
Alpha Modifiers............................................. 58
Amount Paid Always Zero ............................ 59
Bill As A Group....................................... 59, 78
Claim Editor ............................................ 61, 62
Electronic Claims Submission ................ 63 - 66
Formats .......................................................... 57
Hold Secondary Billing ................................. 59
Location of Service........................................ 58
Print by Treating Physicians .......................... 60
Print Zero Charges ......................................... 58
Printing Options............................................. 60
Rebilling ................................................ 61 - 62
Remarks ......................................................... 61
Secondary Forms Payment Left Blank
....................................................................... 59
Set Parameters ............................................... 57
Signature Box ................................................ 58
Spooler File ................................................... 59
Updating ........................................................ 61
Billing Cycle......................................................... 102
Billing Information Sheet ..................................... 123
Billing Parameters .................................................. 57
Billing Services ........................................... 9, 67 - 69
BILLING/COLLECTIONS.................................... 67
Categories ...................................................... 69
Changing Pay/Adj Category .......................... 69
Clearing Totals .............................................. 67
Payment/Adjustment Headings ..................... 69
Printing the Report ........................................ 68
Security Code ................................................ 67
System Date vs Transaction Date .................. 67
Totals ............................................................. 68
Bypass Procedure Code Defaults ........................... 49
Capitation Payments ............................................. 109
Changing Fees ................................................ 47, 114
Changing ICD Codes .............................................. 83
Changing Modifiers ................................................ 47
Charge Reversals .................................................... 50
Check and Cash Register ...................... 107, 125, 127
Check number ....................................................... 127
Claim Editor ............................................... 25, 61, 62
Clearing Patients and Transactions ...... 188, 191, 195
CLINICAL DATA ..................................... 13, 19, 70
Allergies ........................................................ 70
Drug Codes .................................................... 70
Patient Notes .................................................. 70
Closing Out the Month ......................................... 172
CONFIGURATION .................................... 164 - 167
CONVERTING TO POC ....................................... 34
Copying A Patient .................................................. 88
231
INDEX
Section E
CPT Descriptions.................................................... 27
CREDIT, Unapplied ..................................... 110, 111
Cross Posting Payments ....................................... 106
CROSS POSTING REPORT ................................. 70
Clearing Report Totals .................................. 70
Printing Report Totals ................................... 70
Cutoff Date ..................................................... 89, 102
Find Patient by Policy/SS Number ....................... 107
FIRST REPORT OF WORK INJURY .................. 82
First Work Day of a New Month............................ 37
Fold-and-stuff statement ....................................... 102
Freeing charges for printing ................................. 107
From - To Dates...................................................... 48
Function Keys...................................... 23 - 26, 95, 99
Daily Procedures .................................................... 21
Data Entry Conventions ......................................... 26
DATA SEARCH .............................................. 16, 72
By List ........................................................... 72
Deleting a List ............................................... 72
Exclude List ................................................... 74
Generate an ASCII Mail Merge File ............. 74
Insurance Company Criteria .......................... 74
NOT Logic..................................................... 74
Open Charges ................................................ 73
Or Logic......................................................... 73
Saving or Printing Lists ................................. 76
Set Criteria ..................................................... 72
Sort List ......................................................... 74
Wildcards ....................................................... 73
Data Format ............................................................ 26
Day Sheet.............................................................. 125
Delete Insurance ..................................................... 91
Deleting a List ........................................................ 72
Deleting and Insured............................................... 90
Deposit slip ........................................................... 127
DeskJet ................................................................. 162
Diagnosis Codes ..................................................... 27
DOCTOR INFORMATION............................. 15, 77
Group Billing ................................................. 78
DON’TS ................................................................. 33
DOS prompt.......................................................... 124
DOS Shell ............................................................... 26
Drug Codes ............................................................. 70
DRUG LIST ........................................................... 79
Drug Question ........................................................ 52
Drug treatment question ....................................... 164
Duplicate Patients ................................................... 92
Duplicating A Patient ............................................. 88
Group Billing .................................................... 59, 78
Edit Claims ................................................. 10, 61, 62
Electronic Claims Submission ................... 10, 63 - 66
ENCOUNTER FORMS ......................................... 80
Custom Design .............................................. 81
Designing the Form ....................................... 80
Multiple Forms .............................................. 80
Printing Forms ............................................... 81
ENHANCEMENTS ........................................ 10 - 16
Error Detection ....................................................... 44
Error Messages ..................................................... 174
)
*
HFCA Insurance Form ................................ 226 - 229
Head of account .............................................. 88, 101
Hold Secondary Billing .......................................... 23
HOUSE-CLEANING ........................................... 170
An Easier Method ........................................ 171
Clearing Patients and Transactions ............. 171
Errors ........................................................... 171
Last Step ...................................................... 171
Preparation ................................................... 170
Time required .............................................. 170
ICD CODES ............................. 13, 27, 45, 46, 83, 84
ICD Descriptions .............................................. 27, 83
Index numbers ........................................................ 27
Initialization Program .................................................
INSTALLATION ................................................. 8, 9
PRE-INSTALLATION ................................. 7
LANTASTIC® ..................................................
NOVELL ...........................................................
WINDOW 95/98 & NT® ..................................
Insurance Company Code....................................... 84
INSURANCE COMPANY LIST ........................... 84
INSURANCE FORM GENERATOR ........................
Insurance Forms, Separate Print Option ................. 50
Insurance Mailing Labels ....................................... 85
Insured’s Name ....................................................... 90
INTRODUCTION ........................................... 19 - 21
+
Keystrokes .............................................................. 22
,
Lab charges ........................................................... 112
Laser ..................................................................... 162
Ledger notes ................................................... 98, 102
Ledger Notes, Printing.......................................... 102
LICENSE AGREEMENT .................................... 5, 6
Line item ............................................................... 105
Lost transaction .................................................... 173
Family Accounts ............................................. 88, 100
Finance Charges ................................................... 103
232
Section E
Mail Merge ............................................................. 74
MAILING LABELS ......................................... 14, 85
Mailing Labels, Insurance ...................................... 85
MAKING REPORTS BALANCE ....................... 172
Manual .................................................................... 22
Maximum Transactions Per Entry .......................... 50
Medical Record Number ........................................ 88
Medicare ....................................... 50, 57, 89, 90, 112
Medicare HFCA Insurance Form ................ 226 - 229
Medigap Crossovers ............................................... 84
Medigap ID............................................................. 84
Message timing ..................................................... 164
Mini Selection List ................................................. 30
Modifiers, Multiple................................................. 51
Monthly Procedures................................................ 21
Multi-terminal........................................ 32, 165 - 167
Multi-User/Multi-Tasking ...................................... 32
Multiple Dates ........................................................ 48
Multiple Groups........................................................ 9
Multiple Modifiers.................................................. 51
Multiple outstanding balances ................................ 34
Multiple Procedures................................................ 47
Net Change to the Accounts Receivable
..................................................................... 127
New Fiscal Year ..................................................... 38
New Patient List ..................................................... 92
NEW PATIENTS ...................................... 12, 86 - 91
Alternate Fee Schedule .................................. 89
Delete Insurance ............................................ 91
Deleting an insured ........................................ 90
Duplicate Patients .................................... 88, 92
Entering Information ..................................... 86
Family Accounts ............................................ 88
Insurance Company Code........................ 87, 92
Insured’s Name .............................................. 90
Medical Record Number ............................... 88
New Patient List ............................................ 92
Patient Number .............................................. 92
PATIENT STATEMENTS ........................... 87
Responsible Party .......................................... 91
S for Same or Self.......................................... 91
Telephone Numbers....................................... 87
Worker’s Compensation ................................ 92
YP Option ...................................................... 89
NO PURCHASED TESTS ..................................... 51
No Statement .......................................................... 89
NOT Logic.............................................................. 74
Oldest subscriber .................................................... 90
One Time Only diagnosis ....................................... 27
One-Time-Only ...................................................... 27
One-Time-Only procedure codes ........................... 27
Open Charges ......................................................... 42
Open Item ..................................................... 105, 123
INDEX
OR Logic ................................................................ 73
OTO ....................................................................... 27
Parallel Procedure Codes ........................................ 31
Partial statements .................................................. 102
Past-Due Reminders ............................................. 119
PATIENT INFORMATION .......... 12, 29, 30, 93, 94
Insurance Screen Bypass ............................... 94
Jump Back to Patient Screen ......................... 94
PATIENT LEDGERS .............. 11, 26, 30, 96, 98, 99
Columns ......................................................... 98
Disable Pagination ......................................... 97
Enhanced Patient Ledger ......................... 26, 99
Ledger Notes ................................................. 98
Patient Ledger Bypass ................................... 96
Print By List .................................................. 96
Range of Dates .............................................. 97
Patient Name .......................................................... 29
Patient Notes ........................................................... 70
Patient Number ....................................................... 29
Patient recall question.................................................
Patient Search ................................................... 24, 95
PATIENT STATEMENTS ............ 13, 14, 100 - 104
Addressee .................................................... 101
Alphabetical Order ...................................... 100
Billing Cycle................................................ 102
Changing Statement Forms ......................... 104
Cutoff Date .................................................. 102
Dunning Messages....................................... 101
Family Accounts .......................................... 100
Finance Charges .......................................... 103
Minimum balance ........................................ 102
No detail ...................................................... 101
Partial Statement Criteria ............................ 102
Print Statement Line in Ledger.................... 102
Printing Statements ...................................... 100
Special Messages ......................................... 103
Statement Parameters .................................. 101
Statement type ............................................. 102
Updating ...................................................... 101
Zip Code Order ............................................ 100
Payment/Adjustment Headings, Changing..... 69, 109
Pending payment .......................................... 102, 105
PIN...........................................................................59
Plain paper statement .............................................102
POC Error Messages .............................................174
POCDOC .................................................... 176 - 178
Pop Up Appointment Scheduler ..............................25
Pop Up Ledgers .................................................25, 26
Pop Up List Windows .......................................24, 25
POST PAYMENTS ........................ 20, 90, 105 - 111
Check and Cash Register ..............................107
Cross Posting Payments ...............................106
Dates of Service............................................105
Delete Payment .............................................106
Find Patient by Policy/SS Number ...............107
Manual Annotation .......................................105
Open Item .....................................................105
Payment and Adjustment Types ...................105
Payment Entry Bypass ..................................108
233
INDEX
Section E
Payment Option Bypass ...............................106
Payment Reversal .........................................105
Payment/Adjustment Headings ....................105
Refunds .........................................................106
Regular .........................................................105
Remarks ........................................................108
To Be Disbursed ...........................................107
Unapplied Credit ................................ 110 - 111
YNS Option ..................................................105
Power User Bypass Command .......22, 39, 45, 47, 48,
49, 94, 96, 106, 108
Pre-Installation ..........................................................7
Primary policy .........................................................90
Print Zero Charges ...................................................58
Printer driver..........................................................162
Printer Set Up ........................................................122
Printing Forms ...................................................31, 50
Procedure Code 00000 ............................................49
Procedure Code Mask: ............................................59
PROCEDURE CODES .........13, 27, 46, 49, 112, 113
Bypass Procedure Code Defaults ...................49
Changing A Code .........................................113
Changing Prices ............................................114
Description ...................................................112
Four Digit Codes ..........................................112
Parallel Codes ...............................................113
S for Same or Self.........................................112
Type of Service.............................................112
Zero Dollar Charges .....................................112
PREFACE..............................................................130
PRINTERS ..............................................................14
PRODUCTION REPORT ........................... 115 - 117
Before House-Cleaning ................................117
Codes Reported ............................................117
System Data vs Transaction Date .................117
Using Wildcards ...........................................117
Program Version Information..................................23
Provider ID ..............................................................59
Provider Number ...................................................118
PROVIDERS .........................................................118
Rebilling ............................................................61, 68
RECALL NOTICES ..............................................119
Editing a Message.........................................119
Past-Due Reminders .....................................119
Printing Recalls ............................................119
Recall Question .......................................................52
Recent Enhancements ..............................................10
REFERRING PHYSICIAN REPORT ..................120
Refunds ..................................................................106
REM and REM% .....................................................50
Remarks ...................................................................50
Remarks on the HCFA-1500 ...................................50
Responsible Party ....................................................91
RETIRED LEDGERS ...........................................121
Reverse a Charge .....................................................50
RP ... ........................................................................91
S for Same or Self....................................................91
Screen colors .........................................................162
Search Patient by Policy/SS Number ....................107
Secondary Forms Payment Left Blank:...................59
Secondary Insurance..............................................107
Security Code ..........................................................67
Security POC ...........................................................10
SELF on insurance forms ........................................91
Separate Insurance Forms........................................50
Set Parameters .........................................................57
SETFILE................................................................173
Shortcuts ..................................................................22
Set Up Printer ........................................................122
Six-part Speedi-mailer ...........................................102
Skip alignment form ................................................31
Slow Performance ...................................................42
Sort List ...................................................................74
Standard Insurance Form............................ 222 - 225
START OF DAY.....................................................67
Setfile............................................................173
STARTING POC.....................................................36
First Work Day of a New Month....................37
New Fiscal Year .............................................38
Terminal Number ...........................................37
Yesterday’s Transactions................................37
Statement type .......................................................102
Statements................................................................89
Statements, third party .............................................91
Stop Printing ............................................................32
Super Bill ...................................................14, 20, 123
Billing Information Sheet .............................123
SUPPORT POLICY ....................................... 17 - 28
SYSTEM COMMAND .........................................124
SYSTEM CONFIGURATION .............................164
SYSTEM CONVENTIONS ....................................22
CPT and ICD Descriptions .............................27
Date Format ....................................................26
Help ................................................................23
Index Numbers ...............................................27
Keystroke Examples .......................................22
Mini Selection List .........................................30
Multi-Terminal ...............................................32
One-Time-Only ..............................................27
Parallel Procedure Codes ................................31
Patient Name ..................................................29
Patient Number ...............................................29
Pop Up Ledgers ........................................25, 26
Pop Up List Windows ....................................24
Printing Forms ................................................31
Program Version Information.........................23
Stop Printing ...................................................32
System Date ....................................................26
Tutorial Mode .....................................................
Using This Manual ...................................22, 28
System date ..............................................................26
System Date vs Transaction Date ............26, 105, 117
SYSTEM REQUIREMENTS .................... 162 - 163
TBD ......................................................................107
Telephone Numbers.................................................88
Terminal Number ....................................................36
Terminal Number Is In Use ...................................173
234
Section E
INDEX
Third party statements .............................................91
Timing factor .........................................................164
To Be Disbursed ....................................................107
Transaction Date....................................................117
TRANSACTION REPORT........................ 125 - 127
Check and Cash Register ..............................127
Clearing the Report.......................................127
Cross Posting Report ………………………126
Net Change Accounts Receivable ………...127
Printing the Report ...................................... 125
Report Totals ............................................... 126
Storing the Reports ...................................... 125
System Date vs Transaction Date ................ 127
Transaction by Primary Physician ............... 126
Trial Transaction Report.............................. 125
Transactions, Maximum Per Entry ......................... 50
TROUBLESHOOTING ....................................... 173
Tutorial Mode ......................................................... 28
Two Policyholders .................................................. 89
Type of Service..................................................... 112
U L D DX’S............................................................ 51
Unapplied Credit .................................... 41, 110, 111
Updating Insurance................................................. 61
Updating Statements ............................................. 101
UPIN ............................................................... 59, 118
Utilities, POCDOC ............................................... 176
VXINIT.EXE........................................................ 164
Weekly Procedures ................................................. 21
Wildcards ........................................................ 73, 117
Windows, Microsoft ...................................................
Windows 95/98 & NT Installation .............................
Worker’s Compensation ......................................... 92
YB modifier ............................................................ 51
YB, Yes Bypass ...................................................... 49
YBL ........................................................................ 51
Yes Bill Later ......................................................... 51
Yes Bypass ............................................................. 49
Yes, No Statements ................................................ 89
Yesterday’s Transactions........................................ 37
YNIF ................................................................. 51, 58
YNS ........................................................ 89, 102, 107
YO - Yes Override.................................................. 47
YP ........................................................... 89, 102, 107
YP Patient ......................................................... 49, 51
.
Zero balance accounts ................................................
Zero Dollar Charges ............................................... 49
Zero payment ........................................................ 105
ZIP CODES .......................................................... 128
235