1
BATTERY REPLACEMENT INSTRUCTIONS:
TIMER INSTRUCTIONS:
Base Unit (Transmitte4
Count Down Timer:
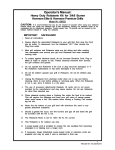
1. Locate battery compartment on bottom side of
Base Unit.
2, Carefully, remove battery cover.
3. Carefully, load 2 AAA batteries (not included).
4. Replace battery cover
1. Press M0DE to select timer mode. The upper display
will show a small TIMER and 0:00.
2. Press HR and lvllN button to set the timer.
Press START/SToP button to slart countdown timer.
will blink for every second.
3. To stop countdown timer, press START/STOP
button again. The "v'becomes solid.
4. Press CLEAR button to clear the setting back
to 0:00.
BASE UNIT BOTTOM
n
'f"1"#
o
lr-------rl
lllt
r[J]
'v"
TROUBLE SHOOTING:
Problem: Cannot Make Meat Selection
soluiionl rr,ti1, Ld iijlime, rr,rbie. Criell to mar<e sure
that the Handheld Unit is in Thermometer
l\4ode by pressing MODE button.
Problem:
Solution
No Data Link between Handheld Unit and
Base Until.
1: Check to make sure that both units are
tumed ON while in close proximity to one
another
Solution
2:
Check Batteries for replacement.
Count Up Timer:
Problem: Flashlightwillnotwork.
1. Press MODE to select timer mode. The upper display
will show a smallTlMER and 0r00.
2. Press START/SToP button to start count up.
The "4" will blink for every second.
3. To stop count timer, press START/STOP button
again. The 'A" becomes solid.
4. Press CLEAR button to clear the setting back
to 0:00.
Solution
1: Make sure receiver switch is
Solution
2:
LED Flashlight lnstructions:
'1. Press and hold silver button on side of Handheld
Unit for flashlight illumination while receiver switch
is in the ON position,
2. Release silver button to turn ofl.
HELPFUL HINTS:
1. For best results, make sure probe tip is inserted into
the meat at least 1 inch.
2. Do not allow the probe or probe wire to come in
direct contact with flames. lf cooking with grill cover
closed, only use medium and low heat.
3. Make sure that probe tip is inserted into the center
of meat (NOT poking through meat).
in the ON
position and press flashlight button on the
side ofthe Handheld Llnit.
Check Batteries for replacement.
CLEANING INSTRUCTIONS:
1. Hand was probe gently with soap and water
2. D0 NOT immerse probe in water while cleaning.
3. Dry immediately.
4. DO N0T WASH Handheld Unit or Base Unit.
5. NOT DISHWASHER SAFE.
CAUTION:
1. Caution lveat Probe and Wire are very hot while
tn use.
2. Always use a healresistant glove when handling
meat probe or probe wire while in use. DO NOT
touch with bare hands.
3. DO NoT expose Handheld/Base Unit to direct heal
or hot surfaces.
4. NOT FOR USE IN MICROWAVE OVENS.
5. D0 NOT expose Base UniUProbe plug connector
to water.
6. DO NOT use Handheld/Base Unit in the rain.
7. Base Unit registers temperatures as low as 14'F and
as high as 482'F. A482'F is exceeded probe wire
may deteriorate.
8. This product is intended for use as a meat
themometer. NOT INTENDED FoR USEAS AN
EXTERNAL OVEN THERMOI\,lIETER,
9. Keep Stainless Steel ProbeMire away from
Children.
Remote Wireless
BB0 Thermometer
I
L
cwm-csss
1
,
Locale lhe baliery compa(meits
and load 2
]
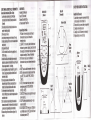
COMPONENTS:
Handheld Unit (Receiver)
Base unit (Transmitter)
Stainless Steel Meat Probe
and Head-resistant Probe Wire
USER'S MANUAL REMOTE GRILL THERMOMETER:
General Use lnstructions (Grill 0r Oven):
AM baiteies
(notincluded) inlo boh Handheld unil (Receiver) and Base Unit
[Iransmitler).
Base Unit
(Transmitter)
Place Hanoheld unitin Base Unitcradle (unih shoud be in close
prcximity for e$ablishing dala link),
Receiver Button Profiles:
Place meaton gdll orin oven.
1. HR Button: ln timer mode, press to set hour, in
lnsen stainless-sleel meat pmbe inlo
he lhickesl
part 0flhe meat.
Carefully, replacejclose grill lid or oven d00r on heat resistant b{aided
steel pmbe wire.
6. Pluo
7. Tufi
Drcbewire inlo Base Unit.
bN the Handheld Unitand Base Unilby localing bolh small
"0N/0FF'
8.
s'ditches.
Handheld Unil and Bas€ Unit vJill establish data link automatically.
Registalion is complete,,rtren he Handheld Unil beeps and lhe prcbe
lemperaturc appeaE where lhe
9.
1-'
tvas
fl
a$ing.
once link iseshblished, enleriype 0fmeal{Beef, Veal, Lamb, Pod(,
Chicken, Turtey) by pressing meal bl]tton 0n Handheld Unit unlil
desired meat is selected.
10,0nce meal type is selected, set desired lasle level (Rare,
Itledium-Rare, Medium, Well-Done) by pressing tasle bl]lton on
Handheld Unlil untl desired lasle/doneness level is selecled.
1LTo sel lhe desircd intemal meat temperature
Press HR
ff
manually.
ltllN button lo mise or lol,/er lhe lempemlure value after
meat seleclion is made,
12.Gdll or Cook unlil
alam
sounds
indiatng lhal lhe
desired tastei
doneness level is reached. For tre besl esdb sel munl down/muni
up timerand cieck meal peiodically 6ee limer inslrudions).
13,Remove mealfrom gdll oloven andallowl0 md (appmx.5 min.)
and s€nie.
I
thermometer mode, press to increase the
temperature value.
CLEARi F"iC": ln timer mode. when the timer count
down/count up process is stopped, press to clear the
timer reading. ln thermometer mode, press to solect
temperature readings in Celsius or Fahrenheit.
3. l\4lN: ln timer mode; press to set minutes. ln
thermometer mode, press to decrease temporature
value.
4, MODE: Press to select thermometer or timer mode.
5. IVIEAT: ln thermometer mode press to solect meat
type (BEEE VEAL, LAMB, PORK, CHICKEN,
TURKEY),
6. TASTE: lh thermometer mode press to solect
taste-doneness level (W DONE, MEDIUM,
M. RARE or RARE).
7. START/STOP: Press to start or stop tho timer count
down or count up.
8. ON/oFF: Switch on backside above cllp - turns
receiver on and ofi,
9. SILVER SIDE BUTToN: Press to tum LEo light on
and offwhile receiver is 0N (LED light will not work
while receiver power is 0FF).
BEEF
.ffi'160,,,r,
arrrrnv ReruceMENT
TNSTRUCTIoNS:
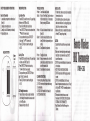
] Handheld Unit (Receive4:
I 1. Locate battery compartment undemeath belt clip
on the backside of the Handheld Unit.
2. Remove belt clip to access battery compartment
I 3. Carefullv. remove batterv covet
' 4. Carefulli, load 2 AAA baiteries {not included).
5. Replace battery cover and belt clip.
l,-.{[k
2
' Battery
Cover
fr -ll
tll \l
o
tf
-o
Belt Cllp
L_t