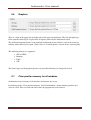
1
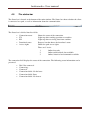
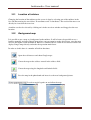
The universal
SCADA client
User manual
Andromeda – User manual
1. Table of contents
1.
Table of contents........................................................................................................................... 2
2.
Introduction................................................................................................................................... 4
3.
Installation .................................................................................................................................... 5
3.1.
3.2.
3.3.
4.
Main window ................................................................................................................................ 8
4.1.
4.1.1.
4.1.2.
4.1.3.
4.1.4.
4.1.5.
4.1.6.
4.2.
4.3.
5.
Andromeda installation ...................................................................................................... 5
HASP dongle driver installation ........................................................................................ 6
Update Andromeda / Get latest version ............................................................................. 7
Menu bar ............................................................................................................................ 9
Demo mode ...................................................................................................................... 10
Overview.......................................................................................................................... 10
Show overview summary ................................................................................................ 10
Show dial history ............................................................................................................. 11
Allow font outline ............................................................................................................ 11
Block background behind data ........................................................................................ 11
Quick tool bar .................................................................................................................. 12
The status bar ................................................................................................................... 13
Phonebook .................................................................................................................................. 14
5.1.
5.2.
5.3.
5.4.
Phonebook management .................................................................................................. 15
Phonebook and filter functions ........................................................................................ 16
Expand ............................................................................................................................. 18
Phonebook ....................................................................................................................... 18
6.
Offline - Overview window ........................................................................................................ 24
7.
Online data .................................................................................................................................. 25
7.1.
7.2.
7.3.
Park navigator .................................................................................................................. 26
Expand ............................................................................................................................. 27
Online data ....................................................................................................................... 28
8.
Connect to parks / Disconnect from parks .................................................................................. 29
9.
Configuration .............................................................................................................................. 30
9.1.
9.2.
9.3.
9.4.
9.5.
9.6.
PS-Data
Communication................................................................................................................ 31
Dial configuration ............................................................................................................ 32
Window update rate ......................................................................................................... 33
Language.......................................................................................................................... 33
Directory .......................................................................................................................... 33
Graphics ........................................................................................................................... 34
October 31st. 2013
Side 2
Andromeda – User manual
9.7.
Clear position memory for all windows .......................................................................... 34
10. About .......................................................................................................................................... 35
11. Access control / Dongle info ...................................................................................................... 36
12. Auto dialer .................................................................................................................................. 37
13. Import and export the phonebook ............................................................................................... 40
13.1.
13.2.
Export parks in the phonebook ........................................................................................ 40
Import parks into the phonebook ..................................................................................... 41
14. Design editor for main window .................................................................................................. 43
14.1.
14.2.
Location of turbines ......................................................................................................... 44
Background map .............................................................................................................. 44
15. Table functions ........................................................................................................................... 46
15.1.
15.2.
15.3.
Sorting.............................................................................................................................. 46
Direct filtering in a table .................................................................................................. 47
Navigation........................................................................................................................ 48
16. Configuration examples .............................................................................................................. 49
16.1.
16.2.
16.3.
16.4.
16.5.
PS-Data
NEG Micon NM52-900 park with four turbines ............................................................. 49
Micon M1100 (WP2000 controller) park with 3 turbines ............................................... 50
Micon M1500 (WP3000 controller) park with 2 turbines ............................................... 51
Bonus WTC 1 with 6 turbines ......................................................................................... 52
Bonus WTC 2 with 1 turbine ........................................................................................... 53
October 31st. 2013
Side 3
Andromeda – User manual
2. Introduction
Andromeda is your universal SCADA client.
Andromeda gives you access to monitor turbines of a wide range of different manufactures and
types.
Andromeda runs on all standard Windows platforms: XP, Vista, Windows 7 and Window 8 (Both
32 bit and 64 bit). However it does not work on Windows 8 RT.
This document describes the features in Andromeda.
The document is divided into 3 groups: An installation section, The main section that describes the
program's functionality, and finally a section that shows examples on how the parks can be
configured.
PS-Data
October 31st. 2013
Side 4
Andromeda – User manual
3. Installation
Andromeda is installed by running the two files located on the installation CD, or downloaded from
the internet.
Andromeda.exe
HASPUserSetup.exe
Andromeda.exe file is the installation kit for Andromeda. HASPUserSetup.exe is the installation kit
for the dongle driver.
The Andromeda will only run if the delivered HASP USB dongle is inserted into the computer. The
dongle stores the license informations which has been sold with the system. Before the dongle is
recognized by Windows is it necessary to install the HASP driver.
3.1.
Andromeda installation
Andromeda software is installed by running Andromeda exe file. Doing so starts the installation
procedure. Under normal circumstances, it is just necessary to accept all choices since the program
will be installed in its default configuration which normally fits all standard users. But if it is
necessary, the location of the program may be changed on request.
PS-Data
October 31st. 2013
Side 5
Andromeda – User manual
3.2.
HASP dongle driver installation
To enable Andromeda to start and gain access to the functionality bought with the system, is it
necessary to insert the dongle delivered with the installation CD.
The dongle contains the license codes and user information’s.
Before the dongle is recognized by Windows is it necessary to install the dongle HASP driver.
The dongle is a HASP USB device which may be inserted in any free USB port.
Before the dongle is inserted the first time must the driver be installed. Run the
“HASPUserSetup.exe” and follow the instructions given during the installation. When the
installation is completed can the dongle be inserted. Hereafter will Windows recognize the new unit
as a “SafeNet Inc. HASP key” and the light in the dongle will be illuminated.
If the dongle is not inserted or the driver is not installed the following error message will be
displayed when Andromeda is being started:
Please insert the dongle or correct the dongle driver and try again.
PS-Data
October 31st. 2013
Side 6
Andromeda – User manual
3.3.
Update Andromeda / Get latest version
Andromeda can always be updated by downloading the latest version from the internet.
The update file can be downloaded directly using an internet browser and the following link:
http://update.ps-data.com/andromeda.zip
It can also be updated from inside the Andromeda program, by pressing the update button in the
“Access control / Dongle view” window.
If the update button is used will Andromeda (If the computer is online) automatically check if there
is any new dongle codes available for download and check if there is a newer version of the
program available. If there is a newer version available will the user be presented with an option to
download the update. The update file is a zip file (A compressed file) that needs to be unpacked
before it can be installed. The Zip file includes the latest installation kit which is called
Andromeda.exe.
When downloading the file can the user either download it by saving it to a directory or simply ask
it to be opened directly in explorer.
If the update file has been saved can the compressed file be opened by double clicking on it. It is
either opened directly in explorer or by a compressing program like WinZip depending on how the
computer is configured.
When the compressed update file is opened can the user extract the installation kit to a directory or
the desktop for storage or simply directly start the installation kit by double clicking on the
Andromeda.exe file. Please see chapter 3.1 for installation details.
BE AWARE that installing a new version of Andromeda DOES NOT destroy the installed
phonebook under normal circumstances. But it is always recommended to make a backup of the
phonebook in case of computer problems.
PS-Data
October 31st. 2013
Side 7
Andromeda – User manual
4. Main window
The client is started by clicking the Andromeda icon on the desktop or via the start menu.
The following window is displayed when Andromeda starts:
The window is divided into five groups:
The menu bar in the top
The Quick Tool bar in the top
The Phonebook / Park navigator to the left
The Overview / Online data windows to the right
The Status line in the bottom
The left side of the screen serves two purposes. In offline mode is the “Phonebook” displayed and
in online mode is the turbines in the park displayed together with the features for each turbine.
PS-Data
October 31st. 2013
Side 8
Andromeda – User manual
The right side of the screen serves also two purposes. In offline mode is the program logo displayed
together with quick select function that allows the user to quickly select one of the last 10 dialed
parks. In online mode is the right side of the screen a dynamic window that displays the data
selected in the “Park the Navigator” tree. If there is no specific data selected is an overview
presented of the park with each turbines status, wind speed and production displayed.
4.1.
Menu bar
The menu is structured as follows:
•
•
•
•
Files
Connect / Disconnect
Demo mode
Export phonebook
Import phonebook
Auto dialer
Print
Printer configuration
Exit
Overview
o Mode 1: Highest details
o Mode 2:
o Mode 3:
o Mode 4:
o Mode 5:
o Mode 6: Lowest details
Show overview summary
Show dial history
Allow font outline
Block background behind data
View
Configuration
Help
Configuration settings
Design editor for main window
Communication monitor
Access control
Open manual
About
(Only available for super users)
(Only available for super users)
(Opens this user manual)
Subsequent chapters will explain menu items individually.
PS-Data
October 31st. 2013
Side 9
Andromeda – User manual
4.1.1. Demo mode
The demo mode is used to enable or disable the communication engine. If the demo flag is checked
will Andromeda be able to connect to any parks without actually establishing a connection. This
will allow the user to work through the different windows in the selected park as if the program
actually was connected. Please be aware that there is no data available in demo mode.
The Demo mode flag can only be changed when it is not connected to a park. (In idle mode)
4.1.2. Overview
The overview mode is used to select different detail levels on the park overview picture when
connected to a park. Mode 1 is the highest resolution where data is displayed in both graphical and
numeric form. Mode 6 is the lowest resolution where each turbine is displayed by a colored marker
displaying the state of the turbine.
Mode 1
Mode 2
Mode 3
Mode 4
Mode 5
Mode 6
4.1.3. Show overview summary
The “Show overview summary flag activates or disables a summary function in the main park
overview picture where the average wind speed and total production is displayed in the bottom of
the screen.
PS-Data
October 31st. 2013
Side 10
Andromeda – User manual
4.1.4. Show dial history
The “Show dial history” flag controls if the last 10 parks that has been connected to is displayed on
the main desktop when the system is disconnected. If the dial history is activated can the parks be
redialed by clicking on one of he displayed parks. The list will display the last 10 different parks in
the order they were dialed with the latest park listed on the top.
4.1.5. Allow font outline
The “Allow font outline” flag controls if the data presented in the overview picture is displayed
with an outline. The outline feature gives better readability on colored backgrounds.
No outline
With outline
4.1.6. Block background behind data
The “Block background behind data” flag controls if the data presented in the overview picture is
displayed with the background grayed out.
No blocking
PS-Data
With blocking
October 31st. 2013
Side 11
Andromeda – User manual
4.2.
Quick tool bar
The quick tool bar appears at the top of the main window and provides quick access to a number of
primary functions:
Close the Andromeda client.
This icon indicates that the client is not connected at the moment.
When pressing the button the client will connect to the selected park.
This icon indicates that the client is currently online.
When pressing the button the client will disconnect from the park.
Print a screen dump of the selected window directly on the printer.
Print the table or graphics in the selected window on the printer.
Copy data to the clipboard. Data may be exported directly to e.g. Excel,
Word or similar programs. It only works if data is listed in a table.
Save a table / data to file. The following formats are available:
o
o
o
o
o
ASCII
Excel
HTML
XML
PDF
Open the program configuration window.
Open the dongle license window.
Open the about window.
Opens the ‘Auto dialer’ window. This button is only visible if the
feature is included in the license.
Some quick buttons are only available if they are valid in the selected window. For example: The
save button is not available unless data which may be saved to a file is available.
PS-Data
October 31st. 2013
Side 12
Andromeda – User manual
4.3.
The status bar
The Status bar is located at the bottom of the main window. The Status bar shows whether the client
is connected to a park, as well as information about the communication.
The Status bar is divided into five fields:
•
•
•
•
•
Connection status
TX
RX
Download status
Access rights
Shows the status of the connection
Lights up when sending questions to a turbine
Lights up when receiving data from a turbine
Progress bar that shows the download status
Shows the park access rights
There are 3 levels:
1
2
3
Online data only
Online and historical data available
Online, historical and commands available
The connection field displays the status of the connection. The following status information can be
presented:
•
•
•
•
•
•
PS-Data
Idle / Not connected
Connecting…
Connected
Connection failed: No dial tone
Connection failed: Busy
Connection failed: No answer
October 31st. 2013
Side 13
Andromeda – User manual
5. Phonebook
The phonebook is visible in the main window's left side when not connected to a park.
The phonebook is divided into 3 sections:
Phonebook management
Phonebook list and filter functions
Function buttons.
In the phone book's upper window are all parks (or parks that match the filter) displayed.
A park can be dialed by double clicking on a park name or a turbine in the park.
PS-Data
October 31st. 2013
Side 14
Andromeda – User manual
5.1.
Phonebook management
The phonebook can be divided into several sub phonebooks.
A phonebook can be selected directly in the dropdown list box in the top of the phonebook.
The
is used to manage the phonebooks. When pressed the phonebook management window
appears:
Here phonebooks can be
added,
erased,
buttons in the lower part of the screen,
PS-Data
renamed or
October 31st. 2013
copied by clicking on the
Side 15
Andromeda – User manual
5.2.
Phonebook and filter functions
The phonebook always list the parks in the phonebook and the title bar shows the name of the
selected phonebook and the number of parks displayed. The number of parks visible in the list
depends on the filters.
In order to make it easy to find a park in the phonebook is a filter system implemented. This enables
searching on one or more fields in the phonebook simultaneously.
The filter function is controlled by two functions: A “filter on” selector and a “filter” field.
The “filter on” selector controls which items are displayed on each park and turbines in the
phonebook. This also controls which values in the phonebook the “Filter” field will used when
deciding which parks will be displayed.
PS-Data
October 31st. 2013
Side 16
Andromeda – User manual
By clicking the filter drop down list, a list of parameters which may be used for searching appears.
By selecting one or more parameters, the Phonebook list will be populated with the selected data.
Searching in the phone book is done via the filter input field:
Here the desired search criteria may be entered. While writing, the phone book will be updated
continuously. The search will display all parks which match the search criteria in one or more of the
selected search parameters. E.g. if Peter is entered the park ‘Jens Peter Hansen’ will also be listed
because ‘Peter’ is a subset of the park name.
PS-Data
October 31st. 2013
Side 17
Andromeda – User manual
5.3.
Expand
It is possible to control the way the phonebook list is expanded.
•
•
•
By clicking the plus icon all parks in the phone book will be expanded.
By clicking the minus icon all parks in the phone book will be collapsed.
If the "Auto" field is checked, the selected park will automatically be expanded and all
others will be collapsed.
5.4.
Phonebook
Maintenance of the phonebook is done by means of the following functions which are located at the
bottom of the phone book window.
Add a new park
Remove the selected park
Modify the selected park
PS-Data
October 31st. 2013
Side 18
Andromeda – User manual
By clicking ’Create’ or ’Modify’ the park editor will be opened.
Here the selected park data may be modified or entered.
Park info
Park name
Here the park name is entered.
Connection type
Here the connection type is selected.
The possibilities are:
-
Modem connection
IP connection
IP over modem connection (RAS)
IP using Cisco VPN client
The Cisco VPN connection requires that the Cisco VPN client is
installed in the computer. When connecting to a park using ‘IP using
Cisco VPN client’ is it necessary to tell Andromeda where the Cisco
client is located on the hard disk. It is typical located in the program file
directory under Cisco client.
PS-Data
October 31st. 2013
Side 19
Andromeda – User manual
Park no.
Here the park phone no. is entered.
When connecting via ‘IP over modem connection (RAS)’ or ‘IP using
Cisco VPN client’ does the Park no. have an additional task. It also holds
the account information’s for the RAS and VNP connection.
RAS:
To generate a RAS connection is 4 parameters needed:
•
•
•
•
Phone number
User account
User password
Domain
The park no. field is formatted as follows:
PHONENO:USERNAME:USERPASSWORD:DOMAIN
Each item is separated with a :.
An example: 004512345678:Peter:PS-Data:*
Phone number:
User name:
User password:
Domain
004512345678
Peter
PS-Data
*
VPN:
To generate a Cisco VPN connection is 3 parameters needed:
•
•
•
Cisco profile name
User account
User password
The park no. field is formatted as follows:
PROFILE:USERNAME:USERPASSWORD
Each item is separated with a :.
An example Test park:Peter:PS-Data:*
Cisco profile:
User name:
User password:
PS-Data
October 31st. 2013
Test park
Peter
PS-Data
Side 20
Andromeda – User manual
Modem device
Here the modem is selected.
This will overwrite the general modem selection. If this field is left
empty the general selection will be used.
If both the general selection and this field is left empty or the selected
modem is not found on the computer, will Andromeda display the
available modems and ask the user to select one before the dialup.
Modem adv. init.
This field is used to send special modem initialization strings to the
modem when connecting to this park. This only works if a modem
device is specified for the park.
Modem speed
Here the selected modem configuration is shown.
Speed, data bit, parity and stop bit.
The configuration may be changed by pressing the ”Adv. Com” button.
Owner
Here the park owners name is entered.
Country
Here the country, in which the park is located, is entered.
Background pic
If a custom background picture is needed the path and filename may
be entered here.
Coordinates
Here the GPS coordinates can be entered.
Adv. com
In the advanced communication window the modem setting can be changed.
Here the communication speed, data bits, parity and stop bits may be configured to match the park.
This field has not effect during IP connections.
PS-Data
October 31st. 2013
Side 21
Andromeda – User manual
Login
When connecting to some parks, it is necessary to use a login password for access. This field is used
to enter that password.
•
•
No login
Use fixed login
•
Use user login
– This park does not use a login
– This park uses a fixed login which is entered in the login text field.
It is automatically transmitted during connection.
– This park uses an individual user login which is entered manual
when connecting to the park.
Unit list
In the unit list the turbines in the selected park are configured.
In order to edit the turbines in the list, are there 4 buttons to add, delete, copy or align a turbines. In
addition, are there a number of navigation keys in the table. See the chapter on table navigating,
sorting, and filtering.
Add a new turbine to the list. (The plus in the navigator bar has the same function)
Remove the selected turbine from the list. (The minus in the navigator bar has the
same function)
Copy the selected turbine. It automatically adds one to the name and com. Id. The X
and Y coordinates will also be raised automatically.
Auto align turbine to best fit on the screen. It overwrites the existing coordinates.
PS-Data
October 31st. 2013
Side 22
Andromeda – User manual
In order to communicate with a turbine, the following parameters must be entered:
Name
The name of the turbine.
This is only used for visual identification on the screen.
Com. Id.
The communication id number.
This number MUST correspond with the communication id in the
turbine. It is also sometimes referred to as the node no. in the turbine.
Loop
The loop number indicating which turbines are on the same loop.
When using modem configuration this is always 1.
When using IP connections is this field used to specify the socket port
number.
For Vestas AP turbines this is typically 8008.
Unit Type
The ’Unit type’ is used to identify the turbine type.
This field can only be selected from the dropdown list.
It is highly important that this field is selected correctly since it is linked
to the communication protocol and the features in the turbine. Failure to
assign the right unit type will typically result in failed communication to
the turbine, wrong presentation of data or wrong alarm codes.
Size
Indicates the size of the turbine in kW.
This field is used for scaling meters and bars when presenting data.
Failure to enter the correct size can result is strange scaling.
Serial no.
The turbines serial number.
This field is only used for filtering purposes in the phonebook.
X and Y
X and Y coordinates is used for the turbine location in the overview map
Figures between 0 and 640 may be used for X, and 0 to 480 for Y.
Coordinates
The turbine GPS coordinates.
This is only information and can be left empty.
PS-Data
October 31st. 2013
Side 23
Andromeda – User manual
6. Offline - Overview window
When not connected to a park, will the overview window show the program logo, and if the show
dial history is activated will a list of the last 10 calls also be displayed. A displayed park can be
recalled by clicking on the park name. The dial history is activated in the configuration window or
by using the flag “Show dial history” in the view menu.
PS-Data
October 31st. 2013
Side 24
Andromeda – User manual
7. Online data
When first connecting to a park, a summary picture of all the turbines in the Park, as well as their
status will be displayed.
If the show summary function is activated in the view menu will two summary data be presented in
the lower part of the screen. It displays the average wind speed and the total active effect. The data
is based on the instant values from each turbine.
When selecting a function from the ‘Park Navigator’, the corresponding data will appear in the
window on the right side.
PS-Data
October 31st. 2013
Side 25
Andromeda – User manual
7.1.
Park navigator
When connected to a park the Navigator appears on the left side of the main window instead of the
phonebook.
The park Navigator shows the turbines which are available in the park, as well as the functions
available for the individual turbines. When a function is selected in the navigator is the data
presented in the right side.
The features varies depends on the turbine manufacture and type. Since turbines have individual
designs and sensor configurations are the features available custom designed to fit the specific
turbine.
There are two navigation buttons available:
Find the same function on the previous turbine in the park.
Find the same function on the next turbine in the park.
These buttons are implemented to ensure quick navigation between the turbines in the park.
PS-Data
October 31st. 2013
Side 26
Andromeda – User manual
7.2.
Expand
It is possible to control the way the park navigator list is expanded.
•
•
•
By clicking the plus icon all parks will be expanded.
By clicking the minus icon all parks will be collapsed.
If the "Auto" field is checked, the selected turbine will automatically be expanded and all
others will be collapsed.
PS-Data
October 31st. 2013
Side 27
Andromeda – User manual
7.3.
Online data
When there is selected a function in the park navigator will the data be presented in the right side.
For example: The online status window for a NM48-750 turbine.
Some windows also give the user a possibility to interact with the system:
Commands:
In some screens (Typically the online status window) is it possible to
control the turbine with a range of commands like: Stop, Start and Reset.
Selections:
When displaying graphical or tabular data is there sometimes the
possibility to change the layout or the number of displayed fields.
Links:
Links is used to directly jump to a different data display windows.
If tables are present in the window can they at any time be printed, saved or copied to clipboard
using the buttons in the quick tool bar.
PS-Data
October 31st. 2013
Side 28
Andromeda – User manual
8. Connect to parks / Disconnect from parks
Connecting and disconnecting to/from a park is done via the main windows connect/disconnect
button, by double-clicking the selected park in the phonebook or by clicking one of the listed parks
in the call history (if enabled)
The connect button can be displayed as
or
The buttons layout shows the present status of the connection and gives the option to change it.
When
•
•
is shown:
There is no connection to a park.
If the button is clicked, the system will connect to the selected park in the phonebook.
When
•
•
is shown:
There is connection to a park or a connection is in progress.
If the button is clicked the system will disconnect from the park.
PS-Data
October 31st. 2013
Side 29
Andromeda – User manual
9. Configuration
The configuration window contains the application's main configuration.
It is divided into:
•
•
•
•
•
•
PS-Data
Communication
Dial configuration
Window update rate
Language
Directory
Graphics
October 31st. 2013
Side 30
Andromeda – User manual
9.1.
Communication
In the communication group the basic communication parameters are entered.
Communication delay
This field controls the delay in milliseconds between an answer has been received and until a new
question is sent to the turbine controller.
Communication timeout
This field controls the maximum time in milliseconds the client will wait for an answer before it
gives up and continuing to the next question.
Communication retry
This field controls how many times the client will retry the same question before it gives up and
moves to the next question.
Default modem
This is the default modem used if no specific modem has been selected for a park.
It is highly important that the above settings are correct. If the timeout is set too low will it result in
a lot of missed communication packages and a very unstable communication.
The delay function can be used to slow down the update rate so that client does not overload or use
too much bandwidth.
Normally are the settings:
Communication delay
Communication timeout
Communication retry
PS-Data
0 mSec
10000 mSec
1 times
October 31st. 2013
Side 31
Andromeda – User manual
9.2.
Dial configuration
When using telephone modem calls it may be an advantage to enter the Park phone number with
country code. This makes it possible to use the same phonebook across borders.
Furthermore, it can be helpful to have the opportunity to enter a dialing prefix in the event that the
client is located behind a switchboard where it e.g. is necessary to press a code for an outside line.
In the dial configuration window the following parameters are available.
Dial prefix
The dial-up prefix is used to dial a fixed code before the Park's phone number is dialed. For
example, it may be necessary to press 0 to get an outside line through a switchboard.
Local Country code and international dial code
The local country code field is used when dialing with international dial codes in front of the local
number. For example: +45 20 60 59 50. Here the +45 indicate that the park is located in Denmark.
By typing 45 into the "Local Country code" field, will the system recognize that the park is located
in the same country as Andromeda and that the call will be a domestic call. If it is a local call within
the country's borders will +45 automatically be removed, and if it is an international call the "+"
will be removed and replaced with the "International dialing code" for the country where the call
originates from. E.g. 00 for Denmark.
The system is pre-configured with +45 as the local country code and 00 as international dialing
code.
Show dial history
By selecting this option the last 10 calls will be listed in the overview window when the client is not
connected to a park.
Clear dial history
By clicking this button the call history in the overview window will be cleared.
PS-Data
October 31st. 2013
Side 32
Andromeda – User manual
9.3.
Window update rate
This option controls the speed of the graphical updates when the client is connected to a park.
Be aware that this is only the updating of the graphical display and not the actual communication
speed. The communication speed is depending on the modem, the turbines configuration, and the
settings in the communication window.
9.4.
Language
Here is the program language selected. The possible languages are listed in the dropdown list.
When changing the language is it necessary to restart Andromeda before the change takes effect.
9.5.
Directory
This is the path to where the phonebook is located on your computer and where all definitions of
parks and turbines are located. These two paths are automatically configured by the application at
first startup, and should usually not be changed.
The phonebook may be moved as needed. One reason for moving the phonebook could be due to
backup and sharing. Andromeda allows for operating on a network shared phonebook so that
multiple users can use a global phonebook. In this case will Andromeda automatically scan and
update the phonebook when it has been changed.
A complete copy of the phonebook is made by backing up the contents of the phonebook directory.
This copy can at any time be copied back into the directory to restore the phonebook, but be aware
that it can ONLY be restored when Andromeda is closed.
PS-Data
October 31st. 2013
Side 33
Andromeda – User manual
9.6.
Graphics
There is a logo in the upper left and right side of all reports and printouts. The left and right logo
fields controls which logos are placed on all reports printed by the Andromeda client.
The default background picture is the standard background picture which is used in the overview
window when connected to a park. (Unless there is a custom picture selected for the selected park)
The following formats are supported:
•
•
•
•
JPG or JPEG
Bitmaps
PNG
GIF
The above logos and background pictures are predefined but may be changed if needed.
9.7.
Clear position memory for all windows
Andromeda keeps a memory of all windows location on the screen.
By clicking on the “Clear position memory” will all information’s about window positions and
sizes be erased. The reset will take effect after the program has been restarted.
PS-Data
October 31st. 2013
Side 34
Andromeda – User manual
10.
About
The ‘about’ window display the Andromeda client name and version.
PS-Data
October 31st. 2013
Side 35
Andromeda – User manual
11.
Access control / Dongle info
The access control shows the license information in the dongle.
The “Check for updates” button is used to update the dongle with new features. This is typically
done when one or more protocols licenses are added to the program.
It also checks for new program versions on the internet. If a new version is available will the user be
asked if they wish to download a zip file with the latest version. Please refer to the installation
chapter for additional information’s on how to install the updates.
PS-Data
October 31st. 2013
Side 36
Andromeda – User manual
12.
Auto dialer
The auto dialer function is used to make an automated call to a number of preselected turbines. The
dial sequence may be started directly or with a time delay.
The automatic dialing feature works by creating a profile which contains a list of turbines to be
checked. When the dial sequence is started the dialer will call and connect to all turbines and
automatically stop when all turbines have been checked. If a turbine cannot be reached the dial
sequence will repeat the call up to 3 times before the turbine is abandoned. Redialing will however
not occur before the complete list has been checked.
After completing each call, the turbines current wind speed, production, Voltages, Currents, RPM’s,
Production as well as the turbines last and current status code will be listed. Depending on the
turbine can some of the fields be empty if they are not supported in the turbine.
The status field will display if the call succeeded or failed.
PS-Data
October 31st. 2013
Side 37
Andromeda – User manual
The quick tool bar in the upper part of the window gives fast access to a number of functions:
Close the auto dialer window.
Open the ‘Select turbine’ window.
Print a screen dump. Prints selected window.
Print a table. Print a table or graphics in numeric form.
Copy data to clipboard. Data may be exported directly to e.g. Excel,
Word or similar programs.
Save the result table to disk.
Save the call profile to disk.
Load a call profile from disk.
Starts the automated dial sequence
Stops the automated dial sequence
By marking "use delayed start time" the dial sequence will sleep until the chosen time. When the
selected time arrives will the dial sequence start automatically.
By marking ”Use this modem” the dial sequence overrides any preselected modem selections in the
park configuration and use the modem selected in this window.
PS-Data
October 31st. 2013
Side 38
Andromeda – User manual
Select turbines for the automated dial sequence.
Here, you select the turbines which will be included in the dial sequence.
By marking one or several turbines in the list, they will be transferred to the "Automatic call"
window when pressing ‘close’.
In order to ease the selection of individual turbines, a filter function is included.
Two function keys are available:
Selects all listed turbines.
Removes all selected turbines from the dial profile.
PS-Data
October 31st. 2013
Side 39
Andromeda – User manual
13.
Import and export the phonebook
Andromeda can export and import its phonebook. This provides the capability to move and backup
the phonebook. All exported data are stored in one single XML file. This makes it very easy to
forward to other Andromeda users or for backup purposes.
13.1.
Export parks in the phonebook
By opening the export phonebook window all available parks in the phonebook are displayed.
In the table it is possible to select the parks which are to be exported to a file. This is done by
setting the check mark next to the individual parks.
In order to ease the exports, a filter function is implemented which makes it easier to find the
individual parks, since only the parks which contain the selected filter criteria are displayed.
PS-Data
October 31st. 2013
Side 40
Andromeda – User manual
There are two buttons which are used to either select or remove all parks:
Selects all displayed parks.
Removes all displayed parks.
When the selected parks are marked they may be exported to a file by pressing the
This will create an .xml file with the name and location entered in the save dialog box.
13.2.
button.
Import parks into the phonebook
The import phonebook window is used to load already made export files created by an Andromeda
client.
PS-Data
October 31st. 2013
Side 41
Andromeda – User manual
By pressing
an exported phonebook file can be selected. When a file is selected all parks in
the export file will be listed in the window. Here one or more parks can be selected by setting a
check mark next to the park.
In order to ease the import, there a filter function is implemented which makes it easier to find the
individual parks, since only the parks which contain the selected filter criteria are displayed.
There are two buttons which are used to either select or remove all parks:
Selects all displayed parks.
Removes all displayed parks.
When the parks are selected they may be imported into the phonebook by pressing the
button. If one or more parks already exist in the phonebook they will be imported with a “new”
prefix attached to the park name.
PS-Data
October 31st. 2013
Side 42
Andromeda – User manual
14.
Design editor for main window
In the configuration menu, there is a design editor for the layout of the park overview window. Here
it is possible to edit the background image and turbines position on the background.
This feature can only be used when connected to a park.
The design editor has two components:
Location of the turbines on the background picture
Adding maps as background picture
To accept or cancel the changes to the park the following functions can be used:
Accept all changes and save the new configuration of the park.
Cancel all changes. The park configuration will not be changed.
If connected to an Orion Server or an Alarm Center server, can the new coordinates be
uploaded to the IP scenarion on the server.
PS-Data
October 31st. 2013
Side 43
Andromeda – User manual
14.1.
Location of turbines
Changing the location of the turbines on the screen is done by selecting one of the turbines in the
list, and then moving the two sliders: X coordinates and Y coordinates. The result of the move can
directly be viewed on the overview.
A turbine can also be selected by clicking on it in the overview window and dragged to the new
location.
14.2.
Background map
It is possible to use a map as a background to the turbines. It will of course be possible to use a
browser manually and open Google maps where you can zoom in on the desired area, store the map
in a file and import it into Andromeda. However, Andromeda has a built-in web browser which can
display Google maps directly and make the operation much faster.
In order to do this there is a number of built-in functions:
Open the web browser and show Google maps.
Center the map on the address entered in the address field.
Center the map using the longitude and latitude fields.
Save the map in the phonebook and insert it as the new background picture.
Is used to toggle legends on and off on the map.
PS-Data
October 31st. 2013
Side 44
Andromeda – User manual
The web browser with Google maps has all the usual functions:
Zoom
Street view
Map or satellite view
The functions may be combined as wished. The save function will always save the present layout as
the new background picture.
Zoom navigator and street view:
Map
PS-Data
Satellite
October 31st. 2013
Side 45
Andromeda – User manual
15.
Table functions
Tables appearing in the Andromeda client have a set of built-in functions for sorting, filtering and
navigating.
15.1.
Sorting
All columns may be used as sort key. By clicking a column title the table will be sorted according to
the data in the selected column. The sort order is ascending or descending depending on the sorting
arrow's
direction. Sorting direction changes each time you click the title.
PS-Data
October 31st. 2013
Side 46
Andromeda – User manual
15.2.
Direct filtering in a table
There is a direct filtering function build into each column in the table. The filter is displayed by
clicking on the
button in the title bar of a column.
By selecting one or more events in the list the table will automatically filter the data and display
only those containing the selected items.
By clicking (All) all selections are cleared
By clicking (Custom…) a special filter window is opened:
Here, special filters may be built with one or more logic expressions. If you created a filter will it
always be visible at the bottom of the table
A filter may at any time be removed by clicking
PS-Data
October 31st. 2013
Side 47
Andromeda – User manual
15.3.
Navigation
At the bottom left corner of a table, there are a number of built-in navigation functions:
Go to the start of the table
Go up one page in the table
Go to the previous event in the table
Go to the next event in the table
Go down one page in the table
Go to the end of the table
Accept changed data
Cancel changed data
Add a new line in the table
Delete the selected line in the table
Update table
Advanced table filter function
Certain buttons are only available in specialized Windows.
PS-Data
October 31st. 2013
Side 48
Andromeda – User manual
16.
Configuration examples
This chapter lists a number of configuration examples of parks with different turbine models and
manufactures:
16.1.
PS-Data
NEG Micon NM52-900 park with four turbines
October 31st. 2013
Side 49
Andromeda – User manual
16.2.
Micon M1100 (WP2000 controller) park with 3 turbines
Please notice that a WP2000 controller typically uses 7E1 modem configuration.
PS-Data
October 31st. 2013
Side 50
Andromeda – User manual
16.3.
PS-Data
Micon M1500 (WP3000 controller) park with 2 turbines
October 31st. 2013
Side 51
Andromeda – User manual
16.4.
PS-Data
Bonus WTC 1 with 6 turbines
October 31st. 2013
Side 52
Andromeda – User manual
16.5.
PS-Data
Bonus WTC 2 with 1 turbine
October 31st. 2013
Side 53