1
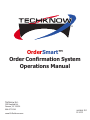
®
OrderSmart™
Order Confirmation System
Operations Manual
Techknow Inc.
393 Mayfield Rd.
Duncan, SC 29334
864-877-1341
www.GoTechknow.com
version 2.0
8-1-03
Table of Contents
Introduction
About Your DFP-300 .........................................................................................................................................................3
Safety Instructions ........................................................................................................................................................
4
II.
OCS 300
Drive-Thru Order Confirmation System (DFP-300) .................................................................................5
AccessWare Controller (AWC-100) .........................................................................................................5
Drive-Thru Event Timer (TFP 100) .........................................................................................................5
Front Counter Order Confirmation System (CFP 100) ...........................................................................5
OCS Overview......................................................................................................................................6-7
III.
TK3000 Software
Getting Your Bearings...........................................................................................................................8-9
General OCB Settings ...........................................................................................................................10
About TK3000FE....................................................................................................................................11
Editing Day Part Scheduling ..................................................................................................................12
Editing Order Screen .............................................................................................................................13
Editing POP Settings ........................................................................................................................14-15
Checking POS Settings .........................................................................................................................16
Changing Pre Selling Message ........................................................................................................17-18
Loading Item Pictures and POPs...........................................................................................................19
Downloading Item Pictures and POPs .............................................................................................20-22
Editing Profiles..................................................................................................................................23-25
Editing Menu Items ................................................................................................................................26
Editing Suggestive Sales .......................................................................................................................27
Communicate with the OCB ..................................................................................................................28
Statistics & Reports - POP Statistics Report..........................................................................................29
Statistics & Reports - Suggestive Selling Statistics Report....................................................................30
Statistics & Reports - Pad Statistics Report ...........................................................................................31
III.
Troubleshooting and Preventative Maintenance
Troubleshooting .....................................................................................................................................32
Technical Specifications.........................................................................................................................33
Points Of Contact...................................................................................................................................34
Care Instructions....................................................................................................................................35
Removing the DFP-300 .........................................................................................................................36
IV.
Diagrams
DFP-300 Wiring Diagram using AccessWare Box (Serial) ....................................................................37
DFP-300 Wiring Diagram using AccessWare Box (Ethernet)................................................................38
Copyright © 2003 Techknow, Inc. All rights reserved. This manual may not be copied, photocopied, reproduced, translated or
converted to any electronic or machine-readable form in whole or in part without prior written permission of Techknow, Inc.
TK Operations Manual
Index • 2
About Your DFP-300
Thank you for your purchase of a Techknow DFP-300 Order Confirmation System. We think that you will
be pleased with the features and performance of your DFP-300.
The DFP-300 utilizes DirectView™ technology which allows the display screen to be 100% viewable, even
in direct sunlight. A durable, impact resistant shell protects the display from damage. The DFP-300 takes
the place of your existing ordering location in the drive-thru. It is activated by the same loop detector
that controls your headset system.
Until a vehicle pulls up, the pre-selling screen will be active. This pre-selling screen can be easily customized
to reflect your own message. (i.e.- Try Our New Big Burger!).
When a vehicle pulls onto the pad, the DFP300 begins to display high-resolution true color POP graphics.
These POPs are configurable in each of your business day parts. These graphics can boost your average
check amount through specialized sales, upselling, and merchandising. (i.e.-cd’s, glasses & mugs, stuffed
animals, etc...).
When the order taker strikes the first key on the register, the order screen will appear. The OrderSmart
software translates your POP short-codes into 25 character text descriptions. Along with the text descriptor,
a full color item picture is also displayed - this feature is patented by Techknow. Customers will also see
their special grill orders in highlighted red text. You choose whether individual item pricing is shown.
Total and tax are clearly displayed. Order display is capable of showing up to 24 lines of text without
scrolling. Depending on the POS.
When the order is totaled, the total screen appears showing the grand total. The customer is also enticed
to add on their order by suggestive selling a “forgotten” item with text and coordinating graphics. This
process is handled entirely by our software, removing the responsibility from your employees. OrderSmart™
also records each time that someone adds an item to their order from the total screen, helping you track
the results. System operators have control over suggestive sell message and graphics. This feature is
extremely useful for pushing those slow-selling items. Totals are displayed clearly and boldly for the
customer, enabling them to have payment ready before reaching the service window. Customer service
speed is also enhanced allowing more cars to be serviced during heavy time periods.
Your new DFP-300 is constructed of a sturdy stainless steel frame enclosed by our exclusive Durashell™
outer cabinet. This construction will withstand hits, gashes and extreme temperatures. This rugged and
durable shell ensures that your DFP-300 will continue to work for you throughout the rigors of the industry.
To maintain your DFP-300 appearance and performance, please keep and use this manual as a valuable
reference. For your convenience, you may download a user’s manual, update your OrderSmart™ software,
download new item pictures at our website, www.GoTechknow.com.
TK Operations Manual
About Your DFP-300 • 3
Safety Instructions
1.
2.
3.
4.
5.
6.
Please read all of these instructions and save them for future use.
Follow all instructions & heed all warnings marked on the product.
When cleaning, first unplug from power supply. See page 30 for complete cleaning instructions.
Do not use product near water.
Do not block or cover any slots or openings.
This product should be operated from the type of power source indicated on the marking label. If
you are not sure of the type of power available, consult your dealer or local power company.
7. This product is equipped with a 3-wire grounding-type plug, a plug having a third (grounding) pin.
This plug will only fit into a grounding-type power outlet. This is a safety feature. If you are unable
to insert the plug into the outlet, contact your electrician to replace your obsolete outlet.
8. Do not allow anything to rest on the power cord.
9. Never push objects of any kind into this product through cabinet slots as they may touch dangerous
voltage points or short out parts that could result in risk of fire or electric shock. Never spill liquid
on this product.
10. Except as explained elsewhere in this manual, do not attempt to service this product yourself.
Opening or removing covers that are marked “Do Not Remove” may expose you to dangerous voltage
points or other risks. Refer all servicing in these cases to service personnel.
12. Unplug this unit from power and refer to qualified service personnel under the following conditions:
a. When the power cord or plug is damaged or frayed.
b. If the product has been dropped or the cabinet has been damaged.
c. If the product exhibits a distinct change in performance indicating a need for service.
13. Caution: Do not remove back cover, risk of electric shock may occur.
TK Operations Manual
Safety Instructions • 4
OCS 300
The Techknow OrderSmart™
Order Confirmation System
Front Counter
OCB
Drive-Thru Order Confirmation System (DFP 300)
The Techknow drive-thru OCS kiosk works in your
drive-thru using a 17” LCD screen mounted in portrait
mode. The OCS utilizes up to 5 full screen POP graphics
to tantalize the customer at Point Of Purchase. When the
customer places their order, the order is shown with
coordinating item pictures as well as running tax and total
shown allowing your customers to confirm their orders
as well as displaying a separate total screen with
coordinated suggestive selling message and graphic.
AccessWare Controller (AWC 100)
The Techknow AWC 100 AccessWare controller
acts as a hub connecting one or more devices in
the drive-thru to your pos system as well as allowing
remote access to send updates to the outside display
and gather statistics from it. Using a computer, either
in the store or remotely, you can connect to the
AccessWare controller and retrieve statistics that
are collected by your OrderSmart™ Order
Confirmation Board. You may use a laptop or
desktop computer to customize and send changes
to the digital flat panel in your drive-thru either at
the store, from your office or from home. This also
allows remote viewing of your OCS.
Front Counter Order Confirmation System
(CFP 100)
The Techknow front counter system is placed
in front of your registers and works similar to
the drive-thru order confirmation board allowing
your customers to confirm their orders as well
as displaying a separate total screen with
coordinated suggestive selling and full screen
POP graphics.
TK Operations Manual
Front Counter
OCB
Drive-thru
Register A
Drive-Thru
Event Timer
Pad 2
Office
Drive-thru
Register B
AWC 100
AccessWare
Controller
Drive-Thru
Order
Confirmation
Board
Menu
Board
Pad 1
Drive-Thru Event Timer (TFP 100)
The Techknow drive-thru event timer can be mounted
at your second drive-thru register in your drive-thru
displaying information that notifies you and your
employees about the status of your drive-thru operation.
Statistics that are shown are: Current Pad Time,
Average Time for Period and Percentage of Goals Met.
The timer is color coordinated to help you quickly
determine status using green, yellow and red numerals.
OCS 300 • 5
Techknow OCS Overview
The TK3000 Front End
application is a fast,
powerful tool to help you
operate your Techknow
Order Confirmation Board.
As soon as you start the
TK3000 Front End, you will
be presented with a window
that allows you to make
changes to your pre-selling
message, pops, day part
scheduling and many more.
In order to get the most use
out of your TK3000 Front
End, we recommend that
you study this user’s manual
thoroughly and keep it within
reach for easy access later.
The Pre-Selling Screen: How It Works
Until a vehicle pulls up to your
Techknow Order Confirmation Board,
the pre-selling message will be
active. This pre-selling message
can be easily customized as shown
on page 14 to reflect your own
message (i.e.- Make Your Soft Drink
A Float For Only 45¢!), color scheme
or other preferences.
The POPs: How They Work
STOP
Order
Here
Confirm
Order Here
When a vehicle pulls up to your Techknow
Order Confirmation Board, your OCB begins
to display high-resolution, true color POP
graphics. These graphics are configurable
in each of the four business day parts as
shown on page 10 of this manual. The
POPs are an excellent marketing tool and
will help you boost your average check. It
is recommended that you change your POP
scheduling at least once a week to
maximize your OCB’s marketing power.
The POPs shown are generic and may or may not have
come with your Techknow 3000 OrderSmart™ system.
TK Operations Manual
Techknow OCS Overview • 6
Techknow OCS Overview
- continued
The Order Screen: How It Works
When the order-taker strikes the first key on
the register, the order screen will appear.
Order display
area will
show
up to 23 lines
of text
WITHOUT
scrolling
1
2
1
1
Bacon Cheeseburger
Medium Fries
Medium Drink
Chicken Sandwich
1 No Lettuce
2 Jumbo Hot Dog
1.29
1.89
1.19
1.29
2.38
Our software
translates your
POS short-codes
into 25-character
text descriptions
Customers will
see their special
grill orders in
highlighted
red text
Individual item
pricing is optional
.39
Along with the text
descriptor,
a FULL-COLOR ITEM
PICTURE is also displayed
- this feature is patented
by Techknow
8.43
Your Message Here
Total and Tax are
clearly displayed
Editable Order
Screen Message
The Total Screen: How It Works
When the order is totaled, the total screen appears showing the
grand total. The customer is also enticed to add on to their order
by suggestively selling a “forgotten” item with text and graphics.
This process is handled entirely by our software, removing the
responsibility from your employees. OrderSmart™ also records
each time that someone adds an item to their order from the total
screen, helping you track the results.
System operators have control over
suggestive sell messages and
graphics as shown on page 21.
This feature is extremely useful for
pushing those slow-selling items.
STOP
Order
Here
Confirm
Order Here
Totals are displayed clearly and boldly for the
customer, enabling them to have payment ready
before reaching the window. Customer service
speed is also enhanced allowing more cars to
be served during heavy time periods.
TK Operations Manual
Complete Your Meal With
A Refreshing Ice Cream Cone!
8.43
Techknow OCS Overview • 7
Getting Your Bearings
Getting Started
To begin using your TK3000 Front End software, open the program files folder and open the TK Front
End folder. Once the TK Front End folder is open you may click the TK3000FE.exe icon and start the
TK3000 Front End software.
TK3000 Front End
After the TK3000 Front End
software has loaded, a splash
screen will appear and stay
on the screen for about 5
seconds and then it will
disappear. You will then see
the TK3000 Front End
desktop screen. Please
continue to the next page to
learn how to use the TK3000
Front End desktop to
maintain your Techknow
OCB.
TK Operations Manual
Getting Your Bearings • 8
Getting Your Bearings
- continued
The Toolbar
The first step in utilizing the TK3000 Front End is to familiarize yourself with the toolbar and icons and
what they mean.
The Main Toolbar
Can be used to exit
the program rather
than clicking on the
“X” at the top right
corner of the screen.
Allows you to view
profiles on the OCB
(see page 20 for
information on using
profiles).
Allows access to all areas, except
Update OCB, of the Techknow
system without having to doubleclick on the icon.
Allows you to
update the OCB
can also remove
the icon toolbar if
desired.
Can be used to load new
POPs or item pics for use
in the OCB.
Use for viewing System Config Files.
This function is mainly for Techknow
use in diagnosing your OCB.
Calls up screens to
view statistics and
reports. See pages
26-28 for more
information.
Help allows you
to view
information
about the
TK3000FE.
The Icons
Profiles
This icon
accesses the Edit
Profiles window.
(See page 20 for
instructions)
Menu Items
This icon accesses
the Edit Menu Items
window. (See page
23 for instructions)
Day Part
This icon
accesses the Edit
Day Part
Scheduling
window. (See
page 12 for
instructions)
Suggestive Sales
This icon
accesses the
Edit Suggestive
Sales window.
(See page 24 for
instructions)
TK Operations Manual
Order Screen
This icon accesses
the Edit Order
Screen window.
(See page 13 for
instructions)
Product Shots
This icon is
used to upload
new product
shots. (See
page 19 for
instructions)
Slide Show
This icon accesses
the Edit POP
Settings window.
(See page 14 for
instructions)
POPs
This icon is used
to upload new
POPs. (See
page 19 for
instructions)
Pre-Selling
This icon accesses
the Edit Pre Sell
Message window.
(See page 17 for
instructions)
Communicate with
OCB
This icon accesses
the Order
Confirmation Board
Communications
window. (See page
25 for instructions)
About
TK3000
Help allows
you to view
information
about the
TK3000FE.
Getting Your Bearings • 9
General OCB Settings
When you select Edit > General Settings from the main toolbar,
a new window will open. This window will allow you to edit the
general settings for your OCB including setting the OCB’s IP
address, enabling the vehicle detect, putting the OCB in portrait
mode or landscape mode, language settings and fonts.
This your OCB’s current IP
address, which is set using
profiles (see page 15)
IP address for
communicating with your
OCB. WARNING: Do
not change this setting
unless directed to do so
by a Techknow service
representative, or you
fully understand what IP
address is needed.
Using an improper IP
address will not allow
you to communicate with
your OCB.
This will allow you
to have your OCB
display text in
English or a
different language.
This will allow you
to select different
fonts that you have
loaded on your
computer to be
used by your OCB.
Enable the OCB’s
vehicle detect system
by selecting “Yes” to
enable the vehicle
detect, “No” to disable
the vehicle detect
system.
Selecting this will Selecting this will
put your OCB in put your OCB in
“landscape” mode.
“portrait” mode.
Select Apply to save
the changes that
you have made in
this window.
TK Operations Manual
Select Exit to
close this
window.
Select Cancel if you
do not wish to save the
changes that you have
made in this window.
General OCB Settings • 10
About TK3000FE
When you select Help > About from the main toolbar, or click the Help Icon, a new window
will open. This window will allow you to learn exactly what the TK3000 system is and how it
can benefit your business. This can also be used in determining which version of the
TK3000FE software that you are currently using.
Help
Icon
TK Operations Manual
About TK3000FE • 11
Editing Day Part Scheduling
This screen is accessed by clicking
on the Day Part icon in the icon
toolbar or selecting Edit > Scheduling
on the main toolbar. This screen will
allow you to change the POP times
for any and all day parts. Click on
the day that you want to change,
then click on the day part needed to
change. This will allow you to see
the current time format for the
particular day part.
Day Part
Icon
To access the day parts that you want to change, simply
click the “+” symbol beside the name of the day part.
A drop down menu will appear that will allow you to
make changes to the breakfast, lunch, dinner and closing
day part times. When the day part is highlighted, it will
display the time associated with that day part. To change
the time, highlight the time and enter the correct time
for the change. For example, for 9:00 pm, simply type
in “0900” and then click the AM or PM arrows or type
“AM” or “PM”. The colons will go automatically in place.
If you do not want the changes that you have made to
take effect, click “Cancel”. Once the correct time is
entered in, click “Apply” then “Exit”. If the program asks
you to save changes, choose “Yes”.
An easy way to apply the same settings to
each day part is to highlight the day part
that contains the settings that you want to
copy, then simply right click and drag it to
the day part that you want to change.
TK Operations Manual
Editing Day Part Scheduling • 12
Editing Order Screens
The Edit Order Screens window is accessed by clicking on the order screen icon in
the toolbar, or by selecting Edit > Order Screen from the main toolbar.
This screen is used to make changes to the order screen that the customer views
when placing their order.
Order
Screen
Icon
Display Options
“Show Line Item Prices” This
menu will allow you to enable
depending on POS or disable line
item pricing if you choose. This
function is typically disabled if
prices for the meals or dinners
and the price for the drink comes
up. The customer may be misled
into thinking that the drink is free
with the meal and can lead to
confusion.
“Show Total Screen”, as seen on
page 21, is optional. If you
disable the total screen, your
suggestive selling will be limited.
If Vehicle Detect is not
enabled, as shown on page
7, “Total Screen Delay” can
be customized by the number
of seconds that you want the
total screen to remain
displayed before the OCB
starts the pre-selling screen
again.
The message that is displayed at the bottom of the order screen can be customized for each day
part quickly and easily. Simply select the area below the day part that you want to change, type
in your new message, keep in mind that the message is restricted in length and will automatically
stop typing if the message is too long. Once you have entered your message, select “Apply”. This
same process is repeated for each successive day part. Please keep in mind that each customer
will see these messages, so you can really use this message effectively. Anything in the store that
may be high profit or slow moving, this is a great opportunity to reach your customers. When you
have finished making any changes that you want to make, click “Exit”. The software will ask you
if you want to save changes, if you want to save your changes, select “Yes” otherwise select “No”.
TK Operations Manual
Editing Order Screens • 13
Editing POP Settings
You may access this window by clicking on
the Slide Show icon or by selecting Edit >
POPs Slide Show on the main toolbar.
Edit POP Settings allows you to change POPs
for any day part as well as any day of the week.
This system will allow you to choose as many
as five POPs to be displayed but 3 POPs are
the most common.
Slide Show
Icon
Please keep in mind that the POPs are a vital
part of your OCB. The POPs are recommended
to be changed at least on a weekly interval.
This will benefit your restaurant by allowing the
customer to see something different each time
they pull up to your speaker post.
Day Parts
First step in changing
the POPs is to select
which day of the
week, click the “+”
symbol to move
down to the day part
that you want to
change.
Next, when the
correct day is
highlighted, click on
the first spot below
Image in the POP
Slide Show menu.
TK Operations Manual
POP Sideshow
The POP library is
displayed below the
image menu and may be
used to select the POP
that you want shown. A
sample of the POP that
is highlighted will be
shown in the preview
window. This screen will
allow you to see the
POP as the customer
will see it.
Editing POP Settings • 14
Editing POP Settings
- continued
POP Sideshow
Image Menu
This is a list of the POPs
that will be displayed to
your customers. To edit
any of the POP
selections, click on the
POP and make your
new selection from the
POP list below.
Duration time in
seconds that the POP
will be displayed.
Image file name
Field to select
POP duration
List of POPs in your
POP Library that you
may choose from
Current POP selected
Tip: A fast way to find the POP that
you want is to enter the first letter of
the POP file name. For example to
get to the JumboSizeIt POP enter
the letter “j”.
Edit POP Sideshow
Click this button to
add the selected
image to your POP
Sideshow in addition
to the 3 default POP
entries .
Click this button
view the
selected image
in the preview
window.
Click this button to
remove the selected
image from your
POP Sideshow.
Click this button view
the entire list of POPs
listed in a simulated
slide show.
Preview
window.
When you have finished making your POP selections, select “Apply” to save
your changes. If you do not want to save your changes, select “Cancel” and
you will return to the main screen. You may also select “Exit”.
TK Operations Manual
Editing POP Settings • 15
Checking POS Settings
When you select the register icon in the icon toolbar or select Edit > POS from the main toolbar, a
warning window will open. In most circumstances, you should not need to access this area.
WARNING! Any change that you make in this area may cause your Techknow OCB to not work
correctly. When you place a call to our service department, a technician may ask you to look in this
section to check settings.
This menu allows you to select from
various POS suppliers. The POS
that your restaurant is using should
be already in the box. If it is not, a
Techknow support technician may
ask you to select the POS that you
are currently using.
WARNING! This is set upon installation and should only be used by your Techknow service technician.
Version # of POS if applicable.
Specifies on ethernet based where the information is
going.
This menu allows you to select from various communication
types. The comm type that your restaurant is using should
be already listed in the box. If it is not, a Techknow support
technician may ask you to select the comm type that you
are currently using.
Specifies format for statistical information.
Video Till / Mask Registers.
TK Operations Manual
Checking POS Settings • 16
Changing Pre-Selling Message
When you select the notepad icon in the icon toolbar or select Edit > Pre Sell Message from the
main toolbar, a new window will open. This window allows you to edit the pre sell message that is
displayed to your customers when they first pull up to your OCB. The pre sell message is limited
in the number of characters that can be used per line but you may enter as many lines as you
choose. It is recommended that you do not use more than 5 or 6 lines in your message to give your
customers a chance to read the entire message. A good rule of thumb is to be able to read the
entire message twice before the OCB starts showing POPs.
Pre-Selling
Icon
Highlight the line
that you want to
change. The text
will then appear in
the editing box.
Preview window
Insert line places a new
line after the line that you
have highlighted within
your message.
Editing Box- This
area is used to
type a line of your
message.
Remove line deletes the
line that is highlighted in
the Message lines
window.
Add line places a
new line at the end
of your message.
If you want the pre-sell
message to drift across
the screen, check this
block. If not, uncheck
this block. This will
leave the message
centered on the screen
and it will not move.
Changes the text
color. See page 14
for instructions on
setting colors.
TK Operations Manual
Select to apply the
changes that you
have made.
Select to cancel the
changes that you
have made.
Select to exit the
Edit Pre Sell
Message window.
This area controls the time
in seconds that your pre
sell message will be
shown before starting the
POP slide show. To
change the entered time,
click the down arrow and
select the time that you
want to use.
Changes the background
color.
Changing Pre-Selling Message • 17
Changing Pre-Selling Message
- continued
To change the text or background
colors, when you click the “Change
Text Color” or the “Change Back
Color” button(s), this window will
open. Simply choose the color that
you want to use and click “OK” the
color will be shown in the preview
window of the Edit Pre Sell
Message screen.
Current selection
Select to create a
new color
Select to save your
changes and go
back to then Edit
Pre Sell Message
window.
TK Operations Manual
Select to cancel
your changes and
go back to then Edit
Pre Sell Message
window.
Changing Pre-Selling Message • 18
Loading Item Pictures and POPs
From time to time you will need to load new item pictures or POPs that
you will receive from Techknow. To load your new item pictures and/or
POPs, select “Images” in the main toolbar and scroll down to the
appropriate function in the drop down menu. You may also click the
item pictures and/or the POPs icon to open the appropriate window to
load your new graphics. A new window will open allowing you to update
the item pictures and POPS that are used by your OCB.
When loading the pictures, they will normally come in on a floppy disk.
Simply insert the disk and follow the instructions below for each task
that you want to accomplish.
Item Pictures
Icon
POPs
Icon
To Load Item Pictures
Use this button to navigate to your A: drive
and you will see the Items.exe file listed.
Double click the Items.exe file then
click the “Open” button.
Once the Items.exe file is shown,
highlight it and click the “Open” button.
The item pictures will automatically
download to the proper folder.
To Load POPS
Use this button to navigate to your
A: drive and you will see the
POPs.exe file listed
Double click the POPs.exe file then
click the “Open” button.
After the images have finished
downloading, you will have the option
of viewing the images and setting them
up for use by your OCB.
TK Operations Manual
Once the POPs.exe file is
shown, highlight it and click the
“Open” button. The POPs will
automatically download to the
proper folder.
Loading Item Pictures and POPs • 19
Downloading POPs and Item Pics
Step 1
Go to our website at
www.gotechknow.com and
click the Customers button
on the navigation bar on
the main page.
Step 2
When you get to the
Customers page,
click the logo for your
franchise.
Step 3
When you click your franchise’s logo, you will be asked for the
franchise password. Simply enter the password in the box that
opens and click “OK”. If you do not know the password or your
password does not work, call 1-800-427-1166.
Step 4
After you have entered
the correct password,
you will be presented
with a form if this is your
first time to this part of
our website. After you
have filled out this form
once, you will not need
to reenter it on your
return visit. Please fill
out all of the fields on
the form. If you make a
mistake, click the
“Reset Form” button
and start over. Fill out
all of the fields on the
form and click the
“Submit Form” button.
TK Operations Manual
Downloading Item Pictures and POPs • 20
Downloading POPs and Item Pics
Step 5
After you have submitted
the form, you will get a
“Thank You” message.
Click the “OK” button and
you will then get another
message stating that the
form is being submitted
by email. Click “OK”.
Step 6
You will now be on the graphics page
for your franchise. On this page you
may download the latest item pictures
and POPs for your Techknow system.
If you want to download item pictures,
click the sample order screen or the
title Item Pictures. To download the
POPs click the sample POP or the
title POPs.
Step 7
To download the item pictures,
please click the category that
you need. The categories may
differ than those shown here.
When you reach the category
that you want to download, view
the thumbnails of the Item
Pictures contained in that
category. If there are a large
volume of item pictures in that
category, the item pictures will
be divided into sets.
Insert a blank floppy disk in your
disk drive and click the download
button.
When you are finished, take the
floppy disk to the PC or laptop
that contains your TK3000 front
end software and then you are
ready to load the graphics.
Please see the Loading Item
Pictures and POPs chapter of
the TK3000 Operations Manual
for instructions on loading the
Item Pictures into the TK3000
Front End.
TK Operations Manual
Downloading Item Pictures and POPs • 21
Downloading POPs and Item Pics
Step 8
To download POPs, click the POP
graphic on your franchise’s graphics
page.
The POP download page will show
thumbnails of the POPs divided into sets
similar to the page shown. Locate the
set that you want to download, insert a
blank floppy disk into your computer’s
floppy drive and click the download
button for the POP graphic set that you
want to download. If you need more
instructions, click the ReadMe link near
the bottom of the page.
When you are finished, take the floppy
disk to the PC or laptop that contains
your TK3000 front end software and
then you are ready to load the graphics.
Please see the Loading Item Pictures
and POPs chapter of the TK3000
Operations Manual for instructions on
loading the POPs into the TK3000 Front
End.
Note
You may also download graphics onto
a CD, hard drive or any other means of
data storage as long as you create
individual folders for each set of graphics
that you download. If you do not create
individual folders for each set that you
download, and you download multiple
sets, each set will be overwritten by the
next set that you download.
WARNING
These POPs are formatted for use in only Techknow OCS-300 Drive-Thru Order Confirmation Systems.
Any misuse will cause the Techknow OCS to malfunction resulting in costly repairs. If you have any
questions about the graphics for your Techknow OCS before downloading, please call 1-800-427-1166.
Conclusion
Your Techknow Order Confirmation System is an excellent investment in your business. To help you
succeed and get the most of your investment, check our website frequently for updated graphics.
Your customers will be informed about all of the exciting happenings in your business.
If you need technical assistance with downloading graphics for your Techknow OCS, please call 1800-427-1166 and ask to speak with Techknow’s Graphics Department.
TK Operations Manual
Downloading Item Pictures and POPs • 22
Editing Profiles
When you click the Profiles icon, a new window will open
allowing you to edit the store profiles that are used by the
TK3000 Front End software to run your OCB.
Note: When you retrieve information from your OCB, you
are retrieving the file names of the graphics that are being
used along with other settings from the OCB, not the actual
graphics.
Profiles
Icon
List of store
profiles
Edit Profiles
Adds a new profile to
your TK Front End.
Allows you to rename
the selected profile in
the preview window.
Allows you to delete
the selected profile in
the preview window.
Allows you to backup
your profiles to a floppy
disk or your hard drive.
Allows you to restore a
previous profile from a floppy
disk or your hard drive.
Exit or Cancel your edit
profiles session.
Profile name is listed
here.
IP address for communicating with your OCB.
WARNING: Do not change this setting unless
directed to do so by a Techknow service
representative, or you fully understand what IP
address is needed. Using an improper IP address
will not allow you to communicate with your OCB.
Adding A New Profile
Enter the name of the new
profile that you want to make.
For example, if your
restaurant’s national store
number is “2001” Then simply
enter “Store 2001”
Enter the IP Address that you
need to communicate with the
store’s OCB. Generally use the
default setting of 10.77.77.59
TK Operations Manual
If you want to use an existing
IP Address for this new profile,
click the radio button beside
that option. If you want to
make a new IP Address, use
the default setting.
Editing Profiles • 23
Editing Profiles
- continued
Renaming A Profile
When you click the “Rename
Selected Profile” button, a window
will open. Simply type the name
that you want to use and click “OK”
Deleting A Profile
When you click the “Delete Selected
Profile” button, a window will open.
This window will verify that you want
to delete the selecting profile. Click
“Yes” if you want to delete the profile.
Click “No” if you do not want to delete
the profile. Click “Cancel” if you want
to cancel the delete selected profile
operation.
TK Operations Manual
Editing Profiles • 24
Editing Profiles
Backup Profiles
- continued
When you click the “Backup Profiles” button, a window will open.
You may backup the selected profile by navigating to the BackUp
folder in the TK Front End folder on your hard drive.
Navigator
window
Profiles window
Selects all
profiles listed in
profiles window
Backs up selected profiles into folder
selected in the navigator window
After backup is complete, you will see this
window pop up. Select OK to close the window.
Restoring A Profile
When you click the “Restore Profiles”
button, a window will open. Navigate
to the BackUp folder in your TK Front
End folder on your computer’s hard
drive and select the profile that you
want to restore to your TK Front End.
Click the “Open” button to load the
profile.
TK Operations Manual
Editing Profiles • 25
Editing Menu Items
Menu Items
Icon
When you click the Edit
Menu Items icon on the
icon toolbar or select Edit
> Edit Menu Items from
the main toolbar, a new
window will open. This
window allows you to
change the POS short
codes into 25 character
maximum text descriptors
as well as assigning other
parameters with that item
when it is ordered.
Short Descriptor
Item Picture Preview
Window
Add Menu Items
Button
Long Descriptor
Window
Associated POP
Item Picture
Menu
Menu
Show Item
Item Family
Menu
Menu
Associated POP
Preview Window
Track Item
Menu
Short Descriptor- This is the code that is used by your POS system. It can be downloaded from the POS as shown
on page 22 of this manual or entered manually by clicking the Add Menu Items button at the bottom of the window.
Long Descriptor- This is the text that will be shown on the Techknow OCB when a customers orders an item.
Image- This is the picture that will be shown when the customer orders an item.
Family Menu- This option is used for suggestive selling. For instructions in using this option, see page 21 of this manual.
Show Item Menu- This option can be set to “true” or “false”. If you want the long descriptor to be shown, select “true”
if you do not want the long descriptor shown, select “false”.
Associated POP Menu-This option is used in tracking your POPs.
Track Item Menu- This option can be set to “true” or “false”. If you want to track how often an item is ordered, select
“true”. If you do not wish to track the item, select “false”.
Add Menu Items Button-This allows you to add new items to your Techknow OCB without having to download the
menu from your OCB. This feature is recommended only if you know the exact short code used by the POS system.
This feature is also case sensitive, so this must be entered exactly as it is used by the POS.
Item Picture Preview Window-This shows you a small preview of the picture that your customer will see when an item
is ordered.
Associated POP Preview Window- This window allows you to see a preview of the POP that is selected in the
Associated POP menu.
TK Operations Manual
Editing Menu Items • 26
Editing Suggestive Sales
A very useful feature of the TK3000 software is the ability to check a
customer’s order when the order is totaled by the cashier and suggest a
“missing item”. Access to this window is made by clicking on the Suggestive
Sales Icon in the icon toolbar or by selecting Edit > Suggestive Sales on
the main toolbar.
Suggestive
Sales
Icon
Day Parts
The first step in setting the
suggestive sales graphics
and text, is to click on the “+”
symbol beside the day of the
week that you want to edit.
Next, when the day of the
week is open, click on the
day part that you want to edit.
Special family is used for
special merchandise. (i.e.:
cds, videos, glasses, etc...)
Select the image that you wish
to show in the selected day
part menu family.
When you have finished setting the suggestive
sell item picture and text, click”Apply” to save the
changes that you have made without exiting the
Edit Suggestive Sales screen. You may then
repeat the process for each successive day part.
When you have finished and want to leave the
Edit Suggestive Sales screen, click “Exit”.
TK Operations Manual
Once the image has been selected, you may enter
the text that you wish to display along with the
image. For example, if you have selected an Ham
and Egg Biscuit, you may want to type “Try our
Ham and Egg Biscuit” or if you are running a
special “Ham and Egg Biscuit - only 99¢! The
length of text is limited and will automatically stop
typing when the limit is reached.
Editing Suggestive Sales • 27
Communicate with the OCB
When you click the communications icon in the icons toolbar or select Tools
> Update OCBs from the main toolbar, a new window will open. This window
allows you to check the settings for the OCB as well as transfer changes
that you have made on the TK Front End to your OCB.
Communications
Icon
Profile
IP Address
Select this radio
button to update
the OCB with your
latest changes.
Select this radio
button to
retrieve the
settings from
your OCB.
Choose a transfer type
for what you wish to do:
Standard Transfer
sends only the latest
changes to your OCB.
Selective Transfer sends only the changes
that you choose from
the Selective Transfer
Options Menu.
Select this radio
button to coordinate
time setting between
your PC and the
Techknow OCB. This
will help you in
tracking statistics.
TK Operations Manual
Selective
Transfer
Options.
Select to have
the OCB notify
you when the
changes are
complete.
Status bar will
let you know
the progress
of the update.
Select Update
to send out to
your OCB.
Select Exit to close the
Order Confirmation
Board Communications
window.
Communicate With The OCB • 28
Statistics & Reports - POP Tracking Report
When you select Reports from the main toolbar, a drop down menu
will open allowing you to view reports that are gathered by your
Techknow OCB. The reports that you may view are: POP Tracking,
Suggestive Selling, Pad Statistics and ASCII Pad Data. These
reports are very useful in helping you get the most value out of your
OCB and your drive-thru operation.
POP Tracking Report
This report may be viewed in spreadsheet fom allowing you to examine
information such as Record Number, Period Ending, Graphic Name, Display
Count and Hit Count.
TK Operations Manual
Statistics & Reports - POP Tracking • 29
Statistics & Reports - Suggestive Sell Statistics
When you select Reports from the main toolbar, a drop down menu
will open allowing you to view reports that are gathered by your
Techknow OCB. The reports that you may view are: POP Tracking,
Suggestive Selling, Pad Statistics and ASCII Pad Data. These
reports are very useful in helping you get the most value out of your
OCB and your drive-thru operation.
POP Tracking Report
This report may be viewed in spreadsheet fom allowing you to examine
information such as Record Number, Period Ending, Graphic Name, Display
Count and Hit Count.
TK Operations Manual
Statistics & Reports - Suggestive Sell Statistics • 30
Statistics & Reports - Pad Statistics
When you select Reports from the main toolbar, a drop down menu
will open allowing you to view reports that are gathered by your
Techknow OCB. The reports that you may view are: POP Tracking,
Suggestive Selling, Pad Statistics and ASCII Pad Data. These
reports are very useful in helping you get the most value out of your
OCB and your drive-thru operation.
Pad Summary Report
This report is submitted in spreadsheet form detailing per car information such as
the check number, the time on the pad, the greet time, the time off the pad and the
order total. A sample report is shown below. The information that is available
is dependent upon your POS and the number of loops that you have.
TK Operations Manual
Statistics & Reports - Pad Statistics • 31
Troubleshooting - Solutions to Common Problems
TROUBLESHOOTING:
The TK3000 system is easy to troubleshoot. Most troubles are likely to be caused by communication
problems. The three communication routes are:
1. From the registers to the AWC
2. From the computer to the AWC
3. From the vehicle detect system on the audio box to the AWC.
4. From the AWC to the OCB.
All three functions run from the AccessWare box and are then sent to the display outside.
When encountering a communication error:
1.
Confirm there is power at the AccessWare Box. (Power On light)
2.
Check to see that cables from the AccessWare Box are still plugged into the appropriate place on
the registers.
3.
Check to see that the OCB still has power. When looking through the window on the
back door, is there at least one light on?
4.
Reboot the OCB by cutting power to the unit, wait 10 seconds, then power the OCB back up.
5.
Reboot the AWC by cutting power to the unit, wait 10 seconds, then power the AWC back up.
6.
Insure that your POS settings for your OCB are correct.
Display Problems
Symptom
My display is
completely black.
Step 1
Check the power
indicator light on the
back of the unit. If light
is not on, go to step 2,
if light is on, go to step
3.
Symptom
My display is
dim.
Step 1
Step 1
Power is off. Restore
power to display.
Check breakers and
outlet.
Step 3
Do an update, then if that
does not resolve the
problem, call Techknow
Service Support Center.
Step 3
Do an update, then if that
does not resolve the
problem, call Techknow
Service Support Center.
Step 2
Step 3
Step 2
Step 3
Call Techknow Service
Support Center.
Symptom
My display is
not showing
orders
Power is off. Restore
power to display.
Check breakers and
outlet.
Step 2
Check the power
indicator light (#8) on
the back of the unit.
If light is not on, go to
step 2, if light is on, go
to step 3.
Symptom
My display is
half black.
Step 2
Step 1
Check the P.O.S.
connection outside.
Make sure that all
connections are tight
and not loose.
TK Operations Manual
Make sure that P.O.S. is
configured properly. If
applicable, send (downline
load) the menu to our
system from your POS.
(PAN do a sign board test).
Call Techknow Service
Support Center.
Troubleshooting - Solutions To Common Problems • 32
Technical Specifications
DFP-300
17”
Electrical Requirements
Voltage:
Frequency:
Current:
100-240 VAC
50-60 Hz.
1.5 amp Max.
Specifications:
Display:
Size:
Resolution:
Luminance:
Operating Temperature:
Dimensions:
Color TFT/LCD
17.0” Diagonal
1024 x 768 pixels
1400 nits
-40° – +60°C (-40° – +140°F)
16” x 12.5” x 7”
55. 11/16
Communications Interfaces:
Network:
10/100 10BT/10B2 Ethernet
Ship Weight: Screen 42 lbs.
Ship Weight: Entire System including screen 115-120 lbs.
Confirm
Order
Here
17 1/8”
TK Operations Manual
Technical Specifications • 33
Points Of Contact
Mailing Address: Techknow, Inc.
393 Mayfield Rd.
Duncan, SC 29644
Website:
www.gotechknow.com
Email:
[email protected]
Service Email:
[email protected]
Service Hours Of Operation
Regular Hours
Monday - Friday 8:00 AM - 5:00 PM Eastern Standard Time
Extended Hours
Monday - Friday 5:00 PM - 10:00 PM EST
Saturday
9:00 AM - 5:00 PM EST
Toll Free:
800-427-1166
TK Operations Manual
Points of Contact • 34
Care Instructions
One of the easiest and most overlooked tasks in maintaining your Techknow COD is
cleaning your window, flat panel screen and Durashell™ outer cabinet. Just a few
minutes of cleaning every couple of weeks will help keep your Techknow OCB looking
good and will extend the life of your OCB.
Cleaning Your Techknow OCB
Your
Logo
Here
Your
Logo
Here
Your
Logo
Here
STOP
Order Here
STOP
Order Here
STOP
Order Here
Step 4:
Clean both sides of
Lexan screen with
lukewarm water. Clean
Durashell with lukewarm
water and mild soap if
needed. DO NOT use
any abrasive cleaners
or scrub pads on Lexan
screen or Durashell
cabinet. After cleaning
Lexan screen, allow to
air dry, or dry with a soft
cloth, then install back
into kiosk using reverse
procedure from step 3.
Confirm
Order
Here
Step 1:
Use your Manager’s Key
to unlock Lexan screen.
Turn key counterclockwise
to unlock.
Step 2:
Pull Lexan screen
toward you
approx. 30 degrees.
TK Operations Manual
Step 3:
Lift Lexan screen out of kiosk.
Step 5:
Gently wipe LCD screen
with a soft moistened
cloth. DO NOT use soap
or other cleaners.
Care Instructions • 35
Removing the DFP-300 Flat Panel Screen
The Techknow OCB is designed to work trouble-free for years. However, when you
need to send in your DFP-300 flat panel screen to Techknow for maintenance, please
use the illustration below to remove the DFP-300 properly.
Removing The DFP-300 Flat Panel Screen
Unplug RJ45 Patch Cable and unplug
DFP-200 from power supply.
Rotate knobs on top and bottom
of DFP-200 counterclockwise until
knobs come out. DFP-200 is ready
to slide out of kiosk.
Flat Panel
1
2
3
4
5
6
7
8
Light
Sensor
Power: 90-264V AC 47-63Hz 1.5A Max
UL
Mark
Flat Panel
Power Cable
CUL
Mark
CB
Mark
CE
Mark
350
Kiosk
Power
Outlet Box
Tripp-Lite
UPS
350
RJ45
Patch Cable
SPEAKER
350 350
WARNING:
The DFP-300 LCD display is a
sensitive piece of equipment and
can be easily damaged once it
is removed from the Techknow
OCB. It is important that it is
handled with care.
IMPORTANT
After you remove your DFP-300
flat panel screen, you need to
package it properly, insure it and
ship it to Techknow for servicing.
Call 1-800-427-1166 for
instructions before you package
your DFP-300 for shipping.
WARNING:
The DFP-300 LCD display is quite heavy
please use caution when lifting to avoid
injury or damage to the DFP-300.
The DFP-300 LCD display is quite heavy
please use caution when lifting to avoid
injury or damage to the DFP-300.
TK Operations Manual
Removing The DFP-300 Flat Panel Screen • 36
DFP-300 Wiring Diagram using AccessWare Box
Serial Connection (Not To Scale)
Vehicle
Detect Box 1
Outside To
Speaker Post
Vehicle
Detect Box 2
At Drive Up
Window
RG58
Vehicle Detect
350
CAT 5
Cable from OCB
Optional
Monitor
Straight Through Cat 5
To OCB
Primary
Order Taker
Register
(with Serial
Connection)
(Not To Scale)
MODEL
S/N
WWW.GOTECHKNOW.COM
1-800-427-1166
TK Operations Manual
Plugs into
SP1
Wiring Diagram using AccessWare Box • 37
DFP-300 Wiring Diagram using AccessWare Box
Ethernet Connection
(Not To Scale)
Optional
Vehicle
Detect Box 1
Outside To
Speaker Post
Vehicle
Detect Box 2
At Drive Up
Window
RG58
Vehicle Detect
Cable
RG58
Vehicle Detect
Cable
Typical POS Hub
Straight Through Cat 5
To OCB
350
350
350
Plugs into 350
open port
Cat 5 Cable
Primary
Order Taker
Register
(with Ethernet
Connection)
(Not To Scale)
350
MODEL
S/N
WWW.GOTECHKNOW.COM
1-800-427-1166
Cat 5 Cable
Optional
Monitor
TK Operations Manual
Wiring Diagram using AccessWare Box • 38