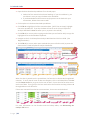
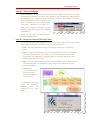
1
State Purchasing Card Audit Guide Maggie Clarke Process Improvement Audit Supervisor 404‐656‐5907 [email protected] Copyright © 2010 – Department of Administrative Services Department of Administrative Services State Purchasing Division Process Improvement CONTENTS EVALUATING THE PURCHASING CARD POLICY ........................................................................... 1 OVERVIEW .......................................................................................................................................... 1 USING THE CHECKLIST ........................................................................................................................ 2 MODIFYING THE CHECKLIST ............................................................................................................... 3 EVALUATING CARD PROGRAM TRAINING ................................................................................... 5 OVERVIEW .......................................................................................................................................... 5 PROCUREMENT TRAINING INFORMATION .......................................................................................... 5 CARDHOLDER AND SUPERVISOR TRAINING CRITERIA ....................................................................... 6 EVALUATING SPENDING LIMITS ................................................................................................... 9 PROFILE “BEST PRACTICES” .............................................................................................................. 9 Limit the Number of Profiles ................................................................................. 9 Base Profiles on Job Titles ...................................................................................... 9 Use Special Purpose Profiles ................................................................................ 11 Data Analysis for Profile Evaluation ..................................................................... 11 PROCEDURE FOR SPENDING LIMITS ANALYSIS ....................................................................... 13 GETTING STARTED............................................................................................................................ 13 BASIC EXCEL SKILLS ......................................................................................................................... 14 Basic Cycle Limit Evaluation ................................................................................. 14 Basic Single Transaction Limit Evaluation ............................................................ 14 CYCLE LIMIT ANALYSIS WITH PIE CHART (ADVANCED EXCEL) ....................................................... 14 Construct first pivot table – Cycle Limit Analysis ................................................. 14 Preparing a Pie Chart ........................................................................................... 16 Alternate Cycle Limit Review ............................................................................... 18 SINGLE TRANSACTION LIMIT (STL) ANALYSIS WITH PIE CHART (ADVANCED EXCEL) .................. 18 Construct second pivot table – Single Transaction Limit Analysis ....................... 18 SPENDING LIMITS ANALYSIS USING THE TEMPLATE (BASIC /INTERMEDIATE EXCEL)................... 19 EVALUATING VENDOR SPEND LEVELS ..................................................................................... 21 COMPILING TRANSACTION DATA ..................................................................................................... 21 BASIC EXCEL SKILLS ......................................................................................................................... 22 P a g e | i P‐Card Audit Guide CYCLE SPEND ANALYSIS – PIVOT TABLE (ADVANCED EXCEL)........................................................ 23 Split Transactions Analysis ................................................................................... 23 FINANCIAL SYSTEM PURCHASES (BASIC EXCEL) ............................................................................. 24 P‐CARD COMPLIANCE ANALYSIS WORKBOOK (ADVANCED EXCEL) ................................... 27 OVERVIEW ........................................................................................................................................ 27 DOWNLOADING TRANSACTIONS FROM WORKS PAYMENT MANAGER ............................................ 28 File Layout ............................................................................................................ 28 Copy Transaction Data to the P‐Card Compliance Workbook ............................. 31 Getting to Know the Data Tab ............................................................................. 33 Refresh the Pivot Table ........................................................................................ 35 Pivot Table Design ................................................................................................ 36 Definitions ............................................................................................................ 36 MODIFYING THE PIVOT TABLE DESIGN ........................................................................................... 37 SUGGESTED ANALYSIS STEPS ........................................................................................................... 38 Open Market Purchases ....................................................................................... 38 Split Purchases ..................................................................................................... 39 Weekend Purchases ............................................................................................. 39 Merchant Utilization ............................................................................................ 40 Combined P‐Card and Financial System Spend ................................................... 40 SAMPLE CRITERIA PIVOT TABLE ..................................................................................................... 41 MAINTAINING THE LOOKUPS TAB ................................................................................................... 42 Excluded Merchant (columns A‐C)....................................................................... 42 Level III Merchants (columns E – F) ..................................................................... 42 Weeks (columns L – N) ......................................................................................... 42 State Eligible MCCs (columns P – W) ................................................................... 43 “Red Flag” MCCs (columns Q – X) ........................................................................ 43 Exempt MCCs (columns Z – AA) ........................................................................... 43 Contract MCCs (columns AC‐AD) ......................................................................... 44 DOCUMENTATION REVIEW ........................................................................................................ 45 PURCHASES OF SUPPLIES AND MATERIALS ..................................................................................... 45 Specialized Transactions ...................................................................................... 45 OTHER PURCHASES .......................................................................................................................... 47 Payment from Statements ................................................................................... 47 Recurring Monthly Charges (Services) ................................................................. 47 Non‐Inventoriable Assets ..................................................................................... 47 CONFIGURABLE REPORTS IN WORKS PAYMENT MANAGER ................................................. 49 OVERVIEW ........................................................................................................................................ 49 CREATING A REPORT ........................................................................................................................ 49 P a g e | ii P‐Card Audit Guide Report Configuration Screen Sections ................................................................. 50 SCHEDULING REPORTS ...................................................................................................................... 54 RETRIEVING A REPORT ..................................................................................................................... 54 MANAGING “BOOKMARKS” ............................................................................................................... 56 USING EQUOTE FOR OPEN STATE ENTITY CONTRACTS ......................................................... 57 OVERVIEW ........................................................................................................................................ 57 1. PURCHASING STAGE 1NEEDS IDENTIFICATION ................................................................. 57 2. PURCHASING STAGE 2PRESOLICITATION ........................................................................ 57 3. PURCHASING STAGE 3SOLICITATION PREPARATION ........................................................ 58 4. PURCHASING STAGE 4SOLICITATION PROCESS ................................................................. 59 5. PURCHASING STAGE 5EVALUATION PROCESS ................................................................... 60 6. PURCHASING STAGE 6AWARD PROCESS ........................................................................... 60 7. PURCHASING STAGE 7CONTRACT PROCESS ...................................................................... 60 APPENDICES ................................................................................................................................. 61 APPENDIX A – STATE USE PROCUREMENT LIST .............................................................................. 62 APPENDIX B – HOW TO PURCHASE .................................................................................................. 65 APPENDIX C – NIGP EXEMPT LIST .................................................................................................. 67 APPENDIX D – EXCEL PIVOT TABLES (EXCEL 2003) ..................................................................... 77 APPENDIX E – EXCEL PIVOT TABLES (EXCEL 2007) ...................................................................... 87 P a g e | iii Department of Administrative Services State Purchasing Division Process Improvement EVALUATING THE PURCHASING CARD POLICY OVERVIEW The purpose of the policy evaluation is to determine if the policy provides adequate guidance to card program administrators, supervisors, cardholders, and other employees affected by the purchasing card (e.g. employees for whom cardholders make purchases). The Policy Evaluation Checklist is an Excel spreadsheet that rates the policy as a high, medium, or low risk that the policy does not provide adequate guidance. The rating is based on the answers to questions about the policy. The answers can be “Yes”, “Needs Improvement”, or “No”. The evaluation checklist is available on‐line at the State Purchasing Division (SPD) web site under Process & Performance. The address is: http://doas.ga.gov/StateLocal/SPD/Process/Pages/Home.aspx Click on the Excel icon to open the document. The version of the checklist on the web site will always be the most current version that the Process Improvement Team from the State Purchasing Division uses. However, Entities can modify the checklist to assign different ratings to individual questions and to the score that results in a particular risk rating. The number of possible points (all questions get a “Yes” answer) should always be 100. In the SPD version of the spreadsheet, some questions receive four points and others three for a “Yes” answer, depending on the importance SPD places on that aspect of the policy. You might want to place more or less emphasis on some questions, and that is acceptable. This tool is designed for you to evaluate your policy based on your organization’s emphases. P a g e | 1 P‐Card Audit Guide USING THE CHECKLIST Go to the SPD web site and download the spreadsheet. It is recommended that you save a master copy of the spreadsheet if you make any customizations. The blank spreadsheet will provide a place to enter your Entity’s name. The score will display on the second line and will increase as more questions are answered either “Yes” or “Needs Improvement”. Questions that are answered “No” will receive zero points and the score will not change. Column C of the spreadsheet has a drop‐down list from which you select the proper response to each question. Column D contains a formula that evaluates the response in Column C and assigns a numerical value. Column E provides a place to enter comments. Column F provides a place to enter the page number where the topic of the question is covered. P a g e | 2 P‐Card Audit Guide MODIFYING THE CHECKLIST Advanced users of Excel who are familiar with the IF/Then statement concept can modify the checklist to change the grading and rating functions. The following areas can be modified: • The number of points for a “Yes” or “Needs Improvement” answer. A “No” answer should always receive zero points. • The score needed to achieve a low, medium, or high‐risk ranking. • The score needed to achieve a grade of A, B, C, D, or F. Modifying the Individual Question Point Values The formula that assigns points is shown below: It uses an Excel IF formula. In this example: • If the answer is “Yes”, the question receives three points • If the answer is “No,” the question receives zero points • If the answer is “Needs Improvement”, the question receives one point To modify the formula, simply change the numbers. Remember, however, that the total score must equal 100 points. If you add a point to the “Yes” answer, then you need to either subtract one point from the score of “Needs Improvement” in the formula for that cell or subtract one point from another question’s “Yes” or “Needs Improvement” formula. Modifying the Overall Points Grade and Rating The scores are maintained on the risk levels for scores tab to the right of the Checklist tab. The illustration to the right shows that a policy that receives a score of 83 or above can be either an A or a B grade and will be a Low risk level, meaning that there is a low risk that the policy does not provide adequate guidance. A policy that receives 82 would be a B score with a Medium risk level. There are similar cutoffs for C, D, and F scores and for High risk. P a g e | 3 P‐Card Audit Guide The VLOOKUP formula in cell E2 evaluates the score in cell D2 and assigns the risk level for that score from the risk levels for scores tab. A similar VLOOKUP formula in cell F2 pulls the letter grade associated with the score from the risk levels for scores tab. P a g e | 4 Department of Administrative Services State Purchasing Division Process Improvement EVALUATING CARD PROGRAM TRAINING OVERVIEW The following checklist provides guidance to determine if an Entity conducts adequate training for (1) personnel involved in program administration, (2) personnel responsible for supervisory review of transactions, (3) cardholders, and (4) personnel responsible for conducting the self‐audit (internal audit). If any answers to the questions on the second table below are “No” or “Needs Improvement”, make comments as to what the deficiency is and how the area could be improved. PROCUREMENT TRAINING INFORMATION In the table below, indicate the training the following personnel have had as it relates to the purchasing card program based on the following key: • I = Introduction to Purchasing Card Principles (yes/no in drop‐down list) • SA = How to Conduct a Self‐Audit (P‐card) (yes/no in drop‐down list) • Other = Indicate any other procurement training Position Name How Long? I SA Other APO / UPO Program Administrator Program Coordinator Program Coordinator Program Coordinator Program Coordinator Program Coordinator Program Coordinator P a g e | 5 P‐Card Audit Guide CARDHOLDER AND SUPERVISOR TRAINING CRITERIA Yes / No / Needs Improvement Training Need 1. Have any other Procurement personnel attended the Introduction to Purchasing Card Principles training? If so, attach an additional sheet showing names and titles. 2. Have any other Procurement personnel attended the How to Conduct a Self‐Audit (P‐card) training? If so, attach an additional sheet showing names and titles. 3. Have any cardholders attended the Introduction to Purchasing Card Principles training? 4. Have any cardholders’ supervisors attended the Introduction to Purchasing Card Principles training? 5. Does management communicate changes in State or Entity policies and procedures to cardholders and supervisors? If so, how is this done? 6. Does the Entity require cardholders and supervisors to attend training prior to issuance of the card? 7. How is this training conducted (select one): • Group (class) • One‐on‐one • On‐line tutorial • Other (explain) 8. Explain “Other” method of training: 9. Does the Entity offer refresher training at least annually? P a g e | 6 Training Need 10. Does management maintain records of who has attended training, including refresher training? P‐Card Audit Guide Yes / No / Needs Improvement 11. Are the following areas covered in the training materials? • Allowed purchases • Prohibited purchases • Spending limits, including STL and cycle • How to complete the transaction log or approved alternative • Tax‐exemption certificates and procedures • How to review monthly billing statement • Cardholder responsibilities, including formal cardholder agreement 12. What materials does management provide to cardholders and supervisors during training for them to keep as references? Check all that apply: • State Purchasing Card Policy • Agency/Institution Policy • Written procedures (describe): • Supply of Sales and Use Tax Exemption certificates • Other (describe): 13. Does the Entity require cardholders to demonstrate an adequate knowledge of State and Entity policy prior to issuance of the card (e.g. written test)? 14. Does the Entity require supervisors to demonstrate an adequate knowledge of State and Entity policy prior to providing supervisory review of transactions (e.g. written test)? P a g e | 7 P‐Card Audit Guide P a g e | 8 Department of Administrative Services State Purchasing Division Process Improvement EVALUATING SPENDING LIMITS The goal in evaluating cardholder spending limits is to determine if the profile groups you have established provide the cardholders with the credit limits needed to do their job without exposing your Entity to unnecessary risk. (By assigning cardholders to profile groups, you can assign the same spending limits to multiple cardholders without manually setting the same limits for each cardholder individually.) There are two required spending limits: (1) the Single Transaction Limit (STL) and (2) the cycle limit, also known as the “credit limit”. State Purchasing Division (SPD) does not dictate the number of profiles an Entity can establish. Except for the Single Transaction Limit of less than $5,000 ($4,999.99 or less) and cycle limit $25,000, SPD does not dictate the spending limits an Entity can impose on cardholders. Card Program Administrators also do not have to obtain any approvals from SPD to raise cardholder spending limits if the amount will still be within these limits. Bank of America also provides an optional limit. An Entity can also choose to limit the number of transactions a cardholder can make in one day. PROFILE “BEST PRACTICES” Limit the Number of Profiles Basing profiles on job titles and actual spend levels permits an Entity to limit the number of profiles it must maintain. For example, an Entity can group job titles with similar spending habits into one profile. When an employee receives a purchasing card, the Card Program Administrator can assign the cardholder to the profile for the employee’s job title. For individual cardholders whose spend does not fit the profile, or who have unusual situations, management can make exceptions to the rule that the cardholder must be in a specific profile. Base Profiles on Job Titles Develop profiles based on job titles. Generally, employees with the same or similar job titles will need the same spending limits. Assign a cycle limit that will accommodate the cardholder(s) in that group with the largest spend. Calculate: • The average cycle spend for a 12‐month period as well as the largest cycle amount for each cardholder. • The average cycle spend and largest cycle amount for the same period for all job titles. For example, determine the average spend for all Clerk II personnel, Procurement Officer I personnel, etc. P a g e | 9 P‐Card Audit Guide • Compare the average cycle spend and largest cycle spend for individual cardholders with the average spend by cardholders with the same job title. Determine if the calculations look reasonable for the type of job each cardholder has. A large volume of spend on a non‐procurement job title might indicate that the cardholder has job responsibilities not normally associated with the title. A small volume of spend on a procurement job title might indicate that the employee is not using the card to its full potential or that the employee fulfills non‐procurement related job duties. The chart below shows an example of a system of standard profiles plus a special‐ purpose profile, explained below. Cycle Limit Single Transaction 1 $1,000 $300 5 1, 2 2 $1,500 $750 5 1, 2, 3 3 $3,500 $1,000 8 1, 2, 3 4 $3,500 $1,000 3 1,2 5 $5,000 $1,000 10 2, 3 6 $10,000 $2,500 15 1, 2, 3 7 $10,000 $2,500 10 2,3 8 $25,000 $5,000 No Limit 1, 2, 3 9 $40,000 $5,000 No Limit 1, 2, 3 Special 1 $100,000 $10,000 No Limit 1, 2, 3, 4 Profile Daily # of Transactions MCC Groups Merchant Category Code Groups (MCCG): • GASTATE • GASTATE1 • GASTATE2 • GAATHTRAV As shown, management can structure the card profiles so that cardholders can make transactions only at merchants assigned to specific merchant category code groups. The P a g e | 10 P‐Card Audit Guide State of Georgia currently has four groups, three that are available to all cardholders and a travel group that can be used on a limited or temporary basis. Assign job titles to a profile based on actual, historical spend information or potential spend for that type of job. For example, the Card Program Administrator could assign all procurement personnel to Profile #7 because they will need more flexibility than an Administrative Assistant who orders office supplies for one unit. The Card Program Administrator could assign the Administrative Assistant to a profile with more restrictions, such as Profile #2. Management must address each case individually because there can be many reasons for spend not in keeping with a job title. Profile procedures should address what to do if an individual cardholder needs larger cycle or single transaction limits than those for the job title. A move up to the next profile might be in order. Use Special Purpose Profiles Each Entity will determine the number of standard profiles it needs based on job requirements and actual spend. Some agencies, such as GEMA, DNR, and DOT, could have emergencies or other special situations arise where cardholders need more flexibility in the types and amounts of purchases they can make. The Card Program Administrator can move cardholders from the standard profile to the emergency profile and then back to the standard profile when the emergency is over. For example, certain agencies, such as GEMA and DOT, must respond to either natural or man‐made disasters anywhere in the State. In these situations, cardholders might need more flexibility in how much they can spend and where they can use the cards. The DOT might send road crews from South Georgia to North Georgia to assist when there is a major winter event. Road crew foremen might need to pay for lodging and meals for the South Georgia crews. Once the emergency is over, the Card Program Administrator can move the cardholders back to the standard profile. Data Analysis for Profile Evaluation In order to perform a spend analysis on profiles, the Card Program Administrator needs the following information for at least 12 cycles. It is highly recommended that you evaluate your profiles annually for the first three years of your program and at least every 18 months thereafter. You can use either Microsoft Excel or Microsoft Access to work with the data. Transaction data and profile information are available through Works Payment Manager. • Cardholder name • Cardholder job title (not in Works Payment Manager) • Current spending limits • Single Transaction (STL) • Cycle • # of transactions per day • Individual transaction dollar amounts P a g e | 11 P‐Card Audit Guide • Individual transaction post date The following list of analysis techniques can help you analyze your data to determine appropriate single transaction and cycle limits. Number of transactions per day is up to the discretion of management. • Compare individual cardholder average cycle spend to the cycle spend for the profile. If the cardholder consistently reaches the cycle limit and needs temporary increases, this might be justification for moving the cardholder to the next higher profile. It could also mean that the cardholder performs actual job responsibilities not in keeping with the job title. If a cardholder consistently uses a lower percentage of the cycle limit, this might indicate that the limit is too high or that the cardholder is not using the card when possible. • Calculate total spend by cardholder. Use the sort feature in Excel to sort these by job title and by amount. Evaluate the types of job titles found in each natural grouping. Do job titles appear in more than one group? Are all cardholders with the same or similar job titles found in the same natural group? Sort the data by job title and then by total spend. Determine the maximum transaction amount and maximum cycle amount within each job title. These figures can provide insight into appropriate limits for the profile that will include that job title. • Compare individual cardholder’s maximum and average transaction amount and maximum and average cycle spend to the assigned profile. Does the cardholder consistently reach the STL or cycle limit? Does the cardholder consistently fall significantly short of the STL or cycle limit for the profile? Determine the cardholder with the highest cycle spend within each job title. This figure might be an indication of a good cycle limit for the job title. • Determine if cardholders within a job title have similar spending habits. If there is a cardholder who has significantly more spend than cardholders in the same job title, this cardholder might be a candidate for an exception to the standard profile. Other cardholders could remain in the lower spending limit profile. P a g e | 12 Department of Administrative Services State Purchasing Division Process Improvement PROCEDURE FOR SPENDING LIMITS ANALYSIS The Spending Limits Analysis is designed to help you answer the question, “Could we reduce our risk of loss due to abuse while still providing our cardholders with the spending capacity they need in order to do their jobs?” This chapters provides guidance on what to look for in a spending limits analysis as well as how to do this using basic Excel skills. For advanced Excel users, the chapter also explains how to create the analysis pivot tables from scratch as well as how to use a pre‐ designed template available from the State Purchasing Division’s Process Improvement Team. It is highly recommended that you read these instructions through completely prior to beginning an analysis in order to ensure that you know where you are going with it. Refer to the Chapter on Evaluating Spending Limits for suggestions for your analysis. GETTING STARTED Download the following fields to a comma‐delimited text file from Works Payment Manager using a custom report. • Cardholder User Name • Last Four Digits (of the card number) • Amount • Purchase Date • Post Date • Merchant/Vendor Name • Merchant City • Merchant State • MCC • MCC Description • Card Profile Name • Group Name (cardholder group name) • Credit Limit P a g e | 13 P‐Card Audit Guide • Single Transaction Limit Open the text file in Excel. Designate all fields except the following as “text” data type. By keeping the “General” data type, the amount will be a number (not currency, though) and the dates will display as dates. • Amount • Purchase Date • Post Date Load all transactions into a new Excel workbook. (NOTE: Illustrations in this document are from Excel 2007. If using 2003, the user will have to follow steps for that version to place the fields.) BASIC EXCEL SKILLS Basic Cycle Limit Evaluation Once the transaction data has been downloaded into an Excel spreadsheet, sort the spreadsheet by cardholder name in either ascending or descending order and then by transaction amount in ascending or descending order. Insert two rows between each cardholder section. Use the SUM function to determine the total spend for the cycle. Compare this to the cardholder’s cycle limit. Basic Single Transaction Limit Evaluation Once the transaction data has been downloaded into an Excel spreadsheet, sort the spreadsheet by cardholder name in either ascending or descending order and then by transaction amount in descending order. Scroll through the cardholders and compare the largest transaction amount to the Single Transaction Limit. CYCLE LIMIT ANALYSIS WITH PIE CHART (ADVANCED EXCEL) Construct first pivot table – Cycle Limit Analysis Create a pivot table with the following configuration: • Row Labels Cardholder name Card # Cycle Limit Status • Column Labels – Cycle Ending Date • Values – Sum of transaction amount P a g e | 14 P‐Card Audit Guide Calculated Columns On the same line as the column headings (row four of the spreadsheet), label the six columns to the right of the data with the names shown in a‐f below. Put the formulas below in each column on the first row beneath the column names (fifth row of the spreadsheet). Once all formulas are entered on the first row, copy them down for all rows: • # of Positive Cycles ‐ This step will calculate the number of cycles during which a cardholder had net positive activity. The formula for positive spend is: =COUNTIF(range, “>0”). “Range” is all of the cycle ending columns, excluding Grand Total, for the row. For example, if the cycle ending columns are column D through column O and the Grand Total is shown in column P, then the range for the first row will be D5:P5. The formula would read =COUNTIF(D5:P5, “>0”). • # of Negative Cycles ‐ This step will calculate the number of cycles during which the cardholder had a net credit (negative) amount: The formula for negative spend is: =COUNTIF(range, “<0”). “Range” is all of the cycle ending columns, excluding Grand Total, for the row. For example, if the cycle ending columns are column D through column O and the Grand Total is shown in column P, then the range for the first row will be D5:P5. The formula would read =COUNTIF(D5:P5, “<0”). • # of Active Cycles Add the number of negative and positive spend cycles to determine the total number of cycles during which the cardholder had activity. The formula for the total number of cycles is =Q5+R5, assuming that the number of positive and negative cycles are in columns R and S, respectively. • Total Cycle Limit: Cycle Limit times # of active cycles. The cardholder could have spent this amount for all cycles during which there was activity on the card. The formula is # of Active Cycles times the cardholder’s credit limit. For example, assume the cardholder’s cycle limit is in cell B5, and the number of active cycles, created in step a.iii, is in cell, the S5 formula would read =B5*S5. • Average Cycle Spend Total Cycle Spend (Grand Total column) divided by # of Active Cycles (from #3 above) For example, if Total Cycle Limit is in cell T5 and the # of Active Cycles is in cell S5, the formula would read =T5/S5. • % of Cycle Format the column as percentage with two decimal places. This is average cycle spend as a percentage of a single cycle limit. P a g e | 15 P‐Card Audit Guide For example, assume the average cycle spend, created in the previous step, is in cell U5 and the single cycle limit is in cell C5, the formula would read =U5/C5. The formulas and results should look like this: Preparing a Pie Chart If desired, you can create a chart or graph to illustrate Cycle Limit and Single Transaction Limit (discussed below) utilization. • Name the column range for the % of Cycle as percycle. • Hi‐lite the entire column and enter percycle in the cell address field in the top left‐hand corner as shown in the diagram to the right. Enter the text and formulas in any three columns to the right. Column letters and row numbers are shown for illustration purposes only. You columns and rows might be different and you will need to use your column letters and row numbers instead of these if they are different. Note that: • The numbers shown in the formulas in Column AC have decimal points. They must be put in exactly as shown. • The greater than/less than symbols and the number must be enclosed in quotation marks. P a g e | 16 P‐Card Audit Guide The results will appear as shown in the diagram to the right. Create the graph or chart using the data shown in the orange box to show the number of cards in each range and the percentage of the total number of cards for each range. See next page for a three‐dimensional pie chart example. Cycle Limit Utilization 8; 13% 2; 3% < 1% 1% ‐ 10% 10% ‐ 20% 20% ‐ 50% 15; 25% 23; 38% >= 50% 13; 21% Analysis Thoughts There are no industry benchmarks, so it is up to management to determine the level of risk that they are comfortable with. As you can see from this illustration, only 13% of cardholders had an average cycle spend of more than 50% of their cycle limit. The largest percentage of cardholders averaged between 1% and 10% of their cycle. From these figures, it appears that cycle limits for this Entity’s cardholders are set higher than what they need. Cardholders who consistently use a high percentage of their cycle limit are probably set at realistic levels. Those who consistently use less than 50% of their cycle limit could be set too high for their needs. However, if these cardholders are also buyers who create purchase orders, they could be encouraged to use the purchasing card in lieu of purchase orders in order to increase efficiency. P a g e | 17 P‐Card Audit Guide Alternate Cycle Limit Review The Cycle Limit should also be able to handle the largest per cycle spend for each cardholder. To determine if cardholders are using the purchasing card to the greatest extent needed, instead of the number of cycles with activity (a‐c above), enter the formula =MAX(range) in the column next to the Grand Total. “Range” is all of the cycle ending columns, excluding Grand Total, for the row. The columns will show the amount of spend in each cycle. The Grand Total column will show the largest cycle amount for the time period for the cardholder. Once again, there are no industry benchmarks. However, doing this analysis, paying special attention to cardholders who also create purchase orders, will identify areas where cardholders have the capacity to transfer purchase order spend to the purchasing card in order to increase purchasing efficiency. Refer to the self‐audit tool Evaluating Vendor Spend for suggestions on incorporating purchase order spend and purchasing card spend into one analysis. SINGLE TRANSACTION LIMIT (STL) ANALYSIS WITH PIE CHART (ADVANCED EXCEL) The Single Transaction Limit Analysis should be done using two different calculations on the transaction amount field. The instructions below use the “average transaction amount” to compare to Single Transaction Limits. However, since the STL also needs to accommodate the highest transaction amount in a given time period, the analysis should be done using the highest transaction amount. Construct second pivot table – Single Transaction Limit Analysis • Row Labels Cardholder name Card # Single Transaction Limit • Column Labels – None • Values – Largest (Max) of transaction amount. This will display the largest transaction amount Calculate the average transaction amount as a percent of the Single Transaction Limit. See illustration below. On row four of the spreadsheet with the pivot table, label the column to the right of the Grand Total as % of STL. 1. Format the column as percentage with two decimal places. Enter a formula on the next row in the same column as the largest transaction amount divided by the Single Transaction Limit. For example, if the average transaction amount created in the previous step is in cell C5 and the STL is in cell B5, the formula would read =C5/B5. 2. Name the column range with the percentages as perstl. 3. Enter the following text and formulas in any three columns to the right of the % of STL column. Column letters and row numbers are shown for illustration P a g e | 18 P‐Card Audit Guide purposes only. Your columns and rows might be different and you will need to use your column letters and row numbers instead of these if they are different. Note that: The numbers shown in the formula have decimal points. They must be put in exactly as shown. The greater than/less than symbols and the number must be enclosed in quotation marks as shown. SPENDING LIMITS ANALYSIS USING THE TEMPLATE (BASIC /INTERMEDIATE EXCEL) If you want review individual cardholders quickly, or if you are not comfortable with Excel pivot tables, the Process Improvement team has developed an Excel template to calculate Total Spend and Average Transaction Amount to compare to Cycle Limit and Single Transaction Limit, respectively. You will need the following data elements (in the order on the spreadsheet) from Works Payment Manager. • Program Card Name (This column is not essential. However, the template has a column for it. If you do not download, or enter, your card program name, then you will need to delete column B from the Data tab.) • Cardholder’s Group Name • Cardholder name • Last four digits of the card number • Transaction amount • Purchase date • Post date • Merchant name • Supplier city • Supplier state • MCC • MCC description • Card Profile Name P a g e | 19 P‐Card Audit Guide • Credit (cycle) Limit • Single Transaction Limit The Read Me tab of the workbook contains instructions on how/where to enter the data and how to refresh the pivot table. The columns on the Data tab of the workbook are named according to the above list of data elements on the second row of the spreadsheet. • The first row of the spreadsheet has a drop‐down list in cell A1 for you to select the day of the month on which your cycle ends (4 or 15 or 27). These are the only values that the cell will accept. • There is also a note instructing you not to delete rows one or two. • Note that in cell A3, there is already a date value of 01‐15‐1900. This field has a formula that you will copy to all data rows during the analysis. Do not delete this formula. However, if you do accidentally delete it, here it is: =(IF(DAY(H3)<=$A$1, MONTH(H3),IF(MONTH(H3)=12,1,MONTH(H3)+1)) &"‐"& $A$1 The Pivot Table tab of the workbook has the pivot table that you will use to review cardholder actual spend and spending limits. Once the data is copied onto the Data tab, you will “refresh” the pivot table. In Excel 2003, select DataRefresh Data from the menu bar. In Excel 2007, click on the Data tab and click Refresh All. The pivot table will do more than one calculation on the transaction amount only if there are three or fewer row fields. If you are not interested in the card number for your analysis, you can leave it off the pivot table. If you leave it off, you can display both the Cycle Limit and the Single Transaction Limit at the same time. However, if you want to see it for the either analysis, you will need to have just the Cycle Limit field as a row or just the STL field as a row. To load the transaction data into the spreadsheet: • Open the Works Payment Manager download file as described above • Click anywhere in the download spreadsheet • Click CTRL‐A to highlight all data • Click CTRL‐C to copy all data to the Windows clipboard • Click on Cell B3 on the Data spreadsheet • Click CTRL‐V to paste the data into the Data tab spreadsheet P a g e | 20 Department of Administrative Services State Purchasing Division Process Improvement EVALUATING VENDOR SPEND LEVELS State purchasing regulations as found in the Official Code of Georgia, Annotated, require competitive bids for any purchases anticipated to be $5,000 or more. The $5,000 competitive bid requirement is based on “purchase(s)” and is interpreted as the total of a single purchase, either purchase order or purchasing card transaction or combination of both. A “single purchase” is defined as any purchase of like or similar items where the need is foreseeable or known at the time of the purchase. Using the purchasing card as a method of payment does not relieve the State Entity, or cardholders, from following competitive bidding procedures when foreseeable and/or known purchases are determined to be $5,000 or more. Refer to the Georgia Procurement Manual for additional information. The APO/CUPO is responsible for including purchasing card transactions in the quarterly spend evaluation required by the Georgia Procurement Manual. This exercise explained below allows the user to: • Quickly identify vendors with more than $5,000 in transactions for any one day, regardless of the number of cardholders, in order to determine if cardholders are splitting purchases to circumvent bid requirements. • Assist in the quarterly vendor spend analysis to identify areas where State Entity contracts could result in cost savings. COMPILING TRANSACTION DATA Works Payment Manager allows the user to download transaction information into an Excel spreadsheet. However, if the user expects that there will be more than 65,535 rows, the transactions must be downloaded to a text file and then opened with Excel. The following data fields should be exported using a custom report. If analyzing for the same time period as the Spending Limits Analysis, you can use that export and/or the spreadsheet used for that analysis. It is recommended that you use at least three cycles (one quarter) of spend for the vendor spend analysis. • Cardholder user name • Post (Bank) Date • Purchase Date • Merchant Name • Merchant City • Transaction Amount P a g e | 21 P‐Card Audit Guide • Transaction MCC • MCC Description Copy the appropriate data to the corresponding columns on the “Spending Limits Analysis Template.xls” used for the cardholder spending limits analysis. Use this spreadsheet because you will need it to calculate the cycle ending date. There is a column with a built‐in formula for calculating the cycle end date based on the bank posting date and when your Entity’s cycle ends. There is a “Read Me” tab on the spreadsheet with general instructions. BASIC EXCEL SKILLS Once the transaction data is downloaded from Works Payment Manager into an Excel spreadsheet, sort the spreadsheet by vendor name and transaction date. Review each vendor individually to determine if: • Any single transaction or combination of transactions in a single day exceeded $5,000. This could indicate split transactions. • Insert two rows beneath each vendor name in order to facilitate calculating total spend for the time period. Use the SUM function in the transaction amount column to determine what was spent by all cardholders with each vendor during the period. Ask: Would a State Entity contract be beneficial? Does another State Entity have a contract for these goods or services that we could piggyback from? • Pull purchase order information from the financial system (see below) and include these amounts for those vendors where there is both purchasing card and purchase order spend. For advanced Excel users, see the following pages on use of a pivot table to facilitate the review. P a g e | 22 P‐Card Audit Guide CYCLE SPEND ANALYSIS – PIVOT TABLE (ADVANCED EXCEL) Use of a pivot table will make analyzing vendor spend much quicker since you will be able to display a list of vendor names and the total spend for each one without having to insert rows and use the SUM function. Refer to the Appendices for pivot tables in Excel 2003 and Excel 2007 for step‐by‐step instructions on creating a pivot table. Once data has been copied to the template, ensure that the Data Source for the pivot table includes all rows on the Data tab. Configure the pivot table to have the following layout • Row – Vendor name • Column – Cycle ending date • Data – Sum of transaction amount Analysis Review the pivot table for vendors with unusual trends in dollar amounts. Review the merchant names for suspicious merchants. Double‐click on the dollar amount to copy these transactions to a new spreadsheet. Rename the spreadsheet to the vendor name. Obtain and review the documentation for the transactions. Split Transactions Analysis Once data has been copied to the template, ensure that the Data Source for the pivot table includes all rows on the Data tab. Configure the pivot table to have the following layout • Row – Vendor name • Column – Purchase Date • Data – Sum of transaction amount Analysis On the pivot table, replace the Cycle End column with the Purchase Date. If any vendors have more than $5,000 in a single day, determine if these transactions were: • From a contract, either SWC or State Entity or • The result of a competitive bid process. • If there are any single transactions >= $5,000 at a non‐contract vendor, determine if these purchases were bid. • Obtain and review the documentation to determine the circumstances. • Ensure that appropriate documentation is retained if it was an emergency purchase and that the Emergency Authorization was sent to the State Purchasing Division. P a g e | 23 P‐Card Audit Guide FINANCIAL SYSTEM PURCHASES (BASIC EXCEL) Run the financial system query that will provide the data shown below to Excel. Name the spreadsheet Vendor PO Analysis. See analysis steps below. Run the PeopleSoft query 0PO019D_PO_LIST_BY_BU_DETAIL (State Accounting Office PeopleSoft users) or equivalent query in non‐SAO PeopleSoft or non‐PeopleSoft financial systems that shows the following information. Items in red font are required, the other items are the ones that come in the standard 19D query. You can delete those columns once you download the query to Excel, if desired. • Unit (Agency code) • Origin • PO Number • Change Order • PO Date • Type • PO Reference • Status • Budget Status • Vendor (this field is the 10‐digit vendor ID) • Name (vendor name) • Vendor Classification • Payment Terms • Buyer‐Phone • Line # • 5 Digit NIGP • 10 Digit NIGP • Description • Line Amount • Build a pivot table with the following layout: • Rows • Name (vendor name) • Buyer‐Phone • Data – Sum of Line Amount (format as currency) Analysis • Using the filter box on the Buyer‐Phone field, select all of the buyers who are also cardholders. P a g e | 24 P‐Card Audit Guide • Review for vendors that also accept the P‐card. • Focus on vendors shown on the listing of Statewide Contracts and Agency contracts. Make a list of the purchase orders: Buyer name Vendor name PO number PO date Total dollar amount • Determine if P‐card spending limits, both Single Transaction and Cycle Limit, for the buyers could have accommodated using the P‐card instead of a purchase order for the purchases. • Determine if other non‐cardholder buyers are using vendors that accept the purchasing card. • Evaluate to determine if it would be beneficial to issue purchasing cards to these buyers. • Encourage buyers with cards to use the card instead of a purchase order for all vendors that accept cards. P a g e | 25 Department of Administrative Services State Purchasing Division Process Improvement PCARD COMPLIANCE ANALYSIS WORKBOOK (ADVANCED EXCEL) OVERVIEW The State of Georgia Purchasing Card (P‐Card) is a procurement tool in the same way that a purchase order is a procurement tool. All legal requirements for procurement in the State of Georgia, as found in the Official Code of Georgia, Annotated (O.C.G.A.) and the Georgia Procurement Manual (GPM), govern use of the P‐Card. Training provided to cardholders and supervisors or approving officials prior to receiving cards or supervising a cardholder must include guidance on these laws and administrative rules. Card Program Administrators, Auditors, and other third‐party reviewers must include compliance with these laws and administrative rules in their audit processes. If cardholders are not abiding by the requirements, then additional training and/or corrective action will be necessary. P‐Card industry best practices state that it is not necessary to audit every transaction. This should be done at the supervisory level. The auditor’s role is to evaluate the controls in place and to review an adequate sample of transactions to determine with reasonable certainty that controls are working and that the card is being used according to State and internal policy requirements. A review method known as “continuous monitoring” is also becoming widely recommended and practiced. Continuous Monitoring allows you to identify transactions where cardholders are not abiding by either State regulations or your own internal policies and procedures. In Microsoft Excel, “VLOOKUP” formulas can look at specific fields in a transaction to determine if they comply with a set of pre‐established business rules for that particular data element, such as the vendor name or the Merchant Category Code (MCC). Those that pass the test can be eliminated from a high‐level review. Those transactions that do not pass are the ones that you can focus your attention on to determine if your State Entity is at risk for financial loss due to such things as failure to bid large purchases or failure to use established contracts. The P‐Card Compliance Analysis Workbook is an Excel workbook designed to help the Card Program Administrator or auditor monitor P‐Card transactions without actually looking at each one. The workbook can be used with transaction data over any period of time, even on a weekly basis if resources permit. Use of this workbook is optional. The P‐Card Compliance Analysis Workbook uses formulas in one cell to compare the values in another cell on the row to a list of a values. It provides a “Yes” or a “No” response to indicate that the value in the cell matches or does not match the criteria. This can eliminate transactions that, for any number of reasons, do not need to be P a g e | 27 P‐Card Audit Guide included in a high‐level audit. (This is not to say that these transactions should never be reviewed, though. When doing an audit, a sample should be chosen from the total population in order to get an adequate picture.) The criteria used in this workbook are based on the Georgia Procurement Manual and the State P‐Card Policy. The workbook can be customized to incorporate unique State Entity business rules, as well. This workbook makes extensive use of lookup formulas, pivot tables, and filters. Users should have intermediate to advanced skills in Excel or access to helpful resources, such as reference books and other users. If the user needs help in this area, the Process Improvement Team has also provided a brief overview on how to use pivot tables on the State Purchasing Division web site. DOWNLOADING TRANSACTIONS FROM WORKS PAYMENT MANAGER The workbook is a template with pre‐established columns based on a specific Works Payment Manager download file layout. The data can be downloaded from Works either to an Excel file or to a text file. However, the download for this workbook must be a text file because some fields that the workbook needs as “text” come out of Works in a numeric format. Numeric fields will not work with the VLOOKUP formulas on the spreadsheet. If you download the transactions to a text file, you can specify that the Merchant Category Code can be a text field instead of a numeric field when you open the file. There are two reasons for this: • There are some MCC’s that have leading zeroes. If opened directly in Excel, Excel will assume that the field should be numeric. The leading zeroes will be removed. The MCC “0742”, for example, would display in Excel as “742”. • The MCC field is used in VLOOKUP formulas. The formula will only work if the field is a text field. It will not work with numeric fields. You can download the transactions for any time period. However, it is recommended that you download based on your cycle end date. For example, if your cycle ends on the 15th of the month, you would want to download from the 14th of one month to the 15th of the next month. This will enable you to more accurately determine if cardholder cycle limit levels are set appropriately for the cardholders’ needs. It is recommended that you configure and “bookmark” a report in Works Payment Manager so that the report does not have to be re‐created each time. Open either the Billing Statement or the Spend by MCC report to get started. Add, delete, and re‐ arrange fields as needed. For assistance with configuring a report in Works Payment Manager, click on the Tools link on the left‐hand side menu and select Training. Navigate to the Quick Reference Guide entitled “Creating Configurable Reports”. Refer to the chapter Configurable Reports in Works Payment Manager for additional information. File Layout The workbook uses the following data fields. The fields in red font are required. If any of the others are not downloaded from Works, the user must remove those columns from the spreadsheet prior to using. If you add any fields from Works Payment P a g e | 28 P‐Card Audit Guide Manager, then a corresponding column must be inserted into the appropriate place on the Data tab of the workbook. The corresponding column letters are shown next to the field name in the list below. The layout in Works Payment Manager is shown below and in the screen shots to the right. Refer to the section in this document entitled Configurable Reports in Works Payment Manager for more details on how to run configurable reports. • CH User Name • Last 4 Digits • Amount • Purchase Date • Post Date • Comp Supp Name • Comp Supp Street 1 • Comp Supp City • Comp Supp State • Comp Supp Zip • Comp Supp Phone • MCC • MCC Description • Grp Group Name • Single Txn Limit • Credit Limit Under “Transaction Type”, ensure that “Reimbursement” and “Payment” are not checked. P a g e | 29 P‐Card Audit Guide Exporting to Excel If you know that you have fewer than 65,535 rows, then you can export the transactions from Works directly into Excel. You can then skip to the section entitled “Copy Transaction Data to the P‐Card Compliance Workbook” below. Exporting to a Text File If you know that you will have more than 65,535 rows, then you will need to export the data to a text file and then open with Excel. Excel 2003, though, will only handle 65,535 rows. Excel 2007 can handle more. The Works download file is a comma‐ delimited text file. This means that the file uses a comma to separate the data fields (columns). To open the text file, open Excel. Select Open from the menu. 1. Navigate to the folder where your data file is. 2. Select Text Files in the Files of type drop‐down list. Note that Excel file type is the default. You must change the file type in order to see your data file. 3. Click on the file name. 4. Click Open. The Import Text Wizard dialog box will walk you through opening the file. Step 1 of 3: Click on the Delimited radio button and then Next. Step 2 of 3: Specify that the mark used to define the fields is the Comma. You can leave the Tab box checked as well. Click the Next button. Step 3 of 3: P a g e | 30 P‐Card Audit Guide Use the scroll bar to review the fields. Notice that the wizard gives a preview of what the data will look like. The default data format is “General”, which means that Excel will import text as text, numbers, as numbers, and dates as dates. The rule of thumb for non‐date fields is, if you are not going to do calculations on the field or the field is not a date, then you should specify “Text” as the field type. • In the Works file, there are some fields that contain numbers (last four digits of the card and the Merchant Category Code) that you will want to specify as text fields. There are also other fields, such as the merchant phone number, zip code, or address that will sometimes have just numbers instead of alpha characters. Designate these fields as text. To do this, click on the field and then click on the Text radio button. • Import the Transaction Date and Post Date columns as “Date”. • Import the Transaction Amount, STL, and Credit Limit columns as General. Notice that you can “skip” a field if desired. However, since your download was designed specifically for this workbook, you will not want to skip any fields. If you do skip any fields, be sure to delete the corresponding column from the Data tab spreadsheet. Click Finish to complete the import process after you have assigned data formats to all fields. You data will display in Excel. Keep the file open. It will be referred to as the “data download spreadsheet” from now on. It is recommended that you save this file so that you do not have to run the report again if you have to start over. Copy Transaction Data to the PCard Compliance Workbook In the next few steps, you will copy the transaction from the data download spreadsheet to the template on the Data tab in the P‐Card Compliance Analysis Workbook. It is recommended that you read through these steps prior to actually performing them in order to have an understanding of what you will do. • Open the P‐Card Compliance Analysis Workbook and click on cell I3 on the Data tab. This will be the first blank row in the CH User Name column. See the screen shot below. [NOTE: The screen shots in this document will be of the workbook using Excel 2007. If you have Excel 2003, your screens will look slightly different. The wording of instructions uses Excel 2007 terminology. You will need to perform the same tasks according to Excel 2003 steps. All cell references will be the same for both versions of Excel.] P a g e | 31 P‐Card Audit Guide • Open the data download spreadsheet if not already open. Delete the first row with the column headings. If you do not delete it, you can delete it once you copy the data to the workbook. If you downloaded reimbursements and payments to the bank with your transactions, delete these rows as well. • Click anywhere in the data download spreadsheet. • Click CTRL‐A to highlight all of the transaction data. [NOTE: Do not simply highlight the entire spreadsheet. If you do, the data will not fit on the P‐Card Compliance Analysis Workbook’s Data tab when you try to paste it into cell I3.] • Click CTRL‐C (or use any other copying method that you are familiar with) to copy the highlighted area to the Windows clipboard. • Navigate to the P‐Card Compliance Analysis Workbook and click on cell I3. (See diagrams below.) • Click CTRL‐V (or use any other paste method that you are familiar with) to paste the data into the P‐Card Compliance Analysis Workbook. When the data is pasted into the spreadsheet, the formulas in columns A through H will calculate. To verify that all rows of data are complete, click on cell I3 and then click End and the Down Arrow key to go to the last row of data. Ensure that the formulas are on each row of data. If not, go up to the last row that has the formulas and copy columns A through H down to all data rows. If there are rows with formulas but no transactions, those rows can be deleted. For more information on the formulas and the lookup tables, see Maintaining the Lookups Tab below. P a g e | 32 P‐Card Audit Guide Getting to Know the Data Tab The Data tab contains more than just your transaction data. Formulas in Columns A through H display information based on the values shown in the columns of the spreadsheet. • Purchase Day – This is the day of the week that the purchase was made on based on the Purchase Date column. It uses this formula: =LOOKUP(WEEKDAY(L3),{1,2,3,4,5,6,7},{"Sunday","Monday","Tuesday","We dnesday","Thursday","Friday","Saturday"}) • Begin Date – This is the Monday of the week during which the transaction took place. It uses this formula: =VLOOKUP(WEEKNUM(L3),weeks,2,FALSE). The VLOOKUP formula looks at the week numbers shown in the “weeks” range on the Lookups tab. This table needs to be updated annually as explained below. • Excl. Merchant? – “Excluded Merchants” are those merchants that have already been identified as Statewide Contract or State Entity contract merchants. The formula in this cell looks at the “excluded” range on the Lookups tab. If it finds the merchant name, it puts a “Yes” in the cell; if not, it puts a “No”. When/if you find a contract vendor that has not been excluded, simply copy the vendor name to the last row of this range. The formula on the data tab will automatically change. The same field on the pivot table will update when you refresh the pivot table. It uses this formula: =IF(ISNA(VLOOKUP(N3,excluded,2,FALSE))=TRUE,"No",VLOOKUP(N3,exclude d,2,FALSE)) • Exempt MCC?1 – “Exempt MCCs” are those MCCs that are probably equivalent to one of the exempt NIGP codes listed on the State Purchasing Division web site. The formula in this cell looks at the “exempt” range on the Lookups tab. If it finds the MCC, it puts a “Yes” in the cell; if not, it puts a “No”. It uses this formula: =IF(ISNA(VLOOKUP2(T3,exempt,2,FALSE))=TRUE,"No","Yes") • Contract MCC – “Contract MCCs” are MCCs that are associated with known Statewide Contract merchants. The formula in this cell looks at the “contract” range on the Lookups tab. If it finds the MCC, it puts a “Yes” in the cell; if not, it puts a “No”. It uses this formula: =IF(ISNA(VLOOKUP(T3,contract,2,FALSE))=TRUE,"No",VLOOKUP(T3,contract, 1,FALSE)) • Level III – “Level III” refers to a list of merchants that are known to transmit Level III detail information. As more are identified, the user can copy these names to the 1 A NOTE ABOUT MERCHANT CATEGORY CODES: If you exported transactions from Works Payment Manager to an Excel spreadsheet, then Excel assumed that the MCC will be used as a number. As a result, it removes the leading zero in the four codes that begin with zero (0701, 0742, 0763, and 0780). You will need to go back and designate the column as text and then manually add the zero to the beginning of those codes in any transactions where they occur. 2 A NOTE ABOUT THE “VLOOKUP” FUNCTION: This function will only work if it is looking up a value in a cell formatted as “text”. P a g e | 33 P‐Card Audit Guide “level3” range on the Lookups tab. The formula in this cell looks at the “level3” range on the Lookups tab. The formula on the data tab will automatically change. The same field on the pivot table will update when you refresh the pivot table. If the formula finds the merchant name, it puts a “Yes” in the cell; if not, it puts a “No”. It uses this formula: =IF(ISNA(VLOOKUP(N3,level3,2,FALSE))=TRUE,"No","Yes") • State Eligible? – State Eligible” MCCs are those that are in one of the four State‐ authorized groups. These groups are (1) GASTATE, (2) GASTATE1, (3) GASTATE2, and (4) GAATHTRAV. The formula in this cell looks at the “mccs” range on the Lookups tab. It then pulls either “Yes” or “No” based on what is in the third column of that range. This column corresponds to the old MCC Analysis workbook. It uses the formula: =VLOOKUP(T3,mccs,3) • Red Flag MCC? – The formula in this cell looks at the “mccs” range on the Lookups tab. It then pulls the value in the eighth column of that range. There might be MCCs that are legitimate, authorized MCCs but that, for any number of reasons, the user might want to review transactions at these merchants. To customize this function, go to column X of the Lookups tab. Enter “Yes” on the row for that MCC. This column uses the formula: =IF(VLOOKUP(T3,mccs,8,FALSE)="Yes","Yes","No") The remainder of the columns contains the transaction data downloaded from Works Payment Manager. If you decide not to download one or more of those fields, be sure to delete those columns from the spreadsheet. The formulas above look at specific columns. The formulas will automatically adjust to reference the new column. For example, if you delete column S (the merchant’s phone number), then the MCC, currently in column T, will be in column S. The VLOOKUP formulas will then look at column S for the MCC. P a g e | 34 P‐Card Audit Guide Refresh the Pivot Table The most efficient method to review the data is to use the pivot table, found on the P‐ Card Compliance Pivot Table tab. Click on that tab and then anywhere in the empty pivot table that is there. On the Options menu tab (Excel 2007), click on the green refresh arrows. The pivot table will populate. If you see (blank) in any of the columns, this means that the pivot table data range encompasses more rows than you have data on. This is not a problem. If you want to change the data source to include only rows with transactions, you can do that. Click on the Change Data Source button (see above), next to the Refresh button. In the dialog box, click at the end of the cell range, backspace out the current row number, and enter the new row number as shown and click OK. The pivot table will automatically refresh. If it does not, click the Refresh button. P a g e | 35 P‐Card Audit Guide Pivot Table Design The pivot table uses Report Filters (known as Pages in Excel 2003) to isolate transactions based on specific criteria. When the filters are set to pull all transactions, as shown by the (All) in column B (see diagram), then all transactions are included in the pivot table. When the values in the filters are changed, transactions that meet all criteria will be included in the pivot table data. The transactions are still on the Data tab. They just aren’t included in the values reflected on the pivot table. Users who are comfortable with pivot tables can change the design to suit their needs. It is recommended, though, that you keep a master copy of the P‐Card Compliance Workbook with any Lookups tab customizations that you might have done. Definitions For more information, see Getting to Know the Data Tab above and Maintaining the Lookups Tab below. • Excl. Merchant? This term refers to merchants that have been previously identified as contract merchants, such as Staples or W.W. Grainger. This filter corresponds to Column C on the Data tab. As more contract vendors are identified, the vendor name as it comes across from the Bank can be added to the lookup table so that it can be excluded in the future. • Exempt MCC? The State Purchasing Division has classified multiple NIGP codes as being exempt from State Purchasing Division rules. The complete list of these is found on the State Purchasing Division web site. Certain MCC’s have been classified as exempt based on the NIGP that it would probably correspond with. This filter corresponds to Column D on the Data tab. • Purchase Day This filter allows the user to focus on purchases based on the day of the week, such as Saturday or Sunday, in order to identify possible misuse of the card. However, not all weekend purchases are inappropriate. The cardholder’s job requirements will influence when purchases are made. This filter corresponds to Column A on the Data tab. • Contract MCC This filter allows the user to focus on transactions at merchants that have the same MCC as a known contract vendor. It is helpful in identifying possible failure to use contracts. This filter corresponds to Column E on the Data tab. P a g e | 36 P‐Card Audit Guide MODIFYING THE PIVOT TABLE DESIGN The pre‐designed pivot table on the Compliance Analysis tab uses the merchant name as one of the Row Labels. However, in your work, you might want to see cardholder names instead of merchant names. To do this: 1. Unclick the box next to the merchant name (Comp Supp Name). 2. Click the box next to the cardholder name (CH User Name). 3. You will want to have the cardholder name in the first column of the pivot table, column A. Simply drag‐and‐drop the field name to the top. See diagram below. 4. You can also show the merchant name along with the cardholder, either as the first column or as the second column. Manipulate the pivot table to determine the best way to meet your review objectives. P a g e | 37 P‐Card Audit Guide SUGGESTED ANALYSIS STEPS Using the filters and reconfiguring the pivot table allows you to select transactions for review based on specific criteria. The suggestions for use in this user’s guide are not the only possibilities but are intended to get you started. As you become more familiar with the pivot table and the various formulas used to provide more information about the transactions, you can reconfigure the pivot table in multiple ways to fine‐tune your review. Open Market Purchases Transactions at vendors that have not been previously identified as contract or mandatory source merchants would be considered “open market” purchases. These purchases will fall into two categories: (1) those at exempt MCCs (NIGPs) and (2) those at MCCs that are not exempt. • Select “No” from the Excl. Merchant? Report Filter. The pivot table will reflect the merchant name and the total dollar amount of transactions at merchants that have not been previously identified as a Statewide or State Entity contract or as mandatory source regardless of the NIGP. If you have customized the merchant list to include your State Entity merchants, these will be excluded as well. • Perform any or all of the following steps. Each activity is designed to be done separately, not at the same time. • If a merchant has more than $5,000 in spend during the cycle, pull all transactions with that merchant from Works Payment Manager for the previous six months to determine if this is an opportunity for a State Entity contract. If you have access to queries in PeopleSoft, you can also pull spend there to determine if between the two methods of procurement, P‐Card and purchase order, there is enough spend to justify the effort to create a contract. • Select “No” from the Excl. Merchant? Report Filter and the Merchant Category Codes shown in the Contract MCC Report Filter (i.e. select every value in the list except the “No”) to determine merchants that have not been previously excluded AND that have the same MCC as an excluded merchant. These transactions could be cases where the cardholder could have or should have purchased the items from a contract vendor or from a mandatory source. P a g e | 38 P‐Card Audit Guide To see these transactions, double‐click on the dollar value. The transactions will be copied to a new spreadsheet in the workbook. Review the documentation to determine if the items purchased were available on a contract. Select “No” from both the Excl. Merchant? and the Exempt MCC? Report Filters. The pivot table will now reflect transactions at merchants that have not been identified as contract merchants AND where the MCC is not exempt. You can also select the known contract MCCs from the Contract MCC Report Filter as described in the previous activity. Review these transactions to determine if the cardholder(s) should have used contract merchants. Remember that even if a purchase is exempt from State procurement regulations, the cardholder must still follow the Order of Precedence and use contract vendors. Split Purchases Add the Purchase Date field to the pivot table as a Column Label. Determine if any vendor had spend in excess of $5,000 on a single day or on consecutive days. (HINT: The easiest way to scan through the data quickly is to apply conditional formatting to highlight any cell greater than or equal to $5,000 and then look for the highlighted cells.) If the answer to either of the following questions is “Yes”, then investigate for possible split transactions. • Did a single cardholder have all transactions? • Did two or more cardholders in the same work unit make the transactions? Weekend Purchases Select “All” from each Report Filter to reset the pivot table to its original configuration. Using the Purchase Day Report Filter, select “Saturday” and “Sunday” to review transactions made on the weekends. Review such combinations as merchant name, MCC description, and cardholder user group to determine if a weekend transaction would be reasonable. If not, investigate those transactions. You can also select “No” from both the Excl. Merchant? and the Exempt MCC? Report Filters to eliminate transactions from contract merchants or at exempt MCCs. If a cardholder is abusing the P a g e | 39 P‐Card Audit Guide card, the abuse will probably not be at contract or exempt MCCs simply because of the nature of the transactions. However, you might want to investigate some contract transactions, such as automotive parts or office supplies. Merchant Utilization There are times when you might want to see if there is a merchant that only one cardholder is using. It is more likely that any personal use will be at merchants that other cardholders do not use. To determine if there are any merchants that fit this category, configure the pivot table so that the merchant name is the first Row Label and the cardholder name is the second Row Label. Keep in mind that if only one cardholder uses a merchant, this does not indicate fraudulent use. The cardholder’s job description, work unit, and other factors determine which merchants a cardholder uses. Moreover, it is possible for a cardholder to make personal purchases at merchants that everybody uses, such as Staples or Home Depot. Combined PCard and Financial System Spend Periodically, you should download purchase order spend and vouchers without purchase orders from the financial system for the same time period and compare to spend on the P‐Card. The Agency/University Procurement Officer should be doing this as part of the regular spend analysis. Use of the P‐Card increases efficiency in most procurement operations and eases the burdens on the Accounts Payable staff. Review the list of vendors used in PeopleSoft with the merchant names in the P‐Card spend data. Answer these questions: • Are buyers who are also cardholders both issuing purchase orders and using the P‐ Card with the same merchant? • Are there local businesses on the list of purchase order vendors that probably serve the general public? If so, then they probably accept credit cards and would accept the P‐Card. P a g e | 40 P‐Card Audit Guide SAMPLE CRITERIA PIVOT TABLE The Compliance Pivot Table tab summarizes transactions by merchant name. This allows you to view the merchants involved when you are looking for suspicious transactions. The Sample Criteria Pivot Table tab contains a pivot table that summarizes transaction data according to “Excluded Merchants”, “Exempt MCC”, and “Contract MCC” status. The tab contains instructions on how to use the filters to isolate transaction dollar amounts at all merchants meeting the criteria selected in the filters. This tab is useful if you want to kick transactions out to separate spreadsheets based on their criteria in order to select a representative sample from each category. P a g e | 41 P‐Card Audit Guide MAINTAINING THE LOOKUPS TAB The Lookups tab contains all of the ranges of data used in the VLOOKUP formulas on the Data tab. Some of these ranges can be customized to fit your needs. Excluded Merchant (columns AC) Merchant names do not come across from the Bank in the same format as the vendor name in the PeopleSoft financial system. As a result, you cannot simply put all of the contract merchant names on a spreadsheet and use it. As contract merchants are identified, they must be added to the lookup range. The State Purchasing Division Process Improvement Team will update the P‐Card Compliance Analysis Workbook on a monthly basis if any new merchants were identified. You can also maintain the list on your version of the workbook. If you identify a new SWC or State Entity contract merchant, those merchant names should be entered on the list. Go to the first empty row in Column B, and enter the new vendor name and “Yes” in column C. The formula on the Data tab will automatically reflect the new value. You will need to refresh the pivot table in order for transactions at the merchant to be excluded. Level III Merchants (columns E – F) The Process Improvement Team has already identified several merchants that transmit this level of detail. These are merchants are already on the Lookups tab. You can determine if a merchant transmits Level III (line item) detail by creating a report in Works Payment Manager that pulls data fields from the “Transaction Details” section. There will be one line for each line on the invoice or receipt. When you find a new one, simply add the merchant name to the list as you did for the Excluded Merchants. Weeks (columns L – N) There might be an occasion, such as looking at split purchases, when you might want to see all transactions during a certain week. Column B on the Data tab reflects the Monday of the week during which a transaction took place. This table must be maintained annually. Enter the Monday of the week during which the new year starts. For example, if January 1st is on a P a g e | 42 P‐Card Audit Guide Friday, the previous Monday would have been December 28th. Enter that date in cell N2. The remaining date cells will calculate based on the previous date plus seven days. State Eligible MCCs (columns P – W) These columns show all Merchant Category Codes and the State‐authorized MCC groups to which they belong. There are not many MCCs that are not in at least one group. The Process Improvement Team will update this list if new MCCs are added to groups or if new groups are added. If you have received approval to use an MCC that is not in one of the State‐authorized groups, you can change the “No” in column S to “Yes” so that the formula on the Data tab will mark that transaction as conducted at an authorized MCC. “Red Flag” MCCs (columns Q – X) If your want to focus attention on transactions at merchants with specific Merchant Category Codes, even if they are allowable, you can use the “Red Flag” column on the MCC table to do this. Simply put the word “Yes” in column X on the row for that MCC. The Data tab will reflect the “Yes” in column H. You can either filter on those transactions on the Data tab or add this column to the Report Filters on the pivot table. You can also use this column to focus on specific spend areas. Exempt MCCs (columns Z – AA) The State Purchasing Division has ruled that certain NIGP (National Institute of Governmental Purchasing) codes are exempt from the State Purchasing Act. This list is available on the SPD website at http://doas.ga.gov/StateLocal/SPD/Docs_SPD_General/ NIGPExemptList.pdf The State Purchasing Division updates this list if other NIGPs are determined to be exempt. The Process Improvement Team has identified Merchant Category Codes that are possible equivalents of the NIGP code. These are shown on the Lookups tab in the “Exempt” range name. Since there is no direct correlation between MCCs and NIGP codes, this list is not guaranteed to be infallible. However, this Report Filter can exclude some transactions that might be exempt. Transactions at some merchants with “exempt” MCCs might not be exempt when the details are reviewed. When conducting an audit, the user should sample these transactions to determine if they are exempt. P a g e | 43 P‐Card Audit Guide This is especially critical if a single purchase or multiple purchases exceed the $5,000 bid limit or were purchased from a non‐contract vendor. Remember – cardholders must still follow the Order of Precedence, even if the NIGP/MCC is “exempt”. While the user can add MCCs to this list, it is not recommended unless the Process Improvement Team updates it since you might exclude some transactions that are, in fact, non‐compliant. Contract MCCs (columns ACAD) Contract MCCs are those MCCs that are associated with known Statewide Contract vendors. Purchases at merchants that have not been previously identified as contract AND have the same MCC represent possible failure to use a contract merchant. As with the exempt MCCs, this list is not guaranteed to be infallible. The user should not assume that all transactions could have been purchased from a contract vendor. Only review of the documentation will determine that. P a g e | 44 Department of Administrative Services State Purchasing Division Process Improvement DOCUMENTATION REVIEW PURCHASES OF SUPPLIES AND MATERIALS There is no one right definition of adequate documentation for all transactions. The nature of the goods or services received determines what information the invoice or receipt must contain. However, all invoices should contain basic information about the transaction. These are: • Vendor or merchant name • Transaction date • Line item information Quantity Description Unit Price Line Price (quantity times unit price) • Total invoice amount • Attestation of receipt of goods or services If the documentation is a cash register receipt, then the cardholder’s signature should be on it. If the items were shipped, the receiving employee should sign the packing slip, and the invoice if it comes in the shipment, and send to the documentation to the cardholder. The cardholder should keep the original, signed packing slip and invoice with the transaction log or monthly billing statement. Specialized Transactions In addition to the above information, good accounting practices dictate that certain transactions have the following documentation: Subscriptions (Newspapers, magazines) • Length of subscription or renewal • Name of periodical • Name of employee for whom periodical was ordered • Delivery address for the periodical • Cardholder should sign original order or renewal form P a g e | 45 P‐Card Audit Guide Organizational Memberships • Name of employee for whom the membership is paid • Length of the membership period Freight Charges (when billed by a third party) • Origination point • Destination point • Nature of items being shipped • For payments to shippers such as FedEx and UPS, the cardholder should attach the statement from that company showing all shipments and the amounts for each individual delivery. Conference Registrations • The Department of Audits and Accounts does not consider conferences registration fees to be employee travel. Therefore, cardholders can use the card for registration fees. It is up to the agency or institution to prohibit this type of transaction. The documentation must include: • Copy of the registration showing who is attending • Copy of the agenda or program Airline Tickets • A copy of the itinerary showing the name of the employees flying and the purpose of the trip must support charges for airline tickets. If the agency pays for non‐employee flights, then the documentation must include an explanation for the charge. • The cost of shuttles to and from the hotel and the airport are employee travel expenses and cannot be put on the purchasing card. Employees must pay these charges and receive reimbursement on a travel reimbursement form. Group Meals The State Accounting Office issued its Employee Group Meals Policy on October 1, 2006. Refer to the Statewide Travel Regulations on their website. Meals that meet the requirements for group meals must have the following documentation in addition to the invoice from the caterer or restaurant providing the meals: • Prior written approval from the agency or department head • Roster signed by all employees participating in the event • Agenda or other documentation showing the purpose of the event at which the meal was served Printing • Copy of finished product • Job order or other document showing the number of documents printed P a g e | 46 P‐Card Audit Guide Newspaper or Internet Advertisements • Copy of the newspaper advertisement as printed and the date(s) printed • Print screen of the actual advertisement on the Internet site. OTHER PURCHASES Payment from Statements Cardholders must pay from an invoice when at all possible. If a merchant regularly holds invoices and generates charges only from a monthly statement to its customers, then the cardholder must retain all individual invoices and attach them to the statement as documentation that the statement reflects the total amount of charges. The cardholder should staple the invoices to the statement and attach an adding machine tape proving that the total of the invoices matches the amount on the statement. Recurring Monthly Charges (Services) If merchants do not send out monthly statements, either through regular mail or via email, then the cardholder should attach a copy of the original order for the service showing what the monthly amount will be and the length of the term of service. The cardholder must document any change in the amount charged compared to the amount shown on this documentation with a new notification from the merchant. Notes generated by the cardholder to this effect are not adequate documentation for the price increase or decrease. NonInventoriable Assets State Entities must record any single piece of equipment with a cost greater than $1,000 for agencies or $3,000 for colleges and universities in asset inventory. State policy prohibits use of the purchasing card for the purchase of any asset that must be included in the asset inventory. The State Purchasing Card Policy allows the purchase of equipment under these thresholds and recommends that entities also maintain any easily misappropriated equipment, such as digital cameras, in the asset inventory. Documentation for this type of purchase must include: • Location of the items purchased • Asset tag/decal number (if not indicated on the invoice, auditors will request to verify the existence and location of the asset) P a g e | 47 Department of Administrative Services State Purchasing Division Process Improvement CONFIGURABLE REPORTS IN WORKS PAYMENT MANAGER OVERVIEW Works Payment Manager (Works), the on‐line card management system provided by Bank of America, uses reports to download transaction data for analysis with either Microsoft Excel or Microsoft Access or to a PDF document for reports that will be printed. For most analyses a State Entity will want to do, the data can be downloaded to Excel. However, if the number of rows exceeds the row limit in older versions of Excel (65,535), then the transactions must be downloaded to a text file or to multiple Excel files. Both types of files can be used in Excel or in Access. Works allows the user to select which data fields to include in a report or download. This is done in the Configurable Reports section. CREATING A REPORT After logging into Works, 1. Click on Reports to display the list of report options 2. Click on Reports to display the list of report categories 3. Report categories are shown in the illustration to the right. Transaction downloads are done in the Spend Reports section. 4. Click on Spend Reports. P a g e | 49 P‐Card Audit Guide Works has certain standard reports that can be run as‐is. These reports can also be configured by adding and removing data fields. In order to configure a report, the user has to start with one of the existing reports, or templates. • Click on the arrow in the Report Template drop‐down list. • To download transactions, start with the Billing Statement report by clicking on it. • The Report Configuration screen will display. This screen has six sections. Report Configuration Screen Sections Step1: Choose a Report Template Once you select your template, shown above, options for the template display. The default display is Show Expert View, which allows the user to see all data fields available and other report options. The Simple View allows the user to change a template, to specify the output format (e.g. Excel), and to enter parameters in the filter options. 1. You can change the template if you decide the one you chose is not correct. 2. Simple View displays just the fields to enter criteria for transaction selection. To show just the Simple View, click the button here. The button name will change to Show Expert View. Both views are discussed in more detail below. 3. Use Last Run Settings allows you to immediately run a report using the template as it was configured for the previous run. 4. Reset to Defaults sets the template back to the original Works design settings. Step 2: Choose the Export Formats Available formats are PDF, Excel, and Delimited Text. Click the desired check box. The Paper Size, Orientation, Add summary data to the header options are only available for PDF documents. P a g e | 50 P‐Card Audit Guide If you select Delimited Text, you have the option to select a delimiter (e.g. comma), what to do if the selected delimiter occurs in the field value itself, and to include the field names as column headings on the first row of the file. This is helpful if the text file will eventually be opened with Excel. Step 3: Configure Report Columns This is the section where you tell Works Payment Manager which data fields you want to include in the report. The Included Columns area displays the fields currently on the report. These fields can be moved up or down, deleted, or edited by clicking on the buttons to the right of the listing. The field can be moved to the Sort Columns list by clicking the down arrow button beneath the listing. The Sort Columns list allows you to move fields up and down to change the sort order or to delete the fields from the sort order using the same type of buttons as the Included Columns listing. The Available Columns listing categorizes available data fields based on the type of data. The categories that are most useful for the State of Georgia are: • Allocation – information on how a transaction was allocated in the General Ledger • Card – information about the cardholder’s card • Card Profile – spending limits for the profile to which the cardholder is assigned • Cardholder – information about the cardholder. The most useful field here are the CH User Name. • Cardholder Group – the work unit or other grouping to which the cardholder is assigned. • Company Supplier – information about the merchant. • Orig[inal] Transaction – basic information about the transaction • Program Card – information about the State Entity’s card program • Transaction – additional information about the transaction • Transaction Detail – information about Level III detail, when available P a g e | 51 P‐Card Audit Guide To select a field to include in the report: 1. Click on the field name 2. Click the arrow button to move it to the Included Columns listing. Use the up and down arrow buttons shown above to arrange the columns in the desired order. Use the down arrow button under the field listing to indicate the fields to be used f or sorting. Arrange the columns in the desired sort order, using the up and down arrow buttons. Click on a field name and then the X button to delete a field from the sort layout. Click on the Specify Sort Directions button to reveal the sort fields and click the radio button for either Ascending or Descending. Step 4: Add General and Column Filters Any field, regardless of whether or not it is included in the field list for the report, can be used as a filter. A filter is where you tell Works Payment Manager to limit the transactions it pulls based on certain parameters, such as between certain dates or for a specific cardholder or merchant. 1. Click on the drop‐down arrow to scroll the fields. Click on the desired field name to display it in the filter list. 2. The filter list displays below the drop‐down list. When Works runs the report, only transactions that meet ALL of the criteria will be pulled. In the example above, only transactions on the card that ends in the Last 4 Digits and are on the Post Date shown will be retrieved. 3. Click on the x button next to a filter to remove it. P a g e | 52 P‐Card Audit Guide Specifying parameters Some fields used as filters have a button to click in order to enter the parameters. In the illustration above, clicking on the Date… button next to Post Date displays the Select Dates dialog box. Select from any of the pre‐designed parameters or manually enter the dates in mm‐dd‐yyyy format. Click Finish to return to the report design screen. Step #5: Bookmarking Bookmarking is the Works word for saving the report template. 1. Click on the checkbox next to Bookmark this report template. 2. Enter a Bookmark name (report name) and Description for the report. 3. Make sure that the Personal radio button is selected. Only Works administrators can create Company reports. Company reports can be seen by all Works users at your Entity. Step 6: Scheduling & Expiration Reports can be run Now or at a later specified time. Reports can also be scheduled to run on a recurring schedule (e.g. every Monday morning at 7:00). Works will also keep a copy of the report for a specified number of days. 1. Specify the Job Name. This can be the name of the report. However, if you are running several versions of the report (e.g. multiple cardholders), you will want to give each one a different name so that you will be able to find it easily later. 2. Click Now to run the report now. 3. Indicate the number of days to keep the report in the Works system. 4. Click the Submit Report button in the lower right‐hand corner. P a g e | 53 P‐Card Audit Guide SCHEDULING REPORTS • Click on the Later… radio button and the Later… button. The Choose a Date and Time dialog box will display. Enter the date and time and click OK. • Click on the Recurring… radio button and the Recurring… button. The Report recurrence dialog box will display. Enter the information and click OK. • Click on the Submit Report button to schedule the reports. RETRIEVING A REPORT Works Payment Manager saves reports for the number of days specified when the report was run. The default for this time period is seven days, but the user can change this to any number of days. Reports are stored in the Reports section under Completed Reports. 1. Click on Reports to display the list of report options. 2. Click on Reports to display the list of report categories. 3. Click on Completed Reports to display all saved reports. 4. The list of reports that have been run and are still in the Works system and available for download displays on the screen. 5. Click on the report name to highlight it. P a g e | 54 P‐Card Audit Guide 6. The Report Info screen will display at the bottom with information about the report and with three option buttons in the lower left‐ hand corner. a. Clicking the Add Another Format button allows you to select a different format (e.g. PDF instead of Excel). Works will run the report without any other input from you. The report will show as Awaiting Processing and both output formats will display in the Requested Export Types column b. Clicking the Download [file format] button will start the download process for the report. You can either Open, Save, or Cancel the operation. Click Open to open the file and view on the screen. Click Save to save the file to a network drive or the hard drive of your computer. Click Cancel to stop the download process. c. Clicking Run Report Again takes you back to the report configuration screen so that you can modify the report design or enter a different set of parameters for the same report. P a g e | 55 P‐Card Audit Guide MANAGING “BOOKMARKS” Bookmarks are the templates for the reports that you have created. You can delete those that are no longer needed by going to Reports Bookmarks Management on the menu on the left‐hand side of the screen. Click on Management to display the reports divided into sections for Personal Bookmarks (those only you have access to) and Shared Bookmarks (those that multiple users have access to). Only someone with administrator privileges can create a shared bookmark. To delete a bookmark, click on the box next to the Bookmark Name and then the Delete button in the lower right‐hand corner. Make sure that you want to delete the bookmark because you will not be prompted to make sure once you click Delete. If you need additional help with Works Payment Manager reports, you can access the Works training information by clicking on Tools Training and Help Documentation to display the Works Payment Manager user manual. This manual can also be downloaded and saved as a PDF file. P a g e | 56 Department of Administrative Services State Purchasing Division Process Improvement USING EQUOTE FOR OPEN STATE ENTITY CONTRACTS OVERVIEW The APO/CUPO identifies a need for an Open State Entity Contract through analysis of purchases. The need for an Open State Entity Contract is justified by the following: • The need cannot be met through a statewide contract, an existing entity contract, or a mandatory source; • The need exceeds (or is expected to exceed) the $5000.00 threshold within a given fiscal year and must be competitively bid; and • The exact quantities or total number of orders are not known. The following describes the action steps for the APO/CUPO for creating an Open State Entity Contract according to 7‐Stage Process: 1. PURCHASING STAGE 1NEEDS IDENTIFICATION 1.1 Through purchase analysis (through PeopleSoft and WORKS Payment Manager), the APO/CUPO determines that an Open State Entity Contract is needed as described above. 1.2 The APO/CUPO’s analysis of previous and anticipated future purchases should assist the APO/CUPO in identifying associated stakeholders and the benefits associated with a State Entity contract (e.g. savings associated with aggregated spend). The APO/CUPO should review purchases and future needs of all of the State Entity’s divisions/business units. 2. PURCHASING STAGE 2PRESOLICITATION 2.1. APO/CUPO assembles a sourcing team, which consists of existing stakeholders (i.e. end users, project facilitator, etc.). APO/CUPO facilitates meetings by the sourcing team to prepare for the solicitation preparation stage: Review existing solicitations, contracts, etc., to identify suppliers with whom the State Entity has conducted business and also analyze the market to identify additional sources of supply, market dynamics, and industry standards (i.e. minimal warranty terms, etc.) Discussion: Analysis of the market and sources of supply provides critical information to the sourcing team, including understanding how items may typically be bundled or sold, P a g e | 57 P‐Card Audit Guide which will assist the source team in organizing the solicitation. For example, if all suppliers provide all of the needed items, then the sourcing team may consider making a single award. However, if the market analysis reveals there are suppliers that provide some but not all items, then the needed items may be best organized into categories or subcategories with split awards. Establish a core item list for current needs and possible future needs. The core item list contains the essential items expected to be purchased by the State Entity as a whole. Determine what other items in addition to the core items list should be included in the Open State Entity Contract. For example, are there value added items such as extended warranties or additional services which should be included? Is it desirable to establish a minimum percentage discount off of the supplier’s catalog? 2.2. APO/CUPO should determine best sourcing method* based on items to be sourced. *The remainder of this document has been developed based on the assumption that the RFQ is the desired sourcing method and that the APO/CUPO will utilize eQuote to conduct the RFQ. 3. PURCHASING STAGE 3SOLICITATION PREPARATION 3.1. To fully develop the RFQ, the sourcing team must address several key questions in conjunction with the APO/CUPO: What are the bid factors? For example, will the RFQ request references or minimum experience? Is there any required certification which the supplier must possess? What are the key requirements and terms? For example, are there certain minimum performance levels which must be met by the supplier such as delivery or response times? How will the State Entity address requests for price increases? The RFQ/contract must stipulate that cost will remain fixed throughout the duration of the contract. In addition, the RFQ/contract must state that no price increases will occur unless it is approved in writing by the State Entity. The APO/CUPO may wish to include a price escalation clause, which establishes the basis for determining whether a price increase may be granted (for example, whether there is an increase in pricing according to a designated product index) as well as the limits to the number of price increases which may occur as well as the amount. Should the APO/CUPO schedule a site visit and/or pre‐bid conference? If so, should supplier attendance be mandatory? How much time should be permitted for supplier questions? How will pricing be requested? There are three common approaches for requesting pricing, and all three approaches require a core items list (representative market basket). The first approach is to send the core item list as part of the solicitation and have offerors bid on the specific items referenced on the core items list. The second approach is to request the offerors provide their catalogs and provide a discount off their catalog price. The third approach is to standardize on and reference a specific manufacturer’s catalog and request offerors bid a discount off the catalog price. There are strengths and weaknesses for each approach that need to be explored by the P a g e | 58 P‐Card Audit Guide sourcing team prior to selecting an approach. Additionally, the sourcing team must decide if the core items will be identified by line item within eQuote OR if the APO/CUPO will attach an Excel sheet with the list of the core items. • Note: SPD will update eQuote training and the eQuote manual to address these options. • Note: Items requiring particular branding will require Sole Brand Justification (SPD‐ NI003b). What other documents will be included with the RFQ? For example, for all contracts with an estimated value in excess of $100,000, the APO/CUPO must request verification from the Department of Revenue that the supplier is not a prohibited source. Therefore, in this example, the APO/CUPO must attach the Sales and Use Tax Compliance form. In addition to identifying necessary forms, the APO/CUPO must attach an approved contract which identifies any renewal options and how those renewal options will be utilized. (Note: SPD must provide prior written approval in the event the State Entity desires to establish a contract which will exceed five (5) years.) 3.2 The APO/CUPO must finalize the evaluation process with the sourcing team. For example, the APO/CUPO and the sourcing team must understand that any requirements of the RFQ must be evaluated on a pass/fail basis and, as a result, any supplier incapable of meeting the identified requirements will be disqualified as nonresponsive. By discussing this with the sourcing team, the APO/CUPO can confirm whether certain identified requirements are actually desirable/needed. With respect to the pricing evaluation, the APO/CUPO and the sourcing team should determine whether certain items will include estimated quantities for the purpose of evaluation. Utilizing estimated quantities will allow certain products to have greater weighting for purposes of determining the supplier providing the best pricing. For example, if the sourcing team determines certain items will be purchased with much greater frequency than other items, weighting the more popular items with a greater quantity will provide a better analysis of which supplier will provide the best savings based on the State Entity’s expected buying pattern. 4. PURCHASING STAGE 4SOLICITATION PROCESS 4.1. Post RFQ in accordance with GPM guidelines to eQuote and ensure you indicate Pre‐Bid Conference information in the bid description. Attach all documents applicable as suggested above. 4.2. Address all supplier questions in writing and post answers to questions publicly as an attached document to the RFQ prior to the closing of the RFQ. 4.3. Make any necessary changes to the RFQ in writing by posting an addendum to the RFQ prior to the closing of the RFQ. The APO/CUPO may need to extend the RFQ closing date in the event an addendum is posted near the current RFQ closing date. Remember no changes may be made to the RFQ after the RFQ has closed. 4.4. Receive all bids through eQuote. eQuote terminates suppliers’ access to the RFQ once the RFQ closing date and time has expired. P a g e | 59 P‐Card Audit Guide 5. PURCHASING STAGE 5EVALUATION PROCESS As noted in the Georgia Procurement Manual, the RFQ must be awarded to the lowest priced, responsive and responsible bidder with whom the State Entity is able to reach agreement as to contract terms. There may be more than one awarded supplier in the event the State Entity elects to make split awards. Although the majority of the evaluation may be conducted by the APO/CUPO, the APO/CUPO should utilize its subject matter experts to determine whether alternate precuts may be considered equivalent (to the extent the RFQ named certain brands but permitted equivalent products to be offered). 6. PURCHASING STAGE 6AWARD PROCESS Public notice of the results of the RFQ must be provided as required by the GPM through the posting of the Notice of Intent to Award (as appropriate) and the Notice of Award. The Notice of Award should not be issued until the State Entity has either issued a PO or the State Entity’s contract has been fully executed. Please note the Notice of Award must be issued within one day of the PO being issued or the contract being signed (whichever comes first). Any supplier challenges to the process will be resolved in accordance with the protest process defined by the GPM. 7. PURCHASING STAGE 7CONTRACT PROCESS 7.1. Contract will be maintained in accordance with the GPM and posted to the Agency Contract Index on the Georgia Procurement Registry (as appropriate). 7.2. Contract Kick‐off meeting should be conducted with the vendor and stakeholders to review the terms and conditions, order process and general contract information. This will help with getting the contract off to a good start. Please review GPM Chapter 6 “Contract Administration” for additional guidance in contract management. 7.3. Annual evaluation will be conducted with end users utilizing the Contract Assessment Report (SPD‐CP025). In the event the State Entity desires to renew the Open State Entity Contract, the renewal shall be exercised in accordance with the terms of the contract and the applicable provisions of the GPM, which identifies the applicable forms such as the Notice of Award Amendment Form (SPD‐CP024). Forms are located at: http://doas.ga.gov/StateLocal/SPD/Seven/Pages/Home.aspx. P a g e | 60 Department of Administrative Services State Purchasing Division Process Improvement APPENDICES P a g e | 61 APPENDIX A – STATE USE PROCUREMENT LIST The items listed on the STATEUSE PROCUREMENT LIST (PeopleSoft Contract # GEPS‐CERT) can be viewed and purchased from the Window Shopper catalogue or from Georgia Enterprises for Products and Services (GEPS). The links for these sites are: Window Shopper: https://solutions.sciquest.com/apps/Router/Login?OrgName=Georgia GEPS: http://www.georgiaenterprises.com/ The current State Use Procurement List can be found on the State Purchasing Division web site at http://doas.ga.gov/StateLocal/SPD/Contracts/Pages/Home.aspx PeopleSoft Contract # GEPS‐CERT Product Description Price Product Status Yellow Rubber Work Gloves ‐ per case (144 pairs) Food Service (Polyethylene) Gloves ‐ per case (10,000 gloves) Leather Work Gloves ‐XL per case (120 pairs) Medical Exam Gloves (Small) ‐ per case (1,000 gloves) Medical Exam Gloves (Medium) ‐ per case (1,000 gloves) Medical Exam Gloves (Large) ‐ per case (1,000 gloves) Medical Exam Gloves (Extra‐Large) ‐ per case (1,000 gloves) $91.52 Mandatory $67.82 $189.27 $69.97 Mandatory Mandatory Preferred $69.97 $69.97 Preferred Preferred $69.97 Preferred NIGP Code 2019800003 2019800005 2019800002 4754161100 4754161200 4754161300 4754161400 3453200001 3453200002 3453200003 3459800016 3459800017 3459800018 3459800019 3459800021 3459800075 3459800022 3459800024 3459800025 3459800028 3459800027 3459800026 3459800032 Gloves First Aid Kits ( $50 minimum order for kits and/or replacements items ) Plastic 10 Person First Aid Kit Plastic 25 Person First Aid Kit Plastic 50 Person First Aid Kit Metal Standard 10‐Unit First Aid Kit Metal Standard 16‐Unit First Aid Kit Metal Standard 24‐Unit First Aid Kit Metal Standard 36‐Unit First Aid Kit $18.65 $21.04 $47.49 $37.95 $53.06 $72.69 $91.24 First Aid Kit Content Replacement ($50 min order) Ammonia Inhalants (10) Antimicrobial Towelettes 10 Bandage, 1" x 3" (16) Non Stick Pad Bandage, 2" Non Stick Pad (4) Bandage, 4" Non Stick Pad (1) Bandage, Finger Tip (10) Bandage, Knuckle Non Stick (8) Bandage, Triangular approx 40" (1) Eye Dressing Set (1) $2.63 $1.80 $0.87 $3.38 $2.15 $1.36 $1.21 $1.66 $3.69 Mandatory Mandatory Mandatory Mandatory Mandatory Mandatory Mandatory Mandatory Mandatory Mandatory Mandatory Mandatory Mandatory Mandatory Mandatory Mandatory P a g e | 62 P‐Card Audit Guide PeopleSoft Contract # GEPS‐CERT 3459800033 3459800034 3459800035 3459800036 3459800037 3459800039 3459800040 3459800041 3459800045 Eye Wash Solution 1 oz (1) Gauze 24" x 72" (1) Gauze, Roll, 4" x 6 yards (1) Hydrocortisone Cream 1 gram (6) Insect Treatment Swabs (10) Medicated Burn Ointment 1/8 (6) Ointment, Triple Antibiotic 1 gram (10) Poison Plant Treatment 1/8 oz (6) Tape, Adhesive, Roll 1"x 2‐1/2 yd (2) $2.87 $2.37 $1.53 $1.71 $2.45 $3.43 $2.31 $3.33 $2.36 Mandatory Mandatory Mandatory Mandatory Mandatory Mandatory Mandatory Mandatory Mandatory 3459800048 Venom Extractor Kit $18.73 Mandatory $28.35 $28.35 $24.95 $30.98 $24.95 $30.02 $24.95 $24.95 Mandatory Mandatory Mandatory Mandatory Mandatory Mandatory Mandatory Mandatory 3659800006S 3659800006B 3659800007S 3659800007BBL 3659800007BC 3659800007BP 3659800007B 3659800007P Floor Pads (Minimum of 6 cases per order) 19" Black Stripping Pad (5 per case) 19" Red Buffing Pad (5 per case) 20" Black Stripping Pad (5 per case) 20" Blue Luster Burnishing Pad (5 per case) 20" Combo Tan Burnishing Pad (5 per case) 20" Porko Burnishing Pad (5 per case) 20" Red Buffing Pad (5 per case) 20" White Polishing Pad (5 per case) 4859800093 4859800094 4859800095 4859800096 4859800087 Mop Handles & Heads 16 oz. Replacement Mopheads (Case of 12) 20 oz Replacement Mopheads (Case of 12) 24 oz Replacement Mopheads (Case of 12) 32 oz Replacement Mopheads (Case of 12) 60" Fiberglass Mop Handles (Case of 12) $60.10 $66.35 $78.00 $83.52 $166.40 Mandatory Mandatory Mandatory Mandatory Mandatory $71.35 $75.75 Mandatory Mandatory $10.67 $10.63 $9.47 $14.48 Mandatory Mandatory Mandatory Mandatory 4859800099 4859800100 5609800002 5609800001 5609800004 5609800005 Soap Pouches Soap Pouches (enriched) Case of 12 Soap Pouches (antimicrobial) Case of 12 Pallets 7 board (40" x 48") 8 board (40" x 40") Light Weight (40" x 48") Heavy Weight (40" x 48") 7359800001 Wiping Rags Wiping Rags (5 pound box) $20.65 Mandatory Price Product Status $198.76 Mandatory NIGP Code Toner Cartridges (Remanufactured) 2079800095 12A6765 ‐ Lexmark P a g e | 63 P‐Card Audit Guide PeopleSoft Contract # GEPS‐CERT 2079800162 2077290435 2079800022 2079800099 2077980453 2077290456 2077290460 2079800023 2079800024 2079800003 2079800004 2079800090 2079800091 2079800092 2079800093 2079800025 2079800075 2079800076 2079800094 2079800154 2079800155 2079800156 2079800157 2079800086 2079800087 2079800088 2079800089 2079800158 2079800159 2079800160 2079800161 2079800028 2079800166 2079800167 2079800152 2079800098 2079800174 2079800178 2079800153 2079800175 2079800177 $122.65 $28.32 $79.43 $41.02 $31.28 $49.99 $92.98 $26.58 $39.35 $38.95 $59.99 $57.42 $86.25 $86.25 $86.25 $63.15 $30.05 $44.27 $129.90 $59.59 $84.33 $84.33 $84.33 $90.24 $90.24 $90.24 $90.24 $140.84 $141.25 $141.25 $141.25 $67.85 $80.55 $85.32 12A7305 ‐ Lexmark 92298A ‐ HP 92298X ‐ HP C2610A ‐ HP C3903A ‐ HP C3906A ‐ HP C3909A ‐ HP C4092A ‐ HP C4096A ‐ HP C4127X ‐ HP C4129X ‐ HP C4149A ‐ HP C4150A ‐ HP C4151A ‐ HP C4152A ‐ HP C4182X ‐ HP C7115A ‐ HP C8061X ‐ HP C8543X ‐ HP C9700A ‐ HP C9701A ‐ HP C9702A ‐ HP C9703A ‐ HP C9720A ‐ HP C9721A ‐ HP C9722A ‐ HP C9723A ‐ HP C9730A ‐ HP C9731A ‐ HP C9732A ‐ HP C9733A ‐ HP FX‐3 ‐ Canon FX‐6 ‐ Canon FX‐7 ‐ Canon Q2612A ‐ HP Q2613X ‐ HP Q2624X ‐ HP Q2670A ‐ HP Q5942X ‐ HP Q5949A ‐ HP Q6511X ‐ HP $36.53 $34.66 $70.32 $93.60 $74.99 $40.85 $77.39 Updated July, 09, 2010 P a g e | 64 Mandatory Mandatory Mandatory Mandatory Mandatory Mandatory Mandatory Mandatory Mandatory Mandatory Mandatory Mandatory Mandatory Mandatory Mandatory Mandatory Mandatory Mandatory Mandatory Mandatory Mandatory Mandatory Mandatory Mandatory Mandatory Mandatory Mandatory Mandatory Mandatory Mandatory Mandatory Mandatory Mandatory Mandatory Mandatory Mandatory Mandatory Mandatory Mandatory Mandatory Mandatory P‐Card Audit Guide APPENDIX B – HOW TO PURCHASE Note that the purchasing card can be used for any of these types of purchases provided the cardholder complies with all procurement laws and administrative rules. PURCHASE TYPE (PS Code) ORDER OF PRECEDENCE DOLLAR LIMITS BID PROCESS (RFx) Mandatory Statewide Contract (SWC ) First No dollar limit Not Required State Entity Contract (AC) Second Within State Entity DPA RFP, RFQ (if Team Georgia Marketplace), or eQuote Mandatory Source (MAN) Third No dollar limit Not Required Convenience Statewide Contract (SWC) Fourth (Optional, choose one from this level) No dollar limit Not Required Preferred Products through (GEPS) Fourth (Optional, choose one from this level) Open Market (OMP) Fourth (Optional, choose one from this level) Within State Entity DPA RFQ (if Team Georgia Marketplace) eQuote, or RFP Exempt (EXM) No State Requirements No dollar limit Not Required Not Required COMMENTS State Entity can buy from GCI if same product is offered on Mandatory SWC State Entity Contract renewals are allowed when eligible per terms of contract and entity follows renewal requirements Certified Products from GCI and GEPS. Mandatory GEPS products are identified on the State Use Procurement List located at: http://doas.ga.gov/State Local/SPD/Contracts/P ages/Home.aspx Convenience Statewide Contracts are available as a "convenience" because prices and contract terms are finalized. Prices for certain products are identified on the State Use Procurement List located at: http://doas.ga.gov/State Local/SPD/Contracts/P ages/Home.aspx No competition required if < $5K and can be used with the P-Card where applicable. > $5K requires competitive bidding Refer to the NIGP Exempt List located at: http://doas.ga.gov/State Local/SPD/Policies/Pag es/Home.aspx P a g e | 65 P‐Card Audit Guide PURCHASE TYPE (PS Code) ORDER OF PRECEDENCE DOLLAR LIMITS BID PROCESS (RFx) COMMENTS Intergovernmental (IGA) No dollar limit Not Required Agreement between Governmental Entities Sole Source (SS) Unlimited DPA Requires Market Research Sole Brand (SB) Within State Entity DPA Post justification with Notice of Intent to Award on GPR RFQ (if Team Georgia Marketplace), eQuote, or RFP Multiple Purchase Types (MUL) Specific Brand Product Multiple PO Type, which may be used for the following combinations of purchases on a single PO to a single vendor: 1. OMP less than $5,000 SWC 2. OMP less than $5,000 AC 3. OMP less than $5,000 MAN Doesn't alter the responsibility to comply with the Order of Precedence or the requirement to follow the competitive bidding process for Open Market purchases >= $5,000. *Note: AC, OMP, or SB that exceeds State Entity's DPA must be submitted to SPD for processing by submitting One-Time Request to Exceed DPA form (SPD-NI006) to SPD for approval. P a g e | 66 RFQ = Mandatory to be processed through the eQuote System with "unlimited" DPA. RFP = $250K DPA Unless other designation has been determined by the Assistant Commissioner of Procurement. P‐Card Audit Guide APPENDIX C – NIGP EXEMPT LIST EXEMPT Code Description (All 019 Category Exempt) 019 X X X X X X X X X X X X X X X X X X X X (All 040 Category Exempt) 01921 01924 01930 01932 01941 01942 01947 01950 01953 01956 01960 01962 01966 01967 01972 01973 01978 01985 01990 01994 040 Berry Crops Buckwheat Corn Cotton Fruits, Citrus Fruits, Deciduous Tree Grapes Hops Melons Nuts, Tree Potatoes, Irish Pumpkins Rice Rye Sorghum Soybeans Sugarcane and Sugarbeets Tobacco Vegetables Wheat ANIMALS, BIRDS, MARINE LIFE, AND POULTRY, INCLUDING ACCESSORY ITEMS (LIVE) X 04001 X X X X X X 04002 04003 04004 04005 04007 04008 X X X X X X X X X X X 04009 04010 04011 04020 04021 04022 04024 04026 04028 04030 04035 Amphibia (Frogs, Toads, Salamanders and other Cold Bloodied Vertebrates) Live Animal Carriers Animal Care Supplies (Collars, Clothing, Leashes, etc.) Animal Training Equipment and Supplies Bees Birds Cages/Shelters, Animal and Marine Life (See Class 495 for Laboratory Type) Cats, All Types (Pets) Cattle, Beef (Breeding Stock) Cattle, Beef (Commercial) Cattle, Dairy Chickens Chicks, Meat Type, Baby Chicks, Meat Type, Starter Cockerels, All Types, Baby Cockerels, All Types, Starter Dogs, All Types Earthworms AGRICULTURAL CROPS AND GRAINS INCLUDING FRUITS, MELONS, NUTS, AND VEGETABLES P a g e | 67 P‐Card Audit Guide EXEMPT Code Description X 04037 X X X X X X X (All 040 Category Exempt) 04040 04042 04045 04048 04050 04058 04060 040 Electronic Identification Systems Used for Inventory and Tracking of Animals Fish, Brood and Fingerling Fish (Not Otherwise Specified) Fish, Tropical Fur Bearing Animals (Not Otherwise Classified) Goats Hibernation Boxes (Butterfly, Ladybug, etc.) Hogs (Breeding Stock) ANIMALS, BIRDS, MARINE LIFE, AND POULTRY, INCLUDING ACCESSORY ITEMS (LIVE) CONT. X X X X X X X X X X 04061 04070 04071 04075 04080 04082 04083 04084 04085 04086 X X X X 04087 04088 04090 04091 X X X X X (All 052 Category Exempt) 04092 04093 04094 04095 04096 052 X X X X X 05202 05208 05212 05216 05224 X X X X X X 05232 05240 05248 05256 05264 05272 P a g e | 68 Hogs (Commercial) Horses Houses and Cages, Bird Marine Life (Not Otherwise Specified) Mules and Donkeys Pullets Pullets, Laying Types, Baby Pullets, Laying Types, Starter Rabbits Recycled Animal, Bird, and Marine Life Accessories and Supplies Rodents (See 495‐12,13 for Experimental Types) Reptiles, Live Sheep Specialty Items for Shows and Entertainment (Perches, Hoods, Hoops, etc.) Toys for Pets Turkeys, Baby Turkeys, Starter Wildlife and Pet Bands, Labels and Tags (Not Electronic) Zoo Animals, All Types ART OBJECTS Antiques Ceramic and Glass Objects Collections, Museum Pieces Drawings (Originals) Engravings, Etchings, Lithographs, Serigraphs, and Similar Reproductions Fabric Designs Masks Mixed Media Paintings (Originals) Photographs Posters and Prints (Not Originals) P‐Card Audit Guide EXEMPT Code Description X X X Select Exemptions 05276 05280 05288 232 X X X Select Exemptions 23227 23232 23235 325 X (All 375 Category Exempt) 32548 375 Milk Products FOODS: BAKERY PRODUCTS (FRESH) X 37515 X X X X X Select Exemptions 37530 37545 37550 37554 37560 380 Bread, Rolls, etc. (Including Brown and Serve Items) Available on SWC Cakes, Cookies, and Pastries Available on SWC Doughnuts, Fried Pies, Bagels Available on SWC Pastry Shells Pizzas Taco Shells and Tortillas FOODS: DAIRY PRODUCTS (FRESH) X X X X X X X X X X X X (All 390 Category Exempt) 38010 38015 38030 38033 38035 38045 38050 38060 38075 38080 38085 38090 390 Butter Cottage Cheese Cream, All Types Desserts, Milk Based (Not Otherwise Classified) Eggnog and Mix Ice Cream Ice Milk Mellorine Milk, All Types Sherbet Toppings, Whipped, Refrigerated Yogurt FOODS: PERISHABLE X 39002 X X X X X 39005 39007 39015 39021 39028 Aquatic Invertebrates (Octopus, Squid, Anemones, Sea Cucumbers) Casings, Meat, All Types Cheese Dips, Food Eggs, Fresh Fruits, Fresh Recycled Art Objects Sculptures: Marble, Metal, Plastic, etc. Wood Carvings CRAFTS, GENERAL (Flowers for Teaching Purposes and Commencement Exercises Only) Dried Flowers and Plants Floral Arrangements, Artificial Floral Supplies: Artificial Flowers, Floral Tape, etc. FEED, BEDDING, VITAMINS AND SUPPLEMENTS FOR ANIMALS (SEE CLASS 875 FOR DRUGS AND PHARMACEUTICALS FOR ANIMALS) P a g e | 69 P‐Card Audit Guide EXEMPT Code Description X 39033 X X X X X X X X X X X X X Select Exemptions 39035 39042 39049 39056 39063 39068 39069 39070 39072 39075 39077 39084 39091 495 Hors d'oeuvres, meat trays, vegetable trays, dessert trays, etc. for meetings and parties Ice Ice, Dry Meat: Cured, Fresh, and Frozen Oleomargarine Poultry, Dressed Salad Mix, Fresh Salted or Smoked Foods (Fruit, Meat, Seafood, Nuts, etc.) Seafood, Fresh Shellfish, Fresh Shortening (Except Vegetable) and Lard Tamales, Fresh Vegetables, Fresh Water, Drinking (Including Distilled) LABORATORY AND FIELD EQUIPMENT AND SUPPLIES: BIOLOGY, BOTANY, GEOLOGY, MICROBIOLOGY, ZOOLOGY, ETC. X X X 49508 49512 49513 X X 49525 49526 X X X X X X X X (All 580 Category Exempt) 49530 49538 49545 49549 49554 49578 49585 49595 580 X X X X X X 58002 58003 58005 58010 58015 58025 X (All 580 Category Exempt) 58030 580 P a g e | 70 Amphibia For Laboratory Research (Preserved) Animals, Experimental, Not Specially Bred Animals, Experimental, Specially Bred or Selected (e.g., Albino Mice and Rats) Biology Specimens and Cultures (Except Microbial) Biology Specimens and Cultures (Including Microbial): Complete Ecosystems, etc. Botany Specimens Cultures, Microbial (Living Organism) Geology Specimens and Collections Invertebrates and Vertebrates, Preserved Insects for Laboratory Research Reptiles, Preserved Skeletons: Mounted, Unmounted, and Partial Zoology Specimens, Live and Injected MUSICAL INSTRUMENTS, ACCESSORIES, AND SUPPLIES Accordions and Accessories Amplified Instruments (Guitars, etc.) and Amplifiers Band and Choral Risers Band Instruments and Accessories Band Room Equipment: Music Cabinets, Stands, etc. Electronic Musical Instruments: Electronic Organs, Synthesizers, Visualizers, etc. Metronomes and Tuners, Conventional or Electronic MUSICAL INSTRUMENTS, ACCESSORIES, AND SUPPLIES CONT. P‐Card Audit Guide EXEMPT Code Description X X X 58034 58035 58040 X X X X X X Select Exemptions 58045 58055 58060 58070 58080 58085 595 Music Boxes Music, Sheet and Folio Musical Instrument Repair Parts and Supplies (Except Organ and Piano) Musical Supplies: Music Holders, Strings, Reeds, etc. Organs (Conventional), Accessories, Parts and Supplies Pianos, Accessories, Tuning Instruments, Parts and Supplies Recycled Musical Instruments, Accessories and Supplies Stringed Instruments, Conventional; and Accessories Tower Chimes, Accessories, Parts, and Supplies NURSERY STOCK, EQUIPMENT, AND SUPPLIES X X X X X X 59506 59507 59510 59515 59526 59528 X 59533 X X 59535 59537 X 59540 X X X X X X X 59550 59552 59555 59557 59558 59559 59560 X X X X X Select Exemptions 59561 59565 59566 59570 59575 59577 715 X X X 71583 71584 71585 Bamboo, Cane, Rattan, Reed, etc. Aquatic Plants Bedding Plants and Cuttings Bulbs and Seeds Edging, Lawn Flowers, Fresh (Flowers for Teaching Purposes, Commencement Exercises, Banquets, Conferences, Workshops, etc.) Grates, Guards, and Other Protective Devices For Trees and Shrubs Groundcovers and Vines Horticultural Specialties incl. Ornamental Floriculture Products Nursery, Greenhouse and Floral Supplies: Labels, Planters, Pots, Tags, Trellises, etc. Peat Moss Perennials Plant Foods (Not Fertilizer) Plants, Non‐Flowering Plant Shine Plants, Herb Plant Sprayers and Respirators, Plant Propagation Mats, etc., and Accessories Plants, Indoor Shrubbery, Evergreen Shrubbery, Flowering Trees, Fruit and Nut Trees, Ornamental and Shade Tropicals PUBLICATIONS AND AUDIOVISUAL MATERIALS (PREPARED MATERIALS ONLY, NOT EQUIPMENT, SUPPLIES, OR PRODUCTION) Textbooks, Adult Education Textbooks, Special Education Textbooks: Kindergarten thru 5th Grade (Includes Student and Teacher Editions) P a g e | 71 P‐Card Audit Guide EXEMPT Code X 71586 X 71587 X 71588 X 71590 X (All 855 Category Exempt) 71595 855 X X X X X 85515 85522 85530 85543 85544 X 85546 X 85548 X 85550 X X X X X 85553 85560 85568 85570 85575 X X X X X (All 906 Category Exempt from DOAS with exception to OCGA 50‐25 Code (> $75K, Prequalify) X 85577 85580 85581 85588 85595 906 Costumes and Accessories Curtains, Cycloramas, Draperies, Drops, etc. Dance Floors, Portable Lifts, Orchestra (Theater Pit Area) Lighting and Dimming Controls: Autotransformer Dimmers, Control Panels, Solid State Thyristor/Triac Dimmers, etc. Lighting Control Systems: Memory and Computer/Microprocessor Type Lighting Distribution Hardware: Borderlight Cables, Pipe Battens, Plugging Strips and Boxes, Wall and Floor Pockets, etc. Lighting Instruments: Border and Cyclorama Striplights, Follow Spotlights, Floodlights, Special Effects Lighting, Spotlights, etc. Lighting Systems, Complete Makeup Scenery and Props Sound Effects Equipment Stage Hardware and Supplies: Braces, Canvas, Clamps, Paints, etc. Standards, Portable; and Ropes (For Theater Lobbies) Stage Rigging and Tracks Stages, Theatre (All Types) Turnstiles, Theater Recycled Theatrical Equipment, Accessories and Supplies ARCHITECTURAL SERVICES, PROFESSIONAL X X X 90602 90604 90606 Acoustics; Noise Abatement ‐ Architectural Services Agricultural Development ‐ Architectural Services Airports (Lighting, Fueling, Navaids) ‐ Architectural Services P a g e | 72 Description Textbooks: 6th thru 8th Grade (Includes Student and Teacher Editions) Textbooks: 9th thru 12th Grade (Includes Student and Teacher Editions) Textbooks: College Level (Includes Student and Teacher Editions) Video Cassettes, Disks, Tapes, etc. (For Computer and TV, Prerecorded) Recycled Publications and Audio‐Visual Materials THEATRICAL EQUIPMENT AND SUPPLIES P‐Card Audit Guide EXEMPT Code Description X X 90607 90608 X X X X X X X 90610 90612 90614 90616 90618 90619 90622 X X X X X 90624 90625 90626 90627 90628 X X X X X X X X X X 90629 90630 90632 90633 90634 90636 90638 90640 90642 90644 X X (All 906 Category Exempt from DOAS with exception to OCGA 50‐25 Code (> $75K, Prequalify) X 90646 90648 906 Architect Services, Professional Automation; Controls; Instrumentation ‐ Architectural Services Buildings ‐ Architectural Design Building Sanitation ‐ Architectural Services Cemeteries, Planning and Relocation, Architectural Services Chemical Processing and Storage ‐ Architectural Cold Storage; Refrigeration; Fast Freeze ‐ Architectural Concrete Architectural Services Corrosion Control; Cathodic Protection; Electrolysis ‐ Architectural Desalinization (Process and Facilities) ‐ Architectural Design Build Services Electronics ‐ Architectural Services Energy Management ‐ Architectural Energy Conservation; New Energy Sources (Solar, etc.) ‐ Architectural Services Environmental ‐ Architectural Fire Protection ‐ Architectural Services Fisheries; Fish Ladders ‐ Architectural Forensic ‐ Architectural Freight Handling; Materials Handling ‐ Architectural Gas Systems (Propane, Natural, etc.) ‐ Architectural General Construction ‐ Architectural Graphic Design ‐ Architectural Harbors; Jetties; Piers; Ship Terminal Facilities ‐ Architectural Heating; Ventilating; Air Conditioning ‐ Architectural Services Highways; Streets; Airport Pay‐Parking Lots ‐ Architectural Historical Preservation ARCHITECTURAL SERVICES, PROFESSIONAL CONT. X X X X X X X X X 90650 90652 90654 90656 90657 90658 90660 90661 90662 Industrial Processes; Quality Control Interior Design, Space Planning, and Exhibits/Displays Irrigation; Drainage; Flood Control ‐ Architectural Landscape Architecture Land Development and Planning ‐ Architectural Lighting (Interior, Exterior) ‐ Architectural Services Mining and Mineralogy ‐ Architectural Models of Layouts and Buildings to Scale, Architectural Petroleum and Fuel (Storage and Distribution) ‐ Architectural P a g e | 73 P‐Card Audit Guide EXEMPT Code Description X 90664 X X X X 90666 90668 90670 90672 X X 90674 90678 X X X X X X X X (All 907 Category Exempt) 90680 90682 90684 90688 90690 90692 90693 90694 907 Planning, Urban (Community, Regional, Areawide, and State) Planning, Site (Installation and Project) Power Generation, Transmission, Distribution ‐ Architectural Railroad; Rapid Transit; Monorail ‐ Architectural Recreation Facilities (Parks, Marinas, etc.) ‐ Architectural Services Recycling Systems ‐ Architectural Design Security Systems; Intruder and Smoke Detection ‐ Architectural Sewage Collection, Treatment, and Disposal ‐ Architectural Solid Wastes; Disposal Systems ‐ Architectural Services Telephone Systems ‐ Architectural Towers ‐ Architectural Services Tunnels and Subways ‐ Architectural Utilities (Gas, Steam, Electric) ‐ Architectural Video Systems Design ‐ Architectural Services Water Supply, Treatment and Distribution ‐ Architectural ARCHITECTURAL AND ENGINEERING X 90714 X 90728 X X X 90735 90738 90740 X X X X X Select Exemptions 90742 90772 90775 90779 90783 915 Architectural Services, Non‐Licensed (Not Otherwise Classified) Communications Systems; TV; Microwave; Telephone; Computer Designing Services Drafting Services Engineering Services, Non‐Licensed (Not Otherwise Classified) Geotechnical ‐ Soils Safety Engineering and Accident Studies; OSHA Studies Site Assessment and Site Field Observation Surveying Services (Not Aerial or Research) Testing Services COMMUNICATIONS AND MEDIA RELATED SERVICES X X X X X Select Exemptions 91502 91503 91504 91514 91571 918 Advertising (Notice of Bid Solicitation) Advertising/Public Relations Advertising, Outdoor Billboard, etc. Broadcasting Services, Radio Newspaper and Publication Advertising CONSULTING SERVICES X X X X X 91804 91814 91815 91842 91874 Accounting/Auditing/Budget Consulting Appraisals Consulting Architectural Consulting Engineering Consulting Legal Consulting P a g e | 74 P‐Card Audit Guide EXEMPT Code Description X Select Exemptions 91878 924 Medical Consulting EDUCATIONAL SERVICES X 92478 Select Exemptions 925 Teaching and Instruction Services (Including Elementary and Secondary Education, Higher Education and Adult Education) ENGINEERING SERVICES, PROFESSIONAL X X X X X Select Exemptions 92504 92517 92533 92539 92586 936 Agricultural Engineering Civil Engineering Engineer Services, Professional Fire Protection Engineering Surveyor Services, Land EQUIPMENT MAINTENANCE, RECONDITIONING, AND REPAIR SERVICES ‐ GENERAL EQUIPMENT X Select Exemptions 93680 946 Theatrical Equipment Maintenance and Repair FINANCIAL SERVICES X X X X Select Exemptions 94612 94615 94630 94631 948 Actuarial Services and Retirement Planning Appraisal Services, Real Estate Cash/Securities and Bonding Services Certified Public Accountant (CPA) Services HEALTH RELATED SERVICES (FOR HUMAN SERVICES SEE CLASS 952) X X 94864 94874 X Select Exemptions 94876 952 Nursing Services Professional Medical Services (Including Physicians and All Specialties) Psychologists/Psychological Services HUMAN SERVICES X Select Exemptions 95221 953 Counseling INSURANCE, ALL TYPES (Not subject to DOAS' authority. DCH handles health insurance and SPA is authorized to handle flexible benefits for state employees.) X X 95337 95348 X Select Exemptions 95363 956 Disability Health/Hospitalization (Including Dental and Visual Insurance) Life LIBRARY SERVICES (SEE CLASS 908 FOR BOOKBINDING, REBINDING, AND REPAIRING) X X X Select Exemptions 95635 95640 95685 961 Internet Database Subscription Magazine Subscriptions Training Material Subscription MISCELLANEOUS PROFESSIONAL SERVICES P a g e | 75 P‐Card Audit Guide EXEMPT Code Description X 96147 X X 96149 96173 X 96185 X Select Exemptions 96186 962 Law Enforcement Services (Including Process Server Services) Legal Services, Attorneys Theatrical Services (Including Production, Scenery Design, Stage, etc.) Utility Services, Electric, Gas, Water (Except when Customer Choice) Veterinary Services MISCELLANEOUS SERVICES X Select Exemptions 96248 963 Interior Design/Decorator Services NON‐BIDDABLE MISCELLANEOUS ITEMS X X 96343 96357 X X Select Exemptions 96348 96364 971 Intergovernmental/Inter‐Agency Contracts Postage Related Purchases (Incl. Postage Stamps, Pre‐Sort 1st Class Inscriptions, Postage by Phone for Meters etc.) Membership Dues Registration Fees REAL PROPERTY RENTAL OR LEASE X Select Exemptions 97165 981 Room Rental for Conferences, Seminars, etc. RENTAL OR LEASE OF EQUIPMENT ‐ GENERAL EQUIPMENT X 98174 Select Exemptions 998 Theatrical Equipment and Supplies (Including Costumes) Rental or Lease SALE OF SURPLUS & OBSOLETE ITEMS X 99844 NIGP Code Food MULTIPLE NIGP CODES AVAILABLE FOR THE ITEMS BELOW X X X Direct Resale through a state Agency/Institution operated service i.e. bookstore, cafeteria etc. Teaching Forms, and Publications for Testing Contractors for services only to be provided by Non‐Profit Entities that comply with the requirements of O.C.G.A. 50‐ 20‐1 et seq P a g e | 76 APPENDIX D – EXCEL PIVOT TABLES (EXCEL 2003) Pivot tables allow you to get different views of data through summarizing in two dimensions – rows that go down and columns that go across. Any or all of the columns in the original spreadsheet can be reflected as rows, columns, or data in the pivot table to present the information you want in summary form. You are probably already familiar with what one looks like. The table below shows summary sales data from multiple regions for multiple quarters. First Quarter Second Quarter Third Quarter Fourth Quarter Eastern Region $10,000 $15,000 $12,000 $13,000 Midwestern Region $20,000 $30,000 $15,000 $25,000 Southern Region $30,000 $40,000 $20,000 $10,000 Western Region $25,000 $15,000 $30,000 $25,000 Totals $85,000.00 $100,000.00 $77,000.00 $73,000.00 Behind all of these summary numbers, lie the thousands of individual transactions that make up those amounts. Instead of manually adding up all of those individual transaction amounts, Excel can do it for you. These exercises are going to use transaction data from the purchasing card and from the PeopleSoft 19D query. Some Preliminaries Make sure your data spreadsheet has no gaps or spaces in it. In order for Excel to properly identify the data source, all columns must be contiguous. For example, you cannot create a pivot table from data in columns A‐D and columns L‐N. The same holds true for rows – you cannot create a pivot table from data in rows 1‐10 and 20‐30. All columns of the spreadsheet with the data must have column headings. Excel will not recognize a column as being in the range if there is not one. A good rule of thumb is that if you don’t want to do a calculation on a column, the data should be formatted as text, even if it is a number. For some Excel formulas to work correctly, these fields must formatted as text. P a g e | 77 P‐Card Audit Guide Step #1 – Initiate Pivot Table The data tab of the workbook has the individual transactions. Click on DataPivotTable and PivotChart Report Step #2 – Define Type of Pivot Table You can create a pivot table from external data sources if you want or from multiple spreadsheets. You can also do a pivot table and chart. Leave the default radio buttons checked (Excel list and pivot table only) and click the Next button. P a g e | 78 P‐Card Audit Guide Step #3 – Define Data Range Excel will identify the range of data on the spreadsheet. Most of the time, you will want to include all of the data in the pivot table. However, you can select the range manually and include just the contiguous columns and rows you want. For example, if you have data in A1:M2000 but you only want to use data in A1:D200, you can manually select that range. However, in our work, it is highly unlikely that we would want to pivot just part of the data (or data from multiple spreadsheets). Accept the data range that Excel chose by clicking the Next button. Step #4 – Design the Layout of the Pivot Table This is the step where you determine what your pivot table will look like and how the data will be summarized. The different areas of a pivot table are: • Data – this is the information that you are trying to summarize, or measure, or count. • Page – a “page” is useful if you have a lot of data and you will want to look at only one main group at a time. For example, if you have 100,000 purchasing card transactions at 100 Agencies, it might be easier to review one Agency at a time rather than all Agencies at once. • Row – the “row” determines what columns from the data will be in the left‐hand columns of the table. You can have as many rows as you have columns in the spreadsheet of data. • Column – the “column” determines the names of the columns going across the pivot table. The diagram to the right shows the relationship between rows and columns on the pivot table. P a g e | 79 P‐Card Audit Guide Click the Layout button. The column names from the data spreadsheet are shown on the right‐ hand side of the layout box. Any of the spreadsheet columns can also be put in the “Data” area. The most common use is to present the total of an amount field, such as transaction or purchase order amount. To present the spreadsheet columns as rows or columns on the pivot table, drag and drop the columns to the “Row” or “Column” areas of the design screen. The “Page” area would be a good place to put the “Program Name” field in order to be able to filter on one Agency or University at a time. For Compliance audits, the vendor name from the 19D query would be a good candidate for a “Page”. Here, we have put the cardholder name as the rows going down, the Merchant Category Code as the column, and the sum of the transaction amounts as the data. The result will be the amount of spend each cardholder made at merchants assigned to those MCC’s. Step #5 – Formatting the Numbers To format the “Sum of Amount” (data) field, double‐ click on the Sum of Amount button in the Data area (circled in the previous diagram). Most of the time, you will want to choose the Sum of the amount field. There might be times when you want to count the occurrence of the amounts, such as when you want to know how many transactions for $50.92 we have. This is probably not very useful. However, you might want to count the number of transaction numbers or purchase order numbers. To format the number (e.g. currency with a $ sign), click on the Number… button on the right side of the dialog box. You can then format the data fields like you would any cells in Excel. P a g e | 80 P‐Card Audit Guide Click the OK button in the Format Cells dialog box when finished. Then, click the OK button on the PivotTable Field dialog box. Click the Finish button on the Step 3 of 3 dialog box. The pivot table will be on a new spreadsheet in the workbook. Step #6 – Modifying the Pivot Table The pivot table will display on the screen. From here, you can remove columns or rows (MCC column added in Step #4 has been removed). You can also drag and drop other spreadsheet columns to rows or columns of the pivot table. In this spreadsheet, the Number column represents the transaction number. Drag the Number column from the Pivot Table Field List (highlighted and circled in this screen shot) to the Total column until the Total column (with the values) is outlined with a broken line. P a g e | 81 P‐Card Audit Guide The pivot table now displays the Count of Number. The table will automatically display the data fields the way it thinks you want to. Spreadsheet columns that are formatted as numbers or currency will automatically be inserted in the data area as a “sum” of the amount. Text fields will automatically be inserted as “count” of the values. If any of this is not correct, you can change it. Now, drag and drop the amount column into the data area. You will now see another Sum of Amount shown as Sum of Amount2. This kind of summary doesn’t make much sense, but you might want to see the largest transaction amount or the smallest transaction amount. To change the summarize option for the new amount field of the Sum of Amount2, click on the Field Settings button on the Pivot Table tool bar (second button from the right). If you don’t like the default names, these can be changed in the PivotTable Field dialog box. Change the Max of Amount2 to Largest Transaction here. Click on the Max option in the Summarize by: area. Click on the Number… button to format the number as Currency and click OK. Notice that you can also do “average” amount and smallest (“min”) amount. Click OK on the PivotTable Field dialog box. P a g e | 82 P‐Card Audit Guide The pivot table now displays the Sum of Amount, the Count of Number, and the Largest Transaction amount for each cardholder. To view the details behind any number, double‐click on the number. Excel will display the individual lines in a new worksheet. Pivot Table Extras Filtering a Pivot Table Drop‐down lists for the row values can be used to filter what is shown on the screen. Click the drop‐down arrow and select the values to show. To de‐select all, click on the (Show All) box to remove all check marks. Use the scroll bar to scroll through the list. Click one or more of the check boxes to show the information for that Agency/University and/or Supplier Name and/or any other row labels. Click OK when finished. Applying Conditional Formatting You can apply conditional formatting to a cell or range of cells just like you would in a standard spreadsheet. Click on the cell or the range of cells you wish to apply conditional formatting to. P a g e | 83 P‐Card Audit Guide On the menu bar, click on FormatConditional Formatting… The Conditional Formatting dialog box will appear. In Excel 2003, you can have up to three conditional formats. Click on Cell Value Is in the first drop‐ down list. (This is the default value.) Click on a criteria in the second drop‐down list depending on what values you want to display. In this example, we are looking for values greater than a certain dollar amount. Enter a value in the third drop‐down list. In this example, we want to filter on all cells where the value is greater than $5,000. Click the Format… button to open the Format Cells dialog box. This is the same format box as you would see for regular cell formatting. Select how you want to display the cells. In this example, we want to see the cells highlighted with pink. Click on the pink box (lower left‐hand corner). Click OK on both the Format Cells dialog box and the Conditional Formatting dialog box. Cells matching the criteria you entered will be displayed in pink. P a g e | 84 P‐Card Audit Guide Removing Subtotals Whenever you put in two or more spreadsheet columns in the “row” area, the pivot table will automatically insert totals for each row. Sometimes this is helpful, sometimes it is not, especially when you have two or more spreadsheet columns represented as rows. To eliminate the subtotals, double‐click on the section that has the subtotals. In this illustration, that would be the Card Program Name row section. To remove the subtotals, click on the “None” radio button and click OK. This looks neater, especially if the subtotals for the agency are not that important. P a g e | 85 P‐Card Audit Guide Sorting a Pivot Table Sorting a pivot table is not quite the same as sorting a regular spreadsheet. The table automatically sorts by the row values. However, we might want to view our data in descending order by amount to see which vendor has the most spend. To sort the pivot table by the amount, click anywhere in the Total column. Click DataSort… on the menu bar. The pivot table Sort dialog box will appear. Click on the “Value” radio button if not already clicked and choose Descending. Click OK to return to the pivot table. The values will be sorted in descending order by amount. The labels automatically sort correctly. P a g e | 86 APPENDIX E – EXCEL PIVOT TABLES (EXCEL 2007) Pivot tables allow you to get different views of data by summarizing in two dimensions – rows that go down and columns that go across. Any or all of the columns in the original spreadsheet can be reflected as rows, columns, or values in the pivot table to present the information you want in summary form. You are probably already familiar with what one looks like. The table below shows summary sales data from multiple regions for multiple quarters. Eastern Region First Quarter Second Quarter Third Quarter Fourth Quarter $10,000 $15,000 $12,000 $13,000 Midwestern $20,000 Region $30,000 $15,000 $25,000 Southern Region $30,000 $40,000 $20,000 $10,000 Western Region $25,000 $15,000 $30,000 $25,000 Totals $85,000.00 $100,000.00 $77,000.00 $73,000.00 Behind all of these summary numbers, lie the thousands of individual transactions that make up those amounts. Instead of manually adding up all of those individual transaction amounts, Excel can do it for you. These exercises are going to use purchasing card transaction data. Some Preliminaries Make sure your data spreadsheet has no gaps or spaces in it. In order for Excel to properly identify the data source, all columns must be contiguous. For example, you cannot create a pivot table from data in columns A‐D and columns L‐N. The same holds true for rows – you cannot create a pivot table from data in rows 1‐10 and 20‐30. All columns of the spreadsheet with the data must have column headings. Excel will not recognize a column as being in the range if there is not one. A good rule of thumb is that if you don’t want to do a calculation on a column, the data should be formatted as text, even if it is a number. For some Excel formulas to work correctly, these fields must formatted as text. P a g e | 87 P‐Card Audit Guide Step #1 – Initiate Pivot Table The examples that follow use purchasing card transaction data. The data tab of the workbook has the individual transactions. You can click anywhere in the data range and Excel will identify the data to be used. Click on Insert Pivot Table Step #2 – Define Data Range & Location of Pivot Table Excel will identify the range of data on the spreadsheet. Most of the time, you will want to include all of the data in the pivot table. However, you can select the range manually and include just the contiguous columns and rows you want. For example, if you have data in A1:M2000 but you only want to use data in A1:D200, you can manually select that range. However, in our work, it is highly unlikely that we would want to pivot just part of the data (or data from multiple spreadsheets). Click the radio button for either “New Worksheet” or “Existing Worksheet”. The default setting is “New Worksheet” and you will use this option most of the time. The other option is helpful if you want to have multiple pivot tables in a single workbook either on multiple data tabs or on the same data. Click OK. Excel Extra To place the pivot table on an existing worksheet, click on the radio button and the red arrow at the end of the “Location” box. Navigate to the spreadsheet and the cell location (not just to the particular spreadsheet) where you want to put the table. Hit “Enter” and Excel will take you back to this dialog box. Click OK. P a g e | 88 P‐Card Audit Guide Step #3 – Design the Layout of the Pivot Table This is the step where you determine what your pivot table will look like and how the data will be summarized. The different areas of a pivot table are: • Values (fka Data) – this is the information that you are trying to summarize, or measure, or count. • Report Filters (fka Page) – a “Report Filter” is useful if you have a lot of data and you will want to look at only one main group at a time. For example, if you have 100,000 purchasing card transactions at 100 Agencies, it might be easier to review one Agency at a time rather than all Agencies at once. • Row – the “row” determines what columns from the data will be in the left‐hand columns of the table. You can have as many rows as you have columns in the spreadsheet of data. • Column – the “column” determines the names of the columns going across the pivot table. The diagram to the right shows the relationship between rows and columns on the pivot table. What was called “Pages” in Excel 2003 (see purple box) is now called “Report Filters” in Excel 2007. The pivot table layout screen is slightly different from that in Excel 2003. It has built‐in formatting for Rows. To see the layout screen in the Excel 2003 version, click on “Options” in the top left‐hand corner. Click on the “Display” tab and the “Classic Pivot Table layout” check box. Then click OK. The column names (Pivot Table Field List) from the data spreadsheet are shown on the right‐hand side of the screen. To put any column in the Row Labels section, click on the box next to the column name. The rows will appear in the Row Labels box in the order shown in the list. If you want to re‐arrange them, you can “drag and drop” the fields in that section into the desired order. You can also drag and drop field names to any of the areas shown instead of clicking on P a g e | 89 P‐Card Audit Guide the box. Any of the spreadsheet columns can also be put in the “Values” area. The most common use is to present the total of an amount field, such as transaction or purchase order amount. If Excel detects a numeric column, it should automatically choose the Sum of that amount for the Value. For any non‐numeric columns, Excel defaults to Count of the rows. The “Report Filter” area would be a good place to put the “Program Name” field in order to be able to filter on one Agency or University at a time. For Compliance audits, the vendor name from the 19D query would be a good candidate for a “Report Filter”. Here, we have put the State Entity name and the vendor name, in that order, as the rows going down and the sum of the transaction amounts as the data. The total in column C will be the amount of spend for the State Entity (column A) at the merchant (column B). The Report Filters will be above the pivot table to allow filtering. When using the Report Filters, only data rows that match ALL of the values selected in the filters will display. For example, in the illustration here, records where the merchant has been identified as “Excluded” from review, regardless of whether or not the MCC is exempt (because of the probable NIGP code), regardless of the day of the week on which the purchase was chosen, and regardless of whether or not there is a contract merchant with the same MCC. As another example, applying the filters as shown here will pull all transactions at merchants where (1) the merchant has not been excluded and (2) the MCC is not exempt because of the probable NIGP code. P a g e | 90 P‐Card Audit Guide Step #4 – Formatting the Numbers Click on the “Sum of Amount” button in the Values area. When the pop‐up menu appears, click on “Value Field Settings…”. Most of the time, you will want to choose the Sum of the amount field. Click on the “Number Format” button to select the format (e.g. General or Currency). Click the OK button in the Value Field Settings dialog box when finished. Excel Extra: There might be times when you want to count the occurrence of the amounts, such as when you want to know how many transactions for $50.92 we have. This is probably not very useful. However, you might want to count the number of transaction numbers or purchase order numbers. Step #5 – Modifying the Pivot Table The pivot table will display on the screen. From here, you can remove columns or rows. You can also drag and drop other spreadsheet columns to rows or columns of the pivot table. Drag the “Credit Limit” field to the Values area. Notice that the default is “Count” of the Credit Limit. Excel assumes that you want to count the number of rows with something in this field. In this example, it will count the number of rows for each merchant name. In this spreadsheet, the Number column represents the transaction number. You can use a “count” of any field to determine the number of data rows associated with the field names shown in the Row Labels area. The pivot table now displays the Count of Credit Limit. The table will automatically display the data fields the way it thinks you want to. Spreadsheet columns that are formatted as numbers or currency will automatically be inserted in the data area as a “sum” of the amount. Text fields will automatically be inserted as “count” of the values. If any of this is not correct, you can change it. See diagram at top of next page. P a g e | 91 P‐Card Audit Guide Now, delete the Credit Limit field from the Values area and drag and drop the amount column into the data area. You will now see Count of Amount. This kind of summary doesn’t make much sense, but you might want to see the largest transaction amount or the smallest transaction amount. To change the summarize option for the additional amount field, click on the Max option in the Summarize by: area. Click on the Number… button to format the number as Currency and click OK. Notice that you can also do “average” amount and smallest (“min”) amount. You will now see the Total Amount of spend at the merchant as well as the largest transaction at the same merchant. If you don’t like the default names, these can be changed in the PivotTable Field dialog box. Change the Max of Amount to Largest Transaction here. In this example, the total spend and the largest transaction were the same for Marvair QPS, so there must have been just one transaction. However, the total spend at Sherwin Williams was $377.77 with the largest transaction being $176.69. To view the details behind any number, double‐click on the number. Excel will display the individual lines in a new worksheet. P a g e | 92 P‐Card Audit Guide Pivot Table Extras Filtering a Pivot Table Drop‐down lists for the Report Filters, Column Labels, and Row Labels areas can be used to filter what is shown on the screen just like using filters on a standard spreadsheet. Click the drop‐down arrow and select the values to show. Note that you can also begin a sort on the column from this option. To apply custom filters, click on the Label Filters bar and then use one of the custom options. This will save time if you have a long list of values and you know that a lot of them begin with the same letter or word. For example, you can select “Begins With…” and enter the letter “B” to see all values in the Row Label that begin with the letter “B”. P a g e | 93 P‐Card Audit Guide Applying Conditional Formatting You can apply conditional formatting to a cell or range of cells just like you would in a standard spreadsheet. Click on the cell or the range of cells you wish to apply conditional formatting to. On the Home tab, click on Conditional Formatting… The Conditional Formatting drop‐down menu will appear. In Excel 2003, you can have up to three conditional formats. However, in Excel 2007, you can apply more than this. Select Manage Rules… . Select “New Rule” Click on “Format only cells that contain” and enter the criteria and desired format in the dialog box. Click OK when finished. In this example, cells containing a value greater than $5,000 will be in red font. To add additional conditional formatting, repeat the above steps for all desired formatting. P a g e | 94 P‐Card Audit Guide Removing Subtotals Whenever you put in two or more spreadsheet columns in the “row” area, the pivot table will automatically insert totals for each row. Sometimes this is helpful, sometimes it is not, especially when you have two or more spreadsheet columns represented as rows. To eliminate the subtotals, right‐click on the Row Label that has the subtotals. In this illustration, that would be the Program Card Name row section. To remove the subtotals, click on the “Subtotal…” bar to toggle the subtotals off. To reinstate the subtotals, simply right‐click on the Row Label name and click on the “Subtotal…” bar. Sorting a Pivot Table Sorting a pivot table is not quite the same as sorting a regular spreadsheet. The table automatically sorts by the row values. However, we might want to view data in descending order by amount to see which vendor has the most spend. To sort the pivot table by the amount, click anywhere in the Total column. Click the Data tab and Sort… on the menu bar. The pivot table Sort dialog box will appear. Click on the “Smallest to Largest” or “Largest to Smallest” radio button. Click OK to return to the pivot table. The Row Labels will be sorted in the selected order by amount. The labels automatically sort correctly. You might also want to sort the pivot table by merchant name. Click anywhere in the merchant name column and click Data Sort. A different dialog box will display. Click on the radio button for either “Ascending” or “Descending” and select the field to sort in the drop‐down list. The choices will be the column that you have clicked in on the pivot table and the Value fields (e.g. Sum of Amount). P a g e | 95