1
•
..raoleculc., compute,
May 24, 1984
SOFTWARE RELEASE ANNOUNCEMENT
Molecular Computer is pleased to announce a new release of the
n/STAR Network Operating System, version 2.62B. N/STAR release
2.62B is now released for shipment to customers, and will be
shipped with Molecular Systems beginning June 15th, 19B4.
N/STAR 2.62B is a major release, with several new features and
error corrections from previous releases. N/STAR 2.62B can be
installed on all Supermicro and Supermicro X systems.
(PLEASE
NOTE: The Molecular Computer MC Series; the Series
9/20 and the Series 9/40 utilize n/STAR version 3.00 and greater ..
These versions of n/STAR (starting with version 3.00) are
distributed on 5.25" diskettes and have a separate release
schedule.)
The following features are highlights of n/STAR version 2.62B:
o
NEW PRODUCT SUPPORT
MOLECULAR MODULAR INTERCONNECT (MMI)
The Molecular Modular Interconnect (MMI) provides the
capability
to
link Molecular Series 9 and/or
Supermicro X systems together to operate as a single,
larger
system.
MMI
allows users to expand an
individual computer system or to share data and
peripheral resources between two systems. MMI extends
the m/BUS Interprocessor Link between system modules.
MMI
is
not supplied standard with a system but
can be ordered with the system or ordered separately
and installed later.
MS-DOS
The system utility MAINT has been modified to allow
the, specification of a file name that is to be loaded
on an AP/B6 processor so that either n/STARB6 or
MS-DOS m,ay be run. The command "SYSTEM: = " has been
added. rhe SYSTEM command should only be used in the
system configuration screen of a 16-bit Application
Processor.
TAPE APPLICATION PROCESSOR (TAPB015/TAPB020)
A Tape Application Procesor is available to facilitate
backup
of
the Molecular system's mass storage.
File-by-file, modified files (using the archive bit)
and image streaming backup are supported.
TAP8015: On-line backup card for Supermicro A Systems
TAP8020: On-line backup card for Supermicro X Systems
251 River Oaks Parkway
San Jose, CA 95134-1986
(408) 262-2122
TWX 9103382:;1
.--t.
r
o
NEW TAPE PROCESSING UTILITIES
Several
enhancements
have
been
added to tape
operations that provide increased functionality and
reliability. The program TAPE has been replaced by the
program LTAPE. A "pseudo-online" program called STREAM
is provided for streaming tape operations, while
on-line operations are speeded up when a special
server
program called OLTSERVE is used with LTAPE.
(These
programs
require the Tape Application
Processor, TAP8015 or TAP8020.) Details on these
enhancements are included in n/STAR 2.62B Software
Release Notice and the Tape Backup Users Guide ( Order
number 87100680.)
o
MP/M SUPPORT
MP/M queues have been implemented in NSTAR-86. MP/M
processing has been enhanced to include additional
BnOS functions.
NOTE: In order to use queues on eXisting 8086 boards,
a new set of proms is required. To take advantage of
this new feature, proms can be ordered using the
attached software order form.
Over 50 field reported problems have been corrected in this
release. These problems are listed in the Software Release
Notice. In the future, corrections to field reported problems
will be listed as part of the Software Release Announcement.
Several additions have been included in this Software Release
Notice. Please be aware of them:
- A Publications Order Form has been included. Molecular
Computer has a growing library of technical' information. Please
order these manuals to complete your library.
- An SPR (Software Problem Report) Form has been
included. Please use this form for submitting problems you have
uncovered or for requesting enhancements to the operating system.
NOTE: This form is to be used by direct customers and
Maintenance customers only. If you are a Dealer or an end user
not covered by the Molecular Maintenance Contract, please forward
this form through your Sales/Support channels.
- Extra copies of the n/STAR 2.62B Package can be
ordered by using the attached form. If you copy diskettes for
your customers, be sure to copy the Software Release Notice. It
contains important information specific to n/STAR 2.62B
Molecular Computer continues to enhance its software product
offerings.
The
addition of MP/M Queue capability greatly
increases the availability of multi-user software that can run on
Molecular ,Systems. The multiprocesor implementation of queues
which Molecular has chosen assures a higher level of software
aplication' performance than is available on a true MP/M-based
system.
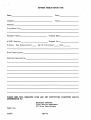
SOFTWARE ORDER FORM
May 24, 1984
Molecular Computer periodically updates its N/STAR, Network
Operating System and associated utilities. In an effort to
_provide a better service to its direct and indirect customers, a
new Software Distribution Policy is being developed. Beginning
with the release of n/STAR 2.62B, all future releases of software
will be be announced by way of a Software Release Anouncement
mailed directly to direct customers and to Molecular Maintenance
Customers.
The Software Release Announcement will also be
reprinted in M/NET NEWS, Molecular Computer's monthly newsletter.
Attached to the Software Release Announcement will be a software
order form.
Mail your order to:
Molecular Computer
251 River Oaks Parkway
San Jose, California 95134-1986
ATTN: Order Entry Dept.
(If you are a direct customer of Molecular Computer orders can be
placed directly with your District Sales Office.)
---------------------------------------------------------------SOFTWARE ORDER FORM
1. n/STAR v2.62B Software Release Package
Order # 87100820 at $75.00 each
qty.
Package contains:
·Software Release Notice
• Publications Order Form
• Diskettes (8" IBM3740 format)
• n/STAR 2.62B
• Diagnostic v1.06
• LTAPE tape utility
$________
2. NSTAR86 MP/M86 Prom Set
Order # 0520503201
E52050330 at $50.00 per set
qty.
$________
Prom Set contains:
• Two (2) proms for
replacement into existing AP/86s
(one Set for each AP/86)
,
• Instructions for replacing existing proms
»
May 24, 1983
Release Notice #9
nlSTAR V 2.62B
Tape Diagnostics V 1.20
Software Release Notice
------------------------------------------------------------------------------This engineering specification describes the additions to version 2.60A of the
n/STAR Network Operating System for Molecular Computer Supermicro series to
make version 2.62B. Version 2.62B is a full release version. BECAUSE n/STAR
AND THE MOLECULAR DIAGNOSTICS ARE NOW SEPARATE PRODUCTS, THIS DOCUMENT DOES NOT
DESCRIBE DIAGNOSTIC DISKETTE FUNCTIONS. A separate release notice will accompany the next Diagnostic Diskette release. The next full release will be
version 2.70. Version 2.62B includes the following changes/enhancements:
o
MMI, Microsoft(r) MS-DOS(tm), ATOM, AP8015, and tape server AP are
supported.
o
New tape backup utilities are provided for more reliable tape backups
as well as more functionali ty in operations. The program TAPE has
been replaced by the program LTAPE.
o
m/BUS
o
MP/M-86 queues have been implemented. MP/M processing has been
speeded up. In addition, functions have been added to allow correct
termination. (A PROM replacement kit is required on the AP/86 to use
MP/M-86 queues.)
o
Problems involving LIST, DESPOOL, and QMAINT have been fixedG
o
Problems involving NSTAR86 have been fixed. It now fully supports
software development and compiler operations.
o
Changes have been made to MAINT and NSTAR86.SYS to support MS-DOS.
o
Support of 38.4k baud has been added.
o
ATOM users and volumes have been defined.
o
Event routine calling sequence has been changed.
o
Get File Size function (45) has been corrected.
o
The ability of Sysint to redirect bad sectors has been improved.
dri vers for A series products have been changed to correct a
timing problem causing bus hangs on some systems.
I
------------------------------------------------------------------------------Document Number:
052484
87100820, Revision A
RN9-1
TABLE OF CONTENTS
RELEASE GROUP • • • • • • • • • •
3
INSTALLATION PROCEDURE•••••
5
ERROR CORRECTIONS • • • • • •
• • • • • • 10
ERRORS NOT CORRECTED. • • • • •
• • 12
DISK CONFIGURATIONS SUPPORTED •
• 13
MEMORY MAP • • • • • • • •
• 15
MAINT CHANGES •
• 16
EVENT ROUTINES
17
ATOM VOLUME GENERATION
TAPE PROGRAMS • • • •
CP/M PLUS OPERATION
NSTAR86 CHANGES •••
APPENDIX
1 --
• • 18
. . . . . . • 19
. . . . . . . • 22
. . . . . . . . • 23
Installing CP/M 2.2
APPENDIX 2 -- n/STAR BOOS List
• 24
•• • • • • .• 26
APPENDIX 3 -- Off Line Tape Backup Operation 28
APPENDIX 4 -- Publications Order Form • • • • 40
APPENDIX 5 -- Software Problem Report Form. • 42
APPENDIX 6 -- Sysint Redirect Manual
052484
RN9-2
• • • •
RELEASE GROUP
The software is released on the following diskettes:
Description
Part Number
n/Star distribution (not bootable)
CP/M serialized distribution (bootable)
Tape Utilities (not boatable)
88002411
88002271
88002451
The n/STAR distribution diskette is to be used for field upgrades of existing
systems and for installation on new systems. The CP/M distribution diskette is
used to generate bootable n/STAR and Diagnostic diskettes. The Tape Utilities
diskette contains the new tape programs.
All new systems contain a serialized -CP/M diskette, the n/STAR diskette, tape
utilities diskette, and a Molecular diagnostic diskette. Field upgrades do not
contain the CP/M diskette.
The follow ing files are available on each diskette (note that the numbers in
each column indicate CP/M User Numbers under which each file resides):
file
AM808Z.RSP
ASM.COM
*ASSIGN.COM
D.COM
DBIOS4.HEX
DBIOSN1.HEX
DBIOSN2.HEX
*DESPOOL.COM
DEVICES. COM
DDT. COM
*DOWN.COM
DUMP.ASM
DUMP. COM
ED. COM
*GENSTAR.COM
*GENSTAR.SUB
*GENSYSF.COM
GPMON.COM·
*INSTALL.SUB
*LIST.COM
LOAD. COM
LOOOFF.COM
*LOOON.COM
*MAINT.COM
MESSAGE.SYS
MOVCPM.COM
*NEWCON.COM
*NSTAR80.SYS
052484
diskette
n/STAR CP/M
1
0
1
1
0
0
0
1
1
0
0
0
0
1
0
0
0
0
0
0
1
0
1
0
1
1
1
0
1
1
0
description
Resident system process for Access Manager
DRI assembler
user profile maintenance utility
directory display program
universal floppy BIOS
5MB floppy BIOS
SM32 floppy BIOS
system despooler
lists created devices
DRI interactive debugger
Power off command
DRI file display utility
DRI file display utility
DRI editor
n/STAR installation program
n/STAR installation control file
'generate .SYS files on MAINT volume
FP/AP debug monitor
new system installation
n/STAR list utility
DRI object file editor
user signoff program
user signon program
n/STAR system maintenance utility
default terminal message
DRI CP/M relocation program
Z80 TLink adaptor
n/STAR-BO system image
RN9-3
file
*NSTAR86.SYS
PIP. COM
*POSTBOOT.COM
*PRLLDR. COM
*PRTLOG.COM
*QMAINT. COM '
*RESET.COM
SET. COM
*SETBAUD.COM
STAT. COM
SUBMIT. COM
SYSGEN. COM
*SYSINT.COM
TLINK.COH
TOD.COM
VOLS.COM
WARMSTAR.COM
*WHO.COM
XSUB.COH
*:
\,
diskette
n/STAR CP/M
1
0, 1 0
0
0
1
1
1
1
1
1
0
0, 1 0
0
0
1
1
1
1
1
1
0
description
n/STAR-86 system image
DRI file copy utility
Floppy post boot processor
PRL and RSP program loader
example program to-display the system log
queue maintenance utility
reset an AP
set file attributes
temporarily change AP baud rates
DRI system status utility
DRI batch execution utility
copy system tracks of floppies
initialize the system drive
terminal link program for use with 8086
time of day utility
show volumes utility
n/STAR warmstart program
list APs and users of system
CP/M SUBMIT utility
changed from n/STAR 2.60A
Note that files on the n/STAR diskette reside under two different user numbers.
Therefore, just doing a DIR on this disk will not show all of the files.
The Tape Utilities Diskette contains the files necessary for tape operations as
well as the files used for CP/M plus. Note that TAPE is still supplied on the
Diagnostic diskette for this release. The Tape utilities diskette contains:
Tape Programs
LTAPBACK.OVL
LTAPREST.OVL
LTAPDIR.OVL
LTAPMENU.OVL
LTAPBSUB.OVL
LTAPE.CCM
SELDRlVE.COM
TAPEAFP .OVL
TAPEAP.OVL
TAPEOLT.OVL
TAPEXFP .OVL
052484
BIOS
DBIOS3.HEX
DBIOS4.HEX
DBIOSN1.HEX
DBIOSN2.HEX
POSTBOOT.COM
CP/M 3.0
CCP.COM
CPM3.SYS
TYPE. COM
DIR.COM
ERASE. COM
RENAME. COM
CPMLDR.COM
RN9-4
INSTAlLATION PROCEDURE
The n/STAR and Tape Utilities diskettes are distributed without a bootable CP/M
on them. This is because the CP/M that is shipped to new customers is
seriali zed and registered wi th DRI. It is the customer's responsi bili ty to
move it around to where he needs it. The follow ing installa t i on procedures
begin by placing a copy of the serialized CP/M (or any other CP/M) onto the
n/STAR, diskette.
o
Upgrade from a previous nlSTAR release
Requirements:
Step 1.
the n/STAR distribution diskette
a Supermicro diagnostic diskette
any bootable CP/M distribution diskette
a Molecular computer
Make the diskettes bootable and copy.
a.
The n/STAR and Tape Utili ties diskettes must be made bootable
before they can be used. If you have a bootable diskette from
the last installation of your system (the CP/M distribution
diskette) you can simply use SYSGEN to wri te your CP/M on the
two diskettes. If the CP/M you have is not a 56K CP/M with the
Molecular DBIOS, you must follow the procedure in Appendix 1 to
MOVE your CP/M.
b.
After you make the diskettes bootable, make copies using the,;
IMAGE program on one of your Diagnostic Diskettes. Instructions
for using IMAGE are contained in the n/STAR System Administrator's Guide or n/STAR Installation and User Reference Manual
that came with your system.
c.
File the original distribution diskettes safely away, and use
your copies to perform the actual upgrade or installation.
IMPORTANT
The CP/M distributed with n/STAR 2.49 and later have
been modified to run on the X-series hardware. The
CP/Ms distributed before then will not operate on Xseries hardware. The CP/M must have the new DBIOS
installed to run on both the A and X versions of
hardware.
Step 2.
052484
Determine the current disk configuration.
a.
Insert your existing (earlier version) bootable Diagnostic
Diskette.
b.
Bring the system up in Diagnostic Mode.
RN9-5
~,
c.
Type
A>STAT B:DS{: <RETURN>
The screen displays the current disk configuration. Make a note
of the number listed as the "Kilobyte drive capaci ty" and the
number of "32-byte directory entries."
d.
Remove the Diagnostic Diskette and insert a copy of your new
bootable n/STAR Diskette.
e.
Press ""c to inform the system that the diskette has been
changed.
f.
Proceed to the Step 3 below to install n/STAR from the distribution diskette.
Step 3.
Install n/STAR from the distribution diskette.
IMPORTANT
The location of the Configuration sector has been
changed in versions 2.60A and later. You must run the
SYSINT "D" option when upgrading (you are prompted to
do this as you proceed with the installation).
a.
Type
SUItUT GEXSTAR <RETURN>
The screen displays
***
Upgrade to 2.62B
***
When SYSINT runs, DO NOT format or verify your disk.
Use the "D" option to reselect your disk configuration.
A>SYSINT
The installation procedure requires you to run SYSINT to set up
·the disk directories for directory hashing. This procedure is
non-destructive to your existing data AS LONG AS YOU SELECT THE
DISK CONFIGURATION CURRENTLY IN USE. The screen displays
SYSTEM DISK INITIALIZATION ROUTINE
DRIVE 0, 1, 2, 3 ([])
,
052484
RN9-6
b.
Enter the number of the hard disk dri ve to configure.
press RETURN. The screen displays
F=Format/Verify,
c.
V=~erify
Only,
Do not
D=Disk Option R=Redirect ([])
Enter
D
Do not press RETURN. Be certain that you do not select format
or verify at this time. The screen displays
***********************WARNING************************
TO CHANGE THE DlRECTORY/BLOCKSIZE OPTION ON YOUR DISK,
YOU MUST ARCHIVE ALL YOUR DATA AND REFORMAT THE DISK.
CONTINUE? YIN
([])
Since you will select the same option as you now are using, you
may disregard this message.-you will not destroy any data on
your disk if you correctly follow this procedure. Type
y
Do not press RETURN. The screen displays a table of possible
disk configurations and details about each. At the bottom of the
table, the screen displays
SELECT CONFIGURATION OPTION (0-4)
d.
Enter the number of the configuration your system is now using,
as determined in Step 2 above. BE SURE TO ENTER THE CORRECT
NUMBER, OR EXISTING DATA MAY BE DESTROYED. The screen displays
a table of information pertaining to the configuration you
select. At the bottom of this table, the screen displays
CONFIGURATION CORRECT? YIN
e.
([])
([])
.If you are certain that you entered the correct configuration,
type
y
do not press RETURN. (If you entered the wrong configuration,
type N to make another selection.) The screen displays
FUNCTION COMPLETE
Hit BREAK key to exit program
052484
RN9-7
f.
Press the BREAK key.
The screen displays
A>GENSTAR
NEW N/STAR VERSION : 2.628
FUNCTION COMPLETE
A>PIP B::A:*.*[G1VR]
COPYING filename 1
filename 2
filename 3
filename n
UPGRADE COMPLETE
A>
g.
o
When all of the files are copied from the n/STAR Diskette onto
the hard disk, remove the n/STAR Diskette from the diskette
drive. Then press BREAK (with the terminal still connected to
the FP) to bring up the system in Multi-User Mode under the
newly installed version of n/STAR.
Install nlSTAR on a new system drive
New systems have a bootable n/STAR already installed on
the hard disk.
Requirements:
Step' 1.
the n/STAR Distribution Diskette
the CP/M Distribution Diskette
a Molecular computer
Create a bootable n/STAR diskette.
Follow the procedure described in Step 1 above, under the heading
"Upgrade from a prevoius n/STAR release."
Step 2.
a.
052484
Initialize the system drive and install n/STAR.
Using a copy of your new, bootable n/STAR system diskette, bring
up the Supermicro in Diagnostic Mode.
RN9-8
b.
Type
SUBMIT INSTALL
and press RETURN.
The screen displays
A>SYSINT
SYSTEM DISK INITIALIZATION ROUTINE
DRIVE 0, 1, 2, 3 ([])
c.
Supply the appropriate information as you are prompted to format, verify and select disk options on this hard disk drive.
(When this entire process is complete, you must run the SYSINT
program on all add-on drives in the system.) When SYSINT is
finished, the screen displays
FUNCTION COMPLETE
Hit BREAK key to continue
d.
Press BREAK, and the screen displays
Supermicro*xx lIMB
56K CP/M V2.62B
A> GENS TAR
NEW N/STAR VERSION = 2.62B
A>PIP B:=A:MESSAGE.SYS[VR]
A>PIP B:FS.SYS=A:GENSTAR.COM[VR]
A>PIP B:=A:*.I[G1VR]
COPYING filename 1
filename 2
filename 3
..
filename n
A>GENSYSF
A>
e.
When all files are copied onto the hard disk, remove the n/STAR
Diskette from the diskette drive and store it in a safe place.
f.
Press BREAK to bring up the system in Multi-User Mode operating
from the newly installed version of n/STAR.
Your Supermicro has now been completely reinitialized, and contains
only the operating system, utilities, and three user IDs. You must
log on as either DEMO or MAINTUSR and use the utility MAINT to
establish users and volumes.
.
052484
RN9-9
ERROR CORRECTIONS
The following errors were corrected in release 2.62B:
o
SPR77. NSTAR86 has been fixed to enable running CIS COBOL
Level II (and other compilers) on the performance accelerator.
o
SPR87.
o
SPR104, 108.
o
SPR111.
o
SPR113. In SYSINT, the configuration table for the 60-32 system
(option number 3 only) with two add-on drives caused memory conflict
with n/STAR tables. The option was changed to select reduced capacity
tables. NOTE: To upgrade to 2.61 and later releases using option
number 3, all files must be backed up to another media other than the
hard disk. Otherwise, data may be lost.
o
SPR114.
o
SPR115. An esoteric hole in the ASSIGN security has been patched.
o
SPR111. SYSINT 2.60A did not give a warning message asking the user
to backup data on the disk. The warning message has been restored.
o
SPR118. Specifying LIST SPOOL (queuename) with multiple copies did
not result in more than 1 copy. This feature now works.
o
SPR 119. QMAINT allowed entry of HOLD 245/0 (or 11) instead of HOLD
245/A (or B). This has been corrected.
o
SPR122. Inserting an AP86 board into a live system caused the system
to hang. The system reset function has been enhanced. NOTE: Users
should NEVER insert ANY board into a powered-on system.
o
SPR126. LIST SPOOL with the queue name specified on the ASSIGN page
caused the AP to go into a loop. This has been repaired.
o
SPR128. On the SM32X, the baud rates were incorrect.
rectified.
o
SPR129. LIST specified to the SYSTEM printer would continually
output, trying to output 255 copies, thus effectively hanging the AP.
o
SPR131.
Doing a DIR of an invalid drive resulted in an incorrect
error message. The error message reporting has been fixed.
o
SPR133. QMAINT correctly executes TOP and UP functions.
o
SPR134, 135, 152, 161, 202.
ted in LTAPE.
052484
TLINK timeouts have been increased.
Miscellaneous SYSINT corrections.
Corrected erasure of previous data.
PIP now correctly transfers file attributes.
This has been
Miscellaneous problems with TAPE correc-
RN9-10
o
SPR137. Illegal "ghost" active entries were showing up on QMAINT
display of print queues. This has been corrected.
o
SPR138.
o
SPR141. In SYSINT, the configuration table for the SM15-8 was incorrect. The table has been corrected.
o
SPR143. In QMAINT, if the CANCEL function was specified with an
illegal (nonexistent) entry, garbage resulted. Any such illegal
entry is now flagged as an error.
o
SPR145. Function 141 (DELAY) delayed an incorrect length of time for
some values. This has been corrected.
o
SPR146.
o
SPR155. When a file was queued to be listed by the despooler, if the
file was currently in use, the des pooler would drop the file from the
queue instead of retrying. This has been fixed.
o
SPR162, 149. System hung on some A series systems. This was an
m/BUS hang problem.
The m/BUS dri vers have been modified to
alleviate this problem.
o
SPR165.
POSTBOOT now displays the error code when an error on the
hard disk is encountered.
o
SPR168.
o
SPR173. BDOS function 45 sometimes returned an incorrect value if
the file was still open. n/Star now checks to see if the file is
open and larger than indicated by the information on the disk.
o
SPR172.
Corrected BDOS function 44.
o
SPR174.
Correction in LIST.COM
o
SPR178 (85). nHub correctly
o
SPR179. CCP has been modified to allow initial command
(CMD:= wi th ASSIGN) execution when SPOOL <filename> is also
specified.
o
SPR 180. An incorrect entry in the defini tion table for PRIAM 3450
configuration (floppy) has been corrected.
o
SPR183.
o
SPR185. New versions of CCP86 and NSTAR86 incorporate corrections
allowing DDT86 , etc., to work correctly.
o
SPR187. On MMI systems, accessing an illegal volume caused
the system to hang. This error is now correctly handled.
052484
Break now resets the FP on X systems
Files no longer continuously queued for print.
Baud rate supported increased to 38.4K baud.
calcu~ates
the size of a file.
STAT did not work with new version of NSTAR86.
RN9-11
o
SPR189.
Under heavy usage, updating of the system clock
was sometimes lost. The system now ensures that the time is
updated,- even under heavy system load.
o
SPR 199 Added support for MP/M BOOS function 6.
o
SPR203, 204.
o
SPR205. Spool files were sometimes not automatically deleted after
printing.
o
Some arithmetic routines were shortened or optimized in nHub, ISDRVR,
and CBIOS. Also, multi-sector reads (READS) have been optimized for
be t t er response.
o
Caused by incorrect compute file size.
Multi-sector reads only allowed up to 15 sectors at a time.
Now
n/Star correctly allows up to 16 sectors.
ERRORS NOT OORRECTED IN THIS RELEASE
The following errors were not corrected in this release:
o SPR164
<BREAK> DURING PRINT JOB CAUSES TRASHED DIRECTORY
(Reported under n/STAR Version: 2.60A).
PROBLEM: Executing a <BREAK> during a print operation (to abort print
job), may cause "trashed" directories on logical drive A:. WORKAROUND: Use a DESPOOLing printer and cancel print jobs with QMAINT.
NOTE: "Trashed" means that a DIRectory listing will be confused and
probably consist' of colons ":".
o SPR21 1: INTERMITTENT ''BUS' HANGS" WHEN USING ACCESS MANAGER.
(Reported under n/STAR Versions: 2.60A & 2.62a.)
PROBLEM: Occasional "bus hangs" occur on systems running Access
Manager. WORK-AROUND: DOWN the system from Diagnostic Mode and bring
it back up in Multi-User Mode. NOTE: "Bus hang" is a condition in
which all the terminals are locked out of the system.
o SPR212: INTERMITIENT "ABORTS" WHEN USING ACCESS MANAGER.
(Reported under n/STAR Versions: 2.60A & 2.62a.)
PROBLEM: When attempting to load an application, Access Manager will
occasionally issue the error message: "Access Manager is not
instalied." WORK-AROUND: A second attempt to load the application will
usually be successful.
o SPR224: TAPE WILL REWIND OFF END-OF-REEL UNDER LTAPE.COM.
(Reported under n/STAR Versions: 2.60A & 2.62a)
PROBLEM: When <ESC> is hit more than once (to abort the current TAPE or
LTAPE operation), the cassette tape may wind off the end of the reel.
o SPR237: RESET TO AP ON "A" SERIES SYSTEM MAY CAUSE BUS HANG.
(Reported under n/STAR Version: 2.62a.)
052484
RN9-12
PROBLEM: A RESET to an "A" series AP may cause a "bus hang." WORKAROUND: DOWN the system from Diagnostic Mode and power-up as usual.
o SPR241: PROBLEMS WITH "DOWN" ON 15-Bs.
(Reported under n/STAR Version: 2.62a.)
PROBLEM: On some 15-Bs, after copying files to the FLOPPY using
PIP.COM, the system will not DOWN. WORK-AROUND: DOWN the system from
Diagnostic Mode.
o SPR249: 300 IS BAUD NON-FUNCTIONAL ON NEWCON
(Reported under n/STAR Version: 2.62a.)
&
LOGON DEVICES.
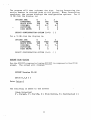
DISK roNFlGURATIONS SUPPORTED
This is a list of the disk configurations supported by release 2.62 of n/STAR.
Option "1" is the configuration that manufacturing installs before shipping.
OPTIONS:
0
1
2
3
4
PRIAM
3350
14'
DIRECTORY:
BLOCKSIZE:
SIZE (MB):
PARTITION:
MAX DRIVE:
Name = "DIRAC 30MB"
320 640 12BO 1024
16K BK
4K
BK
4.9 4.9 4.9 7.3
6
6
6
4
2
2
2
3
PRIAM
6650
14"
DIRECTORY:
BLOCKSIZE:
SIZE (MB):
PARTITION:
MAX DRIVE:
Name = "Supermicro*64 60MB"
320 640 12BO 1024 512
8K 16K
16K BK
4K
4.9 4.9 4.9 B.O B.O
12 12
12
7
7
1
1
1
1
1
PRIAM
3450
B"
DIRECTORY:
BLOCKSIZE:
SIZE (MB):
PARTITION:
MAX DRIVE:
Name = "Supermicro*32 30MB"
512 1024 1920 1024 12BO
16K
BK 4K 16K
BK
7.6 7.6 7.6 9.B 9.8
4
4
4
3
3
3
3
3
3
3
PRIAM
7050
B"
DIRECTORY:
BLOCKSIZE:
SIZE (MB):
PARTITION:
MAX DRIVE:
Name = "Supermicro*32 60MB"
512 1024 204B 1536 1536
BK 4K
BK 16K
16K
21
15
7.7 7.7 7.7
B
B
8
4
3
1
1
1
3
3
PRIAM
3450
DIRECTORY:
BLOCKSIZE:
Name
512
16K
0524B4
= "Supermicro*16
1024 1920
BK 4K
1024
16K
512
16K
7.3
4
3
30MB"
12BO
BK
RN9-13
8"
SIZE (MB):
PARTITION:
MAX .DRIVE:
7.6
4
3
DIRECTORY:
BLOCKSIZE:
SIZE (MB):
PARTITION:
MAX DRIVE:
Name
320
16K
5:0
2
3
= "Supermicro*8
RMS
SEAGATE DIRECTORY:
412
BLOCKSIZE:
5.25" SIZE (MB):
PARTITION:
MAX DRIVE:
Name
320
16K
4.7
2
3
= "Supermicro*8A
SEAGATE DIRECTORY:
BLOCKSIZE:
419
5.25" SIZE (MS):
PARTITION:
MAX DRIVE:
Name = "Supermicro*8 15MB"
512 1024 2048
8K
16K
4K
7.3 7.3 7.3
2
2
2
3
3
3
5.25"
7.6 7.6
4
4
3
3
9.8
3
3
9.8
3
3
10MB"
640 1280
8K
4K
5.0 5.0
2
2
3
3
10MB"
640
8K
4.7
1280
4K
4.7
2
2
3
3
Note that configurations with partitions larger than 8MB cannot be backed up
under CP/M 2.2 (the usual offline backup method). If you have partitions (or
indi vidual files) larger than 8MB, you must use ei ther CP /M 3.0 (provided on
the Tape Utilities diskette) or the tape server AP under n/STAR. (CP/M 3.0 is
provided only for tape backup. purposes and is not to be used for other
purposes. If you attempt to use CP/M 3.0 to make any of the.diskettes
bootable, or if you try to use CP/M 3.0 utilities under n/STAR, you will
encounter problems with unpredictable consequenses.)
Do not use CP1M 3.0 for any purpose other than tape backup as described in the
Tape Backup User's Guide.
IMPORTANT
If you received an "Add-on Drive Backup Diskette" for
backing up add-on disk drives, do not use it any
longer. Instead, use the Tape Utilities diskette
described in this document.
052484
RN9-14
u
HEH>RY MAP
The FP memory map is:
2.60
0300H
2.62
0300H
6C72H
F700H
F780H
34D
6C72H
F700H
F780H
34D
contents
n/HUB base
CBIOS base
ISDRVR base
Z80 system loader
8086 system loader
lock table
base of buffer pool
new mIBUS drivers
end of system RAM
number of buffers
The Z80 AP memory map is:
2.60
OOOOH
0100H
D900H
DDOOH
E800H
EA06H
F800H
052484
2.62
OOOOH
0100H
D900H
DDOOH
E800H
EA06H
F800H
contents
base page
beginning of TPA
CCP initialization
CCP
n/STAR initialization
n/STAR (end of TPA)
base of PROM area
RN9-15
i.
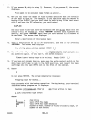
------------------------------------------------------------------------------MAINT has been modified to allow the specification of a file name that is to be
loaded on an AP/86 board so that either n/STAR86 or MS-DOS may be run. The
MAINT system configuration menu now appears as:
I
I
I
I
n/STAR System Maintenance Program
Configuration of unit 195
BAUD RATE FOR THE CONSOLE SERIAL PORT
C:=9600
BAUD RATE FOR THE PRINTER SERIAL PORT
P:=9600
INITIAL COM-1AND
I"'t.AT\. _
U·ll.J. -
SYSTEM: =
RTS LOW ON PORT A CAUSES A REBOOT (YES OR NO) RTS: =NO
DTR LOW ON PORT A CAUSES A REBOOT (YES OR NO) DTR:=NO
Enter command
)
(
The 'effect of entering a file name in the SYSTEM field is to specify that that
file will be loaded onto the AP/86 board. Thus, entering SYSTEM:=MSDOS.SYS
will cause the MS-DOS operating system to be loaded onto the 8086 board.
Leaving the SYSTEM field blank is the same as specifying NSTAR86.SYS, and will
cause the n/STAR-86 operating system for 8086 boards to be loaded.
The SYSTEM command should be used only in the system configuration screen of a
16-bit Application Processor. Do not supply a SYSTEM parameter for an AP
connected to a terminal.
Molecular's implementation of MS-DOS is fully explained in the MS-DOS
Operations Manual included with MS-OOS software.
052484
RN9-16
------------------------------------------------------------------------------The event routine that could be associated with a queue was called in a rather
clumsy way in n/STAR 2.60A. In trying to use the event routines, we have found
that the implementation did not work well. Therefore, before many people write
event routines, the calling sequence has been changed.
The specified event routine is called whenever a record is successfully read or
written from or to the queue. The routine is called just as the queue handlers
are exiting. The program that was running when the event happened has had all
of its registers saved and a return would restore the registers and return to
the interrupted routine. A writer of an event routine must keep in mind that
the routine is called by an interrupt so any system context information may be
in a funny state.
The event routine calling sequence for the Z80 processor is:
SP
A
= interrupted program (beware of overuse)
= 80H if a record was written into the queue
81H if a record was read from the queue
= address of queue control block
DE
Interrupts are disabled
CALL
EventRoutine
Flags,.A, BC, DE, and HL may be modified.
registers MUST be unmodified.
All other
The event routine calling sequence for the 8086 processor is:
SS:SP
AL
= interrupted program (beware
= 80H if a record was written
of overuse)
into the queue
81H if a record was read from the queue
DS:BX = address of queue control block
Interrupts are disabled
CALLF
EventRoutine
Flags, AX, BX, CX, DX, DS and ES may be modified.
registers MUST be unmodified.
All other
CAlJrIOO
BDOS CALLS SHOULD NOT BE MADE FROM WITHIN THE EVENT
ROUTINE.
This may destroy the stack and stack pointers because
n/STAR is not reentrant, and consequently may cause
the bus to hang.
052484
RN9-17
ATCM VOLUME GmmRATION
------------------------------------------------------------------------------New users of a Molecular system will not have to create the files used by ATOM.
When SUBMIT INSTALL is performed during initialization of the system, the
program GENSYSF automatically creates 3 volumes (ATOM, NEWMAIL, and MMAIL).
Also, a user called ATOMADMN is created.
This is in addition to the other
volumes (SYSTEM, SAMPLE, MAINT, FLOPPY, and FLOPPY1D) and users (MAINTUSR and
DEMO) which have always been created by GENSYSF.
The characteristics of the volumes are:
ATOM
Unsecured
NEWMAIL Unsecured
MMAIL
Secured
Location A1
Location A2
Location A3
The characteristics of the user are:
ATOMADMN with drive assignments of
A:= ATOM
B:= SYSTEM
P :::. FLOPPY 1D
052484
( since ATOM is distributed as
single-sided/double-density)
RN9-18
TAPE PROORAM ClIANGES
------------------------------------------------------------------------------The previous backup program "TAPE" has been obsoleted and replaced by "LTAPE".
A "pseudo-online" program called "STREAM" is provided for streaming tape operations (streaming requires a tape server AP). while online operations are
speeded up via creation of a special server program called "OLTSERVE" used with
LTAPE. 1bese programs are documented in a new Tape Users manual, and will not
be detailed here. However, off-line tape backup using the LTAPE program is
covered in Appendix 3, for the benefit of those users who will receive no other
documentation.
IMPORTANT
Backup tapes produced by the program TAPE are NOT
compatible with LTAPE.
Attempting to restore a tape wi th the wrong program
will cause an error message. TAPE is still supplied on
the release diskette to facilitate this transition
period; it will be removed from the distribution diskettes in the next release of n/STAR.
LTAPE may be used in either offline mode ( as TAPE was) or in online mode with
the tape server AP. In either use, it provides significant reliability improvements:
1.
The errol" detection and retry logic has been improved. The program
will now continue processing after encountering an "unrecoverable
data error". Previously, TAPE would abort in that situation making
the rest of the tape inaccessible. LTAPE skips the one bad block, and
processes the rest of the tape as normal.
Errol" messages are produced notifying the user of this occurance.
2.
The data structure written on the tape has been changed to reduce the
block size (from 32K bytes to 24K bytes) and also to properly handle
''hole in file" conditions. Previously, TAPE would not properly process. files containing holes or unwritten data.
3.
A "verify" command has been added which insures the tape is readable
and that all internal checksums (wi thin tape blocks) are correct.
Previously, the tape was checked by performing a directory of the
tape after backup. Doing the directory did not adequately check the
tape; this command does. It is also faster.
052484
RN9-19
>l,
4.
Provision has been made to restore to a different volume than was
backed up from. This allows a backup to be performed, then a restore
to a different volume, then a comparison of the data between the two
volumes to ensure the tape is readable and correct. It also allows
backing up offline, then restoring online (or vice-versa) and redirecting the data to the same logical drives. (Ordinarily, the data
would restore to the wrong partition.)
5.
Provi~ion has been made for selective backup of files based upon
archive bit setting. This allows backup of only those files that have
been changed. This significantly reduces the time (and tape) required for backups and should facilitate more frequent backup cycles.
Provisions are also made for selectively resetting the archive bit,
allowing composite backups to be made. (n/STAR automatically clears
the archive bit whenever you modify a file and LTAPE sets the bit
during backup.)
A clear archi ve bi t means the file has been modified; a set archi ve
bi t means the file has not been modified. You can display the setting of the archive bit (and other attributes) by using the n/STAR D
command. You can manually set the archive bit by entering the command SET fi lename. typ $ARC. You can manually clear the archive bit
by entering the command SET filename.typ $MOD.
6.
Numerous other user features have been added. Al though these features do not increase reliability per se, they do provide a more
complete program which should make backups/restores easier.
All features listed above are usable in offline mode and also in online mode.
The same program supports both modes of operation as well as the full A and X
products line, using the tape as a start/stop device. For offline mode, the
program is loaded into the File Processor and executes from there, using the
tape interface on the FP. For online mode with a terminal AP TLINKed to the
tape server AP, the program runs in the tape server AP using the tape interface
on the tape server AP.
In online mode with Tape Server AP, file and record locking, and backup by
logical volume name are also supported. Performance is improved by making use
of n/STAR's multisector read operation.
In online mode only, OLTSERVE is provided to speed up the backup/restore operation. The LTAPE program runs in the terminal AP, with OLTSERVE running in the
Tape Server AP; communication is via n/STAR's queue system. The performance
improvement comes from overlapping disk and tape operations.
Tapes written by the old TAPE program are not compatible with LTAPE. LTAPE
produced tapes can be processed interchangeably by any mode of operation offline, online, or online/OLTSERVE.
052484
RN9-20
The program STREAM only functions with a Tape Server AP. It runs in pseudoonline mode in that it is initiated from a terminal AP in Multiuser Mode under
n/STAR (not Diagnostic Mode) and makes the system quiescent (all users must be
logged off except the user doing the backup). It loads itself from the AP into
the FP. After performing the indicated operations, it automatically restores
the system to n/STAR state. It is not necessary to move terminal cables.
STREAM uses the tape drive in streaming mode, not start/stop mode. This means
the tape operations are much faster and the tape itself is stressed much less
than in stop/start mode. There is some feeling in the field that using the unit
in streaming mode will be more reliable than in start/stop mode, but this is
not substantiated (nor refuted) by engineering data.
STREAM performs backups and restores by physical partition images, not file by
file oriented as LTAPE. The partitions are those defined in the disk configuration. It does provide disk redirects, but treats each partition as a logical disk. Data may be restored to a di-fferent partition than it was backed up
from; however, partitions will be overwritten with the new data. (Note that
when you are restoring to a different partition, the new partition must be the
same size as the parition from which the data was backed up.
The streaming backup is significantly faster than file by file backup although
at a cost of reduced capaci ty on the tape. To keep the tape streaming, wri te
underrun is performed. The net effect of this is to reduce the cartridge
capacity to one half the capacity when used in file by file mode.
Performance measurements of the various tape options done in engineering
indicate:
LTAPE performance depends upon the characteristics of the files being
processed. Many small files takes longer than a few big files with same
total capaci ty. The limi ting factor is File Processor throughput, not.
tape speed.
LTAPE performance in offline mode is about 300K bytes/minute.
LTAPE used in online mode will be 20% faster than in offline mode, about
360K bytes/minute.
LTAPE used wi th OLTSERVE will be 45% faster than in offline mode, about
500K bytes/minute.
Using the archive bit to select only modified files in most cases will
significantly reduce the amount of data being written and hence significantly reduce the time needed to perform the backup.
STREAM will operate at streaming speeds with underruns, which means on 30
ips drive, will do about 1M byte per minute; on 90 ips drive about 3M
bytes/minute.
052484
RN9-21
CP/M 3.0 OPERATIONS
------------------------------------------------------------------------------The purpose of supplying CP/M 3.0 is to support off-line tape backup/restore of
a file or partition that is bigger than 8M bytes. If the partition/file is
smaller than 8M bytes, CP/M V2.2 will do the operation properly.
n/STAR continues to be based upon CP/M 2.2 with extensions. The CP/M 2.2 manual
will continue to be shipped with n/STAR systems. Only those portions of CP/M
3.0 necessary for file backup are supplied - a full distribution of all
utilities is not included.
Description of CP/M 3.0 files supplied:
Filename
CPMLDR.COM
,CPM3.SYS
Purpose
Reading CPM3.SYS and CCP .COM to the. proper memory location and bringing up CP/M 3.0.
CP/M V3.0 BIOS and BDOS.
CCP.COM
Console Command Processor, it will load by cold start or
warm start.
DIR.COM
Extended support function for CCP.
ERASE. COM
Extended support function for CCP.
TYPE. COM
Extended support function for CCP.
RENAME. COM
Extended support function for CCP.
All the above files are useless under the n/STAR operating system and should
not be used with n/STAR. These progr.ams should be used only in Diagnostic Mode.
To bring up CP/M 3.0:
1.
Insert Tape Utilities diskette (previously made bootable)
2.
Bring up normal CP/M V2.2 in Diagnostic Mode.
3.
Type CPHLDR<RETURN>
The entire system will now be in the CP/M 3.0 environment and LTAPE can be
used for backup/restore. If your system has partitions larger than 8MB,
they will be correctly backed up/restored.
052484
RN9-22
NSTAR86 cmNGES
------------------------------------------------------------------------------.Numerous changes and corrections were implemented in NSTAR86 and CCP86.
Compiler problems in previous versions were corrected. In addition, an outside
firm conducted a validation test suite of various application software packages.
The following problems were fixed:
Errors in BDOS function 36 (Set Random Record) were corrected.
Function 59 (Program load) now returns an error when the current record
field is non-zero.
Function 24 (return login vector) has been corrected.
Error reporting for invalid system calls has been made consistent. Registers AX and BX return with a -1 (hex OFFFF) when an invalid system
function is requested.
Additional minor problems were corrected.
In addition, MP/M queues have been implemented for the 8086 boards and NSTAR86.
IMPORTANT
To use queues on existing 8086 boards, a PROM kit is
required.
The corrections listed above are applicable to existing PROMS wi th the new NSTAR86. The PROM ki t is required only if queue support is required, otherwise
the existing prom can continue to be used. The PROM
kit may be ordered from Molecular Field Service.
The following software packages have been tested and run successfully with the
new NSTAR86: .
CIS Cobol compiler, DRI C compiler, CBASIC-86, PL/1-86, Pascal MT+, RASM86, LINK-86, SID-86.
Supercalc 2, Superwriter, Milestone, Datebook, dBase II, Friday, WordStar,
Mailmerge, Microplan, Fileplan.
052484
RN9-23
APPElIDIX , -
Installing CP/M 2.2 on your
~lecular
Canputer
------------------------------------------------------------------------------Normally one has or receives a serialized CP/M that has been configured to run
on the Molecular Computer. If, however, you need to install CP/M on a
Molecular Computer, the procedure is to make a 56K version of CP/M and then add
the Molecular Computer patches that interface it to the hardware. This
procedure is only necessary if you are upgrading from nlSTAR Version 2.242 or
earlier. Please note that the DBIOS3.HEX has been removed from the n/STAR
2.62B diskette.
You need a bootable CP/M disk with at least 9K of available disk space and the
files:
MOVECPM.COM
DDT •COM
SYSGEN. COM
DBOOT •HEX
DBIOS.HEX
DRI program to
DRI diagnostic
DRI program to
Initialization
Molecular disk
place CP/M in memory
program
write CP/M on a disk
patch for CP/M
drivers for CP/M
Boot the CP/M disk and relocate CP/M to use 56K of memory:
A>MOVCPM 56 *
A>SAVE 34 CPM56.COM
A>DDT CPM56.COM
Insert the disk to be made bootable and patch CP/M as follows:
ISYSGEN.COM
RO
IDBOOT.HEX
R900
IDBIOS.HEX
R4580
F5D,5D,20
G100
(return)
;clear the default fcb
;execute SYSGEN
;skip the read operation of SYSGEN
Enter
A
and RETURN to write the boot-image onto the diskette.
diskette.
052484
RN9-24
You now have a bootable
When you boot the newly initialized diskette, the signon message will be one of
the following:
DIRAC 30MB Diagnostic Diskette
Supermicro*64 60MB Diagnostic Diskette
Supermicro*64 136MB Diagnostic Diskette
Supermicro*32 60MB Diagnostic Diskette
Supermicro*32 30MB Diagnostic Diskette
Supermicro*8 15MB Diagnostic Diskette
Supermicro*8 10MB Diagnostic Diskette
Supermicro*8A 10 MB Diagnostic Diskette
followed by
56K CPM V2.2
Note to system programmers:
be true
For a diskette to be bootable, the following must
1.
The system tracks must contain the boot image.
2.
The diskette must contain the following files:
POSTBOOT.COM
DBIOS4.HEX
(for configured systems)
DBIOSN1.HEX (for Supermicro 8 systems)
DBIOSN2.HEX (for Supermicro 32 systems)
052484
RN9-25
APPmIDIX 2 -
list of BOOS f\mctions in nlSTAR
------------------------------------------------------------------------------------~----------------------------------------------- ------------------------This is a list of all of BDOS functions supported by n/STAR:
'00
01
02
03
04
05
06
07
08
09
10
11
12
13
14
15
16
17
18
19
20
21
22
23
24
25
26
27
28
29
30
31
32
33
34
35
. 36
37
40
42
43
44
45
47
49
50
51
052484
- SYSTEM WARM-BOOT
- GET CONSOLE CHARACTER
- PUT CONSOLE CHARACTER
- GEl READER CHARACTER
- PUT READER CHARACTER
- PUT LIST CHARACTER
- RAW CONSOLE 1/0
- GEl 1/0 BYTE
- PUT 1/0 BYTE
- PUT CONSOLE BUFFER
- GET CONSOLE BUFFER
- GET CONSOLE STATUS
- RETURN VERSION NUMBER
- RESET DISK
- SELECT DISK
- OPEN FILE
- CLOSE FILE
- SEARCH FOR FIRST DIRECTORY ENTRY
- SEARCH FOR NEXT DIRECTORY ENTRY
- DELETE FILE
- READ SEQUENTIAL
- WRITE SEQUENTIAL
- CREATE FILE
- RENAME FILE
- RETURN LOGIN VECTOR
- RETURN CURRENT DISK
- SET DMA ADDRESS
- GET ALLOC TABLE
- POWER-DOWN SYSTEM
- GET READ-ONLY VECTOR
- SET FILE ATTRIBUTES
- GET DISK PARAMETER BLOCK
- SETIGET USER CODE
- READ RANDOM
-'WRITE RANDOM
- COMPUTE FILE SIZE
- SET RANDOM RECORD
- RESET DRIVE
- WRITE RANDOM WITH ZERO FILL
- LOCK RECORD
- UNLOCK RECORD
- SET MULTI-SECTOR COUNT
- SET BDOS ERROR MODE
- CHAIN TO PROGRAM (n/STAR86 only)
- GET SYSDAT ADDRESS (n/STAR86 only)
- DIRECT BIOS CALL
- SET DMA BASE (n/STAR86 only)
RN9-26
52 - GET DMA ADDRESS (n/STAR86 only)
53 - GET MAX MEMORY (n/STAR86 only)
54 - ALLOC ABS MAX MEM)RY (n/STAR86 only)
55 - ALLOC MEMORY SEGMENT (n/STAR86 only)
56 - ALLOC ABS MEMORY SEGMENT (n/STAR86 only)
57 - FREE MEMORY SEGMENT (n/STAR86 only)
58 - FREE ALL MEMORY (n/STAR86 only)
59 - LOAD PROGRAM (n/STAR86 only)
104 - SET DATE AND TIME
105 - GET DATE AND TIME
134 - MAKE QUEUE
135 - OPEN QUEUE
136 - DELETE QUEUE
137 - READ QUEUE
138 - CONDITIONAL READ QUEUE
139 - WRITE QUEUE
140 - CONDITIONAL WRITE QUEUE
141 - DELAY
142 - DISPATCH
143 - TERMINATE PROCESS
152 - PARSE FILENAME
153 - GET CONSOLE NUMBER
155 - GET DATE AND TIME
156 - RETURN PROCESS DESCRIPTOR ADDRESS
158 - ATIACH LIST
159 - DETACH LIST
160 - SET LIST
161 - CONDITIONAL ATIACH LIST
162 - CONDITIONAL ATTACH CONSOLE
163 - RETURN MP 1M VERSION NUMBER
164 - GET LIST NUMBER
. 240 - N/STAR ESCAPE CODE
240.00 - GET SYSTEM DATA ADDRESS
240.01 - COLD START
240.02 - GET SYSTEM REVISION
240.03 - WARM START
240.10 - CREATE DEVICE
240.11 - DESTROY DEVICE
240.12 - ACQUIRE DEVICE
240.13 - CONDITIONAL ACQUIRE DEVICE
240.14 - RELEASE DEVICE
240.15 - READ FIRST DEVICE
240.16 - READ NEXT DEVICE
Any request not in this table is treated as a NOP (no operation) which means
that nothing is affected by the request and A and HL are returned with the
value of zero. This means that some of the MP/M requests that are not directly
implemented by n/STAR "work". For instance, function 146 (attach console) will
perform as defined by MP/M but since each process has a console the operation
is really nothing.
052484
RN9-27
APPDIDIX 3 -
orf-Line Tape Backup Operation
------------------------------------------------------------------------------Since many users will be receiving the new Tape Utilities diskette but will not
have the manual which comes with the tape server AP, this tutorial is provided
to allow use of 'the LTAPE program in offline mode for those who do not have to
the Tape Backup User's Guide.
(For a complete description of how to use the tape programs in both online and
offline modes, and for complete information on tape backup philosophy, methods,
and preventive maintenance, you should obtain the Tape Backup User's Guide,
part number 87100680.)
To use the Tape Backup System, all users must log off and the system must be
configured for Diagnostic Mode.
With the system in Diagnostic Mode; no other terminals can access the system
until you return it to Multiuser Mode operation. Note that if you want to back
up a file or partition bigger than 8/megabytes, you must boot the system with
CP/M 3.0 included on the diskette supplied with the tape backup option. CP/M
2.2 supplied on the system distribution diskette supports files and partitions
up to 8 megabytes maximum.
The TAPEDlS{.DAT File
To operate the LTAPE program, a file on the Tape Utilities diskette called
TAPEDISK.DAT must contain the partitions on the hard disk to be backed up.
Before beginning the backup procedure, check that this file contains the partition letters that correspond to your system's configuration. Type
TYPE A:TAPEDISK.DAT <RETURN>
Make sure that the hard disk drive partitions listed match the partitions for
your system configuration. You can determine the appropriate parti tions by
examining your Volume ID chart prepared when your system was installed, or by
reading the applicable information in your n/STAR System Administrator's Guide.
For example, if you have a Supermicro 32 with a 60M byte drive having 8 partitions, your screen should look like this:
A>TYPE TAPEDlS(.DAT <RETURN>
BCDEFGJK
A>
Remember that when you run your computer in Diagnostic Mode, the A: partition
of the hard disk becomes the B: partition, because the diskette becomes the A:
drive. This means that Volumes which reside on the A: partition of your hard
disk in Multiuser Mode will be located on the B: partition while you are
052484
RN9-28
operating in Diagnostic Mode. This is important - keep it in mind when you are
using the LTAPE program. (To backup or restore the Multiuser A: partition, you
must specify the B: partition.) In our example above, the partitions under
Multiuser Mode have the following correspondence:
Diagnostic Mode Partitions:
Multiuser Mode Partitions:
BCD E F G
I I I I I I
I I I I I I
ABC D E F
K
I I
I I
I J
J
(Remember that in Multiuser Mode, the G, H, 0, and P parti tions are reserved
for diskette operation -- their corresponding Diagnostic Mode partitions [H, I,
P, and Q] have no purpose when operating in Diagnostic Mode.)
If the parti tions listed do not match your system's configuration, you must
change the contents of the file TAPEDISK.DAT. You may do this by typing the
follow ing command:
'
B:PIP A:TAPEDISC.DAT=CON: <RETURN>
The cursor will move to the beginning of the next line. Type the letters
corresponding to the Diagnostic Mode partitions on your system. Letters must
be in UPPER CASE only. Do not use any commas, spaces, or other separators
between the partition letters you enter. If you make a mistake, enter <CTRL-Z>
to exit and start over. DO NOT use <Backspace> <Del> or <CTRL>-H to fix typos.
Press <CTRL-Z> at the end of this character string to save the file and return
to the A> prompt.
The file TAPEDISK.DAT may contain only the drive partition letters (in upper case), followed by a
<RETURN>. It must not contain any other text, spaces,
or data.
Ruming the Tape Program
With the system in Diagnostic Mode, the Tape Utilities Diskette in the diskette
drive, and the A> prompt on your screen, enter:
LTAPE <RETURN>
The screen displays the Tape Backup Menu:
052484
RN9-29
Molecular Tape Backup Utility
Ver n.nn
B = Back up disk files to tape
R = Restore disk files to tape
V = Verify tape
D = List tape directory
T = Re-tension tape
Q = Quit
Select option
Select the option you want.
(_)
Do not press RETURN.
General Tape Backup System Operation
All operations performed with the Tape Backup System are the same whether you
are using on-line tape backup or off-line tape backup. The following information applies to both methods. It does not apply, however, to streaming mode,
which is not covered here.
- Backing Up Disk Files to Tape
Use the following procedure to routinely back up your disk files to tape. To
begin, make sure the tape backup menu is displayed on your terminal's screen.
1.
Type
B
The screen displays
Enter today's date (MMlDD/YY):
2.
(_ I
Enter the date in the format shown.
1984, type
I
)
For example, if today is January 27,
01Z784
Do not press RETURN.
Note that the cursor automatically skips over the
"I" as you enter just the numbers for the date. The screen then displays
Today is mmldd III , correct (YIN)?
3.
(_)
If you entered the correct date, type
y
052484
RN9-30
to continue.
Now the screen displays
Do you want to do volume locking backup (YIN)? (_)
4.
Enter Y if you want to perform Volume locking backup. Volume locking
backup takes advantage of SECURED Volumes which have read and write passwords.
You will be asked to enter the names of n/STAR Volumes to back up. Press
<RETURN> after each Volume name you enter, and press <RETURN> wi thout
making an entry to finish the entry cycle.
When the Tape Backup System actually backs up the Volume, the write password is temporarily changed to prevent users from accessing files in the
Volume while it is being backed up. (If a user has a file opened in the
Volume being backed up, and the Volume is SECURED, that file will not be
backed up. The file name is displayed on your terminal, and- the file is
skipped.)
Enter N if you do not want to perform Volume locking backup.
Either a Y or an N response causes the following message to display:
Enter FP address (for example, FE) to be backed up: _
You can enter an FP ~ddress in hex and press <RETURN>, if you are backing
up a system having multiple File Processors connected by the Molecular
Model Interconnect (MMI). If you just press <RETURN>, the default address
of FF is used. After entering your response, the screen displays:
Do you want to do change-only backup (YIN)?
5.
(_)
This option lets you specify that you only want to back up files which
do not have their ARC (archive) bi t set. If the ARC bi t was originally
set (see Step 6 below), it is cleared whenever you modify the file.
Therefore, by selecting this option, you can back up only those files
which have been modified since your last backup.
If you want to use this option, press Y. If you do not want to use this
option, press N. Either response causes the following message to display:
Do you want to set the archive bit (YIN)?
6.
(_)
If you answer Y to this question, the ARC bit of each file backed up will
be set. Thereafter, modifying the file will clear the ARC bit, flagging
it for another backup operation. If the file is not modified, and you
answer Y in Step 5, above, that file will not be backed up again until the
ARC bit is cleared by modifying the file.
If you answer N to this question, the ARC bit will not be changed during
the backup process.
052484
RN9-31
If you answered Y to the Volume Locking question, skip to Step 10.
answered N to the Volume Locking question, the screen displays:
Do you want to back up all disk files (YIN)?
7.
If you
(_)
If you answer Y, the screen displays:
All files on disk will be backed up
Skip to Step 13 for further instructions.
If you answer N, or if you answered N in Step 6 above, the screen displays:
Disk names or ranges (e.g. A or B-D):
8.
At this point, you may enter a letter or a range to indicate which disk
names you want backed up. Press <RETURN> between each letter or range
entered, and press <RETURN> again when you are finished responding to this
question. Or, if you want all logical drives backed up, press <RETURN> as
your first entry. The scr~en then displays:
.
User numbers or ranges (e.g. 0 or 9-15): _
9.
Now you can enter the CPIM User Numbers you want to back up. The format
for entry is the same as for the previous quest ion. Enter a number or a
range of numbers, then press <RETURN> and enter another number or range.
Use your Volume ID chart to identify the User Numbers at which the Volumes
you want to back up are located.
When you have entered all User Numbers desired, press <RETURN> again to
continue. .Or, if you want to back up all User Numbers, simply press
<RETURN> as your first entry. The screen displays:
File names to be backed up (* and? allowed,e.g.*.COM,TEST.DAT ,or XYZ.H??)
10.
You respond to this question in the same manner as the previous two
questions. That is, enter either an ambiguous or unambiguous file name,
then press <RETURN> and enter another. When you have entered all desired
file names, press <RETURN> a second time to continue. Or, if you want to
back up all files in the specified drives and User Numbers, simply press
<RETURN> as your first entry.
An ambiguous file name is one which contains wildcards
(? andlor *). An unambiguous file name is a specific
file name.
The screen displays:
Do you want to specify files to be excluded from the backup (YIN)?
052484
RN9-32
11.
If you answer N, skip to step 13.
displays:
However, if you answer Y, the screen
File names to be excluded (same format as above)
12.
Now you may enter the names of files already specified that you actually
do not want to back up. For example, if you specified that you wanted to
backup files B:*DOC, and you don't want to back up any files that start
with G and have the DOC extension, you could enter:
B:G*.DOC
and only those files that have the extension DOC and do not begin with the
letter G will be backed up. Press <RETURN> between each filename you
specify, and press <RETURN> again when you have entered all filenames to
be excluded. The screen then displays:
Enter a description of this backup tape:
13.
Type a description of up to 79 characters, and end it by pressing
<RETURN>. The screen then displays:
rV"'r-;- ~ 11
the above erltries correct
... 11
"t.
.-
all questions again.
(YIN)?
(_)
,
:~ t,! ~)r'ogram starts over and
If you type Y, the screen displays:
Please insert backup tape to be written.
Ready
(YIN)?
d!5k~; y();~
(_)
15.
If you have not already done so, make sure the write protect switch on the
data tape cartridge is not in the SAFE position, and insert the tape
cartridge into the tape drive slot on the front of the cabinet.
16.
Enter:
Y
Do not press RETURN.
The screen momentarily displays:
Preparing tape for backup •••
then proceeds wi th the backup operation.
indicates backup progress as it displays:
Reading: £:filename.ext [User Q]
During backup, your terminal
nnn files written to tape
n soft (recovered) tape errors
where:
d
filename
ext
n
052484
=
=
=
=
disk drive
valid CP/M file name
valid CP/M file name extension
number of User, number of files wri tten to tape, or
number of soft errors
RN9-33
11.
If the tape cartridge will not hold all the data from the backup process,
when the tape becomes full the screen displays:
Tape full, insert another tape for Volume £ of this backup.
Ready (YIN)? (_)
where n is the number of the tape cartridge in the sequence. If this
message displays, remove the tape cartridge from the tape drive, and place
another tape in the drive. Then enter:
Y
Do not press RETURN. Again, the screen displays the progress of the tape
backup process. When all designated files have been backed up, the screen
displays:
~
file(s) not backed up
~
soft (recovered) tape errors
Backup completed.
18.
Ready (YIN)?
(_)
Either a Y or N response returns you to the Tape Backup Menu.
- Verifying the Tape
You should always verify a tape after doing a backup, to ensure the integrity
of the data. If the tape does not verify, you should clean the tape head and
try again. If the tape still does not verify, you should backup again on a new
tape.
To verify a tape, follow these steps:
1.
Select:
V Verify tape
from the Tape Backup Menu.
The screen displays
Please insert tape cartridge.
Ready (YIN)? (_)
2.
Set the protect swi tch on the tape cartridge to the SAFE posi tion, then
insert the tape.
3.
Press Y.
The screen displays:
Verifying tape •••
When the verification process completes, the screen displays:
Tape is verified.
4.
Ready (YIN)? (_)
Enter either Y or N to return to the Tape Backup Menu.
052484
RN9-34
- Listing the Tape Directory
To display or print a directory of the files that are currently on a backup
tape, first make sure that the Tape Backup Menu is displayed on your screen.
1.
Enter:
D
Do not press,RETURN.
The screen displays
Molecular Tape Backup Utility
Ver !!:!}!'l
mm/ddlll.
C
= list
to console, P
Listing tape file directory
2.
= list to printer,
*** Press the ESC
B
= both
(_)
key to cancel
***
Type a letter to indicate your choice. If you select a printer, output
will go to the system printer at 9600 baud.
Please insert tape cartridge.
Ready (YIN)?
(_)
3.
Make sure the Write Protect switch on the data cartridge is in the SAFE
position, then place the tape into the tape drive.
4.
Press:
y
Do not press RETURN.
The screen momentarily displays:
Preparing tape for directory listing •••
then:
Tape format 1
Tape Backup Created ,!!!!!!/dd/n (Volume !!).
description of tape
Description is:
(Note: ''Tape format 1" indicates that the tape was backed up using LTAPE.
STREAM produces a message indicating tape format 2. You must use the same
program for both backup and restore.)
5.
Press Y or N. If you press N, your terminal asks you to insert another
tape. If you press Y, your terminal displays a listing of all files on
the tape.
6.
You may enter either a Y or an N to return to the Tape Backup Menu.
052484
RN9-35
- Restoring Disk Files from
Tap~
Use the following procedure if you need to restore a backed-up file from the
tape onto the hard disk. To begin, make sure the tape backup menu is displayed
on your terminal's screen.
J.
Enter
R
The screen displays:
Do you want to restore all files from tape (YIN)?
2.
You may enter Y or N.
(_)
If you type Y, the screen displays:
All files on tape will be restored
Skip to Step 11.
If you enter N, the screen displays:
Answer the following questions to specify the files to be restored. Press
the RETURN key after each response. To select more than one choice for a
question, press RETURN after each choice, and an extra RETURN to move on to
the next question. To select "all" for a particular question, press RETURN
by itself as the first response.
Disk names or ranges (e.g. A or B-D): _
3.
At this point, you may enter a letter or a range to indicate which disk
names you want restored.
Press <RETURN> between each letter or range entered, and press <RETURN>
again when you are finished responding to this question. Or, if you want
all logical drives restored, press <RETURN> as your first entry. The
screen then displays:
User numbers or ranges (e.g. 0 or 9-15): _
4.
Now you can enter the CPIM User Numbers you want to restore. The format
for entry is the same as for the previous question. Enter a number or a
range of numbers, then press <RETURN> and enter another number or range.
When you have entered all User Numbers desired, press <RETURN> again to
continue. Or, if you want to restore all User Numbers, simply press
<RETURN> ~s your first entry. The screen displays:
File names to be restored (* and? allowed,e.g.*.COM,TEST.DAT ,or XYZ.H??):
5.
You respond to this question in the same manner as the previous two
questions. That is, enter either an ambiguous or unambiguous file name,
then press <RETURN> and enter another. When you have entered all desired
file names, press <RETURN> a second time to continue. Or, if you want to
restore all files in the specified drives and User Numbers, simply press
<RETURN> as your first entry. The screen displays:
Do you want to specify files to be excluded from the restore (YIN)? (_)
052484
RN9-36
6.
If you answer N, skip to Step 11.
displays:
However, if you answer I, the screen
File names to be excluded (same format as above)
7.
Now you may enter the names of files already specified that you actually
do not want to restore. For example, if you specified that you wanted to
restore files B:*.DOC, and you don't want to restore any file that start
with G and have the DOC extension, you could enter:
B:G???????OOC
and only those files that have the extension DOC and do not begin with the
letter G will be restored. Press <RETURN> between each file name you
specify, and press <RETURN> again when you have entered all file names to
be excluded. The screen then displays:
Do you want to redirect diskluser (YIN)? (_)
8.
Enter I or N, as desired.
I, the screen displays:
If you enter N, skip to Step 11.
If you enter
Enter FP address (e.g., FE to be restored):
9.
Enter the File Processor address (press <RETURN> for FF).
displays:
Are all the above entries correct (YIN)?
10.
The screen
(_)
Enter I or N. If you type N, the restore program starts over and asks you
'all questions again. If you type I, ,the screen displays:
Please insert tape to restore files from.
Ready (YIN)?
(_)
11.
If you have not already done so, make sure the write protect switch on the
data tape cartridge is in the SAFE position, and insert the tape cartridge
into the tape drive slot on the front of the cabinet.
12.
Enter:
I
Do not
p~ess
RETURN.
The screen momentarily displays:
Preparing tape ••••
then
Tape format 1
Tape backup created on nm/dd/n (Volume !!). Description is:
description ~
052484
RN9-37
13.
Enter Y or N. If you enter N, the program returns to Step 11. However,
if you enter Y, the recovery process begins. As recovery proceeds, your
terminal indicates its progress:
Restoring to: d:filename.ext [User Q]
nnn files restored to disk
where
d
=
n
=
filename =
ext
=
nnn
14.
=
disk drive
valid CP/M file name
valid CP/M file name extension
User number
number of files written to tape
If the tape cartridge reaches its logical end of tape before all files are
restored, the screen displays:
End of tape, please insert Volume Q of the same backup. Ready (YIN)? (_)
where Q is the number of the tape cartridge in the sequence.
If this message displays, remove the tape cartridge from the tape drive,
and place the next tape in the sequence into the drive. Then enter:
y
Do not press RETURN.
screen displays:
Warning:
If you insert a cartridge out of sequence, the
This is not the next volume of the same backup.
OK (YIN)?
Enter Y to proceed with the cartridge that is inserted. Enter N to tell
the program that you are going to insert a different cartridge. Again,
the screen displays the progress of the restore process. When all designated files have been restored, the screen displays:
Restore completed.
15.
Ready (YIN)?
(_)
Either a Y or N response returns you to the Tape Backup Menu.
- Retensioning the Tape
To retension the tape, first make sure that the Tape Backup Menu is displayed
on your terminal's screen.
1.
Enter:
T
The screen displays:
Please insert tape cartridge.
052484
Ready (YIN)?
RN9-38
(_)
(_)
2.
Insert a tape in need of retensioning, then enter:
y
The
sc~een
displays:
Re-tensioning tape_
while the tape drive retensions the tape.
utes. When done, the screen displays:
Tape is re-tensioned.
3.
Ready (YIN)?
This process takes a few min-
(_)
Enter Y or H to return to the Tape Backup Menu.
- Quitting
To quit the Tape Backup program and return to the n/STAR prompt, enter:
Q
052484
RN9-39
APPFlIDIX 4 -
Molecular Publications Order Form
------------------------------------------------------------------------------KlLECULAR PUBLICATIONS ORDER FORM
Part
Number
Unit
Price
Supermicro Series Installation Manual
Supermicro X Series Installation Manual
Series 9 System Installation Manual
Series 9 System Operations ~2mual
87100420
87100430
87100630
87100640
$25.00
25.00
25.00
15.00
n/STAR User's Guide
n/STAR System Administrator's Guide
n/STAR Programmer's Guide
Tape Backup User's Guide
CP/M Operating System Manual
(includes Pocket Guide)
87100650
81100660
87100670
87100680
87100100
25.00
20.00
15.00
20.00
50.00
ATOM Manual Set
ATOM Operations Manual
m/CALC Manual
mlWORD Manual
mlMAIL Manual
98330011
87100450
87100470
87100460
87100480
80.00
25.00
25.00
25.00
25.00
Molecular Modular Interconnect Installation 87100580
and User Manual (for 16X and 32X Customer)
15.00
Menu Master User's Guide
Menu Master Reference Manual
87100270
87100260
20.00
20.00
MT-100 User Reference Manual
MT-100 Maintenance Manual
MT-50 Quick Reference Guide
MT-50 Reference Manual
MT-50 Maintenance Manual
87100230
20.00
50.00
5.00
25.00
50.00
MS-DOS Operations Manual
MS-DOS User's Guide
87100550
87100690
25.00
45.00
AP/186 and TCP Installation Manual
AP/186 and TCP User's Manual
87100700
87100710
15.00
20.00
Hardware Maintenance Manual
(Supermicro Series)
87100150
150.00
MICRO 20-T Tape Backup Unit
Installation Instructions
87100730-11
052484
RN9-40
5.00
Quantity
Ordered
Total
Amount
MICRO 45-TU Tape Backup Unit
Installation Instructions
87100740
10.00
10-D (Supermicro 8/RMS) Disk Drive Add-On
Installation Instructions
87100320
5.00
10A-D (Supermicro 8/Seagate) Disk Drive
Add-On Installation Instructions
87100180
5.00
15-D Disk Drive Installation Instructions
87100310
5.00
Disk Expansion Kit D1 and D2 Installation
Instructions (35-32, 70-32, 16X systems)
87100200
10.00
AP/86 Performance Accelerator Installation
Instructions (for Series A Supermicros)
87100350
5.00
Performance Accelerator Installation 87100360
Instructions (for X Series Supermicros)
5.00
x AP/86
Tape Application Processor Installation
Instructions
87100540
10.00
Sales Training Manual
(Includes Annual Subscription)
Annual Subscription Only
87100890
75.00
Technical Support Manual
(Includes Annual Subscription)
Annual Subscription Only
87100880
50.00
50.00
Ship To: ______________________________________
Attn:
---------------------------------
Telephone: ______________________
052484
75.00
RN9-41
APPmIDIX 5 -
SOFTWARE PROBLEM REPORT FORM
The procedure for reporting software problems to Molecular is via the Software
Problem Report Form (SPR). The SPR Form is recei ved by Field Service and is
then submitted to Engineering for investigation.
Attached is a copy of that
form. Please submit any problems experienced with the n/STAR 2.62 release on
this form and return it to the Field Service Department for processing. Only
problems reported in writing on this form will be recognized am accepted as a
formal Software Problem Report. Molecular will not respond to all SPRs
submitted but only to those that are considered pertinent to generally
acceptable system performance and are actually logged into the Software Problem
Report system
052484
RN9-42
SOFTWARE PROBI...EM REPOR'l' FORM
Name:
---------------------------------------
Date:
------------------
Company:
------------------------------------ Phone:---------------Address:
------------------------------------------------------------City,State,Zip: _______________________________________________________
Hardware Model:
------------------------
Program Name:
-----------------
n/STAR Version: __________________ Program Ver. :________________
History:
New Installation?- - Ran OK Previously?___Ver#_______
Brief Description:
----------------------------------------------------
Detailed Description:
----------------------------------------------
PLEASE SEND THIS COMPLETED FORM AND ANY SUPPORTING DISKETTES AND/OR
DOCUMEln'ATION TO:
MOLECULAR COMPUTER
Field Service Department
251 River Oaks Parkway
Thank
052484
You.
RN9-43
052484
RN9-44
REDIRECTING BAD SECTORS ON HARD DISK
New arlves suppl ied by Molecular are formatted and have attached
a record of which sectors were redirected on a DISK REDIRECT
HIS-WRY LOG.
This log is a valuable document and is affixed to the base pan in
the rear of the Supermicro.
You will add entries to this log
whenever you must correct for sectors that become defective due
to we ar .
Formatting of hard disks should not be prerformed unless surface
analysis diagnostics indicate that additional defective sectors
are .present.
Then and only then should singkle track formattin&
be utilized to eliminate these errors.
Before formatting is
a t t em pte d , a 11 d a tam us t be b a c ked up for res t or at ion u po n
Non-destruc ti v e su rfac e analy sis can
com pI etion of fo rm at ti ng.
be performed with SYSINT Verify mode and HDTEST read mode.
Destructive surface analysis can be performed with HDTEST write
mode.
Should you ever need to completely reformat this disk drive,
utilize this disk redirect history log and re-enter all defective
sectors listed during the format process.
CAUTION:
The procedures contained in this document pertaining to
Redirecting Bad Sectors should only be attempted on systems
wi thi n the follow i ng s eri al num ber ranges:
10-8 SIN 4000 and alone with FP PROM 52050210 Rev B and above
15-8 SIN 1000 and alone with FP PROM 52050220 Rev B and above
This procedure should not be attempted on systems 10-8 or
15-8 that do not meet the above cri teria.
1
INTRODUCTION
Figures 1 and 2 are flow charts of the procedure you should
follow.
You will be using two programs on the Diagnotic
-~ i s k, S YSIN T (S y s t e ill I nit i ali z a t ion) and n DT EST (H a r d Dis k
Test). We will first outline the general procedures and then
describe each major step in more detail.
Figure 1 is a non-destructive surface analysis procedure
through which additional defective sectors can be identified
without destroying any hard disk resident data.
Redirecting
of additional defective sectors will require that the n/STAfi
operating system and customer data be reloaded after
.successful redirecting of defective sectors.
Once these
sectors are identified, they should be added to the Disk
Redirect History log for future reference.
Figure 2 is a more comprehensive surface analysis procedure
which will destroy all hard disk data. This procedure also
requires that the n/STAR operating system and customer data
be reloaded after completion of testing and/or redirecting of
add i t ion al d e f e c t i ve sec tor s •
I f a d d i t ion al d e f e c t i v e
sectors are id~ntified, they should be added to the Disk
Redirect History Log for future reference.
la
NON-DESTRUCTIVE
DISK SURFACE ANALYSIS
Back Up
All Data
SYSINT
VERIFY
No -------=====:1.-_--.
HDTEST
Read
No - - - - ,
Manual ReDirect of
Bad Sectors
No----,
No
I Yes
Install
n/STAR
Recover Data
Replace
Disk
Drive
Continue
Operation
CAUTION:
Before attempting Redirect
insure all data is backed up.
Figure 1
DESTRUCTIVE DISK
SURFACE ANALYSIS
Back Up
All Data
HDTEST
Write
Inc rer.-ienta 1
No
Manual
Redirect
Of Bad
Sectors
SYSINT
Verify
No
HDTEST
Init
CAUTION:
Before attempting
redirect, insure
all data is backed
up.
--No
Replace
Disk
Drive
Figure 2
SYSINT
Di sk
Option
Install
n/STAR
Recover
Data
HARD DISK
--Example:
DRIVE ORGANIZATION
10 Megabyte, 5 1/~ inch, Winchester hard disk
10MB formatted capacity, 306 cylinders, 32 sectors per
cylinder, 4 heads, 1224 tracks.
r
.
,..----
/'
A
I
----
B
'" \
I
\
\
"
HEAD
o
---CP/M LOGICAL
--DRIVE
A
I
B
1-,1_
----I 2
11-
-3-'
B
A
I:
----------------- ------------------
TRACK n = [(CYLINDER #) X (TOTAL HEADS n)] + HEAD H
CYLINDER # = (TRACK #) / (TOTAL HEADS); REMAINDER = HEAD
4
#
BACKGROUND
The hard disk drives in your Supermicro system may develop bad
sectors after a time.
This is normal and the problem can be
corrected. In fact, nearly every drive manufactured has some bad
spots on the platters that make a few sectors unuseable.
Correcting for these bad spots is called redirectin~.
A few
facts about the disk drives will help you understand the process.
A hard disk drive contains two or three platters.
A 10 MB
( me.g a by t e ) d r i ve con t a ins two pIa t t e r s , and a 15M B d r i ve
contains three.
Both the top and bottom surfaces of the platters
are used.
There is a read/write head for each surface.
Each drive
is logically divided into 306 cylinders with 32
sectors per track.
Cylinder 0, the outermost track of each
surface is reserved for correcting for bad spots on any of the
other tracks.
Cylinder 0 is guaranteed by the disk drive
manufacturer to be error free.
New disk drives are formatted at the factory. Formatting means
writing a particular pattern in every sector of every track. This
pattern is necessary so that the operating system can locate
particular sectors either for writing or reading data.
During formatting the patterns written on the disk are also read
back to verify that they were written correctly.
Whenever a
sector does not read back correctly, it is redirected to one of
the spare sectors on cylinder O.
What this means is that the
unusable sector is flagged as unusable and a spare sector is
assigned as a replacement. The redirect table that identifies
which spare sectors are assigned to which bad sectors is recorded
in sector 0 of track O.
For each surface as many as 31 bad
sectors can be redirected since there are 31 spare sectors on
cylinder 0 for each surface.
5
DETAILED PROCEDURES
This section tells you how to run each of the programs called out
in the previous section. Information displayed by these programs
are shown in bold face. The commands or responses you must type
are underl ined.
SYSINT Verify Mode
Run-J,he SYSINT program by typing SYSINT in response to the CP 1M
prompt. The screen will display:
SYSINT Version V5.02
Drive 0,1,2 ( )
Enter Drive # (The drive # you wish to verify)
The following is added to the screen:
F
= Format,
V
= Verify,
D
= Disk
Option, R
= Redirected
( )
Enter V
The following is added to the screen:
VERIFY SINGLE TRACKS (S) OR ALL (A) TRACKS ( )
Enter A
The following is added:
C
= CONTINUOUS
S
= SINGLE
PASS •••
Enter S
The program will then verify that the disk is formatted
correctly. The number of the track being verified is displayed
and the display counts down from the highest track number. At
completion, the errors are displayed.
These errors should be
recorded.
6
SYSINT Manual Redirect Mode
SYSINT versions before 5.02 do not include redirect mode.
There are three sources for determining which sectors must be
manually redirected:
(1) the DISK REDIRECT HISTORY LOG, (2) the
results of HDTEST, and (3) the results of SYSINT Verify Mode.
When performing entry of defective sectors for redirect all
def~tive sectors, for a specific cylinder # and Head #, must~
entered during one session of redirect mode of SYSINT.
When
adding additional defective sectors to Disk Redirect History Log
insure that there are no other defective sectors with the same
Cylinder # and Head # present before preceeding.
If there are other defective sectors with the
and Head # you must proceed as follows:
sa~~
Cylinder #
1.
Perform single track format of that Cylinder # and Head #.
(This will remove any sectors currently redirected).
2.
Enter all defective sectors for this specific Cylinder #
and Head # without entering "f" to terminate redirect
mode.
Run the SYSINT program by typing SYSINT in response to the CP/M
prompt. The screen will display:
SYSINT Version V5.02
Drive 0,1,2 ( )
Enter Drive 11.
The following is added to the screen:
(Mode Selection)
Format, V
Verify, D
F
=
=
= Disk
Option, R
= Redirected
Enter R
The following is added to the screen:
Caution: Tracks containing redirected sectors will be
reformatted, destroying any existing data.
No More than 31 sectors can be redirected per head
(surface).
Enter head, cylinder, and sector to be redirected
or nr" when finished.
Head:
1
( )
•
Enter the head number followed by a RETURN.
You are then prompted
for the Cylinder number and the Sector number. Enter these in the
same manner.
The sector will be redirected and the following will
be added to the display:
Redirected sector X of track Y
You will again be prompted for a head number and you can repeat
the sequence for each sector you wish to redirect. Enter a lower
c a.s..e n f" i n res p 0 n s e t 0 the he ad, c y lin d e r , o r sec tor n u mb e r
prompt to end the program.
Redirect Ranges
It is very important that your responses to the head, cylinder,
and sector prompts are within range.
The ranges and errors
caused by out-of-range entries are given below.
Head:
=
Range
0-3 for 10 MB disk and 0-5 for 15 MB disk.
Entries beyond range will result in a Table Full
error message.
=
Cylinder: Range
1-305. Entry of 0 will result in no action
being taken.
An entry of 306 will result in
an erroneous entry in the Redirect Table.
An entry
greater than 306 will destroy the Redirect Table
for the head selected and the drive must be
reformatted.
Sector:
=
Range
0-31. No error message will occur if 32 is
entered; but the redirect table will be inaccurate.
An entry greater than 32 will result in an error
message.
Limitations
Sectors in cylinder 0 cannot be redirected.
error free.
If cylinder 1, head 0, sectors are
run the Disk Option of SYSINT. The
stored in these sectors and must be
will result in an Unformatted Disk
Diagnostic Mode.
Cylinder 0 must be
redirected, you may need
Disk Configuration Table
reconstructed.
Not doing
error message when booting
to
is
so
in
A blank entry followed by RETURN in response to the head,
cylinder, or sector prompt produces an entry of zero as the entry
value.
Single Track Format Procedures
There are times when you can correct a disk problem more quickly
by selecting the SINGLE TRACK option. The following information
will aid you in using this option.
8
The SINGLE TRACK option can be selected when running SYSINT for
both the Format and Verify Modes. When S is entered the screen
displays:
PLEASE ENTER TRACK NUMBER TO BE Formatted or Verified.
ENTER DESIRED TRACK THEN PRESS RETURN •••
Valid track numbers are in the range of 0 thru 1223 for 10 MB
dr~ves and 0 thru 1835 for 15 MB drives.
You must enter the track number in decimal. To calculate the
track number when given the head and cylinder numbers, use
the formula
Track# = (Cylinder# times # of Heads)
+
Head#
where
Cylinder# is in the range 0-305'
# of Heads is 4 for 10 MB drives and 6 for 15 ME drives
Head# is in the range 0-3 for 10 MB drives and 0-5 for 15 MB
drives
Here are some examples.
CYL
10
15
10
15
ME ST412
MB ST419
ME ST412
ME ST419
1
1
100
100
HD
0
0
2
2
TRACK
=
=
=
=
4
6
402
602
Single track formatting of tracks 0, 1, 2, 3, 4, and 5 should not be
done. These tracks are reserved for redirecting. Doing so will
write the pattern E5E5 (hex) in the Redirect Map Table which will
falsely indicate that all table entries are used (Table Full error
message).
Single track formatting of any other track clears the redirect
flags in that track and clears the Redirect Map Table entries for
that track on cylinder O. If you format a track that contains
any bad sectors you must manually redirect all bad sectors for
that track using the Redirect option of SYSINT.
SYSINT Format Mode
SYSINT format mode with the all tracks option should only be used
to initialize new disk drives or to correct disk errors caused by
controller fail ure.
Run the SYSINT program from the Diagnostic Diskette by typing
SYSINT in response to the CP/M prompt. The screen will display:
9
SYSINT Version V5.02
Drive 0,1,2 ( )
Enter Drive # (The drive # you wish to format)
The following is added to the screen:
(Mode Selection)
-- F
Format, V
Verify, D
=
=
= Disk
Option, R
= Redirected
( )
Enter F
The following is added to the screen:
WARNING:
this procedure will destroy ANY existing data on
the disk. Be sure ALL files are properly archived prior to
running this utility.
OK (Y or N)?
Enter Y
The following is added:
FORMAT SINGLE TRACKS (S) OR ALL (A) TRACKS ( )
Enter A
The following is added:
C
= CONTINUOUS
S
= SINGLE
PASS •••
Enter S
---WARNING--Once Format Mode is entered with SINGLE PASS
selected, the only valid way to exit is to
allow formatting to complete. The last data
pattern written on each track is the
initialization E5 (hex) pattern required by
CP/M. Early termination may not produce the
E5 p~ttern.
10
The program will then reformat the disk. During formatting the
sector number is counted down on the screen. When formatting
completes, the screen displays the configuration options. For a
10 MB disk the display is:
OPTIONS ARE:
DIRECTORY:
BLOCK SIZE:
SIZE (MS) :
PARTITION:
DISK DRIVE:
0
320
16K
1
2
640
8K
1280
4K
4.7
4.7
4.7
2
2
3
3
SELECT CONFIGURATION OPTION (0-4)
2
3
( )
For a 15 MB disk the display is:
OPTIONS ARE:
DIRECTORY:
BLOCK SIZE:
SIZE (HB) :
PARTITION:
DISK DRIVE:
0
2
1
512
16K
1024
8K
2048
4K
7.3
7.3
7.3
2
2
2
3
3
3
SELECT CONFIGURATION OPTION (0-4)
( )
SYSINT Disk Option
Run the SYSINT program by typing SYSINT in response to the CP/M
prompt. The screen will display:
SYSINT Version V5.02
Dri ve 0, 1,2 ( )
Enter Drive Ii
The following is added to the screen:
(Mode Selection)
F = Format, V = Verif'y, D = Disk Option, R
11
= Redirected
( )
Enter D
The screen displays:
•••••••••••••••• WARNING •••••••••••••••••••••••••••
TO CHANGE THE DIRECTORY/BLOCK SIZE OPTION ON YOUR DISK
YOU MUST ARCHIVE ALL YOUR DATA AND REFORMAT THE DISK
CONTINUE? YIN ( )
Enter Y.
For a 10 MB disk the display is:
OPTIONS ARE:
DIRECTORY:
BLOCK SIZE:
SIZE (MB) :
PARTITION:
DISK DRIVE:
0
,
320
16K
4.7
2
3
640
8K
4.7
2
3
2
SELECT CONFIGURATION OPTION (0-4)
1280
4K
4.7
2
3
( )
For a 16 ME disk the display is:
OPTIONS ARE:
DIRECTORY:
BLOCK SIZE:
SIZE(MB) :
PARTITION:
DISK DRIVE:
0
512
16K
7.3
1
1024
8K
2048
4K
7.3
7.3
2
2
3
3
2
3
SELECT CONFIGURATION OPTION (0-4)
2
( )
After entering the desired Directory/Block size option SYSINT will
display the configuration selected and ask
CONFIGURATION CORRECT?
YIN ( )
Upon entering Y the Disk Configuration will be changed and the
display will be
FUNCTION COMPLETE
Hit Break to Exit program
12
HDTEST HARD DISK DIAGNOSTIC
HDTEST is a comprehensive hard disk diagnostic package which
allows a user to test a full range of hard disk functions over
the entire surface of the disk.
The single page menu offers a
c h 0-4:- c e t est ( hom e , see k , rea d , w r i t e , for mat), t y p e ( fix ed,
incremental, convergent, random), driver (local, prom), and the
ability to define any of the hard disk parameters (drive,
cylinder, head, sector).
Errors terminate test execution and are reported to screeen
according to status and error byte information.
Error codes and
bit meanings are then broken down and described briefly.
The
user must press a key to restart the test.
HDTEST is currently designed to run in the diagnostic mode,
and is equipped with a terminal adapter program TERMINAL.COM
whi ch creates a confi gura t i on f il e "CRT .CRT".
Thi s fi Ie is read'
by HDTEST to provide the correct control and escape seqences
needed by the different terminals for cursor movement and screen
attributes.
Enter TERMINAL and select your terminal from the
list before running HDTEST.
The Menu Options
•••••••••••••••••••••••••••
•••••••••••••••••••••••••••
HARD DISK PARAMETER OPTIONS
The Menu provides a quick, one page overview of the current
test configuration.
All numbers are given in hex (base 16)
format and are right justified. ,Entries in the first three
fields (TEST, TYPE, DRIVER) require no carriage return.
When
entering less than four digits in the other fields press <return>
to register the number.
The user may enter a new value
simply press <return> to accept the
the next line. User may enter and
<esc> (When in a 4 digit field, the
exit.)
13
from the cho ices offered or
current value and proceed to
exit the menu by pressing
user presses <esc><return> to
UNDERSTANDING HDTEST
The diagnostic HDTEST will display all information in HEX or base
sixteen. SYSINT requires DECIMAL or base ten.
To change from HEX to DECIMAL use the
Fourth
Second
256
16
1
1
F
2
First
The first digit 2, is the zeros place, the next
digit F, is the 16s place and if there was
another digit it would be the 256s place, then
the 4000s place.
F times 16 (15 X 16)
Example #2
HEX = 1F2
below.
Third
4000
Example !l
HEX = F2
algo~ithm
1 times 256,
+
F X 16
= 240,
+
2
=
plus 2
= 242
498
To change from DECIMAL to HEX use the following algorithm.
Example #3
DECIMAL = 498
Divide 256 into 498 = 1 remainder 242, 256 is
too large a divisor for 242 so the next
smallest value is used 16.
16 into 242 = 15
times with a remainder of 2. 16 is now too large a
divisor for 2 so the next smallest value is
used 1. 1 into 2 = 2. The answer should be 1,
F (think Hex 15 = F), 2 or (1F2 Hex)
HDTEST displays Errors in He~ Base 16 that will be incremented by
one track to yield the LOGICAL track. In order to redirect the
right sector the PHYSICAL track must be entered.
The following
is an example of an Error 40 that was discovered while running a
write, incremental, from prom (W,I,P.):
Example #4
DRV:OOOO 'CYL:OOF1
HEAD:0005
SEC:001B
WD1002 STATUS REG: 51
READY
SEEK COMPLETE
ERROR DETECTED
WD1002 ERROR REGISTER: 40
CRC ERROR
14
PASS:0036
ERROR COUNT:0001
The test stopped on the LOGICAL cyclinder and displayed the LOGICAL
cyclinder at the top. The ERROR 40 was PHYSICALLY located one
cyclinder later.
The PHYSICAL- cyclinder will be redirected with
SYSINT.COM.
TEST:
HOME,SEEK,READ,WRITE,FORMAT,DISPLAY,ERROR (H,S,R,W,F,D,E)
The TEST option defines the command which will be sent to
the disk controller during the test.
HOME restores the head to cylinder zero.
SEEK moves the head to the specified cylinder. (5.25" drives
disallow HOl1E and SEEK within the prom, so local driver should be
used for these functions).
READ reads one sector at the specified location and checks
for contoller errors only (No data verification).
WRITE writes one sector to the specified location using the
data defined in the WRITE DATA PATTERN WORD.
After the write,
the sector is read back and the data pattern is verified.
The
pattern is then rotated one bit and the write/read/rotate
sequence is repeated eight times before moving on to the the next
pass.
FORMAT wri tes the sector header information to one entire
track on the cylinder/head specified.
Data areas are not
initialized, though initialization can be done using the INIT
command with the pattern E5E5.
DISPLAY reads one sector and displays it on the screen in
HEX/ASCII format «ctrl-s> can be used to suspend display
temporarily).
ERROR performs no command of its own but is used to sample
the current status of the controller and report it through the
error routine.
IN!T initializes (writes data into sectors) the entire hard
disk, using the specified data pattern.
This option is normally
used to prepare a disk for use by CP/M or N/STAR, using the
pattern E5E5, since CP/M expects E5's in an empty directory
field.
The pattern is written with no read-after-write
verification, and the screen is not updated during the operation
in order to save time.
TYPE:
FIXED, INCREMENTAL, CONVERGENT, RANDOM (F,I,C,R)
The test TYPE option determines the way in which the various
disk parameters will change from one pass to the next.
All
changes are applied to the disk parameters from left to right
(DRIVE changes most frequently, SECTOR changes least frequently).
The leftmost parameter progresses through its range, then "bumps"
15
the parameter to its right.
FIXED locks the current
change at all.
parameters so that they do not
INCREMENTAL starts at the lowest value in the parameter
range and increases by one at each pass.'
CONVERGENT starts at the lowest value in the parameter
range, then the hi ghest, then the lowest+ 1, then the hi ghest~ 1,
etc, until they meet in the middle.
RANDOM does not progress but simply moves about randomly
within all the parameter ranges.
DRIVER: LOCAL, PROM (L,P)
DRIVER defines which driver code will be used to "talk" to
the controller/drive.
The LOCAL driver (WD1000/1001 only) is contained in HDTEST
and is included as an option because the prom code cannot access
cylinder zero (reserved for sparing) and rejects the HOME and
SEEK commands. This option should not be used with PRIAM drives
(SM32, DIRAC).
The PROM driver is contained in the standard system IPL prom
and is the same low level code used by the operating system and
utilities to "talk" to the disk.
This is the option normally
used for testing.
Seagate 10M/15M Ranges
[nnnn]
[nnnn]
[nnnn]
[nnnn]
[nnnn]
BEGINNING DRIVE NUMBER
ENDING DRIVE NUMBER
BEGINNING CYLINDER NUMBER
ENDING CYLINDER NUMBER
BEGINNING HEAD NUMBER
[nnnn] ENDING HEAD NUMBER
[nnnn] BEGINNING SECTOR NUMBER
[nnnn] ENDING SECTOR NUMBER
60 Meg
Priam
Range
Definition
=
Range
Range
Range
Range
Range
0
0
0
0
0
0
. Range 0
0
Range 0
Range 0
2
2
130 Hex
130 Hex
3 for 10
5 for 15
3 for 10
5 for 15
1F Hex
1F Hex
Meg
Meg
Meg
Meg
30 Meg 8" Priam
8" Priam
Cyll
0 to 40E (Hex)
Head I
0 to 4
Sector #
0 to B (Hex)
=
to
to
to
to
to
to
to
to
to
to
=
16
=
Cy #
0 to 202 (Hex)
Head #
0 to 11
Sector #
0 to B (Hex)
=
=
The drive parameters define what portion of the disk surface
will be tested. HDTEST automatically fills in the maximum and
minimum numbers based on the unit's system ID byte (ENDING DRIVE
value is initially set to zero, though additional drives may be
present). The user is free to change these at any time, even to
va~ues outside the automatically assigned range.
A specific
trouble spot on the drive can be tested intensively by
restricting the beginning and ending values of a given range to
the same number.
For example, by setting the beginning and
ending cylinder numbers to 0010, only that cylinder would be
tested.
[nnnn] WRITE TEST WORD PATTERN (O-FFFF)
The WRITE TEST WORD PATTERN is the 16 bit word pattern which
is written into one full sector on the disk and then read back
for verification.
It is rotated one bit position and then
written/read again. This occurs eight times for the given sector
under test.
The default value 6DB6 is the manufacturer's
recommended "worst case" pattern, though any non-uniform pattern
could be used.
[nnnn] NUMBER OF PASSES (O-FFFF)
The NUMBER OF PASSES determines how many iterations of the
test to perform before stopping.
If 0000 is specified, the test
will run indefinitely.
17
Error Register
WD
--- 01
02
LSD
04
= DAM
Not Found - After successful read of ID Field Data
address mark not found
= TRKOO Error -
= Aborted
Command
After Restore command Track 00 was not
found
Valid command received which cannot
be executed - reason for error is in
status register
08
= Not
10
=
20
= CRC error ID - CRC error encounter in ID field
40
= ECC/CRC
80
= Bad Block
MSD
used
ID Not Found - ID field containing cyc#, head#,
sector# was not found
Error- CRC or ECC error encountered during
Datafield
read in data field error not
recoverable
- Indicates that a bad block mark has
been detected in the specified ID
field
18
WD Status Register
01
= Error
02
= Not Used
03
= ECC
LSD-
- Indicates one or more bits are set
in error reg.
- Read error recovered by controller
(WD1001 Only)
08
= Data
Request - When set indicates that sector
buffer is ready to accept data
(write) or contains data to be read
(read)
WD1001 Status Register
10
= Seek
20
= Write
40
= Ready
80
= Busy
MSD
Complete- Indicates completion of seek
operation
Fault
Write fault detected by WD1001 No commands will be executed
when ON
Drive ready must be on to execute
command
- WD1001 busy executing a command
,'\
19
·
.
The
A~CJJ
Code
ASCII is an abbreviation for the "American Standard Code for Infonnation Interchange". This
standard, shown in Figure] -14, is the result of an international agreement concerning v.. hich binary
numbers would be used to represent alphabetical letters, decimal numbers, symbols, and other
special instructions for use with Teletype equipment. The ASCII code is based o.n a 7 digit binary
n'umbcring system. These seven digits allow for] 28 different characters to have their own specific
binary number. The ASCII code is widely u~ec in the inlerfacin£ Dct\'·;een the computer, keyboard,
and di!.phy terminals.
DECIMAL
BINARY
OCTAL
HEXADE-CIMAl
0
00000
00001
0
1
0
1
2
00010
3
00011
2
3
..
5
6
1
8
9
10
11
12
13
14
15
16
11
18
19
20
21
22
23
24
25
26
27
28
29
30
31
00100
00101
00110
00111
01000
01001
01010
01011
01100
01101
01110
01111
10000
10001
10010
10011
10100
10101
10110
10111
11000
11001
11010
11011
11100
11101
11110
11111
1
2
3
..
..
5
6
7
5
6
7
8
9
10
11
12
13
14
15
16
A
B
C
BIt\;"'RY CODED
DECIMAL (BCD}
0000
0000
0000
0000
0000
0000
0000
0000
0000
0000
0001
0001
0001
0
0001
.£
0001
17
F
ooo~
20
21
22
23
24
25
26
27
10
11
12
13
0001
30
31
32
33
14
15
16
17
18
19
'"
18
34
lC
35
36
37
10
1E
IF
0001
0001
0001
0010
0010
0010
0010
0010
0010
0010
0010
0010
0010
0011
0011
0000
0001
0010
0011
0100
0101
0110
0111
1000
1001
0000
0001
0010
0011
0100
0101
0110
0111
1000
1001
0000
0001
0010
0011
0100
0101
0110
0111
1000
1001
0000
0001
FIGURE 1-15
EQUIVALENT NUMBERS IN DIFFERENT BASE SYSTEMS
'"
.
TRANSACTION
TABLE
Manufactures Bytes fro. Index to Approximate Sector
Bytes From Index
o -
13
14- 18
19 - 310
311 - 317
318 - 637
--368 - 670
671 - 947
948 - 968
969 - 1259
1260 - 1284
1285 - 1570
1571 - 1601
1602 - 1880
1881 - 1904
1905 - 2191
2192 - 2236
2237 - 2502
2503 - 2553
2554 - 2813
2814 - 2870
2871 - 3124
3125 - 3187
3188 - 3435
3436 - 3504
3505 - 3746
3747 - 3821
3822 - 4057
4058 - 4138
4139 - 4367
4368 - 4456
4457 - 4678
4679 - 4773
4774 - 4989
4990 - 5090
5091 - 5300
5301 - 5407
5408 - 5607
5608 - 5724
5725 .... 5922
5923 - 6041
6042 - 6233
6234 - 6358
6359 - 6543
6544 - 6676
6677 - 6854
6855 - 6993
6994 - 7165
7166 - 1310
7311 - 7446
7447 - 7627
Sectors To Redirect
- GAP -
o
o
o
& 4
4
4 & 8
8
8 & 12
12
12 &
16
16
16
20
20
24
24
28
28
&
20
&
24
1
1
& 28
& 1
& 5
5
5 & 9
9
9 & 13
13
13 & 1 7
17
17 & 21
21
21 & 25
25
25 & 29
29
29 & 2
2
2 & 6
6
6 &
10
10
10 & 14
14
14 & 18
18
18 & 22
22
22 & 26
26
26 & 30
30
30 & 3
Bytes From Index I Sectors To Redirect
7628 - 7787
7788 ,- 1944
1945 - 8098
8099 - 8261
8262 - 8409
'0_8410 - 8578
8579 - 8719
8120 - 8896
8891 - 9030
9031 - 9213
9214 - 9341'
9342 - 9530
9531 - 9652
9653 - 9842
9843 - 9963
9964 - 10164
10165 - 99999
3
3 & 1
7
7 & 11
11
11 &
15
19
19
19
23
23
27
27
31
31
-
15
&
15
&
23
&
21
&
31
GAP
-
lr)
j L/