1
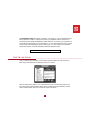
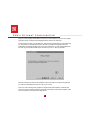
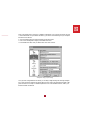
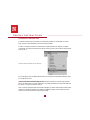
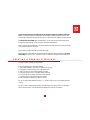
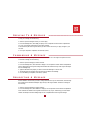
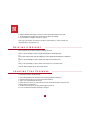
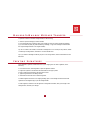
G E T T I N G S TA RT E D
To use the Eudora Pro Email 4.0 or Eudora Pro CommCenter 4.0 for Windows application, you must
have the following:
■ IBM PC or compatible
■ Microsoft Windows 95, or Microsoft Windows NT 4.0 or later
■ Mail account with an Internet Service Provider (ISP) or an Internet-style network account which utilizes
POP3 and/or IMAP4 protocols.
■ Access to your mail account via PPP dial-up networking using a modem or an Internet-style TCP/IP
network connection.
Before you successfully install Eudora Pro Email, you need to know the following basic information
about your email account. Either your ISP or your organization’s email adminstrator can provide you
with this information:
Your return email address. The email address that has been assigned to you by your ISP or your
organization. It is the address other people use to send you email. An example return address is
“[email protected]”.
■
Record your return address here
■ Your login name. The name you use to log into your mail account. It is provided by your ISP or your
organization. It is generally – but not necessarily – the name that appears before the “at” (@) sign in your
return email address (in the example above, “jim” is the login name).
Record your login name here
Your mail account password. This password allows you to access your mail account. It is provided by
your ISP or your organization. Keep this password private.
■
1
■ Your incoming mail server name. Your incoming mail account resides on a computer at your ISP or
within your organization. Your incoming mail server name is the full name of that computer, with no login
name or “at” (@) sign required (for example, “pop3mail.qualcomm.com” or “imap4mail.qualcomm.com”).
Record your incoming mail server name here
The protocol that your incoming mail server uses. Your incoming mail server must use either one of
the following two Internet protocols for storing and forwarding your mail. Ask your ISP or email administrator in your organization.
■
❒
❒
POP3
IMAP4
Note: Most mail accounts use POP3 protocol. If you are unsure, check POP3. If you are setting up an
IMAP4 account, it may require an “IMAP Location Prefix.” Obtain it from your ISP or email administrator. Otherwise, leave it blank.
Record your IMAP Location Prefix here
■ Your SMTP server name. This server, which receives and processes all your outgoing mail, also resides
on a computer at your ISP or within your organization (often the same computer as your incoming mail
account). Your SMTP server name is the full name of that computer, with no login name or “at” (@) sign
required (for example, “smtp.qualcomm.com”).
Record your SMTP server name here
2
■ Your Registration number. This number is provided in your package. Or, if you purchased this product
through an electronic reseller in software archive format, your registration number is provided in an
accompanying email message. The Registration number entitles you, or someone in your organization, to
receive technical support directly from QUALCOMM. It is a 7- or 8-digit number that contains no letters.
Use this number when registering your product electronically. If you are a member of an organization
using Eudora Pro Email, your email administrator handles the registration process.
Record your Registration Number here
I N S TA L L AT I O N
Once you have the above information, you are ready to install and register your copy of Eudora Pro
Email. Simply insert the Eudora Pro Installation CD into your CD drive.
When the Installer Screen appears , click on the Eudora Pro icon to launch the install program. Then,
follow the instructions displayed by the installer. For the complete step-by-step installation procedure,
see the “Installing Eudora” section of your Eudora Pro Email User Manual.
3
E M A I L A C C O U N T C O N F I G U R AT I O N
After you have successfully installed Eudora Pro Email, you must configure your email account using the
information that you collected in the Getting Started section of this Quick Start Guide.
To launch Eudora Pro Email, go to the Start menu, select Programs, select Eudora Pro, then select Eudora
Pro. The first time you launch Eudora Pro Email, the New Account Wizard is displayed (unless you
installed this copy of Eudora Pro Email over an older copy of Eudora Pro, in which case the settings from
the older copy are imported automatically into the new copy). Click on “Next” to get started:
The New Account Wizard
Follow the instructions provided on the subsequent screens of the New Account Wizard using the data
you collected at the beginning of the QSG, to set up your account.
Note: If you have an existing email configuration using Microsoft’s Outlook Express, or Netscape Mail,
Eudora can import the needed configuration information automatically. Valid existing configurations that
are found are shown in the New Account Setup Wizard.
4
Note: If your SMTP server is running on a different computer than your incoming mail server (your ISP
or email administrator can provide this information), you need to do the following once you complete
the New Account Wizard:
1. Open the Options dialog by selecting Options from the Tools menu.
2. Click on the “Sending Mail” category. In the SMTP server field.
3. In the SMTP server field, enter your SMTP server name. Then click OK.
Sending Mail category of Options dialog
Once you have configured Eudora Pro Email, you are ready to begin sending and receiving messages.
For a quick introduction to Eudora Pro Email’s basic functions, refer to the procedures provided in this
guide and to the on-line help. For detailed explanations of all of the available functions, refer to your
Eudora Pro Email User Manual
.
5
SPECIAL INSTRUCTIONS
For Eudora Pro CommCenter Users
In addition to Internet email, your Eudora Pro CommCenter provides you with the option to receive
faxes, voicemail, news subscriptions, and more through the Internet.
In order to configure your Eudora Pro CommCenter to activate these services, select the “Configure
CommCenter” command from the Tools menu. Make sure that you have a live connection to the Internet
when you do so:
Selecting “Configure CommCenter” from the Tools menu
This command will open your default web browser to the CommCenter Configuration web page, where
you will be able to set up:
Faxes and Voicemail via the Internet by jfax.com: This service allows you to receive faxes and voicemail in your Eudora inbox. 3 months of free service is included with Eudora Pro CommCenter. After that,
jfax service is only $12.50 /month to continue.
■
Note: In order to receive JFAX faxes and voicemail messages, you need to install the JFAX Communicator
software from the Eudora installation CD. If there are updates to the JFAX Communicator, this will be
noted for you on the CommCenter Configuration web page.
6
News and Information Services Subscriptions from InfoBeat, Newspage by Individual, Inquisit and
more: Up-to-the-minute news and information from the leaders in Internet information services. The
CommCenter Configuration web page will allow you to customize the news delivery from these services.
■
■ ConferenceCall! by TimeShift: With ConferenceCall!, you can easily set up live phone conferences
through the Internet with any contact you have in your Eudora Address Book.
Note: In order to use ConferenceCall!, you need to download the latest version of the software from the
CommCenter Configuration web page.
■
Useful technical support and help information web pages.
The Eudora Pro CommCenter also includes the Internet paging and chat functionality through Eudora
Internet Pager by iChat. To use it, double-click on its icon and follow the setup intructions that follow.
■
C R E AT I N G & S E N D I N G A M E S S A G E
To create and send a message, do the following:
1. From the Message menu, select New Message.
2. Type an Email address (or nickname you created) in the To: field.
3. Press [tab] to move the blinking cursor to the Subject: field.
4. Type in the subject of your message (optional but useful).
5. Press [tab] and type in the Cc: field Email address (optional).
6. Press [tab] and type in the Bcc: field Email address (optional).
7. Press [tab] twice and type in the body of the message.
8. After completing the message, click Send (or Queue).
Tip: You can type multiple addresses in the To:, Cc:, and Bcc: fields, as long as you separate them with
commas.
Tip: You can save a message without sending it by selecting Save from the File menu. Your message is
saved in the Out mailbox. It can be reopened and edited at any time prior to sending it.
7
CHECKING FOR & RECEIVING MAIL
You can manually check for mail, or set up Eudora to automatically check for mail. To check for mail
manually, do the following:
1. From the File menu, select Check Mail.
2. If Eudora asks for your password, type it in the Password dialog box and click OK (Eudora passwords
are “case-sensitive”).
3. If there is no mail for you, a “no mail” alert is displayed; click OK.
4. If you have new mail, Eudora transfers the messages one by one and then displays a “new mail” alert;
click OK.
5. New messages are delivered to your In mailbox. This mailbox opens automatically, and your new
message summaries are added to the end of the mailbox list. Double-click a message summary to open
it. Or, click once on the message summary to select it, then view the message in the preview pane
below the list.
S E T T I N G U P A U T O M AT I C M A I L C H E C K I N G
1. From the Tools menu, select Options. Then, select Checking Mail.
2. In the Check for mail every __ minutes field, type the number of minutes between automatic mail
checks (15 is the recommended interval).
3. Click OK to close the Options dialog.
4. Eudora automatically checks for mail at the interval you have requested.
Note: When automatic mail checking is on, the time of the next mail check is listed next to the Check
Mail command under the File menu.
To set up automatic mail checking for your alternate email accounts or “personalities,” open the
Personalities window from the Tools menu, right-click on the desired personality and select Modify from
the pop-up menu, then turn on the Check Mail option in the Account Settings dialog and click OK. Each
time Eudora performs an automatic or manual mail check, mail is checked for that account too.
8
R E P LY I N G T O A M E S S A G E
To reply to a message, do the following:
1. Select or open the message to which you want to reply.
2. From the Message menu, select Reply to display a new composition window. Eudora completes the
To:, From:, and Subject: fields based on the original message.
3. Remove those parts of the original text that you don’t want to include in your reply and type in your
own text.
4. Once your response is completed, click Send (or Queue).
F ORWARDING A M ESSAGE
You forward a message when you want someone else who was not on the original recipient list to see it.
To forward a message, do the following:
1. Select or open the message you want to forward.
2. From the Message menu, select Forward to display a new composition window. Eudora completes the
Subject: field based on the original message and transfers the header and body of the original message to
the new message body.
3. Type the addresses of the people you want to forward the message to in the To: field.
4. The existing text may be edited, and more text may be added to the message.
5. Once the editing is completed, click Send (or Queue).
REDIRECTING A MESSAGE
Eudora’s Redirect command lets you send a message that was sent to you to someone else, while allowing
the recipient of the redirected message to reply directly to the original sender. To redirect a message, to
the following:
1. Select or open the message you want to redirect.
2. From the Message menu, select Redirect to display a new composition window. Eudora completes the
From: field with the address of the originator and the words “by way of” followed by your name and/or
address. The Subject: field and message body are also completed based on the original message.
9
3. Type the addresses of the people to whom you wish to redirect the message in the To: field.
4. The existing text may be edited, and more text may be added to the message.
5. Once the editing is completed, click Send (or Queue).
Note: If you add comments, it’s common to put them in square brackets, [], with your initials, like:
[AB: please reply to this right away. CD]
DELETING A MESSAGE
There are several ways to delete a message or messages, as follows:
Select or open the message you want to delete. Select Delete from the Message menu.
Or
From an open mailbox window, select the message(s) you want to delete. Press the [backspace] or [delete] key.
Or
Select or open the message you want to delete. Select Trash from the Transfer menu.
Or
Select or open the message you want to delete. Click the Trash icon in the main toolbar.
Note: All deleted messages are put into the Trash mailbox.
CHANGING YOUR PASSWORD
To change your password, do the following:
1. Select Change Password from the Special menu to display the Password dialog box.
2. Select the personality for which you want to change the password.
3. Type in your current password and click OK.
4. Eudora asks you to type in your new password and click OK (passwords require a minimum of six
characters and are “case-sensitive”).
5. To verify the change, type in your new password again and click OK.
6. If your new password is rejected, repeat steps 1 through 4.
10
M A I L B O X-T O-M A I L B O X M E S S A G E T R A N S F E R
To perform a mailbox-to-mailbox message transfer, do the following:
1. Select or open the message you want to transfer.
2. From the Transfer menu, select the name of the mailbox to where you want to transfer the message
(if you hold down the [shift] key while transferring a message, a copy of the message is transferred and
the original message remains in the original mailbox).
Tip: You can create a new mailbox, and transfer a message into it all in one step. In step 2 above, instead
of selecting an existing mailbox, select New... from the Transfer menu.
Tip: If you transfer a message and decide you put it in the wrong mailbox, select Undo Transfer from the
Edit menu.
C R E AT I N G S I G N AT U R E S
When enabled, a signature is added to the end of your outgoing mail. To create a signature, do the
following:
1. From the Tools menu, select Signatures to open the Signature window.
2. Right-click anywhere in the window and select New from the pop-up menu.
3. Enter a name for the signature in the dialog and click OK.
4. Type the signature text in the editing window.
5. Select Save from the File menu to save the signature.
To add the signature to the end of an outgoing message, open a new message window and select the
signature from the Signature pop-up on the message toolbar.
To edit a signature, double-click on the signature in the Signatures window, make your changes in the
editing window, and Save your changes.
11
MODIFIERS
Many operations in Eudora can be affected by holding down one or more “modifier” keys.
Shift + Check Mail
Displays the Mail Transfer Options dialog to
define the interaction with your POP account.
Shift + Queue/Send
Opens the Change Queueing dialog.
Shift + New Message command
Displays the Message Options dialog to select
a personality for the new message, and optional
stationery.
Shift + Insert Recipient
Inserts the address(es) instead of the nickname.
Shift + Ctrl + ,
Expands the nicknames in the current field to
their real addresses (the cursor must be in
the appropriate field).
Shift + Finish Address Book Entry
Finishes the Address Book entry with the
address(es) instead of the nickname.
Shift + Sort command
Sorts in ascending order.
Shift + Transfer
Puts a copy of the current message in the
selected mailbox and leave the original
where it is.
Shift + Copy
Copies the selected text without the carriage
returns (copy unwrapped).
Shift + Wrap Selection
Removes the carriage returns from the
selected text (unwraps).
Shift + Space
Toggles the current messages status between”read“
and ”unread“.
12
Shift + Save
Saves changes to all open windows.
Shift + Close
Closes all open windows.
Shift + Exit
Sets all open windows to open again when
Eudora is next started.
Alt + Drag toolbar button
Moves the button on the toolbar.
O T H E R I M P O RTA N T K E Y S
arrows
Moves from one message to another
in a mailbox (depends on your
Miscellaneous Options).
enter
Selects the outlined button in any dialog, alert,
or window, or opens the selected messages.
esc
Stops any operation currently in progress.
F1
Displays help.
page up, page down
Scrolls up or down through the window.
13
SHORTCUTS
The shortcuts for Eudora functions are as follows:
Ctrl + 0
Ctrl + 1
Ctrl + 6
Ctrl + ’
Ctrl + ,
Ctrl + A
Ctrl + B
Ctrl + C
Ctrl + D
Ctrl + E
Ctrl + F
Ctrl + H
Ctrl + I
Ctrl + J
Ctrl + K
Ctrl + L
Ctrl + M
Ctrl + N
Ctrl + O
Ctrl + P
Ctrl + Q
Ctrl + R
Ctrl + S
Ctrl + T
Ctrl + U
Ctrl + V
Ctrl + W
Ctrl + Shift + W
Ctrl + X
Ctrl + Y
Ctrl + Z
Ctrl + Tab
Open Out mailbox
Open In mailbox
Check spelling
Paste as quotation
Finish address book entry (nickname)
Select all
Make text bold
Copy
Delete
Send immediately or Queue for delivery
Open Find dialog
Attach file
Make text italic
Filter messages
Make address book entry (nickname)
Open Address Book
Check mail
New message
Open file
Print
Exit Eudora
Reply
Save current window
Send queued messages
Make text underlined
Paste
Close one mailbox at a time (message or window)
Close all open mailboxes (messages or windows)
Cut
Directory Services
Undo
Flip thru all open mailboxes
14
P R E F E R R E D E U D O R A U S E R R E B AT E P R O G R A M
If you purchased Eudora Pro CommCenter v4.0 from a retail outlet, then you may qualify for the
Preferred Eudora User Rebate Program (and you own a previous version of Eudora Pro Mail v2.2 or
higher). The current rebates offered are:
■
■
$20 mail-in rebate for single-user box of Eudora Pro CommCenter v4.0
$90 mail-in rebate for five-user license box of Eudora Pro CommCenter v4.0
Note: The Preferred Eudora User Rebate Program does not apply if you bought your copy of Eudora Pro
CommCenter through an electronic reseller. If you already own a previous version of Eudora Pro Mail
v2.2 or higher, you should purchase the upgrader at a special low price from your electronic reseller.
Note: The Preferred Eudora User Rebate Program does not apply if you bought or acquired a
“For Educational Use Only” or “Not For Resale” copy of Eudora Pro CommCenter.
1. During installation, your Eudora Pro CommCenter installer will search your hard drive for qualifying
copies of Eudora Pro Mail v2.2 or higher.
2. If a qualifying copy of Eudora Pro Mail v2.2 or higher is found, then a special dialog box opens asking you to enter your Registration number. Your Registration number is found on the Technical Support
Information sheet found inside your package.
3. Enter your Registration number when prompted. Then, the installer displays your unique Upgrade
Validation Number. You may want to make a note of it. It also records it in a file called “Upgrade.4ini”
in your Eudora directory.
4. After you successfully install Eudora Pro Email, start up Eudora Pro Email. Choose “Register Eudora”
from the Help menu. YOU MUST REGISTER YOUR COPY OF EUDORA PRO COMMCENTER IN
ORDER TO RECEIVE YOUR REBATE.
5. Once your registration information is received, an email message to the email address you indicated in
your registration is sent to you. The email message provides you with the mailing address where you need
to send the UPC label from the bottom of your Eudora Pro CommCenter box to receive your rebate check.
6. Please allow six to eight weeks for processing.
15