Download User`s Manual Notice D`utilisation Manual del Usario
Transcript
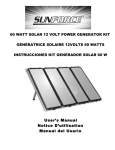
60 WATT SOLAR 12 VOLT POWER GENERATOR KIT
GÉNÉRATRICE SOLAIRE 12VOLTS 60 WATTS
INSTRUCCIONES KIT GENERADOR SOLAR 60 W
User’s Manual
Notice D’utilisation
Manual del Usario
60 WATT SOLAR 12 VOLT POWER GENERATOR KIT
READ this manual BEFORE and DURING the use of this product.
ITEMS INCLUDED:
1. Four 15 Watt Solar Panels
2. Charge Controller
3. 12’ Extension Cable
4. Connector to 12Volt DC plug
5. Connector to 12Volt DC socket
6. 12VDC Socket to Battery Clamps
7. Connector to Battery Clamps
8. Connector to Regulator
9. Inverter
10. 4 in 1 connector
11. PVC Mounting Frame
12. Screws and Nuts for Mounting
1. Pick location of setup - Choose Location with greatest sunlight throughout the day
2. Setup PVC support frame
3. Place panels
4. Connect panels to 4 in1 connector
5. Connect extension to 4 in 1 connector
6. Connect to charge controller
7. Connect charge controller to battery
8. Connect either 12VDC socket to battery to use 12V items or the included inverter to use AC items.
9. Generate Power!
INSTALLATION STEPS
1. Pick Location
Choose Location with greatest sunlight throughout the day.
2. Setup PVC support Frame. Place all parts together and secure with included screws. Be sure that all
screws are tight and solid.
3. Place Panels
Place panels one by one with wire hanging from top part of frame. Use included screws to secure panels
to frame.
4. Connect wires from panels to 4 to 1 connector – refer to image #10
5. Connect extension to 4 in 1 connector. Make sure connections are all tight. See image #3.
6. Connect to charge controller
Connect tinned wire to end of the extension cable. See image #8. Refer to charge controller instructions
included below – ensure that all polarity is followed correctly.
7. Connect charge controller to battery.
Connect to a battery:
Attach the Battery Charge Controller positive (+) wire to the positive (+) battery terminal. Then connect the Battery
Charge Controller negative (-) wire to the negative (-) battery terminal.
WARNING: The alligator clips MUST be placed on to the battery in the aforementioned order—wrong connections
may cause sparking or explosion.
Connect to Solar Panel:
Strip the solar panel wires. Connect positive (+) wire from the solar panel to the positive (+) of the charge controller
and the negative (-) wire from the solar panel to the negative (-) of the charge controller. Ensure the connections
are secure.
Operation:
The Green LED indicates a full-charged battery. When the battery reaches 14.2 V, the Solar Charge Controller will
cut out voltage thereby ensuring no overcharging. Yellow light indicates a battery that is being charged. When the
battery reaches 13 V, the Battery Charge Controller will cut-in and begin charging.
NOTES:
• It is normal for both lights to flicker on and off during normal operation. The Battery Charge Controller should be
placed within 5’ of the battery in a dry, well-ventilated area. All connections should be parallel to ensure 12 V
system (positive to positive and negative to negative).
8. Connect 12VDC socket to battery to use 12V items or the included inverter to use AC items. Please
follow inverter instructions included in package should you wish to use this inverter.
USE OF INCLUDED ADAPTORS
Connector to12 Volt DC Plug (#4)
This connector allows panels to be connected into 12 Volt DC Socket. Use of this connector should be
done for very limited amounts of time due to lack of protection form charge controller. Risk of
overcharging the battery is great.
Connector to 12 Volt DC Socket (#5)
This connector allows 12 Volt devices to be connected directly to the panels. Since the panels have
variable voltage, use of this cable is limited.
12VDC Socket to Battery Clamps (#6)
Connects to battery to use 12 Volt Devices
Connector to Battery Clamps (#7)
This connector allows the panels to be directly connected to the battery. Use of this connector should be
done for very limited amounts of time due to lack of protection form charge controller. Risk of
overcharging the battery is great.
GENERAL TESTING PROTOCOL
Always test outdoors under optimal sunlight
Test Solar Panels for Voltage
Connect Voltmeter to each individual panel separately and observe Open Voltage. Open Voltage can range from
16 Volts to 24 Volts.
Test Connection to Charge Controller for Voltage.
Reconnect solar panels, and connect to charge controller as per instructions. Measure the Open Circuit Voltage at
the battery side of the charge controller. Open circuit voltage should read 5-10% lower than without charge
controller. Open circuit measurement will read between 15 and 23.5 volts.
Connect charge controller to battery
First, disconnect solar panels and connect charge controller to battery. Always connect charge controller to battery
first and remove last. Observe polarity – positive to positive and negative to negative.
Reconnect Solar Panels to Charge Controller
If battery voltage is 14.2 or higher, the GREEN light should be on. If battery voltage is between 13 and 14.2, the
YELLOW LED should be on. If battery voltage is 13 or lower, the YELLOW LED should be on.
If all testing results are within the above indicated ranges, solar system is in acceptable range. If Voltage readings
indicate lower ranges, repeat above connections and retest. Finally, it is common to have 12V Battery issues such
as dead cells or non-rechargeable battery problems.
FAQ
What type of batteries does this panel charge?
All rechargeable 12V batteries such as those used in Cars, Boats, RV’s, Motorcycles and PWC’s.
Can I use these solar panels outdoors?
Yes, these solar panels are weatherproof. The weatherproofing includes UV protection and protects from
weather effects of -35°F-175°F (-37°C - 79°C).
Can I overcharge my battery?
Yes, a Sunforce Solar Charge Controller must be used to prevent battery from overcharging..
When will the Charged Indication light (green) light up?
The charged indication green light will light up when the battery voltage reaches 14.2 Volts and the charge
controller will prevent the solar panels from overcharging the battery. It is normal for the charge controller LED to
light on and off as the battery voltage cuts in and out.
Warranty
The solar panels are covered by a five year limited warranty. Sunforce Products Inc warrants to the original
purchaser that this product is free from defects in materials and workmanship for a period of one year from date of
purchase. Power output is warranted for five years from date of purchase.
The Solar Charge Controller is covered by a five year limited warranty. Sunforce Products Inc warrants to the
original purchaser that this product is free from defects in materials and workmanship for a period of one year from
date of purchase.
To obtain warranty service please contact Sunforce Products for further instruction, at
1-888-478-6435 or email [email protected]. Proof of purchase including date,
and an explanation of complaint is required for warranty service.


