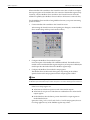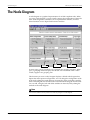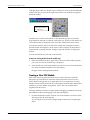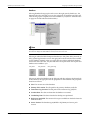
1
Limitation of Liability
For further assistance
please contact us at:
Worldwide Headquarters
2195 Keating Cross Road
Saanichton, BC
Canada V8M 2A5
Tel: 1-250-652-7100
Fax: 1-250-652-0411
Email:
[email protected]
www.pwrm.com
© 2004 Power Measurement
Printed in Canada
Revision Date: August 18, 2004
70000-0204-01
Power Measurement Ltd. (“Power Measurement”) reserves the right to make changes in the
device or its specifications identified in this document without notice. Power Measurement
advises customers to obtain the latest version of the device specifications before placing
orders to verify that the information being relied upon by the customer is current.
Regardless of whether any remedy set forth herein fails of its essential purpose, except to
the extent the following limitation is prohibited by applicable law, Power Measurement
shall not, in any event or under any legal claim or theory (whether based on contract,
indemnity, warranty, tort (including negligence and strict liability) or otherwise), be liable
to the original purchaser or any other person or entity for special, indirect, incidental,
punitive, liquidated, special or consequential damages whatsoever with respect to any
purchased product, including, without limitation, business interruption, loss of use, profit
or revenue, even if Power Measurement has been advised of the possibility of such
damages. To the extent that a limitation or exclusion of consequential damages are
prohibited by applicable law, then Power Measurement’s liability shall be limited to twice
the amount of the relevant purchased product. Not to limit the foregoing, a) Power
Measurement shall not be liable for any claim (other than a claim solely for the breach of one
of the above Warranties that is made in accordance with the above described procedures)
made by the original purchaser, its employees, agents, or contractors for any loss, damage,
or expense incurred due to, caused by, or related to any purchased product; and b) the
above Warranties are the original purchaser's exclusive remedy and Power Measurement
hereby expressly disclaims all other warranties, express or implied, including, without
limitation, warranties of non-infringement and the implied warranties of merchantability
and fitness for a particular purpose.
These limited Warranties shall not apply to any product that has been subject to alteration,
accident, misuse, abuse, neglect or failure to exactly follow Power Measurement's
instructions for operation and maintenance. Any technical assistance provided by Power
Measurement's personnel or representatives in system design shall be deemed to be a
proposal and not a recommendation. The responsibility for determining the feasibility of
such proposals rests with the original purchaser and should be tested by the original
purchaser. It is the original purchaser’s responsibility to determine the suitability of any
product and associated documentation for its purposes. The original purchaser
acknowledges that 100% "up" time is not realizable because of possible hardware or
software defects. The original purchaser recognizes that such defects and failures may cause
inaccuracies or malfunctions. Only the terms expressed in these limited Warranties shall
apply and no distributor, corporation or other entity, individual or employee of Power
Measurement or any other entity is authorized to amend, modify or extend the Warranties
in any way.
The information contained in this document is believed to be accurate at the time of
publication, however, Power Measurement assumes no responsibility for any errors which
may appear here and reserves the right to make changes without notice.
Power Measurement, ION, ION Enterprise, MeterM@il, WebMeter and “smart energy
everywhere” are either registered trademarks or trademarks of Power Measurement. All
other trademarks are property of their respective owners.
Covered by one or more of the following patents:
U.S. Patent No's 6751562, 6745138, 6737855, 6694270, 6687627, 6671654, 6671635, 6615147,
6611922, 6611773, 6563697, 6493644, 6397155, 6186842, 6185508, 6000034, 5995911, 5828576,
5736847, 5650936, D459259, D458863, D443541, D439535, D435471, D432934, D429655,
D429533, D427533.
Contents
Chapter 1
Components and Services ............................................. 9
ION Enterprise Software Components . . . . . . . . . . . . . . . . . . . . . . . . . . . . 10
User Interfaces . . . . . . . . . . . . . . . . . . . . . . . . . . . . . . . . . . . . . . . . . . . . . . . . . . . . . . . 10
Services . . . . . . . . . . . . . . . . . . . . . . . . . . . . . . . . . . . . . . . . . . . . . . . . . . . . . . . . . . . . . 11
Databases . . . . . . . . . . . . . . . . . . . . . . . . . . . . . . . . . . . . . . . . . . . . . . . . . . . . . . . . . . . . 11
The ION Enterprise Services . . . . . . . . . . . . . . . . . . . . . . . . . . . . . . . . . . . 13
Changing a Service’s Startup Type . . . . . . . . . . . . . . . . . . . . . . . . . . . . . . . . . . . . . . 14
Stopping a Service . . . . . . . . . . . . . . . . . . . . . . . . . . . . . . . . . . . . . . . . . . . . . . . . . . . . 15
Service Dependencies . . . . . . . . . . . . . . . . . . . . . . . . . . . . . . . . . . . . . . . . . . . . . . . . . 15
Chapter 2
ION Enterprise Nodes ................................................. 17
The ION Log Inserter . . . . . . . . . . . . . . . . . . . . . . . . . . . . . . . . . . . . . . . . . 18
ION Log Inserter Components . . . . . . . . . . . . . . . . . . . . . . . . . . . . . . . . . . . . . . . . . 18
Configuring the Log Inserter . . . . . . . . . . . . . . . . . . . . . . . . . . . . . . . . . . . . . . . . . . . 19
The ION Virtual Processor Service . . . . . . . . . . . . . . . . . . . . . . . . . . . . . . . 21
Using the Virtual Processor . . . . . . . . . . . . . . . . . . . . . . . . . . . . . . . . . . . . . . . . . . . . 21
Distributed Control . . . . . . . . . . . . . . . . . . . . . . . . . . . . . . . . . . . . . . . . . . . . . . . . . . . 23
Modbus Communications . . . . . . . . . . . . . . . . . . . . . . . . . . . . . . . . . . . . . . . . . . . . . 26
Configuring the Virtual Processor's Modbus Service . . . . . . . . . . . . . . . . . . . . . . . 26
Configuring the Modbus Master Site Parameters . . . . . . . . . . . . . . . . . . . . . . . . . . 28
Modbus Applications . . . . . . . . . . . . . . . . . . . . . . . . . . . . . . . . . . . . . . . . . . . . . . . . . 31
Common Virtual Processor Applications . . . . . . . . . . . . . . . . . . . . . . . . . . . . . . . . . 35
Setting Global Parameters . . . . . . . . . . . . . . . . . . . . . . . . . . . . . . . . . . . . . . . . . . . . . 36
Optimizing System Performance . . . . . . . . . . . . . . . . . . . . . . . . . . . . . . . . . . . . . . . . 38
Chapter 3
ION Management Console .......................................... 39
The ION Management Console Interface . . . . . . . . . . . . . . . . . . . . . . . . . . 40
Management Console Interface Areas . . . . . . . . . . . . . . . . . . . . . . . . . . . . . . . . . . . 40
Management Console Network Components . . . . . . . . . . . . . . . . . . . . . . . . . . . . . 42
Management Console Menus . . . . . . . . . . . . . . . . . . . . . . . . . . . . . . . . . . . . . . . . . . . 43
Menu and Submenu Item Descriptions . . . . . . . . . . . . . . . . . . . . . . . . . . . . . . . . . . 44
Property Details . . . . . . . . . . . . . . . . . . . . . . . . . . . . . . . . . . . . . . . . . . . . 48
Basic Property List . . . . . . . . . . . . . . . . . . . . . . . . . . . . . . . . . . . . . . . . . . . . . . . . . . . . 48
Advanced Property List . . . . . . . . . . . . . . . . . . . . . . . . . . . . . . . . . . . . . . . . . . . . . . . 49
Detailed Operation . . . . . . . . . . . . . . . . . . . . . . . . . . . . . . . . . . . . . . . . . . 50
Modifying Management Console Displays . . . . . . . . . . . . . . . . . . . . . . . . . 54
Chapter 4
ION Enterprise Utilities ................................................ 55
The ION Diagnostics Viewer . . . . . . . . . . . . . . . . . . . . . . . . . . . . . . . . . . . 56
Main Console . . . . . . . . . . . . . . . . . . . . . . . . . . . . . . . . . . . . . . . . . . . . . . . . . . . . . . . . 56
Service Diagnostics Information . . . . . . . . . . . . . . . . . . . . . . . . . . . . . . . . . . . . . . . . 57
Communications Diagnostics . . . . . . . . . . . . . . . . . . . . . . . . . . . . . . . . . . . . . . . . . . 58
Additional Commands . . . . . . . . . . . . . . . . . . . . . . . . . . . . . . . . . . . . . . . . . . . . . . . . 60
Communication Status vs. Site Status . . . . . . . . . . . . . . . . . . . . . . . . . . . . . . . . . . . . 61
Remote Modem Setup . . . . . . . . . . . . . . . . . . . . . . . . . . . . . . . . . . . . . . . . 62
Using the Remote Modem Setup Utility . . . . . . . . . . . . . . . . . . . . . . . . . . . . . . . . . 63
Device Upgrader . . . . . . . . . . . . . . . . . . . . . . . . . . . . . . . . . . . . . . . . . . . 64
Using the Device Upgrader Utility . . . . . . . . . . . . . . . . . . . . . . . . . . . . . . . . . . . . . . 65
Firmware Upgrade Error Codes . . . . . . . . . . . . . . . . . . . . . . . . . . . . . . . . . . . . . . . . 68
ION User Manager . . . . . . . . . . . . . . . . . . . . . . . . . . . . . . . . . . . . . . . . . . 69
ION License Manager . . . . . . . . . . . . . . . . . . . . . . . . . . . . . . . . . . . . . . . . 70
The Alarm Server . . . . . . . . . . . . . . . . . . . . . . . . . . . . . . . . . . . . . . . . . . . 71
Configuring the Alarm Server . . . . . . . . . . . . . . . . . . . . . . . . . . . . . . . . . . . . . . . . . . 71
Chapter 5
ION Designer ............................................................. 79
Getting Started with ION Designer . . . . . . . . . . . . . . . . . . . . . . . . . . . . . . 80
Starting Designer . . . . . . . . . . . . . . . . . . . . . . . . . . . . . . . . . . . . . . . . . . . . . . . . . . . . . 80
The Designer Interface . . . . . . . . . . . . . . . . . . . . . . . . . . . . . . . . . . . . . . . . . . . . . . . . 81
Quitting Designer . . . . . . . . . . . . . . . . . . . . . . . . . . . . . . . . . . . . . . . . . . . . . . . . . . . . . 83
The Node Diagram . . . . . . . . . . . . . . . . . . . . . . . . . . . . . . . . . . . . . . . . . . 84
Using a Node Diagram . . . . . . . . . . . . . . . . . . . . . . . . . . . . . . . . . . . . . . . . . . . . . . . . 85
Icons . . . . . . . . . . . . . . . . . . . . . . . . . . . . . . . . . . . . . . . . . . . . . . . . . . . . . . . . . . . . . . . . 88
Grouping Windows . . . . . . . . . . . . . . . . . . . . . . . . . . . . . . . . . . . . . . . . . . . . . . . . . . . 92
Windows . . . . . . . . . . . . . . . . . . . . . . . . . . . . . . . . . . . . . . . . . . . . . . . . . . . . . . . . . . . . 94
Working with ION Modules . . . . . . . . . . . . . . . . . . . . . . . . . . . . . . . . . . . 96
Using ION Modules . . . . . . . . . . . . . . . . . . . . . . . . . . . . . . . . . . . . . . . . . . . . . . . . . . . 96
Designer Shortcuts . . . . . . . . . . . . . . . . . . . . . . . . . . . . . . . . . . . . . . . . . . . . . . . . . . . 105
Linking and Configuring ION Modules . . . . . . . . . . . . . . . . . . . . . . . . . . . . . . . . . 107
Deleting Links . . . . . . . . . . . . . . . . . . . . . . . . . . . . . . . . . . . . . . . . . . . . . . . . . . . . . . 113
Configuring ION Modules . . . . . . . . . . . . . . . . . . . . . . . . . . . . . . . . . . . . . . . . . . . . 116
Copying and Pasting ION Modules . . . . . . . . . . . . . . . . . . . . . . . . . . . . . . . . . . . . 123
Viewing Output Registers, Setup Registers, and Inputs . . . . . . . . . . . . . . . . . . . 132
Time of Use (TOU) Program Management . . . . . . . . . . . . . . . . . . . . . . . . 134
Advanced TOU Schedule Configuration . . . . . . . . . . . . . . . . . . . . . . . . . . . . . . . . 135
Chapter 6
Database Management ............................................. 137
The SQL Server 2000 Desktop Engine . . . . . . . . . . . . . . . . . . . . . . . . . . . 138
The Network Configuration Database . . . . . . . . . . . . . . . . . . . . . . . . . . . . . . . . . . 138
The System Events Database . . . . . . . . . . . . . . . . . . . . . . . . . . . . . . . . . . . . . . . . . . 139
The ION Database . . . . . . . . . . . . . . . . . . . . . . . . . . . . . . . . . . . . . . . . . . . . . . . . . . . 139
The ION Database Manager . . . . . . . . . . . . . . . . . . . . . . . . . . . . . . . . . . 140
Navigating the Database Manager Interface . . . . . . . . . . . . . . . . . . . . . . . . . . . . . 140
Manual Tasks . . . . . . . . . . . . . . . . . . . . . . . . . . . . . . . . . . . . . . . . . . . . . . . . . . . . . . . 143
Scheduled Tasks . . . . . . . . . . . . . . . . . . . . . . . . . . . . . . . . . . . . . . . . . . . . . . . . . . . . . 150
Detaching then Re-attaching Databases . . . . . . . . . . . . . . . . . . . . . . . . . . . . . . . . . 155
Attaching a Database Using the Database Manager . . . . . . . . . . . . . . . . . . . . . . . 155
Creating a Backup of the ION Database . . . . . . . . . . . . . . . . . . . . . . . . . . . . . . . . . 156
Restoring the ION Database from a Backup . . . . . . . . . . . . . . . . . . . . . . . . . . . . . 157
Manage the ION Database with Archives and Trims . . . . . . . . . . . . . . . . 158
Option 1 - Regular Database Archiving and Trimming . . . . . . . . . . . . . . . . . . . . 158
Option 2 - Using Selective Logging . . . . . . . . . . . . . . . . . . . . . . . . . . . . . . . . . . . . . 159
Accessing the ION Database with 3rd-Party Applications . . . . . . . . . . . . . . . . . 161
Chapter 7
WebReach ................................................................ 163
ION WebReach . . . . . . . . . . . . . . . . . . . . . . . . . . . . . . . . . . . . . . . . . . . 164
Enabling WebReach . . . . . . . . . . . . . . . . . . . . . . . . . . . . . . . . . . . . . . . . . . . . . . . . . . 164
Generating Vista Diagrams for WebReach . . . . . . . . . . . . . . . . . . . . . . . . . . . . . . 164
Using WebReach . . . . . . . . . . . . . . . . . . . . . . . . . . . . . . . . . . . . . . . . . . . . . . . . . . . . 165
Viewing Historical (Trend) Data . . . . . . . . . . . . . . . . . . . . . . . . . . . . . . . . . . . . . . . 166
Viewing Global Event Data . . . . . . . . . . . . . . . . . . . . . . . . . . . . . . . . . . . . . . . . . . . 168
WebReach Registry Settings . . . . . . . . . . . . . . . . . . . . . . . . . . . . . . . . . . . . . . . . . . . 169
Additional WebReach Information . . . . . . . . . . . . . . . . . . . . . . . . . . . . . . . . . . . . . 170
Chapter 8
Tips, Troubleshooting, FAQs ...................................... 173
ION Enterprise Optimizations . . . . . . . . . . . . . . . . . . . . . . . . . . . . . . . . . 174
Operation Differences for ION Enterprise 5.0 . . . . . . . . . . . . . . . . . . . . . . 176
ION Reporter and Scheduled Tasks . . . . . . . . . . . . . . . . . . . . . . . . . . . . . 178
Designer FAQs . . . . . . . . . . . . . . . . . . . . . . . . . . . . . . . . . . . . . . . . . . . . 180
Node Diagrams . . . . . . . . . . . . . . . . . . . . . . . . . . . . . . . . . . . . . . . . . . . . . . . . . . . . . 180
ION Modules . . . . . . . . . . . . . . . . . . . . . . . . . . . . . . . . . . . . . . . . . . . . . . . . . . . . . . . 181
Linking and Configuring ION Module . . . . . . . . . . . . . . . . . . . . . . . . . . . . . . . . . 182
Copying and Pasting ION Modules . . . . . . . . . . . . . . . . . . . . . . . . . . . . . . . . . . . . 182
Miscellaneous FAQs . . . . . . . . . . . . . . . . . . . . . . . . . . . . . . . . . . . . . . . . 184
How To... . . . . . . . . . . . . . . . . . . . . . . . . . . . . . . . . . . . . . . . . . . . . . . . . 185
How to Manually Set Time Synchronization with ION Enterprise . . . . . . . . . . 185
How to Add Constraints To A Dialout Modem . . . . . . . . . . . . . . . . . . . . . . . . . . 186
How to Preserve A Pegasys Install When Installing ION Enterprise . . . . . . . . 187
How to Uninstall Pegasys From Windows 95 Or Windows 98 . . . . . . . . . . . . . 187
How to Determine The Type Of ION Enterprise Install . . . . . . . . . . . . . . . . . . . 187
How to Specify a Vista Diagram to Open for a Given User on Startup . . . . . . . 188
1
Components and Services
This section provides an overview of the software components available with ION
Enterprise. These components are explained in greater detail in their appropriate
sections. The services responsible for running ION Enterprise are explained,
including service dependencies and how to change a service’s startup mode.
In This Chapter
ION Enterprise Software Components . . . . . . . . . . . . . . . . . . . . . . . . . . . . 10
User Interfaces . . . . . . . . . . . . . . . . . . . . . . . . . . . . . . . . . . . . . . . . . . . . . . . . . . . . . . . 10
Services . . . . . . . . . . . . . . . . . . . . . . . . . . . . . . . . . . . . . . . . . . . . . . . . . . . . . . . . . . . . . 11
Databases . . . . . . . . . . . . . . . . . . . . . . . . . . . . . . . . . . . . . . . . . . . . . . . . . . . . . . . . . . . . 11
The ION Enterprise Services . . . . . . . . . . . . . . . . . . . . . . . . . . . . . . . . . . . 13
Changing a Service’s Startup Type . . . . . . . . . . . . . . . . . . . . . . . . . . . . . . . . . . . . . . 14
Stopping a Service . . . . . . . . . . . . . . . . . . . . . . . . . . . . . . . . . . . . . . . . . . . . . . . . . . . . 15
Service Dependencies . . . . . . . . . . . . . . . . . . . . . . . . . . . . . . . . . . . . . . . . . . . . . . . . . 15
Page 9
ION Enterprise Software Components
ION Enterprise Administrator’s Guide
ION Enterprise Software Components
ION Enterprise consists of different kinds of software components: user interfaces,
services, and databases.
ION Management Console
(includes the following:
User Interfaces
ION Vista
ION Reporter
Diagnostics Viewer
Device Upgrader
Remote Modem Setup
Database Manager
User Manager
License Manager)
ION Designer
ION Connection Management Service
ION Site Service
ION Network Router Service
ION Log Inserter Service
ION Enterprise Services
Services
ION Query Service
ION Component Identifier Service
ION XML Subscription Service
ION Dynamic Data Exchange (DDE) Service
ION Virtual Processor Service
Database Servers
Databases
ION Database
MSSQL$ION (default unless a different name
for the database instance was selected)
Network Configuration
Database
System Events
Database
User Interfaces
The user interfaces ION Vista, ION Reporter, and ION Management Console are
available for all ION Enterprise installation types (Primary/Terminal Server,
Secondary Server, and Client computers). Some user interfaces within the
Management Console are only available on the Primary/Terminal server. For more
information on individual components, refer to the help sections specific to that
component.
ION Vista presents a graphical view of your power system, allowing you to
view and analyze real-time data from power meters and historical data from the
ION database. Vista reports on the status of your system components, informing
you of alarm conditions and providing you with control capabilities for
initiating intelligent device functions or actuating field machinery. Vista
includes sophisticated tools for analyzing real-time and logged power data and
system events.
Page 10
Chapter 1 - Components and Services
ION Enterprise Administrator’s Guide
Services
ION Reporter lets you define and create comprehensive database reports using
Microsoft Excel. Configured Power Quality, Load Profile, Energy and Demand,
and EN50160 reports are included with Reporter. You can create custom reports
with ease, and support is provided for other third-party reporting tools.
ION Management Console is used to build your ION Enterprise powermonitoring network to reflect the way the physical communications network is
wired so that ION Enterprise software can communicate with your devices. You
create the network using sites, servers, modems, and intelligent devices, which
you can add, remove, configure, or duplicate.
You can access these Management Tools From the Management Console
menus:
Diagnostics Viewer is the primary source of troubleshooting information in
ION Enterprise.
Device Upgrader allows you to upgrade the operating software inside ION
devices
Remote Modem Setup allows you to set up modems for remote sites
Database Manager lets you manage your ION Enterprise databases with
both manual tasks and scheduled tasks.
User Manager allows you to configure ION Enterprise software user
accounts that define different operations permitted within the ION
software, e.g. viewing meter data, performing control actions, or
configuring the configuration
License Manager lets you upgrade the number of devices and Vista clients
you can have without re-installing the software.
You can also access Designer from the Management Console.
ION Designer lets you customize the operation of an ION device, the ION
Virtual Processor, the ION Log Inserter, and the ION Query Server.
Services
Many of ION Enterprise’s core components run as Windows Services, allowing
your servers to monitor your power system without any user logged on. In the
event of a power outage, your system automatically resumes power monitoring
when the power is restored. Refer to “The ION Enterprise Services” on page 13 for
detailed information.
Databases
ION Enterprise databases install automatically on the Primary Server and run in the
background of your ION Enterprise network system.
The ION Database is the database where ION device data is written and
retrieved. The ION database is essentially a historical account of logged data
from every intelligent device in your system; it contains all the information
displayed by your devices.
The Network Configuration Database (also referred to as the Network Object
Model or NOM) holds information about your network topology — the network
Chapter 1 - Components and Services
Page 11
Databases
ION Enterprise Administrator’s Guide
connections, computers, and every connected device including dialout modems
— for other ION software components to use.
The System Event Database database stores data for events that occur in the
operation of ION software components. You can view the system event records
using the Management Console.
Page 12
Chapter 1 - Components and Services
ION Enterprise Administrator’s Guide
The ION Enterprise Services
The ION Enterprise Services
Windows Services are designed to control applications that do not require a user
interface to operate (unattended applications). Most unattended applications are
services with the ION Enterprise software:
ION Log Inserter Service provides historical data storage for your powermonitoring system. Refer to “The ION Log Inserter” on page 18 for more
information about the Log Inserter.
ION Query Service provides historical data retrieval for your powermonitoring system. Refer to the sections about Vista for more information
regarding this service.
ION Connection Management Service is responsible for determining the
connection status of the ION Enterprise system's sites and devices, as well as
handling resource allocation such as modems.
This service manages the state of connectivity for the ION Enterprise software
system. In order to establish the most appropriate state for the system, each
connection and disconnection request is evaluated against the overall state of
the system and availability of communications channels. The system status is
stored in the Network Configuration Database.
ION Network Router Service is responsible for routing all information between
ION software components, such as client workstations and the Log Inserter. The
service dynamically detects changes to the network configuration, including the
addition of new servers; it is also capable of recognizing new software nodes,
such as Vista, that are added to an existing server. This mechanism is used for
automatic software node registration.
NOTE
ION Network Router Service has many dependent ION software services: the Virtual Processor, ION Log
Inserter Service, ION Site Service, and DDE services cannot start and operate without it.
ION Site Service is responsible for handling packet communications to system
devices and controlling direct device communications. The service reacts to
changes in network configuration: often changes to certain channels, gates,
ports, or device parameters can interrupt a connection. You can add, delete, or
change channels, gates, ports, and devices without having to restart the ION Site
Service, ION Network Router Service, and ION Connection Management
Service.
Chapter 1 - Components and Services
Page 13
Changing a Service’s Startup Type
ION Enterprise Administrator’s Guide
ION DDE Service is responsible for providing Dynamic Data Exchange (DDE)
connectivity between ION devices and DDE compatible applications, such as
Excel. The ION DDE Server service is registered as a manual service, and is
stopped by default. For more information please contact Technical Support.
ION Virtual Processor Service provides coordinated data collection, data
processing, and control functions for groups of meters. For more information on
the Virtual Processor and its functionality, refer to “The ION Virtual Processor
Service” on page 21.
ION XML Subscription Service manages subscriptions to XML data for Vista
diagrams. This service is used only for the web application. When you (or a
software component) requests XML data for a diagram, this service creates a
subscription and delivers the XML data when it is available. Subscriptions
expire automatically if they are not renewed. A browser renews a subscription
by repeatedly requesting XML data.
ION Component Identifier Service manages communications between local
and remote ION Enterprise components.
Changing a Service’s Startup Type
When your workstation boots, all ION software services start automatically except
for the DDE Service which is a manual service. You can change any service’s
startup mode if you want.
Changing the startup type of a service
1.
Click the Windows Start button and select Settings > Control Panel >
Administrative Tools > Services.
2.
Select the service to change and click the appropriate icon on the right side of the
menu bar to start, stop, or pause the service.
3.
Double-click the selected service to modify its properties.
On the General tab, locate the drop-down list for Startup Type. Your three
choices are Automatic, Manual, and Disable.
4.
Page 14
Choose your preferred Startup Type. For example, to make a service start only
when you choose to start it, select Manual. Click OK.
Chapter 1 - Components and Services
ION Enterprise Administrator’s Guide
Stopping a Service
Stopping a Service
There are some instances when you need to stop one or more of the ION Enterprise
services in order to complete a certain procedure:
Service
Reason to Shutdown Service
ION Log Inserter
Firmware upgrade
Database creation, modification, or password change
Changing the auto-mode operation
ION Virtual Processor
Modifying global operating parameters
Adding/modifying Modbus network changes
Stopping a service
1.
Open the Services window by navigate through Control Panel >
Administrative Tools > Services.
2.
Select the service you intend to stop.
3.
Stop the service. There are two ways to do this (refer to the screen capture):
4.
Click the “stop” icon on the menu bar while the service is highlighted.
5.
Right-click the service and select Stop.
Similarly, if you need to restart a service which you have stopped, follow the same
general procedure, substituting “Start” for “Stop” where necessary.
Service Dependencies
Services are typically dependent upon other services before they can start up
correctly. This is the case with ION software services. These dependencies are
shown on the Dependencies tab under the Properties for each service. The
following example shows the dependencies for- and dependents of the ION
Network Router Service.
Chapter 1 - Components and Services
Page 15
Service Dependencies
ION Enterprise Administrator’s Guide
The ION Network Router Service is required for most other ION software services.
The ION Log Inserter Service, ION Site Service, ION DDE Service, and Virtual
Processor cannot start and operate without this service.
If you stop an ION Enterprise service, you are also required to shutdown the services
that depend upon it. In Windows 2000, you are prompted via dialog if you wish to
shutdown these dependent applications:
Chooses Yes and all of the ION software services are shut down. Choose No to
cancel the service shutdown procedure. Once stopped you must start each service
separately, or you can reboot the system and have them all restart if they are set to
start automatically.
Page 16
Chapter 1 - Components and Services
2
ION Enterprise Nodes
A node is defined as any device or processing location on a network, including
intelligent metering and control devices, servers, workstations, processors,
printers, and routers. Every node has a unique network address. There are also
“software nodes” where data is collected, stored, or processed when interacting
with the ION Enterprise network, such as the ION Virtual Processor and the ION
Log Inserter.
In This Chapter
The ION Log Inserter . . . . . . . . . . . . . . . . . . . . . . . . . . . . . . . . . . . . . . . . . 18
ION Log Inserter Components . . . . . . . . . . . . . . . . . . . . . . . . . . . . . . . . . . . . . . . . . 18
Configuring the Log Inserter . . . . . . . . . . . . . . . . . . . . . . . . . . . . . . . . . . . . . . . . . . . 19
The ION Virtual Processor Service . . . . . . . . . . . . . . . . . . . . . . . . . . . . . . . 21
Using the Virtual Processor . . . . . . . . . . . . . . . . . . . . . . . . . . . . . . . . . . . . . . . . . . . . 21
Distributed Control . . . . . . . . . . . . . . . . . . . . . . . . . . . . . . . . . . . . . . . . . . . . . . . . . . . 23
Modbus Communications . . . . . . . . . . . . . . . . . . . . . . . . . . . . . . . . . . . . . . . . . . . . . 26
Configuring the Virtual Processor's Modbus Service . . . . . . . . . . . . . . . . . . . . . . . 26
Configuring the Modbus Master Site Parameters . . . . . . . . . . . . . . . . . . . . . . . . . . 28
Modbus Applications . . . . . . . . . . . . . . . . . . . . . . . . . . . . . . . . . . . . . . . . . . . . . . . . . 31
Common Virtual Processor Applications . . . . . . . . . . . . . . . . . . . . . . . . . . . . . . . . . 35
Setting Global Parameters . . . . . . . . . . . . . . . . . . . . . . . . . . . . . . . . . . . . . . . . . . . . . 36
Optimizing System Performance . . . . . . . . . . . . . . . . . . . . . . . . . . . . . . . . . . . . . . . . 38
Page 17
The ION Log Inserter
ION Enterprise Administrator’s Guide
The ION Log Inserter
The ION Log Inserter is typically run only on the Primary workstation. Most
systems use only a single Log Inserter, and ION Enterprise automatically
configures it to perform all required logging functions. If you need to modify the
Log Inserter’s operation, familiarize yourself with the different modes of operation
and the functions of the internal components.
ION Log Inserter Components
The Log Inserter is composed of several components that interact with other
information system components. Understanding the primary functions of the
main Log Inserter components helps you decide how to configure the logging in
your system.
A typical Log Inserter installation includes the following ION modules:
Factory module lets you view your Log Inserter’s revision information, serial
number and compliance information.
Log Acquisition module stores and retrieves individual data, event and
waveform logs to and from the database.
System Log Controller module converts all system events logged by ION
software applications into an ION-compatible format that is stored in the
database.
The External Boolean module, which provides operator control for enabling and
disabling log acquisition, is another module often associated with the Log Inserter.
While you can create External Boolean modules using Designer, these modules are
not part of a typical Log Inserter, nor are they installed by default.
Log Acquisition Module Function
The Log Acquisition module collects logs from the devices and the Virtual Processor
and inserts the logs into the ION database.
System Log Controller Module Function
The System Log Controller module collects system events from the system log
database and compiles a system event log. System events are those generated by
applications, not by the power system. As with all other log registers, the System Log
Page 18
Chapter 2 - ION Enterprise Nodes
ION Enterprise Administrator’s Guide
Configuring the Log Inserter
Controller’s output is connected to a Log Acquisition module for insertion into the
database.
Only system events with a priority greater than or equal to 192 get transferred into
the ION database. This “cutoff” is set to 192 by default.
External Boolean Module Function
Add External Boolean modules and link them to the enable inputs of the Log
Acquisition modules. This lets you enable or disable logging via a control object
within Vista.
Configuring the Log Inserter
The Log Inserter controls the flow of data into the database; it initiates and controls
data collection and organizes data storage. You can configure the Log Inserter
yourself, or you can let the Log Inserter perform and maintain its configuration for
you. The Log Inserter’s Auto-Mode provides automatic configuration of all of the
required links between the database, and device log registers and system event
logs. When in Auto-Mode, the Log Inserter automatically reconfigures itself when
nodes or workstations are added or removed from your system. Auto-Mode is
recommended, provided your system does not include a large number of logging
devices.
You can manually configure the Log Inserter using ION software to create each
link between device recorders and the database. Manual configuration is required
if you have a very large system, or if you use multiple Log Inserters. Manual
configuration also provides increased control over logging functions.
Log Inserter Auto-Mode
The Log Inserter service is configured for Auto-Mode by default when ION
Enterprise is installed. The first time the Log Inserter runs in Auto-Mode, it
automatically configures system event logging for you: links that exist between log
registers and Log Acquisition modules are ignored. All nodes and workstations in
your network are included in the Log Inserter’s configuration.
The Log Inserter continually monitors the network. When new devices are added
to your system, the Log Inserter recognizes the new log registers. These log
registers are automatically read and uploaded for insertion into the database. As
long as the Log Inserter remains in Auto-Mode, all system event logs are written
to the database. If you restart the Log Inserter without the –a switch (see
“Activating or deactivating Log Inserter’s Auto-Mode”), all System Log controller
Chapter 2 - ION Enterprise Nodes
Page 19
Configuring the Log Inserter
ION Enterprise Administrator’s Guide
modules must be manually linked to Log Acquisition modules for system event
logging to resume.
NOTE
Auto-Mode functions only in systems with a single Log Inserter. If you upgraded a large system that
included multiple Log Inserters, and you want to reconfigure your system to include only one Log Inserter,
you may have to configure the Log Inserter to run in Auto-Mode.
Activating or deactivating Log Inserter’s Auto-Mode
You activate or deactivate Auto-Mode by modifying the Log Inserter’s command
line arguments. You should only deactivate Auto-Mode when manual
configuration is absolutely necessary.
CAUTION
If you used the Services dialog to stop the ION Log Inserter Service, you must close the Services dialog
before unregistering and re-registering the service. If you do not do so, an error message appears
indicating that the Log Inserter is “marked for deletion.”
Page 20
1.
Open a command prompt and change to the ION Enterprise\system\bin
directory. Execute the command logsrv.exe -unregserver.
2.
Open a command prompt and change to the ION Enterprise sytem\bin
directory.
3.
Execute the command logsvr.exe -service -a to activate Auto-Mode, or execute
logsrv.exe -service to deactivate Auto-Mode.
Chapter 2 - ION Enterprise Nodes
ION Enterprise Administrator’s Guide
The ION Virtual Processor Service
Log Inserter and Large Systems
The Log Inserter may need manual configuration in large systems. However, since
there is no firm definition for what constitutes a large system, Log Inserter
configurations can vary. Thus, commissioning is likely required for larger systems.
Commissioning options include:
reconfiguring the devices to eliminate unneeded Data Recorders prior to
starting the Log Inserter
deactivating Auto-Mode (removing the -a switch) and manually configuring a
number of Log Acquisition modules (LAMs) to upload only desired logs
deactivating Auto-Mode (removing the -a switch) and configuring LAMs on a
site-by-site basis in order to distribute the load amongst several ION databases
(i.e. multiple Log Inserters logging to multiple databases)
The ION Virtual Processor Service
The ION Virtual Processor is a service that operates on your workstation. The
Virtual Processor provides coordinated data collection, data processing, and
control functions for groups of meters. This makes distributed operations possible,
providing customized solutions to a variety of industrial, commercial, and power
utility needs.
The Virtual Processor lets you to gather the information available from your
network of power monitoring devices. The Virtual Processor enables you to
categorize, manipulate, and/or customize the data before distributing the
information to the different departments in your company. You may think of the
Virtual Processor as a virtual device, capable of collecting and processing data from
several power monitoring devices, analyzing the information and performing
control functions as required. The Virtual Processor's name implies its
characteristics:
Virtual - The Virtual Processor runs in the memory of your PC, not as a remote
device.
Processor - The Virtual Processor contains a wide selection of ION modules,
which it uses to process information.
Using the Virtual Processor
The Virtual Processor is not configured at the factory. To perform data collection,
data analysis, Modbus communications, or distributed control, you must first
create ION module frameworks. Refer to the online ION Programmer’s Reference for
detailed information on ION architecture and ION Designer software.
NOTE
Virtual Processor startup differs according to the platform you are using (Windows NT/2000). Refer to
“Changing a Service’s Startup Type” on page 14.
Chapter 2 - ION Enterprise Nodes
Page 21
Using the Virtual Processor
ION Enterprise Administrator’s Guide
Configuring the Virtual Processor with Designer
In Designer you can create new ION modules, configure module setup registers, and
link module inputs and output registers to other modules.
All Virtual Processor configuration is done with Designer. To learn about
Designer, refer to the Designer section of the online ION Enterprise Help. In
addition, you can consult the online ION Programmer's Reference for complete
operational details on each ION module.
Adding Additional Virtual Processors
You can create multiple instances of the Virtual Processor, and use each one to
perform different functions. To create additional Virtual Processors consult
Technical Services.
Creating a Second Virtual Processor
Create a second ION Virtual Processor Service and start it using the following steps:
1.
Open a command prompt window.
2.
Register the Virtual Processor as a service from the ION Enterprise\system\bin
folder by typing: vip.exe -Service -N<custom Virtual Processor name>
3.
Open Control Panel > Administrative Tools > Services and start the new
registered Virtual Processor.
Starting a Single Virtual Processor with a Custom Name
You can remove the default ION Virtual Processor Service and create your new
custom Virtual Processor Service following these steps:
1.
Open a command prompt.
2.
Unregister the default Virtual Processor from the ION Enterprise\system\bin
folder by typing: vip.exe -UnRegserver
3.
Register the new Virtual Processor service from the ION Enterprise\system\bin
folder by typing: vip.exe -Service -N<custom Virtual Processor name>
4.
Open Control Panel > Administrative Tools > Services and start the new
registered Virtual Processor Service.
Viewing Virtual Processor Data with Vista
Once you have used Designer to create and link modules in the Virtual Processor,
you can create a user diagram in Vista and link it to the modules in the Virtual
Processor. You can then use your user diagram to display system data, monitor
alarms, and control basic functions in your Virtual Processor framework.
Configuring the Virtual Processor to interact with the desktop
Page 22
1.
Open Services from Control Panel Administrative Tools
2.
Right-click the Virtual Processor, and select Properties.
3.
Select the Log On tab.
Chapter 2 - ION Enterprise Nodes
ION Enterprise Administrator’s Guide
Distributed Control
4.
Select the Allow Service to Interact with Desktop check box, and click OK.
5.
Stop and restart the ION Virtual Processor Service.
Distributed Control
Virtual Processor Distributed Control modules are a means of transferring
information between the different devices in your network. These modules can be
used to build frameworks for control processes such as alarm annunciation, plantwide demand control, power factor control, load shedding, paging, and generator
switching.
Before deciding to use a Virtual Processor to implement a control system, it is
important to understand the various factors that influence the speed with which
the Virtual Processor is able to generate a control action. Some of these factors
include network traffic, the number of polled devices in your network, the
reliability of your communications network, and the Virtual Processor
workstation's CPU usage.
CAUTION
Do not use the Virtual Processor in any capacity where a failure to execute an expected control action
could result in equipment failure or danger to personnel. Do not use the Virtual Processor for time-critical
functions.
The information presented in this chapter assumes that you are familiar with the
various ION modules and their function. Refer to the online ION Programmer's
Reference for details on Distributed Control and other modules.
Distributed Control Modules
The Virtual Processor uses four modules to implement Distributed Control
frameworks. Three types of Distributed Control modules (Distributed Boolean,
Numeric, and Pulse modules) receive data from devices or other Virtual
Processors within your network and transfer this data to the node address
specified in the module's setup registers. The Data Monitoring module is used as
a means of disabling a control module, if the data at the source input (which is used
to make the control decision) becomes “stale”.
Distributed Control Module Setup Registers
All Distributed Control modules (Distributed Boolean, Distributed Numeric, and
Distributed Pulse modules) have a Source input and an Activate input. The Activate
input must be linked to another module, and it must be on for a Distributed
Control module to function. These modules also contain a Destination setup
register that specifies the node receiving the data.
Distributed Boolean Module
All Distributed Boolean modules have one input that must linked to an External
Boolean output register. Whenever this register’s Boolean value changes state, the
new value is sent to the node defined in the Destination setup register.
Chapter 2 - ION Enterprise Nodes
Page 23
Distributed Control
ION Enterprise Administrator’s Guide
Distributed Numeric Module
A Distributed Numeric module's input must be linked to an External Numeric
module. This input’s value is sent to the node specified in the Destination setup
register. This module has two additional setup registers used to determine when
and how often new data is sent to the Destination node.
Distributed Pulse Module
All Distributed Pulse modules have one input that must link to an External Pulse
module. This module’s pulse is sent to the node defined in the Destination setup
register.
Data Monitoring Module
The Data Monitor module provides a means of alerting you to communication
problems that may occur between the Virtual Processor and any ION node
referenced by the Data Monitor's Source inputs.
NOTE
Those ION meters with Advanced Security enabled do not accept control operations from the Virtual
Processor. In order to enable these control operations, you will need to provide a device password in
Management Console for these applications to use. See Management Console for information on
configuring Advanced Security.
It is important to maximize the speed at which the Virtual Processor receives the
data used to make control decisions. The performance of a Virtual Processor using
Distributed Control is sensitive to factors such as network traffic, the Virtual
Processor's global parameters, and the workstation's CPU usage.
Distributed Control Network Performance
The following sections provide some guidelines for improving a distributed
control network's performance.
System Configuration
Minimize the number of devices per site for sites including devices used for
distributed control
Minimize the number of applications (such as Vista diagrams) that are
requesting data from the control site
Set the Virtual Processor's Client Polling Frequency to HIGH
Maximize the site's baud rate
Page 24
Chapter 2 - ION Enterprise Nodes
ION Enterprise Administrator’s Guide
Distributed Control
CPU Performance
Dedicate a single Virtual Processor for control purposes; an additional Virtual
Processor can be run for less critical functions.
Do not run CPU intensive functions on the same workstation as your distributed
control Virtual Processor.
Distributed Control Applications
The Virtual Processor's Distributed Control frameworks can perform various
control processes; two examples are presented below. Ensure that you are familiar
with the sections above before using any of these module frameworks in a control
system.
Passing a Value Between Devices
The following example shows how the numeric output of the Integrator modules
in ION meter “A” is sent to an External Numeric module in ION meter “B”.
Virtual
Processor
VIP
ION meter “A”
Integrator
Module
Distributed
Numeric Module
ION meter “B”
Source
Activate
Output
Destination: ION meter “B”
Data Monitor
Module
External
Numeric
Module
Output
Status
Source
Note that the Distributed Numeric module is disabled if the Data Monitor module
detects a communication problem between the ION meter “A” and the Virtual
Processor (e.g., timeouts or slow network connections). This helps to ensure that
control actions are only performed based on 'fresh' data.
Device Control
This example framework monitors total harmonic distortion (THD), which could
cause a piece of equipment (like a power transformer) to overheat. When a setpoint
is reached, the system sends a network message to a workstation and turns on a
fan.
Chapter 2 - ION Enterprise Nodes
Page 25
Modbus Communications
ION Enterprise Administrator’s Guide
Virtual
VIP
Processor
ION meter
Setpoint Module
Harmonics Analyzer
Module
Status
Distributed
Boolean Module
Source
Total HD
Source
Activate
Data Monitor
Module
External Boolean
Module
State
Digital Output
Module #1
State
Status
Trigger
Destination = ION meter,
External Boolean module,
Switch register
Source
Source
Digital
Outputs
Launching
Module
D4 D3 D2 D1 C
Launch
RunCommand=net send Workstation1
“Current THD is high!
Signal to turn on cooling fan has been sent”
Fan Switch
Modbus Communications
Modicon® Modbus RTU is an industry standard communications protocol used in
control and power monitoring industries. The devices in a Modbus network have
a Master/Slave relationship with communication transactions occurring between
the Master and one or many slaves (up to 247 slave devices can exist in one site).
The Virtual Processor can act as a Modbus Master or a Modbus Slave.
As a Master, the Virtual Processor uses the Modbus Export module to write data
to any slave device that supports the Modbus protocol. (This procedure is
typically used for configuration of slave devices.) The Virtual Processor's
Modbus Import module can also read data made available by Modbus slave
devices.
As a slave, the Virtual Processor can respond to requests from Modbus Masters
and provide power monitoring system data.
The information in this section describes how to configure the Virtual Processor as
a Modbus Master, and set the required parameters for Modbus communications.
Examples of Virtual Processor Modbus Master and Modbus Slave applications are
also provided.
Configuring the Virtual Processor's Modbus Service
The ION Virtual Processor Setup utility is used to configure a Virtual Processor
Modbus Service, allowing you to define sites and devices for a Modbus network.
The utility also allows you to specify and configure a communications port for the
Modbus network.
As you set up your Modbus network, keep in mind that your Modbus port must
be separate from the port that connects to your ION devices. This is due to the
different protocols being used. The Virtual Processor requires its own
communications port for Modbus, separate from any communications port
defined as a site in the ION Management Console.
Page 26
Chapter 2 - ION Enterprise Nodes
ION Enterprise Administrator’s Guide
Configuring the Virtual Processor's Modbus Service
Setting up a Virtual Processor’s Modbus network
1.
Launch the Management Console.
2.
Choose Tool > System > ION Virtual Processor Setup... from the menu bar.
3.
Select the Virtual Processor you wish to configure for Modbus service
4.
Expand the branch to display the current settings for the Modbus Master and
Modbus Slave:
Adding the Modbus Master Site
1.
Highlight Master Sites, and click Add Site.
2.
Select the type of site you are adding in the Modbus Port/Site dialog (below):
This is the IP address of the
Master site or gateway.
The TCP/IP port number is used to
connect the COM port used by the
Modbus network. For example,
TCP/IP port 7802 connects to an
EtherGate device’s COM2 port.
CAUTION
Never use 502 for the TCP/IP port. Modbus/TCP packets use the TCP/IP protocol and are sent to this
registered port number. At this time the Virtual Processor does not support Modbus/TCP (MBAP).
Serial Site
Select this option if you want to use your Modbus Master to communicate to the
slave devices via the computer's serial port. The computer's COM port you select
is used for Modbus communications through the Virtual Processor's Modbus
Import and Modbus Export modules.
Due to the different protocols used, this specific COM port must be a dedicated
communications port to utilize the Virtual Processor Modbus Service. In other
words, the COM port used to define a Master Site must be separate from the port
connecting all the ION devices to your computer.
Chapter 2 - ION Enterprise Nodes
Page 27
Configuring the Modbus Master Site Parameters
ION Enterprise Administrator’s Guide
Use the COM Port dropdown list to select which communications port you want
to assign as a Modbus Master site. The default is COM1.
Configuring the Modbus Master Site Parameters
Select the site and expand the tree to display Settings and Devices. Click to
highlight the parameter you want to change, and then click Modify.
Transmission Delay
This parameter specifies the amount of time the Virtual Processor waits
between sending out requests. The supported range is from 0 to 60000
milliseconds. The default value is 150 milliseconds for serial sites, 500
milliseconds for Ethernet sites.
Time-out Delay
This parameter specifies the time period the Virtual Processor allows for
establishing communications. The supported range is from 100 to 60000
milliseconds. The default value is 1800 milliseconds for serial sites, and 3000
milliseconds for Ethernet sites. For Ethernet sites, the protocol used is Modbus
RTU. Since this protocol does not identify packets, packet mix-up is possible.
Therefore, specify a value that avoids time-outs.
Time-outs are displayed as Information messages in the Virtual Processor
window. For example,
[INFO: VIP.LOAD_SHED 05/22/1998 11:12:51.434 AM Modbus Master Service:
Receive timeout on COM2]
CAUTION
For Ethernet sites, specifying too small a value for Transmission Delay may overload the network.
Similarly, specifying too small a value for Time-out Delay may cause time-out errors on Ethernet sites.
This could result in packet mix-up.
Baud Rate
This parameter specifies the Baud rate used for Modbus communications to
serial sites. Supported values are 300, 1200, 2400, 4800, 9600, 19200, 38400,
57600, 115200. The default value is 9600 baud.
Parity
This parameter specifies whether or not parity is active, and if it is active, the
type of parity (i.e. odd, even, mark, space). Parity refers to a technique of
checking whether data has been lost or written over when it's moved from one
place in storage to another or when transmitted between devices and/or
computers.
Stop Bits
This parameter specifies the number of stop bits supported by the site.
Supported values are a minimum of 1 and a maximum of 2. Stop bits signal the
end of a unit of transmission on a serial line.
Page 28
Chapter 2 - ION Enterprise Nodes
ION Enterprise Administrator’s Guide
Configuring the Modbus Master Site Parameters
Data Bits
This parameter specifies the number of data bits - bits that contain information
or data - supported by the site. Supported values range from a minimum of 4
and a maximum of 8.
Adding Modbus Devices
1.
Select the Modbus Master site you want to add a Modbus device to. Expand
the tree to display 'Settings' and 'Devices'. Click to highlight 'Devices', and
then click Add Device.
2.
Enter the Name and Unit ID of the Modbus device in the appropriate boxes. The
Name must be unique among all the sites serviced by a given Virtual Processor.
The Unit ID must be unique inside a given site. Click Add.
3.
Repeat the previous step if you are adding more Modbus devices to the same
site. When you have finished connecting all the Modbus devices to that site,
click OK.
NOTE
A Modbus device name cannot contain spaces. It should start with a letter, followed by letters, numbers
and/or underscores. The supported range for a Modbus device Unit ID is from 1 to 247. “0” is reserved
for broadcast messages.
Renaming a Modbus Device
1.
Select the Modbus device you want to rename. Click Rename Device
.
2.
Type in the new name. Click OK.
CAUTION
If you rename or delete Modbus devices, all Modbus Export or Modbus Import modules that previously
referred to that renamed or deleted Modbus device will be mapped to “not_a_device” when you restart
the Virtual Processor. Designer displays these modules as off-line (outlined in red).
Deleting a Modbus Device
Chapter 2 - ION Enterprise Nodes
1.
Select the Modbus device you want to delete.
2.
Click Delete Device. Click OK.
Page 29
Configuring the Modbus Master Site Parameters
ION Enterprise Administrator’s Guide
Adding a Communications Port for the Modbus Slave
If you want to use ION data in your Modbus network, you need to convert the data
to Modbus. A Modbus Slave module can perform this task. For this, you need to
create Modbus Slave modules using Designer.
1.
Expand the tree so “Master Sites” and “Slave Ports” are displayed below
“Modbus Network”. Click “Slave Ports” to highlight it, and then click Add
COM Port.
NOTE
The Modbus Slave port must not be set to the same port as any ION or Modbus Master ports. The
supported range is from COM1 to COM16.
The following window is displayed:
Page 30
2.
Use the COM Port dropdown list to select which port you want assigned as a
Modbus Slave port, and click OK. This is the port that the Modbus Master uses
to read Modbus data from the Virtual Processor's Modbus Slave modules.
3.
Double-click the COM port you have just added.
4.
Double-click Settings.
5.
Select 'Unit ID: 100' and then click Modify Unit ID.
6.
Enter the Modbus Slave device Unit ID in the box. Click OK.
7.
If you want to modify the Baud Rate, click to select Baud Rate, and then click the
Modify Baud Rate button. Select the new baud rate from the dropdown list,
then click OK.
Chapter 2 - ION Enterprise Nodes
ION Enterprise Administrator’s Guide
Modbus Applications
Changing Port Assignment for a Modbus Master or Slave
1.
Click the port you want to re-assign, and then click Rename Port.
NOTE
After using the ION Virtual Processor Setup to modify any of the Virtual Processor's parameters, you must
shut down and restart the Virtual Processor in order for any changes to take effect.
2.
Select the port you want to re-assign for the Modbus master or slave, as
explained in “Adding the Modbus Master Site” on page 27 or “Adding a
Communications Port for the Modbus Slave” on page 30.
Deleting a Modbus Master Site or Slave Port
1.
Click on the site or port you want to delete, and then click Delete Port.
2.
Click OK to delete the port.
CAUTION
Deleting a Modbus Master Site also deletes all devices connected to it.
Modbus Applications
This section outlines the fundamental procedures for three common Modbus
applications: recording data from a Modbus slave device, providing data to a
Modbus master device, and writing data to a remote Modbus slave device.
Chapter 2 - ION Enterprise Nodes
Page 31
Modbus Applications
ION Enterprise Administrator’s Guide
NOTE
For more information on how to configure the Modbus Export, Modbus Import or Modbus Slave modules,
refer to the online ION Programmer’s Reference.
Recording Data from a Modbus Slave Device
The following diagram illustrates how data from Modbus registers can be
converted and used by other ION modules. In this example, the Virtual Processor
performs a simple recording of data read from a remote Modbus device. The
registers to be read from the remote device are specified using the setup registers
in the Modbus Import module.
Providing Data for a Modbus Master
The following diagram illustrates how the Virtual Processor can make values in
ION registers available to a Modbus Master device. Assume the Modbus Slave
module's source inputs are linked to numeric or Boolean output registers from
other ION modules. In this example, the values obtained from those registers are
converted to the proper Modbus format (according to how the Modbus Slave
module's setup registers are configured). The Modbus Slave module responds to a
read request from the remote Modbus Master device and sends the Modbus data
to the specified Modbus registers (again, according to how the Modbus Slave
module's setup registers are configured).
Page 32
Chapter 2 - ION Enterprise Nodes
ION Enterprise Administrator’s Guide
Modbus Applications
Writing Data to a Remote Modbus Slave Device
This diagram illustrates how to configure a Virtual Processor to act as a Modbus
Master that can write numeric or Boolean data to a remote Modbus Slave device.
In this example, Source 1 is linked to another ION module's numeric/Boolean
output register. An External Pulse object is created in Vista to generate the pulse at
the Write Now input of the Modbus Export module. When the pulse is sent (from
Vista), the Modbus Export Module writes the data into the Modbus destination
register (specified in the RegAddr setup register of the remote Modbus device).
Writing Data from a Modbus Master to Virtual Processor
In order to allow a Modbus Master to push data into the Virtual Processor Modbus
Slave module, you create a Slave Module with no input linkages. See Expanded
Functionality of the Virtual Processor's Modbus Slave Module for more
information and configuration details.
When there are no input links, the output registers show the contents of the
Modbus address map, as defined by the setup registers of the Slave Module. The
values at the map address are copied to the output registers, starting at the address
specified in the BaseAddr setup register, until each output register is filled.
If the Format setup register is a 16-bit format, then 16-bit data is put into the
outputs. If the Format setup register is a 32-bit value, then 32-bit data is put into the
outputs. In other words, two adjacent Modbus addresses are combined into the
one output.
The Virtual Processor's Modbus Slave Module
A standard Modbus Slave module can take up to 16 ION register values and make
them available to a Modbus master. In the ION Virtual Processor, the Modbus
Slave module can also be used to bring Modbus data into your power monitoring
system (it permits a Modbus master to push data into the Virtual Processor).
NOTE
Refer to the online ION Programmer’s Reference for complete details about the Modbus Slave module.
Chapter 2 - ION Enterprise Nodes
Page 33
Modbus Applications
ION Enterprise Administrator’s Guide
When a Modbus Slave module in the Virtual Processor has no links to its inputs,
the output registers of the module show the contents of the Modbus register map.
Currently, only the Modbus Slave modules in the Virtual Processor have this
additional capability (the Modbus Slave modules in ION meters cannot do this).
Use the Modbus Slave module to bring Modbus data into your power monitoring
system as follows:
1.
Create a Modbus Slave module in the Virtual Processor.
After starting the Virtual Processor and opening it in Designer, create a Modbus
Slave module (drag and drop one from the toolbox)
2.
Configure the Modbus Slave module's inputs.
Leave the inputs of the Modbus Slave Module unlinked. The Modbus Slave
module will not read the Modbus register map if any of its inputs are linked (the
module provides the linked data to the Modbus register map).
3.
Configure the Modbus Slave module's setup registers.
The Modbus Slave module reads the register map starting at the address
specified in BaseAddr setup register until each output register is filled.
NOTE
Descriptions of the Modbus register map, and the effect of the different data formats are presented within
the Modbus Import and Modbus Export module descriptions in the online ION Programmer’s Reference.
If the Format setup register is a
16 bit format, 16 bit data is put into each of the ModVal outputs.
32 bit format, two pieces of 16 bit data are combined into one 32 bit ModVal
output register.
Packed Boolean, then the data is put into the ModVal 1 output register in
Packed Boolean form.
Ignore the Scaling, InZero, InFull, and OutZero, OutFull setup registers; there is
no scaling applied to any of the Modbus register map values.
Page 34
Chapter 2 - ION Enterprise Nodes
ION Enterprise Administrator’s Guide
Common Virtual Processor Applications
4.
Configure Modbus Slave module's outputs.
You can now link the outputs of the Modbus Slave module to the inputs of other
ION modules of the Virtual Processor. Three such examples are:
Data Recorder modules for data logging
Setpoint and Relative Setpoint modules for alarming
Distributed Numeric module for redistribution to ION meters (for
automated plant-wide demand or power factor control)
Common Virtual Processor Applications
The Virtual Processor can be used to create numerous analysis, recording, and
control functions. This chapter describes three common Virtual Processor
applications.
The examples shown on the following pages assume that you understand the
functions and options of the various ION modules used. Refer to the online ION
Programmer’s Reference for ION module details. See the previous chapters for
common Modbus and Distributed Control applications.
Event Driven Report Generation
The Virtual Processor can be used in conjunction with a device and the Log
Inserter to generate reports in response to system events. In the following example,
a Power Quality report is automatically generated in the event of a system
disturbance.
ION Log Inserter
Log
Server
ION meter
Transient
Module
Trans Max
Log Acquisition
Module
Data Recorder
Module
Trans Dur
Source
Data
Log 1
V1
V2
V3
V Nom
Source 1
Source 2
Records
Processed
Log Monitor
Module
Source
Arithmetic
Module
Source
VIP
Chapter 2 - ION Enterprise Nodes
Trigger
Source
Formula: IF(S1-P1(1)>0,1,0)
Virtual
Processor
Setpoint
Module
Result
High Limit: 0
Low Limit: 1
Eval Mode: Greater Than
One-Shot Timer
Module
Trigger
Start
Duration: 300 sec
Launching
Module
Launch
RunCommand: <ION Enterprise folder>\system\bin\Repgen.exe -r Power_Quality
Page 35
Setting Global Parameters
ION Enterprise Administrator’s Guide
As transients often occur in groups, the five minute delay made with the One-Shot
timer module allows multiple transients to appear in one Power Quality report.
NOTE
Using the Virtual Processor’s Launching module may require that the Virtual Processor be run as an
application instead of a service. Contact Technical Services if you require more information.
Data Aggregation
In the following example, meters monitor average current values (I avg). Every
day at a specified time (determined by the Periodic Timer module), the Data
Recorder Module stores the maximum average current value at each meter.
ION meter “A”
Maximum Module
Maximum Module
I avg
...
Maximum Module
Maximum
Source
Reset
One-Shot Timer
Module
ION meter “C”
Recorder Module
Trigger
Start
Source 1
External Control
Module
I avg
...
Power Meter
Module
Maximum
Source
Reset
ION meter “B”
Power Meter
Module
Maximum
Source
Reset
...
Power Meter
Module
Virtual Processor
VIP
I avg
Periodic Timer
Module
Switch 1
Trigger
Rec Log
Source 2
Source 3
Enable
Record
Logging Data From meters
The Virtual Processor can be used to log data from meters that do not have Data
Recorders. In the following example, the total kWh from an ION meter’s Integrator
module is recorded every 15 minutes by a Virtual Processor's Data Recorder
module.
ION meter
VIP
Virtual Processor
Data Recorder
Module
Power Meter
Module
kW tot
Integrator Module
Data Log
Source
kWh tot
Record
Integrand
Periodic Timer
Trigger
Period: 900 sec
Setting Global Parameters
The Virtual Processor global operating parameters and modbus network setup are
configured using ION Virtual Processor Setup (see Modbus Parameters). The
global parameters do not need to be changed for normal operation; the Virtual
Processor operates properly in most applications with the default settings.
Page 36
Chapter 2 - ION Enterprise Nodes
ION Enterprise Administrator’s Guide
Setting Global Parameters
NOTE
The ION Virtual Processor service must be restarted for any changes to take effect, as the Virtual Processor
only reads the vipsys.dat file once on startup. The ION Virtual Processor service can be restarted, like any
other service, using the Services window found via the Control Panel service applet.
The ION Virtual Processor Setup utility is accessed through the Management
Console:
1.
Go to Tools > System > ION Virtual Processor Setup....
2.
Double-click the ION Virtual Processor Setup icon.
A window appears showing the settings for the Virtual Processors on your system.
To view a Virtual Processor’s configuration, double-click its Global Parameters.
Double-click Global
Parameters to view a
Virtual Processor’s
settings.
Modbus setup is
shown here
The four parameters and their current values appear as shown above. The Global
Parameters, and their descriptions are as follows:
Global Parameter
Name Default
Value Range
Description
Module Update Period
100 ms
50 to 1000 ms
Period at which ION modules inside the Virtual
Processor are updated.
Configuration Saver Period
60 sec
10 to 600 seconds
Period at which the Virtual Processor writes its
configuration data to the computer's hard disk.
Client Polling Frequency
LOW
LOW, MEDIUM, or HIGH
Rate at which the Virtual Processor client subsystem
polls an ION software server node (for example, an
IED)
Server Polling Period
1000 ms
200 to 1440000 ms
Period, in milliseconds, at which the Virtual Processor
server sends its information to client nodes (for
example, Vista)
Highlight the parameter you wish to change, and click Modify. Make any changes
you require and click OK. Click Save to write the changes to the configuration file.
You must restart the Virtual Processor for the changes to take effect.
Chapter 2 - ION Enterprise Nodes
Page 37
Optimizing System Performance
ION Enterprise Administrator’s Guide
Optimizing System Performance
The performance of a Virtual Processor depends on many factors: overall number of
ION modules in your Virtual Processor, the execution of ION software or other
applications, and the values of the global parameters. You can significantly enhance
your system performance by following these steps:
Reduce the number of Virtual Processors operating concurrently on the same
workstation
Reduce the number of ION software or other Windows applications running
simultaneously on the same workstation
Reduce the number of complex ION modules used (for example, the Arithmetic,
Data Recorder, and Scheduler modules)
Modify the global parameters
By reducing the number of active Virtual Processors and applications, you free up
some of your workstation's resources. Using fewer ION modules increases the
processing speed of the Virtual Processor as it has fewer calculations to make.
Global parameter modifications change your system performance, as discussed in
the following sections.
Module Update Period
Frequent module updates contribute to the workstation's processor load. By
increasing the Module Update Period, you effectively reduce the number of times
a module executes in a given time period.
Configuration Saver Period
The Virtual Processor's configuration file is saved to the workstation's hard disk at
the rate defined by the Configuration Saver Period. Increasing the Configuration
Saver Period significantly reduces the processor load if you have a large Virtual
Processor configuration file.
Client Polling Frequency
This global parameter sets the frequency at which the Virtual Processor gets
information from other nodes in the network (for example, another Virtual
Processor, or a device). A value of LOW is suitable for most Virtual Processor
applications. If you require more frequent update (for example, distributed
control applications), set this parameter to either MED (this is the frequency at
which Log Inserter polls) or HIGH (Vista).
Server Polling Period
The Server Polling Period defines how often the Virtual Processor responds to
requests for information from client nodes such as Vista or the Log Inserter.
Reducing this value increases the rate at which these responses are sent; however,
reducing this value tends to increase network traffic. The default value should be
satisfactory for most applications.
Page 38
Chapter 2 - ION Enterprise Nodes
3
ION Management Console
The Management Console is the starting application for ION software where you
can manage network components (i.e. servers, sites, devices), set up dialout
modems and connection schedules, launch system and database applications,
update the serial number, and administer ION software user accounts.
NOTE
You need to use a software account with Supervisor, Operator (ION software) or Administrator (Meter
Shop) access to make changes in the Management Console.
CAUTION
Only authorized people should use the Management Console. Changes to the network configuration can
result in an unstable or unusable network.
In This Chapter
The ION Management Console Interface . . . . . . . . . . . . . . . . . . . . . . . . . . 40
Management Console Interface Areas . . . . . . . . . . . . . . . . . . . . . . . . . . . . . . . . . . . 40
Management Console Network Components . . . . . . . . . . . . . . . . . . . . . . . . . . . . . 42
Management Console Menus . . . . . . . . . . . . . . . . . . . . . . . . . . . . . . . . . . . . . . . . . . . 43
Menu and Submenu Item Descriptions . . . . . . . . . . . . . . . . . . . . . . . . . . . . . . . . . . 44
Property Details . . . . . . . . . . . . . . . . . . . . . . . . . . . . . . . . . . . . . . . . . . . . 48
Basic Property List . . . . . . . . . . . . . . . . . . . . . . . . . . . . . . . . . . . . . . . . . . . . . . . . . . . . 48
Advanced Property List . . . . . . . . . . . . . . . . . . . . . . . . . . . . . . . . . . . . . . . . . . . . . . . 49
Detailed Operation . . . . . . . . . . . . . . . . . . . . . . . . . . . . . . . . . . . . . . . . . . 50
Modifying Management Console Displays . . . . . . . . . . . . . . . . . . . . . . . . . 54
Page 39
The ION Management Console Interface
ION Enterprise Administrator’s Guide
The ION Management Console Interface
When you launch the Management Console, you are presented with the following
user interface.
Menu bar
Title Bar
Display Window
(the Servers Display
Window in this
instance)
System Setup pane
Properties Tab
& Events Tab
Management Console Interface Areas
It is important to note that the following “areas” of the Management Console are
tied to one another. For example, selecting Devices from the System Setup pane
changes the Title bar’s label to “Devices” and lists all of the configured network
devices in the Display Window.
System Setup pane
The majority of your navigation within the Management Console is done here. The
System Setup pane contains buttons which allow quick access to the components
that make up your network. You can choose to display large or small icons by
right-clicking anywhere within the pane.
Menu bar
The Menu bar provides access to many basic menu functions (i.e. Exit, Print), but
the menu also provides access to a number of additional ION Enterprise tools.
Title Bar
The Title Bar indicates which Display Window you are currently viewing.
Page 40
Chapter 3 - ION Management Console
ION Enterprise Administrator’s Guide
Management Console Interface Areas
Display Window
This is where you configure your various network components, depending on
which button you selected in the System Setup pane. Accessing an individual
component’s configurable properties, which are displayed in an options dialog
box, is done with a double-click (or right-click then select Properties).
Properties Tab
This tab has different options depending on which Display Window you are
accessing (i.e. which button you pressed in the System Setup pane).
The Properties Tab allows you to add, modify, delete, and configure your network
components. When you select an item and right-click, the configuration and
connection menu appears. You can select multiple items and right-click to change
a single property that is common to all items. These bulk configuration changes
can only be performed on common types of items; therefore, you would be unable
to disconnect two Ethernet devices if each device belonged to a separate computer.
Events Tab
Much like the Properties tab, this tab has different options depending on which
Display Window you are accessing.
The Events Tab displays any events that are logged for all items in the Properties
tab, allowing you to view information regarding such things as communication
interruptions or errors and other network difficulties. If you double-click an event
you can view all of the details for that event in a pop-up window. Depending upon
which Display Window you are viewing (i.e. Servers, Sites, Devices), the events
are specific for those components.
Priority
Priority is a numeric value: the priority column in the event table for the MSDE
system log database contains numbers. When these events are viewed in the
Management Console, however, the numeric priorities are displayed as strings. The
priority mappings are as follows:
Diagnostic 0-5
Warning 21-63
Information 6-20
Error 64-191
Critical 192-255
By default, the ION Log Inserter’s System Log Controller module’s Cutoff setup
register is set to 192. This means that system events with a priority less than 192
are not transferred to the ION database and therefore cannot be viewed in Vista
using the Global Event Viewer. If you want to view lower priority events in Vista,
the Cutoff setup register can be set to a lower value. To determine the value, you
must know the numerical priority of the events that you want to see in Vista.
NOTE
The Global Event Viewer includes records retrieved from meter and Virtual Processor event logs as well
as records transferred from the MSDE system log database.
Chapter 3 - ION Management Console
Page 41
Management Console Network Components
ION Enterprise Administrator’s Guide
Management Console Network Components
The Management Console presents a graphical view of your network, allowing
you to easily add, remove, or configure sites, services and ION meters or other
devices on your network. Furthermore, the Management Console offers
scalability, the ability to clone configuration of servers, sites, and devices, and the
ability to set up dialout modems and connection schedules.
Servers
A server is a computer in an ION Enterprise system running administrative
software that controls access to the network and its resources, such as ION devices,
and provides resources to computers functioning as workstations on the network.
A server runs service components that create communication and software links
between ION systems components, and it creates links into the ION database, too.
Computers with primary and secondary ION Enterprise installations are servers,
as they have the communication software (services) installed. A primary server
contains all software components and the database; a secondary server contains
software but references the primary server for program files and database
information. Both server types connect directly to ION devices via serial, Ethernet,
or modem links, but there can be only one primary server on a network. A client
install on a workstation only has client software, such as Vista, Reporter, and
Designer.
A third party gateway is a general class of devices called “terminal services” that
convert RS-232/RS-485 to and from Ethernet. For example, a third party Ethernet
gateway receives an Ethernet embedded protocol, strips off the Ethernet header,
and sends the embedded messages out one or more serial ports. Likewise, it also
receives a serial message through one of its serial ports, adds an Ethernet header
to the serial protocol, and sends the result out the Ethernet port.
Sites
A site in an ION Enterprise system is a group of devices that share a common
communications link. Depending on the type of site, these devices do not
necessarily need to be at the same location. A site can be a direct site, a modem site,
or an Ethernet gateway site.
Direct Sites, or serial sites, communicate between computers and meters serially
(transmitting data one bit at a time), so you must have and specify a
communications port on the computer and the device. Commonly used serial
interface standards are RS-232 and RS-485. RS-232 is the standard used on most
computers and allows connection to one device. If you are connecting to more than
one device, you need to convert this standard to RS-485. To do this conversion you
need a COM32 or COM128 converting device. A Direct Site is a group of devices
that transmit data one bit at a time.
Page 42
Chapter 3 - ION Management Console
ION Enterprise Administrator’s Guide
Management Console Menus
Modem Sites are remote sites where communications occur between a remote
modem (at the Modem Site) and a local modem (on a server). Even if you have a
very fast modem, the rate that your modem can receive data is limited by the rate
at which the remote modem can transmit data. Either before or after adding the
Modem Site and its associated serial devices, you must add a Dialout Modem to
the Primary (or Secondary) Server. Remote sites that use radio modems or leasedline modems are configured as Direct (Serial) Sites, not as Modem Sites.
Ethernet Gateway Sites consists of an RS-485 chain of devices that communicates
with an Ethernet network via an Ethernet Device (a meter installed on the Ethernet
network) that has a direct connection to the network of serial devices. The
EtherGate protocol allows the Ethernet device to act as a gateway that transfers
data between an Ethernet network and an RS-485 chain of connected devices.
When you add an Ethernet Gateway Site, you provide information about the
Ethernet gateway device, including the TCP/IP port that the serial device (or
network of serial devices) is connected to.
Devices
A device is an ION meter, or other data gathering and communicating component,
that is installed on a network. There are two categories of devices: serial and
Ethernet.
Serial Devices belong to Direct Sites or Modem Sites, so they communicate using
modem, RS-232, or RS-485 connections. Before these types of devices can be added
to the network, they require the prior configuration of a Direct Site or Modem Site.
Ethernet Devices are those that are directly connected to an Ethernet network. You
are not required to create a site for an Ethernet Device, unless you intend to use the
device as an Ethernet Gateway Site. Furthermore, you can manually connect and
disconnect your Ethernet Devices from the Management Console.
Dialout Modems
A Dialout Modem is the modem that a server computer uses to communicate with
a remote modem at a Modem Site.
Connection Schedules
Connection schedules are programmed routines for a server to regularly connect
to and disconnect from Modem Sites and their associated ION (or other) devices.
If so desired, you can also create connection schedules from Direct Sites and
Ethernet Devices / Ethernet Gateway Sites.
Management Console Menus
The Management Console is the starting application for the ION software, where
you can launch system and database applications, update the serial number,
administer ION software user accounts, trim system log database and configure
remote modems.
Chapter 3 - ION Management Console
Page 43
Menu and Submenu Item Descriptions
ION Enterprise Administrator’s Guide
Menu Bar
The Menu bar contains a number of menus, most of which you are already
familiar. The table below lists the submenus and menu items available from the
Menu bar. Menu item and submenu item descriptions follow the table.
Menu Bar Contents
Menu
File
Menu Item
Submenu Item
Print...
Exit
Properties...
Edit
Duplicate
Delete
View
Refresh
Designer...
Diagnostics Viewer...
System
Device Upgrader...
Remote Modem Setup...
Tools
Virtual Processor Setup...
Database Manager
User Manager...
License Manager...
Options...
Help
About...
ION Enterprise Help...
Menu and Submenu Item Descriptions
File Menu
Print: Prints the contents of the Display Screen. You may need to enlarge the
Management Console’s window size and adjust the columns in the Display
Window in order to print all the information. Setting the page orientation to
landscape is also recommended.
Exit: Exits the Management Console application.
Edit Menu
Properties: Opens the Options dialog box for the selected Server, Site or Device.
Duplicate: Makes a duplicate of the selected Server, Site or Device.
Delete: Removes the selected Server, Site or Device from the Management
Console.
Page 44
Chapter 3 - ION Management Console
ION Enterprise Administrator’s Guide
Menu and Submenu Item Descriptions
View Menu
Refresh: Manually updates the Management Console. Pressing F5 does the
same.
Tools Menu
Database Manager: Opens the Database Manager snap-in for the Microsoft
Management Console.
User Manager: Opens a dialog box where you can add, remove, or configure
ION Enterprise software user accounts.
License Manager: Lets you upgrade the number of devices you can have
without re-installing the software.
Options: Opens a dialog box where you can configure the Automatic Refresh
feature. This feature is disabled by default due to the significant processing load
on the computer when many devices are present in the system.
Tools > System
Designer: Launches the Designer application that lets you configure meters and
virtual processors by creating new ION modules, changing links between
modules, or editing setup registers inside existing modules. A logon screen
appears asking you for a valid ION Enterprise username and password.
Diagnostics Viewer: Launches the Diagnostics Viewer application which
provides a tree structure of the ION network, where you can find all associated
events that have been logged. Events are system status occurrences such as data
recording uploading or communication error rates. This is valuable for
troubleshooting your network.
Device Upgrader: Allows you to update the operating software inside your
meters when new releases are available. You can perform the upgrades over
serial, Ethernet, or modem links.
Remote Modem Setup: Helps you set up and test Remote (Modem) Site
modems supported by ION software.
Virtual Processor Setup: Opens the ION Virtual Processor Setup dialog box.
The Virtual Processor is used to bring data together from different sources and
process it for analysis and monitoring applications. You can use the Virtual
Processor to amalgamate readings from many distributed intelligent devices,
launch applications as the result of setpoint conditions, use distributed control,
and more.
Help Menu
About: Displays product information, such as software version and licensee, as
well as copyright protection.
ION Enterprise Help: Launches the ION Enterprise help documentation in a
new browser window.
Chapter 3 - ION Management Console
Page 45
Menu and Submenu Item Descriptions
ION Enterprise Administrator’s Guide
Shortcut Menus
Shortcut menus are accessed by right-clicking in a particular spot within the
Management Console. Depending upon the spot, you open a unique shortcut
menu. The following areas of the Management Console access shortcut menus:
System Setup pane
This shortcut menu allows you to select the size of the icons within the pane.
Title bar
You are given three options when you access this shortcut menu. Refresh
functions in the same way as pressing F5 on the keyboard--it manually updates the
Management Console. Selecting View Field, and then one of the appropriate
column headings, opens a window that displays the entire contents of the column
for whichever row you had selected. This is useful for viewing text that is too long
to fit into the column’s field. Your column heading selection changes according to
whether you are on the Properties tab or Events tab. Properties opens a property
sheet for the Display Window’s column and row settings.
You can choose to filter specific text for the various fields under Column
Properties. Row Properties allows you to configure the color of the row
highlighting (and whether or not you want it) and the number of event records
retrieved when you switch to the Events tab.
Servers
Display Window
Sites
Devices
Page 46
There is a different shortcut menu depending on which Display Window you have
selected (i.e. Devices). Many of the options are the same in each menu, but there
are some options that are menu specific.
Most of the menu specific options fall under New, which is to be expected, since
you are adding a new component according to the Display Screen you are on.
Connect and Disconnect for the Sites shortcut menu do exactly what they say-connect or disconnect the selected site. Likewise, Connect Ethernet and
Disconnect Ethernet to the same for a selected Ethernet device. You cannot
connect or disconnect an individual serial device; this can only be done by
connecting or disconnecting the site to which the serial device belongs. Security...
accesses the Advanced Meter Security Settings dialog box. This is used by the
software to gain access to security enabled devices (i.e. ION 8000 Series); it is only
available from the shortcut menu for the Devices Display Window. When you
select Properties..., a property sheet opens for the selected server, site, or device.
Chapter 3 - ION Management Console
ION Enterprise Administrator’s Guide
Menu and Submenu Item Descriptions
Mandatory properties are highlighted with red and must have values entered for
them when the component is created.
Both Duplicate... and Delete function exactly the same as they do in the Edit
menu.
Component Property Sheet Shortcuts
This shortcut menu is accessed from a property sheet for a server, site, or device.
Selecting Property Details... opens a window containing information on
whichever property you have selected from the property sheet. Advanced
Properties fills reveals the remaining property fields; these are hidden by default
and must be revealed each time you access a components property sheet. Reset All
To Default resets all properties to their original values.
Chapter 3 - ION Management Console
Page 47
Property Details
ION Enterprise Administrator’s Guide
Property Details
A basic property for one type of network component may be located under
advanced properties for another network component type. For example, unit ID is
a basic property for serial devices, but it is an advanced property for Ethernet
devices.
Basic Property List
Property
Description
Computer
The server that is connected to a selected site. It acts as a data server that communicates with an Ethernet
gate or uses a particular Modem channel to connect to remote sites.
Constraints
Baud Rate
The speed of information being transmitted across a serial interface, expressed in bits per second (bps).
When communicating via a serial interface, the baud rate settings for two pieces of equipment must
match. The “auto” value means automatic detection.
Description
This field is for your own information, details, and notes on a particular network component.
Device Type
The type of meter.
Enable
This setting enables the serial port, IP serial port, Ethernet device, serial device, or modem channel for
use. The default setting is YES.
Gateway
The Ethernet host device that is used to access the Ethernet Gateway site.
Group
This box allows you to type or select the logical group to which this device belongs.
Modem Type
The type of modem being used as the dialout modem.
Name
The name of the site or device.
Phone Number
The phone number that the modem will dial to connect to the Modem Site.
RtsCts
Determines whether or not RTS/CTS (Request To Send / Clear To Send) hardware handshaking is enabled
for the site.
Serial Port
This is serial port (COM1, COM2, etc.) on the server that is used for the direct connection. If you have
multiple sites (serial or modem) connected to a server and they are configured to connect at startup, make
sure each site is assigned and connected to a different communications port on the server.
Site
The site that is used to communicate with a particular serial device.
TCP/IP Address
This is the IP address of the gateway host, which is the device listed under the Gateway property.
Unit ID
This is the unit ID of the serial device. This number must be unique among other devices in the same site.
Use DTR
This enables Data Terminal Ready (DTR) signalling for the site. DTR is the name of the serial
communication signal indicating that the computer or device is ready for communication.
Time Synch 3720 Enabled
This enables the transmission of time synchronization messages to 3720 devices.
Time Synch ION Enabled
This enables the transmission of time synchronization messages to ION devices.
Time Synch 3XXX Enabled
This enables the transmission of time synchronization messages to 3XXX devices.
NOTE
The property for enabling or disabling time synchronization appears in the Basic Property List, but the
property for adjusting the time synchronization interval is found in the Advanced Property List.
Page 48
Chapter 3 - ION Management Console
ION Enterprise Administrator’s Guide
Advanced Property List
Advanced Property List
Property
Description
Attempt Increment
This is the number of consecutive unsuccessful requests allowed to the device before a communications
failure is reported. Small values allow the system to keep the polling rate high by quickly ignoring offline
devices; large values allow the system to quickly mark device offline at the expense of rapid polling.
Byte Timeout
This is the time allowed for the next byte in a response from a device (byte-time units).
Connect At Startup
This setting determines whether or not the site gets connected at startup.
Connect Attempts
This is the number of times a device attempts an automatic reconnect before giving up. The supported
range is from -1 to 9999, where -1 equals unlimited attempts.
Data Bits
This specifies the number of data bits used by the serial port. In data transmission, the number of bits used
to send each character, not including any added timing or error checking bits. Contrast with the nondata
bits (start bit, parity bit, stop bits) that are used to separate characters or verify their correct transmission.
ICMP Timeout
This is the time allowed for the device to respond to an existence check.
Max Connections
Maximum number of useful modem connections is 1.
Maximum Attempts Multiple
The number that is multiplied with the value specified in Attempt Increment to determine the maximum
number of communication attempts before an online device node on this site is marked offline.
Num Pad Byte
This specifies the number of bytes used to pad every frame. The supported range is from 0 to 9. The default
value is 2.
Offline Attempt Number
Number of times to attempt to communicate with an offline device. The supported range is from 1 to 10.
The default value is 1.
Offline Event Priority
The priority of a logged system event when the device is marked offline. The supported range is from 0 to
255. The default value is 128.
Offline Timeout Period
The time to delay before attempting to communicate with an offline device. The supported range is from 1
to 9999. The default value is 30.
Online Event Priority
The priority of a logged system event when the device is marked online. The supported range is from 0 to
255. The default value is 10.
Pad Byte
This specifies the padding byte - "dummy" data to fill unused portions of a field such as blanks or zeros that prefixes of every frame.
Parity
Parity used by a serial port. In communications, a simple form of error checking that uses an extra, or
redundant bit, after the data bits but before the stop bit(s).
Receiver Timeout
The time allowed for a device to respond to a request. The supported range is from 1 to 60000. The
default value is 1800.
Stop Bits
Specifies the number of stop bits used to signal the end of the transmission of a group of data bits, such as
those making up a character, during asynchronous transmission. A stop bit at the end of each group of
data bits improves readability.
TCP/IP Port
This specifies the network IP service name or port number assigned for this Ethernet gateway.
Time Synch Ethernet Enabled
This enables the transmission of time synchronization messages to Ethernet devices.
Time Synch Interval 3720
Interval between time synchronization messages for 3720 devices.
Time Synch Interval 3XXX
Interval between time synchronization messages for 3XXX (except 3720) devices.
Time Synch Interval Ethernet
Interval between time synchronization messages for Ethernet devices.
Time Synch Interval ION
Interval between time synchronization messages for ION devices.
Transmit Delay
This specifies the time to delay (in milliseconds) prior to transmitting the next request. The supported range
is 0 to 60000. The default value is 150.
Update Period
Minimum interval between requests to this device. Actual interval may depend on other factors.
Use Acknaks
Asks if message acknowledges should be used to synchronize communications.
Chapter 3 - ION Management Console
Page 49
Detailed Operation
ION Enterprise Administrator’s Guide
Detailed Operation
Your analysis and monitoring system requires one primary Server that controls the
system. Once you have a server set up, you add sites that contain devices. If you
have a large facility with different buildings, you may consider creating a separate
site for each building and then adding the devices that are in various locations
within a building complex.
NOTE
The Management Console lets you make bulk configuration changes by selecting multiple items and
right-clicking; however, you can only perform bulk configuration changes on common types of items. For
example, if you have two Ethernet devices on different computers you cannot disable them by selecting
them both and making the change.
Adding a new network component
1.
Click the button in the System Setup pane that represents the network
component (i.e. Server, Site, Device, or Dialout Modem) you want to add.
2.
Right-click in the display window, select New and the type of Server, Site, or
Device. If you are configuring a modem, you only have one New option.
3.
Configure the properties using the drop-down menus; required properties are
colored red.
If you want to configure advanced properties at this time, right-click and select
Advanced Properties from anywhere within the dialog box.
Right-click a field and
select Property Details
for more information on
a particular property.
4.
Click OK when you are done.
Adding a Modbus TCP device
Page 50
1.
Click the Device button in the System Setup pane.
2.
Right-click in the display window, select New > Ethernet Device. The properties
dialog displays.
Chapter 3 - ION Management Console
ION Enterprise Administrator’s Guide
Detailed Operation
3.
Use the drop-down menus and enter the appropriate information in the fields;
required properties are colored red. You also must enter a Unit ID (found under
Advanced Properties).
4.
Right-click anywhere in the properties dialog box and select Advanced
Properties.
5.
Scroll down to the Unit ID field and enter the appropriate value. Click OK when
you are done.
6.
Right-click on the device in the display window and select Connect Ethernet.
Editing a network component
1.
Click the appropriate button in the System Setup pane, and select the network
component in the display that you wish to edit.
2.
Right-click and select Properties. A menu appears providing access to
configurable options for that component. (Right-click again and select
Advanced Properties to access even more configurable properties.)
For example, if you want to change a COM port setting, you do the following:
1.
Click the Sites button in the System Setup pane.
2.
Select the direct site you want to edit and double-click, or right-click the direct
site and select Properties.
3.
Change the Serial Port entry or click the drop down menu and select the COM
port you want to use.
4.
Click OK to commit the change.
Accessing the ION Log Inserter and ION Virtual Processor (advanced security)
If you have enabled Advanced Security, you need to configure ION software to
access the Virtual Processor and the ION Log Inserter.
1.
Right-click on a device that has Advanced Security enabled and choose
Security....
2.
Select the appropriate settings and click OK. You can also change the user
password.
Performing SQL Statements with the network configuration
You can manually execute SQL statements to the network configuration using the
Management Console.
CAUTION
Altering the network configuration is for advanced users ONLY.
Chapter 3 - ION Management Console
1.
Launch the Management Console.
2.
Hold down the Ctrl key and right-click the title bar above the display window.
Page 51
Detailed Operation
ION Enterprise Administrator’s Guide
3.
Select Custom SQL. You are presented with a warning (once per user session):
4.
Click OK to proceed. Type in your custom SQL statement into the box that
appears in the title bar.
5.
Click Execute when you are done.
The statement results appear in the display window.
Configuring connection schedules
You can create scheduled times when the server connects to a Site.
Page 52
1.
Enter the name of your connection schedule, for example “Daily Reading.”
2.
Click the Sites tab and Change Selection... You can include or exclude the sites
that you want to connect using this dialog, click OK when you are done.
Chapter 3 - ION Management Console
ION Enterprise Administrator’s Guide
Chapter 3 - ION Management Console
Detailed Operation
3.
Make your changes in the Site Connection Settings section and click the
Schedule tab.
4.
Make your changes to the scheduling of the Site Connection, click Apply and
then OK. If you configure a daily full-day schedule, be sure to allow a twominute gap between the time that it stops (end time), and the time that it starts
again (start time).
Page 53
Modifying Management Console Displays
ION Enterprise Administrator’s Guide
Modifying Management Console Displays
Sorting the display
1.
Click on the column header you wish to sort. An arrow appears, indicating
whether the sort is ascending or descending.
2.
Click on the header again if you want to change the direction of the sort.
There are some cases when the display is updated before system changes are
complete. In this situation the new system state is not reflected in the display.
Altering display properties
1.
Right-click on the title area of the display (just above the column headers).
2.
Select Properties from the popup menu to access the display properties. From
this dialog, you can control which columns are shown and enter filter criteria to
restrict which rows are displayed.
Viewing text that is too long to fit
There may be times when the text shown in a display field is too long.
1.
Right-click on the display’s title area (just above the column headers).
2.
Select View Field from the popup menu. Now select the field from the list
provided. For system events, double clicking on the row will display a dialog
showing the complete text of all columns.
Controlling display updates
When the Management Console starts, the display is updated “on demand.” The
actions that trigger updates are as follows:
viewing a different network component
switching between the Properties and Events tabs
after accessing the right-click menus or an Edit menu item
after refreshing the screen (pressing the F5 key)
You have the option of selecting automatic display updates by clicking on the
Tools/Options menu.
Page 54
Chapter 3 - ION Management Console
4
ION Enterprise Utilities
There numerous utilities with specialized functions included with ION Enterprise,
many of which spawn from the Management Console. These utilities perform such
duties as upgrading firmware on a device, viewing your connection diagnostics,
and managing user accounts. Information regarding each utility is provided here.
NOTE
The ION Database Manager has a dedicated chapter called “Database Management” on page 137.
In This Chapter
The ION Diagnostics Viewer . . . . . . . . . . . . . . . . . . . . . . . . . . . . . . . . . . . 56
Main Console . . . . . . . . . . . . . . . . . . . . . . . . . . . . . . . . . . . . . . . . . . . . . . . . . . . . . . . . 56
Service Diagnostics Information . . . . . . . . . . . . . . . . . . . . . . . . . . . . . . . . . . . . . . . . 57
Communications Diagnostics . . . . . . . . . . . . . . . . . . . . . . . . . . . . . . . . . . . . . . . . . . 58
Additional Commands . . . . . . . . . . . . . . . . . . . . . . . . . . . . . . . . . . . . . . . . . . . . . . . . 60
Communication Status vs. Site Status . . . . . . . . . . . . . . . . . . . . . . . . . . . . . . . . . . . . 61
Remote Modem Setup . . . . . . . . . . . . . . . . . . . . . . . . . . . . . . . . . . . . . . . . 62
Using the Remote Modem Setup Utility . . . . . . . . . . . . . . . . . . . . . . . . . . . . . . . . . 63
Device Upgrader . . . . . . . . . . . . . . . . . . . . . . . . . . . . . . . . . . . . . . . . . . . 64
Using the Device Upgrader Utility . . . . . . . . . . . . . . . . . . . . . . . . . . . . . . . . . . . . . . 65
Firmware Upgrade Error Codes . . . . . . . . . . . . . . . . . . . . . . . . . . . . . . . . . . . . . . . . 68
ION User Manager . . . . . . . . . . . . . . . . . . . . . . . . . . . . . . . . . . . . . . . . . . 69
ION License Manager . . . . . . . . . . . . . . . . . . . . . . . . . . . . . . . . . . . . . . . . 70
The Alarm Server . . . . . . . . . . . . . . . . . . . . . . . . . . . . . . . . . . . . . . . . . . . 71
Configuring the Alarm Server . . . . . . . . . . . . . . . . . . . . . . . . . . . . . . . . . . . . . . . . . . 71
Page 55
The ION Diagnostics Viewer
ION Enterprise Administrator’s Guide
The ION Diagnostics Viewer
ION Enterprise comes with a fully featured diagnostics tool called the ION
Diagnostics Viewer. Diagnostics Viewer is the primary source of troubleshooting
information in ION Enterprise. It is highly recommended that if you are not
actively using the Diagnostics Viewer that you shut it down, as it uses system
resources (CPU/memory) that should remain available for other ION Enterprise
applications.
Main Console
The Diagnostics Viewer is accessed via the Management Console Tools menu. The
application displays a tree-view of the available diagnostics information. The
selections are called tree-view nodes. For each node, there may be tabs to change
the type of diagnostics for your selection.
An example of the Diagnostics Viewer main console, with collapsed tree-view
nodes, is shown below:
Tree-view objects:
- the workstation,
- Server Diagnostics,
- Communications Diagnostics
If changes are made to the system topology while Diagnostics Viewer is running,
collapse the ION Enterprise Diagnostics tree-view object (the root of the tree), and
then expand the tree again. The new changes should now be reflected in the treeview.
Changes in Viewing CommServer Console Messages
The CommServer console of PEGASYS V2.x has been removed from view, as it is
now a service. The console messages are still available for viewing through the
Diagnostics Viewer. These console messages can be accessed by viewing the
Service Diagnostics > Communications Server tree-view node, and selecting the
Console Message tab.
It is possible to view CommServer console messages associated with every server
workstation in your ION Enterprise network from any workstation, including
client workstations.
Page 56
Chapter 4 - ION Enterprise Utilities
ION Enterprise Administrator’s Guide
Service Diagnostics Information
Service Diagnostics Information
When you expand the Service Diagnostics node, there is diagnostic information
presented for two services: Communications Server and the ION Log Inserter.
Communications Server Diagnostics
Click on the Communications Server node.
The three tabs below the right pane allow you to view different diagnostic data:
Console Messages, Connection Status, and Tree States.
Console Messages lists all Netman console messages for the current session.
This listing resets if the ION Network Router Service is restarted.
Connection Status displays the current connection status of all software
components connected to Netman.
Tree States displays tree states for all device, Virtual Processor and ION Log
Inserter nodes (for internal use only).
ION Log Inserter Diagnostics
Click on the LOGINSERTER node.
The four tabs below the right pane allow you to view Select Nodes, Node
Information, Node Performance, and Log Performance.
Chapter 4 - ION Enterprise Utilities
Page 57
Communications Diagnostics
ION Enterprise Administrator’s Guide
Select Nodes selects which nodes to include in diagnostics viewing. The devices
and/or nodes of interest can be added or removed by selecting or deselecting the
appropriate check box. Subsequent ION Log Inserter diagnostic queries will
present statistics for only the devices/nodes selected.
Right-clicking in this pane allows access to the Select All and Clear All options.
Select All checks each box and make the diagnostics queries for all devices/
nodes. Clear All clears each box, and devices/nodes must be re-selected for the
diagnostics queries.
Node Information displays information and statistics (with regards to the ION
Log Inserter) for the selected nodes.
Node Performance displays aggregate log performance statistics for the selected
nodes.
Log Performance displays log performance statistics on a per log basis for the
selected nodes.
Communications Diagnostics
Site/device specific diagnostic information is available from the Communications
Diagnostics branch.
Clicking on the Communications Diagnostics node will display each site on the
particular workstation, as well as a Site Overview option that presents summary
information from all sites. Click Communications Diagnostic > Site Overview to
view:
The two tabs below the right pane allow you to view Site Summary and NetUser
Status.
Site Summary displays communications statistics on a per site basis.
NetUser Status displays the state of the incoming and outgoing priority queues,
in particular:
the number of programs currently in the queue awaiting processing
the total number of processed programs
Page 58
Chapter 4 - ION Enterprise Utilities
ION Enterprise Administrator’s Guide
Communications Diagnostics
Site-specific information can be found by clicking the site node.
The three tabs below the right pane allow you to view Communication Status, Site
Status, and Polling Status.
Communication Status displays per site device error rates/diagnostic
information. The following information is available from the Communications
Status tab:
Column
Description
Node
The name of the meter.
Requests
The number of communications requests that have been transmitted to the meter.
Responses
The number of successful responses that have been received.
Total Errors
The total number of errors of all types.
Total Error Rate
The ratio of Total Errors to Requests.
Sliding Error Rate
The ratio of the number of failures in the last 64 requests. An indication of recent communications
performance.
Average Response
Average response time for the meter in seconds.
Last Response
Last response time for the meter in seconds.
Timeouts
The number of timeout errors. A timeout occurs when no data is received in response to a request.
Bad Checksums
The number of received packets where the error-detection checksum failed.
Incomplete Frames
The number of received packets where not all the expected bytes were received.
Bad Frames
The number of received packets that had an internal error.
Broken Connections
Number of times the connection was lost to the meter. Applicable only meters on an Ethernet site.
Hardware Errors
Number of errors that were reported by the PC communication hardware.
Misc Errors
Number of errors that occurred that do not fit any of the above descriptions.
Site Status displays site statistics such as connection status and site totals.
Polling Status displays per site program information.
Chapter 4 - ION Enterprise Utilities
Page 59
Additional Commands
ION Enterprise Administrator’s Guide
NOTE
Requests and responses are transmitted between the ION Enterprise components as ION programs.
Additional Commands
Diagnostic Details Box
Double-click on a device in the right pane to display a summary box for that
device. The summary box appears as follows:
Use the Previous and Next buttons to move to the previous and next devices on
that site.
Use Ctrl+C to copy information to the clipboard for reports or other purposes.
Update/Reset/Copy All/Options
The following options are also available when viewing a given diagnostic table:
Update, Reset, Copy All, and Options.
To access these functions, right-click on the diagnostic table:
Page 60
Chapter 4 - ION Enterprise Utilities
ION Enterprise Administrator’s Guide
Communication Status vs. Site Status
The commands perform the following functions:
Right Click Option
Description
Update
Performs a manual refresh of the diagnostic table.
Reset
Performs a manual reset on the diagnostic table.
Copy All
Copies all selected information to the clipboard.
Options
Presents a dialog allowing the automatic update time to be adjusted.
Please note that adjusting the update time does affect ION Enterprise
performance.
Communication Status vs. Site Status
It is important to understand the difference between the statistics provided on the
Communication Status tab and those on the Site Status tab.
Communication Status provides a statistic called Total Errors, while the Site Status
provides a statistic called Bad Responses. At first one might assume these
statistics are the same, however, this is not true. Total Errors is an ION Site Service
derived statistic, while Bad Responses is a Client derived statistic.
To explain this difference, consider a situation where a direct site is experiencing
timeouts. Communications with the device will be attempted according to two
parameters: Connect Attempts (an advanced site property in the Management
Console), and Maximum Attempts Multiple (an advanced device property in the
Management Console). Multiplying the values of these two properties will
determine the number of attempts made to re-establish communications with the
device.
For instance, if Connect Attempts is set to 1 and Maximum Attempts Multiple is
set to 3, after three timeouts (i.e. on the fourth timeout) the device will go offline.
If there were only two timeouts before the device responded, then
communications would be re-established and the device would remain online.
Chapter 4 - ION Enterprise Utilities
Page 61
Remote Modem Setup
ION Enterprise Administrator’s Guide
Each time the ION Site Service sees a timeout, the Total Errors statistic increments
by one. However, the Bad Responses statistic (because it is at the client level), does
not see each individual timeout, but rather only sees a bad response if the device
goes offline (i.e. the Connect Attempts and Maximum Attempts Multiple are
exceeded).
Consider the case mentioned above where four timeouts occur and the device goes
offline. Total Errors would increment by four, while Bad Responses would only
increment by one. For the case when only two timeouts occur, Total Errors would
increment by two, while Bad Responses would not increment at all.
Remote Modem Setup
Communication between a workstation running ION software and a remote
installation of a power meter is made possible through the use of modems.
The Remote Modem Setup utility lets you configure your remote modems and
your workstation serial port. The utility uses a database that contains
configuration data for a variety of modems, and provides direct access to your
modem so you can customize settings and troubleshoot operation.
NOTE
The meter internal modem is NOT configured with Remote Modem Setup. Refer to your meter
documentation for information regarding the meter internal modem.
Before Getting Started
Ensure that you meet the following requirements before you perform remote
modem configuration:
You have installed the required components (including the Remote Modem
Setup utility).
You have the modem you wish to configure either connected to your work
station serial port (external modems) or properly installed inside your computer
(internal modems).
You have your modem user manual available.
Communications Port Considerations
You cannot use the Remote Modem Setup utility to configure your modem
through a serial port that the Communications Server is using. If you want to
configure the modem through the same port that the Communication Server uses,
shut down the Communication Server before initializing communications with
your modem.
Page 62
Chapter 4 - ION Enterprise Utilities
ION Enterprise Administrator’s Guide
Using the Remote Modem Setup Utility
Using the Remote Modem Setup Utility
Remote Modem Setup can be used to perform all required modem configuration
functions.
Activating the utility
1.
Launch the Management Console.
2.
Select Tools > System > Configure Remote Modems. The Remote Modem Setup
utility window appears.
The Serial Port For Configuring Modem settings let you communicate to the
modem so you can configure it to be used at a remote site. Once you can
communicate to your modem via the Serial Port For Configuring Modem settings,
the Remote Modem Settings let you set the configuration parameters that the
modem uses at the remote site.
Serial Port For Configuring Modem
Port - select the workstation COM port that you have connected the modem to
(so you can configure the modem with the settings it uses at the remote site).
Baud Rate – select the COM port baud rate.
Remote Modem Settings
CAUTION
The settings you choose for a remote modem cannot be changed once the modem is installed at the
remote location. You need to bring the modem back to a workstation and use the Remote Modem Setup
utility.
Type – select your modem type from the list (the list includes all supported
modem types).
Site Baud Rate – select the baud rate that the modem uses at the remote site.
Chapter 4 - ION Enterprise Utilities
Page 63
Device Upgrader
ION Enterprise Administrator’s Guide
NOTE
To reduce possible communications problems, set the workstation, modems, and meter(s) to the same
baud rate.
Auto Answer check box – select the box so the modem answers the phone line
after the number of rings indicated in the Number of Rings field. Clearing the
Auto Answer check box disables the Auto Answer and Number of Rings
features.
Number of Rings – specify how many times the phone line should ring before
the modem answers.
Store Profile check box – check to save the modem configuration data in the
modem onboard memory. The modem reverts to these settings after being
cycled off and on. (Check Store Profile after you have finished configuring a
modem for use at a remote site. This ensures that the modem still operates
properly after a power outage). Clearing the Store Profile check box disables the
Store Profile feature.
Speaker On check box – check to activate the modem internal speaker, and set
the volume in the Volume field. Clearing the Speaker On check box disables the
Speaker On and Volume features.
Volume – specify the modem internal speaker volume as Low, Medium or
High.
After you have configured your modem for remote site use, click the Send button
to save the settings to the modem.
Device Upgrader
Each ION meter and certain meter components (such as the ION 7300 series
Ethernet card; ION 7700 XPRESS card or MGT) use firmware to store operating
software. You can upgrade your ION device to a newer version of operating
software by simply upgrading its firmware. ION software includes a device
upgrade utility that you can use to quickly upgrade each ION device in your
system.
Use the Device Upgrader utility to upgrade the firmware on a single ION device
or to upgrade multiple ION devices of the same type in a single session. If your
ION software Security System has been configured, then Supervisor password
authority (level 5) is required to upgrade ION devices.
Page 64
Chapter 4 - ION Enterprise Utilities
ION Enterprise Administrator’s Guide
Using the Device Upgrader Utility
You access the Device Upgrader utility from the Management Console. After you
have access to the application, a message appears recommending best practices to
reduce downtime during the firmware upgrade process:
Laptop computer considerations
Laptop computers generally have different default power option properties than
desktop computers. Incorrect power options can adversely affect the Device
Upgrader’s performance, because the connection between the laptop and the
device must be maintained in order for the Device Upgrader to complete its task.
If the laptop’s hard disk shuts down or the laptop enters system standby mode,
this connection is broken and the Device Upgrader must be restarted.
When using the Device Upgrader utility from a laptop computer, it is recommended
that you follow these guidelines:
Plug the laptop into a wall outlet. Do not run the laptop on its battery pack.
Configure the hard disks so that they do not shut down after a certain period of
time (i.e. set to “never”).
Turn off power suspension (e.g. system standby) and hibernate options.
Disable options that power down the laptop when it is closed. This prevents a
shut down if the laptop is accidentally closed.
Disable the screensaver; screensavers can burden the CPU.
Using the Device Upgrader Utility
The following instructions detail how to upgrade one or more devices of the same
type. If you need to upgrade devices that are different types, then you must
perform the following instructions for each device. For example, if you need to
upgrade an ION 7330 meter and an ION 7330 Ethernet card for meter email, then
you must perform the following instructions first for the meter, and then again for
the Ethernet card.
NOTE
Data stored in the meter’s memory is lost during a firmware upgrade. This data includes waveforms, data
recorders, min and max values, and integrators (e.g. kWh).
Chapter 4 - ION Enterprise Utilities
Page 65
Using the Device Upgrader Utility
ION Enterprise Administrator’s Guide
Upgrading your ION device(s):
1.
Launch the Management Console.
2.
Go to Tools > System and select Device Upgrader.
3.
Type your username and password, and click OK.
Use “guest” and “0” if ION software security has not been configured. Refer to
the ION Security technical note for more information.
A text file appears with usage information and firmware compatibility data.
When you have read the text file and you are ready to upgrade your devices,
click OK. The Device Upgrader window display:
4.
Page 66
Select the appropriate device from List Devices of Type. The Device Upgrader
searches your system configuration and lists all the supported devices of that
type in the Select Devices to Upgrade box (shown below).
Chapter 4 - ION Enterprise Utilities
ION Enterprise Administrator’s Guide
Using the Device Upgrader Utility
5.
Select the device(s) you want from Select Devices to Upgrade. To make multiple
selections, hold down the Ctrl key.
The Save/Restore Framework check box is selected by default so that you do not
lose your current framework template during the upgrade. When selected the
Device Upgrader restores the framework after the firmware download. Clearing
the Save/Restore Framework check box deletes the current framework template
for each selected device when the firmware upgrade is complete; there is no
framework configuration in the upgraded devices. It is recommended that you
leave this check box selected.
6.
If you are upgrading multiple devices, specify in the Failure Handling area how
the Device Upgrader responds to an unsuccessful upgrade:
Save/Restore framework is enabled by default, so
custom frameworks are not overwritten during upgrade.
Select Halt After if you want to specify the number of failed device
upgrades that can occur before the utility stops.
By default, the utility is set to stop after the first failed upgrade. If, for example,
you increase this number to 5, the Firmware Upgrade utility continues to
upgrade devices until the entire selection has been upgraded, or a total of five
devices have failed the upgrade process.
Select Ignore All to attempt to upgrade all of the selected devices regardless
of the number of devices that fail to upgrade.
Failure handling is useful when upgrading large numbers of devices. Because
the upgrade process is time-consuming, you may choose to leave the Device
Upgrader to operate unattended. By setting the failure handling accordingly,
you can instruct the Device Upgrader to continue the upgrade even after
encountering problems with one or more devices. Possible causes for device
upgrade failure are communications interruption, a locked device not in test
mode, et cetera.
7.
In the Select Revision section, click the Select File button. In the Revision File
Selection box, locate the revision file that you want to use, and click Open.
The selected file and revision number are displayed below the Select File
button. This file is downloaded to all the devices that are highlighted in the
Select Devices to Upgrade list.
8.
Click OK to upgrade the selected device(s).
The Upgrade Status box describes each step in the upgrade process, and the
Percent Completed bar indicates the progress of each upgrade. Each completed
upgrade is noted in the Upgrade Status box.
Chapter 4 - ION Enterprise Utilities
Page 67
Firmware Upgrade Error Codes
ION Enterprise Administrator’s Guide
NOTE
If connection to the device is lost during an upgrade, restart the Device Upgrader procedure.
Firmware Upgrade Error Codes
This table describes the various error codes that may occur when you upgrade your
device's firmware.
Page 68
Error Code
Description
0, 1, 2, 3, 4, 5, 6, 7, 8, or 9
Indicates a negative acknowledgment to a request. Contact Technical Services for assistance.
100
Device timed out while downloading firmware. Probable cause: poor communication, or device
stopped functioning.
101, 102, 103, 104, 105
Indicates a bad response to a request. Contact Technical Services for assistance.
106
Device Upgrader was unable to prepare the device to accept new firmware. Try to upgrade the
device again. Contact Technical Services for assistance if the problem persists.
107
Device Upgrader was unable to verify the device's new firmware. Try to upgrade the device again.
Contact Technical Services for assistance if the error persists.
108
Device Upgrader was unable to download a firmware packet. Try to upgrade the device again.
Contact Technical Services for assistance if the error persists.
109
Device Upgrader was unable to retrieve the device framework. Probable causes: a) time out, or b)
device not functioning.
110
Device Upgrader was unable to retrieve the device's firmware revision. Probable causes: a) time out,
b) device not functioning, or c) can not access the device's firmware revision register.
150
Device Upgrader cannot save the device framework to the file <device_name>.conf. Make sure the
ION Enterprise\config\upgrade directory exists and that you have write permissions.
151, 155
The Device Upgrader failed to successfully upgrade a device and left a <device_name>.conf file.
Probable cause: you are attempting to upgrade a different device than the one which the Device
Upgrader previously failed.
152
The information in the file <device_name>.conf is corrupted or unrecognizable by the Device
Upgrader. Contact Technical Services for assistance.
153
The Device Upgrader was unable to upgrade the device framework from ION 1.0 to ION 2.0.
Contact Technical Services for assistance.
154
Device Upgrader was unable to restore the device setup. Probable causes: a) time out, or b) device
not functioning.
156
Device Upgrader was unable to restore the device framework completely to the file
<device_name>.conf. This error is most likely caused by a full hard drive.
Chapter 4 - ION Enterprise Utilities
ION Enterprise Administrator’s Guide
ION User Manager
ION User Manager
Selecting User Manager opens a dialog box where you can add, remove, or configure
ION Enterprise software user accounts.
The access level that is specified for a user account defines the types of operations
that you can perform: it defines how you can use the software to view and
acknowledge meter data or set up configuration changes that are sent to a meter.
NOTE
A valid user account is required to log on to any ION software application. If it is the first time that an
ION software component has been launched, and/or user accounts have not been created, a Logon
window with a default “guest” user name displays when you launch the application.
The Management Console provides two default ION software security settings:
guest and supervisor. Both security settings use 0 (zero) for the password. These
settings have supervisor privileges, allowing complete control of the system. The
user name and password should be changed from the factory-set default values.
Chapter 4 - ION Enterprise Utilities
Supervisor
Operator
Controller
User
View Only
Software access does not necessarily give a user any access rights to view or
configure meter information. For example, when Standard security is enabled, you
can be logged on to Designer with Supervisor access; if you make a change to one
of the ION modules and then Send & Save this change, the meter requests the
meter password before allowing the change on the meter. If Advanced security is
enabled on the meter you need to supply a user name and password to connect to
the meter and view data. The table below summarizes the user accounts and their
permissions.
View Vista or Designer diagrams
YES
YES
YES
YES
YES
Connect/disconnect sites or devices
YES
YES
YES
-
-
Modify network configuration
(using Management Console)
YES
YES
-
-
-
Change Vista or Designer diagrams
YES
-
-
-
-
Administer software security
YES
-
-
-
-
Page 69
ION License Manager
ION Enterprise Administrator’s Guide
NOTE
Vista control objects have a default “may operate” setting of Controller(3). If you want individuals with
“User” security access to be able to perform a control object’s double-click action, you must change the
“may operate” level to User(2).
Keep a list of your ION Enterprise user accounts and their associated passwords
in a safe place. Be sure to update the list as you add users, remove accounts, and
change passwords.
For more information on both ION software security and ION meter security, refer
to the ION Security technical note.
ION License Manager
The ION License Manager allows you to increase the number of devices your ION
Enterprise system can support. Selecting License Manager from the Tools menu in
the Management Console opens the following dialog:
The System Info area contains your current Product Key number, the number of
devices you currently have in your system, and the maximum number of devices
that are supported based on your current Product Key.
When you want to upgrade the number of devices you can support, enter your
new ION Enterprise Product Key number in the Product Key field and click Apply.
The Current Product Key field is updated with the number you just entered, and
the Maximum # Devices field is updated to reflect the new number of devices that
you can support.
Page 70
Chapter 4 - ION Enterprise Utilities
ION Enterprise Administrator’s Guide
The Alarm Server
The Alarm Server
The Alarm Server is commonly used to receive alarms from a remote meter that is
not continuously or permanently connected to the ION Enterprise network. The
Alarm Server with a dedicated modem and a dedicated phone line monitors a
remote site for a priority event, and when it detects that a priority event has
occurred, typically launches the ION Enterprise Connection Manager to establish
communications with the remote meter and upload its data. Following is a sequence
of steps that outlines the process:
1.
A meter at a remote site records a power system priority event, and initiates
an alert using a remote-site modem (an internal modem within an ION meter
or an external modem) programmed to dial the Alarm Server’s dedicated
modem phone number.
2.
The Alarm Server dedicated modem is contacted and the alert is passed to the
Alarm Server.
3.
The Alarm Server (which has been monitoring the phone line waiting for a
remote meter to annunciate a priority event) receives the alert, and immediately
requests that the ION Enterprise Connection Manager establish communication
with the remote meter to upload its records.
Server
Alarm Server.exe
2. Server computer
receives the alarm
Alarm Server
Dedicated Modem
1. Remote Site
informs the Alarm
Server that a
priority message
exists
Connection
Manager
3. Connection
Any Dialout
Modem
Modem Site
Internal/External
Remote Modem
Manager contacts
the modem site and
retrieves meter data
The Alarm Server uses a series of command line arguments to specify the actions
it takes when a priority event is reported. These commands must be entered on the
ION Enterprise Primary or Secondary server computer that is running the Alarm
Server utility. Although the Alarm Server is typically configured to launch the
Connection Manager which dials up the remote site and retrieves the logs from the
devices, the Alarm Server can also be configured to launch other applications. A
series of parameter switches are added to the command line to pass information
about the event to the application that is launched. More information regarding
command lines and command line arguments is presented in the following
sections.
Configuring the Alarm Server
The Alarm Server should have a dedicated phone line, modem, and COM port on
the ION Enterprise server computer to avoid conflicts with other ION software
components.
Chapter 4 - ION Enterprise Utilities
Page 71
Configuring the Alarm Server
ION Enterprise Administrator’s Guide
The modem used by the Alarm Server is not configured with the Management
Console--only dialout modems are configured in the Management Console. The
Alarm Server's executable, alarmsrv.exe, is typically located in:
C:\Program Files\Power Measurement\ION Enterprise\SYSTEM\bin.
You can run the Alarm Server in a console window, or you can define a shortcut
icon that includes all of the command line arguments required. Defining an Alarm
Server shortcut is recommended because you type the Alarm Sever command line
only once, when the shortcut is initially defined (the command line can be
modified at any time, however). Alternatively, running the Alarm Server in a
console window requires you to type the Alarm Sever command line every time
that you launch the Alarm Server.
Preparation for Alarm Server Configuration
In addition to setting up your ION Enterprise network in the Management Console
to model your physical communications network, an Alert module must be set up
for each remote meter that will contact the Alarm Server.
Setting up the Remote Meter Alert Module
An Alert module for each meter at the remote site must be configured prior to the
Alarm Server configuration, because Alarm Server command line arguments
reference the remote meter Alert module information.
The Alert module is part of the meter firmware, and can be set up to send an alert
for each high priority event. Refer to the online ION Programmer’s Reference for
complete details on the Alert module.
For the remote meter to send an alert to the Alarm Server, the following Alert
module setup registers must be configured:
Type: Enter ION ALERT for alerts to the Alarm Server.
Destination: This string register identifies the alert's destination. Because the
Alarm Server alert is sent over a modem, enter the dialing string that the modem
will dial.
Com Port: Enter the COM port that the remote meter uses to send an alert to the
Alarm Server i.e. the serial COM port where the internal or external modem is
wired.
Lockout Time: When you set the Type setup register to ION Alert (for alerts to the
Alarm Server), the Lockout Time setup register must be set to a value greater than
zero.
For successfully sent alerts, the Lockout Time specifies a period (in seconds)
that all Alert modules wait before another alert transmission can begin.
Triggers received by Alert modules remain pending until the lockout expires.
Lockout Time begins after the alert succeeds (lockout will not occur if the
messaging attempt fails).
Location: The Location register identifies the meter that is sending the alert. Enter
the meter name into this register, exactly as it appears in the Management
Console. The Location setup register only applies to ION Alerts (or PEGASYS
alerts) to the Alarm Server; see the Type setup register.
Page 72
Chapter 4 - ION Enterprise Utilities
ION Enterprise Administrator’s Guide
Configuring the Alarm Server
Configuring an Alarm Server Shortcut with a Command Line
This section describes how to create a shortcut to the Alarm Server that includes
the command line arguments required for the Alarm Server to respond to an alert.
You may want to read the instructions before proceeding, including the section
“Defining Alarm Server Command Line Arguments” on page 75, as you will need
to enter an Alarm Server command line for step 5.
1.
Open the ION Enterprise Tools folder, right-click in the folder, and select NEW
> SHORTCUT.
An icon titled “New Shortcut”appears in the folder, and the Create Shortcut
dialog box prompts you to type the location of the Alarm Server executable for
which you are making the shortcut.
Chapter 4 - ION Enterprise Utilities
2.
Click the Browse button and locate alarmsrv.exe. In this case, alarmsrv.exe is
located in the \ION Enterprise\SYSTEM\bin folder.
3.
Rename the shortcut (e.g. Alarm Server). The shortcut icon changes to an Alarm
Server icon.
Page 73
Configuring the Alarm Server
ION Enterprise Administrator’s Guide
4.
Right-click on the Alarm Server shortcut, select Properties, then click the tab
named Shortcut.
To configure the Alarm Server response, command line arguments for the
remote meter to be contacted, modem to be used etc. MUST be added to the
information in the Target field.
5.
Refer to the next section “Defining Alarm Server Command Line Arguments” to
learn what the Alarm Server command line arguments signify. Then type the
Alarm Server command line arguments following the path information in the
shortcut Target field as shown in the diagram below, and click OK.
In this example, the complete command line looks like this:
"C:\Program Files\Power Measurement\ION
Enterprise\system\bin\alarmsrv.exe" -m"Generic ION Modem - Hayes/GVC/
Zoom"-cCOM1 "conman -p1800 %g"
NOTE
If the default path includes spaces in between the words (in the example above, there is a space between
the words “Power” and “Measurement”), then you must surround the path in quotes for the path to be
valid.
6.
Page 74
Double-click the Alarm Server icon to start the Alarm Server.
Chapter 4 - ION Enterprise Utilities
ION Enterprise Administrator’s Guide
Configuring the Alarm Server
Defining Alarm Server Command Line Arguments
The command line arguments for a typical Alarm Server application look like this:
-m"Generic ION Modem - Hayes/GVC/Zoom"-cCOM1 "conman -p1800 %g"
:
-m =
the type of dialout modem that Alarm Server will use to contact the remote site
-cCOM1=
the COM port on the server that will be used by the Alarm Server dedicated modem
conman =
ION software Connection Manager that will contact the modem site and retrieve
priority messages for the ION database
-p =
the time to stay connected in seconds
%g" =
the remote site where the meter that sent the alert is located
The command line arguments above instructs Alarm Server to use a Generic
Hayes/GVC/Zoom dial out modem connected to the server COM 1 to contact the
remote site where the meter that sent the alert resides, and to launch Connection
Manager for a 1800 second (30 minute) connection to the site so meter data logs can
be uploaded.
CAUTION
The command line syntax must be exact; a space between characters may cause the command line to
fail. The dialout modem and remote site syntax must match the information in the ION software,
described in the following paragraphs.
The modem syntax must match exactly what appears in the Dialout Modem
Options settings in the Management Console as shown below:
Chapter 4 - ION Enterprise Utilities
Page 75
Configuring the Alarm Server
ION Enterprise Administrator’s Guide
As indicated in the preceding formatting example, the syntax %g refers to the
remote site where the meter that sent the alert to the Alarm Server is located. This
syntax “%g” references the information entered for the remote meter Alert module
Location register, and is used by the Alarm Server to locate the remote site where
the meter that sent the alert resides, so the Alarm Server can upload meter data
logs from that site. In this example, the meter that sent the alert to the Alarm Server
is named Meter.Feeder_A.
The remote meter name entered for the Alert module Location register must match
the meter name exactly as it was originally typed in the Management Console
Devices screen.
Alarm Server Command Line Arguments for Launching Windows Net Send
The command line arguments for launching the Windows net program look like
this:
Alarmsrv.exe “net send MARCOM_3456 please check this problem: %t %n %m”
CAUTION
If using the net send command, be sure to enclose the message within single quotes (') or no quotes (as
in the examples above and below), otherwise the net send command will not work. When specifying the
launch of multiple programs, each program is separated by regular quotations (") —see the example
below for details.
This command launches the Windows net program and sends a message to the
workstation named MARCOM_3456. The message reads “Please check this
problem” followed by the timestamp, the name of the node that sent the message,
and the event message programmed into the node.
Page 76
Chapter 4 - ION Enterprise Utilities
ION Enterprise Administrator’s Guide
Configuring the Alarm Server
The display on workstation MARCOM_3456 might look like this:
Supported Alarm Server Command Line Arguments
The Alarm Server supports the following command line arguments:
–m “<modem type>”
Specifies the type of dialout modem that the Alarm Server will use to contact the remote site. The
string must be enclosed in double-quotes, and match the name of the modem as it appears in the
Management Console1.
–c <port>
Specifies which COM port Alarm Server uses on the server computer. COM 1 is used by default.
–b <baud rate>
Specifies the data rate; 9600 bps is used by default.
-D
Displays diagnostics.
–l
Indicates that priority event messages are not to be stored in the ION software system log.
–w
Include –w if both the Alarm Server and the Communications Services share one COM port on the
server computer. If you wish to use the same modem for both the Alarm Server and for dialing out to
a remote site, please contact Technical Services for more information.
“conman %g“
Use “conman %g” to have Alarm Server launch the Connection Manager and connect to the site that
issued the priority message. When the %g is passed to the Connection Manager, it is replaced by the
name of the site where the meter resides that issued the priority message.
“<program>%<x>”
If you want to launch an executable in response to the priority message (i.e. instead of, or in addition
to, launching Connection Manager), enclose the program’s name in double-quotes. The program
you reference must be available in one of the folders specified by the workstation’s PATH variable.
1
Chapter 4 - ION Enterprise Utilities
To verify the modem name: 1) Open the Management Console and click the Dialout Modems icon.
2) Right-click in the Dialout Modems content window and select New... . 3) Examine the drop-down list
in the Modem Type field.
Page 77
Configuring the Alarm Server
ION Enterprise Administrator’s Guide
You can have the Alarm Server pass information to the launched program by adding
different % parameters. The Alarm Server substitutes the corresponding value for
each of the % parameters shown below. These parameters must be added after the
program name, but within the double-quotes.
Page 78
Parameter
Value passed to launched program
%T
local timestamp in Unix time (number of seconds since Jan. 1, 1970)
%t
local timestamp in date format (YYYY/MM/DD hh:mm:ss:mmm)
%U
universal timestamp in Unix time (number of seconds since Jan. 1, 1970)
%u
universal timestamp in date format (YYYY/MM/DD hh:mm:Ss:mmm)
%n
node name of priority message source
%P
alarm priority (0 to 255)
%p
alarm priority (text format; “low”, “medium”, “high”, or “urgent”)
%M
message, delimited by double-quotes
%m
message without delimiter
%g
site name where the remote meter that sent the alert resides
%%
the percent symbol %
Chapter 4 - ION Enterprise Utilities
5
ION Designer
Designer is the component of the ION software that lets you configure IONcompliant nodes on your network. An ION-compliant node can be a software
component running on a workstation; for example the Log Inserter or the ION
Virtual Processor. It can also be an independent intelligent electronic device (IED),
such as ION 7300 series meters.
Designer provides a graphic environment where you can easily visualize a node's
configuration, and where you can link ION modules together to customize a node
for your particular application. By graphically representing a node, Designer
makes it easy to cut, copy and paste functionality within a single node or between
nodes. This allows you to program many nodes, quickly and efficiently.
In This Chapter
Getting Started with ION Designer . . . . . . . . . . . . . . . . . . . . . . . . . . . . . . 80
Starting Designer . . . . . . . . . . . . . . . . . . . . . . . . . . . . . . . . . . . . . . . . . . . . . . . . . . . . . 80
The Designer Interface . . . . . . . . . . . . . . . . . . . . . . . . . . . . . . . . . . . . . . . . . . . . . . . . 81
Quitting Designer . . . . . . . . . . . . . . . . . . . . . . . . . . . . . . . . . . . . . . . . . . . . . . . . . . . . . 83
The Node Diagram . . . . . . . . . . . . . . . . . . . . . . . . . . . . . . . . . . . . . . . . . . 84
Using a Node Diagram . . . . . . . . . . . . . . . . . . . . . . . . . . . . . . . . . . . . . . . . . . . . . . . . 85
Icons . . . . . . . . . . . . . . . . . . . . . . . . . . . . . . . . . . . . . . . . . . . . . . . . . . . . . . . . . . . . . . . . 88
Grouping Windows . . . . . . . . . . . . . . . . . . . . . . . . . . . . . . . . . . . . . . . . . . . . . . . . . . . 92
Windows . . . . . . . . . . . . . . . . . . . . . . . . . . . . . . . . . . . . . . . . . . . . . . . . . . . . . . . . . . . . 94
Working with ION Modules . . . . . . . . . . . . . . . . . . . . . . . . . . . . . . . . . . . 96
Using ION Modules . . . . . . . . . . . . . . . . . . . . . . . . . . . . . . . . . . . . . . . . . . . . . . . . . . . 96
Designer Shortcuts . . . . . . . . . . . . . . . . . . . . . . . . . . . . . . . . . . . . . . . . . . . . . . . . . . . 105
Linking and Configuring ION Modules . . . . . . . . . . . . . . . . . . . . . . . . . . . . . . . . . 107
Deleting Links . . . . . . . . . . . . . . . . . . . . . . . . . . . . . . . . . . . . . . . . . . . . . . . . . . . . . . 113
Configuring ION Modules . . . . . . . . . . . . . . . . . . . . . . . . . . . . . . . . . . . . . . . . . . . . 116
Copying and Pasting ION Modules . . . . . . . . . . . . . . . . . . . . . . . . . . . . . . . . . . . . 123
Viewing Output Registers, Setup Registers, and Inputs . . . . . . . . . . . . . . . . . . . 132
Time of Use (TOU) Program Management . . . . . . . . . . . . . . . . . . . . . . . . 134
Advanced TOU Schedule Configuration . . . . . . . . . . . . . . . . . . . . . . . . . . . . . . . . 135
Page 79
Getting Started with ION Designer
ION Enterprise Administrator’s Guide
Getting Started with ION Designer
Designer is based on ION® architecture. ION treats the functions used in
traditional power monitoring as discrete modular objects that can be
interconnected and customized. These objects, known as ION modules, are the
basic building blocks that comprise a node.
Designer is used to make any changes to the operation of an ION node. The Virtual
Processor, the Log Inserter, and ION devices are all configured using Designer. To
use Designer effectively, you should have some experience working with your
operating system.
NOTE
Before using Designer, you should be familiar with the full ION software system, including the ION
architecture.
Starting Designer
You can start Designer from the Management Console.
1.
Open the Management Console. From the Tools menu, select System >
Designer.
The Designer start up screen is displayed as Designer connects to your network.
Normally Designer connects within ten seconds; however, some connections
(for example, a remote access or heavily loaded network connection) may
require more time.
2.
Upon connecting to the system, Designer prompts you to log on by entering a
user name and password.
Logging on
Designer requires all users to log on to the ION Enterprise network.
Page 80
Chapter 5 - ION Designer
ION Enterprise Administrator’s Guide
The Designer Interface
If you have a user name and password you can log on with Change mode for full
access. If you don't have a user name and password, you can log on with View
Only mode for limited access.
Change mode: Full access. A user logged on in Change mode can configure any
aspect of an ION-compliant node.
View Only mode: Limited access. A user logged on in View Only mode can
view module configuration, links and layout, but cannot make changes.
The user name identifies you as a registered Designer user. This name may be your
name, employee number, or any unique combination of letters and/or numbers.
The default user name is guest.
The password acts as a security key. It may consist of any combination of letters
and/or numbers. The default password is 0.
NOTE
Neither the user name nor password needs to match your Windows Username and Password.
1.
If you have a user name and password, type them into the Name and
Password fields, and then click OK.
2.
If you don't have a user name and password, click View Only.
Once you have logged on, the main Designer screen is displayed.
The Designer Interface
The Designer interface consists of a main screen with a title bar, a menu bar, a
toolbar, a workspace, and a status bar
.
Title bar
Located at the top of the screen is the title bar.
The title bar displays the name of the program (“Designer”), the user name (for
example, “guest”) and the name of the active node diagram.
Chapter 5 - ION Designer
Page 81
The Designer Interface
ION Enterprise Administrator’s Guide
Menu bar
Just below the title bar is the menu bar.
Clicking on a menu name displays a list of available commands. You can use the
mouse or keyboard to select a command from the menu bar.
Choosing a command from the menu bar
1.
On the menu bar, use the mouse to click on a menu name (or press ALT and
then type the underlined letter in the menu name).
The menu appears, displaying a list of commands.
2.
On the menu, click on the desired command (or type the underlined letter in the
command).
Some commands carry out an action immediately; commands followed by an
ellipsis (...) display a dialog box where you can specify additional options.
In some cases, you can choose commands by typing a shortcut key combination
(for example, pressing SHIFT+F4 activates the Arrange All command from the
Window menu). When available, the shortcut key combination is displayed on the
menu beside the command.
Toolbar
Below the menu bar is the toolbar. The toolbar consists of a row of buttons, offering
quick access to the commands that are used most frequently. Each command
offered on the toolbar is also available from the menu bar.
From left to right, the toolbar commands are Open; Save; Reset Module; Create A
Link; Cut; Copy; Paste; and Help.
To choose a command from the toolbar, click on the corresponding toolbar button.
For a description of a toolbar command, move the mouse pointer over the toolbar
button; the button's function appears on the status bar at the bottom of the screen,
and on a small label or ToolTip beside the button.
Workspace
The main area in the center of the Designer screen is the workspace. The
workspace is where you view and edit node diagrams.
Status bar
Located below the workspace is the status bar. The status bar displays information
on specific Designer functions.
Page 82
Chapter 5 - ION Designer
ION Enterprise Administrator’s Guide
Quitting Designer
On the left side of the status bar is the status line. The status line describes any
active processes and provides brief descriptions of the currently selected
command or toolbar button. For example, when you move the mouse pointer over
a toolbar button or click on a menu name, a brief description of the item appears
in the status line (e.g. Create a Link).
On the right side of the status bar is a time display, a progress indicator, and two
communication status lights. The time display shows the present time (set within
Windows); the progress indicator depicts the progress of an action being
performed; and the communication status lights flash briefly to indicate if
Designer is currently communicating on the ION network (receiving or
transmitting data).
Quitting Designer
When you have finished using Designer, you can choose Exit from the File menu
to quit the program.
1.
From the File menu, choose Exit.
A message box appears, prompting you to confirm your intention to exit.
2.
Choose Yes to quit, or No to return to Designer.
If you attempt to quit without saving your work, Designer prompts you to save
your changes.
Chapter 5 - ION Designer
Page 83
The Node Diagram
ION Enterprise Administrator’s Guide
The Node Diagram
A node diagram is a graphical representation of an ION-compliant node. When
you view a node diagram, you are actually viewing the configuration of the node
itself. Node diagrams use module icons to represent ION modules, and lines
drawn between icons to depict links between modules.
Module links
Module icon
Grouping object
In some cases, groups of modules are organized into grouping windows. When
open, a grouping window displays the module icons contained within. When
closed, it appears as a grouping icon.
The first time you view a node, Designer displays a default node diagram that
depicts the node's present configuration. You can change the configuration of the
node just by editing this node diagram; for example, when you delete a module
from a node diagram, the module is removed from both the diagram and the node.
You can add, configure, link and delete modules on the node, all by editing the
modules in the node diagram.
NOTE
You must have sufficient security clearance to make any changes to a node diagram.
Page 84
Chapter 5 - ION Designer
ION Enterprise Administrator’s Guide
Using a Node Diagram
Using a Node Diagram
Every ION node contains a number of ION modules. The links between these
modules are displayed graphically in a node diagram. The node diagram shows all
the modules currently programmed on the node with lines indicating which
modules are linked together. It also provides access to the setup registers of each
module so you can set them appropriately.
A node diagram can be edited, which provides an intuitive, graphical method for
programming a node. You can drag and drop ION modules into a node diagram,
then link them together to configure the node. Every ION-compliant node on the
network has its own unique node diagram.
You can configure the following types of ION nodes using Designer:
ION meters
ION Virtual Processor
ION Log Inserter
NOTE
You can also configure nodes that are not ION-compliant, such as 3000-series devices. (For more on
this, see “Configuring 3000-series devices.”)
The Virtual Processor and the Log Inserter nodes are software nodes; they are
programs that run on a computer on the ION Enterprise network. The ION meters
are physical hardware devices. Designer provides the same interface for
configuring both hardware and software nodes.
You can use any workstation on the ION Enterprise network for node
configuration as long as it is registered to use Designer. Before beginning, ensure
that the communication link to the node you intend to configure is working. If
there are communication problems while you are configuring a node, you may
lose your changes and leave the node in an undesirable state.
Automatic Diagrams in Designer
Designer is aware of both the meter type and the service type (volts mode) of each
meter on your network. When a meter is opened in Designer, the default diagram
for the appropriate meter and service type are loaded automatically. This is
especially helpful with meters that have several different form factors.
NOTE
All default diagrams provided with Designer have been created using standard Designer tools. You can
use them the same way you would use any Node diagram. If you have configuration access rights, you
can also edit or customize a default diagram.
Chapter 5 - ION Designer
Page 85
Using a Node Diagram
ION Enterprise Administrator’s Guide
Opening a Node Diagram
Before you can view or edit a node, you must first open the node's associated node
diagram. You can display a list of available nodes by choosing Open from the File
menu.
When you select a node from the list, Designer communicates with the specified
node and opens the applicable node diagram.
CAUTION
Do not open a node diagram if the node is currently being configured from its front panel.
1.
From the File menu, choose Open.
2.
In the Select Node dialog box, select the node you want to open. Click OK.
Designer displays the specified node diagram.
When Designer loads a node diagram, it compares the diagram with the
configuration of the node. If there are any discrepancies between the diagram and
the node, Designer updates the diagram to match the node:
If a diagram depicts a module that does not exist on the node, Designer deletes
the module icon from the diagram.
If a node contains a module that is not depicted in the diagram, Designer adds
the module icon to the diagram.
If the links between modules differ from node to diagram, Designer adjusts the
diagram to match the node.
A node diagram typically does not differ from the node's true configuration unless
the node's configuration was changed via another means (for example, with a
remote display unit.)
Once you have opened a node diagram, you can view or edit the configuration of
the node. If you make any changes to the diagram, you may choose to save them
to the node.
Page 86
Chapter 5 - ION Designer
ION Enterprise Administrator’s Guide
Using a Node Diagram
Printing a Node Diagram
You can print any part of a node diagram using the Windows Clipboard. (For a
detailed description of how the Windows Clipboard works, refer to the Microsoft
Windows 2000 documentation.)
1.
Click on the title bar of the window you want to print (i.e. either the root
window or one of the open grouping windows). This brings the selected
window to the foreground.
2.
Use the scroll bars to scroll to the portion of the node diagram you want to print.
(If the area you want to print does not fit in one screen, you will need to print in
multiple steps.)
3.
From the File menu, choose Print Window. The standard Print dialog box
appears offering various options depending on the printer to which you are
attached. Select the options you want, and click OK. This prints the entire
Designer workspace that is visible on the screen.
4.
Repeat steps 1-3 until you have printed all the areas of the node diagram you
want to print.
An alternative to printing each screen separately is to make screen captures of each
area of the node diagram, copy each one to the clipboard and paste them into any
application that supports printing (e.g. Paint or WordPad). You can then use the
standard printing technique of the selected application to print all the Designer
screens at once.
Saving a Node Diagram
Saving a node diagram serves two purposes: it saves your changes to the diagram,
and applies your changes to the node. Do one of the following:
To save the active node diagram, choose Send & Save from the File menu.
To save all open node diagrams, choose Send & Save All from the File menu.
The revised node diagram is sent and saved to the node.
Closing a Node Diagram
Once you have finished viewing or editing a node diagram, you can close it by
choosing Close or Close All from the File menu. Close quits the active diagram;
Close All quits all open diagrams and grouping windows.
If you attempt to close a diagram without first saving your changes, Designer
displays a warning, and a list of the modules affected.
Chapter 5 - ION Designer
Page 87
Icons
ION Enterprise Administrator’s Guide
You can then choose to Close Anyway (and discard the changes) or press OK to
return to the diagram and save the changes.
If you reopen a diagram containing unsaved changes, Designer may list the unsaved
changes as offline modules.
1.
Do one of the following:
From the File menu, choose Close to close the active diagram.
From the File menu, choose Close All to close all open diagrams and
windows.
2.
If you have not saved your work, Designer displays a list of modules that have
not been sent to the node. You can then do one of two things:
Choose OK to return to the diagram. You can then choose Send & Save
from the File menu to save your work before closing the diagram.
Choose the Close Anyway button to discard any unsaved changes and close
the diagram.
Icons
In each node diagram, Designer uses icons to represent the configuration of the
node. There are two basic types of icons: module icons (below left) and grouping
icons (below right).
Module icons represent ION modules located on the node. Grouping icons
represent a group of module icons.
NOTE
A module icon with a symbol
in the lower corner is called a shortcut icon.
Module Icons
All module icons share four common elements: a label, a graphic, an input symbol
and an output symbol.
The label displays the name of the module. Initially, the label displays the
module's default name, but the label can be changed to read whatever you want.
(For more on displaying labels, see “Displaying default labels or custom labels”
on page 90.)
The graphic indicates the basic function of the module.
Page 88
Chapter 5 - ION Designer
ION Enterprise Administrator’s Guide
Icons
The input and output symbols provide access to the module's input and output
registers. Clicking on the left symbol displays a list of inputs; clicking on the
right symbol lists output registers. (For more on this, see “Linking and
Configuring ION Modules” on page 107.)
You will notice that some module icons have a double border while others do not.
Module icons with a double border represent core modules; module icons with a
single border represent standard modules.
Grouping Icons
Grouping icons represent grouping windows. Double-clicking on a grouping icon
opens the associated grouping window.
Grouping windows contain module icons. You can use grouping windows to
group module icons by application; for example, a single grouping window may
contain all module icons required for demand or advanced setup routines.
You can use a grouping window much like a standard window. You can create,
rename or delete a grouping window; you can move a grouping window within a
diagram, and you can move a module into or out of a grouping window.
When you have finished, you can close the grouping window to save space on
your node diagram.
Opening a grouping window
Double-click on the grouping icon.
Closing a grouping window
Click Close in the top-right corner of the grouping window.
Displaying Default or Custom Icon Labels
Module icons can display two types of labels: default labels and custom labels. You
can display either type by selecting or deselecting the Show Default Labels option
on the Options menu. (This is a global setting that applies to all node diagrams.)
All modules have a default label. The default label appears in node diagrams, user
diagrams and event logs unless a custom label is available. Each default label
identifies the module by type and if applicable, by number.
Custom labels are available only if they have been preconfigured by a user. A
custom label usually identifies a module by its function or purpose. Custom labels
are useful for describing modules, setup registers, output registers, and Boolean
ON/OFF conditions.
Chapter 5 - ION Designer
Page 89
Icons
ION Enterprise Administrator’s Guide
Displaying default labels or custom labels
Click Show Default Labels on the Options menu to toggle the option on or off.
When Show Default Labels is selected, default labels are displayed
When the check box is cleared, custom labels are displayed.
Moving and Arranging Icons in a Node Diagram
You can move module and grouping icons anywhere in a node diagram. This is
useful for organizing your diagram (for example, by function or type) so that you
can easily find a particular module, or visualize the workings of your node's
configuration. You can move a single icon or group of icons within a single node
diagram, or into an open grouping window. Both standard and core module icons
may be moved.
You can use the Alignment and Grid options to adjust the spacing and layout of
the module and grouping icons in your node diagram. Use the Alignment option
to specify the horizontal and vertical arrangement of the selected icons, and the
Grid option to activate and configure invisible guidelines.
This section describes how to move one or more icons, and how to use the
Alignment and Grid options to arrange a group of icons.
NOTE
Simply moving or arranging the icons in a node diagram does not affect the function of the modules or
the node in any way.
Moving a single icon
Moving an icon is a simple matter of selecting it and dragging it to the new
location. A selected icon is identified by handles along the edges.
1.
Click the icon you want to move (avoiding the symbols).
2.
Drag it to the new location and release the mouse button.
NOTE
When a grouping icon is selected, all icons within the associated grouping window are automatically
selected as well.
Page 90
Chapter 5 - ION Designer
ION Enterprise Administrator’s Guide
Icons
Moving a group of icons
You can move a group of icons by selecting each icon in the group and then dragging
the selected group to the new location. Dragging one selected icon moves the entire
group.
1.
Do one of the following:
Hold down SHIFT and then click each icon you want to move (clicking a
selected icon will clear it).
Click outside of the group and drag a selection box around the icons.
2.
Drag the selection to the new location.
NOTE
When selecting a group of icons, you can only choose icons from within the active window.
Aligning Icons
You specify the alignment of icons by selecting the modules you want to align and
choosing Layout from the Edit menu. On the Layout dialog box, choose the Align
tab to display the available horizontal and vertical alignment options.
The option names in each column describe the criteria by which you can align
modules. For example, if you select Left Sides and Space Evenly under Vertical,
Designer aligns all objects in the selection by their left sides (using the left most object
for reference) and distribute them evenly along a vertical axis.
1.
Select the icons that you want to align. (To select a group of icons, hold down
SHIFT and then click on each one, or click outside of the group and drag a
selection box around the icons).
2.
From the Edit menu, choose Layout.
3.
On the Layout box, choose the Align tab. Here you can specify the horizontal
and vertical alignment of the icons.
4.
Select the options you want, and then click the OK button.
Using the grid
To assist you in laying out module and grouping icons, Designer provides an
invisible grid. Icons placed onto the grid snap to the nearest gridline, helping you
to space them evenly.
Chapter 5 - ION Designer
Page 91
Grouping Windows
ION Enterprise Administrator’s Guide
Select Layout from the Edit menu and choose the Grid tab to view the Grid
options.
On the Grid tab you can activate or deactivate the grid, and specify the distance (in
pixels) between gridlines.
Activating and deactivating the grid
1.
From the Edit menu, choose Layout.
2.
On the Layout box, choose the Grid tab.
3.
On the Grid Tab, select either No Grid to turn the grid off, or Grid Size in Pixels
to activate the grid. You can specify the size of the grid by typing a number into
the Grid Size in Pixels field.
4.
Click OK.
Grouping Windows
A grouping window is like a folder or sub-window where you can store any icons
that you want to keep together. You can open a grouping window by doubleclicking its grouping icon.
This section describes how to move an icon into a grouping window, and how to
add, rename and delete a grouping window.
Moving Icons into a Grouping Window
You can move an icon or group of icons to or from an open grouping window by
selecting it and dragging it to the new location.
1.
Double-click on a grouping icon to open the grouping window.
The grouping window is displayed. Grab the window by the title bar and
position it so that you can see the icon(s) that you want to move.
Page 92
Chapter 5 - ION Designer
ION Enterprise Administrator’s Guide
Grouping Windows
2.
Select the icon or group of icons and drag it into the grouping window.
When you move a linked module icon into a grouping window, any lines
representing links to modules outside the window will disappear. Although the
modules remain linked, the visible lines will not extend beyond the grouping
window.
NOTE
You can “nest” grouping windows by placing a grouping object inside another grouping window.
Creating a New Grouping Window
You can create a new grouping window by dragging the grouping object from the
ION modules toolbox and dropping it onto the node diagram.
The ION modules toolbox is a collection of ION modules and generic tools that
you can add to a node diagram. If the ION modules toolbox is not displayed,
choose Show Toolbox from the Options menu.
When you point to an object in the toolbox, the name of the object is displayed on
a ToolTip. You can use ToolTips to identify the grouping object in the toolbox.
On the ION Modules toolbox, click on the grouping object, and drag it onto the
node diagram. Release the mouse button to place the object in the diagram. When
you release the mouse button, a grouping icon appears in the diagram.
Renaming a Grouping Window
When you create a new grouping window, the default name is that of the node
diagram. You can change the name of a grouping window by renaming the
grouping icon.
1.
Chapter 5 - ION Designer
Right-click on the grouping icon and select Properties to view the available
options:
Page 93
Windows
ION Enterprise Administrator’s Guide
2.
From the Grouping Object Configuration box, you can configure the caption,
font, and positioning of the grouping icon's label. The caption is the name of
both the grouping icon and the grouping window.
3.
Select Use Custom from the Caption section, and type the new name into the
text box. Click OK.
Changing the Font of a Grouping Window
If you want to customize the appearance of a caption, you can change its font.
Available font options include font (typeface), style and size.
1.
Under Font, do one of the following:
To use the default window font (that is, the font specified for the parent
window) select Inherit from Parent Window.
To use a different font, select Custom, then click Font to display the
standard Windows font dialog box. Here you can choose a new font and
click OK to continue.
Changing the Position of the Caption
If you want to change the location of the caption, you can choose to position it above
or below the grouping icon.
1.
Under Position, select either Top or Bottom to specify a caption position above
or below the grouping icon.
2.
Click OK.
Deleting a Grouping Window
When you delete a grouping window, any modules inside are deleted as well.
(Designer warns you before deleting modules. For more on deleting modules, see
“Removing an ION Module” on page 100.)
1.
Select the grouping window you want to delete by clicking on its grouping
icon.
2.
Press the Delete key.
If the grouping window is empty, it will be deleted.
If the grouping window contains modules, Designer displays a list of
modules that will be deleted. (For more on this, see “Removing an ION
Module” on page 100.)
Windows
If you want to create links between several node diagrams or grouping windows,
you need to position the open windows so you can see all the modules involved.
You can use the Window menu in the toolbar to quickly organize open windows
in the workspace.
Page 94
Chapter 5 - ION Designer
ION Enterprise Administrator’s Guide
Windows
Arranging windows in your workspace
Do one of the following from the Window menu:
To locate an open window and move it to the foreground, choose the window
name from the list of open windows on the Window menu.
To arrange all open windows in the workspace, choose Arrange All.
Changing a Window’s Background Color
By default, the background color of all windows in a node diagram is light gray.
(This color setting is independent of the Windows color settings specified in the
Windows control panel.) You can choose a new background color for any window
in a node.
1.
Right-click anywhere on the background of a node diagram or grouping
window (avoiding clicking on modules).
2.
From the pop-up menu, choose Background Color. The Color dialog box is
displayed.
3.
Click on the color you want or press Define Custom Colors to create your own
color. (Refer to your Windows documentation for additional information about
using the Colors dialog box.)
4.
Click OK.
When choosing a background color, consider how the color affects the visibility of
icons and links. Links, highlights and shadow effects used to depict the various
states of an ION module may not appear against certain background colors. For
this reason, you should avoid using certain colors for your background;
particularly white, dark gray and black.
Changing a Window’s Default Font
You can specify a default font to be used for all module icons, grouping icons and
text boxes in a window. (Fonts can also be specified individually for grouping
windows and text boxes.)
Chapter 5 - ION Designer
1.
Right-click anywhere on the background of the window (avoid clicking on
modules).
2.
From the pop-up menu, choose Default Font to display the standard Windows
Font dialog box. Here you can specify the default font, size and style. (Refer to
your Windows documentation).
3.
Click OK.
Page 95
Working with ION Modules
ION Enterprise Administrator’s Guide
Working with ION Modules
Once you have opened a node diagram, you can view or edit the node's
configuration by working with its ION modules. As described earlier, each
module performs a specific function. Using Designer, you can add, remove or link
modules together to customize the function of the node.
This section explains how to add and remove ION modules from your node
diagram. It describes the basic types of modules, and explains how you can
organize your node diagram by grouping modules together, arranging them, and
labeling them.
Using ION Modules
You can change the function of a node by editing the appropriate module(s) in the
node diagram. This section describes how to locate an existing module, how to
create a new module, and how to delete a module. It also explains how to create a
shortcut to a module, and how to view the contents of a module in text format.
(Once you have located or created the module you want, you can configure it using
the procedure described in “Linking and Configuring ION Modules” on
page 107.)
Module Status: Online and Offline
The terms “online” and “offline” describe whether a module is currently active or
not. A module is described as online when it is functioning normally (monitoring
its input and updating its output registers). An offline module is inactive.
Anytime you send and save changes to a node, Designer temporarily takes the
affected modules offline and programs them with your changes. Once they have
been programmed, the modules are then placed back online.
Normally, this is a routine procedure; however, certain circumstances may
prevent a module from returning online. For example, if the node lacks sufficient
processing power to operate the module, the module remain offline.
You can easily identify any offline modules: all offline modules are highlighted
with a red outline. In addition, whenever you open a node diagram, Designer
displays a list of all offline modules in the node, including those that are not
immediately visible (for example, those located in a grouping window).
NOTE
If you have offline modules in your node, you may be able to put them back online by choosing Send &
Save from the File menu.
Page 96
Chapter 5 - ION Designer
ION Enterprise Administrator’s Guide
Using ION Modules
Module Status: Programmed vs. Pending
The terms “programmed” and “pending” refer to whether or not a module's
representation in the node diagram matches the node itself. A programmed
module is one that is the same both in the node diagram and in the node. The links,
labels and setup register values in the node diagram exactly match those on the
node. When you first open a node diagram, all the modules appear programmed
since they are read directly from the node itself and then displayed in the node
diagram.
Once you start editing a node diagram, module icons appear differently to indicate
that they have been edited. If you change a module in the node diagram (for
example, re-link it or edit its setup registers), it will not match the node until you
choose Send and Save from the File menu. Until it is saved, the edited module is
depicted as pending to indicate that it does not match the configuration on the
node. When you send and save your changes to the node, the module will become
programmed.
Core Modules and Standard Modules
There are two basic types of ION modules: core modules and standard modules.
Core modules are required ION modules that are fundamental to the operation of
the node. You cannot create or delete core modules, and in some cases, you cannot
configure them. Core module icons are identified by a double border around the
edge. The Power Meter module is an example of a core module.
Standard modules are reusable ION modules. Generally, most modules in a node
are standard modules. You can create or delete standard modules as required.
Standard modules are represented by icons with single borders. The Setpoint
module is an example of a standard module.
Chapter 5 - ION Designer
Page 97
Using ION Modules
ION Enterprise Administrator’s Guide
Displaying the ION Modules Toolbox
The ION Modules toolbox is a collection of ION modules and generic tools that
you can add to a node diagram. To display the ION Modules toolbox, select Show
Toolbox from the Options menu.
The type and quantity of modules offered on a toolbox varies depending on the
type of node you are configuring; however, the generic tools (the grouping and
text objects) are available for all nodes.
NOTE
To identify a module in the toolbox, point to it with the mouse - the module type is displayed as a ToolTip
beside the module, and on the status line at the bottom of the screen.
You can add a module to your node diagram (and to the node itself) by dragging
its icon from the toolbox into the diagram window. You can move the toolbox
around the workspace by grabbing its title bar and dragging it to the new location.
Opening the ION Modules toolbox
From the Options menu, select Show Toolbox.
Closing the ION Modules toolbox
Click the Close button in the top-right corner of the toolbox, or deselect Show
Toolbox on the Options menu.
Locating an Existing ION Module
Before you can edit a module, you must first locate it in the node diagram. If you
do not know where to find the module, you can locate it using the module tray
feature of the ION Modules toolbox. The module tray displays links to all modules
of the specified type that are currently in use on the node.
NOTE
If the toolbox is not displayed, select Show Toolbox from the Options menu.
Page 98
Chapter 5 - ION Designer
ION Enterprise Administrator’s Guide
Using ION Modules
To display the module tray, find the type of module you want on the ION Modules
toolbox, and then click it with the right mouse button. The module tray appears
beside the toolbox.
In this example, there are
eight Display modules on
the module tray.
Inside the tray are links to all modules of the specified type that are currently
programmed on the node. To identify a link in the tray, point to it with the mouse
- the module's label is displayed on the status line at the bottom of the screen.
To locate the module, click on its link in the module tray. Designer locates the
selected module and displays it in the center of the workspace. If the module is
located inside a grouping window, Designer opens the window to display the
module.
To close the module tray, left-click on the Toolbox.
Locating an existing module from the module tray
1.
In the ION Modules toolbox, right-click on the icon of the module type that
you want to locate. The module tray is displayed.
2.
In the module tray, click on the module you want to locate. (To close the module
tray, click on a different module icon in the toolbox.)
Designer locates and displays the module.
Creating a New ION Module
Most nodes are pre-programmed at the factory with a selection of modules
designed to provide the most commonly required functions. If however, the
factory default configuration is not appropriate for your application, you may
decide to create a new ION module. (For a description of the modules and the links
included in a node's default configuration, refer to the user documentation
supplied with the device.)
Creating a module on a node is a simple matter of dragging a module icon from the
ION Modules toolbox and dropping it onto the node diagram.
1.
On the ION Modules toolbox, click the icon of the module you want to create,
and drag it onto the node diagram.
As you drag the icon, the cursor changes shape to indicate you are placing an
object.
Chapter 5 - ION Designer
Page 99
Using ION Modules
ION Enterprise Administrator’s Guide
2.
Release the mouse button to place the module in the diagram.
When you release the mouse button, Designer creates the module and places a
pending module icon into the diagram. You can then proceed to link and configure
the module.
Removing an ION Module
You can remove a standard ION module from a node by deleting its icon from the
node diagram. By removing unnecessary modules from the node, you can free up
resources for use elsewhere.
While the action of removing a module is easy (simply select the module icon and
press the DELETE key), it is important to consider the effect this has on other
functions in the node.
Each time a module is deleted, all of its output registers, setup registers and input
links are deleted as well. Removing this information from the node affects the
operation of any modules that depend on it. For this reason, you should be aware
of all dependent modules (also known as owners) before deleting anything.
Checking for Dependent Modules
When two linked modules are located in the same window, Designer depicts the
link as a thin line that runs from the output register of the first module to the input
of the second. You can easily identify the dependent module (or owner) by the line
running to its input. However, if one of the linked modules is located in a different
window, the connection is not visible. A more effective way to locate a module's
owners is to view the owners of its registers.
Viewing the owners of a module's setup and output registers
A register is a type of memory bank that stores a module's linking and configuration
information. Each module uses two types of registers: output registers and setup
registers. By viewing a register's owners, you can quickly identify all dependent
modules on the node. You can determine what purpose the modules serve, and then
decide whether to delete them or not.
1.
Do one of the following:
To view the output register's owners, right-click on the output symbol (the
on the right).
To view the setup register's owners, hold the CTRL key and then right-click
on the output symbol.
Page 100
Chapter 5 - ION Designer
ION Enterprise Administrator’s Guide
Using ION Modules
A dialog box appears listing all of the module's registers, and any dependent
modules on the node. (Dependent modules located on other nodes are not
displayed.)
2.
Click on a register in the list on the left to display all local owners of that register
in the box on the right. Owner information includes the module name or label,
and its relevant input. Note that owners located on a different node are NOT
displayed in this dialog box.
3.
If necessary, you can delete the link between a register and one of its owners by
selecting the owner from the list and choosing the Unlink button. (For more on
deleting module links, see “Deleting Links” on page 113.)
4.
When you have finished viewing the register owners, click OK.
Displaying a module's register owners is an effective way of locating all dependent
modules on the selected node; but remember that any dependent module that is
located on another node will not appear on the list of owners.
Viewing owners on other nodes
If you remove a module with a dependent module on another node, the
dependent's inputs are not reset. It continues to look for the deleted output
register.
If you are not sure whether a module has dependents on other nodes, check with
the person who programmed them to ensure you do not disrupt the operation of
any modules on that node. If you still want to remove the module, you may want
to directly delete the link on the other node first. This ensures that the module is
not inadvertently linked to the next module to occupy the location of the deleted
module.
Deleting or Cutting an ION module
Once you have determined that you can safely remove an ION module without
disrupting other functions, there are two ways you can remove it. You can either
delete the module by selecting the icon and then pressing the DELETE key; or you
can cut it by selecting the icon and then choosing Cut from the Edit menu.
In either case, Designer immediately removes the icon from the node diagram, and
deletes the module from the node. The difference is, when you delete a module, it
is discarded; but when you cut a module, it can be restored (by choosing Paste
from the Edit menu).
Chapter 5 - ION Designer
Page 101
Using ION Modules
ION Enterprise Administrator’s Guide
NOTE
You do not have to select Send and Save Changes to delete a module. Designer immediately removes
the module from both the diagram and the node.
Removing an ION module from the node
1.
Select the icon of the module you want to remove. (To select a group of icons,
hold down the SHIFT key and then click each one.)
2.
Do one of the following:
To cut the module, choose Cut from the Edit menu.
To discard the module, press the DELETE key.
NOTE
If a module has a dependent module on another node, Designer does NOT alert you of the dependency
when you delete it. Before you delete a module, ensure that you are aware of all links to modules on other
nodes.
Designer displays a summary of the proposed changes.
The summary lists all selected modules, and identifies those in the selection that
will be deleted (including those with dependents), and those that will not.
Clicking on a module in this list displays any additional information available.
3.
Click OK to remove the selected modules (or Cancel to abort this procedure).
Designer removes the module icon from the node diagram, and deletes the module
from the node itself.
NOTE
If you delete a shortcut icon, the original module is not affected; however, when you delete the original
module, all shortcuts to that module are also deleted.
Page 102
Chapter 5 - ION Designer
ION Enterprise Administrator’s Guide
Using ION Modules
Viewing the Text of an ION Node or Module
You can display the complete contents of one or more modules or an entire ION
node by choosing View Diagram Text from the Options menu. Use this option to
view the specified information on your screen, sort it, or print a copy for your
records.
The View Diagram Text function can be useful to anyone performing a diagnostic
analysis of your system, or creating a detailed record of your node's configuration.
1.
Select the module(s) that you want to display:
To select a single module, left-click on the module.
To select a group of modules, hold the SHIFT key and left-click on each
module.
To select all modules in the node, left-click anywhere in the background of
the main node window (being careful not to click on a module icon) and
then choose Select All from the Edit menu.
NOTE
Clicking in the background of any window displays the text for all modules contained within that window
(and within any of its grouping windows). To select all modules in the node, make sure you click in the
background of the main (root) window of the node diagram.
2.
Chapter 5 - ION Designer
From the Options menu, choose View Diagram Text. The text window is
displayed. The text of any modules that are offline appears in red.
Page 103
Using ION Modules
ION Enterprise Administrator’s Guide
The Text View screen offers several ways to view, sort and find information:
View: In the View box, click on the arrow to choose one of two view modes:
Archive or Diagnostic. Use the Archive mode to display information useful for
archiving the node's configuration. Use the Diagnostic mode to display
diagnostic information on the selected module(s).
Sort By: The Sort By box offers several sort parameters. In Archive view, the Sort
By box offers Default, Module Class, and Module Name. Diagnostic view offers
the same three parameters plus two more: Module State and Module Update
Period.
The Default setting sorts information by module label, Module Class sorts by the
type of module, and Module Name sorts modules by the default label. Module State
displays offline modules first, in alphabetical order, followed by online modules,
again in alphabetical order. Module Update Period displays event driven modules
first, then inactive (not updating) modules, followed by high-speed (one cycle
updates) modules, and finally high-accuracy (one second updates) modules (sorted
alphabetically within each group).
Find: To locate a text string, type the text in the Find box and click the Find
button.
Refresh: To reset the text view after you have made a configuration change, click
the Refresh button.
If you want to print a copy of the text view information, press the Print button
located in the lower-right corner of the Text View window. When you have
finished viewing the text view information, choose Close to quit this function.
Creating a Shortcut to an ION Module
To save time switching between modules in different windows, you can create a
shortcut icon in one window that represents the original module in the other
window.
A shortcut icon is identified by a
icon.
symbol in the lower left corner of a module
Creating a shortcut icon
Hold down SHIFT+CTRL, and then left-click on a module icon and drag it to the
window where you want the shortcut to go. Release the mouse button to place the
new shortcut icon.
You can create multiple shortcuts by selecting a group of icons, and then holding
SHIFT+CTRL, click on one of the group and drag it to the new location.
Once you have created a shortcut icon, you can use it in the same way you would
use the original module icon. Both icons support the same features; however, if
you delete the shortcut icon, the original module icon is not deleted. Deleting the
module icon deletes all shortcuts to that module.
Page 104
Chapter 5 - ION Designer
ION Enterprise Administrator’s Guide
Designer Shortcuts
NOTE
You cannot create more than one shortcut icon per window for a single module.
Designer Shortcuts
Designer provides several functions designed to assist you with programming
your ION nodes. Various useful functions are found by using different
combinations of the Shift and Ctrl keys when clicking on modules. The following
table summarizes the functions you can perform on modules:
Action
Result
Left-click on input
The list of inputs appears - you can select an input
and link it to another module's output register
Shift + left-click on input
The list of inputs appears with the current input values
displayed in square brackets
Right-click on input
The Delete Link dialog appears - you can break links
from this dialog.
Shift + right-click on input
The Delete Link dialog appears, showing inputs and
current input values in square brackets
Left-click on output
The list of output registers appears
Shift + left-click on output
The list of output registers appears with the current
register value displayed in square brackets
Ctrl + left-click on output
The list of setup registers appears - these setup
registers can be linked to inputs on other modules
Shift + Ctrl + left-click on output
The list of setup registers appears with the current
register settings displayed in square brackets
Right-click on output
The list of output register owners appears - you can
break links from this dialog
Ctrl + right-click on output
The list of setup register owners appears - you can
break links from this dialog
Creating a Text Box
A text box displays any text you type into it. You can place a text box anywhere in
a node diagram, and move it or resize it as necessary. You can use a text box to
describe any process or function in your system; for example, you can label
individual components of your system, or display a block of descriptive text or
instructions.
Creating a new text box is a simple matter of dragging the Text object (
the ION Modules toolbox and dropping it onto the node diagram.
Chapter 5 - ION Designer
) from
Page 105
Designer Shortcuts
ION Enterprise Administrator’s Guide
NOTE
If the toolbox is not displayed, select Show Toolbox from the Options menu.
Creating a new text box
1.
On the ION Modules toolbox, click on the Text object and drag it onto the node
diagram. Release the mouse button to place the object in your diagram.
When you release the mouse button, a text box appears in the diagram with the
default message: “Your text goes here.”
2.
To replace this message with your text, right-click on the text box.
The Text Box Configuration dialog box is displayed.
3.
On the Edit Text tab, do one of the following:
To display the name of the node in the text box, select Use Default.
To display your own message, select Use Custom, and then type your text
into the field provided.
4.
Click OK.
The text box displays your specified text.
Resizing a Text Box
If a text box appears incomplete or truncated, you may need to adjust its size or
dimensions. You can resize a text box by clicking it once to select it, and then
dragging its handles.
1.
Click on the text box to select it.
The selected box is identified by handles.
Page 106
Chapter 5 - ION Designer
ION Enterprise Administrator’s Guide
Linking and Configuring ION Modules
2.
Do one of the following:
To make the object larger or smaller, drag a corner handle.
To stretch the object horizontally or vertically, drag a middle handle.
Changing the Font of a Text Box
The font, size and style of the text used in the text box is based on the default setting
specified for the active window. If you want to use a different font without resetting
the default, you can specify a new font for the text box.
1.
Right-click on the text box.
2.
On the Text Box Configuration dialog box, choose the Text tab.
3.
Under Font, do one of the following.
To use the default window font (that is, the font specified for the parent
window) select Inherit from Parent Window.
To use a different font, select Custom, then click the Font button to display
the standard Windows font dialog box. Here you can specify a font, style
and size. Click OK to continue. (For more on using the Font dialog box, refer
to your Windows 95 or Windows NT documentation).
4.
Under Position, click an alignment setting for your text: Left, Center or Right.
5.
Click OK.
Adding a border or background color to a text box
If you want to change the appearance of a text box, you can add a border, change
the background color, or both.
1.
Right-click on the text box.
2.
On the Text Box Configuration dialog box, choose the Box tab.
3.
Do either of the following:
Under Border, select Show, and then click the Color button to choose a
border color. In the Width in Pixels field, type a border width.
Under Background Color, select Custom, and then click the Color button to
choose a background color.
4.
Click OK.
Linking and Configuring ION Modules
Linking ION modules together is the foundation of programming ION-compliant
nodes in the ION software. Although an ION module can perform a function in
isolation, the strength and flexibility of the ION architecture comes from the ability
to interconnect modules to build more sophisticated functions.
Chapter 5 - ION Designer
Page 107
Linking and Configuring ION Modules
ION Enterprise Administrator’s Guide
The order in which you perform operations in Designer is flexible. For example,
you may choose to create many modules at once and then do all the linking
afterwards, or you may prefer to create and link each module one by one. You can
link all the mandatory inputs of a group of modules from left to right, and then go
back to link the optional inputs. You can even configure the setup registers of the
modules before you link them, or after.
Regardless of the order in which you edit a node diagram, always ensure that
when you send and save your changes to the node, you are not sending incomplete
functions that might behave unexpectedly.
Choosing which ION Modules to Link
The first step in linking modules is to decide which modules you want to use.
When choosing a module to link, you have two choices: you can create and link a
new module, or you can re-link an existing module.
In some cases, you may not want to create a new module. For example, if all the
modules of a particular type are already created, you will want to re-link one of
them to perform the new function. Some devices are preconfigured at the factory
to provide common measurements and calculations. If any of these factory
defaults are unnecessary in your application, you can unlink the modules involved
and reuse them.
A node diagram may also contain modules that have been created, but not linked
to anything. For example, you could drag several Minimum modules onto the
node diagram, link half of them, and then send and save the node diagram without
linking the rest of the. The inactive Minimum modules, though, would limit the
number of modules available for other functions.
If the node contains modules that are created in the node diagram but not currently
linked, you should use these modules before creating new ones. This makes it
easier to keep track of module resources.
You may also want to find a module that is already linked and add a new link to
augment the function it is performing. For example, if you have a Setpoint module
that triggers a waveform recording, and you decide to make it reset a counter as
well, then you must link the Counter module to the same Setpoint that controls the
Waveform Recorder module.
Linking ION Modules Graphically
The easiest way to link modules is to do it graphically, pointing and clicking at the
registers involved. You can use the graphical method to link to modules on the
same node, or to create links across nodes. Designer also provides features that
simplify some of the steps involved in linking modules.
You can use the autolinking feature to speed up the process of linking ION
modules. Typically, linking ION modules involves connecting the output register
of one module to the input of another. In many cases, only one of the module's
inputs have the same register class as the selected output register.
Page 108
Chapter 5 - ION Designer
ION Enterprise Administrator’s Guide
Linking and Configuring ION Modules
If autolinking is enabled, Designer automatically selects the appropriate input and
establish the link. If necessary, it overwrites an existing link. This relieves you from
having to manually select the input; however, it also prevents you from seeing
what input you are linking to.
By default, autolinking is disabled. You should only use autolinking if you are
thoroughly familiar with all the inputs and output registers of the modules you are
working with to ensure you don't inadvertently create undesirable links.
Enabling autolinking
From the Options menu, select Enable Autolinking. A check beside the option
indicates it is selected.
Disabling autolinking
From the Options menu, select Enable Autolinking again to deselect the option.
Linking ION Modules on the Same Node
If the selected node is a meter such as an ION 7600 or an ION 7300, the process of
configuring the node primarily involves creating links between the ION modules
on that node.
NOTE
To cancel a link-in-progress, click anywhere in the background of the window or press the ESC key.
Linking modules using the point and click method
1.
To list a module's output registers, click the
symbol on the right side of the
module icon. (To list the module's setup registers, hold the CTRL key while
clicking the
symbol.)
In most cases, a pop-up menu appears listing the available registers. If the
module has many registers, a dialog box appears instead.
Chapter 5 - ION Designer
Page 109
Linking and Configuring ION Modules
ION Enterprise Administrator’s Guide
2.
In the menu, click on the register you want to select. In the case of the dialog box,
double-click on an output register or choose the register and click Select.
3.
Drag the cursor towards the module you want to link to; the cursor changes and
a dotted line follows it across the node diagram. This indicates you are in the
process of creating a link and it shows where the connecting line will appear in
the node diagram.
If you link to a module that is in a different window than the original module
(either in a different node diagram or grouping window) the dotted line
disappears but the cursor still indicates that a link is in progress.
If the module you want is obscured by another window, click on the title bar of
the window containing the module. This brings the window to the foreground
without canceling the link. (If you click on the background of the window, the
link is cancelled.)
4.
Click the symbol on the left side of the module icon to display the module's
inputs. In most cases, a pop-up menu appears listing the module's inputs. Those
that are of a different class than the selected output register are grayed out to
indicate you cannot select them.
If the input is already linked, the label of the register it is linked to is
displayed beside the input. If you select the input, the existing link will be
overwritten.
If there are a large number of inputs, a dialog box similar to the More
Output Registers dialog appears instead.
5.
Choose the input you want, or in the case of the dialog box, click Select.
6.
If the two modules are in the same window, the dotted line remains on the
screen to show the link between the modules. When you save this change to the
node, the line changes from a dotted line to a thin black line to indicate that the
link is now programmed on the node.
The procedure described above can also be performed in reverse order. You can
select a module's input first and then link it to another module's output register.
NOTE
Some modules, such as AND/OR modules, Data Recorder modules, and Log Acquisition modules have
a variable number of inputs. In these cases, when you click on the input symbol, the pop-up menu offers
one instance of the variable input as well as any fixed inputs the module may have.
When linking to one of these modules, you can select the NEW Source item to add
a new link or you can select an existing link and overwrite it.
Page 110
Chapter 5 - ION Designer
ION Enterprise Administrator’s Guide
Linking and Configuring ION Modules
Linking ION Modules Across Different Nodes
If the selected node is a software node, such as the Log Inserter or a Virtual
Processor, many of the links you create will be to modules on other nodes. When
you create links across different nodes, it is important to keep track of these links
and note what modules are dependent on others. This will help you determine
what will happen if you ever want to delete a module that is linked to a module on
another node.
NOTE
You cannot link modules on one device to another. For example, you cannot create a link between a
module on an ION 7700 to a module on a different ION 7700 or to a module on another meter.
1.
Open the node diagrams that contain the modules you want to link.
2.
Position the diagrams within the workspace so you can see the two modules you
want to link.
3.
In the first node diagram, click on the
symbol on the right side of the module
icon. A pop-up menu appears listing the module's output registers. (If the
module has many outputs, a dialog box will appear instead.)
4.
In the list of output registers, click on the register you want. (In the case of the
dialog box, click a register and then click the Select button.)
5.
Drag the cursor from the first node diagram towards the module you want to
link to in the second node diagram. The dotted line ceases to follow the cursor if
it crosses the window boundary but the cursor changes to indicate a link is in
progress.
6.
Click on the
symbol on the left side of the module icon in the second node
diagram to see the module's inputs. A pop-up menu appears listing the
module's inputs. Those that are of a different class than the selected output
register are grayed out to indicate you cannot select them.
7.
Choose the input you want, or in the case of the dialog box, click Select. Designer
does not graphically represent links between modules on different nodes so you
will not see a line connecting the modules.
8.
Click in the title bar of the second node diagram. From the File menu, choose
Send and Save to save your changes to the second node.
This procedure can also be performed in reverse order. You can select a module's
input first and then link it to another module's output register.
NOTE
If the input is already linked, the label of the register it is linked to is displayed beside the input. If you
select this input, the existing link will be overwritten.
A Note About Performance
While creating links, you may notice the circle at the end of the arrow cursor is
sometimes black (
).
Chapter 5 - ION Designer
Page 111
Linking and Configuring ION Modules
ION Enterprise Administrator’s Guide
This indicates that Designer is in the process of retrieving information about a
module. You can still click on the inputs or outputs of other modules, but Designer
aborts the original request. To minimize the amount of communications between
Designer and the connected nodes, avoid unnecessary clicking on the
symbols.
If you click on several items in a row, you only see the menu for the last item you
click; however, Designer initiates many requests for information, which may
impact its performance.
Linking ION Modules Using the ION Tree
In some cases, you may want to use the ION tree to select the register for linking.
The ION tree is simply a hierarchical listing of every node, manager, module, and
register in the ION software network. It allows you to select a register on a node
without opening the node diagram. Generally, you would use the ION tree for
creating links across nodes.
The ION tree is also the only way to select registers from devices that are not IONcompliant (and use translators to make data available) such as 3000 series meters.
For example, if you are programming a Virtual Processor node and you want to
sum data from several 3720 ACMs, you must access the 3720 ACM register via the
ION tree.
Using the ION tree is faster than opening a node diagram. It is useful if you want
to link to a register on a node whose diagram has not yet been opened. It is also
useful if you want to link to a register, but you are not acquainted with the
configuration of the node in which it resides. You can go straight to the register
without having to click through an unfamiliar node diagram. Also, since a
diagram can only be accessed by one user at a time, you may need to use the ION
tree to link to a register on another node where the diagram is already open.
NOTE
You cannot link modules on one device to another. For example, you cannot create a link between a
module on a ION 7700 to a module on a different ION 7700 or to a module on a ION 7300.
1.
Click the
symbol on the left side of the module icon. A list of the module's
inputs is displayed.
2.
In the list of inputs, click on the input you want.
3.
Click the
button in the toolbar. (To link a module's setup register, hold
the CTRL key while clicking this button.)
The Create Link dialog box appears, providing access to the ION tree.
Page 112
Chapter 5 - ION Designer
ION Enterprise Administrator’s Guide
Deleting Links
Double-click the node,
the manager, and the
module to get to the
list of output registers
for you to link to.
4.
Use the Create Link dialog box to specify a node, manager, module and output
register. Start by double-clicking the node you want in the Nodes box. All
managers within the selected node appear in the Managers box. You can then
double-click the manager you want, and repeat this procedure for the modules
and registers.
The module whose inputs changed appear grayed-out to indicate it is now
pending.
5.
From the File menu, choose Send and Save. The new link is established, and the
module appears programmed.
If the module you are linking to is on another node or in a different window from
the source module, no line appears between the two modules. The link is still there
but Designer only draws lines for links between modules in the same window.
The procedure described above can also be performed in the reverse order. You
can click the
button first, select an output register, and then click the
symbol on the left side of a module icon to select one of its inputs.
Deleting Links
If you want to disassemble a group of linked modules and use them for another
function, you can delete the links between the modules rather than deleting the
modules.
Most links between standard modules can be deleted; however, some links between
core modules are fixed and cannot be deleted. These fixed links include:
Data Acquisition module and all Power Meter modules
Data Acquisition module and all FFT modules
FFT module and all Harmonics Analyzer modules
FFT module and all Symmetrical Components modules
If you attempt to delete a fixed link, Designer informs you that the link cannot be
deleted. Designer provides several ways of deleting links.
Chapter 5 - ION Designer
Page 113
Deleting Links
ION Enterprise Administrator’s Guide
Deleting Visible Links
If the linked modules are in the same window, you can simply click on the link line
and then press the Delete key. This is the easiest method as long as you know
which output register and input are involved. For example, in the situation below,
the Sliding Window Demand module has a custom label that identifies the value
for which it is calculating demand (kWtotal). In this case, the easiest way to delete
the link is to click on the line joining the Power Meter and the Sliding Window
Demand module (its color will reverse to indicate it is selected) and press Delete.
If there are multiple lines between the same modules and you only want to delete
one of the links, you may want to use the method described in the next topic:
“Deleting Links with a Hidden Line.”
Deleting Links with a Hidden Line
If you cannot see the line that links the modules (for example, if they are in
different windows), or you need to know which output registers and which inputs
are involved, you must use a dialog box to delete the link between modules. You
can look either at the output register owners of the first module, or you can look at
the inputs of the second module to see what they are linked to, and then delete the
link from there.
Deleting a Module's Input Links
Deleting links at a module's inputs is generally faster than deleting them at the
module's output registers because Designer does not need to check the entire node.
On the other hand, there is less information available if you view input links. All
you see is the label of the output register that is linked to the input. If this is
sufficient information, proceed with this method; if not, go to the output registers
to delete the link.
NOTE
If the link you want to delete is between modules on different nodes, you must delete the link at the
module's inputs.
Page 114
Chapter 5 - ION Designer
ION Enterprise Administrator’s Guide
Deleting Links
Viewing a module's input links
1.
Right-click on the
symbol on the left side of the module icon. The following
dialog box appears.
2.
Each input and the label of the output register it is linked to are displayed in the
list box. To delete one or more of these links, click on the input and Unlink. The
output register label is replaced with dashed lines.
3.
When you have unlinked all the modules you want, click OK.
The next time you choose Send and Save, the modules will be unlinked on the
node.
NOTE
When clicking links, you can hold the SHIFT key to select a range of links, or the CTRL key to select a
group of individual links.
Deleting a Module's Output Links
As described earlier (“Checking for Dependent Modules” on page 100), you can
view the owners of a module's output registers (i.e. all the local modules that are
linked to it); you can also delete these links from the same dialog box. This method
gives you the most information about the link you are deleting (the output register
label, and the input and label of the module it is linked to).
Viewing a module's output links
1.
Chapter 5 - ION Designer
Right-click on the
symbol on the right side of the module icon. (To list the
module's setup registers, hold the CTRL key while right-clicking on the
symbol.)
Page 115
Configuring ION Modules
ION Enterprise Administrator’s Guide
The following dialog box appears:
2.
Click on the output register you want and the Owners list box lists all the
module inputs to which it is linked.
3.
To delete one or more of these links, click on the module input in the Owners list
box and click Unlink. The input names will be replaced with dashed lines.
4.
When you have unlinked all of the module inputs you want, click OK.
The next time you choose Send and Save, the module inputs will be unlinked on
the node.
NOTE
Owners that reside on a different node are NOT displayed in this dialog box. If you need to delete a link
between modules on different nodes, use the procedure described in the previous section.
Configuring ION Modules
Once you have placed an ION module in a node diagram, you can configure the
various setup parameters of the module. It is not necessary to do this before you
link the modules but you should ensure the module is set up correctly before
sending the configuration to the node.
Module setup parameters include the module's label; its setup registers, labels and
values; and its output register labels. These are accessed by right-clicking on the
symbol in the center of the module icon.
Page 116
Chapter 5 - ION Designer
ION Enterprise Administrator’s Guide
Configuring ION Modules
The ION Module Setup dialog box appears.
The Setup Registers box lists all the setup registers of the module along with their
current values or settings. If you want to change any of the settings or assign a
custom label to a setup register, click on the register label, then click the Modify
button (or double-click on the register label). A second dialog box appears where
you can make modifications.
In most cases, configuring a setup register is a simple matter of entering a number,
entering text, or choosing an option from a list. (To determine the options or ranges
available for a setup register, refer to the module's description in the ION
Programmer’s Reference.)
When you have completed all your modifications to the module, click OK to
return to the node diagram. The module icon appears pending until you send and
save your changes.
NOTE
For a ION 7700 or a ION 7300, you may want to limit the number of custom labels you use for setup
registers; these devices have a fixed number of custom labels available and they may be more useful for
labeling output registers or Boolean conditions.
Chapter 5 - ION Designer
Page 117
Configuring ION Modules
ION Enterprise Administrator’s Guide
Modifying Enumerated, Numeric Bounded, and String Setup
Registers
If the register you have selected is an enumerated, numeric bounded or string
register, one of the following dialog boxes appear when you click Modify:
Note that labels can be up to 15 characters long.
To modify an enumerated register, select an option from the Options box.
To modify a numeric bounded register, type a number in the Value box. The
allowable range is shown under the Value box; you are alerted if you type a
number outside this range.
To enter a formatted numeric value, click Format. In the Formatted Numeric
Value dialog box, you can enter the numeric value as a date (offset from Jan 1,
1970) or a time interval.
To modify a string register, type your text in the String box.
Note that when you click Modify for a string register that is the connection string for
a Log Acquisition module or Query module, you receive the Modify Database
Connection Properties dialog box:
Page 118
Chapter 5 - ION Designer
ION Enterprise Administrator’s Guide
Configuring ION Modules
Modifying a custom label for a setup register
Do one of the following in the dialog box:
To create a custom label, select Use Custom Label and then type a name for the
label in the box.
If the register is already using a custom label and you want to revert to the
default label, select Use Default Label.
When you have completed all your modifications to the selected setup register,
click OK to return to the Setup dialog box for the module.
Modifying Calendar Setup Registers
The ION Scheduler module has a special class of setup register called a calendar
register. Configuring a calendar register is more involved than configuring
enumerated, numeric bounded and string setup registers, and it is only necessary
for nodes that have a Scheduler module. For detailed information about how to
configure a calendar register, refer to the description of the Scheduler module in
the online ION Programmer's Reference.
Modifying Address Setup Registers
All Distributed Numeric, Distributed Boolean, and Distributed Pulse modules
contain an Address Setup Register that references another register. You can specify
a new value or clear an existing value as required. (Currently, the Virtual Processor
is the only node offering these types of modules.)
NOTE
Currently, you can only link the Address Setup Register to External Numeric, External Boolean, and
External Pulse registers.
Modifying an Address Setup Register
1.
Chapter 5 - ION Designer
Right-click on a Distributed Numeric, Distributed Boolean or Distributed
Pulse module to display the ION Module Setup dialog box.
Page 119
Configuring ION Modules
ION Enterprise Administrator’s Guide
2.
In the Setup Registers box, click on a register to highlight it, and then click the
Modify button. The Modify Address Register box is displayed.
3.
In the Modify Address Register dialog box, double-click on the node, manager,
module and output register you want to use. Click OK to continue.
4.
In the ION Module Setup dialog box, click OK to accept your choice.
NOTE
You can clear the value of an address setup register. On the Modify Address Register dialog box, select
the Reset Register Value box, and then click OK.
Using Custom Labels
The ION architecture offers the option to assign custom labels to modules, setup
registers, output registers, and Boolean ON/OFF conditions. All modules and
registers have a default label and this label is what you see in node diagrams, user
diagrams and event logs unless you specify a custom label. Creating custom labels
allows you to clearly describe what the module and its registers have been set up
to do.
If the node type is a ION 7700 or ION 7300, you should carefully consider which
modules and registers you assign a custom label. There are a fixed number of
labels available, but there are thousands of registers you can assign them to. Many
of these registers do not benefit from custom labels. For example, most setup
registers can be left at their default names since the only place their names might
appear is in the event log.
NOTE
Labels for the ION 7300 and the ION 7700 can be up to 15 characters long.
Page 120
Chapter 5 - ION Designer
ION Enterprise Administrator’s Guide
Configuring ION Modules
Customizing Module Labels
The ION Module Setup dialog box allows you to edit the module label. The
module label is the text that appears across the top of the module icon in the node
diagram. It is also the label that is used in event logs and in the dialog box for the
ION tree. If you want to specify a custom label, type it into the Module Label box.
If you want to label a module (or somehow describe its function) but you are out
of custom labels, you can use the Text tool in the modules toolbox to type in any
text you want and place it in the node diagram. Note that this text is NOT used for
logging and it does NOT appear in the ION tree dialog box. It can only be used for
adding annotations and comments to a node diagram.
1.
In the ION Module Setup dialog box, do one of the following:
To create a custom label, select Use Custom Label and then type a name for
the label in the box.
If the module is already using a custom label and you want to revert to the
default label, select Use Default Label.
2.
Click OK to return to the node diagram.
Customizing Output Register Labels
You can also specify custom labels for output registers in the Setup dialog box. By
custom labeling output registers, you can clearly indicate the information they
contain. For example, if you have linked the Vlna output register of a Power Meter
module to a Thermal Demand module, and in turn linked the ThrmDemand
output register to a Maximum module, you may want to label the Maximum
module's output register as “Va TD Maximum” (instead of using the default name
of just “Maximum 1”).
Editing a custom output register label
1.
In the ION Module Setup dialog box, click on the output register in the Output
Registers box, and then click Modify.
The Modify Label dialog box is displayed.
2.
In the Modify Label dialog box, do one of the following:
To create a custom label, select Use Custom Label and then type a name for
the label in the box.
If the module is already using a custom label and you want to revert to the
default label, select Use Default Label.
3.
Chapter 5 - ION Designer
Click OK to return to the ION Module Setup dialog box.
Page 121
Configuring ION Modules
ION Enterprise Administrator’s Guide
Customizing Boolean Output Register Labels
If the output registers of the module are Boolean, you can create custom labels to
associate with the ON and OFF conditions of these registers. These labels can be
very helpful for clarifying exactly what the ON or OFF conditions represent. For
example, if a Boolean output register is used to switch a fan on and off, you could
create a Boolean ON label called “Fan Running” and an OFF label called “Fan Not
Running.”
Editing Boolean ON/OFF labels
1.
In the ION Module Setup dialog box, click on the Boolean output register and
then click Modify.
The Modify Boolean Register dialog box is displayed.
2.
In the Modify Boolean Register dialog box, do one of the following:
To create custom labels, select Use Custom Label and then type names for
the Register Label, On Label and Off Label in the appropriate boxes.
If the module is already using custom labels and you want to revert to the
default labels, select Use Default Label.
3.
Click OK to return to the ION Module Setup dialog box.
Resetting ION Modules in a Node Diagram
Designer allows you to undo certain changes you have made in a node diagram
since the last time you saved and sent your changes to the node. It will refresh the
selected module icons so they reflect what is actually on the node. Reversible
changes include:
changing the value of a setup register
changing module or register labels
changing the link between modules
Since creating and deleting modules happen immediately on a node, you cannot
refresh a deleted module (nor can you undo the creation of a module).
Page 122
1.
Select the icon(s) of the module(s) you want to reset.
2.
From the Edit menu, choose Reset.
Chapter 5 - ION Designer
ION Enterprise Administrator’s Guide
Copying and Pasting ION Modules
All the changes made to the selected modules since the last time you sent and
saved the node diagram are discarded. Modules not included in the selection are
unaffected (that is, if they had pending changes, the changes will still be pending.)
Fast-linking ION Modules in the Log Inserter
When linking modules in the Log Inserter, you can save time by using the Fast
Linker utility. The Fast Linker automates much of the linking process, enabling
you to quickly link any combination of event, data or waveform recorders. To
access the Fast Linker options, press CTRL and click on the Log Inserter inputs.
For more information on using the Fast Linker utility, see the description for the
Log Acquisition module in the online ION Programmer's Reference.
Copying and Pasting ION Modules
You can easily create a new function in a node diagram by copying and pasting
modules. You can copy and paste a single ION module, a group of modules,
grouping icons, text objects, or the entire node.
You can copy modules from one node and paste them into another, as long as the
node supports the selected modules and has sufficient resources. When pasting
ION modules, you can replace existing modules or create new ones.
You can also copy ION modules and save them to disk as a framework. You and
other users can then reuse this framework in other nodes. Saving a node's
configuration as a framework provides a fast and easy way to program a large
number of nodes at once.
CAUTION
Persistent modules cannot be deleted, but they can be overwritten during a framework paste. Overwriting
a persistent module effectively relinks its outputs and rewrites its label, but its core functionality remains
intact (e.g. the Master Reset module may be relabelled, but pulsing this module still initiates a master
reset). When pasting a default framework onto a meter, use lock-paste to ensure that all persistent
modules in the "old" default framework are overwritten by the corresponding persistent module in the
"new" default framework. A list of Persistent modules is available on the Library page of Power
Measurement's website, under "ION Device Templates".
Copying Modules
Designer offers two ways to create copies of ION modules: copy and paste using
the ION software clipboard, or copy and paste using a framework.
NOTE
The ION software Clipboard is a temporary storage area that holds any information cut or copied from
Designer. This clipboard should not be confused with the Windows Clipboard.
Chapter 5 - ION Designer
Page 123
Copying and Pasting ION Modules
ION Enterprise Administrator’s Guide
When copying a selection of ION modules, you can use either the Copy or Cut
commands or the Copy to Framework command. (The Copy and Cut commands
save the selection on the clipboard; the Copy to Framework command saves the
selection as a file).
When pasting ION modules into the node, you can choose either Paste (from
clipboard), or Paste from Framework. Pasting modules is a little more complicated
than copying them, because the action of creating modules in the node may require
you to replace existing modules. Whether you choose Paste (from clipboard) or
Paste from Framework, Designer displays a Paste Summary dialog box that
explains each aspect of the proposed changes.
You can use the Paste Summary box to define how to integrate the source modules
into the destination modules. For example, if a source module is being pasted to a
destination that is already occupied, you can either lock paste the new module
over the existing one, or free paste the new module into the next available
destination.
Additional considerations include pasting with shortcuts, modules that cannot be
pasted, and cloning a node (copying and pasting a complete node configuration
from one node diagram to another).
Cutting or Copying ION Modules to the Clipboard
Use the Cut or Copy command to save a temporary copy of the selected modules
to the clipboard. You can then use the Paste command to transfer the selection
from the clipboard into any node diagram. Each copy retains the setup register
values, custom labels, link information and layout of the original selection.
NOTE
When selecting modules to be cut or copied, you can also include grouping icons and text objects. If you
select a grouping icon, all modules within the group are copied, as well as any nested grouping icons.
1.
Click on the module icon to select it. (To select a group of modules, hold down
SHIFT and then click on each icon, or click outside of the group and drag a
selection box around the icons).
2.
Do one of the following:
To cut the selection to the clipboard (and remove the original), choose Cut
from the Edit menu.
To copy the selection to the clipboard (and retain the original), choose Copy
from the Edit menu.
Designer copies the requested information to the clipboard.
Once the selection has been copied to the clipboard, you can paste it into any user
diagram using the Paste command on the Edit menu.
Copying ION Modules to a Framework
You can use the Copy to Framework command to create a framework from the
selected modules. A framework is a template that you can use to reproduce a
group of ION modules. Unlike regular copying and pasting, a framework is stored
as a file, so you can paste it later.
Page 124
Chapter 5 - ION Designer
ION Enterprise Administrator’s Guide
Copying and Pasting ION Modules
When you choose Copy to Framework from the Edit menu, Designer copies the
layout, linkage and configuration information of each ION module in the selected
group. It saves the framework as an .fwn file under a name that you choose. You
can then use the Paste from Framework command to reproduce the group in
another node diagram.
You can use frameworks to simplify the process of programming multiple devices
with similar configurations. For example, if you wanted to program a single
function into several nodes, you could program the first node and then copy the
configuration to a framework. You could then quickly program the other nodes by
simply opening their node diagrams and pasting the framework you created. You
can also use frameworks to program an entire node at once, considerably reducing
the amount of time required to set up a large installation.
Before you save a group of modules as a framework, consider carefully which
modules you want to include. If you include core modules in your framework, you
will not be able to paste them unless you overwrite the existing core modules that
correspond to those in your framework. Another approach is to select the modules
“downstream” of the core module and save them as a framework. Then when you
paste the framework into another node diagram, you can use the Maintain
External Inputs option to preserve your links to the original core modules. (For
more on this, see “Using the Paste Summary Box” on page 127.)
NOTE
Once you have saved a framework, it can be used in another node diagram, as long as the node supports
the modules included in the framework. Although it is possible to create a framework from one node type
and use it with another node type, it is advisable to restrict your use of frameworks to nodes of the same
type.
Copying a group of ION modules to a framework
1.
Select the group of module icons you want to copy. (Hold down SHIFT and
then click on each icon, or click outside of the group and drag a selection box
around the icons).
2.
From the Edit menu, choose Copy to Framework.
3.
Designer displays the Copy to Framework dialog box. In the File Name box,
type a name for the framework, and then choose Save. The framework filename
extension (.fwn) will be added automatically.
The selection is saved as a framework file.
Once you have copied a group to a framework, you can paste it into a node
diagram using the Paste from Framework command on the Edit menu.
Chapter 5 - ION Designer
Page 125
Copying and Pasting ION Modules
ION Enterprise Administrator’s Guide
Pasting ION Modules
You can paste a saved copy of one or more ION modules into any node diagram.
Designer offers two ways to paste modules: Paste, and Paste from Framework.
The Paste command inserts a selection that has been placed on the clipboard using
the Cut or Copy command; the Paste from Framework command inserts a
selection that has been saved as a file. Both of these commands are accessed from
the Edit menu. (For more on this, see “Pasting ION Modules from the Clipboard
or a Framework” on page 126.)
If you paste a selection that contains a shortcut, Designer may paste the shortcut as
a module. For more on this, see “Pasting Shortcuts” on page 130.)
In some cases, Designer may not paste every module in your selection. For more
on this, see “Modules that Cannot be Pasted” on page 130.)
Pasting ION Modules from the Clipboard or a Framework
When pasting ION modules, the first thing to do is choose the node diagram and
window where you want the modules to go. If you have more than one window
open, you can click on the title bar of the window you want to make it the active
window. (The selection you paste is placed into the active window.)
NOTE
You can paste ION modules into the same node diagram they were copied from, or into a different one.
You can paste ION modules from two sources: the clipboard or a framework.
When you paste a selection from either source, Designer describes the proposed
changes on the Paste Summary dialog box. You can use the Paste Summary box to
review your changes and make modifications as necessary.
CAUTION
The lock paste option in the Paste Summary box instructs Designer to overwrite existing destination
modules as necessary. Use lock paste with caution to avoid accidentally overwriting required modules.
(For more on this, see “Using the Paste Summary Box” on page 127.)
Pasting ION modules into a node diagram
1.
Open the window where you want the ION modules to go. Click in the
background of the window to deselect any selected modules.
2.
Do one of the following:
To paste a selection from the clipboard, choose Paste from the Edit menu.
To paste a selection from a framework, choose Paste from Framework from
the Edit menu. In the Paste from Framework box, select the file you want
and then click the Open button.
3.
Page 126
The Paste Summary dialog box is displayed. Use the Paste Summary box to
review the proposed changes (see “Using the Paste Summary Box”). When you
are satisfied with the summary, you can click OK to complete the procedure.
Chapter 5 - ION Designer
ION Enterprise Administrator’s Guide
Copying and Pasting ION Modules
The selection is pasted into the active window. The entire selection is automatically
selected so you can easily move it to a clear area in the window. All module icons
in the selection appears as pending until you send and save the changes to the
node.
Using the Paste Summary Box
Before Designer pastes a selection, it displays the Paste Summary box. You can use
the Paste Summary box to review and modify the proposed changes to the node
diagram.
The Paste Summary box lists each module to be pasted and indicates its
destination in the node. For each module, this box provides a short summary of the
proposed modification, and a more detailed description of how the module is
pasted, or why it cannot be pasted as requested.
The following sections describe the various areas of the Paste Summary box.
Source
The Source column lists each module that was copied to the clipboard or
framework. Each source module is listed by its default label unless a custom label
has been specified (in which case the default name appears in brackets after the
label). Click on a module in this column to view additional information in the
Details box below.
Destination
The Destination column indicates where the copy of each source module is placed
in the node diagram. The module label listed in the Destination column may or
may not match the module label listed in the Source column. (If the destination
module is to be overwritten, it is reused; otherwise, the next available module is
used.)
Summary
The Summary column indicates whether the source module is copied into the
destination as a new module, or if it replaces (overwrite) an existing module. This
column also indicates if a module will not be pasted.
Chapter 5 - ION Designer
Page 127
Copying and Pasting ION Modules
ION Enterprise Administrator’s Guide
NOTE
You can sort the paste summary information alphabetically by source or destination, or by importance of
summary. Clicking on the Source, Destination, or Summary column headers sorts the list by the chosen
criteria.
Details
The Details box located below the list section expands upon the description in the
Summary column. When you click on a module in the Source column, you can
view a description of the proposed transaction in the Details box. This description
explains how a module is pasted, or offers reasons why it will not be pasted.
NOTE
You can create a copy of the information displayed in the Details section of the Paste Summary box. To
copy it, use the mouse to highlight the text you want, right click on the selection, and then choose Copy.
You can then paste this selection into a word-processing program.
Maintain External Inputs
The Maintain External Inputs check box offers the option of pasting the module
selection with all external links intact. If this check box is cleared, all external links
(links to modules outside the selection) are discarded.
The following example depicts an external link to a Power Meter module.
If you copied the two modules on the right but omitted the Power Meter module
from the selection, the link to the Power Meter module would be external. Upon
pasting the selection, the external link to this module would be lost unless you
selected Maintain External Inputs on the Paste Summary box.
Check boxes (free paste/lock paste/no paste)
The check boxes to the left of each module indicate the proposed action (that is,
how the module will be pasted).
A green checkmark
indicates a free paste, a checkmark with a lock
symbol
indicates a lock paste, and a red “X” symbol
indicates the module
will not be pasted. An “X” symbol without a check box
identifies a module that
has no possible destination, and cannot be pasted.
Page 128
Chapter 5 - ION Designer
ION Enterprise Administrator’s Guide
Copying and Pasting ION Modules
You can click on a check box to change the proposed action. For example, clicking
on a “free paste”
or a “will not be pasted”
symbol changes it to a “lock
paste”
symbol. When you change the type of paste, the descriptions in the
Summary column and the Details box also change to describe the new action. (For
more on this, see “Free Paste or Lock Paste?”)
When specifying a free paste or lock paste for multiple source modules, you can
“multi-select” a group and then configure all modules in the group at once. Hold
the SHIFT key, and then click two modules to select all modules in between, or
hold the CTRL key and then click each individual module you want. Once you
have selected the modules, you can click any check box to change the paste for the
entire selection.
Free Paste or Lock Paste?
You can use the Free Paste and Lock Paste options to instruct Designer how to
respond to potential conflicts. For example, if you are pasting the module
“Setpoint 1” into a diagram that already has a “Setpoint 1” module, you have two
options. You can either add the new module under a new name (for example,
“Setpoint 2”) or you can overwrite the existing module with the new one and reuse
the old name.
The first option in the above example, free pasting, can be used to paste new
modules into a diagram without deleting any existing modules. This is useful for
integrating new functions into a node without disrupting the node's existing
functionality. Although this may seem desirable, it is not always the best option.
By leaving existing modules intact, a free paste can result in needless duplication
of functions. In addition, some groups of modules are interdependent and may
require a lock paste to operate correctly.
A lock paste instructs Designer to recreate the source modules exactly, even if this
requires Designer to overwrite existing modules in the diagram. When used to
quickly replace old modules with new ones, lock pasting is an efficient alternative
to the time-consuming process of deleting a module, creating a new one and then
configuring it. When deciding whether to use free paste or lock paste, remember
that you can use a combination of both within a single paste operation.
NOTE
You can pre-select modules for Designer to reuse when free pasting. In the actual diagram where you
paste the selection, press SHIFT and then click on any module icons that you don't want. When you paste
the new selection, Designer has the option of replacing any of the selected modules with the new ones.
NOTE
Overwriting a module is not the same as deleting the module and then pasting a replacement module.
If a module is overwritten, links from the outputs of that module are retained at the inputs of other
modules. If a module is deleted, these links are also deleted and will not exist after the replacement
module is pasted.
Chapter 5 - ION Designer
Page 129
Copying and Pasting ION Modules
ION Enterprise Administrator’s Guide
Pasting Shortcuts
Identified by the symbol
, a shortcut icon is a representation of a module icon
that is located in another window.
You can copy a shortcut in the same way you would copy the original module; but
when you paste a shortcut, one of two things happen. It either is pasted as a
shortcut to an existing module (if one is available), or as a new module. In either
case, it continues to perform its function as before.
There is a basic reason for replacing a shortcut with a module: a shortcut cannot
exist in a node without the module it represents. When you paste a selection
containing a shortcut, Designer searches both the selection to be pasted and the
destination to locate the module the shortcut represents. If it finds the module, it
pastes the shortcut as a shortcut. If it doesn't find the module, it replaces the
shortcut with a copy of the module. In this way, Designer ensures that the pasted
selection is complete, and not dependent on a module that is unavailable in the
destination node.
Designer performs this process automatically, requiring no input from you.
Modules that Cannot be Pasted
Some modules cannot be pasted because their settings are non-transferable
between nodes. All Factory, Communications, and Diagnostics modules must be
individually configured for each node.
When pasting a selection that contains a Factory, Communications or Diagnostics
module, Designer pastes the location of the icons only.
Cloning a Node
You can quickly configure multiple nodes by cloning a node. Essentially, cloning
a node involves copying a node's complete configuration to a framework, and then
pasting it onto another node. This effectively reprograms the node receiving the
framework as an exact copy of the original.
NOTE
When you paste an entire node's configuration, the Factory, Communications, and Diagnostics modules
will not be pasted because they could disrupt the operation of the device's communications. If you need
to change the settings of these modules, you can do so manually.
Page 130
Chapter 5 - ION Designer
ION Enterprise Administrator’s Guide
Copying and Pasting ION Modules
Copying a node's complete configuration
1.
Open the node diagram of the source node (the node you want to copy).
Ensure that the main or root window of the diagram is selected by clicking on
its title bar.
2.
From the Edit menu, choose Select All. All core modules, standard modules,
grouping windows and text icons are selected.
3.
From the Edit menu, choose Copy to Framework.
4.
Designer displays the Copy to Framework dialog box. In the File Name box,
type a name for the framework, and then choose Save. The framework filename
extension (.fwn) will be added automatically.
The complete node configuration is saved in this framework file.
Once you have saved the source node's configuration to disk as a framework, you
can paste it to other nodes of the same type. This file can also serve as a backup in
case you want to restore the configuration of the source node.
Before pasting the source node's configuration onto another node, you should first
open the diagram of the other node and delete its contents. A dialog box will be
displayed indicating that the core modules cannot be deleted. (This does not pose
a problem because you are going to be overwriting the core modules.)
Pasting a node's complete configuration into another node
1.
Open the node diagram of the node that will receive the new configuration.
2.
From the Edit menu, choose Select All. Press the DELETE key to remove the
node's existing configuration. A dialog box appears listing the standard
modules that will be deleted, and the core modules that cannot be deleted. Click
OK to continue.
The standard modules and text icons are deleted, and the core modules (and any
grouping windows containing core modules) remain.
3.
With the module (and grouping) icons selected, choose Paste from Framework
from the Edit menu. (If the remaining icons have been deselected, simply choose
Select All from the Edit menu again.) In the Paste from Framework box, select
the framework file containing the node configuration you want and then click
the Open button.
The Paste Summary dialog box is displayed:
Chapter 5 - ION Designer
Page 131
Viewing Output Registers, Setup Registers, and Inputs
ION Enterprise Administrator’s Guide
4.
Select all modules in the list (click last item, hold SHIFT, and then click first list
item - the entire list appears highlighted).
5.
Change the paste type to lock paste (hold SHIFT, and then click the paste type
check box until all modules are set to lock paste ).
6.
Click OK to complete the procedure.
The selected framework is pasted into the node diagram. All module icons in the
selection appear as pending until you send and save the changes to the node.
Viewing Output Registers, Setup Registers, and Inputs
As described earlier, each module icon has an input symbol
and an output
symbol
. The input symbol (on the left) provides access to the module's inputs,
and the output symbol (on the right) provides access to the module's registers.
A register is a type of memory bank that stores an ION module's linking and
configuration information. Each ION module uses two types of registers: output
registers and setup registers. Both types of registers serve as storage locations for
the module. Output registers store data that has been processed by the module
(such as numeric values, event log entries, and waveform data). Setup registers
store the module's configuration information.
Viewing Output Register Information
Output register information includes the module's available output registers, the
output register real-time values, and the output register owners. Each of these can
be accessed from the output symbol located on the right side of the module icon.
Viewing available output registers
Left-click the output symbol.
Viewing output register real-time output values
Press SHIFT and left-click the output symbol.
Viewing output register owners
Right-click the output symbol to view output register owners.
This displays an output register's owners, so you can identify all dependent
modules on the node and determine the purpose of each dependent module. This
is useful when determining the effects and consequences of deleting a module.
Page 132
Chapter 5 - ION Designer
ION Enterprise Administrator’s Guide
Viewing Output Registers, Setup Registers, and Inputs
Viewing Setup Register Information
A module's setup registers contain its configuration information. When a module
processes data, it manipulates the data according to the guidelines stored in its
setup registers. Setup register information includes the module's available setup
registers, the setup register settings, and the setup register owners. Each of these
can be accessed from the output symbol located on the right side of the module
icon.
Viewing setup registers
Press CTRL and then left-click the output symbol (or right-click the graphic in the
center of the module to display the ION Module Setup dialog box).
Viewing setup register settings
Press CTRL+SHIFT and then left-click the output symbol (or right-click the graphic
in the center of the module to display the ION Module Setup dialog box).
Viewing setup register owners
Press CTRL and right-click the output symbol.
Viewing Input Information
Input information includes the module's inputs and a sample of its real-time input
values. Each of these can be accessed from the module's input symbol.
Viewing inputs
Left-click the input symbol.
Viewing real-time input values
Press SHIFT and then left-click the input symbol.
Chapter 5 - ION Designer
Page 133
Time of Use (TOU) Program Management
ION Enterprise Administrator’s Guide
Time of Use (TOU) Program Management
Tariff schedules, or Time of Use programs, are easily created. Once you have
created a tariff schedule you can manage these files using the TOU Program
Manager.
Creating a Time of Use Schedule
1.
Choose Options from the main menu and Edit TOU Programs...
2.
Click Make a New TOU Program.
A New Program appears in the left window of the display. Click on this to
rename it.
3.
Click Edit (Launch Program Editor).
4.
Follow the instructions on screen and click Finish when you are done and Close.
Downloading a Time of Use Schedule into an ION meter
1.
Launch Designer and connect to your meter using the software.
2.
From the Factory Configuration screen, right-click the Sample TOU module
under Time-Of-Use Setup.
3.
Click the Quick TOU button.
4.
Select the TOU schedule you want and click OK.
The steps for downloading a Time Of Use schedule into an ION meter differ when
trying to do so with Meter Shop. Use the following steps in this situation:
Page 134
1.
Connect to the meter using Vista, and select Meter Setup from the main menu.
2.
Click the TOU schedule button in the Basic Setup diagram.
3.
Select the schedule you want and click OK.
Chapter 5 - ION Designer
ION Enterprise Administrator’s Guide
Advanced TOU Schedule Configuration
Advanced TOU Schedule Configuration
The TOU program editor provides an advanced mode that lets you make
configurations supported by the meter but that are not provided in the TOU Editor
described above. The advanced TOU is useful in the following cases:
When TOU seasons do not use a fixed start or end date that is the same in every
calendar year.
Alternate days defined as a specific date and are not a particular day of the
week.
Accessing advanced TOU mode
1.
From the Options Menu in Designer select Edit TOU Programs... Select a TOU
Program or create a new one and click Edit (Launch Program Editor).
2.
Hold the Ctrl key and right-click the mouse in the text in the Seasons section of
the Seasons and Rate Definitions screen.
A dialog appears that lets you add a setup register override, or delete or modify
an existing setup register override.
Chapter 5 - ION Designer
3.
To add a new setup register override, click the Add... button.
4.
Select a setup register from the drop-down list and type in the register value
(available registers are: Seasons 1, 2, 3, and 4, and Alt 1, and 2 Days).
Page 135
Advanced TOU Schedule Configuration
ION Enterprise Administrator’s Guide
NOTE
Be sure to follow the syntax rules described in the TOU module section of the ION Programmer’s
Reference. If the syntax is incorrect the meter will not accept the configuration.
To delete an existing setup register override, select it in the list and click
Delete and OK.
To modify a register select it in the list and click Modify. Make your changes
and click OK.
5.
Click OK to return to the TOU Program Editor.
6.
Click the Summary tab in the TOU Program Editor. This compiles the schedule
to include the setup register overrides you just defined.
The Device Setup Register Values section of the summary displays the register
values that will be sent to the meter and include the configured values. The TOU
Program Log Output section of the summary displays the log generated while
the TOU schedule is compiled. Any setup register overrides that are defined
appear as entries in this log file.
Page 136
Chapter 5 - ION Designer
6
Database Management
Database maintenance is a priority to ION Enterprise administrators: they must
ensure that information stored in the ION database is always safe and available
when needed. Regular database backups are the only sure method for keeping a
database secure from corruption and unexpected data loss.
All database management is done with one utility: the ION Database Manager.
You launch the Database Manager from the ION Management Console component
of ION Enterprise.
In This Chapter
The SQL Server 2000 Desktop Engine . . . . . . . . . . . . . . . . . . . . . . . . . . . 138
The Network Configuration Database . . . . . . . . . . . . . . . . . . . . . . . . . . . . . . . . . . 138
The System Events Database . . . . . . . . . . . . . . . . . . . . . . . . . . . . . . . . . . . . . . . . . . 139
The ION Database . . . . . . . . . . . . . . . . . . . . . . . . . . . . . . . . . . . . . . . . . . . . . . . . . . . 139
The ION Database Manager . . . . . . . . . . . . . . . . . . . . . . . . . . . . . . . . . . 140
Navigating the Database Manager Interface . . . . . . . . . . . . . . . . . . . . . . . . . . . . . 140
Manual Tasks . . . . . . . . . . . . . . . . . . . . . . . . . . . . . . . . . . . . . . . . . . . . . . . . . . . . . . . 143
Scheduled Tasks . . . . . . . . . . . . . . . . . . . . . . . . . . . . . . . . . . . . . . . . . . . . . . . . . . . . . 150
Detaching then Re-attaching Databases . . . . . . . . . . . . . . . . . . . . . . . . . . . . . . . . . 155
Attaching a Database Using the Database Manager . . . . . . . . . . . . . . . . . . . . . . . 155
Creating a Backup of the ION Database . . . . . . . . . . . . . . . . . . . . . . . . . . . . . . . . . 156
Restoring the ION Database from a Backup . . . . . . . . . . . . . . . . . . . . . . . . . . . . . 157
Manage the ION Database with Archives and Trims . . . . . . . . . . . . . . . . 158
Option 1 - Regular Database Archiving and Trimming . . . . . . . . . . . . . . . . . . . . 158
Option 2 - Using Selective Logging . . . . . . . . . . . . . . . . . . . . . . . . . . . . . . . . . . . . . 159
Accessing the ION Database with 3rd-Party Applications . . . . . . . . . . . . . . . . . 161
Page 137
The SQL Server 2000 Desktop Engine
ION Enterprise Administrator’s Guide
The SQL Server 2000 Desktop Engine
The Microsoft SQL Server 2000 Desktop Engine (MSDE 2000) manages the ION
Enterprise databases, which are the ION database, the Network Configuration
database, and the System Events database.
NOTE
There are blank database and transaction log backup files available in the event of a complete database
loss or corruption. They are located in the ION Enterprise\system\etc\ directory. The task in the ION
Database Manager called New ION Database uses these files.
MSDE 2000 runs as a service; it can be controlled through the Services utility in the
Windows Control Panel. The SQL Server 2000 Desktop Engine should rarely, if
ever, need to be stopped. Databases are detached from and attached to the server
if the files need to be manipulated, and these tasks are performed by the Database
Manager.
Note the the follow information pertains to the default SQL Server instance called
ION. If you chose a different name for the server instance, then it would appear in
place of references to ION.
Default Location: \Microsoft SQL Server\MSSQL\ION
Server Executable:
\Microsoft SQL Server\MSSQL\ION\BinnMSSQL$ION\Binn
Database Services: MSSQL$ION and SQLAgent$ION
The Network Configuration Database
The ION Network Configuration database, also referred to as the NOM, is the
database component where all the details related to network configuration and
communication with the network of ION devices (and other power monitoring
devices) are stored. This information is used by the communications services (e.g.
ION Network Router Service, ION Site Service) and other software components to
manage data and control requests to and from the devices and the other ION
software components (i.e. Vista, Designer, Log Inserter).
Default Install Location: ION Enterprise\Database\Network\
Default Name in the Database Manager utility: ION_Network
By default, the Network database is automatically backed up every day at 1:00 am.
This scheduled backup is configurable using the Database Manager utility.
The tasks you can perform on the Network database via the Database Manager are
Detach, Attach, Backup, and Restore.
Page 138
Chapter 6 - Database Management
ION Enterprise Administrator’s Guide
The System Events Database
The System Events Database
The ION System Events database, often called the System Log, is another database
component that is responsible for storing and displaying data for events that occur
in the operation of ION Enterprise components. For example, the event details about
the communication services’s interactions with devices, details about controls
initiated through Vista, and general or alarm level events that occur in the Virtual
Processor are all inserted into the System Events database and made available from
the Management Console and through access to the main ION database using Vista.
Default Install Location: ION Enterprise\Database\SystemLog
Default Name in the Database Manager utility: ION_SystemLog
Unlike the Network Configuration database, the System Log is not backed up.
Some contents of the System Log — System Events with a priority of 192 or greater
— are automatically inserted into the main ION database file on a regular basis and
are viewable through Vista.
The System Log database is automatically trimmed of all non-current data — data
older than 30 days — in order to better manage its size. The trim occurs every day
at 1:30 am. This scheduled trim is configurable using the Database Manager utility.
The tasks you can perform on the System Log database via the Database Manager
are Detach, Attach, and Trim.
The ION Database
The ION database contains all the information collected from every device that has
the ability to record data and from every ION software component. This database
uses the Log Inserter to gather data from all of the available sources, and then makes
the data available to ION software components like Vista through the Query Service,
or directly from the database for tools like ION Reporter, or third party database
access tools.
Default Install Location: \ION Enterprise\Database\Data
Default Name in the Database Manager utility: ION_Data
The ION database has a scheduled backup configured and enabled in the Database
Manager: backups occur every Friday at 12:00 am. There is a scheduled archive
and a scheduled trim configured, but these schedules are not enabled by default.
It is important that you establish and maintain a regular backup and archive/trim
schedule for proper performance of the ION database.
The tasks you can perform on the ION database via the Database Manager are
Detach, Attach, Restore, Backup, Archive, and Trim.
Chapter 6 - Database Management
Page 139
The ION Database Manager
ION Enterprise Administrator’s Guide
The ION Database Manager
All database management is performed with the Database Manager. You can
manually perform many maintenance operations on the various databases, or you
can configure scheduled tasks to perform these operations.
Launching the Database Manager utility
You start the Database Manager from the ION Management Console.
1.
Launch the ION Management Console.
2.
Go to the Tools menu and select Database Manager... from the list. An ION
Enterprise logon dialog appears.
3.
Enter a valid ION Enterprise username and password with Supervisor access.
See “ION User Manager” on page 69 for more information on access levels.
The Database Manager utility appears in the Microsoft Management Console.
Navigating the Database Manager Interface
The Database Manager utility runs as a snap-in from the Microsoft Management
Console. You can initiate actions when you select the Databases or Schedules
entries in the left pane of the Database Manager interface. When the task icons are
visible in the right pane, you can click them to open a particular task’s dialog box.
Server
Below ION Tools\ION Databse Manager you find the name of the server. The
server name is comprised of the computer name and the SQL Server instance used
to attach the ION Enterprise databases (e.g. WorkstationX\ION). Below the server
level are entries for Databases and Schedules. Selecting the server in the left pane
also brings up Databases and Schedules in the right pane.
Page 140
Chapter 6 - Database Management
ION Enterprise Administrator’s Guide
Navigating the Database Manager Interface
Databases
Selecting Databases brings up the task icons in the right pane by default (i.e., the
Manual Tasks tab is selected). You can also right-click on Databases and select All
Tasks to bring up the complete list of tasks available to you (refer to “Manual Tasks”
on page 143 for individual task information):
NOTE
Selecting Show Non ION Databases displays the system databases; these have a green icon. Selecting
Show Archives displays the ION database archives; these have a blue icon.
Selecting an individual ION Enterprise database (i.e. ION_Data, ION_Network, or
ION_SystemLog) limits the icons in the right pane to those tasks that are available
for the database. Similarly when you right-click one of these individual database
entries and select All Tasks, only the tasks that can be performed on that particular
database are available to you:
ION_Data
ION_Network
ION_SystemLog
Selecting an individual database in the left pane and then selecting the Normal tab
at the bottom of the right pane lists the properties for that database. The properties
listed are as follows:
Size: The current size of the database.
Primary File Location: The file path for the primary database (.mdf) file.
Transaction Log Location: The file path for the transaction log (.ldf) file.
Creation Date: The date and time that the databse was created.
Last Backup Date: The date when the last backup was performed.
Disk Space Available: The amount of free space available on the disk where the
database resides.
Server Version: The database type (MSDE or SQL 2000) and service pack
version.
Chapter 6 - Database Management
Page 141
Navigating the Database Manager Interface
ION Enterprise Administrator’s Guide
Schedules
Selecting Schedules brings up the scheduled tasks in the right pane. Note that it may
take a few seconds for the Database Manager to gather the information for display.
Double-click a scheduled task in the right pane (or right-click and select
Edit<database><task>) to open that scheduled task’s property dialog where you
can then configure the settings to suit your needs. For example, double-click the
scheduled trim on the ION_Data database if you want to open that database’s
Scheduled Trim dialog and enable the schedule. Note that you cannot configure
scheduled MAINTENANCE tasks.
The icons illustrate whether a scheduled task is enabled or disabled as well as
whether the task completed successfully or failed.
Right-click any scheduled task and select View task history... to open the following
dialog which you can use for troubleshooting purposes:
Page 142
Chapter 6 - Database Management
ION Enterprise Administrator’s Guide
Manual Tasks
The run date, status (successful or failure), and duration are available for all
scheduled tasks, including maintenance tasks. Note that if a scheduled task has not
been enabled, then it does not have a history available to view.
Manual Tasks
Details for each of the Database Manager tasks are provided here. You launch a task
when you click its icon or select the task from the All Tasks list.
Alarm Configuration
Database Size
Here you can choose to disable or enable local alarms that monitor database size.
You can also set the size threshold that the ION database and/or the System Events
database must exceed in order to receive an alarm notification.
Hard Drive Space
Here you can choose to disable or enable the alarm that monitors your hard
drive(s). You can choose to monitor all hard drives or just the hard drives
containing the ION databases. You also adjust the threshold for the minimum
amount of space remaining before you receive an alarm notification.
Send Network Message
You specify the computer that receives alarm notifications via network messages.
Send Email
You must specify the name of the SMTP server as well as the email address(es) that
you want to receive the alarm notifications.
Chapter 6 - Database Management
Page 143
Manual Tasks
ION Enterprise Administrator’s Guide
Archive
NOTE
The Database to archive list only shows your live ION database unless you have Show Archives selected.
When you choose a start date for the archive procedure instead of using the
beginning of the database, the option to trim the live database is prohibited, even
if you selected the trim option before setting the date range.
The directory \ION Enterprise\config\cfg\Archives\Data is the default location
where the archive is saved, but you can specify another local directory if you want
(you can only save an Archive to a local directory). Likewise, the archive you create
has a default filename, but you can rename the archive to follow your conventions.
You can also choose which the data types to archive and what date range to use
when performing an archive.
The Progress field displays the current progress of the archive. If a manual archive
fails, you can examine the Progress field to discover where the task failed - the
Database Archive dialog remains open with the OK button greyed out. If the
archive is successful, the dialog closes automatically.
When you perform an archive, the Database Manager creates a Data Source Name
(DSN) entry on the primary server (i.e., the computer running Database Manager).
Furthermore, the Database Manager creates a filtered ODBC registry key export
file called ION_DsnKeys.reg that includes items only related to <SQL> DSN's.
This registry file is created every time you perform an archive so that the file
provides complete, current information. It is stored in the directory ...\ION
Enterprise\config\cfg on the primary machine, allowing client installations and
secondary servers access through the ION E share.
Page 144
Chapter 6 - Database Management
ION Enterprise Administrator’s Guide
Manual Tasks
Attach...
The Attach... task lets you reattach a detached database. You specify the database
to attach. By default the database will attach as... with the name used the last time
a database was attached; you can specify a different name.
However, before you attach a database, you must stop all ION Enterprise services.
Once you have attached the database, you must then restart the ION Enterprise
services.
Backup...
The Backup... task lets you create complete backups for the ION_Data and
ION_Network databases. If you have Show Archives selected, you can also choose
to backup your archives. You can save the backup to your local computer or to
your network using a Universal Naming Convention (UNC) or a mapped drive.
The Description of backup field is included so that you can provide information
about the nature of the manual backup.
Defragment...
You can choose to defragment the ION_Data, ION_Network, and ION_SystemLog
databases. These databases are defragmented every morning by default, but this
task allows you to defragment a database anytime, such as a newly attached
archive or backup database. The default defragmentation only occurs if 10% or
more of the database is fragmented.
Chapter 6 - Database Management
Page 145
Manual Tasks
ION Enterprise Administrator’s Guide
Detach...
This task lets you detach a database from the SQL Server so that the existing
database files can be copied, allowing the option to reattach alternate or default
copies of these files if necessary.
You must clear any connections to the database before you can perform this
procedure if the database you want to detach is an ION Enterprise database: this
includes the ION_Data, ION_Network, and ION_SystemLog databases but not
archives or other attached databases. In order to clear connections, you must stop
all ION Enterprise services (see “Stopping a Service” on page 15 if you require
more information).
Once you have reattached the database, you must then restart the ION Enterprise
services. For example, if you detach ION_Data, the Log Inserter and Query Server
will not run until you reattach an ION_Data database.
CAUTION
Only move the ION_Network and/or ION_SystemLog databases if absolutely necessary.
Export Database Registry Key...
Note that \ION Enterprise\config\cfg\ is the default save location for the
exported database registry key.
This task is particularly useful if you need to setup ION Enterprise clients in a
system where the primary ION Enterprise server’s database settings (server
instance name, database name, or password) are customized. Once you export the
settings to a registry (.reg) file, you can run that registry file on the client machine.
Page 146
Chapter 6 - Database Management
ION Enterprise Administrator’s Guide
Manual Tasks
Modify Login...
The Modify Login... task lets you change the default SQL Server password.
Modifying the SQL Server password using the Database Manager
1.
Stop the ION Log Inserter Service and the ION Query Service using the
Services utility under Administrative Tools. Keep the Services utility open.
2.
Launch Database Manager from the Management Console, and select Databases
from the left pane.
3.
Click the Modify Login... icon to open the dialog, and enter your new password
in the Password field. Click OK.
4.
Restart the ION Log Inserter Service and the ION Query Service from the
Services utility.
New ION Database...
Use the Database Name field to name your newly created ION database
accordingly (ION_Data is the default name for the ION database).
Restore...
Chapter 6 - Database Management
Page 147
Manual Tasks
ION Enterprise Administrator’s Guide
Depending on the database you are restoring, this procedure replaces the existing
Network database or ION database with the database from the appropriate
backup file. These backup files are located in the following directory by default:
\ION Enterprise\config\cfg\DBBackups.
Restore from
This section of the dialog lists all the available database backups. You can verify that
a database is selected when there is a black arrow next to the database.
Click the Properties... button to open a property box for the selected database. The
information displayed is the database name, size, start date, finish date, location,
and backup description.
Restore as
This field lets you to rename the backup database when it is restored.
NOTE
It is not possible to simply detach the live file, copy the backup file into the live file location, and reattach
the file. The backup file is a file copy of the live database, but it must have some operations performed
on it to allow it replace the live database. The Restore command performs these operations.
Show Archives...
Select this task if you want the Databases entry in the left pane of the Database
Manager to include all archived databases along with the live databases already
displayed. Once Show Archives is selected, you have the option to perform any of
the tasks available for the live ION database on your archived databases. This
means you can archive, backup, restore, detach (and attach), and trim your
archived databases. To perform these tasks, you can either right-click the database
archive listed below Databases in the left pane of the Database Manager and select
All Tasks, or you can select the desired database archive from the list box on each
tasks dialog.
Select the Show Archives task a second time to hide the archived databases from
view and to prevent the ability to perform the aforementioned tasks on database
archives.
Show Non ION Databases
Select this task if you want the system databases to appear in the list of databases
in the left pane. These system databases are represented with a green icon.
SQL Editor...
When you choose this task you are presented with the following warning:
Page 148
Chapter 6 - Database Management
ION Enterprise Administrator’s Guide
Manual Tasks
Click OK to proceed to the SQL Editor.
The SQL Editor task is included within the ION Database Manager for a number of
reasons:
The SQL Editor lets you export database information for troubleshooting
purposes.
With the SQL Editor you can write custom queries that let you view whatever
data you want.
The SQL Editor provides a method for implementing custom changes to the
databases. For example, this would allow you to execute a custom SQL script
provided by Power Measurement.
NOTE
Ensure that you select the appropriate database before executing your SQL statement.
Trim...
You can perform the Trim... task on the ION_Data and ION_SystemLog databases.
If you have Show Archives selected, you can also perform a trim on the archived
databases. You must select the data types you want to trim only if you are
trimming the ION database (or an archive). You can select any combination of data
types to trim.
Chapter 6 - Database Management
Page 149
Scheduled Tasks
ION Enterprise Administrator’s Guide
Update Statistics
Statistics on numbers of rows and ranges of key values in the data provided can be
used by SQL Server to determine the most efficient way to access the base tables,
thus improving the performance of distributed queries. Update statistics
recalculates these values for better performance.
Upgrade Database
This task upgrades the selected database with the new database schema.
The ION Enterprise installer automatically upgrades your databases with the new
database schema when you install ION Enterprise on an existing ION Enterprise
server. If you install the latest version of ION Enterprise on a different server so
that you can manually copy older database files to the new computer, you can run
this task on the older databases to upgrade them with the new schema.
Scheduled Tasks
The ION Database Manager has a number of preconfigured scheduled tasks. The
following table explains which tasks are preconfigured, on which databases these
scheduled tasks are performed, and whether or not the scheduled task is enabled by
default.
Database
ION database (ION_Data)
Network database (ION_Network)
System Events database (ION_SystemLog)
Page 150
Scheduled Task
Enabled by Default?
Archive
No
Trim
No
Backup
Yes
Maintenance
Yes
Backup
Yes
Maintenance
Yes
Trim
Yes
Maintenance
Yes
Chapter 6 - Database Management
ION Enterprise Administrator’s Guide
Scheduled Tasks
Scheduled Maintenance
The schedule for the maintenance tasks is fixed. However, you can choose to view
the history for a maintenance task: right-click the task and select View task history....
This allows you to see the last run date, status (successful or failure), and duration
should you need to do so for troubleshooting purposes.
There are a number of tasks performed on the database when a maintenance job is
executed. The following is an ordered breakdown of a scheduled maintenance:
1.
Shrink the database, leaving 10% free space in the database file afterwards.
2.
Check database fragmentation and defragment if the fragmentation level is
more than 10%.
3.
Update statistics for all the tables in the database.
4.
Check and track the database size.
5.
Send an email alert if any maintenance step fails.
The maintenance schedule for each database is as follows:
ION_Data maintenance job occurs daily at 2:00 AM.
ION_SystemLog maintenance job occurs daily at 7:05 AM.
ION_Network maintenance job occurs daily at 7:30 AM.
(Note that the disk usage monitor starts at 7:00 AM, taking only a few seconds to
complete.)
Scheduled Archive
The following dialog illustrates the default settings for the scheduled archive that is
performed on the ION_Data database.
Chapter 6 - Database Management
Page 151
Scheduled Tasks
ION Enterprise Administrator’s Guide
Data Types
A scheduled archive is preconfigured to archive all data types and to trim each of
the data types after the archive completes - all check boxes are selected. Clear the
trim check box for a data type if you only want to perform an archive without
subsequently trimming that data.
You can also choose to trim a particular data type without first archiving it; however,
you must select at least one data type to archive for this to happen. For example, if
you only want to archive data records but trim all data types, your check boxes
would look as follows:
Amount of Live Data
This setting determines the number of complete months of live data that you want
kept in the ION database.
Archive Interval
The available settings for the archive interval are:
monthly: once per month
bimonthly: every two months
quarterly: every three months
semiannually: every six months
annually: once per year
Schedule
You can select any day of the week for your scheduled archive (the default is
Saturday). The archive is performed at the specified time on the first occurance of
that day in the month. For example, if you configure the scheduled archive to
perform monthly on Sunday at 5:30:00 AM, then the Database Manager archives
the ION database at 5:30 AM on the first Sunday of every month.
NOTE
The Scheduled Archive is disabled by default.
Page 152
Chapter 6 - Database Management
ION Enterprise Administrator’s Guide
Scheduled Tasks
Scheduled Trim
The following dialogs illustrate the default settings for both scheduled trims.
Both the ION database and the System Events database have scheduled trim tasks
configured. Note that the scheduled trim for the ION database is disabled (the
scheduled archive for the ION database also includes a trim option); the scheduled
trim for the System Events database is enabled.
Schedule
Click the Change button and the Edit Schedule dialog appears where you can
reconfigure the occurrance and time (not shown) of the scheduled trim.
The Edit Schedule dialog differs according to the occurrance you choose.
Note that if you choose a Weekly occurrance, you can select multiple days to have
the trim task performed.
Chapter 6 - Database Management
Page 153
Scheduled Tasks
ION Enterprise Administrator’s Guide
Scheduled Backup
The following dialogs illustrate the default settings for both scheduled backups.
Both the ION database and the Network database have scheduled backup tasks
configured and enabled by default. The save location is a different folder for each
database, although both databases share the same parent directory: \ION
Enterprise\config\cfg\DBBackups\.
You specify the number of backups — ranging from 1 to 4 — that the Database
Manager keeps available.
Scheduled
Click the Change button and the Edit Schedule dialog appears where you can
reconfigure the occurrance and time of the scheduled backup:
The Edit Schedule dialog for a scheduled backup has the same selections as the
Edit Schedule dialog for scheduled trims (see “Scheduled Trim” on page 153).
Page 154
Chapter 6 - Database Management
ION Enterprise Administrator’s Guide
Detaching then Re-attaching Databases
Detaching then Re-attaching Databases
The following procedure explains how to detach a connected database and then reattach a new database in its place.
Detaching and reattaching a database
1.
Go to Start > Control Panel > Administrative Tools and double-click Services.
This opens the Services utility.
2.
Stop all the ION Enterprise services that you have running (refer to “The ION
Enterprise Services” on page 13 for more information). Keep the utility open.
3.
Launch the Database Manager from the Management Console and click
Databases in the left pane of the Database Manager. Icons for the Manual Tasks
appear in the right pane.
4.
Click the Detach... icon. This opens the Detach Database dialog.
5.
Select the database you want to detach using the list box, ensuring there are no
connections to the database, and click OK. Click OK on the message box.
6.
Click the Attach... icon in the right pane of the Database Manager. This opens the
Attach Database dialog.
7.
Specify the path and name of the database you want to attach by clicking the
button next to the Database to attach field. You can edit the Attach as field with
your own name or you can accept the default name. Click OK.
8.
Go back to the Services utility. Restart all the ION Enterprise services.
Attaching a Database Using the Database Manager
If you are attaching a database to the ION Enterprise system via the Database
Manager, you must keep all ION Enterprise services running. This differs from the
Detach/Attach procedure described in “Detaching then Re-attaching Databases” on
page 155.
Attaching a Database Using the Database Manager
Chapter 6 - Database Management
1.
Launch the Database Manager from the Management Console and click
Databases in the left pane of the Database Manager. Icons for the Manual
Tasks appear in the right pane.
2.
Click the Attach... icon. This opens the Attach Database dialog.
3.
Specify the path and name of the database you want to attach by clicking the
button next to the Database to attach field. You can edit the Attach as field with
your own name or you can accept the default name. Click OK. The following
message box appears when the task is successful:
4.
Click Ok.
Page 155
Creating a Backup of the ION Database
ION Enterprise Administrator’s Guide
Creating a Backup of the ION Database
If data loss or corruption occurs, it is essential to have a secure copy of the current
database so that you can restore the corrupt database to its normal operating state.
In many situations, lost data equates to lost revenue and incurred costs. A secure
backup helps you avoid these unnecessary pitfalls.
The Database Manager performs a complete (or full) database backup; each
backup is a copy of the entire database (*.mdf) file and the transaction log file.
Once a backup has been created, it is recommended that you store multiple copies
in at least two different locations. You can save one backup copy in a folder on
your workstation, and another copy should be stored onto your secondary backup
medium, such as a removable storage device (CD-Rewritable disc, Jazz Drive) or
elsewhere on your network.
Backup Recommendations
Here are some recommendations to follow when backing up your database.
Back up often. As a general rule, a full back up once per week is sufficient. This
procedure should be automated to avoid user negligence.
Monitor disk space. Backup files can be very large. If you choose to store
multiple backup copies, you must ensure there is enough available disk space.
Use the Database Manager’s Alarm Configuration task.
Store multiple copies of the backup. This cannot be stressed enough. Once you
create a backup, it is recommend that you store multiple copies of this backup in
at least two different locations. You can store one copy on the computer running
the ION database itself, and you may also create a copy that will be stored using
some other removable storage devices such as a Jazz Drive or on a re-writable
compact disc. This additional copy is useful in the event of a hard drive crash, or
other unexpected hardware failure. In extreme cases, it is also a good practice to
keep a backup copy somewhere off-site, to account for catastrophic possibilities
like fire or theft.
Performing the Backup
Refer to “Backup...” on page 145 for information on performing a backup of the
ION database.
Page 156
Chapter 6 - Database Management
ION Enterprise Administrator’s Guide
Restoring the ION Database from a Backup
Restoring the ION Database from a Backup
The simplest method for restoring the database from a backup is a manual method.
To recover a database after a full backup, the backup database file simply replaces
the lost or corrupted database.
Restoring a database using the Database Manager
Chapter 6 - Database Management
1.
Go to Start > Control Panel > Administrative Tools and double-click Services.
This opens the Services utility.
2.
Stop all the ION Enterprise services that you have running (refer to “The ION
Enterprise Services” on page 13 for more information). Keep the Services dialog
open.
3.
Launch the Database Manager from the Management Console and click
Databases in the left pane of the Database Manager. Icons for the Manual Tasks
appear in the right pane.
4.
Click the Restore... icon. This opens the Restore Database dialog.
5.
Select the appropriate database to restore from the Restore from field. Edit the
Restore as field to match your needs.
6.
Go back to the Services dialog. Restart all the ION Enterprise services.
Page 157
Manage the ION Database with Archives and Trims
ION Enterprise Administrator’s Guide
Manage the ION Database with Archives and Trims
A key to managing and maintaining a usable ION Enterprise database is the ability
to control the overall size of the data within the database files. Note that if you are
using the default SQL Server Desktop Engine (MSDE 2000), each database is
limited in size to 2 GB.
There are a few options for limiting the growth of the database for improved data
access: regular archiving and trimming and limiting database file size.
CAUTION
Some of the detailed procedures outlined below require an advanced understanding of the database
structure and its operation within ION software. Make a back-up copy of your database files prior to any
custom configurations outlined here.
Option 1 - Regular Database Archiving and Trimming
The simplest method to control database size is regularly archiving logical sections
of the database and then trimming (removing) these sections from your main
database file. This method is recommended for all ION Enterprise systems.
The Database Manager utility is a graphical utility which can archive and trim
your database. The Database Manager archives data by creating a new database
file that is configured in the exact format of the existing database. The utility can
then trim (when that task is selected) the same information out of the main
database file to make room for more database information. It is recommended that
you always archive information first, then trim the database. You can perform
these tasks manually, or you can create an archive/trim schedule in the Database
Manager utility.
NOTE
Remember to select the appropriate data types for both the archive and trim tasks. For example, if you
only chose waveforms to archive, you should only select waveforms to trim.
CAUTION
The Trim operation does not physically reduce the size of the database, it simply makes room available
for more data. However, one of the daily scheduled maintenance tasks includes shrinking the database
Accessing Archived Data
To access archived information in Vista, you must first make some custom
modifications to the Query Service component of the software.
Page 158
Chapter 6 - Database Management
ION Enterprise Administrator’s Guide
Option 2 - Using Selective Logging
Option 2 - Using Selective Logging
This last method for minimizing the growth of a database requires the most effort
and the greatest understanding of both the ION programming concept and the
database structure. However, in large systems, this method has the most potential
for controlling the database file size by limiting the amount of information from
the devices that gets into the database.
CAUTION
The custom nature of this example dictates a high level of prior research and analysis of the information
being captured by the ION devices versus the information needs of your organization. Take the time to
properly define these parameters prior to implementing this solution.
Analyzing the Data Requirements
Limiting the information stored in your database requires a thorough analysis of
your information needs to be completed well in advance of implementing this as a
strategy.
Consider this scenario as an example: an ION 7600 meter has a total of 1 Event
Recorder, 40 possible Data Recorders, and 18 Waveform Recorders. By default the
Event Recorder, 38 Data Recorders, and 18 Waveform Recorders are configured
and regularly recording data. By analyzing the inventory of all these possible
information sources, you may discover that a much smaller percentage of the
information being recorded is actually usable by you in your organization. You
may identify that you only require the Event Recorder, 8 or 9 of the Data
Recorders, and only 6 of the Waveform Recorders.
While the ION device architecture’s flexibility does allow you to remove options
you do not require, the process of actually removing these information sources
from a device is complex. A simpler solution is to include only the information
from the recorders that your analysis deemed important, ignoring the other
information until such time as it is deemed usable.
Once this short list of recorders has been identified, it can be used to customize
your Log Inserter to record only specified sources and ignore all others.
CAUTION
All configurable software nodes (Log Inserter, Virtual Processor, etc.) have Event Recorders and should
not be neglected. The Virtual Processor can have custom Data Recorders that must also be considered.
Customizing the Database
Customizing the database requires modifications to the Log Inserter. The Log
Inserter is the component of ION Enterprise that collects data from ION devices
and builds that data into the database. By default, the Log Inserter automatically
configures itself to collect data from every available recorder in every ION device
or ION software component and inputs this data into the database.
Chapter 6 - Database Management
Page 159
Option 2 - Using Selective Logging
ION Enterprise Administrator’s Guide
While this may be a simple and desirable solution for some systems, you may find
that this automatic configuration can create a flood of information and quickly
force the database file to an unmanageable size in large, more complex systems.
Making the Log Inserter Manually Configurable
The first step in creating a manually configurable Log Inserter is to remove the
attribute that causes the Log Inserter to automatically configure itself. The -a
attribute needs to be removed from the Log Inserter’s start-up command line
parameters.
To activate or deactivate Auto-Mode, modify the Log Inserter’s command line
arguments:
1.
Open a command prompt and change to the ION Enterprise\system\bin
directory.
2.
Execute the command logsrv.exe -unregserver.
3.
Execute the command logsrv.exe -service -a to re-activate Auto-Mode, or execute
logsrv.exe -service to deactivate Auto-Mode.
4.
Restart the Log Inserter service.
For more information on the operation of the Log Inserter and Auto-Mode, refer to
“The ION Log Inserter” on page 18.
CAUTION
Auto-Mode should only be deactivated when manual configuration is absolutely necessary.
Once restarted, the Log Inserter can now be customized using ION Designer.
Log Inserter Configuration
If no custom modifications have been made to the Log Inserter, the default
framework consists of only 3 modules: the Factory module, the Event Log
Controller module, and one Log Acquisition Module that was created by the Automode feature.
The first step for customizing the Log Inserter to record only manually linked data
is setting the Log Source setup register from ALL to INPUT LOGS. Manually link the
relevant recorders from the devices that you previously identified as required to
the Log Acquisition module.
NOTE
You may want to use the “Fast Link” option to select the event recorders from all the available nodes. This
ensures that no Event Recorders are missed. Fast Link can be accessed by pressing and holding the Ctrl
key while clicking the Input to the Log Acquisition Module.
Finally, create and maintain a record of the data sources picked from each device.
Keep in mind that any new recorders added to the system must be manually
linked if the new data is required.
Page 160
Chapter 6 - Database Management
ION Enterprise Administrator’s Guide
Accessing the ION Database with 3rd-Party Applications
Accessing the ION Database with 3rd-Party Applications
The following example uses Microsoft Excel to retrieve data from the ION
database.
NOTE
The database uses Universal Coordinated Time (UTC) time. When you import data into Excel, the Clock
module’s Time Zone Offset register has not been applied.
1.
In order to create a database query in Excel, select the Data menu followed by
Get External Data and Create New Query.
2.
Locate the ION Database data source name from the list of available databases.
Choose OK then provide the appropriate database User ID and Password.
User ID: Report
Password: report
Chapter 6 - Database Management
3.
Scroll down the list of available labels and columns until the predefined custom
view name appears.
4.
Select the name and click the right arrow. A list of all the columns in the custom
view are shown in the dialog box below.
Page 161
Accessing the ION Database with 3rd-Party Applications
Page 162
ION Enterprise Administrator’s Guide
5.
Once you have selected the data you wish to view, two more dialog boxes can
bee used to filter and sort the data that is returned to Excel from the database.
When done select Finish.
6.
The last step asks where to place the data on the Excel spread sheet.
7.
Click on the OK button and the Query is done.
Chapter 6 - Database Management
7
WebReach
ION WebReach is a thin-client component of ION Enterprise that allows users to
view preconfigured Vista screens using a web browser.
In This Chapter
ION WebReach . . . . . . . . . . . . . . . . . . . . . . . . . . . . . . . . . . . . . . . . . . . 164
Enabling WebReach . . . . . . . . . . . . . . . . . . . . . . . . . . . . . . . . . . . . . . . . . . . . . . . . . . 164
Generating Vista Diagrams for WebReach . . . . . . . . . . . . . . . . . . . . . . . . . . . . . . 164
Using WebReach . . . . . . . . . . . . . . . . . . . . . . . . . . . . . . . . . . . . . . . . . . . . . . . . . . . . 165
Viewing Historical (Trend) Data . . . . . . . . . . . . . . . . . . . . . . . . . . . . . . . . . . . . . . . 166
Viewing Global Event Data . . . . . . . . . . . . . . . . . . . . . . . . . . . . . . . . . . . . . . . . . . . 168
WebReach Registry Settings . . . . . . . . . . . . . . . . . . . . . . . . . . . . . . . . . . . . . . . . . . . 169
Additional WebReach Information . . . . . . . . . . . . . . . . . . . . . . . . . . . . . . . . . . . . . 170
Page 163
ION WebReach
ION Enterprise Administrator’s Guide
ION WebReach
ION WebReach is installed along with ION Enterprise on your server. The
WebReach component of ION Enterprise adds thin-client support functionality to
the ION Enterprise software. With the WebReach feature you can use the web
browser from any machine on your network to view the Vista diagrams of all the
meters on your network, regardless of whether they are located locally or across
the country. You can create custom screens in Vista for display in your web
browser, including real-time numeric data, background graphics or diagrams, and
basic views of event, data and waveform logs.
NOTE
The time displayed in the WebReach web pages is the local time at the web server and not your browser
time. Check the Clock module settings on the meter. Ensure that the following setup registers must all be
properly configured for the meter to display the correct local time in WebReach: TZ Offset, DST Start, DST
End, and DST Offset.
Enabling WebReach
If Internet Information Services (IIS) has been installed prior to you installing the
WebReach edition of ION Enterprise, then WebReach is automatically installed.
You are given the opportunity to change the default virtual root during the ION
Enterprise installation.
If IIS is installed after the WebReach edition of ION Enterprise installation, you
must execute the PMLWebReachVrootSetup.exe file found in the ION
Enterprise\system\bin directory. This lets you configure the virtual root.
Manually configuring the virtual root
1.
Navigate to your [ION Enterprise]\system\bin folder in Windows Explorer.
2.
Double-click the file PMLWebreachVRootSetup.exe.
or
1.
Go to Start > Run.
2.
Type [ION Enterprise]\system\bin\PMLWebreachVRootSetup.exe.
Generating Vista Diagrams for WebReach
When ION Enterprise is first installed, there is no network diagram configured for
your network. You must generate the network diagram in Vista prior to being able
to view it in the WebReach environment.
Generate the network diagram automatically
Page 164
1.
Open Vista.
2.
Select File > Generate network diagram. One or more grouping objects appear.
3.
Select File > Save or click the save icon to save the Vista diagrams.
Chapter 7 - WebReach
ION Enterprise Administrator’s Guide
Using WebReach
Once you have generated and saved a network diagram in Vista, the WebReach
environment can be used. When a specific device is selected in WebReach, the
software attempts to determine the appropriate default diagram to open based on
information retrieved from the device.
Custom Network Diagram for WebReach
You can specify a custom Network diagram for WebReach by adding a string value
to the registry at the following key:
HKEY_LOCAL_MACHINE\SOFTWARE\Power Measurement\ION Enterprise\4.5\WebReach
You must add the name of your custom network diagram — and its path — under
the value name NetworkDiagram (see the table under “WebReach Registry
Settings” on page 169 for details). If there is no NetworkDiagram entry in the
registry, then WebReach uses the “x-pml:/diagrams/ud/network.dgm” by default.
Once you have changed this registry key, the Network Diagram navigation button
found on the date range page and on the results page automatically links to the
custom network diagram you specified. However, the default user diagram for
each meter has hard-coded references to “x-pml:/diagrams/ud/network.dgm” for
the Network Diagram button. You must change this reference in Vista.
Changing the network diagram button’s default reference
1.
Open Vista.
2.
Select Options > Show Toolbox from the menu bar to enable the Toolbox.
Show Toolbox must be selected in order to make any customizations.
3.
Right-click the Network Diagram button, and select the Action tab.
The Open User Diagram radial button is already selected.
4.
Click Browse..., navigate to your custom network diagram, and click Open.
5.
Click OK.
Using WebReach
Once you have generated a network diagram in Vista, you are able to utilize the
WebReach environment. You can use the browser from any machine on your
network to view virtually any Vista diagram.
NOTE
WebReach updates have a lower priority than other system components. Under certain circumstances,
this can cause browser updates to take longer.
Chapter 7 - WebReach
Page 165
Viewing Historical (Trend) Data
ION Enterprise Administrator’s Guide
Using WebReach
1.
Open Internet Explorer.
2.
Type one of the following into the address bar:
http://<computerName>/ION or
http://<IPAddress>/ION
This loads the Network.dgm as the default diagram. There are one or more
labelled grouping objects on the page.
The default virtual root name is ION. If you chose a different virtual root name
when installing WebReach, use that particular name in place of ION.
3.
Click the desired grouping object to load the page containing the links (icons) to
all the meters belonging to that group.
4.
Click the appropriate meter icon. This loads that meter's Vista user diagram into
your browser.
Viewing Historical (Trend) Data
The WebReach application contains a powerful graphing utility for viewing
historical data. This utility allows you to select the date range and the data that you
want to view.
Viewing historical data graphically
1.
Launch your web browser and load the meter diagram whose data you want
to view.
2.
Go to the appropriate page with a link to the trending information you want to
view (e.g. Trending section on the Volts/Amps page).
3.
Click the
icon that corresponds to the data you want to view.
A screen appears where you select your date range:
4.
Page 166
Select one of the date ranges provided or specify your own.
Chapter 7 - WebReach
ION Enterprise Administrator’s Guide
Viewing Historical (Trend) Data
5.
Click the Show Table button. The following screen appears.
6.
Select the check boxes for the parameters you want to graph and click the Show
Graph button. The information appears in a graph on the next screen.
7.
Select or clear the check boxes in the legend to show or hide (respectively) the
corresponding data in the graph. You can also manipulate your view by doing
the following:
To zoom in on the information, left click and drag your mouse to select the
portion of the graph. The view changes once you release the mouse button.
To scroll through the information contained in the graph, right-click and
drag your mouse in the direction you want to move.
NOTE
You can return to the original view of the graph by refreshing your browser display (i.e pressing F5).
Clicking the back button returns you to the data table screen.
Chapter 7 - WebReach
Page 167
Viewing Global Event Data
ION Enterprise Administrator’s Guide
You can further alter your graphed data by clicking on Edit Graph in the top right
corner of the screen. This opens a dialog box with numerous customization
options, such as changing various aspects of a graph’s appearance, exporting the
graph in an image format, configuring print options, and more.
Viewing Global Event Data
Viewing Global Event Log data with WebReach is done in much the same way as
viewing historical data.
NOTE
There is no alarm acknowledgement capability in WebReach; this capability is only available in Vista.
Viewing the Global Event Log
1.
Launch you web browser and load the meter diagram whose event data you
want to view.
2.
Click the Global Event Log icon,
, which is located under Meter Events.
A screen appears where you select a date range:
3.
Page 168
Select one of the date ranges provided or specify your own.
Chapter 7 - WebReach
ION Enterprise Administrator’s Guide
WebReach Registry Settings
4.
Click the Show Table button. Your Global Event Log is displayed in your
browser:
WebReach Registry Settings
The first table lists the default registry entries and their settings for WebReach. The
second table lists the optional registry settings that you can create if you want to
use their functionality. Only advanced users should edit the registry.
Default Registry Entries
Default Setting
Description
DataCollectorDemoMode
0
1, used for debugging, DataCollector would not collect real-time data from the
meters.
0, DataCollector collects real-time data from the meters.
ExpireTimeLimit
20
(in seconds)
The time that the diagram subscription would expire. If the timestamp of the
subscription is not updated in such time period, then it will be removed by the
DataCollector.
HTTPRefreshInterval
10
(in seconds)
The web page refresh rate for Netscape and Internet Explorer 4.0 and lower.
XMLRefreshInterval
4000
(in milliseconds)
The real time data update rate on the web page for Internet Explorer 5.0 and
later.
PollInterval
2
(in seconds)
The time interval for the DataCollector to read real-time data from all the
meters.
StaleDataInterval
300
(in seconds)
If the data are not updated in such time period, then the data would be treated
as stale data and would not be delivered to the web page.
AutoDiagramTimeout
20000
(in milliseconds)
This key defines the timeout period for the autodiagram components to
interrogate the device and determine the appropriate template to open.
Chapter 7 - WebReach
Page 169
Additional WebReach Information
ION Enterprise Administrator’s Guide
Optional Registry Entries
Default Setting
Description
NetworkDiagram
x-pml:/
diagrams/ud/
network.dgm
This key lets you specify the network diagram you want to display as the default
for WebReach. The value can be a relative path, such as the default setting, or it
can be an absolute file path (e.g. D:\customdiagrams\ud\networkB.dgm). Note
that forward and backward slashes are interchangeable.
This value determines how long WebReach waits for the results of a query to
return from the database before timing out. If this registry entry is not created or
no QueryTimeout value is specified, WebReach will time out after 60 seconds.
QueryTimeout
See description
This optional registry entry is useful if you know that a query will take more than
60 seconds to return its results and you do not want WebReach to time out
before then. Be sure to specify a value that gives you enough time to get your
query results.
Additional WebReach Information
Virtual Root Name
The default virtual root name is ION. The virtual root name is the directory name,
used in an address (preceded by a forward slash or / ), which corresponds to a
physical directory on the web server where Microsoft's Internet Information
Services (IIS) is installed (e.g. http://10.1.13.44/ION or http://IONserver/ION).
NOTE
Whether you use the default name or provide your own, the virtual root name should be unique when
WebReach is installed. If a naming conflict exists, the installer prompts you for a unique virtual root name,
or the installer gives you the option to use the conflicting virtual root name and override any properties
associated with it. If you are reinstalling WebReach and want the installer to look at the same devices,
then use the same virtual root name as the previous install.
Virtual Directories
The issue of virtual directory permissions largely depends on the circumstances in
which you are deploying Internet Information Services (i.e. external public
Internet access, lots of potential users, moderate to high probability of hacker
activity, private Intranet use only, et cetera).
Virtual directories should only use anonymous permissions while the Windows
integrated logins should not be allowed. If you use anonymous permissions in
combination with proper drive, folder, and registry hive security, you can provide
a good balance between convenience for potential web clients and minimizing
security risks. To ensure proper security, the Everyone Group’s default
permissions for all drives, sub-directories, and registry hives should be modified
according to your company’s IT security policy.
NOTE
The Everyone Group includes the IUSR_[pc name] account and the IWAP_[pc name] account.
Page 170
Chapter 7 - WebReach
ION Enterprise Administrator’s Guide
Additional WebReach Information
The full Virtual Root structure for WebReach can be seen at \ION
Enterprise\system\webreach. This directory structure is created automatically
when the ION Enterprise detects Internet Information Services (IIS) on the web
server during installation. However, if ION Enterprise is installed prior to IIS, then
you must execute the file called PMLWebreachVRootSetup.exe located in the
\system\bin folder of your ION Enterprise directory once IIS is installed.
Manually creating the virtual root directory structure
1.
Navigate to your [ION Enterprise]\system\bin folder in Windows Explorer.
2.
Double-click the file PMLWebreachVRootSetup.exe.
or
1.
Go to Start > Run.
2.
Type [ION Enterprise]\system\bin\PMLWebreachVRootSetup.exe.
This executable automatically re-creates the entire vRoot structure.
Objects in WebReach
AVI objects are not supported in WebReach; they appear as empty grey boxes on
the diagram. Control Objects, such as enables and triggers, are not supported
either.
WebReach Folder Permissions
Note that if you are using the default Windows permissions, the following
permission settings may not be necessary, since the Everyone Group has full
control on all drives, all non-administrator shares, and all registry hives by default.
Folder
Account(s)
Permissions
[ION Enterprise]\system\webreach
IUSR_[pc name]
deny write
IUSR_[pc name]
deny write
IWAP_[pc name]
deny write
C:\WINNT\system32\msvbvm60.dll2
IUSR_[pc name]
allow read and execute
HKEY_LOCAL_MACHINE3
Everyone Group
allow full control
C:\Inetpub\wwwroot1
Chapter 7 - WebReach
1
The C:\Inetpub\wwwroot folder is the only sub-folder that requires these permissions unless the FTP
server is being used. If using the FTP server, then C:\Inetpub\ftproot requires these permissions too.
2
This is required for WebReach to function properly.
3
This is required for proper ASP functionality. Run regedt32 to modify the registry if necessary.
Page 171
Additional WebReach Information
Page 172
ION Enterprise Administrator’s Guide
Chapter 7 - WebReach
8
Tips, Troubleshooting, FAQs
This section is a collection of tips, tweaks, and troubleshooting; it also provides
answers to some frequently asked questions about ION Enterprise components.
ION Enterprise Optimizations has details on how to increase your performance in
certain situations, and How To... has solutions to various specialized tasks.
In This Chapter
ION Enterprise Optimizations . . . . . . . . . . . . . . . . . . . . . . . . . . . . . . . . . 174
Operation Differences for ION Enterprise 5.0 . . . . . . . . . . . . . . . . . . . . . . 176
ION Reporter and Scheduled Tasks . . . . . . . . . . . . . . . . . . . . . . . . . . . . . 178
Designer FAQs . . . . . . . . . . . . . . . . . . . . . . . . . . . . . . . . . . . . . . . . . . . . 180
Node Diagrams . . . . . . . . . . . . . . . . . . . . . . . . . . . . . . . . . . . . . . . . . . . . . . . . . . . . . 180
ION Modules . . . . . . . . . . . . . . . . . . . . . . . . . . . . . . . . . . . . . . . . . . . . . . . . . . . . . . . 181
Linking and Configuring ION Module . . . . . . . . . . . . . . . . . . . . . . . . . . . . . . . . . 182
Copying and Pasting ION Modules . . . . . . . . . . . . . . . . . . . . . . . . . . . . . . . . . . . . 182
Miscellaneous FAQs . . . . . . . . . . . . . . . . . . . . . . . . . . . . . . . . . . . . . . . . 184
How To... . . . . . . . . . . . . . . . . . . . . . . . . . . . . . . . . . . . . . . . . . . . . . . . . 185
How to Manually Set Time Synchronization with ION Enterprise . . . . . . . . . . 185
How to Add Constraints To A Dialout Modem . . . . . . . . . . . . . . . . . . . . . . . . . . 186
How to Preserve A Pegasys Install When Installing ION Enterprise . . . . . . . . 187
How to Uninstall Pegasys From Windows 95 Or Windows 98 . . . . . . . . . . . . . 187
How to Determine The Type Of ION Enterprise Install . . . . . . . . . . . . . . . . . . . 187
How to Specify a Vista Diagram to Open for a Given User on Startup . . . . . . . 188
Page 173
ION Enterprise Optimizations
ION Enterprise Administrator’s Guide
ION Enterprise Optimizations
Increasing Log Retrieval Capacity
The Log Inserter retrieves records from the device using one-shot programs. In a
system with a heavy logging burden, the following changes can be made to favour
record retrieval by the Log Inserter.
1.
In the Management Console, set the Update Period for each device from 500
ms (default) to 10000 ms. This setting specifies the frequency at which data
collected by polled program is retrieved from the device.
2.
Create a DWORD registry value called OneshotRatio under the
HKEY_LOCAL_MACHINE\SOFTWARE\Power Measurement\ION
Enterprise\5.0 key.
3.
Set the OneshotRatio value to 20. This value defines the number of one-shot
programs that are processed for each polled program. If the OneshotRatio value
does not exist, the default value is 4.
This is of particular use during first-time system startup, when a possibly large
backlog of records must be retrieved.
Improving System Performance By Changing Siteserver Thread Pool Size
For a system consisting of many simultaneously-connected sites, communications
performance is poor. Updates in Vista may be infrequent when the Log Server is
running.
The siteserv process uses two pools of threads to service the sites defined in an ION
Enterprise network, one pool for connected sites and one pool for disconnected
sites. The thread pool for connected sites has a default maximum size of sixteen. In
a site with a large number of continuously connect sites, system performance can
be improved by increasing this thread pool size.
To change the size of the thread pool available to connected sites:
1.
Under the HKEY_LOCAL_MACHINE\Software\Power Measurement\ION
Enterprise\5.0 registry key, create a new Registry DWORD value called
ConnectedThreadPoolSize.
2.
Assign a value of 50 (decimal) to the key.
The system does not have to be restarted to detect this change. The new value will
be detected automatically.
How To Start Log Inserter In Mode Where Only New Records Are Uploaded
If a new system (or new database) is started and no pre-existing data from the
meters is required, use the -q 'quick start' Log Inserter command line argument.
When started with -q as an argument, the Log Inserter will upload records with a
timestamp greater than NOW.
This can make the startup process complete much more quickly if meters have
already stored many records.
Page 174
Chapter 8 - Tips, Troubleshooting, FAQs
ION Enterprise Administrator’s Guide
ION Enterprise Optimizations
To put the Log Inserter in 'quick start' mode:
1.
Unregister the Log Inserter service (logsrv -unregserver in a command
prompt)
2.
reregister with the -q (logsrv -Service -q -a)
CAUTION
Once the system is caught up, be sure to shut down the ION Log Inserter Service, unregister it, and then
re-register it without the -q. If you fail to do this, on every subsequent restart, the Log Inserter will only
upload new data.
Optimizing Database Query Time
There are a few things you can do to optimize the database query time.
Use the ION Database Manager to defragment the appropriate database.
Use the ION Database Manager to Update Statistics on the appropriate
database.
NOTE
Instructions on how to perform the Defragmentation and Update Statistic operations can be found in
“The ION Database Manager” on page 140.
Run only one instance of SQL Server.
Run SQL Server 2000 instead of the SQL Server 2000 Desktop Engine (MSDE
2000).
Chapter 8 - Tips, Troubleshooting, FAQs
Page 175
Operation Differences for ION Enterprise 5.0
ION Enterprise Administrator’s Guide
Operation Differences for ION Enterprise 5.0
This information is only of use if you are familiar with certain operations in earlier
versions of ION Enterprise.
Querying a Downstream Device
A downstream device is a device whose data is logged by a recorder on a different
device. Some examples are
the Virtual Processor logging data from remote devices. Inputs to Virtual
Processor Data Recorders are registers from remote devices
the Virtual Processor logging data from Virtual Processor Modbus Import
module outputs which map to data from remote Modbus devices
an ION device that includes the Modbus Mastering feature logging outputs
from Modbus Import modules.
In ION Enterprise 4.5, accessing the data logged by device A on behalf of device B
meant configuring the query for a Data Log Viewer as follows:
1.
In the node screen, the node on which the data recorder physically resides was
selected
2.
In the list of recorders screen, the data recorder that was logging the data from
the remote device was chosen.
3.
In the choose columns screen, the relevant columns were chosen.
In ION Enterprise 5.0, accessing the data logged by device A on behalf of device B
means configuring the query as follows:
1.
In the node screen, choose the node from which the data originates, in this case
device B.
2.
In the list of recorders screen, you will see a data recorder that will something
like: My Data Recorder@device A@ device B. This is the one to choose.
3.
The column selection will proceed as before.
The following is a sample screen capture of the table selection screen:
Page 176
Chapter 8 - Tips, Troubleshooting, FAQs
ION Enterprise Administrator’s Guide
Operation Differences for ION Enterprise 5.0
Meter Configuration In Which Same Parameter Is Logged
Using Different Intervals
You can configure a meter so that the same input is used by different recorders and
recorded at different intervals. For example, Data Recorder 1 is recording kWh at
15 minute intervals, while Data Recorder 2 is recording kWh at 1 minute intervals.
When this data is viewed in ION Vista using the Query Wizard, both recorders
display all the values for kWh.
Archiving/Trimming Databases
The Archival utility does not exist in ION Enterprise 5.0. Archiving functionality
is part of the new ION Database Manager. Refer to the “Database Management”
for more information.
Trimming the System Log
The System Log Trimmer utility no longer exists in ION Enterprise 5.0. The ION
Database Manager performs this function now. Refer to the “Database
Management” for more information.
Using Reporter with Archived SQL Databases
Running reports on an archived SQL database is no different than running reports
on an archived Sybase database. The Database Manager utility creates the
corresponding DSN after each archive.
NOTE
If you are creating a DSN manually, please note that the DSN name for SQL databases must end with
<SQL> (e.g. MyArchivedDB<SQL>).
Chapter 8 - Tips, Troubleshooting, FAQs
1.
Open ION Reporter.
2.
Create or copy a new report and click on Properties.
3.
Click New... under Database queries to create a new query.
4.
Clear the “Show default ION Enterprise log” check box.
5.
Choose the appropriate archived database using the DSN drop down list.
6.
Choose the appropriate Log file using the Log drop down list.
7.
Click OK. You can now add another query, or you can save and generate the
report as normal.
Page 177
ION Reporter and Scheduled Tasks
ION Enterprise Administrator’s Guide
ION Log Server Service Changes
The Log Server Service has been split into two separate services: the ION Log
Inserter Service and the ION Query Server Service.
The Log Inserter appears similar to the old Log Server, but it is now only
responsible for inserting data. The Data Source setup register for the Log Inserter
is different from the Datasource setup register for the Log Server. The Query
Server is responsible for retrieving data for display in ION Vista, and it provides
connection string information used by ION WebReach. For more information
regarding the Query Server functionality, refer to the Vista documentation.
Accessing Archived Data in Vista
Open the Query Server node in Designer, and add additional Query modules for
each additional database to which you require access. The Data Source setup
registers need to be configured to point to the appropriate database.
Management Console Menu Changes
The following utilities have been renamed or removed from the Management
Console Tools menu:
Archive (removed)
System Log Trim (removed)
Options Manager (renamed License Manager)
VIP Setup (renamed Virtual Processor Setup)
ION Reporter and Scheduled Tasks
Most Windows operating systems include a graphical utility, called Scheduled
Tasks, for creating a schedule for routine operations, such as report generation.
The procedure for setting up Reporter to automatically generate reports is outlined
below.
Using Scheduled Tasks to generate reports
Page 178
1.
Open the Windows Control Panel and double-click Scheduled Tasks. The
scheduled Tasks window appears, listing all your scheduled tasks.
2.
Double-click Add Scheduled Task. This launches the Scheduled Task Wizard.
3.
Click Next to advance to the next screen. This screen has a program listing from
which you scroll down and select Reporter. Click Next.
4.
Type a name for your new task and select how often you want to perform the
task. Click Next.
5.
Set the start time and other relevant data for your schedule. Click Next. A screen
asking for your User name and Password appears as below.
6.
Enter your password and confirm it. A user name is automatically entered.
Chapter 8 - Tips, Troubleshooting, FAQs
ION Enterprise Administrator’s Guide
ION Reporter and Scheduled Tasks
7.
Click next. A summary screen of your schedule appears.
Select the check box Open advanced properties for this task when I click
Finish.
8.
Click Finish. The Properties screen of your task opens.
The Task tab displays the command line to run the Reporter. This is all you have
to modify on this tab. It should be highlighted in blue so click at the end of the
line.
9.
Add the following bold text to the end of the command line:
... repgen.exe -r<Report Name>
The -r calls the report, and Report Name is the name of the report in Reporter.
10. Select the Schedule tab and verify your schedule settings. To create more
schedules, select the Show multiple schedules check box. A list of schedules
appears; to create a new schedule, click New. You can edit each schedule below
their listing.
11. Set what options suit you on the Settings tab.
12. Click Ok to save your changes. You may be asked to enter your Password: enter
it and click Ok.
13. Repeat these instructions to create new schedules for each different report you
want to automatically generate.
NOTE
Make sure you have set the Date Range for your report in your report properties and have unchecked
“Show Report on screen” in the Distribution properties. Otherwise, when the report is being automatically
generated, it will pause and ask the user to input a date range for the report; therefore, the report cannot
be finished until you come back and set the date range.
Chapter 8 - Tips, Troubleshooting, FAQs
Page 179
Designer FAQs
ION Enterprise Administrator’s Guide
Designer FAQs
Node Diagrams
When I try to open a node diagram, I get the following message:
Only one user can view or edit a node diagram at a time. If another user has
already opened the diagram for the node you selected, you will not be able to open
it. Wait for the other user to finish and then try again.
Does opening a node diagram affect the node?
No, opening a node diagram does not affect the operation of the node. The node
continues to perform all the functions it is programmed to do until you change
module configurations or change links and send these changes to the node. At that
point, only the operation of the affected modules is modified.
How long should it take to open or save a node diagram?
Each time you open or save a node diagram, Designer communicates with the
node. The amount of time it requires depends on the type of communications link.
For example, a node connected via modem may take more time than one linked
directly to the network through Ethernet.
When I try to open a node diagram, I get the following message:
This means you do not have access to the node diagram. Talk to your system
administrator about changing your authorization.
When I try to save a node diagram, my changes are rejected.
In some cases, the node may reject one or more of the changes you have sent. This
may occur, for example, if the node does not have enough processing power to
implement the proposed changes. Other possible causes include:
Setting a Data Recorder Depth setup register too large. (The node may have
insufficient non-volatile memory to support the requested depth.)
Creating circular linkages. (Most nodes do not allow modules to link to
themselves, or chains of modules to link back to an earlier module in the chain.)
Exhausting the number of custom labels available on the node. (Some nodes
have a limited number of custom labels available.)
Page 180
Chapter 8 - Tips, Troubleshooting, FAQs
ION Enterprise Administrator’s Guide
ION Modules
When a change is rejected, Designer displays a dialog box listing each module
involved; the associated register (if applicable); and a brief description of the
problem. If you click on a module listed in this box, Designer displays any
additional details available.
Since the changes have already been made in the diagram, Designer provides a
reset function that will undo the rejected changes and restore the previous
configuration of the affected modules.
NOTE
The Reset function will not undo changes that have been successfully sent and saved to the node.
ION Modules
Why can't I make changes to my node diagram?
The toolbox must be displayed before you can make any changes. From the
Options menu, choose Show Toolbox.
I want to create a new module, but when I try to drag the module icon from the
toolbox, I get the following message:
No more modules of the specified type are available in the node. Some nodes have
a maximum number of modules you can create for each module type; for example,
on a ION 7300 you can create up to 16 Maximum modules. Since there is a finite
number of each module available, it may be necessary to reuse modules that have
been placed in the node diagram. You may also want to link a module that is
already linked if you want to augment the function it is performing.
Chapter 8 - Tips, Troubleshooting, FAQs
Page 181
Linking and Configuring ION Module
ION Enterprise Administrator’s Guide
Why do some module icons appear on top of others?
The more recently a module is created, the closer it is to the top. To send a module
to the back, select the module and then press CTRL+B. (Remember, when editing
a node diagram, the toolbox must be displayed - from the Options menu, select
Show Toolbox.)
Linking and Configuring ION Module
What are those **X** symbols around register names?
or
Why do I get a “Parent” message box?
In some cases, multiple modules share the same registers (usually setup registers).
This saves you from having to specify the same values in multiple places. For
example, in the ION 7700 there are three different Power Meter modules, but they
all use the same setup registers (i.e. the same PT and CT scales, the same Volts
Mode, etc.). A shared register still belongs to a single module (referred to as the
register's parent) and the other modules that share it simply borrow the setting of
this register.
Designer identifies shared registers by placing asterisks (*) around them in the
Module Configuration dialog box.
If you try to change the value or the label of a shared register, Designer alerts you
that the register is shared and it reports which module is the true parent. If the
module you right-clicked is not the true parent, you can still change the value or
label, but when you return to the node diagram, the selected module icon will not
change; the module icon for the true parent however appears pending.
For example, in a ION 7300 if you right-click on the MUPower Meter icon, then
change one of the setup registers, the MUPower Meter icon will not change in the
node diagram but the Power Meter module icon changes to look pending.
Why can't I change some register values and/or labels?
The node protects some registers because they contain information that cannot
change.
Copying and Pasting ION Modules
Why can't I paste one of the modules I've copied?
It is possible that one or more modules in the group cannot be pasted, particularly if
you are copying from one node type and pasting into a different node type. Some
possible reasons include:
The module is not supported on the selected node.
The node cannot create the new module because it has already created the
maximum number of modules of that type.
The module is a core module. (Core modules cannot be created or deleted.)
Page 182
Chapter 8 - Tips, Troubleshooting, FAQs
ION Enterprise Administrator’s Guide
Copying and Pasting ION Modules
The module is a Factory, Communications or Diagnostics module. Designer will
not paste these types of modules because they can disrupt communications with
the node.
When pasting new modules, why doesn't the module number of the pasted module
match the module number of the copied module?
When pasting modules, Designer can either replace existing modules or create new
ones. If you paste a module into a diagram that already has a module of the same
type and number, Designer may create a new module using the next available
module number. This may occur for a few reasons:
If you free paste a module, it will not replace an existing module. Lock pasting
the module overwrites the existing module with the new one (and retain its
number).
You may be using Designer version 2.0 with devices that are operating on an
older version of firmware (for example, version 1.3). Ensure that your devices
have been upgraded to the latest version of firmware available.
Why have I lost some inputs?
Many ION modules have free numbers of inputs depending on the node type. For
example, an Arithmetic module on a Virtual Processor supports more inputs than
an Arithmetic module on a ION 7700. If you attempt to paste a Virtual Processor
Arithmetic module into a ION 7700 and it has too many inputs, the extra inputs are
ignored.
Why does the device return an exception to my pasted labels?
On some ION meters, the length of custom labels is restricted to 15 characters, but
the Virtual Processor support labels of unlimited length. If you copy a module with
a long label and paste it into an ION 7300, the node truncates the label; however,
the various software components (i.e. Designer, Vista, the Log Server, etc.) attempt
to continue using the longer label.
Why does the device return an exception for some of my pasted register values?
Different nodes support different ranges and options for numeric bounded and
enumerated setup registers. For example, the log capacity of a Data Recorder can
be much larger on a Virtual Processor than on a ION 7700. The length and
allowable characters in string setup registers may also vary across node types. If
you paste a module into a node that does not support how one or more of the
module's setup registers is set, you are notified when you attempt to send and save
the module to the node.
Why do I get an exception when I paste a Scheduler module from the Virtual
Processor to the ION 7700?
On the ION 7700, there is a limit on the number of activities you can program into
a Scheduler module; however, no such limit exists for the Virtual Processor. If you
copy a Scheduler module from a Virtual Processor and paste it into an ION 7700,
the paste will be successful but you are notified when you attempt to send and save
the module to the node. You must delete activities before the module can be saved.
Chapter 8 - Tips, Troubleshooting, FAQs
Page 183
Miscellaneous FAQs
ION Enterprise Administrator’s Guide
Why do I get an exception when I paste a large series of modules from the Virtual
Processor to the ION 7700?
Different nodes have different limits on the number of modules you can link in a
row. For example, on the ION 7700 and ION 7300, you can link a maximum of eight
modules in a row. The Virtual Processor on the other hand has no limit. If you copy
a linked group of modules and paste it into a node that does not support a chain
of modules that long, the modules are created but some of the links are not.
Why do I lose some inputs when I paste a Maximum module from the Virtual
Processor to the ION 7700?
Unlike the Virtual Processor, the ION 7700 cannot support inputs that reference
other devices. All external inputs pasted to a 7000 series meter are set to null.
Why do I lose some inputs when I paste a Virtual Processor Data Recorder to an ION
7700 Data Recorder?
The inputs on a Virtual Processor Data Recorder accept string registers, but those
on an ION 7700 Data Recorder do not.
Miscellaneous FAQs
How can I use Microsoft Access to view ION Enterprise data, when the data from a
newly configured data recorder is not available?
1.
Start Access
2.
Go to the Tools/AddIns menu
3.
Add the 'Link Table Manager'
4.
Select the database you wish to view data from and update the link
A user has made a change to a data recorder and this resulted in a new report view.
Even though the new view has been generated, it will not be available in Access
until the Table Manager has been used to update the link.
When using WebReach, I get image placeholders (an “x” inside a box) at the location
where there should be an image. How can I get the images to appear again?
Close Internet Explorer. Have your network administrator reset IIS (Internet
Information Services) using the “iisreset” command. Once IE is opened and
WebReach is accessed again, the images should appear as normal.
Why are my manual connection requests never removed?
Manual connection requests made through the Management Console are only
removed when manual disconnection requests are issued. Therefore, rebooting a
workstation, stopping the ION Network Router Service, or upgrading ION
Enterprise does not remove manual connection requests. Since manual connection
requests have a higher priority than scheduled connection requests, make sure that
sites (with manual connection requests) are manually disconnected before
implementing a scheduled connection scheme.
Page 184
Chapter 8 - Tips, Troubleshooting, FAQs
ION Enterprise Administrator’s Guide
How To...
When I try to run a power quality report with MS Office XP, the report does not
complete and I receive the following error: Error 1004 (Programmatic access to
Visual Basic Project not trusted) has occurred in Microsoft Excel. How can I get the
report to work?
The problem here is that Office XP adds a security option to deliberately lock out
programmatic access to the VBA object model from any Automation client unless
you choose to permit such access. (This is a per user and per application setting
that denies access by default.)
For any Automation client to access the VBA object model programmatically, the
user running the code must explicitly grant access. To turn on access, do the
following:
1.
Open the MS Office application in question.
2.
Select Tools > Macro > Security... to open the Security dialog box.
3.
Select the Trusted Sources tab.
4.
Select the Trust access to Visual Basic Project check box to enable access.
5.
Click OK.
You may need to restart the application for the code to run if you automate from a
Component Object Model (COM) add-in or template.
When viewing my network diagram in Vista, why can’t I see new devices that I
added in the Management Console?
Vista does not support dynamic configuration. Shut down the Vista application
before adding new network devices using the Management Console. When you
have added your new devices, launch Vista, and generate a new network diagram
(File > Generate Network Diagram). The newly added devices appear in the new
network diagram.
How To...
Each heading in this section marks a task. Below each heading is a set of
instructions pertaining to the task.
How to Manually Set Time Synchronization with ION Enterprise
The timesync.exe program can be used to manually force the time synchronization
of a site. The program resides in the system/bin directory.
Usage (where SITE_NAME is the name of the site):
timesync.exe SITE_NAME
Note that for an Ethernet device, the site name and the device name are equivalent.
Chapter 8 - Tips, Troubleshooting, FAQs
Page 185
How to Add Constraints To A Dialout Modem
ION Enterprise Administrator’s Guide
How to Add Constraints To A Dialout Modem
Use the following steps to constrain a particular modem so that it is used only with
specific sites.
1.
In the Management Console, view the Sites window (Properties tab).
2.
Highlight a modem site of interest.
3.
Right-click the ‘Sites’ heading at the top of the window and choose View Field à
ID from the pop-up menu. The ID number for the site will be displayed in a
dialog.
4.
Record the ID number for the site and close the dialog.
5.
View the Dialout Modems window (Properties tab).
6.
Double-click on the dialout modem of interest.
7.
On the Dialout Modem Options dialog, enter a value in the Constraints field.
Constraints may be of the following formats, in which <ID number> is the ID
number of the modem site:
WHERE port.ID IN (<ID number>)
WHERE port.ID NOT IN (<ID number>)
WHERE port.ID = <ID number>
WHERE port.ID <> <ID number>
Note that to reference multiple sites, you must use a comma-separated list of ID
numbers for each site: for example, WHERE port.ID IN (1, 2, 3).
Page 186
Chapter 8 - Tips, Troubleshooting, FAQs
ION Enterprise Administrator’s Guide
How to Preserve A Pegasys Install When Installing ION Enterprise
How to Preserve A Pegasys Install When Installing ION Enterprise
Use the following the steps to install ION Enterprise without upgrading an existing
Pegasys installation on the same machine.
1.
Run regedit.
2.
Navigate to HKEY_LOCAL_MACHINE\SOFTWARE.
3.
Rename the Power Measurement Ltd. key as Power Measurement Ltd.old.
4.
Install ION Enterprise. The installer will be unable to find reference to an
existing Pegasys installation and will proceed as if the operation was a new
install.
5.
After the install is complete, run regedit again.
6.
Rename the Power Measurement Ltd.old key as Power Measurement Ltd.
How to Uninstall Pegasys From Windows 95 Or Windows 98
1.
Stop all Pegasys applications
2.
Using Sybase Central and stop and delete the database service.
3.
Using the following command from the winnt\system32 directory, delete the
Pegasys system log service: slservice -u
4.
Using the Add/Remove programs applet on the Control Panel, uninstall Sybase
5.
Delete Pegasys 2.0 directory
6.
Using the registry editor, delete the following registry entries:
HKEY_LOCAL_MACHINE\Software\Power Measurement Ltd.
HKEY_CURRENT_USER\Software\Power Measurement Ltd.
7.
Delete the following environment variables from the autoexec.bat file:
PML_ROOT1 and PML_ROOT2
How to Determine The Type Of ION Enterprise Install
Use the following instructions to determine if an ION Enterprise is a Primary,
Secondary, or Client install.
Chapter 8 - Tips, Troubleshooting, FAQs
1.
Start Regedit.
2.
Browse to HKEY_LOCAL_MACHINE\SOFTWARE\Power
Measurement\ION Enterprise\5.0.
3.
Locate the SetupType key. The data value for the Setuptype key gives the install
type.
Page 187
How to Specify a Vista Diagram to Open for a Given User on Startup
ION Enterprise Administrator’s Guide
How to Specify a Vista Diagram to Open for a Given User on
Startup
In some circumstances, it is desirable to maintain a specific Vista workspace for a
particular user, so every time the user logs on to Vista, the same set of diagrams is
opened.
Page 188
1.
Log on to Vista using the user account that is to be set up.
2.
Organize Vista to appear as you want it to appear on startup.
3.
Save, and close Vista.
4.
Using Windows Explorer, navigate to the ION Enterprise (or PEGASYS)/config/
cfg/ud directory. Notice there is a .wsu file named for each user account.
5.
Locate the .wsu file for the user account you want to lock down and right click
to bring up the Properties dialog box.
6.
Mark the file as Read-Only.
Chapter 8 - Tips, Troubleshooting, FAQs
MRP# 70000-0204-01
Revision Date: August 18, 2004