1
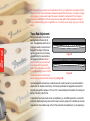
OWNER’S MANUAL
FOR FENDER® BASSES
Languages
1
Si necesita acceder a los manuales de instrucciones de las guitarras bajos en Español, visite
nuestra página web http://www.fender.com/support
Vous trouverez le mode d’emploi des guitares basses Fender® en français sur le site
Internet http://www.fender.com/support
Il manuale d’uso dei bassi Fender® in Italiano è disponibile nel nostro sito web
http://www.fender.com/support
Das Fender Bedienungshandbuch für Bässe in Deutsch, finden Sie auf unserer Website http://
www.fender.com/support
Se desejar ler o manual do proprietário Fender® para baixos em português, por favor, visite
nosso website em http://www.fender.com/support
日本語のベースギター用 Fender オーナーズ・マニュアルは、弊社のウェブサイト
http://www.fender.com/support をご参照ください。
Welcome to the
Fender® Family
Congratulations, you’ve just purchased a piece of
history from Fender Musical Instruments, the company
that brought the solid body electric bass guitar to the
world.
Whether you are new to the bass or even if you’ve
been playing for years, this manual will give you all the
information you need to take the mystery out of tuning,
changing strings, setup, adjustment, intonation, care, and
maintenance of your bass. It’s easy! And once you’ve learned
how to care for your bass properly, you’ll find that it will take
great care of you too, by providing a wonderful vehicle for
years of fun, creativity, and musical self-expression.
With that in mind, we hope you’ll take a few moments
to read through this entire owner’s manual. You’ll be
glad you did!
2
History
From the Beginning…
Fender---our very name is synonymous with all things bass. The electric bass guitar and the bass
amplifier simply weren’t available to the masses before Clarence “Leo” Fender and his small
Southern California company conceived of and produced the Precision Bass® and the Bassman®
amplifier in the early 1950s.
Throughout the 1930s and ‘40s, the upright bass, which was the standard in popular music at the
time, could barely be heard beneath the rumble and volume of the pop and big bands of the era. In
1951 Fender changed all of that with the creation of the Precision Bass®, an electric bass guitar with
“precise” intonation that when amplified, could be easily heard and felt on the bandstands and
throughout the dance venues of the day, forever altering the landscape of popular and recorded
Music.
3
History
In 1960 Fender created another revolutionary instrument, the Jazz Bass®. With
its offset waist, two pickups and narrow neck, the Jazz Bass was sonically
versatile, faster playing, and soon became the standard by which all other bass
guitars were measured.
Fender basses became the most recorded basses on the planet and they
persist in dominating the catalogs of popular music today because the
unique character of their voices has helped to define and shape the very
styles and genres of electric music we all love and listen to.
Fender continues to be on the cutting edge of bass guitar development
and offers a phenomenal selection of world class basses and bass
amplifiers for everyone from the beginning player to seasoned touring
and recording professionals.
From James Jamerson to Geddy Lee to Jaco Pastorius to Marcus Miller, the Fender bass has been the vehicle of choice for the
masters and innovators. With your new bass, the same opportunity to become a virtuoso is now in your hands.
So,… now that you have a brand new bass guitar, it’s time to strap it on, plug it in and Make History™!
4
History
1951
Precision Bass®
and
Bassman® amp
created
1946
1954
Fender founded by
Stratocaster®
Clarence Leonidas
unveiled
“Leo” Fender
1950
Telecaster®
and
Esquire®
created
5
1960
Jazz Bass®
created
1965
Fender sold
to CBS
Timeline
2000+
Fender continues to innovate into the
future
1958
mid-1980s
Jazzmaster® quitar
modern-era Fender
created
launched
1962
1952
® quitar
Jaguar
The Twin Amp®
created
created
6
Anatomy 101
Anatomy
7
Whether you know the names of all the parts or not, anatomical charts are
always cool. Here’s the basic anatomy of a bass guitar:
body
pickup pole
pickups
piece
strap button
bridge
saddle
neck
bridge
strap
button
intonation
adjustment
screw
output
jack
volume/tone
control knobs
string
pickguard
truss rod
adjustment
(depending on
model)
truss rod
adjustment
(depending on
model)
dot position inlay
fret
tuning machines
(keys)
fingerboard
Anatomy
tuning machine
post (shaft)
12th fret
(octave) position
inlay
nut
string tree
(retainer)
headstock
8
9
You can always contact us directly to get this information as well, either
by mail, telephone or e-mail:
Specs
Controls &
For switch/control function diagrams, parts lists and wiring diagrams for
your specific model, visit the “Support” section of www.fender.com, where
the “Wiring Diagrams/Parts Lists” link will take you to info several Fender
instrument models.
Attn: Consumer Relations
Fender Musical Instruments Corp.
8860 East Chaparral Road, Suite 100
Scottsdale, Ariz. 85250-2610
480.596.7195
[email protected]
10
Info
Features
For detailed info on the features and specifications of your bass guitar,
visit the “Products” section of www.fender.com, where each individual
bass guitar listing has a “Specs” link that’ll give you an easy-to-read list.
Info
UNDERSTANDING THE EFFECTS OF TEMPERATURE AND HUMIDITY…
Your bass has been constructed with the finest materials and processes available. As part of its final assembly, it has been
hand adjusted and set up to the Fender® factory specifications, which produce the best possible playing action. However, this
instrument, like all instruments made from wood, can be sensitive to fluctuations in temperature and humidity.
The woods of your bass absorb moisture from the air when it is humid, and they evaporate moisture out when the humidity
falls. The wood also expands and contracts with changes in temperature. These natural movements are fairly minute, and while
generally not visible to the naked eye, they can dramatically affect the setup and playability of the instrument.
On a hot day, for example, when an already-tuned instrument is taken from a hot car into a cool air-conditioned environment
and removed from its case, its woods cool and shrink fairly quickly. This contraction decreases the string tension and causes
the tuning to drop noticeably flat.
These same aspects may come into play after an instrument leaves our factory and before you receive it from your Dealer. The
playing action and setup of the instrument when you receive it will depend on several factors, such as:
•
•
•
•
•
•
•
11
The amount of time between the final assembly and when the instrument actually ships from Fender.
The amount of time taken during shipping for the instrument to travel from Fender’s warehouse to its final destination.
The method of shipping the instrument, i.e. ground, air etc.
The climatic conditions the instrument is exposed to during shipment.
The climatic conditions of the shipping destination.
The amount of time the instrument is in stock at your Fender Dealer before you receive it.
Whether or not a product preparation setup has been performed on the instrument by your Dealer before you receive it.
DO NOT BE ALARMED IF, WHEN YOU FIRST RECEIVE THE
INSTRUMENT, YOU FIND THAT THE PLAYING ACTION IS NO
LONGER SET TO FACTORY SPECIFICATIONS. IT IS NATURAL
FOR THE SETUP TO CHANGE OVER TIME WHEN EXPOSED TO
THE FACTORS DESCRIBED ON THE PREVIOUS PAGE.
Fender electric instruments have numerous points of adjustment that
will allow you to compensate for the changes in the playing action that
may have occurred between final assembly and when you receive
the instrument. If you find the action to be too high or too low for your
taste or playing style, please review this manual for details on the
setup, adjustment, and maintenance that will return the instrument to
an optimum playing condition for you.
Please Note: Initial standard setup and adjustment of the instrument
and its components at the time of purchase are considered normal
Dealer product preparation and are not covered by the Fender
warranty. Upon receipt and acceptance of the instrument, the
consumer assumes all responsibility for setups, adjustments, and
maintenance.
12
Info
If you have any doubts in your ability to make these adjustments
correctly, take your bass to an Authorized Fender Service Center for
assistance.
Great Electric Bass Guitar Setup
While it is certainly possible to give your bass a great setup just using some basic tools and your eyeballs,
we have found that the job is considerably easier with the right tools. For best results in changing strings and
performing setups and adjustments, we recommend using the tools listed below.
Set-up
• Electronic tuner
• Wire cutters
• Capo
• Set of automotive feeler gauges (.002” - .025”)
• A 6” ruler (with 1/32” and 1/64” increments)
• A large Phillips screwdriver (Vintage Series basses), or the hex truss rod adjustment wrench that accompanied your bass (modern basses)
• Mini flat-head screwdriver (Vintage Series basses), or the hex saddle height adjustment wrench that accompanied your bass (modern basses)
TUNING
If you don’t own an electronic tuner, you may want to purchase one. It will simplify many of the following
procedures. If you already have one, just plug in and turn the bass’s volume control all the way up. Pluck
either an open string or the 12th fret harmonic*, to produce the clearest tone for the tuner. (*A harmonic is
a “chime-like” tone that is produced by lightly touching the exact mid point of the string at the twelfth fret
with your finger tip, and plucking the string with the other hand.) Note: If you press the string too hard, it will
choke the string and mute the sound. With a little practice though, you’ll develop the light touch needed to
make the harmonic ring out.
13
If you’re playing a 4-string bass, tune the open strings to E, A, D, G
E
A
D
G
If you’re playing a 5-string bass, tune the open strings to B, E, A, D, G
E
A
D
G
Set-up
B
If you’re playing a 6-string bass, tune the open strings to B, E, A, D, G, C
B
E
A
D
G
C
14
Set-up
Changing Strings
A fresh set of strings can breathe new life into your bass, and something as simple as how you wind the strings onto the tuning machine posts
when changing your strings, will determine tuning stability and string tension. It’s also a good idea to stretch your strings a little as you tune
to make sure that each string is seated well and snugged down on the tuning machine post. This will save you some tuning frustration down
the road. Just grab the string in the middle, lightly tug it up and down to remove slack, and then retune. (See your Fender® Dealer to obtain
replacement Fender bass strings.)
First start by pulling each string through the bridge, over the nut and past the corresponding tuning
machine post, with enough extra length to allow a minimum of three winds around it. Mark that point
on the string. With wire cutters, crimp the string over at a 45-degree angle one inch before the mark,
then clip off the excess at the mark, (Figure A).
Next, place the end of the string all the way down in the hole in the center of the tuning machine
post and bend the string over in the slot. Wind the tuning key to tighten the string to pitch while
holding the loose end of the string in place with your
other hand, (Figure B). Make sure that the string does
not overlap itself and is wound from the top down to the
base of the tuning machine shaft, to insure the string is
seated properly on the nut with the most acute break
angle possible, (Figure C).
15
Figure B
Figure A
Figure C
Changing Batteries
Fender produces basses with passive electronics (no batteries) and basses
with active (battery-powered) preamps. Some active basses have an active/
passive switch, to switch between modes. Depending on the instrument, your
active bass may have either a 9-volt (one-battery) system, or an 18-volt (twobattery) system. (Visit the Fender website for detailed specifications for your
instrument.)
As your batteries lose their power, the voltage supplied to the preamp will
also drop, which will result in distortion and noise in the bass’s signal. When
distortion and noise occur in your signal, it is your cue that the batteries must
be changed for the instrument to operate correctly. Note: Active basses that
do not have an active/passive switch will not play passively when the batteries
are dead.
For basses with 2-battery 18-volt preamps, always replace both batteries at
the same time, as mismatched voltages may adversely affect the performance
of the preamp. It is a good idea to use the same brand of battery consistently,
over the life of the instrument.
Weather, specifically temperature and humidity, may have a
dramatic impact on the way your bass plays. All instrument
woods expand and contract with seasonal fluctuations in
temperature and humidity, and naturally, string height and
playing action are affected. Depending on the climate where you
live, your bass may need routine adjustments a couple of times
a year.
Fender® basses have several points of adjustment which
are there to compensate for the adverse effects of these
environmental changes, and more importantly, these features
allow you to tailor the playing action of the bass to your own
personal playing style.
Note: The following factory specifications are median specs,
and are meant only to guide you. They should not be taken as
hard and fast rules. If you prefer your action a little higher or
lower, change it as you like, but be aware that higher action will
be more difficult to play and lower action may result in excessive
fret buzz, depending on your technique, or style of play.
16
Set-up
Typical battery life for both systems is approximately 600 hours of playing time.
All Fender basses with active preamps are equipped with switching jacks which
engage the battery when a cable is plugged into the jack. Note: To maximize
battery life, unplug your cable from the bass when not playing the instrument.
Setup and Adjustment Made Easy
The following setup procedures and specifications are for your Fender bass as equipped with the
strings that come on the instrument as standard equipment from the factory. If you plan to change
string gauges, you may need to adjust the specs somewhat to compensate for the changes in
string sizes. Modifications of the specs may also be made (within limited parameters) to adjust
for your individual playing style or application (i.e., how hard you pick, finger, slap, pop or fret the
bass).
Truss Rod Adjustment
Set-up
String tension exerts a tremendous
bending force on the neck of the
bass. The adjustable steel truss rod
in the neck exerts a counter-force to
the pull of the strings. If these two
opposing forces are not in harmony
with each other, the result will be a
poorly playing instrument. Note: A
truss rod that is too loose will result
in a concave neck bow and high
action, which will require more effort
to play, (Figure D). A truss rod that is
too tight will result in a convex neck
bow, excessively low action and buzzing strings, (Figure E)
Figure D
Figure E
An ideally adjusted neck will have a moderate amount of relief (curvature), to accommodate the
amplitude of the vibration of each string. The factory specification for appropriate neck relief for
Fender® bass guitars is between .012” and .014”, measured between the bottom of the string and
the top of the fret, at the 7th fret.
To determine if your bass needs a truss rod adjustment, you must first measure the current relief
in the neck. Before beginning, make sure the bass is tuned to proper pitch to facilitate an accurate
measurement. Next, install a capo at the 1st fret (nearest to the headstock). If you are adjusting a
17
4-string bass, depress the “E” string at the last fret with one hand. (If you are
adjusting a 5 or 6-string bass, depress the “B” string at the last fret.)
With the feeler gauge in your other hand, check the gap between the bottom
of the string and the top of the 7th fret and make note of the gap, (Figure F).
The gap should be between .012” and .014”. If you don’t have feeler gauges
don’t give up. You can approximate the appropriate gap by stacking a plain
sheet of paper on top of a regular business card.
If you find your truss rod needs adjustment, detune the strings first, to relieve
neck tension before making the adjustment, and remember to retune to pitch
before measuring again. To adjust the truss rod, use either a large phillips
or flathead screwdriver (for most vintage style basses), or the hex wrench
supplied with your bass (for modern basses).
Figure F
If the neck is too concave, (Figure D), turn the truss rod nut clockwise, (Figure G). If the neck is too convex, (Figure E), turn the truss
rod nut counter clock-wise, (Figure H). Check your tuning, then
re-check the gap with the feeler gauge, Note: Adjust the truss rod
in small increments of only 1/4 turn at a time and allow time for the
wood to settle before measuring and adjusting again.
If you meet excessive resistance, if your neck needs constant
adjustment, or you’re just not comfortable making this adjustment
yourself, take your bass to an authorized Fender Service Center.
Figure G
Figure H
18
Set-up
Note: For vintage style basses with the truss rod adjustment at the
heel of the neck, you must remove the strings and loosen the neck
mounting screws and/or remove the pickguard to gain access to the
truss rod adjustment nut.
String Height (Action) Adjustment
Set-up
The factory specification for string height for Fender® bass guitars is 6/64” on both the bass and treble sides. Before beginning, make sure your
bass is tuned to proper pitch to facilitate an accurate measurement. Then, using your ruler, measure the distance between the bottom of each
string and the top of the 17th fret, (Figure I). Adjust the bridge saddles to height according to the the factory recommendation, then re-tune. Use
a mini-standard screwdriver for vintage saddles, (Figure J). Use the supplied hex wrench for modern saddles, (Figure K). Don’t be afraid to
experiment with the height a little bit, until it feels right to you. If you play with a light touch you can get away with lower action. If you play hard,
you’ll need a little higher action to avoid fret buzz and rattles.
Figure I
Figure J
19
Figure K
Shimming and Micro-Tilt™ Adjustment
Shimming is a procedure used to adjust the pitch, or angle of the neck in relation to the body and may be accomplished with either the use of
a shim or by performing a Micro-Tilt adjustment. The need to adjust the pitch may occur when the relative string height is high, but the action
adjustment is already as low as the string height adjustment will allow. A shim or a Micro-Tilt adjustment will tilt the neck back, relative to the plane
of the body, which allows an increased range of action adjustment.
The Micro-Tilt adjustment is a feature on some Fender® basses, that performs the same function as shimming, by tightening a hex screw in the
neck pocket of the body against a pressure plate installed in the bottom of the neck. The Micro-Tilt eliminates the need to remove the neck from the
body to perform the adjustment.
Figure L
Figure M
20
Set-up
For those basses with the Micro-Tilt adjustment and a 3-bolt neck plate, first loosen the two neck mounting screws at the top, 1/2 turn. Next, loosen
the neck mounting screw nearest to the adjustment access hole on the neckplate by at least 4 full turns, (Figure L). Then, tighten the hex screw
through the hole in the neck plate with a 1/8” hex wrench approximately 1/4 turn, (Figure M). Retighten the neck screws when the adjustment is
complete.
To shim the neck, you must first remove the strings. Next, remove the four screws that hold the neck in place then separate the neck from the body,
(Figure N). Note: All finishes remain somewhat elastic. Use care in separating the neck from the body as damage to the finish may occur if the
neck finish has adhered to the body finish. Inadvertent damage caused to an instrument during set-up or adjustment is the responsibility of the
consumer and will not be covered under the Fender® warranty.
Set-up
Place a shim approximately 1/4” wide x 1 3/4” long x .010” thick, (the thickness of a standard business card) at the end of the neck pocket, (Figure
O), and re-attach the neck. Placing the shim in the neck pocket will effectively lower the string action, and allow approximately 1/32” of additional
saddle height travel. Note: If you feel you need to make a pitch adjustment and you’re not comfortable with the procedure, take your bass to an
authorized Fender Service Center.
21
Figure N
Figure O
Pickup Height Adjustment
Properly adjusted pickups will ensure that your bass is performing to the best of its capability. On the other hand, improper pickup height can be
the source of a couple of potentially confusing problems. Pickups set too low will appear to have a loss of output. Pickups set too high can cause
excessive magnetic string pull, which may result in pitch warbling or false sharp readings when intonating your instrument. The pickups on your
new bass are height adjustable for locating them in the appropriate relative position to the strings for optimum performance.
To measure pickup height, depress each of the outside strings at the last fret. Using your ruler, measure the distances from the bottom of the
strings to the top of the corresponding pole pieces on the pickups, (Figure P). For pickups without pole pieces, or those having flush mounted pole
pieces, measure to the pickup surface. Use the Pickup Height Adjustment Chart as a starting point.
Figure P
Figure Q
22
Set-up
The actual height you adjust to may vary, depending on the amount of magnetic pull of the pickup and the type of strings you are using. Heavier
gauges of strings generally produce a higher amplitude of vibration and may require a bit more clearance. Adjust pickup height with a small Phillips
screwdriver, (Figure Q). Note: When adjusting a pickup higher, it may be necessary to physically pull the pickup up into its raised position, as the
foam spacer under the pickup typically compresses over time and will need the lift to help it expand and fill the void.
Set-up
Pickup Height Adjustment Chart
Pickup Type
Bass Side
Treble Side
Vintage Style Precision Bass®
8/64”
6/64”
Vintage Style Jazz Bass®
8/64”
6/64”
Standard Jazz Bass
7/64”
5/64”
Standard Precision Bass
7/64”
5/64”
American Standard Jazz Bass
7/64”
5/64”
American Standard Precision Bass
7/64”
5/64”
Vintage Noiseless™ Jazz Bass
8/64”
6/64”
N3 Noiseless Jazz Bass
8/64”
6/64”
Special Design Humbucking
7/64”
5/64”
23
Intonation Adjustment
Note: Adjust the intonation only after completing all of the “Setup” steps on the previous
pages. To intonate the bass we either shorten or lengthen the active vibrating length
of each string so that it will be in tune with itself, relative to the scale length of the
instrument. Intonation may be affected by climatic conditions, changes in neck relief,
dirty, worn strings and even the process of putting on brand new strings, so it’s a good
idea to make checking and adjusting intonation a regular part of your maintenance
routine.
Modern Bridge
Figure R
Set-up
To set the intonation for your bass you will need an electronic tuner and either a small
Phillips or standard screwdriver or hex wrench, (depending on whether the saddle
length adjustment screws on your bridge are either Phillips, standard or hex). Note: A
bass that has not been properly intonated will not play in tune, up and down the neck,
even if you have tuned each string to accurate pitch with an electronic tuner.
Vintage Style Bridge
Figure S
24
The procedure for setting your intonation is as follows:
1.
Plug into your tuner and turn the volume full up on the bass. Strike the harmonic, (see Tuning, page 13), at the 12th fret,and tune the string to the appropriate pitch.
2. Lightly press the string to the 12th fret, and recheck the pitch on the tuner. (If you press too heavily it will result in a false sharp reading.)
3. If the pitch of the harmonic and the pitch of the fretted note agree, then the string is properly intonated, and no adjustment will be necessary. If the two pitches disagree, you’ll need to make on of the following adjustments, using either a Phillips screwdriver or a hex wrench, depending on your specific bridge.
Set-up
4.
If the fretted note is sharper (higher in pitch relative to the harmonic), you will need to lengthen the active vibrating length of the string until the two pitches agree. To do this, turn the saddle length adjustment screw clockwise, moving the saddle toward the back of the bridge, until the harmonic and the fretted note register as the same pitch, (Figure R). It’s a good idea to stretch and re-tune the string during the adjustment, as the movement of the saddle will affect the pitch.
5. If the fretted note is flatter, (lower in pitch relative to the harmonic), you will need to shorten the active vibrating length of the string until the pitches agree. To do this, turn the saddle length adjustment screw counter-clockwise, moving the saddle forward, until the harmonic and the fretted note register as the same pitch, (Figure S). Remember to stretch and re-tune the string. Note: You may need to de-tune slightly and manually push the saddle forward to complete the adjustment, as the downward pressure from the string may not allow the saddle to move forward freely.
6.
25
When these procedures have been completed on each string, your bass should be properly intonated. Perform a final tuning check and there’s only one thing left to do. Just plug into your amp and Make History™!
CARE AND MAINTENANCE
Your new Fender® bass is precision crafted to give you many years of playing satisfaction. A few simple maintenance
procedures will help keep your instrument in top condition for years to come.
Keep Your Bass Clean: Dirt, dust, skin oils, perspiration and smoke can prematurely age the finish and fittings of your
bass. Wipe down the entire instrument with a soft dry Fender approved polish cloth after each use. Clean and polish your
bass periodically using a Fender approved polish on the finished wood surfaces and Fender approved polish/cleaner
on the metal surfaces, then dry with a soft polishing cloth. Visit www.fender.com for information on Fender approved
polish and polishing cloths.
Oil The Fretboard Periodically: The natural oils in Rosewood, Pau Ferro and Ebony fingerboards may dry out
over time. Rough, exposed fret edges are evidence of dry, shrunken wood. It is a good idea to give your fretboard
a “drink” of lemon oil, boiled linseed oil or other non silicone-based wood/furniture oil, periodically to preserve
its integrity and natural beauty. Note: With the strings removed, apply oil first to a clean lint free cloth, rub into
the wood, let it soak in for a few minutes, and then wipe to dry any excess oil. Do not apply oil to the finished
surfaces of the bass.
Examine Strap Buttons Periodically: Over time, the shifting weight of your bass on the strap may cause
the strap button screws to loosen up. Snug them up from time to time. If loose screws are neglected and
not tightened up, the moving weight of the instrument may expand the mounting holes to the point where
the screws will no longer hold fast.
Setup And Adjust As Needed: Familiarize yourself with the setup and adjustment procedures in this
manual or visit an Authorized Fender Service Center and adjust as needed. Note: Neglecting an instrument
that is in need of adjustment may lead to complications.
26
Care
Seasonal Adjustments: Your bass, like all instruments made from wood, can be sensitive to seasonal
fluctuations of temperature and humidity. It is natural for the woods to expand and contract with these changes and
this movement can affect the setup and playability of the bass. It’s a good idea to schedule routine adjustments to
compensate for the effects of these seasonal variations.
Care
Avoid Exposing Your Bass To Climatic Extremes: Extremes in
temperature and humidity may damage the instrument. If exposure is
unavoidable, as during shipping, reduce string tension slightly to minimize
potential damage. Allow a cold instrument to warm gradually before
opening its case to avoid finish checking. Never leave your bass for any
length of time, in an environment that you wouldn’t feel comfortable in
yourself.
Lacquer Finishes: Many Fender basses are finished with lacquer, a thin
natural type of wood finish that has been used on fine handcrafted furniture
and elite musical instruments for many years. Lacquer was the finish of
choice for the most collectable and desirable vintage Fender instruments
made in the ‘50s and ‘60s. Lacquer is a relatively thin and somewhat
porous finish that allows the tone-woods to resonate much more freely,
resulting in a more vibrant, and to many seasoned players, beautiful
sounding instrument. While lacquer allows the instrument to vibrate
generously, by its very nature, it is much more subject to the effects of
wear, the aging of the underlying wood, chemical interactions and climatic
conditions, than urethane or polyester finishes.
If your bass is finished with lacquer, please make sure that you read the
“Lacquer Finishes: Precautions and Care” card that accompanies your
instrument. Avoid exposure of lacquer finishes to dyed fabrics or leathers,
plastics, synthetics and surgical rubber tubing, (used on many guitar
stands, hangers and straps), these materials will react adversely with the
lacquer and mar the finish of the instrument. If you are unsure of what type
of finish is used on your bass, please check the detailed specifications
of your instrument at www.fender.com or call our Consumer Relations
department at: 480-596-7195. Note: Checking, shrinkage, sinking,
discoloration and rapid wear are all a natural part of the aging process
of lacquer finishes, and as such, will not be covered under the Fender®
warranty.
27
SERVICE:
For service in the United States and
Canada, please contact an Authorized
Fender Service Center, which you can find
by calling the Fender Consumer Relations
Department (480.596.7195) or using
the “Service Center Finder” link on the
“Support” section of www.fender.com.
For service outside the United States and
Canada, please contact your authorized dealer or the Fender distributor in your
country or region—there’s a helpful global “International Distributors” link on the
“Resources” section of www.fender.com.
Service
28
Warranty
Fender Electric Instrument
Limited Lifetime Warranty
Fender Musical Instruments Corporation warrants this Fender brand instrument to be free
from defects in materials and workmanship for as long as it is owned by the original retail
purchaser, except that pickups, switches, jacks, controls, all other electronic components,
tuning machines, hardware, pickguards, plated surfaces, gig bags, cases and case
hardware are warranted for a period of one (1) year from the date of original purchase. This
warranty applies only to the original retail purchaser when this instrument is purchased from
an Authorized Fender Dealer and is subject to the limitations set forth herein.
IMPORTANT: PLEASE RETAIN YOUR ORIGINAL SALES RECEIPT, AS IT IS YOUR
PROOF OF PURCHASE VALIDATING THIS LIMITED WARRANTY.
Fender has established a network of independent Authorized Fender Service Centers for
warranty service. The Fender Dealer from whom you purchased your instrument may also
be authorized for warranty service and should be the first point of contact when service
of any kind is required for your Fender instrument. To receive warranty service, return the
complete instrument to an Authorized Fender Service Center, with your sales receipt as
proof of purchase, during the applicable warranty period. Defective components that qualify
for coverage under this warranty will be repaired or replaced (at Fender’s discretion) without
charge. Remedies beyond normal service repair of any Fender instrument require both an
evaluation and confirmation of the defect and a direct recommendation to Fender from an
Authorized Fender Service Center for alternative considerations.
29
All transportation, insurance and freight charges associated with warranty service and repairs on
Fender instruments are the responsibility of the purchaser, as is any service initiated for the purpose
of customizing setups or adjustments beyond factory specifications. Initial standard setup and
adjustment of the instrument and its components at the time of purchase are considered normal
Dealer product preparation and are not covered by this warranty.
Limitations and exclusions
The following items are not covered by this warranty.
1. Fret wear, saddle wear, nut wear, strings and batteries.
2. Checking, shrinking, sinking, discoloration and wear of lacquer finishes.
3. Setups, adjustments or routine maintenance of any kind.
30
Warranty
4. Damage to finishes or cracks, splitting, or warpage of wood due to changes in temperature or humidity, exposure to or contact with sun, fire, moisture, body salts and acids of perspiration, guitar straps, guitar stands/hangers made from vinyl, plastic, rubber or other synthetic materials, any other chemicals or non-Fender-approved polishes.
5. Damage, corrosion or rusting of any hardware components caused by humidity, salty air, or exposure to the moisture, body salts and acids of perspiration.
Warranty
6.
Any damage to an instrument resulting from customization or modification.
7.
Normal wear and tear on any part of the instrument case or gig bag including jacks, controls, switches, plated surfaces, tuning machines, pickguards, zippers, clasps, handles, latches, case hardware, etc.
8. All other damage and deterioration due to normal usage, wear and tear, aging, accidents, neglect, abuse, or Acts of Nature.
9.
Any instrument, whose serial number is missing, altered or tampered with in any fashion.
10. Any instrument purchased from anyone other than an Authorized Fender Dealer.
11. Instruments that have been serviced by unauthorized persons (any person other than a Fender Certified Technician at an Authorized Fender Service Center).
THE FOREGOING CONSTITUTES THE ONLY WARRANTY MADE BY FENDER WITH RESPECT TO THE PRODUCTS
AND IS MADE EXPRESSLY IN LIEU OF ALL OTHER WARRANTIES EXPRESS OR IMPLIED
Any implied warranties, including without limitation, any implied warranties of merchantability or fitness for any particular
purpose, imposed under state law are limited to the duration of this limited warranty.
Some states do not allow limitations on how long an implied warranty lasts, so the above limitations may not be applicable to
you.
31
FMIC ASSUMES NO LIABILITY FOR PROPERTY DAMAGE RESULTING FROM FAILURE OF THIS PRODUCT NOR ANY
LOSS OF INCOME, SATISFACTION, OR DAMAGES ARISING FROM THE LOSS OF USE OF SAME DUE TO DEFECTS OR
AVAILABILITY OF SAME DURING SERVICE.
This warranty applies only to Fender instruments manufactured after January 1, 1998, and purchased and serviced within the
U.S.A. and Canada. Warranties outside these countries are as defined by the authorized Fender Distributor for your country or
region, and may vary from the above in terms and/or length.
Fender Musical Instruments Corp.
8860 East Chaparral Road, Suite 100
Scottsdale, Ariz. 85250-2610 U.S.A.
Phone: 480.596.9690
www.fender.com
Fender®, Stratocaster®, Strat®, Telecaster®, Tele®, Precision Bass®, P Bass®, Jazz Bass®, J Bass® and the distinctive
headstock designs commonly found on these guitars are registered trademarks of Fender Musical Instruments Corporation. All
rights reserved.
32
Warranty
IMPORTADO POR: Instrumentos Musicales Fender S.A. de C.V., Calle Huerta # 132, Col. Carlos Pacheco, C.P. 228890,
Ensenada, Baja California, Mexico.
RFC: IMF870506R5A Hecho en Mexico. Servicio de Cliente: 001-8665045875
NOTICE REGARDING USE OF HISTORIC PATENT NUMBERS/MARKINGS: FENDER is proud to offer some of the most
iconic musical instruments and amplifiers of the past 60 years. Some FENDER products are intentional recreations or reissues
of vintage guitars and amplifiers, and may therefore incorporate markings or text associated with original patents that have
since expired. Specific examples of such models include patent numbers on the tremolo plates and decals of the JAGUAR®
and JAZZMASTER® guitars, “Pat Pending” on some vintage TELECASTER® guitar bridge plates, and “Design and Circuits
Patented” language on the control panels of certain model amplifiers in FENDER Vintage Modified, Vintage Reissue and Custom
lines. Such markings are included only for the sake of historical accuracy, and are not intended to denote or imply live patents or
ongoing patent protection.
33
34
© 2011 FENDER MUSICAL INSTRUMENTS CORP.
P/N 0079381000 Rev. A