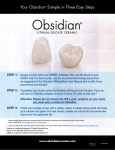
1
Obsidian® Milling Blocks
Instructions for Use
Manufactured by
0086
EC
ENGLISH
Glidewell Direct
18651 Von Karman Ave.
Irvine, CA 92612
Within U.S.: 888-303-3975
Within Canada: 888-278-0414
For all others: 001-949-399-8411
Fax: 800-579-8233
www.glidewelldental.com
REP
MDSS
Schiffgraben 41
30175 Hannover, Germany
Prismatik Dentalcraft, Inc.
(A wholly owned subsidiary of Glidewell Laboratories)
2212 Dupont Drive
Irvine, CA 92612, USA
888-303-6470
Fax: 800-579-8233
Table 3 — Preparation Guidelines
Do not discard Instructions during product use.
NOTE: Please refer to the Obsidian Milling Blocks User Manual for more detailed
instructions.
®
Recommended Minimum Thickness Reduction
for Full Anatomy Restorations
1. Product Description
Obsidian® Milling Blocks are lithium silicate ceramic to be supplied with or
without an attached mandrel using CAD/CAM methods. The product can
produce a variety of monolithic restorations with great esthetics, life-like
translucency and high strength including full-contour crowns, inlays, onlays, veneers, partial crowns and substructures due to its excellent machining properties. The milling blocks will be available in the commonly used
VITA® Classical and Chromascop® Bleach shades.
Anterior
Veneer
2. Indications for Use
This device is used to fabricate ceramic dental prostheses in the nature
of single-unit crowns for posterior and anterior applications using CAD/
CAM methods.
Posterior
3. Contraindications
Single Units
(standard)
Libial/Lingual
Incisal/Occlusal
≥ 1.2 mm
≥ 1.5 mm
Margin area (Shoulder/Chamfer)
≥ 1.0 mm
Cervical
Labial
Incisal Edge
≥ 0.6 mm
≥ 0.6 mm
≥ 0.7 mm
Margin Area
≥ 0.6 mm
Buccal/Lingual
Incisal/Occlusal
≥ 1.5 mm
≥ 1.5 mm
Margin area (Shoulder/Chamfer)
≥ 1.0 mm
There are no known contraindications.
4. Technical Data Table
For optimum milling and restoration integrity, the following criteria are
also recommended:
Table 1 — Type II, Class 3
The margin area should be a shoulder or chamfer with at least 1.0 mm
clearance with NO sharp angles.
As measured according to ISO 6872
Coefficient of Thermal Expansion (CTE) (298-773K)
12.2 x 10 ^-6/deg K
Flexural Strength
385 +/- 45 MPa
Weibull Characteristic strength
404 MPa
For inlays and onlays, the preparation must be expulsive with at least
a 6 degree angle.
The preparation should have no sharp angles. Always have a round
preparation on margins, as well as on occlusal table and cuspid reduction.
5. Design of Restorations
Avoid significant changes in thickness confined to a small area within
the restoration.
Preparation guidelines and minimum thickness recommendations are
shown in Tables 2 and 3. Failure to comply with these recommendations
may result in chipping, delamination, and/or fracture of the final restoration.
For the best results and clinical success, more attention should be
given to design. The software-generated design of the restoration may
need to be adjusted for each individual clinical situation. For detailed
design guidelines including those for inlay, onlay and partial crowns,
please refer to the User Manual.
NOTE: Obsidian® undergoes a linear shrinkage of 0.1% during the crystallization
process.
For specific instructions on design of the restorations, please refer to
the applicable CAD manual designated for your CAD system. Full-contour crowns should follow the same minimum thickness rules.
Table 2 — M
inimum Thickness (in mm) for Obsidian® Restorations
Crowns
Inlay
Onlay
Veneer
Partial
Crown
Anterior
Premolar
Molar
Circular
1.0 *
1.0
0.6
1.5
1.2
1.5
1.5
Incisal/
Occlusal
1.0 *
1.0
0.7
1.5
1.5
1.5
1.5
* isthmus
width
6. Milling
Obsidian® Milling Blocks are designed for CAD/CAM procedures that
utilize a milling device. These can be larger milling machines in the laboratory environment or chairside milling equipment, which most likely use
a mandrel system to secure the Obsidian® Milling Block into a fixture.
Please follow the manufacturer’s operating instructions specific to the
CAM device in order to position the Obsidian® Milling Block correctly.
The CAD software needs to be followed in order to have a successful
data transfer to the CAM device and a problem-free milling procedure.
7. Finishing
After milling, carefully remove the restoration from the still-attached
block and finish the restorations with the recommended tools at low
speeds with light pressure (see User Manual for specific information).
All diamond tools used on Obisidian® restorations must be of fine grit
size (10-75 microns). Any diamond tool with a grit size greater than 75
microns is not recommended for use either intra-orally or extra-orally.
Page 1 of 2
3033775_1.1
ECO #3034352
GD-1058-071315
Failure to use recommended tools, or their equivalent, may result in
chipping or fracture of the final restoration. See the User Manual for
additional information.
All finishing is to be done prior to crystallization. After crystallization, it is
recommended that NO additional finishing be performed.
restoration. For recommended accessories and detailed instructions on
their use, please refer to the Obsidian® User Manual. Failure to use the
recommended accessories may result in chipping or fracture of the final
restoration. See section 14 of this IFU for User Manual download/ordering information.
10. Adjusting the Crystallized Restorations
8. Crystallization
All Obsidian milled restorations must go through a final Crystallization
Cycle (Table 4).
It is recommended that NO additional finishing be performed after the
restoration is in the crystallized and finished glaze phase.
Prior to crystallization, clean the restoration in an ultrasonic water bath
or blast with a steam jet.
11. Cementation
®
Apply stain and spray glaze. For chairside restorations, stain and/
or glaze application is optional. Instead, the restoration can be handpolished to a highly esthetic appearance. Refer to the User Manual for
specific instructions on hand-polishing Obsidian restorations after crystallization.
Program your oven using the applicable oven manual.
Always support the inside of the crown with firing paste and a peg for
crystallizing Obsidian restorations. Only use the standard ceramic pegs
on a standard honeycomb firing tray.
Crystallization and glaze; or crystallization, stain and glaze; can be conducted in a single combined cycle. See the User Manual for details.
TABLE 4 — Crystallization Heating Cycle for Obsidian® Milling Blocks
Ivoclar Programat ® CS2, EP 5010, EP 5000, P300 or similar
Vacuum Quality
72 mbar
N/A
400ºC
3 minutes
90ºC/min
N/A
780ºC
10 seconds
40°C/min
N/A
820ºC
10 minutes
50ºC/min
N/A
Long-term Cooling L
680ºC
N/A
Vacuum 1 Level V1 1 (on) / V2 1 (off )
400ºC
780ºC
Vacuum 2 Level V1 2 (on) / V2 2 (off )
780ºC
819ºC
Standby Temperature / Closing Time S
Heating Rate t 1 ä
Holding Temperature T 1 / Holding Time H 1
Heating Rate t 2 ä
Holding Temperature T 2 / Holding Time H 2
Cooling Rate æ t L
Entry Temperature / Entry Time
Soak Time
72 mbar
N/A
400°C
3 minutes
0 minutes
N/A
The dental professional should use conventional, adhesive resin or
self-adhesive resin cement for luting Obsidian. Adhesive cementation
requires salinization or conditioning of the bonding surface of the restoration. Adhesive cement is preferred for inlay, onlay, and partial crown.
Anterior and posterior full restorations can be cemented with conventional, adhesive resin or self-adhesive resin cements.
12. Storage
efore storing Obsidian® blocks, ensure there is NO damage such as
B
cracks and chips in the block. The blocks should be stored at room
temperature and away from dust, contamination and humidity. When
NOT in use, store blocks in the original packaging.
13. WARNING
Do NOT inhale dust. Do NOT get dust into eyes or have prolonged contact directly with the skin. Personal Protective Equipment (PPE) such as
gloves, masks and lab coats are recommended in order to avoid possible contact and irritation to skin or eyes during processing.
To request the MSDS/SDS for this product, call Glidewell Direct in the U.S.
at 1-888-303-3975.
14. User Manual
For a copy of the Obsidian® Milling Blocks User Manual, please visit
www.ObsidianCeramic.com/resources or call Glidewell Direct at 1-888303-3975.
15. Questions/Comments
For questions and/or comments, or for further instructions regarding the
use of this product, contact Glidewell Direct in the U.S. at 18651 Von
Karman Ave., Irvine, CA 92612 or call 1-888-303-3975.
Whip Mix® Pro 100
Vacuum Quality
The restorations must be etched prior to cementing. Refer to the User
Manual for etching instructions (HF concentration and etching time).
16. Symbols
Only
1st Heating Rate / 1st Temperature
90°C/min
780°C
2nd Heating Rate / Final Temperature
40°C/min
820°C
Hold Time
10 minutes
N/A
680°C
1 minute
Yes
N/A
Lower Table / Cool Time
Use Vacuum
Consult Instructions
for Use
Manufacturer
LOT
Batch Code
Manufactured Date
By Prescription Only
Caution
REF
Reference Number
NOTE: Step-by-step instructions for adding an Obsidian firing program for different
model furnaces can be found at www.ObsidianCeramic.com/resources.
Do NOT open furnace or remove the crystallized restorations until your
furnace cools sufficiently for safe removal.
Refer to the operating instructions for the particular oven used for
proper use, placement of the product, and calibration. Ensure that the oven
used is calibrated according to the particular manufacturer’s specifications.
Contact your oven manufacturer for further instructions.
9. Stain, Glaze, Veneering and Add-On (Accessories)
If desired, stain, glaze, veneering or add-on may be applied to the milled
Page 2 of 2
3033775_1.1
ECO #3034352
GD-1058-071315