1
Chapter 10
Special Features of
the Radix Printer
In the previous chapters we have learned about several
groups of control codes. In this chapter we will look at more control codes. These codes don’t fit neatly into any of the groupings
that we have studied, but they add a lot of capability to Radix. So
here goes.
Commands covered in this chapter include:
l Bell
l Master reset
l Unidirectional
printing
l Eighth bit control
l Block graphics
Radix User’s Manual
98
l
l
International character sets
Macro instruction
Now hear this
You may have heard Radix’s bell if you have ever run out of
paper. And you may have wondered why it’s called a bell when it
beeps instead of ringing! It’s a long story that goes back to the early
days of computers, when teletype machines were used for computer terminals. These mechanical marvels had a bell in them that
could be heard for blocks. This bell was used to signal the operator
that something needed attention. The code that the computer sent
to the teletype machine to ring the bell was, reasonably enough,
called a bell code. Well the name bell code is still with us, even if the
bell has changed to a beeper, and a lot of people still call the beeper
a bell, even if it doesn’t sound like one. So with our trivia lesson
out of the way, let’s see how we can “ring the bell.”
The code to sound Radix’s “bell” is CHR$(7), which is ASCII
code 7 or (BEL) . Any time Radix receives this code it will sound
the bell for a quarter of a second. This can be used to remind an
operator to change the paper or to make another adjustment to the
printer. Note to Apple users: Entering a CHR$(7) will sound
Apple’s bell; the code will not be sent to Radix.
You can try this by typing:
LPRINT CHR$(i');
There are two other codes that affect the bell. One disables the
bell, so that Radix will ignore a CHR!$(7),and the other turns the
bell back on. All three codes that affect the bell are shown in the
following table.
_
Table 10-l
Bell commands
Function
Sound bell
Disable bell
Enable bell
Control code
CHR$(7)
(ESC) “y” CHR$(O)
(ESC) “Y” CHR$(l)
Initializing Radix
Up to now when we wanted to reset Radix to the power on
-.
SneciaIFeaturesof the Radix Printer
99
condition we have had to either turn the printer off and then on
again, or to send the specific codes that reset the particular features. There is an easier way. The control code (ESC) “a” will
reset all of Radix’s features to the power on condition (as determined by the DIP switches), with two exceptions. Those excep
tions are that (ESC) “@” will not erase any characters that you
have stored in Radix’s RAM memory (Chapter 11 tells you how to
create your own characters), and it won’t erase the macro if you
have one stored in Radix’s RAM (this chapter will tell you how to
create a macro].
Putting Radix to sleep
You know how to put Radix o#line with the On Line button.
Radix has another off-line state that can be controlled from your
computer. When you turn Radix off-line from your computer,
Radix will ignore anything that you send it, except for the code to
go on-line again. CHR$(lS) is the code to turn Radix off-line;
CHR$(17) returns Radix to on-line status.
Printing to the bottom of the sheet
Sometimes when you are using sprocket paper you may want
to print near the bottom of the last sheet. The paper-out detector
usually stops Radix when you are about 3 inches from the bottom
of the sheet. This is to notify you if you are running out of continuous paper.
Radix has the ability to print right to the bottom of the sheet.
You can disable the paper-out detector so that it doesn’t stop the
printer. This will allow you to print to the end of the sheet, and
even beyond if you are not careful. The codes to control the paperout detector, along with the other codes that we have just learned
are in the following table.
Table 10-2
Some miscellaneous commands
Function
Control code
Off-line
On-line
Paper-out detector off
Paper-out detector on
Move print head back one space
Delete last character sent
CHR$(lS)
CHR$(17)
(ESC) “8”
(ESC) “9”
CHR$(8)
CHR$11271
Masterreset
(ESC) “@”
Radix User’s Manual
100
Backspace and delete
Backspace (CHR$(8)) “backs up” the printhead so that you
can print two characters right on top of each other. Each time
Radix receives a backspace it moves the printhead one character
to the left, instead of to the right. You can strike over multiple
letters by sending more than one backspace code.
Delete (CHR$(127)) also “backs up” one character, but then it
“erases” the previous character (it’s erased from Radix’s buffer,
not from the paper).
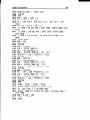
The following program shows how these two codes work.
-
18
20
30
40
50
60
'Demobackspaceand delete codes.
LPRINT "Backspacedoes not" ;
LPRINT CHR$(8)CHR$(8)CRR$(8) ; 'Threebackspaces.
LPRINT 'I===work."
LPRINT "Deletedoes not" ;
LPRINT CHR$(127)U-03$(127)
CHR$(127); 'Three
deletes.
70 LPRINT "work."
-
-
Here is what this program will print:
Baci::space
Del
ete
does
dcjes
wor
RE&
wnrk.
I::.
The backspace codes in line 80 move the printhead a total of
three spaces to the left so that the first part of line 40 will overprint
the word “not”. The delete codes in line 60 “erase” the three letters in the word “not” so that it doesn’t even print.
-
-
-
Unidirectional printing
Unidirectional printing is a big word that means printing in
one direction only. Radix normally prints when the printhead is
moving in both directions. But once in a while you may have an
application where you are more concerned about how the vertical
lines align than with how fast it prints. Radix lets you make this
choice. The table below shows the commands for controlling how
Radix prints.
Special Features
101
of the Radix Printer
Table 10-3
Printinrr direction commands
Function
Print in one direction
Print in both directions
Control code
(ESC) “U” CHR$(l)
(ESC) “U” CHR$(O)
Try this program to see the difference that printing in one
direction makes.
lp!'Demounidirectionalprinting.
2plLPRINT CHR$(27)"A" CHR$(7) ; 'Linespacing= 7/72'.
30 FOR I = 1 TO 10
40 LPRINT "I'
50 NEXT I
60 LPRINT : LPRINT
70 LPRINT CHR$(27)V" CHR$(l) ; 'Turnon unidirectional
printing.
80 FOR I = 1 TO 10
90 LPRINT "1'I
100 NEXT I
110 LPRINT CHR$(12)CHR$(27)"@" ; 'Formfeed, master
reset.
Here is what you will get. The top line is printed bidirec-
Radix User’s Manual
102
tionally, and the bottom is printed unidirectionally. You will have
to look hard because there isn’t much difference.
Let’s analyze the program. Line 20 sets the line spacing to 7/72
of an inch so that the characters that we print will touch top to
bottom. Lines 30-50 print 10 vertical line characters. Then line 70
sets one-direction printing and the vertical lines are printed again.
Finally line 110 sends a form feed to advance the paper to the top
of a new page, and then uses the master reset to restore Radix to
the power-on condition.
The seven bit dilemma
Certain computers (most notably the Apple II) don’t have the
capability to send eight bits on their parallel interface. They can
only send seven bits. This would make it impossible for these
computers to use Radix’s block graphics characters and special
symbols if Star’s engineers hadn’t thought of a solution. (All of
these characters have ASCII codes greater than 127 which means
that the eighth bit must be on to use them.) The solution lies in the
three control codes given in the following table.
.
Table lo-4
Eighth bit control commands
\1Function
Turn the eighth bit ON
Turn the eighth bit OFF
Accept the ei hth bit
“as is” from ta e commder
IControl code
(ESC) I‘)”
(ESC) ‘I=”
-.
I
-
(ESC) “It”
Block gmphics chamcters and special symbols
Besides the upper and lower case letters and symbols that we
are by now familiar with, Radix has a whole different set of characters that are for special uses. These characters include block
graphics characters for drawing forms and graphs, and special
symbols for mathematical, engineering and professional uses.
The following program will print out all of the graphics characters
available.
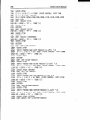
10 'Printsall block graphiccharacters.
20 WIDTH "LPT1:",255
30 FOR J = 160 TO 255 STEP 8
40 FOR I = J TO J + 7
-
-
_.
-
SpecialFeaturesof the Radix Printer
103
50 LPRINT I "= " ;
LPRINT CRR!$(I); 'Sendgraphicchar.
70 LPRINT CHR$(9) ; 'Tab.
80 NEXT I : LPRINT : NEXT J
60
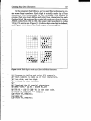
shows what this program will print. If your chart
doesn’t look like this because it has regular letters and numbers
instead of the special symbols, then your computer is only using
seven bits (unless you have set DIP switch C-3 on by mistake). You
can get the correct printout by adding these lines:
Figure 10-l
55
65
LPRINT CRR$(27)")I'; 'Turnon 8th bit.
LPRINT CRR$(27)f'=f'
; 'Turnoff 8th bit.
So how are all of these strange characters used? Here is a
short program that demonstrates how the graphics characters can
be combined to create figures.
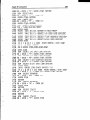
10 'Drawsa figurewith block graphicchars.
20 LPRINT CRR$(27)"A" CRR$(6) ; 'Set line spacing
to 6/72".
30 LPRINT CRR$(235)CRR$(231)CHFG(231) CHR$(236)
40 LPRINT CRR$(233)CRR$(163)CRR$(161)CRR$(234)
50 LPRINT CRR$(233)CRR$(162)CRR$(16pI)
CRR$(234)
60 LPRINT CRR$(237)CRR$(232)CIW(232) CRR$(238)
70 LPRINT CRR$(27)"2" ; 'Restorel/6" line spacing.
If you have a T-bit interface, add the following lines to the
program given above.
25
LPRINT CRR$(27)'f)ff
; 'Turnon 8th bit.
65 LPRINT CHR$(27)ff=f'
; 'Turnoff 8th bit.
In this program line 20 sets the line spacing to 6 dots which is
the height of the graphics characters. Then lines 30-60 print the
Radix User’s Manual
-
Figure 10-l.
figure, and line 70 resets the line spacing to
this program prints:
l/S
inch. Here is what
International chamcter sets
Radix is a multi-lingual printer for it can speak in eight languages! Radix changes languages by changing 11 characters that
are different for the different languages. These sets of characters
Table l&)-5
International chamcter set commands
Country
U.S.A.
England
Germany
Denmark
France
Sweden
Italy
Spain
Control code
(ESC) “7” CHR$(O)
(ESC) “7” CHR$(l)
(ESC) “7” CHR$(2)
(ESC) “7” CHR$(3)
(ESC) “7” CHR$(4)
(ESC) “7” CHR$(5)
(ESC) “7” CHR$(G)
(ESC) “7” CHR$(7)
-
SpecialFeaturesof the Radix Printer
105
are called international character sets. The control codes to select
the international character sets are given in Table 10-5.
The characters that change are shown beneath their ASCII
code in Table 10-6.
Table 10-6
International character sets
Country
1 35 1 64 1 91 1 92 1 93 1 94 1 96 I123 1124 1125 1126
U.S.A.
14t11111)I-
The macro control code
The last of our group of miscellaneous control codes is definitely not the least. It is a user-defied control code, called a macro
control code. The term macro is from the jargonese macro-instruction which refers to an instruction that “calls,” or uses a group of
normal instructions. In computer programming macro-instruc-
106
Radix User’sManual
-_.
tions (which are similar to subroutines) save programmers a lot of
time and effort. Radix’s macro can save you a lot of time and effort
also.
Here is how Radix’s macro works. You define your macro by
telling Radix what normal control codes are to be included in the
macro. Then you can use the macro any time that you want and
Radix will do all the things that you included in the macro definition. You can include up to 16 codes in a single macro. You can
even use the macro to store a frequently used word or phrase.
There are two control codes for the macro: one to define it, and
one to use it. They are given in the table below.
_
_-
Table 10-7
Macro instruction commands
Function
Define macro
Use macro
Control code
(ESC) “+“, . . codes you include.
(ESC) “!”
-
. . CHR!$(30)
-_
-
To see how this works we can build a macro that will reset the
printing style to normal, no matter what style it may be to start
with. The following program will define a macro to do this.
-
18 'Definesa macro that will reset RADIX to normal.
2plLPRINT CHR$(27)"+'I; 'Startmacro definition.
30 LPRINT CHR$(18); 'Selectpica pitch.
40 LPRINT CHR$(27)"W" CHR$(p) ; 'Expandedoff.
50 LPRINT CHR$(27)"F" ; 'Emphasizedoff.
60 LPRINT CHR$(27)f'H"; 'Double-strike
off.
70 LPRINT CHR$(27)I'-"CHR$(p) ; 'Underlineoff.
80 LPRINT CHR$(27)"T" ; 'Super& subscriptsoff.
90 LPRINT CHR$(27)“5” ; 'Selectroman characterset.
100 LPRINT CHR$(30) ; 'End macro definition.
-
As the comments in the program listing show this will define
a macro that will reset all the print style functions. Radix will
remember this macro until the power is turned off or until a new
macro is defined. A macro can hold up to 16 bytes (characters) of
information. The one that we defined contains fifteen.
Now that you have defined a macro, let’s see how to use it.
This program will print one line using several printing style fea-
-
_-
-
107
SaecialFeaturesof the Radix Printer
tures. Then it “calls” the macro in line 60. When line 70 prints the
style is “plain vanilla” because the macro has reset it.
: -
10
20
30
40
50
60
70
'Usesmacro to reset RADIX to normal.
LPRINT CHR$(27)"4" ; 'Italic.
LPRINT CHR$(27)ltGff
; 'Double-strike.
LPRINT CHR$(27)llWf'
CHR$(l) ; 'Expanded.
LPRINT "This line is special."
LPRINT CRR$(27)fr!fr
; 'Use the macro.
LPRINT "This line is normal printing."
This
This
line
if?7dsl
is normal
As
spec
printing.
f
ad?
I
: .
/
-
1
-
In this chapter we have learned many different commands
that have many different uses. In the next chapter we will make up
for this diversity-the whole chapter only covers three commands! But they are some of the most powerful that Radix offers.
They give you the ability to create your own characters.
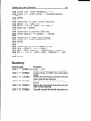
Summary
Function
Bell
CHR$(7)
Disable bell
(ESC) “Y” CHR$(O)
Enable bell
(ESC) “Y” CHR$(l)
Reset
(ESC) “a”
Off-line
CHR!$(lS)
On-line
CHR$(17)
Paper-out detector off
(ESC) “8”
Paper-out detector on
(ESC) “9”
Unidirectional printing
(ESC) “U” CHR$(l)
Bidirectional printing
(ESC) “U” CHIQ(0)
Backspace
CHR$@)
Delete
CHR$(127)
Eighth bit on
(ESC) “)”
Eighth bit off
(ESC) “ = ”
Eighth bit as-is
(ESC) “#”
Select international character set
(ESC) “7” n
(ESC) “+“. . . CHR$(30) Define macro
Use macro
(ESC) “!”
Control code
Radix User’s Manual
-
.-
-
Chapter 11
Creating Your Own Characters
In this chapter we’ll cover:
l Designing and printing your own characters
l Designing proportional characters
In the previous four chapters of this manual you’ve learned
how to control the Radix printer to give you dozens of different
typefaces. By using various combinations of pitches, character
weights, and font selections, you can create nearly any effect you
want to in text. And with international character sets and the special text and graphics characters described in Chapter 10, you can
print almost any character you can think of.
But if “almost any character” isn’t good enough for you, then
it’s a good thing you have a Radix printer! With it you can actually
create your own characters. As you’ll see in this chap-
110
Radix User’s MMU~
ter, download characters can be used to print a logo, special characters for foreign languages, scientific and professional applications, or any other specific printing task.
Dot Matrix Printing
-
In order to create download characters, you’ll need some
understanding of how dot matrix printers work. They’re called
“dot matrix” because each character is made up of a group of
dots. Look closely at some printed characters produced by your
Radix and you will see the dots. Figure 11-l shows how the letter
“C” is formed by printing 15 dots.
I
I
I
I
.-
-
4
._
Figure 11-l. The letter “C” is created by printing 15dots.
The printhead in Radix consists of nine thin wires stacked
one atop the other. Figure 11-2 shows an enlarged schematic view
of the front of the printhead, showing the ends of the wires and
their relationship to the printed characters. As you can see, the
capital letters use the top seven wires of the printhead, and the
descenders (such as the lower case “g” shown) use the bottom
seven pins. As the printhead moves across the page (in either
direction-that’s what is meant by b&directional printing) it prints
one column of dots at a time. Each time a dot is supposed to print
an electromagnet inside the printhead causes the appropriate
wire to strike the ribbon (making Radix an impact printer).
-
111
CreatingYourOwn Characters
The Print Matrix
All of the standard characters that Radix prints are formed
from patterns of dots that are permanently stored in the printer’s
ROM (read-only memory). This includes all of the standard ASCII
characters, the block graphics and special characters, the international character sets, the NLQ characters and the italic characters.
But there is another area of memory in Radix reserved for
g
I
0.0.
0
0
g
g
0
:
0
0
0
.
:0
00
....
:0
l a.e
:
0
.
l e.a
0
l o.e
Figure 11-2. As the printhead moves across the page, each of the wires prints one
row of dots.
userdefied characters. These are characters that you design and
downloadinto Radix. When download characters are defined they
are stored in RAM (random access memory), which allows you to
define or modify them at any time.
Each of these characters, whether it is from the standard character ROM or in download RAM, is constructed on a grid which is six
“boxes” wide by nine ‘boxes” high. The dots used to print a charao
ter can be inside any of the boxes. In addition, a dot can straddle any
of the vertical lines. As an example, take a look at the enlarged “9”
superimposed on the grid in Figure 11-3. As you can see, some dots
are inside the boxes, and some are centered on the vertical lines.
This, in effect, makes the character grid 11 dots wide by 9 dots high.
To see how the rest of the characters in the standard character ROM
are constructed, take a look at Appendix J.
Radix User’sManual
-
Figure 11-3. Dots can be inside boxes or straddle the vertical lines of the grid.
-
Defining Your Own Characters
You’ve seen how the engineers at Star designed their characters by using a grid to lay out the dots. Now you can define characters exactly the same way. Make up some grids (photocopy Figure
11-4 if you wish) and get ready to be creative! (just in case you are
not feeling creative, and to make our explanations a little clearer,
we’ll be using a “bullet” as an example of a download character.
You can see how we’ve laid it out in Figure 11-5. You’ll find this
useful for highlighting a list of items, as we have done at the beginning of each chapter in this manual.
You’ll notice that Figure 11-4 includes a lot of information
around the grid. Don’t be intimidated; we’ll explain each item as
we come to it in our discussion of defining and actually printing
download characters. You may have noticed another difference
between this grid and the one shown in Figure 11-S: it’s only seven
boxes high. Which leads us to. . .
Rule I: Download chamcters are seven dots high
As you noticed in Figure 11-2, capital letters, most lowercase
letters, and most special characters use only the top seven pins of
the printhead. This is also the standard for download characters,
so our grid is only seven dots high.
It’s also possible to use the bottom seven pins, just as the “g”,
“P “, “q”, and “y” of the standard character sets do. These are
called descenders (because the bottom of the character descends
-
-
-
CreatingYour OwnCharacters
1
2
n, =
~
i
~
~
4
Descender
Width
I
8
16
32
I
~
i
/
n2 = Descender l16 + Width
I
i
64
j
I
Format:
Esc*ln,n2m,
m,,
Total
Figure 11-4. Use this grid[oronesimilarto it)to defineyourowncharacters.
below the baseline of the rest of the characters).
One bit in the download character definition command is
used to tell Radix whether a character is to be treated as a descender or not. We’ll get to the command in due time. For now, if your
character uses the top seven dots, write in a zero next to the word
“Descender” on the layout grid; if it uses the bottom seven dots,
write in a one. In our example, we’ll want the bottom of the bullet
to line up with the baseline of the other characters, so it will not be
a descender. As shown in Figure 11-5, we’ve written in a “0” on
our grid.
Rule 2: Dots cannot overlap
As you can see in Figure 11-5 our bullet will print fairly solid.
But, you may ask, why not make it really solid and print all the
intermediate dots, as shown in Figure ll-6? Because the dots that
straddle the vertical lines in the grid actually overlap those inside
the boxes. If we tried to print overlapping dots, Radix’s print head
would have to slow down and back up to print both dots-not very
efficient! To avoid this inefficiency, Radix will not allow you to
define a character like Figure 11-6. (Actually, you can define it, but
Radix User’s Manual
114
n, =
Descender
4
/
Width
n2 = Descender l16 + Width
16
32
1
64
.
Format:
Esc*ln,r$m,
m,,
.*e
Total
Figure 11-5. We’ve designed a character and decided that it would not be a descendei hence the “o” written in.
m, m2 m3 n-b m, n-b m, m, m,m,,m,,
WRONG!
Total
-
.
.*
.
.
*.
*
. .
.
10
J,.
J
Figure11-6.Dots cannot overlap; those m ~mmed~atay aalacent ‘naIJ commnswill be ignored when the character is printed.
-
-
CreatingYourOwnCharacters
115
when it prints, Radix will leave out the overlapping dots, so that it
would print like Figure 11-5.)
Add up each column of dots
Now it’s time to give our creative side a break and get down to
some basic arithmetic. That’s where the numbers down the left
side of the grid come in. Notice that there is a number for each
row of dots and that each number is twice the previous number.
By making these numbers powers of two we can take any combination of dots in a vertical column and assign them a unique
value. Some examples will make this clearer. As shown in Figure
11-7, if we add the numbers for the dots that print in a column, the
sum will be a number in the range of 0 to 127. Each number from
O-127 represents a unique combination of dots.
So add up the values of the dots in each column using this
system. This way it takes one number to describe each column of
dots. In Figure 11-8 we’ve shown our grid with the sums of the
columns filled in across the bottom (see if these agree with your
1
1
2
4
8
o-2
o-1
l -
1
o-2
e-4
.-
2
4
8
l -
O-8
.-
16
32
64
0 - 32
Sum
42
0 - 64
71
0 -
16
0 0 -
32
64
127
J
Figure 11-7. By addingthe valuesof eachdot in a column,you’JJ
get a unique
description
for any combination
of dots.
answers!). Across the top of the grid you’ve probably noticed the
cryptic labeling of each column: ml, m2, m3, etc. These labels
correspond to the labels in the command syntax statement, which
we’ll get to shortly.
Assigning a value to your chamcter
We’ve done a pretty thorough job of designing and describing
Radix User’sManual
116
a user-defined character.
But the Radix has room for 189
n, =
Descender
Width
-.
16
n2 = Descender l16 + Width
32
Format:
Esc’ln,n2m,.
m,,
64
Figure 11-B. Add the values of the dots in each column and write the sum of eacl
column at the bottom.
download characters-how does it know which user-defined character we want to print? Exactly the same way it knows which
standard character we want to print: every character is assigned a
unique number.
The standard characters are assigned the ASCII codes-numbers from 0 to 255. For the download character sets there are two
banks of characters that can be defined: values from 33 to 126 and
160 to 254. This means that once a character is defined and
assigned a value (and the download character set is selected), you
can use that character on the printer the same way you would any
standard character. You can send the character with the same
ASCII value (for instance, if you had assigned your character a
code of 66, it would print each time you sent a character “B” to the
printer). You can also access the character from a BASIC program
with the CHR$ function-in this case LPRINT CHR$(66) would
print the character.
Except for the limitation that download characters must be
assigned vahres in the range of 33 to 126 or 160 to 254, there are no
rules or restrictions on the use of numbers. This means you can
-
._
CreatingYourOwnCharacters
117
use whatever is most convenient for you-perhaps seldom-used
keys can be replaced by more useful characters. In our example,
we’ll assign the bullet a value of 43, which is the ASCII value for
the “ + ” character. This way, when we want to print a bullet, all
we have to do is send the printer a + .
To make our demonstration of download characters more
complete, we’ve designed two more characters. To avoid confusion between the letter “0” and zero, we have created a slashed
zero to replace Radix’s zero (ASCII 48). And, since some people
prefer the “lb” abbreviation for pound, we’ve replaced Radix’s
“#” symbol (ASCII 35) with a “lb.” The information on the grids is
now complete (except for proportional width data-a more
advanced topic we’ll take up shortly).
Download character definition command
You’ve read through a long explanation of download characters and we haven’t even told you the command syntax yet! Now
the wait is over. This is the most complex command in the Radix
repertoire and now you’ve got the necessary knowledge to implement it. Here it is:
(ESC) fl*1'
CHR$(1) nln2mlm2m3m4m5m6m7m8m9mlOmll
‘16
+ Wldl”
m
tJ,a,
/27 0 0 0540
ou7W6S
o
Figure 11-9. Character designs for our three characters.
Radix User’sManuaI
118
-
Like the other Radix commands, it starts with an (ESC)
(CHR$(27)). The next character is an asterisk (*), which is
CHR!$(42), followed by a CHR!$(l).
nl is the value we assign to the character-in the case of the
bullet it is CHR$(43).
n2 is called the attribute byte, for it describes two attributes of
the character we have designed: descender data and proportional
width information. A byte consists of eight bits. In the attribute
byte, the first three (high order) bits are unused, the fourth bit is
used for the descender data, and the last four bits are used for
proportional widths. We’ll be discussing proportional character
widths in detail later in this chapter; for now, we’ll leave it at 11.
The descender data was discussed earlier: to use the top seven
pins, this bit should be 0; to use the bottom seven pins this bit
should be 1. Figure 11-10 shows the bits of the attribute byte as
we’ll use them for our bullet character. Since the descender data is
0, the value of the byte is equal to the value of the proportional
data-11. By now you’ve probably seen an easier way to determine the value of the attribute byte. Instead of translating everything to binary, merely assign the descender data a value of 16 (the
value of the fourth bit) if you want descenders, or 0 if you don’t
want descenders. Then just add the descender data to the proportional width. This way, it’s simply a matter of adding two decimal
numbers. (In our case, it’s 0 + 11 = 11.)
..._
-
-
0000m
-1Unused
Descender data
=
11 (decimal)
Proportional
width
‘-
Figure 11-10. The attribute
byte[nZ)for ourbulletcharacter.
You’ll probably recognize ml. . .mll from the top of our layout grid. That’s right, each column is described by one byte. Now
we’ve got everything we need to download one character to the
printer. The complete command for our bullet character is shown
in Figure 11-11.
Now let’s send the information to the printer. The following
program will send the character definitions for all three characters to the printer. Enter the program and run it.
-.
119
Creating Your Own Characters
CHR$(27) CHR$(42) CHR$(l)
Escape
l
1
CHR$(43) CHR$(ll)
n,
n2
CHR$(24) CHR$i(36) CHR$(90) CHR$(36) CHR$@O) CHR$(36)
.
M,
4
MS
M,
MS
MS
‘&
CHR$@O) CHR$(36) CHR$(24) CHR$(O) CHR!$(O)
-.
I
M,
MS
MS
Ml,
Ml
Figure 11-11. ‘This is the complete command to send our bullet character to the
Radix printer.
.
. .
.
18 'Downloadssymbols.
2/aOPEN "LPTl:"AS #l : WIDTH #1,255
39 FOR I = 1 TO 3 'Do three characterdownloads.
4g PRINT #l,CHR$(27)"*" CHR$(l) ; 'Beginchar download.
59 READNl$,N2
69 PRINT #l,Nl$ CHR$(N2) ; 'Sendchar code, and
attribute.
79 FOR M = 1 TO 11 'Send11 bytes of downloadper char.
8@ READ D
99 PRINT #l,CHR$(D);
199 NEXT M
lla NEXT I
129 CLOSE #l
139 LPRINT
14$ DATA "+",11,24,36,9j'J,36,99,36,99,36,24,9,9
159 DATA"9",11,92,34,9,81,8,69,9,34,29,9,9
169 DATA "#",11,127,~,~,127,~,68,~,68,56,~,~
When you run this program, it looks like nothing happens.
That’s OK. We’ll see why in just a moment. Save this program.
We’ll need it again shortly.
Printing Download Characters
You’ve now defined and sent three characters to the Radix.
Radix User’sManual
120
-
But how do you know that? If you try printing those characters
now (type LPRINT “ + 0#“) you don’t get a bullet, slashed zero and
“lb.” Instead you get . . . + O#.That’s because the download characters are stored in a different part of Radix’s memory. To tell it to
look in download character RAM instead of standard character
ROM it requires another command:
-
(ESC) "$" CHR$(n)
This command is used to select the download character set (if
n = 1)or to select the standard character set (if n = 0).Let’s try it
out. Enter this command:
LPRINT CHR$(27)"$" W@(l)
"+O#"
Voila! It should have printed out the three characters we
defined. Your printout should look like this:
(If it doesn’t, check the last program we ran for errors, then rerun it.)
Let’s find out if there are any other characters in the
download RAM. Try this program:
19 'Printall RAM characters.
29 LPRINT CHR$(27)'Y$lf
CHR$(l) ; 'Selectdownload
characters.
39 FOR I = 33 TO 126 : LPRINT CHR$(I) ; : NEXT I
49 FOR I = 169 TO 254 : LPRINT CHR$(I) ; : NEXT I
59 LPRINT
69 LPRINT CHR$(27)'Y$"CHR$(9) ; 'SelectROM characters.
Nope! Just three characters in the download set. This is inconvenient for a couple of reasons. First, every time you wanted to
use a download character you would have to switch back and
.
Creating
YourOwn Characters
L
121
forth between character sets. Knowing that you wouldn’t want to
do that, Radix won’t even allow it. Standard characters and
download characters cannot be mixed in a line. If you want to use
download characters, the command should appear at the beginning of the line. All subsequent characters (even on following
lines) are printed with the download set until you return to the
standard characters with an (ESC) “$” CHR$(O).(Note that the
(ESC) “$” CHR!$(l) command can be in the middle of a line, and
that entire line will be printed with the download characters. Likewise, if you select the standard character set anywhere in a line,
the entire line will be printed with the standard characters. Conflicting commands within a line can cause unpredictable results.)
So does that mean that in order to print something meaningful with our special symbols we have to define an entire alphabet?
Fear not. The engineers at Star have made it an easy task to use
mostly standard characters with just a few special characters
thrown in. This command copies all the characters from the
standard character ROM into download RAM:
‘c_
(ESC) lr*ll
CHR$(@)
Since it will copy all characters into the download area, it will
wipe out any characters that are already there. So it’s important to
send this command to the printer before you send any download
characters you want to define. With that in mind, add this line to
the program we used to send the characters to Radix:
25 PRINT #l, CHR$(27)tr*vCHR$(@) ; 'CopyROM to RAM.
Now try the download printout test program again. Your
results should look like Figure 11-12. You probably noticed that
our printout test includes the characters with ASCII values from
160 to 254, but nothing prints. The (ESC) “*” CHR$(O)command
copies only the standard ASCII characters (those in the range of
33 to 126) to download RAM; it does not copy any block graphics
characters.
To demonstrate how to use these characters, let’s use this
character set with a word processing program to print a grocery
ad. Just as you learned in Chapter 3, send the printer control codes
to select download characters (2736 1)followed by this text:
RadixUser’s
Manual
122
! ‘1I~$;yr 7 ( ) #:r, ~ -.. ~ i’Qj1 ;;345&789:
T)EFGtiIJt:::LMN[3F~‘:‘QRSTIJVWXYZC’~.
.i ,:iC::ltnn~pqrstctvw~-ciiz
f t :.”
; .:::=: :::.?Izig)~[:;
I.“.-- ‘abcde+yt-i
-
Figure 11-12. Printout of the download character set, into which alI the standard
chamcters have been copied, and the #, +, 0 have been changed.
Today’sSpecials
+ Oranges 10 # / $l.BP
+ Ocean Perch $1.90/#
-
Your output should look like this:
Just a sampling of Radix’s download capabilities! As you can
see, it’s no problem to define characters in BASIC (or another
language) and use them with a word processor or other application.
Note that we didn’t have to reenter the download characters,
since they were already sent to the printer with the previous program. They will stay with the printer until you download new
characters to replace them or turn the printer off. Even the ( ESC >
“@” command, which initializes the printer, does not destroy the
contents of download RAM.
Download
Table 11-I
character definition commands
1Contd code
Function
1(ESC) “a” CHR.9411nl n2 ml. . . ml1
Define download character
1Copy ROM to download RAM 1(ESC) ‘I*” CHR$(O)
Creating Your
OwnCharacters
Proportional
123
Characters
Up until now, all the characters that your Radix has printed
have been of a fixed width-either 10,12,or 17 (or 5, 6 or 8.5 in
expanded mode) characters per inch. Whichever pitch you select,
all the characters are the same width. You’ll notice though, that in
typeset books, such as this one, each character has a slightly
different width. For instance, the “i” is quite narrow, and the “W”
is very wide. This is more pleasing to the eye and easier to read.
So, if you’re going to go to the trouble of designing your own
download characters for Radix, you might as well make them
pleasing to the eye! Proportional download characters allow you
to do just that. As you’ll remember from our initial discussion of
download character definition, part of the attribute byte is for proportional width data. We skipped over that, with the promise of
describing it later. Well now is the time!
Dejining proportional
cha~cters
Except for the actual width, defining characters for proportional printing is exactly the same as defining normal width
download characters. Characters can range from 4 to II dots
wide. This means that characters can be as narrow as one-third
the normal width. The examples in Figure 11-13 show characters
of different widths. These characters are defined in the program
that follows.
10 'Downloadsproportionalcharactersinto RAM.
20 OPEN "LPTl:"AS #l : WIDTH #1,255
30 FOR C = 1 TO r,
40 READ C$,CODE
50 PRINT #l,CHR$(27)O*" CHR$(l)C$ CHR$(CODE);
60 FOR I = 1 TO 11
70 READ BITS
80 PRINT #l,CHR$(BITS);
90 NEXT I
100 NEXT C
110 CLOSE #l
120 'Printa sample.
Mississippi"
130 LPRINT rl
140 LPRINT
150 LPRINT "ROM char set, normal spacing."
160 LPRINT
Radix User’s Manual
124
170 LPRINT
180 'SelectRAM set, normal spacing.
190 LPRINT CHR$(27)"$" CHR$(l) j
200 LPRINT "
Mississippi"
210 'CancelRAM set, normal spacing.
220 LPRINT CHR$(27)"$" CHR$(pI)
230 LPRINT "RAM char set, normal spacing."
240 LPRINT
250 LPRINT
260 'SelectRAM set, proportionalspacing.
270 LPRINT CHR$(27)"X" CHR$(l) ;
280 LPRINT 11
Mississippi"
290 'CancelRAM set, proportionalspacing.
300 LPRINT mm$(27) rfxff
ems(0)
310 LPRINT "RAM char set, proportionalspacing."
320 Em
330 DATA "M",11,1,126
,1,2 ,4 ,8,4,2 ,1,126,l
340 DATA "i",4,64,61,64
,p!
,0,0,pl
>0,0>0,$3
350 DATA “~“,23,127,0,17,0,17,14,0,0,0,0,0
360 DATA “~“,6,8,84,0,84,32,0,0,0,0,0,0
mmmmmmmmmmm
Figure 11-13. These download
characters are defined as proportional characters.
I: /.
,. <,
i. 1
Creating Your Own Characters
I
-
,
..”
One thing to remember about defining proportional characters: a character cannot be wider than the specified width. That
seems obvious enough! For example, if you specify a width of 6 for
a character, the seventh through eleventh columns of dots (if you
specified any) will not print. You must, however, send information
(even if it is 0) for those columns when you define a character;
Radix expects eleven characters following the (ESC) “*”
CHR$(l) nl n2 sequence.
In most cases, the width you select should actually be at least
one dot wider than the number of columns that the character actually occupies. This is so that there will be a space (of one dot)
between characters when you print them. If you specify a width
which is exactly the same as the number of columns in the character definition, the characters will touch when they print (this is
sometimes desirable-for border characters or for large download
characters that are more than eleven dots wide).
Printing proportiond
..
125
characters
Printing with proportional download characters is much like
using normal width download characters: one command is used
to select the download set or the standard character set. Here’s the
command:
(ESC) rfXff
CHR$(n)
If n is 1, then the download character set is selected, and proportional widths are used. If n is 0, the standard character set is
selected.
It should be noted that it is possible to use the same character
definitions for either normal width or proportional download characters (if a valid proportional width is included in the attribute byte).
The only difference is the way they are accessed: (ESC) “$”
CHR$(l) for normal width or (ESC) “X” CHR$(l) for proportional
width. The two comnumds work independently of each other, so
that (ESC) I‘$,’ CHR!j(O) will not turn off proportional download
characters, and (ESC) “X” CHR$(O)will not turn off normal width
download characters. If you have selected both normal and proportional download characters, proportional will print until you send
the printer an (ESC) “X” CHR!$(O).
The printer will then continue to
print with normal width downloadcharacters (rather than returning
to the standard character set) until you send an (ESC) “$” CHR$(O).
Radix User’s Manual
126
This can lead to confusion if you have accidentally specified both
types of download characters.
Hi ssi
ROM char
set,
ssi
normal
I”li ssi
-
ppi
5pacing.
ssi
ppi
-
RAM char
set,
normal
spacing.
Mississippi
RAM chat-
set,
proportianal
5pacing.
Figure 11-14. This printout shows the same text, printed with the some download
characters, in both normal and proportional widths.
Table 11-2
character printing connmands
1Function
IControl cotle
Normal download characters ON
1(ES.3 “$‘* CHR$(l)
FF
1(ESC) “$” CHR$(O)
Normal
download
characters
01
I
’
Proportional download characters ON
I(1ESC) “X” CHR$(l)
Prcmortional download characters OFF
1(ESC) “X” CHR$(O)
Download
Connecting
I
characters
As we noted earlier, it’s possible to connect proportional
width characters. This can be useful for creating logos or other
characters which are larger than one normal character. It also
makes it possible to create connecting scripts, like handwriting.
The trick to this is to specify the width in the attribute byte to be
exactly the same as the number of columns of dots that the character (or partial character) occupies. And, if you change the vertical
spacing to 7/72” (use the (ESC) “1" command), you can make
characters connect vertically. This allows you to make very large
characters indeed!
-.
127
Creatine Your Own Characters
In the program that follows, we’ve used this technique to create some large numbers. Each digit is actually made up of four
characters-two horizontally by two vertically. This means, of
course, that you must define and print four characters for each
finished digit. We assigned the upper left quadrant of each digit to
ASCII codes from 160 to 169, the upper right quadrant to codes
170 to 179, and so on. Figure 11-15 shows how one digit is defined,
and Figure 11-16 shows the final output of our program.
Figure 11-15. Each digit is made
upoffour individual characters.
18 'Programto define and print BIG numerals.
2pl'Eachnumeral is made up of four characters,
3@ 'twowide, and two high.
49 'A blank is also defined.
59 '
6pl 'Downloadthe 41 specialcharacters.
79 OPEN "LPTl:"AS #l : WIDTH #1,255
Spl FOR Nl = 16pl TO 2pIpl
IN1 is the char code.
98 PRINT #l,CHR$(27)"*" CHR$(l) ;
l@@ PRINT #l,CHR$(Nl);
llg READ N2
129 PRINT #l,CHR$(N2);
128
Radix User’s Manual
130 FOR S = 1 TO 11
140 READ MS
150 PRINT #l,CHF@(MS);
16pl NEXT S
179 NEXT Nl
189 CLOSE #l
19PrBLANK$ = CHR$(200)
200 '
210 'Printthe BIG numerals.
220 LPRINT
230 LPRINT CHR$(27)"X'tCHR$(l) ; 'SelectRAM chars.
240 LPRINT CHR$(27)"1" ; '7/72"line spacing.
250 'Printthe top half of the numerals.
260 FOR NUM = 0 TO 9
270 LPRINT CHR$(NUM*4+160)
cHR$(NUM*4+161)
BLANK$ j
280 NEXT NUM
290 LPRINT
300 'Printthe bottom half of the numerals.
310 FOR NUM = 0 TO 9
320 LPRINT CHR$(NUM*4+162)
CHR$(NUM*4+163)
BLANKS ;
330 NEXT NLJM
340 LPRINT CHR$(27)"X" CHR$(0) ; 'DeselectRAM.
350 LPRINT CHR$(27)"2'I'l/6"line spacing (normal).
360 'ZERO
370 DATA 11,0,96,16,104,16,44,30,14,0,2,1
380 DATA 11,2,1,2,1,6,8,38,88,32,88,32
390 DATA 11,3,12,19,12,51,0,96,0,96,0,96
400 DATA 11,0,32,0,48,0,28,3,12,3,4,3
410 'ONE
420 DATA 11,,,,,,,,,>9
0 0 0 0 0 4 0 4 0 4 126
430 DATA 9,12,114,12,114,12,2,0,0,0,0,0
440 DATA 11,64,0,64,0,64,0,64,32,80,47,80
2;; ~A;;09,47,80,47,64,0,64,0,64,0,0,0
470 DATA 11,0,0,0,0,0,12,16,14,0,6,0
480 DATA 11,3,0,3,0,70,56,70,56,4,24,0
490 DATA 11,64,0,64,32,64,32,80,32,80,40,64
500 DATA 11,44,64,38,65,34,65,32,80,32,88,0
510 ' THREE
520 DATA 11,0,0,0,0,0,0,4,2,4,2,4
530 DATA 11,34,84,34,92,34,76,34,68,2,64,0
540 DATA 11,16,0,48,0,56,64,48,64,32,64,32
550 DATA 11,64,32,64,48,9,54,9,22,9,6,1
560 ' FOUR
-
Creating
YourOwn Characters
129
570 DATA 119)99,,,
0 0 0 0 0 0 64,36,88,32,16
580 DATA 11,0,0,64,32,64,56,64,60,2,12,0
590 DATA 11,0,8,4,10,5,10,5,8,4,72,4
600 DATA 11,88,38,89,38,89,6,73,4,8,6,0
610 ' FIVE
620 DATA 11,0,0,0,0,64,32,84,50,76,34,68
630 DATA 10,34,68,34,68,34,68,2,68,2,0,0
640 DATA 10,0,32,24,101,24,97,0,64,0,64,0
650 DATA 11,64,0,96,1,48,15,48,15,16,15,0
660 ' SIX
670 DATA 11,0,96,0,112,0,120,0,92,0,102,0
680 DATA 11,98,0,98,0,98,0,70,0,1~,0,6
690 DATA 11,7,8,23,8,55,8,99,0,65,0,64
700 DATA 11,0,96,0,112,1,62,1,30,1,1~,0
710 ' SEVEN
720 DATA 11,0,16,8,6
,,,,,,,
8 6 8 6 86 8
730 DATA 9,70,8,102,8,54,8,6,0,2,0,0
740 DATA 11,0~6~,0,96,0,1~0,0,1~~,0,30,1
750 DATA 9,6,1, 0, 0 >0 , 0 90 I 0 , 0 , 0 90
760 ' EIGHT
770 DATA11,0,0,0,0,24,36,2~,102,2~,102,0
780 DATA 11,67,0,67,0,99,28,34,28,34,28,0
790 DATA 11,12,18,44,19,108,19,96,1,64,0,64
800 DATA 11,0,96,1,112,15,48,15,16,14,0,0
810 ' NINE
820 DATA11,0,0,120,4,120,6,120,6,0,3,0
830 DATA11,3,0,3,0,67,4,123,4,122,4,120
840 DATA11,48,0,56,0,113,0,99,0,99,0,99
850 DATA11,0,115,0>57,0,31,0,15,0,7,0
860 ' SPACE
870 DATA11,0,0 , 0 , 0 , 0 , 0 , 0 90 , 0 , 0 , 0
I
Figure 11-18.
I
Theoutputforchomcters
like
this
mustbecarejitgyplanned.
Mixing Print Modes with Download
Characters
It’s possible
to get even more
printing
effects by combining
Radix User’s Manual
130
download characters with the various print modes available with
Radix. Most of the commands that you learned in Chapter 7 work
with normal width download characters as well as standard characters. A few of them will work with proportional download characters as well. Table 11-3 summarizes the various print modes and
their compatibility with download characters.
Mixing download
Table 11-3
chamcters with various print modes
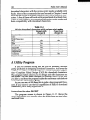
A Utility Program
If you’ve followed along this far you’ve probably become
pretty proficient at designing download characters. And even the
addition is getting easier! But this is a good computer application-computer Aided Design (CAD) for download characters.
The program below allows you to design and edit characters on
the screen. You can make changes (no erasing!) until it’s the way
you like it, and then the program makes the necessary calculations
and sends the character to Radix.
As you can see, at 205 lines this is quite a long program! However, if you want to use the full capabilities of Radix’s download
characters, you’ll really appreciate it.
Instructions
for using DLEDIT
The program screen is shown in Figure 11-17. Above the
main grid (where you actually place the dots) there are two informational lines.
-
Creating Your Own
Characters
131
The first line tells the ASCII code of the character being edited
(and in parentheses, the normal character for that code). The next
field in the first line tells whether the character being edited is a
descender or not (a “1” indicates that it is; “0” means that it is not).
The second status line shows the proportional width of the
character being defined. The asterisks extend over the columns of
dots to indicate the actual width when the character is printed
using the (ESC) “X” command.
Below the layout grid is the prompt line. This will appear only
when you need to enter information, such as the ASCII code of
the character you wish to define.
To the right of the layout grid is the command menu. All of the
valid commands are defined here; if you press any other key, the
computer will beep and no action will be taken. Below, each command is defined in greater detail.
P - Print the character. This command takes the character that is
currently on the screen and prints it in condensed, elite, pica,
expanded pica, and proportional widths so you can see how
it looks. In addition, it prints the complete character set in
both normal and proportional widths. At the end of the printout is the data statement necessary to download this character through a BASIC program.
EC11 CDDE = 48 (8)
WIDTH :
t:tlttttt:tltttttltt~t:t&ttttlltl
r--T-T--I-T-T--~--T--T-T--T-~
1 1~41 I IBI
2
4
DESCENDER= 0
111 I fmi I I
t-t-t-t-t-t-t-t--t-t-t-i
I 111 I I I I 111 I I
t-t-t-t-t-t-t--t-t-t--t--~
imi I I i 1 imi
imi
t-t-t-t-t-t-t-t-t-t-t-i
8 imi l l imi I I 111
t-t-t--t-t-t-t-t-t-t-t-i
16 111 I11 I I I I 111
t-t-t-t-t-t-t-t-t-t-t-t
32 I imi I I I I ml
I
t-t--t-t-t-t-t-t-t-t-t-i
64 imi I imi imi I I I
L-I-I-I-I-L-I-I-I-I-~-,
i
I
i
P -- Print the character.
(I-- Set KC11 code.
C -- Clear all dots.
d -- hit.
R -It+++ -ins -I I de1 -t -I l - -D -I l
I
Perfurr ROH copy.
Move cursor.
place a dot.
reeove a dot.
eake character wider.
rake characternarrower.
Toggle descenderrode.
92 34 lb 65 8 65 4 34 29 fl B
Enter ASCIIcode (33-126 OR 168-2543--) ?
Figure 11-17. DLEDIT screen display shows ASCII code and character layout.
132
Radix User’s Manual
A - Set ASCII code. To change the ASCII code (which is shown in
the first status line), press “A.” You will then be prompted for
the code you want to use.
C - Clear all dots. Press “C” to get a clean screen.
Q - Quit. “Q” closes all files and ends the program.
R - Perform ROM copy. The ROM character set will be copied to
download RAM immediately.
t + --) 1 - Move cursor. The arrow keys are used to move the
cursor around the grid.
Ins - Insert. The insert key places a dot at the current cursor location.
Del - Delete. The delete key deletes a dot from the current cursor
location.
+ - Wider. Use the “ +” key to increase the proportional width,
which is indicated by the row of asterisks above the grid. The
maximum width is 11 columns.
- - Narrower. Use the “ - ” key to decrease the proportional
width. The minimum width is four columns.
D - Descender. This command toggles the descender flag, which is
shown in the first status line. If it is equal to zero, the top seven
pins of the printhead are used; if it is equal to 1, the bottom
seven pins are used to create a descender character.
Enjoy the program!
18 'Programto allow editingdown-loadcharacters.
20 'for the RADIX printer.
30 '
40 'Initialization.
50 DIM Z(8,12),MM(ll)
60 AS=33
70 CS$=CHR$(16)+CHR$(17):SC$=STRING$(2,219)
80 RAMNML$ = CHR$(27)+ "$" + CHR$(l)
90 RAMNMLOFF$= CHR$(27)+ "$" + CHR$(0)
100 RAMPRO$ = CHR$(27)+ "X" + CHR$(l)
110 RAMPROOFF$= CHR$(27)+ "X" + CHR$(a)
120 OPEN "LPTl:"AS #2 : WIDTH #2,255
130 LPRINT CHR$(27)"@" ; : WIDTH "LPT1:",255
140 GOSUB 1930
150 '
160 'Mainloop.
170 A$=INKEY$:IFA$="" THEN 170
180 B$ = LEFT$(A$,l)
190 IF B$ = CHR$(pI)
THEN 290
-
Creating Your Own Characters
133
2&J@IF A$ = "+" THEN GOSUB 1060 : GOT0 370 'Wider.
210 IF A$ = "-" THEN GOSUB 1090 : GOT0 370 'Narrower.
220 IF A$ = "D" OR A$ = "d" THEN GOSUB 1120 : GOT0 370
2391 IF A$="Q" OR A$="q" THEN GOSUB 380 : END
240 IF A$="P" OR A$="p" THEN GOSUB 1360 : GOT0 370
250 IF A$="C" OR A$="c" THEN GOSUB 1930 : GOT0 370
260 IF ,$="A" OR A$="a" THEN GOSUB 1720 : ~GOTO370
270 IF A$="R" OR A$="r" THEN GOSUB 1980 : GOT0 370
280 BEEP:GOTO378
290 B$=RIGHT$(A$,l)
300 IF B$=CHR$(75)THEN GOSUB 91B:GOTO370 'Left.
310 IF B$=CHR$(77)THEN GOSUB 930:GOTO370 'Right.
320 IF B$=CHR$(89)THEN GOSUB 950:GOTO370 'Down.
330 IF B$=CHR$(72)THEN GOSUB 970:GOTO370 'Up.
340 IF B$=CHR$(82)THEN GOSUB 990:GOTO370 'Insert.
;I; ;;E;$=CHR$(83) THEN GOSUB 1830:GOTO370 'Delete.
370 GOT0 170
380 COLOR 7,0 : CLS
390 CLOSE #1,#2
400 RETURN
410 '
420 ' Subroutineto paint screen.
430 CLS
440 GOSUB 1820
450 ’
460 'Drawgrid.
470 Pl = 1 : M$ = CHR$(179)+ STRING$(2,32)
480 N$ = STRING$(2,196)+ CHR$(197)
490 L$ = STRING$(2,196)+ CHR$(193)
500 LOCATE 4,lg:PRINTCHR$(218);CHR$(196);
51p! FOR I=1 TO 10
520 PRINT CHR$(196)CHR$(194)CHR$(196)j : NEXT I
530 PRINT CHR$(196)CHR$(191): LOCATE 5,lp!
540 FOR K=l TO 12 : PRINT M$; : NEXT K : PRINT
550 FOR J=l TO 6:LOCATE5+Pl,l0:Pl=Pl+l:PRINT
CHR$(195);
560 FOR K=l TO 10:PRINTN$;:NEXTK
570 PRINT CHR$(196)CHR$(196)CHR$(180)
580 LOCATE 5+Pl,l@ : Pl=Pl+l
590 FOR K=l TO 12:PRINTM$;:NEXTK
600 PRINT:NEXTJ:LOCATE18,la:PRINTCHR$(192);
610 FOR I=1 TO 10:PRINTL$;:NEXTI
620 PRINT CHR$(196);CHR$(196);CHR$(217)
Radix User’s Manual
134
630 FOR I=@ TO 6:LOCATE 5+1*2,6:PRINT2"I;:NEXTI
640 '
650 'Put in dots.
660 FOR H = 1 TO 11 : FOR J = 1 TO 7 : Z(J,H) = 0
700 NEXT J : NEXT H
710 FOR H = 1 TO 11 : GOSUB 1200 : NEXT H
720 X=l:Y=l:G=l:H=l
730"GOSUB1300
740 '
750 'Paintmenu.
760 LOCATE 6,47 : PRINT "P -- Print the character."
'770 LOCATE 7,47 : PRINT "A -- Set ASCII code."
780 LOCATE 8,47 : PRINT "C -- Clear all dots."
790 LOCATE 9,47 : PRINT "Q -- Quit."
800 LOCATE lp1,47: PRINT “R -- PerformROM copy."
810 LOCATE 11,44 : PRINT CHR$(24)CHR$(27)CHR$(26)
CHM(25) ;
820 PRINT " -- Move cursor."
830 LOCATE 12,45:PRINT"ins -- place a dot.";
840 LOCATE 13,45:PRINT"de1 -- remove a dot.";
850 LOCATE 14,47 : PRINT "+ -- make characterwider." ;
860 LOCATE 15,47 : PRINT 'I--- make characternarrower."
.
870'LOCATE16,47 : PRINT "D -- Toggle descendermode." ;
880 RETURN
890 '
900 'Editsubroutines.
910 GOSUB 1240:Y=Y-3:H=H-l:IF
Y(l THEN BEEP:Y=l:H=l
920 GOSUB 1300:m~um
930 GOSUB 1240:Y=Y+3:H=H+l:IF
Y)31 THEN BEEP:Y=31:H=ll
940 GOSUB 1300:FiETURN
950 GOSUB 1240:X=X+2:G=G+l:IF
X)13 THEN BEEP:X=l3:G=7
960 GOSUB 1300:RETURN
970 GOSUB 1240:X=X-2:G=G-l:.IF
X(1 THEN BEEP:X=l:G=l
980 GOSUB 1300:RETURN
990 IF Z(G,H-l)=lOR Z(G,H+l)=lTHEN BEEP:RETURN
1000 Z(G,H) = 1 : COLOR 31,l
1010 LOCATE X+4,Y+l0 : PRINT SC$ j : COLOR 7,0
1020 GOSUB 1150 : RETURN
1030 z(G,H)=~ : COLOR 7,pl
1040 LOCATE X+4,Y+l0 : PRINT CS$ ; : COLOR 7,0
135
1050 GOSUB 1150 : RETURN
1060 IF PROWID = 11 THEN BEEP : RETURN
1070 PROWID = PROWID + 1
1080 GOSUB 1820 : RETURN
1090 IF PROWID = 4 THEN BEEP : RETURN
1100 PROWID = PROWID - 1
1110 GOSUB 1820 : RETURN
1120 IF DESC = 1 THEN DESC = 0 : GOT0 1140
1130 DESC = 1
1140 GOSUB 1820 : RETURN
1150 '
1160 'Subroutineto calculatea column value & print it.
1170 MM(H) = 0 : FOR J=l TO 7
1180 MM(H)=MM(H)+Z(J,H)*2"(J-1)
1190 NEXT J : GOSUB 1200 : RETURN
1200 '
1210 'Subroutineto print a column value.
1220 LOCATE 19,7+H*3 : PRINT RIGHT$(' "+STR$(m(H)),3)
.
123b RETURN
1240 '
1250 'Subroutineto remove the cursor.
1260 LOCATE X+4,Y+l@
1270 IF Z(G,H) = 0 THEN PRINT " " ;
1280 IF Z(G,H) = 1 THEN COLOR 7,pl: PRINT SC$ ;
1290 RETURN
1300 '
1310 'Subroutineto place the cursor.
1320 LOCATE x+4,y+lpI
1330 IF Z(G,H)=lTHEN COLOR 31,l : PRINT SC$ ; ,:COLOR
7,0
1340 IF Z(G,H)=pTHEN COLOR 7,0 : PRINT CS$ ;
1350 RETURN
1360 '
1370 'Subroutineto print currentcharacter.
1380 GOSUB 2050
1390 LPRINT "ASCII code =I'AS : LPRINT
1400 PRINT #2,REC$ ; 'Downloadthe character.
1410 LPRINT CHR$(27)"B" CHR$(3) 'lCondensed"
1420 LPRINT RAMNML$ STRING$(21,AS)
1430 LPRINT RAMNMLOFF$
1440 LPRINT CHR$(27)*'B"CHR$(2) "Elite"
1450 LPRINT RAMNML$ STRING$(lS,AS)
1460 LPRINT RAMNMLOFF$
_i.
136
Radix User’s Manual
1470 LPRINT CHR$(27)"B" CHR$(l) "Pica"
1480 LPRINT RAMNML$STRING$(12,AS)
1490 LPRINT RAMNMLOFF$
1500 LPRINT CHR$(27)'*W"CHR$(l) "Expanded"
1510 LPRINT RAMNML$STRING$(6,AS)
1520 LPRINT RAMNMLOFF$CHR$(27)"W" CHR$(@)
1530 LPRINT "Characterset (normalwidth)"
1540 LPRINT RAMNML$;
1550 FOR I=33 TO 126 : LPRINT CHR$(I); : NEXT : LPRINT
1560 FOR I=160 TO 254 : LPRINT CHR$(I); : NEXT : LPRINT
1570 LPRINT RAMNMLOFF$
1580 LPRINT "Proportional"
1590 LPRINT RAMPRO$STRING$(lS,AS)
1600 LPRINT RAMPROOFF$
1610 LPRINT "Characterset (proportional)"
1620 LPRINT RAMPRO$;
1630 FOR I=33 TO 126 : LPRINT CHR$(I); : NEXT : LPRINT
1640 FOR I=160 TO 254 : LPRINT CHR$(I); : NEXT : LPRINT
1650 LPRINT RAMPROOFF$
1660 LPRINT : LPRINT : LPRINT
1670 LPRINT "Use this data statementto downloadthis
character."
1680 GOSUB 2050 : LPRINT "DATA 27" ;
1690 FOR I = 2 TO LEN(REC$)
1700 LPRINT "," STR$(ASC(MID$(REC$,I,l)))
;
1710 NEXT I : LPRINT : LPRINT : LPRINT : LPRINT : RETURN
1720 '
1730 'Subroutineto input desiredcharactercode.
1740 LOCATE 23,5
1750 INPUT "EnterASCII code (33-126OR 160-254)--) *';
AS
1760 GOSUB 2010
1770 IF AS ( 33 OR AS > 254 THEN BEEP : GOT0 1740
1780 IF AS ( 160 AND AS > 126 THEN BEEP : GOT0 1740
1810 GOSUB 1820 : RETURN
1820 '
1830 'Subroutineto displayheader.
1840 LOCATE 1,l : PRINT "ASCIICODE =" AS ;
1850 PRINT "(" CHR$(ASAND &H7F) ;
1860 IF AS ) 127 THEN PRINT " + 128" ;
II
.
1870 PRINT ">
1880 LOCATE 1,3fJ: PRIN; "DESCENDER=" DESC ;
-
-
-
CreatingYourOwnCharacters
137
1900 LOCATE 3,10 : PRINT STRING$(33," ") ;
1910 LOCATE 3,2 : PRINT "WIDTH : " s~rRmC$(P~owI13*3,
tl*ll
>
;
1920 RETURN
1930 ’
1940 'Subroutineto clear currentcharacter.
1950 PROWID = 11 : DESC = 0
1960 FOR H = 1 TO 11 : MM(H) = p,: NEXT H
1970 GOSUB 410 : RETURN
1980 '
1990 'Subroutineto perform a ROM copy.
2~~pILPRINT CHR$(27)"*" CHR$(@ ; : RETURN
2010 ’
2020 'Subroutineto erase query message.
2030 LOCATE 23,5 :PRINTsTRING$(70,"'1)j
2040 RETURN
2050 ’
2060 'Subroutineto build commandstring.
2070 REC$ = CHR$(27)+ "*" + CHR$(l)
2080 REC$ = REC$ + CHR$(AS)+ CHR$(DESC*l6+ PROWID)
2090 FOR I = 1 TO 11 : REC$ = REC$ + CHR$(MM(I)): NEXT
I
2100 RETURN
Summary
Function
Control code
(ESC) “*” CHR$(l) nl n2 ml . . . ml1
(ESC) “*” CHR$(O)
(ESC) “X” CHR$(l)
(ESC) “X” CHR$(O)
(ESC) I‘$” CHR$(l)
(ESC) “$” CHR$(O)
Defines download character into RAM
Copies fonts in ROM into download
RAM
Selects the download character set and
uses proportional spacing
Cancels proportional download character set
Selects the download character set and
uses normal spacing
Cancels normal download character set
138
Radix User’s Manual
Chapter 12
Printing With Dot Graphics
Subjects covered in this chapter include:
l Radix’s
bit image graphics capabilities
l Printing
a predefined shape
l Plotting
a calculated shape
l High resolution
graphics
In Chapter 11 you were introduced to a form of computer
graphics; you were able to actually define characters dot by dot. In
this chapter you’ll learn to use the same principles to make Radix
print whole pages of dot graphics! We’ll show you how to use dot
graphics to create “super download characters.” In addition,
you’ll see how your Radix printer can be used as a graphics plotter. This can have some practical business applications as well as
create some terrific computer art!
Radix User’sManual
140
Comparing
Characters
Dot Graphics with Download
A good understanding of dot graphics requires an understanding of how dot matrix printers work; you may want to
review the first few pages of Chapter 11. The principles for dot
graphics are the same as those for download characters.
There are some differences in the way they are implemented
however. While download commands can be used to define a
character between four and eleven columns of dots wide, dot
graphics commands can be used to define a shape as narrow as
one column of dots wide or as wide as 3264 dots on a Radix-15!
There is no “descender data” with dot graphics; graphics
images are always printed with the top seven or eight pins of the
print head, depending on whether you have a 7-bit or 8-bit interface (if you’re not sure which type of interface your computer has,
check the appendix for your computer).
So when do you use graphics and when do you use download
characters? Practically anything you can do with graphics you
can do with download characters, and vice versa. A clever programmer could actually plot a mathematical curve using
download characters or use strings of graphics data as userdefined characters. But why do it the hard way? There are several
instances when dot graphics is clearly the best way to approach
the problem:
l If the graphic image to be printed is wider than 11 dots or higher
than 7 dots
l If an image is to be printed just one time, as opposed to a frequently used “text” character
l If you want higher resolution (Radix can print as many as 240
dots per inch in dot graphics mode; text mode, which includes
download characters, prints 60 dots per inch)
Using the Dot Graphics Commands
The command to print normal density (60 dots per inch horizontal; 72 dots per inch vertical) dot graphics uses this format:
(ESC) **Kff
nl n2 ml m2. . .
-
-
PrintingWithDot Graphics
141
Just like many of the other codes you have learned, the command starts with an escape sequence (( ESC) “K” in this case).
But unlike Radix’s other codes there can be any number of graphics data bytes following the command. That’s where nl and n2
come in; they are used to tell Radix how many bytes of graphics
data to expect.
Specifying
the number of cohnns
of dots
To figure the values of nl and n2, you’ll need to figure out how
wide your graphic image will be (remember that there are 60 columns of dots per inch in normal density). Then comes the fun
part: converting one number (the number of columns of dots) into
two! Why is it necessary to use two numbers to tell Radix the
number of graphics codes to expect? Because the largest number.
we can send in one byte (that’s what the BASIC CHR$( ) function
sends: one byte) is 255. And with normal density graphics it’s possible to have a graphics image as wide as 480 dots on Radix-10 or
816 dots on Radix-15 So to figure out how many columns of
graphics data to expect, Radix multiplies n2 by 256 and adds the
value of n1 to the product. If you divide the number of columns by
256, then n2 is the quotient and nl is the remainder (why not let
your computer figure it out for you: if the number of columns is
assigned to variable X, then Nl =X MOD 256 and N2 = INT(X/
256)). Table 12-1 might make things even easier.
Table 12-l
Calculating nl and n2
If the number of columns,
x. rannes from:
1to 255
I
256to511
512to 767
766to1023
1024to1279
1260to1535
1536to1791
1792to2047
2046to2303
2304to2559
2560to2815
2816to3071
3072to3264
1
then nl
I
x
x
x
x
x
I
x
x
x
x
x
x
x
x
is:
-
256
512
768
1024
1260
1536
1792
2048
2304
2560
2816
3072
and n2 is:
I
0
1
2
3
4
5
6
7
8
I
9
10
11
12
I
I
1
I
Radix User’s Manual
142
Specifying the graphics data
Now that we’ve told Radix how much data to expect, we better figure out how to send that information! Just as you do with
download characters, with dot graphics you have control over the
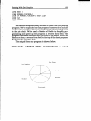
firing of every single pin on Radix’s print head. In Figure 12-1, you
can see that we’ve labeled each pin on the print head with a number, as we did with download characters (you should note one
important difference: this time the top pin has the highest value;
for download character definitions it is the bottom pin). And specifying pins to fire is done in the same way: to fire the second pin
from the top, for instance, send a CHR$(64). Firing several pins at
once is done in a similar fashion. For example, to print the first,
third, and fourth dots, add their values (128 + 32 + 16) to send this
total: CHR$(176).
This is one byte of graphics data; it would
replace ml in our format statement on page 140.
_
8
I I 4
6
Figure 12-1. Starting with the most @@cant bit at the top, each pin of the print
head is assigned a value whichis a power of two. Note that for T-bitcomputers, the
top pin has a value of 64, and the bottom two pins are unused.
-
A short program should demonstrate how to implement the
graphics command. The program below gave us this printout:
_,__- -...-
..__.. ..-“‘“---” ____
--
._..._.__,
._,......_I---
18 'Demobit graphics.
PI = 3.14159
30 WID = 100
2g
-
Printing With Dot Graphics
143
40 OPEN "LPTl:"AS #l : WIDTH #1,255
50 PRINT #l,CHR$(27)"K" CHR$(WIDMOD 256)
CHR$(INT(WID/256))
;
60 FOR I = 0 TO WID-1
70 PRINT #1,CHR$(2AINT((l+SIN(I*PI/32))*J.5+.5))
88 NEXT I
90 LPRINT
100 CLOSE #l
In line 50 we’ve selected normal density graphics and said
that 100 characters of graphics data would follow. The loop
between lines 60 and 80 is repeated to plot 100 points along a
curve. This is an example of plotting a very simple mathematical
function (a sine wave) to create a design. Later in this chapter
we’ll show something more complex. The mathematical concepts
(such as sine and pi) demonstrated here are not important; you
don’t have to be a math whiz to use Radix’s graphics.
Combining
text and gmphics
It’s also possible to mix text and graphics in one line. This can
be useful for labeling charts or graphs, or even inserting fancy
graphics in text. Try adding these lines to our program:
45 PRINT #l,"WOW!";
85 PRINT #l,t'Thi.s
is great!" ;
Now if you run the program you should get a printout that
looks like this:
WOWf --I-----------------------T
h i 5 i 5 g p eat
!
But there is one thing to be careful of: all graphics data must
print on the same line. The graphics command is turned off at the
end of each line, even if you have specified that more graphics
codes follow. To see what we mean, change line 30 to plot 1000
points and run the program.
Radix User’s Manual
144
30 WID = 1000
This will make the sine wave pattern
long enough
to go off the
pageAs you can see, Radix printed graphics up to the end of the
line, then ignored the rest of the graphics data and returned to
normal text on the next line.
Printing
a Design
or Logo
Since you control the firing of every pin, you can print nearly
anything with Radix that you can draw (and probably better, if
you’re like most computer users!). This can be used for creating
“computer art” or drawing maps. Or, as we’ll show you here, you
can use dot graphics to print your logo at the top of each letter you
print.
Designing
an image to print with dot graphics is much like
designing download characters.
The best way to start is to lay out
your image on graph paper. Since you can print eight rows (seven
with a 7-bit interface)
of dots with each pass of the print head,
draw a heavy horizontal
line every eight rows on your graph
paper. And it may be helpful to write the dot values (128, 64, 32,
etc.) down the left side of each row. Then after you’ve filled in the
“dots” that you want to print, it’s time to get out the old calculator
again! Just as you did with download characters,
add up the values of each column of dots; this makes up one byte.
In the program below, we’ve taken the logo graphics information and put it into BASIC DATA statements.
The program itself is
short and simple. The loop starting at line 100 reads the data statements into a string array variable called LOGO$. In line 170 we
change the line spacing to 8/72 inch so that the lines of graphics
data will connect vertically. The actual printing is done in the loop
between lines 180 and 210; line 190 sends the graphics control
code to Radix and line 200 sends one line of graphics data.
The printout
from the program
is shown right below the
program.
Printing
With Dot Graphics
145
S&S
‘igure 12-2. By laying
graphics data.
out the logo on graph
paper, you can calculate
10 'Prints S&S loges.
20 LINE.8$ = CHR$(27)+CHR$(65)+CHR$(8)
30 'Set line spacing to l/6"
40 LINE.12$ = CHR$(27)+CHR$(50)
50 'Select dot graphics
60 GRAPHIC$ = CHR$(27)+CHR$(75)
70 DIM LOG0$(4)
80 WIDTH "LPT1:",255
90 1 READ DATA
100 FOR ROW = 1 TO 4
110 FOR COLUMN = 1 TO 100
120 READ P
130 LOGO$(ROW) = LOGO$(R~W)+ m@(P)
140 NEXT COLUMN
150 NEXT ROW
160 ' PRINT LOGO
170 LPRINT LINE.8$;
180 FOR ROW = 1 TO 4
190 LPRINT GRAPHIC$;CHR$(Q@);CHR$(B);
200 LPRINT LOGO$(ROW)
210 NEXT ROW
all of the
Radix
146
220
230
240
250
260
270
280
290
300
310
320
3;
User’s
Manual
LPRINT LINE.12$
'ROW l
DATA 0 ,0 ,0 ,0 ,1 J3 >7 97 Y7,l5
DATA 14,14,14,14,14,7,7,3,3,15
DATA 15,15,0,0,0,0,0,0,0,0
DATA 0,1,3,3,7,7,15,l4,14,14
DATA 14,15,7,7,7,3,0,0,0,0
DATA 0,0,0,0,0,0,0,0,0,0
DATA 0 ,0 ,0 90 ,0 90 90 90 30 90
DATA 0 ,0 ,0 ,0 ,13
9 ,7 97 97 915
DATA 14,14,14,14,14,7,7,3,3,15
DA~wl:,u,p,O,O,O,O,O,O,O
I
350 DATA 0,0,60,255,255,255,255,255,l43,l5
360 DATA 7,7,7,7,3,3,3,131,193,241
370 DATA 240,240,0 ,0 ,0 ,0 ,0 J0 )0 91
380 DATA 121,253,253,255,255,255,143,7,7,7
390 DATA 31,253,252,248,248,240,192,0,7,15
400 DATA 31,31,15,7,3,0,0,0,0,0
410 DATA 0,0,0,0,0,0,0,0,0,0
420 DATA 0,0,60,255,255,255,255,255,143,15
430 DATA 7,7,7,7,3,3,3,131,193,241
440 DATA 240,240,0,0,0,0,0,0,0,0
450 'ROW 3
460 DATA 0,31,31,3,129,128,192,192,192,192
470 DATA 192,224,224,224,224,240,255,255,255,255
480 DATA 255,127,0,0,0,0,63,127,255,255
490 DATA 255,255,193,128,128,128,128,192,224,240
500 DATA 252,255,255,255,127,63,31,7,7,31
510 DATA 254,252,248,224,128,0,0,3,7,7
520 DATA 7 ,3 ,0 ,0 ,0 ,0 ,0 >0 90 20
530 DATA 0,31,31,3,129,128,192,192,192,l92
540 DATA 192,224,224,224,224,240,255,255,255,255
550 DATA 255,127,0,0,0,0,0,0,0,0
560 'ROW 4
570 DATA 0,248,248,240,224,224,112,112,56,56
580 DATA 56,56,56,120,120,240,240,224,224,192
590 DATA 128,0,0,0,0,0,192,224,240,240
600 DATA 240,248,248,248,120,120,56,56,56,56
610 DATA 48,112,224,224,224,224,240,240,248,248
620 DATA 120,120,56,56,56,56,120,240,224,224
630 DATA 192,128,0,0,0,0,0,0,0,0
640 DATA 0,248,248,240,224,224,112,112,56,56
Printing With Dot Gmphics
147
650 DATA 56,56,56,12~,12~,24~,24$3,224,224,192
660 DATA 128,0,0,0,0,0,0,0,0,0
Plotting
with
Radix
This section of the manual gets into more serious BASIC programming just because it’s required in order to have the computer
act as a plotter driver. Don’t be intimidated;
while it’s beyond the
scope of this manual to teach BASIC, if you try the examples and
take it slowly you should be doing some fancy plotting of your
own before you know it.
If designing
and calculating
dot graphics images by laying
them out on graph paper seems too tedious to you, then let the
computer
do the work for you! With your computer
doing the
calculations
and Radix plotting the output, you can come up with
some terrific business graphs, charts, and mathematical
function
plots.
The best way to do this is to set up an array in memory. This is
your “graph paper.” The first thing to do is to determine how big
you want your output to be; this will determine
the size of your
array. (If you have grandiose plans to fill an entire page with plotter output, you better have lots of memory in your computer. With
60 dots per inch horizontally
and 72 dots per inch vertically, it
takes at least 540 bytes of memory for each square inch of plotted
area. That doesn’t sound so bad-but
an area 8 inches square
requires over 32K!)
Your array should be two-dimensional
(just like graph paper)
where one dimension
will be the number of columns of dots and
the other dimension
is the number of printing lines (remember
that you can have up to eight rows of dots per printed line).
Here’s a program that will use calculated-shape
graphics to
plot a circle. As you’ll see, by changing a few lines it can be used to
plot virtually any shape.
10
20
30
40
I General purpose RADIX plotting program.
'
'Set program constants.
MAXCOLI = 75
: MAXROW% = 14
148
RadixUser’s
Manual
5@ DIM BIT%(MAXCOL%,MAXROW%)
68 MASK%(l) = 64
: MASKI(4)
= 8
78 MASKX(2) = 32
: MASK%(5)
= 4
80 MASK%(3)
= 16
: MASKj(6) = 2
98 Lx = 28
: LY = 20
100 LXFAC = 72/LX
: LYFAC = 87/LY
110 '
120 'Plot curve.
130
GOSUB 600
140
'
150 'Send bit image map to printer.
160 LPRINT CHR$(27) "A" CHR$(6)
170 FOR ROW% = 0 TO MAXROW%
180
A$ = ""
190 LPRINT CHR$(27) "K" CHR$(MAXCOL%)CHR$(B);
200 FOR COL% = 1 TO MAXCOL%
210 A$ = A$ + CHR$(BIT%(COL%,ROW%
>>
220 NEXT COLI
230 LPRINT A$ " "
240 NEXT ROW%
250 LPRINT CHR$(27) "2"
260
END
270
'
280 'Subroutineto draw a line from Xl,Yl to X2,Y2.
290
'
300
XL = x2 - xl
:
310 NX = AB~(~L*LXFA~) :
320 IF NX ( NY THEN Nx =
330 NS% = INT(NX+l)
340 DX = XL/NS%
:
350 FOR 1% = 1 TO NS%
360
Xl = Xl + DX
:
YL = Y2 - Yl
NY = ABS(YL*LYFAC)
Ny
DY = YL/NS%
Yl = Yl + DY
370
GOSUB 400
380
NEXT
390
RETURN
400
410
'Subroutineto plot a point at Xl,Yl.
1%
1
420
'
430
XX =
Xl * LXFAC
:YY= Yl * LYFAC
440 COL% = INT(XX) + 1
450
ROW% = INT(YY/6)
460
XIT% = INT(YY - ROW% * 6)+1
470
BIT%(COL%,ROW%)= BIT%(COL%,ROW%)OR MASK%(XIT%)
480 RETURN
Printing With Dot Graphics
149
600 ’
610
620
630
640
658
660
670
680
690
700
1 Subroutine to plot a circle
'
RAD = 4
: Yl = 10
Xl = 19
FOR ANGX = 0 TO 360 STEP 10
RANG = ANG%*6.28/360
X2 = RAD*COS(RANG)+lfJ: Y2 = RAD*SIN(RANG)+l@
GOSUB270
NEXT ANG%
RETURN
How the program
works
In the program above, we’ve created an array called BIT%,
which is dimensioned
in line 50. You’ll note that instead
of
I
i
._-‘-----I.
.
,/
!
/
_
j
‘.
Y.
‘x.
I
1”
/
_
‘I
I
1
f
i
‘:,,,,...
‘.._
---- -_a-
,;Jf
,..’
-...
using numeric constants to dimension the array, we used the variables MAXCOL%
and MAXROW%.
This way, if your computer
has enough memory and you want to plot a larger image, all you
need to change are the values in line 40. The array MASK% contains the values of the dots. (In order to make this program run on
the most computers,
we’re using only six pins for graphics. With
many computers,
you can use all eight available pins.) In lines 90
and 100 we’ve defined some other variables you’ll be interested in:
LX, LXFAC, LY, and LYFAC are used as scaling factors. By changing these values, you can change the size of your printed image or
even distort it (you can, for example, make our circle print as an
ellipse). Experiment
a little bit!
The main calculations
for plotting the image are done in the
subroutine starting at program line 600. This is where you put the
formulas that you want to plot. By changing just the lines after 600
(with some creative mathematics!)
you can plot any functionlimited only by your imagination.
Some examples are shown at
the end of this section.
150
RadixUser's
Manual
What the program section starting at line 600 actually does is
to calculate starting and ending points for a line (in our circle the
“lines” are very short-sometimes
the starting and ending points
are the same). The coordinates
of the starting point of the line are
assigned to variables
Xl and Yl. The line ends at point X2,Y2.
When these coordinates
have been calculated,
a subroutine call is
made to line 270. This subroutine
calculates
the coordinates
of
individual points along that line.
After these coordinates
have been determined,
the subroutine
at line 400 is called. This routine turns “on” an individual dot in
our array called BIT%. (Keep in mind that no printing has been
done yet; the computer
is still drawing the image on its “graph
paper” in memory.) The way an individual
dot is turned on is
using the logical OR function in line 470.
When all the points have been plotted in memory, printing
begins at line 150. We first set the line spacing to 6/72 inch using
the (ESC)
“A” command.
This is so that there are no gaps
between rows of dots. Then the loop from line 170 to line 240
prints the dot graphics image one line (which is six dots high) at a
time. The variable A$ is used to build a string of all the columns of
BIT% in a given row.
As you can see, by taking the program in small pieces and
analyzing it, graphics programming
does not have to be difficult.
If you want to try some other plots, try these (replace lines after
600 with the lines below). The printouts from each program are
shown below the listing.
600
610
620
630
640
650
'
'Subroutineto plot a star.
'
RAD = 9
FOR ANGI = 0 TO 360 STEP 45
RANG = ANG% * 3.14159 / 180
660 RANG2 = (ANG% + 135) * 3.14159/ 180
670 Xl = RAD * COS(RANG) + 10
680 Yl = RAD * SIN(RANG) + 10
690 X2 = RAD * COS(RANG2)+ 10
700 Y2 = RAD * SIN(RANG2) + 10
710 GOSUB 270
720 NEXT ANGX
730 RETURN
Printing
WithDotGraphics
151
6@ 'Subroutineto plot a sine wave.
629 '
63pIXl = 0 : Yl = 10 : X2 = 29 : Y2 = 18
640 GOSUB 270
650 Xl = 10 : Yl = p!: X2 = 10 : Y2 = 20
660 GOSUB 270
670 Xl = pl: Yl = 18
680 FOR X2 = p!TO 20 STEP .2
690 Y2 = 10 - 9 * SIN(3.14159* X2 / 10) : GOSUB 270
700 NEXT X2
710 RETURN
Using Radix for business gmphics
You don’t have to be a mathematician, scientist, or computer
hacker/artist to use Radix’s graphics capabilities. It can be used
for business graphics too-line graphs, bar charts, pie charts, and
more! There are many commercially available graphics programs
that support Radix’s graphics. And, of course, you can write your
own. To get you started, we’ve written a program that prints a pie
chart. Here it is:
10 'Programto print a piecharton the RADIX.
Radix User’s Manual
152
20 ’
30 'Initializeprogram constants.
: LF$ =CHR$(la)
40 ESC$ = CHR$(27)
: VTAH$ = CHR$(ll)
50 FF$ = CHR$(12)
60 REVFF$ = ES@ + FF$
70 'Emphasized& expandedmodes.
80 TITLE.ON$= ESC$ + "E" + ESC$ + "W" + CHR$(l)
90 TITLE.OFF$= ES@ + "F" + ES@ + "W" + CHR$(pI)
l&J OPEN "LPTl:"AS #l : WIDTH #1,255
110 DIM BIT%(190,36),A$(36),PCT%(25)
120 DIM TEXT$(48),PIECETEXT$(25)
: MASKI(4)= 8
130 MASK%(l)= 64
140 MASK%(2)= 32
: MASK%(S)= 4
: MASKS(6)= 2
150 MASKI(3)= 16
: LY = 20
160 LX = 20
: LYFAC = 216/LY
170 LXFAC = 19pI/LX
180 FOR I= plTO 48
= SPACE$(79)
190 TEXT!!(I)
2&J NEXT I
210 GOSUB 1040
220 '
230 1 Plot curve
240 RAD = 9
: Yl = 10
250 Xl = 19'
270 FOR ANG% = 0 TO 360 STEP 12
280 RANG = ANG%*6.28/360
290 X2 = RAD*COS(RANG)+Q : Y2 = RAD*SIN(RANG)+@
300 GOSUB 640
310
320
330
340
NEXT A.NG%
FOR PIECE% = 1 ~0 NHMHER.PIECES%
: Yl = 10
TOTAL.PCT%=TOTAL.PCT%+PCT%(PIECE%)
350 ANG%=360*TOTAL.PCT%*.pll
360 RANG = ANG%*6.28/360
: Y2 = RAD*SIN(RANG)+l@
370 X2 = RAD*COS(FtANG)+l0
380 GOSUB 640
390 GOSUB 870
400 NEXT PIECE%
410 '
420 'Sendchart title to printer.
440 LPRINT ESC$ "A" CHR$(6)REVFF$ VTAH$ ;
450 LPRINT TITLE.ON$SPACE$(2j&LEN(TITLE$)/2)
;
Xl = 10
Printing
WithDotGraphics
460 LPRINT TITLE$ TITLE.OFF$
470 LPRINT VTAB$ VTAB$ ;
480 FOR I = 0 TO 48
490 LPRINT TEXT$(I) : NEXT I
500 ’
510 'Sendbit image map to printer.
520 LPRINT REVFF$ VTAB$ VTAB$ VTAB$ ;
530 LPRINT LF$ LF$ LF$ LF$ LF$ LF$
540 FOR ROW% = 0 TO 35
.
550 LPRINT "
560 LPRINT ESC$ "K" CHR$(190) CHR$(0; ;
570 FOR COL% = 1 TO 190
580 PRINT#l,CHR$(BIT%(COL%,ROW%))
j : NEXT
590 PRINT#l,LF$
600 PRINT CHR$(176)CHR$(176);
610 NEXT ROW%
620 LPRINT ES@ "2" FF$
630 Em
640 ’
650 'Subroutineto draw a line from X1,Yl to X2,Y2.
660 ’
: YL = Y2 - Yl
670 XL = X2 - Xl
680 NX = ABS(XL*LXFAC): NY = ABS(YL*LYFAC)
690 IFNX ( NY THEN NX = NY
700 NS% = INT(NX+l)
: DY = YL/NS%
710 DX = XL/NS%
720 FOR 1% = 1 TO NS%
: Yl = Yl + DY
730 Xl = Xl + DX
740 GOSUB 780
750 NEXT 1%
760 PRINT CHR$(29)CHR$(205)CHR$(205)CHR$(175);
770 RETURN
780 ’
790 'Subroutineto plot a point at Xl,Yl.
800 ’
:YY= Yl * LYFAC
810 XX = Xl * LXFAC
820 COLI = INT(XX)+ 1
830 ROW% = INT(YY/6)
840 XIT% = INT(YY - ROW% * 6)+1
850 BIT$(COL%,ROW%)
= BIT%(COL%,ROW%)
OR MASK%(XIT%)
860 RETURN
870 ’
880 'Subroutineto arrange field descriptions.
890 ’
153
154
RadixUser’s
Manual
MIDANG%=(ANG%+PREvANG%)/~
910 RANG = MIDANG%*6.28/360
920 X3 = INT(24*SIN(RANG)+.S)
: Y3 = INT(20*COS(RANG))
930 X4 = 24 + X3
: Y4 = 42 + Y3
940 IF (MIDANGJ> 70 AND MIDANGX ( 110) THEN 990
950 IF (MIDANG%> 250 AND MIDANGI ( 290) THEN 990
960 IF MIDANG%)270OR MIDANGI(90THEN 1010
970 MID$(TEXT$(X4),Y&LEN(PIECETEXT$(PIECE%)))
=PIECETEXT$(PIECE%)
980 GOT0 1020
990 MID$(TEXT$(
X4),Y4-LEN(PIECETEXT$(PIECE%))/2)
=PIECETEXT$(PIECE%)
1000 GOT0 1020
1010 MID$(TEXT$(X4),Y4)
= PIECETEXT$(PIECE%)
1020 PREVANG%=ANG%
1030 RETURN
900
1040 I
lja5p!
'Subroutineto query user for data.
1060 ’
1070 CLS: PRINT : PRINT : PRINT :
1080 INPUT "ENTERTITLE FOR CHART: ",TITLE$
1090 IF LEN(TITLE$)(= 40 THEN 1110
1100 PRINT "TITLE TOO LONG - 40 CHAR. MAX" : GOT0 1080
: AMT.LEFT%=l&J
1110 AMT.SOFAR%=@
1120 FOR I=1 TO 24
1130 c~s
ENTER PARAMETERSFOR
1140 PRINT "
PIECHART"
1150 PRINT "
TOTAL SO FAR : ";
1160 PRINT USING "###";AMT.SOFAR%
1170 PRINT "
TOTAL REMAINING:";
1180 PRINT USING "###";AMT.LEFT%
1190 PRINT :PRINT :PRINT :PRINT
1200 INPUT "ENTERPERCENTAGEFOR FIELD: ",PCT%(I)
1210 IF PCT%(I))AMT.LEFT%
OR PCT%(I)=@THEN
PCT%(I)=AMT.LEFT%
1220 AMT.LEFT%=AMT.LEFT%-PCT%(I)
1230 AMT.SOFAR%=AMT.SOFAR%+PCT%(I)
1240 PRINT :PRINT
1250 INPUT "ENTERDESCRIPTIONOF FIELD:
",PIECETEXT$(I)
1260 IF LEN(PIECETEXT$(I))(16
THEN 1280
1270 PRINT "FIELDTOO LONG - 15 CHAR. MAX": GOT0 1250
1280 IF AMT.LEFT%=@THEN 13jiJ0
PrintingWithDot Graphics
155
1290 NEXT I
1300 NUMBER.PIECEs%=I
1310 IF NUMBER.PIECES%=~
THEN 1110
1320 c~s
1330 RETURN
You should recognize many sections of code from the plotting
program. We’ve expanded on that program framework to include
routines for inputting data to be graphed and placing labels next
to the pie chart. We’ve used a feature of Radix to simplify programming and speed up the program: a reverse form feed. The
program calculates locations and prints all of the labels. When the
labels are done, a reverse form feed to the top of the sheet prepares
Radix for the graphics data.
The output from our program is shown below.
RadixUser’s
Manual
High Resolution Graphics
Up until now ail of the dot graphics printing we have done has
been with Radix’s normal density mode. This can give you some
pretty sharp images at great speed. Sometimes though, you may
want to create an image with even higher resolution. Radix has four
graphics modes you can use; they’re summarized in Table 12-Z.
Table 12-Z
Dot graphics commands
Function
Control code
Normal density (60 dots/inch)
(ESC)
“K” nl n2 ml m2. . .
Double density (120 dots/inch)
Double density/double speed
(ESC)
(ESC)
“L” nl n2 ml m2. . .
“y” nl n2 ml m2. . .
Quadruple density (240 dots/inch)
(ESC)
“z” nl n2 ml m2 . . .
Note: If your computer does not support lowercase characters, use CHR$(121)
and CHR$(122) for “y” and “z”, respectively.
The command syntax for all of the commands is the samejust as you have learned it for the (ESC) “K” (normal density)
command. The number of columns to be printed is nl + 256m2.
So what do these different modes do? On the following pages
are actual size reproductions of printouts of the same image
printed in each of the four different graphics modes. They were all
printed using the plotting program in this chapter (with a rather
complex set of formulas starting at line 600!).
_.LY.._.,
yyI.::..,
.,,..__
1.:+ .:.:r..:-.*.
.y..
___,
.,&.‘.::d,- ..
,;...,. ...I...
.:...-...:,,,,, .. ,:,- ::::~:_:l!n,C,(“_
_...(
:<
.y:_.-.... .j’.’ .-,.
,:.“‘::‘.p:_.......
.:.,_ ,,, -...L-‘.. .,..,,::::;:::::
..._..._
...---.......2- -,,..
..-,;;y ,..___, ,, ,,_ ..(,_,
,“,....
., ,_.T’. ,_........
I_::, :*.:
.,_I:,:_: ,_I,:,,/
..‘q-..
,.
_....::_,
ffiyL, I_,.+.. .: :.
:*::.
:_.]!,’
., ,...:_,..,‘I,?~_‘&*P... .it*>
911:.
.. ..” ,;,,::i.:
..._:.,_
.‘,::_ :
,,:+$. I. ‘,+$.,:’,I ’ .>=:
.L,i‘. ; .ji:_, _,
.., _,,, ,~,y.,, .. .... ... . :::,.,.
?.:y:.;,
..:.
‘j;,!:,j ..: i ..!:.i.: :,..-::5,..
....:;,,,,:.... ..2.;
.“:‘“;i;i;i,;::!“‘“““‘.;::~, ,,.. :
__.‘J,, ::.:2’:‘:,:~.~~r
..:._jI!
:,,.,..,/,,,.,;
i ‘, i, 11;::‘.,,,/ ,’ .; ~:.‘.+. ,. ....., ....-....&
..^. ....ip ..
..+ ,,,..
..:/. .. .”
.,..;.
:. b . ‘! .:.
:; ;. ...A.: .;;: : .. _..,,2’
: ‘y),
: ii.,...,-;:.;jl,........J,.., ., : ‘. .+ .. :/;I::
q;.;,: ,:-_
j:j,- .:::_.;ij.: ,......
i :,(,. .. ; . ..i, _.‘,‘!L,‘:;;:. ; .,
..
.:.,4i;-...z...;,.
,,..
-::.r::,
.,.:j+.: ..--.
“.’ .:_:::;.;ji’2’.’ .‘, ., _,,
.Ly:~‘l~,‘::~
.:;;::‘q.‘;tt..’.‘.> ,_j: f:gfqr;;,. y_+ ..%!‘,.,.
.v ,_,. ..::...:...:&: ..:“-‘ .: :.
,..::,y,y?. ,, ....‘_I:.: “‘q!‘$.;‘:: t.- y:-; ..gj;;
,,
,,,:
_
,,;~~:~(l!
.,y,,
‘_
.:..
‘.
.;
‘I ._.T.’..’ .;:: “, I.
; .)..‘-l
I:..;::,
,,
.+: ‘. ~._
.!/Sj.. ./it’,. .1_
.:- ,. ,:...--.::y
: : .. ;y:,“’/ .._!.
,‘T.,,_, : .;,
, _,,,;. ....l’. ‘.“,-,:“;I’ ‘,. ‘7,. :
: ..A.,, .-:hii’ ,’ ,’ :,._
.. .
‘& ,. :I ‘, ,‘:‘]:: .::+j
.s :y,,y.’ -:j:, __‘,’_,: ‘.yp. .‘..:!:;i,.:::’
*,‘,‘$
j’ .. .:‘i..,“:r:,
_ ._,:$.,!.
.’ ‘.
1,: ,, :‘:~‘~::.!..I~.::,,!~~~~,::,..
__
.,, .:,:,
/I!i,. .’ y .;:_.,,,,,:,;,F’.
:A..
..j
.....j,;j::, ::y,.il__
.._r .. .../j.‘( : /.. :s:,..:j&y... ,_,...
;:F r;s.)!a ::,::j::::jLi::...; !.&. is..-.,’ ..“,.jjTI’
_,,
,;:,_ ,.
..._...,, ‘Z.,!+:!:.:;:$P: _,..
I,.-.....,.:..,i, ,iig ‘_, .:_A,:::.
..‘,:;j:T..,:‘, ..::I(_,. ,.. ‘.G,
..,r. _,: ,, .:.....3;:/,,,._.‘.
,,,/ *,t!: ..”
18 ..~_.-~!..
,.(.
.
.._
k,
.]+“‘::‘::ic.;l’
:!:.........
:.x::‘~ ... ““.’ .:.. :. ’i.‘::i,*,‘:i,l~.c;~;,:::::::..-..:Is
.,:.
.,:;;‘:
Y.; ,.,_ ,_,...“‘.::-:y.:l,;
:...-.
,j:-..,. ,, ,,..,.,,,....
:
::!,a..
.::::!:“:“‘~4::;::ii:.
..:::i:i$$,;:;
‘. .: .:.,,,.I,.!1:“i”.~‘8i:::::,.,,.. :
I.:.;,., .,
,;_.
_,.,.
::y& :,y 2. “’ _, ,. ._I,* .._
..,..
.....*Q’48
;;,,,..F:
..“,, ..: .rir .... : /.:
..I.
__.,___
:::::,:
”
,. ..,;;a!.;’
‘_ .........
,,,, ,,,,,
,,,
,...... -6..
‘. ‘:...;‘:i;;,.,.l
!’
:’..- ,. ... ...:::!;::
.::A-. ‘. :..:ti:.
: ‘k.
: ,. : ;- .,. .’
‘I
./,
.:
-,y?;
.,; .:.; .’
,.
‘!_ ‘.(, /.s::;
:,. ..:.j.,
:.,.:>
‘.
ty. .‘.
:’
.
.
.
., .,s..
,_
..
Normal density graphics
-
Printing
WithDotGraphics
157
Double density/double speed
.__..
Quadruple density graphics
Y.-‘.
Radix User’sManual
158
So if quadruple density looks so great, why not use it all the
time? Let’s try an experiment on your printer which will show just
how the different density modes work. Using the first program in
this chapter, change line 50 to try each of the different modes. Just
change the “K” to “L“, “y”, and “z” in turn. Your printouts should
look something like this:
(ESC)“L”
_--”
x-__
d_---__I_
(ESC)“y”
(ESC)“z”
As you can see, the different modes seem to condense the
printed image. So, to get the same image in a higher density mode,
you must plot more points. This requires twice as much memory
for your array, twice as much computing time, and twice as much
printing time (but the results may be worth it!).
Star’s engineers have given programmers a unique shortcut
for program development though-double density double speed
graphics. Although this mode requires just as much memory and
computing time as double density, it prints at the same speed as
normal density graphics. Amazing, you say? Well, it is-until you
know the secret. Every other column of dots is ignored, so the
output is actually the same as normal density graphics. The
advantage is that you can write and debug your programs at double speed, then change to double density graphics for terrific output.
If You Have Problems with BASIC
You may write some graphics programs that look just right in
the listing, but the printouts aren’t quite what you expected. A
Printinn
WithDot GraDhics
159
common problem is that the BASIC interpreter in your computer
is inserting a few of its own codes. For instance, if your program
generates a CHR$(13) as valid graphics data, BASIC may follow it
with a CHR$(lO). Another problem arises with certain computers
that replace horizontal tabs (CHR$(S)) with a series of spaces
(CHR!$(32)).A possible solution to these problems is to not use the
bottom dot (which has a value of 1). This way, you will never
produce an odd number, hence, you will never have a CHR$(13)
or CHR$(S). (This is why we used only six pins in our plotting
program.)
That’s one solution to one problem. You’ll find more of each
(with specific information for your computer) in the appropriate
appendix.
Summary
Function
Control code
(ESC) “K” nl n2 ml m2. .. Print nl + 256*n2 columns of normal density graphics
(ESC) “L” nl n2 ml m2. . . Print double density graphics
(ESC) “y” nl n2 ml m2. . . Print double density graphics at
double speed
(ESC) “z” nl n2 ml m2. .. Print quadruple density graphics
RadixUser’s
Manual
-
-
-
-
--
I-
i
Chapter
33
Putting Radix to Work For You
If you’ve followed us this far, you’ve learned a lot about your
Radix printer-how to use its myriad of type styles, sizes, line
spacing options, character sets, margins, tabs, and more. Perhaps
you’ve even created some download characters (maybe using the
utility program in Chapter 11).
Now, as your reward (as if the knowledge of how to use all
these features wasn’t enough!) for reading this entire manual, we
have one more utility program for you. With this program you can
set many of Radix’s print parameters with just a few keystrokes.
No more writing a short program each time you want to change
the print style to NLQ, for example. All you will need to do is type
“RUN (return) 1100"and it’s done-the program is completely
menu-driven.
..
Putting
RadixtoWorkForYim
163
It may take a while to enter it, but we think that in the long
run, this program will save you time when you want to set margins or tabs or any of Radix’s other advanced features. Enjoy!
18 'Programto setup RADIX printer as directed.
2pl '
30 'Initialize.
40 ESC$ = CHR$(27) : TB = 25 : DIM TBS(256)
50 OPEN "lptl:"AS #l : WIDTH #l, 255 : KEY OFF
60 '
70 'DisplayMAIN menu.
80 TITLE$ = "MAIN MENU"
90 GOSUB 2290
100 PRINT TAB(TB) "0. Exit."
110 PRINT TAB(TB) "1. Select CHARACTERSET."
120 PRINT TAB(TB) "2. Select PRINTINGMODES."
l3P,PRINT TAB(TB) “3. Select PITCH."
140 PRINT TAB(TB) "4. Select LINE SPACING."
150 PRINT TAB(TB) “5. Set MARGINS,TABS & FORMS."
160 GOSUB 2380
170 IF S(plOR S)5 THEN BEEP : GOT0 160
180 IF S = 0 THEN CLOSE #l : CLS : END
190 ON S GOSUB 210,480,350,1240,640
200 GOT0 60
210 1
220 'Subroutineto displayCHARACTERSET menu.
230 TITLES = "CHARACTERSET MENU"
240 GOSUB 2290
250 PRINT TAB(TB) "0. Return to main menu."
260 PRINT TAB(TB) "1. Select NLQ characterset."
270 PRINT TAB(TB) "2. Cancel NLQ characterset."
280 PRINT TAB(TB) “3. Select ITALIC characterset."
290 PRINT TAB(TB) "4. Cancel ITALIC characterset."
300 GOSUB 2380
310 IF S(p!OR S)4 THEN BEEP : GOT0 300
320 IF S = 0 THEN RETURN
330 ON S GOSUB 1180,1210,1590,1620
340 GOT0 210
350 '
360 'Subroutineto displayPITCHESmenu.
370 TITLE$ = "PITCHESMENU"
380 GOSUB 2290
164
RadixUser's
Manual
390 PRINT TAB(TB) "a. Return to main menu."
400 PRINT TAB(TB) "1. Select PICA pitch."
410 PRINT TAB(TB) "2. Select ELITE pitch."
420 PRINT TAB(TB) "3. Select CONDENSEDpitch."
430 GOSUB 2380
440 IF S(0 OR S)3 THEN BEEP : GOT0 430
450 IF S = 0 THEN RETURN
460 ON S GOSUB 820,850,880
470 GOT0 350
480 '
490 'Subroutineto displayPRINTINGMODES menu.
500 TITLE$ = "PRINTINGMODES MENU"
510 GOSUB 2290
520 PRINT TAB(TB) "0. Return to main menu."
530 PRINT TAB(TB) "1. Select EXPANDEDmode."
540 PRINT TAB(TB) "2. Cancel EXPANDEDmode."
550 PRINT TAB(TB) "3. Select EMPHASIZEDmode."
560 PRINT TAB(TB) "4. Cancel EMPHASIZEDmode."
570 PRINT TAB(TB) "5. Select DOUBLE-STRIKEmode."
580 PRINT TAB(TB) "6. Cancel DOUBLE-STRIKEmode."
590 GOSUB 2380
600 IF S(0 OR S)6 THEN BEEP : GOT0 590
61/aIF S = p!THEN RETURN
620 ON S GOSUB 1530,1560,2170,2200,2230,2260
630 GOT0 480
640 '
650 'Subroutineto displayMARGINS,TABS & FORMS menu.
660 TITLE$ = "MARGINS,TABS & FORMS MENU"
670 GOSUB 2290
680 PRINT TAB(TB) "$3.Return to main menu."
690 PRINT TAB(TB) "1. Set HORIZONTALTABS."
700 PRINT TAB(TB) "2. Set VERTICALTABS."
710 PRINT TAB(TB) "3. Set LEFT MARGIN."
720 PRINT TAB(TB) "4. Set RIGHT MARGIN."
730 PRINT TAB(TB) "5. Set TOP MARGIN."
740 PRINT TAB(TB) "6. Set BOTTOM MARGIN."
750 PRINT TAB(TB) "7. Cancel TOP & BOTTOM MARGINS."
760 PRINT TAB(TB) "8. Set PAGE LENGTH."
770 GOSUB 2380
780 IF S(0 OR S)8 THEN BEEP : GOT0 770
790 IF S = 0 THEN RETURN
800 ON S GOSUB 1820,2130,910,970,1030,1090,1150,1650
810 GOT0 640
-
-
-
-
Putting
RadixtoWorkForYou
820 '
830 'Subroutineto select PICA pitch.
840 S$ = ES@ + "B" + CRR$(l) : GOSUB 2460 : RETURN
850 '
860 'Subroutineto select ELITE pitch.
870 S$ = ESC$ + "B" + CRR$(2) : GOSUB 2460 : RETURN
880 '
890 'Subroutineto select CONDENSEDpitch.
;Tj;s$ = ESC$ + "B" + CRR$(3) : GOSUB 2460 : RETURN
920 'Subroutineto set LEFT MARGIN.
930 GOSUB2500
940 INPUT "Enternew left margin (l-255)"; X
950 IF X ( 1 OR X > 255 THEN BEEP : GOT0 930
960 S$ = ESC$ + "M" + CBR$(X) : GOSUB 2460 : RETURN
970 ’
980 'Subroutineto set right MARGIN
990 GOSUB2500
1000 INPUT "Enternew right margin (l-255)"; X
1010 IF X ( 1 OR X > 255 THEN BEEP : GOT0 990
1020 S$ = ESC$ + "Q" + CRR$(X) : GOSUB 2460 : RETURN
1030 ’
1040 'Subroutineto set TOP MARGIN.
1050 GOSUB 2500
1060 INPUT "Enternew top margin (l-16)"; X
1070 IF X ( 1 OR X > 16 THEN BEEP : GOT0 1050
1080 S$ = ESC$ + "R" + CRR$(X) : GOSUB 2460 : RETURN
1090 ’
1100 'Subroutineto set BOTTOM MARGIN.
1110 GOSUB 2500
1120 INPUT "Enternew bottom margin (l-127)"; X
1130 IF X ( 1 OR X ) 127 THEN BEEP : GOT0 1110
1140 S$ = ESC$ + "N" + CRR$(X) : GOSUB 2460 : RETURN
1150 ’
1160 'Subroutineto CANCEL TOP & BOTTOM MARGINS.
1170 S$ = ESC$ + "0" : GOSUB 2460 : RETURN
1180 '
1190 'Subroutineto select NLQ characterset.
1200 S$ = ESC$ + "B" + CRR$(4) : GOSUB 2460 : RETURN
1210 '
1220 'Subroutineto cancel NLQ characterset.
1230 S$ = ESC$ + "B" + CRR$(S) : GOSUB 2460 : RETURN
1240 '
165
166
RadixUser's
Manual
1250 'Subroutineto select LINE SPACING.
1260 TITLE$ = "LINE SPACINGMENU"
1270 GOSUB 2290
1280 PRINT TAB(TB) "0. Return to main menu."
1290 PRINT TAB(TB) "1. Select l/6 inch line spacing."
1300 PRINT TAB(TB) "2. Select l/8 inch line spacing."
1310 PRINT TAB(TB) “3. Select 7 dot graphicsspacing."
1320 PRINT TAB(TB) "4. Select n/l44 inch spacing."
1330 GWJB 2380
1340 IF S(O OR S)4 THEN BEEP : GOT0 1330
1350 IF S = 0 THEN RETURN
1360 ON S GOSUB 1380,1410,1440,1470
1370 GOT0 1240
1380 '
1390 'Subroutineto select l/6 inch line spacing.
1400 S$ = ESC$ + "2" : GOSUB 2460 : RETURN
1410 '
1420 'Subroutineto select l/8 inch line spacing.
1430 S$ = ESC$ + "0" : GOSUB 2460 : RETURN
1440 '
1450 'Subroutineto select 7 dot graphicsspacing.
1460 S$ = ESC$ + "1" : GOSUB 2460 : RETURN
1470 '
1480 'Subroutineto select n/144 inch line spacing.
1490 GOSUB 2500
1500 INPUT "Enter line space in l/144 ths of an inch";X
1510 IF X ( 0 OR X ) 255 THEN BEEP : GOT0 1490
1520 S$ = ESC$ + "3" + CHR$(X) : GOSUB 2460 : RETURN
1530 '
1540 'Subroutineto selectEXPANDEDprint.
1550 S$ = ESC$ + "W" + CHR$(l) : GOSUB 2460 : RETURN
1560 '
1570 'Subroutineto cancel EXPANDEDprinting.
1580 S$ = ESC$ + "W" + CHR$(0) : GOSUB 2460 : RETURN
1590 '
1600 'Subroutineto select ITALIC characterset.
1610 S$ = ESC$ + "4" : GOSUB 2460 : RETURN
1620 '
1630 'Subroutineto cancel ITALIC characterset.
1640 S$ = ESC$ + "5" : GOSUB 2460 : RETURN
1650 '
1660 'Subroutineto set PAGE LENGTH.
1670 GOSUB 2500
-
-
-
-
Putting
RadixtoWorkForYou
.
-.
167
1680 PRINT "Page length in Inches or Lines (I,L)?"
1690 PRINT TAB(TB) ;
1700 A$ = INKEY$ : IF A$ = "" THEN 1700
1710 IF A$ = "I" OR A$ ="i" THEN 1740
1720 IF A$ = "L" OR A$ ="l" THEN 1780
1730 BEEP : GOT0 1700
1740 INPUT "Lengthof page in inches (l-32)"; X
1750 IF x ( 1 OR x ) 32 THEN BEEP : GOTO 1670
1760 S$ = ESC$ + "C" + CHR$(0)+ CHR$(X)
1770 GOSUB 2460 : RETURN
1780 INPUT "Lengthof page in lines (1-127)"; X
1790 IF X ( 1 OR X ) 127 THEN BEEP : GOT0 1670
1800 S$ = ES@ + "C" + CHR$(X)
1810 GOSUB 2460 : RETURN
1820 '
1830 'Subroutineto set HORIZONTALTABS.
1840 S$ = ES@ + "D" : MAX = 255 : GOSUB 1850 : RETURN
1850 '
1860 'Subroutineto set tabs, either horie or vert.
1870 GOSUB 2500
1880 PRINT f'Would
you like to set the tabs in"
1890 PRINT TAB(TB) "Regularintervals,or specify"
1900 PRINT TAB(TB) "each one Individually(R,I)"
1910 A$ = INKEY$ : IF A$ = "" THEN 1910
1920 IF A$ = "R" OR A$ = "r" THEN 2070
1930 IF A$ = "I" OR A$ = "i" THEN 1950
1940 BEEP : GOT0 1850
1950 PRINT : I = 2 : TBS(1) = -1
1960 PRINT TAB(TB) "Enterthe list of tabs, in"
1970 PRINT TAB(TB) "ascendingorder. No more than" MAX
II
I!
1980'PRINTTAB(TB) : INPUT "Entera tab" * TBS(1)
1990 IF TBS(1) ( 0 OR TBS(1) > 255 THEN lb40
2000 IF TBS(1) = 0 THEN I = 1 : GOT0 2040
2010 IF TBS(1) (= TBS(I-1)THEN 1940
2020 I = I + 1 : IF I ) MAX THEN 1940
2030 GOT0 1980
2pl.40 I = I + 1
2050 S$ = S$ + CHR$(TBS(I)): IF TBS(1) 0 0 THEN 2040
2060 S$ = S$ + CHR$(0) : GOSUB 2460 : RETURN
2070 PRINT : PRINT TAB(TB) ; : INPUT "Enter interval";
X
2080 IF X ( 0 OR X > 255 THEN 1940
2090 FOR I = 1 TO 255 STEP X
168
RadixUser’s
Manual
21091MAX = MAX - 1 : IF MAX = p!THEN 2120
2110 S$ = S$ + CHR$(I) : NEXT I
2120 S$ = S$ + CHR$(@) : GOSUB 2460 : RETURN
2130 '
2140 'Subroutineto set VERTICALTABS.
2150 S$ = ESC$ + "P" : MAX = 20 : GOSUB 1850
2160 RETURN
2170 '
2180 'Subroutineto select EMPHASIZEDprinting.
2190 S$ = ESC$ + "E" : GOSUB 2460 : RETURN
2200 '
2210 'Subroutineto cancel EMPHASIZEDprinting.
2220 S$ = ESC$ + "F" : GOSUB 2460 : RETURN
2230 '
2240 'Subroutineto selectDOUBLE-STRIKEprinting.
2250 S$ = ESC$ + "G" : GOSUB 2460 : RETURN
2260 '
2270 'Subroutineto cancel DOUBLE-STRIKEprinting.
2280 S!$= ESC$ + "H" : GOSUB 2460 : RETURN
2290 ’
2300 'Subroutineto print a menu title.
2310 as
2320 PRINT : PRINT : PRINT
2330 PRINT TAB(27) II---RADIX PRINTERSETUP ---II
2340 PRINT
2350 PRINT TAB((80-LEN(TITLE$))/2)
TITLE$
2360 PRINT : PRINT
2370 RETURN
2380 ’
2390 'Subroutineto input menu selection.
2400 LOCATE 20,18 : PRINT "Enter selectionor press P
for print sample."
2410 C$ = INKEY$ : IF C$ = "" THEN 2410
2415 IF C$ = "P" OR C$ = fy THEN GOSUB 3000 : G0~0 2380
2420 IF C$ ( "0" OR C$ ) "9" THEN BEEP : GOT0 2410
2430 S = VAL(C$)
2440 LOCATE 20,18 : PRINT STRING$(50,"")
2450 RETURN
2460 ’
2470 'Subroutineto output commandstring.
2480 PRINT #l, S$ ;
2490 RETURN
2500 ’
Putting
RadixtoWorkForYou
2510 'Subroutineto clear screen & positioncursor.
2520 CLS : LOCATE l@,TB : RETURN
3000 '
3010 I Subroutineto print sample
3020 FOR I = 1 TO 4 : FOR J = 33 TO 126
303pIPRINT #l, CHR$(J);
3040 NEXT : PRINT #l, CHR$(l0) : NEXT
3050 RETURN
169
170
RadixUser’s
Manual
-_
-
Chapter
14
Basic Maintenance
As almost any good mechanic will tell you, dust and heat are
prime enemies of any mechanism, and Radix is no exception. The
best maintenance is preventive. So, to start with, we hope you’ve
found a clean, dust-free location with a comfortable temperature
range for both you and your computer/printer system. Appendix
A gives you further tips on locating Radix.
Cleaning Radix
The second rule for long life is periodic cleaning. Both inside
and outside of the case and covers respond gratefully to periodic
172
Radix User’sManual
cleaning with a damp rag and alcohol. Do this whenever the case
appears to be getting dirty, always being careful to avoid dripping
alcohol on the printer mechanism.
To remove dust and paper lint from inside the tractor and
printer areas, it’s best to use a soft brush, but, be very, very careful
not to bend or injure any electronic parts or wiring, as they are
vulnerable to a heavy-handed touch.
Besides the periodic cleanings, the only other maintenance
you’ll likely encounter will be changing the ink ribbon cartridge,
replacing a blown fuse, or replacement of the print head after a
long period of use.
Replacing the Ink Ribbon
When the printing gets too faint for comfortable reading, it’s
time for a new ink ribbon. By far the most convenient way is to
simply replace the entire ribbon cartridge (Appendix A describes
this procedure). After all, that’s the purpose of the cartridge: to
save time and messing with dirty ribbons.
It is possible, however, to buy a replacement ribbon and insert
it yourself inside the original cartridge casing. The procedure for
inserting a new ribbon into the old cartridge (not recommended
for non-mechanical types!) is as follows.
1. First, obtain from your Radix dealer the correct type of ribbon
“sub-cassette” (not spool-type ribbons used with some other
printers).
2. Remove the ribbon cartridge from the printer by holding both
ends and pulling straight up from the holder springs. (Refer to
Appendix A for illustrations of installing ribbon cartridge.)
3. Pry open the cartridge cover with a thin-bladed screwdriver.
Arrows in Figure 14-l show the numerous slots for inserting a
screwdriver.
4. Press hard against the end of the idler gear holder to make a
gap between it and the ribbon drive gear, and remove the old
ink ribbon sub-cassette. See Figure 14-2.
5. Clean out any dirt from inside and around the cartridge and
around the ribbon drive gear.
---
,’
.
Basic Maintenance
173
Screwdriver
Figure 14-l. Use a screwdriver to pry open the cartridge.
Ribbon drive gear
Figure U-2. Replace the ribbon sub-cassette.
.
174
Radix User’sManual
6. Remove the wrapping from the new ribbon sub-cassette,
removg the adhesive tape attached to the joint, and insert the
sub-cassette into the ribbon cassette as shown in Figure 14-2.
7. Pull out the ink ribbon and set it according to the directions
shown by the arrow in Figure 14-3. It’s easy for the ribbon to
get twisted somewhere along its pathway. Don’t let it happen!
‘igure143.
Make sure that the ribbon is not twisted when you thread it through its
path.
8. Firmly pull the idler gear towards you and guide the ribbon
between the idler gear and the ribbon drive gear.
9. Remove both top and bottom of the ribbon sub-cassette.
10. Replace the ribbon cartridge top cover.
11. When you’ve completed the installation, mark the correct
number on the silver label stuck on the right-hand side of the
cartridge cover. This number indicates the number of times
the ribbon has been replaced. Five replacements is the maximum, after which you should buy a complete new cartridge.
-
:..
i.
c
Basic Maintenance
175
RepJacing a Fuse
How can you tell when you’ve blown a fuse? Well, when the
printer won’t operate and the power lamp on the control panel
isn’t lit, even though you’re sure that the power switch is on and
the printer is plugged in - it’s likely a blown fuse.
To check the primary fuse, you start by turning the power
switch ofl and unplugging the power cord.
Warning: There is an extreme shock hazard inside Radix. To
avoid serious injury, it is important that the power cord is disconnected.
Next, remove the upper case, shown in Figure 14-4, by pulling
off the platen knob.
Caution: Don’t twist or turn the platen knob; pull it straight off.
Then remove the fastening screws along the back side. Lift
the back edge of the cover and at the same time, pull it slightly
forward to release the front of the case. Lift it all the way off, being
careful not to pull the wires which connect the cover to the case.
When the case is off, check Figure 13-5 for location of the primary fuse, which you’ll find held by its clamps close to the power
switch. The fuse is a commonly used type, with a metal strip suspended in a glass and metal case. If the strip is broken, the fuse is
blown. Replace this fuse with a 3N125V slow-blow type fuse (Bell
5MT3 or equivalent). Now reassemble Radix and test-run it. If the
printer still isn’t working, call on your Radix dealer/servicecenter
for help.
Replacing the Print Head
The dot matrix print head has a remarkably long life, printing
perhaps 100,000,000 characters before it wears out. You’ll know
when that happens when the printout is too faint for your taste
even after replacing the ink ribbon or cartridge.
Warning: The print head gets hot during operation, so let it cool
off for awhile, if necessary, to avoid burning your fingers.
To replace the print head, start by turning the power switch
ofi and unplugging the power cord.
Then, in sequence:
1. Remove the front cover and the ribbon cartridge.
176
Radix User’s Manual
-
fuse
Figure 14-4. After removing the screws, pull the upper case slightly prward
lift it ofi the printer. The primary fuse is located near the power switch.
and
Basic
Maintenance
177
2. Remove the two screws and washers fastening the print head.
3. While holding the print head, pull off the head cable connector
from the print head.
4. Insert the head cable connector to a new print head and fasten
with the same two screws and washers.
Print head
Head cable connec
of Radix’s print head is simple.
178
Radix User’s Manual
5. Apply “screw lock,” (an adhesive available at hardware stores]
to the heads of the screws.
Be absolutely sure that you’ve made a good solid connection
between the print head and its cable connector, or it could cause
problems.
180
RadixUser’s
Manual
Appendix A
Setting Up Radix
In this appendix, we’ll show you how to unpack your new
Radix printer, set it up in the right location, and get it ready for
you to load it with paper and start printing. But first . . .
Where Shall We Put It?
Before you do anything else, give some thought to where
you’ll be using your printer. Obviously, it will be somewhere near
your computer. And both printer and computer will lead longer,
healthier lives if they like their environment. For a congenial environment, we recommend . . .
l Placing the printer on a flat surface
l Keeping it out of direct sunlight and away from heat-producing
appliances
l Using it only in temperatures where you are comfortable
l Avoiding areas with a lot of dust, grease, or humidity
l Giving it “clean” electricity. Don’t connect it to the same circuit
as large, noise-producing motors
l Power supply voltage should be the same voltage that’s specified
on the identification plate - not over 10% more or less than the
recommended 120 volts AC.
Warning: Extremely high or low voltage can damage your
printer.
What Have We Here?
Now let’s take a look at what’s in the carton. Take it slow and
easy, and check each item in the box against Figure A-l. There
should be exactly 9 items. One important item is the printer’s warranty and registration card. Now is the time to fill it in and mail it.
It’s a good warranty, and you’ll like the protection it gives you.
Radix User’s Manual
182
.-.
L
F igure A-l.
Inside the carton you should have received: 1) ttadix prmter, ~j cut
sheet guide, 3) continuous paper guide, 4) power cord, 5) platen knob, 61 spare ‘pse,
7) ribbon cartridge, 8) this user’s manual, and 9) warranty registration card.
Let’s move on to the next step . . .
Removing the printer covers
What are covers for, really? Primarily, for two reasons: one, to
keep dust and dirt away from the delicate “innards,” and two, to
keep the noise level down. The front cover must be on or Radix
will not print. So, you should keep the covers on all the time,
except when setting the ink ribbon cartridge in place, loading
paper, or making other adjustments when the cover might be in
the way.
Radix has two covers, front and back. Both operate in the
--
SettingUp Radix
183
same way. To remove them, lift up the free end (nearest the center
of the printer) so that the cover makes approximately a 45O angle
with the printer frame, then with a slight rocking motion, lift it
straight up and off the machine. To replace, just reverse the procedure. Figure A-2 illustrates the proper position and movement for
both removal and replacement of the covers.
R/earcover
Figure A-2.
Remove the printer covers by tilting them up to about 45O, then lifting
straight up.
Removing packing and shipping scmws
There are three (on a Radix-lo) or four (on a Radix-15) shipping screws on the bottom of the printer, used to hold the internal
chassis securely to the external frame during shipping. To get at
these, carefully place the printer upside down on a soft surface
like a foam cushion. Remove the screws with a Phillips screwdriver as shown in Figure A-3.
Next, remove the front cover, and remove the large flat piece
of cardboard packing which protects the print head, per Figure
A-4.
.
. .
,__,
184
Radix User’s Manual
-.
Ggure A-3. Radix-10 has three screws which secure the chassis during shipping;
Radix-15 has four. They should be removed before use.
‘.
,::
,. .’
Setting Up Radix
185
-...
Figure A-4. Remove the piece of cardboard packing that protects Hadix’s pnnt
head.
You’ll be smart to save these screws, along with the rest of the
packing material and the shipping carton, in case you ever have to
ship the printer. Tape the screws somewhere on the carton or
packing. (You did fill in that warranty card, didn’t you?)
Installing the platen knob
This is the knob that turns the rubber platen cylinder. It fits
into the hole on the right side of the printer case. Just match the
odd-shaped hole in the knob with the same shape on the shaft
you’ll see inside the hole in the case, and press it on firmly. Give
the knob a few turns to see that it’s turning the platen easily and
smoothly.
Installing the ribbon cartridge
The ribbon cartridge greatly simplifies installing the ink ribbon. For easy installation, though, it’s wise to follow the sequence
and diagrams shown here.
186
Radix User’sManual
Turn the power switch off, and remove the front cover (as
explained earlier.)
2. Slide the print head gently with your fingers to the approximate
center of its pathway.
1.
-
.-
Guide pin
Figure A-5.
A guide pin on each side of the ribbon cartridge helps to align the
cartridge during installation.
-
3. Note the position of the guide pins on the cartridge as shown in
Figure A-5. Then hold the cartridge at each end, with the ribbon
facing away from you, and insert the guide pins into the cut-out
hooks of the printer frame. You’ll find this easier if you tilt the
cartridge forward as you do this, as Figure A-6 shows.
4. Using the guide pins as a fulcrum, lightly press the cartridge
down until the two holder springs snap shut to hold the cartridge firmly in place.
5. Now thread the ribbon carefully between the print head and the
ribbon guide next to the platen, (Take a good look at
-
Settine
187
UD Radix
Guide pin
I
Figure A-6. Tilt the ribbon cartridge in until the guide pins meet the hooks in the
printer frame, then lower the front edge until the holder springs hold it in place.
Figure A-7.) You might want to use a ball point pen to lightly
press the ribbon guide against the platen (rubber roller) while
you insert the ribbon into the thin space between the print head
and ribbon guide. Important: Center the ribbon vertically in the
middle of the print head to avoid misprints or the ribbon coming off during printing.
6. Turn the spool gear knob in the direction of the arrow printed
on the top left side of the cartridge to take up the slack in the
ribbon; continue turning the spool gear four or five times to
verify that everything is properly set and ready to roll.
7. As a final step, replace the front cover. As you’ll learn in Chapter 1, Radix refuses to print unless the front cover is securely in
place! A glowing “pause” lamp warns of a loose cover. When
this occurs, do the obvious thing: fasten the cover securely,
press the pause button to douse the green light, and you’re back
in business!
188
Radix User’s Manual
^._
-.
_-
Figure A-7. Use a ball point pen to place the ribbon between the print head and the
ribbon guide. It’s important that the ribbon is centered vertically between the print
head and the ribbon guide.
Connecting Radix to
Computer
To complete
installation,
need
connect
computer.
appendices through
we’ve
including
guidelines
making
(“interfacing”)
several
the
popular
Radix
Then,
Chapter
you’ll
how
load
you’ll
the
guides)
operate
to
this
used
(here’s
Appendix B
IBM Personal Computer
and Compaq Computer
Both the IBM Personal Computer and the Compaq computer
function the same when connected to Radix. We will discuss the
IBM-PC, knowing that all we say works just as well for the Compaq.
Connecting Radix to an IBM
Radix can connect to either a serial or a parallel interface in
the IBM-PC or IBM-XT computers. IBM calls a parallel interface a
“Parallel Printer Adapter,” and they call a serial interface an
“Asynchronous Communications Adapter.”
You only need a cable to connect Radix to your IBM-PC. Your
Radix dealer can furnish this cable, or you can use a standard
IBM-PC parallel printer cable for the parallel interface.
Connecting with the parallel interface
We recommend that you set the DIP switches in Radix as
shown below when connecting it to an IBM-PC parallel interface.
Connecting to the serial interface
The IBM-PC expects its printer to be connected to the parallel
interface. If you are using the serial interface, then you will need
to instruct your computer to send information to the serial interface instead of to the parallel interface. This is done with the
MODE command. You must use the following two commands
each time you turn on your computer.
Radix User’sManual
190
MODE COM1:48,N,8,1,P
MODE LPTl:=COMl:
The first line sets up the asynchronous adapter to match the
-
Table B-l
Recommended DIP switch settings for IBM-PC
-
Table B-2
IBM-PC pamJJeJ cable
Radix
Pin No.
1
2
3
IBM-PC
Function
Pin No.
Parallel
Function
STROBE
Dl
D2
1
2
3
STROBE
DO
Dl
4
D3
4
D2
5
6
D4
D5
5
6
D3
D4
7
D6
7
D5
8
9
D7
D8
8
9
D6
D7
10
ACK
10
ACK
11
BUSY
11
BUSY
12
13
PAPER END
SELECTED
12
13
PAPER END
SELECT
16
GROUND
18-25
GROUND
31
32
RESET
ERROR
16
15
RESET
ERROR
IBM PersonalComputeri+Compaq
191
settings of DIP switch B in Radix. The second re-directs printer
output to the serial port. The switches on DIP switch B must be set
as shown below to use this MODE command. (The IBM-DOS
manual tells you how to create a different MODE command for
different DIP switch settings.) You can put these two MODE commands into a file named AUTOEXECBAT and it will execute
automatically each time you start your computer.
Table B-3
Serial switch settings
The serial cable shown below will work with DIP switch B set
as shown above to connect Radix to a serial interface on the IBM.
Table B-4
IBM-PC serial cable
IBM-PC
Radix
Pin No.
Pin No.
Function
Function
-
3
3
RECEIVE DATA
-
2
TRANSMIT
4
REQUEST TO SEND
-
5
CLEAR TO SEND
5
CLEAR TO SEND
-
4
REQUEST TO SEND
7
SIGNAL GROUND
-
7
SIGNAL GROUND
CARRIER DETECT
DATA TERMINAL READY-
4
6
REQUEST TO SEND
2
8
20
TRANSMIT
DATA
RECEIVE DATA
DATA
DATA SET READY
RadixUser’s
Manual
192
-
BASIC programming
All the programs in this book are written in the BASIC used
by the IBM-PC. That makes it easy to do the things that we show
you. But when you start writing your own programs there are
several things that you should know.
IBM BASIC defaults to a printer width of 80. This means that
it will automatically insert a carriage return and line feed after
every 80 characters. If you want to print lines longer than 80 characters you will need to change the width of the printer. If you set
the printer width to 255, then the IBM will never insert a line feed
and carriage return, unless you start a new line. (This is what you
want usually.)To set the width of the printer to 255, use this statement:
-
-
l@J WIDTH "LPTl:",255
IBM BASIC has one other little trick that will mess up your
graphics if you let it. IBM BASIC is very insistent about adding a
line feed to a carriage return. This is fine if you are printing text,
but if an ASCII 13 pops up in the middle of your graphics printout,
IBM BASIC will still add a line feed to it. This will put strange
things in the middle of your graphics, and leave you with extra
characters at the end of your line.
There is an easy way to avoid this problem. You just open the
printer as a random file. The following program shows how this is
done.
-
10
20
30
40
OPEN "LPTl:"AS #l
WIDTH #l, 255
PRINT #l, ~~TESTINCI~
PRINT #l, G-03$(10)
' RANDOM ACCESS
' SET WIDTH TO 255
' PRINT A LINE
' ADD YOUR OWN LF
Listing programs
-
To list programs on Radix, make sure the program is in the
IBM’s memory and use the LLIST command. This directs the listing to the printer instead of the screen.
-.
-
IBM PersonalComputerb
193
Printing Graphics Screens
Version 2.0of the IBM DOS has a program called GRAPHICS
that allows you to print a graphics -displayscreen. The program as
IBM created it is, however, not compatible with Star printers. But
all that is required to make it work is to change two bytes of the
program. This can easily be done with the DEBUG program that
comes with IBM DOS. (Even if you have never used DEBUG
before we will lead you through it.)
The first step is to create a diskette with DOS,
GRAPHICS.COM and DEBUG.COM on it (it doesn’t matter if
there are other things on it too). We will leave it to you to create
this diskette. Look in your computer’s manual if you have trouble.
Be sure that this is not your original DOS diskette.
With this diskette in drive A, follow the script below. The
things that you are to type are shown in italic type. The messages
that will appear on your screen are shown in regular type. With
two exceptions, every number should appear on your screen
exactly as it does in this script. The two exceptions are the four
digit numbers before the colons (0921: in the script). They may be
different on your computer. The symbol (enter) means to press
the enter key.
A)DEBUG GRAPHICS.COM(enter)
-E 169 (enter)
jiI921:fiI169
18.1/J(enter)
-E 29 (enter)
0921:025pI24.18 (enter)
-W (enter)
Writing 0315 bytes
-Q (enter)
To use this program, type GRAPHICS at the A) prompt before
you create a graphics image on the screen. Then when you want
to print a graphics image, press shift-PrtSc and the image will be
copied from the screen to the printer. For more information on
the GRAPHICS program refer to your DOS manual.
194
Radix User’s Manual
Program Listings
There are no program listings given here for the IBM-PC
because all the programs in the book are written for the IBM-PC.
Appendix C
Apple II Computers
Apple II computers require an interface board (mounted
inside the Apple II) and a cable to run Radix. Star recommends
that you use the grafstar” interface for the Apple II, II + , and IIe.
It comes complete with a cable and is easily installed. A unique
feature of the g&star” makes it possible to do some fancy dot
graphics programming.
You can, of course, use many of the available parallel interface
boards for the Apple II, and an appropriate cable.
Setting the Switches
We recommend that you set the DIP switches in Radix as
shown below when connecting it to an Apple II. Since you’ll be
using the parallel interface, the settings of switch B have no effect.
Table C-1
Recommended DIP switch settings for Apple
I
I
Switch
A-l
A-2
A-3
A-4
A-5
A-6
A-7
Settinn
I
ON
ON
ON
ON
ON
ON
Function
1 11 inch narze size
Normal print density
10 CPI pitch
Normal characters
l/S inch line feed
ON
ON
U.S.A. Character set
A-8
c-1
c-2
ON
OFF
Paper-out detector active
Parallel interface
c-3
ON
i’-bit interface
C-4
OFF
No auto line feed
I
,v
-Radix User’s Manual
196
Table C-2
Apple parallel cable
Apple Board
Radix
‘in No.
Function
25
26
SIG GND
SIG GND
27
1
26
Pin No.
Function
1
2
SIG GND
SIG GND
SIG GND
3
SIG GND
STROBE
4
STROBE
SIG GND
5
N/C
2
3
DATA1
DATA2
6
7
DATA1
DATA2
4
5
DATA3
DATA4
a
DATA3
9
DATA4
6
7
DATA5
DATA6
10
11
DATA5
DATA6
a
9
DATA7
DATA8
i2
13
DATA7
DATA8
ACK
SIG GND
14
15
ACK
SIG GND
10
29
Applesojl BASIC
The Apple II computer, using Applesoft BASIC, does not
have different types of PRINT statements for the screen and
printer. You must add commands to your programs that direct the
output of the PRINT statements to the printer. To direct output to
the printer (with the interface board in slot #l) you must use the
PR# 1 command. Depending on the version of Applesoft BASIC
that you are using this command can take various forms. It is usually one of the following:
18 PR# 1
or
18 PRINT “( Ctrl-D)PR#l”
:t; PRINT
W@(4)
“PR#l”
To return output to the screen, the command is PR# 0, in the
same form that works for PR# 1.
-
-
Apple II Computers
197
To allow line lengths longer than the Apple II usually uses you
add the following statement to your programs:
must
20 PRINT CHR$(9) "255N"
This allows lines of any length to be sent to the printer and is
especially important for dot graphics. (The number 255 in the
BASIC statement above could be replaced by any number from 0
to 255 and would set the line length to that value.)
Two codes are a particular problem on the Apple II: CHR$(7)
and CHR$(S). The computer will not send these codes to Radix.
Try to avoid using these in dot graphics programs.
The Apple II computer uses CHR$(S) as a printer initialization code. It won’t send it on to the printer. There is a way to
bypass this problem, however. You can change the printer initialization code to a value other than CHR!$(S)like this:
PR#l
PRINT CHR$(9);CHR$(l)
This makes CHR$(l) the printer initialization code (and transfers the problems to that code) and allows you to use Radix’s tabs.
There is one more way to sneak problem codes past the Apple
II’s operating system and that’s to poke the codes directly to the
output port. To send ASCII code 9, for example, you could do this:
100 N = 9
110 IF PEEK(49601))127
THEN 110
120 POKE 49296,N
Line 110 checks the printer’s status, and when it’s okay, line
120 pokes the code to the printer.
Listing progmms
To make a listing of your BASIC programs on Radix from
your Apple II computer you must take the following steps:
Radix User’sManual
198
1. Be sure that the program that you wish to list is in the memory
of the Apple II.
2. Direct the output to the printer by typing PR#l.
3. Type LIST to start the listing.
4. When the listing is finished, type PR#Oto redirect the output to
the screen.
-
-
Program Listings
Following are program listings in Applesoft BASIC for the
main utility programs used in the tutorial section of this book.
Download character editing utility
10 DIM Z(8,12),MM(ll)
-
11 PF$ = CHR$ (27) + "X" +
12 PN$ = CHR$ (27) + "X" +
13 NF$ = CHR$ (27) + "$" +
14 NR$ = CHR$ (27) + "$" +
15 CS$ = "*":sC$= "6"
16 BEEP$ = CHR$ (7)
18 AS = 33:PP$ = "$":ESC$=
20 GOSUB 1910
260 REM
.-
CHR$ ($3)
CHR$ (1)
CHR$ (0)
CHR$ (1)
CHR$ (27)
265 FOR I = 1 TO ll:MM(I)= 0: NEXT I
270 VTAB 3: HTAB 6: PRINT CS$;
275 VTAB 23: HTAB 1
280 GET A$
290 IF A$ = "J" THEN GOSUB 390: GOT0 370
3pI@ IF A$ = "K" THEN GOSUB 410: GOT0 370
310 IF A$ = "M" THEN GOSUB 430: GOT0 370
32p IF A$ = "I" THEN GOSUB 450: GOT0 370
330
IF A$ = CHR$ (13) THEN GOSUB 470: GOT0 370
340 IF A$ = CHR$-(32) THEN GOSUB 490: GOT0 370
350 IF A$ = CHR$ (27) THEN HOME : END
360 IF A$ = "+" THEN GOSUB 3000: GOT0 370
362 IF A$ = "-" THEN GOSUB 3100: GOT0 370
363 IF A$ = "A" THEN GOSUB 3500: GOT0 370
364 IF A$ = "D" THEN GOSUB 3200: GOT0 370
365 IF A$ = "P" THEN GOSUB 3300: GOT0 370
366 IF A$ = "C" THEN GOSUB 1910: GOT0 260
367 IF A$ = "R" THEN GOSUB 3700: GOT0 370
370 GOT0 280
.-
-
-
Apple II Computers
199
380 RETURN
390 GOSUB 1000:Y = Y - 2:H = H - 1: IF Y ( 1 THEN
PRINT CHR$ (7);:Y= 1:H = 1
400 GOSUB 1050: RETURN
410 GOSUB 1000:Y = Y + 2:H = H + 1: IF Y ) 21 THEN
PRINT CHR$ (7);:Y= 21:H = 11
420 GOSUB 1050: RETURN
430 GOSUB 1000:X = X + 2:G = G + 1: IF X ) 13 THEN
PRINT CHR$ (7);:X= 13:G = 7
440 GOSUB 1050: RETURN
450 GOSUB 1000:X = X - 2:G = G - 1: IF X ( 1 THEN
PRINT CHR$ (7);:X= 1:G = 1
460 GOSUB 1050: RETURN
470 IF Z(G,H - 1) = 1 OR Z(G,H + 1) = 1 THEN PRINT
CHR$ (7);: RETURN
480 Z(G,H) = 1: INVERSE : VTAB X + 2: HTAB Y + 5: PRINT
SC$;: NORMAL: GOSUB 4000: RETURN
490 Z(G,H) = 0: NORMAL : VTAB X + 2: HTAB Y + 5: PRINT
CS$;: GOSUB 4000: RETURN
900 X = 1:Y = 1:G = 1:H = 1
901 HOME
902 FOR I = 2 TO 16 STEP 2: VTAB I: HTAB 5: FOR J = 1
TO 23: PRINT "-";: NEXT J: PRINT : NEXT I
904 FOR J = 3 TO 16 STEP 2: VTAB J: FOR I = 5 TO 27
STEP 2: HTAB I: PRINT "!";: NEXT I: PRINT : NEXT J
905 K = 1: VTAB 1: HTAB 5
906 FOR K = 1 TO 11: PRINT K;" "j: NEXT K
907 K = 0
908 FOR V = 3 TO 15 STEP 2: VTAB V: HTAB 2: PRINT 2 A
K:K = K + 1: NEXT V
909 VTAB 17: FOR I = 1 TO 11: HTAB 4 + I * 2: PRINT
rl
0 ";: NEXT I
910 VTAB 1: HTAB 30: PRINT "CURSOR"
912 VTAB 2: HTAB 29: PRINT "MOVEMENT"
914 VTAB 3: HTAB 29: PRINT "(I) UP"
916 VTAB 4: HTAB 29: PRINT "(M) DOWN"
918 VTAB 5: HTAB 29: PRINT "(J) LEFT"
920 VTAB 6: HTAB 29: PRINT "(K) RIGHT"
922 VTAB 7: HTAB 29: PRINT "(RET) INSERT"
924 VTAB 8: HTAB 29: PRINT "(SPACE)DEL"
926 VTAB 9: HTAB 29: PRINT "(A) ASCII"
928 VTAB 10: HTAB 29: PRINT "(P) PRINT"
930 VTAB 11: HTAB 29: PRINT "(C) CLEAR"
932 VTAB 12: HTAB 29: PRINT "(R) COPY ROM"
200
Radix User’s Manual
934 VTAB 13: HTAB 29: PRINT "(+) WIDER"
936 VTAB 14: HTAB 29: PRINT "(-> NARROWER"
938 VTAB 15: HTAB 29: PRINT "(D) DESCENDER"
940 VTAB 16: HTAB 29: PRINT "(ESC) EXIT"
950 FOR I = 1 TO 11: FOR J = 1 TO 7:Z(J,I)= 0: NEXT J:
NEXT I
960 RETURN
1000 IF Z(G,H) = 0 THEN VTAB X + 2: HTAB Y + 5: PRINT
I'
_-
'I .
1010 ;F Z(G,H) = 1 THEN VTAB X + 2: HTAB Y + 5: PRINT
SC$;
1015 VTAB 23: HTAB 1
1020 RETURN
1050 IF Z(G,H) = 1 THEN INVERSE : VTAB X + 2: HTAB Y +
5: PRINT CS$;: NORMAL
1060 IF Z(G,H) = 0 THEN NORMAL : VTAB X + 2: HTAB Y +
5: PRINT CS$;: NORMAL
1065 VTAB 23: HTAB 1
1070 RETURN
1910 REM CLEAR CURRENTCHARACTER
1920 PW% = 11:DS = 0
1930 FOR H = 1 TO ll:MM(H)= 0: NEXT H
1935 GOSUB 900
1940 GOSUB 2200: RETURN
2080 REM BUILD COMMANDSTRING
2085 RC$ = ES@ + "*" + CHR$ (1)
2090 RC$ = RC$ + CHR$ (As) + CHR$ (DS * 16 + PW%)
2095 FOR I = 1 TO ll:RC$ = RC$ + CHR$ (MM(I)):NEXT I
2096 RETURN
2200 REM
2210 VTAB 20: HTAB 1: PRINT "ASCIICODE = "jAS;
2220 PRINT "('I;CHR$ (AS);")";
2230 VTAB 20: HTAB 25: PRINT "DESCENDER=";Ds;
2250 FOR I = 8 TO 19: VTAB 22: HTAB I: PRINT " "j: NEXT
I
2260 VTAB 22: HTAB 1: PRINT "WIDTH:"j: FOR I = 1 TO
PW%: PRINT "*";: NEXT I
2270 VTAB 23: HTAB 1
2280 RETURN
3000 REM WIDER
3010 IF PW% = 11 THEN PRINT BEEPS;:RETURN
3020 PW% = PW% + 1
3030 GOSUB 2200
-.
-
Apple II Computers
201
3040 RETURN
3100 REM NARROWER
3110 IF PW% = 4 THEN PRINT BEEPS;:RETURN
3120 PW% = PW% - 1
3130
GOSUB 2200
3140 RETURN
3200 REM DESCENDER
3210 DS = ABS (1 - Ds)
3220 Gosu~ 2200: RETURN
3300 REM PRINT
3310
GOSUB 2080
3320
PR# 1
3325 PRINT CHR$ (9);"255N"
3327 PRINT CHR$ (27);"8"
3330 PRINT "ASCIICODE = ";AS: PRINT
3335 PRINT RC$
3345 PRINT CHR$ (15);"CONDENSED"
3350 PRINT NR$: FOR I = 1 TO 21: PRINT CHR$ (AS);:
NEXT I: PRINT
3355 PRINT NF$
3360 PRINT CHR$ (27); "B"; CHR$ (2); "ELITE"
3365 PRINT NR$: FOR I = 1 TO 15: PRINT CHR$ (AS);:
NEXT I: PRINT
3370 PRINT NF$
3375 PRINT CHR$ (27);"B";CHR$ (1);"PICA"
3378 PRINT NR$: FOR I = 1 TO 12: PRINT CHR$ (AS);:
NEXT I: PRINT
3379 PRINT NF$
3380 PRINT CHR$ (27);"W";CHR$ (1);"EXPANDED"
3384 PRINT NR$;: FORI=lTO6:PRINT
CHR$(AS);:
NEXT I
3385 PRINT CHR$ (27);"W"; CHR$ (0)
3386 PRINT NF$
3387 PRINT : PRINT "CHARACTERSET ": PRINT NR$: FOR I =
33 TO 126
3388 PRINT CHR$ (I);:NEXT I: PRINT : PRINT NF$: PRINT
3390 PRINT : PRINT "PROPORTIONAL"
3392 PRINT PN$;: FOR I = 1 TO 15: PRINT CHR$ (AS);:
NEXT I: PRINT PF$
3393 PRINT : PRINT : PRINT "CHARACTERSET
..PROPORTIONAL":
PRINT PN$: FOR I = 33 TO 126: PRINT
CHR$ (I);:NEXT I: PRINT : PRINT PF$: PRINT
3394 PRINT "USE THIS DATA STATEMENTTO DOWNLOADTHIS
CHARACTER."
202
Radix User’s Manual
3395 PRINT "DATA 27";
3396 FOR I = 2 TO LEN (RC$)
3397 PRINT ",'I;STR$ ( ASC ( MID$ (RC$,I,l)));
3398 NEXT I: PRINT : PRINT : PRINT :
3399 PR# 0: RETURN
3500 REM ASCII CODE
3510 VTAB 23: HTAB 1
3520 INPUT "ENTERASCII (33-126)";AS
3530 IF AS ( 33 OR AS > 126 THEN PRINT BEEP$;:GOTO
3510
3535 VTAB 23: FOR I = 1 TO 39: HTAB I: PRINT " "j: NEXT
I
3540 GOSUB 2200: RETURN
3700 REM COPY ROM
3710 PR# 1
3715 PRINT CHR$ (9);"255N"
3720 PRINT ESC$;"*";CHR$ (0);
3730 PR# 0
3740 RETURN
4000 REM CALCULATEA COLUMN VALUE
4010 MM(H) = 0: FOR J = 1 TO 7
4020 MM(H) = MM(H) + Z(J,H) * 2 A (J - 1)
4030 NEXT J: GOSUB 4100: RETURN
4100 REM PRINT A COLUMN VALUE
4103 FOR I = 1 TO 3: VTAB 16 + I: HTAB 4 + H * 2 : PRINT
I''1
.. NEXT I
,.
4105 Lvfi= STR$ (MM(H))
4106 FOR I = 1 TO LEN (LV$)
4107 VTAB 16 + I: HTAB 4 + H * 2: PRINT MID$
(LV$,I,l);:NEXT I
4120 VTAB 23: HTAB 1: RETURN
Piechart program
4
5
10
20
HOME
PRINT "PleaseStand By"
A = 768
FOR I = A TO A + 12
30 READ B
35 POKE 1,B
40 NEXT I
50 DATA 32,74,255,165,250,5,251
60 DATA 133,252,32,63,255,96
100 REM PIECHART
Apple II Computers
,
203
110 DIM BIT%(l90,36),A$(36),PCT%(25),TXT$(48),PTXT$(25)
120 ES$ = CHR$ (27):LF$= CHR$ (10)
130 FF$ = CHR$ (12):VT$= CHR$ (11)
140 EM$ = ES$ + "E":CE$= ES$ + "F"
145 RF$ = CHR$ (27) + CHR$ (12)
150 FOR I = 1 TO 148:SP$= SP$ + CHR$ (0): NEXT I
160 FOR I = 1 TO 79:SS$ = SS$ + " ": NEXT I
1000 REM SET PROGRAMCONSTANTS
1010 MASK%(l)= 64:MASK%(4)= 8
1020 MASK%(2)= 32:MASK%(5)= 4
1030 MASK%(3)= 16:MASK%(6)= 2
1040 Lx = 20:LY = 20
1050 XFAC = 190 / LX:YFAC = 216 / Ly
1060 FOR I = 0 TO 48
1070 TXT$(I) = SS$
1080
NEXT I
1090 GOSUB 7000
1092 HOME : PRINT : PRINT : PRINT : PRINT
1093 PRINT "THIS PROGRAMTAKES ABOUT"
1094 PRINT "2 MINUTES TO RUN. PLEASE"
1095 PRINT "TURN ON YOUR PRINTERAND"
1096 PRINT "STANDBY................"
1097 PRINT : PRINT : PRINT
1098 FOR I = 1 TO 31: PRINT "0";: NEXT I
1099 PRINT " ": PRINT " "
1100 FOR I = 1 TO NP%: PRINT "0";: NEXT I
1110 PRINT " "
1120 VTAB 12: HTAB 1
2000 REM PLOT CURVE
2010 RAD = 9
2020 Xl = 19:Yl = 10
2030 FOR ANG = 0 ~0 360 STEP 12
204jiI Rl = ANG * 6.28 / 360
2050 X2 = RAD * COS (Rl) + 10:Y2 = RAD * SIN (Rl) + 10
2060
GOSUB 4000
2070
NEXT ANG
2075
VTAB 14: HTAB 1
2080
FOR PI = 1 TO NP%
2090 Xl = 10:Yl = 10
2100 TP% = TP% + PCTX(P1)
2110 ANG = 360 * TP% * .01
2120 Rl = ANG * 6.28 / 360
2130 x2 = RAD * cos (Rl) + 10:Y2 = RAD * SIN (Rl) + 10
,.
:
204
Radix User’s Manual
2140 GOSUB 4000
2150 GOSUB 6000
2160 NEXT PI
3000 REM SEND BIT IMAGE MAP TO PRINTER
3090 PR# 1
3100 PRINT CHR$ (9); "0N"
3110 x = (40 - LEN (TI$) / 2)
3120 FOR I = 1 TO x: PRINT " "j: NEXT I
3130 PRINT EM$;TI$;CE$;LF$
3140 PRINT VT$;VT$;VT$
3150 PRINT ES$;"A";CHR$ (6)
3160 FOR I = 0 TO 48: PRINT TXT$(I):NEXT I
3165 PRINT RF$;VT$;VT$;VT$;
3166 PRINT LF$;LF$;LF$;LF$;LF$;LF$
3170 FOR ROW = 0 TO 35
3180 PRINT ES$;"K";CHF@ (82); CHR$ (l);SP$;
3190 FOR COL = 1 TO 190: PRINT CHR$ (BIT%(COL,ROW));:
NEXT
3192 PRINT " "
3210 NEXT ROW
3250 PRINT ES$;"2";FF$
3255 PR# 0
3257 HOME
3260 END
4000 REM DRAW A LINE FROM X1,Yl TO X2,Y2
4010 XL = X2 - Xl:YL = Y2 - Yl
4020 NX = ABS (XL * XFAC):NY= ABS (YL * YFAC)
4030 IF NX ( NY THEN NX = NY
4040 NS% = INT (NX + 1)
4050 DX = XL / NS%:DY = YL / NS%
4060 FOR I = 1 TO NSJ
4070 Xl = Xl + DX:Yl = Yl + DY
4080 GOSUB 5000
4090 NEXT I
4095 PRINT "*";
4100 RETURN
5000 REM PLOT A POINT AT xl,Yl
5010 XX = Xl * XFAC:YY = Yl * YFAC
5020 COL = INT (xx) + 1
5fJ3jiI ROW = INT (YY / 6)
5040 XIT% = INT (YY - (6 * ROW)) + 1
5042 POKE 250,BIT%(COL,ROW)
5044 POKE 251,MASK%(XIT%)
5046 CALL 768
--
I
.‘_ ,’
..,-,
.
Apple II Computers
5050 BIT%(COL,ROW)=
205
PEEK (252)
5060 RETURN
6000
REM
6010 MA% = (ANG + PA%) / 2
6020 Rl = MA% * 6.28 / 360
6030 X3 = INT (20 * SIN (Rl)):Y3= INT (22 * COS
(Rl))
6040 X4 = 22 + X3:Y4 = 40 + Y3
6045 IF (MA% > 70 AND MA% ( 110) THEN GOSUB 6300: GOT0
6070
6047 IF (MA% > 250 AND MA% ( 290) THEN GOSUB 6300:
GOT0 6070
6050 IF MA% ) 270 OR MA% ( 90 THEN GOSUB 6100: GOT0
6070
6060 GOSUB 6200
6070 PA% = ANG
6080 RETURN
6100 MM$ = TXT$(X4)
6102 LL$ = LEFT$ (MM$,Y4)
6104 PP = LEN (PTXT~PI))
6106 RR$ = RIGHT$ (MM$,80- (Y4 + PP))
6108 TXT$(X4)= LL$ + PTXT$(PI)+ RR$
6110 RETURN
6200 MM$= TXT$( X4)
6202 pp = LEN (PTxT$(~I))
6204 LL$ = LEFT$ (MM$,(Y4- PP))
6206 RR$ = RIGHT$ (MM$,(80- Y4))
6208 TXT$(X4)= LL$ + PTXT$(PI)+ RR!$
6210 RETURN
6300 MM$ = TXT$(X4)
6310 PP = INT ( LEN (PTXT$(PI))/ 2)
6320 LL$ = LEFT$ (MM$,(Y4- PP))
6330 RR$ = RIGHT$ (MM$,(80- Y4))
6340 TXT$(X4)= LL$ + PTXT$(PI)+ RR$
6350 RETURN
7000 REM
7010 HOME : PRINT : PRINT : PRINT
7020 INPUT "ENTERTITLE FOR CHART ";TI$
7025 IF LEN (TI$) ( = 40 THEN 7030
7027 PRINT CHR$ (7);"TITLETOO LONG - 40 CHAR. MAX ":
GOT0 7000
7030 AS% = 0:AL% = 100
7035 FOR I = 1TO 24
7040 HOME
206
Radix User’s Manual
: ";AS%
7050 PRINT "TOTALSO FAR
7060 PRINT "TOTALREMAINING : ";AL%
7070 INPUT "ENTER % FOR FIELD ";PCT%(I)
7080 IF PCT%(I) > AL% OR PCT%(I)= pITHEN PCT%(I)= AL%
7090 AL% = AL% - PCT%(I)
7100 AS% = AS% + PCT%(I)
7110 INPUT "ENTERDESCRIPTIONOF FIELD : ";PTXT$(I)
7120 IF LEN (PTXT$(I))) 15 THEN PRINT "FIELDTOO
LONG - 15 CHAR. MAX": GOT0 7110
7130 IF AL% = 0 THEN GOT0 7200
7140 NEXT I
7200 NP% = I
7210 IF NP% = 1 THEN 7030
7220 HOME
7230 RETURN
.-
-
Printer setup utility
10 REM PROGRAMTO SET UP RADIX
20 BEEP$ = CHR$ (7)
40 ESC$ = CHR$ (27):TB= 5: DIM TBS(256)
80 HOME
90 TI$ = "MAIN MENU"
100 GOSUB 2560
110 PRINT TAB( TB);"@.EXIT "
120 PRINT TAB( TB);"l.SELECT CHARACTERSET."
130 PRINT TAB( TB);"~.SELECT PRINTINGMODES"
140 PRINT TAB( TB);"j.SELECT PITCH "
150 PRINT TAB( TB);"4.SELECT LINE SPACING"
160 PRINT TAB( TB);"5.SET MARGINS,TABS & FORMS"
170 GOSUB 2650
180 IF S ( 0 OR S ) 5 THEN PRINT BEEP$;:GOT0 170
190 IF S = 0 THEN HOME : END
200 ON S GOSUB 220,490,360,1410,650
210 GOT0 80
220 REM SUBROUTINETO DISPLAY CHARACTERSET MENU
240 TI$ = "CHARACTERSET MENU"
250 GOSUB 2560
260 PRINT TAB( TB);"g.RETURN TO MAIN MENU"
270 PRINT TAB( TB);"l.SELECT NLQ CHARACTERSET"
280 PRINT TAB( TB);"2. CANCELNLQ CHARACTERSET"
290 PRINT TAB( TB);"J.SELECT ITALIC CHARACTERSET"
300 PRINT TAB( TB);l’4.
CANCEL ITALIC CHARACTERSET"
310 GOSUB 2650
-.
-
--
_d
Apple II Computers
207
328
339
349
358
369
IF s ( g 0~ s ) 4 THEN PRINT BEEPS;:G0~0 318
IF S = g THEN RETURN
ON S GOSUB 131@,1368,18@@,184@
GOT0 22a
REM DISPLAY PITCHESMENU
38pl TI$ = "PITCHESMENU"
39p! GOSUB 256@
4pjJ PRINT TAB( TB);"$l.
RETURN TO MAIN MENU"
41@ PRINT TAB( TB);"l.SELECT PICA PITCH"
42g
PRINT TAB( TB);"2.SELECT ELITE PITCH"
43pI PRINT TAB( TB);"j.SELECT CONDENSEDPITCH"
44@ GOSUB 2658
45@ IF S ( plOR S > 3 THEN PRINT BEEP$;:GOT0 44@
46g
IF S = 0 THEN RETURN
470 ON S GOSUB 830,880,930
480
499
GOT0 360
640
650
660
670
680
690
GOT0 490
REM
REM DISPLAYPRINTINGMODE
508 TI$ = "PRINTINGMODES MENU"
510 GOSUB 2568
530 PRINT TAB( TB);"@.RETURN TO MAIN MENU"
540 PRINT TAB( TB);"l.SELECT EXPANDEDMODE"
550 PRINT TAB( TB);"2.CANCEL EXPANDEDMODE"
560 PRINT TAB( TB);"J.SELECT EMPHASIZEDMODE"
570 PRINT TAB( TB);"4. CANCEL EMPHASIZEDMODE"
580 PRINT TAB( TB);"5.SELECT DOUBLE STRIKE MODE"
590 PRINT TAB( TB);"6. CANCEL DOUBLE STRIKE MODE"
600 GOSUB 2650
610 IF S ( 0 OR S ) 6 THEN PRINT BEEP$;:GOT0 600
620
IF S = 0 THEN RETURN
630 ON S GOSUB 17~~,175~,24!iI~,244P,248!J,252~
700
710
720
730
740
750
760
770
REM DISPLAYMARGIN, TABS AND FORMS
TI$ = 'MARGINS,TABS & FORMS MENU"
GOSUB 2560
PRINT
PRINT
PRINT
PRINT
PRINT
PRINT
PRINT
PRINT
PRINT
TAB( TB);"@.RETURN TO MAIN MENU"
TAB( TB);"l.SET HORIZONTALTABS"
TAB( TB);"2.SET VERTICALTABS"
TAB( TB);"j.SET LEFT MARGIN"
TAB( TB);"4.SET RIGHT MARGIN"
TAB( TB);"5.SET TOP MARGIN"
TAB( TB);"6.SET BOTTOM MARGIN"
TAB( TB);"7. CANCEL TOP & BOTTOM MARGINS"
TAB( TB);"8.SET PAGE LENGTH"
-.
208
Radix User’s Manual
780 GOSUB 2650
790 IF S ( 0 OR S ) 8 THEN PRINT BEEP$;:GOT0 780
800 IF S = 0 THEN RETURN
810 ON S GOSUB 2~5~,236~,98~,l$I6~,113!J,l21~,128~,188~
820 GOT0 650
830 REM SELECT PICA
850 S$ = ESC$ + "B" + CHR$ (1)
860 GOSUB 2730
870 RETURN
880 REM SELECT ELITE
890 S$ = ESC$ + "B" + CHR$ (2)
900 GOSUB 2730
910 RETURN
930 REM SELECT CONDENSED
940 S$ = ESC$ + "B" + CHR$ (3)
960 GOSUB 2730
970 RETURN
980 REM SET LEFT MARGIN
1000 GOSUB 2770
1010 INPUT "ENTERNEW LEFT MARGIN (l-255)";X
GOT0 .1000
la2$ IF X ( 1 OR X ) 255 THEN PRINT BEEP!$;:
1030 s$ = ~sc$ + "M" + cHR$ (x)
1040 GOSUB 2730
1050 RETURN
1060 REM SET RIGHT MARGIN
1080 GOSUB 2770
1090 INPUT "ENTERNEW RIGHT MARGIN (l-255)" X
1100 IF X ( 1 OR X ) 255 THEN PRINT BEEP$;:GOT0 1080
1110 S$ = ESC$ + "Q" + CHR$ (X)
1120 GOSUB 2730: RETURN
1130 REM SET TOP MARGIN
1150 GOSUB 2770
1160 INPUT "ENTERNEW TOP MARGIN (1-16) ";X
1170 IF X ( 1 OR X ) 16 THEN PRINT BEEP$;:GOT0 1150
1180 S$ = ESC$ + "R" + CHR$ (X)
1190 GOSUB 2730
1200 RETURN
1210 REM SET BOTTOM MARGIN
1230 GOSUB 2770
1240 INPUT "ENTERNEW BOTTOM MARGIN (1-127)";X
1250 IF x ( 1 OR x ) 127 THEN PRINT BEEPS;:GOTO 1230
1260 S$ = ESC$ + "N" + CHR$ (X)
1270 GOSUB 2730: RETURN
1280 REM CANCEL TOP & BOTTOM MARGIN
-
Apple II Computers
209
1300 S$ = ESC$ + "0": GOSUB 2730: RETURN
1310 REM SELECT NLQ
1330 S$ = ESC$ + "B" + CHR$ (4)
1340 GOSUB 2730: RETURN
1360 REM CANCEL NLQ
1380 S$ = ESC$ + "B" + CHR$ (5)
1390 GOSUB 2730: RETURN
1410 REM SELECT LINE SPACING
1430 TI$ = "LINE SPACINGMENU"
1440 GOSUB 2560
1450 PRINT TAB( TB);"@.RETURN TO MAIN MENU"
1460 PRINT TAB( TB);"l.SELECT l/6 INCH LINE SPACING"
1470 PRINT TAB( TB);"2.SELECT l/8 INCH LINE SPACING"
1480 PRINT TAB( TB);"3.SELECT 7 DOT GRAPHICSSPACING"
1490 PRINT TAB( TB);"4.SELECT N/144 INCH SPACING"
1500 GOSUB 2650
1510 IF S ( 0 OR S ) 4 THEN PRINT BEEP$;:GOT0 1500
1520 IF s = g THEN RETURN
1530 ON S GOSUB 1550,1580,1610,1640
1540 GOT0 1410
1550 REM SELECT l/6 INCH LINE SPACING
1570 S$ = ESC$ + "2": GOSUB 2730: RETURN
1580 REM SELECT l/8 INCH LINE SPACING
1600 S$ = ESC$ + "0": GOSUB 2730: RETURN
1610 REM SELECT 7 DOT GRAPHICSSPACING
1630 S$ = ESC$ + "1": GOSUB 2730: RETURN
1640 REM SELECT N/144 INCH LINE SPACING
1660 GOSUB 2770
1670 INPUT "ENTERLINE SPACE (g-255)";X
1680 IF X ( 0 OR X ) 255 THEN PRINT BEEP$;:GOT0 1660
1690 s$ = ESC$ + "3" + CHR$ (X): GOSUB 2730: RETURN
1700 REM SELECT EXPANDED
1720 S$ = ESC$ + "W" + CHR$ (1)
1730 GOSUB 2730
1740 RETURN
1750 REM CANCEL EXPANDED
1770 S$ = ES@ + "W" + CHR$ (0)
1780 GOSUB 2730
1790 RETURN
1800 REM SELECT ITALIC
1820 S!$= ESC$ + "4": GOSUB 2730
1830 RETURN
1840 REM CANCEL ITALIC
1860 S$ = ESC$ + "5": GOSUB 2730
Radix User’s Manual
210
1870 RETURN
1880 REM SET PAGE LENGTH
1900 GOSUB 2770
1910 PRINT "PAGE LENGTH IN INCHESOR LINES (I,L)?"
1920 PRINT TAB( TB);
1930 GET A$
1940 IF A$ = "I" THEN 1970
1950 IF A$ = "L" THEN 20191
1960 PRINT BEEP$;:GOT0 1930
1970 INPUT "LENGTHOF PAGE IN INCHES (l-32)";X
1980 IF X ( 1 OR X > 32 THEN PRINT BEEP;: GOT0 1900
1990 S$ = ESC$ + "C" + CHR$ (0) + CHR$ (X)
2000 GOSUB 2730: RETURN
2010 INPUT "LENGTHOF PAGE IN LINES (1-127)";X
2020 IF X ( 1 OR X ) 127 THEN PRINT BEEP$;:GOT0 1900
2030 sqi= ~sc$ + "c" + CHR$ (x)
2040 GOSUB 2730: RETURN
2050 REM SET HORIZONTALTAB
2070 S$ = ESC!$+ "D":MAX= 255: GOSUB 2080: RETURN
2080 REM SET TABS
2100 GOSUB 2770
2110 PRINT "WOULDYOU LIKE TO SET THE TABS IN"
2120 PRINT TAB( TB);'REGULARINTERVALS,OR SPECIFY"
2130 PRINT TAB( TB);"EACHONE INDIVIDUALLY(R,I) "
2140 GET A$
2150 IF A$ = "R" THEN 2300
2160 IF A$ = "I" THEN 2180
2170 PRINT BEEP$;:GOT0 2080
2180 PRINT :I = 2:TBS(l)= - 1
2190 PRINT TAB( TB);'ENTERTHE LIST OF TABS, IN '
2200 PRINT TAB( TB);'ASCENDING
ORDER. NO MORE THAN
I' .m.
I,
.
II
2210' PR;NT TAB( TB): INPUT "ENTERTAB ";TBS(I)
2220 IF TBS(1) ( plOR TBS(1) > 255 THEN 2170
2230 IF TBS(I) = plTHEN I = 1: GOTO 2270
2240 IF TBS(1) ( = TBS(1 - 1) THEN 2170
2250 I = I + 1: IF I ) MAX THEN 2170
2260 GOT0 2210
2270 I = I + 1
2280 S$ = S$ + CHR$ (TB~(I)):IF TBS(I) ( > 0 THEN 2270
2285 GOSUB 2730
2290 RETURN
2300 PRINT : PRINT TAB( TB);: INPUT "ENTER INTERVAL
";x
._
..
Apple ZZComputers
's.
'-_
.
*
..
b.
'.
..
&.
211
2318 IF x ( g OR x > 255 TkrEN PRINT BEEPS;:GOTO 2p3pr
232~ FOR I = 1 TO 255 STEP X
2330 MAX = MAX - I: IF MAX = 0 THEN 2350
2348 S$ = S$ + CHR$ (I): NEXT I
2350 S!$= S$ + CHR$ (a): GOSUB 2730: RETURN
2368 REM VERTICALTABS
2380 S$ = ESC$ + "P":MAX= 20: GOSUB 2080
2390 RETURN
2400 REM SELECT EMPHASIZED
2420 S$ = ES@ + "E": GOSUB 2730
2430 RETURN
2440 REM CANCEL EMPHASIZED
2460 S$ = ESC$ + "F": GOSUB 2730
2470 RETURN
2480 REM DOUBLE-STRIKE
2500 S$ = ES@ + "G": GOSUB 2730
2510 RETURN
2520 REM CANCEL DOUBLE-STRIKE
2540 S$ = ESC$ + "H": GOSUB 2730
2550 RETURN
2560 REM PRINT A MENU TITLE
2570 HOME
2580 PRINT : PRINT : PRINT
2590 PRINT TAB( 6);"---RADIXPRINTERSETUP ---'
2600 PRINT
2610 PRINT TAB( (40 - LEN (TI$))/ 2);TI$
2620 PRINT : PRINT
2630 RETURN
2650 REM SELECTION
2660 VTAB 19: HTAB 10: PRINT "HIT (P) FOR SAMPLE PRINT"
2665 VTAB 21: HTAB 10: PRINT "SELECTION";
267/a GET C$
2675 IF C$ = "P" THEN GOSUB 3j@pI:GOT0 2650
2680 IF C$ ( "0" OR C$ > "9" THEN PRINT BEEP$;:GOT0
2670
2690 S = VAL (CS)
2700 VTAB 20:
2710 FOR H = 10 TO 40: HTAB H: PRINT " "j: NEXT H
2720 RETURN
2730 REM OUTPUT COMMANDSTRING
2750 PR# 1
2755 PRINT S$;
2758 PR# 0
2760 RETURN
212
2770
2790
3000
3005
3007
3010
3020
3030
3040
3050
Radix User’s Manual
REM CLEAR SCREEN AND POSITIONCURSOR
HOME : VTAB 10: HTAB TB: RETURN
REM PRINT
PR# 1
PRINT CHR$ (9);"255N"
FOR I = 1 TO 4: FOR J = 33 TO 126
PRINT CHR$ (J);: NEXT J
PRINT : NEXT I
PR# p!
RETURN
-
.-.