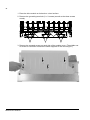
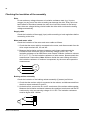
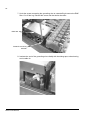
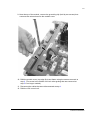
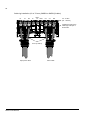
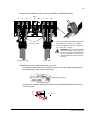
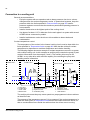
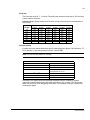
1
ACSM1
Hardware Manual
ACSM1-04Lx Liquid-cooled Drive Modules (55 to 160 kW)
ACSM1 Drive Manuals
DRIVE HARDWARE MANUAL*
ACSM1-04Lx Liquid-cooled Drive Modules (55 to 160 kW)
Hardware Manual
3AUA0000022083 (English)
ACSM1-04 Drive Modules (0.75 to 45 kW) Hardware Manual
3AFE68797543 (English)
ACSM1-04 Drive Modules (55 to 110 kW) Hardware Manual
3AFE68912130 (English)
DRIVE FIRMWARE MANUALS
ACSM1 Speed and Torque Control Program Firmware Manual
3AFE68848261 (English). For drives of type ACSM1-04xS…
ACSM1 Motion Control Program Firmware Manual
3AFE68848270 (English). For drives of type ACSM1-04xM…
DRIVE PC TOOLS MANUALS
DriveStudio User Manual
3AFE68749026 (English)
Solution Program Composer User Manual
3AFE68836590 (English)
APPLICATION GUIDES
Safe Torque Off Function (STO) Application Guide
3AFE68929814 (English)
OPTION MANUALS*
FIO-01 Digital I/O Extension User’s Manual
3AFE68784921 (English)
FIO-11 Analog I/O Extension User’s Manual
3AFE68784930 (English)
FEN-01 TTL Encoder Interface User’s Manual
3AFE68784603 (English)
FEN-11 Absolute Encoder Interface User’s Manual
3AFE68784841 (English)
FEN-21 Resolver Interface User’s Manual
3AFE68784859 (English)
FEN-31 HTL Encoder Interface User’s Manual
3AUA0000031044 (English)
ACSM1 Control Panel User’s Guide
3AUA0000020131 (English)
*A multilingual quick installation guide is included with the delivery.
ACSM1-04Lx Liquid Cooled Drive Modules
55 to 160 kW
Hardware Manual
3AUA0000022083 REV A EN
EFFECTIVE: 1.9.2008
© 2008 ABB Oy. All Rights Reserved.
5
Safety instructions
What this chapter contains
This chapter contains the safety instructions which you must follow when installing,
operating and servicing the drive. If ignored, physical injury or death may follow, or
damage may occur to the drive, the motor, or driven equipment. Read the safety
instructions before you work on the unit.
Use of warnings and notes
There are four types of safety instructions used in this manual:
Electricity warning warns of hazards from electricity which can cause
physical injury and/or damage to the equipment.
General warning warns about conditions, other than those caused by
electricity, which can result in physical injury and/or damage to the
equipment.
Electrostatic sensitive devices warning warns of electrostatic
discharge which can damage the equipment.
Hot surface warning warns of component surfaces that may become
hot enough to cause burns if touched.
Safety instructions
6
Installation and maintenance work
These warnings are intended for all who work on the drive, motor cable or motor.
WARNING! Ignoring the following instructions can cause physical injury or death, or
damage to the equipment.
Only qualified electricians are allowed to install and maintain the drive.
•
Never work on the drive, the motor cable or the motor when input power is
applied. After disconnecting the input power, always wait for 5 minutes to let the
intermediate circuit capacitors discharge before you start working on the drive,
the motor or the motor cable.
Always ensure by measuring with a multimeter (impedance at least 1 Mohm)
that:
1. There is no voltage between the drive input phases U1, V1 and W1 and the
ground.
2. There is no voltage between terminals UDC+ and UDC– and the ground.
3. There is no voltage between terminals R+ and R– and the ground.
•
Drives controlling a permanent magnet motor: A rotating permanent magnet
motor feeds power to the drive causing the drive to become live even when it is
stopped and the supply power switched off. Before maintenance work on the
drive,
– disconnect the motor from the drive by using a safety switch
– prevent the start-up of any other motors in the same mechanical system
– lock the motor shaft
– measure that the motor is in fact de-energised, then connect the U2, V2 and
W2 terminals of the drive to each other and to the PE.
•
Do not work on the control cables when power is applied to the drive or to the
external control circuits. Externally supplied control circuits may carry
dangerous voltages even when the input power of the drive is switched off.
•
Do not make any insulation or voltage withstand tests on the drive.
•
Disconnect the internal EMC filter of the drive (for directions, see page 57) if the
drive is to be installed on an IT power system (an ungrounded power system or
a high resistance grounded [over 30 ohms] power system) or a cornergrounded power system.
Notes:
•
Even when the motor is stopped, dangerous voltages are present at the power
circuit terminals U1, V1, W1 and U2, V2, W2, and UDC+, UDC–, R+, R–.
•
Depending on the external wiring, dangerous voltages (115 V, 220 V or 230 V)
may be present on the terminals of the relay output(s) of the drive.
•
The drive supports the “Safe Torque Off” function. See page 49.
Safety instructions
7
WARNING! Ignoring the following instructions can cause physical injury or death, or
damage to the equipment.
•
Never attempt to repair a malfunctioning drive; contact your local ABB
representative or Authorized Service Center.
•
Make sure that dust from drilling does not enter the drive during the installation.
Electrically conductive dust inside the drive may cause damage or lead to
malfunction.
•
Ensure sufficient cooling.
WARNING! The printed circuit boards contain components sensitive to electrostatic
discharge. Wear a grounding wrist band when handling the boards. Do not touch
the boards unnecessarily.
Safety instructions
8
Start-up and operation
These warnings are intended for all who plan the operation of the drive, start up or
operate the drive.
WARNING! Ignoring the following instructions can cause physical injury or death,
or damage to the equipment.
•
Before adjusting the drive and putting it into service, make sure that the motor
and all driven equipment are suitable for operation throughout the speed range
provided by the drive. The drive can be adjusted to operate the motor at
speeds above and below the speed provided by connecting the motor directly
to the power line.
•
Do not activate automatic fault reset functions if dangerous situations can
occur. When activated, these functions will reset the drive and resume
operation after a fault.
•
Do not control the motor with an AC contactor or disconnecting device
(disconnecting means); instead, use the control panel or external commands
via the I/O board of the drive or a fieldbus adapter. The maximum allowed
number of charging cycles of the DC capacitors (i.e. power-ups by applying
power) is one per two minutes.
•
Drives controlling a permanent magnet motor: Do not run the motor over the
rated speed. Motor overspeed leads to overvoltage which may permanently
damage the drive.
Notes:
•
If an external source for start command is selected and it is ON, the drive will
start immediately after an input voltage break or a fault reset unless the drive is
configured for 3-wire (pulse) start/stop.
•
When the control location is not set to local, the stop key on the control panel
will not stop the drive.
WARNING! The surfaces of drive system components (such as the braking
resistor, if present) may become hot when the system is in use.
Safety instructions
9
Work on the liquid cooling system
These instructions are intended for all who are responsible for installation and
maintenance work of the liquid cooling system of the drive. Ignoring these
instructions can cause physical injury or damage to the equipment.
WARNING!
• Beware of hot liquid. Do not work on the liquid cooling system until the pressure is
lowered down by stopping the pumps. High-pressure warm coolant (max. 10 bar,
55 °C) is present in the internal cooling circuit when it is in operation.
• Before power switch-on, make sure that the internal cooling circuit is filled up with
coolant. Running the pump dry will damage it. Also the drive will not cool down.
• Avoid skin contact with any coolant, especially antifreeze. Do not syphon them by
mouth. If such substance is swallowed or gets into the eyes, seek medical advice.
• Do not use the liquid piping or any of its parts for grounding electrical equipment
• Do not use weld connectors. Voltage spikes caused by welding may damage
electronical components of the drive and shorten the lifespan of the drive.
Disconnect the piping of the drive from the external cooling system when welding
external pipes.
• Do not overtighten the outer union of the nuts of the liquid
hoses - leave 2 to 3 mm of thread visible. Overtightening may
break the hose.
2 mm
• Drain the unit before storing in temperatures below 0°C.
Drying the pipes with compressed air is recommended. Freezing of the liquid
cooling system is not allowed.
Safety instructions
10
Safety instructions
11
Table of contents
Safety instructions
What this chapter contains . . . . . . . . . . . . . . . . . . . . . . . . . . . . . . . . . . . . . . . . . . . . . . . . . . . . . . . .
Use of warnings and notes . . . . . . . . . . . . . . . . . . . . . . . . . . . . . . . . . . . . . . . . . . . . . . . . . . . . . . . .
Installation and maintenance work . . . . . . . . . . . . . . . . . . . . . . . . . . . . . . . . . . . . . . . . . . . . . . . . . .
Start-up and operation . . . . . . . . . . . . . . . . . . . . . . . . . . . . . . . . . . . . . . . . . . . . . . . . . . . . . . . . . . . .
Work on the liquid cooling system . . . . . . . . . . . . . . . . . . . . . . . . . . . . . . . . . . . . . . . . . . . . . . . . . . .
5
5
6
8
9
Table of contents
About this manual
What this chapter contains . . . . . . . . . . . . . . . . . . . . . . . . . . . . . . . . . . . . . . . . . . . . . . . . . . . . . . .
Compatibility . . . . . . . . . . . . . . . . . . . . . . . . . . . . . . . . . . . . . . . . . . . . . . . . . . . . . . . . . . . . . . . . . .
Intended audience . . . . . . . . . . . . . . . . . . . . . . . . . . . . . . . . . . . . . . . . . . . . . . . . . . . . . . . . . . . . . .
Categorization according to the + code . . . . . . . . . . . . . . . . . . . . . . . . . . . . . . . . . . . . . . . . . . . . . .
Product and service inquiries . . . . . . . . . . . . . . . . . . . . . . . . . . . . . . . . . . . . . . . . . . . . . . . . . . . . .
Product training . . . . . . . . . . . . . . . . . . . . . . . . . . . . . . . . . . . . . . . . . . . . . . . . . . . . . . . . . . . . . . . .
Providing feedback on ABB Drives manuals . . . . . . . . . . . . . . . . . . . . . . . . . . . . . . . . . . . . . . . . . .
Contents . . . . . . . . . . . . . . . . . . . . . . . . . . . . . . . . . . . . . . . . . . . . . . . . . . . . . . . . . . . . . . . . . . . . .
Installation and commissioning flowchart . . . . . . . . . . . . . . . . . . . . . . . . . . . . . . . . . . . . . . . . . . . .
Terms and abbreviations . . . . . . . . . . . . . . . . . . . . . . . . . . . . . . . . . . . . . . . . . . . . . . . . . . . . . . . . .
17
17
17
17
17
17
17
18
19
21
The ACSM1-04Lx
What this chapter contains . . . . . . . . . . . . . . . . . . . . . . . . . . . . . . . . . . . . . . . . . . . . . . . . . . . . . . .
The ACSM1-04Lx . . . . . . . . . . . . . . . . . . . . . . . . . . . . . . . . . . . . . . . . . . . . . . . . . . . . . . . . . . . . . .
Layout . . . . . . . . . . . . . . . . . . . . . . . . . . . . . . . . . . . . . . . . . . . . . . . . . . . . . . . . . . . . . . . . . .
Main circuit and control interfaces . . . . . . . . . . . . . . . . . . . . . . . . . . . . . . . . . . . . . . . . . . . . . . . . . .
Operation . . . . . . . . . . . . . . . . . . . . . . . . . . . . . . . . . . . . . . . . . . . . . . . . . . . . . . . . . . . . . . . .
Type code . . . . . . . . . . . . . . . . . . . . . . . . . . . . . . . . . . . . . . . . . . . . . . . . . . . . . . . . . . . . . . . . . . . .
23
23
23
24
25
25
Planning the cabinet assembly
What this chapter contains . . . . . . . . . . . . . . . . . . . . . . . . . . . . . . . . . . . . . . . . . . . . . . . . . . . . . . .
Cabinet construction . . . . . . . . . . . . . . . . . . . . . . . . . . . . . . . . . . . . . . . . . . . . . . . . . . . . . . . . . . . .
Disposition of the devices . . . . . . . . . . . . . . . . . . . . . . . . . . . . . . . . . . . . . . . . . . . . . . . . . . .
Grounding of mounting structures . . . . . . . . . . . . . . . . . . . . . . . . . . . . . . . . . . . . . . . . . . . . .
Main dimensions and free space requirements . . . . . . . . . . . . . . . . . . . . . . . . . . . . . . . . . . . . . . . .
Cooling arrangements . . . . . . . . . . . . . . . . . . . . . . . . . . . . . . . . . . . . . . . . . . . . . . . . . . . . . . . . . . .
Cooling and degrees of protection . . . . . . . . . . . . . . . . . . . . . . . . . . . . . . . . . . . . . . . .
Open cabinet . . . . . . . . . . . . . . . . . . . . . . . . . . . . . . . . . . . . . . . . . . . . . . . . . . . . . . . . . . . . .
Preventing the recirculation of hot air . . . . . . . . . . . . . . . . . . . . . . . . . . . . . . . . . . . . . .
Outside the cabinet . . . . . . . . . . . . . . . . . . . . . . . . . . . . . . . . . . . . . . . . . . . . . . . . . . . .
27
27
27
27
28
29
29
29
30
30
Table of contents
12
Inside the cabinet . . . . . . . . . . . . . . . . . . . . . . . . . . . . . . . . . . . . . . . . . . . . . . . . . . . . .
Heat exchanger, closed circulation cabinet . . . . . . . . . . . . . . . . . . . . . . . . . . . . . . . . . . . . . .
EMC requirements . . . . . . . . . . . . . . . . . . . . . . . . . . . . . . . . . . . . . . . . . . . . . . . . . . . . . . . . . . . . .
Cabinet heaters . . . . . . . . . . . . . . . . . . . . . . . . . . . . . . . . . . . . . . . . . . . . . . . . . . . . . . . . . . . . . . . .
30
31
32
34
Mechanical installation
Contents of the package . . . . . . . . . . . . . . . . . . . . . . . . . . . . . . . . . . . . . . . . . . . . . . . . . . . . . . . . .
Delivery check and drive module identification . . . . . . . . . . . . . . . . . . . . . . . . . . . . . . . . . . .
Before installation . . . . . . . . . . . . . . . . . . . . . . . . . . . . . . . . . . . . . . . . . . . . . . . . . . . . . . . . . . . . . .
Requirements for the installation site . . . . . . . . . . . . . . . . . . . . . . . . . . . . . . . . . . . . . . . . . . .
Connection to an IT (ungrounded) or a corner-grounded power system . . . . . . . . . . . . . . . .
Installation procedure . . . . . . . . . . . . . . . . . . . . . . . . . . . . . . . . . . . . . . . . . . . . . . . . . . . . . . . . . . .
Mounting onto a solid mounting plate . . . . . . . . . . . . . . . . . . . . . . . . . . . . . . . . . . . . . . . . . .
Push-through mounting . . . . . . . . . . . . . . . . . . . . . . . . . . . . . . . . . . . . . . . . . . . . . . . . . . . . .
Hole dimensions for push-through mounting . . . . . . . . . . . . . . . . . . . . . . . . . . . . . . . .
Braking resistor installation . . . . . . . . . . . . . . . . . . . . . . . . . . . . . . . . . . . . . . . . . . . . . . . . . .
Installing pipe connectors . . . . . . . . . . . . . . . . . . . . . . . . . . . . . . . . . . . . . . . . . . . . . . . . . . . . . . . .
35
35
36
36
36
36
36
37
42
42
43
Planning the electrical installation
What this chapter contains . . . . . . . . . . . . . . . . . . . . . . . . . . . . . . . . . . . . . . . . . . . . . . . . . . . . . . .
Motor selection and compatibility . . . . . . . . . . . . . . . . . . . . . . . . . . . . . . . . . . . . . . . . . . . . . . . . . .
Protecting the motor insulation and bearings . . . . . . . . . . . . . . . . . . . . . . . . . . . . . . . . . . . . .
Permanent magnet synchronous motors . . . . . . . . . . . . . . . . . . . . . . . . . . . . . . . . . . . . . . . .
Supply connection . . . . . . . . . . . . . . . . . . . . . . . . . . . . . . . . . . . . . . . . . . . . . . . . . . . . . . . . . . . . . .
Supply disconnecting device . . . . . . . . . . . . . . . . . . . . . . . . . . . . . . . . . . . . . . . . . . . . . . . . . . . . . .
Europe . . . . . . . . . . . . . . . . . . . . . . . . . . . . . . . . . . . . . . . . . . . . . . . . . . . . . . . . . . . . . . . . . .
Other regions . . . . . . . . . . . . . . . . . . . . . . . . . . . . . . . . . . . . . . . . . . . . . . . . . . . . . . . . . . . . .
Thermal overload and short circuit protection . . . . . . . . . . . . . . . . . . . . . . . . . . . . . . . . . . . . . . . . .
Thermal overload protection . . . . . . . . . . . . . . . . . . . . . . . . . . . . . . . . . . . . . . . . . . . . . . . . .
Protection against short circuit in motor cable . . . . . . . . . . . . . . . . . . . . . . . . . . . . . . . . . . . .
Protection against short circuit in the supply cable or the drive . . . . . . . . . . . . . . . . . . . . . . .
Operating time of the fuses and circuit breakers . . . . . . . . . . . . . . . . . . . . . . . . . . . . .
Circuit breakers . . . . . . . . . . . . . . . . . . . . . . . . . . . . . . . . . . . . . . . . . . . . . . . . . . . . . . .
Motor thermal protection . . . . . . . . . . . . . . . . . . . . . . . . . . . . . . . . . . . . . . . . . . . . . . . . . . . .
Ground fault protection . . . . . . . . . . . . . . . . . . . . . . . . . . . . . . . . . . . . . . . . . . . . . . . . . . . . . . . . . .
Emergency stop devices . . . . . . . . . . . . . . . . . . . . . . . . . . . . . . . . . . . . . . . . . . . . . . . . . . . . . . . . .
Safe Torque Off . . . . . . . . . . . . . . . . . . . . . . . . . . . . . . . . . . . . . . . . . . . . . . . . . . . . . . . . . . . . . . . .
Selecting the power cables . . . . . . . . . . . . . . . . . . . . . . . . . . . . . . . . . . . . . . . . . . . . . . . . . . . . . . .
General rules . . . . . . . . . . . . . . . . . . . . . . . . . . . . . . . . . . . . . . . . . . . . . . . . . . . . . . . . . . . . .
Alternative power cable types . . . . . . . . . . . . . . . . . . . . . . . . . . . . . . . . . . . . . . . . . . . . . . . .
Motor cable shield . . . . . . . . . . . . . . . . . . . . . . . . . . . . . . . . . . . . . . . . . . . . . . . . . . . . . . . . .
Protecting the relay output contacts and attenuating disturbances in case of inductive loads . . . .
Residual current device (RCD) compatibility . . . . . . . . . . . . . . . . . . . . . . . . . . . . . . . . . . . . . . . . . .
Selecting the control cables . . . . . . . . . . . . . . . . . . . . . . . . . . . . . . . . . . . . . . . . . . . . . . . . . . . . . .
Relay cable . . . . . . . . . . . . . . . . . . . . . . . . . . . . . . . . . . . . . . . . . . . . . . . . . . . . . . . . . . . . . .
Control panel cable . . . . . . . . . . . . . . . . . . . . . . . . . . . . . . . . . . . . . . . . . . . . . . . . . . . . . . . .
Connection of a motor temperature sensor to the drive I/O . . . . . . . . . . . . . . . . . . . . . . . . . . . . . .
Routing the cables . . . . . . . . . . . . . . . . . . . . . . . . . . . . . . . . . . . . . . . . . . . . . . . . . . . . . . . . . . . . . .
45
45
45
46
46
46
46
46
46
46
47
47
47
47
47
47
48
49
50
50
50
51
51
52
52
53
53
53
53
Table of contents
13
Control cable ducts . . . . . . . . . . . . . . . . . . . . . . . . . . . . . . . . . . . . . . . . . . . . . . . . . . . . . . . . 54
Electrical installation
What this chapter contains . . . . . . . . . . . . . . . . . . . . . . . . . . . . . . . . . . . . . . . . . . . . . . . . . . . . . . .
Checking the insulation of the assembly . . . . . . . . . . . . . . . . . . . . . . . . . . . . . . . . . . . . . . . . . . . . .
Drive . . . . . . . . . . . . . . . . . . . . . . . . . . . . . . . . . . . . . . . . . . . . . . . . . . . . . . . . . . . . . . . . . . . .
Supply cable . . . . . . . . . . . . . . . . . . . . . . . . . . . . . . . . . . . . . . . . . . . . . . . . . . . . . . . . . . . . .
Motor and motor cable . . . . . . . . . . . . . . . . . . . . . . . . . . . . . . . . . . . . . . . . . . . . . . . . . . . . . .
Braking resistor assembly . . . . . . . . . . . . . . . . . . . . . . . . . . . . . . . . . . . . . . . . . . . . . . . . . . .
Connection to an IT (ungrounded) power system . . . . . . . . . . . . . . . . . . . . . . . . . . . . . . . . . . . . . .
Disconnection of internal EMC filtering . . . . . . . . . . . . . . . . . . . . . . . . . . . . . . . . . . . . . . . . .
Power cable connection . . . . . . . . . . . . . . . . . . . . . . . . . . . . . . . . . . . . . . . . . . . . . . . . . . . . . . . . .
Power cable connection diagram . . . . . . . . . . . . . . . . . . . . . . . . . . . . . . . . . . . . . . . . . . . . . .
Procedure . . . . . . . . . . . . . . . . . . . . . . . . . . . . . . . . . . . . . . . . . . . . . . . . . . . . . . . . . . . . . . .
Cable lug installation (16 to 70 mm2 [AWG6 to AWG2/0] cables) . . . . . . . . . . . . . . . .
Screw terminal installation (95 to 240 mm2 [AWG3/0 to AWG500] cables) . . . . . . . . .
Grounding the motor cable shield at the motor end . . . . . . . . . . . . . . . . . . . . . . . . . . .
Connecting the control cables . . . . . . . . . . . . . . . . . . . . . . . . . . . . . . . . . . . . . . . . . . . . . . . . . . . . .
Control connections to the JCU Control Unit . . . . . . . . . . . . . . . . . . . . . . . . . . . . . . . . . . . . .
Jumpers . . . . . . . . . . . . . . . . . . . . . . . . . . . . . . . . . . . . . . . . . . . . . . . . . . . . . . . . . . . .
External power supply for the JCU Control Unit (X1) . . . . . . . . . . . . . . . . . . . . . . . . . .
Thermistor input (X4:8…9) . . . . . . . . . . . . . . . . . . . . . . . . . . . . . . . . . . . . . . . . . . . . . .
Drive-to-drive link (X5) . . . . . . . . . . . . . . . . . . . . . . . . . . . . . . . . . . . . . . . . . . . . . . . . .
Safe Torque Off (X6) . . . . . . . . . . . . . . . . . . . . . . . . . . . . . . . . . . . . . . . . . . . . . . . . . .
Control cable grounding . . . . . . . . . . . . . . . . . . . . . . . . . . . . . . . . . . . . . . . . . . . . . . . . . . . . .
Installation of options . . . . . . . . . . . . . . . . . . . . . . . . . . . . . . . . . . . . . . . . . . . . . . . . . . . . . . . . . . . .
55
56
56
56
56
56
57
57
62
62
63
64
65
65
66
66
67
67
67
68
68
70
71
Installation checklist
Checklist . . . . . . . . . . . . . . . . . . . . . . . . . . . . . . . . . . . . . . . . . . . . . . . . . . . . . . . . . . . . . . . . . . . . . 73
Maintenance
What this chapter contains . . . . . . . . . . . . . . . . . . . . . . . . . . . . . . . . . . . . . . . . . . . . . . . . . . . . . . .
Safety . . . . . . . . . . . . . . . . . . . . . . . . . . . . . . . . . . . . . . . . . . . . . . . . . . . . . . . . . . . . . . . . . . . . . . .
Maintenance intervals . . . . . . . . . . . . . . . . . . . . . . . . . . . . . . . . . . . . . . . . . . . . . . . . . . . . . . . . . . .
Cooling fan . . . . . . . . . . . . . . . . . . . . . . . . . . . . . . . . . . . . . . . . . . . . . . . . . . . . . . . . . . . . . . . . . . .
Fan replacement . . . . . . . . . . . . . . . . . . . . . . . . . . . . . . . . . . . . . . . . . . . . . . . . . . . . . . . . . .
Capacitors . . . . . . . . . . . . . . . . . . . . . . . . . . . . . . . . . . . . . . . . . . . . . . . . . . . . . . . . . . . . . . . . . . . .
Reforming . . . . . . . . . . . . . . . . . . . . . . . . . . . . . . . . . . . . . . . . . . . . . . . . . . . . . . . . . . . . . . .
Changing . . . . . . . . . . . . . . . . . . . . . . . . . . . . . . . . . . . . . . . . . . . . . . . . . . . . . . . . . . . . . . . .
Other maintenance actions . . . . . . . . . . . . . . . . . . . . . . . . . . . . . . . . . . . . . . . . . . . . . . . . . . . . . . .
Transferring the memory unit to a new drive module . . . . . . . . . . . . . . . . . . . . . . . . . . . . . . .
The 7-segment display on the JCU Control Unit . . . . . . . . . . . . . . . . . . . . . . . . . . . . . . . . . . . . . . .
75
75
75
76
76
76
76
76
77
77
77
The internal cooling circuit
General . . . . . . . . . . . . . . . . . . . . . . . . . . . . . . . . . . . . . . . . . . . . . . . . . . . . . . . . . . . . . . . . . . . . . . 79
Table of contents
14
Internal cooling system diagram . . . . . . . . . . . . . . . . . . . . . . . . . . . . . . . . . . . . . . . . . . . . . . . . . . .
Connection to a cooling unit . . . . . . . . . . . . . . . . . . . . . . . . . . . . . . . . . . . . . . . . . . . . . . . . . . . . . .
General recommendations . . . . . . . . . . . . . . . . . . . . . . . . . . . . . . . . . . . . . . . . . . . . . .
Coolant temperature control . . . . . . . . . . . . . . . . . . . . . . . . . . . . . . . . . . . . . . . . . . . . .
79
80
80
80
Technical data
What this chapter contains . . . . . . . . . . . . . . . . . . . . . . . . . . . . . . . . . . . . . . . . . . . . . . . . . . . . . . .
Ratings . . . . . . . . . . . . . . . . . . . . . . . . . . . . . . . . . . . . . . . . . . . . . . . . . . . . . . . . . . . . . . . . . . . . . .
Power loss and cooling characteristics . . . . . . . . . . . . . . . . . . . . . . . . . . . . . . . . . . . . . . . . .
Derating . . . . . . . . . . . . . . . . . . . . . . . . . . . . . . . . . . . . . . . . . . . . . . . . . . . . . . . . . . . . . . . . .
Temperature derating . . . . . . . . . . . . . . . . . . . . . . . . . . . . . . . . . . . . . . . . . . . . . . . . . .
Glycol concentration derating . . . . . . . . . . . . . . . . . . . . . . . . . . . . . . . . . . . . . . . . . . . .
AC supply voltage derating . . . . . . . . . . . . . . . . . . . . . . . . . . . . . . . . . . . . . . . . . . . . . .
Altitude derating . . . . . . . . . . . . . . . . . . . . . . . . . . . . . . . . . . . . . . . . . . . . . . . . . . . . . .
Cyclic loads . . . . . . . . . . . . . . . . . . . . . . . . . . . . . . . . . . . . . . . . . . . . . . . . . . . . . . . . . . . . . .
Dimensions, weights, noise . . . . . . . . . . . . . . . . . . . . . . . . . . . . . . . . . . . . . . . . . . . . . . . . . . . . . . .
Supply cable fuses . . . . . . . . . . . . . . . . . . . . . . . . . . . . . . . . . . . . . . . . . . . . . . . . . . . . . . . . . . . . .
Internal cooling circuit specifications . . . . . . . . . . . . . . . . . . . . . . . . . . . . . . . . . . . . . . . . . . . . . . . .
Temperature limits . . . . . . . . . . . . . . . . . . . . . . . . . . . . . . . . . . . . . . . . . . . . . . . . . . . . . . . . .
Pressure limits . . . . . . . . . . . . . . . . . . . . . . . . . . . . . . . . . . . . . . . . . . . . . . . . . . . . . . . . . . . .
Flow rate . . . . . . . . . . . . . . . . . . . . . . . . . . . . . . . . . . . . . . . . . . . . . . . . . . . . . . . . . . . . . . . .
Coolant quality . . . . . . . . . . . . . . . . . . . . . . . . . . . . . . . . . . . . . . . . . . . . . . . . . . . . . . . . . . . .
Glycol concentration . . . . . . . . . . . . . . . . . . . . . . . . . . . . . . . . . . . . . . . . . . . . . . . . . . .
Materials . . . . . . . . . . . . . . . . . . . . . . . . . . . . . . . . . . . . . . . . . . . . . . . . . . . . . . . . . . . . . . . .
AC input (supply) connection . . . . . . . . . . . . . . . . . . . . . . . . . . . . . . . . . . . . . . . . . . . . . . . . . . . . .
DC connection . . . . . . . . . . . . . . . . . . . . . . . . . . . . . . . . . . . . . . . . . . . . . . . . . . . . . . . . . . . . . . . . .
Motor connection . . . . . . . . . . . . . . . . . . . . . . . . . . . . . . . . . . . . . . . . . . . . . . . . . . . . . . . . . . . . . . .
JCU Control Unit . . . . . . . . . . . . . . . . . . . . . . . . . . . . . . . . . . . . . . . . . . . . . . . . . . . . . . . . . . . . . . .
Efficiency . . . . . . . . . . . . . . . . . . . . . . . . . . . . . . . . . . . . . . . . . . . . . . . . . . . . . . . . . . . . . . . . . . . . .
Cooling . . . . . . . . . . . . . . . . . . . . . . . . . . . . . . . . . . . . . . . . . . . . . . . . . . . . . . . . . . . . . . . . . . . . . .
Degree of protection . . . . . . . . . . . . . . . . . . . . . . . . . . . . . . . . . . . . . . . . . . . . . . . . . . . . . . . . . . . .
Ambient conditions . . . . . . . . . . . . . . . . . . . . . . . . . . . . . . . . . . . . . . . . . . . . . . . . . . . . . . . . . . . . .
Materials . . . . . . . . . . . . . . . . . . . . . . . . . . . . . . . . . . . . . . . . . . . . . . . . . . . . . . . . . . . . . . . . . . . . .
Applicable standards . . . . . . . . . . . . . . . . . . . . . . . . . . . . . . . . . . . . . . . . . . . . . . . . . . . . . . . . . . . .
CE marking . . . . . . . . . . . . . . . . . . . . . . . . . . . . . . . . . . . . . . . . . . . . . . . . . . . . . . . . . . . . . . . . . . .
Compliance with the European Low Voltage Directive . . . . . . . . . . . . . . . . . . . . . . . . . . . . .
Compliance with the European EMC Directive . . . . . . . . . . . . . . . . . . . . . . . . . . . . . . . . . . .
Definitions . . . . . . . . . . . . . . . . . . . . . . . . . . . . . . . . . . . . . . . . . . . . . . . . . . . . . . . . . . .
Compliance with EN 61800-3 (2004), category C2 . . . . . . . . . . . . . . . . . . . . . . . . . . .
Compliance with EN 61800-3 (2004), category C3 . . . . . . . . . . . . . . . . . . . . . . . . . . .
Compliance with EN 61800-3 (2004), category C4 . . . . . . . . . . . . . . . . . . . . . . . . . . .
Compliance with the Machinery Directive . . . . . . . . . . . . . . . . . . . . . . . . . . . . . . . . . . . . . . . . . . . .
C-Tick marking . . . . . . . . . . . . . . . . . . . . . . . . . . . . . . . . . . . . . . . . . . . . . . . . . . . . . . . . . . . . . . . .
Compliance with IEC 61800-3 (2004) . . . . . . . . . . . . . . . . . . . . . . . . . . . . . . . . . . . . . . . . . .
UL marking . . . . . . . . . . . . . . . . . . . . . . . . . . . . . . . . . . . . . . . . . . . . . . . . . . . . . . . . . . . . . . . . . . .
UL checklist . . . . . . . . . . . . . . . . . . . . . . . . . . . . . . . . . . . . . . . . . . . . . . . . . . . . . . . . . . . . . .
Product protection in the US . . . . . . . . . . . . . . . . . . . . . . . . . . . . . . . . . . . . . . . . . . . . . . . . . . . . . .
83
83
83
84
84
85
85
85
86
87
87
88
88
88
89
89
90
90
91
91
91
92
93
93
93
94
94
95
96
96
96
96
96
97
97
97
97
97
98
98
98
Table of contents
15
Resistor braking
What this chapter contains . . . . . . . . . . . . . . . . . . . . . . . . . . . . . . . . . . . . . . . . . . . . . . . . . . . . . . . 99
Braking choppers and resistors with the ACSM1-04Lx . . . . . . . . . . . . . . . . . . . . . . . . . . . . . . . . . . 99
Braking choppers . . . . . . . . . . . . . . . . . . . . . . . . . . . . . . . . . . . . . . . . . . . . . . . . . . . . . . . . . . 99
Braking resistor selection . . . . . . . . . . . . . . . . . . . . . . . . . . . . . . . . . . . . . . . . . . . . . . . . . . . . 99
Chopper data / Resistor selection table . . . . . . . . . . . . . . . . . . . . . . . . . . . . . . . . . . . . . . . . 100
Resistor installation and wiring . . . . . . . . . . . . . . . . . . . . . . . . . . . . . . . . . . . . . . . . . . . . . . . . . . . 101
Contactor protection of drive . . . . . . . . . . . . . . . . . . . . . . . . . . . . . . . . . . . . . . . . . . . . . . . . 101
Braking circuit commissioning . . . . . . . . . . . . . . . . . . . . . . . . . . . . . . . . . . . . . . . . . . . . . . . . . . . . 102
Dimension drawings
What this chapter contains . . . . . . . . . . . . . . . . . . . . . . . . . . . . . . . . . . . . . . . . . . . . . . . . . . . . . . 103
Drive module . . . . . . . . . . . . . . . . . . . . . . . . . . . . . . . . . . . . . . . . . . . . . . . . . . . . . . . . . . . . . . . . . 104
Braking resistor (JBR-09, air-cooled) . . . . . . . . . . . . . . . . . . . . . . . . . . . . . . . . . . . . . . . . . . . . . . 106
Table of contents
16
Table of contents
17
About this manual
What this chapter contains
This chapter describes the intended audience and contents of this manual. It
contains a flowchart of steps in checking the delivery, installing and commissioning
the drive. The flowchart refers to chapters/sections in this manual and other
manuals.
Compatibility
The manual is compatible with ACSM1-04Lx (frame size E).
Intended audience
This manual is intended for people who plan the installation, install, commission, use
and service the drive. Read the manual before working on the drive. You are
expected to know the fundamentals of electricity, wiring, electrical components and
electrical schematic symbols.
This manual is written for readers worldwide. Both SI and imperial units are shown
wherever appropriate.
Categorization according to the + code
The instructions, technical data and dimensional drawings which concern only
certain optional selections are marked with + codes, e.g. +L500. The options
included in the drive can be identified from the + codes visible on the type
designation label of the drive. The + code selections are listed in chapter The
ACSM1-04Lx on page 25.
Product and service inquiries
Address any inquiries about the product to your local ABB representative, quoting
the type code and serial number of the unit in question. A listing of ABB sales,
support and service contacts can be found by navigating to www.abb.com/drives and
selecting Sales, Support and Service network.
Product training
For information on ABB product training, navigate to www.abb.com/drives and select
Training courses.
Providing feedback on ABB Drives manuals
Your comments on our manuals are welcome. Go to www.abb.com/drives and select
Document Library – Manuals feedback form (LV AC drives).
About this manual
18
Contents
The chapters of this manual are briefly described below.
Safety instructions gives safety instructions for the installation, commissioning,
operation and maintenance of the drive.
About this manual lists the steps in checking the delivery and installing and
commissioning the drive and refers to chapters/sections in this manual and other
manuals for particular tasks.
The ACSM1-04Lx describes the drive module.
Planning the cabinet assembly guides in planning the installation of the drive module
into a user-defined cabinet.
Mechanical installation instructs how to place and mount the drive.
Planning the electrical installation instructs on the motor and cable selection, the
protections and the cable routing.
Electrical installation instructs on how to wire the drive.
Installation checklist contains a list for checking the mechanical and electrical
installation of the drive.
Maintenance lists periodic maintenance actions along with work instructions.
The internal cooling circuit contains information on the drive internal cooling system.
Technical data contains the technical specifications of the drive, e.g. the ratings,
sizes and technical requirements, provisions for fulfilling the requirements for CE
and other markings and warranty policy.
Resistor braking describes how to select, protect and wire braking resistors.
Dimension drawings contains the dimensional drawings of the drive and connected
equipment.
About this manual
19
Installation and commissioning flowchart
Task
See
Plan the installation.
Planning the cabinet assembly (page 27)
Check the ambient conditions, ratings, required
cooling, external cooling circuit arrangements, input
power connection, compatibility of the motor, motor
connection, and other technical data.
Technical data (page 83)
Select the cables.
Planning the electrical installation (page 45)
Unpack and check the units.
Mechanical installation: Contents of the
package (page 35)
Check that all necessary optional modules and
equipment are present and correct.
Only intact units may be started up.
Check the installation site.
If the converter has been non-operational for
more than one year, the converter DC link
capacitors need to be reformed. (see ACS800
Capacitor Reforming Guide [64059629,
English]))
Mechanical installation: Before installation
(page 36)
Technical data (page 83)
If the drive is about to be connected to an IT
Connection to an IT (ungrounded) power
(ungrounded) or corner-grounded system, check that system: Installation and maintenance work
the internal EMC filtering of the drive has been
(page 57)
disconnected.
Install the drive and the equipment related to the
cooling system in a cabinet.
Mechanical installation: Installation procedure
(page 36)
Attach the cooling pipes to the drive.
Cooling arrangements (page 29)
Route the cables.
Planning the electrical installation: Routing the
cables (page 53)
Check the insulation of the supply cable, the motor
and the motor cable, and the resistor cable (if
present).
Electrical installation: Checking the insulation of
the assembly (page 56)
About this manual
20
Task
Connect the power cables.
Connect the control and the auxiliary control cables.
See
Electrical installation: Power cable connection:
(page 62) and Connecting the control cables:
(page 66)
For optional equipment:
Resistor braking (page 99)
Manuals for any optional equipment
Check the installation.
Installation checklist (page 73)
Commission the drive.
Appropriate Firmware Manual
Commission the braking chopper if required.
Resistor braking (page 99)
Operating of the drive: start, stop, speed control etc.
Appropriate Firmware Manual
About this manual
21
Terms and abbreviations
Term/Abbreviation
Explanation
EMC
Electromagnetic Compatibility.
FIO-01
Optional digital I/O extension for the ACSM1.
FIO-11
Optional analogue I/O extension for the ACSM1.
FEN-01
Optional TTL encoder interface for the ACSM1.
FEN-11
Optional absolute encoder interface for the ACSM1.
FEN-21
Optional resolver interface for the ACSM1.
FCAN-0x
Optional CANopen adapter for the ACSM1.
FDNA-0x
Optional DeviceNet adapter for the ACSM1.
FENA-0x
Optional Ethernet/IP adapter for the ACSM1.
FPBA-0x
Optional PROFIBUS DP adapter for the ACSM1.
Frame (size)
Size of the drive module. This manual applies to ACSM1-04Lx frame
size E.
IGBT
Insulated Gate Bipolar Transistor; a voltage-controlled semiconductor type
widely used in inverters due to their easy controllability and high switching
frequency.
I/O
Input/Output.
JBR-xx
Series of optional braking resistors for the ACSM1.
JCU
The control unit of the drive module. The JCU is installed on top of the
power module. The external I/O control signals are connected to the JCU,
or optional I/O extensions mounted on it.
JMU-xx
The memory unit attached to the control unit of the drive.
JPU
The power unit.
RFI
Radio-frequency interference.
About this manual
22
About this manual
23
The ACSM1-04Lx
What this chapter contains
This chapter describes the construction and operating principle of the drive in short.
The ACSM1-04Lx
The ACSM1-04Lx is a liquid-cooled IP20 drive module for controlling AC motors. It is
to be installed into a cabinet by the customer.
The ACSM1-04Lx is only available in frame size E.
Layout
JCU Control Unit
7-segment display
External 24 V power input
Relay output
Digital inputs/outputs
JCU
Control Unit
Slots 1 and 2 for optional I/O
extensions and encoder/resolver
interface
Analogue inputs
Thermistor input
Analogue outputs
Drive-to-drive link
Safe Torque Off connection
Control panel / PC connection
AC supply, DC, braking
resistor and motor
connections
Slot 3 for optional fieldbus adapter
Coolant inlet and outlet pipes
Memory unit (JMU) connection
The ACSM1-04Lx
24
Main circuit and control interfaces
The diagram below shows the control interfaces and the main circuit of the drive. For
further information on the JCU Control Unit, see the chapter Electrical installation.
Power unit (JPU)
Control unit (JCU), installed onto the power unit
7-segment status display (see page 77)
Option 1
Slot 1
Digital or analogue I/O extension
(FIO-01, FIO-11)
External 24 V power input (see page 67)
Incremental or absolute encoder interface, or
resolver interface (FEN-01, FEN-11, FEN-21)
Digital I/O
Option 2
Slot 2
Connectivity as with Option 1 above.
Note: No two I/O extensions or feedback
interfaces of the same type can be
connected at a time.
Analogue I/O
Thermistor input
Drive-to-drive link
Safe Torque Off connection
Option 3
Control panel (optional) or PC connection
Slot 3
Fieldbus adapter (FPBA-0x, FCAN-0x,
FDNA-0x, FENA-0x etc.)
Memory unit (JMU) containing the
application program (see page 77)
Capacitor bank
ACSM1-04Lx
U1
AC supply
V1
U2
+
V2
Motor output
W2
W1
–
Inverter
Rectifier
R-
Braking chopper
The ACSM1-04Lx
UDC+
R+
Braking resistor
(optional)
UDC-
25
Operation
This table describes the operation of the main circuit in short.
Component
Description
Braking chopper
Conducts the energy generated by a decelerating motor from the DC
bus to a braking resistor. The braking chopper is built in the
ACSM1-04Lx; braking resistors are external options.
Braking resistor
Dissipates the regenerative energy by converting it into heat.
Capacitor bank
Energy storage which stabilizes the intermediate circuit DC voltage.
Inverter
Converts the DC voltage to AC voltage and vice versa. The motor is
controlled by switching the IGBTs of the inverter.
Rectifier
Converts the three-phase AC voltage to DC voltage.
Type code
The type code contains information on the specifications and configuration of the
drive. The first digits from left express the basic configuration (e.g. ACSM1-04LS175A-4). The optional selections are given thereafter, preceded by + signs (e.g.
+L501). The main selections are described below. Not all selections are necessarily
available for all types; refer to ACSM1 Ordering Information, available on request.
See also section Delivery check and drive module identification on page 35.
Selection
Product series
Type (1)
Type (2)
Type (3)
Size
Voltage range
+ options
Fieldbus
Alternatives
ACSM1 product series
04
Drive module. When no options are selected: IP20, no control panel,
internal EMC filter, internal mains choke, braking chopper, coated boards,
Safe Torque Off, Quick Guide (multilingual), latest firmware version,
Drive SP programming
L
Liquid-cooled module
S
Speed and torque control firmware
M
Motion control firmware
Refer to Technical data: Ratings.
4
380 V, 400 V (nominal rating), 415 V, 440 V, 460 V or 480 V AC
K...
I/O extensions and
feedback interfaces
L...
Memory unit
configuration
N...
+K451: FDNA-01 DeviceNet adapter
+K454: FPBA-01 PROFIBUS DP adapter
+K457: FCAN-01 CANopen adapter
+K466: FENA-02 Ethernet/IP adapter
+L500: FIO-11 analogue I/O extension
+L501: FIO-01 digital I/O extension
+L502: FEN-31 HTL encoder interface
+L516: FEN-21 resolver interface
+L517: FEN-01 TTL encoder interface
+L518: FEN-11 absolute encoder interface
Solution functions and programs
The ACSM1-04Lx
26
The ACSM1-04Lx
27
Planning the cabinet assembly
What this chapter contains
This chapter guides in planning the installation of a drive module into a user-defined
cabinet. The issues discussed are essential for safe and trouble-free use of the drive
system.
Note: The installation examples in this manual are provided only to help the installer
in designing the installation. Note that the installation must, however, always be
designed and made according to applicable local laws and regulations. ABB
does not assume any liability whatsoever for any installation which breaches the
local laws and/or other regulations.
Cabinet construction
The cabinet frame must be sturdy enough to carry the weight of the drive
components, control circuitry and other equipment installed in it.
The cabinet must protect the drive module against contact and meet the
requirements for dust and humidity (see chapter Technical data).
Disposition of the devices
For easy installation and maintenance, a spacious layout is recommended. Sufficient
cooling air flow, obligatory clearances, cables and cable support structures all
require space.
For layout examples, see section Cooling arrangements below.
Grounding of mounting structures
Make sure all cross-members or shelves on which drive system components are
mounted are properly grounded and the connecting surfaces left unpainted.
Note: Ensure that the components are properly grounded through their fastening
points to the installation base.
Planning the cabinet assembly
28
Main dimensions and free space requirements
The modules can be installed side by side. The main dimensions of the drive
modules as well as free space requirements are shown below. For more details,
refer to the chapter Dimension drawings.
415 [16.34”]*
313.5 [12.34”]
Free space above the module:
200 mm (7.9”)
700 [27.56”]
675 [26.57”]
60.5 [2.38”]
Free space below the module:
300 mm (12”)
*Including options installed on the JCU Control Unit. Note that the wiring to some fieldbus
adapters requires approximately 50 mm (2”) of additional depth.
Planning the cabinet assembly
29
Cooling arrangements
The cabinet must have enough free space for the components to ensure sufficient
cooling. Observe the minimum clearances given for each component.
70–80% of the heat is absorbed by the liquid-cooled heatsink and 20–30% by air.
See chapter The internal cooling circuit for information on cooling arrangements of
the liquid cooling system. Two methods of arranging air cooling are described in this
chapter: open cabinet and closed circulation cabinet equipped with a heat
exchanger.
Ensure that coolant flow is adequate in the internal cooling circuit and the coolant
inlet temperature is within allowed limits and the coolant meets the specifications
given in Internal cooling circuit specifications.
Cooling and degrees of protection
The air inlets and outlets must be equipped with gratings that
• guide the air flow
• protect against contact
• prevent water splashes from entering the cabinet.
Arrange the cooling air flow through the modules so that the requirements given in
chapter Technical data are met:
• cooling air flow
• allowed ambient temperature.
Make sure the air inlets and outlets are sufficient in size. Note that in addition to the
power loss of the drive module, the heat dissipated by cables and other additional
equipment must also be ventilated.
The internal cooling fans of the modules are usually sufficient to keep the component
temperatures low enough in IP22 cabinets.
In IP54 cabinets, thick filter mats are used to prevent dust from entering the cabinet.
This entails the installation of additional cooling equipment, such as a hot air exhaust
fan.
The installation site must be sufficiently ventilated.
Open cabinet
Air enters through the lower part of the cabinet and is then fanned out of the cabinet
at the top. With an open cabinet, it is important to prevent the recirculation of hot air.
Planning the cabinet assembly
30
Preventing the recirculation of hot air
Push-through mounting
Typical vertical mounting
Main
air
flow
out
Cabinet (side view)
HOT
AREA
Main airflow out
Cabinet (side view)
Air flow out
HOT AREA
Air baffle
plate
Air baffle plates
COOL AREA
COOL AREA
Air flow in
Main airflow in
Main
air
flow
in
Outside the cabinet
Prevent hot air circulation outside the cabinet by leading the outcoming hot air away
from the area where the inlet air to the cabinet is taken. Possible solutions include:
• gratings that guide air flow at the air inlet and outlet
• air inlet and outlet at different sides of the cabinet
• cool air inlet in the lower part of the front door and an extra exhaust fan on the
roof of the cabinet.
Inside the cabinet
Prevent hot air circulation inside the cabinet with leak-proof air baffle plates; make
sure the air vents of the drive module remain clear. No gaskets are usually required.
Planning the cabinet assembly
31
Heat exchanger, closed circulation cabinet
The ACSM1-04Lx drive module is installed in a closed cabinet without air vents. As
some parts of the drive module are not directly liquid-cooled, module cooling fans
circulate air inside the cabinet through an air-to-liquid or air-to-air heat exchanger.
For purposes of selecting the heat exchanger and temperature limits (see Ambient
conditions) in a closed cabinet, ambient temperature is effectively the temperature of
the air after it exits the heat exchanger.
With an air-to liquid heat exchanger, the liquid circulation is first connected to the
heat exchanger and then to the drive module. The coolant inlet and outlet are usually
at the bottom of the heat exchanger and outside the cabinet. The coolant
temperature increases approximately 1–2 °C. Ensure that the coolant is within
allowed limits when entering the drive module; see Derating and Temperature limits).
In a cabinet with an air-to-air heat exchanger, the heat is transfered into cool air from
outside the cabinet that is fanned through the heat exchanger and then blown out.
Air-to-liquid heat exchanger
Air-to-air heat exchanger
HOT
AREA
COOL
AREA
HOT
AREA
Air-to-liquid
heat exchanger
Air-to-air
COOL
AREA
heat exchanger
Ambient temperature
Planning the cabinet assembly
32
EMC requirements
Generally, the fewer and smaller the holes in the cabinet, the better the interference
attenuation. The maximum recommended diameter of a hole in galvanic metal
contact in the covering cabinet structure is 100 mm. Special attention must be paid
to the cooling air inlet and outlet gratings.
The best galvanic connection between the steel panels is achieved by welding them
together as no holes are necessary. If welding is not possible, the seams between
the panels are recommended to be left unpainted and equipped with special
conductive EMC strips to provide adequate galvanic connection. Usually, reliable
strips are made of flexible silicon mass covered with a metal mesh. The nontightened touch-contact of the metal surfaces is not sufficient, so a conductive
gasket between the surfaces is required. The maximum recommended distance
between assembly screws is 100 mm.
Sufficient high-frequency grounding network must be constructed in the cabinet to
avoid voltage differences and forming of high-impedance radiator structures. A good
high-frequency grounding is made with short flat copper braids for low inductance.
One-point high-frequency grounding cannot be used due to the long distances inside
the cabinet.
First environment EMC compliance (defined under Compliance with the European
EMC Directive in the chapter Technical data) of the drive requires 360° high
frequency grounding of the motor cable shields at their entries. The grounding can
be implemented by a knitted wire mesh shielding as shown below.
Cable ties
Bare cable shield
Knitted wire mesh
Lead-through plate
Cable
Cabinet bottom plate
Planning the cabinet assembly
33
360° high frequency grounding of the control cable shields is recommended at their
entries. The shields can be grounded by means of conductive shielding cushions
pressed against the cable shield from both directions:
Bare cable shield
Shielding cushion
(conductive)
Cabinet bottom plate
Cable grommet
Cable
Planning the cabinet assembly
34
Cabinet heaters
Use a cabinet heater if there is a risk of condensation in the cabinet. Use a cabinet
heater only when the drive is in use.
Although the primary function of the heater is to keep the air dry, it may also be
required for heating at low ambient temperatures. When placing the heater, follow
the instructions provided by its manufacturer. See also Internal cooling circuit
specifications for information on minimum coolant inlet temperature.
However, using a cabinet heater may also cause condensation if the ambient air
temperature rises above the coolant temperature. Therefore, it is recommended that
coolant circulation be stopped when the drive is not in use.
Planning the cabinet assembly
35
Mechanical installation
Contents of the package
The drive is delivered in a plywood box. The box contains:
• ACSM1-04Lx drive module, with factory-installed options
• one cable clamp plate for control cabling with screws
• screw-type terminal blocks to be attached to the headers on the JCU Control Unit
• two pipe connectors
• Quick Installation Guide.
Delivery check and drive module identification
Check that there are no signs of damage. Before attempting installation and
operation, check the information on the type designation label of the drive module to
verify that the unit is of the correct type. The label is located on the left-hand side of
the drive module.
Type code + options
(see page 25)
Ratings
Compliance markings
Serial number
The first digit of the serial number refers to the manufacturing plant. The 2nd and 3rd
digit indicate the year of manufacture, while the 4th and 5th digits indicate the week.
Digits 6 to 10 are a running integer starting every week at 00001.
Mechanical installation
36
Before installation
Check the installation site according to the requirements below. Refer to Dimension
drawings for frame details.
Requirements for the installation site
See Technical data for the allowed operation conditions of the drive.
The mounting plate the drive is to be mounted on must be of non-flammable material
and strong enough to carry the weight of the drive. The material below the drive
must be non-flammable.
Connection to an IT (ungrounded) or a corner-grounded power system
The internal EMC filter must be disconnected if the drive is to be supplied from a
corner-grounded power system or an IT power system, in other words an
ungrounded power system or a high resistance-grounded (over 30 ohms) power
system. As the procedure involves the removal of drive module covers, it is
convenient to perform it before the drive is installed.
See page 57 for directions.
Installation procedure
Mounting onto a solid mounting plate
1. Mark the locations for the four holes. The mounting points are shown in
Dimension drawings.
2. Fix the screws or bolts to the marked locations.
3. Position the drive onto the screws on the wall.
Note: Only lift the drive by its lifting holes.
4. Tighten the screws.
Mechanical installation
37
Push-through mounting
An installation kit is available for push-through mounting. The kit enables the
installation of the drive module in the wall of a cooling air duct so that part of the
module protrudes into the duct.
Keep the screws removed during the procedure – they will later be used to fasten
the push-through mounting parts.
Upper collar
Lifting lug
Lower collar
Lateral supports
Mechanical installation
38
1. Place the drive module on its back on a level surface.
2. Remove the grounding terminals (3 × 2 screws) as well as the three screws
nearby.
3. Remove the arrowed screws on each side of the module cover. (The middle row
of screws is used later to attach the lateral supports of the mounting kit.)
Mechanical installation
39
4. Attach the grounding terminals to the lower collar.
5. Slide the lower collar onto the drive module into the position shown. Fasten
through the holes (arrowed) using the three screws removed at step 2.
Mechanical installation
40
6. Slide the upper collar onto the drive module into the position shown.
7. Attach the lateral supports to the drive module and the collars. Each support is
fastened to the collars by four nuts, and to the drive module by three (out of six)
screws removed at step 3.
Mechanical installation
41
8. Join the collars by attaching lifting lugs on both sides. Attach further lifting lugs as
needed.
9. Use the measurements in the drawing below to cut the hole in the duct. Fasten
the module to the edges using screws.
WARNING: With the kit attached to the drive module, do not lift the module by one
lifting lug only. Always use at least two lifting lugs.
Note: The maximum allowed vibration for the drive has not been tested with pushthrough mounting. If the drive is exposed to vibration, it is recommended to fasten it
also by the standard mounting holes.
Mechanical installation
42
Hole dimensions for push-through mounting
Braking resistor installation
See the chapter Resistor braking on page 99.
Mechanical installation
43
Installing pipe connectors
1. Slide the nut and the cutting ring onto the liquid inlet pipe marked as coolant in.
Ensure that the ring’s thicker end is towards the nut.
2. Place the union body of the connector to the end of the pipe.
3. Tighten the connection but leave 2 to 3 mm of thread visible.
Overtightening may cause leaks.
2 mm
4. Repeat the steps for the outlet pipe.
1
2
3
Mechanical installation
44
Mechanical installation
45
Planning the electrical installation
What this chapter contains
This chapter contains the instructions that you must follow when selecting the motor,
cables, protections, cable routing and way of operation for the drive. If the
recommendations given by ABB are not followed, the drive may experience
problems that the warranty does not cover.
Note: The installation must always be designed and made according to applicable
local laws and regulations. ABB does not assume any liability whatsoever for any
installation which breaches the local laws and/or other regulations.
Motor selection and compatibility
Select the (3-phase AC induction) motor according to the rating table in the chapter
Technical data. The table lists the typical motor power for each drive type.
Protecting the motor insulation and bearings
The output of the drive comprises – regardless of output frequency – pulses of
approximately 1.35 times the equivalent mains network voltage with a very short rise
time. This is the case with all drives employing modern IGBT inverter technology.
The voltage of the pulses can be almost double at the motor terminals, depending on
the attenuation and reflection properties of the motor cable and the terminals. This in
turn can cause additional stress on the motor and motor cable insulation.
Modern variable speed drives with their fast rising voltage pulses and high switching
frequencies can generate current pulses that flow through the motor bearings, which
can gradually erode the bearing races and rolling elements.
The stress on motor insulation can be avoided by using optional ABB du/dt filters.
du/dt filters also reduce bearing currents.
To avoid damage to motor bearings, the cables must be selected and installed
according to the instructions given in the hardware manual. With a non-ABB motor,
optional du/dt filtering is also recommended. An insulated N-end (non-drive end)
bearing is recommended if the motor is random-wound, or if the motor power is
above 100 kW.
Planning the electrical installation
46
Permanent magnet synchronous motors
Only one permanent magnet synchronous motor can be connected to the inverter
output. It is recommended to install a safety switch between the permanent magnet
motor and the drive output in order to isolate the motor from the drive during
maintenance work on the drive.
Supply connection
Use a fixed connection to the AC power line.
WARNING! As the leakage current of the device typically exceeds 3.5 mA, a fixed
installation is required according to IEC 61800-5-1.
Supply disconnecting device
Install a hand-operated input disconnecting device (disconnecting means) between
the AC power source and the drive. The disconnecting device must be of a type that
can be locked to the open position for installation and maintenance work.
Europe
If the drive is used in an application which must meet the European Union Machinery
Directive according to standard EN 60204-1 Safety of Machinery, the disconnecting
device must be one of the following types:
• a switch-disconnector of utilization category AC-23B (EN 60947-3)
• a disconnector that has an auxiliary contact that in all cases causes switching
devices to break the load circuit before the opening of the main contacts of the
disconnector (EN 60947-3)
• a circuit breaker suitable for isolation in accordance with EN 60947-2.
Other regions
The disconnecting means must conform to the applicable safety regulations.
Thermal overload and short circuit protection
Thermal overload protection
The drive protects itself and the input and motor cables against thermal overload
when the cables are dimensioned according to the nominal current of the drive. No
additional thermal protection devices are needed.
WARNING! If the drive is connected to multiple motors, a separate thermal overload
switch or a circuit breaker must be used for protecting each cable and motor. These
devices may require a separate fuse to cut off the short-circuit current.
Planning the electrical installation
47
Protection against short circuit in motor cable
The drive protects the motor cable and the motor in a short-circuit situation when the
motor cable is dimensioned according to the nominal current of the drive. No
additional protection devices are needed.
Protection against short circuit in the supply cable or the drive
Protect the supply cable with fuses or circuit breakers. Fuse recommendations are
given in the chapter Technical data. When placed at the distribution board, standard
IEC gG fuses or UL type T fuses will protect the input cable in short-circuit situations,
restrict drive damage and prevent damage to adjoining equipment in case of a short
circuit inside the drive.
Operating time of the fuses and circuit breakers
Check that the operating time of the fuse is below 0.1 seconds. The operating
time depends on the type, the supply network impedance, and the cross-sectional
area, material and length of the supply cable. US fuses must be of the “non-time
delay” type.
Circuit breakers
The protective characteristics of circuit breakers depend on the supply voltage as
well as the type and construction of the breakers. There are also limitations
pertaining to the short-circuit capacity of the supply network. Your local ABB
representative can help you in selecting the breaker type when the supply network
characteristics are known.
Motor thermal protection
According to regulations, the motor must be protected against thermal overload and
the current must be switched off when overloading is detected. The drive includes a
motor thermal protection function that protects the motor and switches off the current
when necessary. Depending on a drive parameter value, the function either monitors
a calculated temperature value (based on a motor thermal model) or an actual
temperature indication given by motor temperature sensors. The user can tune the
thermal model further by feeding in additional motor and load data.
The ACSM1-04 has a dedicated connection for PTC or KTY84 sensors. See page
67 in this manual, and the appropriate Firmware Manual for the parameter settings
concerning motor thermal protection.
Ground fault protection
The drive is equipped with an internal ground fault protective function to protect the
unit against ground faults in the motor and the motor cable. This is not a personal
safety or a fire protection feature. The ground fault protective function can be
disabled with a parameter, refer to the appropriate Firmware Manual.
The internal mains filter includes capacitors connected between the main circuit and
the frame. These capacitors and long motor cables increase the ground leakage
current and may cause fault current circuit breakers to function.
Planning the electrical installation
48
Emergency stop devices
For safety reasons, install the emergency stop devices at each operator control
station and at other operating stations where emergency stop may be needed.
Note: Pressing the stop key on the control panel of the drive does not generate an
emergency stop of the motor or separate the drive from dangerous potential.
Planning the electrical installation
49
Safe Torque Off
The drive supports the Safe Torque Off (STO) function according to standards EN
61800-5-2; EN 954-1: 1997; EN/ISO 13849-1: 2006, IEC/EN 60204-1: 1997; EN
61508: 2002, EN 1037: 1996, and IEC 62061:2005. The function also corresponds
to an uncontrolled stop in accordance with category 0 of IEC 60204-1.
The Safe Torque Off function disables the control voltage of the power
semiconductors of the drive output stage, thus preventing the inverter from
generating the voltage required to rotate the motor (see diagram below). By using
this function, short-time operations (like cleaning) and/or maintenance work on nonelectrical parts of the machinery can be performed without switching off the power
supply to the drive.
ACSM1-04
X6:1
+24 V
X6:2
Safe Torque Off
connection on JCU
Activation
switch
X6:3
X6:4
UDC+
Control
circuit
Output stage
(1 phase shown)
U2/V2/W2
Notes:
UDC-
• The contacts of the activation switch must
open/close within 200 ms of each other.
• The maximum cable length between the drive
and the activation switch is 25 m (82 ft)
WARNING! The Safe Torque Off function does not disconnect the voltage of the
main and auxiliary circuits from the drive. Therefore maintenance work on electrical
parts of the drive or the motor can only be carried out after isolating the drive system
from the main supply.
Note: If a running drive is stopped by using the Safe Torque Off function, the drive
will cut off the motor supply voltage and the motor will coast to stop.
For further information on the function, refer to Safe Torque Off Function, Application
Guide (3AFE68929814 [English]).
Planning the electrical installation
50
Selecting the power cables
General rules
Dimension the supply (input power) and motor cables according to local
regulations.
• The cable must be able to carry the drive load current. See the chapter Technical
data for the rated currents.
• The cable must be rated for at least 70 °C (US: 75 °C [167 °F]) maximum
permissible temperature of conductor in continuous use.
• The conductivity of the PE conductor must be equal to that of a phase conductor
(ie. same cross-sectional area).
• 600 V AC cable is accepted for up to 500 V AC.
• Refer to the chapter Technical data for EMC requirements.
Symmetrical shielded motor cable must be used (see the figure below) to meet the
EMC requirements of the CE and C-tick marks.
A four-conductor system is allowed for input cabling, but shielded symmetrical cable
is recommended. Compared to a four-conductor system, the use of symmetrical
shielded cable reduces electromagnetic emission of the whole drive system as well
as motor bearing currents and wear.
The motor cable and its PE pigtail (twisted shield) should be kept as short as
possible in order to reduce electromagnetic emission.
Alternative power cable types
Power cable types that can be used with the drive are represented below.
Motor cable
(also recommended for supply cabling)
Symmetrical shielded cable: three phase conductors and
a concentric or otherwise symmetrically constructed PE
conductor, and a shield
PE conductor
and shield
Note: A separate PE conductor is required if the
conductivity of the cable shield is not sufficient for the
purpose.
Shield
Shield
PE
PE
Shield
Allowed for supply cabling
A four-conductor system: three phase conductors and
a protective conductor.
PE
Planning the electrical installation
PE
51
Motor cable shield
To function as a protective conductor, the shield must have the same cross-sectional
area as a phase conductor when they are made of the same metal.
To effectively suppress radiated and conducted radio-frequency emissions, the
shield conductivity must be at least 1/10 of the phase conductor conductivity. The
requirements are easily met with a copper or aluminium shield. The minimum
requirement of the motor cable shield of the drive is shown below. It consists of a
concentric layer of copper wires with an open helix of copper tape. The better and
tighter the shield, the lower the emission level and the bearing currents.
Copper wire screen
Insulation jacket
Helix of copper tape
Inner insulation
Cable core
Protecting the relay output contacts and attenuating disturbances in case
of inductive loads
Inductive loads (relays, contactors, motors) cause voltage transients when switched
off.
The relay output on the drive is protected with varistors (250 V) against overvoltage
peaks. In addition, it is highly recommended to equip inductive loads with noise
attenuating circuits (varistors, RC filters [AC] or diodes [DC]) in order to minimize the
electromagnetic emissions at switch-off. If not suppressed, the disturbances may
connect capacitively or inductively to other conductors in the control cable and form
a risk of malfunction in other parts of the system.
Planning the electrical installation
52
Install the protective component as close to the inductive load as possible, not at the
relay output.
Varistor
230 V AC
Relay output
RC filter
230 V AC
Relay output
Diode
Relay output
24 V DC
Residual current device (RCD) compatibility
ACSM1-04 drives are suitable to be used with residual current devices of Type B.
Other measures for protection in case of direct or indirect contact, such as
separation from the environment by double or reinforced insulation or isolation from
the supply system by a transformer, can also be applied.
Selecting the control cables
It is recommended that all control cables be shielded.
Double-shielded twisted pair cable is recommended for analogue signals. For pulse
encoder cabling, follow the instructions given by the encoder manufacturer. Use one
individually-shielded pair for each signal. Do not use a common return for different
analogue signals.
Planning the electrical installation
53
Double-shielded cable is the best alternative for low-voltage digital signals but
single-shielded twisted multipair cable (Figure b) is also usable.
a
Double-shielded twisted
pair cable
b
Single-shielded twisted
multipair cable
Run analogue and digital signals in separate cables.
Relay-controlled signals, providing their voltage does not exceed 48 V, can be run in
the same cables as digital input signals. It is recommended that the relay-controlled
signals be run as twisted pairs.
Never mix 24 V DC and 115/230 V AC signals in the same cable.
Relay cable
The cable type with braided metallic screen (e.g. ÖLFLEX by Lapp Kabel, Germany)
has been tested and approved by ABB.
Control panel cable
The cable connecting the control panel to the drive must not exceed 3 metres in
length. The cable type tested and approved by ABB is used in control panel option
kits.
Connection of a motor temperature sensor to the drive I/O
See Thermistor input (X4:8…9) on page 67.
Routing the cables
Route the motor cable away from other cable routes. Motor cables of several drives
can be run in parallel installed next to each other. It is recommended that the motor
cable, input power cable and control cables be installed on separate trays. Avoid
long parallel runs of motor cables with other cables in order to decrease
electromagnetic interference caused by the rapid changes in the drive output
voltage.
Where control cables must cross power cables make sure they are arranged at an
angle as near to 90 degrees as possible. Do not run extra cables through the drive.
The cable trays must have good electrical bonding to each other and to the
grounding electrodes. Aluminium tray systems can be used to improve local
equalizing of potential.
Planning the electrical installation
54
A diagram of the cable routing is below.
Supply cable
Drive
Motor cable
Supply cable
Control cables
min 300 mm (12”)
min 200 mm (20”)
90°
min 500 mm (20”)
90°
90°
Motor cable
Braking resistor cable
min 500 mm (20”)
Control cable ducts
24 V 230 V
Not allowed unless the 24 V
cable is insulated for 230 V or
insulated with an insulation
sleeving for 230 V.
Planning the electrical installation
24 V
230 V
Lead 24 V and 230 V control
cables in separate ducts inside
the cabinet.
55
Electrical installation
What this chapter contains
This chapter describes the electrical installation procedure of the drive.
WARNING! The work described in this chapter may only be carried out by a qualified
electrician. Follow the Safety instructions on the first pages of this manual. Ignoring
the safety instructions can cause injury or death.
Make sure that the drive is disconnected from the supply (input power) during
installation. If the drive is already connected to the supply, wait for 5 minutes
after disconnecting the input power.
Electrical installation
56
Checking the insulation of the assembly
Drive
Do not make any voltage tolerance or insulation resistance tests (e.g. hi-pot or
megger) on any part of the drive as testing can damage the drive. Every drive has
been tested for insulation between the main circuit and the chassis at the factory.
Also, there are voltage-limiting circuits inside the drive which cut down the testing
voltage automatically.
Supply cable
Check the insulation of the supply (input) cable according to local regulations before
connecting to the drive.
Motor and motor cable
Check the insulation of the motor and motor cable as follows:
1. Check that the motor cable is connected to the motor, and disconnected from the
drive output terminals U2, V2 and W2.
2. Measure the insulation resistance between each phase conductor and the
Protective Earth conductor using a measuring voltage of 500 V DC. The
insulation resistance of an ABB motor must exceed 10 Mohm (reference value at
25 °C or 77 °F). For the insulation resistance of other motors, please consult the
manufacturer’s instructions. Note: Moisture inside the motor casing will reduce
the insulation resistance. If moisture is suspected, dry the motor and repeat the
measurement.
U1
V1
ohm
W1
M
3~
PE
Braking resistor assembly
Check the insulation of the braking resistor assembly (if present) as follows:
1. Check that the resistor cable is connected to the resistor, and disconnected from
the drive output terminals R+ and R-.
2. At the drive end, connect the R+ and R- conductors of the resistor cable together.
Measure the insulation resistance between the combined conductors and the PE
conductor by using a measuring voltage of 1 kV DC. The insulation resistance
must be higher than 1 Mohm.
R+
R-
ohm
PE
Electrical installation
57
Connection to an IT (ungrounded) power system
WARNING! Before connecting the drive to an IT power system [an ungrounded
power system or a high resistance-grounded (over 30 ohms) power system] or a
corner-grounded power system, the internal EMC filtering of the drive must be
disconnected.
If a drive with its internal EMC filtering connected is installed on an IT system or a
corner-grounded system, the drive system will be connected to earth potential
through the EMC filter capacitors of the drive. This may cause danger or damage the
unit.
Disconnection of internal EMC filtering
1. Place the drive module on its back on a level surface.
2. Release the two screws holding the JCU control unit.
Electrical installation
58
3. Lift the left-hand edge of the JCU control unit until the connector beneath
disengages, then move JCU to the left to remove it.
2
1
4. Disconnect the two cables coming to the mounting base of the JCU.
Electrical installation
59
5. Remove the screw in the middle of the air outlet grating.
6. Remove the screws holding the drive module cover (8 on each side). Lift off the
cover, bottom edge first.
Electrical installation
60
7. Undo the screw connecting the grounding wire to a standoff right next to the EMC
filter. Cut off the lug. Discard the screw and the tubular insulator.
EMC filter
Standoff covered by
insulator
8. Insulate the end of the grounding wire reliably with insulating tape, tube sleeving
and a cable tie.
Electrical installation
61
9. Near the top of the module, remove the grounding clip (held by two screws) that
connects the varistor board to the module cover.
10. Refit the module cover (top edge first) and fasten using the screws removed at
step 6. (The screw in the middle of the air outlet grating that was removed at
step 5 is no longer needed.)
11. Reconnect the cables that were disconnected at step 4.
12. Refit the JCU control unit.
Electrical installation
62
Power cable connection
Power cable connection diagram
ACSM1-04
PE
1)
U1
INPUT
V1 W1
R-
UDC+ UDCR+
OUTPUT
U2 V2 W2
2)
(PE) PE (PE)
U1
For alternatives, see
Planning the electrical
installation: Supply
disconnecting device.
Optional braking
resistor (360°
grounding required)
L1
L2
V1
3
~
3)
W1
PE
Motor
L3
Notes:
– If shielded supply (input) cable is used, and the conductivity of the shield is less than 50% of the conductivity of a phase conductor, use a cable with a ground conductor (1) or a separate PE cable (2). With
shielded cable, 360° grounding at cable entry is recommended.
– For motor cabling, use a separate ground cable (3) if the conductivity of the cable shield is less than 50%
of the conductivity of a phase conductor and the cable has no symmetrical ground conductors. See also
section Selecting the power cables on page 50.
If there is a symmetrically-constructed ground conductor in the motor cable in addition to the conductive
shield, connect it to the ground connectors at both the drive and motor ends. Do not use an asymmetrically-constructed motor cable.
Electrical installation
63
Procedure
Follow the procedure below to connect the cables. See the following pages for
drawings detailing the installation and the correct tightening torques.
1. Remove the plastic shroud covering the main terminals. Remove the two screws
at the sides, then release the two clips on the front edge as shown.
2. Connect the twisted shields of the power cables to the grounding terminals of the
drive module.
3. Connect the phase conductors of the supply cable to the U1, V1 and W1
terminals, and the phase conductors of the motor cable to the U2, V2 and W2
terminals. The recommended stripping length is 28 mm (1.1”).
4. Secure the cables mechanically outside the drive module.
5. Cut suitable slots on the edge of the plastic shroud to accommodate the power
cables. Refit the shroud.
6. Ground the other end of the supply cable shield or PE conductor at the
distribution board.
Electrical installation
64
Cable lug installation (16 to 70 mm2 [AWG6 to AWG2/0] cables)
U1
V1
W1
R-
UDC+
R+ UDC-
U2
V2
W2
30…44 N·m
(22…32 lbf·ft)
Insulate the ends of the
cable lugs with tape or
shrink tube
PE
8 N·m (5.9 lbf·ft)
Input power cable
Electrical installation
Motor cable
65
Screw terminal installation (95 to 240 mm2 [AWG3/0 to AWG500] cables)
U1
V1
W1
R-
UDC+
R+ UDC-
U2
V2
W2
a
b
PE
a. Connect the cable to the terminal. Tighten the
Allen screw to 20…40 N·m (15…30 lbf·ft).
8 N·m (5.9 lbf·ft)
b. Connect the terminal to the drive. Tighten to
30…44 N·m (22…32 lbf·ft).
WARNING! If the wire size is less than
95 mm2 (3/0 AWG), a crimp lug must
be used. A cable of wire size less than
95 mm2 (3/0 AWG) connected to this
terminal will loosen and may damage
the drive.
Input power cable
Motor cable
Grounding the motor cable shield at the motor end
For minimum radio frequency interference, ground the cable shield 360 degrees at
the lead-through of the motor terminal box
360 degrees grounding
Conductive gaskets
or ground the cable by twisting the shield so that the flattened shield is wider than
1/5 of its length.
b > 1/5 · a
a
b
Electrical installation
66
Connecting the control cables
Control connections to the JCU Control Unit
X1
Notes:
[Default setting]
*Total maximum current: 200 mA
**Default assignment with ACSM1
Motion Control Program
The wiring shown is for demonstrative
purposes only. Further information of
the usage of the connectors and
jumpers are given in the text; see also
the chapter Technical data.
Wire sizes and tightening torques:
X2: 0.5 … 2.5 mm2 (24…12 AWG).
Torque: 0.5 N·m (5 lbf·in)
X3, X4, X5, X6:
0.5 … 1.5 mm2 (28…14 AWG).
Torque: 0.3 N·m (3 lbf·in)
Order of terminal headers and
jumpers
X1 (2-pole)
X2 (3-pole)
X3 (4 × 4-pole,
1 × 3-pole)
X4 (1 × 7-pole,
1 × 2-pole,
1 × 3-pole)
J1
J2
J3
X5 (3-pole)
X6 (4-pole,
orange)
Electrical installation
External power input
24 V DC, 1.6 A
+24VI
GND
1
2
Relay output
250 V AC / 30 V DC
2A
NO
COM
NC
1
2
3
X2
+24 V DC*
Digital I/O ground
Digital input 1 [Stop/Start]
Digital input 2 [EXT1/EXT2]
+24 V DC*
Digital I/O ground
Digital input 3 [Fault reset]
Digital input 4 [Positioning start]**
+24 V DC*
Digital I/O ground
Digital input 5 [Position ref. set 1/2]**
Digital input 6 [Homing start]**
+24 V DC*
Digital I/O ground
Digital input/output 1 [Ready]
Digital input/output 2 [Running]
+24 V DC*
Digital I/O ground
Digital input/output 3 [Fault]
+24VD
DGND
DI1
DI2
+24VD
DGND
DI3
DI4
+24VD
DGND
DI5
DI6
+24VD
DGND
DIO1
DIO2
+24VD
DGND
DIO3
Reference voltage (+)
Reference voltage (–)
Ground
Analogue input 1 (Current or voltage, selectable
by jumper J1) [Speed reference]
Analogue input 2 (Current or voltage, selectable
by jumper J2) [Torque reference]
AI1 current/voltage selection
AI2 current/voltage selection
Thermistor input
Ground
Analogue output 1 (current) [Output current]
Analogue output 2 (voltage) [Actual speed]
Ground
+VREF
-VREF
AGND
AI1+
AI1AI2+
AI2-
TH
AGND
AO1 (I)
AO2 (U)
AGND
Drive-to-drive link termination
Drive-to-drive link.
B
A
BGND
Safe Torque Off. Both circuits must be closed for
the drive to start.
OUT1
OUT2
IN1
IN2
Control panel connection
Memory unit connection
X3
1
2
3
4
5
6
7
8
9
10
11
12
13
14
15
16
17
18
19
X4
1
2
3
4
5
6
7
J1
J2
8
9
10
11
12
X5
J3
1
2
3
X6
1
2
3
4
X7
X205
T
67
Jumpers
J1 – Determines whether Analogue input AI1 is used as a current or voltage input.
Current
Voltage
7
AI1
AI2
8
7
AI1
AI2
8
J2 – Determines whether Analogue input AI2 is used as a current or voltage input.
Current
Voltage
7
AI1
AI2
8
7
AI1
AI2
8
J3 – Drive-to-drive link termination. Must be set to the ON position when the drive is
the last unit on the link.
Termination ON
Termination OFF
T
T
External power supply for the JCU Control Unit (X1)
External +24 V (minimum 1.6 A) power supply for the JCU Control Unit can be
connected to terminal block X1. Using an external supply is recommended if
• the application requires fast start after connecting the drive to the main supply
• fieldbus communication is required when the input power supply is disconnected.
Thermistor input (X4:8…9)
Motor temperature can be measured using PTC or KTY84 sensors connected to the
thermistor input.
One PTC or KTY84 sensor
Three PTC sensors
TH
TH
Motor
Motor
AGND
AGND
T
10 nF
T
T
T
10 nF
1)
1) Use capacitor or leave unconnected.
WARNING! As the thermistor input on the JCU Control Unit is not insulated
according to IEC 60664, the connection of the motor temperature sensor requires
Electrical installation
68
double or reinforced insulation between motor live parts and the sensor. If the
assembly does not fulfil the requirement,
• the I/O board terminals must be protected against contact and must not be
connected to other equipment
or
• the temperature sensor must be isolated from the I/O terminals.
Drive-to-drive link (X5)
The drive-to-drive link is a daisy-chained RS-485 transmission line that allows basic
master/follower communication with one master drive and multiple followers.
Termination activation jumper J3 (see section Jumpers above) next to this terminal
block must be set to the ON position on the drives at the ends of the drive-to-drive
link. On intermediate drives, the jumper must be set to the OFF position.
Shielded twisted-pair cable (~100 ohm, e.g. PROFIBUS-compatible cable) must be
used for the wiring. For best immunity, high quality cable is recommended. The cable
should be kept as short as possible; the maximum length of the link is 50 metres
(164 ft). Unnecessary loops and running the cable near power cables (such as motor
cables) must be avoided. The cable shields are to be grounded to the control cable
clamp plate on the drive as shown on page 70.
Termination ON
JCU
Drive 1
Termination OFF
JCU
Drive 2
BGND 3
A 2
X5:D2D
J3
...
B 1
T
BGND 3
A 2
X5:D2D
J3
J3
X5:D2D
B 1
T
BGND 3
A 2
B 1
T
The following diagram shows the wiring of the drive-to-drive link.
Termination ON
JCU
Drive n
Safe Torque Off (X6)
For the drive to start, both connections (OUT1 to IN1, and OUT2 to IN2) must be
closed. This is implemented by means of a safety switch and related wiring. See
page 49.
By default, the terminal block has jumpers to close the circuit. Remove the jumpers
before connecting an external Safe Torque Off circuitry to the drive.
Electrical installation
69
More information is available in the Safe Torque Off Function (STO) Application
Guide (3AFE68929814 [English]). For related parameter settings, see the
appropriate Firmware Manual.
Electrical installation
70
Control cable grounding
The shields of all control cables connected to the JCU Control Unit must be
grounded at the control cable clamp plate. Use three M4 screws to fasten the plate
as shown below left. The plate can be fitted either at the top or bottom of the JCU.
The shields should be continuous as close to the terminals of the JCU as possible.
Only remove the outer jacket of the cable at the cable clamp so that the clamp
presses on the bare shield. At the terminal block, use shrink tubing or insulating tape
to contain any stray strands. The shield (especially in case of multiple shields) can
also be terminated with a lug and fastened with a screw at the clamp plate. Leave
the other end of the shield unconnected or ground it indirectly via a few nanofarads
high-frequency capacitor (e.g. 3.3 nF / 630 V). The shield can also be grounded
directly at both ends if they are in the same ground line with no significant voltage
drop between the end points.
Keep any signal wire pairs twisted as close to the terminals as possible. Twisting the
wire with its return wire reduces disturbances caused by inductive coupling.
Mounting the clamp plate
Use shrink tubing or
tape to contain
strands
0.7 N·m
(6.2 lbf·in)
Remove outer jacket of
cable at clamp to
expose cable shield.
Tighten to 1.5 N·m
(13 lbf·in)
Electrical installation
71
Installation of options
Options such as fieldbus adapters, I/O extensions and encoder interfaces are
inserted into slots on the JCU Control Unit. See page 24 for the available slots; see
the appropriate option manual for specific installation and wiring instructions.
Electrical installation
72
Electrical installation
73
Installation checklist
Checklist
Check the mechanical and electrical installation of the drive before start-up. Go
through the checklist below together with another person. Read the Safety
instructions on the first pages of this manual before you work on the unit.
Check
MECHANICAL INSTALLATION
The ambient operating conditions are within the allowed limits. (See Mechanical installation,
Technical data: Ratings, Ambient conditions.)
The unit is fastened properly to the cabinet. (See Planning the cabinet assembly and
Mechanical installation.)
The motor and the driven equipment are ready for start. (See Planning the electrical
installation, Technical data: Motor connection.)
ELECTRICAL INSTALLATION (See Planning the electrical installation, Electrical installation.)
The internal EMC filter is disconnected if the drive is connected to an IT (ungrounded) or
corner-grounded supply network.
The capacitors are reformed if stored over one year (see ACS800 Capacitor Reforming
Guide [64059629, English])).
The drive is grounded properly.
The supply (input power) voltage matches the drive nominal input voltage.
The supply (input power) is connected to U1/V1/W1 (UDC+/UDC- in case of a DC supply)
and the terminals are tightened to specified torque.
Appropriate supply (input power) fuses and disconnector are installed.
The motor is connected to U2/V2/W2, and the terminals are tightened to specified torque.
The braking resistor (if present) is connected to R+/R-, and the terminals are tightened to
specified torque.
The motor cable (and braking resistor cable, if present) is routed away from other cables.
There are no power factor compensation capacitors in the motor cable.
The external control connections to the JCU Control Unit are OK.
There are no tools, foreign objects or dust from drilling inside the drive, and no discarded
installation material has been left in the cabinet.
Installation checklist
74
Check
The supply (input power) voltage cannot be applied to the output of the drive through a
bypass connection.
Motor connection box and other covers are in place.
COOLING CIRCUIT (See The internal cooling circuit)
The cooling circuit joints are tight.
Bleed and drain valves (if any) in the cooling circuit are closed.
The inlet and outlet valves (if any) to each power module are open.
The internal cooling circuit is filled up.
The coolant is able to flow freely through the drive system.
Coolant temperature, flow rate and pressure are within allowed limits. See also Internal
cooling circuit specifications.
Installation checklist
75
Maintenance
What this chapter contains
This chapter contains preventive maintenance instructions.
Safety
WARNING! Read the Safety instructions on the first pages of this manual before
performing any maintenance on the equipment. Ignoring the safety instructions can
cause injury or death.
Maintenance intervals
If installed in an appropriate environment, the drive requires very little maintenance.
This table lists the routine maintenance intervals recommended by ABB.
Interval
Maintenance
Instruction
Regularly
Inspect and purify
the pipeline or
change the coolant
in the internal
cooling circuit
See manufacturer’s instructions
on the cooling unit.
Every year of storage
Capacitor
reforming
See Capacitors on page 76.
Every 6 years if the ambient temperature
does not exceed 40 °C (104 °F).
Every 3 years if the ambient temperature
is higher than 40 °C (104 °F).
Cooling fan change
See Cooling fan on page 76.
Every 10 years
Capacitor change
See Capacitors on page 76.
Note: The coolant and external piping may require routine maintenance such as
adding inhibitor.
Maintenance
76
Cooling fan
The actual lifespan of the cooling fan depends on the drive usage and ambient
temperature. Fan failure can be predicted by the increasing noise from fan bearings
and the gradual rise in the heatsink temperature in spite of heatsink cleaning. If the
drive is operated in a critical part of a process, fan replacement is recommended
once these symptoms start appearing. Replacement fans are available from ABB.
Do not use other than ABB-specified spare parts.
Fan replacement
To remove the fan, undo the fixing screws. Disconnect the cable. Install the new fan
in reverse order.
1
2
Bottom view
1
Capacitors
Reforming
The capacitors must be reformed if the drive has been stored for a year or more. See
page 35 for information on finding out the manufacturing date. For information on
reforming the capacitors, (see ACS800 Capacitor Reforming Guide [64059629,
English])).
Changing
The drive intermediate circuit employs several electrolytic capacitors. Their lifespan
is from 45 000 to 90 000 hours depending on drive loading and ambient
temperature. Capacitor life can be prolonged by lowering the ambient temperature.
It is not possible to predict a capacitor failure. Capacitor failure is usually followed by
a mains fuse failure or a fault trip. Contact ABB if capacitor failure is suspected.
Replacements are available from ABB. Do not use other than ABB specified spare
parts.
Maintenance
77
Other maintenance actions
Transferring the memory unit to a new drive module
When a drive module is replaced, the parameter settings can be retained by
transferring the memory unit from the defective drive module to the new module.
WARNING! Do not remove or insert a memory unit when the drive module is
powered.
After power-up, the drive will scan the memory unit. If a different application program
or different parameter settings are detected, they are copied to the drive. This may
take a few moments; the LED display will read “L” while copying is in progress.
The 7-segment display on the JCU Control Unit
The following table describes the indications given by the 7-segment display on the
JCU Control Unit. Multi-character indications are displayed as repeated sequences
of characters.
Display
L
Meaning
Loading application program or data from the memory unit. This is the normal
display immediately after powering up the drive.
Normal operation – drive stopped.
(Rotating display) Normal operation – drive running.
“E” followed by
System error.
four-digit error code 9001, 9002 = Control unit hardware failure.
9003 = No memory unit connected.
9004 = Memory unit failure.
9007, 9008 = Loading of firmware from memory unit failed.
9009…9018 = Internal error.
9019 = Contents of memory unit corrupted.
9020 = Internal error.
9021 = Program versions of memory unit and drive incompatible.
9102…9108 = Internal error.
“A” followed by
Alarm generated by the application program. For error codes, see the Firmware
four-digit error code Manual.
“F” followed by
Fault generated by the application program. For error codes, see the Firmware
four-digit error code Manual.
Maintenance
78
Maintenance
79
The internal cooling circuit
General
This chapter describes the internal cooling circuit of the ACSM1-04Lx drive module
(frame E) and gives examples of arranging heat transfer out of the system. Use the
information in this chapter as guidelines for building a liquid cooling system.
While the liquid cooling system deals with a majority of the heat generated, some
components are air-cooled. For more information on cooling arrangements as a
whole, see Cooling arrangements on page 29.
Note: The cooling systems described below are examples. It is possible to equip the
system with a different kind of cooling unit.
Internal cooling system diagram
The internal cooling system
ACSM1-04Lx
Heatsink
Coolant OUT
a
b
c
d
Coolant IN
Each drive module can be isolated from the main cooling circuit by closing the inlet
(a) and outlet valves (b). Each drive module is also equipped with a drain valve (c)
that can be used to drain the drive module. It is recommended to install a leak
detector (d) under the drive cabinet.
The coolant enters and exits the module through the bottom. Inside the module, the
coolant runs through the heatsink.
The internal cooling circuit
80
Connection to a cooling unit
General recommendations
• Equip the system with an expansion tank to damp pressure rise due to volume
changes when the coolant temperature varies. In pressurized systems, keep the
pressure within the limits specified in Pressure limits on page 88. Install a
pressure regulator to ensure that the maximum permissible operating pressure is
not exceeded.
• Install a bleed valve at the highest point of the cooling circuit.
• Use pipes of at least 1 1/2” in diameter for the main pipes in a system with several
ACSM1 drives connected in parallel.
• Install a leak detector under the drive or drive cabinet to detect leaks and
condensation.
Coolant temperature control
The temperature of the coolant in the internal cooling circuit must be kept within the
limits specified in Temperature limits on page 88. Note that the minimum coolant
temperature is dependent on ambient temperature and relative humidity.
The following diagram shows an example of coolant temperature control in a system
with a chiller cooling unit. In this example an auxiliary drive controls the pump (h) and
receives information from the sensors (f and l). The auxiliary drive may be an
ACSM1 or any other drive with sufficient capacity for controlling the pump and
handling sensor information.
Cooling unit
ACSM1-04Lx
ACSM1-04Lx
b
Internal circuit
c
i
g
d
f2
a
External circuit
f1
Heat
exchanger
k
h
j
e
a.
b.
c.
d.
Inlet valve
Outlet valve
Drain valve
Bleed valve
l
Auxiliary
drive
e. Sewer system or drain collector
f. Temperature sensors
g. Expansion tank
h. Circulation pump
i.
j.
k.
l.
Compressor
Expansion valve
Condenser and fan
Leak detector
The auxiliary drive sets the pump motor speed to a preprogrammed value to achieve
an ideal flow rate.
The purpose of the temperature sensor f1 is to measure if the coolant temperature is
within the limits given in Temperature limits before the coolant enters the drives, so
that no condensation forms inside the cabinet when the drives are not running.
The internal cooling circuit
81
The primary function of the temperature sensor f2 is to ensure an adequate flow
rate. A rise in the coolant temperature above a set limit indicates that there is an
obstruction in the pipes. The limit depends on how much losses the system has and
what the flow rate is. The obstruction can be temporarily compensated for by
increasing pump motor speed (and thus flow rate) but only up to the maximum given
in Flow rate. The sensor f2 can be replaced or supplemented with pressure sensors
or flow sensors.
The auxiliary drive is connected to the ACSM1 drives. If the drives are shut down for
a certain period of time, the circulation pump stops running. If the coolant
temperature is above the maximum at f2 or below the minimum at f1, the auxiliary
drive gives a fault indication, and if necessary, system power is reduced or the
system shuts down. Also, if the leak detector detects moisture, the system shuts
down.
The internal cooling circuit
82
The following diagram shows an example of coolant temperature control using the
three-way valve in the external cooling circuit. Part of the infeed coolant flow is
directed into the return pipe through a three-way valve without letting it circulate in
heat exchanger if the coolant in the internal circuit is too cold.
Cooling unit
ACSM1-04Lx
ACSM1-04Lx
Internal circuit
External circuit
i
TC
b
f
d
Return
e
a
Heat
exchanger
g
c
Infeed
h
a.
b.
c.
d.
Inlet valve
Outlet valve
Drain valve
Bleed valve
The internal cooling circuit
Bypass valve
e. Throttle valve
i. Temperature control
f. Expansion tank
g. Circulation pump
h. Sewer system or drain collector
83
Technical data
What this chapter contains
This chapter contains the technical specifications of the drive, e.g. the ratings, sizes
and technical requirements, and provisions for fulfilling the requirements for CE and
other markings.
Ratings
The nominal ratings for the ACSM1-04 with 50 Hz and 60 Hz supplies are given
below.
Drive type
Frame
ACSM1-04Lx… size
-110A-4
-135A-4
-175A-4
-210A-4
-260A-4
E
E
E
E
E
Input ratings
I1N
I2N
A
107
131
171
205
254
A
110
135
175
210
260*
Output ratings
I2cont4k I2cont8k I2max
A
A
A
110
75
165
135
90
202
175
115
282
210
135
326
260*
165
351
PN
kW
55
75
90
110
160
HP
75
100
125
150
200
PDM-00425726
I1N
Nominal input current (rms) at 40 °C (104 °F).
I2N
Nominal continuous output current at 40 °C (104 °F).
I2contxk Continuous output current at a switching frequency of 4 or 8 kHz at 40 °C (104 °F).
Typical motor power.
PN
Maximum short-time output current. See section Cyclic loads below.
I2max
*
I2cont2K and I2cont3k for type ACSM1-04Lx-260A are 304 A.
To achieve the rated motor power given in the table, the rated current of the drive must be higher than
or equal to the rated motor current.
The DriveSize dimensioning tool available from ABB is recommended for selecting the drive, motor
and gear combination for the required motion profile.
Power loss and cooling characteristics
Drive type
Frame
ACSM1-04Lx… size
-110A-4
-135A-4
-175A-4
-210A-4
-260A-4
E
E
E
E
E
Power loss
liquid
air
W
825
1240
1540
1925
2450
W
235
350
510
645
865
Air flow
m3/h
270
PDM-00425726
Technical data
84
Derating
The continuous output currents stated above must be derated if any of the following conditions apply:
• the ambient temperature exceeds +40 °C (+104°F)
• the coolant temperature exceeds +42 °C (+108°F)
• a mixture of water and glycol is used as the coolant
• the AC supply voltage is higher than 400 V
• the drive is installed higher than 1000 m above sea level.
Note: The final derating factor is a multiplication of all applicable derating factors.
Temperature derating
Ambient temperature derating and coolant temperature derating are not cumulative. Only the worse
derating value of the two applies. For example, if both the ambient and coolant temperature are +50 °C,
the derating factors are approximately 0.85 and 0.92, respectively. Since only the worse derating value
applies, the temperature derating factor is 0.85 in this case.
If the ambient temperature is +40…55 °C (+104…131 °F), the output current is derated linearly as
follows:
Derating factor
1.00
0.70
+40 °C
+104 °F
+55 °C
+131 °F
Ambient temperature
If the coolant temperature is +42…55 °C (+108…131 °F), the output current is derated linearly as
follows:
Derating factor
1.00
0.87
+42 °C
+108 °F
Technical data
+55 °C
+131 °F
Coolant temperature
85
Glycol concentration derating
For every three percent of glycol in the coolant, the output current is derated by 1%.
Derating factor
1.00
0.80
0%
60%
Glycol concentration
AC supply voltage derating
With AC supply voltages above 400 V AC, the output current is derated linearly as follows:
Derating factor
1.00
0.86
400
480
AC supply voltage [V]
Altitude derating
At altitudes from 1000 to 4000 m (3300 to 13123 ft) above sea level, the derating is 1% for every 100 m
(328 ft). For a more accurate derating, use the DriveSize PC tool.
Note: If the installation site is higher than 2000 m (6600 ft) above sea level, connection of the drive to
an ungrounded (IT) or corner-grounded delta network is not allowed.
Technical data
86
Cyclic loads
If the load cycle is shorter than 10 seconds, the thermal time constant of the heatsink (approximately 30
seconds) can be ignored, and the following simple procedure can be applied to find out whether the
drive can handle the cycle.
1. Determine the rms value (I2rms) of the output current over the whole load cycle.
2. Determine the maximum instantaneous rms value (I2peak) of the output current during the load cycle.
3. Determine the point (I2rms, I2peak) on the graph below.
If the point falls within the region bordered by a solid line, the load cycle is safe. For I2contxk and I2max,
use the ratings stated for the drive type and switching frequency used.
If the point falls within the shaded area, a more detailed study is required.
I2peak
I2max
I2contxk
0.75×I2contxk I2contxk
I2rms
The above procedure can also be applied to longer load cycles by dividing the cycle into subcycles no
longer than 10 seconds. If any of the subcycles fail the test, a more detailed study is required.
The DriveSize dimensioning tool available from ABB is recommended for more detailed dimensioning.
Technical data
87
Dimensions, weights, noise
See also the chapter Dimension drawings.
Height
Frame
size
E
mm (in.)
700 (27.56)
Depth
(without options
Width
installed on
JCU)
mm (in.)
mm (in.)
313.5 (12.34)
398 (15.67)
Depth
(with options
installed on
JCU)
mm (in.)
415 (16.34)
Weight
Noise
kg (lbs)
67 (148)
dB
65
PDM-00425726
Note: Some of the I/O options require some 50 mm (2”) of additional depth for wiring.
Supply cable fuses
Fuses for short circuit protection of the supply cable are listed below. The fuses also
protect the adjoining equipment of the drive in case of a short circuit. Check that the
operating time of the fuse is below 0.1 seconds. The operating time depends on
the supply network impedance and the cross-sectional area and length of the supply
cable. If the operating time of 0.1 seconds is exceeded, use a fuse of the aR type
instead. See also chapter Planning the electrical installation.
Note: Fuses with a higher current rating must not be used.
IEC fuse (gG)
IEC fuse (aR)
Cross-sectional area of cable
Input
Drive type
Rated
Rated
current
Voltage
Voltage UL
ACSM1-04xx…
AWG/MCM
current
Class current
mm2
(A)
(V)
(V)
Class
(A)
(A)
-110A-4
107
160
500
gG
200
690
aR
-135A-4
131
200
500
gG
315
690
aR
-175A-4
171
200
500
gG
400
690
aR 95…240 3/0 AWG…500 MCM
-210A-4
205
250
500
gG
400
690
aR
-260A-4
254
315
500
gG
550
690
aR
PDM-00425726
Input
Drive type
Rated
current
ACSM1-04xx…
current
(A)
(A)
-110A-4
107
150
-135A-4
131
200
-175A-4
171
225
-210A-4
205
300
-260A-4
254
350
UL fuse
DC fuse
Voltage UL
(V)
Class
600
600
600
600
600
T
T
T
T
T
Cross-sectional area of cable
Rated current
(A)
Class
200
315
315
400
550
aR
aR
aR
aR
aR
mm2
AWG/MCM
95…240 3/0 AWG…500 MCM
PDM-00425726
Technical data
88
Internal cooling circuit specifications
Temperature limits
Ambient temperature: See Ambient conditions.
Minimum coolant inlet temperature: Condensation is not allowed. The minimum
coolant temperature to avoid condensation (at an atmospheric pressure of 1 bar) is
shown below as a function of the relative humidity (φ) and the ambient
temperature (Tair).
Tair
Min. Tcoolant (°C)
(°C)
φ = 95%
φ = 80%
φ = 65%
φ = 50%
φ = 40%
5
4.3
1.9
-0.9
-4.5
-7.4
10
9.2
6.7
3.7
-0.1
-3.0
15
14.2
11.5
8.4
4.6
1.5
20
19.2
16.5
13.2
9.4
6.0
25
24.1
21.4
17.9
13.8
10.5
30
29.1
26.2
22.7
18.4
15.0
35
34.1
31.1
27.4
23.0
19.4
40
39.0
35.9
32.2
27.6
23.8
45
44.0
40.8
36.8
32.1
28.2
50
49.0
45.6
41.6
36.7
32.8
55
53.9
50.4
46.3
42.2
37.1
= Not allowed as standard but the coolant temperature must be 5 °C or
above. Consult an ABB representative if operation below coolant
temperature 5 °C is required.
Example:
At an ambient temperature of 45 °C and relative humidity of 65% the
coolant temperature may not be below +36.8 °C
Maximum coolant inlet temperature
• 42 °C when the drive output capacity is not derated
• 42 °C …55 °C when the drive output capacity is derated. See Derating.
Pressure limits
• 0…1000 kPa
• If operation above 1000 kPa is required, consult ABB.
Technical data
89
Flow rate
The flow rate must be 7…12 l/min. Exceeding the maximum flow rate of 12 l/min may
cause erosion corrosion.
Pressure loss: Shown below as a function of flow rate and glycol concentration in
the coolant.
Glycol%
(weight)
Δp (kPa)
7 l/min
8 l/min
9 l/min
10 l/min
11 l/min
12 l/min
0%
103
134
170
210
254
302
10%
109
142
180
222
269
321
20%
115
151
191
235
285
339
30%
121
159
201
248
300
357
40%
128
167
211
260
315
375
50%
134
175
221
273
330
393
60%
140
183
231
286
346
411
Coolant quality
Cooling has been tested with water and a water-propylene glycol (CAS Number: 5755-6) solution. If you use another coolant, contact ABB.
Note: Do not use sea water for cooling.
Industrial water that fulfills the following requirements may be used.
pH value
5…9.5
Chloride
< 250 mg/l
Sulphate
< 200 mg/l
Total dissolved solids
< 200 mg/l, no deposits are allowed at
the temperature of +57 °C
Total hardness Ca2+ + Mg2+
< 2.5 mmol/l
Conductivity
< 2500 µS/cm
Maximum solid particle size
2 mm
Deposits in the pipes should be avoided. Deposits may be caused by organic
impurities (bacteria and algae) and other impurities in the coolant. This should be
taken into account when designing the system. If necessary, arrange a method for
cleaning the pipes.
Technical data
90
Glycol concentration
The maximum glycol concentration in the coolant is 60%.
The graph below shows the required glycol concentration in weight percentage
according to ambient/storage temperature T.
Glycol concentration% (weight)
80
60
40
20
0
T (°C)
-50
-40
-30
-20
-10
0
+5
Note: A water-ethylene glycol solution may also be used. Ethylene glycol is not
appropriate for drain disposal.
Materials
The internal cooling circuit is made of stainless steel (DIN 1.4401 (AISI 316) / DIN
1.4404 (AISI 316L)).
Corrosion
Stainless steel is an inert material and thus appropriate for different kinds of cooling
systems. Other materials have to be chosen depending on the liquids used to avoid
corrosion.
Technical data
91
AC input (supply) connection
Voltage (U1)
Frequency
Network type
Imbalance
Fundamental power factor
(cos phi1)
Terminals
380…480 V AC +10%/-15%, 3-phase
50…60 Hz ±5%
Grounded (TN, TT) or ungrounded (IT).
Note: Connection to an ungrounded (IT) or corner-grounded delta network is not allowed
at altitudes of 2000 m (6600 ft) or higher.
Max. ±3% of nominal phase to phase input voltage
0.98 (at nominal load)
With cable sizes from 16 to 70 mm2 (AWG6 to AWG2/0): Posts for crimp lugs (lugs not
included).
With cable sizes from 95 to 240 mm2 (AWG3/0 to AWG500): Screw lugs (included).
Grounding clamps.
DC connection
Voltage
Ratings
436 … 712 V DC
Drive type
ACSM1-04Lx…
-110A-4
-135A-4
-175A-4
-210A-4
-260A-4
IdcN
C
IdcN
(A)
122
149
194
232
287
C
(µF)
3300
3300
4700
4700
7050
Average DC input current requirement when running a typical induction motor
at PN at a DC link voltage of 540 V (which corresponds to an AC input voltage
of 400 V).
Capacitance of DC link.
Motor connection
Motor types
Frequency
Current
Switching frequency
Maximum motor cable
length
Terminals
Asynchronous induction motors, asynchronous servo motors, synchronous permanent
magnet motors
0…500 Hz
See section Ratings.
Selectable between 1…8 kHz. Default: 4 kHz, above which output current derated
50 m (164 ft) with screened cable
75 m (246 ft) with unscreened cable
With cable sizes from 16 to 70 mm2 (AWG6 to AWG2/0): Posts for crimp lugs (lugs not
included).
With cable sizes from 95 to 240 mm2 (AWG3/0 to AWG500): Screw lugs (included).
Grounding clamps.
Technical data
92
JCU Control Unit
Power supply
Relay output (X2)
Digital inputs DI1…DI6 (X3)
24 V (±10%) DC, 1.6 A
Supplied from the power unit of the drive, or from external power supply through connector
X1 (pitch 3.5 mm, wire size 1.5 mm2).
Connector pitch 5 mm, wire size 2.5 mm2
250 V AC / 30 V DC, 2 A
Protected by varistors
Connector pitch 3.5 mm, wire size 1.5 mm2
24 V logic levels: “0” < 5 V, “1” > 15 V
Rin: 2.0 kohm
Filtering: Adjustable, 0.25 ms min. (see also Firmware Manual)
Digital inputs/outputs
DIO1…DIO3 (X3).
Connector pitch 3.5 mm, wire size 1.5 mm2
frequency input (3…32 kHz)
for 24 V level square wave
signal (sinusoidal or other
wave form cannot be used).
DIO3 can be configured as a
24 V level square wave
frequency output. See
Firmware Manual, parameter
group 12.
As outputs:
Total output current limited by auxiliary voltage outputs to 200 mA
Output type: Open emitter
As inputs:
Input/output mode selection by 24 V logic levels: “0” < 5 V, “1” > 15 V
Rin: 2.0 kohm
parameters.
DIO2 can be configured as a Filtering: Adjustable, 0.25 ms min. (see also Firmware Manual)
VCC
DIOx
RL
DGND
Analogue inputs AI1 and AI2 Connector pitch 3.5 mm, wire size 1.5 mm2
Current input: –20…20 mA, Rin: 100 ohm
(X4).
Voltage input: –10…10 V, Rin: 200 kohm
Current/voltage input mode
Differential inputs, common mode ±20 V
selection by jumpers. See
Sampling interval per channel: 0.25 ms
page 67.
Filtering: Adjustable, 0.25 ms min. (see also Firmware Manual)
Resolution: 11 bit + sign bit
Inaccuracy: 1% of full scale range
Thermistor input (X4)
Connector pitch 3.5 mm, wire size 1.5 mm2
Input devices: PTC or KTY84 thermistor
Up to three PTCs can be connected in series
KTY84 thermistor: Inaccuracy 5 °C
No safety insulation (see page 67)
Analogue outputs AO1 and Connector pitch 3.5 mm, wire size 1.5 mm2
AO1 (current): 0…20 mA, Rload < 500 ohm
AO2 (X4)
AO2 (voltage): –10…10 V, Rload > 1 kohm
Frequency range: 0…800 Hz
Resolution: 11 bit + sign bit
Inaccuracy: 2% of full scale range
Reference voltage (VREF)
Connector pitch 3.5 mm, wire size 1.5 mm2
10 V ±1% and –10 V ±1%, Rload > 1 kohm
for analogue inputs
Technical data
93
Drive to drive link (X5)
Safe Torque Off connection
(X6)
Control panel / PC
connection (X7)
Connector pitch 3.5 mm, wire size 1.5 mm2
Physical layer: RS-485
Termination by jumper
Connector pitch 3.5 mm, wire size 1.5 mm2
For the drive to start, both connections (OUT1 to IN1, and OUT2 to IN2) must be closed
Connector: RJ-45
Cable length < 3 m
Efficiency
Approximately 98% at nominal power level
Cooling
Method
Free space around the unit
Liquid cooling and internal fan, flow direction from bottom to top.
See chapter Planning the cabinet assembly.
Degree of protection
IP20 (UL open type). See chapter Planning the cabinet assembly.
Technical data
94
Ambient conditions
Installation site altitude
Air temperature
Relative humidity
Contamination levels
(IEC 60721-3-3,
IEC 60721-3-2,
IEC 60721-3-1)
Sinusoidal vibration
(IEC 60721-3-3)
Shock
(IEC 60068-2-27, ISTA 1B)
Free fall
Environmental limits for the drive are given below. The drive is to be used in a heated,
indoor, controlled environment. Drain the unit before storing or transporting it.
Operation
Storage
Transportation
installed for stationary use
in the protective package
in the protective package
0 to 4000 m (13123 ft) above sea level. [See also section
Altitude derating on page
85.]
-10 to +55°C (14 to 131°F). -40 to +70°C (-40 to +158°F) -40 to +70°C (-40 to +158°F)
No frost allowed. See section
Derating on page 84.
0 to 95%
Max. 95%
Max. 95%
No condensation allowed. Maximum allowed relative humidity is 60% in the presence of
corrosive gases.
No conductive dust allowed.
According to IEC 60721-3-3: According to IEC 60721-3-1: According to IEC 60721-3-2:
Chemical gases: Class 3C2
Solid particles: Class 3S2
Chemical cases: Class 1C2
Solid particles: Class 1S2
The drive must be installed in
clean air according to
enclosure classification.
Cooling air must be clean,
free from corrosive materials
and electrically conductive
dust.
–
Tested according to
IEC 60721-3-3, mechanical
conditions: Class 3M4
2…9 Hz: 3.0 mm (0.12”)
9…200 Hz: 10 m/s2 (33 ft/s2)
–
According to ISTA 1B.
Not allowed
Max. 100 m/s2 (330 ft/s2),
11 ms
25 cm (10”)
Chemical cases: Class 2C2
Solid particles: Class 2S2
–
According to ISTA 1B.
Max. 100 m/s2 (330 ft/s2),
11 ms
25 cm (10”)
Materials
Drive enclosure
Packaging
Pipe connectors
Technical data
• JCU Control Unit housing: PC/ABS, colour NCS 1502-Y (RAL 9002 / PMS 420 C)
• Sheet metal parts: Hot-dip zinc-coated steel. Front cover painted on the outside, colour
NCS 1502-Y (RAL 9002 / PMS 420 C)
• Heatsink: Cast aluminium AlSi.
• Internal cooling circuit: DIN 1.4401 (AISI 316) and DIN 1.4404 (AISI 316L).
Plywood, PE-LD wrapping, PP or steel banding.
Male stud connector, thread Whitworth ISO7/1, R1/2”K (12.7 mm), stainless steel (DIN
1.4401 (AISI 316) and DIN 1.4404 (AISI 316L))
95
Disposal
The drive contains raw materials that should be recycled to preserve energy and natural
resources. The package materials are environmentally compatible and recyclable. All
metal parts can be recycled. The plastic parts can either be recycled or burned under
controlled circumstances, according to local regulations. Most recyclable parts are marked
with recycling marks.
If recycling is not feasible, all parts excluding electrolytic capacitors and printed circuit
boards can be landfilled. The DC capacitors contain electrolyte, which is classified as
hazardous waste within the EU. They must be removed and handled according to local
regulations.
For further information on environmental aspects and more detailed recycling instructions,
please contact your local ABB distributor.
Applicable standards
• EN 50178 (1997)
• IEC 60204-1 (2005),
modified
The drive complies with the following standards. The compliance with the European Low
Voltage Directive is verified according to standards EN 50178 and EN 60204-1.
Electronic equipment for use in power installations
Safety of machinery. Electrical equipment of machines. Part 1: General requirements.
Provisions for compliance: The final assembler of the machine is responsible for installing
- an emergency-stop device
- a supply disconnecting device
- the ACSM1-04 into a cabinet.
Degrees of protection provided by enclosures (IP code)
• EN 60529: 1991
(IEC 60529)
• IEC 60664-1 (2007), Edition Insulation coordination for equipment within low-voltage systems. Part 1: Principles,
2.0
requirements and tests.
• IEC 61800-3 (2004)
Adjustable speed electrical power drive systems. Part 3: EMC requirements and specific
test methods.
• EN 61800-5-1 (2003)
Adjustable speed electrical power drive systems.
Part 5-1: Safety requirements. Electrical, thermal and energy
Provisions for compliance: The final assembler of the machine is responsible for installing
the ACSM1-04 in a cabinet that is protected to IP2X (IP3X for top surfaces for vertical
access).
• prEN 61800-5-2
Adjustable speed electrical power drive systems.
Part 5-2: Safety requirements. Functional
• UL 508C (2002), Third
UL Standard for Safety, Power Conversion Equipment
Edition
• NEMA 250 (2003)
Enclosures for Electrical Equipment (1000 Volts Maximum)
• CSA C22.2 No. 14-05
Industrial Control Equipment
(2005)
Technical data
96
CE marking
A CE mark is attached to the drive to verify that the drive follows the provisions of the European Low
Voltage and EMC Directives (Directive 73/23/EEC, as amended by 93/68/EEC, and Directive 89/336/
EEC, as amended by 2004/108EC).
Compliance with the European Low Voltage Directive
The compliance with the European Low Voltage Directive has been verified according to standards
EN 50178, EN 61800-5-1 and EN 60204-1.
Compliance with the European EMC Directive
The cabinet builder is in responsible for the compliance of the drive system with the European EMC
Directive. For information on items to consider, see:
•
Subsections Compliance with EN 61800-3 (2004), category C2; Compliance with EN 61800-3
(2004), category C3; and Compliance with EN 61800-3 (2004), category C4 below
•
The chapter Planning the electrical installation in this manual
•
Technical Guide No. 3 – EMC Compliant Installation and Configuration for a Power Drive System
(3AFE61348280 [English]).
Definitions
EMC stands for Electromagnetic Compatibility. It is the ability of electrical/electronic equipment to
operate without problems within an electromagnetic environment. Likewise, the equipment must not
disturb or interfere with any other product or system within its locality.
First environment includes domestic premises. It also includes establishments directly connected
without intermediate transformers to a low-voltage network which supplies buildings used for domestic
purposes.
Second environment includes all establishments other than those directly connected to a low-voltage
network which supplies buildings used for domestic purposes.
Drive of category C2. Power drive system with rated voltage less than 1000 V which is neither a plug-in
device nor a movable device and, when used in the first environment, is intended to be installed and
commissioned only by a professional.
Drive of category C3. Power drive system with rated voltage less than 1000 V, intended for use in the
second environment and not intended for use in the first environment.
Drive of category C4. Power drive system with rated voltage equal to or above 1000 V, or rated current
equal to or above 400 A, or intended for use in complex systems in the second environment.
Compliance with EN 61800-3 (2004), category C2
The drive meets the requirements of the EMC Directive with the following provisions:
1. The motor and control cables are selected as specified in the chapter Planning the electrical
installation.
2. The drive is installed according to the instructions given in this manual.
3. Motor cable length does not exceed 50 metres (164 ft).
Note: The internal EMC filter must be disconnected on IT (ungrounded) systems. Otherwise the supply
network becomes connected to ground potential through the filter capacitors which may cause danger
or damage the drive.
Note: The internal EMC filter must be disconnected on a corner-grounded TN system. Otherwise the
drive will be damaged.
Technical data
97
WARNING! The drive may cause radio interference if used in a residential or domestic environment.
The user is required to take measures to prevent interference, in addition to the requirements for CE
compliance listed above, if necessary.
Compliance with EN 61800-3 (2004), category C3
The drive meets the requirements of the EMC Directive with the following provisions:
1. The motor and control cables are selected as specified in the chapter Planning the electrical
installation.
2. The drive is installed according to the instructions given in this manual.
3. Motor cable length does not exceed 50 metres (164 ft).
Compliance with EN 61800-3 (2004), category C4
The drive meets the requirements of the EMC Directive with the following provisions:
1. It is ensured that no excessive emission is propagated to neighbouring low-voltage networks. In
some cases, the natural suppression in transformers and cables is sufficient. If in doubt, a supply
transformer with static screening between the primary and secondary windings can be used.
Medium voltage network
Supply transformer
Neighbouring network
Static screen
Point of measurement
Low voltage
Low voltage
Equipment
(victim)
Equipment
Drive
Equipment
2. An EMC plan for preventing disturbances is drawn up for the installation. A template is available from
the local ABB representative.
3. The motor and control cables are selected as specified in the chapter Planning the electrical
installation.
4. The drive is installed according to the instructions given in this manual.
Compliance with the Machinery Directive
The drive is intended to be incorporated into machinery to constitute machinery covered by Machinery
Directive (98/37/EC) and does therefore not in every respect comply with the provisions of the directive.
For more information, see the Declaration of Incorporation by ABB Drives (code 64652770).
C-Tick marking
Compliance with IEC 61800-3 (2004)
See section Compliance with the European EMC Directive on page 96.
Technical data
98
UL marking
See the type designation label for the valid markings of your drive.
UL checklist
Input power connection – See section AC input (supply) connection on page 91.
Disconnecting device (Disconnecting means) – See section Supply disconnecting device on page
46.
Ambient conditions – The drive is to be used in a heated indoor controlled environment. See section
Ambient conditions on page 94 for specific limits.
Input cable fuses – For installation in the United States, branch circuit protection must be provided in
accordance with the National Electrical Code (NEC) and any applicable local codes. To fulfill this
requirement, use the UL classified fuses given in section Supply cable fuses on page 87.
For installation in Canada, branch circuit protection must be provided in accordance with the Canadian
Electrical Code and any applicable provincial codes. To fulfil this requirement, use the UL classified
fuses given in section Supply cable fuses on page 87.
Power cable selection – See section Selecting the power cables on page 50.
Power cable connections – For the connection diagram and tightening torques, see section Power
cable connection on page 62.
Control connections – For the connection diagram and tightening torques, see section Connecting
the control cables on page 66.
Overload protection – The drive provides overload protection in accordance with the National
Electrical Code (US).
Braking – The ACSM1-04 has an internal braking chopper. When applied with appropriately sized
braking resistors, the braking chopper will allow the drive to dissipate regenerative energy (normally
associated with quickly decelerating a motor). Braking resistor selection is discussed in the chapter
Resistor braking on page 99.
UL standards – See section Applicable standards on page 95.
Liquid cooling circuit – Connected to a system in which pressure, flow rate, coolant temperature and
material requirements are fulfilled. See Internal cooling circuit specifications.
Coolant type – See Coolant quality.
Product protection in the US
This product is protected by one or more of the following US patents:
4,920,306
5,612,604
6,094,364
6,252,436
6,370,049
6,600,290
6,922,883
6,972,976
7,023,160
7,067,997
7,164,562
7,245,197
7,280,938
7,388,765
D512,026
D548,182S
5,301,085
5,654,624
6,147,887
6,265,724
6,396,236
6,741,059
6,940,253
6,977,449
7,034,510
7,082,374
7,176,779
7,250,739
7,330,095
D503,931
D512,696
D548,183S
Other patents pending.
Technical data
5,463,302
5,799,805
6,175,256
6,305,464
6,448,735
6,774,758
6,934,169
6,984,958
7,036,223
7,084,604
7,190,599
7,262,577
7,349,814
D510,319
D521,466
5,521,483
5,940,286
6,184,740
6,313,599
6,498,452
6,844,794
6,956,352
6,985,371
7,045,987
7,098,623
7,215,099
7,271,505
7,352,220
D510,320
D541,743S
5,532,568
5,942,874
6,195,274
6,316,896
6,552,510
6,856,502
6,958,923
6,992,908
7,057,908
7,102,325
7,221,152
7,274,573
7,365,622
D511,137
D541,744S
5,589,754
5,952,613
6,229,356
6,335,607
6,597,148
6,859,374
6,967,453
6,999,329
7,059,390
7,109,780
7,227,325
7,279,802
7,372,696
D511,150
D541,745S
99
Resistor braking
What this chapter contains
This chapter describes how to select, protect and wire braking choppers and
resistors. The chapter also contains the technical data.
Note: All braking resistors available from ABB are air-cooled.
Braking choppers and resistors with the ACSM1-04Lx
Braking choppers
ACSM1-04Lx drives have a built-in braking chopper as standard equipment to
handle the energy generated by a decelerating motor.
When the braking chopper is enabled and a resistor connected, the chopper will start
conducting when the DC link voltage of the drive reaches 780 V. The maximum
braking power is achieved at 840 V.
Braking resistor selection
To select a braking resistor:
1. Calculate the maximum power generated by the motor during braking.
2. Calculate the continuous power based on the braking duty cycle.
3. Calculate the braking energy during the duty cycle.
Pre-selected resistors are available from ABB as shown in the table below. If the
listed resistor is not sufficient for the application, a custom resistor can be selected
within the limits imposed by the internal braking chopper of the ACSM1-04Lx. The
following rules apply:
• The resistance of the custom resistor must be at least Rmin. The braking power
capacity with different resistance values can be calculated from the following
formula
2
Pmax <
UDC
R
where UDC equals 840 V.
WARNING! Never use a braking resistor with a resistance below the value specified
for the particular drive type. The drive and the chopper are not able to handle the
overcurrent caused by the low resistance.
Resistor braking
100
• The maximum braking power must not exceed Pbrmax at any point
• The average braking power must not exceed Pbrcont
• The braking energy must not exceed the energy dissipation capacity of the
selected resistor
• It is highly recommended that the resistor be protected from thermal overload;
see the section Contactor protection of drive below.
Chopper data / Resistor selection table
The ratings apply at an ambient temperature of 40°C (104°F).
Internal braking chopper
Drive type
Rmin
Pbrcont Pbrmax
ACSM1-04Lx…
(kW)
(kW)
(ohm)
-110A-4
40
75
-135A-4
55
100
4
-175A-4
65
120
-210A-4
80
150
-260A-4
110
180
Example braking resistor
R
Type
(ohm)
JBR-09
(Danotherm CBT-H 560 GHT 415 4R0)
4
Pn
(W)
Epulse
(kJ)
2200
540
*
PDM-425726
Pbrcont The internal chopper will withstand this continuous braking power. The braking is considered
continuous if the braking time exceeds 30 seconds.
Pbrmax Maximum braking power of the chopper. The chopper will withstand this braking power for 1
second within every 10 seconds. Note: The listed resistors will withstand this braking power
for 1 second within every 120 seconds.
The minimum allowed resistance of the braking resistor.
Rmin
R
Resistance of the listed resistor.
Continuous power (heat) dissipation of the listed resistor when cooled naturally in a vertical
Pn
position.
Epulse Energy pulse the listed resistor will withstand.
*
Listed resistor braking power is 150 kW for 1 second within every 120 seconds.
Refer to page 106 for a dimension drawing of the resistor.
Resistor braking
101
Resistor installation and wiring
All resistors must be installed outside the drive module in a place where they are
cooled sufficiently, do not block the airflow to other equipment, or dissipate hot air
into the air inlets of other equipment.
WARNING! The materials near the braking resistor must be non-flammable. The
surface temperature of the resistor may rise above 200 °C (400 °F), and the
temperature of the air flowing from the resistor is hundreds of degrees Celsius.
Protect the resistor against contact.
The maximum length of the resistor cable(s) is 20 m (65 ft). For the connections, see
section Power cable connection on page 62.
Contactor protection of drive
It is highly recommended to equip the drive with a main contactor for safety reasons.
Wire the contactor so that it opens in case the resistor overheats. This is essential
for safety since the drive will not otherwise be able to interrupt the main supply if the
chopper remains conductive in a fault situation.
Below is a simple example wiring diagram.
L1 L2 L3
1
OFF
Fuses
1
2
3
4
5
6
2
13
3
ON
14
4
ACSM1
U1 V1 W1
Θ
Resistor thermal switch
K1
Resistor braking
102
Braking circuit commissioning
For more information, see the appropriate Firmware Manual.
• Enable the braking chopper function. Please note that a braking resistor must be
connected when the chopper is enabled
• Switch off the overvoltage control of the drive
• Adjust any other relevant parameters in group 48.
WARNING! If the drive is equipped with a braking chopper but the chopper is not
enabled by parameter setting, the braking resistor must be disconnected because
the protection against resistor overheating is then not in use.
Resistor braking
103
Dimension drawings
What this chapter contains
Dimension drawings of the ACSM1-04Lx (frame size E) and related accessories are
shown below.
Dimension drawings
104
Drive module
Dimension drawings
105
Drive module (continued from previous page)
Dimension drawings
106
Braking resistor (JBR-09, air-cooled)
560 ±2
460 ±1
Dimension drawings
3AUA0000022083 REV A EN
EFFECTIVE: 1.9.2008
ABB Oy
AC Drives
P.O. Box 184
FI-00381 HELSINKI
FINLAND
Telephone
+358 10 22 11
Fax
+358 10 22 22681
Internet
http://www.abb.com