Transcript
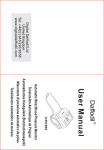
Daffodil
User Manual
Mini Wireless-N Adaptor
LAN03
Once your computer has finished rebooting, connect the
Wireless Adaptor to a free USB 2.0 port.
When the “Found New Hardware Wizard” appears, select
“ No not this time ” from the options, then click “ Next ” to
continue.
The wizard will prompt you with “What do you want the
wizard to do?” select “ Install the software
automatically (Recommended) ” from the options and
click “ Next ” to continue.
-5-
1. Introduction
User Manual
Thank you for purchasing this Wireless LAN Adaptor, the
LAN03 allows you to connect your computer to the
internet wirelessly through a supported router.
Compatible with high speed, modern N-Standard
networks, it is perfect for upgrading or replacing your
internal network card or adding wireless functionality
via USB.
2. Contents
Mini Wireless-N Adaptor
Installation CD with User Manual
3. System Requirements
Processor: 1Ghz or above
Operating System: Windows 7 (32 & 64 bit), XP, Vista,
Linux, Mac OS 10.4.1 and above
Required Ports: 1 x USB 2.0
-1-
A status screen will display whilst Windows is installing
the Wireless Adaptor, once the wizard notifies you that
the installation has been successfully completed, your
Adaptor is ready for configuration.
5. Configuration
After the installation has completed, the configuration
utility will load automatically, to adjust settings at a later
date or connect to different networks, right click on the
Realtek 11n icon in your computers system tray and
select “ Open Config Utility ”.
-6-
4. Installation
NOTE: Do not connect the Wireless LAN Adaptor until
the software has finished installing.
Insert the Installation CD into your PC, if the Autoplay
function is disabled on your computer, start the
Setup.exe file through My Computer – CD Drive (e.g. D:)
– Setup.exe.
From the installation menu on the CD, select the correct
operating system.
-2-
1. Select the Available Network tab and click “ Refresh ”
to view a list of wireless networks within range.
2. Select the correct network from the list and click “ Add
to Profile ”, the configuration window for the selected
network will open automatically.
3. The authentication type for the Network is automatically
selected, you should not change this. Select the correct
Data encryption type (if you are unsure, please consult
the person responsible for your wireless network).
4. If the network authentication type is Open System or
Shared Key, tick PASSPHRASE and type in the
password. The password will be automatically filled in
Network key and Confirm network key, then click OK .
For other network authentication types, just type in the
password in the Network key and Confirm network key.
-7-
Select the correct language from the Install Shield Wizard
setup menu and click “ Next ” to continue.
Click “ Next ” to continue.
-3-
5. Once you have successfully connected to your wireless
network the following screen will appear.
-8-
Please wait whilst the software installs.
-4-
After the installer has completed you will need to reset
your PC before connecting the Wireless Adaptor and
connecting to the internet. To do this immediately select
“ Yes I want to restart my computer now ” and click
Finish .
6. Specifications
IEEE 802.11n (draft 2,0), IEEE 802.11g, IEEE802.11b
USB2.0 compatible with USB1.1
2412 ~ 2484 MHz
Windows 7, XP, Vista, Linux and Mac OS X
Please note the above instructions are only intended for
reference purposes.Digital Daffodil Ltd reserves the right
to revise product specifications, features and design
without notice.
For any further enquiries, please telephone
Digital Daffodil Ltd's helpline on +44 (0)871 423 2368
or email [email protected]
-9-


