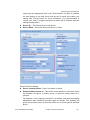
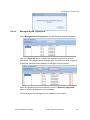
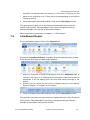
1
AIM CrossChex User Manual © 2014 Anviz Corporation. All rights reserved. Anviz CONFIDENTIAL: This document contains proprietary information of Anviz and is not to be disclosed or used without the prior written permission of Anviz Due to update and improvement of Anviz products and technologies, information in this document is subjected to change without notice. AIM CrossChex User Manual About This Document TABLE OF CONTENTS 1. INTRODUCTION......................................................................................................................................... 1 2. INSTALLATION........................................................................................................................................... 1 3. CONFIGURATION ...................................................................................................................................... 5 3.1. COMPANY INFORMATION ................................................................................................................................ 5 3.2. DEPARTMENT SETTINGS .................................................................................................................................. 8 3.2.1. Create a New Department ................................................................................................................ 9 3.2.2. Delete Departments .......................................................................................................................... 9 3.2.3. Change Assigned Employee Department ........................................................................................ 10 3.3. ADD EMPLOYEE........................................................................................................................................... 11 3.3.1. Manually input Employee Information ........................................................................................... 11 3.3.1.1. 3.3.1.2. 3.3.1.3. 3.3.1.4. 3.3.1.5. 3.3.1.6. 3.3.1.7. Basic Information ........................................................................................................................................ 12 Salary Information Tab ................................................................................................................................ 13 Company Information ................................................................................................................................. 14 Device Options Tab ..................................................................................................................................... 15 Fingerprint Enrollment Tab ......................................................................................................................... 16 FacePass Enrollment Tab ............................................................................................................................ 18 History Tab .................................................................................................................................................. 20 3.3.2. Import Employees From CSV File .................................................................................................... 22 3.3.3. Import Employees From Device File ................................................................................................ 28 3.4. OVERTIME SETTINGS .................................................................................................................................... 28 3.5. DATABASE SETTINGS .................................................................................................................................... 30 3.5.1. Backup Database ............................................................................................................................ 30 3.5.2. Restore Database ........................................................................................................................... 31 3.6. SECURITY SETTINGS ...................................................................................................................................... 32 3.6.1. Add Administrator .......................................................................................................................... 32 3.6.2. Add User ......................................................................................................................................... 35 3.6.3. Search User ..................................................................................................................................... 35 3.6.4. Modify User Information ................................................................................................................ 36 3.6.5. Delete User ..................................................................................................................................... 36 3.7. CONFIGURE EMAIL ....................................................................................................................................... 36 3.8. CHANGE NETWORK PATH.............................................................................................................................. 37 3.9. CHANGE THEMES ........................................................................................................................................ 38 3.10. IMPORT DATA ......................................................................................................................................... 39 3.11. REPORT CONFIGURATION .......................................................................................................................... 39 4. ATTENDANCE SCHEDULE ......................................................................................................................... 39 Anviz Confidential Proprietary © 2013 Anviz Corporation. All rights reserved. II AIM CrossChex User Manual 4.1. CREATE OR MANAGE SHIFTS .......................................................................................................................... 39 4.1.1. Create the Shift ............................................................................................................................... 43 4.1.1.1. Set the Type ................................................................................................................................................ 44 4.1.1.2. Set the Recurrence ...................................................................................................................................... 45 4.1.1.3. Examples of Recurrence Setting ................................................................................................................. 48 4.1.1.4. Category ...................................................................................................................................................... 56 4.1.1.4.1. Create / Manage Categories................................................................................................................. 57 4.1.1.4.2. Delete a category ................................................................................................................................. 60 4.1.2. Delete the Shift ............................................................................................................................... 60 4.2. RECORDS ................................................................................................................................................... 62 4.2.1. Preview Employee Records ............................................................................................................. 62 4.2.2. Record Operations .......................................................................................................................... 63 4.2.2.1. 4.2.2.2. 4.2.2.3. 4.2.2.4. 4.3. 5. Add Record.................................................................................................................................................. 63 Edit and Delete Record ............................................................................................................................... 67 Approve Record .......................................................................................................................................... 68 Round Off Record Times ............................................................................................................................. 70 EMPLOYEE PERFORMANCE ............................................................................................................................ 71 ACCESS CONTROL .................................................................................................................................... 72 5.1. ACCESS CONTROL CENTER ............................................................................................................................. 73 5.2. TIME FRAME MANAGEMENT ......................................................................................................................... 75 5.3. REPORTS .................................................................................................................................................... 76 5.3.1. Access Control Reports ................................................................................................................... 76 5.3.2. Door Usage Report ......................................................................................................................... 79 6. DEVICE MANAGEMENT ........................................................................................................................... 80 6.1. ADD DEVICE ............................................................................................................................................... 80 6.2. REMOVE A DEVICE ....................................................................................................................................... 82 6.3. CONFIGURE A DEVICE ................................................................................................................................... 82 6.3.1. Access Control & Time Attendance Device ..................................................................................... 82 6.3.2. FacePace Device ............................................................................................................................. 87 6.4. DEVICE WORK AREA .................................................................................................................................... 87 6.5. DEVICE DATA MANAGEMENT ........................................................................................................................ 92 6.5.1. Device Options ................................................................................................................................ 92 6.5.1.1. Upload Employee to Device ........................................................................................................................ 92 6.5.1.2. Download or Remove Employee from Device ............................................................................................ 94 6.5.1.3. Manage Message to Employee ................................................................................................................... 95 6.5.1.3.1. Assign Messages to Employees ............................................................................................................ 96 6.5.1.3.2. Manage Device Messages .................................................................................................................... 97 6.5.1.4. Manage Devices Ring Setting ...................................................................................................................... 98 6.5.1.5. Manage Device State .................................................................................................................................. 99 6.5.2. 6.5.2.1. 6.5.2.2. 6.5.2.3. 6.6. 6.7. 6.8. 7. Fingerpint Options ........................................................................................................................ 101 Backup Fingerpint from Device ................................................................................................................. 102 Restore Fingerpint to Device ..................................................................................................................... 103 Managed Stored Fingerprints ................................................................................................................... 104 DELETE ADMIN IDENTIFIER .......................................................................................................................... 105 SET GPRS ................................................................................................................................................ 105 FLASH DRIVE ............................................................................................................................................ 106 REPORT ..................................................................................................................................................108 7.1. 7.2. 7.3. 7.4. 7.5. COMPLETE REPORT .................................................................................................................................... 108 HOURS REPORT ......................................................................................................................................... 112 SUMMARY REPORT .................................................................................................................................... 113 LATE/ABSENT REPORT ................................................................................................................................ 114 JOBS CODE REPORT ................................................................................................................................... 115 Anviz Confidential Proprietary © 2013 Anviz Corporation. All rights reserved. III AIM CrossChex User Manual 7.6. CUSTOM REPORT ...................................................................................................................................... 115 7.7. EMPLOYEES HISTORY REPORT ...................................................................................................................... 116 7.8. DAILY ATTENDANCE STATISTIC ..................................................................................................................... 117 7.9. PRINT AND SAVE REPORTS........................................................................................................................... 118 7.9.1. Print Reports ................................................................................................................................. 118 7.9.2. Save Report in Excel ...................................................................................................................... 119 7.9.3. Save Report as PDF ....................................................................................................................... 122 8. EXPORT ..................................................................................................................................................125 8.1. SETTING................................................................................................................................................... 126 8.1.1. QuickBooks Export Setting ............................................................................................................ 126 8.2. EXTERNAL APPLICATION .............................................................................................................................. 133 8.2.1. Export to QuickBooks .................................................................................................................... 133 8.2.2. Export to ADP................................................................................................................................ 135 8.2.3. Export to PAYCHEX........................................................................................................................ 136 8.2.4. Export to Heartland Plus One ....................................................................................................... 137 8.2.5. Export to GMS ............................................................................................................................... 139 8.2.6. Export to Total Track .................................................................................................................... 140 8.2.7. Export to Easy Choice T&A ............................................................................................................ 141 8.2.8. Export to REPLICON ...................................................................................................................... 141 8.2.9. Export to CheckMark .................................................................................................................... 142 9. UPDATE & UNINSTALLATION .................................................................................................................142 9.1. 9.2. UPDATE ................................................................................................................................................... 142 UNINSTALLATION....................................................................................................................................... 143 Anviz Confidential Proprietary © 2013 Anviz Corporation. All rights reserved. IV AIM CrossChex User Manual 1. Introduction AIM CrossChex is an intelligent management system which is applicable to all Anviz access controls and time attendance devices. The user-friendly and interactive design makes this system very easy to operate, the powerful function makes this system realize the management of department, staff, shift, access authority, and exports different time attendance and access control reports, satisfying different time attendance and access control requirements in different complicated environments. AIM-CrossChex Software Requirements/Pre-Requisites: Windows XP, Windows 7, Windows Server 2003 and above Microsoft .NET 4 or higher. (The AIM-CrossChex installer will install this application if it is not currently present on the machine at the time of installation.) 2. Installation Place the AIM-CrossChex CD in your Computers CD-ROM drive. If auto-run is enabled on your machine, the installation will start on its own. If not, then double-click the "setup.exe" from the included CD-ROM or from your local download directory which obtained from the AIM-CrossChex.com website. 1 Click "Next" to begin installation. 2 Choose the installation "Folder". (It is recommended to leave this at the default location setting.) Anviz Confidential Proprietary © 2001-2013 Anviz Global Inc. 1 AIM CrossChex User Manual 3 Check the licensing agreement and click on "I accept the terms in the Licensing Agreement" box below. 4 Then click, "Next" to continue. 5 Click the "Install" button to start the installation procedure. Anviz Confidential Proprietary © 2001-2013 Anviz Global Inc. 2 AIM CrossChex User Manual 6 Please wait while the software is installed. 7 Once the setup is complete, click on the "Run AIM-CrossChex" button to complete the installation procedure and launch the software. Or, you may choose to click on "Close" to complete the installation process and open the software at a later time. Anviz Confidential Proprietary © 2001-2013 Anviz Global Inc. 3 AIM CrossChex User Manual 8 The first time you open the Crosschex, the registration form will pop up. Fill the form and click “REGISTER” to register customer information or click “NOTHANKS” to close the form. The entire system software includes the following sections: Anviz Confidential Proprietary © 2001-2013 Anviz Global Inc. 4 AIM CrossChex User Manual To change the current language that the AIM-CrossChex software displays in, simply click the Dropdown Menu next to the current Language Name: Choose the appropriate language from the list and then click the "Apply" button. The Software can connect to “Microsoft SQL Server Database” or “Access Database”. Default setting is using Access database. If you want to change the connection, please refer to Chapter 3.8 Change Network Path. 3. Configuration 3.1. Company information Anviz Confidential Proprietary © 2001-2013 Anviz Global Inc. 5 AIM CrossChex User Manual To begin using your software, the Company Settings MUST be configured. The application will not function properly without completing the Company Information Wizard. The first time AIM-CrossChex is opened, it will present you with the Company Information Wizard. 1 Click "Next" at the bottom of the Welcome screen to begin configuring the company settings. 2 Click the "Add/Change Company Logo" to add a new company logo. If needed, click the "Remove Company Logo" button to Remove or Change the existing company logo.(Optional) Anviz Confidential Proprietary © 2001-2013 Anviz Global Inc. 6 AIM CrossChex User Manual 3 Type the name of the new Company in the "Company Name" text field. Choose the type of “Company Time Display Format” and “Employees Names Format” if necessary. 4 Click "Next" to continue. 5 Click the drop down menu next to the "Beginning of fiscal year" field to select the date that your company’s fiscal payroll year began. 6 Click the drop down menu next to the "Start Day" field to select day that your most previous overtime period began. 7 Click the drop down menu next to the "Term" field to select the frequency that your companies will calculate overtime. Anviz Confidential Proprietary © 2001-2013 Anviz Global Inc. 7 AIM CrossChex User Manual 8 Choose whether "The company will allow overtime" and/or if "The company will allow double-time pay" by selecting the appropriate radio buttons. 9 Click "Next" to complete the initial company settings wizard. 10 The following window will appear. Click “Finish” to finish the setting process. 3.2. Department Settings To set the Department Information: 1 Click the "Settings" tab and the "Manage Department" button. 2 The following window will appear: Anviz Confidential Proprietary © 2001-2013 Anviz Global Inc. 8 AIM CrossChex User Manual 3.2.1. Create a New Department On the lower right corner of “Settings->Department->Manage Departments”: 3.2.2. Department Name - Type in the name of the new department. These names should match the existing department names in your organization. Example: Human; Resources; Contractors; Staff; Administration; Executive. Department Company Code - Type in the Company Code for this department. This should reflect the current internal department code used in your organization today. Once the department name and code have been defined, click the "Create Department" button at the bottom. Delete Departments To delete the Department: Select the department need to be removed. Then Click the "Remove" tab. The department is not allowed to remove when it is in use. Anviz Confidential Proprietary © 2001-2013 Anviz Global Inc. 9 AIM CrossChex User Manual 3.2.3. Change Assigned Employee Department To change the employees assigned department, simply click inside the field entitled "Change Department" from the employee list. Select the department from the drop down menu that you wish to move the employee to. Once the correct department name is displayed in the "Change Department" field, click the "Apply Changes" button at the bottom of the employee list. Anviz Confidential Proprietary © 2001-2013 Anviz Global Inc. 10 AIM CrossChex User Manual Additionally, the department can be changed through each individual employee profile under the "Department Information" Tab at the bottom of the employee profile screen. 3.3. Add Employee 3.3.1. Manually input Employee Information Click on the "Manage Employee" button to Add, Remove, Modify or Search Employee Profiles. The following screen will be displayed: Anviz Confidential Proprietary © 2001-2013 Anviz Global Inc. 11 AIM CrossChex User Manual 3.3.1.1. Basic Information To add a new employee 1 Click the "New Information" button in the middle of this window. 2 Fill in all appropriate Employee information fields such as First Name, Middle Name, Last Name, Address, Phone numbers, email, ID Number and Device Password. Anviz Confidential Proprietary © 2001-2013 Anviz Global Inc. 12 AIM CrossChex User Manual Note: The minimum required fields are First Name, Company ID and ID in Device. ID in Device will be the same number used when enrolling an employee fingerprint on your time clock. More information can be found on the bottom section of this window, there are several tabs including Company Information, Department Information, Device Options, Fingerprint Enrollment, FacePass Enrollment. 3.3.1.2. Salary Information Tab Salary and Department Information setting for employees The Tab includes the following settings: Department - Set department for employees. Position - Set positions for employees. Maximum Vacation Hours - This allows you to set the maximum amount of vacation hours that can be scheduled for the employee. Once the maximum number of hours assigned for Vacation has been scheduled, the software will show a warning of this and will not allow additional Vacation hours to be applied to this employee. Anviz Confidential Proprietary © 2001-2013 Anviz Global Inc. 13 AIM CrossChex User Manual Maximum Sick Hours - This allows you to set the maximum amount of sick hours that can be scheduled for the employee. Once the maximum number of hours assigned as Sick time has been scheduled, the software will show a warning of this and will not allow additional Sick hours to be applied to this employee. Hourly Rate - The hourly payment. If you assign “0”, employee will not receive any pay. Maximum Vacation Hours / Maximum Sick Hours are on a per fiscal year basis and will reset once the fiscal year has rolled over in the software. 3.3.1.3. Company Information Company Information setting for employees: The Company Information Tab includes the following settings: Employee Status - This will be set to Active or Inactive. If set to Inactive, then this employee list is the only list that the inactive employee will show up in throughout the application. Allow calculate overtime for this employee - Check this box if the employee has been approved for overtime. (The box is visible only if the company allows overtime pay in company setting.) ID Card - This would be a current ID Card number assigned to the employee. Company Number - This is the employee number assigned by the company. Employed Since - The date of the employee be haired. This employee does not require a schedule - Check this option if you do not require a specific schedule be set for this employee. Without a set Schedule, which defines a Start Time and End Time of the work Day, then the Late/Tardy Report cannot be used for this employee, nor can the Time Rounding options be used. Both of these features require a Start Time and End Time to function properly. This is most commonly used for more flexible work hours where total hours on the clock need to be reported as regular work time. Anviz Confidential Proprietary © 2001-2013 Anviz Global Inc. 14 AIM CrossChex User Manual Select Pre Set Option - Choose the overtime calculate policy that will be applied to this individual employee by choosing it from the drop down menu. See the Overtime Settings article of the Settings section of this guide to configure your company overtime calculate policies. Note: The first available number in the employee list beginning at "1" will be auto-populated in the Company Number Field. This same number should be used in the ID in device field as well as during fingerprint enrollment on the time clock. 3.3.1.4. Device Options Tab The Device Options Tab includes the following settings: Device User - Employee will be a device User. This is the default setting for every enrolled employee. Device Users have no access to the device Firmware menus. Device Administrator - Employee will be a device Administrator. Device Administrators have full access to the firmware menus and can perform all functions required to enroll new employees and configure the device settings. Identification Method (May not apply to all devices): - Fingerprint Only : Only Fingerprint verification will be required (Can be used in combination with ID + PW and/or Card Only) FP + Password : Fingerprint plus a password will be required for verification FP + Password + Card : Fingerprint plus a password plus an ID Proximity Card will be required for verification ID + Password : ID Number plus a password will be required for verification (Can be used in combination with Fingerprint Only and/or Card Only) ID + Fingerprint : ID Number plus a Fingerprint will be required for verification ID + Password + FP : ID Number plus a Fingerprint plus a password will be required for verification Card Only : Only Proximity Card verification will be required. (Can be used in - Anviz Confidential Proprietary © 2001-2013 Anviz Global Inc. 15 AIM CrossChex User Manual - 3.3.1.5. combination with ID + PW and/or Fingerprint Only) Card + Password : Proximity Card plus a Password will be required for verification. Card + Fingerprint : Proximity Card plus a Fingerprint will be required for verification. Fingerprint Enrollment Tab This section can be used to capture the employee fingerprint directly into the software database using the U-Bio USB fingerprint reader. Once captured, this fingerprint can then be uploaded to any or all connected devices for employee authentication. Connect the U-Bio USB fingerprint reader to the computer running the AIM-CrossChex software. 3 Select the U-Bio scanner from the drop down menu: 4 Click on "Open Device" 5 Select the "Finger #1" radio button and place the first employee finger on the BR10 sensor. Anviz Confidential Proprietary © 2001-2013 Anviz Global Inc. 16 AIM CrossChex User Manual 6 With the finger still on the sensor, click the "Saved Scanned" button. 7 A message will appear that reads, "Fingerprint Stored in Database" if this process is successful. 8 Repeat the steps above to capture "Fingerprint #2" if required or desired. 9 To complete this fingerprint capture process, click on "Close Device". 10 Once all Employee information is entered, captured and complete, Click the "Save Changes" Button. Anviz Confidential Proprietary © 2001-2013 Anviz Global Inc. 17 AIM CrossChex User Manual 3.3.1.6. FacePass Enrollment Tab This section can be used to capture the employee face template directly into the software database using the ANVIZ FacePass device. Once captured, this face template can then be uploaded to any or all connected FacePass devices. Connect the ANVIZ FacePass Basic device to the network via IP address. Once connected, Add the Device to the software using the device serial number and the validation code provided. See the Add a Device article under the Device Management section of this manual for information on adding a new device. 11 Select the FacePass device from the drop down menu: 12 Click on "Open Device" Anviz Confidential Proprietary © 2001-2013 Anviz Global Inc. 18 AIM CrossChex User Manual 13 The "Enroll Employee" button will now be available. Click the "Enroll Employee" button. 14 The FacePass device will now be put into Enrollment mode. The employee will be required to look into the camera of the device until it captures a quality face template. Once enrollment at device is complete, a message will appear in the software as follows: 15 To Complete this face capture process, click on "Close Device" Anviz Confidential Proprietary © 2001-2013 Anviz Global Inc. 19 AIM CrossChex User Manual 16 Once all Employee information is entered, captured and complete, Click the "Save Changes" Button. This employee face template can now be uploaded to any connected device by following the "Upload Employee to Device" article of the "Device Management" section of this manual. When new employees are added to the system, they will show up under the "Employee List" located on the left hand side of the screen. 3.3.1.7. History Tab Anviz Confidential Proprietary © 2001-2013 Anviz Global Inc. 20 AIM CrossChex User Manual This section can be used to record events and scores of employees. The initial number is 100. 1. Click “Add Record” button to enter new page. 2. Choose action of this record: “Lower the score” or “Higher the score”. Input the increased/decreased value of score in “By:#points”, and the date of event. 3. Input the description of event in left text box, and click “Save”. 4. Click “Search History” to search the records. By Day- Record search by day; Others-Search records of this month, last 3/6/9 months, this year, or last year; All- Search for all records; Anviz Confidential Proprietary © 2001-2013 Anviz Global Inc. 21 AIM CrossChex User Manual 5. Choose the record you want to delete, and click “Del Record” to delete it. 6. Once all Employee information is entered, captured and complete, Click the "Save Changes" Button. 3.3.2. Import Employees From CSV File The AIM-CrossChex software gives you an option to Import large quantities of users at the same time by using its Advanced Import feature. You will need to create a .csv file in Microsoft Excel. 1. Open a new file in MS Excel. It should be formatted as follows: 2. The Column Headings should match the following user fields within the employee profile section: First Name, Middle Name, Last Name, Address, Phone, Mobile, Email, ID in Device, Device Password, Company Number and ID Card Number. Not all of these fields are required, but they can be included in the import. Anviz Confidential Proprietary © 2001-2013 Anviz Global Inc. 22 AIM CrossChex User Manual 3. Once you have all of your employees information completed, Click File > Save As. The following window will appear: 4. Choose the location to save the file. It is recommended to save this file on your local hard drive. 5. Choose the filename by typing the name you wish to use in the File Name field. Choose the Save as Type of .CSV (Comma Delimited) 6. Click “Save”. 7. Once you have this .CSV file created, click on the "Import Employees From CSV Files" button under Employee Information. Anviz Confidential Proprietary © 2001-2013 Anviz Global Inc. 23 AIM CrossChex User Manual 8. The following window will appear: Click "Next". 9. Choose the .CSV file that was previously created by clicking the "Browse" button. 10. Select the Import File created above from the location in which it was previously saved, then click the "Open" button. Anviz Confidential Proprietary © 2001-2013 Anviz Global Inc. 24 AIM CrossChex User Manual 11. Verify the information of this .CSV file in the quick preview area. If all appears correct, click "Next" 12. Select the "Source" file headings that will match with the appropriate "Destination" fields in the database by using the drop down menus. Then click "Next". Anviz Confidential Proprietary © 2001-2013 Anviz Global Inc. 25 AIM CrossChex User Manual 13. Verify your selections in the next window. This should only display the fields that you have chosen to map. If everything appears correct, click "Next". 14. The next window will start the import process. click "Next" to Finish Anviz Confidential Proprietary © 2001-2013 Anviz Global Inc. 26 AIM CrossChex User Manual 15. You should receive a message that the process completed successfully. Then click "Finish". You should now see the employees that were imported in the "Employee List". 16. To complete the employee profile information, double-click an employee name from the list, and fill out all appropriate fields in the employee profile form. Anviz Confidential Proprietary © 2001-2013 Anviz Global Inc. 27 AIM CrossChex User Manual 3.3.3. Import Employees From Device File Export the employee information following the Device Operation Guide first and then Click on “Import Employees From Device File” tab. Then choose the exported file in the open dialog, the employees on the device will be imported to CrossChex, You can see the imported employees in the Employee List. 3.4. Overtime Settings Click on the "Overtime Settings" button on “Settings” tab. Anviz Confidential Proprietary © 2001-2013 Anviz Global Inc. 28 AIM CrossChex User Manual The Overtime Settings Center window will appear: Overtime Settings Center: Pre Set Name - Choose a name to reference this type of Regular, Overtime, Double-time, Special Project, etc. Overtime status: - After XX a day - Select this option to allow overtime, but only after a specified amount of hours per day. - And/Or after XX per week - Choose this option in addition to or instead of the previous option to allow overtime, but only after a specified number of hours per week. Double-time status: - After XX a day - Select this option to allow double-time, but only after a specified amount of hours per day. - And/Or after XX per week - Choose this option in addition to or instead of the previous option to allow double-time, but only after a specified number of hours per week. Do not allow an employee using this rule to work more than XX - This option will restrict employees using this payroll rule to a specified amount of over-time hours to eliminate overtime rule abuse. Pay Overtime At XX – Pay N times salary of overtime. Pay Doubletime At XX– Pay N times salary of doubletime. Pay employee lunch time for up to XX minutes – The time for lunch is not considered to be work time. Anviz Confidential Proprietary © 2001-2013 Anviz Global Inc. 29 AIM CrossChex User Manual Pay recess to employee up to XX minutes – The time for rest is not considered to be work time. If Employee does not take lunch, automatically deduct a lunch time of XX minutes - Configure the number of minutes to auto-deduct from the employee work day if they do not clock out for a lunch break. Deduct Lunch entirely after this time - Configure the numbers of minimum hours required for a shift before automatically deducting time rule is applied. Hourly Rate#- N times regular hourly pay. Use Employee Hourly Rate- Hourly paid employee. Allow a Late Arrival Grace Period of #minutes- A permitted grace period about XX minutes available for late to work time.. 3.5. Database Settings 3.5.1. Backup Database To backup the database, click the "Backup Database" option. Browse to a location that you wish to save this backup. It is recommended to save this backup in a remote or offsite location. Anviz Confidential Proprietary © 2001-2013 Anviz Global Inc. 30 AIM CrossChex User Manual Then click "Save" button to save it. The following window will appear: 3.5.2. Restore Database Click the "Restore Database" button. Browse to the location where the backup was saved and select the backup file you wish to restore, then click the "Open" button. Anviz Confidential Proprietary © 2001-2013 Anviz Global Inc. 31 AIM CrossChex User Manual 3.6. Security Settings 3.6.1. Add Administrator 1. Click “security settings” button. 2. The following window will appear: Anviz Confidential Proprietary © 2001-2013 Anviz Global Inc. 32 AIM CrossChex User Manual 3. Click “New User“ to add a new user, and CrossChex grants full administrator privileges to the first user by default. 4. Input “user name“ and “user password”, and assign authorities. Or click “Select All” to select all privileges. Anviz Confidential Proprietary © 2001-2013 Anviz Global Inc. 33 AIM CrossChex User Manual [Employee Control]- You can assign employee control authorities such as employee management and shifts management directly to a user. [Device Managment] - You can assign device management authority directly to a user. [Report and Export]- You can assign report and export management authority directly to a user. [Departments To Manage]- You can grant this authority that can manage one or more departments to a user. 5. Click “Save User“ to save the settings. The following message will be displayed after you add the user successfully. 6. The new users will be listed on “Security User List”. 7. Click “Log Out” or “Exit” to exit the software. Anviz Confidential Proprietary © 2001-2013 Anviz Global Inc. 34 AIM CrossChex User Manual 8. Reopen the CrossChex Advanced, and the following window will appear: 9. Input the “User Name” and “Password”, and click “OK” to log in CrossChex. 3.6.2. Add User Click “New User”, and input “User Name” and “User Password”. [View only records Employee]- The user can only get the right to view the records of one particular employee. 3.6.3. Search User Input username in search box, and click “Find User”. If the user exist, the user’s permission list will be displayed on right part. Anviz Confidential Proprietary © 2001-2013 Anviz Global Inc. 35 AIM CrossChex User Manual 3.6.4. Modify User Information Choose the user you want to change in “Security User List” to change the user name, password and authorities. Click “Save User” to save the changes. 3.6.5. Delete User Choose the user you want to delete in “Security User List” and click “Remove User” to delete. Or click “Cancel” to cancel the operation. 3.7. Configure Email You can send email containing the attendance records to employees from the email you configurated in. Click “Settings->Configure Email” to enter mail configuration page. The default setting is “Use AIM CrossChex SMTP Server”, click “Save” to keep the configuration. Anviz Confidential Proprietary © 2001-2013 Anviz Global Inc. 36 AIM CrossChex User Manual Or deselect “Use AIM CrossChex SMTP Server”, then you can input right mail address, mail server, port, user name and password, and click “Save” to save configuration. 3.8. Change Network Path Anviz Confidential Proprietary © 2001-2013 Anviz Global Inc. 37 AIM CrossChex User Manual Click “Settings->Change Network Path” to change the path of database if you want to use Microsoft SQL Server Database. Click “Next” to enter database configuration page. Please choose the connection type and follow the instructions to change the network path. 3.9. Change Themes Anviz Confidential Proprietary © 2001-2013 Anviz Global Inc. 38 AIM CrossChex User Manual Select the theme you want in themes area. 3.10. Import Data Click “Settings->Import Data” to enter “Import Data” page. Click “Following” to next step. Choose the path of existing database, and click “Following” to import data. Note: The function only enabled when connected to an SQL Server and allow transfer MS Access Database info to SQL Server. 3.11. Report Configuration Choose “Report Configuration” to set the Report items. 4. Attendance Schedule 4.1. Create or Manage Shifts The AIM-CrossChex application requires Employee Shifts, by default, to calculate when an employee is on-time or tardy for work. On-Duty hours worked during the employees scheduled shift will show up in the Regular worked hours field. On-Duty worked hours which is outside of the Employees scheduled shift will show up as Out-of-Shift work hours, and would not be calculated as worked hours for payroll processing. Out-of-shift time can be approved in two clicks. Shifts can be created for individual employees, or they can be assigned to an entire department or organization at once. IE: Mon-Fri; 8am-5pm can be assigned to the entire company at once. Creating and Managing new employee shifts and schedules can be accomplished by clicking on the "Employee Control" tab. Anviz Confidential Proprietary © 2001-2013 Anviz Global Inc. 39 AIM CrossChex User Manual Next, click on the "Create or Manage Shifts" button. The following window will appear: To preview an employee’s shift or schedule on the calendar, click on an employee from the "Employee List" to highlight them. Anviz Confidential Proprietary © 2001-2013 Anviz Global Inc. 40 AIM CrossChex User Manual You will see a preview of the employees scheduled work time on the calendar View Options: Day View -This option will display only one day on the calendar above. Anviz Confidential Proprietary © 2001-2013 Anviz Global Inc. 41 AIM CrossChex User Manual Week View - This option will display a five day work week on the calendar above. Month View - This option will display a month on the calendar above. Timeline View - This will display the schedule in a timeline view. Show Weekend - Selecting this option displays weekend days on the calendar above. Other Available Options Select Week to Work - Select the week in which you wish to print or clear. Print Week - This option will print the employees schedule for the Selected Week to Work. Clean Week - This option will clear the employees schedule for the Selected Week to Work. Select Month to Work - Select the Month in which you wish to print or clear. Print Selected Month - This option will print the employee schedule for the entire month for the Selected Month to Work. Anviz Confidential Proprietary © 2001-2013 Anviz Global Inc. 42 AIM CrossChex User Manual 4.1.1. Clean Selected Month - This option will clear the employee schedule for the entire month for the Selected Month to Work. Create the Shift To create or modify a shift or schedule for an employee, select an employee from the Employee List and double-click the appropriate date on the calendar shown above. You may also right-click the day you wish to start to schedule and choose "New Appointment" from the menu that appears. Or just leave your mouse over the calendar, there will be a tip show as follows: Anviz Confidential Proprietary © 2001-2013 Anviz Global Inc. 43 AIM CrossChex User Manual The following window will appear: 4.1.1.1. Set the Type To set shift type: Start Date - Start Date and Time for the new shift. End Date - End Data and Time for the new shift.(Choose whether to include a lunch time period or not by selecting the Check box to the left.) Amount of time to apply - Enter the number of hours to apply regardless of time setting above. Pre Set - Select the type of overtime to apply. New overtime types can be created through the Overtime Settings button under the Settings tab. Anviz Confidential Proprietary © 2001-2013 Anviz Global Inc. 44 AIM CrossChex User Manual Exceptions - Choose whether time worked will be applied as Regular, Overtime, Double-time, or Pay worked time at XX. Pay worked time at XX- Input the hours will be applied as worked time. Use Pre Set: Select this option to use the type of pre set. Reset - Click this button to reset all the options selected on this form. 4.1.1.2. Set the Recurrence If this shift will be a recurring shift, click on the "Recurrence" button at the bottom. The following window will appear: Anviz Confidential Proprietary © 2001-2013 Anviz Global Inc. 45 AIM CrossChex User Manual Appointment Time - Shows a preview of the new shift for which you are setting the recurrence for. Anviz Confidential Proprietary © 2001-2013 Anviz Global Inc. 46 AIM CrossChex User Manual Reoccurrence Pattern - Select the pattern in which this shift will recur as Daily, Weekly, Monthly. Range of Recurrence - Select the date range in which this recurring shift will span. Anviz Confidential Proprietary © 2001-2013 Anviz Global Inc. 47 AIM CrossChex User Manual Click "OK" once all recurrence settings are configured to return to the Shift creation Appointments window. Click Save and Close at the bottom of the Appointments window to save this new shift and return to the Employee Attendance window. Verify that your new shift has been created properly by double clicking on the appropriate employee from the Employee List. The new shift should display on the calendar in the date range in which it was created. 4.1.1.3. Examples of Recurrence Setting 1 Daily Recurrence Pattern: 1) Work one day every three days, End after 3 Occurrences: Anviz Confidential Proprietary © 2001-2013 Anviz Global Inc. 48 AIM CrossChex User Manual Click “OK” Tab, and then click “Save and Close” Tab,the following window will appear: 2) Work one day every three days, End at the 2013.8.31: Anviz Confidential Proprietary © 2001-2013 Anviz Global Inc. 49 AIM CrossChex User Manual Click “OK” Tab, and then click “Save and Close” Tab,the following window will appear: 3) Work on every weekday, end after 20 occurrences: Anviz Confidential Proprietary © 2001-2013 Anviz Global Inc. 50 AIM CrossChex User Manual Click “OK” Tab, and then click “Save and Close” Tab,the following window will appear: 1 Weekly Recurrence Pattern:Weekly in Recur week (s) indicates that the cycle cycles once every few weeks. 1) Select the day from Monday to Sunday in 1 week recur, as shown below: Anviz Confidential Proprietary © 2001-2013 Anviz Global Inc. 51 AIM CrossChex User Manual Click “OK” Tab, and then click “Save and Close” Tab,the following window will appear: 2) If user ask for Recur for every 2 week: Anviz Confidential Proprietary © 2001-2013 Anviz Global Inc. 52 AIM CrossChex User Manual Click “OK” Tab, and then click “Save and Close” Tab,the following window will appear: You also can change the Range of recurrence end after several “Occurences”. Anviz Confidential Proprietary © 2001-2013 Anviz Global Inc. 53 AIM CrossChex User Manual 2 Monthly Recurrence Pattern: Divided into 2 types: Day of every month (s) and The day of the week in every month (s): 1) The 6th day of every one month: Click “OK” Tab, and then click “Save and Close” Tab,the following window will appear: Anviz Confidential Proprietary © 2001-2013 Anviz Global Inc. 54 AIM CrossChex User Manual 2) The Thursday of the second week in every one month and end at 2013.8.31: Click “OK” Tab, and then click “Save and Close” Tab,the following window will appear: Anviz Confidential Proprietary © 2001-2013 Anviz Global Inc. 55 AIM CrossChex User Manual Range of recurrence: End After Occurrence and End By Date, the former represents the number of cycles, which means that as of a certain date. 4.1.1.4. Category Categories - Choose the category that this schedule will fall into: Shift, Sick, Vacation, Holiday, Personal or Call No Work. Call No Work and Sick have sub-options that will appear in the drop down menu below. Anviz Confidential Proprietary © 2001-2013 Anviz Global Inc. 56 AIM CrossChex User Manual There are settings for user to export to “QuickBooks”. 4.1.1.4.1. Create / Manage Categories Under “Other Options” tab, you can create/manage categories. Anviz Confidential Proprietary © 2001-2013 Anviz Global Inc. 57 AIM CrossChex User Manual Create a new category: 1 Click “Create New” button to create a new category. 2 Type in a new category name in the "Name:" field. 3 Select a Text Color and a Background Color for this new category by selecting the appropriate button: Anviz Confidential Proprietary © 2001-2013 Anviz Global Inc. 58 AIM CrossChex User Manual 4 Click the "Save Category" button to save the changes. 5 The following notification will appear: 6 You may now select your new category from the Categories Drop Down Menu on the Options Tab: Anviz Confidential Proprietary © 2001-2013 Anviz Global Inc. 59 AIM CrossChex User Manual 4.1.1.4.2. Delete a category Click “Other Options” Tab, choose the category you want to delete, and click “Remove Category” Tab to delete it. 4.1.2. Delete the Shift 1 Delete by day: Select one employee (or employees), simply right-click the shift you want to delete on the day, and choose “Edit Appointment”. Anviz Confidential Proprietary © 2001-2013 Anviz Global Inc. 60 AIM CrossChex User Manual The following window will appear: Click “Delete” button to delete the shift. 2 Delete by week: Select Week to Work - Select the week in which you wish to print or clear. Clean Week - This option will clear the employees schedule for the Selected Week to Work. 3 Delete by Month: Anviz Confidential Proprietary © 2001-2013 Anviz Global Inc. 61 AIM CrossChex User Manual Select Month to Work - Select the Month in which you wish to print or clear. Clean Selected Month - This option will clear the employee schedule for the entire month for the Selected Month to Work. 4.2. Records 4.2.1. Preview Employee Records This section allows you to preview and adjust all employee times before running the final reports. Employee Information is accessed via the "Employee Control" Tab. Click on the "Employee Information" button to preview and modify current employee time and attendance records. The following screen will appear: Anviz Confidential Proprietary © 2001-2013 Anviz Global Inc. 62 AIM CrossChex User Manual To preview employee records for the current date range specified, double click an employee from the "Employee List". 4.2.2. Record Operations 4.2.2.1. Add Record You have two ways to add records: On “Employee Performance” page Anviz Confidential Proprietary © 2001-2013 Anviz Global Inc. 63 AIM CrossChex User Manual On “Employee Information” page Click “New Record”, the following window will appear: Anviz Confidential Proprietary © 2001-2013 Anviz Global Inc. 64 AIM CrossChex User Manual 1 Select an employee(s) from the "Employee List" on right hand. You can click “Select All” for all employees. 2 Select a date from the calendar in which these new or modified times will be applied. Anviz Confidential Proprietary © 2001-2013 Anviz Global Inc. 65 AIM CrossChex User Manual 3 Select the Times information to add to the employees attendance records. 1) Time: You can add individual times for Start Work, Start Lunch, End Lunch, End Work by checking the boxes next to each additional time you wish to add and then modifying the time settings. You can also add time just by the number of total hours without individual punches by choosing the last "Add this time" option. 2) Method Normal Time - Calculates an employees work hours as Regular time until the overtime threshold is reached at which point it will begin to Anviz Confidential Proprietary © 2001-2013 Anviz Global Inc. 66 AIM CrossChex User Manual calculate overtime hours. Regular Time - Calculates an employees work hours as Regular time no matter whether the overtime threshold has been reached or not. 3) Overtime - Calculates an employees work hours as Overtime where 1 hour worked is equal to 1.5 hours of pay. Double-time - Calculates an employees work hours as Double-time where 1 hour worked is equal to 2 hours of pay. Use this Reason - You MUST select a reason for this manual time modification by choosing from the "Use this Reason" drop down menu or typing in a new reason in the text box. New reasons typed will be retained and can be chosen from the drop down list in the future. The new records will not be saved if there is no reason listed. The software will generate a warning message if there is no reason listed when the new record is saved. Use this Work Code - Type in a work code to be used when adding this record(s). This would be the same as if the employee keyed in a job code on the time clock before clocking IN or OUT in order to apply the hours worked to a specific job code. See Employee Performance under the Work Activity section of this topic. Selection Information The information you have selected can be previewed under the "Selection Information" heading at the bottom of this section. You may choose whether the times you are adding are IN's, OUT's or Breaks by choosing the appropriate drop down menu and making the proper IN, OUT or Break selection. This makes it convenient when adding time records that may cross multiple days or overnight. Once all of the time modification settings are completed and an employee has been selected, click the "Add Record/s" button at the bottom of this screen. 4.2.2.2. Edit and Delete Record To Modify an Employees current time records, simply right click on any of the time entries and choose "Edit Record" from the right-click menu. When editing records only the numbers and the AM and PM can be changed. The format of the Date and Time must remain exactly the same or it will not allow the change to be made and will revert back to the original data before the edit was attempted. To delete this entry, choose "Delete Record" from the right-click menu Anviz Confidential Proprietary © 2001-2013 Anviz Global Inc. 67 AIM CrossChex User Manual 4.2.2.3. Approve Record Any time records that are outside of the users assigned shift time frame will show up under the "Out of Shift" column. To approve out of shift time, simply right click on the hours field under the "Out of Shift" column and choose "Approve this O.S" or "Approve all O.S" Once either Out of Shift Approval option has been selected, the following window will appear: Anviz Confidential Proprietary © 2001-2013 Anviz Global Inc. 68 AIM CrossChex User Manual Amount of Time to Apply - Choose the total amount of Out of Shift time you would like to apply for this record. Pre Set - Choose a type of overtime to apply. New overtime types can be created through the Overtime Settings button under the Settings tab. Exceptions - Choose how you would like to apply this time. Typically this would be left blank so that the normal payment rules would be followed. If this Out of Shift time should be applied as an exception to the payment rules, then choose the appropriate selection of Regular Time, Overtime, Double-time. QuickBooks Export Settings – The export information of QuickBooks. Anviz Confidential Proprietary © 2001-2013 Anviz Global Inc. 69 AIM CrossChex User Manual The following Pop-up will appear above the time on your computer screen as a visual reminder of the Date and Time that the Out of Shift time occurred that you are approving. 4.2.2.4. Round Off Record Times In order for the Rounding function to work, the employees must have been setup with a shift. The shift settings define the start time and the end time for each employees work day. The rounding option allows managers or administrators to quickly adjust the start and end time captured which is outside of the approved works hours or shift time frame. For Example: An employee’s shift is set for 8am - 5pm. The employee clocks IN at 7:45am and clocks OUT at 5:15pm. If these times were to be rounded, then they would show up on the report as 8am and 5pm respectively. However, in this same example, if the employee clocks IN at 8:15am and clocks OUT at 4:45pm, then Rounding would not adjust either time. This is because the employee arrived to work late and left work early. In both cases they would be missing time and rounding would not affect these times in this case. Therefore, Rounding only adjusts time stamps that are outside of the approved work hours to reflect the start and end time of the shift as set in the employee’s schedule. To Round off employee times, simply Click the "Round Off Employee Times" button at the bottom of the screen. A Pop-up message will appear in the bottom right hand corner of the screen to let you know that this process is complete. You will notice all time stamps will now be adjusted to reflect the start and end time that is set in the employee schedule. Anviz Confidential Proprietary © 2001-2013 Anviz Global Inc. 70 AIM CrossChex User Manual 4.3. Employee Performance Click the "Employee Control" Tab. And then, click on the "Employee Performance" button The following window will appear: To view an Employees current work performance, double click a name from the Employee List. The current employee performance information will display in the charts and grid on the right, as follows: Anviz Confidential Proprietary © 2001-2013 Anviz Global Inc. 71 AIM CrossChex User Manual 5. Time Log - Displays the Total hours worked for each job code during the payroll period selected. Work Log - Display the total number of time punches collected for each job code during the payroll period selected. Work Name /Work Code - This is the name associated with the Job Codes that your company may use to pay for additional services from employees. Click on the Name of the job code to edit the name of the Job Code. Employee Activity - This section displays data listed in the Employee Information with the addition of showing Each Job code used during each day’s work. Time entries in this grid can be modified by using the right click command. Work Codes can be modified by choosing the appropriate Job Code from the drop down menu that displays when you click each Job Code Name Field. Access Control Once you install a device capable of Access Control to the AIM-CrossChex Software, a new tab “Access Control” will appear in the toolbar up top. To Manage Access control, click the "Access Control" Tab. Device Management: Anviz Confidential Proprietary © 2001-2013 Anviz Global Inc. 72 AIM CrossChex User Manual 5.1. Access Control Center Click the "Access Control Center" button. The following window will appear: 1. Select the device you wish to work with from the Device List at the bottom. 2. Click the View "Device Information" button to view the current users on this device and their access control permissions. 3. Employees who currently have permission Access to the area protected by this device will display under the "Employees with Access Privilege" table Anviz Confidential Proprietary © 2001-2013 Anviz Global Inc. 73 AIM CrossChex User Manual on the left. To change the current Access control Group of an Employee, click the drop-down menu under the "Assigned to Group" column. 4. To change the Employee permissions, click the checkbox to the right of the Employee Name. 5. Click the "Remove Employee Privilege" button in between the two tables. The employee will be transferred to the "Employee to the Employees Without Access Privilege" table on the right. This will remove the Access permissions for this employee on the selected device. Alternatively, to permit access to an employee that does not currently have permissions, place a check next to the employee under the "Employees without Access Privilege" table, and click the "Permit Employee Privilege" button in between the two tables. Anviz Confidential Proprietary © 2001-2013 Anviz Global Inc. 74 AIM CrossChex User Manual 5.2. Time Frame Management To manage the device time frames and access groups, click on the "Device Time Frames" button. The following window will be displayed: Select a device from the Device List at the bottom and click the "Get Time Frames" to view the current time frame configuration settings on the selected device. The current time frames will display in the top window Anviz Confidential Proprietary © 2001-2013 Anviz Global Inc. 75 AIM CrossChex User Manual To change any of these settings, click any of the time fields and change the time. There are start time and end time for each day of the week and for each time frame group. Once these settings are configured to your needs, click the "Set Time Frames" button to save the settings. To display the current group settings, click the "Get Group Settings" button Click the Drop-down menu under each Time Frame column to adjust the current setting. When all groups are configured as needed, click the "Set Group Settings" button to save these settings. 5.3. Reports 5.3.1. Access Control Reports Access Control Records are separate from Time and Attendance records and Access Control records are stored in separate database files. Anviz Confidential Proprietary © 2001-2013 Anviz Global Inc. 76 AIM CrossChex User Manual To Run Access Control Reports, click the "Access Control Report" button. The following window will appear: Select an employee or group of employees from the "Employee List" to include in this report. If no employees are selected the report will include all employees in the list starting from the head and working through to the bottom. To narrow down the list of employees to only include certain departments or individuals, use the "Department Filtering Options" and "Search Employees” filters at the bottom. Anviz Confidential Proprietary © 2001-2013 Anviz Global Inc. 77 AIM CrossChex User Manual Choose how you would like the report to display using the view options. One Page Per Data - this option runs the report displaying only one use per page. Add Signature Line - This option adds an Employee signature line at the bottom of the report. Add Manager Line - This option adds a Manager signature line at the bottom of the report. Period Selected - This option will run the report for the date period chosen in the Title Bar of the application. Selection - This option will allow you to select the days of the week to include in this report. When Selection is chosen, the days of the week will become available. Today - This option will run the report for the current day only. Once view options have been selected, click on the "Run Report" button. The report preview gives you many options to display and easily verify the reports on the screen. Take advantage of the many viewing and archiving features available in the top bar of the preview window. Anviz Confidential Proprietary © 2001-2013 Anviz Global Inc. 78 AIM CrossChex User Manual 5.3.2. Door Usage Report To Run Door Use Reports, click the "Door Use Report" button. The following window will appear: Select a device(s) from the "Device List" to include in this report. If no devices are selected the report will include all devices in the list starting from the top and working through to the bottom. The report will be sorted by each individual door. Choose how you would like the report to display using the view options. Anviz Confidential Proprietary © 2001-2013 Anviz Global Inc. 79 AIM CrossChex User Manual One Page Per Device - this option runs the report displaying only one device per page. Add Manager Line - This option adds a Manager signature line at the bottom of the report. Custom Period - This option will run the report for the date period chosen in the Title Bar of the application. Selection - This option will allow you to select the days of the week to include in this report. Once view options have been selected, click on the "Run Report" button. 6. Device Management 6.1. Add Device To add a device,click “Add Device”: Then the following window will appear: Anviz Confidential Proprietary © 2001-2013 Anviz Global Inc. 80 AIM CrossChex User Manual Input the Device Serial Number of Device,Click “Validate” Tab to continue: The device will show as below: The "Registered Devices" section displays the clocks that have currently been registered and activated in the AIM-CrossChex software. These devices can be Time Clocks or Access Control devices. Anviz Confidential Proprietary © 2001-2013 Anviz Global Inc. 81 AIM CrossChex User Manual 6.2. Remove a Device Select the appropriate device in the "Registered Devices" section, click the "Remove Device" button. When the "Remove Device" popup appears, verify that the serial number displayed is the same serial number of the time clock you wish to remove. If correct, click "OK" to complete the removal process. 6.3. Configure a Device Double-click the device you want to configure, click the "Configure Device" button. 6.3.1. Access Control & Time Attendance Device The following popup window will appear: Anviz Confidential Proprietary © 2001-2013 Anviz Global Inc. 82 AIM CrossChex User Manual Connection Type: USB - Select this option if you are connecting this time clock using the USB interface. This would mean that the time clock would plug directly into the computer running the AIM-CrossChex software. TCP/IP - Select this option if you are connecting this time clock by IP address. This requires the following information to be configured on the time clock itself: Static IP Address, Subnet Mask and Gateway. Some units may also require the AIM-CrossChex Server IP address or the Static IP address on your LAN assigned to the computer running the AIM-CrossChex software. (It is recommended to consult your local IT support personnel to assist with IP address and port settings configuration.) DNS – Select this option if you are connecting this time clock by DNS address. Port Number (1-65535) - By default all AIM-CrossChex time clocks use port "5010"for external and internal communication. If this port is already in use on your network or if multiple clocks will be installed on the same LAN, Anviz Confidential Proprietary © 2001-2013 Anviz Global Inc. 83 AIM CrossChex User Manual simply type the appropriate port in the "Port Number" text field. If modified, the port setting on the time clock must be set to match this custom port setting. See "Clock Control" for more information. (It is recommended to consult your local IT support personnel to assist with IP address and port settings configuration.) Device ID – The Device ID set in the device. Device Mode – Select the device as Server or Client. Device Preferred Setting: Device Location Name - Type in the name of device; Delete Double Punches In - This will be in time duration in minutes in which the software will ignore a double punch. A common setting would be 5 minutes. For example, if an employee punches in at 8:00am, and gets immediately sidetracked, then mistakenly punches again at 8:04am. The software will ignore the 8:04am punch as this falls within the 5 minute period specified above. Anviz Confidential Proprietary © 2001-2013 Anviz Global Inc. 84 AIM CrossChex User Manual Device Time Zone Value Adjustment - This value can be modified to increase or decrease the time settings by the appropriate number of hours for the purposes from syncing the time with the central AIM-CrossChex database computer. For example, if the central database is located in Florida and this time clock is going to be installed in California. Then you would enter a value of -3 since Pacific Time is 3 hours behind Eastern Time. This allows the clock to remain at its local time when the "Sync Time" command is sent to the device from the central database. If all clocks are installed in the same time zone, then this setting would not be used. Device Time Format - Select the time display format; 12 hours or 24 hours. Select Access Control Mode - Choose whether this device will be used for access control, time and attendance or both by selecting the options from the drop down menu. Click “Verify Settings” to synchronize the configuration to the device, then “Save Settings”. Note: Once you choose this device and as Access Control Device, you will have a new tab at the top of the application called Access Control. This section will allow you to configure the access control settings. Anviz Confidential Proprietary © 2001-2013 Anviz Global Inc. 85 AIM CrossChex User Manual Other Settings: Wiegand Settings - Use this setting to specify the type of communication that will be used with your access control device. Standard Anviz Contollers use the Encrypted Wiegand option. Fixed Wiegand Code (0-254) - If a fixed Wiegand code is selected from above, this is where the specific code would be entered. Lock Relay Time (0-15s) - This setting specifies how long the lock relay will be opened. Once the duration is reached, the relay will close again. Device Volume (0-5)- Set the device volume level. Device Sleep Time (0-250s) - Set the time before the device display will go to sleep. Update the fingerprint template intelligently - Select this option to have the fingerprint template of each user automatically updated with a better image capture every time the users touch the sensor. Device Initialization password (0-9999) - Set the password that will be used to Initialize the device. By default this password is "0". Anviz Confidential Proprietary © 2001-2013 Anviz Global Inc. 86 AIM CrossChex User Manual 6.3.2. FacePace Device When you connect FacePace device, the following popup window will appear: IP Range – Type the IP Range of the device; IP Address – Type IP address of the device; Port Number – Type the communication port number of device; Username – Type the Administrator account name; Password – Type the Administrator account password; Device Location Name - Type in the name of device; Device Time Zone Value Adjustment - This value can be modified to increase or decrease the time settings by the appropriate number of hours for the purposes from syncing the time with the central AIM-CrossChex database computer. Device Respond Time Frame – Set the response time of device; Device Initialization Password – When the user want to initialize the device, this password is needed for device security; Click “Verify Settings” to synchronize the configuration to the device, then “Save Settings” 6.4. Device Work Area Anviz Confidential Proprietary © 2001-2013 Anviz Global Inc. 87 AIM CrossChex User Manual Click on the "Device Work Area" button. The following window will appear: Place a check mark next to the Device you wish to communicate with to synchronize the time, collect time records, or clear records on a device. To connect all devices at once, click on the "Select All" button in the right hand side tool bar. Anviz Confidential Proprietary © 2001-2013 Anviz Global Inc. 88 AIM CrossChex User Manual Sync Date/Time - Once the device/s is selected you can synchronize the time with the computer by clicking it. Download New - Once the device/s are selected you can download the latest employee time and attendance or access control records stored on the device by clicking this button. Download All - To collect all records in history from the device Clear Records - After these records have been downloaded into the software database, you can clear all records from the device by clicking on this button. It is recommended to leave the records on the device as long as possible to act as an alternate backup of all of your time records. Deselect All - To deselect the device/s uncheck the box next to the device or click the " Deselect All " button at the bottom. Other optional available: Available Device To Initialize: To reset the device to factory default settings, choose the appropriate clock from the drop down list in the bottom right hand corner, then click the "Initialize Unit" button. Initializing the device will erase all users and records from the device. After select the device you want to initialize, Click “Initialize Unit” Tab, the following window will appear: Anviz Confidential Proprietary © 2001-2013 Anviz Global Inc. 89 AIM CrossChex User Manual Click “OK” tab, software will ask you enter the password for this device. Enter the password you set on “Configure Device” page. The system will prompt “Process Completed” message. Device Network Settings: With the device connection established through the provided USB cable, you can pre-configure the "Device Network Settings" before deployment or installation. Choose the appropriate device from the drop down list. Click the "Change Network" button. Anviz Confidential Proprietary © 2001-2013 Anviz Global Inc. 90 AIM CrossChex User Manual The following Fields will become available. (If you need assistance with this section, please contact your local IT support representatives.) IP Address - The static IP address of the clock on your LAN. Subnet Mask - The default Subnet Mask of your LAN. Default Gateway - The default gateway IP address on your LAN. Physical Address - The MAC address of the device. Server IP Address - The IP address of the machine that will serve the AIM-CrossChex Professional software. Network Port - The communication port that the server will use to communicate through the LAN or WAN to the time clock. By default, this port is set to 5010. If this port is already in use on your network, you can change this setting here. External Access Only - With this option enabled, this device will only be accessible via a server on the WAN. No computer on the local LAN will have access to this device. TCP/IP Mode - Set the device as Server or Client. Server Mode - With this option enabled, the device will only communicate with the Server IP address configured to the right. Client Mode - With this option enabled, the device will communicate with any or multiple computers that request the time records from the device. Note: You must currently be connected to the device via USB before it will be available in the drop down list. If all devices are connected, be sure to choose the correct device that you want to restore to default settings. Anviz Confidential Proprietary © 2001-2013 Anviz Global Inc. 91 AIM CrossChex User Manual 6.5. Device Data Management To manage data on device, you must have first establish a connection to one or more devices, double click “Device Management” Tab, the following window will appear: To use the links in the Device Options and Fingerprint Options sections, you must select a device in the bottom by placing a check in the box next to the device name. 6.5.1. Device Options 6.5.1.1. Upload Employee to Device To upload employee names from the AIM-CrossChex database to the device, select a device to upload the employee to from below and then click on the "Upload Employee to Device". This option is used to upload the employees Anviz Confidential Proprietary © 2001-2013 Anviz Global Inc. 92 AIM CrossChex User Manual profile including the name onto the device so that when the fingerprint sensor is touched, the employees name will display on the screen. The following window will display: Choose the employees that you would like to upload to the selected time clock/s by placing a check in the box on the right hand side. If you would like to upload all employees at once, click the "Select All" button up top. This will place a check next to all employees in the list. Check the box "If present upload Fingerprint", if you would like to transfer fingerprint stored in the database to the device also. This is useful when uploading existing employees to a new device. Then, click the "Upload Employees" button to complete this task. The following message will appear if this operation is successful: Anviz Confidential Proprietary © 2001-2013 Anviz Global Inc. 93 AIM CrossChex User Manual 6.5.1.2. Download or Remove Employee from Device To download or remove an employee from the device, select a device to download or remove the employee from at the bottom, then click on "Download or Remove Employee on Device". This option is used to upload the employees profile including the name onto the device so that when the fingerprint sensor is touched, the employees name will display on the screen. The following window will display: Anviz Confidential Proprietary © 2001-2013 Anviz Global Inc. 94 AIM CrossChex User Manual Choose the employees that you would like to download or remove from the selected device by placing a check in the box on the right hand side. If you would like to download or remove all employees at once, click the "Select All" button up top. This will place a check next to all employees in the list. Check the box "Download Fingerprint" if you would like to download or remove the fingerprint stored in the device also. This is useful when re-enrolling existing employees to make sure that the fingerprint is not repeated in the system during re-enrollment. Then, click the "Download Employees" or "Remove Employees" button to complete this task. 6.5.1.3. Manage Message to Employee To manage messages to employees from the device, select a device at the bottom, then click on “Manage Messages to Employees”, this option is used to assign messages to employees so that when the employees punches, the messages will display on the device’s screen. The following window will appear: Anviz Confidential Proprietary © 2001-2013 Anviz Global Inc. 95 AIM CrossChex User Manual 6.5.1.3.1. Assign Messages to Employees Click the "Load Information" button to see the current messages on the selected device. The following window will appear: To send a message to a single employee, place a check mark in the "Upload Message" check box next to the appropriate employee. In the "Message" field, type the message you wish to have display on the device when that employee clocks IN. Anviz Confidential Proprietary © 2001-2013 Anviz Global Inc. 96 AIM CrossChex User Manual Select the duration of time that this message will be active and click the "Assign" button to save. A pop-up window will appear letting you know that this was successful. To Assign a Public Message to all employees, select valid time, and simply type the message into the Public Message Field and click the "Assign Public Message" button. A pop-up will appear letting you know that this was successful. 6.5.1.3.2. Manage Device Messages Click the Manage Device Message Tab and the following window will appear: Anviz Confidential Proprietary © 2001-2013 Anviz Global Inc. 97 AIM CrossChex User Manual Click the "View Device Messages" button to see all existing messages that have been saved to the selected device. Click either "Select All Messages" button or place a check in the check box next to the individual message you wish to remove. Then click the "Remove Selected Messages" button. You may also remove all messages at once with the "Remove all Messages" button. 6.5.1.4. Manage Devices Ring Setting To manage devices ring setting, select a device at the bottom, then, click on “Manage Devices Ring Setting”. Anviz Confidential Proprietary © 2001-2013 Anviz Global Inc. 98 AIM CrossChex User Manual The following window will display the device ring setting, you can set the ring time, check the day you want to set from Monday to Sunday, you can set 30 times at most. Click on “Set Ring Time” to save the ring setting on device after you set all the ring time. A pop-up will appear letting you know that this was successful. 6.5.1.5. Manage Device State To manage devices state, select devices at the bottom, then click on “Manage Devices State”. Anviz Confidential Proprietary © 2001-2013 Anviz Global Inc. 99 AIM CrossChex User Manual The following window will display. First step we set the company’s state. You can set 8 states and it will save automatically. Next Step is to apply the company setting to the selected device. Just click on “Send Setting to Device/s” On “Manage Device State” tab will apply company setting to device. Anviz Confidential Proprietary © 2001-2013 Anviz Global Inc. 100 AIM CrossChex User Manual Last Step is to set device time frames, Click on button “Load Device/s State Frames” to display current device state frames, you can select the state and modify the begin time and end time from Monday to Sunday. After complete configuration, click “Save Device/s State Frames” to save the settings on device. 6.5.2. Fingerpint Options Anviz Confidential Proprietary © 2001-2013 Anviz Global Inc. 101 AIM CrossChex User Manual To manage Fingerprint: 6.5.2.1. Backup Fingerpint from Device Click the "Backup Fingerprint from Device" option and the following window will appear: Click the "Select All" button or check the fingerprints you wish to backup individually. The total number of fingerprints on the device and total number of fingerprints selected will be displayed in the upper left hand corner. Once all the fingerprints you wish to backup are selected, click the "Backup Fingerprint" button to complete this task. The following window will appear if this operation is successful: Anviz Confidential Proprietary © 2001-2013 Anviz Global Inc. 102 AIM CrossChex User Manual 6.5.2.2. Restore Fingerpint to Device Click the "Restore Fingerprint" option once the device is selected below and the following window will appear: Click the "Select All" button or check the fingerprints you wish to restore individually. The total number of fingerprints on the device and total number of fingerprints selected will be displayed in the upper left hand corner. Once all fingerprints have been selected, click the "Restore Fingerprints" button to restore fingerprints to the selected Device/s. The following window will appear if this operation is successful: Anviz Confidential Proprietary © 2001-2013 Anviz Global Inc. 103 AIM CrossChex User Manual 6.5.2.3. Managed Stored Fingerprints Click "Managed Stored Fingerprints" and the following window will appear: Click the "Select All" button or check the fingerprints you wish to remove individually. The total number of fingerprints on the device and total number of fingerprints selected will be displayed in the upper left hand corner. Once all fingerprints have been selected, click the "Remove Fingerprints" button to remove fingerprints from the Software. The following window will appear if this operation is successful: Anviz Confidential Proprietary © 2001-2013 Anviz Global Inc. 104 AIM CrossChex User Manual 6.6. Delete Admin Identifier Just Click on button “Delete Admin Identifier” to delete the selected device’s admin user. The following window will appear if this operation is successful: 6.7. Set GPRS Click on button “Set GPRS” will pop up a window to present current device’s GPRS information. Anviz Confidential Proprietary © 2001-2013 Anviz Global Inc. 105 AIM CrossChex User Manual Change APN, Server IP, Port Number, Mode, Local IP, Username, Password and Click on button “Set GPRS”. The following message will appear if the operation is successful. 6.8. Flash Drive All time and attendance records are stored locally on the device. If you choose to manage your time clock in a stand-alone environment or if you lose connection to your network or internet and are unable to download the records through the remote database, you may use the USB Upload feature in the AIM-CrossChex application to manually transfer these records from the device into the database. To capture the time records manually from the device, follow the Device Operation Guide for the steps required in this simple procedure. Once these steps are completed, you will have the downloaded employee records on a USB flash drive. Anviz Confidential Proprietary © 2001-2013 Anviz Global Inc. 106 AIM CrossChex User Manual The BAK.KQ file will be located in a folder on the flash drive. Every time you download the records, the file in this directory will be over-written. You MUST create a new folder on the flash drive named using the same serial number of the device you have added to the software. Once created, copy the BAK.KQ file from the folder into the new folder labeled with your device serial number. This new folder is the location you will choose to import the files from in the following procedure. You should have also already added and configured your device in the AIM-CrossChex Software and it should be listed under the Registered Devices section of the Device Management window. Click on "Upload USB Data", the following window will appear: Browse to the USB flash drive directory created above with the device serial number as the name of the folder. Once you locate the filename with the extension ".KQ", highlight it by clicking on the *.KQ file, then press the "Open" button. This will import the Time records for the employees who are enrolled and use this specific device. Repeat these steps for any additional USB flash drive which has employee time and attendance records from other offline devices. Anviz Confidential Proprietary © 2001-2013 Anviz Global Inc. 107 AIM CrossChex User Manual 7. Report To run Time and Attendance reports, Click on the "Reports" tab. 7.1. Complete Report Choose the "Complete Report" to display a detailed Basic report. You can choose to run the report with the location name included or without the location name included. The Complete - With Location report will display the time clock location name next to each punch in a landscape mode report. The Complete - Without Location report will not display the location name of the time clock for each punch, and will display in portrait mode. 1 Select an employee or group of employees from the "Employee List" to include in this report. If no employees are selected, the report will include all employees in the list starting from the top and working through to the bottom of the list. Anviz Confidential Proprietary © 2001-2013 Anviz Global Inc. 108 AIM CrossChex User Manual 2 Choose how you would like the report to display using the view options. One Page Per Employee - this option runs the report displaying only one use per page. Add Signature Line - When One Page per employee is selected, this option adds an Employee signature line at the bottom of the report. Add Manager Line - When One Page per employee is selected, this option adds a Manager signature line at the bottom of the report. Period Selected - This option will run the report for the date period chosen in the Title Bar of the application. Selection - This option will allow you to select the specific days of the week during the pay period above to include in this report. When Selection is chosen, the days of the week check boxes will become available. Today - This option will run the report for the current day only. Custom Period - This option allows you to select a custom range of pay periods to run a report for. The maximum number of pay periods that can be selected is 26 pay periods in the history or 26 pay periods in the future. This gives you the ability to run a report for up to 1 fiscal year or more depending on your payroll frequency setting. 3 Once view options have been selected, click on the "Run Report" button. Anviz Confidential Proprietary © 2001-2013 Anviz Global Inc. 109 AIM CrossChex User Manual The report preview gives you many options to display and easily verify the reports on the screen. Take advantage of the many viewing and archiving features available in the top bar of the preview window. Email report: Email inform: Click “Email Inform” button, the software will send an email containing the report to the employee you choose in list. The following window will pop up when successfully sent the emails. Anviz Confidential Proprietary © 2001-2013 Anviz Global Inc. 110 AIM CrossChex User Manual Note: Make sure each employee gets a available email address in employee information. Email inform to….: 1. Click the “Email inform to….” Button. The following window will pop up. Input the email address that will receive the report. And click “OK”. 2. Input the email content, and click “Send” button on top left corner. You also can add email address on copy. Anviz Confidential Proprietary © 2001-2013 Anviz Global Inc. 111 AIM CrossChex User Manual The following window will pop up when successfully sent the emails. 7.2. Hours Report To run Hours reports, Click on the "Reports" tab. Choose the "Hours Report" to display total hours on report. Anviz Confidential Proprietary © 2001-2013 Anviz Global Inc. 112 AIM CrossChex User Manual 1. Select an employee or group of employees from the "Employee List" to include in this report. If no employees are selected the report will include all employees in the list starting from the head and working through to the bottom. 2. Choose how you would like the report to display using the view options. Refer to Chapter 7.1 for detail of view options. 3. Once view options have been selected, click on the "Run Report" button. The report preview gives you many options to display and easily verify the reports on the screen. Take advantage of the many viewing and archiving features available in the top bar of the preview window. About email report, please refer to Chapter 7.1 “Email Report”. 7.3. Summary Report To run Time and Attendance reports, Click on the "Reports" tab. Choose the "Summary Report" to display total hours on report. 1 Select an employee or group of employees from the "Employee List" to include in this report. If no employees are selected the report will include all employees in the list starting from the head and working through to the bottom. 2 Choose how you would like the report to display using the view options. Custom Period - This option allows you to select a custom range of pay periods to run a report for. The maximum number of pay periods that can be Anviz Confidential Proprietary © 2001-2013 Anviz Global Inc. 113 AIM CrossChex User Manual selected is 26 pay periods in the history or in the future. This gives you the ability to run a report for up to 1 fiscal year or more depending on your payroll frequency setting. 3 Once view options have been selected, click on the "Run Report" button. The report preview gives you many options to display and easily verify the reports on the screen. Take advantage of the many viewing and archiving features available in the top bar of the preview window. About email report, please refer to Chapter 7.1 “Email Report”. 7.4. Late/Absent Report To run Late/Absent reports, Click on the "Reports" tab. Choose the "Late/Absent Report" to display the list of employees who clocked in late for their shift within the date range specified. 1 2 3 Select an employee or group of employees from the "Employee List" to include in this report. If no employees are selected the report will include all employees in the list starting from the head and working through to the bottom. Choose how you would like the report to display using the view options. Refer to Chapter 7.1 for detail of view options. Once view options have been selected, click on the "Run Report" button. The report preview gives you many options to display and easily verify the reports on the screen. Take advantage of the many viewing and archiving features available in the top bar of the preview window. Anviz Confidential Proprietary © 2001-2013 Anviz Global Inc. 114 AIM CrossChex User Manual About email report, please refer to Chapter 7.1 “Email Report”. 7.5. Jobs Code Report To run Job Codes reports, Click on the "Reports" tab. Choose the "Jobs Code Report" to display employee work performance across all job codes in report format. Select an employee or group of employees from the "Employee List" to include in this report. If no employees are selected the report will include all employees in the list starting from the head and working through to the bottom. 4. Choose how you would like the report to display using the view options. Refer to Chapter 7.1 for detail of view options. Once view options have been selected, click on the "Run Report" button to get the report. About email report, please refer to Chapter 7.1 “Email Report”. 7.6. Custom Report To run Time and Attendance reports, Click on the "Reports" tab. Choose the "Custom Report" to display a report across a custom date range. Anviz Confidential Proprietary © 2001-2013 Anviz Global Inc. 115 AIM CrossChex User Manual 1 Select an employee or group of employees from the "Employee List" to include in this report. If no employees are selected the report will include all employees in the list starting from the head and working through to the bottom. 2 Choose how you would like the report to display using the view options. You can choose the period you need for report. 3 Once view options have been selected, click on the "Run Report" button. The report preview gives you many options to display and easily verify the reports on the screen. Take advantage of the many viewing and archiving features available in the top bar of the preview window. About email report, please refer to Chapter 7.1 “Email Report”. 7.7. Employees History Report To run Time and Attendance reports, Click on the "Reports" tab. Choose the "Employee History Report" to display a report across a custom date range. Anviz Confidential Proprietary © 2001-2013 Anviz Global Inc. 116 AIM CrossChex User Manual 1 Select an employee or group of employees from the "Employee List" to include in this report. If no employees are selected the report will include all employees in the list starting from the head and working through to the bottom. 2 Choose how you would like the report to display using the view options. 3 Once view options have been selected, click on the "Run Report" button. The report preview gives you many options to display and easily verify the reports on the screen. Take advantage of the many viewing and archiving features available in the top bar of the preview window. About email report, please refer to Chapter 7.1 “Email Report”. 7.8. Daily Attendance Statistic To run Time and Attendance reports, Click on the "Reports" tab. 1. Choose the "Daily Attendance Statistic" to display a report across a custom date range. 2. Select an employee or group of employees from the "Employee List" to include in this report. If no employees are selected the report will include all employees in the list starting from the head and working through to the bottom. 3. Choose how you would like the report to display using the view options. Anviz Confidential Proprietary © 2001-2013 Anviz Global Inc. 117 AIM CrossChex User Manual 4. The report preview gives you many options to display and easily verify the reports on the screen. Take advantage of the many viewing and archiving features available in the top bar of the preview window. About email report, please refer to Chapter 7.1 “Email Report”. 7.9. Print and Save Reports The reports allow you to run and view reports of the collected time records. You may also print the reports or save them as the following file types: .pdf, .xls, .xlsx, .emf, .tiff, .bmp, .jpg, .png, .jpg, .gif 7.9.1. Print Reports To print a report, simply click the "Printer" icon in the upper left hand corner of the Report View Window. Anviz Confidential Proprietary © 2001-2013 Anviz Global Inc. 118 AIM CrossChex User Manual The "Print" pop-up window will appear: 7.9.2. 4 Select the printer that you would like to print this report. 5 Click the "OK" button at the bottom of the window to start the print job. Save Report in Excel To save a report in an Excel file format, complete the following steps: 1 Click on the "Save As" icon in the upper left hand corner of the Report View window. Anviz Confidential Proprietary © 2001-2013 Anviz Global Inc. 119 AIM CrossChex User Manual 2 The "Save As" popup window will appear: 3 Browse to a location to save the Excel File. Anviz Confidential Proprietary © 2001-2013 Anviz Global Inc. 120 AIM CrossChex User Manual 4 Type a name for this report, then select the File type *.xls from the "Save as Type" dropdown menu. 5 Click the "Save" button at the bottom of this popup window. 6 A popup will appear which allows you to choose certain options that you want to apply when saving the report. Anviz Confidential Proprietary © 2001-2013 Anviz Global Inc. 121 AIM CrossChex User Manual 7 Select all default and click the "OK" button. If Microsoft Excel is installed on your machine, once saved, the file will automatically open in Excel. The following is a preview of an AIM-CrossChex Report in Excel: 7.9.3. Save Report as PDF To save a report in an Adobe PDF file format, complete the following steps: 1 Click on the "Save As" icon in the upper left hand corner of the Report View window. Anviz Confidential Proprietary © 2001-2013 Anviz Global Inc. 122 AIM CrossChex User Manual 2 The "Save As" popup window will appear: 3 Browse to a location to save the PDF File. Anviz Confidential Proprietary © 2001-2013 Anviz Global Inc. 123 AIM CrossChex User Manual 4 Type a name for this report, then select the File type *.pdf from the "Save as Type" dropdown menu 5. Click the "Save" button at the bottom of this popup window. Anviz Confidential Proprietary © 2001-2013 Anviz Global Inc. 124 AIM CrossChex User Manual 6 A popup will appear which allows you to choose certain options that you want to apply when saving the report. 7 Select all default and click the "OK" button. Once saved, the file will automatically open in Adobe Acrobat. The following is a preview of an AIM-CrossChex Report in Adobe: 8. Export Click "Export" to export page. Anviz Confidential Proprietary © 2001-2013 Anviz Global Inc. 125 AIM CrossChex User Manual 8.1. Setting 8.1.1. QuickBooks Export Setting Click “QuickBook Export Settings”. The following is configuration page: Configure Service Items: 1. Click “Add Service” button. Anviz Confidential Proprietary © 2001-2013 Anviz Global Inc. 126 AIM CrossChex User Manual 2. Input the name of “New Service”, and click “OK” to save the setting. 3. Choose the item you want to modify, and Click “Edit Service” button. Input the new name and click “OK” to save the setting. 4. Choose the service you want to delete, and click “Remove Service” button. Anviz Confidential Proprietary © 2001-2013 Anviz Global Inc. 127 AIM CrossChex User Manual 5. Click “OK” to confirm the operation or “Cancel” to cancel the operation. Configure Payroll Items: 1. Click “Add Payroll” to add Payroll Item. 2. Input the name of “Payroll Item” and Payroll Type in dialog box. Anviz Confidential Proprietary © 2001-2013 Anviz Global Inc. 128 AIM CrossChex User Manual 3. Click “Add Payroll” to add this Payroll Item. 4. Choose the item you want to change, and click “Edit Payroll” button. 5. Input the new name of “Payroll Item” or new Payroll Type in dialog box. Click “Edit Payroll” to save this Payroll Item. Anviz Confidential Proprietary © 2001-2013 Anviz Global Inc. 129 AIM CrossChex User Manual 6. Choose the service you want to delete, and click “Remove Payroll” button. 7. Click “OK” to confirm the operation or “Cancel” to cancel the operation. Configure Jobs Items: 1. Click “Add Job Item” button to add Job items. Anviz Confidential Proprietary © 2001-2013 Anviz Global Inc. 130 AIM CrossChex User Manual 2. Input Job name and Job Type in dialog box. Click “Add Job” button to save the setting. 3. Choose the item you want to change, and click “Edit Job Item” button. Anviz Confidential Proprietary © 2001-2013 Anviz Global Inc. 131 AIM CrossChex User Manual 4. Input new Job name or new Job Type in dialog box. Click “Edit Job” button to save the setting. 5. Choose the job you want to delete, and click “Remove Job Item” button. Anviz Confidential Proprietary © 2001-2013 Anviz Global Inc. 132 AIM CrossChex User Manual 6. Click “OK” to confirm the operation or “Cancel” to cancel the operation. 8.2. External Application 8.2.1. Export to QuickBooks Click “Export to QuickBooks”. Select employees from employees list. The default is all employees. Click “Preview Export” to view the exported data. Anviz Confidential Proprietary © 2001-2013 Anviz Global Inc. 133 AIM CrossChex User Manual Click “Generate Export” to export the data. Choose the path of data and click “Save” in the dialog box. The following window will pop up after successful export. Anviz Confidential Proprietary © 2001-2013 Anviz Global Inc. 134 AIM CrossChex User Manual If you want to add a comma in last name, please click “Check the box if a comma is needed in your employee last name”. 8.2.2. Export to ADP Click “Export to ADP”. Input Sick Code,Vacation Code,Holiday Code and Double Code from the third part financial software. Choose ”Include Employee Name” if you want to add Employee Name in report. Input “Company Code” and “Batch ID”. Choose the employees in “Employee List” and click “Preview Export” to view the data. Click “Generate Export” to export the report. Choose the path of data and click “Save” in the dialog box. Anviz Confidential Proprietary © 2001-2013 Anviz Global Inc. 135 AIM CrossChex User Manual The following window will pop up after successful export. 8.2.3. Export to PAYCHEX Click “Export to PAYCHEX”. Input Company Code, Doubletime Code and Sick Code from the third part financial software. You don’t need to input Doubletime Code if the overtime is not permitted. Click “Sum all identical payment types per period” to export the sum of all identical payment types per period Anviz Confidential Proprietary © 2001-2013 Anviz Global Inc. 136 AIM CrossChex User Manual Choose the employees in “Employee List” and click “Preview Export” to view the data. Click “Generate Export” to export the report. Choose the path of data and click “Save” in the dialog box. The following window will pop up after successful export. 8.2.4. Export to Heartland Plus One Anviz Confidential Proprietary © 2001-2013 Anviz Global Inc. 137 AIM CrossChex User Manual Click “Heartland Plus One“. Input “Company Code“. Choose the employees in “Employee List” and click “Preview Export” to view the data. Click “Generate Export” to export the report. Choose the path of data and click “Save” in the dialog box. The following window will pop up after successful export. Anviz Confidential Proprietary © 2001-2013 Anviz Global Inc. 138 AIM CrossChex User Manual 8.2.5. Export to GMS Click “Export to GMS“. Input Program Element Number, and choose “Batch Format” or “Individual Format”. Choose the employees and click “Preview Export” to view the exported data. Click “Generate Export” to export the report. Choose the path of data and click “Save” in the dialog box. Anviz Confidential Proprietary © 2001-2013 Anviz Global Inc. 139 AIM CrossChex User Manual 8.2.6. Export to Total Track Click “Export to TotalTrack“. Choose the employees and click “Preview Export” to view the exported data. Click “Generate Export” to export the report. Choose the path of data and click “Save” in the dialog box. Anviz Confidential Proprietary © 2001-2013 Anviz Global Inc. 140 AIM CrossChex User Manual 8.2.7. Export to Easy Choice T&A Click “Export to Easy Choice T&A“. Input the “Company Code”, and choose the employees. Click “Preview Export” to view the exported data. Click “Generate Export” to export the report. 8.2.8. Export to REPLICON Click “Export to REPLICON“. Anviz Confidential Proprietary © 2001-2013 Anviz Global Inc. 141 AIM CrossChex User Manual Choose the employees. Click “Preview Export” to view the exported data. Click “Generate Export” to export the report. 8.2.9. Export to CheckMark Click “Export to CheckMark“. Choose the employees. Click “Preview Export” to view the exported data. Click “Generate Export” to export the report. 9. Update & Uninstallation 9.1. Update To update the AIM CrossChex online, simply click the button on the top left corner. Anviz Confidential Proprietary © 2001-2013 Anviz Global Inc. 142 AIM CrossChex User Manual The following menu will pop up, click the ” Application Updates” button. Follow the instructions to finish the update. 9.2. Uninstallation There are 3 ways to uninstall the software: Remover via software: 1. Double click on “Setup.exe” of CrossChex, and the following window will appear: Anviz Confidential Proprietary © 2001-2013 Anviz Global Inc. 143 AIM CrossChex User Manual 2. Click “Remove”, you will start the process to remove the software. 3. Click “Remove” button to continue the process. The following window will pop up when the software is successfully removed from computer. Anviz Confidential Proprietary © 2001-2013 Anviz Global Inc. 144 AIM CrossChex User Manual Remove via control panel: 1. Click “Start”,”Control Panel”, and look for “Programs and Features”, find AIM CrossChex Advanced in the list. Anviz Confidential Proprietary © 2001-2013 Anviz Global Inc. 145 AIM CrossChex User Manual 2. Click “Uninstall” button, the following window will show you the process of uninstallation. 3. The window will close when the removal/uninstall completes. Remove via start menu: 1. Click “Start”, and look for “AIM CrossChex” folder on left side, click it. Anviz Confidential Proprietary © 2001-2013 Anviz Global Inc. 146 AIM CrossChex User Manual 2. Click “Uninstall”, the following window pop up. 3. Click “Yes” to uninstall the software. 4. The window will close when the removal/uninstall completes. Anviz Confidential Proprietary © 2001-2013 Anviz Global Inc. 147