1
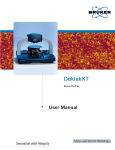
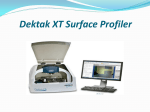
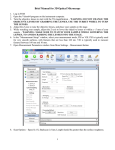
DektakXT Stylus Profilometer User Instructions (MMRC) GLAs: Emily Warren ([email protected]) and Heather Audesirk ([email protected]) Document Updated: 4/16/2012 These basic instructions are for general use of the DektakXT profilometer. The full user guide can be found on the desktop of the control computer. How the system works: The DektakXT system takes measurements electromechanically by moving a diamondtipped stylus over the sample surface according to a userprogrammed scan length, speed, and stylus force. The stylus is linked to a Linear Variable Differential Transformer (LDVT), which produces and processes electrical signals that correspond to surface variations of the sample. Our system is only configured in 2D mode, which means: Manual XY translation: 101.6 x 101.6 mm (4 x 4 inches) of XY translation, manual leveling manual theta rotation Maximum sample thickness: 50 mm (1.9 inches) thick Maximum scan length: 55 mm (2.16 inches) Stylus Tip Diameter: 2 microns When you arrive, the instrument should be off, and the cover to the isolation chamber should be closed. The bottom of your sample must be clean (no Hg or Ga/In contaminated samples allowed!) StartUp: 1. Turn on power supply (Black box on right) 2. Press (I) button on white power control box 3. Start Vision64 Software. The following should happen: The tower assembly will move to its upper limit. The system stops with the stylus in the Tower Up position. The scan stage initializes. The Vision64 Welcome screen appears, followed by the Vision64 “Instrument” tab, which includes the DektakXT Live Video Display 4. After the system initializes, it is safe to load your sample onto the stage (Bruker recommends letting the system warm up for 15 minutes, but we haven’t seen that it makes a difference in measurement quality). *Put on gloves before touching anything inside of the lid* 5. Check that the flat glass block is free of dust (this flat surface is what allows us to measure 1 accurately over longer distances. It should be kept clean at all times!) If you see any dust, please blow it off with compressed air or N2. Loading your sample: 1. In the “Live Video” Window, hit “Unload Sample” the stage should move toward you (if not, it was already in unload). 2. You can now position your sample on the chuck (vacuum capabilities are currently not installed, so just center it carefully) 3. In the “Live Video” Window, hit “Load Sample” Note: During a scan, the machine will pull the stylus towards the back of the machine, so you want to move your sample so that you are at the front edge of your desired scan area. Adjusting sample position: 1. To position a sample using the manual samplepositioning stage controls: Ensure the stylus is not touching the sample surface. If it is, click the Tower Up button on the toolbar. Position the scan start site by using the XY positioning levers. •Pull the lever below the front of the platform for coarse X movement. Push the lever back up to secure coarse position •Pull the lever below the left side of the platform for coarse Y movement. Push the lever back up to secure coarse position •Turn the respective knobs to finely position the sample. 2. Hit “Tower Down” to lower the stylus. The stylus will hit the sample, and then retract to ~1mm above the surface. Be sure not to bump the instrument during this process. Calibration: 1. If desired, you can use the calibration standards (in DektakXt drawer or by old profilometer) to calibrate the instrument prior to use to check that the system is working properly. To do so, follow the instructions above for loading and running a scan, and ensure that the measurements correspond to the calibration standard specs. If the standards are off significantly, contact the GLA. Software Scan Parameters: The “Measurement Setup” window allows you to control scan parameters. Set each of the following: 1. Scan Type: Standard Scan 2. Range: Sets the Z range of the instrument. Set this to a range slightly larger than the feature you want to measure. Note if using Hills and Valleys mode, you can only measure half of the range above the starting point, and half below. The selected scan range is scaled across the LVDT output of the stylus head sensor and digitized. The greater the selected scan range, the lower the vertical resolution of the measurement. The 6.5um range will provide a vertical bit resolution of approximately 0.1nm. The 65.5um range has a resolution of 1nm, the 524um range has a 2 resolution of 8nm, and the 1mm range has a vertical resolution of 15nm. So while the 65.5um, 524um, and 1mm scan ranges would all work for a 10um step, the 65.5um is the best. 3. Profile: Will determine whether you start at bottom, middle, or top of designated range. Valleys: Provides 90% of the measurement range below the zero horizontal grid line. This option is used primarily for measuring etch depths. Hills and Valleys: Provides 50% of the measurement range above the zero horizontal grid line and 50% below. This option is used in most applications, especially if the surface characteristics of the sample are not well known, or if the sample is out of level. Hills: Provides 90% of the measurement range above the horizontal grid line. This option is used primarily for measuring step heights. . 4. Stylus Tip: 2 microns (need to be sure to reset this everytime you start the program!) 5. Stylus Force: Standard range is between 1 and 15mg. Default is 3mg, but use less force for soft/fragile samples. (*Can use NLite mode for very low force (down to 0.03mg), but you need to select the box... this limits your scan length as well) 6. Length: Y length of scan(can measure up to 55000um (5.5cm)) 7. Duration: Time of scan (Length and Duration determine the resolution of your scan) Saving Data: 1. Under the “Advanced Options” tab (in “Measurement Setup), you can select whether you want the software to autosave your data. Running a Scan: 1. You can run a single scan or multiple scans. To run a single scan, click the “Single Acquisition” button, and the scan will begin automatically. 2. To run multiple identical scans,under the measurement setup menu, click the “Advanced Options” tab and change the number of measurements. Press “Measurement” to begin scanning. Manual Leveling: Note: If you notice a significant slope to your data during the scan, you can adjust the stage tilt by turning the silver knob in the front of the instrument. Turn the knob to counteract the slope in your data. You should not have to adjust this significantly (you can further level the data during the data analysis step). If something seems wrong, contact a GLA. 3. After the scan is complete, the “Data Analysis” window should automatically open. If not, you can click on it. To export your data, you can rightclick on the plot and select “Export Data”. To zero/level data on computer: 1. Under “Data Analyzer” window, select “Terms Removal (FOperator)”. You should now be 3 able to right click on your data to set your reference cursor to zero and level your data. Analysis: 1. Select the “Data Analysis” Screen (if you’re not already there) . You should see a trace of your data in the “Data Analysis” box. 2. Right click inside the “Analytical Results” box and select “Append”. You can then select whatever it is that you want to measure, and select a location for R and M cursors. When you hit “Calculate” you will see all of those values listed in the Analytical Results box. Unloading Sample: 1. Hit “Tower Up”. 2. Hit “Unload sample”. 3. Either load a new sample or power the system down. To power down the DektakXT system: 1. Close the Vison64 software. 2. Press the black OFF button on the EMO Box . 3. Turn off the power switch on the black power supply box. Calibration notes 4/16/2012: ELW manually reset vertical calibration using 8.48kA standard (measured 704.105, 3x), Bruker should be sending the correct calibration profile sometime soon. For reference: Bruker Customer Service: 8008739750. 4