1
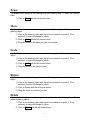
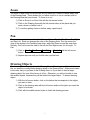
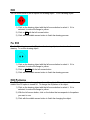
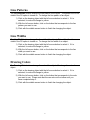
Draw A Face
User Manual
Written by Charlotte Archuleta
CSSIE 450
Autumn, 2000
Final Project
Table of Contents
Menu Names and Locations ........................................................................3
Using the program........................................................................................5
Quit ...........................................................................................................5
Save..........................................................................................................5
Load ..........................................................................................................5
Erase.........................................................................................................6
Move .........................................................................................................6
Scale .........................................................................................................6
Rotate .......................................................................................................6
Delete........................................................................................................6
Zoom.........................................................................................................7
Pan............................................................................................................7
Drawing Objects........................................................................................7
Fill .............................................................................................................8
No Fill........................................................................................................8
Fill Patterns ...............................................................................................8
Line Patterns.............................................................................................9
Line Widths ...............................................................................................9
Drawing Colors .........................................................................................9
2
Menu Names and Locations
The Draw A Face program allows you to draw one or more faces, and add different
objects to the faces, such as eyes, noses, and mouths to the face. Once an object is
drawn you can change it by moving it, making it smaller or larger, rotating it, or making it
a different color. If you don’t like the drawing, you can erase the entire drawing or parts
of it.
Function Menu
Drawing Area
View Menu
Attribute Menu
Drawing Menu
There are several areas of the program that allow you to do different things. All face
items are drawn in the Drawing Area. The buttons in the View Menu change the view
in the Drawing Area. The buttons in the Drawing Menu add drawing items to the
Drawing Area, and the Attribute Menu changes a selected object on the Drawing Area.
The Function Menu lets you do extra things, like rotate, scale, move, or delete a
selected object, and erase the Drawing Area, save or load a drawing file, or quit the
program.
3
Message Window
The Message Window is where you enter any information needed by the program. For
example, when you want to save a drawing file, the program needs to know what you
want the file name to be. The message gives you a way to talk to the program in order
to give it the information it needs to perform some of the tasks from the Function Menu.
4
Using the program
Quit
The Quit button allows you to exit the program. To exit the program:
1) Click Quit with the left mouse button.
Save
The Save button lets you save a drawing. If you like your drawing and want to save it:
1) Click Save with the left mouse button.
2) Click in the message window.
3) Type the file name.
4) Press the <Enter> key.
Load
The Load button allows you to open a drawing file you saved at some earlier time. To
open an drawing file:
1) Click Load with the left mouse button.
2) Click in the message window.
3) Type the file name.
4) Press the <Enter> key.
5
Erase
The Erase button erases all the drawings from the Drawing Area. To erase the Drawing
Area:
1) Click on Erase with the left mouse button
Move
The Move button lets you move drawing objects in the Drawing Area. To move a
drawing object:
1) Click on the drawing object with the left mouse button to select it. If it is
selected, its color will change to yellow.
2) Click on Move with the left mouse button.
3) Drag the object to the place you think it looks best.
Scale
The Scale button lets you change the size of the drawing object. To scale the drawing
object:
1) Click on the drawing object with the left mouse button to select it. If it is
selected, its color will change to yellow.
2) Click on Scale with the left mouse button.
3) Drag the object to the size you want.
Rotate
The Rotate button lets you change the rotation of the object. To rotate the drawing
object:
1) Click on the drawing object with the left mouse button to select it. If it is
selected, its color will change to yellow.
2) Click on Rotate with the left mouse button.
3) Drag the object to a rotation you like.
Delete
The Delete button lets you erase a single drawing object from the Drawing Area. To
delete a drawing object:
1) Click on the drawing object with the left mouse button to select it. If it is
selected, its color will change to yellow.
2) Click on Delete with the left mouse button.
6
Zoom
The Zoom In and Zoom Out buttons will let you either get a closer or farther away view
of the Drawing Area. These buttons let you either zoom in or out at a certain point in
the Drawing Area that you choose. To zoom in or out:
1) Click on Zoom In or Zoom Out with the left mouse button.
2) Click on the Drawing Area with the left mouse button at the place that you
want a closer or farther look of.
3) To continue getting closer or farther away, repeat step 2.
Pan
There are four pan buttons on the View Menu, which are Pan Up, Pan Down, Pan Right,
and Pan Left. Each one changes the view of the Drawing Area. Pan Up moves the
view of the objects in the Drawing Area down, while Pan Down moves the view down.
Similarly, Pan Left moves the view to the left and Pan Right moves it to the right. To
Pan:
1) Click on Pan Up, Pan Down, Pan Right, or Pan Left with the left mouse
button.
2) Repeat step one until you find the view you like best.
Drawing Objects
There are eight drawing objects in the Drawing Menu. Selecting any of these buttons
lets you draw the corresponding drawing object in the Drawing Area. Objects are drawn
in the order that you put them in the Drawing Area, so if you want to draw a larger
drawing object, like one of the faces, do it first. Otherwise, you will not be able to see
the smaller objects, because they will be behind the larger object. To draw a drawing
object:
1) With the left mouse button, click on the button that corresponds to the object
you want to draw.
2) Click on the drawing area with the left mouse button at the place you want the
object to be drawn.
3) Click with the middle mouse button to finish the drawing process.
7
Fill
The Fill button turns on the fill option of a drawing object. To fill a drawing object:
1) Click on the drawing object with the left mouse button to select it. If it is
selected, its color will change to yellow.
2) Click on Fill with the left mouse button.
3) Click with the middle mouse button to finish the drawing process.
No Fill
The No Fill button turns on the fill option of a drawing object, and makes it a line
drawing. To un-fill a drawing object:
1) Click on the drawing object with the left mouse button to select it. If it is
selected, its color will change to yellow.
2) Click on No Fill with the left mouse button.
3) Click with the middle mouse button to finish the drawing process.
Fill Patterns
The Fill Patterns buttons change the pattern of the object. This pattern will not be
visible if the Fill option is turned off. To change the fill pattern of an object:
1) Click on the drawing object with the left mouse button to select it. If it is
selected, its color will change to yellow.
2) With the left mouse button, click on the button that corresponds to the pattern
you want to use.
3) Click with the middle mouse button to finish the changing the object.
8
Line Patterns
The Line Patterns buttons change the line pattern of the object. This pattern will not be
visible if the Fill option is turned on. To change the line pattern of an object:
1) Click on the drawing object with the left mouse button to select it. If it is
selected, its color will change to yellow.
2) With the left mouse button, click on the button that corresponds to the line
pattern you want to use.
3) Click with the middle mouse button to finish the changing the object.
Line Widths
The Line Width buttons change the line width of the object. This width will not be
visible if the Fill option is turned on. To change the line width of an object:
1) Click on the drawing object with the left mouse button to select it. If it is
selected, its color will change to yellow.
2) With the left mouse button, click on the button that corresponds to the line
width you want to use.
3) Click with the middle mouse button to finish the changing the object.
Drawing Colors
The Drawing Color buttons change the color of the object. To change the color of an
object:
1) Click on the drawing object with the left mouse button to select it. If it is
selected, its color will change to yellow.
2) With the left mouse button, click on the button that corresponds to the color
you want to use. Please note that the new color will not show until you
have completed step 3.
3) Click with the middle mouse button to finish the changing the object.
9