1
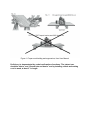
Small Tools Training Advanced Tools Specific Tool Training: Circular Saw NOTE: THIS IS A CLASS 3 MACHINE. All general principles from the primary Small Tools training apply. In addition, for the circular saw, The trained user should be able to: ● Know the location of the trigger lock. ● The direction of cut and direction of potential workpiece ejections. ● How to safely secure and orient the workpiece, given the above. ● Ergonomics and safe holding/handling of the tool itself. ● Know the causes and consequences of a kickback. ● How to adjust the angle and height of the blade. ● What to do in the event of a stuck blade. About this circular saw (Dewalt DCS391) ● The angle of cut can be adjusted on the front of the saw. ● The depth of the cut can be adjusted on the right side of the saw. ● The front of the saw has a notch indicating where the kerf will be. This indicator lines up with where the LEFT side of the blade will be. General dos and don'ts: ● All dos and don’t in the primary training document apply. ● Use hearing protection. ● Start the saw and wait for it to run at full speed before beginning any cut. ● Do not stand directly behind the saw (kickback risk). ● Keep the area in front of the saw clear (piece throwing risk). ● Before each use, inspect the blade guard by retracting it and confirming that it springs back into place. Do not use the saw if the blade guard is not working properly. ● Choose the minimum cut depth required for your cut. Rule of thumb: less than a full tooth of blade should be showing below the workpiece. ● Support large pieces in multiple places so they don’t sag. When cutting in the middle of a large piece, support both ends so that the weight of the cut piece does not pinch the blade. Examples of proper workplace support, from the User Manual, are enclosed on the following page (Figure 1). ● For cutting wood only, and no rip cuts. ● Even if you are familiar with general operation of the tool, please ask for help if there are specific features you are unsure of. ● If the blade binds, release the trigger, wait for the blade to stop, and inspect the situation. To remove the saw, center the STOPPED saw in the kerf such that no teeth are engaged, turn the saw back on, and back the blade out. Figure 1: Proper work holding and ergonomics, from User Manual Proficiency is demonstrated by verbal confirmation of sections “The trained user should be able to” and “General dos and don’ts” and by installing a blade and making a cut in wood, at least 3” in length. Specific Tool Training: Jig Saw All general principles from the primary Small Tools training apply. In addition, for the jigsaw, The trained user should know: ● The location of the trigger lock. ● How to choose and install blades. (The jigsaw takes Tshank blades only) ● The direction of cut & how to appropriately secure workpiece. ● How to adjust the angle of the blade. ● How to choose a cut speed and cut mode. ● What to do in the event of a stuck blades. About this jigsaw (Dewalt DCS331) ● The jigsaw can be adjusted to any bevel angle between 0 and 45 degrees, and has detents at 15, 30 and 45 degrees. ● There are two cutting modes: orbital and straight. They are labeled 03 on a lever on the left side of the saw. ○ Orbital mode (cutting modes 1, 2 and 3) moves the blade forward and back in addition to up and down during the cut. It is faster, but less smooth. Orbital mode should only be used on soft materials, i.e. wood and plastic. The levels, 1, 2 and 3 correspond to increasing levels of “aggression” of the cut. ○ Straight mode (cutting mode 0) should be used for metals or hardwoods, with an appropriate blade. ● A dust blower lever on the right side of the jigsaw blows chips away from the cut area. General dos and don'ts: ● All dos and don’t in the primary training document apply. ● Never cut hardwoods or metals in orbital action. ● Start the saw and wait for it to run at full speed before beginning a cut, to prevent stalling the motor. ● Cut wood and soft metals (aluminum, copper, brass, galvanized pipe) at high speeds. Cut plastics, tile, laminate, hard metals, cast iron, at low speeds. ● If cutting thin sheet metal, clamp the metal to wood to reduce vibration and produce a clean cut. Proficiency is demonstrated by verbal confirmation of sections “The trained user should be able to” and “General dos and don’ts” and by installing a blade and making a cut in wood, at least 3” in length.