1
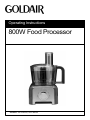
Operating Instructions
800W Food Processor
Models: GFP425G, GFP425R
General care and safety guide
Thank you for choosing this GOLDAIR Food Processor. This
GOLDAIR appliance has been designed and manufactured to high
standards of engineering and with proper use and care, as
described in this leaflet, will give you years of useful service.
Please read these instructions carefully and keep them for future
reference.
ALWAYS
✔ Always ensure hands are dry before
handling the plug or the Food Processor.
✔ Always operate the Food Processor in the
middle of a secure, dry, level surface.
Always allow adequate air space above and on
all sides for air circulation. Do not allow the
Food Processor to touch curtains, wall
coverings, clothing, dishtowels or other
flammable materials during use. Do not use
under cupboards or curtains.
✔ Always allow the Food Processor to cool
before cleaning and storing and before
removing and/or cleaning its components.
✔ Carry out regular checks of the supply cord
to ensure no damage is evident.
✔ Return the Food Processor after a
malfunction, or if it has been damaged in any
manner, to an authorised electrical service
technician for examination, repair or adjustment
as special purpose tools are required.
✔ Children should be supervised to ensure
that they do not play with the appliance.
✔ Before washing blender rod, remove it from
the Food Processor.
✔ Unplug from outlet while not in use and
before cleaning.
✔ Switch off the appliance and disconnect
from supply before changing accessories or
approaching parts that move in use.
✔ Avoid contact with the moving parts. Keep
hands, hair, clothing, as well as spatulas and
other utensils away from blade of the blender
during operation to reduce the risk of injury to
person and/or damage to the Food Processor.
✔ Take special care when preparing food for
babies, the elderly and infirm. Always ensure
that the Food Processor shaft is thoroughly
sterilized. Use a sterilizing solution in
accordance with the sterilizing solution
manufacturer’s instructions.
✔ Care must be exercised when handling
sharp cutting blades, emptying the bowl and
during cleaning. Injury may occur if the food
processor and/or blender is misused.
NEVER
✘ Never use this appliance outdoors.
✘ Never use this appliance for any purpose
other than its intended use. This appliance is
intended for household use only or in similar
applications such as:
•
Staff kitchen areas in shops, offices and
other working environments;
•
Farm houses
•
By clients in hotels, motels and other
residential type environments;
•
Bed and breakfast type environments
✘ Never leave the appliance unattended when
in use.
✘ Never allow the power cord to overhang the
edge of a table or bench top or to touch any hot
surface.
✘ This appliance is not intended for use by
persons (including children) with reduced
physical, sensory or mental capabilities or lack
of experience and knowledge, unless they are
supervised or have been given instruction
concerning the use of the Food Processor by a
person responsible for their safety.
✘ Never place this appliance on or near a hot
gas or electric burner or where it could touch a
heated oven or microwave oven. Do not place
in a hot oven.
✘ Never immerse the Food Processor’s power
housing, the cord set or plug in water or any
other liquid to protect against electrical
hazards.
✘ Never place the Food Processor in a
dishwasher.
✘ Never use harsh, abrasive or caustic
cleaners to clean this appliance.
CARE AND SAFETY CONTINUED
OVERLEAF
TECHNICAL SPECIFICATION
Model No:
GFP425G, GFP425R
Power Supply:
220 - 240VAC 50Hz
Power:
800W
General care and safety guide, continued
✘ Never operate the appliance with a
damaged cord or plug, after it malfunctions, or
if it has been damaged in any manner. Have
the appliance checked and repaired by a
qualified electrician if repair is necessary. If the
supply cord is damaged, it must be replaced by
the manufacturer, its service agent or similarly
qualified persons in order to avoid a hazard.
✘ The Food Processor is not intended to be
operated by means of an external timer or
separate remote-control system. The use of an
extension cord is not recommended.
✘ Never use metal scouring pads for cleaning.
Small metal pieces can come loose and cause
short-circuiting of electrical components, which
can cause electric shock or damage the
appliance.
✘ Due to the risk of injury, the use of third
party accessories is not recommended by the
manufacturer.
✘ Never blend hot oil or fat.
✘ Never touch blades while the machine is
plugged in.
✘ Do not allow children to use the blender
without supervision.
Components
Pusher
Food chute
Main bowl lid
Main bowl
Detachable drive shaft
Base
Accessories
Top Row
Blender jug
Mini bowl with stainless ‘S’ blade
Bottom Row
Spatula
Plastic ‘S’ blade
Stainless slicing/grating discs
Before first use
Before first use
Carefully unpack the Food Processor and
remove all packaging material.
When unpacking the product and removing
the packaging material, handle the blades
with great care as these items come presharpened.
Wash all parts except the base in warm
soapy water. Rinse and dry thoroughly
before use.
Be sure to read this user manual
thoroughly.
Care and cleaning
To avoid risk of electric shock, before
cleaning, you MUST ALWAYS switch off
and unplug the cord from the electrical
outlet.
CAUTION: The blades on the
grating/shredding disc, the chopper
blade and blender blade unit are very
sharp. Exercise caution when handling
them, emptying the bowl and cleaning.
Injury may occur from misuse. Switch
off the appliance and disconnect from
power before changing accessories or
approaching parts that move.
NOTE: Do not attempt to sharpen the
cutting edges of the chopping blade or
the reversible disc. They are
permanently sharpened at the factory
and will be ruined if you attempt to
sharpen.
1. Before cleaning, be sure the unit is
switched off and the cord is unplugged.
2. Whenever possible, rinse parts
immediately after processing or
blending for easy cleanup.
3. Wipe the base, control area, and feet
with a damp cloth and dry thoroughly
stubborn spots can be removed by
rubbing with a damp cloth and a mild,
non-abrasive cleaner. Do not immerse
the base in liquid.
4. Removable parts should be washed
by hand. Wash in hot, sudsy water,
rinse, and dry thoroughly. If necessary,
use a small nylon bristle brush to
thoroughly clean the jugs and food
chute/cover. This type of brush will also
help prevent cutting yourself on the
blades and disc.
5. Do not use rough scouring pads or
cleansers on any plastic or metal parts.
6. Do not fill processor or blender jug with
boiling water or place any of the parts
in boiling water. Some foods, such as
carrots, may temporarily stain the
bowl. Wiping with a cloth dipped in
vegetable oil helps remove
discolouration. To remove stains,
make a paste of 1 tablespoon baking
soda and two tablespoons warm water.
Apply the paste to the stains and rub
with a cloth, rinse in sudsy water to
remove the baking powder then dry
well.
Operating your Food Processor
CONTROL PANEL
PULSE
Pulse button must be held for unit to
operate. When released, unit will stop. Use
Pulse for short processing tasks, such as
chopping nuts, raw meats, or vegetables.
This allows you to check processed results
and control the fineness.
1 to 5 (Speeds)
When these functions are selected, unit
runs continuously until the dial is turned
back to 0 position.
To make the processor work more slowly,
select a lower number. To make the
processor work more quickly, select a
higher number.
0 (Off)
Processor should always be left in 0
position when unit is not in use.
TO USE ‘S’ BLADES (IN MAIN BOWL)
When using ‘S’ blades, to ensure the long
life of your food processor DO NOT use it
continuously for more than 30 seconds at a
time. Cool for at least 1 minute between
uses and for longer after 3 cycles.
The ‘S’ blades are versatile attachments.
The length of the processing time will
determine the texture achieved, which can
alter quickly. For coarser textures use the
pulse control for more control.
Use the ‘S’ blades for cake and pastry
making, chopping raw and cooked meat,
vegetables, nuts, pate, dips, pureeing
soups and to also make crumbs from
biscuits and bread.
1.
2.
3.
4.
5.
TO USE STAINLESS STEEL DISCS
When using stainless steel discs, to ensure
the long life of your food processor DO
NOT use it continuously for more than 3
minutes at a time. Cool for 30 minutes
before next use.
Use the slicing side for cheese, carrots,
potatoes, cabbage, cucumber, courgette,
beetroot and onions.
Use the shredding side for cheese, carrots,
potatoes and foods of a similar texture.
Use the Julienne disc for grating Parmesan
cheese and potatoes.
1.
2.
3.
4.
5.
Place detachable drive shaft into unit
Place plastic bowl onto drive shaft
Place desired disc onto drive shaft
Place lid on bowl and click into place
Feed ingredients through food chute
TO USE MINI PROCESSOR BOWL
When using mini processor bowl, to
ensure the long life of your food processor
DO NOT use it continuously for more than
30 seconds at a time. Cool for at least 1
minute between uses and for longer after 3
cycles.
1.
2.
Do not use the ‘S’ blade for mixing flour.
If processing meat, first chop it into cubes
about 3cm x 3cm. Never place more than
1kg of meat in the processor at one time.
Place detachable drive shaft into unit
Place plastic bowl onto drive shaft
Place ‘S’ blade onto drive shaft within
bowl
Place ingredients into bowl
Place lid on bowl and click into place
3.
4.
5.
Fit the drive shaft and main bowl onto
the processor base.
Fit the mini processor bowl into main
bowl. Ensure the ribs on inside of mini
bowl chimney align with the slots in the
main bowl chimney .
Place the small knife blade over the
drive shaft .
Add the ingredients to be processed.
Fit the lid and switch on.
Operating your Food Processor, continued
TO USE BLENDER JUG
When using blender function, to ensure
the long life of your food processor DO
NOT use it continuously for more than 30
seconds at a time. Cool for at least 3
minute between uses and for longer after 3
cycles.
MAXIMUM LOADING IS 0.9L LIQUID OR
600gm OF INGREDIENT SUCH AS
CARROTS.
1.
2.
3.
4.
5.
6.
Put your ingredients into the jug.
Put the filler cap in the lid, then turn.
Turn the lid in a clockwise direction to
lock onto the jug
Place the blender jug onto the
processor base and turn to lock
Select a speed or use the pulse
control.
Don’t move the jug, lid and filler cap
when the machine is working.
SUPPORT AND TECHNICAL ADVICE
Goldair – New Zealand
Monday – Friday 8am-5pm
Phone +64 (0)9 917 4000
Phone 0800 232 633
[email protected]
Goldair – Australia
Monday – Friday 8am-5pm
Phone +61 (0)3 9336 4423
Phone 1300 465 324
[email protected]
Operational guide
SHREDDING GUIDE
FOOD
CARROTS
GUIDE
Use shredding disc for very fine cabbage or slaw. Cut into pieces to fit chute.
Shred using light pressure. Empty bowl as cabbage reaches disc.
Position in chute and shred.
POTATOES
Position in chute. Cut large potatoes in half or quarters.
ZUCCHINI
Cut to fit chute, either lengthwise or horizontally.
CABBAGE
SLICING GUIDE
FOOD
GUIDE
APPLE
Quarter and stack horizontally in chute. Use firm pressure.
CABBAGE
For coarsely shredded results, use slicing side of disc. Cut into pieces to fit
chute. Empty bowl as cabbage reaches disc.
CARROTS
Cut into 10cm lengths and pack in chute, alternating thick and thin ends.
CELERY
Remove string, cut stalks into thirds, pack chute for best results.
CUCUMBER
Cut to fit chute if necessary.
NUTS
For coarsely chopped results, fill chute with nuts and slice.
ONIONS
Quarter and fill chute, positioning onions upright for coarsely chopped results.
PEACHES/PEARS
Halve or quarter and core. Position upright in chute and slice using light
pressure.
PEPPERS, GREEN
Halve and seed. Fit pepper up bottom of chute, squeezing slightly to fit if
necessary. Cut large ones into quarters or strips, depending on desired
results. Slice using moderate pressure.
PEPPERONI
Cut into 8cm lengths. Remove inedible casing. Slice 2 pieces at a time using
firm pressure.
POTATOES
Peel if desired. Position in chute, cutting large potatoes in halves or thirds.
STRAWBERRIES
Arrange berries on their sides for lengthwise slices.
TOMATOES
Use small tomatoes for whole slices, halve if necessary. Use gentle, but firm
pressure.
TURNIPS
Peel. Cut turnips to fit chute.
ZUCCHINI
Slice off ends. Use small squash for whole slices; halve larger ones to fit
chute.
Operational guide
CHOPPING GUIDE
FOOD
AMOUNT
BABY FOOD
Up to 4 cups
BREAD CRUMBS
Up to 10 slices
COOKIE/CRACKER
CRUMBS
Up to 4 cups
CRANBERRIES
MINCED
3 cups
EGGS, CHOPPED
Up to 3 cups
GARLIC, MINCED
Up to 5 cloves
MEAT, CHOPPED
(RAW OR COOKED)
MUSHROOMS
CHOPPED
NUTS, CHOPPED
Up to 3 cups
Up to 20 medium
4 cups
ONIONS, CHOPPED
Up to 3 large
PARMESAN OR
ROMANO CHEESE,
GRATED
Up to 1-1/2 cups
PARSLEY, CHOPPED
Up to 2 cups
PEPPER, GREEN
CHOPPED
Up to 1 pepper
SOUPS, PUREED
OR CREAMED
2 cups
STRAWBERRIES,
PUREED
2 cups
TOMATOES, CHOPPED 4 medium
COMMENTS
Add up to 4 cups cooked vegetables and meat to
bowl, along with 1/2 cup cooking liquid/broth. Process
to reach desired fineness.
Break either fresh or dry bread slices into quarters.
Add to bowl and process until finely crumbed.
Use for crumbing graham crackers, chocolate or
vanilla wafers. Break larger crackers into quarters.
Add to bowl and process until fine.
Pulse to chop to desired fineness. Can also add
sugar to make cranberry relish.
Peel, dry and halve hard-cooked eggs. Add to bowl.
Pulse to chop, checking fineness after 4-5 pulses.
Drop clove(s) down food chute while unit is running.
Cut meat into 2.5cm cubes. Add to bowl and pulse to
chop.
Halve large ones and add to bowl. Chop to desired
fineness.
Add to bowl and process to chop.
Quarter, and to bowl. Pulse or 2 times to coarsely
chop. For green onions, cut into 2.5cm pieces and
add up to 3 cups.
Allow cheese to reach room temperature. Cut into
2.5cm cubes. Add to bowl and process to desired
fineness.
Add to bowl and pulse to chop to desired fineness,
abort 10-15 seconds Process other herbs in same
manner (basil, mint).
Cut into 2.5cm pieces. Add to bowl and pulse to chop.
Add up to 2 cups hot (not boiling) vegetable soup for
pureeing and creaming. Process to desired
smoothness
Hull and halve large berries. Add to bowl and process
to chop.
Quarter tomatoes. Add up to 4 and pulse to desired
fineness.
Recipes
BLENDER RECIPES
Orange Berry Smoothie
2 navel oranges, peel and pith removed, cut into
chunks
1 cup frozen blueberries
1 cup frozen raspberries
Combine all ingredients in blender, and blend
until smooth.
Pomegranate and Berry Smoothie
2 cups mixed frozen berries
1 cup unsweetened pomegranate juice
1 cup water
Combine all ingredients in blender and blend
until smooth.
Carrot and Mango Smoothie
1 ripe mango, chopped (or 1 1/2 cups frozen
mango chunks)
1 cup fresh carrot juice
Nutmeg
1/2 cup crushed ice (crush ice in a plastic bag
with a rolling pin)
Leave out ice if using frozen mango
Combine all ingredients in blender and blend
until smooth
Fruit and Yoghurt Smoothie
1 1/2 cups plain non-fat or low-fat yogurt
1/2 medium chopped peeled pear
Small sliced banana
1 Tablespoon protein powder
3/4 cup crushed ice (crush ice in a plastic bag
with a rolling pin)
Combine all ingredients in blender and blend
until smooth
Tropical Slushy
Ingredients
1 cup shaved ice
330ml pineapple juice
550ml milk or coconut milk
2 tbsp chopped fresh mint
Pour the mixture into jug. Blend. Transfer to tall
glasses and serve with straws and a
maraschino cherry garnish.
Fresh Fruit Smoothie
Ingredients
1 cup orange juice
1 banana
1-2 cups frozen berries
2 tbsp sweet yoghurt
Place all ingredients in the jug and blend.
NOTE: Any additional fresh fruit can also be
added at the beginning to create your own taste
sensation.
FOOD PROCESSOR RECIPES
One Crust Standard Pie Crust
1 cup all-purpose flour
1/2 teaspoon salt
1/4 cup vegetable shortening, room
temperature, divided into 3 parts
1 tablespoon butter or margarine, well chilled
3 tablespoons chilled water
Position stainless “S” blade in bowl. Add flour,
salt, vegetable shortening, and butter. Process
until particles resemble coarse crumbs, about
15 seconds.
Add water all at once through food chute with
processor running.
Process until dough forms a ball, or no more
than 20 seconds. If dough does not form a ball,
stop processor. Remove chopping blade. Gently
shape dough into a ball with hands. Roll out for
pie, or as directed in recipe. If crust is to be
baked before filling, prick generously with fork.
Bake in preheated oven at 230°C until golden
brown, about 9-10 minutes.
Makes: 1 (23 cm) pie crust.
Aioli
Ingredients
1 tbsp lemon juice
3 egg yolks
2 cloves garlic, peeled and crushed
Pinch salt
300ml olive oil
½ tsp dijon mustard
Method
Serves 4
Place the lemon juice, egg yolks, chilli, garlic
and salt into the food processor bowl. While
mixing, gradually add the oil through the food
chute in the lid. Process until the sauce
emulsifies.
Recipes
Two year warranty
Thank you for purchasing this Goldair product. Your product is warranted against faults and manufacture
when used in normal domestic use for a period of two years. In non-domestic use Goldair limits the
voluntary warranty to three months.
Goldair undertake to repair or replace this product at no charge if found to be defective due to a
manufacturing fault during the warranty period.
This warranty excludes damage caused by misuse, neglect, shipping accident, incorrect installation, or
work carried out by anyone other than a qualified electrical service technician.
PLEASE KEEP YOUR RECEIPT AS THIS WILL HELP VERIFY YOUR WARRANTY.
The benefits given to you by this warranty are in addition to other rights and remedies available to you
under law in relation to the goods or services to which this warranty relates.
In Australia, our goods come with guarantees that cannot be excluded under the Australian Consumer
Law. You are entitled to a replacement or refund for a major failure and compensation for any other
reasonably foreseeable loss or damage. You are also entitled to have the goods repaired or replaced if the
goods fail to be of acceptable quality and the failure does not amount to a major failure.
In New Zealand this warranty is additional to the conditions and guarantees of the Consumers Guarantee
Act (1993).
Goldair – New Zealand
CDB Goldair
PO Box 100-707
N.S.M.C
Auckland
Phone +64 (0)9 917 4000
Phone 0800 232 633
www.goldair.co.nz
Goldair – Australia
CDB Goldair Australia Pty
PO Box 574
South Morang
Victoria, 3752
Phone +61 (0)3 9336 4423
Phone 1300 GOLDAIR (1300 465 324)
www.goldair.com.au
IMPORTANT: Please complete and retain this warranty card
Name ……………………………………………… Purchased from …………………………………
Address …………………………………………… Date of purchase …………………………………
………………………………………………………. Name of product …………………………………
Suburb …………………………………………… Model no ……………………………………………
Attach a copy of the purchase receipt to this warranty card
Due to continual design improvements, the product illustrated in this User Manual may differ slightly from the actual product.