1
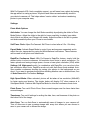
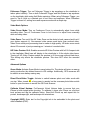
ProCamera User Manual
Capture the moment with ProCamera! ProCamera 3.5 is a
versatile, powerful, multi-function camera app for the iPhone and
iPod Touch that allows you to take photos and shoot video and then
easily and quickly view and edit them within the app. Here is an
overview of the features and functions available in ProCamera 3.5:
Camera Module: The camera module is heart of ProCamera. Itʼs
designed for easy access to the tools you need to take better pictures faster.
The semi-transparent heads-up display provides easy access to the Flash/Torch
controller, the Front/Rear Camera switch (on devices equipped with a front camera),
and the White Balance controls (in Expert Mode).
Steady Light: The Steady Light, available on iPhone 4 and 4S, allows
you to shoot photos in dim light or even in complete darkness. Steady
Light lets you illuminate the subject of your photo before the digital flash
triggers. This feature allows you to fully control the light levels of your
picture, even when your surroundings are pitch-black. Steady Light
makes use of the iPhoneʼs digital flashlight mode. In the onscreen flash controller,
tapping the Steady Light control turns it on/off, regardless of the flash setting. If needed,
Steady Light can remain on for as long as you like.
Focus and Exposure: To set and lock Focus and Exposure in Normal shooting mode,
Tap & Hold the desired spot on the screen. Tap & Hold the center of the viewfinder to
switch back to Auto mode. In Expert Mode, you can also drag the yellow Exposure
circle or the blue Focus rectangle anywhere onscreen to set Exposure and Focus
separately. Tap & Hold the center of the viewfinder to switch back to Auto Mode. The
targets pulsate to indicate camera activity (whenever focus or exposure are being
adjusted). When setting focus and exposure lock separately, you can move your device
without changing these adjustments.
White Balance Lock: Expert Mode enables the onscreen White Balance Lock. Using
this tool, you can set and lock a specific color temperature to better compensate for the
ambient light.
The “White Paper” Method for locking White Balance: With White Balance still on Auto
(AWB), aim your camera at a bright white sheet of paper, then lock White Balance. You
can also simply move your device around and tap to lock the White Balance as soon as
the color temperature looks the way you want it onscreen.
6x Full-Resolution Zoom: ProCameraʼs Full-Res Zoom automatically
improves the quality of zoomed photos. Images are resampled up to full
device resolution. To zoom in and out, use the pinch gesture (with two
fingers) or the zoom slider. The zoom slider is hidden in the viewfinder
near the shutter release button. It becomes visible onscreen after the first
pinch-to-zoom gesture, by simply sliding over the invisible zoom slider area just above
the shutter release, or by pressing the “invisible” zoom-in (+) button at the far right
position of the slider. The current magnification of zoom is displayed live onscreen.
When using higher zoom levels, also shooting with ProCameraʼs Anti-Shake mode is
recommended. Even slight movements of your iPhone will result in motion blur while
zooming.
Main Control Bar: This contains the Pro button with shortcuts to your deviceʼs photo
albums, the appʼs Pro Studio modules, and the appʼs Settings. The new Photo/Video
Toggle switches between the photo, video, and QR Code cameras. The Main Shutter
button is in the center of the Control Bar. To the right of the Main Shutter button is the
Anti-Shake/Self Timer Shutter Release button. At the far right is the Pro Settings
menu, where you can turn off/on the onscreen composition guides, the onscreen Virtual
Horizon, and the photo compass. You can also easily turn on/off Expert Mode and SelfTimer Mode.
In Video Mode, the Pro Settings menu on the right lets you turn off/on the onscreen
composition guides, the onscreen Virtual Horizon, and the photo compass. You can turn
on/off Expert Mode and also easily switch between several video resolutions in case
you need smaller video files for faster uploading or to save disk space on your device.
ProCamera 3.5 includes:
•
•
Up to 1-hour video recording with iPhone 4 and 4S, iPad2, iPod (2 hours for
iPhone 3GS)
Full HD video recording for iPhone 4S
In QR Reader Mode, the semi-transparent heads-up display provides
easy access to the Torch controller. Align the QR between the brackets.
The camera will read the QR Code automatically. Once scanned, you can
automatically open the URL in Mobile Safari, copy it to the clipboard to
paste into other apps, share the code, or use of one of the contextsensitive options which are offered depending of the type of code (e.g. adding a vCard
to your address book, etc.).
Anti-Shake Mode: The Anti-Shake feature will delay the shutter release
until ProCamera is steady. This helps you to take clearer, sharper
photographs. Tap the Anti-Shake button on the right of the shutter button and
ProCamera will shoot the picture once the iPhone is held steady. Movement detection is
displayed onscreen by the small icon above the shutter button.
Self-Timer (0.5s - 20s): Activate Self-Timer from the menu on the right. To
use the Self-Timer to take a photo, press the button to the right of the main
shutter button (The icon should change from anti-shake to a countdown
clock). The countdown will start. Three beeps will signal the last seconds.
The timer duration can be adjusted within ProCameraʼs settings.
You can use the lowest setting (0.5s) as another shake-preventing capture method. We
call it Smart Trigger and it is an alternative to Anti-Shake mode. Touching the screen to
trigger the shutter can cause a little shake which creates motion blur. Smart Trigger
takes the photo after this shake is over and the device is steady again.
Volume Trigger: This feature allows you to take photos simply by
pressing the iPhoneʼs volume control button. Volume Trigger also allows
iPhone users to use their headsets as a remote shutter release and take
pictures “at arms length” (length of your headset cord) without touching the
iPhone screen. Volume Trigger can be turned on/off in the General
Options of the appʼs Settings.
Volume Trigger
While ProCamera 3.5 already includes its innovative Anti-Shake technology, using
Volume Triggerʼs headset controls, can greatly minimize or even eliminate a common
problem for every photographer, the lack of a “steady hand.” You can take your photos
by pressing either the up (+) or down (-) volume button (both work). An additional benefit
of snapping photos with the headset is the elimination of shutter noise. The shutter click
is only audible through the earbuds.
Saving Photos: ProCamera saves pictures in the background. While images are
saving, the shutter button shows a red dot. However, itʼs safe to continue shooting or
press the Sleep/Wake button to lock your iPhone. Your images will continue to save in
the background.
NOTE: As the iPhone 3G is unable to use the iOS multitasking features, you should not
leave the app or click the deviceʼs Home button while the shutter button shows a red dot
as photos might not save properly. After completion, your iPhone will briefly vibrate.
Wait for this confirmation before leaving ProCamera to make sure your picture gets
properly saved.
QuickFlick Album: This feature offers fast and easy access to all of the
photos and videos on your iDevice. Simply flick onscreen from left to right
to view, edit or share your most recent photos or any photos/videos in your
iDeviceʼs photo albums.
When viewing photos, these QuickFlick functions are available:
•
•
•
•
•
•
Double-Tap to zoom in or out
Two-finger Pinch to zoom in or out
Rotate your iDevice to view the photo in landscape orientation.
Tap the Export icon on the left of the bottom toolbar to email a photo or to share
it to your favorite social network.
Tap the Info button in the center of the bottom toolbar to see all available info
and EXIF data for the selected picture, including time, date, size, location and
much more.
After tapping the Menu icon on the bottom right, you can edit the photo in one of
ProCameraʼs editing studios.
Social Sharing: To upload a photo to your favorite social network, select
a picture and tap the Export icon on the bottom left, then choose Share
from the menu. On the Sharing screen select one or more social sites you
would like to upload the photo to. Currently, ProCamera supports
Dropbox, Facebook, Flickr, and Twitter. When using this function for the
first time, you will need to login to the social sites you would like to use. ProCamera
stores this information securely and doesnʼt misuse or share your info at any time.
Depending on the social network, you can:
•
•
•
•
Select or add a folder to sort your photo
Add a comment/tweet
Set up privacy and
Geo-tagging
Once you are finished selecting sites and options, tap the Share button. ProCamera will
display the upload progress and confirm when the photos have uploaded successfully.
You can leave the app while uploading. If the upload cannot be completed due to a slow
Internet connection, ProCamera will notify you and ask you to restart the upload and to
keep the app open (the iOS cancels background tasks automatically after 10 minutes).
Photo Info (EXIF-/Map-View): EXIF
stands for Exchangeable Image File
data.
ProCamera stores all EXIF data
(date, time, location, exposure,
aperture, ISO values and much
more) for your photos and allows you
to view the full set of data by going to
Album, selecting the desired photo
and tapping the Info button. The Pro
tab gives you a quick overview of the
imageʼs size, date and time, camera
information and shot location if the
information is available in the image.
By tapping on the Expert tab, you can view all available EXIF data in the image. To see
the location of the photo, tap Map. In map view you can switch between standard and
satellite view.
With photos containing compass-heading data as well as GPS (global positioning
satellite) data, ProCamera displays the compass direction the camera is facing (a
ProCamera exclusive). Tap the red dot to show the photoʼs location inside your
deviceʼs Maps app. Within the Maps app, you can use Google Street View or show a
route to the exact location the photo was taken. This is very useful for locating your car
or other interesting landmarks via pictures taken with ProCamera.
Editing Studios:
Pro Lab Studio has editing tools to adjust brightness, contrast, exposure,
color saturation and color temperature settings to improve your shots.
There are also auto contrast and auto color tools for basic, quick
adjustments. Use the sliders to adjust the brightness, contrast, exposure,
and color saturation of your image. Tapping the button on the left of the
sliders quickly toggles the adjustment off and on. The color temperature tool can be
used to help compensate for images shot under standard light bulbs, fluorescent light,
sunlight, overcast light, and shaded light. Settings can be toggled on and off in the
toolbar.
Pro Cut Studio has tools to let you manually crop, straighten and rotate
your image. To crop your photo, move the handles on the crop rectangle.
Double-tap the screen to reset the crop. Use the constrain crop tool to
choose one of the preset aspect ratios. Tap the aspect ratio to select. Tap
again to rotate the crop 90°. Tap again to disable constrain. Use the slider
of the Straighten tool to rotate the image in 1° increments. Tapping the button on the left
of the slider quickly toggles the adjustment off and on. From the Flip & Rotate toolbar,
you can rotate your image in 90° increments in either direction. Use this tool to flip your
image horizontal or vertical.
Pro FX Studio has a number of one-click filters and effects presets in four
categories that you can easily apply simply by selecting them.
With Pro Lab and Pro FX Studios, tapping the arrow button in the center
of the top toolbar compares the result with the original photo. Tap ʻSaveʼ
after you have finished adjusting the photo. Edited images save as a new file to your
camera roll. The original photo will remain unaltered in your Camera Roll.
Multitasking: ProCamera supports the background processing and multitasking
features of latest iOS. After using ProCamera, you can switch back quickly at any time
without waiting for the app to load. ProCamera will be ready to take a picture or video
the second you open the app again via the Home Screen or the app drawer.
With ProCamera's iOS 4 task completion support, you will never lose a photo by leaving
the app while it is saving a picture. All photos and videos are automatically stored to
your device's camera roll. This helps reduce “version clutterʼ and makes transferring
photos to your computer easy.
Settings:
Photo Mode Options
Anti-shake: You can change the Anti-Shake sensitivity by adjusting the slider in Photo
Mode Options. Adjust the slider to the right for lower sensitivity for shaky, less stable
shots that do not allow your iPhone to be steady. Adjust the slider to the left for greater
anti-shake sensitivity when your iPhone is more stable.
Self-Timer Clock: Adjust ProCameraʼs Self-Timer to shoot after a 0.5s - 20s delay.
Expert Mode: Activate Expert Mode to control focus and exposure separately and to
adjust the color temperature by using the White Balance lock feature. These features
can be used in both photo and video mode
RapidFire Continuous Burst: With ProCameraʼs RapidFire feature, simply hold the
shutter button to shoot continuous, full-resolution burst shots in quick succession. For
faster uploads and saving storage space, choose a lower photo resolution (VGA) within
Settings (LQ High-speed mode). In combination with RapidFire, you can shoot ultrafast continuous burst shots. RapidFire works only with Auto-Save mode enabled. AutoSave enables continuous shooting by saving your photos in the background as you
shoot. If you want to preview photos before deciding whether save or discard them, turn
off Auto-Save within ProCamera Settings.
High Speed Mode: When activated, photos will be taken at low resolution (640x480)
for faster saving and sharing. The shutter button will display “LQ” when camera is in
UltraSpeed Mode. Combine with RapidFire Mode for ultra-fast continuous burst shots.
Photo Zoom: Turn on/off Photo Zoom. Non-zoomed images save five times faster than
zoomed images.
Timestamp: Turn on/off settings for writing the date, time, and timezone of the photo on
the bottom left of the image.
Auto Save: Turn on Auto-Save to automatically save all images to your camera roll.
Turn off Auto-save to see a preview image after every shot where you can choose to
save to your camera roll or discard the image.
Fullscreen Trigger: Turn on Fullscreen Trigger to tap anywhere on the viewfinder to
take a photo instantly. Turn on both Fullscreen Trigger and Anti-Shake to tap anywhere
on the viewfinder while using Anti-Shake capturing. When using Fullscreen Trigger, you
need to Tap & Hold on a desired spot to set focus and exposure. When Fullscreen
Trigger is turned off, setting focus and exposure works with a simple tap.
Video Mode Options
Video Focus Mode: Turn on Continuous Focus to automatically adjust focus while
recording video. Turn off Continuous Focus to lock focus or to adjust focus manually
while recording video.
Video Zoom: Turn on/off the 6X Video Zoom on the deviceʼs back camera (and front if
your device supports it). Non-zoomed video saves much faster than zoomed video.
Video Zoom needs post-processing time to render in high quality. HD video zoom needs
almost 50 seconds of post-processing per 1 minute of recorded video.
HD Video Preview 16:9: Enables accurate HD Video Preview with full 16:9 aspect ratio
in the viewfinder. Black bars will display in the viewfinder to fit the whole video frame.
Turning off HD Video Preview scales the preview to fill the screen without black bars.
This setting only affects the viewfinder preview. This does NOT effect the recorded
video.
Advanced Options
Green Mode: Activate Green Mode to save battery life. The device will enter an energy
saving mode after the defined timeout in iOS settings. Additionally, GPS resources will
be used in a more battery-saving way.
Direct Photo/Video Toggle: Activate to switch between photo and video mode with
one tap. When turned on, a long press is needed on the onscreen photo/video switch
button to open the menu to access the QR Code Scanner.
Calibrate Virtual Horizon: ProCameraʼs Virtual Horizon helps to ensure that your
iPhone is held straight while shooting. To calibrate it, place your iPhone on a flat and
level surface and tap the calibrate button. Stand the iPhone up and repeat this for
portrait, landscape-right, and landscape-left orientations.
Copyright (EXIF): Enter text for the Copyright info to be embedded in the photo and
video metadata (EXIF).