1
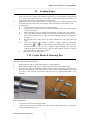
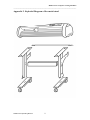
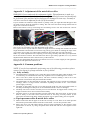
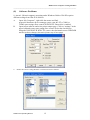
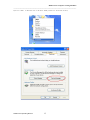
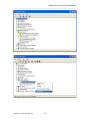
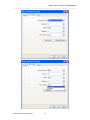
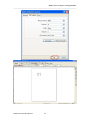
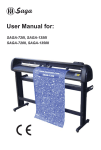
Rabbit Series Computer Cutting Machines
_____________________________________________________________________
IV. Initial Set-up
4.1 Installation
Place the machine on a flat level surface and ensure it is stable. Earth the machine to a suitable
ground point to ensure reliable operation. An earth wire run to the computer cabinet is a good idea
for long term reliability.
4.2 Off-line Test
4.2.1 Reset
Plug the power cable into the socket on the machine and connect it to 220V AC and turn on the
power switch. The knife dolly will move to its home position at the right hand side of the machine
and the metal drive roller will rotate forwards and then backwards. The knife holder on the dolly
will also move up 1.5~2mm. This is the correct reset sequence.
4.2.2 Testing the correct operation of the knife drive (Z axis)
Press the “Test” key on the cutter machine keypad and the knife holder on the dolly will be driven
to the down position, release and it will be driven up (Z axis).
4.2.3
Test cutting speed adjustment
Press the “S+” or “S-” keys on the keypad and the LCD screen will display “SPEED XXXmm/s”,
This presets the machine cutting speed.
4.2.4 Test blade pressure adjustment
Press the “P+” or “P-“ buttons to adjust the blade pressure. The LCD screen will display
“PRESSURE XXXg”, this presets the blade down force (pressure).
4.2.5 Start position & Test cut
Press the “Off-line” key, the machine goes into Off-line mode and the yellow LED illuminates.
Manual paper movement can now be made using the four arrow keys.
The paper or knife dolly will move according to the button pressed. When satisfied with the paper
and knife dolly position press “Test” key and the machine will make a square test cut. This allows
for cutting pressure adjustment and knife tip protrusion adjustment.
If the sequence described above works as described then the cutting machine in working normally.
4.3 On-line with Computer
The cutting machine is connected to the computer (PC) via a serial interface using COM1 or
COM2 on the computer.
4.2.3 On-line Operating Sequence
A.
B.
C.
D.
E.
Make sure the cutter and computer are both switched off.
Connect the cutter to the serial interface of the computer (COM1 or COM2)
using the serial lead supplied.
Turn on the cutter and computer and wait for the cutters reset sequence to
complete.
Open the software for the cutting machine and ensure the correct configuration
parameters have been selected.
When the finished work is sent to the cutter it starts cutting/drawing immediately.
Rabbit Users Operating Manual
4