
1
photoworld
1
2010/#4
photoworld
photoworld • autumn ’10
photoworld
Cover: by Peter Karry
As we progress towards higher
megapixel counts – 12
became 14, now 14 becomes
16 – the early Konica Minolta
6 megapixel DSLRs may seem
hopelessly out of date. But
they are not. 6 megapixels
can make a perfect 12 x 16
print. Our cover is an attempt
to appease the Gods of Winter
early, for once. Peter Karry
used a Dynax 5D fitted with
a 90mm Tamron macro lens,
exposing for 1/2s at ƒ16 using
a tripod.
1
2010/#4
photoworld
CONTENTS
2
Editorial
3
The Translucent Truth – Sony’s Alpha 33 and
55 ‘DSLT’ cameras arrive and we test the 16
megapixel 55 with its GPS map-data recording.
10
Gallery – the pick of your images for the season.
14
The Speed of Sound – Greg Wright captures
fellow musicians and their instruments
with dynamics and movement.
18
The Third Dimension – with this issue you
will find a 3D Red-Cyan viewer. Use it to get
the 3D effect on these pages – and read about
how to create 3D anaglyph prints yourself.
22
Cowboy in the Cathouse
Shirley Kilpatrick took her Sigma
18-250mm OS lens and Alpha 700 body
along to Europe’s biggest brothel, Pascha in
Cologne, where fashion photographer Steve
Thornton was staging a publicity shoot.
26
Quest 2011 Workshops, Information.
Published by
Icon Publications Limited
Maxwell Place, Maxwell Lane
Kelso, Scottish Borders TD5 7BB
Tel: 01573 226032
Fax: 01573 226000
e-mail: [email protected]
PUBLISHED AND EDITED BY
David Kilpatrick FBIPP Hon. FMPA
Shirley Kilpatrick MSc (Colour
Science), BA Hons (OU)
ADVERTISING MANAGER
Richard Kilpatrick – 01562 777729
photoworld
2
Whilst every care is taken of MSS and photographs submitted all
submissions remain the responsibility of the sender. Return postage
and packing must be included. The views expressed in this magazine
are those of individual contributors and do not represent the views
or policies of Icon Publications Ltd unless otherwise stated. This issue
© 2010 Icon Publications Limited. All rights reserved. No part of this
publication may be reproduced by any means without permission.
Photoworld magazine is an independent quarterly from Icon
Publications Ltd which provides free membership of the Photoworld
Club UK/Photoclubalpha. The aim of the Club is to provide support,
information, inspiration and activities for owners of Minolta, Konica
Minolta, Seagull, Sony Alpha and other equipment compatible with the
Minolta SR, MC, MD, VS, AF, AF-xi and AF-D mounts. Membership of
the Club is not dependent on subscription and you may also sign up,
receiving emailed information only but no magazine, through www.
photostore-uk.com, www.minoltaclub.co.uk or www.photoclubalpha.
com. Subscriptions cost £19.95 for four issues (UK/Europe), £23.95
(Rest of World), payable to Icon Publications Ltd, Maxwell Place,
Maxwell Lane, Kelso, Scottish Borders TD5 7BB This publication has
no connection with Konica Minolta Holdings or Sony Corporation, or
the brands mentioned. The logo typeface is ‘Minolta Classic’ designed
by Justin Bailey.
ILC, SLR,
ILT?
IN the last issue we
introduced the term
‘ILC’ used by Sony for
‘Interchangeable Lens
Compact’. This term
competes with ‘CSC’
used by other makers –
Compact System Camera.
But why are we stuck
with the terms we use now?
For example, SLR. Single
Lens Reflex. Single lens?
Mine has loads of lenses!
What a very confusing
term for anyone who was
not a camera user in the
1950s, when the Twin
Lens Reflex was the most
popular enthusiast type.
Single Lens Reflex
distinguishes the instantreturn mirror 35mm
design (remember that
term?) from the double
lensed, fixed mirror TLR.
It is an obsolete term 60
years after the Contax
S, Exakta, Wrayflex and
other pioneers appeared
on the post-war market.
Now Sony says ‘Single
Lens Translucent’.
Translucent is a bad choice
of word to describe a transparent but semi-silvered
mirror. There’s no quality
of diffusion or opacity
about it. And ‘Single Lens’
now means nothing at all.
If they want to call the
camera an SLT or DSLT
at least change that to
Single Lens Transflex.
That includes the ‘flex’ bit
which indicates a mirror
is present, if only for AF.
But even better
would be ILC and
ILT – Interchangeable
Lens Compact, and
Interchangeable Lens
Transflex. Plus, of course,
ILR – Interchangeable
Lens Reflex.
C can stand for
camera, not just for
compact, in case full
format versions appear.
If it’s too much change
to introduce, let’s call
them System Lens not
Interchangeable – SLC, SLT,
SLR. Or DSLC, DSLT, DSLR.
And TLR still works!
– DK
Á
Translucent future
The Alpha 55 and 33 transflex mirror cameras were launched just before
photokina, held in a balmy late September Cologne. The conventional Alpha
560 and 580 with HD video join them in the shops soon.
I
have finally got over my indignation that Sony should have abused
our language by hijacking the
word ‘translucent’ to mean something
it does not, in any modern lexicon.
But it’s their own loss, as you can
not copyright a regular word as a
trademark in the USA and many other
markets and translucent is very
much a regular word. You won’t even
find it in the list of Sony and other
trademarks printed at the end of
the user manual No matter how they
try to protect it, I will still be able
to describe anything as translucent
if it possesses that attribute!
The Sony ‘SLT’ cameras – Single
Lens Translucent as opposed to Single
Lens Reflex – do not of course use
anything translucent, they actually
use a transparent semi-silvered
mirror, a transmissive-reflective
mirror sometimes referred to as
a trans-mirror or a transflective
mirror. It is not a pellicle mirror; as
I explained in my last introduction
to the Summer magazine, pellicle
refers to a stretched ultra-thin film of
plastic. The Sony mirror is rigid very
thin glass, in a plastic frame, to allow
it to be hinged up for sensor cleaning.
So, to all those magazines and
websites happily spouting forth about
‘pellix’ mirrors (a copyright trade
name of Canon – see above!) or
‘pelical’ mirrors (ones with very large
beaks and a fishing habit), a simple
message. Just call it Translucent.
We’ll get used to it, just the same way
we got used to calling the process
of lending the bank our money
‘saving’ or ‘investment’ or ‘deposit’.
Alpha 55/33 principle
By allowing over two-thirds of the
image forming light to reach the
CMOS sensor through a semi-silvered
mirror which does not move, Sony has
enabled quiet shooting and HD video
along with high resolution off-sensor
live view. In these
respects,
the
The Alpha 55 is a very compact
body design. The rear
screen can be
rotated for
vertical shots
The left hand end has
covers for USB, HDMI,
wired remote and for
an external stereo
microphone
Alpha 33 is
basically a NEX-5
(both share the same 14 megapixel
sensor) with an A-mount body. The
Alpha 55 uses a new 16 megapixel
sensor with further enhancements to image processing.
The Translucent Mirror is not
placed at 45° like a regular SLR
mirror, because it does not have
to reflect the entire image on to a
focusing screen. It only has to reflect
Not Cologne! Sony PR image.
3
photoworld
The viewfinder has
Eye-Start for
focus, which is
also used to auto
switch from
rear screen
to EVF.
The right
hand end
controls of the
Alpha 55/33 are
packed into a very
limited space. Even so
they fall neatly to hand.
The red ‘Movie’ button starts
filming instantly – there is no
need to enter a movie mode first.
Buttons access most vital functions.
It may be easier to find the
Alpha 55 and 33 models in kit
form with lens, than body only,
until it is more widely stocked.
From the side, you can see how extended the viewfinder eyepiece for the electronic
screen is (not unlike the old Konica Minolta A2 or A200). When the camera is
switched off, you see nothing at all; this takes some getting used to. Below, the small
size of the A55 can be seen along with its Translucent mirror. The clip at the bottom
allows this to be lifted manually for sensor cleaning.
The A55 handgrip may be
small, but it’s very deep and
offers a really secure grasp
even for larger hands.
photoworld
4
the centre of the image, to cover a
new 15-point AF module which is
placed slightly forward of the position
of a focusing screen, towards the
lens mount, and angled. The mirror
is at a flatter angle to the sensor and
lens, which produces a number of
benefits, some of these very technical.
Digital sensors are very sensitive
to polarised light. With or without
microlenses and covering filters, their
reflective quality is specular meaning
that towards the edge of images light
can be lost by reflection due to its
angle of incidence. Such reflection is
accompanied by polarisation of the
light, both reflected and received.
This is why polarising filters can
seem to have unpredictable or
excessive effects on digital sensors,
compared to their effect on film – and
it’s also why live view, as on the
NEX-5, has greatly improved the use
of polarisers and the accuracy of
exposure given when using them.
Any semi-silvered mirror also has
a polarising effect, and in a typical
45° mirror this can vary from top to
bottom if the lens exit pupil is very
The rear LCD can be
turned to face the
camera back, for
protection and to
eliminate stray light.
Images can be reviewed
through the EVF after shooting – but the EVF uses much
more battery power.
close to the focal plane (as with
wide-angles). By placing the mirror
more parallel to the sensor, any such
shift is minimal. Even so, great care
should be taken to observe the results
carefully using live view, if you use
a polariser on a wide-angle fitted to
one of the new Translucent models.
The one-third or so of light
diverted to the focus module is never
interrupted, meaning phase detect
focusing (the traditional ‘continuous
AF’ with predictive focus that we are
used to) can operate during live view
and HD filming. The new module
has three cross-type sensors, to give
greater accuracy. These are for some
reason organised as a vertical group
when viewing a horizontal picture.
We expected them to be arranged
lengthwise, but not so; they are
obviously not for tracking subjects
panned or followed in the usual way
when using the camera for sports.
In place of the focusing screen
and prism, but occupying exactly the
same general shape of top ‘bulge’,
there is a new EVF – an electronic
viewfinder similar to that found on
the Konica Minolta A2 or A200, or
Sony Cyber-shot DSC R-1. This finder
has a long eyepiece unit which sticks
out further than normal, keeping
the face and nose away from the
rear LCD screen of the cameras.
The EVF carries full information
and can look rather cluttered, as this
includes a useful horizon-levelling
display to help you keep everything
straight. You can of course turn this
off (in fact, you can have it on the rear
3 inch screen or the EVF only, either
way, at choice, or on both, or neither).
The rear screen is now fully
articulated much like the Nikon
D5000 and the new Canon EOS 60D,
with a central rotating hingepoint
that allows it be seen from the front
of the camera (below the body, not
ideal) and to operate as a waist-level
finder for vertical compositions. Like
the D5000, this screen can be turned
right round to face the camera body
and be protected. The user then
just has the eye-level EVF to go by.
Auto switching between rear
screen and EVF is possible, and you
can also divert both by simply plugging in a MiniHDMI cable connected
to a video monitor or a TV. The display will then appear to surprisingly
high resolution on your larger screen.
As for looking through the finder,
the image appears reassuringly
large and bright and certainly
sharp enough to judge focus.
Enlarged manual focusing at 7X
Shooting information is
overlaid on the image
view whether on the
rear screen or in
the finder
GPS accurately
recorded the location
from which this view
was taken (Hume
Castle) but often
took a minute or
two to register a new
location after driving
a few miles. Viewed
using a Lightroom
Plugin.
and 14X scale leaves no doubt when
you’re on the spot. But if you pan
or move the camera, a rainbow of
coloured flickering edges appears
while the video image tracks your
movement, only settling down when
the camera is stable. It is an effect
which some will find so distracting
they can’t consider this an alternative to a true optical viewfinder.
There are distinct benefits to the
EVF. Actual exposure, white balance,
contrast and other image qualities
can be previewed including very accurate depth of field using the reinstated
stop down preview button. Just pressing the AE Lock button will switch the
finder and screen into ‘exposure and
effects’ preview mode, allowing you
to adjust visually. It can also give a
better image in dark conditions, but
some will find the extra brightness
reduces their ability to see once the
eye is removed from the camera.
The screen, though a 100% view
and larger visually than models like
the A350, does not look like a normal
vierwfinder as there is a substantial
darker margin all round which
carries some information such as the
focus confirm light and anti-shake
level bars. Shooting information is
still overlaid on the viewing image,
despite there being loads of active
display space (1.44 million dots total,
only 1.15 million used for the image).
If you use 16:9 ratio for stills, or
shoot movies, more use is made of the
5
photoworld
screen area and you get a bigger view
– the reverse of the cropping which
usually happens. You can switch from
a full display including battery status,
GPS and so on to one with just shutter
and aperture data, or this with the
added horizon-level indicator. You
can’t opt for a completely plain view.
Brightness and colour reflect the
settings in use, including picture
style, exposure over-ride or manual
shutter and aperture. There is an
issue with using the A55/33 with
studio or non-dedicated flash; since
it has no optical finder, the required
manual settings result in a completely
black screen. There is no easy
workround for this except to fit a
manual flash (perhaps an old Minolta
one) used on low power as a trigger.
Ultimately it will be your
personal like or dislike for the
EVF which decides whether you
can live with this camera type.
Exposure metering with these
models does not use a metering
cell. Instead, the main sensor
provides 1000-zone metering with
all the usual weighting and spot
functions, as on the NEX. It remains
to be seen how accurate this is,
given the tendency of the NEX-3
and 5 to be rather generous.
Advanced features
I bought an Alpha 55 despite the
Alpha 33 being available earlier
and 14 megapixels being ‘enough’.
My reason was simple – the builtin Global Positioning System, GPS.
I have used the Sony GPS-CK1
accessory in the past but there are
some real issues with this. First of all,
Sony lives in the dark ages and only
makes its Picture Motion Browser for
Windows PCs, and only this software
can handle post-addition of GPS
data to files (I know there are many
utilities). It only adds to JPEGs, and its
accuracy depends on how precisely
your camera’s date and time setting
synchronises with the satellite signal.
The Alpha 55 solves all this in
one go and adds more. The GPS is
in the camera, you can’t forget it or
leave it in the car while you walk a
few hundred yards. It is always in
perfect time synchronisation with
the camera, as it embeds the position
when you shoot. It tags raw files as
photoworld
6
Above: a standard sweep panorama made with the 16-80mm Carl Zeiss lens (as
for the landscape on the previous page. The level of detail in the panorama with
this lens was excellent. Below, an extreme into-the-light shot shows flare patches.
The sky appeared to be plain grey through the viewfinder.
Smile Shutter. Many people will love
these features and they are enabled
by default when you get the camera.
To enable magnified Live View
manual focusing, a menu item must
be set. This converts the Delete
button on the camera back into a
Magnify button. It also works when
AF has been locked, and depending
on the lens in use you can fine-tune
focus. However, it’s a good idea to
move the switch to MF after doing
so, as when you press the shutter
again this setting can be lost and
the lens refocused. There is no
marking on the ‘Trash’ button to
indicate this secondary function.
Haunted by ghosts
well as JPEGs, and does not require
an archaic PC-only program (this is
not polemic, Picture Motion Browser
really is a legacy program Sony has
not bothered to develop) to do so.
The A55 GPS does not just
record your position on the map
when you took the shot. It records
your elevation above sea level and
the compass orientation (which
I have not been able to view, or
confirm as a feature). It is said to
be a full orientation tagging which
means you can be absolutely sure
which of those anonymous-looking
mountain peaks is which!
For me, this single feature is
the main reason I have gone for
the A55. We will come later to the
A560 and A580, conventional DSLRs
without the transflective mirror;
I would have preferred an Alpha
580, but this lacks the GPS.
The second important advanced
feature of the A55 is its 10 frames per
second continuous burst shooting.
Combined with a 16.2 megapixel
sensor, this is an amazing amount
of data to shift, and the camera has
a buffer twice the size of the A33.
Even so, it does have slightly more
restriction on numbers of shots
and card writing times, compared
to the modest 7 frames per second
and 14.2 megapixel sensor.
The A55 also loses out on video
recording time. The sensor gets
hotter, and on the whole you will get
about 20% less continuous video
before the overheat limits your take.
Both cameras are most limited if you
use Super Steady Shot, sensor-based
stabilisation, during video. The NEX
models of course lack this, but the
A55 and A33, A560 and A580 all have
SSS during filming. All have limited
recording times (much less than the
29 minutes maximum, as short as
7 minutes) when SSS is enabled.
Video shooters will be more
than happy with the built-in stereo
microphone, cleverly placed either
side of the ‘prism’ housing to imitate
human ear stereo sound reception.
You can also plug in a stereo mic
and the camera will provide 5V
phantom power, making it possible
to use a wide range of computer,
telephony and field recording mics.
During movie shooting, AF is
still active because it uses the phase
detection sensors. It is surprisingly
fast-reacting and worked well with
our Sigma 18-250mm OS zoom.
The A55 and A33 have all
the innovative functions of the
NEX from Sweep Panorama and
3D Movie Panorama, to 3-shot
Auto HDR, and very high ISO.
Both go to ISO 12,800 and have
a multishot mode which creates
acceptable ISO 25,600 – if you
can really call anything which
fires a burst of frames a true ISO
speed rating. The Anti Motion Blur
function of NEX is missing, as is
the Twilight mode which effectively
becomes the 25,600 setting instead.
And then you have the things I simply don’t use, like Face Detection and
Now to the crunch! The Alpha
33 and 55 put an extra layer
of glass, at an angle, between
the lens and the sensor.
Is this a problem? Well, an extra
layer of glass certainly is not. Kodak
DSLRs had removable filters, and
Sigma’s DSLRs have a hot-mirror
infra red blocking filter which sits
between the mirror and the lens.
Even their latest 48 megapixel SD-1
supercamera will have this feature.
All sensors already have one or two
layers of glass covering them.
Glass at an angle is not quite the
same. Within its thickness, despite
coatings, it can produce a very faint
ghost image which is offset a few
pixels lower on the sensor. It will
only show from very bright light
sources or areas. but it’s present,
and in theory it degrades the whole
image very slightly. I have seen some
images in adverse conditions, from
the A33 and A55, which I would not
consider up to the required minimum
standard for professional work.
But it’s not a professional camera.
And I’ve seen others which are
fine. I trust my own ability to assess
the way my lenses interact with the
hardware, and to spot likely trouble
in my chosen subjects. I’m taking
the risk and I am confident that even
with the extreme demands made
on lens quality by a 16.2 megapixel
sensor, I’ll see good results. The
Alpha 55 is going to be my main
travel camera in place of the Alpha
900 because of that GPS tagging
feature. It’s going to have to be good!
Video and sound
We will report in more detail on
video, and post videos on internet,
after this magazine goes to press.
The same goes for the 10fps drive
function; it needs a subject to justify
using it, and in the short time available nothing ‘right’ has turned up.
Initially I handed the camera to
our daughter Ailsa, and let her film
in the badly-lit, high sound pressure
environment of our pub Scottish
(and world!) music night – including
a virtuoso African drummer. The
result was surprisingly well exposed,
with rapid refocusing as the camera
was aimed at different people, and
really clear undistorted sound with
a high level of stereo separation.
Ailsa found the rear screen much
better than the EVF for filming,
allowing more freedom in positioning the camera and a clearer view
of the shot. Like many people today
she is used to filming with a screen
to compose on with her iPhone.
The sound from the NEX was
already good, but the SLT built-in
microphone format appears even
better. In quiet conditions, you
will hear lens focusing noises and
unless an SSM lens is used they
may be obtrusive. The 18-55mm
SAM kit lens is only just acceptable,
most screw drive AF lenses actually
sound quieter, and the 30mm ƒ2.8
SAM macro was almost unusable –
definitely better set to manual focus.
No other SLR-format camera
can focus during video in quite
the same way. That said, you may
prefer to set manual focus for
anything except casual filming.
The Alpha 560/580
Take the video functions of the 33/55/
NEX models, and the two sensors
from the 33 and 55, put them in a 550style body with a few tweaks including
Autofocus Off-Sensor Live View
The line-up as seen by Sony – 10
cameras, three colour variants. This
excludes several recent models still
on sale.
The Alpha 580 will be a better choice for many photographers; the optical finder is
superior for landscapes and shows lighting and contrast accurately. There is less
risk of flare from reflections within the camera in challening light conditions.
and you get the 14 megapixel Alpha
560, and 16 megapixel Alpha 580.
Both ‘only’ manage the same
7fps as the NEX, Alpha 550 or 33
and getting the 580 does not get you
10fps. Nor do you get the new 15-zone
AF sensor, or off-sensor metering.
With a conventional mirror
mechanism, the 580 and its 16.2
megapixel resolution from a 16.6
megapixel sensor should deliver the
highest res telephoto images from any
Alpha body to date. With the superior
high ISO, and no transflective mirror
light losses, the 7fps burst rate and its
1.5X sensor factor this could be the
ultimate wildlife and sports Alpha.
And then I read the specifications
and realise that the Alpha 580 has
no GPS. Of the four new cameras,
only the Alpha 55 has GPS (and that
is restricted to certain markets, fortunately including the UK) – look for
the product code 55V). It may seem a
trivial feature, but if want it, you have
only one choice right now. Why on
earth doesn’t the 580 have GPS too?
Perhaps because the forthcoming
Alpha 750 or whatever its number will
be – or the rumoured Translucent
mirror Alpha 77 – will have GPS.
Hyperactive Sony
This year has been a nightmare for
Photoworld. We have set out to keep
up with Sony cameras, and that does
not mean trying to judge the gear on
the basis of one-week loan periods.
Sony is such a huge consumer
brand that dozens of popular
magazines, TV stations and national
newspapers request their gear to
feature. Websites like dPreview
often get the cameras in advance
of launch, making it impossible
for any other websites to ‘compete’
in the extremely time-sensitive
matter of going live with a report.
Despite this, we have to work
fast as readers need to know
whether a camera model is right
for them without waiting three
months for our next edition.
We have avoided buying the Alpha
290 or 390 mini-generation and purchased an Alpha 550 to represent the
450/500/550 period. I chose a NEX-5
to work with the mirrorless E-system.
It all adds up financially,
particularly if I happen to like a
camera and do not sell it to make way
for the next generation. With anything
up to four new product rollouts in
a single year and a baffling total of
cameras now into the teens, Sony is
fast leaving me behind. I know that
Gary Friedman is having the same
issue with his e-Book manuals; he
wants to cover every camera, but how
do you handle eight new launches
within a six-month period? Like
our company, he simply has to buy
and sell every camera in turn.
When I did get a loan camera
in the form of the NEX-3, it was one
working week only. The Alpha 55
became available from Jessop just in
time to let me run a few vital tests,
get out and shoot some pictures in
reasonable light, and hand it round
to get opinions on the viewfinder.
This experience puts me, I guess,
in the same position as a typical buyer
who may have holiday or a family
event coming up and decides they
want the GPS or the movie function.
They order well in advance… but
as the date comes closer, dealers
are unable to say exactly when
the camera will be shipped.
I hope that Sony settles down. I
hope that innovation moves back to a
once-a-year cycle, like the A700 and
A900. Otherwise, I fear I’m going to
lose interest in any new products. We
seem to have done nothing but write
about what’s new without even the
time to use the kit and write about
techniques and applications instead.
At photokina, I bumped into
Roger Hicks and Frances Schultz, two
old friends and fellow photo writers.
No new gear for them! Newish, admittedly, Leica digital bodies but every
chance of lasting for many years.
That is how I see my Alpha 900
– as a camera which may still be
working away ten years from now. But
I still like many of the new features
appearing on lesser cameras. When
will they have finished and got EVERY
feature you can possibly want?
– David Kilpatrick
Á
A900, A850, A580, A560, A55, A33,
A390, A290, NEX-5, NEX-3
with A77 and/or A750
still to come
7
photoworld
Sony at photokina 2010
E
very two years, we attend
photokina in Cologne. This
year, remembering that three
days proved a very tight schedule in
2008, Shirley and I went for an entire
week (because the flights and hotel
worked out as costing no more than
nipping over for a couple of nights
on the peak days of the show).
This gave us time to attend the
Sony press conference, for which a
full NEX-5 video recording in three
parts can be found on the photoclubalpha website and YouTube. We
were also able to meet Paul Genge on
the Sony stand which was on a scale
far greater than any previous show.
It was not just a larger stand, it
was far more visitor-friendly and
interactive with loads of cameras and
lenses to handle and a range of odd
subjects to shoot. These included a
BMX bike half-pipe which provided
a target for the 7fps or 10fps motor
drive bursts of the latest cameras.
By far the greatest thing to happen
was the transformation of Sony’s
public image in a single half hour.
All the press had already attended
Samsung’s conference, at which it was
made very clear Samsung would not
release details of their new i-Fn lens
mount to third parties and indeed
preferred it if no-one ever made
any accessories for the NX range.
They wanted to keep their customers to themselves and they actually
said so to the entire world press.
Sony’s conference then featured
Toru Katsumoto with a delighted
smile on his face announcing how
wonderful it was that all these
third party companies had started
to make adaptors for NEX.
It was, he said, allowing people
to rediscover photography through
all the lenses going back 100 years
which could be used again thanks
to the 18mm slim back focus design
and wide bayonet mount of NEX.
Then he announced that Sony
was going to make the mount
specifications public and would be
working with selected third party
companies to develop independent NEX accessories. He even
hinted – clearly – that this might
include camera bodies from other
makers using the NEX mount.
Later on, we learned that Cosina
is a likely partner with its Voigtländer
brand already being used for NEX
adaptors. They have suitable lenses
waiting to be made in NEX mount
(manual focus, but superb glass) and
they even have a history of making
photoworld
8
Top: photokina entrance. Above and below: the Sony stand, with half-pipe stunt
bicycle action and African safari themes.
rangefinder bodies with digital
sensors – the Epson RD-1. So we
might yet see a Leica-style body with
the NEX mount from that direction.
Another company they favour working
with is the German mount adaptor
and bellows system maker Novoflex.
But in the Chinese product halls,
we found Kipon showing tilt adaptors
for Nikon, Leica R, Contax-Yashica
and 42mm thread lenses. The
adaptor has a ball and socket type
action and simply fits between the
NEX body and the manual lens.
LensBaby showed a tilt version
of their Composer with a similar
ball and socket movement, designed
only for Nikon fit lenses – but they
too have promised other fits will
be available. We are just waiting
for one to appear in Minolta MD!
On the Sony stand, a cabinet was
full of these third party accessories and adapted lenses. It was
remarkable to see how Sony, a
company once regarded as the most
jealous custodian of its proprietary
designs and systems, had grasped
the value of this explosion in NEX
use by serious photographers with
legacy glass from older systems.
We showed this in our last issue,
in full, with large pictures of many
optical systems attached to NEX.
Indeed, it was the very first message I sent out about NEX from the
press conference in Croatia – this
camera’s mount will allow the use
of almost every lens ever made.
I think the popularity of NEX with
serious photographers was something
that took Sony by surprise. They built
the camera as an upgrade for point
and shoot users, but its success has
been more visible in the enthusiast
NEX firmware v3
S
ony has released the firmware upgrades which were promised at
photokina for the NEX models NEX-5 and NEX-3, and the Alpha mount
lens adaptor LA-EA1. Please note: five hours after their press release
went live, the upgrade is still not showing up at the URL listed below.
Readers in Europe can download the firmware upgrade from:
http://support.sony-europe.com/hub/hub.html
Autofocus is now supported when using the NEX-5/NEX-3 with 14
lenses from the full range of A-mount optics by Sony and Carl Zeiss
that includes telephotos, primes and zooms. Aperture settings can be
maintained during HD movie recording, and system menu operation
has been streamlined alongside other usability improvements.
Autofocus with A-mount lenses
Single-shot autofocus is supported with 14 optional A-mount SAM and
SSM lens models3 when used with the optional LA-EA1 Mount Adaptor.
Single-shot AF is also possible while in movie recording mode by pressing
the shutter button halfway down. Support for AF operation with A-mount
lenses also requires a separate firmware upgrade for the LA-EA1.
Aperture priority with video recording
HD video can be shot while maintaining constant aperture, either
in A (aperture priority) mode or in iAuto mode with background
defocus activated. This aids the simple creation of beautiful background defocus effects during movie recording.
Soft key settings
It’s possible to customise functions of two of the three soft keys on the
camera’s rear panel. Functions that can be assigned include Shooting Mode,
Shooting Tips, Precision Digital Zoom, ISO, White Balance, Metering Mode,
Flash Compensation, DRO, Auto HDR, Creative Style, MF Assist and AF Area.
Above: E-system expansion on show,
Kipon Contax-Yashica tilt adaptor, and
new GN20 flash for NEX. Below: the
500mm ƒ4 G SSM in bare metal.
and ‘downsized second system’
bracket. Even now, three months after
the E-system hit the retail shelves, we
are hearing from professionals who
buy the pocketable camera with its
16mm and 18-55mm lens options.
On the Alpha front, the new ‘DSLT’
models Alpha 33 and 55 were the big
news with the conventional 560 and
580 taking a back seat. It was great
to see so many Alpha bodies on the
Carl Zeiss stand, where CZ lenses of
many types were mounted on a wide
range of cameras. In a cabinet, Sony
showed the forthcoming 500mm ƒ4
Apo G SSM in an unpainted form to
display the metal construction. A
mockup or prototype of the Alpha
700 replacement was also shown,
with a lens which is thought to be
a 16-80mm ƒ2.8-3.5 Carl Zeiss
SSM – though Paul Genge hinted
it might be a more affordable Sony
SAM design. And a whole range of
new lenses was announced for the
NEX system including a CZ fast wide
angle, a premium grade standard
zoom, a wide zoom, a fixed medium
telephoto, a macro lens and a portrait
lens. These will be rolled out over
2011-2012 giving the NEX system
a range of nine E-mount lenses.
We’ll be reporting on all this
in future issues. – D&SK
Á
Menu start
When ‘Menu’ is selected, there’s now the option to display either the
main menu screen or the last parameter set. This simplifies quick
readjustment of recently-selected functions and settings.
MF Assist
An enlarged image portion can be displayed on screen with userselectable duration while in MF (Manual Focus) Assist mode. MF Assist
operation has also been improved. The previously-chosen magnified
image portion can now be maintained when MF Assist is re-selected,
making repeated checks of fine focus quicker and more convenient.
System requirements
PC: Windows XP SP3 (64-bit and Starter editions not supported);
Windows Vista SP2 (Starter edition not supported); Windows 7
Macintosh: OS X Ver.10.5 or later
All platforms: Hard disk space: min. 200MB / RAM: min. 512MB.
Upgrade requires USB cable connection between computer and NEX-5/NEX-3.
Autofocus function is supported with these A-mount lenses:
SAM lenses
• DT 18-55mm F3.5-5.6 SAM [SAL1855]
• 28-75mm F2.8 SAM [SAL2875],
• DT 55-200mm F4-5.6 SAM [SAL55200-2]
• DT 30mm F2.8 Macro SAM [SAL30M28]
• DT 35mm F1.8 SAM [SAL35F18]
• DT 50mm F1.8 SAM [SAL50F18]
• 85mm F2.8 SAM [SAL85F28]
SSM lenses
• Vario-Sonnar T* 16-35mm F2.8 ZA SSM [SAL1635Z]
• Vario-Sonnar T* 24-70mm F2.8 ZA SSM [SAL2470Z]
• Distagon T* 24mm F2 ZA SSM [SAL24F20Z]
• 70-200mm F2.8 G [SAL70200G]
• 70-300mm F4.5-5.6 G SSM [SAL70300G]
• 70-400mm F4-5.6 G SSM [SAL70400G]
• 300mm F2.8 G [SAL300F28G]
9
Á
photoworld
gallery
photoworld
10
Golden seasons
For some, the world turns to drab brown as winter arrives – but others see
the colours of bronze, copper and gold glinting in the low sun. Carl McKie
photographed the red fox in snow using his Alpha 700, Minolta 400mm ƒ4.5
at ƒ6.3, ISO 400 and 1/160th. Above, still loyal to film, John Gilkerson photographed Glenlochsie in April 2009 on a coach holiday based at Glenshee. Fuji
Velvia 50, Minolta Dynax 7, 24-105mm at 105mm, 1/6 at f22, tripod. Below
left, Tony Jones found these teasel heads in winter and isolated them from the
out of focus background using a 135mm lens at ƒ8, with ISO 400 on his Alpha
100 giving a very brief shutter speed of 1/1250th.
T
o enter your own pictures for future Gallery pages, just send digital
files. Images should be no larger than 2000 x 3000 pixels or the
equivalent data size for panoramas (6 megapixels). They should
saved as AdobeRGB or sRGB JPEG files, with embedded ICC profile and
intact EXIF data, to level 8 quality (High) or better. Your details, caption,
copyright information, website URL, email address etc should be written
into the file EXIF or IPTC fields – use 'File Information' in Photoshop File
Menu to view and edit these text fields.
You may also put caption, website, etc information in a separate
text document attachment or in the body of your email.
The pictures must have been taken on Minolta, Konica Minolta,
Sony or Sony Alpha equipment. Scans from slides, negatives or prints
are accepted and full details must be provided of equipment used.
EXIF data will be used to confirm the origin of digital entries.
Send by email to: [email protected]
You may also send by post on CD or DVD to :
Photoworld Gallery, Icon Publications Ltd,
Maxwell Place, Maxwell Lane, Kelso, Scottish Borders TD5 7BB.
You may enter as many images as you like at any time, including
your name and address and all relevant caption details. Gallery entries
will be considered for cover or portfolio use and web editions. Each
contributor chosen receives a year’s subscription/renewal, or a prize
of similar value which may be a photographic book or other item.
Ë
11
photoworld
Aboe:by Dr Francis Vallely of Pately Bridge, Yorkshire. This is our ideal of an Autumn scene – even, if we are lucky, in November. Taken in the grounds of Fountains
Abbey, Studley Royal Park. Below: perhaps not an ideal way to see those leaves hanging on, but a great experience for all involved – Peter Karry joined one of the Quest
photo trips organised by Colin Westgate (see page 26) and found this frozen waterfall in Glencoe, Scottish Highlands.
photoworld
12
A small world in a
suburban garden
ES
SU
IS
CK NE
A
B
LI
N
O
N
UR
T
GE R
PA ADE
RE
R
FO NG
N
I ADI
M
E
O
ZO SY R
EA
Photoworld & Minolta
Image electronic
editions on YUDU
GLENN TURNER has sent us a series of
macro images which show the interesting natural history that can be seen on
our own doorsteps, even in suburbia.
“We don’t have a pond, but we get
quite a lot of frogs and toads at various
times of the year. I photographed this
large frog on the patio, handholding
the camera and focusing the 100mm
macro lens on the amazing eyes.
“The little toadstool was growing
in our lawn, and appears to have been
a tasty meal – maybe for a mouse?
I used the Sony 30mm macro lens
for this, holding the Alpha 700 on a
beanbag on the grass and using the
2-second delayed shutter release
option to try to reduce shake. There
was no alternative but to grovel about on the ground to line up the pic (and
the frog one too). Maybe one day I’ll get an Alpha with a fold-out live-view
screen which will make things a bit more comfortable for my knees!
“The third shot is very hungry and exotic-looking caterpillar of a
species of moth called the Vapourer. I was impressed by the neat way
it was munching its way through a rose bud, just like a boiled egg with
its top cut off! This was lit with an HVL-F58AM flash mounted on the
camera, in combination with the 100mm macro without its lenshood.”
You can now subscribe for the future
and get a digital edition instead
of printed – or you can have both.
It’s only £10 a year for digital only,
and you get access to hundreds
of pages of back issues and extra
articles. We have converted over
24 previous issues already. Visit
http://www.yudu.com/albums/
items/51212 to read on-screen or
download to read later – print
pages, print articles, print whole
issues. Never lose your copy again…
See www.photoclubalpha.com too
Á
13
photoworld
The speed of sound
Greg Wright focused on the details of local musicians and their instruments
after rediscovering the mandolin. Now that every household once again has
a ukulele, he’s got some tips for moving music photographs.
I
n the summer of 2008 my son,
like many boys, decided that
he wanted to learn to play
the guitar. I took him to a music
shop and we went home with a
small sized instrument for him.
When I was there, I noticed a
mandolin hanging on the wall. I
have wanted to play one of these
for a long time, ever since I went to
concerts by bands such as Jethro
Tull, Fairport Convention and
Lindisfarne who all featured this
intriguing small instrument.
A few weeks later I did buy myself
a mandolin and started to play. Fairly
soon – probably too soon – I was
asked to play with a group of musician friends. It was nothing too serious, just making music and enjoying
each other’s company. Not surprisingly, soon afterwards, I started
taking a camera along with me.
A photograph captures an instant
in time as immortalised by Henri
Cartier-Bresson’s idea of the ‘decisive
moment’, whereas music exists
through time. It is the relationship
between the notes, their length and
pitch that defines music. It is the
progress through a piece of music
that gives it its emotion. When I was
photographing the other musicians I
really wanted to capture this aspect of
music making because music cannot
exist in an instant. It is dynamic
by nature which is fundamentally
the opposite of photography.
With this aim in mind I wanted to
show this movement in my images.
This was fairly easy as I just had to
keep the shutter open for long enough
to get a blurred image. By trial and
error I settled on an exposure time of
between one and five seconds to get
the appropriate amount of movement,
depending on the music and the musician. I selected the aperture to ensure
that the shutter speed was right.
This was fairly easy to do with
my Sony A100 as it has a minimum
ISO of 100. With other cameras that
have a higher minimum ISO I might
have needed to use neutral density
filters to achieve the necessary
slow shutter speed. Sometimes this
meant I had to use a very small
aperture but this was not a problem
photoworld
14
Above: Looking along the neck of a fiddle in action. Sony A100 with Sony 18-70mm lens set at 60mm, 1.6s at f10, ISO 100.
Facing page top: Playing a bodhrán. Sony A100 with Sony 18-70mm lens set at 40mm, 4s at f11, ISO 100.
Facing page bottom: Picking out the melody on an electro-acoustic mandolin. Sony A100 with Sony 18-70mm lens set at
60mm, 2.5s at f25, ISO 100.
because the motion blur would
smear out any resulting diffraction.
I made sure that all the motion
came from the instrument and the
musician by mounting the camera
on a tripod. This also allowed me to
concentrate on the right moment to
make the exposure rather than thinking about where I was pointing the
camera. Often I asked the musicians
to repeat the same short passage
several times so that I could get a feel
for their movements and their rhythm.
This also helped me to time my shots.
Sharp not flat
Above: Detail of an f-hole in the top of an acoustic mandolin. Sony A100, Sigma 70mm macro lens, 1/160s at f/2.8, ISO 100.
Having said all of this, a blurred
image of someone playing an
instrument is still a blurred image
and is not very interesting. The photos
needed something to anchor them
and give them a solid foundation. To
get this anchor, I added a blip of flash
to the mix. I used the wireless-flash
facility to fire my Minolta 3600HS(D)
flash. I chose the position of the flash
to minimise unsightly reflections
from the instruments which often
have a glossy, reflective finish. I also
used exposure compensation to
reduce the effect of the flash so that
the static part of the image did not
overwhelm the dynamic element. For
the majority of the pictures I found
an exposure compensation setting
of -2 worked best but of course
there was a lot of trial and error.
Effectively I was using a slow-sync
technique along with fill-in flash.
As always, the choice of background is vital to the success for
an image. Sometimes I managed to
use part of the musical instrument
itself as the background. On other
occasions I used a black cloth so
that the background did not draw
the eye away from the subject and
take the viewer’s attention. Not only
that, the dark background adds
to the atmosphere of the shot. A
lot of musical performances take
place in subdued lighting and the
dark background reflected this.
I found that I could make these
images in a surprisingly small space.
There was no need for a conventional
studio at all. I could set the tripod
up fairly close to the subject as I only
wanted to include a small portion
of the player and the instrument in
the frame - usually just one hand on
the instrument. I found that a focal
length of around 70mm (105mm,
35mm equivalent) was about right
to fill the frame with the part of the
subject I was interested in at the
same time as providing sufficient
distance between the camera and
the subject. As the subject was fairly
small, the flash could be quite close
15
photoworld
to the subject and still give an even
coverage. Typically I could shoot in
an area of about 2m by 2m, or less.
I was lucky because I was already
making music with the subjects of
my photos but even if you are not so
fortunate, musicians are fairly accessible to many photographers. There
are pubs in many towns where local
bands will perform, alternatively,
there are folk clubs, jazz clubs and
other places where musicians gather
which are all worth investigating. If
you talk to the musicians they may
well agree to pose as your subjects.
Many musicians are outgoing people
who like showing off and will be
flattered by your request, especially
if you offer to shoot some publicity pictures for them in exchange
for your more ‘arty’ images.
Musicians often want good
quality pictures for their MySpace
and Facebook pages. Don’t expect
to shoot this type of image at a
concert, however. It would be better
to arrange to meet up later, perhaps
at one of the band’s rehearsals where
everyone will be far more relaxed.
Using local amateur musicians
as your models makes this very
rewarding and at the end of the
day it does not matter if the music
was great or terrible, because the
final photo is the important thing.
Á
photoworld
16
Facing page top: The many fingers of the left hand of a fiddle player. Sony A100 with Sony 18-70mm lens set at 60mm, 3.2s at f14, ISO 100. Centre left: Rhythm playing
on a Patrick Eggle electric guitar. Sony A100 with Sony 18-70mm lens set at 40mm, 3.2s at f16, ISO 100. Centre right: An electric blue electric bass guitar. Sony A100 with
Sony 18-70mm lens set at 70mm, 3.2s at f22, ISO 100. Bottom: A jazz guitarist playing finger-style on this chosen tool – a classical guitar. Sony A100 with Sony 18-70mm
lens set at 55mm, 3.2s at f22, ISO 400. This page top: Moving the sliders on a studio mixing desk. Sony A100 with Sony 18-70mm lens set at 70mm, 3.2s at f22, ISO 100.
Below: A piano player’s right hand plays the tune. Sony A100 with Sony 18-70mm lens set at 70mm, 4s at f11, ISO 400.
17
photoworld
The 3rd Dimension
It is the commercial ‘drive’ of the decade (or maybe the coming one). Sony,
and many others, want you to shoot and watch 3D images.
E
very generation has had its
3D boom. In photography,
things started early. Sir David
Wheatstone had already worked out
how to make sterescopic drawings
even before the invention of the
photographic process. So within
a short time after the birth of
photography, stereoscope viewers
were selling along with sets of 3D
prints. By the end of the 19th century,
you could put a penny in electrically
illuminated stereo viewers at the
end of the pier, and see the world
with a clarity never imagined.
The 1914-18 war brought a
boom in stereo prints and viewers.
In 1963, I was confined to a public
school sanatorium for the summer,
because someone thought I needed
my toes straightening (a process
which involved breaking the bones,
drilling through them from the
end of the toe, inserting a stainless
steel rod and forcing each toe to
‘set’ as a rigid unjointed digit). The
convalescence was relieved only by a
library of books which had not been
updated for 50 years, and a cabinet
full of horrifying views of the Great
War trenches and no-man’s land with
a wooden Holmes style 3D viewer.
But I was already deeply into 3D.
I had been given a Tru-Vu viewer with
a box of filmstrips, black and white
views of Banff National Park, Aztec
ruins and many other transatlantic
things, years before. The depthrendering given by the wires covering
ancient graves, with skeletons lying in
the half-dark below, was fascinating.
My more up to date friends had
a Viewmaster with seven full colour
3D pairs mounted in each circular
card. They did not offer anything
like the depth of coverage of my
educational Tru-Vu films with their
detailed captions appearing between
each shot. Some of the discs for the
Viewmaster were Disney cartoons.
So, with my Olympus Pen D halfframe camera acquired at the age of
15 by raiding a small inheritance, I
naturally took my own 3D views by
the simple process of shooting one
frame then moving three inches to
the left. A print made from the two
negatives side by side was a stereo
pair. I learned two ways of viewing
– one with the pair reversed, and
photoworld
18
David Burder (a young version, left!)
with his grafted-together Minolta X-500
based stereo film camera (above). A
long time friend of the Minolta Club,
David kindly sponsored the provision
of the 3D viewers with this magazine.
Below, one of his ‘Burdlo’ multi-lens
variations on the Nimslo lenticular 3D
camera. See his website:
www.3Dimages.co.uk
crossed eyes, the other with the pair
correct and ‘staring through’ the print
but focusing on it. That is the reverse
of crossing your eyes and takes a
lot of practice. It also produces
headaches if the images get too wide.
A little over ten years later I was
a professional photographer, and
was asked to shoot pictures with the
brand new Nimslo system, which
created lenticular 3D prints of large
size. My first Nimslo shots were made
using very large and heavy custombuilt multi lens cameras, and a device
called the Computrak for still life.
The Computrak allowed you to space
a set of up to eleven frames at precise
intervals, calculated according to the
focal length and subject distance.
The highpoints of the Nimslo
experience included shooting aerial
views of the oil rig yards on the Isle
of Lewis, using both a custom camera
and a brand new method for me – the
Minolta X-700 fitted with a motordrive
base, firing a sequence of frames as
the helicopter flew past the subject.
This created even better 3D than the
relatively tight spacing of the custom
camera, for such a distant subject.
The military regularly use wide base
stereo photography for identifying
camouflaged and other hard-to-analyse details in aerial reconnaissance.
We then landed on a rig, and I was
allowed to walk out over the open
sea to the end of the flare-boom to
take pictures of the platform from
this attached viewpoint.I had no
harness, no safety equipment, not
even a life jacket and I don’t think
a photographer would be allowed
to do that now. The force of wind
by the time I had got to the tip of
the boom was worrying; the view of
the sea far below was beautiful.
During this period, I met David
Burder FRPS, who was working
for British Oxygen and was a true
3D enthusiast who wanted to use
the Nimslo process. David and I
worked together on several publicity
shots, including 3D animated
welding shots. He started using
Minolta, and in the early years of
the Minolta Club, he joined us on
a week’s photo trip to Tunisia.
Then the Nimslo 3D camera
for the public appeared, the neat
little four-lens compact made by
the Timex factory in Dundee. It was
a scoop for British manufacturing,
a US company choosing Dundee to
assemble a camera designed for the
mass market. I visited Timex and shot
a documentary series in black and
white showing the whole process.
David Burder in the meantime
helped graft two Minolta X-500
bodies together to form a 3D camera,
fitted with two matched 28-85mm
lenses with their apertures and
zoom rings linked by gears and their
shutters synchronised, taking a
single film (of course). We featured
his 3D Minolta in the magazine.
David left British Oxygen to form
3D Images Ltd, and has been ever
since then the leading consultant
and expert on stereo photography
in all its forms. It is digital today,
though he still has the 3D Minolta.
As I was putting this issue together,
he called to ask for advice on
getting a secondhand full frame
digital body to experiment with a 3D
lens (since the cheapest and most
common option was the Canon 5D,
he’s now shooting Canon not Sony).
It is thanks to David that we
have 3D glasses with every copy of
this magazine. They are provided
by courtesy of 3D Images Ltd, and
can be used to view the anaglyph 3D
pictures shown here. It was David
who, in 1986, invented and patented
the colour anaglyph method which is
the basis of today’s anaglyph prints.
Now we have the Sony NEX-5,
NEX-3 and Alpha 55 and 33 which
can all create 3D images by a simple
process of panning the camera.
The internal software of the NEX
creates a ‘movie’ file (really just a
pan you can scroll through) with
two images, left and right, created
from the pan at different points in
the multishot sequence. It works
exactly like my old method of taking
two pictures with the Olympus Pen,
but the camera does it all for you.
This file can be viewed on a Sony
Bravia 3D television and possibly
on other brands (Samsung is likely,
Panasonic not). This is a new problem
we are going to encounter, each
camera make is going to produce 3D
stills and in future 3D movies which
will only work with matching TV sets.
Using a free software program
for my Apple iMac computer,
Mac3DViewer, two JPEGs can be
extracted from the NEX panoramic
.MPO format files I have been
shooting. The camera offers the
choice to shoot these in a simple
16:9 widescreen ratio, as well as
wider panoramas. When extracted
from the 16:9 file, you get two
JPEGs which are a stereo pair.
These can then be placed on
two layers in Photoshop, lined up
carefully, and processed to produce
the required red-cyan effect which
separates them when viewed through
the coloured specs. If this is done
well, normal colour is restored for
viewing and there should not be
too much evidence of fringes.
It is also possible to use a Loreo
3D lens made for your camera
format (full frame or APS-C) which
creates two vertical shaped stereo
halves, ideal for viewing as a print
using the folding magnifier available
from Loreo. These can also be made
into anaglyph red-cyan images.
And, of course, it is equally
possible to take two still images
from a separation of about 65mm
(inter-ocular distance) just as
stereo photographers have done with
conventional cameras for years.
NEX-5 3D sweep pan 16:9 anaglyphs
These three pictures were all taken using the 18-55mm lens on the NEX-5, and a tripod with a short arm holding
the camera away from the central pivot of the pan tilt head. This ensures the lens moves in an arc, rather than
the camera just rotating round its tripod bush, which will not produce any 3D effect. The pictures were opened
from the resulting .MPO file using Mac3DViewer, and exported to pairs of JPEGs. These were then combined to
make anaglyph Red-Cyan images which you can view using the filter spectacles enclosed with this magazine.
What makes good 3D?
Inviting NEX 3D submissions, I found
that initially most photographers are
not geared up to see 3D pictures.
It’s a bit like knowing how to see
black and white, once you get the
feel of it, it becomes easier.
Where the advice given for
conventional photography to produce
a sense of depth is to frame the scene
(trees to one or both sides, through
a gateway and so on) this does not
work as well with stereo pairs. Details
near the edges of the shot may get
lost entirely when lining them up.
The best 3D has a subject located
19
photoworld
at medium range - maybe two to three
metres away. There will then be some
foreground, but not extremely close
– certainly no closer than one metre,
with a 3m subject about 1.5m is ideal.
This will occupy part of the central
space, not just framing, and may
‘interfere’ with the subject by getting
in front of it in a way you would not
plan for a regular 2D composition.
It helps if the subject and the
foreground have good vertical
lines and fairly strong simple
textures; if they have a pattern,
it should not be dead square-on
to the camera or too regular.
The background (and the ground
itself) should have detail, and well
defined vertical elements. Everything
should be more or less in focus,
and the angle of view should not be
either a long tele shot or an extreme
wide angle. A good choice of lens
for making stereo shots was David
Burder’s 28-85mm zoom. On the
NEX-5, the 18-55mm kit zoom is ideal.
3D will not normally work well
if all the subject is beyond 3 metres,
and there is no identifiable set of
planes. The ideal situation might be,
for example, to focus on a statue seen
beyond some foreground railings,
with a building beyond which has
its wall at an angle to the camera.
Keeping the foreground and background ‘layers’ out of parallel to the
camera helps. If there is also some
perspective given by convergence
or scale, this adds to the 3D effect.
The least effective 3D images have
no foreground in front of the subject,
and a plain background with little
texture and mainly horizontal detail.
An example of a bad 3D shot might
be a someone on a beach with a calm
sea and smooth sand and plain blue
sky. Even on the NEX, the brief time
between the exposure of the 3D pair
would cause problems with waves
or surf and keeping the horizon
perfectly straight would be difficult.
A studio test shot for a Sheffield CNC machining bit manufacturer. This very small
cutter stands out in 3D because the background has enough detail to show depth.
Attempts to make a successful 3D shot on plain white failed. By adjusting the separation left-right of the two image layers used, the picture can be made to appear
level with the paper it’s printed on, or as if seen through a window, or as if floating
in front of the paper.
Good illumination on all planes
helps, but the main subject can afford
to be better lit than the foreground
or background. If you do not have
any foreground, it’s vital that the
background has details which
can form the 3D impression.
Things which don’t work at
all include having the sky as the
background, a plain studio backdrop,
leaves or branches on a day with
wind (unless you have a true one-shot
camera or stereo lens), crowds of
moving people (ditto) and distant
landscapes with no real foreground.
It also does not help to use wideangle lenses with very close ground
as the foreground (on a tripod just
a foot or two above ground). This
may give a sense of depth in a still
shot, but the separation can be
uncomfortable in a stereo pair.
I have selected and taken some
stereo images to show here, so
you can see – with the aid of those
anaglyph specs – how it works.
Of course it’s all much better with
polarising specs and a 3D TV and
a scrolling panorama. You will
have to ask your local Sony Centre
to demonstrate that – it is beyond
the scope of this magazine.
In the coming months you will
see many more 3D photography
ventures. Here is an example:
www.3dportraitsuk.webs.com
This is a franchise based on
some very old technology updated,
but there has hardly been a year
since 1980 when one studio or
another did not try to market 3D
lenticular portraits in the UK.
Fuji has a £15,000 lenticular dye
sub photo printer on the market
now, which studios can install along
with a low-cost Fuji 3D camera.
There is also a lenticular 3D digital
photo frame to go with this system.
3D is always with us and has been
for most of the history of photography
but for whatever reason, it’s always
been a passing craze or a special
product used as an eye-catcher
for advertising. Maybe this time
round we will have 3D for everyday
family and enthusiast use which
survives more than a year or two.
– David Kilpatrick
To view images: Red filter left
eye, Cyan filter right eye.
Á
Keep your 3D viewer specs with this magazine – we may publish 3D anaglyph pictures in future issues.
You can also view 3D on our web pages and forum using the viewer. 3D examples are welcome for our Gallery!
This NEX-5 3D wide pan by Andy Johnson does not have much depth range – but it does have a strong
photoworld
20
How to make your own Anaglyph Red-Cyan prints
T
he first task is to create a stereo
pair of printable or viewable
JPEGs. You can used the Red
(left eye) and Cyan (right eye)
viewer with your computer screen,
you don’t have to make prints.
With any camera, take two
pictures of a subject which does not
change (no wind, no moving clouds,
no changing light, no people). Take
the left hand shot first then move
the camera about 65mm to the right
without changing its line of sight. A
good way to do this is by mounting
the camera sideways on a macro
focusing rail, or using a tripod with
a horizontal crossbar option.
For distant subjects with
not much strong foreground,
increase the separation – very big
landscapes (Grand Canyon) or
cityscapes can be taken with 1m
or even 2m separation between the
camera positions for left and right.
Macro and close-up pictures may
only work well if you reduce the
separation to around 25-35mm.
With a NEX or other camera
equipped with Sweep Panorama 3D,
either use a tripod equipped with
an arm to create an arc with the
camera, or pan across your scene
left to right with a “swivelling from
the hip” action. This will move the
camera through an arc, and from
the multiple exposures made (over
40 shots!) the Sony BIONZ processor
will auto-align and separate two
separate stereo images. For prints,
use the 16:9 ratio to start with as it’s
easier to learn how to time the shot
to get the composition you want.
Use Mac3DViewer or suitable
PC software to extract two JPEGs by
exporting them from the .MPO file.
The left hand one will be numbered
with a 0, the right hand with a 1,
added to the frame number. If you do
shoot a full panorama, the software
will extract four JPEGs – a pair of
small views (1 and 3), and a pair
of full size (0 and 2) for printing.
Now, in an editing program
which supports RGB Channels,
first open the left hand image and
right hand image side by side (or in
left and right tabs). Select the left
hand image, go to the CHANNELS
working mode, and shift-select just
the Green and Blue channels so that
only these are active and viewed.
Go to the right hand image, select
ALL, copy. Go back to the left-hand
image which has G and B as the
active channels, and PASTE. This
will paste the right-hand image into
the G and B channels, leaving the R
channel unaffected. Now click on
the composite (RGB) view option
for the left image. It has become a
left-right pair, with colour fringes
visible. Depending on the program
you are using, and the option of using
LAYERS, you can nudge the position
of the pasted-in right hand image
relative to the background left image.
Using your Red-Cyan viewer,
set the size of the image on your
computer screen to a comfortable
scale. About A5 or half this page is a
good size. You should now be able to
check the stereo effect. It can help
to use a +1 dioptre lens on your
Extract two JPEGs
– or shoot left and
right (top and
bottom windows,
left).
Open the Channels control, set the Eye to view only Green and Blue, in the LH image. Copy the whole RH image, paste into this. Then view in RGB below – 3D done!
left eye with the red filter (one lens
from a pair of reading glasses).
Black and white conversions are
produced by converting both images
to DESATURATED monochrome – still
RGB, and not Greyscale – before
doing the 3D channel/paste process.
You can not convert to BW after
doing this with a colour image!
Black and white is highly effective
and often works better than colour.
Finally, try making an inkjet or
similar good quality print around
A6 to A5 size. With experience you
can progress to making much larger
images. You can also display the
anaglyph images on any TV and
view with the Red-Cyan specs.
Stereo pair and polarised TV
viewing are a further subject and
we will cover this in a later issue
as the 3D TV trend develops.
Photo example: Andy Johnson
window effect and enough 3D to look very effective when printed large, or scrolled on a 3D TV
21
Á
photoworld
Cowboy in the cathouse
T
he first person we saw in
the empty corridors of the
photokina halls, the day
before the show opened, was Steve
Thornton. You can’t really miss a
six-foot-something figure with an
extra six inches of hat, cowboy boots
and everything except the spurs
and chaps, even from behind.
“That’s Steve Thornton”, said
David. “He’s the guy you are going
to the brothel with on Thursday…”
Cologne has always been
known for its robust seamy side.
When David went to one of his first
photokinas with John Battison and
David Shaw from Japanese Cameras
Ltd – importers of Minolta in the
1970s – he was courteously treated.
“After you”, said Messrs Shaw and
Battison as they hit yet another
hostelry. Gay bars were not common in Britain in 1976, and it was a
minute before he realised they had
stayed outside the revolving door…
But this location, Pascha, had
to be seen. It is Europe’s largest
legal brothel, a multi-storey block
just outside the inner city limits of
Cologne (it would be illegal within
them). It is claimed to have 120
working girls, and one thousand
customers a day. Thursday mornings
must be quiet, as they seemed able
to close down the main cabaret and
lapdancing bar to allow German lighting and accessory makers California
Sunbounce to stage their model shoot
with invited press and TV crews.
It was a photo-call too good to be
missed. Shirley Kilpatrick reported
for duty at Europe’s biggest brothel
where fashion photographer Steve
Thornton was staging a publicity
stunt for California Sunbounce.
Welcome to the House of the Rising
Sunbounce, also known as Pascha.
Top: preparing for the shoot – sometimes the light off-set worked better than on.
Below: glossy cocktail menu for a house of ill repute. Left: Thornton lecturing at
photokina, and caught in a mirror. Right: German efficiency 12 stories high
photoworld
22
Because of its location, Pascha
was a taxi fare away – half the taxis in
Cologne seem to carry advertising for
it, and unless a visitor already knew
the true identity of the business you’d
assume it was a nightclub. Indeed,
it does stage music gigs and many
will visit it just for the floorshow.
In the cocktail-cabaret bar, with
Thornton’s halogen video lights positioned on stands or waved on poles
by assistants, the grubby state of the
decor was only too clear. The floor
carpet stuck to my sandals and the
beige curtain behind the first model
to ‘take the stage’ had threadbare
Our first model had a very distinctive and versatile face, taking on different looks
depending on the angle and the lighting. Model: Svetlana Lobanova.
23
photoworld
patches. The furnishings felt as if you
really wouldn’t want to touch them
without rubber gloves on, let alone
lounge around posing in undies.
Pascha may be the biggest cathouse in
the west, but it didn’t smell wonderful and looked about as tired and
well-used as its statistics suggest. Our
models, of course, were unconnected with the venue and along with
make-up and stylist Davina took the
occasional wry look at their location.
As for Steve Thornton, we
had stopped by one stand during
photokina where he was holding forth with a lecture. He was
animated, gesturing, extrovert
and kept his audience attentive.
At Pascha, he did less to explain
what he was doing with the lighting, or how he was using the large
California Sunbounce reflector
panels which were the key to
controlling such small, hard light
sources. His instructions to his
crew were not aimed at the posse of
journalists and press photographers
assembled to witness the event. I
had thought he would be conducting
the shoot more as a masterclass
or demonstration, but it was very
much a working session with one
exception, permission for the invited
media to take their own pictures and
publish them as we are doing here.
This is unusual, but our models
knew the score and posed for all of
the press gang in turn. The second
girl, working in front of a not-quitegood-enough Turkish bath wall
painting, had more direct communication but from my angle the lighting
cast a strong face profile shadow.
When this worked with a flattering
face silhouette and visible shadows
from her eyelashes, it was good; when
it cast the wrong shaped shadow
from her profile, much less so.
Thornton worked hard and his
crew moved the halogen lights and
Sunbounce panels round while
dodging both the still cameras
and the video crew. I was shooting
with my Sigma 18-250mm ƒ3.5-6.3
photoworld
24
Above, lights and reflector with make-up artist and photographer in foreground.
Below, hard side lighting produced distinctive profile shadows from my angle.
Facing page, Thornton demonstrates a pose, and gets that hat out of the way.
OS stabilised zoom, which proved
more than useful at the long end.
Originally, I planned to use just a
28mm ƒ/2 Minolta RS on my Alpha
700, but this would not have got me
either the overall scenes or the closeup final shots. The A700 was set to use
auto ISO all the way to 1600, as we
have found that Adobe Camera Raw
6.2 (or Lightroom 3.2) makes such
excellent noise-free conversions it is
safe to use even 1600 for model shots.
At this setting, typical exposures were
around 1/80th wide open at ƒ6.3. The
slight hint of softness in lens at full
apertures was flattering; a few shots
stopped down in stronger direct light
were cruel to skin, to say the least.
Well, it may be the first and last
time I will be able to claim I went
to work in a brothel. German social
morals accept this place in a way
which I think real Californians
might not. The brand name makes
you think it’s an American product,
but California Sunbounce was
developed in Germany and all their
early publicity shots were taken on
the sunny shores of the Baltic!
They also make the SunSniper
camera sling (used by Thornton)
and they are imported to the
UK by The Flash Centre.
Á
See: www.theflashcentre.co.uk
Call the Photostore
Adrian Paul at the Photostore can obtain almost any accessory you need
for your Alpha system camera. Lost a flash shoe cover? Or just want to get
one for your new camera which came without? Call Adrian – the same
goes for lens caps, body caps, flash ‘feet’, AC adaptors, battery packs, lens
hoods, cases, straps, LCD protectors, eyepiece magnifiers, LCD hoods, hand
grips… If it’s a Sony accessory Adrian can obtain it for you. He also has
stocks of Minolta and Konica Minolta items. Photostore has its own web
forum with former Minolta expert Bernard Petticrew as resident guru.
01132 448664
www.photostore-uk.com
25
photoworld
Improving Your Landscape
Photography, with Colin
Westgate and Hugh Milsom
2 days, at Seaford, East
Sussex. Wednesday/Thursday
1/2 December 2010
A repeat of last year’s over subscribed
workshop, so if you missed that,
then here is your chance. Landscape
photography is often thought to be
straightforward and indeed, it is not
difficult to obtain reasonable pictures. Frequently, however, landscape
photographs are disappointing, perhaps because of unfavourable light,
poor composition or unsatisfactory
printing. With the right approach,
such problems can be overcome and
this comprehensive workshop will
cover methods of improving your
landscape pictures from the moment
of taking to aesthetic enhancements
prior to making the final print.
The content will be a mixture of
discussion, an appraisal of pictures
from participants, and a field trip
into the local area where there are
interesting beaches and features
such as the wonderful cliff scenery
of the Seven Sisters. The In-depth
discussion will cover the principles
of landscape photography, both
technical and aesthetic. Topics such
as the characteristics of different
lenses, various filters, choice of
subject matter, viewpoints, composition, principles of exposure, use of
light and more will be included.
Vision and Interpretation are vital
elements in the production of most
successful landscape photographs.
This includes ‘pre visualisation’ at
the moment the picture is taken and
post production prior to making the
print. Both aspects will be covered,
the latter using Photoshop procedures, which will be demonstrated
using digital projection. A selection
of images taken digitally on the
workshop will be used, but if you are
a film worker, you are invited to bring
negatives or transparencies with you.
Both Colin Westgate and
High Milsom have many years of
experience photographing in the
landscape and both will demonstrate and discuss their individual
approaches to the subject.
Price £125 (deposit
£40). 8 places
All About Exhibitions
and Exhibiting
1 day, at West Mersea, nr Colchester
Saturday 15 January 2011
Exhibitions are one of the showcases
of photography and to have your work
on show is very satisfying, especially
if you are able to sell some pictures.
photoworld
26
Quest Workshops 2010
Colin Westgate’s QUEST workshops, sponsored by Photoworld, are based in
Essex. Telephone 01206 384315 or email [email protected].
Download a PDF programme for the full year from www.questphoto.co.uk
Whether you want to exhibit with
your club, or compete in National
or International exhibitions, or
perhaps have a show of your own,
in this workshop we will seek to
demystify the process and discuss
the best way of going about it. We
will cover all aspects, including
types of exhibitions, venues, open
exhibitions, one person shows, prints,
digital, how pictures are judged,
fashions, fads and formulae, paper
work and records, distinctions such
as FIAP and BPE, and much more.
It will also include an appraisal
session with the aim of encouraging
you to ‘have a go’! Remember, if no
one sent work to exhibitions, we
would not have pictures to see!
Price £55 (deposit £20).
Includes lunch. 6 places
The Darkroom, with
Colin Westgate
Saturday 22 January to
Friday 28 January 2011. Other
days by arrangement.
Complete course 7 days at West
Mersea, Essex. Days may be booked
on an individual basis – choose
any day or combination of days to
suit your requirements). Max. 3
people any one day. See website
for detailed information.
Price – any single day £75
(deposit £25). Two or more days,
£60 per day (deposit £20 per day).
Complete course £350 (deposit £75)
Picture Forum, One Day
Seaford, West Sussex
Saturday 5 February 2011 (date
changed from 6 October 2010)
Picture Forum is a unique event,
where photographers have an informal day sharing and viewing pictures.
The formula of mini presentations
by participants, plus a competition
and a talk by a leading photographer,
has proved very successful. It is the
opportunity for everyone to show
their work, and we invite short
presentations of up to 15 minutes
(about 25 pictures). These can be
with prints, slides, or digital files. It
is not, however, obligatory to give a
presentation, and you are welcome to
attend Forum just to enjoy the work of
others, if that is what you would like.
The presentations occupy most
of the day, and this is your chance
to show your photography amongst
friends. It is not a critique, so your
pictures will not be ‘judged’ and
anything of interest will be fine – they
do not have to be competition winners! The competition is a separate
item and for practical reasons, it
is open for prints only – not more
than one per person. A brief critique
and appraisal on all entries will be
made and prizes awarded for the best
work, one to be chosen by the judge
(t.b.a.) and another by audience vote,
plus runners up. Forum is always an
interesting and exciting day of sharing
pictures and experiences, where everyone can join in. Not to be missed!
Price £25 – includes buffet
lunch & refreshments (but not
bar drinks!). Payable in full on
booking – not eligible for ‘early
booking’ discount arrangements
Landscape with Joe Cornish
Two workshops
2 days, at Seaford, East
Sussex, Saturday/Sunday
12/13 February 2011
2 days, Mersea Island, Essex
Tuesday/Wednesday
15/16 February 2011
We are delighted to welcome
back Joe Cornish to the Quest
programme. Joe is arguably Britain's
finest contemporary landscape
photographer and his use of light and
composition, in conjunction with his
total commitment, has resulted in a
series of magnificent pictures of the
British landscape and elsewhere.
In this workshop, Joe will be
showing and discussing his work and
philosophy, and will also appraise
pictures brought along by participants. There will field trips each day
and conditions permitting, these will
include one to a local beach to catch a
winter sunrise. This really is a workshop not to be missed, as it represents
a very rare opportunity to work with
this top professional landscape artist
in this part of the country. Joe is the
author of several superb landscape
books and autographed copies will
be available for sale. His enthusiasm
and experience will guarantee an
inspiring two days You are advised to
book early as places will in demand.
Price £275 (deposit £80)
10 places (strict limit)
Isles of Arran, Mull & Iona
Saturday 26 February to Monday 7
March 2011. Hotel & Guest House
based, 9 nights. (8 places)
A new Quest destination, the Isle
of Arran is said to be ‘Scotland in
miniature’, as it contains many of
the geographical features of the mainland. We will spend three nights there
before travelling north to the larger
island of Mull, where the quietness of
the unspoilt landscape and beaches
will offer plenty of subject matter.
A day trip to the nearby historical
island of Iona will be included. The
holiday will include three return
ferry trips – Arran, Mull & Iona.
Price £1055 (deposit £200)
Single supplement £90. (8 places)
Price includes accommodation (dinner + b&b) and minibus
travel from Glasgow. Flights and
midday lunch are not included.
The quoted price is for a shared,
en suite, room and a supplement
is payable for single occupation.
If you require a single room, this
must be made clear when booking
and is subject to availability.
Southern Iceland
Sunday 20 March to Sunday
27 March 2011. Hotel based.
7 nights. (8 places)
The landscape in Iceland is some of
the most dramatic and spectacular
in the world, with its lava fields,
waterfalls, glaciers and mountains,
hot springs and snow & ice. This year,
in addition to our normal May tour
(see below), we are scheduling this
early trip in March, when we expect to
find the conditions more wintry. With
spring not yet underway, this should
offer opportunities to photograph
snow and ice, especially around the
waterfalls. Of course, the weather
at this time of the year cannot be
predicted and this trip is, therefore,
more speculative and is not for the
faint hearted! There is also the possibility of seeing the aurora borealis
(northern lights) if conditions permit.
The tour route will take us inland
from the Reykjavik area, and then to
the south coast, where we will follow
the coast road as far as the incredible glacial lagoon, Jokulsarlon,
after which we will make our way
back along the coastal route, with
deviations where possible. Waterfalls
including Gullfoss, Skogafoss and
Seljalandfoss lie along the route
and we hope to visit the dramatic
coastal location Dyrholaey, with
its dramatic rock stacks, which is
not accessible in May due to the
breeding season for seabirds etc.
Price £1075* (deposit £200). 8
places. Single supplement £275
Price is for accommodation
(B&B) in shared twin room and
travel in Iceland. Single occupation
is expensive in Iceland, hence a supplement of £275 is payable. Flights
and cost of meals (except breakfast)
not included. NB Prices are based on
an exchange rate of 185 Icelandic
kronur per GB£1. Quest reserves the
right to request a premium of not
more than 10% should the exchange
rate move adversely by a significant
amount.. Travel insurance essential.
South West Ireland
Saturday 9 April to Monday 18 April
2011. Guest House based, 9 nights,
6 at Inch and 3 at the Burren
Quest returns to Ireland after a
two year gap, and for the main part
of the trip we will, as before, be
based at Inch Strand, on the Dingle
peninsula. This is one of the most
stunning locations in the country,
with over 3 miles of sandy beach, and
with mountains in the background.
From here, we will explore the
peninsula and surrounding area,
including a visit to fascinating Dingle
town itself. As well as landscape,
there will be plenty of other subject
matter, including the colourful shops
and houses, and equally colourful
characters!. For the second location,
we will move to The Burren, where
we will photograph the extraordinary
terrain and coastline. The friendliness of the Irish is renowned and
we can be sure of a warm welcome.
Travel arrangements will be to fly to
Shannon, which is convenient for both
locations, and thence by minibus.
Price £945* (deposit £150)
Single supplement £85. (8 places)
Price includes B&B accommodation and minibus travel. It
does not include the cost of flights,
lunch and evening meals. The latter
will be taken at the nearby Beach
Restaurant, which is owned by
the proprietor of the Guest House.
Accommodation is on a shared
room basis, but twins as singles
are available, subject to a supplement of £95. Prices are based
on an exchange rate E1.20 per £.
Quest reserves the right to request
a premium of not more than 10%
should the exchange rate move
adversely by a significant margin.
HELPLINES AND INFORMATION
Iceland
Sunday 8 May to Thursday
19 May 2011. Hotel based,
11 nights. (8 places)
Authorised & warranty repairs, assistance and enquiries
Iceland is a highlight in the Quest
programme, with an amazing
landscape full of unique and often
bizarre features, including magnificent waterfalls, black sand beaches,
lava fields, glaciers, icebergs, active
volcanoes, mud pools, hot springs,
geysers, and more. The weather
can be exciting too, with everything
from sunshine to snow storms. The
tour will take in much of the island,
with the exception of the interior,
which is not accessible at this time
of the year, or the remote north
west, which would require an extra
few days. We will, therefore, travel
round the island, staying for one,
or sometimes two, nights at hotels
en route. The itinerary has been
arranged to allow ample time for in
depth photography in selected areas,
as well as plenty of impromptu stops.
With a population of a mere
300,000 the island is never crowded,
even in the capital, Reykjavik. The
climate will be similar to March in
the UK, unlikely to be excessively cold
– but temperatures can drop to below
zero, so you need to be prepared.
The schedule is to fly to Keflavik,
near Reykjavik, Iceland’s international airport, and then to drive east
via Thingvelllir, to Geysir, then to
Gullfoss, along the south coast via
Skaftafell and the astonishing glacial
lagoon at Jokulsarlon, where we
spend two nights. We will then head
north, through the mountains before
diverting to one of the east coast
fiords. We will continue through the
eastern highlands to Myvatn, where
there are thermal springs. From there,
we will head west and then south,
ending near Reykjavik. The hotels are
clean and comfortable, and if you like
lamb or fish, you will enjoy the food!
Flights are normally available from Gatwick (Iceland
Express), Heathrow (Icelandair),
Manchester and Glasgow.
Price £1695* (deposit £400).
Single supplement £425. (8 places).
Price is for accommodation
(B&B) in shared twin room and
travel in Iceland. Single occupation
is expensive in Iceland, hence a supplement of £425 is payable. Flights
and cost of meals (except breakfast)
not included. NB Prices are based on
an exchange rate of 185 Icelandic
kronur per GB£1.*Quest reserves the
right to request a premium of not
more than 10% should the exchange
rate move adversely by a significant
amount. Travel insurance essential.
Á
Our website www.photoclubalpha.com is now packed with detailed features
on the Minolta and Sony Alpha systems, has a busy discussion Forum and you
can search the site for help on topics. It has a full directory of useful links for
downloading software or obtaining help. For personal advice from the Club, use
e-mail only please, to [email protected].
A DEDICATED helpline is available for Konica Minolta Dynax and Dimage
digital system owners, and also for film camera owners. The helpline phone
number is 0870 0104107.
All repairs for Konica, Minolta and Konica Minolta branded photographic
products are handled by;
JP Service Solutions
Johnsons Photopia Ltd
Hempstalls Lane
Newcastle under Lyme
Staffordshire ST5 0SW
Tel: 01782 753366 – Fax: 01782 753340
Email: [email protected]
SONY may announce further firmware upgrades or indeed products. Your first
step should be to check Sony’s website regularly:
www.sony.co.uk
Their general helpline, which will have information on any other numbers,
addresses, departments or offices which Konica Minolta owners may need to
reach in future, is: 08705 111 999
For downloadable printable manuals, legacy firmware and software updates,
visit:
http://ca.konicaminolta.com/support/americas/
For the Sony European user service – there is still no UK user club:
http://www.sony.co.uk/nextlevel
To order KM/Sony parts, accessories, and new Sony flash components etc, visit
the Photostore, where Bernard Petticrew also hosts an advice forum:
http://www.photostore-uk.com/
MINOLTA REPAIRS
by specialist workshop in Milton Keynes
For many years Camera Repair Workshop, based in Milton Keynes
close to the original Minolta UK service department, handled the repair
of classic SRT, X, Vectis and later film cameras for Minolta UK.
They have obtained many of the spare parts and KM’s stocks of older
‘cannibalisation cameras’ like 7000 and 8000i. Their proprietor is David Boyle,
and his two technicians are Minolta trained. As an independent repairer they
will specialise in film and digital, and hold parts going back to models like
the XM. The Dynax 9 is an exception, previously serviced by a special European
centre, and must be sent to JP (see above). No VAT is chargeable at present, and
they offer Photoworld Club members a 10 per cent discount on prices which
they say are already better than former retail repair charges. This enables
the Club to continue with its 10 per cent service and repair discount offer.
The Photoworld Club Camera Check scheme will be operated by
Camera Repair Workshop, though in absence of Konica Minolta’s former
bulk shipping arrangements, the return carriage costs have increased and a
charge of £25 per camera/standard lens combination is now required.
Your equipment is bench-tested for shutter speed, metering, focusing and
aperture accuracy, externally cleaned and adjusted (this includes mirror box
and film track, and all accessible parts or adjustments). If performance is
below standard, a quotation will be issued for optional servicing. A certificate
is completed showing the test results and functions checked, and returned
with the camera. Camera Repair Workshop were actually responsible for
most of the Club Camera Check work, and hold a stock of original ‘Minolta
Club’ certificates along with all the necessary bench testing equipment.
They are based at:
Unit 9, Wharfside, Bletchley, Milton Keynes MK2 2AZ.
Telephone 01908 378088, fax 08712 427677.
Email: [email protected]
27
photoworld
CAMERA : SIGMA SD14 : ISO50, F4, 1/320sec | LENS: SIGMA APO 70-200mm F2.8 EX DG OS HSM : 200mm(70-200)
SIGMA LENS
APO
70-200
mm
F2.8
EX DG OS HSM
For Sigma, Canon, Nikon, Sony and Pentax
Supplied with fitted padded case, petal type hood, hood adapter and tripod collar
photoworld
28
A classic fast aperture, f/2.8
lens, enhanced by Sigma’s
unique Optical Stabiliser (OS)
system. Combines superb
optical quality, handling and
value for money.
The very latest optical technology
including FLD and SLD glass elements has
been incorporated to produce superb
optical performance throughout the entire
zoom range. This new high-performance
lens benefits from Sigma’s unique Optical
Stabiliser and HSM yet still retains a
compact construction and is the smallest
lens of its type.
Sigma Imaging (UK) Ltd 13 Little Mundells, Welwyn Garden City, Hertfordshire, AL7 1EW
Telephone: 01707 329 999 Email: [email protected] Website: www.sigma-imaging-uk.com


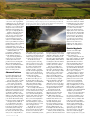


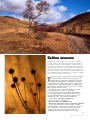
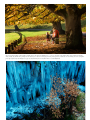


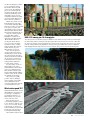
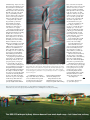
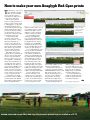


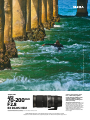


![reply_card [Converted] - TheMysticHelming.mono.net](http://vs1.manualzilla.com/store/data/005649301_1-3a046a309a634867449ff92cdd957a65-150x150.png)