1
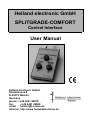
Heiland electronic GmbH
SPLITGRADE-COMFORT
Control Interface
User Manual
Heiland electronic GmbH
Schulstrasse 8
D-35579 Wetzlar
Germany
phone: ++49 6441 26978
fax:
++49 6441 26988
email: [email protected]
Internet: http://www.heilandelectronic.de
Features
The SPLITGRADE Comfort Control Interface can be used as an useful
accessory in order to operate the main SPLITGRADE Controller functions
comfortably and securely. The development was driven by customers
demanding clearly visible displays, easy to operate handles for exposure
time and gradation setting as well as START/STOP and FOCUS function.
Please note that the SPLITGRADE Comfort Control Interface does not
replace the SPLITGRADE Controller itself.
Ahead of future software version 2.0 of the SPLITGRADE Controller (which
should be available in spring 2003) the COMFORT control interface already
contains an integrated tone indicator. It offers pre-visualisation of the approx.
density while changing paper grade and exposure time. The implemented
LED segments of the tone indicator will show the actual measurement using
the “Zone scale system” in reference to the brightest and darkest areas of
the final print. In order to update older systems you can download the
software update for SPLITGRADE free of charge as soon as the software
update will be available on our homepage. Of course you can also request a
floppy disc or you may send back your SPLITGRADE to us in order to have
us update your system. Please note that we will charge a handling fee for
labour costs and transportation.
Preparation for Installation
Please see the SPLITGRADE User Manual prior to any operation or set-up
of the Comfort Control Interface. Please make sure that the SPLITGRADE
Controller is at least using software version 1.19B2, before you connect both
systems in order to ensure 100% compatibility and secure operation of all
functions. The number of the software version will be briefly displayed in the
LCD display, when the SPLITGRADE Controller is switched on. The
Controller needs to be updated, when a lower version number is displayed.
Connecting the system
The COMFORT Control Interface will be delivered with a AC/DC supply unit.
The power supply connector is located on the rear side of the Comfort
Control Interface. The communication cable need to connected to the COM1
port of both systems. Please use the cable provided with your SPLITGRADE
Controller only. It can be used for updating your SPLITGRADE System also.
Operation and Displays
The functions are operated by using dials with rest stops. The selected value
is increasing while turning the dial clockwise. Turning counter clockwise will
decrease the value. Additionally the dials can be used as switches while
2
pressing down the dials itself. The selected values for exposure time, grade
and the actual print number are shown using large red coloured displays.
The red colour has been chosen in order to avoid any undesired exposure of
B&W paper. The dials are located in-between the displays and highlighted
symbols in order to locate them securely while working in the darkroom.
Exposure time setting
Turn the dial underneath ”Time– until the desired exposure time is selected.
The display rabove the exposure time dial will show the selected exposure
time. The resolution is depending on the absolute exposure time. Long time
big increments, short time small increments.
Paper grade setting and white light burn in
Turn the dial underneath ”Grade– until the desired paper grade is selected.
The display above the paper grade dial will show the selected paper grade.
To select burn-in using white light first choose one of the burn in times 1...7.
Then increase the grade, beyond grade 5 the display will show “--- ”, which
is the sign for white light exposures. Further clockwise turning will change
the display to grade 00.0 / 00.1 / 00.2 ..... This overflow from hard to soft
grade allows flexible and easy selection of every paper grade setting. While
turning the grade dial counter clockwise the selected grade will change 00.1
/ 00.0 / ---- / 5.0 / 4.9 .....
Setting of burn-in times
Using the dial underneath ”Burn In Time– allows the selection, display and
execution of the main exposure or one additional exposure time.
Please note that the SPLITGRADE Comfort needs to distinguish between
the main exposure of the main menu and the additional exposure menu.
This allows to separate the two different operation modes of the
SPLITGRADE Controller.
The main menu of the SPLITGRADE Controller will be represented using a
”dark– display of the Comfort Control Interface. In this mode the
measurement of the negative could be done.
Inside the burn in menu, the main exposure time will be shown as ”0–. The
selected burn in exposure times will be indicated by using ”1– to ”7–.
START / STOP of exposure time
Press the “Time” dial in order to start the selected exposure. An on going
exposure can be stopped by pressing the dial again. Once more and the
actual exposure will be continued. The exposure could be terminated by
pressing the ”Focus– dial.
SPLITGRADE-COMFORT User Manual
3
Focus light On/Off and abort of exposure sequence
This function is implemented by pressing the ”Grade– dial. The focus light
can switched on in the main menu as well as in-between the burn in
exposure times. In conjunction with the red filter of the enlarger this might be
helpful to locate areas that should be dodged.
In the main menu measurements can be done after the focus light has been
switched on. The focus light is switched off by pressing the ”Grade– dial
again.
Change of display intensity
The intensity of the display can be adjusted in 4 different steps. While
pressing down the “Burn In Time” dial and turning, the desired intensity can
be selected. Please note that the intensity is at maximum level, when the
system is switched on.
Tone indicator
This function has been implemented in the Comfort hardware, but can be
used only in conjunction with future software version 2.0 of the
SPLITGRADE Controller. The advantage of the tone indicator will be the
pre-visualisation of the approx. density of a measurement point while
changing paper grade and exposure time settings in reference to the
brightest and darkest point.
The prediction of the print result will be much easier using the density
measurements of those 3 points. In order to allow a quick orientation the
tone indicator is using the Zone scale system. Zone “X” represents plain
white paper and Zone “0” shows maximum density of the paper. Also you
can prepare and stick a grey scale right above the tone indicator replacing
the Zone scale.
Foot switch
The foot switch of the SPLITGRADE controller can also be connected to the
SPLITGRADE Comfort Control using the implemented front side connector.
It enables starting and stopping of the exposure time very comfortably while
having the hands free.
Hint: For further explanations please see the SPLITGRADE user manual.
th
December 12 , 2002, Changes without notice.
4


![Download_[PDF:2.54MB]](http://vs1.manualzilla.com/store/data/005691480_1-b58821d12ecc880b7183c5bf90d0eb66-150x150.png)