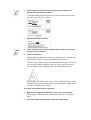
1
Introduction What a Long, Strange Trip It’s Been Introducing Fontographer How to get the most out of your Fontographer materials Before you begin by David Berlow They say that good things come in small packages. When it comes to Fontographer, this has never been so true. In 1985, I was working at Bitstream designing type on a large proprietary font design system. For those of you who don’t know what this means, I’ll tell you. Large means it wouldn’t fit on a desktop because it was larger than a desk. We had workstations that were about six feet wide by six feet deep by four feet tall, with a 19" vector-monitor, a mouse with four or five buttons, and a keyboard with a few dozen extra keys. If you must know, this was trucktop publishing. Proprietary means that we developed the software and some of the hardware ourselves so no one else could use it, and there were only two or three engineers in the world who knew how to make changes, additions or fixes to the software and this happened quite infrequently and very slowly. In addition, proofing the fonts required a series of conversions, and mastery of a typesetting command language about as friendly as Kanji. Into this world, one day, came two visitors from somewhere down south. They carried a little box that, because it was so small, I thought was surely a kitchen appliance, a toaster or blender perhaps. But when they plugged it in there seemed to be type drawing going on inside of the little box. There were about ten Bitstream type designers in the room and we all gasped. I climbed upon the table to get a closer look and sure enough, there was a letter on that tiny screen. But there were not enough points on the character and not enough buttons on the mouse and the screen was smaller than my face—how could this possibly work? Well, within two months I had a Mac Plus and Microsoft Word, so I could “correspond with our clients.” I also purchased my first copy of Fontographer from Altsys. I played around and drew a few characters. It took a while to get the hang of the Bézier tools. At first I thought I had a tiger by the tail. But for me, used to the real estate of the big screen, and the point structures of Bitstream outline fonts, this “toaster” font design system was like painting a picture through a porthole. A bit later though, the Mac II came out. It didn’t take me long to convince the powers at Bitstream that “corresponding with our clients” would be a lot easier if I had a more powerful machine and a bigger screen and a LaserWriter and a 300 dpi scanner. (I can’t remember how I got the scanner, I think it had something to do with OCR.) The first upgrade of Fontographer also was bought and now I was able to cook. I started making characters that were much more complex than what we could make on our proprietary system and I was making them in much less time. But still I wasn’t making fonts. I will never forget the first time I actually made a font on Fontographer. Roger Black, the well-known publication designer who worked at Newsweek back then, wanted a font for his redesign of California Magazine. Roger had visited the letterdrawing offices at Linotype where I worked in the 70’s, and he had visited Bitstream as well in the 80’s in several failed attempts to get Linotype and Bitstream to make custom fonts for him and his clients. When he came back to strafe us again in the winter of 1986, we were ready. Matthew Carter, Bitstream’s VP of design, deflected him at me and I told Roger that we had never actually made a font with Fontographer and the Mac, but we would love to try. He sent me the artwork of a long neglected type from an Italian foundry which I scanned, and went to work on digitizing and spacing. I was totally stunned at how quickly it was done and the quality of the results. It was great, and Roger loved it as well. Most especially because it took less than a working week to accomplish. From the time we agreed to do the face to the time it appeared in the magazine was about a month! By 1989, Fontographer was getting better and better. Things like remove overlap, correct path direction, merge point, the ability to generate Type 1 fonts and more, were all making it a pleasure to design fonts for the first time in my life. The Mac was getting more powerful and there were a lot of graphic designers, droves in fact, moving to the Mac. But they were constrained in their graphic design by the limited availability of fonts on the Mac. When Fontographer got hinted generation of Type 1 fonts into the market in 1990, the font world was truly changed. By this time I had left Bitstream to concentrate fully on The Font Bureau, the type design company I have founded with Roger Black. We released our first retail fonts that year. The general impression was that they were as good as any fonts available for the Mac. Needless to say, Altsys had become my best friend. Throughout these years, from 1985 to 1990, the most astonishing thing to me was that Altsys was constantly improving the features, performance and ease-of-use of Fontographer in spite of the fact that there was no competition in the field for Fontographer. When competition and a larger user base developed, Altsys went into overdrive. Through Fontographer 3.0 and 3.5, TrueType and PC font generation, improved printing functionality, Multiple Masters, change weight, and all the rest—Altsys was always doing the right things at the right time for all the right reasons. Today, you have before you the next generation of this great tool. Macromedia Fontographer 4.1 is a truly revolutionary change in the quality and functionality of type design tools. Letter spacing is treated like a database, scaling, rotation, skewing and such are totally interactive functions, and autotrace is amazing! The Font Bureau tested and tempted itself with version 4 as soon as the specification came to us in 1991. Throughout our review and use of version 4, we had the feeling that we had only scratched the surface of what it can do for type designers like us. In the coming year we think we’ll be finding out that we’ve got a tiger by the tail—again! Good luck to all, and thanks to the Fontographer team! Introducing Fontographer Welcome to Fontographer! First of all, thank you for buying our product. Second, thanks for opening this manual. We hope you’re reading it not because you’re having trouble, but because you want to learn more about this exciting program. Our manuals are written by people who actually use (and create) Fontographer and who have graphic arts and typography backgrounds. We’ve tried to be as informative as possible without being stuffy. We hope you’ll find every aspect of this program easy: from our unique approach to learning, to the panoramic interface of the program itself, and finally, to the actual process of creating fonts. We want your experience with Fontographer to be so satisfying and painless that when you’re through, you’ll agree that this is the best font design program in the world! As a matter of fact, Fontographer has been the standard for professional typeface and logo design since its introduction in 1986. Before Fontographer, typed images could only be produced by using complex, expensive, and time-consuming procedures. With the advent of personal computers however, typography became attainable to everyone: from the graphic illustrator to the desktop publisher to the business executive. And now, Fontographer provides this capability to you. So, on with the manual—we hope you enjoy it. Fontographer 4.1 allows you to generate ATM-compatible Type 1 fonts, as well as Type 3 PostScript fonts, TrueType fonts, PICTs and multiple masters on the Macintosh, and Encapsulated PostScript (EPS) files. You can import EPS files directly, and use their outlines in the drawing window. You can also use metrics information from a variety of sources, and export information to those sources, as well. Additionally, you can import kerning tables from Adobe Font Metrics (AFM) and other files. You can also take advantage of the PostScript graphics you create in Macromedia FreeHand and Adobe Illustrator by pasting them directly into your characters. Many dialogs in the program give you two options: Easy and Advanced mode—letting you have total control of the program if you want it, or allowing you to rely on its simple and automatic settings. For advance users who don’t always want to rely on automatic hint settings, we have a menu of hinting controls. And in the Metrics arena, Fontographer lets you space and kern faster and easier than ever. With autospace, autokern, and assisted kerning and metrics you can save yourself from having to kern and space each individual character or font separately. Now you can ask Fontographer to do it automatically, or you can use the same kerning and spacing information from one font, for others that kern and space similarly. So whether you are a novice or an experienced graphic designer, Fontographer allows you to assign your characters and graphic images to any key or combination of keys, and gives you the added ability to instantly repeat and resize these images in any application. Fontographer makes it easy to create new typefaces or add your logo to existing typefaces. Fontographer’s drawing tools help you create a professional-quality character in minutes and print that character on any Post-Script or TrueType compatible printer. Now, with Fontographer and your personal computer, you can create designs that rival those produced by professional typographers. How to get the most out of your Fontographer materials Our User’s Manual is designed for both Macintosh and PC users. We placed keyboard alternatives after certain menu commands; the Macintosh command is always followed by the command for the PC. Get into the habit of using these “quick commands” that our more experienced users prefer. For basic information about using Fontographer on the Macintosh, and for information about how to set up Macintosh multiple master fonts and KHCRs refer to Using Fontographer on Your Macintosh. For the PC, refer to Using Fontographer on Your PC. For an update on the changes made to the newest version of Fontographer, see the What’s New guide for current users. What’s New is in two parts: Part I: Best New Features and Abilities, and Part II: Tips for Previous Fontographer Users. All of the Fontographer manuals assume that you are familiar with the computer and that you have a working knowledge of how your system operates. If you need more information on these topics, refer to your Macintosh or PC owner’s manual. Tips icon We’ve also compiled a truly excellent collection of tips you can use to create your fonts. Tips are also easy to find. Look for this tip icon throughout the manual or find them under “Tips” in the Index. Before you begin Getting started Before you can actually start using Fontographer, you need to check to make sure your package is complete. Your package should include a “User’s Manual” (this book), “What’s New,” “Using Fontographer on Your Macintosh” OR “Using Fontographer on Your PC,” a Quick Reference Card, a product registration card, and—of course—a CD ROM. In the event you don’t have access to a CD ROM reader, you will also find a floppy disk request card with which you can request software on 3.5” diskettes. Make sure that you have everything you need to be able to use Fontographer. If you are using the Macintosh version of Fontographer 4.1, you must have a Macintosh Plus (or higher) computer running a System 6 or later operating system with 5.1 MB hard drive space, and at least 4 MB of available RAM. It’s also a good idea to make sure you have the latest version of Apple’s Hardware System update for your machine. Otherwise you may encounter unexpected results. You can get this utility from your Apple dealer, through local user’s groups, or from Apple’s on-line service AppleLink™. For the PC version of Fontographer 4.1, you will need a 386 (or better) computer running Windows 3.1, 3.11, NT, or Windows 95 with 5.5 MB hard drive space, VGA video, and at least 6 MB of available RAM. If you want to print PostScript files from your PC, you will also need have an HP driver dated after September 1993, or use Adobe 3.01 PostScript driver. Read me... All Macromedia release and update disks contain a document titled ReadMe (.txt). It contains late-breaking information about the product which may not be present in the User’s Manual. You should read this file before attempting to use the program. Registering your software to receive technical support To become a registered user and receive technical support, you must complete and return the registration card included in this package. Macromedia believes in customer support, and wants to resolve any problems you have. Our support lines are available Monday through Friday from 6:00 a.m., to 5:00 p.m. Pacific Time. The technical support phone number for Fontographer is (415) 252-9080. Please have your serial number on-hand when you call. You can also try the MacroFacts faxback at (800) 449-3329, or check out Macromedia’s web site at http://www.macromedia.com. Network Copy Protection No, Fontographer is not “copy protected.” We know that most people view copy protection with the contempt usually reserved for root canals and tax audits. The last thing we want to do is make it difficult to use Fontographer. We have, however, given Fontographer the ability to detect copies of itself running elsewhere on a network. Should you receive the following message, “Sorry, the user named ‘blah blah’ is using a duplicate of this program...,” this means that more than one copy has inadvertently been personalized with the same serial number. In order to alleviate this problem, simply discard the Fontographer preferences file (located in the Preferences folder in your System folder on the Macintosh, or in the FOG41 directory on the PC), restart Fontographer, and fill out the Fontographer personalization dialog with a different serial number. If you have only one serial number (meaning you only purchased one copy of Fontographer), you must purchase additional copies of Fontographer in order to run more than one copy at the same time. (For additional copies, call Macromedia at (415) 252-2000, or your nearest Fontographer dealer). Chapter One Modifying Your Fonts Steps to Modifying Fonts Opening Fonts Changing Character Weight About Font Piracy Creating Oblique Fonts Creating Fractions Creating Ligatures Creating Condensed Characters Imagine an ideal world where you can create completely new fonts without ever drawing a thing. Picture yourself in this “Font Utopia,” creating new weights of your font, new small caps versions, and new oblique typefaces—without drawing a line, placing a point, or manipulating a curve. Does the very concept sound so far-fetched as to be beyond belief? Well, it’s not...because Fontographer lets you create completely new fonts by modifying your existing fonts. Why would you want to modify a font instead of buying a new one? The answer is simple: You’ve invested a lot of money in the typefaces you own. Although many talented people create their own from scratch, the easiest way to create a completely new typeface is by modifying the fonts you already have. Fontographer makes it so easy to modify your existing typefaces, that you practically don’t even have to think about it. So, if you don’t have to think about it...what’s the point of this section? This section gives you some quick ways to make modifications. Hopefully, it will encourage you to create some outstanding typefaces of your own. Steps to modifying your font 1. Open a font. 2. Modify it; for example, you can simply change the weight. 3. Save the file (Optional). 4. Generate an installable font. 5. Install the font. 6. Put it to work! Opening a font You start Macromedia Fontographer the same way you start other applications—by double-clicking the program icon. In a few seconds, Fontographer’s About box appears. Choose “Open Font” from the File menu to open one of the fonts in your System, a folder, a file server, or a disk (or you can use one of the fonts provided in the Sample Fonts folder). The standard file selection dialog works in the normal fashion, so you can change drives or directories, open a file, or cancel. You can also specify which types of font file formats you want to display. On the Macintosh you can eject disks as well. Once the selection dialog is open, you can select a font file by clicking on its name and then “Open,” or simply by double-clicking on its name. One or more progress dialogs will appear before Fontographer displays the Font Window. To cancel progress dialogs, type Command-period on the Macintosh, or Esc on the PC. Changing the character’s weight You can quickly create a heavier or lighter version of your character (or the entire font) by using Fontographer’s Change Weight command. To change weight: 1. Go to the Font Window and double-click on the “v” to open it. 2. Choose “Change Weight” from the Element menu. The “Change Weight” dialog appears. 3. Enter “30” in the “Change by” text edit box and click “OK.” Fontographer increases the weight of the “v” by 30 em units. Fontographer also gives you the option of changing the weight of your character (or entire font) without affecting the vertical or horizontal size of the character. Go back to the “v” and select “Undo Change Weight” from the Edit menu to undo the changes you performed in the last exercise. Repeat the exercise above, but check the “Don’t change vertical size” option before you click “OK.” Look at the difference in the two options. You can try the option with the “Don’t change horizontal size” option next. Now try the exercise with both options checked. You can now apply the desired weight to the entire font, or just selected characters. From the Font Window, use the pointer tool to click and Shift-click on the desired characters. (You can choose them all by choosing “Select All” from the Edit Menu.) Then repeat the procedure above to apply the selected changes to the desired characters. Naming your font You can name your font by choosing “Font Info” (-General on the PC) from the Element menu. The Font Information dialog appears. For this exercise, name your font something simple like “Garamond-Fat.” (Don’t forget the hyphen before the Style Name.) For more information about naming your font, refer to the section “The menu name” in Chapter 7, “Generating and Exporting Fonts.” If you want to use a custom style name, be sure to let Fontographer assign a standard style name first and then re-assign your custom name. So, if you want to call your bold-italic version of a font “fat slanted,” use the pull-down menu and select “bold italic” first, then change the style name to “fat slanted.” This will allow Fontographer to recognize and assign the proper style to your custom name. Be sure to name your font before you save your database file and generate a font. Otherwise your fonts will end up with unusable names like “Untitled.ttf” (for a TrueType font), and you’ll have to start over. Saving your work You save Fontographer database files via the Save or Save As commands in the File menu. The database file is where Fontographer stores all the parts needed to construct any font. Just like you save documents in Microsoft® Word, or graphics in Macromedia ® FreeHand™, the database is where you save your fonts in Fontographer. The standard file saving dialog appears. You can name your databases anything you like, because there’s no relationship between the name of the actual font you’ll use in your programs and the name of the database itself. 1. Choose “Save as” from the File menu. Macintosh users have the option of creating and naming a new folder to store a font in. You can save your font directly to another folder, drive, or directory on all platforms. 2. Type in “MyFatFont.” PC users will note that Fontographer automatically gives you the name “MyFatFon.fog” if you also named it “MyFatFont” in Font Info. Generating your font After you save the file, it’s time to generate an installable font. You will have to do this if you want to use the font in another application besides Fontographer. Fonts are composed of different files which you will need to install before you can use the font. For more about installing fonts, refer to Chapter 9, “Installing and Removing Fonts.” 1. Choose “Generate Font Files” from the File menu. The Generate Font Files dialog offers a number of options (including the ability to generate fonts for several computer platforms), but for the purposes of this exercise you’ll use the Easy mode. Choose the computer you’re generating fonts for and select TrueType for the Format. We’ve typed some commonly used bitmap sizes in our example and you can do the same. However, bitmaps are only necessary if you’ll be using a PostScript font on the Macintosh. The Set Folder/Directory button gives you the option of generating your fonts directly into a specific folder. This saves you the extra step of moving files into folders later. The Overwrite existing files option lets you replace an existing file (that has the same name) with a new file. If you don’t choose this option (and have a font with the same name), Fontographer will create a new font with the same name followed by a bullet (•), on the Macintosh, or a dollar sign ($) on the PC. Installing the font Since installing fonts is different depending on the platform and operating system you’re using, we can’t really cover this in a quick “how-to” here. If you need more information about installing fonts, refer to Chapter 9 or your System’s User’s Manual. Using the font Once you’ve installed the font, go to the application of your choice, type some text, and select your font (just like you would any other font) from the Font menu. Creating an oblique font By using Fontographer’s Skew feature, you can create your own oblique font. You can consider this an easy way to make an oblique typeface. Actually, it’s sort of like cheating since an oblique font is just a right-slanted version of a Roman typeface; a true italic typeface has redesigned characters that compliment the face. But, skewing is a really easy way to create a new typeface that can add emphasis to your text. Again, Fontographer allows you to skew one, several, or all characters at once. As in our previous example, we recommend that you try out your modifications on one character before you apply the transformation to the entire font. Follow the steps given in the “Change Weight” exercise to open your font. To skew a character: 1. Go to the Font Window and double-click on the character “k” to open it. 2. Choose “Transform” from the Element menu. 3. Drag down in the “First transformation” pop-up menu until you’ve selected the Skew option and made sure the other pop-up menus say: “Do nothing.” Fontographer defaults to a horizontal skew value of -12 degrees (the appropriate angle for an oblique font, depending on who you ask). 4. Click the Transform button, and Fontographer skews the “k.” Fontographer gives you the option of applying other transformations at the same time you skew the character. To apply more than one transformation: 1. Double-click on the “k” and select “Undo Transform” from the Edit menu to undo your last move. 2. Select “Skew” from the Transform dialog and enter -12 degrees Horizontal (leave Vertical at 0). 3. Then select “Scale” and enter “80” in the Horizontal text box. 4. Select “Basepoint” from the Center Transformations around pop-up menu. 5. Click “Transform.” Fontographer skews and condenses the “k” at the same time. Try some of the other transformation options to see what effects they have on your character. Once you’ve finished trying out all the options, you can apply the transformation to several characters or the entire font, by selecting groups of characters in the Font Window. Skewing multiple characters You can skew, scale, flip, or move either a single character or a range of characters. Select more than one character in the Font Window by holding down the Shift key while clicking on characters. Select a range of characters by dragging through the characters. In this way you can apply transformations to one, several, or all characters. Creating a fraction using composite characters Have you ever checked out how many fractions are in your font? If you have, you know that most commercial fonts have a small number of fractions, if any. Historically, if you wanted to type the fraction 3/8, you had to type the 3, the forward slash, and the 8, and even then the fraction didn’t look so hot! Fontographer makes it extremely easy to add composite characters made up of more than one character combined in a single character slot to your font. So you can now have traditional fractions in all your fonts! To create a fraction: 1. Go to the Font Window and double-click on the “3” to open it. 2. Click on the “8” character slot in the Font Window (it’s not necessary to open the Outline Window to copy the character) and then select “Copy Reference” from the Edit menu. 3. Click on the “3” Outline Window and choose “Paste” from the Edit menu. Fontographer pastes the number “8” on top of the “3.” 4. Select everything in the Outline Window by choosing “Select All” from the Edit menu. 5. Go to the Transform menu, select “Scale Uniformly” as your first transformation, enter 60%, and make sure all the other transformation pop-ups say “Do nothing.” Fontographer scales both characters to 60% of their original size. 6. Position your pointer away from the characters, and click on nothing to deselect everything (or simply press the tab key, which always deselects everything). Then click the mouse on the outline of the “8.” A box will appear around the number “8” (this represents the composite character’s bounding box). Composite characters do not show the points you normally see. (You cannot edit points in a composite character unless you first choose “Unlink Reference.”) 7. Drag the box containing the “8” toward the lower right-hand corner. 8. Double-click on the path or on any point on the number “3” to select all of it, and then move the “3” toward the top left corner. You can create the divisor line by copying the forward slash into your character. You can also draw the divisor line if you prefer. However, it is often much easier to use existing characters to create parts. 9. Select the forward-slash character in the Font Window. 10. Choose “Copy” from the Edit menu. 11. Paste the forward-slash character into the “3” character slot. To change a reference character: 1. Open the Outline Window for the actual character “8.” 2. Modify some part of it. You’ll see any changes you make to the original eight reflect in the denominator you created in your fraction character. Unlinking a reference character Fontographer also lets you remove the link from any composite character. This gives you access to the points in the character as well as removing the link to the original character. To unlink a reference character: 1. Click on the fraction you created (in the “3” character slot). 2. Choose “Unlink Reference” from the Edit menu. As you can see in our illustration, the character’s points are now visible and you can move them individually, or together as a group. Creating a ligature A ligature is a character made up of one or more characters. Most commercial fonts have some commonly used ligatures like “æ,” and “œ.” However, Fontographer makes it easy to create ligatures of your own without drawing a thing. To create a ligature: 1. Open the Outline Window for the “f.” 2. Choose “Select All” and then choose “Duplicate” to create another “f.” 3. Move the new “f” to the right. 4. Go back to the Font Window. 5. Copy the “l” into the same window using the “Copy Reference” command from the Edit menu. 6. Move the referenced “l” to the right of the second “f.” 7. Choose “Unlink Reference” from the Edit menu. 8. Choose “Remove Overlap” from the Element menu. Changing the character width You probably noticed the vertical line that runs through the second “f.” This is the character width line. Width is a moveable vertical line which specifies the width of each character. (Width is covered in more detail in Chapter 5.) When you print a line of text, the origin line of the next character is placed on top of the width line of the current character. Since you changed the contents of this particular Outline Window, it’s important that you change the width as well. To change the character’s width: 1. Make sure you still have the Outline Window for the “f” open. 2. You can choose “Preview” and turn off Show Points from the View menu to get a better look at the character if you like. 3. Move the width line with the selection pointer. That’s all there is to it! So, if your font doesn’t contain the ligature you want, you now know how to create your own with Fontographer. In some word processing and page layout programs you can set the preferences to automatically substitute curly quotes for straight ones, or the fl ligature if you type “fl.” For the substitutions to occur, you’ll need to be sure to use an Adobe encoded font. Creating a condensed character or font Fontographer has the ability to modify character images to produce interesting special effects. You can create these effects in either the Outline Window (on one particular character) or the Font Window (on the whole font). For example, you can create an oblique font by selecting all the characters in the Font Window and skewing them -12 degrees (like we did in the earlier exercise “To skew a character”). Or you can create an extended font, by increasing the horizontal scaling factor of the font. Your options are limitless. You can also create a condensed font by scaling the character 80% horizontally. Condensed versions of a font are the same height as their counterparts, but are narrower to fit into a more compact space. To create a condensed character: 1. Click on the Font Window to make it active, and then press and hold the mouse button while you drag through the characters “a” through “e.” 2. Choose “Transform” from the Element menu. The Transform dialog appears. As you can see from the screen shots on this page, Fontographer scales the characters horizontally without changing their height. Setting the basepoint The baseline is the line upon which the letters sit. The baseline position is always at a vertical location of zero. The dot at the intersection of the origin line and baseline is the basepoint. The basepoint is used to accurately and quickly align points and characters. The basepoint is generally at the character’s origin (where the origin line and the baseline intersect at 0,0); but, you can position the basepoint anywhere. Fontographer allows you to set each character’s basepoint differently. It can be moved as needed by selecting the pointer tool and dragging it to a new location, or by entering a specific horizontal and vertical location. For precise numeric entry, choose “Set Basepoint” from the Points menu. To reset the basepoint back to the origin point, choose “Reset Basepoint” from the Points menu. If you select one point and choose “Set Basepoint,” Fontographer will move the basepoint to that point. However, if you select more than one point, Fontographer will set the basepoint to the center of selection. In the position display in the Outline Window, distance from the basepoint is continuously updated as the pointer moves within the drawing area. This on-screen measuring tool makes it easy to measure character parts. Just place the basepoint on a reference point of the character and watch the position display as you move the pointer. Horizontal or vertical alignment of points is very easy to check; set a basepoint on one point then drag the other until the horizontal or vertical delta is zero. Chapter Two Creating New Fonts Autotracing Transformation Options Guidelines Creating a Stroked Font Clean Up Paths Creating Calligraphic Characters Creating Variable Weight Characters Blending Fonts to Create New Fonts Somewhere in the dark recesses of a second-hand bookstore, there is probably a well-worn and dust-covered book that contains an old-fashioned typeface no one has seen for years. Imagine being able to digitize that typeface and transfer it to your documents. Or how about that logo you created with a pen or pencil before you ever heard of a graphics program? What about the beautiful effects that are created with calligraphy fountain pens? Wouldn’t it be great if you could use all of these in your word processor? With Fontographer, any of these scenarios is simple. Fontographer takes what used to be possible with only pen and pencil, and puts it into the hands of the desktop designer. Autotracing The bitmap option is one of Fontographer’s most advanced features. Autotracing is probably most useful for tracing scanned images. Say you have an existing character, logo, or image that you want to assign to a keystroke. On the Macintosh, you can scan your image, save it in PICT format, and place it into your Scrap-book or Clipboard. Then you can paste your character into the Outline Window (where it will be used like a background template) and let Fontographer autotrace the image. On the PC, take your scanned image to an application like FreeHand or Adobe Streamline where you can either copy from the application and paste into Fontographer and then autotrace, or save/export as an EPS and then import into Fontographer. To paste an image into the Template layer: It’s remarkably easy to paste an image into the Template (or background) layer. Select an image from the “Scanned images/Scanned.bmp” file on your Fontographer CD. In this example, we use a scanned Vivaldi “f.” 1. On the Macintosh, copy the image from the Scrapbook or Clipboard and “Paste” it into the Outline Window. On the PC, copy the image from Paint/Paintbrush, and paste it into Fontographer’s Outline Window. Fontographer will automatically paste the image into the Template layer where it will be shown as a grayed-out image. To move a Template image: 1. Click the Template layer to select it. 2. Click the template image with the selection pointer. A gray bounding box appears. 3. Move the image into place by positioning the pointer inside the image, then dragging it to a new location. To resize a Template image: 1. Click the template image to select it. 2. Choose “Transform” from the Element menu and “Scale uniformly” 90 percent. Tracing an image Once you have your image sized and positioned the way you want, you can trace it 1. Make sure you are in the Outline layer. 2. Choose “Auto Trace” from the Element menu. The Auto Trace dialog appears. You have two options: Easy and Advanced. 3. Choose “Easy” and keep the default Curve fit of “5.” The tighter you set a curve fit, the more points will be placed on your character. By having more points, the tracing will more closely resemble the original image. However, too many points will consume unnecessary memory without appreciably improving the accuracy of your path. It is better to use as few points as possible to get the shape you desire. When the Tracing progress dialog box finishes generating, you will have a completely traced character in the Outline Window. You can cancel the tracing operation at any time by clicking on the Cancel button or by typing Command-period, or Esc on the PC. Advanced tracing options Fontographer’s Advanced tracing mode offers some specific options. Curve fit Choosing an item from this pop-up will set all the other controls in the dialog to recommended settings for Loose, Normal, or Tight fit. Try changing the value of this pop-up a few times and see how the other controls respond. It might give you an idea of how each slider affects the fit tightness. If you change any of the other controls in the dialog, the Curve Fit pop-up will automatically switch to “Custom” to indicate that you have customized the values. Once you have customized the settings you can always go back to Loose, Normal, or Tight by changing the Curve Fit pop-up back to one of these settings. You can switch back to Custom as well. Normal is generally the best all-purpose selection. Tight would be a good selection for more intricate designs, while Loose would be good for characters with straight angles (such as block letters) and poor quality scans. Choose “Custom” if you want to set the Curve fit options manually. Allow curve fit errors This control will have the largest affect on your tracing results. A low value means Fontographer will allow fewer curve fit errors, and you’ll get a very tight trace with more points. A higher value means Fontographer will allow more errors, and you’ll get a loose trace with fewer points. Balance lines This control will have very subtle, almost unnoticeable affects on your tracing results. A low value means it will do almost nothing. A high value means Fontographer will attempt to align lines when it thinks it’s necessary. For instance, it might try to align the left and right parts of the crossbar in a “T” character. Eliminate close points This control can help eliminate redundant points (points that are almost on top of each other). A low value means that almost no points will be eliminated, and the shape of the path will be the most accurate. A high value means that it will eliminate as many points as necessary, but it may slightly alter the shape of the curve in order to do so. Make straight lines This control has very subtle effects. It determines how straight a curve should be before it is turned into a straight line. This will never turn extremely curvy paths into straight lines; however, curves that appear to be almost straight to begin with may be slightly modified so that they are perfectly straight. A low setting for this control means almost no curves will be straightened. A high value will cause more curves to be straightened. Look for cusps When Fontographer traces an image it often finds places where two paths join at a sharp angle. A join of this type is called a cusp, and Fontographer will always place a corner point at such a location. The “Look for cusps” control determines how lenient Fontographer is in finding cusps, and thus it will have an effect on how many corner points are used in the tracing results. Setting this control to a low value means it will find very few cusps, and the results won’t have many corner points. Setting the control to a high value means it will find many cusps, and the results will have more corner points. Treat nearly flat paths as straight lines This check box is similar to the “Make straight lines” control; however, it differs in a subtle way. The Make straight lines control can help straighten any curves that are nearly flat. However, the “Treat nearly flat paths as straight lines” checkbox only straightens curves that are nearly flat, and that only bend to one side. For example, this control can straighten a C-shaped curve that bends to the left of the straight line, but it can’t straighten an S-shaped curve that bends to either side of the straight line. If you think the difference between these two controls is too subtle for your needs, then we recommend that you ignore this control and just use the Make straight lines control. Find extrema points You should probably leave this checkbox turned on. It will make sure that points are always placed at extrema points in the tracing results, and this is recommended for PostScript and TrueType fonts. Transformation options Fontographer’s transformation options are located under Transform in the Element menu. Any of these can be applied from the Font Window or Outline Window. When used from the Font Window, you can apply a transformation to one, several, or all characters. On the other hand, in a character’s Outline Window, you can only apply the transformation to the selected points. If there are no selected points, the transformation applies to the entire character. Flip You can use the Flip transformation to flip the image to the opposite side of an imaginary horizontal or vertical line. You access the Flip transformation pop-up menu via the Transform menu, or by double-clicking on the Flip tool in the tool palette. To flip selected items horizontally: 1. Select a character. 2. Choose “Flip” as the first transformation. 3. Click on the Horizontal radio button. 4. Click the Transform button. To flip selected items vertically: 1. Choose “Flip” as the first transformation. 2. Click on the Vertical radio button. 3. Click the Transform button to apply the vertical flip. Move The Move transformation can move whole characters, or a specific point a specified horizontal and/or vertical amount. To move selected items horizontally: 1. Choose “Move” as the first transformation. 2. Enter a value in the Horizontal text box. 3. Click “Transform” to move the image. To move selected items vertically: 1. Choose “Move” as the first transformation. 2. Enter a value in the Vertical text box. 3. Click “Transform.” Move an image horizontally and vertically by entering values in both text boxes. Rotate The Rotate option is used to rotate the selection a specified number of degrees. Selected points rotate around the reference point by a specified angle. Positive angles indicate a counterclockwise rotation, while negative angles specify a clockwise rotation. You access the Rotate transformation pop-up via the Transform menu or by double-clicking on the Rotate tool in the tool palette. To rotate a selected item: 1. Choose “Rotate” from the Transform pop-up. 2. Enter a rotation angle in the text box. 3. Click “Transform.” Scale There are two Scale pop-up menus: Scale and Scale uniformly. Both of these options are used to increase or decrease the size of an image by a specific scale factor. The Scale option lets you scale horizontal and vertical attributes independently of each other. You’ll find this feature useful when you want to create condensed and extended versions of a font, since you can apply the scaling transformation to the entire font. You access the Scale transformation pop-up via the Transform menu or by double-clicking on the Scale tool in the tool palette. To scale a character vertically: 1. Choose Scale from the pop-up menu. 2. Enter a vertical scaling value. 3. Click “Transform.” To scale a character horizontally: 1. Choose the Scale pop-up menu. 2. Enter a horizontal scaling value. 3. Click “Transform.” Scale uniformly This option scales the entire image uniformly. If you select a character and enter a scale factor of 50%, the image will be reduced to 50% of its original size (both horizontally and vertically). Doubling the size of the image would require a scale factor of 200%. To scale uniformly: 1. Choose the Scale uniformly pop-up menu. 2. Enter a scaling value in the text box. 3. Click “Transform.” Skew The Skew option applies a slant to the image. Negative values slant the character to the right, positive values to the left. Vertical skewing can be used to create oblique characters (sort of a “fake” italic). Italics are normally skewed vertically by -12 degrees. You access the Skew transformation pop-up menu via the Transform menu or by double-clicking on the Skew tool in the tool palette. To skew selected characters: 1. Choose the Skew transformation pop-up menu. 2. Enter a skew value in either the horizontal or vertical text box. 3. Click “Transform.” Multiple transformations There are times when you’ll probably want to do more than one transformation at once. Fontographer lets you apply up to four transformations (at one time) to one character, or the entire font. Say you want to create a condensed oblique font and move it closer to the baseline to compensate for the skew angle. It’s easier than you probably think. To apply multiple transformations: 1. Select a character. 2. Choose Transform from the Element menu. 3. Select up to four transformations. 4. Enter the transformation values. 5. Click “Transform.” 3-D transformations using the Transform dialog Using the Transform dialog to apply 3-D transformations is simpler if you use the tools to setup the transformation. Double-clicking on the Perspective tool will bring up the Transform dialog ready to apply a 3-D rotation transformation. Option double-clicking on the selection tool will bring up the Transform dialog ready to apply a 3-D move transformation. Let’s do an example of a 3-D rotation. In our example, we will draw and then transform a square/circle . To use the Scale tool: 1. Draw a square and a circle (holding the shift key down to constrain the tools) that start at the origin point and extend to the descent. 2. Drag the width line on top of the rightmost point on the circle. 3. Choose “Correct Path Direction from the Element menu. The character should look like this with Preview selected from the View menu (or press Command- or Ctrl+L): 4. Choose “Select all” from the Edit menu. 5. Option or Alt double-click on the Scale tool to bring up the Transform dialog with Scale uniformly as the first transformation. 6. Choose “Center of Selection” from the Center transformations around pop-up menu at the top of the dialog. 7. Type in “90” into the text edit field and press return or click Transform. The character should look like this in Outline mode: To use the Perspective tool: 1. Option double-click on the Perspective tool to bring up the Perspective Setup dialog. 2. Set the Distance to 1000 and the Point to Basepoint and press Return or click OK. This tells the Perspective tool that the image you see in the Outline Window is being viewed as if you are 1000 em units away from the Basepoint. 3. Choose “Select All” from the edit menu. 4. Choose “Set Basepoint” from the Points menu. Your basepoint just moved to the center of the square/circle, which is defined as the perspective point in this example. 5. Choose Copy from the Edit menu. You will paste this copy later in this example. 6. Click and hold the mouse on the origin line (the line that extends from the bottom of the window to the top if the window along the left side of the character). 7. Drag the mouse to the right while holding down the shift key. As you drag the mouse you will notice that the information bar looks something like this: 8. Continue dragging to the right until the number underneath the reads -90. You have just rotated the selected points by -90 degrees in the XZ Plane. You can also think of it as rotating around the Y axis. 9. Choose Paste from the Edit menu. You now can apply the next transformation to the copy of the original. 10. Click down with the mouse on the baseline. 11. Now drag the mouse up while holding down the shift key until the symbol reads 90. number under the The character in the Outline Window should now look something like this: To apply 3-D transformations using the Transform dialog: Let’s do an example of a 3-D rotation. To make things simple, you will start where you left off using the Perspective tool. For this example to work, the square/circle being transformed should already be copied into the clipboard. 1. Choose “Paste” from the Edit menu. 2. Choose the Perspective tool from the tool palette. 3. Click down with the mouse on the width line and release the mouse button immediately. The mouse click will be used as the center of the transformation in the Transform dialog. 4. Double-click on the Perspective tool. The Transform dialog will be brought up ready to apply a 3-D rotation. 5. Choose “Last mouse click” from the Center transformations around pop-up menu. 6. Set the XY angle to 0, the XZ angle to 90, and the YZ angle to 0. 7. Set the Perspective Point pop-up to “Basepoint.” Important: If you wish to setup additional transforms in this dialog, then make sure you do the perspective transform last. Any transforms that occur after the perspective transform will not have a three-dimensional appearance. When you are done, the Transform dialog should look like this: 8. Press “Return.” You have probably noticed that a three-dimensional box or cube is being created. The previous set of steps created the right side of cube. The next set of steps will create the top side of cube. 1. Choose “Paste” from the Edit menu. 2. Click down on the ascent line. 3. Double-click on the Perspective tool. 4. Set the XZ angle to 0 and the YZ angle to -90. 5. Press “Return.” If you have been following our example from the beginning, then your character in the Outline Window should look something like this: To do a 3-D Move: Let’s continue where we left off, creating a disjointed cube. For this example to work, the square/circle you are transforming should still be copied into the clipboard. You will now create the back side of the cube by moving the selected points backward (by 800 em units) into the 3rd dimension. 1. Choose “Paste” from the Edit menu. 2. Option double-click on the selection tool to bring up the Transform dialog. The dialog will come up showing Move and Perspective, ready to do a three-dimensional move. 3. Set both the transformation (at the top of the dialog) and the Perspective transform (at the bottom of the dialog) to Basepoint. 4. Change the Horizontal and Vertical text edit fields to “0” and change the depth edit text field to “800.” 5. Press “Return” or click OK. 6. Select “Preview, ” and voilà: Guidelines Setting guidelines The Guides layer is used to construct drawing guidelines which are common to every character of the font (such as the x-height line). The Guides layer is similar to the Template layer, except it is drawn in light gray or green and appears behind every character of the font. Guides are purposely drawn in a lighter color so they can be distinguished from the outline and template images. Guidelines may be edited or created from any character’s Outline Window. Change to the Guides layer by clicking on its name in the Layers palette or by typing “g” when the lock icon is in the locked state. With the Guides layer active, you can edit or draw guidelines with the standard drawing and editing tools. Changes made to the Guides layer will appear in every character in the font. You can undo changes made to the Guides layer just like you would in any other layer. Setting guidelines from the Font Info dialog Ascent and descent are already defined and can be reset by choosing “Font Info” from the Element menu and typing the values in the Ascent and Descent text boxes. Adding new guidelines Additional guidelines can be set two ways in the Guides layer. To create a guideline: 1. Select the Guides layer. 2. Use the selection tool to drag vertically from the baseline or horizontally from the origin line. You can also create a guide by drawing it with any of the drawing tools in Fontographer. 1. Select the Guides layer. 2. Click on the drawing tool of your choice to draw a guideline. Hiding guidelines You can hide the guides by checking on the Guides layer checkbox to turn it off or (when the lock icon is locked) by typing Option-G (Macintosh) or Caps Lock+G (on the PC). Snap to guides Choose “Snap to Guides” from the View menu. When points are within a predetermined distance (you set this value in the File menu Preferences’ Editing Behavior) from the guideline, they snap or align to that guideline. Creating a stroked font Outline vs. stroked characters Up until this point in the manual, we have been discussing outline characters. You create outline characters by drawing a path around the character’s perimeter. Stroked characters are constructed by drawing just the centerline path. PostScript draws these characters by sweeping a pen along the path. The pen has a width called the stroke weight which is made up of em units. As PostScript sweeps along the path, it paints a line that is so many units wide. Any character which is constructed entirely of equal weight strokes can be drawn as a stroked character. For example, we drew the letters in this Fontographer logo as stroked characters. You must generate these as Type 3 fonts, since neither TrueType nor Type 1 fonts allow stroked characters. Fontographer gives you complete control over the type of pen you’ll use to create your stroked font. In addition to its width, you can specify its appearance and behavior where segments join. Also, since some people prefer drawing with a pen (in real life situations), Fontographer makes it easy to change the stroked character into an outline character (or font). Setting stroke attributes Before you can create a stroked character, you will need to change the attributes of the character from filled to stroked. To change a filled character to stroked: 1. Choose “Selection Info” from the Element menu. 2. Turn off “Fill” and turn on “Stroke.” 3. Leave the Tint set at 100%. 4. Enter a pen Weight. You’ll notice that Fontographer has two pop-up menus for Cap and Join. In our example, we use Round on both since we want the ends of the characters to be rounded. Each of these options is discussed after this example. 5. Click “OK” and get ready to draw a character. 6. Choose a drawing tool, or one of the control point tools. 7. Draw an “L.” 8. Turn on Preview to see what your character actually looks like. End caps and joins There are three types of end caps: butt, round, and square. Butt end caps stop right at the end point of the line. Round end caps project a semicircle out from the end point. This semicircle has a diameter equal to the stroke weight and center point at the end point. Square end caps project out one half the stroke weight in the direction of the path. There are three types of line joins: miter, round, and bevel. Miter joins extend the outer edges of the lines until they meet at an angle, like the corners of a picture frame. Round joins draw a circle with a diameter equal to the stroke width at each bend. Bevel joins are drawn as if the joining segments were stroked with butt cap ends and the resulting notch filled with a triangle. Expand stroke The Expand Stroke command is used to expand stroked characters into contoured (outline) or filled characters. To expand the stroke width: 1. Choose “Expand Stroke” from the Element menu. 2. Click “Normal pen.” 3. Enter a Pen width value. 4. Click “OK.” Fontographer automatically changes the stroked character into an outline character. The Expand Stroke command can also be used to automatically change your stroked character into a calligraphic character. To change a stroked character into a calligraphic character: 1. Choose “Expand Stroke.” 2. Click “Calligraphic pen,” enter a value, and click “OK.” 3. Choose “Selection Info” and change the character to a “Filled” character. 4. Choose “Remove Overlap” from the Element menu. Clean Up Paths One of the most revolutionary features in Fontographer is called Clean Up Paths. This incredible command automatically improves the quality of your outlines by removing unnecessary points. Fontographer will try to change the path as little as possible; less will change the outline as little as possible—more will remove more points and thus, change the path more. And if you have less points, your printing time will be faster as well! There are two different uses for this dialog: one is to put points where they belong for proper typographical outlines. This is called putting points at the extrema. If you bring up the dialog and only have the Insert points at extrema box checked, that’s all Fontographer will do. Simplify paths will remove points it judges to be superfluous. The slider control adjusts the ratio between getting rid of a lot of points (and changing your path a little), and getting rid of fewer points and maintaining the integrity of the path. We believe you should spend your time creating wonderful designs instead of worrying about point placement and the mechanical details of Bézier path construction. When your character is through, just choose “Clean Up Paths” from the Element menu or (even better!) apply the command to the entire font directly from the Font Window. Creating calligraphic characters One of the most notable features of Fontographer is the freehand drawing tool which you can use directly with the mouse or with a pressure-sensitive pen and digitizing tablet. Additionally, you can use the freehand drawing tool as either a calligraphic pen or a variable-weight pen. To use the calligraphic pen: 1. Double-click on the freehand drawing tool. The Freehand Tool Setup dialog appears. 2. Click on the Calligraphic pen checkbox. 3. Make sure the Pressure sensitive option, the Tight curve fit and the Draw dotted line Stroke options are all turned off. 4. Enter a Pen width of 100 em units. For the purposes of this exercise, you should leave the Pen angle set at 45 degrees since that is one of the recommended angles for calligraphic characters. 5. Click “OK.” The freehand tool icon will change to a calligraphic pen icon. 6. Press and hold down the mouse button while moving it around on your desk or mouse pad, or use a digitizing tablet to draw a calligraphic character. 7. Choose “Remove Overlap” from the Element menu. Fontographer removes the overlapping area, and your calligraphic character is complete. 8. Choose “Preview” from the View menu and turn off “Show Points” to view your character without points and filled. Calligraphic tutelage from Judith Sutcliffe Calligraphy is not the same thing as type. Generally, type is carefully structured, straight-backed and neatly drawn. Calligraphy is often looser, more graphically expressive and flowing, and it more closely reminds us of the instrument with which it was drawn. You can use Fontographer to simulate a flat-nibbed pen or a Chinese brush, any of the variety of instruments with which people have written with calligraphic panache over the centuries. Start by taking a look at the past and present of western, eastern or middle eastern calligraphy. Your local library or bookstore’s graphics section will have books with samples of the work of ancient and modern calligraphers. Try working with a calligraphic pen or brush. You don’t have to be a whiz at it. You just need to pay attention to the limitations of the medium. Try holding a wide, flat-nibbed pen at a 45 degree angle and making vertical, horizontal and angled lines as well as circles. You will quickly see how the characteristic shapes of western calligraphy are achieved. That knowledge of how the position of the pen affects the line of ink that flows from it is what you need to know to draw calligraphy with Fontographer. You need to internalize the mechanics of the pen in your head. So that when you draw an “O” you know that the pen will issue a wide curving line on the right-side downstroke, but will taper to near nothingness as you pull the stroke to a close at lower left. Because the pen has a precise width, the stroke will have a predictable variance in size. Most basic strokes are made without turning the pen, but more advanced strokes do involve a twist of the wrist and pen, and if you carefully study the calligraphy manuals, you will find these little secrets. Also, most letters are made with two or more strokes joined together invisibly. An “O” is made from a downward left stroke and a downward right stroke, not one stroke all the way around. These conventional stroke combinations are shown in most calligraphy manuals and are easy to learn. Remember, you don’t have to be a calligrapher, you just have to learn to think like a calligrapher’s pen. If you are interested in oriental calligraphy, dip a Chinese brush in ink and press the soft tip to paper, pushing the bristles about half way down and to one side and then gradually lifting it and tapering off to the other side. Note the shape of the ink stroke. The movement of the brush and the look of the marks it leaves is considerably more complex than the workings of the western pen. However, Chinese calligraphy involves a graphic language of a very small number of simple stroke shapes combined into more complex characters. There is a particular way to make dots, horizontal lines, vertical lines, lines angled left, lines angled right, corners and endings of lines. You can find these in books on Chinese calligraphy. You can also draw with a pen or brush roughly, without paying much attention to any calligraphic tradition, but the instrument will still leave characteristic marks. Those are what you want to remember. Turning to Fontographer, you might wish to start by copying some calligraphic hand that you admire. There are three ways to do this. One is by scanning the original in and auto-tracing it. For the instructions on that method, refer back to the beginning of this chapter. The second way is without a drawing tablet: Choose a couple letters that are most characteristic of the hand you are going to recreate. You might start with the lowercase “l” and “o” as they contain the basic straight and rounded strokes on which the rest of the alphabet will be based. One way to do this quickly is to use corner points for every point you place. That will rough out the letter for you. Then go back and change the points ruling what should be curves to curve points. Adjust, check the black image in Preview, readjust. If you draw an “o” that you think works, copy it to the background [Template layer] of “c,” “d” and other rounded characters and construct them over the pattern. That will give you a consistency of form that a calligrapher works for years to achieve in eye and hand coordination. The same goes for your “l” and all the ascenders of the lower case alphabet. You must, of course, keep your stroke widths very similar, as it has all been written with the same “pen.” But—don’t be too perfect, or you’ll be making something more akin to a text typeface. Let every rounded form vary just a little bit from every other one, let the ascenders lean a little, but not so much that it is obvious. This is a subtle way to add life to your font. Continue building characters until you have enough to write a word in the Metrics Window and to print out some word-like gibberish from the Print Sample window. Take the printed proof and look at it upside down. What’s your first impression of the weight of the letters? Turn it right side up and look again. How do the letters look together? Do they look related in their stroke widths, sizes, leanings? If not, try to pick out the offending characters and rework them to fit into the family a bit better. How’s the spacing? Move the margins in the Metrics Window until you get a pleasant spacing, particularly in smaller sizes. Third method, with drawing tablet: You’ll be doing the same thing as described above, but you’ll have the aid of Fontographer’s wonderful, automatic, electronic calligraphic pen. In your hand it looks like the cordless pen of your drawing tablet, but on screen it draws like a calligraphic pen or a Chinese brush. If you have any natural or trained calligraphic talent, you will find a drawing tablet extremely useful because you can whip out a calligraphic shape with one swoop of that pen. You will want to experiment a bit at the outset with the various nib widths and slant variations available. And you will want to try the calligraphy pen alone, the pressure pen alone, and the combination of the two. For imitating western calligraphy you will use the calligraphic pen with or without the pressure mode. Try it both ways and see which produces most easily the shapes you have in mind. Now here’s one difference that practicing pen calligraphers will need to curb at the outset. Fontographer characters are usually made in one continuous outline. So make an “O” in one fell swoop, not two separate ones. Pretend you’re writing on really slick paper and your pen doesn’t catch. Go all the way around. If you don’t, you’ll have to patch the two sections together and that’s a drag. (It’s easy, of course, using the Remove Overlaps command, but save yourself time by not creating multiple parts in the first place.) Since this is spontaneous drawing, you might consider sketching each letter several times in succession across the character window and then picking the best one to keep. This is only the beginning. Unless you are one of the world’s best calligraphers, you are not going to whip out 26 perfect calligraphic letters on the first try. No problem. Do the best you can. Decide which ones are the right proportions, the best style, and then do minor alterations on the others to bring them in line. Using Fontographer commands, scale them up or down, rotate when necessary, etc. If a stroke is too narrow, grab points on one side and pull to widen it. You can’t do this in ink but you sure can in Fontographer. Sometimes when you sketch a letter, the Fontographer outline that appears will have more points than are necessary. You want the fewest points possible, so prune out the excess (using Merge Points, or Clean Up Paths). Also check to be sure that you have the path direction correct (clockwise on outer outlines). If your character has overlapping parts, do a Select All and Remove Overlap. If that doesn’t work, make a copy of the outline and put it in the Template layer, then in Outline rework the overlapping section, following the original calligraphic shape. If there’s something that doesn’t please you, just grab the points and adjust. It’s not ink; you can tweak it until you get it right. Assuming you’ve got a lower case that’s looking good, you can get a little fancier for your upper case characters. Maybe you will add a few flourishes. Remember that the margin and kerning adjustments leave you great leeway in how you place each lower case letter in combination with each upper case. Use automatic kerning to make them fit just the way you want. Let’s say you have now worked out a basic alphabet and it is looking good when you do some proof printing of various letter combinations. But when you print two “l”s together, they look mechanical and wooden. Here’s where the fun begins, and the complications start. Make yourself a nice calligraphic double “l,” with one letter a little taller than the other. Then when you’re setting type you can do a “search and replace” command and drop a hand-tooled double “l” in for every two twin “l”s. Alternate characters look really neat, and give the look of authenticity to calligraphic typesetting. You can create as many double letters as you want. You can create nice combinations of “Th.” You can give your font 15 different “a”s, if you feel in the mood. That’s the creative part. The complex part comes in with the decision on just where in the world of keyboard character positioning do you put a double “l.” There are no standards and no rules. If you are the only person who is going to use the font, you can do anything you like, as long as you make yourself a map so you can find that double “l” six months from now. But if you’re going to sell the font, you will do some brow furrowing, because you will probably be supplying both Mac and PC versions of your font, and characters maps differ considerably between the two platforms and also within the two platforms. The safe way out is to not put anything in the “Upper ASCII” positions (numbers 128 to 255) except standard position international accent characters. Put extras into a separate font on the upper/lower case keys, even though it is much less convenient than having all the alternates in one font. Or, if you’re creating fonts in Mac original format, put the alternates wherever it’s most convenient for Mac users (bearing in mind that there are differences between System 6 and 7 key positions). Then make a separate font and put the “Upper ASCII” characters into it, on upper/lower case keys and supply both fonts for PC users. Another aspect of calligraphic font making arises if you decide to make a script face, one in which all letters in a word appear joined, as if written in one continuous hand. It is quite possible to create a font of script letters that will appear when printed out to be written as a continuous line, but it is not easy. The general principle is that you must design a standard shape for both incoming and outgoing strokes and use them as part of every character. The margins of characters need to be set so that the outgoing stroke of one letter overlaps the incoming stroke of the following character. This takes some careful experimentation with and slight manipulation of each character’s incoming and outgoing strokes. But once you get it to work right, it will look quite natural, especially if here and there you leave an incoming stroke off. You will want to avoid kerning as much as possible and should design an alphabet set that needs very little. For Chinese or Japanese calligraphy or to give an oriental flavor to a western alphabet, try a cordless pen and drawing tablet with Fontographer set to pressure-sensitive pen only. It’s very quick and sensitive and will take a little getting used to, but with some practice you will be able to construct Chinese characters with only minor need for point adjustments. If you are quite serious about working on a Chinese font, you will probably want to work out a library of the basic strokes and copy from that storehouse when building new characters. The Remove Overlap command will be very handy. You can always adjust each new character for balance and style. Creating variable weight characters Variable weight characters give the effect of being drawn with a brush. That is, they can have wide and thin areas. Fontographer’s freehand drawing tool can be used directly with the mouse or with a pressure-sensitive pen and digitizing tablet to give you these effects. To use the pressure-sensitive pen: 1. Double-click on the freehand drawing tool. The Freehand Tool Setup dialog appears. 2. Click on the Pressure sensitive checkbox. 3. Make sure the Calligraphic pen and other options are turned off. 4. Enter a minimum and maximum stroke width (like the ones we’ve set here). Try experimenting with different values, and line caps and joins to get different line effects. 5. Click “OK.” The freehand drawing tool icon changes to reflect the Pressure sensitive setting. If you are using a pressure-sensitive pen, go to step 6; if you are using a mouse, skip to step 8. 6. By applying varying amounts of pressure as you draw, you can create Script characters with thick and thin areas like our example: 7. Choose “Remove Overlap” and then “Clean Up Paths” from the Element menu. Fontographer removes the overlapping area, and your character is complete. If you are using a mouse instead of a pressure-sensitive pen, follow these instructions: 8. Press and hold down the mouse button while moving it around on your desk or mouse pad to draw a character. 9. Press the right and left arrow keys while you move the mouse button to see the different effects you can create. The left arrow key (or the number “1”) reduces the stroke width (down to the minimum stroke width you specified in the Freehand Tool Setup). The right arrow key (or the number “2”) increases the stroke size (up to the maximum stroke width you specified in the Freehand Tool Setup dialog). Blend Fonts to create new fonts Experimentation is at the heart of creating fonts. And Fontographer’s Blend Fonts option is the ultimate vehicle for creativity. Font Blend is going to let us create as new fonts as we like, without drawing a thing. Well... not exactly. Blend Fonts is very much like our own Macromedia FreeHand’s blending of one object to another. It helps if your fonts are similar in characteristics. Imagine that your fonts are at opposite ends of a one-dimensional line segment and that you are creating a new font that is some percentage of the way between them (or beyond them). You can edit those intermediate versions as you like, and quickly produce a family of weights, say, from just two master designs like Extra Light and Extra Bold. To blend fonts: 1. Open a font. Font blending needs the least amount of attention when you blend between similar fonts. In this exercise, we use two from the same family: TimesRoman and TimesBold. 2. Choose “Blend Fonts” from the Element menu. The Font Blend panel appears. The font you opened in Step #1 automatically appears as the Font 1 Source font. Source fonts are the fonts you will base your third font upon. If you have any other fonts open when you choose Blend Fonts, they will automatically appear in the Font 1 and Font 2 Source fonts pop-up menus. 3. Choose a Source font for the Font 2 position by clicking on its pop-up menu and selecting “Other.” A standard dialog appears that lets you choose fonts directly from your drive, directory, or a folder. 4. Enter a Blend amount of 50%. 5. There are three other settings below the Blend amount; leave them turned on for this exercise. 6. Click the OK button. Fontographer automatically creates a completely new Untitled font based on the values you set in the Blend amount text box. The two source fonts are now dynamically linked to the new font. If you open any Outline window in the new font, you will see both source outlines in the Template layer (like in this illustration). Any changes you make to the source font’s outline will show in the Template layer, but not change the new blended font’s outline unless you choose “Blend Fonts” again. To change selected destination characters: 1. Make some changes to a character in one of your Source fonts. The change is reflected in the Untitled font character’s Template layer. 2. Click on the Selected destination character’s radio button. 3. Click “OK.” Fontographer will automatically reblend the characters. 4. Turn off the Template layer and “Show Points” and then choose “Preview” from the View menu to view your new character. You can continue making minor tweaks to the blended character (or font), or simply save it as a new variation and go on to another variation with a different interpolation percentage. Closing the new font unlinks the source fonts. When things go wrong... Doing the above example using Times and Times-Bold, you most likely encountered an error message after the blend attempt that read, “Could not complete your request because some characters didn’t match during blending. Consult your log file for details about the unblended characters.” When you open the text file Fontog.log, you will see the list of error(s). Here are some examples of possible errors: char. #1 char. #2 290 290 303 303 Path # Error different # of paths 1 741 different type of paths char missing in font 2 Let’s go through the error messages one at a time: The first headers refer to the character decimal location in the fonts. So character 290 in Font 1 and Character 290 in font 2 don’t match because they have a different number of paths. This means that, for example, your lowercase “g” in font 1 has three paths, but in font 2 it only has two. Or the Ccedillas (ç) don’t match because in one font you used remove overlap, causing the character to have one path, but you forgot to do it in font 2, so the ç still has two paths. The message “different types of paths” occurs when a character such as ç is a Referenced character in one font, but is an actual outline character in the other. You can correct this by using the “unlink reference” command on the referenced character. The path # is the number of the path that the error message applies to, and it doesn’t check any further than the first mismatch. The last message, “Character missing in font 2” means that while one font has this character, the other does not, and Fontographer can’t blend what isn’t there. If the two fonts do not have the same number of character slots, your blended font will have the same number of characters as the font with the fewest character slots. After consulting your log file, you can go back and correct the errors and then blend again—blending only the selected characters if you wish—to finish your font blend. Just remember, the key to success using Blend Fonts is that your characters in both fonts must have the same number of paths, the same types of paths, and each font must have the same number of character slots. For information about the more technical details of the blending process, refer to Chapter 10, Expert Advice. Jonathan Hoefler sez... In 1990, Sports Illustrated commissioned my studio to design six typefaces, a set of six sans serifs in differing widths (Champion Gothic Heavyweight, Middleweight, Welter-weight, Lightweight, Featherweight, and Bantamweight.) These fonts were drawn in Adobe Illustrator and manufactured in Fontographer. In 1992, the rights for these typefaces bounced back to me, and I began selling them retail. Several art directors called to say how much they liked the six fonts, but expressed hope that I would someday extend the range to include a super-condensed typeface. Given that no one was willing to underwrite the design of a seventh font (whereas Sports Illustrated had paid for the considerable development of the first six faces), it seemed unlikely that I would ever have the opportunity to revisit the fonts.Until 1993, when Fontographer added the interpolation feature (now called Font Blend). Using interpolation, I could quickly create intermediate fonts between the Bantamweight and Featherweight types; more importantly, using extrapolation (using a blend amount greater than 100 percent), I was able to carry the changes from the wider Featherweight font, through the narrower Bantamweight font, into a new typeface, a super condensed sans serif I dubbed Champion Gothic Flyweight. By caricaturing the ways in which the Bantamweight and Featherweight fonts differed, the new extrapolated font highlighted some of the design flaws in the original two faces, which I was able to easily correct. But most importantly, this technique enabled me to create a new font in just MINUTES rather than weeks. Chapter Three Altering Outlines Altering Logos Paths and Points Power Duplicating Adding Serifs Editing and Placing BCPs Auto Curvature In any art or craft there is a line between grace and excess that the artist usually doesn’t want to cross. Fontographer’s Outline Window can help you walk that line with style. Self-expression knows few boundaries with Fontographer. The only limits are your own imagination and skill—the raw materials, the drawing tools and layers, offer you all you need to start creating typefaces. The Outline Window is the place to test your creative wings. So go for it! Add serifs to a sans-serif font, create geometric designs, or import your favorite illustrations from other PostScript drawing programs. If you want to learn more about the basics of font production make sure you read the Typography section and Type Designers section of the Bibliography in the Appendix at the back of this manual. The tools provided in Fontographer’s Outline Window let you alter graphic images or font characters in a number of different ways. You can move points or paths, duplicate points, merge points, insert points, remove them, or drag them. You may want to alter your outlines based on other images placed in the Template layer of the window, either using copied images from other characters, or scanned images for tracing. Refer to Chapter 2, “Creating New Fonts,” if you’d like more information about tracing a scanned image. If you already know everything about outlines, paths, and points you can skip this chapter. If not... or you’re just curious... read on. Altering a logo This quick-step exercise shows you how to import an image from a drawing program into a character slot in Fontographer so you can access it with a keystroke. You will make some changes to the logo, and then change its width by scaling the image. For practice, import any Encapsulated PostScript (EPS) image created in a drawing program like Macromedia FreeHand® or Adobe Illustrator® or use the art file, torch.eps, provided on your Fontographer disks. 1. Open a font in Fontographer, and from the Font Window select and open a character‘s Outline Window. You can delete the character outline from its Outline Window if you need to, by choosing “Select All” from the Edit menu, and then pressing the delete key. 2. Select “Import” from the File menu and then select “EPS” from the submenu. 3. Select the PostScript file named “Torch.eps” from the Fontographer Sample Files folder or directory, or choose your own Macromedia FreeHand or Adobe Illustrator EPS file. Fontographer automatically imports the image into the character’s Outline Window. The image will be scaled to fit between the character’s baseline and ascent lines. If you choose Preview from the View menu, you can see that the fills are automatically transferred to the typeface. If you have trouble getting a single character logo to display on screen and/or print, you may need to break the character into parts that can be placed into multiple key-strokes. For more information, check MacroFacts at (800) 449-3329 for a TechNotes. Important: That’s all there is to it. If you’d like to modify the image further, you can. The rest of this chapter is bursting with additional information about manipulating points. Pasting EPS outlines from the clipboard On the Macintosh, you can also paste FreeHand and Illustrator images directly into the character edit window (without saving the file as an EPS). While you are in FreeHand or Illustrator, select the graphics you wish to copy, then press the Option or Control key and select “Copy” from the Edit menu. In Fontographer, select a character slot and “Paste” in the image. The path data will be pasted into your character so it fits between the ascent and the descent. Holding down the Option key while pasting the EPS file (or bitmap image) will retain the image’s size at the moment you copied it. Pressing Shift-Option-Paste will fit the EPS file (or bitmap image) between the baseline and the ascent. Pressing Shift+Alt+Paste will have the same effect for a bitmap on the PC. Paths and points Paths are made of straight or curved line segments which are either connected or unconnected. Characters like the lowercase “i” and “j” are composed of two separate non-over-lapping paths: the dots and the stems. When you join the endpoints of a path, you’ve closed that path. Important: All typographically correct paths need to be closed. If you already know how paths work, you can skip this section and go to Types of Points later in this chapter. Closed paths Closed paths can be filled; open paths can’t. PostScript always closes paths and fills images unless you specifically command Fontographer to do otherwise. To turn character fill off, choose Selection Info from the Element menu and click off Fill in the Character Information dialog. If you want to have outline and path connections without a fill (this is a character made up of stroked lines), click on the Stroke checkbox. Basically, you should know that 99% of the time you’ll be using closed paths. For more about stroked characters, refer to Chapter 2, “Creating New Fonts.” Path direction and fills A character with an open path remains unfilled by PostScript, but characters with closed paths are filled. PostScript automatically closes paths unless you specify otherwise. Open paths are lines in which the final point does not reconnect to the initial point in the path and are basically worthless unless you’re creating a Type 3 font. A closed path includes an endpoint that reconnects with the first point in the path. In the Character Information dialog (which displays when you choose “Selection Info” from the Element menu), you can select one of two types of fills—“Normal” or “Even/odd.” The standard PostScript filling technique is called a winding number fill, which is the Normal fill. The Even/odd fill operates differently (refer to the even/odd fill section later in this chapter for more information about this technique). When you choose “Selection Info,” you will only get the Character Information dialog if no points are selected or more than one is selected. When one point is selected, the Point Information dialog will appear. Normal fill You should use the Normal fill type for PostScript Type 1 and TrueType fonts. The Normal fill relies on the outside path being described as clockwise, and the next inside path being described as counterclockwise, hence the term “ winding number.” Important: This results in normally filled characters, like in the “o” below. The current path direction, clockwise or counterclockwise, is shown in the Element menu. Click on a control point and choose “ Clockwise” or “Counterclockwise” from the Path menu to change path direction. You can also change it via the path direction indicator in the Outline Window. Path direction is only defined on closed paths. Technically, it doesn’t make any difference whether the outside path is clockwise or counterclockwise, but for the sake of consistency between Fontographer’s fonts and the proper operation of automatic hints, we recommend that the outer paths should be clockwise and the inner paths counterclockwise. Even/odd fill The other filling technique is called an even-odd fill. You should use the even/odd fill type for PostScript Type 3 fonts or for modifying the behavior of the Remove Overlap command. An outside path is not filled until it crosses a path. The area that it crosses is filled; the next area the path crosses becomes unfilled, and so on. In the previous illustration of the “O,” even/odd filling would give the desired result even if both paths were clockwise. Correct path direction Path directions can be automatically corrected—that is, you can tell Fontographer to examine all the path directions and reorder them if necessary. Path directions must be correctly set for proper filling of characters. Choosing “Correct Path Direction” from the Element menu tells Fontographer to examine all the selected characters and, if necessary, automatically adjust their path directions. Outer paths will be set to clockwise, inner paths to counterclockwise. When required, Fontographer automatically (but temporarily) reverses these (for instance, when generating Type 1 fonts). Reverse path direction To reverse path direction, select the path to be reversed and click on the path direction indicator with the mouse (in the lower left corner of the Outline Window), or choose the opposite direction from the Element menu—either clockwise or counter-clockwise. Reversing path direction will alter the fill in your character. Types of points Fontographer uses three different types of points: corner points, curve points, and tangent points. Don’t be confused by the different point types—like control handles, they’re nothing more than different ways of working with the same basic element. The shape of characters is determined by the kinds of points used to construct them. You control the shape of the line segments in a path by either manipulating two control handles attached to each point or directly manipulating the path itself. Certain principles operate in using the corner, tangent, and curve points. Once you understand these principles, creating and altering characters is easy. Curve points When you place a curve point (or convert another type of point to a curve point), Fontographer automatically extends two control handles from the point to create a smooth curve between the preceding and following points on the path. The shape of the lines that extend from both sides of a curve point will be an arc. The curve point tool is used to create curve points and join curves to other curves smoothly. The curve point tool can be selected by clicking on its indicator. When the lock icon is in the locked position, the numeric keypad equivalent for choosing the curve point tool is “8.” Basically, if a series of curve points is connected, the points will display an arc that takes the most graceful and efficient route in maintaining the line through the sequence of points. In mathematical terms, the slope of the curve is continuous through the point. Corner points The corner point tool is used to join straight segments to curved segments or to other straight segments at an angle, or to connect two curve segments at a cusp. The corner point tool can be selected by clicking on its indicator. When the lock icon is in the locked position, the numeric equivalent for choosing the corner point tool is “9.” When you select a corner point, Fontographer displays the point as a hollow square. You can change an existing point to a corner point by selecting “Corner Point” from the Points menu. Tangent points The tangent point tool is used to connect straight lines to curves with a smooth tangent join. Tangent points may also be used to connect straight line segments together. You can select the tangent point tool by clicking on its indicator. When the lock icon is in the locked position, the numeric keypad equivalent for choosing the curve point tool is “0.” When you select a tangent point, Fontographer displays the point as a hollow triangle. You can change an existing point to a tangent point by selecting “Tangent Point” from the Points menu. Selecting multiple points In Fontographer, you can select a group of points or paths in a variety of ways: Position the pointer tool outside the area of points you want in the selection, press the mouse button down, and drag to the opposite corner of the group of points or paths you want to include. A dotted-line box surrounding your selection appears as you drag. Release the mouse button when you’re through selecting points. You can select an entire path by double-clicking on any point in that path or on the path itself. To select any combination of points, just press the Shift key and select each point individually with the pointer tool. Select all the points by choosing “Select All” from the Edit menu. Changing a point type You can convert any point into another type of point at any time. To change a point’s type, select the point or group of points, and choose the new point type from the Points menu, or press the Command or Ctrl key plus the appropriate numeric equivalent. The need to change point type arises in cases where the shaping of a line requires different attributes than those offered by the currently selected point type. To change point types: 1. Select the point with the pointer tool, by clicking on it once. 2. Then choose the point type you’d like to change it to from the Points menu. The point changes to the new point type. The check mark beside the point type in the Points menu indicates the selected point type. or 1. Select the point with the pointer tool by clicking on it. 2. Then choose the new point type from the Points menu or use the menu command. Inserting points In general, with font characters and other graphic images, the fewer points you include the more graceful the image. On the other hand, there are situations when you need to add points to get more control. One professional typographer—Judy Sutcliffe—recommends “roughing out” characters by drawing them in an outline form with corner points, and then returning and substituting other kinds of points where needed. With whatever process you use for building images or characters, there will be instances where you want to add points to a path, so you can more easily control the path’s shape. To insert a point: 1. Select the appropriate control point tool (or the pen tool). 2. Position the pointer on the figure where the new point should be inserted (on top of a line or a curve). If the pointer is positioned some distance away from the line or curve, a new path is started, or if the current path is active (open), it is continued. 3. Click on the figure. The point is inserted into the figure at that position. Duplicating points By choosing “Duplicate” from the Edit menu, you can copy selected points and paths. The duplicated points will offset slightly (down and to the right) from the original outline and are selected. Power duplicating By combining the Clone and Duplicate items in the Edit menu you can create some pretty interesting images. Follow our example below to create a spiral character, and then try some combinations of your own. 1. Create any shape. 2. Choose “Clone” from the Edit menu. 3. Use the rotation tool on the cloned image. 4. Select “Duplicate” from the Edit menu. 5. Repeat step #4 to make as many duplicates as you like. Try this with some of the other transformation tools to see what effects you can create. Removing points Anytime you want, you can delete a point in a path by selecting the point and pressing the Backspace or Delete key. Fontographer removes the point and opens up the path. Sometimes, you will want to split a path to create two open paths. However, most of the time you’ll probably want to remove points without breaking the path—this is called merging points. We tell you how to do both in this section. To remove points within a path: Select the points and choose “Clear” from the Edit menu. or Select the points and press the Delete or backspace key. This removes active points, opening the path up if it was closed, or splitting it if it was open and the selected point was not an endpoint. Splitting a path Sometimes, you’ll need to split a path at a point to create either two open paths, or, if you’re working with a closed path, to create an open path. Simply click on a point and then select “Split Points” from the Points menu. Fontographer splits the selected point into two separate points. Both of the new points are selected after Fontographer splits the point. The point connected to the start of the original path (according to the path’s direction) will be under the point connected to the end of the original path. To split a path: 1. Click on the point you want to split into two points. 2. Choose “Split Points” from the Points menu. Fontographer splits the selected point into two points. The second point is hidden under the top point. 3. Press the Tab key to deselect any selected points. 4. Choose the selection pointer from the tool palette. 5. Click on the split point and move it. Splitting line segments If you want to split a path by splitting a line segment (rather than by splitting the path at a point), select the knife tool, and drag across the path where you want to split it. Fontographer splits the path, creating two new points where the knife tool crossed (or intersected) the path. Joining points When you want to connect a path to another by joining points, as in instances where you are joining serifs and stems, we recommend using the “Frankenstein” approach—pasting your image together by joining points. This can be especially useful if you want to copy the stems from a serif typeface and add them to your sans-serif typeface. To join points from open paths: Drag an endpoint of one of the paths over an endpoint of the other path. Fontographer joins the paths. In the example below, the curve point changed to a corner point since Fontographer always tries to maintain the original shape of the path. Adding Serifs For those instances where you might want to combine the serifs from a serif typeface with your sans serif typeface: 1. Drag around an area to select the points you want to copy (in your serif typeface). 2. Choose “Copy” from the Edit menu. 3. Choose “Paste” from the Edit menu to paste the points into the new character (in your sans-serif typeface). 4. Drag the selected path, until the points you want to merge cover their coordinate points on the other path or paths. 5. Release the mouse button. Fontographer automatically joins the points and unites the paths. Merging points There will be many times when you’ll want to remove excess points from a character. If you use the methods described in the previous sections, you’ll be left with a broken line segment... or an open path. Merging points simply removes the point from the path and connects the point on either side of the deleted point with a single line segment. This is handy for removing unnecessary points. Merging points removes the active point, but joins the points on either side, so closed paths remain closed and open paths are not split into two pieces. See “Cleaning Up Paths” in Chapter 2 for more automatic ways of removing unneeded points. Moving a point Moving a point or a group of points can be done in a couple of ways. Use the arrow keys to move the point a certain number of em-units in any of four directions, or drag the point with the selection pointer. To move a point with the mouse: 1. Click on the selection tool, position it on the point to be moved, and click. 2. Without releasing the mouse button, drag the point to the new location. When you use the selection pointer to move a point that is connected to other points, you can see the line segments change as you drag. If the point is connected to other points, the connecting lines or curves are shown during the move, so you can see the effect of the move as it happens. While you’re moving the point(s), the position indicators at the top of the window are continuously updated to show the actual position and distance of the pointer from the basepoint. Demagnified move Most drawing programs require zooming to a more detailed view to draw intricate designs. Sometimes, however, this causes a loss of overall perspective. Fontographer has a unique capability called a demagnified move which allows for very precise point placement by constraining cursor movement to one tenth the distance specified in the Preferences, at full resolution. To use demagnification: 1. Hold down the Control key while dragging a point. If your Preferences under the File menu are set to the default of 10 em units, Fontographer will move the selection in one-em-unit increments. Keyboard commands to move points: Click on a control point to select it, and use the left, right, up, or down arrow keys to move the point by one em unit. Click on the control point to select it, and hold down the Shift key while using the arrow keys to move the point by ten times the specified cursor distance. To move a point by more than one em unit, which is the default preference setting for cursor editing behavior, select “Preferences” from the File menu. Type in the preferred distance in the cursor textbox. Accurate point placement For accurate BCP and point placement, select a control point and choose “Selection Info” from the Element menu. Type in whatever coordinates you like. You can move the Point Information dialog anywhere on your screen to allow an unobstructed view of the points you are setting. Any changes you make in the Point Information dialog are immediately reflected in the character Outline Window. In addition to being able to use the “Tab” key to move through the fields, additional key commands are available for the Next and Previous Points operations. These commands are shown on the Next and Previous buttons. To select the next point in the path: Click the “Next pt” button. To select the previous point in the path: Click the “Prev pt” button. To make a point the first point in a path: 1. Select a point. 2. Click the “Make First” button in the Point Information dialog. You can undo resetting of the first point by pressing the Cancel button or choosing “Undo” when you’re back in the Outline Window. Pressing “Cancel” will undo everything you did in the Point Information dialog and restore the character to its original state. Choosing “Undo” from the Edit menu will also undo everything you did in the Point Information dialog since selecting it is considered one action. To retract BCPs into their point: 1. Click on the “On point” checkbox for the incoming and/or outgoing BCP in the Point Information dialog. The BCPs will move (or disappear from view) into their point. 2. Click on the checkbox again to disable it and the BCPs will reappear and return to their previous coordinates. You can also retract BCPs in the Outline Window with a menu command. See “Retracting BCPs” later in this section for more information. Point and path preferences Path display You can control the way paths appear by setting options in the Preferences dialog. Choose “Preferences” from the File menu. Then select “Editing behavior” from the first pop-up menu in the dialog. Next choose the radio button relating to the path behavior that best describes how you want paths to act when you select them. You can drag paths as a whole. To choose this option, click on the “Select and drag the path” radio button. In this case, when you click on a path with the selection pointer, you select the two adjacent points and any segments extending between and on either side of them. or Choose the “Select and edit the path” radio button to move a segment lying between two points (and leave those points in place) when you click on the segment and drag with the mouse. Instead of having to manipulate control handles to regulate the shape of the segment, you can drag the line in any direction. The outline of the original position of the line stays on the screen as you drag, enabling you to go back to your starting place. Of course, you can also undo these actions by choosing “Undo” from the Edit menu. Choosing the “Do nothing” option results in no action taking place when you click on a path with the mouse. In order to move the path, you will have to move the control point or its BCP handles. Point display To select the type of point display that you want to see when you edit your characters or graphic images, choose from the possibilities found in the Preferences dialog. First choose “Preferences” from the File menu. Then select “Point display” from the pop-up menu to display the options for viewing points. Click on each of the options to see the differences you’ll get when you edit. For more information on each of the display options, refer tothe section “Point Display” in Chapter 10, “Expert Advice.” Show and hide control points Depending on the type of work you are doing, you may or may not want to view your image with the points showing. The Show Points item in the View menu lets you show or hide control points. When you are dealing with very small paths and points that may overlap, the screen can get a little full, and in those instances you can either reduce the point size, or turn off the display of points. This is important for premium WYSIWYG in the Preview mode. To show control points: Choose “Show Points” from the View menu to turn on the display of points. To hide control points: If Show Points is already checked, choose “Show Points” from the View menu to deselect it. Editing and placing BCPs Fontographer gives you considerable control over the shape of curved segments. This is done by adjusting the position of the Bézier Control Points (nicknamed BCPs because Fontographer’s curved segments are Bézier curves). Bézier curves define complex shapes with a minimum number of points. All points include one or more BCPs that occasionally seem to hide inside the control point. Most corner points are constructed so that BCPs remain inside the point. Curve points ordinarily work the other way around. You can think of these points as knobs with handles on the ends. Pull the BCP out of the control points and use them like levers to control the shapes of the extending line segments. Moving the lever adjusts the angle of the curve. The length of the lever determines the degree and depth of the curved segment. When a point has two BCPs—as in corner and curve points—one handle controls the incoming segment, and the other controls the outgoing segment. The default preference setting displays the BCP lines when a control point is selected, although you can change this in the Point display area in the Preferences dialog. BCP principles BCPs control the shape of Bézier curves between points. Selecting a control point activates that point’s Bézier points. BCPs that lie within control points may not be visible. There are two BCPs associated with each control point. Dragging a control point’s BCPs The BCPs for each of the three different kinds of points behave in different ways. A curve point’s BCPs align in a 180 degree angle, whereas a corner point’s BCPs move independently of one another. The tangent point’s BCPs move only along the line of its slope. Dragging a curve point’s BCPs A curve point and its BCPs lie on the same segment. Each BCP (and its curved segment) is affected by the movement of the other BCP. Dragging one of a curve point’s BCPs in any direction will result in the other BCP moving to maintain the straight line. Dragging a corner point’s BCPs A corner point’s BCPs generally lie on top of that same corner point. To select an incoming or outgoing BCP: 1. Hold down the Option or Alt key before clicking on the control point. Moving or adjusting one of the corner point’s BCPs does not move the other BCP or its attached segment. 2. Hold down the Option or Alt key, click on the point, and drag out from the control point. Dragging a tangent point’s BCPs A tangent point’s BCPs always constrains to the tangent (that is why they are named tangent points). Consequently, a tangent point’s BCPs can never be moved away from the tangent line. Moving the BCP will not change the slope of the curve. The Option or Alt key can be used to select the BCPs that lie on top of a tangent point. Retracting BCPs As we discussed earlier, you adjust Bézier control handles by selecting the point they’re attached to, then dragging the handle. You can also retract the control handles. This is useful when you have a corner point with unnecessary BCPs. Auto Curvature Auto Curvature is the option that instructs the curve point tool where to put the BCPs and how far to extend their handles. You can control Auto Curvature from the Points menu. Auto Curvature is active primarily on curve points, but corner points can also have Auto Curvature if their adjacent points are curve points. Auto Curvature allows a point that’s being moved to automatically update the angle and length of BCPs. If the adjacent points are also set for Auto Curvature, their BCPs will also update automatically as the point is moved. This means that when a point is moved you will no longer have to adjust BCPs after moving a point nor will you need to select the adjacent points and re-edit their BCPs. A BCP with Auto Curvature active will look different from BCPs without it. Instead of a square “+”, the BCPs will look more like an “x”. When you use the curve point tool to draw a new path, the curve points will default to have Auto Curvature on. To toggle it off, select “Auto Curvature” from the Points menu or move a BCP. When you edit a BCP, Auto Curvature thinks that you don’t like what it did, so it turns itself off. When you insert a curve point on an existing path, Auto Curvature will be automatically off, otherwise it would distort the path. If you want to turn it on, select “Auto Curvature.” One of the most important uses for Auto Curvature is in tweaking paths. If you’ve copied a bitmap image into the template layer and autotraced it, Auto Curvature can make your work easier. Here is a template image that was traced. 1. You should move the curve point so that it will be at the extrema (the outermost edge of any curve). 2. Select the point. 3. Select “Auto Curvature” from the Elements menu. 4. Move the point, and the BCPs update automatically. 5. After you move the point, move the BCP with the Shift key to make it vertical (and conform to the template bitmap). This will turn off Auto Curvature. What else can you do with this Auto Curvature? Say you want to make a “Beer Belly” font. Grab the east-most point of the bowl of letter “D” and pull it out and down. In the bad old days, before you could control Auto Curvature it would look like this: With Auto Curvature turned on, it will look like this: Choose “Clean Up Paths” from the Element menu, and there you have it: a “D” with a prominent Beer Belly. Auto Curvature is not an exact science. You may want to tweak the BCPs slightly once you get the point in the place where you want it. But it saves you the effort of constantly having to tweak BCPs, only to decide later that you like it elsewhere. After you’re done moving all the paths, we also recommended that you choose “Clean Up Paths” to put the extrema at the extremes so that the character (and font) will hint correctly. Chapter Four Editing Bitmaps Using the Bitmap Window Editing Bitmaps Tools in the Bitmap Window Preserving Your Original Bitmaps Okay... okay... okay. You’re probably asking yourself why you even need to read this section since there are two good reasons why you most likely won’t have to worry about bitmaps. The first is Adobe Type Manager (ATM), a program that improves the screen appearance of PostScript Type 1 fonts. The second is TrueType, the outline font format developed by Apple and Microsoft which doesn’t need bitmaps at all, since the font’s outlines are used for the screen display. The advent of ATM and TrueType has almost made bitmaps a thing of the past. So we recommend that you spend your time designing good outlines, and your bitmaps will take care of themselves. So why would you want to bother editing bitmaps? Maybe you don’t have ATM... or just plain don’t want to switch to TrueType. Perhaps you’d like to create gray-scaled Type 3 fonts which TrueType doesn’t recognize and ATM can’t contain... or you’re creating professional fonts for distribution and since ATM and TrueType don’t render well at the smaller point sizes (say below 12 points), you might want to hand-edit them yourself to achieve more readable character images. Or maybe you just like playing with pixels. Using the Bitmap Window You can use the Bitmap Window as a tool to improve the look of a font on the screen. It is composed of a series of square dots called pixels which can be turned on or off to produce images. When the dots are turned on they appear black, and when they are turned off they become white. To open a Bitmap Window: 1. Select a character by clicking on it in the Font Window or opening a character’s Outline Window or clicking on a character in the Metrics Window. 2. Choose “Open Bitmap Window” from the Windows menu. You have to have created bitmaps before you can view them. If you don’t have any bitmaps for the font yet, Fontographer will prompt you to create some. You can type in whatever sizes you’d like in the Bitmap Information dialog, which will appear automatically if you try to open the Bitmap Window without first creating bitmaps. You can open multiple windows so that different characters (or even different point sizes of a single character) can be worked on at the same time. This is especially helpful when you are editing a character with several bitmap sizes. The Bitmap Window The Bitmap Window includes a title bar, that shows the name of the font, the point size of the character, and the character itself. The toolbox contains a pencil, eraser, hand tool, marquee selection tool, magnifying tool, measuring tool, straight line tool, and a move tool. The lock icon in the lower left corner has two functions. When the lock is open (white), you can change to a different character by simply typing the keystroke(s) of the new character. Having the lock icon closed (black), prevents the character from being changed to another character, if you accidentally press a keystroke. The Info bar at the top of the Bitmap Window shows you the character’s ascent, descent, offset, and width values, as well as listing the horizontal and vertical location of the cursor in pixels. These features give you the ability to precisely measure distances when you create a character. An actual point-size image of the character is displayed in the top left corner. The Recalc from outline button allows you to recompute a new pixel image based on the character’s outline. This button (called “From outline” on the PC) is useful when you have edited a particular outline character and don’t want to recalculate the entire bitmap font. For more information, refer to “Recalculating from outlines” later in this chapter. Editing a bitmap To make changes to a bitmap: 1. Select the “A” in the Font Window. 2. Choose “Open Bitmap Window” from the Windows menu. If you are opening a font for the first time, you probably won’t have any bitmaps associated with it. Fontographer will ask you if you want to generate any. 3. Click “Yes.” The Bitmap Information dialog will appear. Fontographer automatically defaults to include the 12 and 24 point bitmap size. You can add to or change the sizes in this list if you like. 4. Click “OK.” Fontographer generates the bitmap files, and the Bitmap Window of the “A” appears. 5. Choose “Next Point Size” from the View menu to view the next larger point size available. 6. Type “Option-G” or “G” (on the PC) to turn off the guidelines, if you find them distracting. 7. Select the bitmap and select the Move tool to move the bitmap. 8. Choose “Next Character.” The character “B” appears. 9. From this view decide which bits to change to improve the character’s looks and then click with the pencil tool to remove or add them. That’s all there is to editing your bitmaps. The majority of the time Fontographer creates perfectly acceptable bitmaps, so you only need this option if you’re a real perfectionist . The central edit area The central edit area is the space where the bitmap image appears. This is where all your bitmap drawing and editing takes place. The bitmap image includes pixels which are simply dots that may be highlighted to create a pattern on the screen. Behind the pixel image is the outline of the character to guide you in choosing the pixels that you want to turn on or off. The Info bar shows the offset and width values for the character. The offset value will change to correspond to any changes made to the bitmap character’s offset. The width value is the character’s advance width in pixels and cannot be changed in the Bitmap Window. Changing the width in the Outline Window will update the Bitmap Window if you press the Recalc from outline button. Ascent and descent values The ascent is the number of points between the baseline and the top boundary of the em square. In the font pictured here, the ascent is 19 pixels from the baseline. Consequently, the descent is the amount of pixels between the baseline and the lowermost boundary of the em square. The descent for this point size is five pixels. The Bitmap Window in Fontographer 4.1 includes maximum ascender and descender lines. These lines represent the limits for bitmap placement based upon the outlines for all existing characters. You’ll find these guides valuable when you are manually creating bitmaps. The maximum ascender line only appears when a character’s outline extends below the descender line. However, if you have selected to preserve line spacing (in the Recalc Bitmaps dialog), the maximum ascender and descender lines will not appear for that character, they will be the same as the normal ascender and descender lines. Offset and width values The offset is the distance in pixels from the left-most black pixel to the origin line. This value changes as you edit the bitmap character. If there are no points between these two, the offset is zero. There are 0 pixels between the origin and the left edge of the letter “T” pictured above. The width indicator shows us the width of the character in pixels: The “T” is 13 pixels wide. Visible layers You can choose to display or hide guidelines in the Bitmap Window by typing “Option-G” or “G” (on the PC). The guidelines you will see are the ascent, descent, and baseline of the font. Use them in the Bitmap Window as a drawing aid. To display or hide the Outline layer, type “Option-O” or “O” (on the PC). The outline is visible behind the bitmap, and you can use it as an aid in bitmap editing, but no changes to the Outline can be made in this layer. Changes to the outline character will, however, display in the Bitmap Window. Tools in the Bitmap Window There are eight tools in the Bitmap Window’s tool palette. The straight line tool, directly beneath the close box, allows you to draw straight bitmapped lines by holding down the mouse and dragging. Hold down the Shift key to constrain the line tool to draw horizontal lines, vertical lines, or 45-degree angle lines. When the lock icon is in the locked position, access the straight line tool by typing “1.” The hand tool is used to move the screen in any direction by clicking on the window and dragging. The hand tool scrolls the entire character window. Move the bitmap image around to an optimum screen position before you begin to edit it. You’ll need to do this if your characters are too large to fit into the central edit area. When the lock icon is in the locked position, you can access the hand tool by typing “2.” The pencil tool lets you place or erase pixels with a click of the mouse. When you place the pencil above the pixel and click, the bit will change from black to white or vice versa. You can either drag or click with the pencil. Clicking draws just one dot. Dragging produces a black or white series of dots. Holding the Shift key down while dragging constrains drawing to a 45-degree line, a vertical line, or a horizontal straight line. When the lock icon is in the locked position, you can access the pencil tool by typing “3.” The eraser tool removes any pixels it touches. You can also use the pencil tool to erase pixels one-by-one, but using the eraser tool can be more effective for larger areas. Holding the Shift key down while dragging constrains the eraser to a vertical or horizontal straight line. When the lock icon is in the locked position, you can access the eraser tool by typing “4.” The marquee selection tool is used to select and move pixels. If the marquee is present, pasted bits will be scaled to fit within it. You can paste bitmap images into the marquee area. To de-select the marquee area, click anywhere outside the central edit area or press the Tab key. When the lock icon is in the locked position, you can access the marquee selection tool by typing “5.” The move tool lets you move the bitmap character away from its outline in any direction. When the lock icon is in the locked position, you can access the move tool by typing “6.” You can use the measuring tool to measure distances between pixels. When you position it and click the mouse and drag to another place, the measured distance in pixels will appear within a rectangular box. The measuring tool is automatically constrained to 45 degree angles, horizontal or vertical straight lines. Hold down the Shift key to move it freely. When the lock icon is in the locked position, you can access the measuring tool by typing “7.” The magnifying tool can increase the screen size of the bitmap by 2, 4, 8, or 16 times its actual size. When the tool appears on-screen, click the mouse and release to show a magnified version. Clicking again increases the magnification unless there isn’t a larger size, in which case an empty magnifying tool will appear. To reduce the size of the bitmap, hold down the Option or Alt key. The magnifying tool will display a minus sign. When the lock icon is in the locked position, you can access the magnifying tool by typing “8.” When you can no longer enlarge the image, the magnification tool will display nothing in its center. Undo and Redo There are a few ways to undo and redo changes made to the bitmap. If you want to remove an added point just click on it with the pencil tool or choose “Undo” from the Edit menu. To redo the change choose “Redo.” The default setting for number of Undo’s and Redo’s is eight, but you can change this from the Preferences option in the File menu. Changing bitmap views Enlarging using the View Menu You can enlarge the bitmap image by selecting “Magnification” from the View menu. In the submenu, you can choose a magnification level for the display of the bitmap image. When you choose 100% you are selecting the actual size. The other choices offer you the bitmap at 2, 4, 8, and 16 times its actual size. The corresponding command keys are as follows: Fit in Window Command (Ctrl) T Actual size Command (Ctrl) 1 200% Command (Ctrl) 2 400% Command (Ctrl) 4 800% Command (Ctrl) 8 1600% Command (Ctrl) 6 To enlarge using the magnifying tool: 1. Select the magnifying tool and click once on the screen on the area you want to enlarge in the window. You can magnify the image to 2, 4, 8, or 16 times the actual size. When you can no longer magnify the image, the tool will display nothing in its center. To reduce the bitmap image with key commands: 1. Press Command-Option-Spacebar or Ctrl+Alt+Spacebar and then click the mouse. The magnifying tool displays with the minus indicator. 2. Continue clicking to reduce the image. Switching characters in the Bitmap Window There’s a small lock in the lower left corner of the Bitmap Window. If the lock is filled with black (in a locked position), it locks the current character into that window. This prevents a character from being changed in case you acidentally press a character key. It also lets you use shortcut commands like Option-G or G (on the PC) to hide the guidelines. If the lock is white (in the unlocked position), you can switch to a different character by typing that character’s keystroke(s). Next and previous character To display the next sequential character, choose “Next Character” from the View menu or use the shortcut, Command-] or Ctrl+]. To select the previous character choose “Previous Character” from the View menu, or press Command-[ or Ctrl+[. Next and previous point size To show the next point size of a bitmap, choose “Next Point Size” from the View menu, or press Command-= or Ctrl+=. The next point size will only appear if you have chosen various sizes from the “Bitmap Info” dialog in the Element menu and you’re not already at the largest point size available. To change to a previous point size: Choose “Previous Point Size” from the View menu or press Command-- or Ctrl+-. The next available smaller point size will automatically replace the character in the Bitmap Window. To change to the next point size: Choose “Next Point Size” from the View menu, or press Command-= or Ctrl+=. The next available larger point size will automatically replace the character in the Bitmap Window. When should you recalculate bitmaps? Recalculate bitmaps from the outline when you have edited bitmap characters and you want to start over. Also, when editing small point sizes, you can use this to see the results of hint editing or metrics changes. If parts of the font have changed, you can recalculate just those changed letters. Preserving your original bitmaps Even though you may have modified an existing font’s outlines, you can still keep the original font’s bitmaps if you like. This is useful in those instances where you’ve added some special characters to your font (fractions or accents, for example). You don’t want to regenerate all the existing bitmaps, since commercial fonts already have hand-edited bitmaps in them anyway. Like everything else it does, Fontographer offers you an easy way to do this: import any other bitmap font file. 1. Choose “Import” from the File menu in any of Fontographer’s windows, and then choose “Bitmaps” from the pop-up menu. Fontographer presents a standard file dialog that lets you find the bitmap font file containing the bitmaps you want to import into this database. Then, if more than one bitmap is present you will be given a choice of which bitmaps to import. 2. Click on the file and choose the sizes and styles of bitmap. Fontographer will read the bitmap screen fonts from the file and store them in the currently open and selected database so you’ll be able to generate these bitmaps into a bitmap font file anytime you generate a new font. 3. Now you can go back and hand-edit your added characters if you like. Chapter Five Metrics: Spacing and Kerning Spacing Kerning Auto Spacing Auto Kerning The Metrics Window Importing & Exporting Metrics Advanced Metrics Advanced Auto Spacing Advanced Auto Kerning Font metrics is the term used to describe how letters are spaced when they are typed. Do metrics matter? The answer depends on what you want to accomplish with your fonts. If you are producing a logo or graphic font that relies mostly on shapes rather than words, you might not need to use either kerning or spacing information. Or, if you are a novice and you are just playing around with fonts and aren’t yet ready to pursue the finer details, you might delay reading this section until later on. Professional type designers usually do use metrics when they create a font. There are a few good reasons for doing this, which you may or may not already know. The untrained eye may not notice kerning and spacing in printed text, but any reader will experience text as more difficult to perceive if it has not been well kerned and spaced. We know that our brains like for the type to coalesce in meaningful groups—and the more clearly defined the meaningful groups are in the visual field—the quicker we will be able to read the information. When groups (words on the page) do not “hang” together very tightly, the brain has to work harder to see them in meaningful ways. That’s why it would be pretty hard to read this page if: Itwereprintedlikethisinsteadofwiththecorrectspacing. In this case the brain has a daunting group-making job to do. Think of how you feel when reading the unspaced sentence above. When you read poorly kerned and spaced text, you get a toned-down version of that same sensation. So, if you are going to design fonts, you will probably want to pay attention to the metrical details, out of courtesy to the people who may use them. As we said, font metrics is the term used to describe how letters are spaced when they are typed. This is easy to imagine if you remember how type used to be set. When characters were carved on the end of a piece of metal, each character’s width was (had to be, in fact) the width of the piece of metal on which it was carved. Setting type was a matter of laying these pieces of metal down next to each other; therefore, the spacing was determined exactly by the width of each piece of metal. To influence the metrics, you could space the characters further apart by wedging little thin strips of metal between them. You could even squeeze the characters closer together by filing down parts of the metal type. Fundamentally, character spacing was determined by how wide the metal pieces were. And that’s still pretty much what we mean by spacing: it’s mostly determined by how wide the characters are. Letters are set down one after another, each new character’s position determined by the width of the previous character. In other words, each new character starts where the previous one left off. One of the most impressive features of Fontographer is its ability to let you control the metrics of electronic fonts either letter by letter or the entire font, manually or automatically! The next exercise shows the power of Fontographer’s autospacing command. You can autospace an entire font at once directly from the Font Window. However, in this exercise, you’ll work in the Metrics Window so you can see Fontographer autospace interactively on screen. In addition, we are going to ask you to purposely mess up the spacing of your characters, so you can see just how effective our auto-spacing is, even in a worst-case scenario! To automatically space a font: 1. Open one of your fonts. 2. Choose “Select All” from the Edit menu. 3. Choose “Set Width” from the Metrics menu. 4. Set as illustrated below: Fontographer will automatically set the spacing of the characters to be a uniform width of 400 em units, producing an awful, monospaced font. 5. Click on any character to deselect all. 6. Choose “Open Metrics Window” from the Windows menu. 7. Type the word “Space.” Rather than manually setting different widths for each monospaced character, you can Auto Space the font. 8. Choose “Auto Space” from the Metrics menu. The Auto Space dialog appears. The dialog has an Easy and Advanced mode. 9. Choose “Easy” by clicking on the Easy radio button. 10. Enter a value for spacing the characters. This is the result of a value “30” entered in the text edit box. You can adjust the spacing even further from the Metrics Window, or apply Auto Spacing again (with a different value) until you get the “look” you like. Fontographer also has Auto Kerning, which works in the same easy manner as Auto Space. The rest of this chapter covers both Auto Spacing and Auto Kerning in more detail. Spacing Since “metal type pieces” don’t actually exist in the computer, electronic type is not bound by the same kind of physical limitations that used to apply to type production. In fact, you even have to tell the computer how wide each character is supposed to be, so it will know how much to move over before placing the next character. That’s what the handy width guide in Fontographer’s Outline Window is for: you should place it where you want the next character to begin with respect to the one you are modifying. Determining proper widths for each character in a font is a difficult task, because each letter can appear alongside any other letter. You can imagine that a spacing value for “W” which looks good for “Wo” may not look as good for “Wh” so finding the “right” values to use is a matter of looking at lots of examples, and making some trade-offs. This is sometimes easier said than done: If your font has 200 characters in it, for instance, there are 200 x 200 = 40,000 different character combinations to consider! Some letters can never really be spaced correctly for all possible combinations. For example, the “T” usually presents some problems. Now, of course, you have a new problem. Clearly, you can fix some of the spacing problems some of the time, but never all of the spacing problems all of the time. Which brings us to kerning, and what it is. Pair kerning Pair kerning lets you get around those sorts of difficulties. With a properly kerned font, you can actually get perfectly wonderful character spacing all of the time, with a bit of extra work up front. Pair kerning, or informally, just “kerning,” is a way of overriding a character’s spacing in certain circumstances. To do kerning, you must first have a properly spaced font. So, in this example, you would pick a width for “T” which works best for most cases. Since overlapping characters look pretty ugly and should almost always be avoided, you will pick a width that fixes “Th” and “TT,” and leaves “To” a little loose. Once the spacing has been determined, you then look at all the character combinations which cause trouble for the spacing value you picked. Typical problem character pairs involving “T” are “Ta,” “Te,” “To,” “Tu,” “Tw,” “Ty,” “T,” and so on. Those character pairs are prime candidates for kerning pairs. You can create different kerning pairs for each of those cases, and individually adjust the spacing for each pair. Here’s how it works: Let’s say the optimum width for “T” is 825 em units. That means that the “T” is always 825 units wide, no matter what character follows it, except for the ones we define as kerning pairs. For example, the “T” in “Ta” could pretend to have a width of 780, so the “a” gets tucked underneath a bit. For “Te,” we would start with the same value and modify it, if necessary. Another way to say it is that in the presence of kerning pairs, widths of characters can change depending upon what the next character is (i.e., the widths are contextually sensitive). There is an upside to kerning pairs, which we have discussed, and a downside. Many programs do not support kerning. There is a rule of thumb to use about kerning and whether programs do it: typically, if the suggested retail price of a piece of software is $400 or over, it will support kerning. Otherwise, it may not. There are exceptions to this rule of course, but it is usually correct. Programs that do page layout (Aldus PageMaker®, Quark XPress, etc.) almost always use kerning; the same is true for the higher-end graphics programs. Some word processors, spreadsheets, databases, and cheaper graphics programs still do not support kerning. Anyway, the point is that a font must look halfway decent without any kerning in it at all, because you will probably want your font to look good both in your word processor (without kerning) and in your page layout programs (with kerning). The other drawback to pair kerning is that the more kerning pairs you make for your font, the bigger and slower it becomes. Granted, it won’t make the font tremendously slower or bigger, but it can become noticeable in extreme cases. Most commercial font vendors ship their fonts with between 100 and 4,000 pairs per font. 100 pairs is certainly ‘way’ too few (except for a monospaced font, in which case it is ‘way’ too many!); 4,000 pairs is clearly (to us, anyway) a sign that the font was poorly spaced, and had to be compensated for by over-kerning it. A happy medium might be somewhere between 400 and 1,500 pairs, depending upon the typeface, and nature of the particular type designer. For example, some people like to kern all the characters in the font, even pairs like ªƒ, or °¢, rather than just the most commonly used ones, which will naturally result in more kerning pairs. Now that you know the basics of font metrics, let’s cut right to the good stuff: Auto Spacing and Auto Kerning (located in the Metrics menu)! Auto Spacing Auto Spacing is one of the most incredible features in Fontographer. As of this writing, Fontographer is the only program we know of that is capable of doing it. Auto Spacing is the process by which Fontographer will examine your entire font, and give each character the best possible spacing value that it can. It is a tremendously valuable, time-saving command. Some of our famous typographical customers, while they sort of sniffed at the idea of the computer algorithmically creating widths and sidebearings for them, nevertheless allowed that they would certainly use Auto Spacing at least as a starting point. Auto Spacing comes in two flavors: Easy, and Advanced. Easy is what the casual user should choose: its parameters have already been set to do the best job for typical fonts. If you are really into spacing, you can switch to the Advanced mode, where you have the opportunity to change lots of values and parameters. The only control you get to modify in the Easy mode is the one which determines how close (or how far apart) the spacing should be. Here’s an example: We opened up the font TFHabitat, and demolished the spacing by setting each letter’s width to 450. As you might expect, it looks kind of lousy; however, this is what you get after having drawn a typeface without setting any spacing. Now, rather than manually and painstakingly setting different widths for each character, we’ll simply have Fontographer Auto Space the font! This is the result of an Easy mode Auto Space, with the value “60” entered using the slider: That’s a little loose for our taste; let’s Auto Space again, this time with a value of “25”: As you can see, Auto Spacing is as easy as choosing a value, and seeing if you like the result! Any characters that have spacing you don’t like can easily be tweaked in the Metrics Window. Auto Spacing, as you can probably imagine, is not the fastest operation you can perform on the computer. It is very much calculation-intensive, and may seem a bit slow (between half a minute and a minute is not at all uncommon, but it depends on the speed and power of your computer). Nevertheless, that is at least one hundred times faster than we could have set the spacing by hand, so we’re not complaining too much! There is a lot more to Auto Spacing; it’s extra controls are in the Advanced mode, which is covered a little later on. We would like to reiterate, however, that the Easy mode is perfectly adequate for probably 90% of our Fontographer customers. Don’t feel obligated to deal with the Advanced mode unless you want to; it usually isn’t necessary. Auto Kerning Since we have taken the pain out of spacing a font, you might assume we did the same for kerning a font, and you’d be right! Auto Kerning does a very good job of creating kerning pairs automatically for your fonts. Like Auto Spacing, it has two modes: Easy and Advanced. Easy-mode Auto Kerning has a bit more to specify than Auto Spacing, but it is still pretty simple. To Auto Kern in the Easy mode: 1. Choose “Auto Kern” from the Metrics menu. 2. First, you get to decide how many kerning pairs should be created. You can either choose “As many as it takes,” or you can set an upper limit on how many should be created. This is a personal preference; some people like to have only 100 or 200 pairs in a font; others don’t care. We recommend limiting the number of pairs to 1,000 or so. 3. Next, choose a setting for how close together you want the kerning pairs to be. This control is a lot like the one in Auto Spacing, only for kerning. 4. Finally, there is a checkbox for changing existing kerning pairs. This is useful for when you have manually set some special kerning pairs, and want Fontographer to do the rest without changing your work. Here is an example of some potential kerning pairs, as seen in the Metrics Window in an unkerned state. Now we’ll apply Auto Kerning, with a slider value of “60,” which yields this: Fontographer’s Auto Kerning has created a “To,” “Wa,” “Yo,” and “AV” pair. Remember, these are only the characters that are currently displayed in the Metrics Window, there are other kerning pairs. Note that Fontographer did not create an “oW,” “aY,” or “oA” kerning pair. That is because in the Easy mode, Fontographer tries to kern only the more useful pairs; you don’t usually see a lowercase letter immediately followed by an uppercase letter, so it didn’t create a bunch of unnecessary kerning pairs. (This behavior may be overridden. The controls for this are located in the Advanced mode of the Auto Kerning dialog.) Just for comparison’s sake, here are the resulting kerning pairs for a slider value of “20”: With Fontographer’s Auto Kerning, you can try different values and see what you get, just like with Auto Spacing. Also like Auto Spacing, you’ll find a ton of hidden ability, conveniently tucked away in the Advanced mode. The controls in the Easy mode are suitable for 90% of our customers. Don’t feel obligated to wade through the Advanced mode parameters unless you really feel compelled. To get the best results, you should Auto Space your font first, and then Auto Kern it. Important: The Metrics Window Since most metrics issues involve how characters look in relation to one another, you might expect there to be a way of simultaneously viewing characters from within Fontographer. There is, and it is cleverly called the Metrics Window. To invoke it, simply choose “Open Metrics Window” from the Windows menu. The contents of the Metrics Window should look something like the one below. You enter text in the box at the top of the window labeled “Text.” You can either type in text directly, or paste in lines of text from some other source. There is a theoretical maximum of 255 characters; however, the practical maximum is probably considerably smaller than that. Basically, the fewer characters there are in the window, the snappier Fontographer’s performance is going to be. In our experience, most people never put in more than about ten characters at a time. If you select some characters in the Font Window, and then open the Metrics Window, it will appear with those selected characters automatically showing in the window. To view even more characters at once, you can, of course, open many different Metrics Windows at the same time. The large area in the middle of the window is called the character display area, and that’s where the actual characters are shown. They are all positioned next to each other according to the spacing information set up in the font. Kerning pairs are also shown in this area, if there are any. By the way, our “Yo” example here could really use a kerning pair! The rather complicated area at the bottom of the window is the spreadsheet area. This is where all the exact kerning and spacing values are shown. You can enter numbers directly into these cells, or merely look at them to see what the values are. You can also cut, copy, and paste values between the cells. In the upper right section of the window you see a checkbox marked “Kerning.” When checked, the Metrics Window character display will show the effects of any kerning pairs defined for that font. When unchecked, it shows the characters without kerning applied to them. The File button, also at the upper right of the window, is an alternate way to enter text samples into the window. If you press the File button, a standard file dialog box comes up which allows you to choose a standard text file. After you have chosen a file, the Metrics Window will display the first line of that file. You can navigate from line to line by using the little up and down arrows located to the left of the File button. This allows you to come up with particularly illuminating files of text samples and run your fonts through them quickly and easily, without having to type in all kinds of stuff over and over. Character display The fun thing about the metrics character display is that all the attributes of the characters can be modified interactively with the pointer tool. The “L” guide is for adjusting the left sidebearing (the distance from the character origin to the beginning of the actual character outline). The guide itself is situated at the character origin. Simply click anywhere on the line with the mouse button and drag to change this value. The “R” guide does the same thing, but for the right side-bearing (the distance from the rightmost part of the character outline to the width of the character). The guide itself is situated at the character width. Click anywhere on the line and drag in order to change this value. The “K” guide is for creating and adjusting kerning values. In Fontographer, you kern the currently selected character with the previous character. That’s why, when you select the first character in the Metrics Window, no kerning guide appears: there is no previous character with which to kern. In order to create a new kerning pair, or to modify an existing pair, simply click anywhere on the line and drag it around until the kern pair looks right. As you drag these indicators around, you can watch their values change interactively in the spreadsheet area. Fontographer’s multiple levels of Undo and Redo are active for each character in the window. To move through a particular character’s set of undo’s, select that character and then choose “Undo” from the Edit menu. Of course, moving the character itself around between the sidebearings is very straightforward. Simply click on any character, and move it left or right! If you hold down the Shift key, the character movement is constrained to up and down with respect to the baseline. If you hold down the option or Alt key, you can move it anywhere you want: over a bit, up off the baseline, etc. A good technique for manually creating kerning pairs is to enter the left character, “T” for example, and enter a character like “a” for the second character. Select character “a” and the kerning line appears. Click on the kerning line and move the mouse to adjust the kerning. When you have kerned “Ta” to your liking, you can choose Next Character from the View menu, and the Metrics Window will update itself to show “Tb.” You probably don’t want to kern that one though, so you can leave it alone and just choose “Next Character” again until you see another pair you think needs kerning. This is an easy way to move quickly through all the combinations of characters. Once you have made lots of kerning pairs, you can step through them all with Next Kerning Pair and Previous Kerning Pair, also found in the View menu. This way, you can see all the pairs which you’ve kerned, and ignore those you didn’t kern. If a character is selected, you can choose a new character simply by typing a different letter. However, be sure you do not have a blinking insertion cursor somewhere else in the window. If you did, you would enter a new value into that field. You can easily tell if typing a new character will change the current selection by looking at the Char field in the spreadsheet. If it is black, as in the previous Metrics Window illustration, that means it’s selected and you can change characters in this way. The general rule of thumb is that what you type from the keyboard will replace any black (selected) cell’s contents with that keystroke. If there is a blinking cursor, on the other hand, the new keystroke will simply be inserted into the existing cell contents at the location of the blinking cursor. The spreadsheet area The spreadsheet area has numeric displays for all the entities in the character display section: the character, width, left sidebearing, right side-bearing, and kerning values. To activate a cell: 1. Click on it, and it will become highlighted. 2. You can delete cell contents, paste in new values, or type in new values. 3. To have a newly entered value take effect, be sure to hit the Return or Enter key! If you simply move to a width cell, for instance, and type in a new number, nothing will happen until you: hit Return or Enter, click on another cell, move to another cell, change to a different character (previous/next), or click in another view. To move from cell to cell: You can use the arrow keys or the Tab key. or You can simply click on a new cell with the pointer. Shift-tab moves backward through the fields, just like it does in dialog boxes. Sometimes, you will be examining a font whose characters are wider or narrower than the cell widths in the spreadsheet area, and so the character and its spreadsheet view will no longer be vertically aligned. This doesn’t affect the functioning of the spreadsheet; however, it can sometimes look confusing. To correct this, simply Option or Alt-click on the character in the character display area, and its corresponding spreadsheet column will adjust itself to be directly underneath that character. One important thing to remember about the spreadsheet area is that you don’t have to use it. Some people are much more visually oriented, and they get dismayed by fields of flashing numbers. That is why we made sure everything is available interactively. If you don’t want to fiddle with tables of numbers, feel free to completely ignore the spreadsheet. On the other hand, be aware that some of our more production-oriented font development people have told us that they can create between 400 and 500 kerning pairs an hour, with their hands never leaving the keyboard. So see which method works best for you, and don’t worry about the other. Importing Metrics When you open up an existing PostScript font, Fontographer automatically includes its spacing information, because it is located in the PostScript file. So the character widths and offsets which appear in the Metrics Window are the actual values from the font. However, Fontographer does not automatically load the font’s kerning table. This is because the kerning information is found in a different file, and Fontographer has no way of knowing where that file might be. Kerning tables are stored in various places: on the Macintosh, the kerning information is stored in the bitmap suitcase; on the PC, it is stored in the PFM file. Kerning and spacing information can be found in other places as well: AFM files, other Fontographer databases (.fog), or in the Fontographer Metrics files (.met) described later in this chapter. When you have opened the outline font, you can choose “Import,” then “Metrics” from the File menu. That command brings up a standard file dialog. Simply select the file which contains the kerning tables, and Fontographer will open that file and apply those kerning pairs to your font. You should be sure to do this when modifying existing typefaces; otherwise, unless you create them yourself, your font will not have any kerning pairs in it. TrueType fonts often have embedded kerning information. Fontographer will read in any existing kerning data as it opens a TrueType font. Clearing kerning pairs If you import the kerning from the wrong font, either by accident or because you were curious about how Helvetica might look with Times-Roman spacing, you can easily undo this “experiment” by choosing “Clear Kerning” from the Metrics menu. This command will remove all kerning pairs from the font you are editing. Then use the Import Metrics command again! Exporting Metrics Sometimes you want to export a font’s metrics to a file. There are a couple of reasons for doing this. For example, you might want to experiment with a number of different sets of metrics to see which fits the best. With the ability to export the current metrics information, you can save off what you have, choose “Clear Kerning Pairs” from the Metrics menu, and then try importing a bunch of stuff; if that doesn’t work out, you can import the metrics you exported, and be right back where you started. Another reason to export metrics is just to see them all. Some people like to see all the width values in a big list, as well as all the kerning pairs and kerning values. These lists can be printed out and compared with one another; you can even edit the lists and re-import the metrics information! Exporting metrics is easy: just choose “Export,” and then “Metrics,” from the File menu. This will cause a standard file dialog box to appear, along with a number of choices for the kind of file to create: an AFM, PFM, or Fontographer Metrics file (.met). With Fontographer, you can, of course, import metrics from all the file types which it can create. The Fontographer Metrics file The Fontographer Metrics file is a standard text file any word processor can read. The reason for having a file like this is that it is more pleasant to deal with than AFM or PFM files. People who like seeing their metrics information in a big long list can do so via this file. They can also edit width and kerning values and even create new kerning pairs by typing them in and entering kerning values! Then they can import these metrics back into their fonts. A Fontographer Metrics file looks like this: FogMetricsFile 1000 emsquare % Output character spacing 17 670 width 18 790 width 19 58 width 20 620 width ( ) 250 width (!) 271 width (“) 309 width (#) 664 width ($) 585 width (%) 736 width (&) 748 width . . . A 733 width B 649 width C 679 width D 729 width E 575 width F 536 width G 708 width . . . 252 437 width 253 500 width 254 440 width 255 405 width 256 280 width % A A A Output kerning pairs C -78 kern G -99 kern o -49 kern A v -113 kern A w -141 kern A y -141 kern Characters for which there are no standard letters (like the first 20 characters, or characters over 128) are indicated by their character number. So a line like “254 440 width” means that character number 254 has a width of 440 em-units. Copying widths The Copy Widths command in the Edit menu is a quick way to select a bunch of characters in the Font Window, and then copy and paste their widths over a selection of other characters, without altering anything else in those other characters. More powerful spacing and kerning commands Up until now, we’ve been discussing mostly manual ways of adjusting and creating metrics. Fontographer has some really cool automatic ways to do metrics. The metrics commands, located in the Metrics menu, range from completely easy and automatic to very technical and extremely powerful. Or, to use a different analogy, it can be the difference between flying a kite and flying the space shuttle; it sort of depends upon what you want to do. Set Width Set Width is a straightforward and easy way to adjust the widths of lots of characters at once. Set Width works with the current selection. So if you are in the Font Window, simply select all the characters you want to change, and then bring up Set Width. You can simply replace each character’s width with a new one, or you can increase or decrease the existing widths. This is an easy way to take an entire font, and quickly make the spacing five percent looser, for example. Equalize Sidebearings Sometimes you will want a character’s left sidebearing to equal its right sidebearing, for the sake of vertical alignment. Numbers frequently appear in tabular form, and it’s a lot nicer when the columns of numerals line up. In addition, some programs (like Macromedia FreeHand) can vertically align arbitrary text. Equalizing the sidebearings is easy: choose “Equalize Sidebearings” from the Metrics menu. Advanced Metrics operations Fontographer really tries to create a civilized shell for the rather technical problems posed by font metrics. Set Width, the Metrics Window, and the Easy modes of Auto Space and Auto Kerning are examples of that. However, Fontographer also has a “you asked for it, you got it” metrics area, where we bring out the heavy-duty stuff. These commands are, by and large, not particularly intuitive, unless you already have a solid background in typography. The vast majority of our users will be able to do everything they need to do just splendidly by using the other tools. So we really advise most people to sort of ignore this stuff (the signpost in the Wicked Witch of the West’s haunted forest—“I’d turn back if I were you”—applies here). But if you insist, feel free to explore the bleeding edge in computerized font metrics. Consider yourself forewarned! Set Metrics Set Metrics is the funny uncle of Set Width. In addition to the width, you can set left and right sidebearings as well. You can apply values to specific sets of characters, and there are lots of controls for incrementally increasing and decreasing various fields. Here is what the Set Metrics dialog looks like: At the top of the dialog box, you choose the characteristic you wish to modify: either the left or right sidebearing, or the width. Next, you choose which characters you wish to apply the changes to. We have found that Selected chars is what we normally choose. So, you can go to the Font Window, select just those characters you want to adjust, and then choose only “Selected chars” in Set Metrics. Finally, you choose what changes to make. The first line is for setting absolute values. You can set character’s attributes equal to those of a different character, or equal to a specific value. You can then add or subtract either an absolute value or a percentage. For example, you could set the left sidebearings of Å, Ã, and Ä equal to the left sidebearing of A, plus five percent: The second line is for relative changes. This line allows you to increase or decrease the selected attribute by either a number of em-units, or some percentage. You can absolutely trash your font metrics in no time at all with Set Metrics. In software interface design, there is a trade-off between really powerful commands, and really safe ones. Since we’re in the advanced section now, all the commands err on the side of being frighteningly powerful. For this reason, we advise you to Save (or Save As) your font before doing lots of Set Metrics commands, so you can Revert if something doesn’t work out. Important: Assisted Metrics Assisted metrics are halfway between completely manual metrics (Set Width and Set Metrics) and fully automatic metrics manipulation (Auto Space and Auto Kerning). Assisted metrics are for those typographers who don’t quite trust the computer to do all their metrics creation for them, but don’t want to have to do it all manually—the computer must be good for something, right? What we call “assisted metrics,” other people might refer to as “equivalence classes.” An equivalence class is a rule which dictates what other characters’ attributes should be. These rules can involve sidebearings, widths, and kerning pairs. Equivalence classes are like programming languages for fonts. That’s why not everybody likes them! The best way to explain all this is by example, so let’s dive right in. Metrics Assistance Metrics Assistance can be found under the Metrics Window. Here is how the Metrics Assistance dialog box looks, with one equivalence class: Each line of this dialog box can have its own equivalence class. When you have entered more than ten classes, a scroll bar will appear along the right side of the box, which will allow you to create more classes. You can have lots of equivalence classes; they are limited only by available memory. Insert Line and Delete Line allow for intuitive grouping when relating characters to one another. In the left-hand column, you choose the base character. This is the character whose attributes will determine the values applied to the other members of that particular class. Next, you choose what attributes the equivalence class is going to govern. Then, you choose the other members in the class: these are the letters whose values are going to be set according to those of the base character. Now you can optionally set up some difference (in value) to be applied to the base character’s attributes. For instance, you could create an equivalence class that means certain characters’ widths will be equal to a base character’s width, plus 10 percent. Next, you specify whether the class should be linked. If the Link to base checkbox is checked, whenever the values in the base character change, the corresponding values in all the other characters in that class will be automatically updated. Finally, you can link everything together. This is similar to the Link to base checkbox, but Link all means that if any of the character’s controlled attributes change, all other character’s attributes will be automatically updated (including the base character). Using these definitions, let’s explore the sample equivalence class: Our base character is “A”. That means that the attributes of the “A” will determine what the other character’s attributes are. We chose to control both the left sidebearing and the width. The other members of the equivalence class are “Å, Ã, Â, Ä, and Á.” This is a fairly typical class. All the members of it are related rather obviously to the base character. Other common classes are ones that link “E” with “Ê, Ë, É,” and so on. There is nothing added to the base value. “A” is linked to all the letters “Å, Ã, Â, Ä, and Á”, but not vice versa. When this class is applied, by accepting the dialog box, the left sidebearings and widths of “Å, Ã, Â, Ä, and Á” will all be made equal to the left sidebearing and width of the base character “A.” In addition, if you should ever edit the “A,” either by changing its width or moving the outline around so that the left sidebearing changes, all those other characters will update automatically! You can get pretty imaginative in figuring out which characters should be linked to which others. For instance, perhaps you want to link the left sidebearing of “B” to “D, E, F, H, I, K, L, M, N, P, R, and U.” Many other characters share a similar right sidebearing. Once you have set up all the equivalence classes imaginable, you probably won’t want to do so again. That’s why there is the big “Save to file” button. Of course, the real power of equivalence classes lies in the fact that once set up, you can change the values of the base characters. Therefore, if you really get into it, it is possible to set up enough classes so that you can completely determine the widths and sidebearings of the entire font by manually setting those characteristics for some small set of base characters. Removing equivalence classes is quite straightforward: simply select the base character, delete it, and click “OK.” If you open the dialog again, you will see that the class has been erased. Sometimes you will see constructs like this: “a d-m z” in the “Apply to these characters” field. This happens when you had originally entered something like “adefghijklmz”. Fontographer will detect contiguous characters, and abbreviate them with a hyphen. This can frequently save some space, because sets like “abcdefghijklmnopqrstuvwxyz” appear much shorter as “a-z.” If you want, you may also use the “a-z” convention when entering characters. The same base character can be involved in different classes. For instance, one class might connect the left sidebearing of the “A” with a bunch of other characters, while another class could connect the width of the “A” to some different characters. If you need to connect “A” with more characters than will fit in the “Apply to these characters” field, it is perfectly legal to make another class, with the same base character and same characteristics, to continue the first class. Of course, base characters for some classes can be included in the “Apply to these characters” parts of other classes, but watch out—this can get confusing really fast. If you include the base character in the “Apply to these characters” field of that same class, it will be recognized as a circular reference, and automatically removed when the dialog is accepted. If you set up mutually exclusive classes, which is legal to do but not recommended, the class furthest down in the dialog will be the one which takes precedence. Kerning Assistance Kerning Assistance is a lot like Metrics Assistance and is best explained by example. However, if you haven’t read about Metrics Assistance yet, you are strongly urged to do so before reading about Kerning Assistance. Kerning Assistance is found in the Metrics menu. Here is how the Kerning Assistance dialog looks, with a sample kerning equivalence class already entered: Just like in the Metrics Assistance dialog, Insert Line and Delete Line allow for intuitive grouping when relating characters to one another. The first column of equivalence classes are those characters which kern the same when they are the first character of a kern pair. (In other words, they will each get all the same kerning “companions” that the others have—for instance, if the font has the two kerning pairs “Te” and “Wy,” it will have the four pairs “Te, Ty, We, and Wy” after the above class takes effect.) In this example, it has been declared that all kerning pairs which begin with “T” automatically have equivalent counterparts for “W,” and so on. When more than ten classes have been entered, a scroll bar will appear to the right of the column to allow for the creation of additional classes. The second column of classes are those characters which kern the same when they are the second character in a kerning pair. So in our example, any kerning pairs which end in “a” automatically have equivalent counterparts to those ending in “o,” and vice-versa. The Link all checkboxes perform a function similar to what they do in Metrics Assistance. When these boxes are checked, any changes to kern pairs involving the members of that class will cause the other kerning pairs derived from the class to update automatically. Here are some examples: You might want to follow along in Fontographer to get the most out of these explanations. We will begin with two kerning pairs already existing—“To” and “Wa:” When we apply this set of kerning equivalence classes... ...accepting the dialog (by clicking “OK”), produces this: Fontographer has made the “To” and “Wa” kerning pair values equivalent. They are both now set at -150. In addition, Fontographer has also created the “Ta” and “Wo” kerning pairs below: In summary, we began with To = -150, Wa = -100. We ended with To = Wa = Ta = Wo = -150. Since the characters were all linked, they all became equal. Next, let’s explore what happens when we change the status of the Link all checkboxes. We’ll start again from scratch, with just these two kerning pairs: Now, however, we will apply this slightly changed set of kerning equivalence classes: The only difference is that the “T” and “W” are no longer linked together. This time, nothing has been changed for “To” or “Wa;” after all, “T” and “W” are not linked. The “a” and the “o” are, however, and so Fontographer has gone ahead and created the “Ta” and “Wo” pairs: Note that this time, the values of “Ta” and “Wo” are not the same. In summary, we began with To = -150, Wa = -100. We ended with To = Ta = -150, and Wa = Wo = -100. This class sort of says “anything-with-o will be equal to that-same-anything-with-a.” Now let’s try one more permutation. We’ll again start from scratch, with our trusty old “To” and “Wa” pairs: Now we’ll unlink “a” and “o”, but link “T” and “W.” That gives us these two classes: When we apply this set of classes, it again does nothing to the “To” and “Wa” pairs. However, Fontographer did go ahead and create the “Ta” and “Wo” pairs: This time, however, the “Ta” got the value of -100 and “Wo” got -150. This is because the “T” and “W” are linked, but the “a” and “o” are not. In summary: we began with To = -150, Wa = -100. We ended with To = Wo = -150, and Ta = Wa = -100. This class says essentially “T-with-anything will always equal W-with-that-same-anything.” Advanced Auto Spacing There is a lot more to Auto Spacing than merely what appears in the Easy mode. Switching to the Advanced mode causes a pop-up menu to appear at the top of the dialog, which allows you to move through three screens of Auto Spacing controls. The first dialog is the Which characters dialog. The which characters dialog allows you to tell Fontographer which characters should get their widths set, and which characters should be considered when choosing optimal widths. The First letter field defines which characters should get new widths. The Second letter field describes which companion characters Fontographer should consider. You may not want to have Fontographer set the widths of every character in the font. Suppose you have manually set the widths for the uppercase and lowercase characters. By selecting other characters in this field, you can have Fontographer space the rest of the font but not touch the characters you set by hand. In addition, you might not want Fontographer to consider all the possible combinations of letters in determining optimal spacing. For instance, you might want to bias the spacing to favor the uppercase and lowercase letters. By changing the selection in the Second letter field, you can optimize the spacing for the character combinations most likely to occur, and basically let Fontographer worry more about how “Th” is spaced instead of how “T‡” is spaced. The second dialog is the How much dialog, which determines the tightness or looseness of the spacing, works just like it does in the Easy mode dialog described earlier in this chapter. The third screen is the Technique dialog: This dialog allows you to customize some of the behavior of Auto Spacing. Check Monospace numerals if you want all the numbers to have the same width. Check Adjust left sidebearings if you want to let Fontographer (in its quest to achieve optimum spacing) move the character around relative to the origin. Some people are pretty adamant about where their characters sit relative to the origin, so they want Fontographer to leave them alone and do spacing solely by adjusting the widths, which is what happens if this box is left unchecked. Check Allow negative right sidebearings if you want to let Fontographer have portions of the character outlines extend to the right of the width. This will generally allow tighter spacing, but can in some cases cause certain characters to touch each other. The Threshold field contains a value which influences the grouping of sets of character pairs Fontographer is considering. Threshold is a numerical value describing the distance necessary to define a kerning pair. This value is the kerning width used to group kerning pairs for spacing. By decreasing this value, fewer kerning pairs are included in the sample set used to determine optimum spacing. Having the value too small will cause only one or two values to be in each group. Having the value too large will cause most or all of the kerning pairs to be in each group. Neither of these will be helpful. Moderation is the key for determining the best value. By controlling the spacing of the sample set used to calculate kerning pairs, you influence the final result of your autospacing. The useful range of this value is 10-80, with the best results being in the 20-30 range. Because this procedure is very complex, our advice is that if you feel the need to adjust this field, do so and see if you like it. If all of this sounds too complex then don't worry about this field—the default value will give you a good answer. Spacing direction allows you to have Fontographer change spacing only by making characters narrower (tighten), or only by making characters wider (spread), or whatever is needed (spread and tighten). Spacing technique is another difficult-to-document feature. Examine minimum distance tells Fontographer to calculate spacing by looking only at the smallest distance two characters are from each other. For serif fonts, this can result in loose spacing because serifs frequently come close to touching each other. In this case, Fontographer will be essentially spacing the font by looking at the font’s serifs and little else. Examine average distance and Examine weighted distance try to compensate for that problem by averaging the outlines a little bit—allowing the serifs to get closer if other parts of the character are further away. Of those two options, the weighted one is supposed to be a more optical kind of comparison. Because fonts vary so widely, it is practically impossible to absolutely state the differences you will see with the various techniques. Our advice: try the different settings, to see which one looks best to you. Advanced Auto Kerning Auto Kerning also has a lot of hidden functionality. It is probably at its most powerful when applied to a font in several different ways. You can have Auto Kerning operate one way on some of the character set, and another way for the rest or can also use Auto Kerning in combination with manual kerning. Of course, you can always manually adjust the results of Auto Kerning as well. You can even use Auto Kerning as a diagnostic tool for your font: by running it with different settings and then exporting the kerning and examining it, you can tell where the biggest spacing problems occur. Of course, anything with this many enhancements is going to take some practice and getting used to before you can learn to use it properly. But if you are really interested in kerning, it will be worthwhile. When you choose the Advanced mode (presumably after making out your will), a pop-up menu will appear which can navigate you through four different Auto Kerning screens. The first of these dialogs is called Which characters, and it looks something like this: This dialog lets you tell Fontographer which characters to Auto Kern. The first option, Open file of pairs allows you to select a text file of kerning pairs. Once you do that, Fontographer will do its normal Auto Kerning functions, but it will only create kerning pairs for the ones specified in that file. This is good for telling Fontographer exactly what you want done in the way of kerning. The Choose letters option allows you to pick ranges of characters to kern. For instance, under First letter, you could simply enter “T” in the These characters field, and for the Second letter field, choose “All characters.” That would make Fontographer create only kerning pairs starting with “T.” Or, it could be that you only want Fontographer to create kerning pairs among the most commonly used characters (in English, anyway), in which case you would choose “Upper case, lower case, numbers, and punctuation.” The next screen is the How many and how much dialog, and it is just like the Easy mode screen described earlier. The third screen is called Technique, and it looks like this: The technique screen allows you to choose different kerning techniques. Direction to kern is a way of having Fontographer create only kerning pairs which are negative (tighten), only kerning pairs which are positive (spread), or both (spread and tighten, which is the normal option). Pairs to kern first is useful when you are controlling the total number of kerning pairs Fontographer is allowed to make (as specified in the “How many and how much” screen). If you have told Fontographer that it can only make 500 kerning pairs, for example, and Fontographer can find 2,500 pairs which need kerning, Fontographer then needs a way to decide which 500 pairs to include. However, if you choose “Doesn’t matter,” Fontographer will simply choose the first 500 it finds. Most common pairs first will cause Fontographer to give precedence to an internal list of common pairs, and output them first to make sure they are included. If you are really concerned about telling Fontographer which kerning pairs are important, choose the “Open file of pairs” option from the first screen. Largest pairs first will cause Fontographer to order the 2,500 pairs it found from largest value to smallest, and output the 500 largest values. This is a ‘surefire’ way to set the letter combinations which need kerning the most desperately; however, you will find that many or most of these are often the goofy symbols characters, or punctuation characters (unless, of course, you told Fontographer not to consider those—which would have been smart—in the first screen). The final option, Most common then largest, is what you will probably find yourself using the most. This option has Fontographer select the ones which it thinks are most common out of the 2,500 found; then, when it has exhausted that set, it will generate the remaining pairs in order of magnitude. This way, you will get a lot of common pairs, and also the ones which need kerning the most. Kerning speed allows Fontographer to use less memory during Auto Kerning. Since Auto Kerning is already not blindingly fast, you are strongly encouraged to choose the Faster mode, and buy more memory if you need it. Kerning technique tells Fontographer which internal algorithm it should use to compare characters. “Examine minimum distance” tells Fontographer to calculate kerning by looking only at the smallest distance two characters are from each other. For serif fonts, this can result in loose kerning because serifs frequently come very close to touching each other. In this case, Fontographer will be essentially kerning the font by looking at the font’s serifs and little else. “Examine average distance” and “Examine weighted distance” try to compensate for that problem by averaging the outlines a little bit—it will allow the serifs to get closer if other parts of the character are further away. Of those two options, the weighted one is supposed to be a more optical kind of comparison. Since fonts vary so drastically, and the sets of characters you can tell Fontographer to use for Auto Kerning are limitless, there is no meaningful way to document the differences in output that these various techniques will show. Our advice, as in Auto Spacing, is to try the different methods, and decide which ones give the best results for you and your fonts. The final Auto Kerning dialog is called Exceptions, and it looks like this: Check Change existing kerning pairs if you want to let Fontographer, in the course of Auto Kerning, adjust kerning pairs which have already been created. Unchecking this locks the current pairs; if you go in the Metrics Window and manually set up a bunch of new pairs, you can now have Fontographer Auto Kern the rest, and be assured that it won’t readjust any of the ones you created. Check Don’t kern numerals with numerals if you don’t want any kerning pairs created for the numerals. While number pairs often could benefit from kerning pairs, that will mess things up if the numbers ever have to appear in vertical columns: the columns of numbers won’t line up perfectly if some of the numbers are involved in kerning pairs. Check Don’t kern lowercase to uppercase if you want Fontographer to skip all kerning pairs in which the first character is lowercase and the second character is uppercase. Having this checked is the recommended option, since those sorts of letter combinations almost never occur. The bottom parameter is among those that exert the most influence on how many kerning pairs are created (unless you limit Fontographer to a specific number of pairs, which you can do in the “How many and how much” screen). This value tells Fontographer when to make kerning pairs, and when not to. When Fontographer is considering a particular pair of letters and the kerning amount that Fontographer has decided that pair needs is greater than or equal the reference value (20 in this case), then those two characters are made into a kerning pair. If the kerning value Fontographer came up with for those two letters is smaller than this value, then it is deemed a trivial kerning pair, and Fontographer will not create a kerning pair for those two letters. You could sum up the preceding paragraph by saying that the size of every kerning pair Fontographer makes will be greater than or equal to the reference value you choose. Therefore, the larger the number you enter, the fewer kerning pairs will be created; the smaller the number, the more kerning pairs will be created. Once you have done all the kerning you think your font needs, you can do Auto Kerning one last time, step up that value to 100 or 150 em units, and be assured that the most severely needed kern pairs will be created. For instance, you might want to have kerning pairs involving just the upper and lower case, but you also might want to have 10 or 20 pairs involving the accent characters or the symbol set to ensure that the most severe cases are covered. In summary, by setting this value very high, you can have Fontographer find only the very largest pairs; conversely, you can set the value lower and have Fontographer find and create many more kerning pairs, involving smaller and smaller amounts. Chapter Six Printing Printing Samples Printing PostScript Files Printing Key Maps Printing Lists of Kerning Pairs You have just created a font, or perhaps just a few characters, and now you would like to see those characters in various point sizes and kerning combinations. Maybe you created a large “Do Not Disturb” sign for your office door and want to print it now before you actually go through the font’s installation procedures. Good news! You can print a sample of your choice any time your font is open, from any of its windows. Fontographer gives you the choice of printing a variety of samples: All characters in the font Individual characters Specific typed text Text from a file A PostScript sample with several lines of text A key map, showing all the characters in the font and their respective widths, codes, and offset specifications A complete list of all the kerning pairs in the font A character sample in assorted sizes or just one giant character A sample showing all of the points in a selected character, and optionally shows the X/Y coordinates for each point. Before you go to the Print Sample dialog, it is important to decide which printer you want to use. Fontographer will print to both PostScript and non-PostScript printers, but the quality of output will vary. If you are printing to a PostScript printer, Fontographer hints the font before downloading it to the printer. This method will give you the highest quality prints. If you are printing to a non-PostScript printer, Fontographer must draw each character unhinted, so the quality may be slightly lower. It should be noted that when Fontographer’s print samples are output to a non-PostScript printer, they only show an approximation of what the font will look like when actually installed. Subtle variations will appear depending on the type of font generated (Type 1, Type 3, TrueType, etc.). Fontographer’s print command in the File menu provides several options for printing font samples, most of which give you the opportunity to choose the point size of your printed sample. Sample text The first choice in the Sample type pop-up menu is “Sample text” which provides three printing options. Choosing “All characters” prints all the characters of the font at the point size you designate. To print a sample of all characters: 1. Choose “Print” from the File menu. 2. Choose “Sample text” from the Sample type pop-up menu. 3. Click the All characters radio button in the Print sample dialog box. 4. Click “Print.” Choosing Selected characters allows you to print characters selected in the Font Window at a designated point size. To print selected characters: 1. In the Font Window, select the characters you wish to print. 2. Choose “Print” from the File menu. 3. Choose “Sample text” from the Sample type pop-up menu. 4. Click the Selected characters radio button in the Print Sample dialog box. 5. Click “Print.” To print specific text samples: 1. Choose “Print” from the File menu. 2. Choose “Sample text” from the Sample type pop-up menu. 3. Click the lowest radio button in the Print Sample dialog box. (The lowest radio button is located to the left of the text sample box.) 4. Type your text into the text box. Fontographer allows you to type up to 256 characters in this box. If you press the Return or Enter key while you’re entering text you will begin the printing process. However, text containing carriage returns can be pasted into this text box. 5. Click “Print.“ Sample file Printing a Sample file allows you to print the contents of a text file using the current font at any given point size. To print a Sample file: 1. Choose “Print” from the File menu. 2. Select “Sample file” from the Sample type menu. 3. Enter the desired point size or use the default setting of 36 points. 4. Click “Print.” At this time Fontographer asks you to select the text file that you would like to print. PostScript file The PostScript file option allows you to choose custom PostScript samples. Fontographer then sends this file to the printer along with the font. As in the Sample file print option, the file is chosen after the Print button is selected. This option is only available with PostScript Printers. Several PostScript text files are provided with Fontographer 4.1. You may use them as is, or you may edit them with any text editor to define your own custom print sample. Key map The Key map option allows you to print a sample for the entire font or only characters that you have selected. If you select the “All characters” option, Fontographer prints pages containing all the characters in the font. The printed pages consist of rows of characters, along with their offsets, widths, and corresponding key stroke codes. Fontographer gives you the option of showing Decimal, Octal, or Hexadecimal locations. The “Print undefined characters” option allows you to print or omit “undefined” characters from your printout. If printed, these characters will be surrounded by a gray box, their Decimal, Octal, or Hexadecimal code, and the word “Undefined.” A character with a normal offset (not less than zero) will print a key map sample that looks something like this: Kerning pairs The Kerning pairs sample type option makes it is possible to print a list of kerning pairs in the font. A full page, consisting of several columns will be printed showing each pair, the number of em units of each pair, and the percent of the em square each kerning value represents. The kerning pairs can either be printed in a monospaced font or in the current font open in Fontographer. Characters The Characters sample type option provides you with four different choices: printing one full-page-sized filled character, several assorted sizes of the filled character, a sample that shows the points of the character, or a sample that shows both the points and X/Y coordinates for each point. To print a full page character sample: 1. Select the character(s) you want to print from the Font Window or open an Outline Window for the character you want to print. 2. Choose “Print” from the File menu. 3. Choose “Characters” from the Sample type pop-up menu. 4. Click the “Full page” radio button. 5. Click “Print.” This is the quickest way to print a single character. To print a text sample in assorted sizes: 1. Select the characters you want to print from the Font Window. Use any letters you want to see printed or open an Outline window for the character you want to print. 2. Choose “Print” from the File menu. 3. Choose “Characters” from the Sample type pop-up menu. 4. Click “Assorted sizes.” 5. Click “Print.” To print the other print samples repeat the printing steps but instead click on “Show points” or “Show points and coordinates.” The print header All printed samples have a similar print header. The gray box that occupies the left corner of the header indicates the print sample type. For instance, if you choose the “Kerning pairs” option, the header will read “Kerning.” If you choose “Selected characters,” the header will read “Selected,” and so on. An individual character such as the letter “S” will only have the character as a header. The rest of the box will show the name of the font, the font size, any applicable textual information and the date and time of printing. This is useful for archiving, filing, and other quality control procedures. Chapter Seven Generating and Exporting Fonts Easy or Advanced Macintosh Fonts Windows Fonts NeXT & SunPostScript Fonts Pack Your Suitcase: Bitmap Fonts Exporting Files ISOLatin1 Encoding Vectors You have been happily editing away on your new font. It appears that everything is just the way you want it. Now what? For starters, did you realize that your new font isn’t really a font yet? All you have is a bunch of characters in a database. Likely, you’ve noticed the message displayed when you save your font: “Writing Fontographer database.” You can try to install this database file as many ways as you can imagine and it will never work as a font because it has not been encoded into the proper structure. Fonts are resources which the system must have stored in a particular manner in order to be shared with applications which use fonts. In this chapter, we will discuss all the options available to you in the wonderful world of font generation. Before you do anything... Fonts on the computer all have names, and your fonts are no exception. If you have not gone into the Font Info dialog and entered a name for your font, be sure to do so before generating any font files. Otherwise, your fonts will have names like “Untitled,” which probably isn’t the name you want. Since Fontographer 4.1 allows you to save your font with a name other than the filename, confusion can arise as to what the filename of the font is. The default is for the font to be viewed by the font name specified in the Font Info dialog. For those who keep font names and filenames the same, this method works fine. If, however, you have many versions of the same font name, we recommend that you change the "View by" option to filename. This enables you to always know at a glance which file you are presently working on. Easy or Advanced? Fontographer is a do-all, end-all font editor. It is the Louvre of Font Design programs. Since there is so much to see and do in it, we created many of our dialogs with an Easy option to simplify the process. Most novice users of Fontographer will be prudent enough to select the Easy option and let the program set the desired font up properly. But more advanced readers, beware! You know just enough to be dangerous with font generation. Time for a pop quiz: What encoding do Sun fonts require? What em square does Quark™/Win prefer for TrueType fonts? What happens in NEXTSTEP installation if you have no AFM file? If you are unsure of the answers to these questions, then use the Easy option and let Fontographer make the best decisions for your fonts. You experienced readers, dive right into the Advanced dialogs and wade up to your armpits in the technical stuff; if you get stuck, then your experience will rescue you. If even that fails, then contact our Technical Support group. If your time is a terrible thing to waste, then you should also take advantage of the Easy option in the Generate Font Files dialog. In the Easy Generate Font Files dialog, you have five simple decisions to make. 1. Select the computer for which you are preparing the font. 2. Determine the format (PostScript or TrueType). 3. Choose the bitmap sizes—if any. 4. Set the folder into which you want the font files saved. 5. Decide whether you want to overwrite existing files with the same name. Fontographer will then decide the sticky issues; for instance, if an AFM file should be generated for the NeXT fonts (yes), or which encoding to select for Sun fonts (ISO Latin 1), or even how to set up the em square for Windows TrueType fonts (2,048). This is all the information necessary to use the Easy mode. The rest of this chapter covers the more complicated stuff which appears in the Advanced mode. Macintosh fonts Macintosh fonts require two particular font resources: the outline font and the FOND. In the case of PostScript fonts, these font resources are in separate files. For TrueType fonts, the two resources exist in the same file. This section will deal with the “How to” issue of generating the font resources. Much more information on how to make use of the fonts once they’re generated will be covered in Chapter 9, “Installing and Removing Fonts.” PostScript Type 1 PostScript Type 1 fonts—also known as ATM fonts—are the fonts supported by Adobe Type Manager. There are two principle advantages of Type 1 over the older Type 3 font format. When printing to low-resolution laser printers, Type 1 fonts are more legible at small point sizes. Also, ATM will render the Type 1 PostScript fonts on-screen, thus removing the need for bitmaps for every point size. Type 3 fonts have their own advantages, which will be discussed in detail in the next section. To generate Macintosh PostScript Type 1 fonts: 1. Choose “Generate Font Files” from the File menu. 2. If you are not already in the Advanced mode, click on the Advanced radio button in the Generate Font Files dialog. 3. Select “Macintosh” from the Computer: pop-up menu. In the Encoding pop-up, you have several choices. If you feel adventurous, read the story on Encoding options later in this chapter. Ninety-five percent of the time, you’ll want to use the Macintosh encoding. 4. Select “PostScript Type 1” from the “Format:” pop-up menu. 5. The ID field is useful in PostScript Type 1 fonts. Generally, just accept the number we propose. It is randomly generated in the range of 4,000,000 to 4,999,998. If you want more information on this field, then read the PostScript ID field section. 6. We recommend that you accept our default settings for the Hints and Flex checkboxes. If you want more information on these fields, then refer to our hinting and flex sections later in this chapter. 7. The Overwrite existing files checkbox is provided as a means to prevent the accidental removal of original files. If checked, Fontographer will replace older files with the same names as those currently being generated. If unchecked, Fontographer will keep the older files alone, and change the name of the conflicting file by appending a bullet ( • ) or dollar sign ($) to the file name. 8. AFM files are not used on the Macintosh. So, if you’re using a Macintosh this option is turned off by default. If we thought there was a good reason to make one, we’d have it turned on. If you want an AFM for your Macintosh font, just turn the checkbox on. 9. The default directory is indicated in the first line of the “Where to output the fonts” checkbox. If you press the “Set Folder/Directory” button, you are presented with a standard file dialog. Select the destination folder in the dialog and press “OK.” Many users find it extremely useful to be able to save the generated files to various folders on their disk. The Set Folder button displays a standard Save File dialog which enables the user to select any folder on any mounted volume as the destination folder for their fonts. The currently specified path will appear in the Generate Font Files dialog. The PostScript ID Field Type 1 fonts use this information, so if you are generating Type 1 fonts it might be to your advantage to use it. This ID is used for caching the stored bitmaps inside your printer. When a page is sent to the printer for the print job, all the characters it uses are rasterized (turned into a bitmap at the specified point size). When the print job is finished, the bitmaps are flushed from the printer’s RAM. If you have a hard drive attached to your printer for storage of outline fonts, then the newly rasterized bitmaps are saved to it in a font cache and referenced not by font name, but by the PostScript ID and point size. The operating system does not save the image as PostScript, but as a bitmap matched to the output resolution of the printer. When you print the same font a second time at the same point size, the bitmaps print much faster. Font IDs for new fonts are automatically generated in the range of 4,000,000 to 4,999,998. If you are a commercial font developer, you should contact Adobe Systems, Inc. at (415) 961-4111 for an allocated font ID. The PostScript ID Field is optional. If you do not want your font to have a unique PostScript ID, set this field to 0 and Fontographer won’t put a unique ID in your font. TrueType Developed as a joint venture by Apple and Microsoft, TrueType fonts have become a popular outline font option for Macintosh and Windows systems You can set your ascent and descent in Font info under the Element menu to adjust for the larger em square, if you wish. You might try values of 1,638 for ascent and 410 for descent to approximate the default em square’s 800/200 split. Many users like working in the larger em square, as they feel it gives them finer control of the character outline. You can, however, successfully create a TrueType font using the default em square of 1,000 built into Fontographer. To generate Macintosh TrueType fonts: 1. Choose "Generate Font Files" from the File menu. 2. If you are not already in the Advanced mode, click on the Advanced radio button in the Generate Font Files dialog. 3. Select Macintosh from the “Computer:” pop-up menu. 4. Select "TrueType" from the "Format:" pop-up menu. There is a TrueType Options dialog which appears when you click on the “TrueType Options” button. You can select the type of hints that will be used to instruct the character, select the amount of dropout control that is to be used when the characters are imaged, and select whether you would like standard or sequential character ordering. Each of these preferences is explained in the sections that follow. Include vertical and horizontal hints This checkbox can override options set in Hint Parameters and Hint Info. Refer to Chapter 10 for more information about hinting. Include diagonal hints This checkbox can override options set in “Hint Parameters” and “Hint Info.” Refer to Chapter 10 for more information about hinting. Dropout prevention A “dropout” occurs when both sides of a character’s outline or curve fall between pixel boundaries. A dropout is said to have happened when an important feature of a character fails to appear at all. Fontographer provides three levels of dropout control. If you select “None,” the TrueType Fontscaler will not attempt to find and correct dropouts. Standard dropout control will eliminate nearly all dropouts. More will eliminate all dropouts but will sometimes turn on bits which weren’t wanted. The following illustrations show the results obtained using the three levels of dropout prevention. The first “F” character is missing its cross bar because it happens to fall between two pixel boundaries. With Standard dropout prevention, the feature is restored. Notice that the outline at the right side of the top bar descends below the bar. This type of structure is called a “stub.” The character would conform to the intended outline better if a pixel were turned on in this area. Standard dropout prevention will not find stubs. The third character was drawn with “More” dropout prevention. It obviously has too many pixels turned on. (Due to a quirk in the TrueType Fontscaler, the pixel that is turned on is to the left of the end of the bar.) Character mapping Most of the time, you will never change the default, which is “Standard.” Choosing this option gives you a normal font with all the characters you would expect, in the places defined by Apple and Microsoft for a standard TrueType font. Sequential character mapping, on the other hand, means that in the generated TrueType font, characters are stored in the same order as they appear in the Font Window. This option is potentially useful for non-Roman character sets, and non-standard fonts. This is really of marginal use on the Macintosh; unless you are a real font guru, don’t worry about it. See the section on encoding vectors for how sequential character mapping can be used to mimic different font encoding. PostScript Type 3 The steps for generating a Type 3 font are almost identical to those for generating a Type 1 font. But why would anyone want to generate a Type 3 font, since it won’t work with ATM and is not as legible as Type 1 when printed to a 300 dpi printer? The advantage is the flexibility of the Type 3 format. Let’s assume you want an ornaments font that uses several tonal variations and filled-and-stroked objects in the same character. No problem with Type 3 fonts; absolutely impossible with Type 1 or with TrueType. The general rule is: for plain text fonts, go Type 1 or TrueType; for decorative or special-use fonts, experiment with Type 3. The rewards of this flexible format may surprise you. To generate Macintosh PostScript Type 3 fonts: 1. Choose “Generate Font Files” from the File menu. 2. Click on the Advanced button, and then select the Macintosh option from the “Computer:” pop-up menu. 3. You have several choices in the Encoding pop-up, If you feel adventurous, read the article about encoding options later in this chapter. Ninety-five percent of the time, you’ll want to use the Macintosh encoding. There are only two encoding vectors which make no sense for the Macintosh: ISO Latin 1 and Windows. 4. In the Format pop-up menu, select “PostScript Type 3.” 5. The ID field is NOT necessary in PostScript Type 3 fonts. (Disregard it.) 6. For more information on the Absolute coordinates and Compressed checkboxes, see the section below titled “Other Type 3 formats.” 7. The Overwrite existing files checkbox is provided as a means to prevent the accidental removal of original files. If checked, Fontographer will replace older files with the same names as those currently being generated. If unchecked, Fontographer will leave the older files alone, and change the name of the conflicting file by appending a bullet (•) or dollar sign ($) to the file name. 8. AFM files are not used on the Macintosh. This option is turned off by default. If you think you’ve got a use for the AFM, then output it. 9. Use the Set Folder/Directory button to tell Fontographer where you’d like to place your fonts. The Set Folder/Directory button displays a standard Save File dialog which enables the user to select any folder as the destination folder for their fonts. The currently specified directory will appear in the Generate Font Files dialog. 11. Press “Generate” to create your font files and close this dialog . Other Type 3 Formats The Absolute coordinates checkbox creates a file extension of “.abs.” This is an ASCII text file which is often used by sign-cutters in their plastic cutting machines which require absolute coordinates, rather than the usual relative coordinates. PostScript-Absolute requires a compressed file so when that option is checked, the Compressed option should also be checked. If you uncheck the Compressed checkbox, Fontographer will create a plain PostScript file. PostScript programmers use this to generate standard PostScript definitions of all the characters in the font. This will create a usable, if very large, Type 3 PostScript font. Compressed is the standard Type 3 font format. This font file can be used for both automatically downloadable fonts or fonts that are to be down-loaded to the printer’s hard disk. Compressed PostScript is the preferred form for generating Type 3 fonts. PostScript is stored very inefficiently inside the printer, so compression is necessary to pack as much information into the memory as possible. Fontographer’s compression scheme generates fonts which take up one-fifth the space, on the average, of uncompressed fonts. Nevertheless, a Type 3 compressed font is still larger than a Type 1 font. None This option is provided to disable outline font generation. In the remote instances when you only need a fresh bitmap file, it is not necessary to regenerate the outline font. Encoding Options The encoding of the font is the ordering of its characters. Version 4.1 of Fontographer has two dialogs which allow you to set the encoding. The Encoding pop-up in the Font Info dialog will reorganize the layout of the Font Window to display the key positions of the encoding you selected. On the other hand, when you select a different encoding in the Generate Font Files dialog, Fontographer will output the font to match the encoding you select—it won’t change the encoding displayed in the Font Window. The most commonly-used encodings for the Macintosh are Macintosh and Adobe Standard. For Windows, the prevailing choices are Windows/Windows 95 and Adobe Standard. Custom encoding allows for the custom naming of characters. The Character Information dialog (which is opened by selecting a character and choosing “Selection Info” from the Element menu) contains a name field which allows you to change the character name. Custom encoding becomes the default encoding option any time you change a character name. Custom character naming is widely used by people who design non-Roman fonts. Original encoding is like an elephant; it never forgets the encoding of the font at the time it was first opened in Fontographer. This is a very handy way to get back to where you began—wherever that was. This can be useful when opening fonts with strange encodings such as Sonata, Carta, or Zapf Dingbats. Adobe Standard encoding (ASE) is Adobe’s default encoding. In a Macintosh font, ASE will allow for the substitution of 16 characters from the Symbol font (see the tip to the left of this paragraph). Adobe Expert is the encoding required for fonts known as “expert sets.” These typically include small caps, swash caps, old style numerals, superior and inferior characters, and special text symbols. You would want to use this option only if you are creating an expert font set. ISO Latin 1 is the encoding preferred by most UNIX based systems. Select this option if you are generating a font for Sun Computers. Macintosh encoding lets you use your font on a Macintosh and maintain keystroke compatibility with other Macintosh fonts. This is very similar to Adobe Standard Encoding, but it will put something in every spot (assuming you have enough characters for that!) and won’t substitute the symbol characters. Also, characters can appear in the lower 32 slots. Windows lets you create a Windows 3.1 PostScript or TrueType .fon. On the PC, you also have the option of Windows 95. Windows Unicode Glyph List (Uni-code Glyph List on the PC) gives you access to the full character set for Windows 95. Your database will change to the appropriate size (2,147 on the Macintosh and 1,267 on the PC), and you can begin filling your character slots with characters from Greek, Cyrillic, Hebrew, Arabic, Eastern European, and other languages. OS/2 Unicode Glyph List gives PC users access to the full OS/2 character set. OEM encoding is a pretty plain encoding vector that lists character names and Unicodes. If you need more information about encoding vectors, see the end of this chapter. When should you use Hints? Hints are information placed into a character’s outline definition that adjusts it in a way that improves the character’s perceived shape when it is drawn on the screen or on the printer. For the thorny technical details of hinting, turn to Chapter 10. Hints almost always enhance the look of your font. Fontographer generates hints on by default. You would do well to leave hinting on unless you have found some problem with the printing of your font which seems to indicate inaccurate hints. So here is a toast to hinting in your fonts: use it in good health! A word about Flex Flex is helpful only for Type 1 PostScript serif fonts which meet very exacting design criteria. If your font doesn’t match this exact model, then don’t use Flex! Here’s what it does... The purpose of Flex is to eliminate slight indentations in the font’s outline at small sizes if possible, while still keeping those same indentations at larger sizes. When the Flex box is checked, Fontographer applies subtle effects to cupped serifs and tapered stems. Garamond is a good example of a font that would need Flex to properly render its serifs. A segment will only respond to Flex if it meets certain requirements: The segment must be composed of exactly two Bézier curve segments, typically created by placing a corner point, a curve point, and a corner point. The outer points must be perfectly vertical or horizontal (meaning that they have the same X or Y coordinate). The difference between the end points’ X/Y coordinates and the middle point (known as Flex height) must be 6 units or less in the Flex direction. Thus, for a serif Flex, the middle point should be at Y = 0 and the end points should be at or above Y = -6. A special note to designers of non-Roman Macintosh fonts! With the advent of Apple’s System 7.1 with WorldScript, fonts can be assigned to a particular script system. This assignment is achieved by using a range of font ID numbers from 16384 through 32767. In other words, if you wish to design a Thai font for use in the Thai system, by simply entering a font ID of 26625, you have linked the font to the Thai scripting system. Perhaps you need a right to left font. Simply use an ID # in the range for the Arabic or Hebrew systems, switch to those systems, and your font will type right to left in those operating systems! A table of the more popular script systems and their assigned ID range is at the right. For more information on this, please refer to Inside Macintosh Volume VI , pages 13-6 through 13-9. Also see the section on KCHR resources in your Using Fontographer on your Macintosh manual. Script System Font ID range Japanese Traditional Chinese Korean Arabic Hebrew Greek Cyrillic Simplified Chinese Vietnamese 16384 - 16895 16896 - 17407 17408 - 17919 17920 - 18431 18432 - 18943 18944 - 19455 19456 - 19967 28672 - 29183 31232 - 31743 Windows fonts PostScript Type 1 Five encoding vectors are accepted in Windows: Custom, Windows 3.1, Windows 95, Adobe Standard, and Adobe Expert. In the Advanced dialog, you also get to choose which files should be output, whether or not the use of “Flex” is appropriate, and if hints should be included in the font. Windows Type 1 PostScript fonts—also called ATM fonts—are intended for use in Windows with Adobe Type Manager (ATM) 2.x (or higher). ATM requires that two files be available in order for font installation to be successful: the PFB and PFM. To generate Windows PostScript Type 1 fonts: 1. Choose “Generate Font Files” from the File menu. 2. Select “PC” from the Computer pop-up menu. 3. Select the encoding option appropriate for your font. If you feel adventurous, read the section about encoding options earlier in this chapter. Ninety-five percent of the time, you’ll want to use Windows or Windows 95 encoding. There are only two encoding vectors which don’t make sense for Windows: ISO Latin 1 and Macintosh. 4. Select the PostScript Type 1 option in the Format field. 5. The option Include hints is checked by default. Generally leave this on; only turn it off if your font exhibits hint-related printing problems. 6. Output PFM file should be checked; the AFM and INF options should be unchecked in most situations. 7. Do not generate a bitmap font. They are not useful for Windows. If you will be using your font in DOS, check the requirements of the host application to see if BDF or FON files will be helpful. 8. Point Fontographer to the destination folder, via the Set Folder/Directory button. 9. When all the options have been selected, press “Generate” to close the dialog and create your font files. Other Options Overwrite existing files When this option is not checked, any file name created which conflicts with an existing file name in the same folder will have a bullet (•) or dollar sign ($) appended to its name. Output AFM file The AFM file is not used by ATM/Windows in normal installations. If you have a use for this metrics file, then check the box to generate the file. Output PFM file The PFM file is required by ATM/Windows. This option is on by default. This is a binary file containing metrics information (similar to information found in the AFM). Output INF file The INF is an information file used by some older DOS applications for name and style information. In rare situations, it can also be read by ATM and used with the AFM file in lieu of the PFM. Only generate this file if you know you will use it; otherwise, its presence may cause confusion when installing fonts in ATM/Windows. The CFG file CFG files are used by Adobe’s Font Foundry DOS program for installing PostScript Type 1 fonts into major DOS programs, such as WordPerfect. Since this is the only use of a CFG file, we decided to show you how to make one, rather than generate a dummy file every time you generate fonts. If you were to create a CFG file for the Nova family, it would look like the following example. [We have included comments to help explain things.] If you must install fonts into WordPerfect DOS and the like, then use this as a model for writing your CFG. All lines preceded by “#” are comments and do not need to be in the actual file. When you are finally ready to run the Installer program, copy the PFB, PFM, INF, AFM, and the CFG files to their own disk. # Installer Configuration File # Contains package specific information used # by the install program. DISKSIZE 713 # size in kbytes of floppy disk used FILE INSTALL.CFG 1 # the CFG file must be named “install.cfg” FILE README 1 # It looks for a Readme file to install # Font entry fields: # Fontname - PostScript name of the typeface # Filename - 5 character PC filename base # Number of the disk this filetype sits on or # zero if not present. # One entry for each filetype PFB, INF, CTF, # PFM, ABF, and AFM. FONT Nova-Normal NON_1 1 0 1 0 1 FONT Nova-Oblique NOO_1 1 0 1 0 1 FONT Nova-Bold NOB_1 1 0 1 0 1 FONT Nova-BoldOblique NOBO_1 1 0 1 0 1 DISKNAME 1 ‘Font Disk’ # Give the name -label- of the floppy PKGNAME novafam TrueType for Windows To use Windows TrueType fonts, you must have Microsoft Windows 3.1 or later. When generating TrueType for Windows, Fontographer makes use of a dialog which allows you to determine the level of hinting, dropout, encoding and character mapping options. Activate this dialog by pressing the TrueType Options button. (Choices in this dialog may override the selection made in the Encoding pop-up menu.) 1. For your Computer, select “PC.” 2. Select the “TrueType” option in the Outline font to output Format field. 3. You can disregard the ID field as that pertains only to PostScript Type 1 fonts. 4. If you are curious, press the TrueType Options button; otherwise, skip to step 6. The default setting are shown below. Generally leave them alone, but turn off hinting if your font exhibits printing problems. The Use Symbol encoding and Sequential Character Mapping should only be selected if you wish to create a “ Wingdings” style symbol font for Windows, or if you have some other special purpose (like getting some additional characters, etc.). For more information, see the next section, “Symbol Encoded PC fonts.” Confine screen characters to em-square will not change the way characters print. Include extra TrueType tables is provided for future use by Windows applications. 5. Press “OK” to close the TrueType Options dialog. 6. Windows users may generate a bitmap font (.fon) for use with Windows TrueType fonts, or for use when printing to a non-postscript printer, such as dot matrix. 7. Check the “Overwrite existing files” option. When this option is not checked, any filename created which conflicts with an existing filename in the same folder will have a bullet (•) or dollar sign ($) appended to its name. 8. Point Fontographer to the folder where you wish to save your fonts, via the Set Folder/Directory button. 9. For more on choosing the PC Family, see the section on FONs. 10. When all the options have been selected, press “Generate” to close the dialog and generate the font. Symbol Encoded PC fonts When you generate a PC TrueType font, a checkbox allows for a special symbol encoding option. This is the same encoding format used in the dingbats font in Windows 3.1, “Wingdings.” Rather than converting your PC font to the ANSI key layout (which results in some missing characters), Symbol encoding will output every character in your database from the Dec 32 (space) to Dec 255 (caron), except 127 and 160. All characters in the normal ASCII (Dec 32-126) sequence will remain accessible by striking the alpha-numeric keys. But since extended ASCII characters on the PC are accessed by typing the ALT+0XXX key combination, if you want the copyright symbol (©), hold down the ALT key and use the numeric keypad to type 0 followed by the decimal number for the copyright symbol, which is 169. Do likewise for every other extended ASCII (Dec 128-255) character. If you have any characters mapped to decimal 0-31, they won’t be output to the PC with Symbol encoding, nor will anything in Dec 127 (delete) or Dec 160 (non-breaking space). When Symbol encoding is selected, sequential character ordering should also be used. All other TrueType preferences do apply. Be sure to select “Decorative” from the PC Family pop-up in the Advanced Generate Font Files dialog for your Symbol encoding to work. Important: PostScript Type 3 This option has become a relic. We include it for those one or two folks who are using older applications which may require it. The instructions for using Type 3 fonts are very similar to the Type 1 discussion. The only additional note is that you will have to provide a bitmap screen font for the application. You can start with our BDF format and use some conversion tool in DOS to make it into a usable format. NeXT and Sun PostScript fonts Whether you are running NEXT-STEP on a sleek, black, discontinued slab, or a 486 machine, your NeXT Type 1 PostScript fonts will behave similarly. For that matter, using your Sun fonts on a SPARCStation requires very similar font generation. Both formats generate only two files: the AFM and the PostScript file. The AFM (Adobe Font Metrics) contains the metrics information. The Post-Script file—the one with the “.next” or “.sun” extension—is a text file which contains a small header followed by the encrypted PostScript routines. The difference in the files for the two operating systems is indeed small. The naming conventions required for both platforms are the same. Always insert a hyphen between the family name and style type (this is highly recommended for all platforms). Thus, the italicized face from the Nova family will be “Nova-Oblique.” If you get this correct, then all the fonts should line right up by their lineage. Unless you really need the special features of the Advanced mode, you are better off keeping to the Easy font generation routine for UNIX fonts. This will ensure that the encoding is optimum and that the AFM file is generated. If you generated fonts in the Advanced mode, but failed to generate the AFM file, then do not proceed—go back to the Generate Font Files dialog and generate the AFM file. You won’t get anywhere installing the font without it. For more about hints, flex, and other options, see the articles earlier in this chapter and in Chapter 10. Pack your Suitcase: Bitmap fonts Bitmaps vs. Outlines In these days of Type 1 and TrueType fonts, the relationship between screen fonts and printer fonts is getting blurred. There was a time when they were both represented by individual files. But in the present day of Adobe Type Manager, the TrueType page description language, Display Post-Script, and NEWS, every platform we support can render the outline file to both the screen and the printer. So does that mean we never have to deal with bitmaps again? Not really. Think about your screen image. It is represented by a lot of pixels, each either turned on or turned off. When the font is rendered to the screen, the font display driver maps out the bits it wants turned on. That is essentially a “bitmap” created “on the fly.” Now, consider the printed image. What is the “resolution” of your printer? Most laser printers print at least 300 dots (read “bits”) per inch. Thus, in one letter-size page, the particular page description driver determines which of the 8,145,000 dots it wants on; the ones turned on attract the black toner, the others don’t. But before the page is printed, the intelligent printer has mapped out each bit and saved the page in RAM as a bitmap image. You can imagine how much memory that 300 dpi bitmap can consume! While bitmap font files are rapidly becoming obsolete, bitmaps themselves—whether they are screen images or page descriptions—are always with us. Understanding their relationship will enable better use of fonts in general. Fontographer 4.1 generates three varieties of bitmap fonts: one specifically for use as a screen image on the Macintosh, the .bmap (called “NFNT” in the bitmap selection box), one used as a screen image in Windows, the .fon—and one intended for distribution to other platforms (which may require further customization)—the BDF. The bitmap sizes entered in the Bitmap Information dialog are stored in your database. These are not output to a file until you say so in the Generate Font files dialog. If you won’t be hand-editing your bitmaps, then there is no compelling reason to use this dialog. Adding bitmap sizes Type the desired point sizes in the Bitmap sizes to output field and click “Generate.” Adding a new size will automatically generate all the characters for the newly added size(s). They are limited to sizes between 1 and 255 points. Deleting bitmap sizes Unwanted bitmap sizes can be removed from the database file by removing the size from the “Bitmap point sizes” field in the “Bitmap Information” dialog. Fontographer will display a warning message before it deletes the bitmaps. Bitmap format None This option is provided to disable bitmap generation. In the instances where simple changes have been made to the outline font (like adjusting a BCP, which does not always affect the bitmap), it is not necessary to regenerate the bitmaps. Also, when you have no need of a bitmap, there is no reason to take the time to generate one. You can also avoid the bitmap generation process by having no sizes in the Bitmap sizes to output field. NFNT This information is specific to the Macintosh. If you have no desire to comprehend the mysteries of the NFNT and FOND, then you can proceed to the next section. Fontographer generates NFNTs (New FoNTs) for the Macintosh. NFNT ID numbers can range up to 32,767. The NFNT is the repository for the bitmaps. The spacing, kerning, naming, and metrics information is handled by the FOND. With the arrival of TrueType fonts on the Macintosh and System 7, the NFNT is being phased out and in many situations today, it is not even required. But the FOND remains a necessary part of the font handling equation on the Macintosh. BDF This option is provided to generate Adobe Bitmap Distribution Format (BDF) files. BDF’s can be used for creating screen fonts on computer systems such as the Sun, DEC, and DOS. Information on the format of the BDF file can be found on CompuServe. GO MACROMEDIA and choose Fontographer Forum, Data Library 12. The Macintosh file you should download is named “BDF.SIT.” FON This option gives you FON file generation for use in Windows. FONs allow you to have hand-tuned bitmaps which you can use as screen fonts in Windows. Fontographer 4.1 generates FONs at the standard Windows VGA resolution of 96 dpi. In order for the bitmaps from Fontographer on the Macintosh to match up to the higher resolution bitmaps in Windows, you must apply a 4/3 factor to the source bitmap. In other words, if you want the bitmap to be 12 points in Windows, then start with a 16 point bitmap on the Macintosh. The formula to use would be Windows bitmap size X ÷ 3 = bitmap size in Fontographer. Fontographer 4.1 for Windows converts the bitmap sizes automatically. (For more information, refer to the section on Creating bitmaps for cross-platform use.) The ID Field The ID field is provided to assign the font family ID. Bitmap font families (essentially, FONDs) are identified internally by a unique number ranging between 1 and 16,383. Numbers between 1 and 1,023 have already been used by Apple and other font developers, and they should not be used. Apple has reserved font numbers between 3,071 and 16,383 for commercial use. However, when creating a font, you must try to choose a value that does not conflict with those assigned to existing fonts. This is especially important with respect to your printing devices, like those at your service bureau. Macromedia recommends that you assign font numbers ranging from 1,024 to 3,070 to try to avoid those conflicts. Conflicting font IDs are automatically renumbered during font installation, but this renumbering can cause confusion when the font is used. Many Macintosh programs identify fonts by ID number, not by name. Thus, if you move a document from one computer to another, the displayed fonts may change if numbering conflicts occurred during font installation. The best way to avoid this problem is to number all your fonts uniquely so the conflict won’t occur. Again, we recommend you start with font family ID 1024 and count up; this is the best compromise we can suggest for now. The menu name The menu name is the name which will be used in the font menu on the Macintosh. This field becomes the FOND resource name so we don’t recommend making the name radically different. For instance, don’t enter a menu name of “Skipper” for a font named “Gilligan”! Creating bitmaps for cross-platform use Because of the difference in monitor display resolution between the Macintosh and the PC, you'll need to use the table below to create bitmaps at sizes that will display properly on both platforms. You'll notice that a few NFNT font sizes will not be available for cross-platform use. The table isn't all-inclusive, so you can create larger bitmaps in the same proportions as those shown in the table. FROM the Macintosh... TO the PC Create a point .FON to get a point .FON 5 4 7 5 8 6 9 7 11 8 12 9 13 10 15 11 16 12 17 13 19 14 20 15 FROM the PC... TO the Macintosh Create a point NFNT to get a point NFNT 4 5 5 7 6 8 7 9 8 11 9 12 10 13 11 15 12 16 13 17 14 19 15 20 Exporting files Fontographer is equipped with an Export menu item. From within its submenu you may export EPS files or metrics files. From the Macintosh you can also export PICT files, while Windows users have the option of exporting encoding. In this chapter we will discuss exporting your font characters as graphics for use in applications such as Macromedia FreeHand or Claris’ MacDraw Pro. For more about exporting metrics, and the Fontographer Metrics file, refer to Chapter 5, Metrics: Spacing and Kerning. Exporting EPS files The “EPS” option generates an Adobe Illustrator 1.1-style EPS (Encapsulated PostScript) format file. Programs such as Macromedia FreeHand and Adobe Illustrator can open this file format directly for editing purposes. And once you open your EPS file, you can add or delete points, reshape, distort or fill characters with a specific color or pattern, or change the stroke weight. To export an EPS file: 1. Select the “EPS” format from the Export pop-up in the File menu. 2. Select the point size necessary for your intended use. 3. Choose an “Output” option. All characters will export all the characters in your font. Selected characters will export only the characters currently selected in the Font Window; or from the Outline Window, the active character. Choosing “Sample text” will bring up a text entry box for you to type the text string you would like to export. 4. When you export an EPS file, Fontographer allows you to choose your own file name. 5. Once you’ve chosen the folder to export the file to, press the “Save” button and the font will be exported without further comment. To export an AI file from the PC: Follow the steps for exporting an EPS file, but be sure to select the “AI” format from the Export pop-up in the File menu. Exporting Macintosh PICT Fontographer provides the PICT file option to generate PICT format files. Fontographer creates an object-oriented PICT that stores the points and paths of the characters. To export a PICT file: 1. Select the “PICT” Format. 2. Select the point size necessary for your intended use. 3. Determine the “Output” option. “All characters” will export all the characters in your font. “Selected characters” will export only the characters currently selected in the Font Window; or from the Outline Window, the active character. Choosing “Sample text” will bring up a text entry box for you to type the text string you would like to export. 4. When you export a PICT file, Fontographer allows you to choose your own file name. Once you’ve chosen the folder to export the file to, press the “Save” button Fontographer will export the font. Programs such as MacDraw and MacDraw II, Canvas, Desk Draw, Cricket Draw, and Macromedia FreeHand can read this file format directly for editing purposes. So now you can reshape, distort, or enhance characters, or fill them with specific colors or patterns, and even change their line sizes. Exporting Encoding Fontographer 4.1 for Windows lets you export a font's encoding to a Windows text file. This allows you to use the encoding from one font for use in creating a new one—which comes in particularly handy if you want to design your own non-Roman font without starting from scratch. For the how-to’s of exporting encoding, refer to Using Fontographer on Your PC. ISO Latin1 Encoding vectors Char name Dec # notdef 0-31 space 32 exclam 33 quotedbl 34 numbersign 35 dollar 36 percent 37 ampersand 38 quoteright 39 parenleft 40 parenright 41 asterisk 42 plus 43 comma 44 minus 45 period 46 slash 47 zero-nine 48-57 colon 58 semicolon 59 less 60 equal 61 greater 62 question 63 at 64 A-Z 65-90 bracketleft 91 backslash 92 bracketright 93 asciicircum 94 underscore 95 quoteleft 96 a-z 97-122 braceleft 123 bar 124 braceright 125 asciitilde 126 .notdef 127-143 dotlessi 144 grave 145 acute 146 circumflex 147 tilde 148 macron 149 breve 150 dotaccent 151 dieresis 152 .notdef 153 ring 154 cedilla 155 .notdef 156 hungarumlaut 157 ogonek 158 caron 159 space 160 exclamdown 161 cent 162 sterling 163 currency 164 yen 165 brokenbar 166 section 167 dieresis 168 copyright 169 ordfeminine 170 guillemotleft 171 logicalnot 172 hyphen 173 registered 174 macron 175 degree 176 plusminus 177 twosuperior 178 threesuperior 179 acute 180 mu 181 paragraph 182 periodcentered 183 cedilla 184 onesuperior 185 ordmasculine 186 guillemotright 187 onequarter 188 onehalf 189 threequarters 190 questiondown 191 Agrave 192 Aacute 193 Acircumflex 194 Atilde 195 Adieresis 196 Aring 197 AE 198 Ccedilla 199 Egrave 200 Eacute 201 Ecircumflex 202 Edieresis 203 Igrave 204 Iacute 205 Icircumflex 206 Idieresis 207 Eth 208 Ntilde 209 Ograve 210 Oacute 211 Ocircumflex 212 Otilde 213 Odieresis 214 multiply 215 Oslash 216 Ugrave 217 Uacute 218 Ucircumflex 219 Udieresis 220 Yacute 221 Thorn 222 germandbls 223 agrave 224 aacute 225 acircumflex 226 atilde 227 adieresis 228 aring 229 ae 230 ccedilla 231 egrave 232 eacute 233 ecircumflex 234 edieresis 235 igrave 236 iacute 237 icircumflex 238 idieresis 239 eth 240 ntilde 241 ograve 242 oacute 243 ocircumflex 244 otilde 245 odieresis 246 divide 247 oslash 248 ugrave 249 uacute 250 ucircumflex 251 udieresis 252 yacute 253 thorn 254 ydieresis 255 Unencoded Characters Char name Dec # Lslash 256 lslash 257 Scaron 258 scaron 259 Zcaron 260 zcaron 261 quotesingle 262 dagger 263 bullet 264 trademark 265 florin 266 ellipsis 267 OE 268 oe 269 endash 270 emdash 271 quotedblleft 272 quotedblright 273 Ydieresis 274 slash 275 guilsinglleft 276 guilsinglright 277 fi 278 fl 279 daggerdbl 280 quotesinglbase 281 quotedblbase 282 perthousand 283 Macintosh Encoding vector Char name Dec # NUL [do not use] 0 Eth 1 eth 2 Lslash 3 lslash 4 Scaron 5 scaron 6 Yacute 7 yacute 8 HT [do not use] 9 LF [do not use] 10 Thorn 11 thorn 12 CR [do not use] 13 Zcaron 14 zcaron 15 DLE 16 DC1 17 DC2 18 DC3 19 DC4 20 onehalf 21 onequarter 22 onesuperior 23 threequarters 24 threesuperior 25 twosuperior 26 brokenbar 27 minus 28 multiply 29 RS 30 US 31 space 32 exclam 33 quotedbl 34 numbersign 35 dollar 36 percent 37 ampersand 38 quotesingle 39 parenleft 40 parenright 41 asterisk 42 plus 43 comma 44 hyphen 45 period 46 slash 47 zero-nine 48-57 colon 58 semicolon 59 less 60 equal 61 greater 62 question 63 at 64 A-Z 65-90 bracketleft 91 backslash 92 bracketright 93 asciicircum 94 underscore 95 grave 96 a-z 97-122 braceleft 123 bar 124 braceright 125 asciitilde 126 DEL [do not use] 127 Adieresis 128 Aring 129 Ccedilla 130 Eacute 131 Ntilde 132 Odieresis 133 Udieresis 134 aacute 135 agrave 136 acircumflex 137 adieresis 138 atilde 139 aring 140 ccedilla 141 eacute 142 egrave 143 ecircumflex 144 edieresis 145 iacute 146 igrave 147 icircumflex 148 idieresis 149 ntilde 150 oacute 151 ograve 152 ocircumflex 153 odieresis 154 otilde 155 uacute 156 ugrave 157 ucircumflex 158 udieresis 159 dagger 160 degree 161 cent 162 sterling 163 section 164 bullet 165 paragraph 166 germandbls 167 registered 168 copyright 169 trademark 170 acute 171 dieresis 172 notequal 173 AE 174 Oslash 175 infinity 176 plusminus 177 lessequal 178 greaterequal 179 yen 180 mu 181 partialdiff 182 summation 183 product 184 pi 185 integral 186 ordfeminine 187 ordmasculine 188 Omega 189 ae 190 oslash 191 questiondown 192 exclamdown 193 logicalnot 194 radical 195 florin 196 approxequal 197 Delta 198 guillemotleft 199 guillemotright 200 ellipsis 201 nbspace 202 Agrave 203 Atilde 204 Otilde 205 OE 206 oe 207 endash 208 emdash 209 quotedblleft 210 quotedblright 211 quoteleft 212 quoteright 213 divide 214 lozenge 215 ydieresis 216 Ydieresis 217 fraction 218 currency 219 guilsinglleft 220 guilsinglright 221 fi 222 fl 223 daggerdbl 224 periodcentered 225 quotesinglbase 226 quotedblbase 227 perthousand 228 Acircumflex 229 Ecircumflex 230 Aacute 231 Edieresis 232 Egrave 233 Iacute 234 Icircumflex 235 Idieresis 236 Igrave 237 Oacute 238 Ocircumflex 239 apple 240 Ograve 241 Uacute 242 Ucircumflex 243 Ugrave 244 dotlessi 245 circumflex 246 tilde 247 macron 248 breve 249 dotaccent 250 ring 251 cedilla 252 hungarumlaut 253 ogonek 254 caron 255 Adobe Standard Encoding vector Char name Dec # .notdef 0-31 space 32 exclam 33 quotedbl 34 numbersign 35 dollar 36 percent 37 ampersand 38 quoteright 39 parenleft 40 parenright 41 asterisk 42 plus 43 comma 44 hyphen 45 period 46 slash 47 zero-nine 48-57 colon 58 semicolon 59 less 60 equal 61 greater 62 question 63 at 64 A-Z 65-90 bracketleft 91 backslash 92 bracketright 93 asciicircum 94 underscore 95 quoteleft 96 a-z 97-122 braceleft 123 bar 124 braceright 125 asciitilde 126 .notdef 127-160 exclamdown 161 cent 162 sterling 163 fraction 164 yen 165 florin 166 section 167 currency 168 quotesingle 169 quotedblleft 170 guillemotleft 171 guilsinglleft 172 guilsinglright 173 fi 174 fl 175 .notdef 176 endash 177 dagger 178 daggerdbl 179 periodcentered 180 .notdef 181 paragraph 182 bullet 183 quotesinglbase 184 quotedblbase 185 quotedblright 186 guillemotright 187 ellipsis 188 perthousand 189 .notdef 190 questiondown 191 .notdef 192 grave 193 acute 194 circumflex 195 tilde 196 macron 197 breve 198 dotaccent 199 dieresis 200 .notdef 201 ring 202 cedilla 203 .notdef 204 hungarumlaut 205 ogonek 206 caron 207 emdash 208 .notdef 209-224 AE 225 .notdef 226 ordfeminine 227 .notdef 228-231 Lslash 232 Oslash 233 OE 234 ordmasculine 235 .notdef ae 236-240 241 .notdef 242-244 dotlessi 245 .notdef 246 .notdef 247 lslash 248 oslash 249 oe 250 germandbls 251 .notdef 252-255 Windows 3.1 Encoding vector Char name Dec # .notdef 0-31 space 32 exclam 33 quotedbl 34 numbersign 35 dollar 36 percent 37 ampersand 38 quotesingle 39 parenleft 40 parenright 41 asterisk 42 plus 43 comma 44 hyphen 45 period 46 slash 47 zero-nine colon 48-57 58 semicolon 59 less 60 equal 61 greater 62 question 63 at 64 A-Z 65-90 bracketleft 91 backslash 92 bracketright 93 asciicircum 94 underscore 95 grave 96 a-z 97-122 braceleft 123 bar 124 braceright 125 asciitilde 126 .notdef 127-129 quotesinglebase 130 florin 131 quotedblbase 132 ellipsis 133 dagger 134 daggerdbl 135 circumflex 136 perthousand 137 Scaron 138 guilsinglleft 139 OE 140 .notdef 141-144 quoteleft 145 quoteright 146 quotedblleft 147 quotedblright 148 bullet 149 endash 150 emdash 151 tilde 152 trademark 153 scaron 154 guilsinglright 155 oe 156 .notdef 157-158 Ydieresis 159 nbspace 160 exclamdown 161 cent 162 sterling 163 currency 164 yen 165 brokenbar 166 section 167 dieresis 168 copyright 169 ordfeminine 170 guillemotleft 171 logicalnot 172 minus 173 registered 174 macron 175 degree 176 plusminus 177 twosuperior 178 threesuperior 179 acute 180 mu 181 paragraph 182 periodcentered 183 cedilla 184 onesuperior 185 ordmasculine 186 guillemotright 187 onequarter 188 onehalf 189 threequarters 190 questiondown 191 Agrave 192 Aacute 193 Acircumflex 194 Atilde 195 Adieresis 196 Aring 197 AE 198 Ccedilla 199 Egrave 200 Eacute 201 Ecircumflex 202 Edieresis 203 Igrave 204 Iacute 205 Icircumflex 206 Idieresis 207 Eth 208 Ntilde 209 Ograve 210 Oacute 211 Ocircumflex 212 Otilde 213 Odieresis 214 multiply 215 Oslash 216 Ugrave 217 Uacute 218 Ucircumflex 219 Udieresis 220 Yacute 221 Thorn 222 germandbls 223 agrave 224 aacute 225 acircumflex 226 atilde 227 adieresis 228 aring 229 ae 230 ccedilla 231 egrave 232 eacute 233 ecircumflex 234 edieresis 235 igrave 236 iacute 237 icircumflex 238 idieresis 239 eth 240 ntilde 241 ograve 242 oacute 243 ocircumflex 244 otilde 245 odieresis 246 divide 247 oslash 248 ugrave 249 uacute 250 ucircumflex 251 udieresis 252 yacute 253 thorn 254 ydieresis 255 Windows 95 Encoding vector Char Dec # Unicode Name .notdef 0-31 32 0020 space 33 0021 exclam 34 0022 quotedbl 35 0023 numbersign 36 0024 dollar 37 0025 percent 38 0026 ampersand 39 027 quotesingle 40 0028 parenleft 41 0029 parenright 42 002a a asterisk 43 002b plus 44 002c c comma 45 002d hyphen 46 002e period 47 002f f slash 48 0030 zero 49 0031 one 50 0032 two 51 0033 three 52 0034 four 53 0035 five 54 0036 six 55 0037 seven 56 0038 eight 57 0039 nine 58 003a colon 59 003b semicolon 60 003c less 61 003d equal 62 003e greater 63 003f question 64 0040 at 65 0041 A 66 0042 B 67 0043 C 68 0044 D 69 0045 E 70 0046 F 71 0047 G 72 0048 H 73 0049 I 74 004a J 75 004b K 76 004c L 77 004d M 78 004e N 79 004f O 80 0050 P 81 0051 Q 82 0052 R 83 0053 S 84 0054 T 85 0055 U 86 0056 V 87 0057 W 88 0058 X 89 0059 Y 90 005a Z 91 005b bracketleft 92 005c backslash 93 005d bracketright 94 005e asciicircum 95 005f underscore 96 0060 grave 97 0061 a 98 0062 b 99 0063 c 100 0064 d 101 0065 e 102 0066 f 103 0067 g 104 0068 h 105 0069 i 106 006a j 107 006b k 108 006c l 109 006d m 110 006e n 111 006f o 112 0070 p 113 0071 q 114 0072 r 115 0073 s 116 0074 t 117 0075 u 118 0076 v 119 0077 w 120 0078 x 121 0079 y 122 007a z 123 007b braceleft 124 007 125 007d braceright 126 007e asciitilde 161 00a1 exclamdown 162 00a2 cent 163 00a3 sterling 164 00a4 currency 165 00a5 yen 166 00a6 brokenbar 167 00a7 section 168 00a8 dieresis 169 00a9 copyright 170 00aa ordfeminine 171 00ab guillemotleft 172 00ac logicalnot 174 00ae registered 175 00af overscore 176 00b0 degree 177 00b1 plusminus 178 00b2 twosuperior 179 00b3 threesuperior 180 00b4 acute 181 00b5 mu1 c bar 182 00b6 paragraph 183 00b7 middot 184 00b8 cedilla 185 00b9 onesuperior 186 00ba ordmasculine 187 00bb guillemotright 188 00bc onequarter 189 00bd onehalf 190 00be threequarters 191 00bf questiondown 192 00c0 Agrave 193 00c1 Aacute 194 00c2 Acircumflex 195 00c3 Atilde 196 00c4 Adieresis 197 00c5 Aring 198 00c6 AE 199 00c7 Ccedilla 200 00c8 Egrave 201 00c9 Eacute 202 00ca Ecircumflex 203 00cb Edieresis 204 00cc Igrave 205 00cd Iacute 206 00ce Icircumflex 207 00cf Idieresis 208 00d0 Eth 209 00d1 Ntilde 210 00d2 Ograve 211 00d3 Oacute 212 00d4 Ocircumflex 213 00d5 Otilde 214 00d6 Odieresis 215 00d7 multiply 216 00d8 Oslash 217 00d9 Ugrave 218 00da Uacute 219 00db Ucircumflex 220 00dc Udieresis 221 00dd Yacute 222 00de Thorn 223 00df germandbls 224 00e0 agrave 225 00e1 aacute 226 00e2 acircumflex 227 00e3 atilde 228 00e4 adieresis 229 00e5 aring 230 00e6 ae 231 00e7 ccedilla 232 00e8 egrave 233 00e9 acute 234 00ea ecircumflex 235 00eb edieresis 236 00ec igrave 237 00ed iacute 238 00ee icircumflex 239 00ef idieresis 240 00f0 eth 241 00f1 ntilde 242 00f2 ograve 243 00f3 oacute 244 00f4 ocircumflex 245 00f5 otilde 246 00f6 odieresis 247 00f7 divide 248 00f8 oslash 249 00f9 ugrave 250 00fa uacute 251 00fb ucircumflex 252 00fc udieresis 253 00fd yacute 254 00fe thorn 255 00ff ydieresis 256 0100 Amacron 257 0101 amacron 258 0102 Abreve 259 0103 abreve 260 0104 Aogonek 261 0105 aogonek 262 0106 Cacute 263 0107 cacute 264 0108 Ccircumflex 265 0109 ccircumflex 266 010a Cdot 267 010b cdot 268 010c Ccaron 269 010d ccaron 270 010e Dcaron 271 010f dcaron 272 0110 Dslash 273 0111 dmacron 274 0112 Emacron 275 0113 emacron 276 0114 Ebreve 277 0115 ebreve 278 0116 Edot 279 0117 edot 280 0118 Eogonek 281 0119 eogonek 282 011a Ecaron 283 011b ecaron 284 011c Gcircumflex 285 011d gcircumflex 286 011e Gbreve 287 011f gbreve 288 0120 Gdot 289 0121 gdot 290 0122 Gcedilla 291 0123 gcedilla 292 0124 Hcircumflex 293 0125 hcircumflex 294 0126 Hbar 295 0127 hbar 296 0128 Itilde 297 0129 itilde 298 012a Imacron 299 012b imacron 300 012c Ibreve 301 012d ibreve 302 012e Iogonek 303 012f iogonek 304 0130 Idot 305 0131 dotlessi 306 0132 IJ 307 0133 ij 308 0134 Jcircumflex 309 0135 jcircumflex 310 0136 Kcedilla 311 0137 kcedilla 312 0138 kgreenlandic 313 0139 Lacute 314 013a lacute 315 013b Lcedilla 316 013c lcedilla 317 013d Lcaron 318 013e lcaron 319 013f Ldot 320 0140 ldot 321 0141 Lslash 322 0142 lslash 323 0143 Nacute 324 144 nacute 325 0145 Ncedilla 326 0146 ncedilla 327 0147 Ncaron 328 0148 ncaron 329 0149 napostrophe 330 014a Eng 331 014b eng 332 014c Omacron 333 014d omacron 334 014e Obreve 335 014f obreve 336 0150 Odblacute 337 0151 odblacute 338 0152 OE 339 0153 oe 340 0154 Racute 341 0155 racute 342 0156 Rcedilla 343 0157 rcedilla 344 0158 Rcaron 345 0159 rcaron 346 015a Sacute 347 015b sacute 348 015c Scircumflex 349 015d scircumflex 350 015e Scedilla 351 015f scedilla 352 0160 Scaron 353 0161 scaron 354 0162 Tcedilla 355 0163 tcedilla 356 0164 Tcaron 357 0165 tcaron 358 0166 Tbar 359 0167 tbar 360 0168 Utilde 361 0169 utilde 362 016a Umacron 363 016b umacron 364 016c Ubreve 365 016d ubreve 366 016e Uring 367 016f uring 368 0170 Udblacute 369 0171 udblacute 370 0172 Uogonek 371 0173 uogonek 372 0174 Wcircumflex 373 0175 wcircumflex 374 0176 Ycircumflex 375 0177 ycircumflex 376 0178 Ydieresis 377 0179 Zacute 378 017a zacute 379 017b Zdot 380 017c zdot 381 017d Zcaron 382 017e zcaron 383 017f longs 385 0192 florin 386 01fa Aringacute 387 01fb aringacute 388 01fc AEacute 389 01fd aeacute 390 01fe Oslashacute 391 01ff oslashacute 392 02c6 circumflex 393 02c7 caron 394 02c9 macron 395 02d8 breve 396 02d9 dotaccent 397 02da ring 398 02db ogonek 399 02dc tilde 400 02dd hungarumlaut 402 0384 tonos 403 0385 dieresistonos 404 0386 Alphatonos 405 0387 anoteleia 406 0388 Epsilontonos 407 0389 Etatonos 408 038a Iotatonos 409 038c Omicrontonos 410 038e Upsilontonos 411 038f Omegatonos 412 0390 iotadiere-sistonos 413 0391 Alpha 414 0392 Beta 415 0393 Gamma 416 0394 Delta 417 0395 Epsilon 418 0396 Zeta 419 0397 Eta 420 0398 Theta 421 0399 Iota 422 039a Kappa 423 039b Lambda 424 039c Mu 425 039d Nu 426 039e Xi 427 039f Omicron 428 03a0 Pi 429 03a1 Rho 430 03a3 Sigma 431 03a4 Tau 432 03a5 Upsilon 433 03a6 Phi 434 03a7 Chi 435 03a8 Psi 436 03a9 Omega 437 03aa Iotadieresis 438 03ab Upsilondieresis 439 03ac alphatonos 440 03ad epsilontonos 441 03ae etatonos 442 03af iotatonos 443 03b0 upsilondieresis-tonos 444 03b1 alpha 445 03b2 beta 446 03b3 gamma 447 03b4 delta 448 03b5 epsilon 449 03b6 zeta 450 03b7 eta 451 03b8 theta 452 03b9 iota 453 03ba kappa 454 03bb lambda 455 03bc mu 456 03bd nu 457 03be xi 458 03bf omicron 459 03c0 pi 460 03c1 rho 461 03c2 sigma1 462 03c3 sigma 463 03c4 tau 464 03c5 upsilon 465 03c6 phi 466 03c7 chi 467 03c8 psi 468 03c9 omega 469 03ca iotadieresis 470 03cb upsilondieresis 471 03cc omicrontonos 472 03cd upsilontonos 473 03ce omegatonos 475 0401 afii10023 476 0402 afii10051 477 0403 afii10052 478 0404 afii10053 479 0405 afii10054 480 0406 afii10055 481 0407 afii10056 482 0408 afii10057 483 0409 afii10058 484 040a afii10059 485 040b afii10060 486 040c afii10061 487 040e afii10062 488 040f afii10145 489 0410 afii10017 490 0411 afii10018 491 0412 afii10019 492 0413 afii10020 493 0414 afii10021 494 0415 afii10022 495 0416 afii10024 496 0417 afii10025 497 0418 afii10026 498 0419 afii10027 499 041a afii10028 500 041b afii10029 501 041c afii10030 502 041d afii10031 503 041e afii10032 504 041f afii10033 505 0420 afii10034 506 0421 afii10035 507 0422 afii10036 508 0423 afii10037 509 0424 afii10038 510 0425 afii10039 511 0426 afii10040 512 0427 afii10041 513 0428 afii10042 514 0429 afii10043 515 042a afii10044 516 042b afii10045 517 042c afii10046 518 042d afii10047 519 042e afii10048 520 042f afii10049 521 0430 afii10065 522 0431 afii10066 523 0432 afii10067 524 0433 afii10068 525 0434 afii10069 526 0435 afii10070 527 0436 afii10072 528 0437 afii10073 529 0438 afii10074 530 0439 afii10075 531 043a afii10076 532 043b afii10077 533 043c afii10078 534 043d afii10079 535 043e afii10080 536 043f afii10081 537 0440 afii10082 538 0441 afii10083 539 0442 afii10084 540 0443 afii10085 541 0444 afii10086 542 0445 afii10087 543 0446 afii10088 544 0447 afii10089 545 0448 afii10090 546 0449 afii10091 547 044a afii10092 548 044b afii10093 549 044c afii10094 550 044d afii10095 551 044e afii10096 552 044f afii10097 553 0451 afii10071 554 0452 afii10099 555 0453 afii10100 556 0454 afii10101 557 455 afii10102 558 0456 afii10103 559 0457 afii10104 560 0458 afii10105 561 0459 afii10106 562 045a afii10107 563 045b afii10108 564 045c afii10109 565 045e afii10110 566 045f afii10193 567 0490 afii10050 568 0491 afii10098 570 1e80 Wgrave 571 1e81 wgrave 572 1e82 Wacute 573 1e83 wacute 574 1e84 Wdieresis 575 1e85 wdieresis 576 1ef2 Ygrave 577 1ef3 ygrave 579 2013 endash 580 2014 emdash 581 2015 afii00208 582 2017 underscoredbl 583 2018 quoteleft 584 2019 quoteright 585 201a quotesinglbase 586 201b quotereversed 587 201c quotedblleft 588 201d quotedblright 589 201e quotedblbase 591 2020 dagger 592 2021 daggerdbl 593 2022 bullet 594 2026 ellipsis 595 2030 perthousand 596 2032 minute 597 2033 second 598 2039 guilsinglleft 599 203a guilsinglright 600 203c exclamdbl 601 203e radicalex 602 2044 fraction 603 207f nsuperior 605 20a3 franc 606 20a4 afii08941 607 20a7 peseta 609 2105 afii61248 610 2113 afii61289 611 2116 afii61352 612 2122 trademark 613 2126 Ohm 614 212e estimated 616 215b oneeighth 617 215c threeeighths 618 215d fiveeighths 619 215e seveneighths 621 2190 arrowleft 622 2191 arrowup 623 2192 arrowright 624 2193 arrowdown 625 2194 arrowboth 626 2195 arrowupdn 627 21a8 arrowupdnbse 629 2202 partialdiff 630 2206 increment 631 220f product 632 2211 summation 633 2212 minus 635 2219 periodcentered 636 221a radical 637 221e infinity 638 221f orthogonal 639 2229 intersection 640 222b integral 641 2248 approxequal 642 2260 notequal 643 2261 equivalence 644 2264 lessequal 645 2265 greaterequal 647 2302 house 649 2310 revlogicalnot 650 2320 integraltp 651 2321 integralbt 653 2500 SF100000 654 2502 SF110000 655 250c SF010000 656 2510 SF030000 657 2514 SF020000 658 2518 SF040000 659 251c SF080000 660 2524 SF090000 661 252c SF060000 662 2534 SF070000 663 253c SF050000 664 2550 SF430000 665 2551 SF240000 666 2552 SF510000 667 2553 SF520000 668 2554 SF390000 669 2555 SF220000 670 2556 SF210000 671 2557 SF250000 672 2558 SF500000 673 2559 SF490000 674 255a SF380000 675 255b SF280000 676 255c SF270000 677 255d SF260000 678 255e SF360000 679 255f SF370000 680 2560 SF420000 681 2561 SF190000 682 2562 SF200000 683 2563 SF230000 684 2564 SF470000 685 2565 SF480000 686 2566 SF410000 687 2567 SF450000 688 2568 SF460000 689 2569 SF400000 690 256a SF540000 691 256b SF530000 692 256c SF440000 694 2580 upblock 695 2584 dnblock 696 2588 block 697 258c lfblock 698 2590 rtblock 699 2591 ltshade 700 2592 shade 701 2593 dkshade 702 25a0 filledbox 703 25a1 H22073 704 25aa H18543 705 25ab H18551 706 25ac filledrect 707 25b2 triagup 708 25ba triagrt 709 25bc triagdn 710 25c4 triaglf 711 25ca lozenge 712 25cb circle 713 25cf H18533 714 25d8 invbullet 715 25d9 invcircle 716 25e6 openbullet 718 263a smileface 719 263b invsmileface 720 263c sun 721 2640 female 722 2642 male 723 2660 spade 724 2663 club 725 2665 heart 726 2666 diamond 728 266a musicalnote 729 266b musicalnotedbl 730 f001 fi 731 f002 fl 732 fb01 fi2 733 fb02 fl2 Chapter Eight Creating a font Family Families: Windows, SUN, NEXTSTEP Font Families on the Macintosh How Style Merger Works Do you look like your brother... or sister? Do you both have brown eyes, or red hair? Or does one of you look like your mother and the other like your father? How about your parents; do they resemble your grandparents? Well, just as your own family has differences and similarities... so do your fonts. A family of fonts is defined as all the styles of one typeface. The group shares a common design but can differ in attributes such as character width, weight, and posture (i.e., Roman vs. Italic). A typical computer [font] family unit frequently contains four fonts—Plain, Italic, Bold, and BoldItalic—in all point sizes. To understand and appreciate the advantage of font families, imagine having twenty typefaces with four styles each installed in your system. How would that look in your font menu? It would look like 80 fonts, since every typeface would appear four times, representing each of its styles. It would also be inconvenient to drag your mouse up the font menu and search through the 80 entries every time you wanted to make your existing font bold. Using font families improves this scenario in two ways: it lets you use the command keys on the keyboard to change the style of the font, and it shortens your font menu by three-fourths since there is just one listing for each family rather than one for each font. It is easy to appreciate the “urge to merge” your fonts. In order to build families, you must use appropriately named fonts. In other words, their names must have the same base part. So you cannot choose Helvetica-Bold as the bold style in the Nova family; you must choose a font whose name starts with Nova. When you name your font in Fontographer’s Font Information dialog (which appears when you select “Font Info” from the Element menu), you have to be sure to name each font properly. This means you need to make sure the Family Name text box has the same name in it for all the styles of the family you’re building. This is important to remember for making families on all platforms. Families: Windows,SUN, NeXTSTEP Making the family name the same is all you need to do to create a font family for Windows, NeXTSTEP and SUN environments. For more information about these systems, see Chapter 7, “Generating and Exporting Fonts.” Font families on the Macintosh If your font is a logo typeface or one that contains special symbols, you probably don’t need to make a family of fonts. In fact, many people use Fontographer to make only one version of a typeface. In these cases, family information is not important. But if you are ambitious, and have made more than one member of a font family, you can use Style Merger® to bring those styles together into a family of Macintosh typefaces. Making a Macintosh font family requires using Style Merger, a Macromedia utility that comes with your Fontographer 4.1 package. Style Merger takes styled Macintosh screen fonts and merges them into one Macintosh screen font family. Macintosh font family relationships are coordinated by special resources located in the screen font suitcases. Style Merger will work with both PostScript and TrueType fonts. It never affects any fonts or font files already on your computer; it simply reads existing fonts and creates a new file containing a family. This allows you to quickly and easily build a family containing Plain, Bold, Italic, and BoldItalic fonts. If you use Fontographer to create four styled fonts of the same typeface, Style Merger can merge the four separate fonts into one family, thus saving space in your font menu. Before you run Style Merger, generate any fonts you want to include in your family (see Chapter 7). For this example, we started with these font files: Now let’s run Style Merger. It is so easy to use that the complete process takes only four steps. To create a font family with Style Merger: 1. Double-click on Style Merger’s icon. Style Merger’s main window appears. 2. Click on the button marked “Plain” and then choose the bitmap or TrueType file that contains the Plain style of your font (“Nova-Normal.bmap” in this example). 3. Press the applicable buttons and then choose the appropriate bitmap font files for your Bold, Italic, and BoldItalic faces. 4. Press the Save Family button and OK the dialog to save your new family. You can even change the name of the suitcase file if you like. That’s all there is to it! How Style Merger works Style Merger’s main window is mostly a collection of buttons. The button that you should press next always has a bold outline around it, to guide you through the family building process (pressing the Return key always has the effect of clicking on the currently bolded button). Buttons which you are not supposed to press yet are dimmed so that you can’t press them by mistake. On the left side of the window are the style buttons: Plain, Bold, Italic, and BoldItalic. When you start up Style Merger, Plain is the only button you can initially press (other than the Help button, which is always available). In addition, Plain has a bold outline around it, indicating that this is the button you should press first. Pressing the Plain button begins the process of creating a family. A file selection dialog box appears, allowing you to choose your fonts. Say you choose “Nova-Normal,” because that is the Plain style of Nova. Clicking “Plain” always wipes out any previously selected fonts and allows you to start over. So if you are making a family, and you choose the wrong fonts by accident, simply press “Plain” to automatically remove your mistakes and start over. After you choose the Plain bitmap, the little suitcase file image to the right of the button changes from gray to black, indicating that you’ve already selected a Plain font. In addition, a proposed new family name appears just above the Save Family button on the right. This name isn’t set in stone: you can change it when you press the Save Family button. Notice that the Save Family button is disabled until you choose the second font to merge into the family. Now that you’ve chosen a Plain face, Style Merger enables the Bold, Italic, and BoldItalic buttons, and it also puts a bold outline around the Bold button, directing you to press this button next. Of course, you can choose to add Bold, Italic, and BoldItalic styles in any order you want, so you can choose Italic next if you feel like being a rebel. To continue with the example, just click on the Bold button and add fonts in order. Clicking on the Bold button brings up the file selection dialog again, just like it did for Plain. This time, choose the Bold style, which in this example is “Nova-Bold.” Once you have accepted the file selection dialog box, the name “Nova-Bold” appears next to the Bold button, and the Save Family button becomes active. This is because you could save the family at this point and be finished. This is useful when you don’t have all four styles to merge into a family. Style Merger bolds the Italic button next, so just choose “Nova-Oblique” as the italic face, and “Nova-BoldOblique” for the bold italic face. If you look at the Style Merger window, you can see that each style button has a name beside it, indicating that you can build a complete family now. And sure enough, Style Merger has bolded the Save Family button to tell you to do so. When you click on that button, a dialog box appears asking where you want to save the family and what it should be called. Typically, Style Merger suggests names like “Nova-Normal.fam.” This will be the name of the suitcase file Style Merger creates. The part of the name before the period is what the font will be called in your font menus (it becomes the name of the FOND resource). For instance, if you accept the name “Nova-Normal.fam,” Style Merger creates a file named “Nova-Normal.fam,” and when you install that new family, you’ll see “Nova-Normal” in your font menus. If you want to see just “Nova” you should tell Style Merger to save the family as “Nova.fam.” After you press “OK” in the standard file dialog box, Style Merger builds the family and saves it. Then it cleans out all the font selections, and is ready to build another family. The window now looks exactly as it did when the program first started. If you just want to build one family, you can quit now. To do so, type “Command-q,” choose “Quit” from the File menu, or simply click in the close box of Style Merger’s window. If you want to create more families, you can leave Style Merger running to make some more. Things you should know about Style Merger Style Merger won’t prevent you from choosing incorrect faces for particular styles. For instance, you could be a wise guy and tell Style Merger to use Nova-Bold for the italic face. Your family will work just the way you set it up, but it would be a little confusing. It could be called a “dysfunctional family,” or one that boldly goes where no italic has gone before. Please, do yourself a favor and always make sure the fonts you use to build families with are not installed. Always close any fonts installed with Suitcase, Master Juggler, Font Porter or whatever you installed them with; then build your family and reinstall your fonts. If you are using Style Merger and notice that the little suitcase icons change from capital “A’s” to “B’s”, that means that the font you have just chosen was already installed. In technical terms, you are hosed at this point, and you may have to restart your Macintosh. If you have never heard of Suitcase, or Master Juggler, or “installed fonts,” then don’t worry; you most likely will not encounter this situation. Important: Never try to open fonts that are in your System Folder. Adobe Type Reunion (ATR) compatibility Style Merger builds a completely functional Macintosh font family: there is only one entry in the font menu for the font, and all the appropriate styles are referenced automatically when different styles are applied to the font. This is the recommended method for creating font families. However, some people like to create font families that work in conjunction with a product called Adobe Type Reunion™, which makes your fonts display in the font menu in a manner similar to the Adobe typefaces. Each of these faces has an entry for each style which appears in a hierarchical menu off of the font menu. For example, the Futura family has a single entry in the font menu, and to the right of the name is an arrow indicating that there are multiple fonts under that listing. If you press on the “Futura” font listing you will see a menu of four styles off to the right: Light, Light Oblique, Book, Book Oblique, Bold, Bold Oblique. It is easy to create font families that behave like this. All you need is Style Merger, ResEdit, and a couple of minutes. Be aware, however, that if you create ATR-style families, everyone who uses that font without Adobe Type Reunion will have the penalty of seeing four entries in their font menu (one for each style). The first step in creating ATR-compatible font families is to make sure you have named each font properly. Type the name you want to see in the font menu in the Family Name field of the Font Information dialog. In the Style Name field specify the name you want to appear for that particular style, prefixed with a hyphen. In the next example, we create a font family called “PetesFont,” which consists of four styles. For all four fonts, enter “PetesFont” in the Family Name field. Then for the plain font, leave the Style Name field blank. For the other fonts, enter “-Bold,” “-Italic,” and “-BoldItalic” in the Style Name field for the bold, italic, and bolditalic fonts, respectively. Of course, you don’t have to use these names; Wacko, Slanto, and ClapDappo would work just as well—maybe better! The thing that’s complicated about doing this stuff is linking together the subfamilies. For example, suppose you were using PetesFont-Italic in an application, and you changed to the bold style. The selected font should automatically change to PetesFont-BoldItalic, not merely make a fake bold of the italic face. In addition, if you were using PetesFont-Bold, and you selected the italic style, that should also switch to PetesFont-BoldItalic since it was already bolded. So the first thing to do is build the two subfamilies. PetesFont-Bold has to link to PetesFont-BoldItalic for the italic, and PetesFont-Italic has to link to PetesFont-BoldItalic for the bold. This is easy to do. To build subfamilies: 1. Open Style Merger and choose the bold font for the Plain style, and the bolditalic font for the Italic style. This makes a family with the bold font as the base font, and the bolditalic font as the italic style. We don’t add any more fonts here, because there isn’t a bolder version of the bold, nor is there a boldbolditalic. 2. Simply choose “Save Family” and keep the name “PetesFont-Bold.fam.” This builds one of the subfamilies. 3. To build the other subfamily, choose “PetesFont-Italic” as the Plain style, and then “PetesFont-BoldItalic” as the Bold, and create a family called “PetesFont-Italic.fam.” This builds the other subfamily. Now you are ready to build the main family, which links the bold, italic, and bolditalic with the plain. 4. Run Style Merger on the “PetesFont” fonts as described in the initial example with the Nova family. This is the main family, so save the family with the name you would like to see in the font menu. In Step 4, make sure you use the “.bmap” files rather than the “.fam” files—this is an extremely easy mistake to make if you’re not careful. Important: The final step involves ResEdit. What you want to do is merge the three families you just created and the bolditalic font into one file. 5. Copy each FOND resource from PetesFont-Bold.fam, PetesFont-Italic.fam, and PetesFont-Bold-Italic.bmap into the file called PetesFont.fam. This is easy to do in ResEdit; just launch ResEdit, open up these four files, and copy and paste the FONDs from the three other suitcases into PetesFont.fam. To use ResEdit: 1. Open ResEdit 2.0 or a later version. 2. Open the three font families you just created plus the bolditalic bitmap file. 3. Using the PetesFont.fam file as your repository, copy each FOND in the other fonts into it. When you have done that, there should be a total of four FONDs in “PetesFont.fam.” This can easily be checked in ResEdit by double-clicking on the little FOND icon in the window for the “PetesFont.fam file.” Note that you don’t need to copy any of the NFNT resources; the construction of the main font family in Style Merger copied in all the NFNT’s for you. All you need are the four FONDs brought together into the main family. 4. Close ResEdit, save your changes, and install the file “PetesFont.fam.” Now you have an ATR-compatible font family! Chapter Nine Installing and Removing Fonts Macintosh PostScript Fonts Windows Fonts Windows Fonts from Macintosh to DOS Porting NeXT PostScript Fonts to NEXTSTEP PostScript Fonts in NEXTSTEP Porting Sun PostScript Fonts to SUN Removing Installed Fonts You’ve devoted a lot of time to getting your font ready to use. You’ve tweaked, scaled, and skewed the characters, adjusted the kerning and spacing, printed out a sample to see what the characters look like, and finally generated the font. And since you’re perfectly happy with your creation, you’re ready to install the font and actually use it! Telling your system about your new font is the final step toward this goal. The manner in which the system is made aware of the font depends totally upon system configuration and computer platform. We will examine the specific steps for each platform. If your pulse is getting rapid, then think on this and be thankful: you only need to install a font once to make it usable in all the programs on your computer. Installing Macintosh PostScript fonts Macintosh PostScript fonts consist of two parts: a PostScript file which is sometimes known as the “printer font”... ...and a bitmap file which is sometimes known as a “suitcase file” because it looks like a little suitcase. Each of these files must be installed in its proper place for a PostScript font to work. Installing PostScript fonts in System 6 or earlier Installing a PostScript font in Macintosh System 6 (or earlier versions) requires using Font/DA Mover. You can find Font/DA Mover on the Utilities 2 disk which came with your Macintosh system software. 1. Quit all open programs. You can’t make changes to the System file while programs that use fonts are open. 2. Drag your font’s PostScript file into your System Folder, making sure that you do not put it inside any other folder within the System Folder. 3. Double-click on the bitmap file to start Font/DA Mover. When Font/DA Mover is active, look at the number in the top left section of your menu bar. It must be 3.8 or larger. If the number is 3.6 or smaller, you will not be able to see the fonts you made with Fontographer. You’ll need to get rid of the old version and obtain a copy of the newer version from your Apple Dealer or local user group. 4. Click the Open button and then open your System file. A list will appear of all fonts currently residing in your System file. 5. Select the bitmap sizes of your font that you want to install by dragging through their names. 6. Click the Copy button to copy the fonts from your bitmap file into the System file. 7. Click the Quit button to exit from Font/DA Mover. 8. If you’re running under MultiFinder, choose “Restart” from the Special menu to ensure all the programs on your computer will recognize the new font. Your font is now installed. The font name will appear in the font menu of any application that has a font menu. Installing PostScript fonts in System 7.0.x Font installation in System 7.0 is considerably simpler than with earlier Macintosh Systems. 1. Quit all open programs. You can’t make changes to the System file while programs that use fonts are open. 2. Select both the PostScript and bitmap files by dragging the pointer around both. 3. Drag both files on top of the closed System Folder and drop them there. 4. The System will ask you if you want to install the files in their proper places. Click “OK” to install the font. 5. The System will put the PostScript file into the Extensions folder and will automatically install your bitmap fonts in the System file. Your font is now installed. The font name will appear in the font menu of any application that has a font menu. You may now use it in any document and print it to any printer. Now, you’re ready for the next task. Installing PostScript fonts in System 7.1 or later versions System 7.1 simplifies font installation even further and doesn’t cause the bitmap file to disappear. You don’t even have to quit all your programs before installing a font. Wow! This is really easy! 1. Select both PostScript and bitmap files by dragging the pointer around each. 2. Drag both files on top of your System Folder and drop them there. The System will ask you if you want it to put the fonts into the Fonts folder inside your System folder. Click “OK” to install the font. Both PostScript and bitmap files are moved into the Fonts folder. Your font is now installed. The font name will appear in the Font menu for each application that has a Font menu. Don’t put your Fontographer database file in System 7.1’s Fonts folder. Doing so could cause problems for Fontographer when you generate your fonts. Important: Installing PostScript fonts with Suitcase or MasterJuggler Suitcase (from Fifth Generation Systems, Inc.) and MasterJuggler (from ALSoft) are both System extensions that make it easier to install and deinstall fonts. Both allow you to create a separate folder anywhere on your computer’s hard disk that can hold all your fonts, installed or not. They also allow you to install any fonts available on your computer, no matter where they are. Refer to your Suitcase or Master Juggler manual for detailed instructions on installing fonts with each program. Make sure that any time you use Fontographer’s Generate Font Files command, the font you’re working on is not installed with Suitcase or MasterJuggler. If you accidentally leave a font installed and then choose “Generate Font Files” Fontographer will inform you if there’s a problem and give you a chance to de-install the font before regenerating. Important: Macintosh TrueType font installation TrueType fonts exist all in one file. There are no separate screen and printer files like there are for PostScript fonts. Instead, everything comes in a single suitcase file. Installing TrueType Before you can install TrueType fonts in System 6, you will need to obtain the TrueType INIT from your Apple dealer or an on-line service. Drag the TrueType INIT into your System folder and choose “Restart” from the Finder’s Special menu to install it. Another requirement for installing TrueType fonts in System 6 is that you have Font/DA Mover 4.1, which is available from your Apple dealer. No earlier version of Font/DA Mover is capable of handling TrueType fonts. To install TrueType fonts: 1. Quit all open programs. You can’t make changes to the System file while programs that use fonts are open. 2. Double-click on the TrueType suitcase (the one with “.suit” appended to the end of its name) to start Font/DA Mover 4.1. Your TrueType outline appears as a font name without a size number after it, while any bitmap sizes you may have in the file show up with their size numbers after them. You may choose to install all the bitmap sizes, or none of them. Remember that TrueType fonts do not depend upon the bitmaps to properly display a screen image of the font. 3. Click the Open button and then open your System file. 4 Select all the fonts you want to install by dragging through their names. 5. Click the Copy button to copy the fonts from your suitcase into the System file. 6. Click the Quit button to exit Font/DA Mover 4.1. 7. If you’re running under Multi-Finder, choose “Restart” from the Special menu to ensure all the programs on your computer will recognize the new font. Your font is now installed. The font name will appear in the font menu for each application that has a font menu. Installing TrueType fonts in System 7.0.x System 7 simplifies the installation of TrueType fonts because you don’t have to use Font/DA Mover. 1. Quit all open programs. You can’t make changes to the System file while programs that use fonts are open. 2. Drag the suitcase file(s) containing your font(s) on top of the System folder and release the mouse button. The System will ask you if you want to install the fonts. 3. Click “OK” to start the installation process. The System incorporates your suitcase file and installs your fonts. Your font is now installed. The font name will appear in the font menu for each application that has a font menu. Installing TrueType fonts in System 7.1 or later System 7.1 simplifies font installation even more than previous versions and doesn’t cause the suitcase file to disappear. 1. Drag the suitcase file containing your font on top of the System folder icon and release the mouse button. The System will ask you if you want to store your fonts in the Fonts folder. 2. Click “OK” to install your fonts. The System moves your suitcase into the Fonts folder, where it is automatically installed. Your font is now installed. The font name will appear in the font menu in any application that has a font menu. Be sure not to put your Fontographer database file in System 7.1’s Fonts folder. Doing so could cause problems for Fontographer when you generate font files. Important: Installing Windows fonts PC fonts generated by Fontographer are intended for use in Windows 3.x, Windows 95 and Windows NT. PostScript fonts may be used in 3.0 or later versions with the help of Adobe Type Manager. (While PostScript fonts can be used in non-Windows environments, they are not directly supported.) TrueType fonts require Windows 3.1 (or later versions), which has increased functionality in its Control Panel to enable TrueType font installation. There is a difference in the implementation of PostScript and TrueType fonts in Windows, but they do have one similarity: neither depends upon a bitmap file for the screen image. Installing PostScript fonts in Windows 3.x or higher with Adobe Type Manager 2.x Installing PostScript fonts in Windows requires that you have Adobe Type Manager (ATM) 2.0 or later versions. Windows 95 requires ATM 3.02 or later. ATM creates screen fonts from the PostScript outlines and allows you to print your PostScript fonts to any printer attached to your Windows computer. PostScript fonts in Windows consist of two parts, a .PFB file (PostScript Font Binary) and a .PFM file (PostScript Font Metrics). Both files are necessary. Make sure you have generated both files from Fontographer before proceeding. 1. Double-click on the ATM Control Panel icon in the Program Manager to start it. The ATM Control Panel displays. 2. Click on the Add button. 3. Scroll the Directories list until you find the drive/directory containing your fonts. 4. Double-click on the drive/directory to show the names of the fonts on the disk. 5. Select the fonts you want to install from the Available Fonts list. You can drag through the list to select multiple fonts. 6. Click the Add button to install your font(s). 7. Click the Exit button in the ATM Control Panel. ATM 2.0 will display a dialog asking you to restart Windows. 8. Press “Restart Windows.” If you didn’t see this dialog, everything’s okay; you’re just using ATM 2.5 or later, so this doesn’t apply to you. Your font is now installed. The font name will appear in the font menu in every application that has a font menu. Windows TrueType and .fon installation TrueType and .fon fonts for Windows consist of a single file with the extension .ttf (TrueType Font) or .fon. You must be running Windows 3.1 (or later versions) to use TrueType or .fon fonts, since no previous version of Windows has TrueType or .fon capability. Installing TrueType and .fon fonts in Windows 3.1 or later versions 1. Open the Windows Control Panel by double-clicking on its icon. 2. Open the Fonts panel by double-clicking on its icon. The Fonts panel appears. 3. Click on the Add button. The Add Fonts panel appears. 4. Choose the appropriate disk drive from the Drives list. 5. Choose the appropriate directory from the Directories list. 6. Select the names of the fonts you want to install from the List of Fonts or click “Select All.” 7. Click “OK” to install your font(s). The Add Fonts panel closes. Your font is now installed. The font name will appear in the font menu in every application that has a font menu. Installing TrueType Fonts in Windows 95 1. Open the Windows 95 control panel by double-clicking on its icon or trace from the start button. Inside the control panel you’ll see a fonts folder that lists all of the .ttf fonts currently installed on the system. 2. Select Install New Font from the File menu to bring up the Add Fonts dialog box. You’ll see three windows labeled List of Fonts, Folders, and Drives to help you in locating the fonts to be installed. 3. Click on the active folder in the Folders window (it should show the default Win95 directory). Clicking on this folder brings you back to the root directory, C:. 4. Scroll down until you see the folder where you told Fontographer to generate the .ttf fonts and click on that folder. The fonts will now display by name in the List of Fonts window directly above the Folders. 5. Be sure that the Copy fonts to folder box is checked. 6. Select the fonts you want to install, or click on Select All, and the fonts will be copied into the Windows 95 system fonts folder. You can look in the fonts folder to verify that everything copied okay and you’re done. Transferring Windows fonts from the Macintosh to your PC Before you can install the fonts you created on your Macintosh in Windows, you’ll have to get them copied to your PC. There are so many ways to accomplish this that we hesitate to get specific. The only key to getting files across platforms is to be sure that you don’t let the process change the binary data in any way. In other words, just change the disk format, not the data format. Transferring fonts from the PC to your Macintosh Fontographer 4.1 for Windows ships with a utility that builds Macintosh font files from files that you produce in Windows. For more information on using the Macromedia PC to Macintosh Font Conversion Utility (MMPC2MAC), refer to Part II of Using Fontographer on Your PC. Porting NeXT PostScript fonts to NEXTSTEP This is often the trickiest part of porting fonts. If you’re fortunate enough to have your Macintosh, DOS, and UNIX® boxes on a network, then you already know what to do. Otherwise, read on. From the Macintosh If you’re using NEXTSTEP™ 3.0 or later (including NEXTSTEP/486), you can read Macintosh diskettes directly. Simply transfer your font files from the Mac to the NEXTSTEP environment on a Macintosh high-density diskette. All versions of NEXTSTEP (and NEXTSTEP/486) can read DOS diskettes. To transfer your Macintosh-created NeXT fonts, first rename all your files so that they conform to the DOS 8.3 naming conventions. Make a record of the original file names (minus the “.next” extension, which isn’t used on the NeXT). Use the default transfer in Apple File Exchange to copy your NeXT fonts to a DOS floppy. Once you have copied them from the DOS floppy into your NEXTSTEP drive, rename the DOS files with their full NeXT names. Installing PostScript fonts in NEXTSTEP You can install your fonts in one of 2 places: “~/Library/Fonts” or “~/LocalLibrary/Fonts” (the tilde denotes your home directory). Installing fonts into “~/Library/Fonts” will make these fonts accessible only to you, while installing fonts into “/LocalLibrary/Fonts” will allow anyone using the workstation to access them. 1. Quit all open applications that use fonts. Otherwise, currently running applications won’t see the newly installed fonts. 2. If you are going to install your fonts into “~/Library/Fonts,” log in as yourself. If you are going to install your font into “/LocalLibrary/Fonts,” you must have access to that directory, which usually means you have to log in as ‘root’. 3. Create a new folder in the Fonts directory and move both the PostScript and “.afm” files into it. 4. Change the name of the folder to the name of the font, and add a “.font” extension. If you named your font “MyCondensedLight-Italic” then you should name your folder “MyCondensedLight-Italic.font.” Its icon will change to a font file icon once you name it and press “Return.” Now your path should read: “~/Library/Fonts/MyCondensedLight-Italic.font.” Or, if you’re choosing the local library, it should read: “~/LocalLibrary/Fonts/MyCondensed-LightItalic.font.” 5. If you are installing your font into “~/Library/Fonts,” you can install your font simply by launching any application that uses fonts. This will automatically load the fonts. Continue to step number 6 if you’re installing into “/LocalLibrary/Fonts.” 6. If you are going to install your font into “/LocalLibrary/Fonts,” you will need to launch the Terminal application and complete the following steps: Type: “buildafmdir” followed by the correct path to your fonts: “buildafmdir/LocalLibrary/ Fonts.” Then type: “cacheAFMData” followed by the correct path to your fonts: “cacheAFMData/ LocalLibrary/Fonts.” That is all there is to it! You should now be able to use your fonts in any NeXT program that has a font menu. On the NeXT, the Bold command will select the Bold style. Choosing Italic selects its proper style. Selecting Heavier/Lighter will also move you through the available weights. If you still have trouble using your NeXT fonts, refer to the section on generating a NeXT font and make sure you didn’t miss something there. If the font doesn’t appear in the font list at all, then suspect the .afm file. If the font appears in the font list, but you get the “Unusable Font” error when selecting the font from the Fonts panel, double check the FontName, FamilyName, etc. in the .afm and PostScript files. If the font appears in Courier, make sure the PostScript and .afm files refer to the same font. If you’ve tried all these options, and it still doesn’t work, then it is finally time to call our Technical Support department. Important: Porting Sun PostScript fonts to the SUN Sun® Microsystems Inc. has released an operating system named NEWS® which renders PostScript Type 1 fonts. In order to use the Sun fonts from Fontographer 4 for the Macintosh, you must be running under Solaris® 2.x/Open Windows™ 3 on your Sun Workstation™. Remember when we said that being on a network is a blessing when it comes to porting fonts to UNIX? Well, for Sun stations, it’s a MUST. Without special software, the Sun will not read a Mac or DOS formatted diskette. So there is not much direction we can give you on porting your fonts to the Sun if your Sun station is an island. Get connected! Installing PostScript fonts Are you running under Solaris 2/Open Windows 3 on your Sun Workstation? If not, then upgrade your OS before reading any further. NEWS, SPEED, and Type 1 fonts are worth the upgrade. Ready? This is going to be simple... especially if you have ever tried installing F3 fonts in Solaris 1! 1. First, you’ll need to create a directory to install the fonts in. Let’s say “/Fonts”. So the first step is to create the directory “/Fonts,” and a place to keep the “.afm” (Adobe Font Metrics) files that go with them. # cd / # mkdir Fonts # cd Fonts # mkdir afm 2. Copy the font file to the directory you just created (/Fonts) # cp SpiffyFont.ps /Fonts Make sure that the file ends in a “.ps”, or you will not be able to download the font to the printer when you print. 3. Next you need to copy the “.afm” file to where the system can access it. # cp SpiffyFont.afm /Fonts/afm The font files are now in all the right places. 4. Now for the really hard part. Run the Console (command tool) and you’ll run a system utility that will set up some things that OpenWindows needs in order to use the fonts correctly. This utility is “bldfamily,” and is part of the OpenWindows distribution. For more information on this program, refer to your system documentation. # cd /Fonts # bldfamily -d. What “bldfamily” does is create a list of all of the fonts in this directory and places it in the file “Families.List.” OpenWindows needs this file to correctly use the fonts that you’ve installed, so don't delete it. The “-d.” that we typed in after “bldfamily” is just telling it which directory to look in (“.” is a way of specifying the current directory). 5. Now tell the OpenWindows to use this “library” of fonts that you’ve just created. The easiest way to do this is to edit your “.xinitrc” file (or you can just type it in the command tool in OpenWindows): # xset +fp /Fonts This command will add the directory “/Fonts” to the list of places that OpenWindows looks for fonts (the font path, therefore +fp). To remove a directory from this list, type in: # xset -fp /Fonts By adding and deleting directories from the font path, you can create several different font directories, and choose to use only a few at a time. This way you can still maintain a large library of fonts without needing to maintain them as a single unit. Your font will display on-screen without a bitmap, courtesy of NEWS. And, your font will print at the maximum resolution to most printers without special drivers or software. Installing Type 1 fonts in OS/2 Version 2.0 Adobe Type 1 fonts for use with the OS/2 operating system require two files for each typeface—one with a .AFM and one with a .PFB file-name extension. The Font Palette converts the AFM file to an OFM file when it installs the new font. 1. Open OS/2 System. 2. Open the System Setup. 3. Open the Font Palette. 4. Select “Edit Font.” The Edit Font window appears. 5. Select “Add.” 6. Follow the instructions on the Add Font window; then select “Add.” 7. Select the names of the font files that you want to install on your system. 8. Select “Add.” 9. Point to the title-bar icon and double-click. For more information about the Font Palette, and adding new type-faces to the Font Palette samples, refer to your OS/2 documentation. Removing installed fonts It’s a rare occasion that you want to remove a font from your computer. Removing a font is not necessarily the same as updating a font. On most platforms, replacing an old version of a font with a newer one is simply a matter of installing it again. If you do remove a font, any documents you’ve created with that font will revert back to some default font, a situation you should generally avoid. But if you don’t have any documents that contain a certain font, you might want to remove it to save space on your computer’s disk or to reduce clutter in your font menus. Disks containing fewer files generally work faster, and font menus with fewer fonts display more quickly. It’s also true that programs start more slowly when there are lots of fonts installed. So there really are some valid reasons why you might want to remove unused fonts from your computer. Done carefully, font removal can speed your work and brighten your day. Removing a Macintosh font In System 6.0 1. Quit any open applications, and return to the Finder. 2. Start Font/DA Mover by double-clicking on its icon. Make sure you’re using the latest version. 3. All the fonts installed in your System file will be displayed. From the list of fonts shown, select the font you wish to remove. 4. Click “Remove.” 5. Click “Quit.” 6. If it’s a PostScript font, drag the PostScript file (the one with the abbreviated name and the laser printer icon) from the System folder into another folder or into the Trash. In System 7.0 1. Quit any open applications. 2. Double-click on the System file to open it. 3. Select the font you want to remove and drag it (and all its bitmap sizes) to another folder or into the Trash. 4. Close the System file. 5. If it’s a PostScript font, open the Extensions folder and drag the PostScript file (the one with the abbreviated name and the laser printer icon) into another folder or into the Trash. In System 7.1 or higher 1. Quit any open applications. 2. Open the Fonts folder (in the System Folder). 3. Drag the font files (both bitmap and PostScript if it’s a PostScript font) out of the Fonts folder and into some other folder on your disk or into the Trash. Removing a Windows font PostScript 1. Open the ATM Control Panel. 2. Select the font you want to remove. 3. Click “Remove.” 4. Exit ATM. The next time you restart Windows, the font will be removed from the font list. 5. To remove the font files from the hard disk, open your “\psfonts directory” and delete the “.PFB” file for the font, then open the “\psfonts\pfm” directory and delete the corresponding “.PFM file.” One step remains if you wish to remove any trace of the font from your system; editing the “WIN.INI file”: 1. Use NotePad or the System Configuration Editor to open the “WIN.INI” file. 2. Find the section header “PostScript, LPT1” or whichever port you had selected when you installed the font. 3. Identify your font by its DOS file name and remove that entire line from the table. 4. Find the line near the beginning of the table which reads “Softfonts=nn.” Adjust the number to reflect the number of fonts you have removed. [PostScript,LPT1] ATM=placeholder Softfonts=21 TrueType 1. Open the Control Panel. 2. Open the Fonts Control panel by double-clicking on its icon.. 3. Select the font you want removed. 4. Click “Remove.” 5. If you want the font permanently removed from your disk, click on the “Delete Font File From Disk” checkbox. 6. Press “Enter” or click “Yes” to remove the font. Removing fonts from the NEXTSTEP operating system 1. In the Browser, go to your fonts folder. It can be found either in “~/LocalLibrary/Fonts” or “~/Users/~/Library/Fonts.” 2. Select the font you want to remove. 3. Remove the “.font” extension from the name and press “Return.” 4. Now the icon representing your font has changed to a directory. 5. The font is no longer connected to the system, so you can move the folder to a storage area of your hard drive, or to the Recycle bin. Removing fonts from Solaris 2/Open Windows 3 on the SUN 1. To remove just one font from your font list, first delete (i.e., Trash) the font from the fonts directory. Do the same for the .afm file. 2. Get back to your console and type: cd ~/fonts “fonts” is what we named our fonts directory. bldfamily -d. This tells the system to read those fonts again. 3. Now you have one less font in your font list. If you’d really rather remove an entire font directory from the font path, type this: xset -fp ~/fonts This removes the fonts directory from the font path. That’s enough to get your font out of the system. If you REALLY want to know more, check your OpenLook documentation. Removing fonts from OS/2 2.0 1. Open the OS/2 System. 2. Open the System Setup. 3. Open the Font Palette. 4. Select “Edit Font.” The Edit Font window appears. . 5. Select “Delete.” 6. Select the names of the font files that you want to delete from your system. 7. Select “Delete.” 8. When the files have been deleted, point to the title bar icon and double-click. Chapter Ten Expert Advice General Preferences Font Blending Font Hinting Using a Resource Editor Customizing Sounds The Preferences dialog is like the dials on your television: it is where you control the way Fontographer looks and behaves... customizing your work environment. Many of the commands and tools behave in several different ways, and you can easily choose between the various items in Preferences. Items chosen in Preferences are remembered, so the next time you run Fontographer, your customizations will automatically remain set. Choose “Preferences” from the File menu. A dialog will appear, and like some of the others in Fontographer, a pop-up menu at the top of the dialog allows you to navigate through the various Preferences screens. Preferences are divided into four areas: General preferences Editing behavior Point display Windows and dialogs General preferences Options for Undo This is where you can set the number of undo’s and redo’s. You can have Fontographer remember up to 101 things to undo or redo! The penalty for this is, as usual, memory: the more undo’s you request, the more memory Fontographer will wind up using. Unlike other programs, Fontographer has to remember undo’s for each separate character. While that allows you to go back to any character you have edited, open up that character’s outline window, and have all your undo’s ready and waiting, it does eat up some memory. Unless you simply don’t care about memory requirements (maybe you have virtual memory or lots of RAM), we recommend setting this preference between 10 and 20, depending upon how often you like to undo (and how far back you like to go). The other two items in the undo area have to do with memory considerations. When Fontographer runs out of memory, it can throw away undo’s to free up some memory. For instance, if you have been running Fontographer for a couple of hours, edited fifty characters with an average of ten edits per character, you have 50 x 10 = 500 undo’s floating around. If you let Fontographer get rid of these when it runs out of memory, you can sometimes reclaim a fair amount of memory. In addition to the “Throw away undo’s when out of memory” item, there is an “Ask before throwing away undo’s” checkbox. This is useful so you will know when Fontographer is running low on memory; an alert box will appear, asking if you want Fontographer to throw away the undo’s. Using the keyboard to choose a character This area has to do with typing in things from the Font Window. When you are looking at the Font Window and you type a key from the keyboard, Fontographer has to automatically choose the cell in the Font Window that corresponds to that key click. However, there are a couple of choices to be made to decide which character should be highlighted. Basically, Fontographer can either choose the character which corresponds to the font’s encoding vector, or it can choose the character which corresponds to the encoding vector of the computer currently running Fontographer. On the off-chance that that explanation wasn’t entirely crystal-clear, let’s run through an example. Suppose you’ve opted to run Fontographer on the Macintosh, you have opened an Adobe Standard encoded font, and this preference item has been set to “Use the font’s encoding to choose the character.” What is going to happen now can be a little confusing if you’re not used to thinking in this manner. Fontographer, even though it is running on a Macintosh, will not use the Macintosh-standard character encoding. It is instead going to use the character ordering of the Adobe Standard encoding. For most of the alphabet and “normal” characters, you won’t notice a difference. If you choose “a” from the keyboard, “a” is going to get highlighted in the Font Window. However, if you press “Option-2,” the “quotedblleft” character will get highlighted instead of the expected “trademark” character which Macintosh users expect to get when they key in “Option-2.” This is because “Option-2” from the keyboard maps to character number 170, and character number 170 in the Adobe Standard encoding is not “trademark” like it is in the Macintosh encoding, but is “quotedblleft.” To get “trademark” when you type “Option-2,” change the preference so Fontographer will use the machine-specific encoding vector. The main point of all this is, unless you are doing a lot of cross-platform font development or have some other reason to be messing with different encodings, keep this preference set to use your computer’s encoding vector. That way, you’ll get what you expect. When reading an outline font Before reading this section, read the previous section called “Using the keyboard to choose a character.” These two preferences are very closely related. Essentially, this preference item allows you to either see the font in its original encoding (which will typically be Adobe Standard encoding for most PostScript fonts), or to see the font in the encoding of your particular computer. We recommend, unless you have some particular need to see the font’s native encoding, that you have Fontographer re-encode each character to your computer’s encoding vector so the Font Window will place each character where you are used to seeing it. Editing behavior Distances The Cursor-key distance field lets Fontographer move points around by specified amounts when you press the arrow keys. For instance, if you set this value to be 2.7, every time you hit an arrow key the selected points will move exactly 2.7 units in the direction of the arrow. In addition, if you hold down the Shift key and an arrow key, the amount moved is ten times the normal value. Holding down the Option key, or toggling on Caps Lock on the PC, moves by one-tenth the normal amount. The Grid spacing field is for setting up an invisible grid that the Snap To Grid function snaps to. The Align Points to Grid command also uses this as the grid. One popular use for gridding is to have all your coordinates be on integral-number coordinates. Simply set a grid spacing of 1 em unit, make sure Snap To Grid is on, and then as you drag points around, they will always fall on em unit boundaries (i.e., coordinates will always be 120, 66 rather than things like 120.223, 65.97). Snap-to distance specifies how close something has to be before a snap will occur. For instance, if Snap To Point is on, this preference states how close in pixels the object you’re dragging has to be to another point before it automatically snaps to that point. If you are having trouble moving points around because they seem to be snapping to everything too often, try using a lower value in this field. Behavior of Snap to Point Snap to Point is a mode which makes aligning points much easier. If Snap to Point is on, points you drag around with the mouse will “snap” to other points as you drag by them, as if they were magnets. This is how snap-to-point works when you have set the Only snap to the closest point mode. Automatically align with all points, on the other hand, makes objects snap to “point extensions” rather than just the points. In other words, let’s say you have a point at x = 50, y = 100. In the Only snap to the closest point mode, you will snap to that point only when the point you are dragging comes close to 50,100. In the Automatically align with all points mode, however, the point you are dragging will snap anywhere along a vertical line at x = 50, or anywhere along a horizontal line at y = 100. When a path is clicked on This influences what happens when you click and drag the mouse on an actual path (i.e., the line between the control points), as opposed to clicking on one of the points. What you would expect to happen in this case depends upon your prior drawing program experience. Do nothing is a good setting if you want to prevent yourself from modifying a path by clicking on it accidentally. Select and drag the path is a Macromedia FreeHand-style operation. If you want to move an entire path, this preference allows you to do so merely by clicking on it with the mouse and dragging it around. (This can also be accomplished, as in previous versions of Fontographer, by double-clicking on one of the points, and dragging the path around by a point.) Select and edit the path is more of an Adobe Illustrator-style edit. This allows you to edit the path without having to click on control points or BCPs; simply click directly on the path, and drag. This is especially fun to do in Preview mode, with the points turned off. This is a very exciting path editing feature, but it makes it easier to accidentally modify paths. Point display The picture area at the top of this dialog box is the most important part of this screen. It lets you see the effect of each of the items in the dialog: simply change the state of one of the checkboxes, and look at the picture to see how that will affect the outline editing environment. Rather than document all of the 128 different combinations of checkbox items and their effects, we’ll just comment on a few of the items. Hilite the first point in each path, when checked, draws a square around the first point in each path. This information is useful for doing Font Blending, or for multiple master font creation (on the Macintosh). Some people objected to the visual clutter of showing that, and so we made it a preference so it can be turned off. Hilite the ends of unclosed paths is a way to tell at a glance whether a path is opened or closed. Sometimes it is not clear in the Outline Window whether a path is opened or closed. (It is easy to lay down the last point of a path a little too far away from the first point, and so the path doesn’t close like you think it did.) When this preference is on, big gray circles will appear around the two endpoints. The purpose of this preference is not to have it on all the time. What you should do is turn this preference on, flip rapidly through all the characters in the font, see if any have this problem of paths being left open, and then turn off the preference when you have finished. Hilite adjacent points that overlap when checked, causes a double circle to appear on adjacent points (in the same path) which are on top of each other. This is a condition you almost never want, but which can occur by an inadvertent double-click of the mouse while laying down points. This preference should probably always remain on. Show points while dragging paths when checked, will display all the control points as you drag something around. Turning this off causes all the control points to disappear when you’re editing. Some think this results in a cleaner image to view while performing an edit. Draw border around paths when in Preview mode when checked, causes a dashed border to appear around lines during edits in Preview mode. This lets you always see your lines even when dragging them over black areas, which is not an uncommon occurrence in Preview mode. This preference makes editing somewhat slower, however, and can distort the image of the character while you are editing it. Show labels for is useful for Font Blending and multiple master font creation (on the Macintosh). This preference causes a small figure specifying point number to appear to the right of each control point, and BCP, if desired. This option can be used to determine path direction and path order. Having this on will slow editing performance a bit. Show coordinates for is a way to have coordinates appear next to points, right in the Outline Window. It is probably most useful to show coordinates of only the selected points. That helps keep screen clutter down. Choosing to show coordinates will also slow editing. Windows and dialogs Window preferences Automatically fit characters to windows when checked, essentially performs an automatic “Fit in Window” command to be performed every time the Outline Window gets resized. Move palettes with windows when checked, locks the positions of the palettes with respect to the window frame. So if you always place your tool palette one inch in from the left of the Outline Window, and two inches down from the top, this preference will make sure that’s where the palette stays, even when you move the window around on the screen, or switch from one Outline Window to another. Dialog box Remember dialog box positions when checked, tells Fontographer to open up each dialog box at the same place where that particular dialog box was last positioned. This is a handy way to have different dialogs appear in different places, rather than always centered in the screen. Remember dialog box values when checked, will cause Fontographer to remember all the values of all the controls in each dialog box (even if you quit Fontographer and start it up later). This is a time-saver for those dialogs where you frequently have to enter the same values, or choose the same settings. Defaults This button is a fast way to throw away all of your Preference customizations, and start again with Fontographer’s “out of the box” defaults for everything. Font blending—the technical details Font Blending, introduced earlier in the section “Blend Fonts to create new fonts” in Chapter 2, is a very easy, intuitive, and powerful feature of Fontographer. For casual use, you don’t have to know much about it. For more industrial-strength use, however, there are some technical issues you might want to know about. Mastering a few key concepts will allow you to get the most out of Font Blending. Fontographer’s Font Blending, or “interpolation,” allows you to take two extreme variants of a typeface, then automatically generate any number of intermediate versions within that range (or “extrapolate” to obtain versions outside of this range). You can edit those intermediate versions as desired, and quickly produce a family of weights, from just two master designs like Extra Light and Extra Bold. The basic idea behind Font Blending is to create a few key designs, then let the computer do the work of producing a family of variants. Fontographer even gives you some powerful tools like “Change Weight” and “Remove Overlap” to help produce those key designs quickly, from a single base font. Typically, you will not be able to successfully blend two entire fonts together; there will always be a few problem characters which can’t be interpolated. You will know when this has happened, because Fontographer will display an alert saying that a problem occurred during blending. Usually almost every character will have interpolated (unless you have chosen two very disparate fonts). Characters which don’t get blended are frequently some of the seldom-used symbol characters, because the upper 128 characters can vary greatly from font to font. If this is the case, you can decide you don’t care because you never use those characters, and go on and use the font successfully. Or you can try to figure out why those several characters couldn’t be interpolated like the rest, which is what this section is about. The blending process Font Blend is very much like the Macromedia FreeHand blending of one object with another. The mathematical process for interpolation is very straightforward. Given two points, Fontographer will calculate another point that lies some specified fraction of the way between those points. Referring to Figure 1, assume we drew the inner and outer bold rectangles on the left, with the numbers indicating the ordering of the points. If you want to interpolate another rectangle that is 50% of the way between them (the gray rectangle on the right), you draw lines connecting the corresponding points of the two figures to be interpolated, then mark a point on each line that is 50% of the way from the outer point to the inner point. Connecting those points gives us the gray interpolated figure. You could interpolate 25% by marking the point 25% of the way from the outer to the inner point (or from the inner to the outer—it depends on how we set up the interpolate operation). So far, the process is fairly simple. Now let’s consider what can go wrong if the points of the two master figures don’t correspond (like not having the path direction correct or the ordering of points be the same). The points in Figure 2 again have been numbered so you can see what is going on. The only change from the first example is that the inner figure has its points permuted (or reordered) slightly. You should remember this rule: Connect like-numbered points, then add a point halfway between the connected points, and connect those halfway points. Note in the example how unlike the desired rectangle the resulting diamond shape appears. It is likely that you will see something similar as you begin using “Font Blend” to make fonts. Clearly this is not an interpolate bug; Fontographer does exactly what it is supposed to do mathematically, and exactly what you asked it to do when you permuted the points. Other aspects of blending make it a little difficult to use, but follow clearly from the mathematics. Consider the case where the outer figure is a square, but the inner figure is a triangle. If you uncheck “Insert points to force a match,” you run out of points to connect before you are done with the square, so it is pretty hard to know what to do with the extra point. Similarly, if the outer figure is two squares and the inner figure is a single rectangle, you don’t have enough figures to connect; Fontographer would complain that the number of paths didn’t match. A more subtle error occurs when the two figures have the same number of points, but the points don’t correspond well. Consider the case shown in Figure 1, but where the outer rectangle had four points inserted into the line from point 1 to point 2, and the inner rectangle had four points in the line from point 3 to point 4. Even though the point count is the same, the points don’t correspond in a way that will give a pleasant result. To make characters interpolate more easily, Fontographer reorders the points (and the paths) if you check the “Correct path directions” check-box. If you correct path directions on all characters of each font you are trying to interpolate, Fontographer will almost always arrange the points so that they match up, and interpolating will give you the right result. On rare occasions, due to the way some characters might have been drawn, you can confuse Fontographer’s point ordering technique. If this occurs, you will know it from the heinous interpolate results (characters will appear imploded, or turned inside-out, like the proverbial font-in-a-blender). Those cases will require manual point reordering with the Point Information dialog. Select a point on the character, choose “Selection Info,” then move to the next or previous point until you are at the desired starting point. Check the “Make first” button, and Fontographer will make that point the first point of the path. The Point Information dialog also shows the total number of path contours and the total points in the current contour. See “Point” and “Path” in the illustration below. This is useful for finding mismatches between the same character in different fonts. You will have to figure out the best technique for getting the points to match on a character–by–character basis. Sometimes it is better to remove extra points from a character with too many points, and sometimes it is better to add points to a character with too few. Just remember how the points get matched up, and let that guide you as to where to insert or delete points. Font hinting Only about two percent of our Fontographer customers need to concern themselves with hinting. This statement is not meant to demean the other ninety-eight percent; Fontographer’s autohinting abilities are quite good, and should serve most cases well. Think of it like this: most people fly on commercial airplanes. They get around without any problems, and are usually happy with their flights. Very few of the people who take airplane rides need to know all the physics controlling airplane lift and related phenomena. Some people might want to know: they could be curious, or be interested in piloting their own airplane. The point is, however, that in some cases it isn’t necessary to become an expert in all the details. Hints are just like that. Fontographer’s autohints will take you where you want to go; only those few who want to be pilots really need to manually edit them. So don’t feel you need to read this section and master these concepts, or that you should go into the Hints layer and start changing things around. Feel free to check it all out, but be assured that you absolutely do not have to know a thing about hinting in order to successfully use Fontographer. Are you still with us? We highly recommend that you obtain and read Adobe’s Type One Font Specification before getting too involved in hint editing. Although that publication deals entirely with PostScript Type 1, the concepts covered will be valuable no matter what font format you want to use. What is hinting all about? Hinting is a process by which the computer makes type look good at small sizes and low resolutions (72 - 600 dots-per-inch, or “dpi”). To understand hinting, you first have to understand a bit about how computers print (or as the techies say, “put dots on the page”). The oft-forgotten reality of laser printing is that those nice smooth lines you get out of your printer aren’t really smooth at all! They are composed of little dots (called pixels) which, like a mosaic, are all assembled on a grid to form a picture. At high enough resolution, your eye perceives smoothness even though there really is jaggedness. When the printer prints, it has to choose which pixels to turn on or off to best achieve the desired image. As you can imagine, it isn’t quite as nice as just drawing smooth curves on paper with a pen! To see how that relates to characters and hinting, let’s do an example. We’ll follow along as the computer constructs the letter “H” at a small point size, on a low-resolution printer. First, the computer must get the mathematical outline of the “H,” scale it to the requested size, and position it in memory over the pixel grid at the requested location: Remember that the printout you get is composed entirely of pixels, so if we were to print now, we would get a blank sheet because the computer hasn’t yet turned on any pixels. That’s the hard part; drawing the “pure” mathematical outline was easy! The trick is to figure out, by examining the outline, which pixels to turn on, and which to leave off. A reasonable start is to simply turn on all the pixels which are entirely contained by the character outline. That gives this result: ...or shrunk down to size, this: Since that was less than an ideal “H,” we obviously need to be more clever. Let’s try turning on all the pixels which are mostly contained in the outline (i.e., at least half of the pixel must be in the outline in order for it to be turned on). That yields this result: ...or scaled down, this: That didn’t turn out very well either. Note that, although we have at least a semblance of the four serifs, we still don’t even have a cross bar! Let’s try one more way: we’ll turn on all the pixels which have any of the outline touching them whatsoever: ...when scaled down, it looks like this: To review, here are the three H’s thus far: ...and here is what the mathematical outline looks like: The last of our H’s looks better than the other two, but unfortunately, it is still a terrible-looking letter! The left stem is 50% wider than the right stem, the serifs are chunky and irregular, the cross bar is too heavy, and most importantly, it doesn’t match the outline. What we would like is something like this: That’s where hinting comes in. As we’ve shown, you can’t simply turn on pixels just by looking at the outline if you expect to wind up with a decent character. More intelligence has to be added in. Hinting works by feature recognition. Hints basically define interesting features such as vertical stems, horizontal stems, serifs, cap heights, x-heights, etc. For example, in the case of the H, there is information in the font which says things like “I don’t care where on the pixel grid the outlines fall; the left stem and the right stem must be the same width!” Hints can also control global font-wide attributes such as x-heights, so the tops of characters like x, n, c, m, etc., are all aligned properly at all sizes. Hinting is most important at low resolutions, because there are fewer pixels to define the character image. At high resolutions, it’s easy to get a good image; there are so many pixels to deal with, the differences hinting makes are not normally noticeable or important. The figure on the right is how our “H” example might look on a Linotronic at very high resolutions. Since hinting can control at most one pixel’s difference either way, the human eye can’t usually perceive the difference hinting makes at high resolutions. To sum up: A hint is special information placed into a character’s outline definition that causes the character’s outline to be adjusted in a way that improves the character’s perceived shape when printed. Hinting controls Fontographer lets you control hints from two places: the Hints layer of the Outline Window, and the Hints menu. To see actual hints, open an Outline Window, and make the Hints layer visible by checking the box next to its name in the layers palette. Here is an example of a character with hints: The small arrows indicate the presence of hints. Autohint Hinting in Fontographer is always in one of two modes: automatic, or manual. Automatic means that Fontographer will recalculate hints automatically when you edit character outlines. Manual means that you have actually edited some hints. Manual mode tells Fontographer not to replace your manually-edited hints with its own. Fontographer automatically switches to manual after you have edited hints. Automatic or manual hinting varies from character to character. Whenever you open a PostScript font, Fontographer reads in the hints from that font, and turns autohinting off. Note that Fontographer hasn’t made up any new hints yet. It is waiting for the outline to be edited first. Once an outline has been edited, new hints may be calculated to match the new outline. When you open an existing TrueType font, Fontographer can not read in the hints, which are compiled into the font. Fontographer will automatically turn autohinting on. You can tell if Fontographer is on automatic by looking in the Hints menu. There is an item called Autohint; if there is a check mark next to it, that means Fontographer will recalculate hints for the selected character every time the outline gets edited. If you don’t want that, choose Autohint from the menu. The check mark will go away, and autohinting will be turned off for that character. Be careful, because if you then turn Autohint back on by reselecting it from the menu, Fontographer will re-calculate new hints for that character. When autohinting is on, you can watch Fontographer come up with new hints as you edit a character. Just make the Hints layer visible, check to see that Autohint is on, and edit the character outline. You will see the hints adjust, disappear, move, and change, depending upon what you do with the outline. This is a good way to get a feeling for how Fontographer finds hints. Editing hints in the Outline Window You must make the Hints layer active before you can edit hints. You do this by clicking on the Hints’ layer name in the Layers palette. You can select hints with the mouse, just like you select points. Selected hints have a hollow looking arrowhead: You can select more than one hint by dragging a marquee around a group of hints, or by using the standard Shift-select method. You can reorder hints by dragging them around (this is useful in the case of overlapping hints: PostScript fonts will get the hint that appears closest to the character outline in the case of overlap). Hints may also be reordered from the Hint Parameters dialog, covered later. Changing the direction of a hint can be done by selecting the hint, and then choosing “Flip Hint Direction” from the Hints menu or clicking on the arrowhead of the hint. See the “Hint Parameters” section for more information on hint direction. To see what points were responsible for creating a particular hint, simply Option or Alt-click on the hint, and those points will become selected: Removing hints Removing a hint is simple. Just hit the delete key, or choose Clear from the Edit menu. Be careful — if you have just Option or Alt-clicked on a hint to study the points that made it, you will remove both the hint and those points if you press delete! Be sure to deselect the points, by pressing Tab or clicking somewhere else, then select just that hint before deleting anything. Making new hints Creating new hints is done in the Hints menu. To make this process faster, we have made sure each command in the Hints menu has its own key-equivalent. To make a new vertical stem hint: 1. Select two points which define the stem. 2. Choose “Make Vertical Stem” from the Hints menu. To make a new horizontal stem hint: 1. Select two points which define the stem: 2. Choose “Make Horizontal Stem” from the Hints menu. To make a new serif hint: There are two ways to do this: 1. You can start off with two hints. In the case of a serif on a vertical stem, you need one hint from the right side of the stem to the left side of the serif; the other should be from the left side of the stem to the right side of the serif. Hint direction doesn’t matter. 2. Select those two hints. 3. Choose “ Build Serif” from the Hints menu, and those two hints will be replaced by a serif hint. The other method is to select four points which define the serif and choose “Make Horizontal Serif” or “Make Vertical Serif” from the Hints menu. To get the two separate hints back again, select the double-headed serif hint, and choose “ Split Serif” from the Hints menu. To make a new diagonal hint: 1. Select four points which define the diagonal stem. 2. Choose “Make Diagonal Hint” from the Hints menu. Selection Info for hints Selecting a hint and then choosing “Selection Info” from the Element menu brings up a dialog box that is somewhat analogous to the Point Location dialog box. It lets you traverse through all hints in the character, and modify them. This dialog box will not win any awards for “Most Approachable Dialog Box,” but it is quite powerful. Hint type Hint type is a pop-up menu showing which kind of hint you are currently examining. The message to the right, “1 of 2,” means that you are currently looking at the first of two hints of the indicated type (Vertical stem, in this case). To look at the other hints, simply choose the hint type you are interested in from the Hint type pop-up menu. The area directly under the Hint type pop-up changes depending upon which kind of hints you are viewing. For Vertical stems, it lists the x coordinates of the stem (i.e., the locations of the sides of the stem). These values can be edited by entering new ones. If we change to Vertical serif, for instance, we get corresponding information about that particular serif. Changing to Diagonal hint displays this screen: Apply to These three checkboxes influence how the particular hint gets output. You can control, on a hint-by-hint basis, the font types which should receive the hint. For example, there may be some hints which work well for PostScript fonts but not for TrueTypes. By setting these flags, you can have one Fontographer database which is tuned to different font formats. The “Bitmaps” checkbox refers to Fontographer’s internal bitmap generation algorithms—if you discover some hints which seem to throw off Fontographer’s automatic bitmap generation, you can suppress those hints. That may save time over having to hand-edit the poorly-created bitmap images. Of course, you don’t always have the option of choosing hint format type. If you choose “Diagonal hint” from the Hint type pop-up menu, Type 1 and Bitmaps both become grayed, indicating that neither of those two choices are able to accept diagonal hints. The buttons Flip will change the direction of the current hint. See the “Hint Parameters” section for more information on hint direction. New hint is a way to make a new hint anywhere you want; simply fill in the location fields in the left side of the dialog box to position the hint. Since most hints must involve actual points, this is really useful only for ghost hints (hints that exist only to pull part of a character into an alignment zone). Remove gets rid of the current hint. Forward and Back moves the hint around relative to the other hints of that type. This is the same thing as dragging a hint with the pointer tool, except that with the buttons, you only move in or out one hint level with each click. To move a hint all the way out or all the way in, keep clicking on the appropriate button until it grays out, which indicates that’s the farthest the hint can go in that particular direction. Autohint performs the same task as the Autohint item in the Hints menu—it will turn on autohinting and rehint the character. Next and Previous are the controls which change the currently selected hint. Next will choose the next-outer hint of the currently selected type, and Previous will choose the next-inner hint of that type. To move on to examining other groups of hints, choose a different hint type in the Hint type pop-up menu. Vertical Alignment Zones In addition to stem width hints, Type 1 font hints also control the vertical positions of characters. Due to the way the human vision works, curved letters like the “O” should be drawn taller than straight letters like an “E” if they are to appear to be the same height. The technical term for this is overshoot. However, at small sizes this overshoot should drop out and the letters should be the same height. The oversize is typically 4%, which means that if 4% of the em square is less than one pixel, there should be no overshoot. The way overshoot is controlled in a Type 1 font is through a blue zone. Only Adobe knows how they derived that term, but the concept is to specify important vertical alignment coordinates in a table. Blue zones are not associated with particular characters, they apply to the entire font. However, it is helpful to think of them as corresponding to certain groups of characters. When Fontographer computes or recomputes the vertical alignment zones, the first pair of values is based on characters such as “A” and “C,” which are normally drawn with their bottoms on or near the baseline. The first value of the pair is the baseline overshoot (characters such as “C” and “O”). The second value is the normal baseline. The remaining blue zones are computed from the tops of characters and the x-height (characters such as “c” and “x”); the cap height line (“H” and “O”), and the ascender line (“d” and “l”). Since the zones cannot overlap, the ascender zone may not be found. The Other blues are based on the bottoms of characters such as the descender line in characters “g” and “y.” Choosing “Vertical Alignment Zones” from the Hints menu brings up this dialog. These fields are named after Bob Dylan’s famous hinting-inspired ballad, “Tangled up in Blues.” Well, maybe not—we don’t really know why these fields are called “Blue values” and “Other blues.” Of course, we know why they are in this dialog—we typed them in that way! What we don’t know is why the PostScript hinting variables these were named after have anything to do with the color blue. But they do, and once again, you are encouraged to look at Adobe’s Type One Font Specification, which covers the ins and outs of PostScript hinting quite admirably. Be aware that although the nomenclature in this dialog is PostScript-centric these values are used by Fontographer for vertical alignment in TrueType as well. You can edit any of these values by entering new numbers into the various fields. If you ever have occasion to go back to how they used to be, you can press the “Recompute” button. If that button is inactive, that means you haven’t edited anything yet, so the recomputed values would be the same as those which are currently showing. Fontographer will read in all the blue values from PostScript Type 1 fonts. It can also calculate blue values itself, by examining characters $21-$7E (decimal 33-126) to see where the topmost and bottommost parts of those outlines lie. Those areas are typically what should be included in the vertical alignment zones. The fields in the Vertical Alignment Zones correspond exactly to the little I-beams that appear along the left side of the Outline Window, when the Hints layer is visible. These I-beams are the vertical alignment zone indicators. You select them by clicking on them with the mouse; selected zones appear to be hollow on each end. When a zone indicator has been selected, horizontal lines go through it to make it easier to tell which points fall inside the zone. You may change the size of any of the zones by dragging either the top or bottom part of the indicators. To describe the location of the zone numerically, you must use the Vertical Alignment Zones dialog box. To remove a zone, you can select it and then press the Delete key. You may also go into the Vertical Alignment Zones dialog box and enter “0” for both the low and high value for a particular zone. To create a new zone, go into the Vertical Alignment Zones dialog box, find a zone which has zeros in it, and enter new values. If there are no zones with zeros, that means all the available zones are used up, and you will have to remove an existing zone in order to add a new one. Hint Parameters Choosing “Hint Parameters” from the Hints menu brings up this dialog box. Hint Parameters, like most of the other dialog boxes, will affect different groups of characters, depending upon which window you are in when you bring it up. If you are in the Outline Window, it will only affect the hints of that character. If you bring it up from the Font Window, it will affect all the currently selected characters. Type 1 fonts have a restriction that hints cannot overlap. There is a way to get around this, known as “hint replacement,” but the technique is not implemented in Fontographer. Maybe someday the Type 1 font renderer will be changed to handle overlapping hints. This mainly affects serifs, which require overlapping hints to control the serif width on each side of the stem. Without overlapping hints or hint replacement, serif widths are uncontrolled. Fortunately, this effect is not generally a serious problem in practice. Fontographer applies heuristics to pick which hints to keep and which to ignore when sorting through overlapping hints. You can override this by changing the pop-ups in “Hint order” so you can control whether the most frequent hints get applied first, or the largest, or some other option. Hints to include This is a way to suppress entire groups of hints. If you are developing PostScript fonts, for instance, you could decide that you never want to look at any serif hints, or diagonal hints, since those kinds of hints can’t be applied to PostScript fonts. By unchecking “Serif hints” and “Diagonal hints,” those hint types will never appear in the Outline Window. Hint order Changing hint ordering is useful for PostScript Type 1 and TrueType fonts. Since PostScript doesn’t handle overlapping hints, you sometimes need to specify which of the overlapping hints should get used—the hints closest to the outline in the window are the ones that will get used in the case of overlap. Typically, you will want to apply the most frequent hints first, on the grounds that they will work best for that character in comparison to the rest of the font. (Hint frequency is based on examining all the hints in the entire font and sorting them according to frequency of occurrence.) Usually, changing these pop-ups will result in changes in hint ordering which you can see in the Hints layer of the Outline Window. Hint direction The hint direction tells which way the outline will be adjusted during gridfitting (aligning the outline to the pixel “grid” used by the screen and/or printer). Generally, you want all your hints to point inwards (“Toward center”), but that is not always the case; so we included these pop-ups as a way to customize this behavior easily for entire characters. (Individual hints can have their direction changed on a hint-by-hint basis, in the Hints layer of the Outline Window.) Hint direction makes a difference for TrueType, but if it affects PostScript, we haven’t been able to detect it. Common stems Changing these fields is useful for PostScript Type 1 and TrueType fonts. These fields are calculated by examining all the stems in the font, and finding which widths are the most popular (i.e., occur the most). These values appear here, and get output in the PostScript font as StdHW, StdVW, StemSnapH, and StemSnapV. See the Adobe Type One Font Format book for more information on these fields. To throw away your edits to these values, or to get new values after substantially editing the font, press the “Recalc” button. Changing the default Hint Parameters In the Font Window, Hint Parameters works with the selected characters. For example, if you wanted to modify some of the parameters for an entire font, you would simply Select All prior to bringing up Hint Parameters. Option or Alt-Hint Parameters, on the other hand, changes the defaults for new characters. What happens when Fontographer opens up PostScript Type 1 fonts When a PostScript Type 1 font is read, Fontographer always keeps the hints that were defined as part of the font. Each character is marked as having user-edited hints. This lets you generate a Type 1 font and still leave the original hints unchanged. Before generating a TrueType font, however, you should select all characters and choose “Autohint” from the Hints menu, so serif and diagonal hints can be found. This will remove the original stem hints and find new ones. Autohinting is on by default, so when you edit a character, its hints get recalculated. This is usually what you want to happen. If you change the outline, you don’t want to still have the hints for the old outline—you want new hints to match the new outline, which is what autohinting gives you. However, sometimes you may want to make extremely minor tweaks to the outline, and keep the exact original hints. You can accomplish this by turning Autohinting off, in the Hints menu (the Autohinting item is essentially a toggle; when it is on, as indicated by a check mark, you turn it off simply by selecting it). If you turn autohinting back on, it will re-hint the selected characters. Usually, that’s not a problem, because you either want Autohinting or you want manual hinting—you rarely want to switch between them. To preserve hints for the entire font, go to the Font Window, Select All, and then turn Autohinting off. To rehint the entire font, go to the Font Window, Select All, and turn Autohinting off and back on again. Important: What happens when Fontographer opens TrueType fonts Fontographer completely hints TrueType fonts when it opens them. This happens for a number of reasons, not the least of which is that Fontographer has to change the outline format from quadratic to cubic. Using a resource editor to tweak Fontographer 4.1 on your Macintosh The tips and notes in this highly technical section are intended for the hacker. If you don’t know a salad fork from a resource fork, then don’t proceed. We offer this glimpse below the hood of Fontographer to people experienced with how resources work on a Macintosh. If you don’t qualify, but still want to try this, first get a handbook on how to use ResEdit and learn it well before proceeding. Adding custom encoding vectors What is a custom encoding vector? Different languages have their own encoding vectors. It represents the layout of the script or alphabet. In previous versions of Fontographer, it was very difficult to set up a foreign language script. It required setting new character names to each of the cells in the font. In Fontographer 4.1 we have added two special resources to the STR# resource in order to enable you to set up a custom encoding vector with custom names. To create your own custom encoding vector, you will need to be familiar with the use of a Macintosh resource editor such as Apple’s own ResEdit. The particular resources we will begin looking at are id 384 and 386. Before you begin, make a copy of Fontographer 4.1 to work with. When Fontographer is open in ResEdit, you will only be able to run one copy of Fontographer at once. Therefore, you should work on a copy so as not to cause irreparable harm to your original copy of Fontographer. This example will not necessarily set up the unicode numbers for your new character names. If the names you use are listed in STR#400, then the standard unicode number will match up with it. Otherwise, refer to step 11 for further instructions. To begin: 1. Open a copy of Fontographer in your resource editor of choice. Our example uses ResEdit. 2. Double-click on the “STR#” icon. 3. Open id 386. WAIT, first take a look in id 384... (Don’t make any changes though!). You will see a list like the one that follows. Each line is a separate field in the resource. 7 21317 Adobe Standard 256 1 22597 Adobe Expert 256 1 19800 Macintosh Expert 256 1 The first line (7) refers to the number of strings in the resource. This resource has 7 strings, which in this case means seven encoding vectors. The next four lines comprise the first string in this resource. They set up the Adobe standard encoding vector. The 21317 is the STR# id in which you will find the list of character names in sequential order starting at 1 and ending at 256. The name of the encoding vector is next. It appears in the Encoding popup found in Font Info and Generate Font Files dialogs. The next field, 256, represents the number of character names in the encoding vector. You can have more than 256 names, but never less. The final entry in the string is the “1”. This indicates that you want the encoding name to show up in the dialogs. If you do not want it to show, set this to 0. We have done this for TrueType glyph encoding. Now that you have seen the format for setting up your encoding, open id 386 to make your own custom encoding vector. Do not make any changes to id 384! This was just a rehearsal so that you can understand the format required. 4. Back in id 386, the resource opens with a 0 in one field. To add new fields in ResEdit, select the last line (in this case “2) ******) and press Command-K. You will need to add 4 lines (type Command-K four times). 5. After adding all the fields, go back to string 1, select the 0, and begin entering your data. The first field will be 1, for the number of encoding vectors in this resource. 6. The second field will contain the id of the new resource you will make which will contain all the character names. Select a resource id which has not been used. 7. Here is an example of an encoding vector (STR# 386): 8. 1 number of encoding vectors 21321 id for resource containing character names Cyrillic name of encoding vector 256 number of chars 1 makes the encoding name show up in thedialogs Close the resource id 386. Creating the names resource Now you need to decide how to make your resource of character names. If you have a font which already has your custom names, the easiest way to get a list of the names is to export an afm file from Fontographer. Open the afm in a text editor and then copy and paste the names into the ResEdit resource. Rather than create your own resource by typing Command-K 256 times, you’ll find it faster to copy one of the existing resources and replace your names with the ones there. 9. Select id 21317 and duplicate it. It will likely be given an id of 129. To change an id in ResEdit, select the resource id and type Command-I. Then type in the number you want. Make sure it is the same number you entered in step 6. This is now a copy of the Adobe encoding vector. To begin changing your names, just start replacing the names in the strings. You will notice that the first 32 fields are .notdef. Most operating systems do not reliably access characters in this range. However, certain encoding vectors, such as Arabic, require that characters be mapped in that range. As was mentioned before, if you have your custom encoded font, then you already know where the characters belong in the font. If you don’t have your custom encoding font, then you must find out what the sequential order of the character names is. 10. When you have entered all the character names, close the resource, “Save,” and “Quit.” Fontographer is now ready to supply your custom encoding at the click of a mouse! 11. Open Fontographer and create a new font. Choose Font Info from the Element menu and select your own encoding from the encoding pop-up. Now copy your characters into their proper locations in this font database. While in the Font Window, select “Unicode” from the View by: pop-up. If a ** appears in the character label over the custom characters, then you know that the custom names did not map to known unicode numbers. All of the unicode data in Fontographer is stored in STR# 400. It is a large resource; so large that ResEdit can’t open and edit it in the template view. If you want to edit it, be extremely careful, or your other encodings will not work correctly. We strongly recommend against making any changes to STR# 400. It’s better to make further changes to the specific character in the Character Info dialog. 12. When your font is ready to generate, just choose Generate Font Files from the File menu and select your custom encoding from the encoding pop-up. Setting Developer IDs If you are a font developer who has been issued an unique developer id by Microsoft, then we have provided a means for you to hard code that id into Fontographer by editing the STR# 5140 resource. Open the resource in ResEdit. The fourth string is the TrueType (Vendor) Developer id. The default selection is “MACR.” This is the ID Microsoft supplied to Macromedia. Replace the Macr four-character string with your own unique vendor id. Customizing Sample Text printout Yet another ResEdit trick is to edit the STR# resource to change the font used to label coordinates in the character points and coordinates printout. If you have noticed that the coordinate locations run over each other on paper, then you might try this quick fix. 1. Open STR#6021. 2. Change the following code: (|______Helvetica) RF /descFont /|______Helvetica findfont def Simply replace Helvetica with HelveticaNarrow or Helvetica-Narrow or whatever font you desire. Just be sure the font you specify is resident in your Adobe PostScript printer. Customizing Fontographer sounds on your Macintosh Fontographer 4.1 has the ability to play cool sounds during certain actions. It plays sounds when you snap to a point or snap to a guide in the Outline Window, and it plays a sound whenever the “Please Wait” dialog closes. The sound file is not installed, but you can copy it off the Fonts folder on your CDROM. If you wish to use the sounds in Fontographer on your Macintosh, you should do the following: 1. Find the file called “Fontographer Sounds” on the CDROM. 2. Place the file into the same folder as Fontographer. 3. Don’t change the name of the file, because Fontographer looks for that name specifically. If you’re comfortable using ResEdit, you can easily customize your sounds. 1. Get the sound you wish to use. 2. Convert the sound into a “snd” resource if necessary. 3. Use ResEdit to paste the snd resource into the “Fontographer Sounds” file. 4. Then use ResEdit to name the resource (the spelling must be exact) one of the following names: - “Snap to point” - “Snap to guide” - “Operation done” That’s it! Run Fontographer and you’ll now hear the sounds. Have fun!!! If you find the noises emanating from your Mac just too annoying, then remove the file “Fontographer Sounds” from the folder where you keep your Fontographer application. Customizing Fontographer sounds on your PC If your PC has a sound card, you too can enjoy the sounds described under Customizing Fontographer Sounds on Your Macintosh, with a few important differences: The sounds that Fontographer uses are stored in WAV files in the main Fontographer directory on your CD ROM. BUSY.WAV plays when the progress dialog is open. SNAPP.WAV plays when snapping to points in the outline window. SNAPG.WAV plays when snapping to guides in the outline window. SILENCE.WAV checks at startup to look for a sound card. To turn sounds on or off: 1. Select Preferences from the File menu. 2. Choose Sounds from the pop-up menu in the Preferences dialog. Check or uncheck the appropriate checkbox to enable or disable particular sounds, or use the master switch to turn all sounds on or off at once. You can personalize the sounds that Fontographer plays by replacing the three sound files with your own WAV files. Chapter Eleven Reference Section Windows Menus Keyboard Alternatives Windows Font Window The Font Window shows you all the characters in your font at 24 points. The View by menu at the top of the window allows you to change the label over each character slot. The default choice display mode is Character, which shows the character symbol above each slot. On the Macintosh, if you choose “Keystroke” to display the keystrokes that correspond to each character, and scroll the window down so that you can see the international characters, you will see some cryptic things like SOe and Oee. SOe means that to produce this character you will need to press the Shift key, the Option key, and the “e” key simultaneously, producing the character “‰.” In the case of Oee the procedure is slightly different: press the Option key and the “e” key simultaneously, then let up on them and press the “e” key by itself. In Fontographer for Windows, if you choose “Keystroke” to display the keystrokes that correspond to each character, and scroll the Window down so that you can see the international characters, you will see numbers in the label like “A0174.” Characters in the extended range are accessed by pressing the Alt key and typing the decimal number, preceded by a zero. For instance, to produce the ®, hold down the Alt key and type “0174.” Similarly, to reach the ¶, hold down the Alt key and type “0187.” Be sure to use the numeric keypad to the right of the keyboard. View by menu Character The Character item shows the symbol that corresponds to each slot in the Font Window. Keystroke The Keystroke item corresponds to the keyboard sequence used to enter the character. Decimal The Decimal item shows the decimal value of a character’s current slot. For example, “A” is in decimal location 65. Hexadecimal The Hexadecimal item shows hexadecimal (base 16) values. For example: “A” displays as “$41.” Octal The Octal item shows octal (base 8) values. For example: “A” displays as “o101.” Width The Width item shows the character’s width in em units. Em units are not related to point size or any other physical measurement. Left sidebearing The left sidebearing mode shows the measurement of the character’s left sidebearing—the distance between the origin line and the left edge of the character’s outline—in em units. Right sidebearing The Right sidebearing mode shows the measurement of the character’s right sidebearing (the distance between the width line and the right edge of the character’s outline) in em units. Fill Tint The Fill Tint item shows the percentage of black that will fill the character when you output a PostScript or Type 3 font. (We recommend using 100%.) Stroke Tint The Stroke Tint item shows the percentage of black that fills strokes when you output a PostScript or Type 3 font. (We recommend using 100%.) Weight The Weight item shows the character’s stroke weight in em square units when you output a PostScript Type 3 font. Outline Window The Outline Window shows you the outlines (or strokes) of the character named in the title bar and allows you to edit them. At the top of the window (in the info bar) you will see position indicators. The numbers below them are horizontal and vertical distances measured in em units. These distances let you know the distance from the cursor or selected points to certain objects in the window. Whenever you select a tool from the tool palette in the Outline Window, the information displayed in the information bar will update to accommodate the specific tool and its behavior. Some of the indicators that appear are horizontal and vertical displacement, angle indicator, and length. These indicators allow for precise control of your tools. The lock at the bottom of the window indicates that you cannot change from the character in the Outline window to some other character by merely typing the keystroke(s) of that character. If you click on the lock, it will open and you will then be able to change characters simply by typing the keystroke(s) of the new character. You can also toggle the lock icon on and off by pressing the Return or Enter key. Fontographer will not save the state of this lock when you “Quit” or “Exit” the program. You can close all open Outline Windows by Option- or Alt-clicking on the close box of any open Outline Window. Any open Bitmap or Metrics Windows will remain open. Tool palette Pointer tool The pointer tool is for selecting and dragging objects. To change to the pointer tool when another tool is being used, while the lock icon is locked, type the accent grave key (`). To temporarily use the pointer tool when another tool is selected press the Command key or the Ctrl key, and release to deselect the pointer tool. Hand tool The hand tool lets you scroll through the display area—useful for large characters. To temporarily change from the other tools to the hand tool, hold down the Spacebar. Rectangle tool The rectangle tool is for drawing rectangles, squares, and rectangles with rounded corners. To change the radius of curve at the corners of the square or rectangle, double-click on the icon and make changes from the dialog. To constrain the shape to a square, hold down the Shift key while dragging. Press the Option or Alt key and drag with the mouse to change the shape of the rectangle to a square, using the point clicked on as the center of the figure. To access the rectangle tool from another tool, while the lock icon is locked, type the number “1.” Multigon tool The multigon tool draws starbursts and regular polygons. Double-click on the tool to bring up a dialog that controls the shape. From the dialog box specify polygon or star shape, number of sides, and shape of points. To access from another tool, while the lock icon is locked, type the number “2.” Oval tool The oval tool creates ovals and circles. Hold down the Option or Alt key to draw the oval outwards from the center. To constrain the oval to a circle, hold down the Shift key and drag. You can choose this tool, while the lock icon is locked, by typing the number “3.” Straight line tool The straight line tool draws straight lines without requiring you to place points manually. To constrain the line to the vertical, horizontal, and 45 degree angles, hold down the Shift key while dragging with the mouse. To access from another tool, while the lock icon is locked, type the number “4.” Press the Option or Alt key and click the mouse to draw a straight line that centers on the point where you click, and extends outward as you drag. Freehand tool The Freehand tool can be used to draw paths freestyle or as either a variable-weight or calligraphic pen tool. The calligraphic pen tool draws calligraphic lines. You can set the pen width and angle from the dialog accessed by double-clicking on the icon. To use the calligraphy pen when the selection pointer or other tools are selected, while the lock icon is locked, type the number “5.” From the dialog (accessed by double-clicking the icon) you can choose the Freehand tool by selecting the pressure-sensitive option. Choose the maximum and minimum widths of strokes, as well as the shapes of caps and joins. The Tight curve fit option lets you increase how much the outline conforms to the curved lines you draw. (The other option is normal fit, the default option, ordinarily used if you ignore this choice.) Choose “ Draw dotted line” to display your lines as a series of hash marks; this option displays the strokes faster than does the normal option. Pen tool The pen tool is for drawing outlines or strokes without having to change tools. You can choose this tool, while the lock icon is locked, by typing the number “6.” Knife tool Use the knife tool to cut paths or points. Access the knife when using another tool, while the lock icon is locked, by typing the number “7.” Curve tool The curve tool creates a point with curves on both sides. The angle of the curve can be adjusted from either of the incoming or outgoing BCPs and the radius of the curve can be adjusted individually by the BCP on the appropriate side of the point. You can choose this tool, while the lock icon is locked, by typing the number “8.” Corner tool The corner tool connects two straight lines or two curves at a cusp. Both the incoming and outgoing paths can be adjusted with their respectively independent BCPs. You can choose this tool, while the lock icon is locked, by typing the number “9.” Tangent tool The tangent tool is used to connect straight lines to curves for smooth joins. You can choose this tool, while the lock icon is locked, by typing the number “0.” Rotate tool The rotate tool lets you rotate a character or its parts, centering the rotation around the place where the mouse clicks. Double-click on the tool to access the Transform dialog and specify degrees of rotation. Click the mouse and drag to display a radius used to rotate the image on-screen. (The rotation occurs around the point where the mouse clicked on the screen.) If you press the Shift key and click with the mouse and drag, you will constrain the movement of the radius to horizontal, vertical, and 45 degree angles. Flip tool The flip tool functions similarly to the rotate tool by allowing you to flip a figure horizontally or vertically, centering the movement around the click of the mouse. Double-click on the tool to get the Transform dialog where you can choose either direction, horizontal or vertical. Click the mouse and press the Shift key to display a radius used to rotate the image on-screen. (The rotation occurs around the point where the mouse clicked on the screen.) If you click with the mouse and drag, you will constrain the movement of the radius to horizontal, vertical, and 45 degree angles. Scale tool The scale tool allows you to scale a figure horizontally and vertically, centering around the click of the mouse. Double-click on the tool to access the Transform dialog where you can enter horizontal and/or vertical degrees for scaling. Option or Alt-double-clicking on the Scale tool brings up the Transform dialog with Scale Uniformly selected as the first transformation. To scale horizontally and vertically, click the mouse and drag in either direction. To constrain scaling to horizontal, 45 degree, or vertical axes, just press the Shift key and drag to those locations. Skew tool The skew tool lets you skew figures both horizontally and vertically, centering the movement around the click of the mouse. Double-click on the tool to access the Transform dialog where you can enter horizontal and/or vertical degrees to skew the selection. To skew horizontally and vertically click the mouse and drag in either direction. To constrain skewing to horizontal, 45 degree, or vertical axes, just press the Shift key and drag in any of those directions. Measuring tool The measuring tool measures distances in em units in the Outline Window. Press the Option or Alt key and click the mouse to draw a measuring line that centers on the point where you click, and extends outward as you drag. If you press Shift, and click with the mouse and drag, you will constrain the movement of the measuring line to horizontal, vertical, and 45 degree angles. Magnifying tool Use the magnifying tool to enlarge or reduce the image in the window. With the tool selected, click on the place you want to center in the window, to enlarge the image (or type Command-Space-click or Ctrl+Space+ click to temporarily invoke the tool). Press Option or Alt and click with this tool to reduce the image. With the magnifying tool selected you can drag a box around the area you wish to magnify, and Fontographer will zoom into the area enclosed by the box. You can also use this method to zoom out by holding down the Option or Alt key. Perspective tool The Perspective tool works in conjunction with 3-D rotate to apply 3-dimensional rotations to 2-dimensional objects while still maintaining perspective. Option or Alt-double-clicking on the tool brings up the Perspective Setup dialog where you can set the Perspective Distance and select a Perspective Point of Basepoint, Center of selection, Character origin, or Mouse click. Double-clicking on the tool brings up the Transform dialog ready to apply a 3-D move transformation. Arc tool The Arc tool allows you to create one-fourth of an oval and arc-like shapes. Double-click on the tool to access the Arc Tool Setup dialog where you can choose to create Open, Flipped, or Concave arcs. You can also create different types of arcs without changing the Setup dialog by using modifier keys. Hold down the Command or Ctrl key while creating a new arc to toggle between creating an open and a closed arc. Hold down the Option or Alt key to flip the arc both horizontally and vertically. The Caps Lock key toggles between creating a convex and a concave arc. To constrain the arc tool to create quarter circles, hold down the shift key. The Option or Alt key is the demagnified move modifier key. By holding down Option or Alt when you create a new arc, you can increase/decrease the size of the arc in one em-unit increments. Layers palette The Layers palette displays in the Outline window. It shows which layer is currently active and which ones are visible. The highlighted layer shows which one is currently in use. When a check appears in the checkbox beside a layer, that layer is displayed in the current window. You can click the checkboxes of the layers on or off to show or hide them. Outline layer The Outline layer is where you will create and edit your outline character. Template layer The Template layer is where you will place images you want to use as a template for drawing. Any points you draw here will not be used for PostScript creation, but will show gray in the Outline and Guides layers. You can also paste artwork or scanned images into the Template layer for hand-tracing or autotracing. Each character in the font has its own Template layer. Guides layer The Guides layer is where you place guidelines and outlines to help you draw a character. Dragging from the origin and base lines creates horizontal and vertical guidelines that will show up behind every character in the font, Like guidelines, any outlines drawn here will not be used for PostScript creation. They will show up gray (on the Macintosh) or green (on the PC) behind the characters. Hints layer The Hints layer displays hints that define features like vertical stems, horizontal stems, serifs, and cap-heights. Here you can adjust the hinting of individual characters and edit character outlines. Changing and hiding layers You can turn layers on and off by clicking on the checkbox next to their name in the Layers palette. When the lock icon is in the locked position, Fontographer also allows you to change layers simply by typing “O,” “T,” “G,” or “H.” (On the PC, you must also have Caps Lock turned on.) When the lock icon is in the locked position, you can also hide the Outline, Template, Guides, and Hints layers from view. Hold down the Option key, or Caps Lock on the PC, and type “O” to hide the Outline layer from view. Repeat to bring the Outline layer back into view. Repeat this procedure to hide the Template, Guides, and Hints layers, substituting “T,” “G,” and “H,” for the “O.” Magnification You can change the magnification of the Outline Window with the Magnification menu item in the View menu or you can use the magnifying tool or keyboard shortcuts. To increase the magnification, hold down the Command and Spacebar (or the Ctrl and Spacebar) and click on the place you want to center in the window. To reduce the magnification, hold down the Option, Command, and Spacebar (or Ctrl, Alt, and Spacebar) and click in the window. Switching characters If you need to change the character in the Outline Window to the next sequential character, you can use the View menu’s Next Character item (Command or Ctrl+]). To change to the previous sequential character, use the View menu’s Previous Character item. When the lock icon is off, you can change characters simply by typing the character (Command or Ctrl+[). Bitmap Window The Bitmap Window allows you to edit the various sizes of bitmap fonts that Fontographer creates. It works very much like FatBits in a paint-type program. You can use a pencil or other tools to turn the dots in the bitmap on or off. The character’s outline is visible in the background to help you place the dots properly. Each of the dots in this window is equivalent to one point (pixel) on the computer screen. At the top left area of the screen you will see the current size preview of the bitmap. Maximum ascender and descender lines will apear if a character’s outline extends above the ascender line or descender line. If you have selected to preserve line spacing (in the Recalc Bitmaps dialog), these guides will not appear for that character, as they will be the same as the normal ascender and descender lines. At the bottom of the Bitmap window is a lock icon. When the lock is closed, you will not be able to change characters by merely typing the keystroke(s) for the new character. If you click on the lock, it will open and you will be able to change characters by simply typing the keystroke(s) of the new character. Press Enter or Return to change the status of the lock. You can close all open Bitmap Windows by Option- or Alt-clicking on the close box of any open Bitmap Window. Any open Metrics or Outline Windows will remain open. Tool palette Straight line tool The straight line tool draws straight lines without requiring you to place points manually. To constrain the line to the vertical, horizontal, and 45 degree angles, hold down the Shift key while dragging with the mouse. To access from another tool, while the lock icon is locked, type the number “1.” Hand tool The hand tool lets you move the display area—useful for large characters. To change from the other tools to the hand tool, hold down the Spacebar. You can use the tool as long as the Spacebar is held down. Or, while the lock icon is locked, type the number “2” to select the hand. Pencil tool The pencil tool allows you to change the bits of a bitmap character in the Bitmap Window. To access the pencil from another tool, while the lock icon is locked, type the number “3.” Eraser tool The eraser tool will remove pixels when you drag it across them. Double-click on the eraser tool icon to remove all pixels in the character bitmap. To use the eraser when another tool is selected, while the lock icon is locked, type the number “4.” Marquee tool Use the marquee tool to outline an area and display its pixel grid. The gridded section can be moved around the window by dragging it. To place the moved bits and deselect the marquee, click outside of the movable section. To use the marquee when another tool is selected, while the lock icon is locked, type the number “5.” Move tool Use the move tool to move the bitmap away from its outline in any direction. Click on the character bitmap and drag to a new location. Access the move tool, while the lock icon is locked, by typing the number “6” when another tool is selected. Measuring tool The measuring tool measures distances in pixels. Press the Shift key and drag the mouse in any direction to use a deconstrained measuring line. Press the Option or Alt key and click to extend a measuring line that centers on the clicked point, and that rotates constraining to 45 degree, horizontal and vertical angles. Select the measuring tool when using another tool by typing the number “7.” Magnifying tool Use the magnifying tool to enlarge or reduce the image in the window. With the tool selected, click on the place you want to center in the window to enlarge the image or press Option or Alt and click with this tool to reduce the image. To temporarily invoke this tool, press Command-Space-click to enlarge and Option (or Alt) -Command-Space-click to reduce. Select the magnifier when another tool is selected by typing the number “8.” Ascent/Descent/Offset/Width In the Info bar at the top of the window, you find the character’s ascent, descent, offset and width numbers. The ascent is the maximum distance above the baseline measured in points. The descent is the maximum distance below the baseline measured in points. The offset is the number of points between the origin line and the leftmost point in the character. The width indicator shows us the width of the character in points. From outline When you press this button the bitmap will be recalculated in order to correspond with the outline of the character. This is useful when you change a character’s outlines after having created bitmaps. To recalculate bitmaps for more than one character at a time use the “Recalc Bitmaps” command in the Element menu. Magnification You can change the magnification of this window with the Magnification items in the View menu or you can use keyboard shortcuts. To enlarge the bitmap’s magnification, hold down the Command key and Spacebar (or the Ctrl key and Spacebar) and click anywhere in the window. To reduce the bitmap’s magnification, hold down the Option, Command, and Spacebar (or the Alt, Ctrl, and Spacebar) and click anywhere in the window. You can also use the magnifying tool. Scrolling The Spacebar switches the current tool to a hand tool that will allow you to scroll the character back and forth in the window. Switching characters If you need to change the character in the Bitmap Window to the next sequential character, you can use the View menu’s Next Character item (Command or Ctrl+ “]”). To change to the previous sequential character, use the View menu’s Previous Character item. When the lock icon is off, you can change characters simply by typing in the character (Command or Ctrl+“[”). Changing point sizes To select the Next or Previous bitmap point size choose one of these menu items from the View menu. Command or Ctrl+“=” will give you the next point size up. Command or Ctrl+“-” will give you the previous point size. Metrics Window The Metrics Window displays the metrics for characters you type into the textbox at the top left. Here you can edit widths, sidebearings, and kerning pairs for those characters. Underneath the characters is a table that displays the numerical values in em units that apply to each character and its kerned pair. Changes to the kerning and width show up in the table below the screen area. Width is the distance in em units between the origin point and the width line. Kern is the number of em units (negative) the character on the right overlaps or is pushed away from the character on the left (positive). You can change kerning distance, left and right sidebearings, and width by changing the numbers in the table, or by using the kerning and sidebearing lines for each character. You can close all open Metrics Windows by Option- or Alt-clicking on the close box of any open Metrics Window. Any open Bitmap or Outline Windows will remain open. The keys to using the Metrics Window are: The Tab and right arrow keys allow you to move between slots from left to right. The Shift-Tab and left arrow keys allow you to move between slots from right to left. Typing a character when a slot is highlighted changes the character in that slot. Kerning and sidebearing lines Use the kerning or sidebearing lines to adjust the amount of space that a character has on it’s left and right edges. Click on any character, and drag its sidebearings or kerning line to the desired location to affect the amount of empty space that will exist between that character and those on either side of it. Key commands to change spacing and/or kerning: Option (Caps Lock)-H Toggles sidebearings and kerning lines on or off when you click on the screen area (not inside the textbox). Option (Caps Lock)-G Toggles Guides on or off when you click on the screen area (not within the textbox). Option-left arrow-right arrow When a character cell is selected, changes the selected character to the following character in the font sequence. Option-left arrow-right arrow When a numeric cell is selected, adjusts the values up or down by one unit. Holding down the Shift key simultaneously adjusts by ten units at a time. Command (Ctrl) ’ Views the Next kerning pair. Command (Ctrl) ; Shows the Previous kerning pair. Command (Ctrl) ] Shows the Next character. Command (Ctrl) [ Shows the Previous character. Kerning To display the characters in the textbox with or without kerning information, click on the Kerning checkbox. When an “x” appears in the checkbox, the kerning information is displayed on-screen. Using this option allows you to see how your font will appear in a program that does not support kerning. File This button allows you to load text from a file into the textbox and display area. Click on the up and down arrows beside the file button to scroll vertically within the file. Menus About Fontographer This dialog shows you information about your current set up. You can see the version number below the program title. Click in the window to make it disappear. The File Menu New Font In Fontographer when you select “New Font,” you automatically open a new Font Window. The default values for font attributes will be in use, unless you decide to change them from “Font Info” in the Element menu. (Things like the font name, ascent, descent, leading, and encoding.) (See also “Preferences.”) Open Font Open Font shows you a standard file dialog which allows you to open a Fontographer outline file, a PostScript font, or a TrueType font file. The dialog also allows you to display files according to their formats. Close Close the active window with this item. If you have made changes and close the Font window, Fontographer will ask you if you want to save your changes. Save Saves any changes you have made since opening the font. Save As Allows you to save your file with a different name (but not your font in use). Revert Restores your font to the last saved version on the disk, throwing away any changes you may have made since you last saved it. You can revert from any window. Preferences By selecting Preferences you can alter the default settings for Fontographer. The settings that you can change cover many aspects of the program, from the number of undo’s allowable (up to 101), to how points display (large or small, with or without BCP lines, etc.), editing behavior of lines and points, and the way windows and dialogs operate. For a detailed description of what you can do from the Preferences menu see Chapter 10, “The Expert Section.” Generate Font Files To make generating fonts a little bit easier, Fontographer includes two approaches: Easy and Advanced mode. The Easy mode includes everything which is usually required. And ordinarily you won’t want to bother with the Advanced mode. You just choose the computer type and the type of font to output, the bitmap sizes, and where you want the generated files to be placed. Fontographer no longer creates AFMs unless you specifically ask for them in the Advanced mode. The Advanced mode includes several other choices, including encoding vectors, outline font IDs, etc. Import Importing bitmap fonts, EPS, or Metrics into a font file is a simple matter using the Import item in the File menu. Just choose one of these three options from the submenu and import from another file. You can select whether or not you want to import bitmaps into the internal bitmap list or just into the Template layer, or you can do both. You can also import EPS outlines into a character. When you import Metrics you can choose to import only kerning information or spacing information, or both types, or ascent/descent. When importing ascent/descent, Fontographer looks for a .bmap or a TrueType font. When selecting the .bmap corresponding to the original PostScript font, we read the original ascender/descender information found in the FOND resource. You can also choose the kinds of files you want to appear in the dialog display: Fontographer database files, TrueType files, AFM files, PFM files, and Macromedia metrics files. This allows you to easily recognize your files, and select the right one for importing. On the Macintosh, you can also import a specific character(s) from an installed TrueType font. This comes in handy when you wish to use specific characters from existing typefaces without disrupting changes you have already made to your open font. Import TrueType characters also works from double-byte TrueType fonts. Export When you want to export metrics information, an EPS graphic (PC or Macintosh), aPICT image (Macintosh only), or Encoding (PC only) just select Export from the File menu. You can choose Metrics, EPS, PICT, or Encoding from the submenu. When you choose EPS or PICT, a dialog appears allowing you to choose the format type for the exported material, whether to export all characters or just a selected group, or the sample text, and the point size to use. You choose the file to export “to” from the dialog. Exporting Encoding and Metrics works in pretty much the same way, but for Metrics you choose to export either kerning or spacing, or both types of information, and you select the file format to use: Macromedia metrics, AFM, or PFM. Print In the Print Sample dialog you can choose the sample type you want to print. Choose sample text, sample or PostScript file, keymap, kerning pairs, or Characters. Printing Sample text offers three choices. All characters will print all the characters in the font you are modifying. Selected characters will print only those you select from the Font Window. Sample text will allow you to print the text you type in the print sample text box. Choose Sample file to print a text file with the new font style. PostScript file will print a custom PostScript file; some sample PostScript files are available in the “PSFiles” folder or directory. You can use these files as they are, or modify them with a text editor to define your own sample. Key map prints all the characters in the font including offsets, widths and key codes, and offers you the choice of Selected or All characters, and format types. Kerning pairs prints the kerning pairs in the current font or in a monospaced System font. Characters prints four kinds of print samples: a single full-page sized character, assorted sizes of the same character, a sample showing the points of a character, or one that shows points and X/Y coordinates. Quit/Exit If you Quit or Exit without first saving some changes you have made, Fontographer will ask if you want to save those changes. You can discard those changes by clicking the Don’t Save button. The Cancel button stops the process. If you Quit/Exit with multiple, unsaved databases open, you will have the option to “Close All,” “Save All,” “Cancel,” or “Review.” The Edit Menu Undo Fontographer has 101 possible levels of “Undo.” The default setting is ten. This means that you can Undo the last ten things you changed in Fontographer. The operation that can be undone will appear in the menu after the Undo if you are using the Outline or Bitmap Window. Undo is not available in the Font Window. Redo Redo allows you to undo an Undo. There are 101 possible levels of redo. Cut Cut deletes the selected object(s) and puts them in the Clipboard. Copy Copy makes a copy of the selected object(s) and puts them in the Clipboard. Paste Paste takes the object(s) in the Clipboard and puts them into the selected window or character slot. Clear Clear deletes the selected object(s) without doing anything to the Clipboard. Copy Widths Copy Widths will copy the character width of a selected character to the Clipboard. Copy Reference Copy Reference copies a reference of a selected character into the Clipboard, which can then be pasted to allow layered objects. You must use Copy Reference instead of Copy if you want to create a composite character. Unlink Reference Unlink Reference relaces a referenced character with explicit paths. Select All Select All selects everything in the currently active window and layer. From the Font Window you can choose Select All to select all the character slots that are filled; Option-Select All (Alt-Select All) selects all slots, even if there are no paths in them. Duplicate Duplicate makes a copy of the selected object(s) and leaves it on the screen slightly displaced from the original(s). Power duplicating occurs when you duplicate the same object several times (in the Outline Window). Clone Clone duplicates a point or path and places it directly over the original (in the Outline Window). The View Menu Preview In the Outline Window, the Preview mode displays the character or image filled, and stroked (if it’s a stroked character), as it will appear when printed. You can edit the character in Preview mode. Show points If this item is checked, Fontographer will show the points on the path(s) in the Outline Window. When this item is unchecked, Fontographer merely draws the character’s outline(s) and does not show the points. Magnification You can magnify an image in Fontographer by selecting any one of the Magnification submenu options. Fit in Window will fit the character in the window. The other choices magnify at various levels: 6.25%, 12.5%, 25%, 50%, 100%, and 200%. Next Character This item switches the currently selected character to the next character of the font. Next Kerning Pair If kerning pairs have been created for a font, you can choose “Next Kerning Pair” in the Metrics Window to change the currently selected kerning pair to the next one in the sequence of kerned pairs. Next Point Next Point changes the selected point to the next one in the path’s sequence of points. Next Point Size If more than one size of bitmaps has been created for a font, you can choose this item in the Bitmap Window to switch the size of the bitmap character to the next larger point size. Previous Character This item switches the currently selected character to the previous character in the font. Previous Kerning Pair If kerning pairs have been created for a font, choose “Previous Kerning Pair” in the Metrics Window to change the currently selected pair to the previous one in the sequence of kerned pairs. Previous Point In the Outline Window choose “Previous Point” to change the selected point to the previous point in the path’s sequence of points. Previous Point Size This item switches the size of the bitmap character in the Bitmap Window to the next smaller point size. Snap to Points Choose “Snap to Points” to turn this item on or off. Snap to Points will make the selection snap to the nearest point within a certain number of pixels from the pointer. Or you can choose to align the selection with all the points in the Preferences dialog. Snap to Guides Choose “Snap to Guides” when you want the selected point to snap to the nearest guideline within a certain distance from the pointer. Snap to Grid Choose “Snap to Grid” when you want a selected point to snap to the nearest intersection of invisible grid lines. You can change the grid size in Preferences. The Element Menu Transform The Transform menu item displays a dialog that lets you choose various transformations in the Outline Window. You can choose to center transformations around the origin, the basepoint, the center of selection, or the last mouse click, and you can make up to four transformations simultaneously. Flip The Flip item allows you to flip any character(s) or selected parts of a character. The flip can be either horizontal or vertical and will occur relative to the Basepoint or you can flip around the Center of selection or the Character origin if you have selected objects in the Outline window. Move The Move item allows you to move selected objects a specified distance horizontally, vertically, or both. Rotate The Rotate item allows you to rotate any character(s) or selected parts of a character. You can choose for the rotation to occur relative to the Basepoint, the Character origin, or around the Center of selection or last mouse click if you have selected objects in the Outline Window. Scale The Scale item allows you to resize selected characters. If 100% scaling is selected, Fontographer does not change the size of the character(s). If you wish to make selected characters smaller, use numbers below 100. If you wish to make them larger, use numbers over 100. You can scale the horizontal and vertical dimensions separately if you wish. A 200% horizontal scaling coupled with 100% vertical scaling will make selected characters twice as wide while leaving them just as tall as they were before the scaling operation. You can choose whether Fontographer will scale from the Basepoint, the Character origin, or around the Center of selection or last mouse click if you have selected objects in the Outline Window. Scale Uniformly Uniform scaling will resize selected characters uniformly, with 100% representing the current size. Scale relative to the Basepoint, the Character origin, or the Center of selection. Skew The Skew item allows you to skew any character(s) or selected parts of a character. The skewing will occur relative to the Basepoint, the Character origin, or you can skew around the Center of selection or last mouse click if you have selected objects in the Outline Window. Positive degrees of horizontal skew slant the character to the left; negative degrees slant right. Arrange Arrange allows you four choices when you are working with referenced or composite characters. It also can be used when you’re reordering paths in font blending, or when you’re creating a multiple master font. Bring to Front This item brings a selected object all the way to the front layer. Send to back This item sends a selected object all the way to the back layer. Bring forward This item brings selected objects forward by one layer. Send backward This item sends a selected object back one layer. Font Info In the top of the dialog you will see the name of the current font and its style. Next you will see the encoding options. If you choose “ Adobe® standard character encoding” from the Encoding box, Fontographer displays and stores a font with Adobe encoding. Do not check this option if your fonts have all the upper 128 characters defined. All the numbers in this dialog are in em square units. The Ascent and Descent default to a sum of 1,000 units for a PostScript font, or 2,048 for a TrueType font (refer to Chapter 7, Generating and Exporting Fonts). Since a PostScript underline is accomplished by defining a stroked line a certain distance from the bottom of the character, the Underline position entry allows you to change the distance between this stroked underline and the characters above it. The default indicates that this line will be drawn below the baseline. The Underline width indicates how wide the underline should be; the default is 20 units. You can put any text in the Notice you like, but it must be limited to 100 characters or less. Normally you will put a copyright notice here. You would uncheck the Automatically compute em square from ascent + descent if you want an em square that is not equal to the sum of the ascent plus the descent. With the Retain path coordinates when changing em square checked, the entire font will look smaller if you make the em square larger. Selection Info When you choose “Selection Info,” a dialog will display on the screen that relates to the type of selection you have made. In the Font Window, this choice will display character information, and in the Outline Window either character or point information will appear, depending on your selection. In the Hints layer, you get the Hint Info dialog, and in the Metrics and the Bitmap Windows the Selection Info menu item displays character information. Character Information The Character Information dialog allows you to change the fill and stroke characteristics of individual characters for Type 3 fonts. Normally a character will be either filled or stroked, but you can use this dialog to create characters that are both filled and stroked. The Tint, Weight, Cap, and Join options allow you to set the characteristics of a stroked font. The character Name textbox allows you to change the name of the character—but be warned that doing so will also change the type of encoding your font uses if the current type does not include a slot with the name you select. Fill If the Fill box is checked, you can change the percentage of black with the Tint option: 100% is black; 0% is white. The Normal fill will fill between paths that are alternately clockwise and counterclockwise and can be seen in Preview. The Even/odd fill will fill between every even/odd pair of paths, starting with the outermost path. Stroke If the “Stroke” box is checked, you can change the percentage of black which fills the stroke with the “Tint” option: 100% is black; 0% is white. Weight The Weight option allows you to change the thickness of this individual character’s stroke from the default set in the Font Info dialog. Cap and Join In this dialog, the Cap and Join options are for stroked fonts. The Cap options determine the shape of the endpoints of a stroked path. The Join options determine the shape of joins along a path. Point Information The Point Information dialog appears when you select a point in the Outline Window and choose “Selection Info” from the Element menu. Point Information lets you change the location of a point horizontally and vertically, or designate it the first point in the path. You can also alter the position of its BCPs or you can return the BCPs to the point, or move to the next or previous point in the path. Hint Information The Hint Information dialog appears when you select a hint in the Outline Window and choose “Selection Info” from the Element menu. Hint Information lets you navigate through your hints by hint type and set the starting and stopping point of a hint, You can also add, remove, and flip hints, and apply them to Type 1, TrueType, or Bitmap fonts as applicable. Bitmap Info The Bitmap Information dialog allows you to specify the point sizes you want to create. The bitmaps are stored in the Fontographer file. When you are ready to create an installable bitmap font use the Generate Font Files command in the File menu. Auto Trace Auto Trace will autotrace any artwork or scanned image that you have pasted in the Template layer or have brought in as a reference using the Import Bitmap item in the File menu. You may use the Easy or Advanced mode to trace images. In the Easy mode the “tight” end of the slider makes the trace follow every possible contour on the image. The default “normal” or middle range of the slider is a good compromise between the “tight” and “loose” options. The “loose” end of the slider ignores little jagged edges and attempts to fit only the largest features of the image. Advanced mode specifies the kind of fit curves will take: normal, loose, tight, or custom fit. In the lower portion of the dialog you can click on checkboxes that tell your computer to treat nearly flat paths as straight lines, or to find extreme points. Change Weight Change Weight allows you to change the character’s thickness. You can choose to correct path direction before changing the weight—to maintain proper filling. You can also limit the change in size to either vertical or horizontal size. Clean Up Paths Clean Up Paths improves the quality of your outlines. It removes unnecessary points and adds points where they are needed. Simply create the paths any way you’d like, and Fontographer will automatically clean them up for you. Expand Stroke The Expand stroke item is used to expand stroked characters (such as old versions of Courier) into contoured (outline) or filled characters. You can choose Cap and Join types, and if you are using the calligraphy option, the width and angle of the pen. Recalc Bitmaps When you choose this item selected bitmaps and point sizes will be recalculated. You can recalculate all the characters in your font, selected characters, or just the characters that are changed. You may also choose to preserve the line spacing, or the character shapes. Recalculating bitmaps is useful when you change a character’s outlines after having created bitmaps. Remove Overlap The Remove Overlap item allows you to merge and remove overlapping areas. You’ll get the best results if your path has a normal fill. If the path has an even/odd fill, you will be able to merge the paths, but you’ll need to remove the overlapping segment(s) manually. Removing the overlap(s) may result in faster printing fonts and help the hinting process and eliminate some TrueType printing problems. Correct Path Direction Correct Path Direction examines all the selected characters or paths and, if necessary, automatically reorders their path directions. Outer paths are set to clockwise, the inner paths to counterclockwise. Clockwise This item will be checked if the selected path was drawn in a clockwise direction. You can change the direction of a path to clockwise by selecting this item. Counterclockwise This item will be checked if the selected path was drawn in a counter-clockwise direction. You can change the direction of a path to counter-clockwise by selecting this item. Blend Fonts Blend Fonts takes two fonts you have selected and develops a third font that is the offspring of this merger. Multiple Master (Macintosh only) This is the dialog which controls the creation of multiple master typefaces. You can choose the ‘master fonts,’ as well as coordinate space and many other multiple master variables. To actually generate a multiple master typeface, go into the Generate Font Files dialog. The Points Menu Align Points Align Points will align selected points along a horizontal or vertical axis. Fontographer decides which axis they are closer to forming. Align Points to Grid Align Points to Grid will align the selected points with the nearest intersection of grid lines. If no points are selected then all points are aligned with the grid lines. Hold down the Option or Alt key during the selection to align BCPs as well. Merge Points Selecting this item will remove the selected point without breaking the path it is on. If you need to open a path, use the Delete (or Backspace) or Clear key, or the knife tool. Retract BCPs This item will retract the extended BCP lines of selected points. Split Points Split Points will divide a selected point into two points. The path can be opened by dragging one point from on top of the other. Auto Curvature This item automatically adjusts the slope of the BCPs of a selected point to maintain a regular curve as the point is moved. Curve Point This item will be checked if the selected point is a curve point. Selecting this item while other kinds of points are selected will change those points to curve points. Corner Point This item will be checked if the selected point is a corner point. Selecting this item while points of other kinds are selected will change those points to corner points. Tangent Point This item will be checked if the selected point is a tangent point. Selecting this item while points of other kinds are selected will change those points to tangent points. Set Basepoint If you have not selected any points, choosing this item will cause a dialog box to appear which will allow you to set the horizontal and vertical location of the basepoint. If you’ve selected a single point, Fontographer will move the basepoint to that point. If you have selected more than one point, Fontographer will set the basepoint to the center of the selection‘s bounding box. Reset Basepoint Click “Reset Basepoint” to return the basepoint to its original location at the intersection of the origin and the baseline. The Metrics Menu Auto Space Auto Space automatically spaces a font, setting widths for each character. You can select the Easy or the Advanced mode. With the Easy mode you just select the spacing between characters that you prefer. Check the spacing out in the Metrics Window by typing text in to the textbox. See “Advanced Auto Spacing” in Chapter 5 for a detailed explanation. Auto Kern Auto Kern automatically kerns a font. In the Easy mode you can choose how many kerning pairs you want, how close together you want the pairs kerned, and whether or not you want Fontographer to change existing pairs. (Check this item if you want to manually set some pairs but want Fontographer to set the others.) The Advanced mode allows you to choose which characters to kern, how many pairs to make, and a lot more. You can also specify the techniques to use, as well make choices about special cases. See “Auto Kerning” in Chapter 5 for more details. Kerning Assistance Kerning Assistance provides a table where you can name kerning pairs by typing characters in to columns. See “Kerning Assistance” in Chapter 5 for a detailed explanation. Metrics Assistance Metrics Assistance allows you to set up a table for kerning that uses certain characters as bases or prototypes for the rest of the characters in any class you set up. See “Metrics Assistance” in Chapter 5 for more information and detail. Set Metrics Set Metrics allows you to set width, as well as left and right sidebearings. You can also apply values to specific sets of characters. Choose the characters you want to apply the metrics settings to, from the categories under Which character. These include: A-Z, a-z, 0-9, Punctuation, Accent characters, Symbols, or Selected characters. Add any other characters to apply the setting to, in the provided textbox. The next area in the dialog tells you “What to do.” You can choose to set the sidebearings or width according to a particular character’s measurement, or you can pick an em unit value to type in to set the width, and/or sidebearings for the selected characters. You may also add an amount to that specification, either in em units, or as a percentage of the distance represented by the character’s metrical measurements, or the value you chose. Set Width This dialog allows you to set the width of any selected character(s). If you are creating a monospaced font, select all the characters and set their width to a chosen number of units. Fontographer will set them all at once. If the spacing of your characters is too tight or too loose, you can use the Change width by em units option to change the width of selected characters by a specified number of em square units. If you need to increase or decrease the width of selected characters by a specified percentage, you can do so with the Change width by % value option. Enter a percentage change value in the box. Equalize Sidebearings If you want to make both left and right sidebearings for selected characters the same size choose “Equalize sidebearings” from the Metrics menu. This improves the looks of typed columns of numbers. When points are selected, Equalize Sidebearings will center them between the origin and the width lines. If you press the Option (Alt) key and choose “Equalize Sidebearings” the right sidebearing will become the same width as the left. Clear Kerning Pairs This option allows you to remove all kerning pairs from your font. You may wish to do this before choosing “Import Metrics” for a font. As a precautionary measure, a warning message allows you to Cancel this option before Fontographer deletes all the kerning pairs. The Window(s) Menu Open Outline Window Select “Open Outline Window” to view or edit outlines. Open Bitmap Window Open Bitmap Window will open an existing bitmap. If none exist, the dialog will ask if you want to create bitmaps. Open Metrics Window Open Metrics Window will display the Metrics Window for a selected character. View Windows by View Windows by lets you choose whether you want to display your font windows by Font name, File name, or Both. Show Layers Palette This item displays or hides the movable Layers palette when you select it. Show Tool Palette Click on this item to show or hide the movable tool palette. The Window Choices In the lower section of the Windows menu, there is a list of all open windows. Selecting a window in the list will bring that window to the front. Fontographer 4.1 for Windows users , have the additional menu choices of Cascade, Tile, Arrange Icons, and Close All. The Hints Menu Make Vertical Stem To make a new vertical stem hint select two of the points that define the stem and choose this item from the menu. Make Horizontal Stem To make a new horizontal stem hint select two points which define the stem and choose this item from the menu. Make Vertical Serif To make a vertical serif (a serif that attaches to a vertical stem) select four of the serif’s points and choose this item from the Hints menu. Make Horizontal Serif To make a horizontal serif (a serif that attaches to a horizontal stem) choose four of the serif’s points and select this item from the Hints menu. Make Diagonal Hint Select four of a diagonal stem’s defining points and choose “Make Diagonal Hint” from the Hints menu. Diagonal hints are used only in Fontographer’s internal bitmap generation and for TrueType. PostScript doesn’t use diagonal hints. Build Serif When you choose “Build Serif” from the Hints menu with two hints selected, one from each side of the vertical stem at its upper end, a serif hint will replace those two hints. Or you can select four points and choose “Build Serif.” Split Serif Select a double-head serif hint and choose this item to split it into two separate hints. Flip Hint Direction This item will change the direction of the current hint. Generally, hints should point inward but there are some exceptions. The direction of the hint tells you which way the outline will be adjusted when the pixels are fit to the grid during outline rasterization. Hint Parameters You can change the hint parameters for selected characters using the Hint Parameters dialog. When you change hints for certain characters, you reset the default hints for just those characters. Other characters in the font retain the prior default hint settings. See the section “Font hinting” in Chapter 10, “Expert Advice,” for more details on hints. Vertical Alignment Zones The vertical alignment zones correspond with the I-beam indicators appearing along the left-hand side of the Outline Window when the Hints layer is visible. When you click a zone indicator, the selected zone will appear with horizontal lines defining its parameters. You can alter a zone’s size by dragging on the upper or lower part of its indicator. Selected zone indicators appear hollow on each end. Autohint Use Autohint to recalculate hints automatically when you edit character outlines. Once an outline has been edited, new hints will be calculated to match the new outline. Autohinting is turned on if you see a check mark beside it in the Hints menu. To turn it off select it from the menu and the checkmark will disappear. The Help Menu (PC Only) Contents Browse through the topics in the Contents dialog to navigate the on-line Help provided with Fontographer 4.1 for Windows. Keys The Keys dialog lets you access on-line Help by typing key words. How to Use Help Look here for detailed information on using and customizing the on-line Help provided with Fontographer 4.1 for Windows. About Fontographer This About box displays the version number, release date, and Who’s Who of developers for Fontographer 4.1 for Windows. Special keys Keyboard alternatives To avoid having to constantly move the pointer back to the tool palette, you can use the number keys on your keyboard to switch between tools. When the lock icon is in the locked position, pressing the following keys will access the corresponding tool: Outline tools 1 2 3 4 5 6 7 8 9 0 Pointer Rectangle Multigon Oval Straight line Calligraphy pen Pen Knife Curve point Corner point Tangent point Bitmap tools 1 2 3 4 5 6 7 8 Straight line Hand Pencil Eraser Marquee Move Measuring tool Magnifier In the Font Window the left and right arrow keys will move you to the previous character or to the next character. The up and down arrows select the character in the row above or below the present character. In the Outline Window the arrow keys will move selected points by ten em units in the direction of the arrows. If the default setting in Preferences is changed, then this number will reflect that change. Option (Caps Lock)-arrow moves selected points by one em unit in the direction of the arrow. When the default setting in Preferences changes this number will be 1/10th the distance of the new setting. Shift-arrows move the selected points in the direction of the arrows by 10 times the default setting. In the Metrics Window, use the left-right arrow keys to move to the next or previous character in the screen display when a character is selected. Appendix A Tips We’d like to share several tricks we’ve learned while using Fontographer. Some of these are just reminders, others are shortcuts to solving typical problems. If you have additions, please send them to us. Minimize the total number of points when drawing characters. Smaller characters draw faster, take up less space in the printer and on your disk, and usually generate smoother characters. Most standard roman characters can be described in fewer than sixty points. “Clean Up Paths” makes sure your characters include the optimal number of points. Images that are imported or pasted into the Template layer are automatically sized to fit the em square. To maintain the original size of the image when pasting into the layer, hold down the Option or Alt key when you paste or import the image. The size of the image you see depends on the magnification level in the window. Open a line by using Option or Alt-knife to click on a point and remove the section of line between the adjacent points on either side of it. You might do this to open a sans serif character so a serif foot can be glued onto it. To pull a BCP out of a point, select the point, press the Option or Alt key, and drag until the BCP handle appears. Move one or both BCP handles directly on top of their curve points to get sharp corners with slope control. Fontographer has vertical “zones” that are important for uniformity in the font. If letters fall into these zones, the font will have uniform height. If not, your characters could unexpectedly vary in height at small sizes. Some guidelines to keep in mind: Technically, the “O” and the “o” (and other curvy letters) are said to overshoot the “H” and the “x” by about 4%, which makes them appear to be the same size as straight letters. We take advantage of Type 1 fonts’ ability to align upper and lower coordinates vertically within these overshoot zones, but only if the font is drawn according to the above rules (or if you adjust the vertical alignment zones from the Vertical Alignment Zones dialog accessed through the Hints menu). Don’t create outlines with overlapping paths. Whenever a tool is selected from the tool palette in the Outline Window, the information displayed in the information bar updates to accommodate the specific tool and its behavior. Some of the indicators that appear are horizontal and vertical displacement, angle indicator and length. For example, when the pointer tool is selected, additional indicators appear for horizontal and vertical displacement. The line tool activates additional indicators for line length and angle. Check out the Align Points command in the Points menu. This will take the selected points, and automatically align them horizontally or vertically (depending upon which they are closest to being already). It’s a great time saver for lining things up. Since Fontographer 4.1 allows the user to save a font with a name other than the filename, there have been occasions for confusion as to what the filename of the font is. The default is for the font to be viewed by the font name. The font name is specified in the Font Info... dialog. For those who keep font names and filenames the same, this method works fine. If, however, you have many versions of the same font name, we recommend that you change the View by... option under the Windows menu to filename. This will enable you to always know at a glance which file you are presently working on. Appendix B Answers to commonly asked questions Macromedia’s Technical Support has compiled answers to our customer’s most commonly asked questions. If you have any other questions, just give our technical support department a call at (415) 252-9080, contact the MacroFacts faxback at (800) 449-3329, or check out Macromedia’s web site at http://www.macromedia.com. I’ve made a PostScript font using Fontographer and have printed it to my printer. I then made some changes to the font and tried printing again, but the changes didn’t show up on the second printing. What is going on here and what can I do about it? Built into all Adobe PostScript printers is some software called a “font cache.” This font cache holds the imaged bitmaps of each of the characters that the printer has recently printed, so that it doesn’t have to waste time re-interpreting the PostScript description of the character, but can instead pull the already-imaged bitmap out of the font cache and place it on the page. Fontographer Type 1 fonts normally have an “Outline ID” which can be changed in the “Generate fonts” dialog. This ID is the numeric handle by which the PostScript interpreter references the font cache images. If you temporarily change the number of the outline ID to zero (0), then the interpreter will not cache any of the characters of your font and you won’t have this problem. Be sure to restore the original outline ID (or any random number between 4,000,000 and 4,999,999) when you’re finished with the font and are satisfied that you won’t be making any more changes. Another way to get around this is to flush the font cache after each iteration of your font by either turning the printer off for a few seconds, then turning it back on (for printers without hard disks) or by using Adobe’s Font Downloader 4.x (or later), which can get rid of the font cache on a printer that has a hard disk. The LaserWriter IIf and IIg do not store the font cache on the hard disk, so it is merely necessary to restart these printers. What is the difference between Type 1 and Type 3 PostScript fonts? Type 1 fonts are smaller, faster to print, better looking, and work with ATM. However, Type 1 characters must be entirely black. Type 3, on the other hand, can have grayscale fills and strokes and other special effects. Type 3 fonts are bigger, slower, look worse in very small point sizes and at low resolutions (up to 600 dpi) and don’t work with ATM. About 99% of the time, you will want to create Type 1 fonts. I need to exactly duplicate a font, with just a few changes to a few characters in that font. When I use Fontographer to “Open font” and get the outlines of the characters of the font I want to duplicate, I find that the resulting font doesn’t have any of its characters kerned like the original. What should I do? Choose “Import” from the File menu and then select its submenu “Metrics” to import the kerning pairs from the original font’s AFM or PFM file or bitmap file. Sometimes when I generate PostScript files with Fontographer, then look at those files in a Finder window “by Name,” I see that the document type for those files contains the name of one of my other PostScript fonts. Why does this happen and what can I do about it? Weird and wonderful are the ways in which the Macintosh Finder gets the information it shows you in the “by Name” view. We have found that if you wish to avoid this problem, always generate your PostScript files into a closed folder. If you have a lot of files that already have this problem and you’d like to fix them, you can use ResEdit or DiskTop to set the “Bundle” bit on each file, or you can use the public domain “BundAid” program to set them all at once. After having set the bundle bits, be sure to rebuild your desktop file by restarting your computer and then holding down the Option and Command keys until you see a dialog that asks you if you want to rebuild your Desktop file. Answer “Yes” and your desktop file will be rebuilt and you won’t see those pesky names any more. I’m running Macintosh System 7 and suddenly some of the keystrokes I used to type in System 6 to get characters in the upper 128 range don’t work any more. Why did this happen? Apple has changed the keyboard mapping in System 7. The advantage to the System 7 mapping is that there are now four new characters that are accessible from the keyboard and some of the other characters are more logically accessible. There are three things you can do: 1. Learn the new keypresses so you’ll know what to type when you need these characters; 2. Apple has a KCHR resource called “oldUS” which can be used with System 7 to emulate the old keyboard mapping. You should be able to download this resource, and instructions for its use, from CompuServe or America Online. If you have CompuServe GO MACBVEN, choose Data Library #3 (Altsys) and download the file named SY7KCH.SIT. If you have America Online, type Command-k and enter the name Altsys in the dialog, then open the “Fonts and Demos” library and choose the file called “System 7 Keyboard Remap.” 3. Upgrade to System 7.1 which comes with the System 6 keyboard mapping as an easily changed option in the Finder. Below is a chart that diagrams the changes to the keyboard which appeared when System 7 was released. The “S” character stands for Shift, the “O” character stands for Option. Hold down either the Shift and/or Option key while typing the next character in the sequence. In sequences like O-i-S-a, hold down the Option key, then press the “i” key, let up on both, then hold down the Shift key, and press the a key, finally letting up on both. Ignore the hyphens and the ampersands. See Part II of Using Fontographer on Your Macintosh for more information on KCHRs . Char Decimal Hex System 6.0.7 System 7.0 ´ 171 AB O-e-O-e S-O-e ¨ 172 AC O-u-O-u S-O-u Ÿ 217 D9 S-O-‘ O-u-S-y ‰ 228 E4 S-O-e S-O-r  229 E5 S-O-r & O-i-S-a S-O-m & O-i-S-a Ê 230 E6 S-O-t & O-i-S-e O-i-S-e Ë 232 E8 S-O-u & O-u-S-e O-u-S-e È 233 E9 S-O-i & O-‘-S-e O-‘-S-e Char Decimal Hex System 6.0.7 System 7.0 Ì 237 ED S-O-g & O-‘-S-i O-‘-S-i Û 243 F3 S-O-z & O-i-S-u O-i-S-u Ù 244 F4 S-O-x & O-‘-S-u O-‘-S-u ˆ 246 F6 S-O-n S-O-i ˜ 247 F7 S-O-m S-O-n ¸ 252 FC - - - S-O-z ² 253 FD - - - S-O-g 254 FE - - - S-O-x 255 FF - - - S-O-t My logo font has a fairly complex drawing in it that prints just fine to my LaserWriter at small point sizes, but won’t print large sizes at all to my Linotronic (or any other imagesetter). Why won’t it print and what can I do about it? There is a limitation in Adobe PostScript Level 1 that limits the number of “turn points” in a PostScript character. Turn points are required when PostScript images any curved line because the PostScript imaging system really can’t do curved lines at all, it just fakes them with lots of very short straight lines all lined up at angles to one another. Each time there’s a new little straight line, you have a turn point. PostScript level 1 font characters can’t have more than 1500 of these per character, and when you image a character on a 300 dpi printer like a LaserWriter, not as many turn points are generated because fewer are needed to define a curve at this low resolution. Thus the LaserWriter will print the character because its low resolution avoids exceeding the 1500 turn point limit, while the imagesetter with its higher resolution exceeds the limit. Similarly, the number of turns required to image the curve at 12 points is far fewer than the number required at 120 points. The solution to this problem is either to make a Type 3 font with internal composites (as described in Chapter 1) or to make a Type 1 font with the character broken out into parts in various characters so that the first few parts have zero width and the last part has the actual width of the entire logo. To get the whole logo, simply type the character strings, each of which will pile on top of the last one, until the final character in the series finally moves the cursor to the right to give the character its true width. My .ttf font shows open rectangles in the character slots instead of the characters. What went wrong and how can I fix it? If this is happening with signatures or symbols (logos, icons, and picts) your character is probably too complex for the TrueType rasterizer. You can get around this by either simplifying the object, or splitting it into multiple keystrokes (e.g., AB instead of A) to access the image. For a signature, place “John” in the J slot and “Smith” in S. If the last name is too long, such as “Supercalafragilisticexpialadocious,” you’ll need to split that too. This could take a bit of experimenting until you get it working. If ALL of the characters appear as rectangles in a non-pictorial font, it probably means the character mapping table got thrashed. To fix this, go back to the Fontographer database and make a note of the attributes (i.e., family name, full name, ascent, descent, etc.) and open a new font and give it those same attributes. Then copy your characters into the new database, save, and regenerate the .ttf. Uninstall the old font, install the new one, and you’re ready to go. Check the MacroFacts faxback for a TechNotes on this. I’ve imported some characters into Fontographer from FreeHand (or Illustrator) by using Option-copy and the fonts seem to print OK, but I can’t “Convert to paths” in Illustrator 3.x. Why? Some further rules of Type 1 fonts state that no overlapping paths are allowed in a Type 1 character. If your imported characters were drawn in such a way as to overlap some of the paths, you will need to redraw those portions of the character that overlap. Another reason for this problem can be that a path in a character was accidently left open (unclosed). Make sure that all outlines for a Type 1 character are closed paths that don’t overlap one another. Another possibility is that somewhere in the font is a character where one point is exactly on top of another point. This will also cause problems for ATM and Illustrator. I’ve been working on a font in Fontographer and suddenly, when I try to open my font, Fontographer tells me it can’t open the file and gives me Error # -54. What’s going on here and what can I do about it? You may be using FontPorter from Adobe (it came free with ATM 2.0) and have dragged your bitmap file (the one with the .bmap extension on it) into the System Folder rather than installing it with Font/DA Mover. FontPorter still has a hold of the bitmap font and Fontographer is trying to get at it but can’t, because FontPorter already has first dibs. Error #-54 is a “permissions” error telling you that Fontographer doesn’t have permission to open the file because FontPorter already has it opened. To fix this problem, drag the .bmap file out of the System Folder and back into the folder where you were working on your font, then restart your computer. This problem could also potentially occur if you are using Suitcase or Master Juggler to attach the .bmap file to your System. Detach the file and Fontographer will work normally. All I did was load an existing font, generate it as a Windows TrueType, and install it. It displays terribly, compared to the way it originally looked before I opened it in Fontographer. How can I make it look good again? First—in case something got corrupted—select all from the original font, and copy and paste into a new font. If paste doesn’t work, try copying one or two rows of the database at a time. Next you will need to rehint the font as follows: from the Hints drop-down menu select Vertical Alignment Zones, click on Recalc, and click OK. Then select Hint Parameters from the Hints drop-down, click Recalc, and click OK. Go to the Hints menu and select Autohint twice to turn it off and back on. I want to use Fontographer to create my own version of a non-Roman font. Why can’t I load an entire 2-Byte font into Fontographer? 2-Byte fonts contain tens of thousands of characters. Fontographer 4.1 has a limit of 8,192 characters. You will need to create more than one database/font generation in order to get all the characters you need. You can access characters above 256 in Windows via Uni-code. Get a copy of the “Unicode Standard” book from Addison-Wesley. You will need to purchase either an Operating System such as “Japanese MS-Windows” or find a keyboard driver and an editor which support your Unicode characters. Try Eastern Language Systems at (801) 377-4558, or Gamma at (310) 451-4725 for more information. You’ll need a special MS-Windows driver from Microsoft to let your keyboard access the Unicode characters. Windows 95 recognizes the entire Unicode book, but Windows 3.1 only recognizes ANSI Unicode values. There are no special tools to do this—you’ll have to do it manually by highlighting position 256 and then selecting Next char from the View menu to add characters above 256. Fontographer 4.1 for Mac has a built-in Unicode font encoding option that allows you to paste glyphs into 2,147 pre-numbered Unicode slots. This makes life a lot easier for those who are using standard systems such as Cyrillic, Hebrew and most European characters. I spend a lot of time importing graphics and making fonts out of them. But I am tired of having to have all the programs open at once in order to do the “Option-copy’ trick. Is there anything else I can do? Yes! Fontographer 4.1 can import EPS files directly (from Macromedia FreeHand or Adobe Illustrator) either from the Outline Window or from the Font Window. That means you can quickly and easily import graphics without having to launch other applications. Is the process of font generation still the same? Pretty much, but there are some additional options. To make font generation more approachable, we have divided the dialog box into two modes: Easy and Advanced. Most of the time you won’t want to be bothered with all the choices and specifications possible for fonts. The Easy mode has everything that is usually required. In the Easy mode, simply choose the computer of interest (Macintosh or PC), what sort of font to output (PostScript Type I, TrueType, etc.), what bitmap sizes you want (if any), and where to generate them. That’s right, you can now explicitly tell Fontographer where to put the files it generates. In addition, Fontographer will no longer create the practically useless AFM field unless you specifically ask for them! The Advanced mode has all the rest: choice of encoding vectors, outline font ID’s, bitmap font ID’s, AFM’s, etc., etc., etc. For more information on Unicode, Cope Pages, cmap tables, input systems, keyboard drivers, localization, etc., use a Web browser to search the World Wide Web via http:\\www.yahoo.com. Search for “language” or “fonts” and you’ll find plenty of info and font nerds to talk to. Or check out Multilingual Computing Magazine, 111 Cedar, Sndpoint, ID 83864, (208) 263-8178, [email protected]. Appendix C General information Type terminology Ascent The ascent line marks the top of the capital letters. An ascent guideline is automatically drawn at the vertical position specified when the font is created, and may be changed by using the “Font Info” command from the Element menu. Characters should not normally go above the ascent line. Baseline The baseline is the imaginary line upon which capital letters sit. When printing mixed fonts on a line, all baselines line up with one another. The baseline position does not need to be explicitly specified, since it is always at a vertical location of zero. Display type Display type is generally used for headlines or advertisements and is meant to attract attention. Display type is bold and heavier than text type because it is used in larger point sizes. More often, display type is highly stylized to the point where it is unreadable in small point sizes. Em square Each character is described in terms of a rectangle called an em square. The em-square is the outer square around the letter. This square is so named because it is nominally as wide as the letter “M” and the same height. Face A face (typeface) is a complete set of characters that share a similar appearance. Typical methods of categorization consist of measures such as thickness of stroke, angle of the stroke, roundness of letterforms, and many other dimensions which lie beyond the scope of this guide. Before the advent of Fontographer, the number of typefaces available for Windows was limited. Family When speaking about a group of related fonts, we shall use the word family to describe a related group of faces. The Goudy Oldstyle family used in the text of this manual consists of four fonts: Goudy Oldstyle-Plain, Goudy Oldstyle-Bold, Goudy Oldstyle-Italic, and Goudy Oldstyle-BoldItalic. Font A font (derived from “found,” as in typefoundry) of type is a particular style of type in one body-size and one style of face. For Windows, the distinction between fonts and faces is not always straightforward. Since the distinction between face and font is not clear, we feel justified in using the term “font” to describe both a particular size of a face, and the underlying face itself. When talking about the face in the abstract sense, we shall continue to use the word “face” in its proper sense. Point size A letter’s type size is measured by its point size. The point system of type measurement was invented in 1737 by Pierre Fournier, a Parisian typefounder. Fournier’s unit of measurement was 0.349 mm. In modern desktop publishing, a point is defined as 1/72 of an inch. The point size of a font is measured as the distance from the ascent line to the descent line. A 14-point font measures 14 points from its ascent line to its descent line. Sans serif This manual’s section headings are sans serif (without serifs). Sans serif type is generally considered more modern, while serif type is considered more readable. Some typographers have referred to sans serif typefaces as “grotesque.” In the United States, sans serif letters have been called “gothic,” which in Europe refers to black letters. Helvetica is an example of a sans serif face. The typeface used for our headings in this manual is a sans serif face, TFForever. Serif Serif letters can be distinguished by the line that crosses the main strokes of a character. Serifs are the short cross-strokes at the ends of letters, drawn there to improve readability of the type. The typeface used in this text is a serif face, Goudy Oldstyle. Another example of a serif face is Times. Style Styles of a face include modifications such as bold, italic, condensed, and extended. Each style should be considered a separate face. The combination of styles makes up a font. A typestyle provides a way to add emphasis to written text. Other styles could be defined: Many faces have condensed and extended versions, and some have light and heavy versions. Ultra-bold is frequently used for headline text. Text type Text type is used for larger masses of text and should be highly readable. x-height The x-height line marks the top of the lower case letters without ascenders or descenders, such as “x” and “o.” This line may be positioned anywhere you wish, since it is only a guideline. In general, faces with taller x-heights are perceived as larger and more readable than those with small x-heights. Fontographer background Em square Fontographer’s em square is used as a normalization value when generating PostScript and also defines the precision possible in the font. The ascent and descent (found in the Font Info dialog) are measured in em units, as are all measurements in Fontographer. The sum of these two values defines the em square. Units Fontographer units are values whose size is relative, varying with the size of the em-square and the point size of the output. Because outline fonts are scaleable, units do not directly relate to points, pixels, or any physical distance. It is possible to relate units to physical distance if the em-square is set up knowing the printing device resolution and scale at which the font is to be printed, but this defeats the whole concept of outline fonts. We recommend that you forget about trying to relate units to distance and think of them as design units whose dimension may vary. Fontographer is capable of defining fonts with an em square of up to 8,000 by 8,000 units. This range is far greater than needed for any normal font. Most PostScript fonts have an em square of 1000 units, which is also Fontographer’s default. Precise work for high-resolution printers above 1000 dpi might benefit from an em square of 2,000 or more. The choice of em square size is left up to you. Choosing a larger em square means that you have more precision when outputting the character. It does not mean that the printed characters are larger. Since a font is always normalized so that the em square is one point high, a font defined with an em square of 4,000 prints out at exactly the same size as a font defined with an em square of 1,000. It has four times the internal resolution, but that is insignificant on a 300 dot per inch printer except at very large point sizes. A 1,000-point high character (almost 14 inches) would have at most 1/72 inch of inaccuracy if drawn on a 1,000-unit em square. If drawn with a 4,000-unit em square, the inaccuracy would be approximately one dot (1/288 of an inch). Proper positioning of the control points, whatever em square size is used, is more important than greater resolution. Unique PostScript ID This ID is used for caching character images in your printer, thereby decreasing printing time. Font IDs for new fonts are automatically generated in the range 4,000,000 to 4,999,998. If you are a commercial font developer, you should contact Adobe Systems, Inc. at (415) 961-9611 for an allocated font ID. If you do not want your font to have a unique PostScript ID, enter “0” in this field, and Fontographer will not assign a unique ID to your font. Bitmap background Bitmap fonts (Macintosh) The Macintosh uses bitmap fonts for screen display. Bitmap fonts are selected from any application which understands fonts. Bitmap fonts are stored in the System file, where they are accessible to all programs. Bitmap fonts cannot be smoothly scaled, so each outline font usually will have several bitmap fonts in different sizes for display purposes. FONDs (Macintosh) A FOND is a table that creates the link from the bitmap font to the outline font. A FOND is automatically generated by Fontographer whenever a bitmap font is generated. It contains several important types of information. he Macintosh print manager examines the FOND, and if there is an outline font file available in the System Folder, it is downloaded to the printer before printing begins. If no outline font file is found, the bitmap font is used. The outline font file must be in the System Folder or in the same folder as the printing application in order to be found for downloading. The FOND also links all the bitmap fonts in a family so that custom-tuned italic or bold faces may be used in place of inferior derived styles. This component of the FOND is independent of outline fonts. FONDs also store additional information, such as character metrics and kerning. Windows FON (PC) Windows FON is a Windows-compatible bitmap font that Fontographer 4.1 allows you to generate. Since these are standard bitmap fonts, they are limited to sizes between 1 and 255 points. The width of a bitmap character is limited to 254 points. At the larger point sizes, this may require you to limit the width of an outline character. Fontographer avoids trouble by automatically limiting wide bitmap characters to 254 points, even if the character is calculated to be wider. Generating bitmaps doesn’t necessarily mean that Fontographer will generate a .FON file. Fontographer will keep those bitmaps in memory and in its database file until you decide to remove them. PostScript background PostScript is a programming language developed by Adobe Systems, Inc. to drive high-resolution printers. Invented as a standard page description language with a well-documented behavior, it is used on printers produced by a number of different manufacturers. PostScript’s generality allows any picture to be described as a program; this is how fonts are constructed. Each letter is described by a small program which draws the letter outline using PostScript graphic commands. In order to print the character on a page, this character drawing program is run by the printer control software to draw and fill the outline, generating a high-resolution bitmap. The bitmap is generated at the current point size, and then copied to the page at the appropriate location. Bezier curves The PostScript graphic commands available are straight lines, arcs, and Bezier curves. A Bezier curve has control points which allow changing the shape of the curve. An arc has uniform curvature everywhere, but a Bezier curve allows non-uniform curvature. This property is useful in describing complex shapes with only a few well-chosen control points. Additionally, Bezier curves have desirable smoothness properties which lend themselves to efficient generating programs. Another useful property of Bezier curves is that it is very easy to guarantee smooth joins at the endpoints of the curve. Smooth tangent joins are very important to high quality letter shapes. Fontographer supports automatic tangent joins during character construction, so its characters are perfectly smooth where they should be smooth (but can be discontinuous if necessary). Caching Translating from the program into a bitmap is a complex process which takes an amount of time proportional to the complexity of the character. To minimize the amount of time spent generating bitmaps from the letter drawing programs, the bitmaps are saved on the printer’s hard disk or in memory for later use. This saving process is called caching. The first time a particular letter is printed, its bitmap must be generated and cached before it can be drawn on the page. Once a letter has been converted, its bitmap is normally found in the cache, and is used directly. Paths A path is composed of line or curve segments. These segments may be connected (the normal case) or disconnected (such as the dot on a lower-case “i”). Paths may be open or closed. A segment of a path is closed if the last point connects back to the first point, otherwise it is open. Characters may consist of open paths or closed paths, but not both. Normally a character is constructed such that its outline is defined as a single closed path. The program that generates the bitmap can then just fill in the outline. Some characters, such as the letter “O,” have an inside and an outside. A simple-minded approach to filling such a letter would fill both outlines, resulting in a single solid circle. To handle this case, PostScript has two sophisticated approaches to filling. Filling techniques Winding number fill The standard PostScript filling technique is called a winding number fill. This relies on one path being described in a clockwise direction, and the other path being described in a counterclockwise direction. A point is outside, and thus not filled, if a line away from that point in any direction crosses exactly as many counterclockwise paths as it crosses clockwise paths. In the case of the “O,” the outer path should be drawn clockwise and the inner path counterclockwise. Technically, it doesn’t make any difference whether the outside path is clockwise or counterclockwise, but for the sake of consistency between Fontographer’s fonts and the proper operation of automatic hints, the outer paths should be clockwise and the inner paths counterclockwise. Even-odd fill (Macintosh) The other filling technique is called an even-odd fill. A point is outside, and thus not filled, if a line away from that point in any direction crosses an even number of paths, regardless of the path direction. In the case of the “O,” even-odd filling would have the desired result even if both paths were clockwise. Fontographer will fill the paths properly as long as the paths do not self-intersect. Metrics PostScript stores auxiliary information in the character metrics table. This contains information such as the width of the character, its origin, and its bounding box. This table is generated automatically by Fontographer as you edit the character. The only direct user interaction with the character metrics is specification of the character width. The width is the distance by which the drawing pen is advanced before starting the next character. The origin point of the current character is aligned with the width point of the previous character before drawing the current character. TrueType fonts This is an outline font format developed by Apple Computer (for use with System 7) and supported by Microsoft Corporation. TrueType is the primary font format for Windows 3.1 and Windows 95. Type 1 fonts Type 1 fonts are the standard type of PostScript fonts. These may be sent to PostScript printers or viewed on-screen with Adobe System’s program, Adobe Type Manager (ATM). LaserWriter background Downloading Downloading is the means by which the font description is sent from the computer to the PostScript printer. PostScript printers contain powerful computers which allow them to accept a variety of fonts and graphics commands expressed in PostScript. In particular, they can accept new typefaces through the process of downloading. PostScript printers have two important types of built-in memory. The first is ROM (Read-Only Memory) which is unchangeable. ROM holds its information indefinitely, even when the power is turned off. The basic printer control program and several typefaces are programmed into the ROM and thus are not changeable. The second type of built-in memory is RAM (Random-Access Memory) which can be changed. However, RAM loses its contents each time the power is turned off. Downloaded fonts are put into RAM, as is the image of the page to be printed. RAM has enough space to hold three to five fonts, depending on their complexity. Both outline fonts and bitmap fonts may be downloaded into RAM, so your computer is able to print documents using bitmap fonts when the outline font is unavailable. However, the process is very slow, due to the way bitmap fonts are used. Downloaded fonts can further be divided into two classes: permanent and transient. Permanent fonts Permanent is a misnomer here, since the permanent fonts are only semi-permanent. Unless you have a hard disk attached to your printer, permanent fonts are downloaded once, and remain available until the LaserWriter is turned off. If your printer does have a hard disk attached, you can download your fonts permanently to the hard disk. Permanent fonts are good for those installations which do a considerable amount of processing, using just a few frequently used fonts, and don’t want to incur the overhead of downloading them with each printed document. Transient fonts Transient fonts are downloaded each time a document is printed, and remain resident only while that document is being printed. The printing program flushes them from memory, usually at the end of a document. Transient fonts allow a huge variety of fonts to be used without filling the printer’s memory. Automatically downloading a font takes only 15-20 seconds, so the price of transient fonts is quite low. Macromedia recommends that you use transient fonts in most cases. The download time is insignificant when compared with the problems caused by filling up the printer’s memory with permanent fonts. Appendix D A Short Bibliography of Typography and Allied Subjects by David S. Rose Fontographer gives you the ability to create new digital typefaces from your imagination, to recreate classic faces that are otherwise unavailable in digital form, and to adapt existing faces for your particular needs. As with any powerful tool, the more you know of the history behind it, the better able you will be to utilize it. The books listed here are just a few of the many hundreds that have been written on the subject of typography over three centuries, but they will provide an excellent start for background reading in this area. While many of the works listed are classics in the field, not all of them are currently in print. Those that are not available from the publisher (or from reprint houses such as Dover Publications) are generally available at most large libraries, and may often be found at antiquarian dealers who specialize in the field of Books about Books. A number of such dealers are listed at the end of this bibliography. Books marked with a bullet (•) should be the easiest to find. Overviews of Printing Types Printing Types: An Introduction by Alexander Lawson [Boston: Beacon Press, 1971] is a short (120 pages) easy-to-read overview that is exactly as advertised: an introduction. For over thirty years, Lawson has taught a course in the history of printing types at the Rochester Institute of Technology School of Printing, and this book grew out of his need for a simple handbook on the subject for his students. It is a well designed and illustrated inexpensive paperback, and would probably be your best bet if you have a casual interest in the subject and only want to read one book. Letters of Credit: A View of Type Design by Walter Tracy [Boston: David Godine, 1986. 224 p, ill.] A beautiful and profusely illustrated step-by-step demonstration of type-design aesthetics that traces the beginnings and the path of modern-day typesetting. Printing Types: Their History, Forms, and Use by Daniel Berkeley Updike (1860-1941) [New York: Dover, 1980 reprint of the second (1937) edition]. This is the classic work in the field of typographic history. Updike was a leader in the revival of traditional printing typefaces in the United States, and was the founder of the Merrymount Press (1893). A series of lectures he gave at Harvard from 1910-1917 served as the basis for Printing Types, which was first published in 1922. This Dover reprint is in two volumes, 618 pages of text plus 300 unnumbered illustrations. As Dover says in the jacket notes, “Printing Types presents the standards, the landmarks in typography that anyone connected with printing must know. In its mammoth, illustrated coverage, it is without a doubt the definitive guide to the subject.” Type and Typefaces by J. Ben Lieberman [New Rochelle: The Myriade Press, 1978] is an alternative to the Lawson book, but much less accurate, bigger (142 pages, 8 1/2 x 11, hardcover) and much harder to find. Lieberman was an enthusiastic amateur printer, and this book is an exuberant look at the history, classification, identification, and personalities of typography. It includes examples of over 1,000 type faces, and is well illustrated. Lieberman was not a scholar, but if you like unabashed ‘boosterism,’ you might find this book fun to read, despite its errors of both omission and commission. Fine print on type; the best of Fine print magazine on type and typography by Charles A. Bigelow, Paul Hayden Duensing, Linnea Gentry [San Francisco: Fine Print: Bedford Arts, 1988] is an excellent selection of articles from Fine Print magazine, the one indispensable periodical that anyone concerned with type should subscribe to. Each issue is designed by a different typographer, and is printed by letterpress. In addition to scholarly articles, typographic overviews, reviews, and notices of new books on typography, a supplement included with each issue contains a complete calendar of everything of typographic interest that is happening nationally and internationally. Fine Print was published quarterly through about 1990, after which the publication led a cliff-hanging existence as various groups and institutions tried to save it. Information might still be available from Fine Print at (415) 543-4455. Typographical periodicals between the wars; a critique of the Fleuron, Signature, and Typography by Grant Shipcott [Oxford: Oxford Polytechnic Press, 1980. xiv, 111 p. :ill.]. These classic periodicals (particularly the Fleuron) were to their time what Fine Print was to typography and book design today, but because of the ferment in the world of design during the 20s and 30s and because of their illustrious contributors, they had a much greater effect on the typography of the time. History and Development of Lettering and Letter forms The 26 Letters by Oscar Ogg [New York: Thomas Y. Crowell, 1948]. A nicely done book by a well known American calligrapher, tracing the evolution of the alphabet from prehistoric times to the invention of printing. 250 pages, well illustrated. Letters by James Hutchinson [New York: Van Nostrand Reinhold, 1983]. A stylishly designed, very readable history of alphabets, writing, and printing types. The History and Technique of Lettering by Alexander Nesbitt [New York: Dover Publications, 1957]. A thorough history of type design from its origin through the mid-twentieth century, this book covers some of the same material as the Ogg book, but includes much more information on the development of letter forms since the invention of printing. It is written from an artist’s perspective, and has a how-to section on lettering. The Alphabet and Elements of Lettering by Frederic W. Goudy [New York: Dover Publications, 1963. Reprint of 1952 University of California edition]. This falls somewhere between the Ogg and Nesbitt books, from Goudy’s unique perspective as the most prolific type designer of the twentieth century. Roman Lettering by L.C. Evetts [New York: Taplinger, 1979] includes a character-by-character analysis of the letters on Trajans Column in Rome, which have served for centuries as one of the foundations of roman (serif) letter design. Evetts also includes charts showing the evolution of the roman alphabet through the centuries. Handsome lettering, with little text to clutter the presentation. An ABC Book: ABC of Lettering and Printing Types by Erik Lindegren [New York: Pentalic, nd ca. 1976]. A survey of type, calligraphy, and design, with examples of work from all periods, with an especially strong representation of lettering by Swedish, English, German, and American scribes and designers. A lively, well-designed introduction to letters. Writing, Illuminating and Lettering by Edward Johnson [New York: Taplinger, 1980]. The comprehensive calligraphy manual by the man who led the twentieth century revival of calligraphy. Johnson’s influence on English, American and German lettering and design was immense. History of Lettering by Nicolete Gray [Boston: David Godine, 1987. 256 p]. Type Designs from Various Periods Art of the printed book, 1455-1955; masterpieces of typography through five centuries from the collections of the Pierpont Morgan Library, New York by Joseph Blumenthal, (1897- ) [New York: Pierpont Morgan Library; 1984. Boston, MA: D.R. Godine, xiv, 192 p. : ill.]. Available both in hardcover and paperback, this collection by one of the great printer/scholars of the century is a must have for anyone interested in original source material. More than a hundred full pages facsimiles from the Morgan Library provide an instant overview of the development of typographic design from Gutenberg to the mid-twentieth century. Selected Essays on Books and Printing by A. F. Johnson [Amsterdam: Van Gendt, 1970]. Johnson was a scholar at the British Museum, and along with Daniel Berkeley Updike and Stanley Morrison was considered one of the experts in the field of typographic history. This lovely, massive (500 pages), and very expensive collection of some of his writings from 1927-1957 concentrates primarily on the typographic work of sixteenth century calligraphers and printers. A view of early typography up to about 1600 by Harry Carter [(The Lyell lectures 1968) Oxford, Clarendon P., 1969. xii, 137 p. 45 plates. Illus., facsims., col. Map]. A history of the old English letter foundries; with notes, historical and bibliographical, on the rise and fall of English typography by Talbot Baines Reed, 1852-1893 and A. F. Johnson [Folkestone: Dawsons, Reissued 1974 xiv, 400 p., fold. Leaf : ill., facsims]. Notes on a Century of Typography at the University Press, Oxford, 1693-1794 by Horace Hart [Oxford, Clarendon Press, Reissued 1970 (1st ed. of 1900 reprinted) with an introduction and additional notes by Harry Carter. ix, 16, xvi, 203 p., plate. illus. Facsims]. History of the types and typography of the Oxford University Press, generally regarded as the preeminent scholarly press in the western world. Nineteenth Century Ornamented Type Faces by Nicolete Gray [Berkeley: University of California Press, 1976]. Reprint of a classic from 1938, this large format 240 page work is the definitive book on its subject. American Wood Type, 1828-1900 by Rob Roy Kelly [New York: Da Capo Press]. Notes on the evolution of decorated and large wood types, and comments on related trades. As with the Nicolete Gray book, this is the definitive work in its field. The book was issued in several editions, of which this (paperback) is the least expensive. The Typographic Book 1450-1935 by Stanley Morrison and Kenneth Day [Chicago: University of Chicago Press, 1963]. A lush, expensive, visual treasury of almost 500 years of typography, including 357 plates. American typography today by Rob Carter [(New York: Van Nostrand Reinhold, 1989. 159 p. : ill. (some col.)]. The Liberated Page Edited by Herbert Spencer [San Francisco: Bedford Arts, 1987]. An anthology of the major typographic experiments of the 20th century, as recorded in Typographica magazine. Typography The Crystal Goblet; sixteen essays on typography by Beatrice Warde [Cleveland and New York: World Publishing Company, 1956]. From a major woman in the field of typography come some thought-provoking pieces, including the famous analogy that gave the collection its name. Out of print, but available, and mandatory reading. Better Type by Betty Binns [New York: Watson-Guptill, 1989. 192 p]. An excellent contemporary book that shows by copious examples the subtle differences in relationships between typefaces, letters, and spaces. From the preface: “This book systematically trains designers to make these fine discriminations, with the aim of specifying text type that is not only readable, but also beautiful and expressive.” Highly recommended. Introduction to Typography by Oliver Simon [London: Faber & Faber, 1945]. Not a bad place to start. This edition is out of print, but there has been at least one reprint in recent years. Simon’s introduction is designed for the layman, and discusses many of the basic principles and theories of designing with type. First Principles of Typography by Stanley Morrison [Cambridge: at the University Press, 1951]. An important book from the man who designed Times Roman for the London Times. Asymmetric typography by Jan Tschichold [(Translated by Ruari McLean) New York, Reinhold Pub. Corp. 1967. 94 p. illus. (part col.) facsims]. Jan Tschichold (1902-1974), a well-known typographer, caused many people to rethink ‘conventional’ theories of typography when this seminal work was published in the mid-60s. Whether or not you agree with his approach, this book is required reading and will widen your typographic horizons. An essay on typography by Eric Gill [1st U.S. ed. Boston: D.R. Godine, 1988]. A classic typographic manifesto on the art and craft of letterforms from the designer of Gill Sans and the famous typography of London Underground. Typography, A Manual of Design by Emil Ruder [Niederteufen, Switzerland: Arthur Niggli Ltd, 1977. 3rd Edition]. A fascinating, disciplined, and very Swiss analysis of typography and letterforms. Ruder’s discussion and illustration of the importance of white space in letter forms and graphic designs is excellent background reading. Report on the typography of the Cambridge University Press by Bruce Rogers [Cambridge, Cambridgeshire: University Printer, 1950. viii, 32, (3) p. : ill.]. Bruce Rogers (1870-1957) is regarded by many as having been the greatest typographer and book designer of the twentieth century. After World War II he was commissioned by the Cambridge University Press to undertake a thorough review of all of the Press’ publications and standards. The resulting Report had a major impact not only on the C.U.P., but also on the general typographic theory and practice in both Britain and the U.S. Designing with type; a basic course in typography by James Craig and Susan E. Meyer [Rev. ed. New York: Watson-Guptill Publications, 1980. 176 p]. A modern ‘how-to’ book, available at many large bookstores and graphic arts dealers. Type Designers Twentieth Century Type Designers by Sebastian Carter [New York: Taplinger Publishing Company, 1987]. An excellent look at the people behind the type faces, with in-depth profiles of designers such as Goudy, Morrison, Zapf, etc. Typologia; studies in type design & type making, with comments on the invention of typography, the first types, legibility, and fine printing by Frederic W. Goudy (1865-1947). [Reissued 1977. Berkeley: University of California Press, xviii, 170 p.: ill.; 24 cm.]. Written by the most prolific type designer of the 20th century [creator of, among others, the eponymous Goudy Oldstyle], this reprint of the 1940 edition discusses the history, function, and meaning of type, and gives some very good insights into how a type designer works. Jan Tschichold: typographer by Ruari McLean [Boston: David R. Godine, 1975]. This puts Tschichold’s career and writings in the context of developments in society around him. It is informative and thought-provoking on its own, and serves as useful background to his writings on the subject. Manuale Typographicum; 100 typographical arrangements with considerations about types, typography and the art of printing selected from past and present, printed in eighteen languages by Herman Zapf [Frankfurt, New York: Z-Presse, 1968]. Herman Zapf is known to most desktop typographers primarily for giving his name to the Zapf Dingbat font. He is, in addition, one of the most respected and creative typographers and type designers of the century, who created not only the Dingbat and Zapf Chancery fonts, but also Optima, Lydian, and many other faces. Manuale Typographicum is a breathtaking ‘tour de force,’ consisting of 100 broadsides about type design in a wide variety of faces and styles. Superb as a source of inspiration and example. Herman Zapf and His Design Philosophy by Herman Zapf, Introduction by Carl Zahn [New Haven: Yale University Press, 90 color plates]. While the Manuale shows the master at work, this volume is a discourse on Zapf’s insights into type design. An excellent book. Edward Johnson by Priscilla Johnson [New York: Pentallic, 1976]. This biography of the twentieth century’s most important calligrapher, written by his daughter, traces his career and influence. Unlike many printing books, this one is a delightful read. Of the Just Shaping of Letters by Albrecht Dürer [New York: Dover Publications, 1965. (reprint of the Grolier Club translation of 1917)]. Originally part of Dürer’s theoretical treatise on applied geometry, here is the source for those famous capital letters set against a gridded background. Champ Fleury by Geoffrey Tory, translated into English and annotated by George B. Ives [New York: Dover Publications, 1967. (reprint of the Grolier Club translation of 1927)]. Similar to the Dürer book, but this is the one with the letters shown against naked human bodies in addition to the grid system. Pioneers of modern typography by Herbert Spencer [Cambridge, Mass.: MIT Press, 1983. Rev. ed. 160 p. : ill.]. Typeface Reference Works Graphics master; a workbook of planning aids, reference guides, and graphic tools for the design, estimating, preparation, and production of printing, print advertising, and desktop publishing by Dean Phillip Lem [Los Angeles, Calif.: D. Lem Associates, 1988. 4th ed. 153 p. : ill. (some col.)]. Although it covers much more than just type design, and is fairly expensive, this is probably the most important and continually useful reference work that a desktop designer and/or publisher should have. A.T.A. Type Comparison Book by Frank Merriman [Advertising Typographers Association of America, 1965]. An indispensable handbook for identifying typefaces. Hundreds of faces are grouped together by design, making it easy to find the one you want. Still in print, possibly in a more recent edition. The Encyclopedia of Type Faces, 4th Edition by W. Pincus Jaspert, W. Turner Berry, and A. F. Johnson [Poole, Dorset: Blandford Press, 1983]. The standard reference in the field. A detailed listing of over 1,000 faces, arranged by name, with full information on their history, designers, etc. Graphic Arts Encyclopedia, 3rd Edition by George A. Stevenson, Revised by William O. Pakan [New York: McGraw-Hill, 1990, 624 pp, 167 illus.] is a complete, readily available, and pricey ($58) reference to everything from basic block printing to desktop publishing. While not as Macintosh-specific as some of the other works available, it covers the hows, whens and whys of a whole range of graphic tools, including typography, art preparation, copyfitting and layout, film and platemaking, traditional photocomposition and typesetting, papers and papermaking, etc. A good general purpose book, but overkill for the beginning desktop publisher. Type Terminology on the Desktop [Richardson, Texas: Altsys Corporation, 1992] is already in your possession, in hypertext form (included with Fontographer on its CD.] A hard copy of this award-winning booklet defining typographic terms is also in the Fontographer package. Font & Function [Mountain View, California: Adobe Systems] is Adobe’s biennial catalog of their latest font offerings. But this tabloid size, four-color publication is also quite a bit more. It includes articles on typographic history, the background to many Adobe PostScript fonts, technical information and a graphic listing of over 1500 Adobe fonts. There’s no reason not to get this, especially since it is free for the asking from: Adobe Systems Incorporated, Attention: Font & Function, P.O. Box 7900, Mountain View, CA 94039-7900. The typEncyclopedia; a user’s guide to better typography by Frank J Romano [New York: R.R. Bowker Co., 1984. xii, 188 p. : ill.]. Type and typography; the designer’s type book by Ben Rosen [New York: Van Nostrand Reinhold Co., 1976 Rev. ed. 406 p. : ill.]. History of Printing A Short History of the Printed Word by Warren Chappell [Boston: Nonpareil Books (David Godine), 1980]. A once-over-very-lightly in 240 pages of large type, hitting the highlights in the development of type, printing and bookmaking. Five Hundred Years of Printing by S. H. Steinberg [Baltimore: Penguin Books, 1974]. A 400-page small-print paperback which is still in print, this covers Gutenberg through the early 20th century. Steinberg’s style is a little dry. Since his death, the book (starting with the third edition) has been edited by James Moran. A Dictionary of Book History by John Feather [New York: Oxford University Press, 1986, 278 pp] is a concise one-stop reference, in alphabetical order, to topics including bibliography and bibliographical terminology, the history of printing, the physical history of the book (including typography, binding, etc.) and book collecting. It has over 650 articles ranging from a few lines to several pages, and covers the ground pretty thoroughly. Although not a classic work (and, indeed, poorly designed itself as a book), it serves as a very handy reference to the history of books. An expensive purchase at the original price of $45, it is often available on remainder for about $10. The Making of Books by Seán Jennett [New York and Washington: Frederick A. Preager, 1967]. A good overview of the entire art and craft of the book, including a little history and a fairly detailed examination of every stage of the process. If you are interested in books in general, this is a good place to start. Out of print, but rather ubiquitous at second-hand and antiquarian dealers. The Book: The Story of Printing & Bookmaking by Douglas C. McMurtrie [New York: Oxford University Press, 1943]. Almost 700 pages of large type devoted to the history of the book, by one of the most prolific writers in the field. Easy to read, anecdotal, and illustrated. Although out of print, it is not particularly scarce and, if you can find it, probably the quickest way to get up to speed on printing history. Electronic Typography The Macintosh Font Book 2nd Edition by Erfert Fenton [Berkeley: Peachpit Press, 1993. 350 pp]. Everything you want to know about Macintosh fonts and type faces, including type terminology, building a typeface library, font management, printing options, and a near-complete list of available Postscript typefaces (with vendor addresses) and typesetting service bureaus. The second edition of this award-winning book covers TrueType fonts, System 7 and much more. The best all-around introduction to the world of Macintosh-specific font handling. Desktop Publisher’s Survival Kit by David Blatner [Berkeley, California: Peachpit Press, 1991, 172 pp, 800K disk] An excellent overview of the various facets of desktop publishing on the Macintosh. Blatner writes informally and well, and provides a good general grounding in file formats, fonts, typography, scanning and printing. The book includes a helpful section on troubleshooting when things go wrong, as well as a Macintosh disk full of DTP utilities, clip art and two PostScript fonts. While not an in-depth study of any particular area, this book is a very good first place to start for beginning desktop publishers. Collier’s Rules for Desktop Design and Typography by David Collier [New York: Addison-Wesley, 1992, 135 pp, illus.] David Collier of DeCode Design is a Young Turk of the British graphic design field, who has produced, an interesting, useful, graphically dazzling and extremely self-absorbed reference for Macintosh typography. This affordable paperback is chock-full of the latest on Mac-based typography, page-layout, design conventions and the like. While it has a distinctly British flavor, and goes overboard in its layout and graphic examples, Collier’s Rules is not a bad way for a budding typographer to absorb some of the basic principles and arcana of computer-based typography. The Mac is not a typewriter by Robin Williams [Berkeley, California: Peachpit Press, 1993, 72 pp.] A slim, elegant guide to typesetting on the Mac. Quick and easy chapters cover the ‘top twenty’ tips for effective Mac-based typographic design. Friendly in tone and easily accessible, most of the included information will be known by experiences designers but provide a very good primer for the novice. Fontographer: Type by Design by Stephen Moye [MIS: Press a subsidiary of Henry Holt and Company, Inc, 1995. 275 pp]. The first and only third-party manual on using Macromedia Fontographer. Learning PostScript: A Visual Approach by Ross Smith [Berkeley, California: Peachpit Press, 1993, 350 pp.] For those who are interested in manipulating PostScript directly, this hefty but accessible guide provides the best introduction to the industry-standard page description language. Clear and comprehensive, it alternates PostScript concepts and demonstration programs with full-page examples of printouts. Topics include drawing lines, arcs and curves, repeat loops and special effects. Macintosh desktop typography by John Baxter [Sunnyvale, CA, U.S.A.: Baxter Group, 1986 ill.]. One of the first books of this genre. A well done introduction to typography on the Macintosh, including useful suggestions about dealing with Postscript typefaces. Not as up to date as some of the books from Peachpit Press, though. Digital typography; an introduction to type and composition for computer system design by Richard Rubinstein [Reading, MA: Addison-Wesley Pub. Co., 1988. xi, 340 p.: ill.]. Bibliographies A Typological Tally compiled by Tony Appleton [Brighton, (T. Appleton, 28 Florence Rd., Brighton, Sussex BN1 6DJ), 1973. 94 p. ill.]. Thirteen hundred writings in English on printing history, typography, bookbinding, and paper-making, compiled by one of the world’s top dealers in the field. A Bibliography of Printing with Notes and Illustrations by F. C. Bigmore and C. W. H. Wyman [London: Oak Knoll Books, 1978]. Universally known as “Bigmore and Wyman,” this is to printing bibliographies what Updike is to books about printing types. Published in 1880 (editions since then have been reprints) B&W provides excellent commentaries on just about every book that had been written on the subject as of the year it was published. Book Dealers/Publishers Specializing in Typography Oak Knoll Books 414 Delaware Street New Castle, DE 19720 (302) 328-7232 David R. Godine, Publisher 300 Massachusetts Avenue Boston, MA 02115 (617) 536-0761 Peachpit Press 2414 Sixth Street Berkeley, CA 94710 (800) 283-9444 (510) 548-5991 Timothy Hawley Books 2114 Douglass Boulevard Louisville, KY 40205 (502) 451-0518 The Veatchs, Arts of the Book 20 Veronica Court Smithtown, NY 11787-1323 (516) 265-3357 The Bookpress Ltd. Post Office Box KP Williamsburg, VA 23187 (804) 229-1260 Many thanks to Howard Gralla, Alvin Eisenman, Robert Fleck, Kathy Schinhofen, Chuck Rowe, Earl Allen, Susan Lesch, Kathleen Tinkel and Michael J. Boyle for their suggestions before and during the compilation of this bibliography. This bibliography has been adapted and expanded from an earlier annotated checklist by the same author prepared for members of the MAUG Forums on CompuServe. Copyright © 1988-1993 by David S. Rose • CompuServe: 70210,563 Applelink: EX.MACHINA The Fontographer User Guide Bibliography Adobe Type 1 Font Format. Adobe Systems Incorporated. 1990. Adobe Type 1 Multiple Master Typefaces. Adobe Systems Incorporated. 1991. Shubitz, Steve. Installing and Using Fontographer PostScript PC Fonts on MS-DOS Machines. La Jolla: Published Perfection!. 1990. Speedball Textbook for Pen and Brush Lettering (20th Edition). Philadelphia: Hunt Manufacturing Co. 1972. Glossary AFM: (Adobe Font Metrics) A specification for storing (in a text file) font metrics information such as character widths, kerning pairs, and character bounding boxes. Application: A computer program, designed to perform a specific function such as word processing or illustrating. Ascent: A font’s maximum distance above the baseline. ASCII: (American Standard Code for Information Interchange) A numbering scheme used for identifying printing characters. Adobe Type Manager (ATM): The program that improves your screen font display by eliminating jagged edges on Type 1 fonts. Baseline: The line upon which the letters of a font rest. Basepoint: Fontographer’s reference point from which distances are measured, and about which the special effect transformations may be performed. BCP: Bezier Control Point. One of two points which guide a Bézier curve. Bezier curve: Mathematical equations commonly used to describe the shapes of characters in electronic typography. The Bezier curve was named for Pierre Bezier, a French computer scientist who developed the mathematical representation used to describe that curve. Bit: A contraction of BInary digiT, this word signifies the smallest unit of data a computer holds, and represents a two-way choice like ‘on or off,’ or ‘black or white.’ Bitmap: A grid of individual dots or pixels that make up the graphic display. Each pixel (or picture element) corresponds to bits in the computer’s memory. Bitmap font: A character set created by turning on or off individual dots in a rectangular grid of dots. Bitmap Window: The window used to view and edit character bitmaps. Blend: To merge two different font shapes to create a third. Byte: A unit of data consisting of a small number of bits; usually a byte equals a series of eight bits and signifies a character. Caching: The process that saves bitmaps in memory or on the printer’s hard disk in order to minimize the amount of time spent generating bitmaps. The first time a particular letter is imaged, its bitmap is generated and cached. Subsequent uses of that letter can use the cached version for faster printing. Cap height: The height of uppercase letters. Cap line: The imaginary line which represents the uppermost part of capital letters and some characters’ ascenders. Character: A symbol in writing. A letter, punctuation mark, or figure. Character label: The portion including a character’s name located above the character slot in the Font Window. Character set: The characters, symbols, and numbers that make up one single font. Character slot: The boxed area enclosing a font character in the Font Window. Clipboard: The place where the most recent cut or copied image is stored. Condensed: Characters which are narrowed to fit into a compact space. A properly condensed character should fit into a smaller space without making it too thin or reducing the character’s height. Crosshair: The cross-like shape the pointer assumes when certain drawing tools from Fontographer’s tool palette are selected. Demagnified move: A special feature of Fontographer which allows precise point adjustment without requiring a zoom-in. Descent: A font’s maximum distance below the baseline. Descender line: The lowest line that a character’s descender extends to, like the line beneath the lowercase ‘j’ and ‘y.’ Dialog box: A window that displays when the computer needs more information from the user. Discontinuous: Not adjacent to each other (as in discontinuous characters). Downloadable font: A font that can be temporarily stored in the printer’s memory. Downloading: The process by which an outline font file is sent to a PostScript printer. Dots Per Inch (dpi): The measure of resolution for a video monitor or printer. High-resolution printers contain usually at least 1000 dpi. Laser printers typically have a resolution of 300 dpi; monitors usually contain 72, 75, or 90 dpi. Em: A unit of measure, which is the square of a face’s point size. Traditionally, the width of a face’s widest letter, the capital ‘M.’ For instance, if the “M” is 10 points wide, an em is equal to 10 points. Em space: A space equal to the width of a typeface’s point size. Often used for paragraph indentions. Traditionally, the em space was created by non-printing blocks of metal used to add space between words. Em square: A square the size of a capital letter “M.” Also the height of the ascent added to the height of the descent. Em units: Measuring units in Fontographer whose size is relative. The em square can be visualized as being divided up by horizontal and vertical grid lines that result in box-like units of equal size. Em units are relative to the size of the em square and are not measured in points. Expanded: A typeface whose letters have been made wider without visually adding weight. Extended: A typeface whose letters are stretched (or expanded) horizontally while still retaining their original height. Face: Short for ‘typeface’; the style of a font or set of character images. Family: All the type sizes and styles of one typeface. A complete character set of a font. The group shares a common design but can differ in attributes such as character width, weight, and posture (i.e., Roman vs. Italic). A typical computer family unit frequently contains four fonts—Roman, Italic, Bold, and BoldItalic—in all sizes. Fill: In Fontographer, the degree of black within characters. (You can only specify the degree of fill for Type 3 fonts.) Flex: A means of automatically suppressing small details, such as cupped serifs, that would print poorly at small sizes. At large sizes or high resolutions, the details are automatically reinstated. (Applies only to Type 1 fonts.) FON: Windows bitmap font format. FOND (FONt family Descriptor): FONDs define the relationship between a plain Macintosh font and its styles (such as Bold, Italic, and BoldItalic). The FOND groups a family of fonts and contains the family name, the style, and size, as well as metrics information like fractional width tables and kerning tables. FONT: Old Macintosh bitmap font size resource name. (See NFNT.) Font: In modern usage the term “font” is often confused with “typeface” and “family.” Traditionally, the term “font” represents a complete set of characters or symbols, which share the same size and style. For example, 12 point Goudy Oldstyle Bold is a font. Fonts can be as small as the basic alphabet or up to hundreds of characters. Some languages, like Japanese, can exceed these numbers, which make them more difficult to access from the standard keyboard. Originally derived from the word “found” as in typefoundry. Font attributes: Characteristics which apply to the font as a whole (such as the ascent, descent, leading, etc.). Font Window: The graphic display of a character set in Fontographer from which individual character slots may be accessed. Fontographer: Macromedia’s outline font editor designed to simplify the creation of high-quality fonts, logos, and other intricate PostScript artwork. Generate: To create a character or set of characters so that they can be viewed on the screen or printed. Usually a bitmap font and a PostScript font is generated for each font, but with outline font formats, you only need to generate one font file. Hints: Information embedded to enhance the appearance of characters printed or imaged at low resolutions (72-600 dpi). ATM and TrueType can take advantage of hints to render more uniformly shaped screen fonts across the character set. Hints layer: The layer in the character’s Outline Window that displays hint information. Italic: Best used to set off quotes, special phrases, and foreign words, italic letters have a redesigned structure that allows them to slant to the right. The first italic type was designed by Aldus Manutius in AD 1501 and was based on the handwriting style of that time. Justified text: Text that lines up at both the left and right margins. Also known as “fully justified.” Kerning: Moving pairs of letters either closer together or farther apart to adjust and improve the space between them. Kerning pairs: Combinations of character pairs where the space between them has been modified to improve readability. Keystroke: A single pressing of a key on the keyboard. Layers palette: The window of layers within the Outline Window. Leading: The space, measured from baseline to baseline, added between successive rows of text in a document. Left justified: Type that is aligned with its left margin. Also called “flush left.” Linotype 100/300: High-resolution typesetting systems. Megabyte: A measuring unit; 1,048,576 bytes; denoted by the letters “M” or “MB.” Mean line: The top (imaginary) point of all lowercase characters without ascenders. Also called “x-height.” Metrics: Font information such as ascent, descent, leading, character width, and kerning. MMPC2MAC: Macromedia PC to Macintosh font conversion utility. Converts files created for the Macintosh on a PC into Macintosh font files ready for installation. Monospaced type: Like typewritten characters, these all have the same width and take up the same amount of space. Use of this type allows figures to be set in vertical rows without leaving a ragged appearance (as opposed to proportional type). NFNT (New FoNT): The Macintosh font resource which contains your bitmap screen font. NFNTs have a wider range of font identification numbers than the older FONTs, NFNTs opened up another 16,000 FOND ID numbers when they were introduced by Apple with the Macintosh Plus. Oblique: A right-slanted version of a Roman typeface without changes to the letter’s design. Often confused with Italic. Old Style: Characterized by variations in stroke width, bracketed serifs, high contrast, and a diagonal stroke. Some popular Old Styles include Garamond, Janson, and Caslon. Outline font: A font created by drawing the outlines of each character. A PostScript font is an outline font. Outline layer: The layer in the Outline Window used in editing a character’s outline. Outline Window: The window that displays a characters points and paths, used for editing character outlines. Path: A sequence of points which may be connected, open, or closed. Permanent font: A font which resides in a PostScript printer until the power is turned off. Pica: A unit of typographic measurement equal to 0.166 inches or 12 points. PICT: A Macintosh graphics format that Fontographer and other graphic and page layout programs use. Pixel (PICture ELement): Square dots that represent the smallest units displayed on a computer screen. Typical monitors display about 72 pixels per inch. Characters and graphics are created by turning pixels on or off. Point: A unit of typographic measurement equal to approximately 1/72 inch (0.01383 inches). Point size: The height of the type body. A standard type measurement system was originally developed by the Parisian type founder Piérre Fournier Le Jeune in 1737. In the days of metal type, the point size was the total number of points in the height of metal type, including the ascent and descent of the letters, and the metal above and below the letters (i.e., built-in leading). Pop-up: A menu (aka pull-down or drop-down) that appears in a dialog box or in a main menu when related information is selected. PostScript: Adobe System’s page description language. Programs like Macromedia FreeHand use PostScript to create complex pages, text, and graphics on-screen. This language is then sent to the printer to produce high-quality printed text and graphics. Preview: A mode for editing or viewing a character which shows a filled outline. Printer font: A font that permanently resides in the printer. Proportionately spaced type: Type whose character widths vary according to the features of the letters (as opposed to monospaced type). RAM: Random Access Memory. The computer printer’s temporary place for storing data. When the computer or printer is turned off, the information in RAM is erased. Rasterization: The process of converting outlines into bitmaps. The outlines are scaled to the desired size and filled by turning on pixels inside the outline. (See pixel.) Reference: An image that refers to an original character; a composite. Rendering: The actual placement of rasterized pixels on the monitor’s display. Refers both to graphic objects and type, particularly for fonts using hints. Also called “rasterization.” Resolution: The number of dots in an image’s screen display or printed output. A monitor’s resolution refers to the number of pixels per linear inch. Printed resolution refers to dots per linear inch. (See dpi.) Right justified: Type aligned with its right margin. Also known as “flush right.” Sans serif: A typeface with no counterstrokes at the end of each stroke. Scale: To change the size of a character or image by altering it proportionally. Scan: To digitally capture an image and save it in a format that can be manipulated or altered from within a computer application; the image can be autotraced in Fontographer, thus creating a character with editable outlines. Screen font: Bitmap fonts used for screen display. Script: Letters are joined and should not be confused with cursive, which are not connected. Since script is difficult to read, its use should be limited to a few lines at a time. Early script typefaces were developed in the sixteenth century, and were based upon formal cursive handwriting. Scroll bar: The window bars containing arrows that allow the document to be moved so that other parts of it become visible. Serif: A typeface with counterstrokes at the end of each stroke. Set-width: The width of a letter and its surrounding space; the space needed to set a line of text in a specific typeface. Some programs have tracking to adjust the typeface to make it set looser or tighter. Also known as “advance width.” Sidebearings: The distance between the origin and the left edge of a character (left sidebearing) and the distance between the width line and the right edge of a character (right sidebearing). Skew: Creating an oblique image by transforming paths. Spacing: The amount of unused area that exists between characters. Stroke: A line which may be expanded in width; or the width of the linear elements that compose characters. Style: A visual variation of a basic typeface used to create emphasis. Type style is important since it can attract (or repel) the reader’s eye. The four basic computer styles are Plain, Bold, Italic, and BoldItalic. Style Merger: Macromedia Inc.’s utility that merges Macintosh styled fonts into one font family. Swash capitals: Uppercase letters that have flourishes added to them. Originally designed to go with Italic typefaces. Template layer: The layer of the Outline Window where background images and scans are inserted. Textbox: Within a dialog box any rectangular outline that includes text. TTF: A file in an outline font format (TrueType Font) that is used both in screen display and in printing. Tool palette: The collection of drawing tools in the Outline and Bitmap Windows. Tracking: The overall letterspacing in text. Tracking can also be used to tighten or loosen a block of type. Some programs have automatic tracking options which can add or remove small increments of space between the characters. Transform: To alter an image by rotating, flipping, scaling, or skewing. Transient font: A font which stays in the printer memory only until the current document is finished printing. TrueType: Apple’s outline font format designed to be used with their System 7 operating software and Microsoft Windows 3.x. Type 1 PostScript font: Genuine Adobe PostScript or Fontographer Type 1 fonts with hints, which provide high quality resolution at any size. Type 3 PostScript font: Also referred to as user-defined fonts, these are non-Adobe encrypted fonts. They will not render on-screen if you are using ATM. Typeface: A set of characters which share a similar appearance. Weight: The measurement of a stroke’s width; or, in general, the heaviness of a character or font. Common names for weights include demibold, light, and bold. Some typeface families have several weights, including ultra-bold and extra-light. x-height: The height of a face’s lowercase letters, or the size from mean line to baseline of the lowercase ‘x.’ The lowercase ‘x’ is used for measurement since it usually sits squarely on the baseline and has no ascenders or descenders.