1
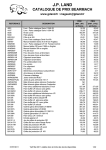
UK
Subject to change
UK
USERS MANUAL
Art.nr. 820110
PBS-205/1000
0304-17
1
2
EXPLODED VIEW
3
15
14
4
5
6
13
7
12
11
8
10
9
Fig. 4 - Adjusting angle of bottom plate
Fig. 1 - Description
Fig. 2 - Changing the saw blades
Fig. 3 - Assembling saw
2
Fig. 5 - Sawing a work piece
Fig. 6 - Positioning parallel saw guide
Powercraft
Powercraft
11
SAFETY INSTRUCTIONS
SPARE PARTS
FERM. NR.
DESCRIPTION
407680
RULER
001
407557
SQUARE NUT
002
407455
KNOB
003
407555
MOVABLE QUARD
407681
SUNK SCREW M3 X 12
009
407560
TABLE INSERT
010
407558
RIVING KNIFE
014 - 018
407682
HANDLE LOCK SCREW
022
407683
NUT M12
023
407553
FIXING GUARD
024
407552
OUTER FLANGE
027
407551
INNER FLANGE
030
407684
STAND BAR
034
407559
SWITCH
036
407763
MOTOR 1000 WATT
038
The following symbols are used in these instructions for
use:
REF. NR.
SAW BENCH
THE NUMBERS IN THE FOLLOWING TEXT
CORRESPOND WITH THE PICTURES AT PAGE 2.
004 - 008
Denotes risk of electric shock.
TECHNICAL SPECIFICATIONS
Voltage
Frequency
Input power
Speed, no load
Saw blade dimensions
Max.cutting depth 90°
Max.cutting depth 45°
Diam. dust extraction
Cutting angle
Machine weight
Lpa Sound pressure level
Lwa Sound power level
|
|
|
|
|
|
|
|
|
|
|
|
230 V~
50 Hz
1000 W
2950/min
205x16 mm
43 mm
31 mm
34 mm
0 - 45°
14 kg
85 dB(A)
105 dB(A)
PACKAGE CONTENTS
1 Saw bench
1 Push stick
1 Mitre guide
1 User manual
1 Warranty card
Check the machine and accessories for transport
damage.
PRODUCTINFORMATION
Fig. 1 - Saw bench
1. Table surface
2. Protective guard
3. Push stick
4. Saw blade
5. Riving knife
6. Insert piece
7. On/off switch
8. Motor
9. Mains cable
10. Frame
11. Rip fence
12. Interlocking knob
13. Mitre guide
14. Nut
15. Screw
10
Denotes risk of personal injury, loss of life or
damage to the tool in case of non-observance of
the instructions in this manual.
Powercraft
Powercraft
Carefully read this manual before using the machine.
Make sure that you know how the machine functions and
how to operate it. Maintain the machine in accordance
with the instructions to make sure it functions properly.
Keep this manual and the enclosed documentation with
the machine.
Electrical safety
Warning! When using electric tools, basic safety
precautions should always be followed to reduce the
risk of fire, electric shock and personal injury. Read
all these instructions before attempting to operate
this product and save these instructions.
ELECTRICAL SAFETY
Always check that the power supply corresponds to the
voltage on the rating plate.
Replacing cables or plugs
Immediately throw away old cables or plugs when they
have been replaced by new ones. It is dangerous to insert
the plug of a loose cable in the wall outlet.
Using extension cables
Only use an approved extension cable suitable for the
power input of the machine. The minimum conductor
size is 1.5 mm2. When using a cable reel always unwind
the reel completely.
GENERAL SAFETY INSTRUCTIONS
Warning! When using electric tools, basic safety
precautions should always be followed to reduce the
risk of fire, electric shock and personal injury,
including the following. Read all these instructions
before attempting to operate this product.
Retain for future refence.
1. Keep work area clean
Cluttered areas and benches invite injuries.
2. Consider work area environment
Don’t expose power tools to rain. Don’t use power
tools in damp or wet locations. Keep work area well
lit. Don’t use power tools in presence of flammable
liquids or gases.
3. Guard against electric shock
Prevent body contact with grounded surfaces (e.g.
pipes, radiators, ranges refrigerators).
4. Keep children away
Do not let visitors contact tool or extension cord.
All visitors should be kept away from work area.
5. Store idle tools
When not in use, tools should be stored in dry, high,
3
or locked-up place, out of reach of children.
6. Don’t force tool
It will do the job better and safer at the rate for which
it was intended.
7. Use right tool
Don’t force small tools or attachments to do the job
of heavy duty tool. Don’t use tools for purposes not
intended.
8. Dress properly
Do not wear loose clothing or jewellery. They can be
caught in moving parts. Rubber gloves and nonskid
footwear are recommended when working
outdoors. Wear protective hair covering to contain
long hair.
9. Use safety glasses
Also use face or dust mask if cutting operation is
dusty.
10.Don’t abuse cord
Never carry tool by cord or yank it to disconnect it
from receptacle. Keep cord from heat, oil and sharp
edges.
11.Secure work
Use clamps or a vise to hold work. It’s safer than
using your hand and it frees both hands to operate
tool.
12.Don’t overreach
Keep proper footing and balance at all times.
13.Maintain tools with care
Keep tools sharp and clean for better and safer
performance. Follow instructions for lubricating and
changing accessories. Inspect tool cords periodically
and, if damaged, have repaired by authorized service
facility. Inspect extension cords periodically and
replace if damaged. Keep handles dry, clean and free
from oil and grease.
14.Disconnect tools
When not in use, before servicing, and when
changing accessories such as blades, bits and cutters.
15.Remove adjusting keys and wrenches
Form the habit of checking to see that keys and
adjusting wrenches are removed from tool before
turning it on.
16.Avoid unintentional starting
Don’t carry plugged-in tools with finger on switch.
Be sure switch is off when plugging in.
17.Outdoor use extension cords
When tool is used outdoors, use only extension
cords intended for use outdoors and so marked.
18.Stay alert
Watch what you are doing. Use common sense. Do
not operate tool when you are tired.
19.Check damaged parts
Before further use of the tool, a guard or other part
that is damaged should be carefully checked to
determine that it will operate properly and perform
its intended function. Check for alignment of moving
parts, binding of moving parts, breakage of parts,
mounting, and any other conditions that may affect
its operation. A guard or other part that is damaged
should be properly repaired or replaced by an
authorized service center unless otherwise
indicated elsewhere in this instructions manual.
Have defective switches replaced by an authorized
center. Do not use tool if switch does not turn it on
and off.
4
20.Warning
The use of any other accessory or attachment other
than recommended in this operation instructions or
the catalog may present a risk of personal injury.
21.Have your tool repaired by an expert
This electric appliance is in accordance with the
relevant safety rules repairing of electric appliances
may be carried out only by experts otherwise it may
cause considerable danger for the user.
22.Connect the dust extraction device
Whenever there are facilities for fitting a dust
extraction system, make sure it is connected and
used.
Always check that the voltage corresponds to the
voltage on the rating plate.
REPLACING CABLES OR PLUGS
Immediately throw away old cables or plugs when they
have been replaced by new ones. It is dangerous to insert
the plug of a loose cable in the wall outlet.
SPECIAL SAFETY INSTRUCTIONS
BEFORE USING THE APPLIANCE
1. Make sure that the saw bench is adequately
and effectively illuminated.
When you use strip lighting you should be aware of
the so-called stroboscopic effect. This may cause a
rotating saw blade to appear to be stationary. One
solution is to use two light fittings in order to create
phase displacement.
2. Check the following points:
• Does the voltage of the motor and any fuse
employed correspond with the mains voltage?
Appliances with a voltage of 230 V~ may be
connected without problems to a mains voltage
of 220 V~.
• Are the feeder cable and plug in good condition:
sturdy, without loose bits or damage?
• Has the saw blade lost any teeth or is it displaying cracks or fractures?
If so, replace the saw blade immediately.
• The protective guard may not be set higher than
required to let the workpiece pass.
• The riving knife should be narrower than the
saw cut and broader than the saw blade.
3. Do not exercise lateral pressure on the saw
blade as it may cause it to break.
4. Check the wood for knots, nails, cracks and
waste residues.
These irregularities may cause the workpiece to
kick back dangerously.
5. Ensure that no objects get into the extraction system.
These objects may come into contact with the saw
blades resulting in potentially hazardous situations.
USING THE APPLIANCE
1. Push the workpiece that you are going to saw
securely to the table surface.
Hold at the same time the section of the workpiece
that has been sawed to prevent it breaking off.
Powercraft
Powercraft
9
MAINTENANCE
During maintenance and cleaning always remove
the mains plug from the socket. Never use liquids
when cleaning electrical parts of the saw bench.
The Powercraft machines have been designed to
operate over a long period of time with a minimum of
maintenance. Continuous satisfactory operation
depends upon proper machine care and regular cleaning.
Cleaning
Keep the ventilation slots of the machine clean to
prevent overheating of the motor.
Regularly clean the machine housing with a soft cloth,
preferably after each use. Keep the ventilation slots free
from dust and dirt.
If the dirt does not come off use a soft cloth moistened
with soapy water. Never use solvents such as petrol,
alcohol, ammonia water, etc. These solvents may
damage the plastic parts.
Lubrication
The machine requires no additional lubrication.
CEı
DECLARATION OF CONFORMITY
(UK)
We declare under our sole responsibility that this
product is in conformity with the following
standards or standardized documents
2.
EN55014-1, EN55014-2,
EN61000-3-2, EN61000-3-3
EN61029-1, 61029-2-1
3.
4.
5.
in accordance with the regulations.
98/37EEC,
73/23/EEC,
89/336EEC
6.
from 01-05-2002
Oststrasse 11 -13
50996 KÖLN BRD
E. Kok
Quality department
Faults
Should a fault occur, please contact Helpdesk:
UK HELPLINE:
0870 - 7323023.
IRELAND HELPLINE:
180 - 0481005.
In the back of this manual you find an exploded view
showing the parts that can be ordered.
7.
ENVIRONMENT
In order to prevent the machine from damage during
transport, it is delivered in a sturdy packaging. Most of
the packaging materials can be recycled. Take these
materials to the appropriate recycling locations.
Take your unwanted machines to your local Powercraftdealer. Here they will be disposed of in an
environmentally safe way.
8.
9.
GUARANTEE
The guarantee conditions can be found on the separately
enclosed guarantee card.
The hand that secures the sawed section should
remain behind the saw blade and move away from it.
Make sure that the hand that you use to secure the
workpiece does not cross the hand that you use to
operate the appliance.
Use the push stick supplied with the
appliance.
Use the push stick to guide smaller workpieces past
the saw blade.
Do not use long extension cables.
Allow the appliance to cool off before moving
it.
Do not remove wood residues in the vicinity
of the saw by hand.
When wood residues are trapped between
stationary and moving parts switch the appliance off
and remove the plug from the electrical socket. Only
then remove the residues.
Select the appropriate saw blade.
Select the saw blade (with the correct teeth) and the
correct speed of rotation and slip appropriate for the
material to be sawed and fit the saw blade carefully.
This will not only increase the lifetime of the saw
blade but also prevent cracks and fissures with their
attendant hazards.
Fit only recommended saw blades that meet
European standard EN-847.
Do not saw pegs or sharp-cornered
workpieces.
This is hazardous. Saw pegs or sharp-cornered
workpieces with an appliance designed for that
purpose (a peg cutter or milling machine) and not
with a saw bench.
Exercise care when sawing waste or firewood.
Waste or firewood often requires less careful
sawing, so there is a danger that you may not be quite
so alert to irregularities in the wood and impose too
much pressure on the saw.
Use a table extender for large workpieces.
When sawing large workpieces, support the
workpiece at table level with a table extender.
3.
4.
5.
6.
recoil for the following reasons (or a combination of
them):
• The saw does not protrude far enough above the
table surface, causing the workpiece to be guided
directly into contact with the teeth of the saw
that is itself moving in the direction of the user.
• The workpiece seizes on the saw because the
riving knife is not fitted or incorrectly adjusted.
• There is no auxiliary saw rip fence (straight edge)
or it is adjusted incorrectly. Because of this the
wood may become stuck between the main rip
fence and the rotating saw blade.
Rotating saw blade breaks
This can be caused by the following factors:
• an improper sawing procedure;
• an improperly adjusted saw blade;
• an improper method of operation;
• processing material that is unsuitable for the saw
bench.
Metal parts under voltage
Defective electrical installation may result in metal
parts coming under voltage and causing fire.
Damage to hearing when noise level is too
high
A noise level that is too high may cause damage to the
hearing of persons who are often close to the saw
bench.
Release of harmful wood dust
Release of harmful wood dust or glue vapours may
pose health risks. Connect a vacuum cleaner to the
saw bench.
TURN THE APPLIANCE OFF IMMEDIATELY
IN THE EVENT OF:
1. a faulty mains plug, mains flex or flex damage;
2. a faulty switch;
3. smoke or smell from scorched insulation.
4. Seizing of the saw.
EXAMPLES OF PROBLEMS ARISING FROM
IMPROPER USE OF THE SAW BENCH.
1. Contact with rotating saw blade
This can occur when the protective elements (such
as the protective guard, the protection under the
table surface, the riving knife, the push stick) are
missing or are used improperly. Improper operation
of the protective elements can result in accidents.
When the machine is switched off, the saw blade may
continue to rotate. There is a risk of your not
noticing this because the appliance falls silent. That is
why the protective guard is so important.
2. Recoil of the workpiece
When the workpiece recoils it may hit those in the
surrounding area at high speed. This may result in
serious or even fatal injury. The workpiece may
8
Powercraft
Powercraft
5
ASSEMBLY INSTRUCTIONS
APPLICATIONS
You may use the saw bench to saw workpieces with a
maximum thickness of 43 mm.
SELECTING THE SAW BLADE.
Select a saw blade that meets European standard EN847. Make sure that it has the proper teeth. In general
you will be able to saw faster and less precisely with
coarse teeth than with fine teeth.
Make sure that the saw blade is sharp at all times in order
to realize an optimum result.
CHANGING SAW BLADES
Fig. 2 - Changing saw blades
Check before fitting the saw blade that the mains
plug has been removed from the electrical socket.
To change the saw blade proceed as follows (Fig. 2):
- Loosen the two screws (A) from the sawdust
collection bin (B).
- Remove the sawdust collection bin.
- Loosen the nut (C) from the saw blade with a
spanner.
Secure the spindle with a second spanner.
- Remove the flange (D).
- Remove the saw blade, moving it diagonally
downwards.
- Check that the flange (E) behind the saw blade is in its
correct position before fitting a new saw blade.
- Fit a new saw blade and carry out the foregoing
procedure in reverse sequence.
one another on the sides of the saw bench.
- Adjust the saw blade to the angle required.
THE SAW ANGLE IS DISPLAYED ON THE
PROTRACTOR (B).
- Tighten the knobs (A) once more securely.
OPERATION
When you depress the red off switch the saw bench will
switch off.
Depressing the green on switch will activate the saw
bench.
Should the mains power fail or when the plug is removed
from the electrical socket, the safety switch will switch
the appliance off immediately. The appliance will not
activate automatically when the power is turned on
again. The appliance will operate only when you depress
the green on switch.
DUST-COLLECTION
To keep the work surface clean, the saw bench is
equipped with a connection for dust extraction. You can
connect your vacuum cleaner to this.
PUTTING INTO OPERATION
MALFUNCTIONS
SAWING
Fig. 5 - Sawing work piece
Remove during maintenance and cleaning in all
cases the mains plug from the electrical socket.
Never use water or aggressive fluids when cleaning the saw
bench. Use for this purpose a brush.
Take care to keep your hands away from the saw
blade when sawing.
When sawing proceed as follows (Fig. 5):
- Loosen the knobs of the rip fence (A) on the table
surface.
- Set the rip fence to the correct distance.
- Re-tighten the knobs of the rip fence securely.
- Set the protective guard (C) to the appropriate
height.
- Switch on the saw bench.
- Feed the workpiece, without imposing pressure on
it, towards the saw blade.
Support the section of the workpiece that has
already passed the saw to ensure that it does not fall.
- When the rear edge of the appliance comes close to
the saw blade, use the push stick (B) to feed the
workpiece further.
Use at all times the push stick for small workpieces.
- Switch off the saw bench when you have sawed the
workpiece.
MITRE GUIDE
Fig. 6 - Sawing with the saw rip fence
THE MITRE GUIDE (A) ALLOWS YOU TO PLACE
THE WORKPIECE ON THE TABLE AT AN ANGLE OF
45° ALLOWING DIAGONAL SAW CUTS TO BE
MADE. YOU CAN FOR THIS PURPOSE SECURE THE
MITRE GUIDE TO THE GUIDE (B) (FIG. 6).
Maintain the saw bench on a regular basis as this will
prevent unnecessary problems.
The following will ensure that your appliance remains
in optimum condition:
• Empty the dust-collection bin regularly. You can
remove the bin readily by loosening the two attachment screws.
• Keep the saw blade clean to avoid irregularities in
the saw cut.
• Inspect the saw blade regularly for cracks, fractures
and broken or blunt teeth. Replace damaged saw
blades immediately.
• Keep the ventilation grid of the motor clean to
avoid the motor becoming overheated.
• Replace the inset piece when it is worn.
1. The electric motor becomes hot.
The motor is being overloaded by workpieces that
are too big.
- Saw at a lower speed so that the motor can cool down.
The ventilation grid of the motor is blocked.
- Clean the ventilation grid
The motor is defective.
- Return the appliance to your Powercraft dealer for
checking and/or repair.
2. The appliance does not work when
connected.
The motor has been switched off by the thermal
cutout.
- Allow the applliance to cool down and switch it on
again.
The mains connection has been broken.
- Check the mains connection for faults.
The switch is damaged.
- Return the appliance to your Powercraft dealer for
checking and/or repair.
Check when fitting the saw blade that the arrow
on the saw blade is pointing in the same direction
as the arrow on the sawdust collection bin.
ADJUSTING THE RIVING KNIVE
Fig. 3 - Riving knife adjustment
Sawing will reduce the diameter of the saw blade. The
space between saw blade and riving knife must however remain more or less constant. This means that you
will have to re-adjust the riving knife from time to time.
To adjust the riving knife you should proceed as follows
(Fig. 3):
- Remove the inset piece (A) by loosening the screws
(B).
- Loosen the screws (C) of the riving knife.
- Adjust the riving knife (D) so that the separation
between the upper edge of the knife and the saw
blade is at least 3 mm and at most 5 mm.
Re-adjust the riving knife whenever the separation
exceeds 5 mm.
- Re-tighten the screws (C).
- Refit the inset piece (A).
3. It is very difficult to move the workpiece along
the saw blade in a straight line and the saw cut
is uneven.
The saw blade is warped or blunt.
- Replace the saw blade.
The rip fence is not properly secured.
- Clean the rip fence and secure it in the correct way.
4. The workpiece starts to vibrate violently
during sawing.
The saw blade is overheated or distorted.
- Replace the saw blade.
ADJUSTING ANGLE OF SAW CUT
Fig. 4 - Adjusting angle of saw cut.
IT IS POSSIBLE WITH THE SAW BENCH TO SAW AT
VARIOUS ANGLES, TO A MAXIMUM OF 45°. THE
SAW-CUT ANGLE IS SET AS FOLLOWS (FIG. 4):
- Loosen the knobs (A). These are located opposite
6
Powercraft
Powercraft
7