1
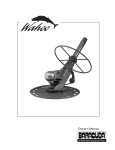
ENGLISH
13
Dear Customer,
Thank you for choosing a Sweepy M. by Zodiac. Renowned worldwide for
the quality and reliability of its products in the aeronautical and marine sectors,
Zodiac has now brought its expertise to swimming pools, to bring you a full
range of pools, automatic pool cleaners and water treatment systems.
Backed by Baracuda technology, expertise and experience, Zodiac brings you
the reassurance of top quality equipment in terms of both design and
performance.
A real guarantee of efficiency and peace of mind!
Before using it for the first time, please read this short leaflet carefully. It
contains all the information you need to ensure your Sweepy M gives you long
service in complete safety.
For any further information, your retailer, who is a pool expert, will be able to
advise you on the use and maintenance of your robot. Have your robot serviced
only by a Sweepy M3 specialist.
You will be able to obtain spare parts from them and receive After Service
from qualified staff.
14
How to install your Sweepy M3™ ?
1
1. Unpacking
2. Electrical connection
How to use your Sweepy M3™ ?
2
1. Immersing the robot
2. Starting up
Automatic operation
Manual operation
3. Cleaning and maintenance
4. Advice on use
If You have a problem...
3
Your safety
4
Your guarantee
5
Terms and conditions
Guarantee period
Purpose of the guarantee
Damage in transit
Compliance
15
6
1
How to install your Sweepy M3™ ?
1. Unpacking
• The following items should be in the packaging :
- your Sweepy M3™ robot
- its carrying trolley including the control box
• Make sure your appliance has not been damaged in transit (impact, broken parts etc.). If you notice
the slightest fault, however minor, do not hesitate to contact your retailer before using your
Sweepy M3™.
• Assembling the carrying trolley
Before removing the appliance from the box :
- Loosen the round black knobs on the transport trolley as far as they will go (they should pull out by
approximately 1 cm) ;
- Fold out the carrying trolley (Fig. 1) ;
- Retighten the black knobs on the trolley (Fig. 2) ;
Take the robot out of the box, then the trolley ;
- Put the hooks used to rewind and store the cable towards the rear (Fig. 3).
2. Electrical Connection
For your own safety and to ensure that your Sweepy M3™ functions properly, proceed as follows:
• Put the control box at least 3.5 metres away from the edge of the pool avoiding direct exposure to
the sun.
• Fix to the ground using the fixing dowels supplied, and lock the trolley foot into them to immobilise
the trolley (Fig. 4).
• Connect the robot cable to the control box and screw the connector tight.
• Lift the lid of the control box (Fig. 5).
• Make absolutely sure that the «I/O» [On/Off] switch is set to «O» (Fig. 6) ; the robot may be
seriously damaged if it is switched on whilst it is out of the water.
• Only connect the control box to an earthed electrical socket fitted with a maximum 30 mA residual
current protection device (if you are not sure, contact your installer’s electrician ).
16
How to use your Sweepy M3™ ?
2
1. Immersing the robot
IMPORTANT : Do not allow any bathing while your Sweepy M3™ is in the pool.
• We advise you to place the robot in a corner at the shallow end and position it so that it will start
moving across the width of the pool. The cable should be positioned towards the middle of the pool
(Fig. 7).
• Push the robot down into the water and evacuate the air it contains by turning it over if necessary.
• Use your hands to press on the foam brushes to push out the air and take in water.
This step is unnecessary for rubber brushes.
• It is essential that the appliance goes down by itself and rests on the bottom of the pool.
2. Starting Up
You can choose whether to operate your Sweepy M3™ in automatic or manual mode.
Whichever mode you choose the robot will operate for a period of time pre-set in the factory :
- 1 and a half hours for models fitted with a 16 m cable ;
- 3 hours for models fitted with a 25 m cable.
a) Automatic operation
In this mode your robot will perform a sequence of movements which have been programmed in the
factory to meet the requirements of most pools.
If this configuration does not suit the size or shape of your pool, contact your retailer so that he can
select the most suitable program for your pool.
• Set the rocker switch «manual / automatic mode» on the control box to «automatic» mode (Fig. 6).
• Set the «I/O» rocker switch to «I».
• Press the «Start» button to start the appliance.
• You can change to manual control of the robot’s movement at any time by setting the switch to
manual mode.
• When the programme has been completed, the robot stops. Set the «I/O» switch to «O» and disconnect the supply lead from the mains.
IMPORTANT : Wait for about 1/4 hour before taking the robot out of the water.
17
b) Manual operation
In this mode your robot will move in the direction you indicate by using the control buttons on the control
box.
• Set the manual / automatic mode button on the control box to manual mode.
• Set the «I/O» rocker switch to «I» (Fig. 8).
• Press the «Start» button to start the appliance.
• To make the robot move forward or back use the 3 position switch «Forward, Stop, Back»
IMPORTANT : the robot will not move if this switch is in the central position (STOP).
• To change the direction of the robot, use the button controlling the rotation while the robot is moving
forward or back.
• You can change to automatic mode at any time by setting
the switch to automatic mode. The robot will start performing
the pre-set program as if it had been started up in automatic mode.
• After use, set the «I/O» switch to «O» and disconnect the supply lead from the mains.
IMPORTANT : Wait for about 1/4 hour before taking the robot out of the water.
3. Cleaning and Maintenance
Cleaning the filter bag
We advise you to clean the filter bag after completion of every cycle.
• Switch off the robot at the mains electricity supply and disconnect the control box from the mains.
• Take the robot out of the water using the lifting cord (Fig. 9) and put it upside down beside the pool
(Fig. 10), so as to access the filter holder plate located on the underside of the robot.
• Unlock the four hooks (Fig. 11) and pull out the 4 clips holding the plate. Remove it, holding it
upside down so that the debris stays in the bag (Fig. 12).
• Undo the 2 plastic locking clips (Fig. 13) to permit removal of the bag. Empty the bag and clean it
under running water or in slightly soapy water if necessary. If using soap, rinse thoroughly taking care
to turn it over. Do not wring to dry it, or put it in the washing machine.
• Also rinse the filter holder plate and remove any debris caught under the flaps.
• Replace the filter bag by positioning the seam over the short width of the filter holder and the
corners of the bag over the corners of the stainless steel rails (Fig. 14). Put back the plastic locking
clips
• Replace the filter holder, snap shut and lock using the hooks.
18
Cleaning the robot
The robot should be cleaned regularly in pure or slightly soapy water, but never with any solvent such
as trichlorethylene. Rinse thoroughly.
None of the mechanical parts accessible to the user requires greasing.
Replacing the foam pads
a) Your robot is equipped with foam pads :
We recommend that you change the foam pads at the end of each season. It is essential to replace
them if their surface is smooth or worn.
• Slide a finger under the foam pads to release the clips holding them in place (Fig. 15).
• Take out the worn foam pads and replace with new pads.
• Reclose the clips.
b) Your robot is equipped with rubber brushes :
We recommend that you change the brushes every two years.
Replace spiked brushes as follows :
• Unfasten the attachment tabs by pulling the spiked brushes apart along seam.
• Remove used brushes.
• Mount the new brushes in place by inserting the slotted edges from the front end of the cleaner (tabs
must be facing the right way for smooth operation of the cleaner) (fig. 16).
• Fold the brush around the tube and slide the tabs into the slots.
• Gently pull the tabs so that the heels snap through the slots.
• Use scissors to trim the tabs to a length of less than 5 mm from the heel.
4. Advice on Use
• Use your robot as often as possible. This will give you the maximum benefit from a pool that is always
clean and a filter bag that clogs less quickly.
• Part of the pool may occasionally not be absolutely clean after running your robot on the automatic
program. If this occurs you can use the manual mode to complete the cleaning in very little time.
19
3
If you have a problem...
The robot does not run along the bottom of the pool properly.
There is air inside the body of the appliance. Repeat the initial immersion procedure making sure you carry
out the steps described earlier point by point. Turn the robot right over keeping it immersed so the air
trapped inside the body escapes. Press the foam pads well to push out the air.
The robot does not mount or no longer mounts the sides.
There can be 3 reasons for this :
• The filter bag is full or clogged. Simply clean it.
• Although the water looks clear, there are microscopic algae in your pool not visible to the naked eye,
which are making the sides slippery and preventing the robot from climbing. Carry out a chlorine
shock-treatment and reduce the pH slightly. Never leave the robot in the water during a chlorine
shock-treatment.
N.B. : failure to climb the sides will not have a major effect on cleaning which is primarily done over the
bottom of the pool. Since the Sweepy M3™ can turn, it will still clean the whole of the bottom surface.
The robot does not move at all.
• Make sure there is electricity being supplied to the socket to which the control box is connected.
• Make sure you have :
- set the «I / O» switch to «I»,
- pressed the «start» button,
If you have selected manual mode, check that the button controlling the direction of movement is set
to forward or back and is not in the middle position.
If the problem persists, contact your retailer.
Cleaning Efficiency seems to have reduced.
Check that the foam pads have not become smooth. As a rule, it is advisable to replace the foam pads
after one season’s use.
4
Your safety
Your Sweepy M3™ has been manufactured in compliance with the strictest standards. To get the most
of your appliance in complete safety, treat your appliance as follows:
• Only connect the control box to an earthed electrical socket fitted with a maximum 30 mA residual
current protection device.
20
• Make sure the control box is at least 3.5 metres from the edge of the pool and do not expose it to
direct sunlight.
• Never let anyone bathe in your pool while your robot is in the pool.
• To prevent any risk of electric shock, never open the electronic control box. Call in a qualified
technician.
• Never try to repair the mains electricity cable. Contact the After Sales Service to have it replaced with
a genuine spare part to prevent hazard.
Your guarantee
5
These conditions are governed by the French legislation in force on the date of going to print.
1. Terms and Conditions
We guarantee that all our products are manufactured in compliance with current marketing standards
and that they are free from any material or manufacturing defects. Subsequent modifications made to our
products (improvements or modifications forming part of a technological advance of the product) shall not
give rise to our intervention.
The guarantee is restricted to either the repair or the replacement of the unit. The decision in this
respect will be taken by us. The guarantee amount shall be no greater than the loss incurred and shall not
cause unreasonable costs to be borne by either the seller or the manufacturer.
The guarantee shall be legally invalidated if the appliance has been subject to any intervention by any
one not employed by our workshops or by a repair or service engineer not approved by us, or if any
modifications have been made thereto without our written consent. The guarantee shall also be legally
invalidated if it has not been used in accordance with the instructions provided with appliance when
purchased.
Any legal guarantee such as the guarantee described in Section 1641 of the Code of Civil Law applies.
Any enactment coming into force after publication of this guarantee, the terms of which concern law and
order would apply automatically even if different from the present document.
The following shall be excluded from the guarantee :
• Normal wear and tear of parts such as tracks, foam or rubber brushes, belts and filter bags.
• Electrical damage caused by lightening or poor electrical connection, inappropriate voltage or
electrical power.
• Breakage due to impact damage.
In no circumstances may repairs or replacements effected under the guarantee extend, defer or renew the
guarantee period of the appliance.
2. Guarantee Period
The guarantee period shall be 2 years from the date of invoicing to the first user.
21
3. Purpose of the Guarantee
During the guarantee period defined above, any part acknowledged to be defective shall be repaired or
exchanged by the manufacturer for a new part or a part in good running order.
Subject to any French public legal provisions which may come into effect subsequent to the issue of
this guarantee, the user shall be responsible for the cost of transport and labour. If the appliance is
returned to the manufacturer, the cost of return carriage shall be borne by the user and labour costs shall
remain the manufacturer's responsibility.
The unavailability for use and deprivation of enjoyment of an appliance in the event of repair shall not
give rise to compensation. In any case, the legal guarantee of the vendor shall continue to be applied by
virtue of Article 4 of the decree No. 78-464 of 24 March 1978.
4. Damage in transit
Appliances shall always be transported at the user's own risk. It is the user's responsibility to make sure,
before accepting delivery of the appliance, that the appliance is in perfect condition.
We cannot be held liable in this respect.
6
Compliance
This appliance has been designed and manufactured in accordance with the following norms :
• NF EN 50 081- June 1992
Electromagnetic compatibility - Generic emission norm
Part I : residential, commercial and light industry
• NF EN 50 082- June 1992
Electromagnetic compatibility - Generic immunity norm
Part I : residential, commercial and light industry
• NF EN 60 335-2-41 April 1996
Safety of domestic electrical appliances and similar
Part Two : Special rules for electric pumps for liquids not exceeding 35°C.
Additional note to the EC marking
The Sweepy M3™ robot pool cleaner is EC marked in accordance with directives :
• C.E.M. 89/336/CEE and 92/31/CEE
• Low Voltage 73/23/CEE
with which the appliance complies.
This product has been tested in normal conditions of use.
22