1
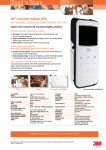
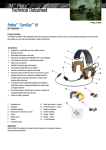
3M Personal Safety Division 3MTM E-A-RfitTM Dual-Ear Validation System The Right fit test. Right now. 3M E-A-Rfit Dual-Ear Validation System User Manual Warning! To avoid the risk of electric shock, which if not avoided could result in serious injury or death: Do not immerse the 3M E-A-Rfit Dual-Ear Validation System in any liquid. Use indoors only. Disconnect power cord before cleaning. Clean the exterior surface of the speaker with a clean anti-static cloth. Do not attempt to clean the interior components. There are no user serviceable parts. The 3M E-A-Rfit Dual-Ear Validation System must be returned to the manufacturer for repair. Caution! General To avoid possible environmental contamination, dispose of the 3M E-A-RFit Dual-Ear Validation System according to applicable governmental regulations. Substitution of components may impair the accuracy of the instrument. Repair should be performed by authorized service personnel only. Read the manual before operation. Hearing Protection and Measurements Test results, PAR values and hearing protector sufficiency determinations are based upon data entered by the operator and from the employee’s test results at a given 3M E-A-Rfit Dual-Ear Validation System testing session. ii Table of Contents Getting Started Introduction...................................................................................................................................................................................... 1 Getting Started ............................................................................................................................................................................ 1 Install 3M E-A-Rfit Dual-Ear software ......................................................................................................................................... 1 Hardware setup: speaker stand assembly and cable connection .............................................................................................. 2 Software Start-up ............................................................................................................................................................................ 3 Home Screen .............................................................................................................................................................................. 3 Microphone Verification............................................................................................................................................................... 5 Run Test Overview .......................................................................................................................................................................... 8 How it works?.............................................................................................................................................................................. 8 Run Test ..................................................................................................................................................................................... 8 Test Results .................................................................................................................................................................................. 11 Quick View ................................................................................................................................................................................ 11 Measurements and hearing protection product .................................................................................................................... 12 Protection Results ..................................................................................................................................................................... 14 Attenuation Graph ..................................................................................................................................................................... 15 Detail View ................................................................................................................................................................................ 15 Reports .......................................................................................................................................................................................... 16 Employee Report ...................................................................................................................................................................... 16 Company Report ....................................................................................................................................................................... 17 Data Manager................................................................................................................................................................................ 18 Company records ...................................................................................................................................................................... 18 Employee records ..................................................................................................................................................................... 19 Operator records ....................................................................................................................................................................... 20 Reports Tab .............................................................................................................................................................................. 22 Export Tab ................................................................................................................................................................................ 23 Import 3M™ E-A-Rfit™ 4 Data Import ...................................................................................................................................... 25 Settings ......................................................................................................................................................................................... 26 Database folder location option................................................................................................................................................. 26 Reporting Tab ........................................................................................................................................................................... 26 Software updates .......................................................................................................................................................................... 27 Appendix A: Specifications ........................................................................................................................................................... 28 Standards/Directives/References.............................................................................................................................................. 28 iii List of Figures Getting Started Measurements Computed ......................................................................................................................................................... 28 Mechanical Specifications ......................................................................................................................................................... 28 Power Supply and Operating Conditions .................................................................................................................................. 28 Environmental Operating Conditions ........................................................................................................................................ 29 User Interface requirements: ports and connectors .................................................................................................................. 29 Appendix B: model, parts, and accessories ................................................................................................................................. 30 Kit Components ........................................................................................................................................................................ 30 3MTM Probed Test Hearing Protectors Accessories (Sold Separately) ..................................................................................... 30 Contacting 3MTM E-A-RfitTM Dual-Ear Validation System .............................................................................................................. 32 User Support (US)..................................................................................................................................................................... 32 Calibration ..................................................................................................................................................................................... 32 Warranty ........................................................................................................................................................................................ 33 Figure 1: 3M E-A-Rfit Dual-Ear Validation System kit contents ...................................................................................................... 1 Figure 2: Installing USB drive into pc ............................................................................................................................................. 1 Figure 3: Speaker stand assembly .................................................................................................................................................. 2 Figure 4: Connecting Hardware Figure 4B: Hardware connected ................................................................................................ 2 Figure 5: Start page ........................................................................................................................................................................ 3 Figure 5a: Home page: Selecting Language ................................................................................................................................. 3 Figure 5b: Add and Edit Operator dialog boxes ............................................................................................................................. 4 Figure 5c: E-A-Rfit home page: Add and Edit Operator dialog boxes ........................................................................................... 4 Figure 6: Begin Test and quick tools explained on start page ......................................................................................................... 5 Figure 7: Microphone placement and start verification button ........................................................................................................ 6 Figure 8: Microphone verification and verified ................................................................................................................................. 6 Figure 9: Verification test results with legend displayed .................................................................................................................. 7 Figure 10: Select an employee ....................................................................................................................................................... 8 Figure 11: Add and/or edit employee record .................................................................................................................................. 9 Figure 12: Employee selected in run test screen ........................................................................................................................... 9 Figure 13: Product Selector dialog box ......................................................................................................................................... 10 Figure 14: Run Test screen .......................................................................................................................................................... 10 Figure 15: Test Results and Quick View tab................................................................................................................................. 11 Figure 16: Quick View Tab Results .............................................................................................................................................. 12 Figure 17: Protection Tab Results ................................................................................................................................................ 14 Figure 18: Attenuation Graph Results Tab ................................................................................................................................... 15 Figure 19: Detail View Tab Results .............................................................................................................................................. 15 Figure 20: Employee Report Example.......................................................................................................................................... 16 Figure 21: Company Report Example .......................................................................................................................................... 17 Figure 22: Data Manager - Company Tab .................................................................................................................................... 18 Figure 23: Data Manager - Employee Tab ................................................................................................................................... 19 Figure 24: Data Manager - Operator Tab: Adding ........................................................................................................................ 21 iv List of Tables Getting Started Figure 25: Figure 26: Figure 27: Figure 28: Figure 29: Figure 30: Figure 31: Figure 32: Figure 33: Figure 34: Data Manager - Operator Tab: Edit and/or Delete ..................................................................................................... 21 Data Manager - Reports Tab....................................................................................................................................... 22 Export with Employees Due for Testing Example ....................................................................................................... 23 Export Data Query Example........................................................................................................................................ 24 Export Hearing Protector Assignment example........................................................................................................... 24 Import EARfit 4 Data Tab ............................................................................................................................................ 25 Import Data Screen ..................................................................................................................................................... 26 Settings -Report Tab ................................................................................................................................................... 26 Software Update Prompt Example .............................................................................................................................. 27 Install Shield Wizard for Software Updates ................................................................................................................. 27 Table 1: Support and 3M HPD media links .................................................................................................................................... 5 Table 2: Verification test results ...................................................................................................................................................... 7 Table 3: Add/Edit Employee explained........................................................................................................................................... 9 Table 4: Test Results User Actions .............................................................................................................................................. 13 Table 5: Employee report explained ............................................................................................................................................. 16 Table 6: Company report explained ............................................................................................................................................. 17 Table B-1: 3MTM Hearing Protector Test Probes .......................................................................................................................... 31 1 Introduction Getting Started The 3MTM E-A-RfitTM Dual-Ear Validation System is comprised of hardware and software that enables the operator to test and record the personal attenuation rating (PAR) of many hearing protection products by 3M. (See Appendix B, “Model, Parts and Accessories” for details.) The 3M E-A-Rfit Dual-Ear Validation System contains the components illustrated below. Please follow the illustrated quick set-up guide in the lid of the case to assemble your hardware. Figure 1: 3M E-A-Rfit Dual-Ear Validation System kit contents 1. Insert the 3M E-A-Rfit flash drive into your computer’s USB drive. Figure 2: Installing USB Drive into the Computer 2. Run the setup.exe file by double-clicking the file. 3. Follow the screens prompts by clicking Next through the wizard and click Finish to complete the installation. 2 Hardware setup: speaker stand assembly and cable connection Install 3M E-A-Rfit Dual-Ear Software 1. After removing the items from the case, lay the speaker down on a table and thread the stand post to the bottom of the speaker (see Figure 3-A). Then attach the stand base to the stand post by threading clockwise (see Figure 3B). Set upright on table (see Figure 3-C). Stand post Figure 3-A. Thread stand post to bottom of speaker Figure 3-B: Thread stand post to bottom the stand base Figure 3-C: Assembled Figure 3: Speaker Stand Assembly 2. To attach all the necessary cords, remove the power cord, the microphone assembly, and the USB cord from the grey compartments of the kit. After plugging the power cord into a power outlet, attach the other end of the power cord into the top socket on the back of your speaker. A green light will illuminate. Insert the microphone assembly into the middle socket on the back of the speaker being careful to align the microphone plug into the socket. Hang both microphones by their integrated clips to the clip on the front of the speaker. Attach the USB cord into the bottom socket on the back of the speaker and insert the other end of the USB cord in the computer’s USB port. A device driver message appears in the task bar when connecting the speaker component to the USB. A flashing red light will illuminate and then go dark when the speaker is successfully connected. Figure 4A: Connecting Hardware Figure 4B: Hardware Connected 3 Software Start-up Home Screen The home screen is used to perform an E-A-Rfit validation test. The start-up parameters entail the selection of the language, operator, and company. It may also be used to begin testing, review hearing protection fit-tests, and access the data manager (see following sections for details). Tip: At any point in the subsequent E-A-Rfit testing screens, click home screen. 1. Open the E-A-Rfit software by double- clicking on the icon or the logo to return to the icon. 2. In the Home screen, select the language, operator, and company information. (Please refer to 1a – 1c.) Select: 1a. Language 1b. Operator (person conducting the test) 1c. Company (when applicable) using drop down boxes. Figure 5: Start Page a. Language field: The language field is saved as the default language once selected. To select the Language, click on the drop down box and begin typing while noting the text will highlight. Press Enter to select. You may also use the slider bar to scroll and click the desired language. The software will save the selected language as the default for subsequent uses. Language: click and/or use the slider bar to select your language. Slider bar Figure 5a: Home Page: Selecting Language 4 Software Start-up Home Screen b. Operator field: The person conducting the test is the operator. To add an operator, click on the button and enter the last and first name fields (required) and any other applicable fields. Click Save to store or click “x” to close. To edit an operator, click on the button and enter the appropriate fields. Note: the light gray button indicates the button is not accessible until an operator is added to the software. Figure 5b: Add and Edit Operator Dialog Boxes c. Company field: Basic company information is stored in this dialog box and may be used in reports. Company Exposure Limit pertains to the maximum level of noise a company wishes to protect an employee’s exposure. This number is up to the discretion of the operator but may be either the legal limit or a number between 80 to 90 dB. In the Company screen, there are three optional Label fields which allow you to customize the name that appears in the software and in the reports. The fields include the Employee ID, Employee Section, and the Employee Function. For example, if the company you are working with has “Departments” instead of “Sections”, you may add the alternative name, and it will appear in the Employee records and in the reports. To add or edit a company record, click on the / Note the asterisk fields are required prior to saving. icon. Enter the appropriate fields and click Save. Add Company: Enter in company information as needed and click Save. This will store in the company records. Label fields: Enter in a customized field names and it will appear in the software screens and in the reports. Edit Company: Type over the text or add as needed and click Save. Figure 5c: Home page: Add and Edit Operator Dialog Boxes 5 Software Start-up Microphone Verification 2. Click on button to start testing with the 3MTM E-A-RfitTM Dual-Ear Validation System. Tip: for reporting, click on button. (See Data manager section for details.) Tip: for test results, click on button. (See Review Tests section for details.) Begin Testing: Select to get started with fit-testing Tools/support icons 3M Hearing Protection media links Figure 6: Begin Test and Quick Tools Explained on Start Page Quick Support Tools and 3M HPD media links Verify Microphone Screen Capture Settings User Support Explanation Used to verify microphone is functioning correctly. See Figure 2-A for screen example. Provides the capability to capture a screen for user support purposes. Provides a link to database folder storage options and reporting settings. (See Settings section for more information. Used to send a technical support question with the ability to attach a screen capture. (See User support section page xxx.) Speaker not connected Displays a red “x” speaker icon indicating the Speaker is not connected. (Check speaker cables and USB is connected to the computer.) Speaker connected Displays a speaker icon when connected appropriately for Fit-Testing. or Speaker and Microphone calibration Facebook Speaker and Microphone calibration icon notice. When you mouse over, a pop text appears explaining the due dates for speaker and microphone calibration. 3M Hearing Protection on Facebook link provides dialog with work and friends through the online social media when signed in. Linked In 3M Hearing Conservation LinkedIn Community business collaboration group. Video 3M Hearing Protection video training links you to 3MTM E-A-RTM Hearing videos. Table 1: Support and 3M HPD Media Links The microphone speaker serial number, sensitivity and speaker serial number and firmware version will automatically be detected and stored in the software under the system details section of the user support screen. Before you can begin testing employees, you will verify the microphone and speaker are in good working order. To start the verification, please follow below: 1. Slide the right (red) and left (blue) microphones into the speaker clip as illustrated on the microphone verification screen in the software. 6 Software Start-up Microphone Verification 2. Click the button (see Figure 7). A warning statement will appear indicating E-A-Rfit will store the baseline data as the new response. Click Ok. Note: The microphone verification process must be conducted before you begin testing each time the software is launched. You may re-check the microphone by going back to the home screen by clicking on the microphone icon. Slide right/left microphones onto clip on front of speaker Start verification button Figure 7: Microphone Placement and Start Verification Button 2. Click below for details.) button (when connected properly) in the microphone verification screen appear. (See If microphone is functioning correctly, the Verified (see Figure 8-A). If connected incorrectly, Verification Failed microphones to speaker and press Figure 8-A: Microphone Verification Verified icon will appear. Click button icon will appear. Please unconnect and reconnect button (see Figure 8-B). See troubleshooting section. Figure 8-B: Verification Failed Prompt 3. (Optional) Click Show Results button to view the verification test results. Click details. button to view graph 7 Software Start-up Microphone Verification The verification graph will display four curves (explained in the table below) of the 7 tested octave band frequency levels. Verification test results Maximum Baseline Response Explained Indicates the upper boundary of proper operation. Plots the first response curve for the microphone. This will be used through the life of the microphone to monitor changes. Today’s Response The last response curve for the microphone. Minimum Indicates the minimum boundary of proper operation. Table 2: Verification test results Left ear verification results with legend Right ear verification results with legend Figure 9A: Verification Test Results with Legend Show Legend Close Figure 9B: Verification Test Results without Legend 8 Run Test Overview How it Works? The 3MTM E-A-Rfit™ Dual-Ear Validation System encompasses a specially designed loudspeaker that allows for an accurate presentation of the test signal and real-time communication between the microphones, speaker and software. The dual-element microphones make it possible to measure the sound level simultaneously inside and outside the hearing protector. The external microphone measures the level of the test signal outside the ear. The internal microphone is connected to one of the specially modified 3M™ Hearing Protectors Probed Earplugs to allow measurement of the sound level inside the wearer’s earcanal while the earplug is worn. The difference between the outside and inside microphone levels is used to calculate the Personal Attenuation Rating for each employee; the amount of noise reduction in decibels obtained by that individual with the specific model and size of hearing protector being worn. The PAR is an indication as to whether or not the standard version of that model of hearing protector, without the test probe attached, will provide sufficient attenuation for the noise exposure in the workplace. After properly setting up the fit-test and running the test, the software will quickly measure the noise reduction or attenuation of the earplugs the employee is wearing. The results can be used to retrain the worker to select and wear hearing protection more effectively and provide positive reinforcement when they do so. Below explains the steps to run a test once the employee is seated and has the probed hearing protectors inserted. (For a live demo of 3M E-A-Rfit Validation System and fit testing, please refer to http://earfit.3m.com.) 1. Welcome the employee to sit in a chair in front of the speaker. Explain the fit test process. 2. In the software, select the employee via the drop arrow. Begin typing and press enter to select an employee. If adding an employee, click the icon to Add (refer to step 2). Add Employee Select Employee Figure 10: Select an Employee 9 Run Test Overview Run Test Once selected, these buttons will appear: ,, , , . 3. When adding or editing, enter the appropriate fields by clicking and highlighting the pre-populated text, if applicable. (See Table 2 for details.) Click button when complete. To Edit an employee select the icon when visible after an employee is added to the software. Highlight and/or type over the appropriate text and click button. This will return you to the run test screen. Figure 11: Add and/or Edit Employee Record Employee fields Explained Exposure Level field Enter in the employee’s A-weighted Sound Pressure Level (dBA) or the employee’s A-weighted exposure level over an 8 hour period (also noted as TWA) if applicable. Exposure data not available checkbox Employee ID Section Function Check this box when hearing exposure levels are unknown. (Optional, user-customizable field used to correspond to the users’ needs.) Enter in the employee’s company/ID number. (Optional, user-customizable field used to correspond to the users’ needs.) Enter in your company’s section number of the employee. For example, assembly line at a manufacturing site. (Optional, user-customizable field used to correspond to the users’ needs.) Enter in the employee’s work position/job function. Table 3: Add/Edit Employee Explained 4. Fit testing is conducted with the employee and operator. Click the Test instructions button for an illustration of fit test setup. Test instructions Figure 12: Employee Selected in Run Test Screen 10 Run Test Overview Run Test 5. Click tested employees. and/or button to add and/or change a product for new/previously To navigate and/or select a product, expand the selector arrows by clicking on an arrow(s). Using the righthand scroll bar, drag up/down accordingly. To select, click on a product type and it will appear on the run test page. Arrow collapsed - click to expand and view/select products. Arrow expanded - click again to roll-up/collapse products. Scroll bar Slide up/down to view product line Example of selected earplugs Figure 13: Product Selector Dialog Box 6. With the employee properly positioned, click on the button. You will hear a short test signal from the loud speaker. Employee History column displays the products previously tested and shows the PAR value, the date and time tested, and if it passed or failed . Change/Edit employee Employee History column Change earplug/earmuff Run Test button Figure 14: Run Test Screen 11 Test Results Quick View 7. Once the test signal ends, the tests results page will display the measured attenuation. The results can be used to retrain the worker to wear hearing protection more effectively and provide positive reinforcement when conducted. 8. (Optional) Test another product or Retest Product using the or buttons. 9. Once completed with the employee’s fit test, click the end session button ( ). Note: the session timer will start and stop when a different/new employee is selected, or the session is ended by the operator, or when the software is closed. Test Another Product button or Retest Product button Session Duration Figure 15: Test Results The hearing protection fit-test results are displayed on the tabs entitled Quick View, Protected Exposure, Attenuation Graph, and Detail View. The action buttons are repeated in each tab and are identified in Table 3 below. (Please refer to Table 1 for the repeated tool support icons and 3MTM Hearing Protection Links.) The Quick View Tab Results main components detail the PAR results from the fit-test, the values in the left and right ear, the type of hearing protector, Baseline and Assigned check boxes, the Session Duration, and the Test History column. When you visit this view, the Baseline and Assigned checkboxes may be assigned or selected. The Baseline indicates the benchmark or target of the measurement. The Assigned checkbox may be used when the employee achieves adequate hearing protection, and the operator recommends wearing this hearing protector while working in a noise environment. If these are assigned, this information will appear in the test history column with the hearing protection product, the PAR value, and the date and time of the test. It will also appear on the company and employee reports. Note: a data export may be exported into a report or to Excel. (See Data Manager for additional details.) 12 Test Results Quick View When viewing this screen, you can review the test results and give guidance to the employee. The measurements and the test results symbols are identified below: • The PAR is displayed for both the left and right ears as well as a binaural. The values have the uncertainty subtracted and displayed on this tab. The Binaural is calculated using the lowest PAR value per octave band for each ear. • The checkmark indicates the measurement passed, denoting the employee’s binaural PAR minus the uncertainty is equal or above the target minimum attenuation (TMA). TMA is the employee’s exposure minus the company exposure limit. For example, if you enter the employee’s exposure of 95 dBA and the company exposure limit is entered as 80 dBA, then the TMA is 15 dB. The employee’s binaural PAR minus the uncertainty must be 15 dB or above in order to “Pass”. The operator may mark the measurements that Pass as a baseline and assign the hearing protector if desired. • The checkmark indicates the employee’s binaural PAR minus uncertainty failed to meet the target minimum attenuation. Although you may mark a failed measurement as a baseline, you will not be able to assign a hearing protector that has failed. Note: the uncertainty is displayed in the Detail View Tab. • The caution symbol is displayed under two different conditions. In both conditions, a pop-up will alert the operator. The first condition is when the PAR value is less than 10 dB at 125 Hz. The second condition is when there is a 15 dB or more difference between the left and right PAR measurements. In both cases, the pop-up will suggest that the hearing protector be retested after adjusting how it is worn. Although you may mark a cautioned measurement as a baseline, you will not be able to assign a hearing protector when a caution symbol is present. • A gray symbol is displayed if the employee record does not have a noise exposure level included. Without an employee exposure value, protection sufficiency cannot be determined. Although you may mark a grey measurement as a baseline, you will not be able to assign a hearing protector where protection sufficiency cannot be determined. • The tested hearing protection is identified (see 2) and stored as History in the Test History column (See 4). • The Left and Right Values are the computed results from the fit-test for each ear with the uncertainty value subtracted. (See 3.) (See Detail View for additional details.) 4 2 1 3 Figure 16: Quick View Tab Results 3 13 Test Results Quick View The table below explains the actions you may perform in the test results screens. (Note: See Table 1 for explanation of the tool support icons, located on bottom right-side of screen, and the 3M Hearing Protection media icons, located on left-side of screen.) Action buttons Explained Session Duration and End Session button Session Duration is the length of time the employee was fit-tested for each hearing protection product (if more than one is tested). The session timer will start and stop when a different employee is selected, or the session is ended by the operator, and/or when the software is closed. Retest product button To end the session, click on the button. Retest Product button will immediately run a new test of the same product. Test another product button Test another product button opens the product selector to allow changing to a different 3MTM Hearing Protector product. Baseline (Optional): Check the baseline is used to set a benchmark when the employee is first tested. Assigned Once checked , it will store and display in the history column. (Optional): Assigned feature may be used when the employee achieves adequate hearing protection, and the operator recommends wearing this hearing protector while working in noise. Create Report Once checked , it will appear in the history column and store in the database as the primary hearing protector. Create a report opens a window to view two types of reports, Employee Report and Company Report. To view, click and buttons. Note that the View buttons toggle between Employee Report and Company Reports when selected. To print, click on the or button depending on which one appears. Toggle between Print Employee and Print Company Reports via the View buttons. Print the report that appears, if desired. Delete Change employee/ Edit employee icons The delete icon allows you to delete a fit-test when selected from the Test History column. To delete, first select a product from the test history column. Then select the icon. Confirm the prompt Okay or Cancel to return without deleting the measurement. Change employee icon allows you to return back to the run test screen and select a different employee. Edit employee icon allows you to change the employee record information. Notes Add employee text to the notes field when applicable. These will appear on the Company Report and store in the E-A-Rfit software. Notes can be edited at any time. Home E-A-Rfit logo Home icon is displayed to provide a quick return to the home screen when applicable. Earfit logo, when clicked, Table 4: Test Results User Actions will also return you to the home screen. 14 Test Results Protection Results The Protection Tab Results shows the employee's protected exposure as it compares to the European Union guidance document EN 458 and in regulatory documents in other parts of the world. Table 1 identifies the screen icons and action buttons. Tip: How is protected exposure calculated? The protected exposure is calculated by subtracting the binaural PAR (minus the uncertainty) from the employee's exposure. Looking at the Safety guide, the “you are here indicator and dB Level” indicates if the employee’s fit-test results are insufficient, acceptable, good, acceptable, or at risk of overprotection. The Fitting Gauge is a rough estimate of where the employee's PAR value compares to what can be achieved with this hearing protector. (See 2 below.) How to view percentage detail on fitting gauge? Roll your mouse-over the green needle and a pop-up window explains your fitting percentage fit compared to the laboratory population. Also, roll your mouse over the “Your Fit” and a pop-up appears with the PAR value (See 3). 1 2 3 Figure 17: Protection Tab Results 15 Test Results Attenuation Graph The Attenuation Graph Results Tab plots the PAR at each of the seven octave bands for the left ear (blue) and the right ear (red). (See 1 and 2.) The PAR values for left, right, and binaural are values carried over from the Quick View tab. (See 3.) This information allows the operator to analyze the shape of the curve and look for abnormalities. 3 Quick View PAR results for Left, Right, and Binaural 1 2 PAR values for 7 Octave Bands for Left and Right ear. Figure 18: Attenuation Graph Results Tab In the Detail View Tab Results, the full value of the PARs are displayed for Left, Right, and Binaural along with associated uncertainty values. In the middle of the screen, the formula for the protected exposure is displayed and calculated providing the results for the recommended user protected exposure. The formulas are provided below: Protected Exposure: employee exposure (inputted via the add/edit icons) subtracting the binaural PAR (minus uncertainty) equals the protected exposure. Maximum Protection: company exposure limit plus the binaural PAR (minus the uncertainty) equals the protected maximum. PAR binaural with +/- variability. Computed protected exposure and maximum protection Figure 19: Detail View Tab Results 16 Reports Employee Report There are two types of reports used to either view online, save as a file, and/or print. The employee report provides a basic personalized fit-test report. When the button is selected from the Test results page, the employee report will appear as a mid-size pop-window. To view the report, select the righthand slider bar to scroll through the details. The employee report actions are identified in Table 5. Employee report 1. General information 1 5 2 2. Summary 3. Educational messages 4. Action buttons 3 Explained At the top of the report, the employee’s general information is provided along with the tested hearing protector, reported exposure (this is the inputted value via the add/edit employee data), the calculated maximum exposure limit, and assigned checkbox. The date and time and optional company logo is presented in the report header. The PAR minus the uncertainty is displayed with the hearing protector product type. The left and right PAR values are also displayed. Educational messages rotate through to increase hearing loss prevention awareness. –allows you to save the file in a local directory. Used to toggle between company and employee reports. Note that these buttons change when clicked. “View” toggles between employee and company. “Print” enables you to print the viewed report and will toggle based on the “View”. 4 Figure 20: Employee Report Example 5. Slider bar Used to print the selected company report. “The open file after saving” is selected as the default in order to quickly view the report after saving as a .pdf. Uncheck to disable this feature. Select the slider bar to scroll up/down through the report (see 7). Table 5: Employee Report Explained Reports Company Report 17 The company report provides additional fit test detail desired for company record-keeping. A signature line is available for companies who wish to have employees sign after they have been tested. The company report actions are identified in Table 6. Company report 1. Employee and Hearing Protector Information 1 7 2. Measurement data 2 3. Notes field 4. System information 3 5. Signatures 4 5 6 6. Action buttons Explained At the top of the report, the employee’s general information is provided and includes: hearing protector type, the reported exposure, company exposure limit, targeted minimum, maximum attenuation calculations, and if the baseline and/or assigned were selected during the testing. The company test results summary displays the PAR minus uncertainty values for left, right, and binaural as well as the attenuation graph. Operator’s notations are displayed here. The system information includes the operator’s name, software version, speaker serial number, date and time calibration occurred of the last factory calibration, and the serial numbers for the left and right microphones. The employee and operator signatures may be hand signed after printing. –allows you to save the file in a local directory. Used to toggle between company and employee reports. Note that these buttons change when clicked. “View” toggles between employee and company. “Print” enables you to print the viewed report and will toggle based on the “View”. Figure 21: Company Report Example 7. Slider bar Used to print the selected company report. “The open file after saving” is selected as the default in order to quickly view the report after saving as a .pdf. Uncheck to disable this feature. The slider bar is used to scroll up and/or down the report. Table 6: Company Report Explained 18 Data Manager Company records The data manager is used as a user support portal to manage the company, employee, and operator data without having to have hardware connected. Additionally, reports can be generated, fit-test data can be exported and data from 3M™E-A-Rfit™ 4 database files can be imported. The following sections outline how to use these operator tools. In lieu of the home page, the Company Tab may be used to modify, add,or delete company data or records. The required fields are noted by an asteriks which include the name, country and company exposure limit. The company exposure limit is a required value and is used to compute the the target minimum attenuation, the protected exposure and protection maximum value. Tip: to change the field labels for the employee ID, employee section, and/or employee function you may enter in a different field decriptors, if desired. When saved, these will appear in the E-A-Rfit software screens and in the reports. To add, edit, and delete a company, do one of the following: 1. To add a company, click on the icon. Fill in the appropriate fields noting the company is a required field with red outline shading. Use the drop down arrow and type the first few letters to quickly find and then click to button. 2. To Delete a company record, click on the icon. 3. To Edit a company, click on a specific company name (see below). Type over or highlight and the delete the text. Then enter the new information. Click button. Note: to cancel, click the Home icon or select a different tab without saving. Company tab Add button Delete button Label fields: enter different field names and it will appear in the E-A-Rfit screens and in the reports if desired. Save button Figure 22: Data Manager - Company Tab Important: Responsibility for Data Privacy and Security Purchaser is solely responsible for complying with all privacy and security-related laws and regulations applicable to the collection, storage, use, import and export of all data (personally-identifiable or otherwise) entered into, or generated by, the 3M™ E-A-Rfit™ Dual-Ear Validation System. Access to the 3M E-A-Rfit DualEar System is not password-controlled. Purchaser should implement all necessary administrative, physical and technical safeguards it determines are necessary to ensure the integrity, confidentiality and security of the data against both internal (e.g., access by unauthorized personnel, misuse of data) and external threats (e.g., "hacking"). 19 Data Manager Employee records The Employee Tab of the data finder page may be used to add, edit, delete, and import employees into the 3MTM E-A-RfitTM Dual-Ear Validation System database. The first name, last name, country and the employee’s exposure level are the required fields when completing these records. If there is no employee’s exposure level available, you may click the “exposure data not available” check box. However, if not selected, this will affect the protected exposure results displayed in the Detail View of the Test Results page. To add, edit, and delete employee, do one of the following: 1. To add an employee, click on the icon. Fill in the appropriate fields noting the company is a required field with an astricks. Use the drop down arrow and type the first few letters to quickly find and then click the button. 2. To Delete an employee record, click on an employee’s name in the employees name box and then click on the icon. 3. To Edit an employee, click on a specific company name (see below). Type over text (or highlight, delete, and enter text) with new information. Click button. Note: to cancel, select a different tab or click on the home screen. Employee screen Add button Import button Delete button Save button Figure 23: Data Manager - Employee Tab The Import feature enables an administrator to import the company’s employees whom will be fit tested via an existing Excel spreadsheet. Once the employee data is imported, you have the option to map the Excel file fields to the E-A-Rfit Dual-Ear Validation System database. To import (or add-in) employee data, follow below: 1. To import, click on the (see Figure 23). button when Employee tab is selected from the Data Manager page 20 Data Manager Importing Employee Data 2. In the Import Employee list dialog box, select button. 3. Map the pre-existing employee record file via your network/pc folder. Select the file. Below is an example of a pre-existing Employee Record file which details last and first names, exposure, number (mapped to employee ID), department/section, and function. Employee record file: example of mapping the file example Loads the column headings into the data file fields drop down boxes. 4. Select the dropdown box data file fields to map the fields. Example: “Last” is mapped to “Last Name” and “Number” is mapped to Employee ID (refer to Figure 24). 5. Select the button. A preview of the import data appears in the right preview pane of the Import Employee List (refer to Figure 24). 6. Click button when correct (refer to Figure 24). *Note: if the data will create duplicate employee entries which may be manually deleted. button is reselected, 7. (Optional): Select Save Template (to save the mapped files) and select Load Template to reload. 7. Close the dialog box via “x” (refer to Figure 24). The imported employees will appear in the Employee’s field of the Data Manager. 1 2 Figure 24: Import Employee List 3 21 Data Manager Operator records In the Operator Tab of the Data Manager, you may add, edit, and delete operator/safety personnel information. The operator information is saved and is presented in "system information" section of the Company Report. To add, edit, delete, and or view operator information, follow below: 1. Click the button to add an operator. Fill in the appropriate fields noting the first and last names are the required fields. Use the drop down arrow and type the first few letters to quickly find and then click the button. Enter applicable operator details and click the Save button. Figure 24: Data Manager - Operator Tab: Adding 2. To Edit and/or Delete an Operator, do one of the following: In the operator’s window, select an operator. To Edit/Change the information, click in desired fields and enter in new information. Click the button. To Delete, click on a name from the Operators section and select the button. Operator’s window To delete, click on the delete button once the operator is selected. To edit, select a user and then type over text and Click Save. Figure 25: Data Manager - Operator Tab: Edit and/or Delete 22 Data Manager Reports Tab In the Reports Tab of the data manager, you can generate the hearing protector fit test reports. To create reports, do one of the following: 1. Select a Company from the drop-down list. 2. In the employee selection, click in one of the following: select latest visits, select dates, select all, and/or unselect all. 3. Select either Employee Report or Company Report by clicking in the appropriate radio button. 4. Click Generate Reports button. The selected reports will appear on your screen to view, save as .pdf, and/or for printing. Select All Company selection Company selection Click to create reports. Figure 26: Data Manager - Reports Tab 23 Data Manager Export Tab In the Export Tab of the data manager, you may run an export or data query of the stored fit-test data. There are three Export options which are illustrated and explained below. Employees due for testing – this data query will provide a list of employees due for testing for a given company. The query can be filtered by a selected cut-off date parameter. The query results will display the employee name, the employee ID, their function and section, and the last known test date. To run this export: double click on the “Employees Due for Testing”. Select the company and date parameters. Click Accept. The following will be displayed. ` Select the two parameters and click Accept to continue your data query. Select Employees due for testing. Add parameters. Then click View Exported Data button. Data appears on screen. Figure 27: Export with Employees due for Testing Example Export Data – this data query will provide all fit-test data information when filtered by company, by all employees or by specific employee. (Note: use the horizontal slider bar at the bottom of the export window to view all the data fields.) To run this export: double click on the “Export Data”. Select the range, employees, company, employee (if applicable) and date parameters. Click Accept. The following will be displayed. Select parameters and click Accept to continue your data query. 24 Data Manager Export Tab Export Data Figure 28: Export Data Query Example Hearing Protector Assignment – this data query filters by company and will display the company, all employees fit-tested, the fit-test visit dates, the product tested, and the left PAR, the right PAR, and the Binaural PAR values. To run this export: double click on the “Hearing Protector Assignment”. Select the company and click Accept. The following will be displayed. Hearing Protector Assignment Figure 29: Export Hearing Protector Assignment Example Note: If there is a data query you would like customized, please contact the technical services as outlined in the “User Support” section at the end of the user manual. 25 Data Manager Import 3M™ E-A-Rfit™ 4 Data Import This feature is used to Import EARfit 4 data into the 3MTM E-A-RfitTM Dual-Ear Validation System software. 1. To Import E-A-Rfit4 database files, click on the button. 2. Select the files from your computers directory and click Open. Select and click Open or Hold Control and select more than one database. Click Open. 3. The files will appear in the Selected Files listing (see 1) of the Data Manager screen. Click the button. The program will display when the import completed importing the files (see 2). 1 2 Figure 30: Import E-A-Rfit 4 Data Tab 26 Settings Database folder location option In the "Database" tab, you can determine where you wish to store your test results, either on the local hard drive or remotely to a SQL Server of your choice. You may also store your test results on a remote server not on your local hard drive (without using SQL). By default, the data is stored on the local hard drive on your computer. Note: be sure to consult your company IT department before proceeding. 1. To change the database location, click on the icon select the button. 2. Select a mapped location and click Ok. Click the button to revert back to the default saved location. 3. Advanced user option: click store results remotely to SQL server checkbox. Then, enter a SQL Server Connection String and click Test. Click Save. Note: this allows the database to run in a different mode while prohibiting software updates. For software updates, please refer to the ear.3m.com website.) Database Folder – Select Browse to change folder location if desired. Advanced user option – Choose an SQL Server String. Figure 31: Import Data Screen In the Reporting Tab, you can select the location of the Report Queries folder via the allow the local drive default location. In the Reporting Tab, the company logo image on the reports can be customized via the back to the 3M Company logo which is set as the default. button or click to button. Reset to return Report query folder – Option to browse to a different folder location. Company logo image – Select browse to select a different image from your computer/mapped folders. Figure 32: Settings -Report Tab 27 Software updates Reporting Tab Software update messages will appear on the bottom of the home screen. To update: Click on the message box. Click button. Click to update software when it appears on the home screen. Figure 33: Software Update Prompt Example Note: you will have to close the E-A-Rfit screen behind the small wizard box. Click as displayed below. Follow the install wizard prompts by selecting Next through each screen. Click Finish at the last screen. Reopen the software. Close by clicking on “X: Follow prompts by clicking on Next through the wizard screens. Click Finish. Re-open the software. Figure 34: Install Shield Wizard for Software Updates 28 Appendix A: Specifications Standards/Directives/References IEC 61010-1 (2010 Revision/Edition 3.0). “Safety requirements for electrical equipment for measurement, control, and laboratory use - Part 1: General requirements”. International Electrotechnical Commission. EN 61326-1 (2013 Revision/Edition 2.0). “Electrical equipment for measurement control and laboratory use – EM requirements- Part 1: General Requirements.” International Electrotechnical Commission. Code of Federal Regulations (CFR): Title 47, Part 15 Subpart B. (2012 Revision.). “Radio Frequency Devices, Unintentional Radiators.” Federal Communications Commission. ROHS/ Directive 2011/65/EU (June 8, 2011). “The Restriction and Use of Certain Hazardous Substances in Electrical and Electronic Equipment.” European Parliament and the Council of the European Union. WEEE/Council Directive 2002/96/EC. “Waste Electrical and Electronic Equipment.” European Parliament and the Council of the European Union. Safety/Council Directive 2006/95/EC. “Low Voltage Equipment Safety.” European Parliament and the Council of the European Union. EMC/ Council Directive 2004/108/EC. “Electromagnetic Compatibility.” European Parliament and the Council of the European Union. hnh CE mark. European Conformity. (Conformité Européenne.) 3M.com/patent Octave band data computed in: PAR Frequency weighting 125 Hz, 250 Hz, 500 Hz, 1000 Hz, 2000 Hz, 4000 Hz, 8000 Hz Personal attenuation rating A Speaker housing Speaker size Aluminum, black material 6.5” long x 3.75” width x 6” depth; 2.54cm long x 9.5cm width x 15.24cm depth 3.1 lbs; 1406.1 grams LED Red blinking indicator light – signifies USB is not connected. It will disappear when connected successfully. LED Green Indicator light – signifies power is on. Speaker Weight Speaker Status Indicators Voltage Frequency Current 120 to 240VAC 50-60 Hertz 250 mA 29 US Patents Environmental Operating Conditions Altitude Operating temperature Relative Humidity Voltage Range Transient overvoltage 3000 (maximum) meters 5 °C to 40 °C (41 °F to 140 °F) 80% for temperatures up to 31°C (87.8 °F) ; decreasing linearity to 50% at 40°C (140 °F) 12 Volts DC Impulse withstand (overvoltage) category II. Rated pollution degree 2. AC/DC output (power) 2 LED indicators USB connector Power connector Screen Resolution Operating System 1024 X 768 pixels (minimum) Microsoft Windows 7 Professional, 32-bit and 64-bit Microsoft Windows 8, 32-bit and 64-bit Mic Microsoft Windows 10, 32-bit and 64-bit Microsoft .NET Framework: Net4Full 4.0.30319.1, Net4Client USB Port 1 USB port available Pointing Device If the screen is not a touch screen, a pointing device, such as a mouse is required. Internet Connection Internet is required for some features such as Software Updates and How-To Videos. MicroProcessor Required 1 GHz or faster 32-bit (x86) or 64-bit (x64) processor Memory Required 1 GB RAM (32-bit) or 2 GB RAM (64-bit) Additional Disk Space 100 MB 30 Appendix B: model, parts, and accessories Kit Components 3M ID 3MTM E-A-RTM Dual-Ear Validation System Kit Components 70-0716-7411-6 3MTM E-A-RfitTM Dual-Ear, Enclosure Speaker Assembly (073-783); Dual-Ear Microphone/Cable Assembly (073-781); Dual-Ear ¼”-20 to 5/8”-27 Speaker Stand Adaptor (073-096); Test plug kit (693-1000); 3MTM SecureFitTM Protective Eyewear (70-07164-7682); Microphone stand (393-0003); USB cable (393-0007); Power cord/supply (053-825); 3M™Roll Model (319-1003); 3M™Eargauge (85099-00000); Tweezers (073092); USB flash drive with software install and user manual (093-411); antistatic ziplock bag (293-0008); Removable microphone clip (2) (073-100); Carrying case assembly (073-784). The following 3MTM Hearing Protector Test Probes are used for testing and may be purchased through a 3M distributor. Probed Product image Product Number 3M Stock ID Number UPC Number Description 393-2000-50 70071562741 10080529190731 3M™ E-A-Rsoft™ Yellow Neons™ Probed Test Plugs 50 PR/Case (5 bags of 10 pair each) 393-2001-50 70071562758 10080529190748 3M™ E-A-R™ UltraFit™ Probed Test Plugs 50 EA/Case (5 bags of 10 pair each) 393-2002-50 70071562766 10080529190755 3M™ E-A-R™ Push-Ins™ Probed Test Plugs 50 PR/Case (5 bags of 10 pair each) 393-2003-50 70071562774 10080529190762 3M™ E-A-R™ Classic™ Probed Test Plugs 50 PR/Case (5 bags of 10 pair each) 393-2004-50 70071562782 10080529190779 3M™ E-A-Rsoft™ FX™ Probed Test Plugs 50 PR/Case (5 bags of 10 pair each) 393-2005-50 70071562790 10080529190786 3M™ E-A-R™ E-Z-fit™ Probed Test Plugs 50 PR/Case (5 bags of 10 pair each) 393-2006-50 70071562808 10080529190793 3M™ E-A-R™ TaperFit™ 2 Probed Test Plugs 50 PR/Case (5 bags of 10 pair each) 393-2007-50 70071562816 10080529190809 3M™ Classic™ Small Probed Test Plugs 50 PR/Case (5 bags of 10 pair each) 393-2008-50 70071562725 10080529190816 3M™ E-A-R™ Express™ Pod Plugs™ Probed Test Plugs 50 PR/Case (5 bags of 10 pair each) 393-2009-50 70071562733 10080529190823 3M™ Classic™ Plus Probed Test Plugs 50 PR/Case (5 bags of 10 pair each) 393-2010-50 70071577772 10080529190871 3M™ 1100 Probed Test Plugs 50 PR/Case (5 bags of 10 pair each) 393-2011-50 70071647740 10093045937124 393-2012-50 70071647757 10093045937131 3M™ Tri-Flange™ Probed Test Plugs 50 PR/Case (5 bags of 10 pair each) 3M™ Skull Screws™ Probed Test Plugs 50 PR/Case (5 bags of 10 pair each) 31 Appendix B: model, parts, and accessories 3M™ Probed Test Hearing Protectors Accessories (Sold Separately) Probed Product image Product Number 3M Stock ID Number UPC Number Description 393-2014-50 70071650249 10078371659490 3M™ E-A-Rsoft™ Yellow Neons™ Large Probed Test Plugs 50 PR/Case (5 bags of 10 pair each) 393-2015-50 70071650298 10078371660397 3M™ E-A-R™ Push-Ins™ with Grip Rings Probed Test Plugs/50 PR/Case (5 bags of 10 pair each) 10093045937483 3M™ No Touch™ Probed Test Plugs 50 PR/Case (5 bags of 10 pair each) 393-2013-50 70071650231 393-2016-50 70071654423 10078371664838 3M™ 1260/1270/1271 Probed Test Plugs 50 PR/Case (5 bags of 10 pair each) 393-2017-50 70071673142 10078371666085 3M™ Pomp Plus Probed Test Plugs 50 PR/Case (5 bags of 10 pair each) 393-2018S-50 700716-74132 10078371667570 3M™ Combat Arms™ 4.0 Probed Test Plugs - Small 50PR/Case (5 bags of 10 pair each) 393-2018M-50 7007167327-4 10078371667587 3M™ Combat Arms™ 4.0 Probed Test Plugs-Medium 50 PR/Case (5 bags of 10 pair each) 393-2018L-50 7007167414-0 10078371667594 3M™ Combat Arms™ 4.0 Probed Test Plugs-Large 50 PR/Case (5 bags of 10 pair each) 393-2020-50 70071674157 10078371667600 3M™ E-A-Rcaps™ Model 200 Hearing Protector Test Pods 50 PR/Case (5 bags of 10 pair each) 393-3001-2 70071691110 10078371668341 3MTM PELTORTM Earmuffs X1/X2 Probed Test Cushions, 2PR/CS 393-3003-2 70071691128 10078371668358 3MTM PELTORTM Earmuffs X3 Probed Test Cushions, 2PR/CS 393-3005-2 70071691136 10078371668365 3MTM PELTORTM Earmuffs X4/X5 Probed Test Cushions, 2PR/CS Table B-1: 3MTM Hearing Protector Test Probes 32 Contacting 3MTM E-A-RfitTM Dual-Ear Validation System User Support (US) Should your 3M equipment need to be returned for repair or for recalibration, please contact the one of the following in the United States: Technical Support: Customer Service and/or Service: Direct Government Orders: User support website: 1-800-243-4630 1-800-245-0779 1-800-752-3623 EARfit.3M.com Please contact your local 3M Technical Service person to coordinate the service or repair. Guidelines for Calibration/Repair Return: 1. Contact Customer Service and/or Service as stated above in “User Support”. 2. Package the unit(s) in accordance with the shipping guidelines. 3. Once the shipment is received, the Service Center will complete the requested calibration or Diagnostic Analysis. Shipping Guidelines 1. All material must be packaged in an appropriate container that will ensure undamaged delivery. Options include double corrugated cardboard boxes or shipment in original E-A-Rfit case. 2. Ensure all parts within the box are packed in such a way to prevent movement within the box. 3. Speakers returned for calibration that include a microphone clip fastened to the grill must be protected with an appropriate wrapping for protection (if not returned in the original E-A-Rfit case). Contact the 3M Customer Service (800-245-0779) for additional assistance, if needed. Please refer to the following for additional information: 3M™ E-A-Rfit™ Repair Service Guide A calibration once every two years is recommended. For additional details please refer to: Calibration Policies for 3M™ E-A-Rfit™ Validation Systems via Earfit.3m.com 33 Warranty Responsibility for Data Privacy and Security 3M warrants our instruments to be free from defects in materials and workmanship for 90 days under normal conditions of use and service. For United States customers, we will replace or repair (our option) defective instruments at no charge, excluding batteries, abuse, misuse, alterations, physical damage, or instruments previously repaired by other than 3M. Microphones, sensors, printers, and chart recorders may have shorter or longer warranty periods. This warranty states our total obligation in place of any other warranties expressed or implied. Our warranty does not include any liability or obligation directly resulting from any defective instrument or product or any associated damages, injuries, or property loss, including loss of use or measurement data. 3M takes no responsibility and shall bear no liability for use or misuse of individual or personally identifiable data. All responsibility for such data resides with the purchaser and/or employer. For warranty outside the United States, a minimum of 90 day warranty applies subject to the same limitation and exceptions as above with service provided or arranged through the authorized 3M distributor or our 3M European Service Laboratory. Foreign purchasers should contact the local 3M authorized sales agent for detail. Purchaser is solely responsible for complying with all privacy and security-related laws and regulations applicable to the collection, storage, use, import and export of all data (personally-identifiable or otherwise) entered into, or generated by, the 3M™ E-A-Rfit™ Dual-Ear Validation System. Access to the 3M E-A-Rfit Dual-Ear System is not password-controlled. Purchaser should implement all necessary administrative, physical and technical safeguards it determines are necessary to ensure the integrity, confidentiality and security of the data against both internal (e.g., access by unauthorized personnel, misuse of data) and external threats (e.g., "hacking"). The Right fit test. Right now. 3MTM E-A-RfitTM Dual-Ear Validation System. Personal Safety Division 3M Center - Building 235 - 2W-70 St. Paul, MN 55144-1000 Technical Assistance: 1-800-243-4630 Customer Service: 1-800-245-0779 EARfit.3M.com Please recycle. Printed in USA. © 2015 3M All rights reserved. 093-411 RevD. 11/15