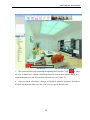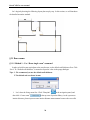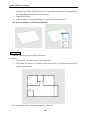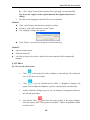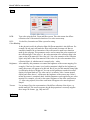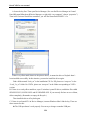
1
Foreword Thank you for using InteriCAD Lite! InteriCAD Lite is a real 3D design software for professionals involved in interior design field. From a quick floor plan to real 3D presentation, from presenting various color schemes to selecting thousands of furniture, you can satisfy your clients and yourself by InteriCAD Lite. Wall coverings, floor coverings and fabric finishes can be dragged straight into the software to show different designs. Features - Easy to learn and use - Special material effect - Realistic lighting effect - Powerful material editing - Massive and updatable online library - Easy and accurate dimensioning - Compatible with MAX file Guangzhou Yuan Fang Computer Software Engineering Co., Ltd. August,2008 Windows, Excel are registered trademarks of Microsoft; Pentium, Centrino, Xeon, Core Duo are registerted trademarks of Intel; Other brands and trademarks belong to their respective owners. Content Content ......................................................................................................................................1 Chapter 1 System installation and configuration ..................................................................1 §1.1 System requirements ....................................................................................................1 §1.2 System installation........................................................................................................1 Chapter 2 Quick Start ..............................................................................................................6 Chapter 3 2D Design ..............................................................................................................25 §3.1 Draw rooms .................................................................................................................26 §3.1.1 Method 1—Use “Draw single room” command ...................................................26 §3.1.2 Method 2—Use “Free wall” command .................................................................31 §3.1.3 Method 3—Use “Insert Picture” command ...........................................................34 §3.2 Install rooms and windows ........................................................................................42 §3.3 Furniture layout .........................................................................................................47 §3.3.1 Add single furniture ...............................................................................................48 §3.3.2 Add furniture set ....................................................................................................50 §3.3.3 Edit single furniture ...............................................................................................53 §3.3.3.1 Copy ...............................................................................................................53 §3.3.3.2 Move...............................................................................................................54 §3.3.3.3 Rotate .............................................................................................................55 §3.3.3.4 Delete .............................................................................................................56 §3.3.3.5 Replace ...........................................................................................................57 §3.3.3.6 Elevation.........................................................................................................57 §3.3.3.7 Edit size ..........................................................................................................58 §3.3.4 Edit multiple objects ..............................................................................................59 §3.4 Dimensioning ..............................................................................................................61 §3.5 Column, ceiling, spotlight ..........................................................................................64 §3.6 List ...............................................................................................................................65 §3.7 Enter 3D...................................................................................................................... 69 §3.8 Command details ....................................................................................................... 69 §3.8.1 File command ....................................................................................................... 69 §3.8.2 Edit command ....................................................................................................... 72 §3.8.3 View command ..................................................................................................... 75 §3.8.4 Draw command ..................................................................................................... 76 §3.8.5 Room command .................................................................................................... 85 §3.8.6 Setting command .................................................................................................. 89 §3.8.7 Help command ...................................................................................................... 94 Chapter 4 3D mode ................................................................................................................ 94 §4.1 Overview ..................................................................................................................... 94 §4.2 Introduction of the interface ..................................................................................... 95 §4.3 3D scene basic commands ......................................................................................... 95 §4.3.1 Move ..................................................................................................................... 95 §4.3.1.1 Walk ............................................................................................................... 96 §4.3.1.2 Elevate ........................................................................................................... 96 §4.3.1.3 Spin ................................................................................................................ 96 §4.3.1.4 Pan ................................................................................................................. 97 §4.3.1.5 Zoom .............................................................................................................. 97 §4.3.1.6 Look at ........................................................................................................... 97 §4.3.2 View ...................................................................................................................... 97 §4.3.2.1 Top view ........................................................................................................ 97 §4.3.2.2 Front view ...................................................................................................... 97 §4.3.2.3 Right view...................................................................................................... 97 §4.3.2.4 Bottom view................................................................................................... 97 §4.3.2.5 Zoom window ................................................................................................ 97 §4.3.2.6 Zoom extend .................................................................................................. 98 §4.3.2.7 Rotate view .................................................................................................... 98 §4.3.2.8 Previous view................................................................................................. 98 §4.3.2.9 Camera ........................................................................................................... 98 §4.3.3 Object edit............................................................................................................ 99 §4.3.4 Material edit ....................................................................................................... 103 §4.3.4.1 Two methods of material editing ................................................................ 103 §4.3.4.2 Basic operations for material processing .....................................................104 §4.3.5 Effect ..................................................................................................................105 §4.3.5.1 Save the effect picture .................................................................................105 §4.3.5.2 Print the effect picture .................................................................................106 §4.3.5.3 Turn off light ...............................................................................................106 §4.3.6 Animation ...........................................................................................................106 §4.4 3D scene advanced commands ................................................................................109 §4.4.1 Commands of material editor .............................................................................109 §4.4.2 Special materials edit.......................................................................................... 111 §4.4.3 Light setting......................................................................................................... 116 §4.4.3.1 Set light source or remove light source ........................................................ 116 §4.4.3.2 Edit light source ........................................................................................... 117 §4.4.3.3 The management of light source group and adjustment ...............................120 §4.4.4 Render .................................................................................................................121 §4.4.4.1 Radiosity.......................................................................................................121 §4.4.4.2 Raytrace ........................................................................................................124 Chapter 5 Appendix .............................................................................................................126 §5.1 Frequent ask question (FAQ) ..................................................................................126 §5.2 About software ..........................................................................................................130 §5.3 Technical support .....................................................................................................131 InteriCAD Lite user manual Chapter 1 System installation and configuration This chapter shows the software and hardware requirements for running “InteriCAD Lite”, and also introduces how to install and configure the system. §1.1 System requirements In order to run InteriCAD Lite, it is necessary for your system to include the following components: Component Requirement Microsoft® Windows® XP SP2, Windows Vista® Operating system (Windows XP is recommended.) Intel® Pentium® 4 processor or AMD Athlon, 2.4 GHz or faster Processor Intel or AMD Dual Core processor, 1.6 GHz or faster Intel Core 2 Duo and Intel Core 2 Quad are recommended 1GB RAM Microsoft Windows XP Memory 2GB RAM Microsoft Windows Vista Hard drive 1GB (including model library), at least another 1GB is needed as swap space DVD drive 8 speed or faster OpenGL compatible video cards with true color Video Card Another 1GB RAM is required for integrated video card Standalone video card is recommended Display resolution At least 1,024 x 768 screen resolution Internet dial-up or broadband Internet access is required for updates and model connection downloads Browser Microsoft® Internet Explorer 6 or later §1.2 System installation Before you install this system, please make sure 1. The hard disk drive has free space more than 1GB. 2. Set the color quality as 32bit, or you can not enter 3D mode. 3. Do not insert the lock before you finished the installation of the lock driver. 4. Before you install, close all applications currently running on your system—including other YFCAD applications, Microsoft Office applications, and browser windows. 5. Insert the CD in your drive, and follow the on-screen instructions. If the installer does not launch automatically, navigate to the InteriCAD Lite folder found at the root level on your disk and double-click Setup.exe to start the installation process. 6. If you have installed any former version, please uninstall first. 1 InteriCAD Lite user manual Note: Please use the administrator account when you install the software in vista. Insert the disk into the CD-ROM. Afterward the installation interface will automatically appear as showed below. Or you can double click the setup.exe in the CD. Please click “next” as the tip shows. Please read the license agreement carefully. If you agree to all the items, click “Next”. Select the location folder as the destination folder of the software. The default folder is “c:\ InteriCAD Lite”. You can change the folder by clicking “Browse”. 2 InteriCAD Lite user manual For example, if you want to install the software in Disk D, just replace the “C” with “D” on the path “c:\ InteriCAD Lite” in the popup window. Then click “OK”. Click “Next” to use the default destination folder as shown below. You may select the software name in the “Start” menu in the popup dialogue “Select program Folder”. Click “Next” to use the default. 3 InteriCAD Lite user manual After installing the main program, the system will require you to install the software keylock driver. Click “Next” to continue. When the installation is completed, click “Finish”. 4 InteriCAD Lite user manual After installing the software keylock driver, you need to add the authorization code in the popup dialogue. Input the code and then click “add”. After inputting all the codes, click “OK”. The installation is complete. Please click “Finish”. 5 InteriCAD Lite user manual Chapter 2 Quick Start In this chapter, you will learn how to create the two images (shown below) using InteriCAD Lite. 6 InteriCAD Lite user manual Please read the following instructions before you start. Instruction: A. Using the mouse: Most operations are confirmed by clicking the left button, for example: selecting from menu, selecting operation from the toolbar, selecting object, confirming the insert point of the furniture, and selecting products from the library. Usually, click means left click. Further instructions for using of the mouse: a) Click the right button to end an operation. b) Click the right button to stop an operation that is in progress. c) Click the right button to show the personal menu of an object. d) Double click an object to move it. e) Drag the mouse to move in the workspace. f) Use the wheel to zoom in or zoom out. B. Highlight When you click an object, the object selected will be highlighted in green or yellow. C. Guidelines in the software 7 InteriCAD Lite user manual Please note that there is always a guideline every time you perform a command. The guidelines will help you to figure the next step. The guideline might appear in two different ways. One is moving along with the mouse, the other one is displayed on the top left area in the workplace. 1. For example, when drawing a wall, you can see the following guideline. 2. When you draw a room, you will find a guideline in the top left area of the workplace. So, just follow the displayed guidelines if you cannot figure out the next step. Detail operational instructions: First, double click the shortcut of InteriCAD Lite 8 to launch to software program. InteriCAD Lite user manual Step 1 Build room structure 1. 2. Click “Draw single room” on the left navigation panel. Click “More house templates” and choose “L-shape”. Set the following dimension. A=9000, B=2000, C=6600, D=4500, then click OK. Step 2 Install doors and windows 9 InteriCAD Lite user manual 1. Click “Single door” in the product library and input the size. Here we use the default size. Click “OK” to continue. 2. Now move the mouse to wall and you will find that the door is automatically inserted into the wall. Just move the door icon to either side of the wall to determine the direction of the door inside or outside the room. You can also move along the wall to change the door location. Press space bar to change the direction of the door to face either left or right. 10 InteriCAD Lite user manual 3. Left click to confirm the location. 4. Click again to complete the insertion. Now, you have inserted a single door. Please insert the other two doors using the same procedure. 5. After inserting all the single doors, choose the sliding door shown in the product library. You can change the size (width, height, elevation) in the top area of the panel. Here we accept the default. Click “OK” and then left click to confirm the location. 6. Next, insert an arcadia door into the Wall D using the same procedure as the single door. 11 InteriCAD Lite user manual So far, we have inserted all the doors and windows. Step 3 Product layout 1. Click “Furniture” on the top navigation panel, then double click “System library” in the product library, or alternately click the “+”. (Tips: If there is a “+”before the item, please click “+” to unfold it.) 2. Left click the image of the object to select it. The object can then move around the room following the movement of the mouse. When the object is close to a wall, it will snap to the 12 InteriCAD Lite user manual wall automatically. You can also press space bar to rotate the object or right click the object to display the property menu. You can then change the size, rotate, copy etc. 3. Use the same procedure to insert the objects in the room. 4. After all the objects are inserted, click on objects to open a pop-up dialogue to assist you with any further modifications. You can also view detailed information in the left navigation panel. 13 InteriCAD Lite user manual Step 4 Ceilings and Ceiling lights 1. Click “Room” “Auto ceiling” in the menu bar. Then left click in the room. You can set the elevation in the pop-up dialogue which is by default set to 2800. After that, click OK to generate the ceiling for the whole room. 2. To add a ceiling for a specific region, click “Room” “Ceiling blocks” in the menu bar. Move to the first point (upper left point) as the instruction shows and left click to confirm. Then move to the second (lower right point) and left click again to confirm. A dialogue will pop up for you to complete the settings. 14 InteriCAD Lite user manual Choose “use existing ceiling type” and then click “option”. Another dialogue will pop up. Click the ceiling you like and then click “OK” (Tip: You can select the ceiling by double clicking the image.) Click “OK” to finish setting. 3. To set the ceiling lights, click “Room” “Linear spotlights” in the menu bar. Click the first point as the start point. Then click another point as the end point. In the popup dialogue, enter 3 as the quantity. There are 4 generation modes. Here we use the default. Click “OK” to confirm. 15 InteriCAD Lite user manual The spots shown in the workplace are the ceiling lights. Step 5 Dimension 1. Click “Draw” “Line dimension” or “Parallel dimension” in the menu bar. You can also click or below the navigation bar. Now let’s get the dimensions of Wall C. Click on one end of the wall and then click on the other end. Move the mouse along the direction perpendicular to the wall and left click to decide the location. Tip: The system will automatically get the end point of the wall. If it doesn’t, activate the node snap function. (For details of the snap function, refer to Page 83.) 16 InteriCAD Lite user manual First point 2. Second point You can also obtain the dimensions for the other walls since the command is still active until you right click the mouse. Step 6 Enter 3D View 1. Click “3D” on the navigation panel. Now you need to select a template from the popup template window. Choose the style you prefer and left click on the picture. 17 InteriCAD Lite user manual 2. The system will convert to 3D automatically. 3. Click “Enter Room” to navigate inside the room. 18 InteriCAD Lite user manual Step 7 Navigate in the 3D View Hold down left click and drag the mouse to move the view. You can now navigate around the room to see how the interior looks. Alternatively, you can adjust the view by using the buttons on the auxiliary toolbar. Step 8 Product layout in 3D View 1. Click “Deco” , and then choose the object you want to decorate. Select the tea table for example, clicks “+” in the popup dialogue and click the decoration selected and it will automatically add the decoration to the tea table. 19 InteriCAD Lite user manual 2. Use this method to add decorations to other objects. 3. Some objects are inserted in a different way. For example, when adding TV set as decoration onto the cabinet, click the object in the product library from the left navigation panel. Move it into the room and left click to confirm position. Step 9 Rendering 1. Click the button “Light On” 2. The system will begin calculating the lighting inside the room, and data will be shown at the bottom. (Tips: Please click “Stop” at the bottom left area of the workplace. before you carry out other operations.) 20 InteriCAD Lite user manual The system will keep on calculating the lighting until you click “stop” or when the error is almost zero. A longer calculation time will create a more realistic image. It is 3. recommended that you stop the calculation when the error goes below 1%. 4. After you stop the calculation, a dialogue will appear to adjust the brightness. Hold down left click and adjust the slider bar. Click “OK” after you get the desired effect. 21 InteriCAD Lite user manual Step 10 Save image 1. Click the button “Render” the pop-up dialogue. 2. at the top navigation panel. Select the desired effect in Try the “Quick effect” first. After the system generates the photo, a popup dialogue will guide you to save it in hard disk drive. 22 InteriCAD Lite user manual Step 11 List Click “List” on the top navigation panel. The system will generate a price list of all the products in the scene. 23 InteriCAD Lite user manual To save the price list, click “File” in the menu bar and select “Export html”. In the popup dialogue, choose the path and enter the name, then click “Save”. Step 11 Save file Click “File” “Save” or “Save as” in menu bar. Select the destination folder and type in the file name. Click “OK” to save the file. If you are able to create a photo-realistic image similar to the given example, congratulations! You have now mastered the basic functions of InteriCAD Lite. In the next chapter, you will learn the more detailed functions of InteriCAD Lite. 24 InteriCAD Lite user manual Chapter 3 2D Design In the previous chapter, we have introduced the overall process and the basic techniques for operating the software. In this chapter, we will help you to understand the detailed functions of 2D design. On completion of this chapter, you will be able to draw a detailed furniture layout plan. 2D Design Interface Menu bar Navigation panel Quick toolbar Workplace Product library Auxiliary toolbar Menu bar: Most commands are listed here. Left click to select the command. Navigation panel: Some frequently-used commands are here. Left click to select the command. Workspace: the drawing area Auxiliary toolbar: Zoom control tools. Left click to use the command. Quick toolbar: Some frequently-used commands are here. Left click to use the command. Product library: You can see the pictures and detail information of the product on top of this area. You can select the product from the lower area. 25 InteriCAD Lite user manual Let’s begin by drawing the following layout plan step by step. In this section, we will introduce the detailed operating method. §3.1 Draw rooms §3.1.1 Method 1—Use “Draw single room” command In order to build a room equivalent to the actual room, set the default wall thickness first. Click “Save” “Default wall thickness” in menu bar. Input the value in the popup dialogue. Tips: 1. We recommend you use the default wall thickness. 2. The default unit are shown in mm. 1. Let’s draw the living room first. Click “Floorplan” in the navigation panel, and then click “Create room” in the top area of product library. As the system use interior distance, please input accurate interior distance measurement between the two walls. 26 InteriCAD Lite user manual 2. Click “More house templates” and select the third “L shape” template. Please input “10280” for Wall A, “1880”for Wall B, “7980” for Wall C, “4280” for Wall D, and then click “OK”. Tip: To modify the room size, we should first identify the wall that every letter represents and then input the length in the blank on the right. 3. The system will automatically generate the room in the workplace. As a result, we have now built the living room. 27 InteriCAD Lite user manual 4. Let’s continue to draw the kitchen. Click “More house templates” and choose “rectangle”. Input “2180” for Wall A, “2280”for Wall B, and then click “OK”. 5. Move the rectangular room to the corner of the living room. The system will automatically get the corner point. When a small red rectangle appears, it means that the two walls have connected successfully. Left click to finish this step. (If you can see the red rectangle, please activate the node snap function first. For more details about the snap function, refer to Page 83.) 28 InteriCAD Lite user manual 6. Click “Zoom all” in the auxiliary toolbar to enlarge the size of the room image on the workplace. Tips: a. You have to make sure that the snap function is active before connecting rooms together. Make sure that the small red rectangle appears before you confirm the location in order to avoid problems in the 3D mode. b. Sometimes the image in the workplace is too big or too small, then you can use the zoom function in the Auxiliary toolbar. Click “Zoom all” to zoom the whole picture to a proper size. In this way, you can see the whole picture of the workplace. If you want to zoom into a certain part of the picture, click “View” “Zoom window” in menu bar, then define the part that you want to zoom in. If you want to zoom in on the whole picture, click in the auxiliary toolbar to zoom in by 1.6times. If you want to zoom out from the whole picture, click in the auxiliary toolbar to zoom out by 1.6times. If you want to move the picture, please click button to drag. 29 and hold down the left mouse InteriCAD Lite user manual 7. Please finish the bedroom, toilet, balcony and other rooms following the same procedure. 8. We have now finished the main structure of the house, but there are still some unnecessary walls. Left click the wall to select it and then in the popup dialogue, click delete it. 30 to InteriCAD Lite user manual 9. Now we have completed the structure. Tip: To delete the wall, you can also select the wall and then press “Delete”. Let’s save the structure plan for later use. Click “File” “Save” in menu bar. Input the file name in the popup dialogue and choose the path you want to save. Then click “Save”. §3.1.2 Method 2—Use “Free wall” command 1. Click “File” “New” in menu bar to create a new file. Click “Setting” “Snap setting”. Set the popup dialogue as the following picture. 31 InteriCAD Lite user manual 2. Click “Floorplan” in the navigation panel, and then click in the top area of the product library. Input “120” as the wall thickness and click “Draw wall”. Left click in the workplace to define the first point. Then move the mouse to show the end point with the length shown on the top left panel. Length:the length of wall Angle:the angle between the wall and the horizontal line Thickness:wall thickness Tick a check mark here, to draw continuous walls. If you have the inner wall distance, please draw anti-clockwise with this function on. draw with the middle wall distance If you have the inner wall distance, please draw clockwise with this function on. 3. Move the mouse horizontally, and then input “10280” as the length. Click to confirm then move it upward by 90°, input “4280”, and click to finish the second wall. 32 InteriCAD Lite user manual 4. For the third wall, turn the mouse to the left by 180°. When you move to a certain distance, a red cross will appear, which indicates that the third wall has the same length as the first one. Left click to confirm the third wall. 5. Move the mouse down and the wall will automatically attach to the end point. When a small rectangle appears, click to complete the room. 33 InteriCAD Lite user manual 6. Please finish the other walls in the same way. Tips: a. If you did not activate the angle snap function, the wall may not be horizontal or vertical. You can tick a check mark before “Snap at angle” in the auxiliary toolbar to activate this function. b. If you can not input the length of the wall, delete the data of length in the column first, then input the new length and press enter. c. Ensure that only reasonable wall thicknesses are inputted to avoid problems in 3D mode. §3.1.3 Method 3—Use “Insert Picture” command Tips: If a customer already has a floor plan, then you can scan it into a JPG file. We can then use this method to draw the room. 1. Create a new file. Click “Draw” “Insert picture” in menu bar. 34 InteriCAD Lite user manual 2. In the popup dialogue, choose the JPEG file and click “Open”. 3. Specify the location of the picture. Click to confirm the position. 35 InteriCAD Lite user manual 4. The system will automatically display the picture in a proper size. The following dialogue pops up to define the ratio. Click “Choose reference point”. 5. The system will require you to specify the first point. Choose the wall that has length information on it. Click on both end of the wall. 36 InteriCAD Lite user manual Second point First point 6. In the popup dialogue, please input “10280” as the actual length in the blank. Then click “OK”. In this way, we have finished scaling the size of the plan according to the actual size. Tips: As the room and the objects are designed according to actual size, we have to set this ratio before we draw in the detailed plan. If you want to reset the ratio, right click the picture and select “Adjust scale”. 7. Now you can draw the plan. Click “Free wall” to begin. We don’t have to input the length. Instead, we just draw the walls according to the picture. 37 InteriCAD Lite user manual Tips: when using the “Insert Picture” command, one should use the snap function in a careful and logical manner: If you need to draw a wall horizontal or vertical to another wall, activate the ortho function. (To activate the ortho function, click “Setting” “Wall ortho snap” in menu bar. For details of the ortho function, refer to Page 83.) If you want to connect the wall to another wall, activate the node snap function. (You can tick a check mark before “Snap at node” on the auxiliary toolbar to activate the function. For details of the node snap function, refer to Page 84.) If you are drawing a wall that is close to another wall on a different horizontal or vertical level, deactivate the snap function. If you can’t get the reference points when you change the map ratio, please deactivate the length snap function. (To deactivate the snap function, make sure there is no tick mark in “Snap at length” on the auxiliary toolbar. For the detail of the length snap function, refer to Page 84.) 8. Click “Draw” “Hide all images” after you have finished drawing all the walls. 38 InteriCAD Lite user manual 9. So far, we have completed the structure of the house. Click to save the file. §3.1.4 Method 4—Use “My floorplans” command 1. Click “Floorplan” in the navigation panel, and then click “My floorplans” 2. in the top area of product library. Click the item to check the floorplan. To use the floorplan, click on the floorplan image. 3. Left click in the workplace to confirm the location. 39 InteriCAD Lite user manual Tip: How to add your own floorplan? 1. Click “Floorplan” in the navigation panel, and then click “My floorplans” 2. in the top area of product library. Right click on “Room _Template Lib”. Select “Insert node” to add a subnode. 3. In the popup dialogue, input the name for the node. Then click “OK”. 40 InteriCAD Lite user manual 4. Right click on the node you added. Select “Add to library”. 5. In the popup dialogue, input the name for the floorplan. Then click “OK”. 41 InteriCAD Lite user manual §3.2 Install rooms and windows 1. Click “Floorplan” in the navigation panel, and select “Single door” in the product library. Input the size of the door and click “OK”. 2. Move the door to the wall and it will automatically insert onto the wall. 42 InteriCAD Lite user manual 3. You can move the door icon to either side of the wall to determine the direction of the door inside or outside the room. Move along the wall to the preferred position and click to confirm. At this point, we have inserted the door. 4. Repeat the steps above to complete the insertion of all the single doors. 43 InteriCAD Lite user manual 5. Click “Sliding door” in the product library and input “1600” for the width. Click “OK”. 6. Make sure that the snap function is activated. (Refer to Page 84.) When a red rectangle appears, it indicates the middle of the wall. 44 InteriCAD Lite user manual 7. Left click to finish this step. 8. Now choose the “Arcadia door”. Input “3500” for the width and click “OK”. 9. Insert the arcadia door using the same procedure. Position it in the middle of the wall. 10. Again choose “Window”. Input “1500” for the width and click “OK”. Insert it the same way as inserting a door. 45 InteriCAD Lite user manual 11. Similarly, insert the window into the middle of the left bedroom wall, into the right bedroom wall, and into the middle of the toilet wall. 12. So far, all the windows and doors have been inserted. Click “File” in the menu bar and save the file. Tips: 46 InteriCAD Lite user manual If you need to modify the parameter of a door or a window, remember to click “Modify Size” before you try to install it. You don’t need to click “Modify Size” if you use the default parameter. Click “File” in the menu bar, and select “Save as” to save the file with a different file name. The saved file is in “.KOC” format. If you want to open the saved file, please run InteriCAD Lite. Click “File” in the menu bar and select “Open”. A popup dialogue will then appear. Find the file and click “Open”. §3.3 Furniture layout Click in the navigation panel and you can see the product library on the left hand side. Click “+” to unfold the subdirectories. 47 InteriCAD Lite user manual §3.3.1 Add single furniture 1. Now, let’s add furniture to the bedroom. Click “System library” and select “Home_furniture” to unfold the item. Select “Bed” and click a bed model and it will move along with the mouse. When the furniture is close to the wall, it will automatically adjust and snap to the wall. You can rotate the furniture by pressing the space bar. 2. Move the bed to the bedroom. Position the bed to the wall. Left click to confirm the position. (Tip: When moving furniture, the red cross indicates the back side of the furniture.) 3. Add more wardrobes and dressing tables to the bedrooms. 48 InteriCAD Lite user manual 4. After we furnish the bedrooms, let’s furnish the living room. Click in the product library. Click on a sofa set. Add it to the living room in the same way as adding the bed. (Tip: The furniture set won’t snap to the wall automatically.) 5. If you want to adjust specific furniture in the set, click the furniture set and explode it first. 6. Please add more furniture into the house. 49 InteriCAD Lite user manual §3.3.2 Add furniture set To add furniture set, make sure you are in furniture mode. Then click “Set” button. Select the set you want and left click in the workplace to confirm the position. 50 InteriCAD Lite user manual To edit single furniture in the set, explode the set first. Tip: How to add your own furniture set? 1. Right click on “furniture sets”. Select “Insert node” to add a subnode. 2. In the popup dialogue, input the name for the node. Then click “OK”. 51 InteriCAD Lite user manual 3. Right click on the node you added. Select “Add to library”. 4. In the popup dialogue, input the name for the set. Then click “OK”. 5. Draw a selection window that includes all the object of a set. (When you click a blank portion of the drawing area, InteriCAD Lite automatically starts a selection window.) Or you can simply click on the objects of a set on by one. Right click to finish. 52 InteriCAD Lite user manual §3.3.3 Edit single furniture Even after we finish arranging the furniture, we still have to edit the size, location or the rotation of some furniture. §3.3.3.1 Copy Take the dining chair as an example. Method 1: Click on the chair. Click “Copy” in the popup dialogue and automatically a new copied chair will move along with the mouse. Move it to your preferred position and click to confirm. Method 2: Right click on the chair and select “Copy” in the popup dialogue and automatically a new copied chair will move along with the mouse. Move it to your prefered position and click to confirm. 53 InteriCAD Lite user manual Please layout 4 chairs using the two methods. Tips: The furniture that you select will be highlighted. Press the space bar to rotate the furniture. Activate the snap function to attach the furniture to the walls. With the snap function activated, move the furniture to the wall to adjust the angle automatically. You can check for detailed information about the furniture in the top left area by clicking on it. Some objects can only be added in the 3D mode. §3.3.3.2 Move Take the bed as an example. Method 1: Double click on the bed and you can move the bed around. Find the preferred position and click to confirm. To cancel the movement, right click or press Esc. Method 2: Click on the bed, click “Move” in the popup dialogue, and move the bed to your preferred position. Click to confirm. 54 InteriCAD Lite user manual Method 3: Right click on the chair and select “Move” in the popup dialogue. Move the bed to your preferred position and click to confirm. §3.3.3.3 Rotate Take the carpet as an example. Method 1: Click the carpet and then input the angle in the popup dialogue. Click “OK” to confirm. 55 InteriCAD Lite user manual Method 2: Click on the carpet and drag the red line inside the circle. Method 3: Right click on the carpet and select “Rotate”. Move it to your preferred position and left click to confirm. There is a tip showing you the rotation angle information. §3.3.3.4 Delete Take the cabinet as an example. Method 1: Click on the cabinet and click . Method 2: Right click on the cabinet and select “Delete” in the popup dialogue. 56 InteriCAD Lite user manual Method 3: Click on the cabinet and press the delete key. §3.3.3.5 Replace You can replace the furniture directly by clicking on the furniture and click . Choose the desired furniture in the popup dialogue. As a result, the furniture has been replaced. §3.3.3.6 Elevation Normally, the object you added was located on the floor, or on the surface of an object that the mouse points at. However, sometimes there will be an error. For example, after we inserted the end table, we inserted a carpet in the same position as the table. The table will be positioned under the carpet. Now, we have to set the elevation. Method 1: Click on the carpet and click . When the carpet is on the floor, the elevation will be shown as zero. To get the carpet to the floor just set the elevation to zero. 57 InteriCAD Lite user manual Method 2: Click on the carpet and select “Elevation”. When the carpet is on the floor, the elevation will be shown as zero. To get the carpet to the floor just set the elevation to zero. §3.3.3.7 Edit size Here we take the bed as an example. Method 1: Click on the bed and input the length, width and height of the bed in the column. You can also click the arrow to change the size. Method 1 To keep its scale, click the “s” button first. 58 InteriCAD Lite user manual Method 2: Right click on the bed and select “Edit size”. Input the data in the column. The tick mark in the “Scale” box means the object will keep its scale. However, we will have to tick off the “Scale” box since we will only change the length and the width. §3.3.4 Edit multiple objects In order to improve efficiency, we can edit multiple objects at the same time. The difference between editing a single object and multiple objects is that: 1. When editing a single object, we click on the object and then select the command. However, we have to select the command first before selecting the objects. 2. When editing multiple objects, we can only use the copy, move, rotate, delete or mirror commands. However, for a single object, we can also edit the elevation. 3. When editing multiple objects, right click means confirming the objects we selected. If we want to end the operation, press Esc. Steps for editing multiple objects: 59 InteriCAD Lite user manual a) select the command b) select the objects c) right click to confirm the objects d) continue as the tip shows Now, let’s take a furniture set as an example. 1. Click “Edit” in the menu bar and select “Move”. The mouse pointer will turn into a red rectangle. 2. Click the objects you preferred and it will be highlighted in green. Right click to confirm the selection. 3. Move to the prefered position and click to determine the starting point. Now define the end point by clicking on a new position to confirm the move. Tips: 1. You can also drag the mouse to select the objects. 2. Press SHIFT key and select the object that you want to cancel from the selection. 60 InteriCAD Lite user manual §3.4 Dimensioning in the quick toolbar, or click “Draw” “Line Dimension” in the menu bar. 1. Click 2. Move the mouse close to the end of a wall. A small red rectangle will appear when you reach the center. Left click to confirm, then move to the other end and click again. You can now move the dimension along with the mouse. 3. Determine a position and click to confirm the position. After this, the system will request you to set another first point. 4. Do it the same way as before to obtain the dimension of other walls. 61 InteriCAD Lite user manual 5. If you want to figure the distance between two objects, you can use the “Parallel dimension”. Click an object and click another object, then move to a proper position to place the dimension. Click to confirm. Tips: We normally use the snap function to draw a dimension. However, sometimes you cannot get to the point that you want because the snap function is activated. There are three distance of a wall, inner distance, middle distance, outer distance. Move the mouse to the different nodes of a wall. If you want to reset the dimension after you draw it, you can click the dimension. left click right click 62 InteriCAD Lite user manual a. Click to define the position of the dimension. b. Click and move the mouse to define the first point. c. Click and move the mouse to define the second point. d. Click and input the data in the blank. Click “OK” and the previous dimension will be replaced. e. If you want to change the style of dimension, click font, color, height, arrow style and so on. f. Click to delete the dimension. 63 . You can change the InteriCAD Lite user manual §3.5 Column, ceiling, spotlight 1. Click “Room” in the menu bar and choose “Column”. Or you can click navigation panel. Click “column” in the in the product library. Input the length and width in the blank and click “OK”. Move to a proper position and left click to confirm. 2. Click “Room” in the menu bar and choose “Ceiling block”. Move the mouse to the workplace to define the first point. Click to confirm the first point and then move to a proper position to define the second point. You can see the distance between two points when moving. 3. Input the elevation in the popup dialogue and click “use existing ceiling type” to select ceiling types. You can hold the Shift key and double click the picture to preview first. Choose a proper ceiling style from the ceiling library to build a ceiling with complex structure. 64 InteriCAD Lite user manual 4. Click “Room” in the menu bar and choose “Linear spotlights”. Left click to define the first point and then the second point. You can see the distance between two points as you move. After you have defined the two points, you can set the type and the number of the lights. Click “OK” to confirm the operation. §3.6 List Click in the navigation panel. The system will automatically list all the products and generate the List. You can now check the price, size, quantity etc. : Export the list to text format. In the popup dialogue, designate the location and input the file name. Then click “OK”. 65 InteriCAD Lite user manual : Export the list to HTML format. In the popup dialogue, designate the location and input the file name. Then click “Save”. 66 InteriCAD Lite user manual : Export the list to excel format. In the popup dialogue, designate the location and input the file name. If the list is more than one page, you can Then click “Save”. : Print out the list. It’s better to set the printer before you try to print. : Preview the printing result. 67 InteriCAD Lite user manual : Detail settings of the list, including the printer setting. : Erases the last change done to the list. 68 InteriCAD Lite user manual : Reverse the undo command. : Delete the selected line. : Add a line to the last line. : Save the changed template. §3.7 Enter 3D 1. Click in the navigation panel. 2. In the popup dialogue, the left area contains the room templates. Choose the room template first and then click on the template similar to your house style. Now we are entering the 3D mode. So far, we have completed the 2D part. In the following part, we will operate in 3D. §3.8 Command details §3.8.1 File command New 69 InteriCAD Lite user manual Open a new drawing file. Operation: Click “File” “New” in menu bar. Tips: if you made changes in the current file, the system will ask you whether to save the change. Open Open a previously saved file, which is in *.koc file format Operation: Click “File” “Open” in menu bar, then select the file and click “Open”. Save Save the current file in *.koc file format. Operation: Click “File” “Save” in menu bar. If the current file has previously been saved, a tip will show and the former file will be saved under another name. When you are saving a new file, the “Save” dialogue box will appear. Input the name of the file in the dialogue box and click “save” button. Save as Save the current file as another file with a changed file name in *.koc file format. Operation: Click “File” “Save as” in menu bar. Input the name of the changed file, and then click“Save as” button. 70 InteriCAD Lite user manual Export image Export the whole workspace to a file in *.jpg file format Operation: Click “File” “Export jpeg file” in menu bar. The system will show “Export image” dialogue box as follows. In the dialogue, you can modify the resolution and the size of the jpeg file. Select the file path and input the file name and then click the “Export” button. Print Print the plot drawing. Operation: 1、 Click “File” “Print” in menu bar. 2、 The system will display the “print” dialogue box. There are three ways you can choose. Whole image area: print all content in the current view port. Choose scope:print certain items, in the current view point. First click the left button to indicate a point of rectangle, and then move the mouse to the proper position to indicate the other point on the cross. All objects inside the rectangle will be printed 71 InteriCAD Lite user manual Choose frame: print the content within one frame. Tip:You have to insert a frame before you use this function. As for how to insert a frame, please refer to command introduction of “insert frame”.?????? 3、 Before printing, click“preview” button. 4、 If you are not satisfied with the print out image, please click print setup to adjust. 5、 Click “Print” button to print. 6、 Click “cancel” button to exit. Plot setting Select the paper type and resolution. Operation: Click “File” “Plot setting” in the menu bar. Input the resolution and choose the paper type. Click “OK” to confirm. Exit “Exit” means you will exit 2D design system. Operation: Click “File” “Exit” in the menu bar. If the current file has been modified, then it will display the “Save” dialogue box. §3.8.2 Edit command Undo 72 InteriCAD Lite user manual Undo command erases the last change done to the document reverting it to an older state. (up to 100 times) Operation: Click “Edit” “Undo” in the menu bar. The Undo command can also be activated by pressing Ctrl-Z. Redo The redo command reverses the undo or advances the buffer to a more current state. Operation: Click “Edit” “Redo” in the menu bar. Move This command can move one or more objects at a time. It is usually used to adjust a set of furniture. Operation: 1. Click “Edit” “Move” in the menu bar. 2. Click on the object that you want to move. The selected object will be highlighted in yellow. 3. After selecting, right click to confirm the objects. 4. Left click to choose the starting point. Then move the mouse. At the same time, it shows the relative displacement dynamically. 5. Move the target position and left click. Tips: you can simultaneously select and move multiple objects (if you left click an object and choose the move command, you can only move one object). Rotate This command can be used to rotate one or more objects at a time. It is usually used to adjust a set of furniture. Operation: 1. Click “Edit” “Rotate” in the menu bar. 2. Click the object to be rotated. The selected object will be highlighted in yellow. 3. After selecting, right click to confirm the objects. 4. Left click to define the rotation center, and then move the mouse. At the same time, it shows the relative displacement and rotation angle dynamically. 5. Move the target position and left click. Copy This command can be used to copy one or more objects at a time. It is usually used to adjust a 73 InteriCAD Lite user manual set of furniture. Operation: 1. Click “Edit” “Rotate” in the menu bar. 2. Click the object to be copied. The selected object will be highlighted in yellow. 3. After selecting, right click to confirm the objects. 4. Left click to define the start point for copying. At the same time, it shows the displacement of the copied object relative to the source object. 5. Move the target position and left click. Mirror This command can mirror one or more objects at a time. The mirror command is a way of copying the object according to a specified axis. Operation: 1. Click “Edit” “Mirror” in the menu bar. 2. Click the objects to be mirrored. The selected object will be highlighted in yellow. 3. After selecting, right click to confirm the objects. 4. Left click to define the start point define the axis. 5. Move the target position and left click. 6. An instruction will be pop up to ask you whether to keep the original objects or not. Delete This command can simultaneously erase one or more objects at a time. 74 InteriCAD Lite user manual Operation: 1. Click “Edit” “Delete” in the menu bar. 2. Click the objects to be deleted. The selected object will be highlighted in yellow. 3. After selecting, click the right button to delete the selected objects. §3.8.3 View command Zoom all Zoom to maximally display all the objects. Operation: Click “View” “Zoom all” in the menu bar, or click in the auxiliary toolbar. Zoom window Maximally display the objects in a chosen area. Operation: Click “View” “Zoom window” in the menu bar. The mouse will automatically move into the workspace. Drag a rectangle that you want to zoom. Free zoom Zoom in or zoom out on the objects in the workspace at any moment. Operation: 1. Click “View” “Zoom window” in the menu bar. The mouse will automatically move into the workspace. Move mouse to the workplace. 2. Moving the mouse upwards is to zoom in on the objects, while moving downwards is to zoom out on the objects. 3. After scaling to a proper degree, right click and then select“end” from the properties menu. Pan Drag the drawings into the workspace. Operation: Click “View” “Pan” in the menu bar, or click in the auxiliary toolbar. The mouse automatically moves into the workspace. Drag the mouse in the direction you want to move. For example, if you move the mouse downwards, the drawings will be moved downwards; if you move the mouse to the left, the drawings will be moved to the left. 75 InteriCAD Lite user manual Zoom In Zoom in on the objects in the workspace. Operation: Click “View” “Zoom in” in the menu bar, or click in the auxiliary toolbar. Zoom Out Zoom out on the objects in the workspace. Operation: Click “View” “Zoom out” in the menu bar, or click in the auxiliary toolbar. Show all images/ Hide all images Show or hide all images inserted by the “insert picture” command in the workspace. Operation: Click “Draw” “Show all images/hide all images” in the menu bar, and then the system will show or hide all images in the draw area. Tips: You can quickly portray a drawing without affecting the final plot effect (that is, use the “show all images” command to show all images and take them as an assistant when portray a drawing; when export the final 2D effect drawing, hide all images so that they will not influence the final effect). Properly using the two functions, you can quickly portray a drawing without influencing the final plot effect (that is, use the “show image” command to show all images and take them as an assistant when portray a drawing; when export the final 2D effect drawing, hide all images so that they will not influence the final effect). §3.8.4 Draw command Line Draw a line. Operation: 1. Click “Draw” “Line” in the menu bar. 76 InteriCAD Lite user manual 2. “Line parameter” dialogue box will pop up. Move the mouse, left click to determine the start position, and then move the mouse to another position. A tip will be displayed to ask you to determine the end point, and then dynamically shows the distance between the two points. 3. Click at a proper position to determine the end point, and now the line has been completed. 4. Repeat the procedure, and you can draw multiple continuous lines using the end point of the previous line as the start point. 5. Click the right button to finish. Tips: 1. You can use the “snap” function to snap the two points to accurately locate the line. 2. You can input the data of length of angle to lock it. Arc Draw an arc. Operation: 1. Click “Draw” “Arc” in the menu bar. 2. Move the mouse into the workspace. Left click to determine the start position, and then move the mouse to another position. A tip will be displayed to ask you to determine the end point, and dynamically shows the distance between the two points. Click the left button. Then move the mouse; another tip will be displayed to ask you to determine the radius of the arc. Click the left button to finish. 77 InteriCAD Lite user manual Start point End point Circle Draw a circle. Operation: 1. Click “Draw” “Circle” in the menu bar. 2. Move the mouse cursor into the workspace, and left click to determine the arc center. Then move the mouse to another position. The radius of the circle will be displayed dynamically. Click the left button to determine it. Tips: Repeat the procedure, and you can draw multiple circles until you click the right button to finish the command. Polyline Continuously draw any shape, which is combined, by line and arc. Operation: 1. Click “Draw” “Polyline” in the menu bar. 2. Move the mouse cursor into the workspace, and you can see a tip for the first point. Click at a suitable position to determine the first point, and then you will see a prompt for the next point, if you want to continue to draw an arc, press“A” in the keyboard. 3. For example: When you finished drawing a line, press“A” in the keyboard, then you can draw an arc. After you finished drawing the arc, if you want to draw a line, press “L” in the keyboard. Press C to close the whole the line. 78 InteriCAD Lite user manual 4. If you don’t want to close the whole line, then right click after you finish drawing the last section. Text Add some text into the drawing as a description for objects. Operation: 1. Click “Draw” “Text” in the menu bar. 2. Input the text in the “Input data” dialogue box. Press “OK”. 3. Click at the position you want to put in the text. Auto dimension Dislpay the dimension of the walls you choose. Operation: 1. Click “Draw” “Auto dimension” in the menu bar. 2. Click the walls you want to display the dimension. Right click to confirm. Tip: In order not to make any confusion, only click the wall of a single room once at a time. Line dimension Measure the horizontal or the vertical distance between two points. Operation: 1. Click “Draw” “Line dimension” in the menu bar, or click toolbar. 79 in the quick InteriCAD Lite user manual 2. Move the mouse cursor to the workspace. Click one point as the first point. Then move the mouse to another position. A tip will be displayed to ask you to determine the second point, and dynamically shows the distance between the two points. Click to determine the second point. 3. Now, if you want the horizontal dimension, move the mouse to the lower left direction. For the vertical dimension, move to the top right direction. Tips: Due to three wall construction methods, left side, center line and right side, each wall has three nodes including two outer nodes and one center node. It is recommended that you should combine snap settings with zoom out function to accurately snap the appropriate node for exact dimensioning. For example, when using the right side as the locate method, then locate based on the inner side endpoint of the wall. 80 InteriCAD Lite user manual Parallel Dimension Get the distance between two points, also called the oblique dimension. Operation: 1. Click “Draw” “Parallel dimension” in the menu bar, or click in the quick toolbar. 2. Move the mouse cursor into the workspace. Click one point as the first point. Then move the mouse to another position. A tip will be displayed to ask you to determine the second point, and dynamically show the distance between the two points. 3. Click at a proper position to determine the second point. Angle Dimension Get the angle between two lines. The system automatically measures the angle. Operation: 1. Click “Draw” “Angle Dimension” in the menu bar, or click in the quick toolbar. 2. Move the mouse cursor into the workspace, and you can see a prompt asking you to determine the vertex. Click at a proper position to fix it, and then move the mouse to another position. A tip will be displayed to ask you to identify the first side, and here also dynamically shows the distance and angle variation between the two points. Click to determine the first side of the inclination; click again to determine the second line. 3. Now you can see the angle. Move to an appropriate position and left click to determine the location for angle dimension. 81 InteriCAD Lite user manual Hide Dimension Hide all the dimensions. Operation: Click “Draw” “Hide Dimension” in the menu bar. Show Dimension Unhide all the dimensions. Operation: Click “Draw” “Show Dimension” in the menu bar. Insert picture Insert an image (.jpg format) into the workplace for drawing the floor plan. To use this command, you need to scan the real floor plan and save it as .jpg format. For this part, refer to §3.1.3 Method 2—Use “Insert Picture” command. Insert frame Insert a frame into the workplace, and then you can print the selected frame style. It is recommended that you combine the command with the above-mentioned “Print” command on Page 63. Operation: 1. Click “Draw” “Insert frame” in the menu bar. 2. There are three items to setup in the popup dialogue box: paper size, map direction and frame containing area. If you choose “Define scope”, you need to define the frame range. Click to determine the insert point and move to a proper position to determine the range; if you choose “Whole image scope”, the frame me will be inserted automatically. 3. Click “Ok” after you set the items. 4. Also, you can carry out operations such as move, rotate, copy, mirror and delete, etc. 82 InteriCAD Lite user manual Inset koc file Add a file in .koc format to the current one. After exploding them you can edit any part in the current view. Operation: 1. Click “Draw” “Insert koc file” in the menu bar. 2. Select a file in .koc format and click “Open”. 3. The system automatically switches to the current workplace; you can move the image to a proper location and then left click. The image will be inserted. 4. Click the inserted image, and in the popup dialogue, click so that you can edit individual object. Free region Draw any shape or area, which consists of several sections of direct line and can be filled in with color. Operation: 1. Click “Draw” “Free region” in the menu bar. 2. Move the mouse cursor into the workspace, and you can see a tip for the start point of the line. Click at a proper position to determine it, and then move the mouse to another 83 InteriCAD Lite user manual position. A tip will be displayed to ask you to determine the end point, and dynamically shows the displacement between the two points 3. Right click to finish. 4. Click the region. In the popup dialogue, you can do further settings here. Tip: The area shall have at least three endpoints. Search region Function: Transfer any closed figure into an area. Operation: 1. Click “Draw” “Search region” in the menu bar. 2. The system will require you to define a point in the region. Left click and the closed area will transfer to an area. Now, we can right click and edit the parameters of this area. 84 InteriCAD Lite user manual Let’s see what’s different. Before After (the color has been changed) §3.8.5 Room command Room You can create different shapes of rooms. Operation: Click “Room” “Room” in the menu bar, or click click room” command. in the navigation panel and then in the top left area. For details, refer to §3.1.1 Method 1—Use “Draw single Wall Build walls of different thickness and they will automatically fit to other walls. Operation: 85 InteriCAD Lite user manual Click “Room” “Wall” in the menu bar, or click in the navigation panel and then click in the top left area. For details, refer to §3.1.1 Method 2—Use “Free wall” command. Door/Window Build the windows and doors in the wall Operation: Click “Room” “Door/Window” in the menu bar, or click in the navigation panel. For details, refer to §3.2 Install rooms and windows. Column Insert columns. Operation: 1. Click “Room” “Column” in the menu bar. 2. Input the length, width and height. 3. Click “OK” to generate the column. 4. Move the mouse to a position selected. Then left click to confirm. Auto ceiling The system automatically searches for a closed area around the selected point and take this area as the ceiling in the 3D scene. Usually the function is used to build a room’s ceiling framework. Operation: 1. Click “Room” “Auto ceiling” in the menu bar. 2. Move the mouse into the workspace, and you can see a tip “Specify a point inside the room”. Left click inside the room to determine the position of the ceiling framework, and then the “Ceiling setting” dialogue pops up. 3. In the dialogue box set the elevation of the ceiling (default elevation is 2800mm). For details, refer to §3.5 Column, ceiling, Spotlight. 86 InteriCAD Lite user manual Draw ceiling Generate ceilings with any shape at any place. Operation: 1. Click “Room” “Draw ceiling” in the menu bar. 2. Move the mouse into the workspace, and you can see a tip asking you to determine the “First point”. Left click to determine it. A “Next point” tip appears, and it also dynamically displays the distance between the two points. Click at the second point. Repeat the process to determine all the nodes of the ceiling framework. Right click to finish selecting the area, and a “Ceiling setting” dialogue pops up. 3. In the dialogue box set the elevation of the ceiling framework (default elevation is 2800mm). For details, refer to §3.5 Column, ceiling, Spotlight. Tips: You need to define at least three points to determine the ceiling. Ceiling block Generate ceilings in the rectangle area. Operation: 1. Click “Room” “Ceiling block” in the menu bar. 2. Move the mouse into the workspace, and you can see a tip asking you to select the ceiling framework’s “First point”. Click to select the first point. Move the mouse to another position. Then click to select the “second point”. At the same time, it dynamically displays the distance between two points. Click at a proper position to the area for the ceiling. And a “Ceiling setting” dialogue pops up. 3. In the dialogue box set the elevation of the ceiling framework (default elevation is 2800mm). For details, refer to §3.5 Column, ceiling, Spotlight. Single spotlight Arrange ceiling lights one by one in the workplace. Operation: 87 InteriCAD Lite user manual 1. Click “Room” “Spotlight” in the menu bar. 2. Move the mouse to the workspace, and you can see a tip asking you to select the “Position”. Left click to select it. 3. Repeat the above operations to arrange other ceiling lights. Tip: The ceiling light is displayed as a small red dot in the workplace. Linear spotlights Arrange ceiling lights along a line in the workplace. Operation: 1. Click “Room” “Linear spotlights” in the menu bar. 2. Move the mouse into the workspace, and you can see a tip asking you to select the “First point” of the line. Left click to determine it. 3. After you define the first point, you can see another tip asking you to select the “Second point”. At the same time, it dynamically displays the distance between two points. Left click to select it. Then the “Linear lights” dialogue pops up. The dialogue provides four ways for arranging ceiling lights, including “Both ends” “Skip first” “Skip last” “Skip both ends”. Also, you can set the number of ceiling lights along the line (default value is 5). After setting these parameters, press “OK”. Show ceiling Hide ceiling Show or hide all ceilings in the workplace. The function can facilitate the user’s design through showing or hiding ceilings so as to select, locate and edit other objects easily. 88 InteriCAD Lite user manual Operation: Click “Room” “Show ceiling” (“Hide ceiling”) in the menu bar. Wall advanced setting Show the advanced setting when drawing wall. Operation: Click “Room” “Wall advanced setting” in the menu bar. “Wall advanced setting” activated List The system can collect all furniture in the design automatically. Operation: Click “Room” “List” in the menu bar, or click refer to §3.6 List. in the navigation panel. For details, §3.8.6 Setting command Display mode There are two modes to be selected, one is texture mode, and the other is wireframe mode. Operation: 1. Click “Setting” “Display mode” in the menu bar. A “Display Mode” dialogue box popup. 2. Default is “Texture mode”. The furniture will be more real if you select texture mode. 89 InteriCAD Lite user manual 3. Selecting wireframe mode, you can see all objects are showed in wire frame. It not only can increase the speed of display, but saves the printer ink Snap to wall This is an auxiliary drawing tool. When furniture and columns are very close to wall, you can activate this function to automatically lean them on the wall and reverse them appropriately. This tool greatly facilitates furniture setting. However, if you want to put the furniture very close to wall but to not fully lean against the wall, activation of the “Snap on” will make the operation difficult. Operation: Click “Setting” “Furniture snap to wall” in the menu bar. Tip: If there is a mark near the “Snap to wall” command in the “snap” menu, it indicates that the function is on; otherwise it is off. Wall ortho snap This is an auxiliary drawing tool. When building the wall, you can see there is an axis on the end point of wall. It not only helps you to view the X direction and Y direction, but also snap the 90 InteriCAD Lite user manual exact point of the wall. Sometimes however it may bring inconvenience. For example, if you draw a wall close to another wall. With the wall ortho snap activated, you can not draw a wall of which the length is between 4334 and 4690. Operation: If there is a mark before the “Wall ortho snap” command in the “Setting” menu, it indicates that the function is on; otherwise it is off. Snap setting Default settings of two auxiliary snap tools. Operation: 1. Click “Setting” “Snap setting” in the menu bar. 2. Length snap is use to control the step value of the mouse when drawing line or wall. The default is 50, which means the length of the wall is in multiples of 50. 3. Angle snap is use to control the step angle for rotating the object. The default is 15, which means the rotation angle is in multiples of 15. Tips: You must first activate the snap function before you set the parameter. Tick a check mark before “Snap at angle” in the auxiliary toolbar to activate the function. It is the same with “Snap at length” and “Snap at node”. Set image insert point Define the insert point of the file in .koc format. The function is useful when you want to save the furniture as a .koc file and insert it next time. 91 InteriCAD Lite user manual Operation: 1. Click “Setting” “Set image insert point” in the menu bar. 2. Click a proper position on the furniture. Tip: This function is useful when you want to save the file and insert it into another file. If you don’t set the insert point first, it may cause some problems when you want to insert the file. Unit Set metric system or English unit as the default unit. Operation: 1. Click “Setting” “Unit” in the menu bar. Tip: You have to restart the program to apply the change. Dimension setting Set dimension parameters including font, color, size and arrow style, etc. Operation: 1. Click “Setting” “Set image insert point” in the menu bar. 2. You can set font, text color, height, offset and arrow style and arrow size in the popup dialogue. Press “OK” to confirm. Default text color Set the default color of the text you draw in the workplace. Operation: 1. Click “Setting” “Default text color” in the menu bar. 2. Choose the default color in the popup dialogue. Press “OK”. 92 InteriCAD Lite user manual Default wall thickness Set the default thickness of walls. Operation: 1. Click “Setting” “Default wall thickness” in the menu bar. 2. Input default thickness of wall in the popup dialogue. Press “OK”. Highlight wall Set the wall highlighted in green or not. Operation: Click “Setting” “Default wall thickness” in the menu bar. If there is a mark before the “highlight wall” command in the “Setting” menu, it indicates that the function is on or otherwise it is off. 93 InteriCAD Lite user manual §3.8.7 Help command Wall Room Door/Window Furniture 3D Rendering Decoration Other In the “Help” menu, you can click to watch the corresponding video file. Online update You can click this command to check if there are any available updates for InteriCAD Lite. Tip: Every time you run InteriCAD Lite, it will check for updates. If there are, it will update the software automatically. Chapter 4 3D mode In Chapter 2, we presented an overview of the 3D mode. In this chapter, we will learn more advanced commands. §4.1 Overview We can do further modifications in 3D mode. For example, select preferred material from the library and attach it directly to the models. The diffuse reflection texture maps can also be displayed right away. All the operations are simple and clear. The following chapter will further explain the 3D mode. Step by step: 1. Click in the navigation panel. 94 InteriCAD Lite user manual 2. Try more advanced editing as follows: editing the wall surface, editing the ground material add, replace, erase a furniture modeladd, replace the decorationlight setting, switching on the lights and so on. 3. Preview the changes you have made, save the picture, print it, and output the furniture list. §4.2 Introduction of the interface 3D interface: Menu bar Navigation panel Quick toolbar Workplace Product library Auxiliary toolbar Menu bar: Most commands are shown here. Navigation panel: Provides simpler forms of commands. Workplace: the drawing area Auxiliary toolbar: Zoom control tools. Quick toolbar: Provides easier access to the commands. Product library: You can see the pictures and detailed information of the product on top of this area. You can select the product from the lower area. §4.3 3D scene basic commands §4.3.1 Move In this part, we will learn how to walk inside the room. 95 InteriCAD Lite user manual After entering the 3D mode, click on the left bottom area of the workplace or click on the auxiliary toolbar to enter the room. If you want to return to the 3D view mode, please click in the auxiliary toolbar. §4.3.1.1 Walk Operation: Click “View” “Walk” in the menu bar. The default in 3D mode is walk mode. Walk forward Drag the mouse downwards, or click on the auxiliary toolbar. Walk backward Drag the mouse upwards, or click on the auxiliary toolbar. Turn right Drag the mouse to the right on the slider bar auxiliary toolbar. , or click on the Turn left Drag the mouse to the left on in the slider bar auxiliary toolbar. , or click on the Tip: You have to select the move command to navigate inside the room. You can use the mouse wheel to walk forward or backward in this mode. §4.3.1.2 Elevate Operation: Click “View” “Elevate” on the menu bar. Look up Drag the mouse downwards, or click on the auxiliary toolbar. Look down Drag the mouse upwards, or click on the auxiliary toolbar. Ascend Click on the auxiliary toolbar. Descend Click on the auxiliary toolbar. Tip: Activate the elevate command to move along with the movement of your mouse. §4.3.1.3 Spin Operation: Click “View” “Spin” on the menu bar. 96 InteriCAD Lite user manual Drag the mouse to the right or to the left. §4.3.1.4 Pan Operation: Click “View” “Zoom” on the menu bar. Drag the mouse to change the camera angle and the target. §4.3.1.5 Zoom Operation: Click “View” “Zoom” on the menu bar. Drag the mouse upwards or downwards as you like. §4.3.1.6 Look at Operation: Click “View” “Look at” on the menu bar. Click on the surface you want to focus on and it will automatically turn to face the surface. §4.3.2 View This function shows how to view the house from different angles. §4.3.2.1 Top view Operation: Click “View” “Top view” on the menu bar. This function shows the view from the top of the room. §4.3.2.2 Front view Operation: Click “View” “Front view” on the menu bar. This function shows the view from the front of the room. §4.3.2.3 Right view Operation: Click “View” “Right view” on the menu bar. This function shows the view from the right side of the room. §4.3.2.4 Bottom view Operation: Click “View” “Bottom view” on the menu bar. This function shows the view from the bottom of the room. §4.3.2.5 Zoom window Operation: 97 InteriCAD Lite user manual Click “View” “Zoom window” on the menu bar. Define the first corner and then the second corner. After you define the two corners, it will zoom out of the area. §4.3.2.6 Zoom extend Operation: Click “View” “Zoom extend” on the menu bar. Zoom to maximally display all the objects in the workplace. This function is practical when you are outside the room. §4.3.2.7 Rotate view Operation: Click “View” “Rotate view” on the menu bar. Rotate the view by 30 degree each click. §4.3.2.8 Previous view Operation: Click “View” “Previous view” on the menu bar. Return to the last view. This function will help you to get back to normal view from the other views. Tip: When you are in “Top view” “Front view” “Right view” “Bottom view” mode, you can use “walk” “Elevate” “Spin” “Pan” “Zoom” “Look at” to adjust the view. §4.3.2.9 Camera Here we introduce two useful methods of adjusting the camera. Method 1: To change the camera, click click . Click in the bottom left area of the workplace. To further adjust, to finish the adjustment. Method 2: You can also use the thumbnails of the room map in the bottom right area of the workplace to change the view. The cursor will change to when you move around inside the room map. Click to define the position of the camera, and then click to define the position of the target. 98 InteriCAD Lite user manual For further adjustment, please click “View” “Edit camera”. You can then set the focus distance here. Tip: If the room is small, set focus distance below 25. After adjusting the camera, you can save it in the camera list. Operation: Click “View” “Save camera”. Input the name of the camera in the popup “Camera name” dialogue. Click “OK” to finish this step. After you then saved several camera lists, you can easily view the previously saved cameras. Operation: Click “View” “Camera list”. Double click the camera that you like and the system will automatically turn to it. Tip: The system will also automatically save the camera. §4.3.3 Object edit Object editing can only be carried out when the light is off. Add furniture To insert furniture models into the current showroom. Operation: 1. Click on the furniture that you select in the product library, and the mouse will move to the workplace automatically with the furniture. 2. Pay attention to the blue cross cursor. Point the cursor to the position that you prefer. 99 InteriCAD Lite user manual 3. Left click to confirm the position. Add Decoration To add decorations to the furniture. Operation: 1. Click on the bottom left area of the workplace. 2. The system will ask you to select an object. Click on the object. Then select the decoration in the popup dialogue and it will be added automatically. Tip: Not all the objects have decorations. Edit object 100 InteriCAD Lite user manual Do further setting and editing of objects. Operation: 1. Click on the object you want to edit. 2. Modify the settings in the popup dialogue. Replace the object with another object in the popup “Product replace” dialogue. Copy the selected object. Move to the position and click to confirm. Move the object freely. Mirror the object. Delete the object. Change the dimension of the product. Input the distance to move accurately. Drag the red line in the circle to rotate. Input the degree to rotate accurately. Tips: Refer to §4.3.4 Material edit. When moving, you can double click on the object by using the arrow keys “←→↑↓”. To change the elevation, please press the Shift key in conjunction with the arrow keys “↑↓”. To move more precisely, please press the Ctrl+“←→↑↓”. To change the elevation, press Ctrl+Shift+“↑↓” to move more precisely. After moving, click the object to confirm the object, or you can press enter. To rotate, click on the object and press the space bar. Press “Enter” to confirm the position. To delete, click on the object and press the “Delete”. Edit surface 101 InteriCAD Lite user manual You can also edit a certain surface of an object. Click “Object” “Edit surface” and select the command. Move Click “Object” “Edit surface” “Move” Click the object which needs to be moved, then right click or Enter to confirm the selection. Left click to set base point. Move the mouse and you can see the object dynamically moves following the mouse. Left click to confirm. Rotate Click “Object” “Edit surface” “rotate”. Click the object which needs to be edited, then right click or Enter to confirm the selection. Left click to set the center point. Move the mouse and you can see the object dynamically rotates following the mouse. Left click to confirm Size Click “Object” “Edit surface” “scale”. Click the object which needs to be edited, then right click or Enter to confirm the selection. Left click to set the base point and click the other point as the scale reference point. Move the mouse and you can see the object dynamically scales following the mouse. Left click to confirm. Mirror Click “Object” “Edit surface” “mirror”. Click the object which needs to be edited, then right click or Enter to confirm the selection. Left click to set the first point of mirror centerline and click another point again as the other point of mirror centerline. Delete Click “Object” “Edit surface” “delete”. Click the object which needs to be edited, then right click or Enter to confirm the selection. A dialogue box appears and asks you whether to delete. Press “Y” to delete. Copy Click “Object” “Edit surface” “copy”. 102 InteriCAD Lite user manual Click the object which needs to be edited, then right click or Enter to confirm the selection. Left click to set base point, and then move the mouse to an appropriate position, left click to finish. §4.3.4 Material edit §4.3.4.1 Two methods of material editing When editing the material, move close to the surface to choose the right material. Method 1: 1. Click the object. 2. Click texture map. The popup dialogue will assist you in changing both the texture and the color of the object. Click on “More Color” to get more options in changing the color and click on “More Picture” to change the texture of the object. Method 2: 1. Click “Material” “Material editor”. 2. Click the surface you want to edit and see the information in the material editor. 3. Select material type. The system will automatically set the detailed parameters for the chosen material. For example, if you select glass, then its reflection is 0.9, transparency 0.8 and color transmission 0.6. 103 InteriCAD Lite user manual Tips: There are some common materials in real life such as glass, metal, wood, plastic and leather, etc. these materials have their own typical features. For example, glass is transparent and can be used to mirror. In the “Material Editor” dialogue box these objects have been clearly classified. §4.3.4.2 Basic operations for material processing Basic operations are shown as the follows:: 1. To choose the existing material on the model, change the color and apply it to other models. Click “Material” “Material editor”. Here the default “select” button is activated, and the mouse turns into a straw shape. Left click to distill the material used by the model. Switch to “color” label in the “Material Editor”, then move the color slider observing the changing color. Click “apply”, then the mouse changes to an oblique arrow. You can apply the current settings to the other materials by left clicking. Tip: All the models that are applied with the same material in the material editor will change together. If it is a texture material, you can not modify its color. 2. You also can walk through when editing material. Click “move” item to return move mode. Create a new material and apply it to other objects. Click the “Select” button in the material tool bar to distill the objects’ material. Switch to “basic” label in the “Material Editor”. Click “new” button, and input a new name. Click “OK”. 104 InteriCAD Lite user manual Click “Apply” button in the material tool bar, and apply it to other materials. Tip: If you don’t apply it to the original material, the original material won’t change. 3. Set color texture mapping for material. There are two methods: Method 1: Click “select” button, and then select an object’s surface. Switch to “color” label, and click “texture” button. The “Mapping” dialogue box appears. Click “Browse”, and select the image file in relevant directory. Method 2: Open an image browser. Select the image file. Left click to drag it to the surface, and then the surface material will be automatically changed. §4.3.5 Effect §4.3.5.1 Save the effect picture 1. Click in the bottom left of the workplace to start radiosity. The smaller the error is, the closer it is to reality. 2. Click if you are satisfied with the effect. A “Brightness” dialogue will appear. You can adjust the brightness, exposure, contrast, black, and white here. 3. Another “Material” dialogue pops up. You can change the arrangement scheme of the wall and ground here. 4. After all this, click and select the picture quality in the popup dialogue. After the raytrace, click “Save picture to hard disk”. Choose the destination folder and click “Save”. 105 InteriCAD Lite user manual Tip: Please wait until the raytrace is done before you save the file. §4.3.5.2 Print the effect picture 1. Click in the bottom left of the workplace. The system will automatically start radiosity. The smaller the error is, the closer it is to the reality. 2. Click when you are satisfied with the effect. A “Brightness” dialogue pops up. You can adjust the brightness, exposure, contrast, black, and white here. 3. Another “Material” dialogue pops up. You can change the arrangement scheme of the wall and ground here. 4. Click in the navigation panel. After the raytrace, click “Print”. Tips: Please wait until the raytrace is done before you save the file. §4.3.5.3 Turn off light Click in the bottom left of the workplace. In the popup confirm dialogue, click “Yes”. Tips: If you don’t turn the lights off first, you cannot edit the object, like move, delete, rotate and so on. §4.3.6 Animation To make animation is one of current trends. 3DShow VR provides simple but practical function of making animation. System provides totally 2 methods of making animation: 1. Record the condition that walking with the mouse. 2. Set path in the top view of render workspace. These 2 methods of setting animation have their own advantages. Method 1: this method is the freest and the most visual. But it is hard to use the mouse smoothly. When preview the animation, you can see that the picture dithering is big. Method 2: easy to realize. 106 InteriCAD Lite user manual Basic Operations of Method1: Click “record” button in” Animation” menu. Then you can walk in the scene willfully. Note: you’d better walk in wireframe mode and the control of mouse is relatively easy. After you finish walking, click “record” button again to finish recording. Basic Operations of Method2: Click “Select path” in “Animation” menu. The system will automatically convert to top view. Then, draw the path by left click, right click to end. (Tips: the path at least 3 Nodes are needed.) After finishing setting the animation path, you should perform animation preview to view the roughly effect. Tips: Animation preview is very important. The effect previewed is completely the same as that of the saved animation. If the picture dithers (dropped frames) in the preview, the saved animation file will have the same effect. Furthermore, the most important is the total number of frames determine the time of the animation. For example, if the total number is 300 frames and the preview play in 30frame/second, the time of the animation is 300÷30=10seconds. If the length of the polyline that is used as the path of the camera is 200 meters, the animation will make people feel that it is running like the wind at the speed of 20meters/second. Note: if you feel the moving speed of the camera is too fast or too slow, don’t adjust the number of frames per second but add or delete the total number of frames. Basic Operations of Animation Preview: 1. Switch to wireframe mode after you set the animation. Then click “preview animation”. 2. In the appeared dialogue box, remove the activate status of “disable speed con” option, which means do not use speed control and preview the animation at the fastest speed that the computer can run. 3. Constant is set to 30 in common cases. 107 InteriCAD Lite user manual 4. Click “OK” and the preview starts. It is allowed to switch to color mode or texture mode during preview. 5. Right click to stop the animation preview. Basic Operation of Saving Animation File: 1. After the animation preview completes, 2. From the “animation” menu click “make animation”. 3. Set the save directory and file name in the appeared dialogue box. 4. Set the compression format of the animation file. Set the compression quality to 100 and remove the activate status of main frame interval and data speed to get the best quality. 5. Then set the resolution ratio of the animation. 512x384 or 640x480 in common cases. Set the Playback to 15 if you want to play the animation on the computer or set it to 30 if you want to make the animation to VCD. In other effects, antialias will increase the total saving time. It is recommended to use antialias (medium) to get better effect. Motion Blur can make the effect of double image for the motion element. It is the same as making effect drawing that whether to use OpenGL or raytrace. 6. The system will start calculating automatically if you click “OK”. 108 InteriCAD Lite user manual 7. The time needed to save the animation will appear in the status bar. We can click “stop” again to terminate the file saving process at any time. Tips: the animation file save to the frame at which the process is terminated. §4.4 3D scene advanced commands §4.4.1 Commands of material editor Every material has its own basic attributes. For example, a green film glass has three attributes: First, it is green; second, it has a mirror reflection and third, it is transparent. While smooth marble has two attributes, marble pattern and reflection. In InteriCAD Lite, we can change the attributes as in the nature. Base Name: the name of the current material. You can enter a name, e.g. floor. It enables you to conveniently manage the material. Type: Classify different types of materials according to their different attributes in the physical world. For example, if you select “glass”, the material will have attributes such as transparent and mirror. This option is intelligent and convenient. In most cases, you only need to select different types if you want to change the material attribute. Transmit: If light casts to the front side of an object, it will transmit the object and generate diffuse reflection on the object’s backside. If you see from the backside, the object is alight. Value “0” indicates that the object is nontransparent; Value “1” indicates that the object is completely transparent. This option usually is used in lampshade, lampbox surface, sunlit window screen and ground glass with lamp hidden in, etc. Reflection: When doing radiosity, this parameter controls how much luminous energy will be reflected by the material. To a pure white material, value 0.8 means 80% luminous energy will continuously be diffuse reflected. You should have more experience to maximize the use of this parameter. Usually this parameter needs no adjustment. Map Size: This parameter can readjust the value of the auto-axis texture map coordinate. (Refer to next section for texture map coordinate). 109 InteriCAD Lite user manual Color RGB: Tone color using the Red, Green and Blue system. This color means the diffuse reflection color of the material when there is no color texture map. HSV: Use the Hue, Saturation and Value system for toning. Color Blending: In the physical world, the reflection light of different materials is also different. For example, the red paper will make the white wall around it become red. But to a smooth red marble, the red saturation of the wall around is much lower than that made by the red paper. This parameter can be used to control the color saturation of the reflection light. If the value is 1, the color saturation of the reflection light is the same as that of the material. If the value is 0.5, the color saturation of the reflection light is only half of that of the material. If the value is 0, the color saturation of the reflection light is 0, which means it is neutral color-- white. Brightness: After radiosity, this parameter can control the brightness of the texture mapping. For example, if the hue of a texture is red, and its saturation is high but the brightness is small, this texture will appear to be dark red. But if you give this material strong light, it will display the hue of bright red. You can use this parameter to make this texture display its original dark red. The value can be 0 to infinite. Value 1 means normal display and values above 1 will increase the brightness of the texture map. Value 0 means the texture is completely dark. And this parameter can be applied to pure color material. For example, you can set the texture brightness of the white wash basin to 1.3. After using raytrace, this white wash basin will appear to be more bright and limpid. Texture: Use an image file as the representation of the diffuse reflection of the object, e.g. marble material. This texture supports drag & drop operation. It currently supports three image file format: .jpg, .bmp and .tiff. Reflection 110 InteriCAD Lite user manual Reflection: It means the degree of reflection of an object surface. This feature is called mirror reflection. Value 1 means pure mirror and value 0 means it has no mirror reflection feature. Smoothness: It means the smoothness level of an object surface. This parameter is only valid when the reflection level is not 0. It is used to make the effect of diffuse reflection. Usually the value is from 0.1 to 0.4. Texture: Use texture mapping to control the reflection area. You can make some special effect and we will give examples later. Transparency Transparency: It sets the degree of transparency of an object surface. Use texture map to control transparency. You can make some special effects with it, and in the following we will illustrate that. Refraction: Transparent objects, for example, magnifier, can produce ray refraction. Some thicker glass may produce unreal color. Refraction settings include red, green and blue. Usually default value is 1. Also, we can make some special effects by using stencil, bump, emit and wave labels. In the following we will respectively illustrate them. §4.4.2 Special materials edit Transparent material If light casts to the front side of an object, it will transmit the object and generate diffuse reflection on the object’s backside. If you see from the backside, the object is alight. Value “0” indicates that the object is nontransparent; Value “1” indicates that the object is completely 111 InteriCAD Lite user manual transparent. This option usually is used in lampshade, lamp-box surface, sunlit window screen and ground glass with lamp hidden in, etc. The edit method is very simple, and you only need to set an appropriate value for transparency in the Material Editor. Transparent material’s lamp-box Reflection texture mapping Reflection texture mapping is a kind of black and white picture, including JPG, BMP and TIF file. It requires the black part of the picture be pure black, while the white part is pure white. It can use the black and white picture to control surface reflection area. The black part cannot reflect light, while the white part can reflect light according to reflection parameter setting. For example, suppose to make an engraved mirror. The graved part of mirror cannot reflect light, while other parts without pattern can normally reflect light. Reflection texture map can easily realize the function. Operation: 1. Open the Material Editor. 2. Switch to “Reflection” label. If you want to make pure mirror, you can set the reflection to 1. (Tips: If you want to use reflection texture mapping, the reflection must not be 0, otherwise reflection texture mapping has no effect). Click the big button of reflection texture mapping. 3. 112 InteriCAD Lite user manual 4. Select the required black and white picture by browsing. 5. Function of Inverse: the system makes an inversion process to the black and white picture, that is, interchanges white color and black color. It results that original reflection area cannot reflect any more, while original non-reflection area can reflect now. Effect of graved mirror Transparency texture mapping Transparency texture mapping uses a pattern file to control the transparency of different areas of object surface. First the system turns this picture to a black and white one, among which the pure black area is shown using default transparency, while the pure white area is completely nontransparent. The gray level between pure black and pure white is represented by transparency grade. That is, we can make a glass from completely transparent to completely nontransparent. Operation: 1. Open the Material Editor. 2. Switch to “Transparency” label. If you want to make pure transparent material, you can set the transparency to 1. (Tips: If you want to use transparency texture map, the transparency must not be 0, otherwise it will show no effect.) 3. Click the big button of transparency texture map. 4. Select the required black and white picture by browsing. Function of Inversion: the system makes an inversion process of gray level. 113 InteriCAD Lite user manual Stencil texture map Stencil texture mapping is similar to reflection texture mapping. It is also a kind of black and white picture, including JPG, BMP and TIF file. It requires the black part of the picture be pure black, while the white part is pure white. It can use the black and white pattern to control whether the object surface will be displayed or not. The black part will be displayed normally, while the white part will disappear completely. Usually you can combine texture mapping with color and stencil texture mapping to process some complex models, for example, plant, handrail and human, etc. Now we will make a plant in the following. Operation: 1. Open the Material Editor. 2. Switch to “Color” label. 3. Click the big button of color texture mapping. 4. Select the required normal plant pattern file by browsing. 5. Switch to “Stencil” label. Click the big button of stencil texture map. 6. Select the black and white picture of plant. Tips: All texture mappings can be used together, among the stencil type is the first to be processed. For example, a transparency and a stencil texture mapping can be used together, and the system will first process stencil texture mapping, then process the transparency. In addition, all texture mappings use the same coordinate (Refer to next section for texture map coordinate.) the integrated effect of plant through stencil and color texture mapping Bump texture mapping It can use pattern to simulate concavo-convex effect on the object surface. Presently, the system only support reflective bump texture mapping. It needs to meet one of two conditions to make bump texture mapping work: Condition 1: the reflection parameter of material must not be 0. Condition 2: the light source with “Direct calculate” can shine the object surface Operation: 1. Open the Material Editor. 2. Switch to “Bump” label. 114 InteriCAD Lite user manual 3. Click the big button of bump texture mapping. 4. Select the bump pattern file by browsing. 5. Set the bump parameter. The bigger the value, the greater the bump. Emit texture mapping Emit texture mapping is a kind of black and white picture, including JPG, BMP and TIF file. It requires that the black part of the picture be pure black, while the white part is pure white. It can use the black and white pattern to control whether to display source light or not. The black part can display it, while the white part cannot display it. Operation: 1. Open the Material Editor. 2. Switch to “Emit” label. 3. Click the big button of emit texture mapping. 4. Select the required pattern file by browsing. Wave effect Wave effect can be used to simulate water effect. Operation: 1. Open the Material Editor. 2. Switch to “Wave” label, and set the following parameters. Wave numbers: Center Location: Wave length: Wave amplitude: Specify the number of the wave source center points, for example, if the value is 1, then it is equal to the effect of throwing a stone into the quiet lake surface. If the value is greater than 3, then you basically cannot see the location of those wave sources. It is the coordinate location of wave source. Usually you need not to adjust it. The distance between wave crests. It is the wave amplitude. 115 InteriCAD Lite user manual Wave effect §4.4.3 Light setting InteriCAD Lite VR uses radiosity render theory and all the light sources are based on physical optics. There are totally four kinds of light sources in InteriCAD Lite VR: general light, spot light, sunlight, and IES, among which general light and spot light are real light sources. Real light source is that the light source is real 3D model and after radiosity calculation, this 3D model will shine as the light source in the physical world. General Light: Diffusion Light Spot light: Emit directional rays and all the rays will concentrate in the circular cone. In addition, you can use direct lighting option to calculate clear shadow and light source illumination boundary. Sunlight: The entrance of sunlight. You can get real effect only after you make raytrace calculation. IES: Use the IES file. §4.4.3.1 Set light source or remove light source Set light source Sometimes we need to set an object as light, such as the TV screens, windows. Operation: 1. Click “Render” “Set object as light”. 2. The mouse will become a blue cursor 3. Right click to end selecting. . Left click the corresponding surface. Tips: The surface will be set as general light source. To set as spot light or sunlight, you need further adjustment. Hold down Shift key to select multiple surfaces. Remove light source You can also cancel the above operation easily. Operation: 116 InteriCAD Lite user manual Click “Render” “Drop light property”. Tips: Hold down Shift key to select multiple surfaces. §4.4.3.2 Edit light source Operation: Click “Render” “Edit light”. Now the mouse will become a blue cross cursor . All the light sources on the screen will be displayed in red color. The “Edit light source” dialogue will appear. Left click to select the light which needs to be edited and it will be displayed in yellow color. Below is the instruction of the light source parameters: Name: The name of the current light source Type: You can select the type of light source: general light, spot light and sunlight (entrance), which is used to set the direction of sunlight and specify the entrance of sunlight. RGB: Use red, green and blue system to adjust the color of the light source. HSV: Use the hue, saturation and value system to adjust the color of the light source. Power: This is the intensity of the light source. Its unit is related to the physical type of the light source. 117 InteriCAD Lite user manual Source Type: The type here refers to the physical type of the light source. For example, if the incandescent lamp and fluorescent lamp that are both of 100w, the latter would be much brighter than the former. That’s because the fluorescent lamp’s luminous energy is higher than that of the incandescent lamp. Generally, you should select the type of light source according to the actual situation. E.g.: common lamps should be incandescent lamps; Daylight lamps should be straight fluorescent lamps. Target Spot (H): Control the horizontal lighting direction of sunlight and spot light. Target Spot (V): Control the vertical lighting direction of sunlight and spot light. Beam Spread: The coning angle of spot light. Falloff: Spot light uses direct lighting option and will have clear light source boundary. This option cans smoother the light boundary. Calculate Direct Lighting: This option is only valid for spot light. If you activate this option, you could see clear shadow and lighting boundary after raytrace calculation. Show Selected Only: If this option is selected, only the name and power of currently selected light source will be displayed. Switch Off: This light source will not be calculated in radiosity calculation. Eps: Set the eps of this light source in radiosity calculation. Length: Set the minimum length of this light source in radiosity calculation. Spot light The following illustrates the setting of spot light: 1. Click “Render” “Edit light”. 2. You can see that all the light sources are displayed in red color and the mouse will become 3. . You can left click to select and adjust light source. Now select a light. The selected light source will be displayed in yellow. All the parameters of the selected light source will appear in the “Edit light source” dialogue. a. Firstly, we change its type to spot light. Now you can see the conical projection area of spot light clearly. b. Secondly, change the color of the light source. The color of the cone is changing simultaneously. 118 InteriCAD Lite user manual c. Thirdly, click the “pick” button and left click at anywhere in the scene. You can control the projection center of spot light. You can also control the projection direction using the sliding bar of spot light (horizontal) and spot light (vertical). d. Last, adjust the emission angle of spot light to control the dimension of the coning angle. From the operations above, you can see that it is visual to set spot light. Sunlight Next, we will learn about how to set sunlight. There are two methods of setting sunlight. Operation: 1. Click “Render” “Set object as light”. 2. 3. 4. 5. 6. The mouse will become a blue cursor . Left click the corresponding surface. Click “Render” “Edit light”. Select the surface set as sunlight. Change the type as sunlight. Input the sunlight brightness in “Power”. Click “Render” “Sunlight setting”. 7. Determine the incident angle of sunray using Pick button. Then exit. 8. Click Exit button. Tips: a. Please activate the sunlight effect. (A check mark before “Activate sunlight effect” means it is activated. If not, sunlight will not perform calculation. 119 InteriCAD Lite user manual b. Sunray (horizontal) sliding bar is used to adjust the horizontal incident angle of the sunray. 0 degree indicates to sunray from the east. c. Sunray (vertical) sliding bar is to adjust the vertical incident angle of the sunray. For example, in summer noon, the sunray is basically vertical and the angle is from 85 to 90 degrees, while the sunray angle in early morning should be around 10 degrees. d. Atmospheric controls the sunray degree of the weather. The higher the value is, the finer the sky is. §4.4.3.3 The management of light source group and adjustment InteriCAD Lite provides light source grouping function and supports up to 10 groups. You can redefine the group freely. The operation is the same as the common real-time strategy game, which is very convenient. The grouping status and light intensity parameter can be displayed directly on the workspace. With this function, you can change multiple light source property easily. Shown as the following figure, these three cylinder lamps have been set group 1. The light intensity of all the three cylinder lamps is 10 watt. Operations: 1. Click “Render” “Edit light”. 2. Left click a light source, and then add others by using SHIFT + left click. To remove the light source, you can also use SHIFT + left click. 3. Then use CTRL + (0~9) to make these lights become one group. For example, CTRL + 1 mean the select lights are in group 1. Call out the light source group It is very convenient for you to call out the grouped light source. Operation: 1. Select any light source in the scene. 2. Press corresponding key. 120 InteriCAD Lite user manual E.g.: Three groups, which are 1, 2, 3, have been grouped in the scene. To call out group 1, select any light source and then click 1 on the keyboard. The combination of groups The combination of groups is also very convenient. For example, if you want to combine group 2 into group 1. Call out group 1first and press SHIFT + 2. So the group 1 and group 2 have been selected. Then press CTRL + 1 to combine the two groups into group 1. Modification of Light Group You can simultaneously modify the parameters of the selected light sources. Operations: First, select the light source that will be adjusted from a group or directly choose multiple light sources. The operation is same as adjusting single light source except the use of “pick” button. It can focus the illuminating center points of several target spot to one point. Shown as the following figure: §4.4.4 Render There are two render technology in InteriCAD Lite VR: raodisity and raytrace. §4.4.4.1 Radiosity When performing render calculation, the light calculation can be the same as that of the physical world reflection. When the light illuminate a surface, it will be reflected by the surface again until the light attenuates completely. After the scene has been prepared (front and back surface, material and lighing have all been set), you can perform radiosity. Click “Raodisity” from menu “Render”. In the popup dialogue box, the system provides three render methods of radiosity. In addition, it also provides three calculation precisions to control the quality of the image. Render methods: 121 InteriCAD Lite user manual 1. Continue until [stop] button is pressed: The more times the calculation carries out, the better the effect is. To stop the calculation of this method, press “stop” button. 2. Stop running after () times: This option can control the number of times that the calculation will be performed. The radiosity calculation will be terminated automatically. 3. Stop running after () minutes: This option can control the time that the calculation will be performed. After that the radiosity calculation will be terminated automatically. Tips: You can still continue calculating based on the current render effect after you stop rendering. Calculation Precisions: 1. Normal Precision: The process to the surface is relatively reasonable. You can see the main effect after twice or three times of calculation. The calculation time needed is less. Meanwhile, it uses less system resource, especially the memory usage. The final effect is normal. 2. High Precision: The subdivision level of the surface is much higher than normal precision. The shadow effect of light and transition effect of halo are richer than normal precision. Correspondingly, the required number of calculation times is more than the normal precision. In addition, it requires more system resource, and the final effect will be better than normal precision. 3. User Define Before using user-defined precision, you should understand how the system performs radiosity: Epsilon When enter virtual reality, the surface is divided according to division length parameter in InteriCAD Lite VR. If the default precision is 800, all the surfaces will be divided to the patch of which the length of the right angle side is 800.Radiosity will subdivide the patch surface of which the length of the right angle side is 800. The patch far away from the light will not be subdivides, for example. The precision parameter controlling the surface subdivision is epsilon. When the value of the light energy received by a patch surface exceeds this parameter, the patch surface will 122 InteriCAD Lite user manual be continuously divided. The smaller the area of the patch surface is, the less the light energy it can receive. The division continues until the value of the light energy is smaller than the light energy limit parameter. No matter how many times it calculates, the patch surface will not be subdivided. The value of epsilon supports scientific notation, for instance, 1e-006 is 0.000001. Under the same lighting condition, the smaller the value is, the smaller the area of the subdivision surface is. Another parameter is subdividing length. This parameter controls the size of the minimum subdivision surface. Without this parameter, the surface that is very near to the light source will be subdivided endlessly, which can cause the system out of resource. Furthermore, if the scene is very big, such as a scene of 1000 square meters, a higher subdivide length should be used to raise working efficiency. In addition, during radiosity calculation, different epsilon and subdivide length can be applied to the direct surface illuminated by the light source and the indirect surface illuminated by the second reflection light. As the light energy is abundant for the surface that illuminated by the light source, the effect may be good if you use high precision and small subdivide length; as the light energy is relatively small for the second reflection light, using lower precision and higher subdivide lengthen will improve the radiosity calculation efficiency. The third parameter is diffuse factor. This factor has great affect on the radiosity calculation result. Take a scene with many light sources and many white surfaces as an example. After some times of radiosity calculation, the whole scene will become no levels. Because the indirect light will illuminate the part that originally has shadow. As the shadow becomes unclear or pale in color, the whole scene will become no levels. Diffuse factor: The diffuse factor is used to control the attenuation level of indirect light. Value 1 of this parameter means the pure white material will reflect 100% light energy for secondary lighting. Value 0 means this surface will absorb all the light, which equals no indirect lighting. This parameter should be specified according to solid conditions. For the scene that has numerous light sources, this value can be lower down. In most cases, the default value 0.9 is ok. Under most circumstances, the effect will be good using normal precision while the high precision takes much longer calculation time. It will take the current mainstream computer several minutes to calculate a moderate scene using normal precision but half an hour for high precision. The value of user define precision can be set between these two values as a compromise scheme. 123 InteriCAD Lite user manual §4.4.4.2 Raytrace Raytrace technology in InteriCAD Lite can affect sunlight, spot light and material (such as highlight material, metal and glass), etc. The effect is real, and meanwhile the calculation speed is fast. Raytrace calculation can be performed before and after radiosity. The table below is the comparison of the two: Raytrace before radiosity The effect is not very real. Only the spot light that calculates the direct light can function. One ambient light performs main lighting effect in the scene. Save time Raytrace after radiosity The effect is real. All the light source lighting effects of InteriCAD Lite VR can be reflected. No ambient light. All the lightings are received using radiosity calculation Take more time. Raytrace after Radiosity: After you perform radiosity to the scene, you should perform raytrace preview calculation first. Click “Render” “Raytrace”, or you can click “Render” “Raytrace window” to preview partially. As it is preview calculation, it is ok to use the quick default method. Click the “Ok” button, the system will perform raytrace calculation to the perspective workspace. If you are not satisfied with the effect, for example, the mirror effect of the material is too strong, you can modify the property of the material directly. Save the final result until you are satisfied with the effect. Raytrace before Radiosity: Click “Render” “Raytrace”. As it is preview calculation, it is ok to use the quick default method. Click the “Ok”, the system will perform raytrace calculation to the perspective workspace. If you are not satisfied with the effect, for example, the mirror effect of the material is too strong; you can modify the property of the material directly. In addition, in the scene, only the spot light and sunlight that can calculate direct lighting will function. Adjust the setting of the ambient light and it will change the effect intensity of spot light and sunlight. Click “Render” “Environment setting”. 124 InteriCAD Lite user manual Set corresponding parameter in the popup dialogue box. Ambient light intensity is displayed in scientific counting method. The default value is 5E-5. If you want to increase the ambient light, you can adjust the value to 1E-4 so that the light intensity can be increase. Save the final result until you are satisfied with the effect. Raytrace option: The common setting of antialias is 2x2 or 3x3 and the maximum is 9x9. As the blurred effect will increase the calculation time by 5 to 8 times, you can select quick mode to disable blurred effect. Enable shadow prediction can accelerate the speed of raytrace but errors may occur. After all the options have been determined, click Ok to carry out the raytrace. 125 InteriCAD Lite user manual Chapter 5 Appendix §5.1 Frequent ask question (FAQ) 1. Q: I forgot to input the code during installation. After installation, I cannot open InteriCAD Lite. A: There are two ways you can input the code after installation: Tips: For Vista, please follow the steps using the administrator account. Method 1: 1) Click “Start”; 2) Click “run” and input “regedit” in the blank, then click “OK”. You can see the window of “registry editor”. 3) In the left of the window, open the folder as the process below. HKEY_LOCAL_MACHINE\SOFTWARE|\YFSoftware\3DShow\7.0\General 4) In the “General” folder, you can see “model1” on the right of the window. Double click “model1”, then input the authorize code into the blank. Click “OK”. Close the window of registry editor. Now, you can open the 3D mode normally. 126 InteriCAD Lite user manual Method 2: Click Start Programs YFCAD Software InteriCAD Lite Input author code. In the popup windows, input the authorization code. 2. Q: The system can not find the software lock: A:When you run YuanFang program, sometimes the system prompts. And it may be “The software lock is not checked out.” or “key not found”. Sometimes the system finds the key but it can only open 2D design or VR. For these problems, you can follow the instruction: 127 InteriCAD Lite user manual A. Insert the key first. Then open Device Manager (You can find Device Manager in Control PanelSystemHardwareDevice Manager; or right click “my computer”, choose “properties”) Then in the Universal Serial Bus controllers, you will find Senselock SENSEIV v2.x. If there is a yellow mark (shown as the picture above), it means the driver of keylock hasn’t been installed successfully. In this situation, you need to install the driver again. Find a folder named “Lock_en” in the installation CD. For XP, please run “setup.exe” in the “Lock_2.x_en” folder. For VISTA, please run “setup.exe” in the folder corresponding to VISTA version. B. If there is no such yellow mark here, open C:\windows\system32\drivers, and delete files called SENSE4V2.SYS, SLVBUS.SYS and SLVREADER.SYS. If you can only find one or two of them, delete completely. (Remember to empty the Recycle.) Then install the driver of keylock again. C. If there is not Sense4V2.0 in Device Manager, it means Windows didn’t find the key. There are three reasons for this: The USB port doesn’t work properly. You can try to change to another USB port. 128 InteriCAD Lite user manual The USB port is set as “disable” in BIOS setting. You might need to modify the BIOS setting. The key is corrupted. You need to change another key. 3. Q: When using 2D Design of InteriCAD Lite, the graphic is showing scattered (or become dirty). . A: An error print screen is shown as below: This is because the display card is not suitable for InteriCAD Lite. To solve this problem, you may: 1. Update the driver of the display card. If there is no available update, you can lower or shut down the hardware acceleration. 2. To change the hardware acceleration: Right click the mouse on the screen and select the properties. In the “Display Properties” dialogue, go to the setting part and click on the “Advanced” button. 129 InteriCAD Lite user manual Then go to the “Troubleshoot” setting. Here you will see the “Hardware Acceleration” setting. Please set the acceleration to a lower level. Then start the program again, it will be ok. §5.2 About software In order to safeguard your right of enjoy quality technical support and excellent after services of Guangzhou Yuan Fang Computer Software Engineering Company, and to receive the most updated information and upgrade services, please fill in the warranty card correctly. Send the upper part back to us in one month after you purchase our software. It will be kept as a certificate of receiving our services. Once you are our user, you have accepted and must obey all the terms conditions as the following items: 1. The copyright of this software belongs to Guangzhou Yuan Fang Computer Software Engineering Company. Without the permission of Guangzhou Yuan Fang Computer Software Engineering Company, no one can modify, compile or copy any part of the software. 2. Within two months’ after your purchasing this software, if the installation disk collapses under normal usage, Guangzhou Yuan Fang Computer Software Engineering Company will replace the installation disk. But if the collapse is caused intentionally or unintentionally caused by the user, Guangzhou Yuan Fang Computer Software Engineering Company dose not have the responsibility to replace the installation disk. 3. Guangzhou Yuan Fang Computer Software Engineering Company bears limited responsibility of this software. Guangzhou Yuan Fang Computer Software Engineering 130 InteriCAD Lite user manual Company is not responsible for any direct and/or indirect and/or accidental damage caused by this software. 4. When you transfer this usage right of this software to any other third parties, please transfer this warranty card as well. And delete relative documents on your document. Your usage right will be terminated. Company information: Name: Guangzhou Yuan Fang Computer Software Engineering Co.,Ltd. Address: 26-27/F West of Fuxing Commerce Mansion No. 159, West of Huangpu Ave.Guangzhou, ,Guangdong Province, People’s Repulic of China Postcode: 510620 Tel: 0086-20-87535661, 87598783 Fax: 0086-20-87535661 Website: www.yfcad.com §5.3 Technical support If there is any question or problem when you use the software, please contact our technical department at: Tel: 0086-20-87598783 or 87535661(direct line) Fax: 0086-20-87535661 E-mail: [email protected] 131