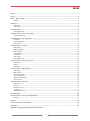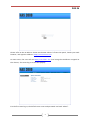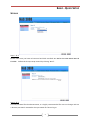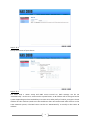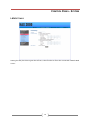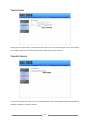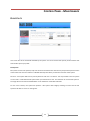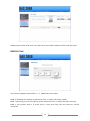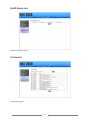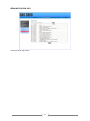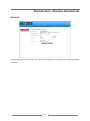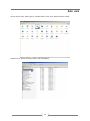
1
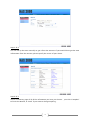
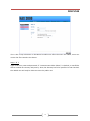
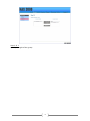
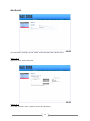
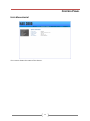
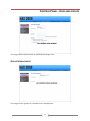
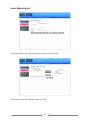
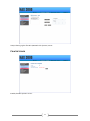
NAS 3000
4-bay User Guide
INDEX
Index ................................................................................................................................................ 1
Log in ............................................................................................................................................... 2
Basic - Quick Setup .......................................................................................................................... 3
Wizard....................................................................................................................................................................... 3
Add User .......................................................................................................................................... 6
Add Group ................................................................................................................................................................ 7
Add Share ...............................................................................................................................................................10
Control Panel ................................................................................................................................. 12
User Management ..................................................................................................................................................12
Control Panel - User and groups .................................................................................................. 13
Group Management ................................................................................................................................................13
Control Panel - File and Print ........................................................................................................ 15
File Server ...............................................................................................................................................................15
Share Management .................................................................................................................................................16
Printer Server ..........................................................................................................................................................17
Control Panel - System .................................................................................................................. 18
LAN Settings ...........................................................................................................................................................18
Wireless Settings ....................................................................................................................................................19
Time Settings..........................................................................................................................................................20
Turn Off Server .......................................................................................................................................................20
Information.............................................................................................................................................................21
Disk Usage ..............................................................................................................................................................21
Error Notification ....................................................................................................................................................22
Control Panel - Network Service ................................................................................................... 23
DHCP Server............................................................................................................................................................23
Bonjour ...................................................................................................................................................................24
BitTorrent ...............................................................................................................................................................24
Control Panel - Maintenance ......................................................................................................... 25
Disk Utility ..............................................................................................................................................................25
RAID Setting ...........................................................................................................................................................26
Firmware Upgrade ..................................................................................................................................................27
Save Configuration .................................................................................................................................................28
Restore Configuration ............................................................................................................................................28
Factory Reset ..........................................................................................................................................................29
Control Panel - Log File ................................................................................................................. 30
Samba Log ..............................................................................................................................................................30
FTP Log ...................................................................................................................................................................30
DHCP Server Log.....................................................................................................................................................31
System Log .............................................................................................................................................................31
Administration Log .................................................................................................................................................32
Personal Info .................................................................................................................................. 33
Personal Info - Personal Information ............................................................................................ 34
Account ..................................................................................................................................................................34
Logout ............................................................................................................................................ 35
Active Directory Installation ......................................................................................................... 36
Add user ......................................................................................................................................... 38
Appendix (Important Operation Information)
1
LOG IN
Please refer to the IP address shown on the NAS Chassis’s front LCD panel, launch your web
browser, and type the address: http://xxx.xxx.xxx.xxx.
In most cases, the user will see http://192.168.1.xxx (xxx being the IP address assigned to
this device). The main log-in screen will pop-up.
For the first time log-in, the default user name and password are both “admin”.
2
BASIC - QUICK SETUP
WIZARD
Step 1 of 6
Please make sure you have at least one hard disk installed. ALL DATA ON HARD DRIVE WILL BE
ERASED!
Follow the 6-step setup wizard by clicking “Next”.
Step 2 of 6
Set new password for the administrator, it is highly recommended for users to change and use
a distinct password. Remember this password for future log-in.
3
Step 3 of 6
Set up host name of your choice
Step 4 of 6
For users with a router setup and DNS server turned on, both settings can be set
“Automatically”. In this case, each time the system boots, an IP address will be assigned to the
system depending on the IP availability. For some users who prefer a fixed IP, just type in the IP
address for this machine (make sure the IP address does not conflict with other devices in the
same network system). The DNS server can be set “Automatically” or usually to the router IP
address.
4
Step 5 of 6
You can set up the time manually or get it from the internet. If you would like to get the time
information from the internet, please specify the server of your choice.
Step 6 of 6
This is a summary page of all of the information you have just chosen.
to finish the Wizard, or “Back” if you want to change anything.
5
Just click “Complete”
ADD USER
This is the 3-step sub-menu in the Wizard to add users. After the users are added, users can
access the files stored in the device.
Step 1 of 3
Type in the user name and password, if “Create Private Folder (Share)” is checked, a new folder
will be created for security and privacy. Also, the directory has to be specified. If not checked,
the added user will only be able to access the public area.
6
Step 2 of 3
Add user to a certain group for assigning them the group access rights.
Step 3 of 3
To specify the right of permission “Read Only” or “Writable”.
ADD GROUP
7
Using Groups is an easier way to manage users: the same group of users have the same rights
to access device.
Step 1 of 3
Adding group, specify the name of the group.
Step 2 of 3
Adding group members in the group
8
Step 3 of 3
Specify the right of the group.
9
ADD SHARE
The Add Share setting is to set “Share” of the directory for specific users.
Step 1 of 3
Type the share name and path.
Step 2 of 3
This step specifies users’ right to access this directory.
10
Step 3 of 3
This step specifies the IP addresses or Subnet address to access the device. If “Allow for all” is
checked, there will be no restriction for all users.
11
CONTROL PANEL
USER MANAGEMENT
This screen shows the status of the device.
12
CONTROL PANEL - USER AND GROUPS
This page allows administrator to add/delete/manage users.
GROUP MANAGEMENT
This page creates groups for simplified user management.
13
This page allows administrator to add/delete members in the group.
14
CONTROL PANEL - FILE AND PRINT
FILE SERVER
There are several options to setup servers. Unless there is a special concern, all servers are
turned on by default. For the Windows Setting, please specify the Workgroup name to be
compatible with Windows users.
15
SHARE MANAGEMENT
This page allows user to specify the share name and shared path.
Setup sharing rights for Windows and FTP servers
16
Setup sharing rights for NFS (Network File System) server
PRINTER SERVER
Enable/Disable printer server.
17
CONTROL PANEL - SYSTEM
LAN SETTINGS
Setting the way this device gets the IP from, either fixed IP or from the connected network DNS
server.
18
WIRELESS SETTINGS
This device also works as a Wireless Access Point. For most users, SSID is the only thing you
need to change. Please specify the name you would like to be seen by the Wireless clients.
19
TIME SETTINGS
Setting up the system time, selecting the time zone you are in and the time server you wish to
use so the system time will be automatically updated over the internet.
TURN OFF SERVER
Turn off or Restart the server. This can also be done from the front power button on the NAS by
holding it down for several seconds.
20
INFORMATION
Current system information
DISK USAGE
This page is to manage and/or format hard disk drives.
21
ERROR NOTIFICATION
To specific when and how the administrator is notified if error happens, you can specify if you
would like get an email notification.
22
CONTROL PANEL - NETWORK SERVICE
HCP SERVER
Enable/Disable DHCP server, in most applications, DHCP server should be “Disabled” in this
device, since very likely you should have a DHCP server in the network already.
Specific the fixed IP address for the device.
23
BONJOUR
If you are an Apple Mac user, please enable this server for data access, otherwise, please leave
it off.
BITTORRENT
BitTorrent is a peer-to-peer file sharing protocol. The system will do the download in the
background if a Torrent “seed” is provided to the system. Just specify the seed location then
enable the task. The download file will be stored under “public” directory.
24
CONTROL PANEL - MAINTENANCE
DISK UTILITY
This screen lists all the hard disks detected by the system. You can check the disk capacity and format the disk
with the file system you prefer.
File Systems
EXT2, EXT3 are Linux file systems; they have all the Linux features like data security and personal quota. But the
content of the file can’t be read from a Widows based system when you take the drive out of the system.
FAT32: is a file system without any security features and runs a bit slower. The only benefit is this file system
can be read in a Windows based system when you take the drive out. The limitation of a FAT32 file system is
the single file size cannot exceed 2GB which is not suitable for most DVD video files.
For the “Scan” button, the system will perform a file system data integrity checking to make sure the file
system is OK with no errors or missing links.
25
SMART report of the hard drive. This tells users the health condition of the hard disk drive.
RAID SETTING
The system supports Raid modes 0, 1, 5, JBOD and Linear mode
RAID 0: doubling the capacity of whichever drive is smaller (for faster speed)
RAID 1: Mirroring: mirror the capacity of the whichever drive is smaller (for data security)
RAID 5: For systems have 3 or more drives, if one drive fails, the user data can still be
recovered.
26
JBOD: Just a Bunch Of Disks (independent disk access)
Linear: Adding the two drives capacity together (for drive capacity)
For example: if you have two drives, and one is 500GB and the other one is 750GB, you’ll have
RAID 0: 500G + 500G = 1TB (the 250G is wasted)
RAID 1: 500G single drive (but if any one drive fails, your data is still intact)
JBOD: two independent 500GB and 750G drives
Linear: 500GB + 750G = 1.25TB
If you have 4 750G drives installed in the system, the overall capacity you will get is
750G * (4 – 1) = 2.25TB
If you have 4 drives installed in the system, they are 500G, 750G, 750G, 1TB, the capacity you
will get is: 500G * (4 – 1) = 1.5TB
In order not to waste the storage capacity, matching all 4 drives’ capacity is the best way to go.
For more information, please refer http://en.wikipedia.org/wiki/RAID
FIRMWARE UPGRADE
System firmware upgrade
27
SAVE CONFIGURATION
Save all configurations in a file.
RESTORE CONFIGURATION
Restore all the configurations stored in the system file.
28
FACTORY RESET
Reset all settings to the factory default
29
CONTROL PANEL - LOG FILE
SAMBA LOG
Windows server log report
FTP LOG
FTP server log report
30
DHCP SERVER LOG
DHCP server log report
SYSTEM LOG
System log report
31
ADMINISTRATION LOG
Administration log report
32
PERSONAL INFO
System status report
33
PERSONAL INFO - PERSONAL INFORMATION
ACCOUNT
On this page you can check your user settings and change your password and language setting
if needed.
34
LOGOUT
To logout from the system please use the button in the upper right corner.
35
ACTIVE DIRECTORY INSTALLATION
This advanced feature is used in a network environment equipped with Microsoft Windows
Server. CM404 will act as a client of the server, when this device joins the server domain, the
authentication of all user access to this system will be controlled by the server. The user
accounts will be managed in the server. CM404 synchronizes the users’ information with the
server in a designated period of time to make sure the user information is the most updated
one.
To install Active Directory, please follow the steps in described in previous sections to format
the drives or prepare the RAID system. Make sure the CM404 is accessible, copy the
“adpacked.tgz” in the CD-ROM disk to the “public” directory of CM404. Please don’t try to
unpack this file, just copy it. The next step is to reboot the system by using web management
page or push and hold the power switch for 3 seconds to make the installation effective.
36
This is the setup screen “before” the Active Directory module is installed.
This is the setup screen “after” the Active Directory module is installed.
Under “Control Panel” click “File and Print” and select “File Server”. In the “Mode Select” item,
select “Join Domain(AD)” then type in the AD Host.DomainName, AD KDC Address, AD ID,
AD password. After you are done, just click “Save” button to save the settings.
37
ADD
On the Server side, please go to “Control Panel” then click “Administrative Tools”
Double Click “Active Directory Users and Computers”
38
USER
Double Click “Computers”, you should be able to see your NAS host name is present in the list.
That means the you have successfully joined the NAS to the server domain. If not, please
double check the information you type in the setup is correct or consult your MIS personnel.
NAS 3000
To verify the installation, please type \\192.168.XXX.XXX (this the IP address shown on the
LCD display) in the Network Neighborhood. Before the installation, users should be able to
access the “public” directory without any limitation. After the successful installation, if users
double click the “public” directory, user will be asked for account name and password.
NAS 3000(192.168.1.112)
39
Please type in the user name and password preset in the server.
If the account name and password match the server’s preset users, the access will be granted
like this or the access will be denied.
Public on NAS 3000(192.168.1.112)
40
If you go up a directory, users will be able to see their own private folder.
NAS 3000(192.168.1.112)
41
Appendix:
1. To turn on the system power: make sure the main power switch is turned on then touch
the power switch in the front panel and the power will be turned on.
2. To turn off the system power: push and hold the power switch for more than 3 seconds
for the system to go through the proper shut-down procedure. [WARNING] By turning off
the switch on the back panel during operation, the system data integrity is not guaranteed.
3. LCD display: After the system boots, the LCD will stay in the IP address screen for 30
minutes, after that, the LCD will go to the system time page. By rotating the knob left or
right, the LCD will change its display in the following sequence
(1) IP and MAC Address <---> (2) System Time <---> (3) System Temperature <--->
(4) Fan Speed RPM <---> (5) Drive Remaining Capacity <---> (6) System up time
4. To operate the USB back to the system: plug-in the USB device and wait for 15 second for
the drive to mount, push and hold the backup switch for 3 seconds till the blue light is on
and LCD screen will display a copying activity. The whole content on the USB device will be
copied to the “public” directory with a folder name based on the starting time.
5. To turn on-off the fan: the fan is controlled by an internal temperature sensor. It will start
to work if the system temperature is more than 45C and stop working below 40C. If user
would like to turn the fan on and of manually, you just have to rotate the knob to the LCD
fan speed page to push the knob to turn on or off the fan.
6. To lock/unlock the drive door: please use the tab comes with the system to pull up or
down. When you see the red dot, the door is locked and the door handle is disabled. To
unlock the door, just do it the other way.
7. Hardware switch to restore the factory default setting: For any reason, if user wants to
restore the system setting to the default state (like forgetting the password of the system
administrator), please locate a pin hole on the bottom left of the LCD display. Use a pin to
poke the switch inside for 5 seconds, the setting will be restored to the factory default.
Please note, the data content on the drive will not be affected by this operation.
8. The sequence of the drives: The drives are counted bottom-up, the bottom drive is “A”
drive and the top drive is “D” drive. If you remove the drives and forget the sequence, that
is not a problem, the sequence doesn’t matter at all. But please don’t remove the drive
while the power is on, always shutdown the system before you remove the drive.
42