1
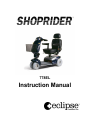
778EL
Instruction Manual
Table of Contents
Introduction
2
EMI Warning
3
Safety Guidelines
5
Features
7
Free Wheel Mode
10
Operating Your Scooter
11
Battery Charging & Maintenance
15
Inspection & Maintenance
17
Trouble Shooting
20
Warranty
21
Specifications
22
Options
23
1
Introduction
Congratulations on the purchase of your Shoprider scooter.
Please carefully read this owner’s manual before attempting to use
your scooter. After reading the manual if you still have any questions
or concerns please feel free to contact your local authorized dealer.
Model:
778EL
Serial #:
________________________
Date Purchased:
________________________
Dealer Information:
________________________
2
EMI Warning
Electromagnetic Interface (EMI) From Radio Wave Sources
Powered motorized scooters may be susceptible to electromagnetic interference
(EMI), which is interfering electromagnetic energy (EM) emitted from sources
such as radio stations, TV stations, amateur radio (HAM) transmitters, two-way
radios, and cellular phones. The interference (from radio wave sources) can
cause a powered scooter to release its brakes, move by itself or move in
unintended directions. It also can permanently damage the powered scooter's
control system.
The sources of radiated EMI can be classified broadly into three types:
1. Hand-held portable transceivers (transmitters-receivers) with an antenna
mounted directly on the transmitting unit. Examples include: citizens band
(CB) radios, "walkie-talkies", fire and police transceivers, cellular telephones
and other personal communication devices. **NOTE: some cellular
telephones and similar devices transmit signals while they are ON, even when
not being used.
2. Medium-Range mobile transceivers, such as those used in police cars, fire
trucks, ambulances and taxis. These usually have the antenna mounted on
the outside of the vehicle.
3. Long-range transmitters and transceivers, such as commercial broadcast
transmitters (radio and TV antenna towers) and amateur (HAM) radios.
**NOTE: So far as we know, other types of hand-held devices, such as
cordless phones, laptop computers, AM/FM radios, TV sets, CD players,
cassette players and small appliances, such as electric shavers and hair
dryers, are not likely to cause problems to your powered scooter.
Powered Scooter Electromagnetic Interference (EMI)
Because EM energy rapidly becomes more intense as one moves closer to the
transmitting antenna (source), the EM fields from hand-held radio sources
(transceivers) are of special concern. It is possible, unintentionally, to bring high
levels of EM energy very close to the powered scooter's control system while
using these devices. This can affect powered scooter movement and braking.
Therefore, the warnings listed below are recommended to prevent possible
interference with the control system of the powered scooter.
3
Warnings
The warnings listed below should reduce the chance of unintended brake release
or powered scooter movement, which could result in serious injury.
1. Do not operate hand-held transceivers (transmitters-receivers) such as
citizens band (CB) radios, or turn on personal communication devices, such
as cellular phones, while the powered scooter is turned ON.
2. Be aware of nearby transmitters, such as radio or TV stations, and try to avoid
coming close to them.
3. If unintended movement or brake release occurs, turn the powered scooter
OFF as soon as it is safe to do so.
4. Be aware that adding accessories or components, or modifying the powered
scooter, may make it more susceptible to EMI (NOTE: There is no easy way
to evaluate the overall immunity of the powered scooter.)
5. Report all incidents of unintended movement or brake to the powered scooter
dealer, and note whether there are sources of EMI nearby.
4
Safety Guidelines
The user needs to be familiar with the operation of this scooter before
using. Please read the following notes carefully to ensure safety at all
times. Always make certain your scooter is in full working order before
use.
1.
Do not ride your scooter without reading this instruction manual first.
2.
Do not exceed the maximum gradient outline for your scooter.
3.
Do not carry passengers or exceed the maximum weight.
4.
Do not mount or dismount your scooter, unless it has come to a full stop
and is turned off.
5.
Do not switch your scooter on with the forward/reverse lever depressed.
6.
Do not mount or dismount your scooter unless the speed adjustment dial is
set to minimum.
7.
Do not backup your scooter onto uneven inclines or surfaces. Be cautious
when traveling on slopes.
8.
Do not drive your scooter in a confined space unless the speed adjustment
dial is set to minimum.
9.
Do not turn suddenly at full speed, especially on uneven or hilly ground.
Failure to observe this may result in tipping of your scooter.
10.
Do not drive your scooter unless the seat is locked into driving position.
11.
Do not drive your scooter over deep, soft terrain (Loose gravel, soft dirt).
12. Do not operate your scooter when under the influence of alcohol or certain
drugs, which may impair your safety.
13. Do not climb curb cut outs that exceed your scooter's capacity. Do not turn
when negotiating curbs. Always approach curb cut outs at low speed and
straight.
5
14.
Always stop fully before changing direction (forward / reverse)
15.
Always keep your feet on the scooter when driving.
16. Always proceed carefully while riding your scooter, especially when
approaching a ramp or hill.
17.
Always proceed carefully while riding on uneven surfaces.
18. Do not sit on your scooter while being transported in a moving vehicle.
Always tie-down your scooter and transfer yourself to a vehicle seat.
19. Do not drive your scooter in deep water or clean with a high-pressure
hose.
6
Features
Tiller Adjustment
The tiller of your scooter is uniquely designed to allow you to
position it to a comfortable driving position.
Your scooter’s tiller is very versatile, and can be adjusted to
five different positions. To decide which position best fits
your needs, carefully pull the large black ball that is located
on the left side, at the base of tiller, and gently lower or raise
the tiller. Once you are satisfied with the position of the tiller,
simply release the black ball and the tiller will automatically
lock for your safety.
Using the Electric Seat Lift
Your scooter comes equipped with an electric seat lift for easy
height adjustment. To raise or lower your seat to your desired
position, simply move the switch, located on the inside of the
tiller, up to raise the seat or down to lower the seat. Once you
release the switch, the seat will automatically lock to your
desired position.
Scooter Light Package
Your scooter comes complete with a full light package. This package includes a
front headlight, left and right turn signals plus a hazard light for emergencies.
Front Headlight – To turn on and off your front headlight, simply press the round
blue button located on the right side of the tiller, just under your forward lever. To
shut off the headlight, press the blue button again.
Left and Right Turn Signals – When making a turn always use your left and
right turn signals. The turn signal switch is located on the top of your tiller just
above your speed dial control. Simply flip the switch to the right or left to activate
your turn signals. When done turning, just flip the switch back to its center
position.
7
Hazard Lights – If your scooter breaks down or you need assistance, press the
red button located on the left side of the tiller, just under the reverse lever. Once
you have received assistance, press the red button again to turn it off.
Adjusting Your Scooter Seat
Your scooter has a fully adjustable seat for your comfort. Your deluxe captain
seat will recline, slide up and back, and will swivel for your convenience.
Recline - To manually recline your seat, simply pull
your lever located on the lower left side of the seat and
you will be able to adjust it to fit your desired
convenience.
Slide - To move closer or farther away from the tiller,
depress the black lever located under the center of the
seat and slide to your desired position.
Swivel - To turn your seat left or right, depress the red
lever located on the lower right side of the seat and you
will easily be able to adjust the seat to the desired
position.
Control Features
Your controls are located on the handle bar console, and they are:
1. On-Off Switch: Located in the center of the tiller console. Insert the key and
turn it. You will notice the digital bar on the battery state indicator moves towards
the right. Your scooter is ready to drive.
To switch off your machine, turn the key counter clockwise. Make sure to remove
the key when the vehicle is unattended.
CAUTION: Do not switch to ‘off’ when scooter is moving. Failure to observe this
will result in the motor brake being applied suddenly, and placing you in a
dangerous situation.
You should only switch ‘off’ when in motion in the case of an emergency.
Continual use in this mode may cause undue stress to the drive system,
and damage the main electronic speed control unit. Be extremely cautious
on slopes. Sit upright in your seat or your scooter may become less stable.
8
2. Battery Indicator Gauge: Located at the top of your console. When your
scooter is switched on the bar on the gauge will move across the scale from the
left towards the right, indicating full charge batteries. As the power is used up in
your batteries the red bars will move towards the left indicating the state of
charge at the precise time. When the red bars are completely over to the right,
the batteries are fully charged. When the red bars start to disappear, your
batteries are losing power. It is wise to recharge your batteries when the two red
bars remain. (See Batteries and Battery Charging section of this manual).
3. Speed Adjustment Dial: This allows you to pre-select your desired speed.
The dial is proportional to speed, and can be set anywhere between 1 and 10
increments. Turn the dial knob counter-clockwise to "minimum" to decrease
speed, and clockwise towards "maximum" to increase your speed.
NOTE: When attempting to climb slopes, you will need to set the dial to "high"
setting. Remember the higher the number you set your speed dial to, the faster
your scooter will travel.
4. Free-Wheel Switch: Located on the back right side underneath the rear
shroud, push the release switch down to disengage the brakes. This will enable
you to free wheel the scooter and push it around.
Thumb Lever Control
Located under the handle bar grips. Your speed for forward and reverse motion
is controlled here. The right thumb lever moves your scooter in a forward motion,
and also controls the rate of speed by the proportional amount of pressure
applied.
The left thumb lever moves the scooter in a reverse motion and controls the rate
of speed by the amount of pressure applied. Releasing the lever will return itself
to the neutral position, and you will stop gently.
You will note that you can obtain the reverse of this procedure by pulling the
levers backwards with your thumb.
CAUTION: If you are not an accomplished outdoors powered vehicle driver,
we strongly recommend that you first practice in an open, safe area, free
from traffic, preferably with a companion who can assist you.
9
Free Wheel Mode
Free-wheeling is used when you want to move your unit without riding on it.
If for reasons of convenience you need to free wheel your scooter, there are two
ways in which this can be accomplished:
By disengaging the electromagnetic brakes and by lifting the front of the unit and
letting it ride on its antitippers.
To disengage the electromagnetic brakes,
with the power “OFF”, simply depress the
freewheeling switch located underneath the
shroud, just above the back right wheel. You
can easily get to it without having to take the
unit apart. When you are done moving your
scooter always remember to depress the
switch again. In the event that the unit had
the batteries disconnected and therefore,
unable to disengage the electromagnetic
brakes, your scooter can still be freewheeled by lifting the front of the unit and
pulling, using the base of the tiller as a secure handhold.
Caution Notes:
Never sit on your scooter with the free wheel in the disengaged position. When
the free wheel device is disengaged, you do not have braking function. Do not
park your scooter on a slope with the free wheel disengaged.
If your scooter is in the free-wheel mode, when you depress the speed control
you will not be able to move under motor power. Depress the free-wheel switch
once again. You will hear a clicking sound of the brakes being re-applied to be
able to start driving your scooter.
General: If you are able to push your scooter, the free-wheel switch is on and the
electromagnetic brakes are disengaged. Please check once more the abovementioned procedure for re-engaging the drive.
10
Operating Your Scooter
Mounting
For your first drive, make sure that you and your scooter are on a level surface.
Make sure that the unit is off before sitting on it. Make certain that both of your
feet are on the deck of the scooter.
Insert the on/off key into its key slot, but leave it turned off.
Next, turn the ‘speed adjustment dial’ to slow, and turn the ‘on/off’ key clockwise
to the ‘on’ position. (The battery state indicator will move, and the red status
lights will illuminate). Press the right thumb control to move in a forward motion.
To stop, simply let go; the brakes will automatically be applied.
CAUTION: Please take care not to have your thumb on the forward/reverse
control lever when you switch ‘on’ your scooter; this will result in your
scooter going into a fault mode. Switch ‘off’, then ‘on’ again, to clear the
fault.
Dismounting
Always switch off your scooter before dismounting. Make sure that you dismount
the unit on a level surface.
Parking in Public
If you need to park and leave your scooter, simply remove your key. This will
keep the brake on and will make your scooter difficult to move. It is best to leave
it in sight of someone (like a store assistant, etc.) who can watch it for you.
Another precaution is to note your serial number and the date of purchase.
Your serial number can be found on the lower section of the back frame of the
scooter.
Basic Driving
Make certain that you are properly sitting on your scooter. Ensure that the ‘speed
control dial’ is turned to slow for your first drive. When you have become more
confident, you can increase the setting to a higher speed. Push the ‘thumb lever
control’, as described earlier. You will very gently accelerate. Release the lever,
11
and you will gently stop. Practice these two basic functions until you get used to
them.
Steer the scooter by turning the handlebars in the direction you wish to
maneuver. Be sure to remember to give a wide clearance when turning, so that
the rear wheels follow the path of the front ones, instead of cutting short. Cutting
short on pavement corners can mean that a back wheel will go off the pavement,
causing a stability problem. Avoid this at all times by steering an exaggerated,
wide arc around the obstacle.
If you must steer in a tight spot, such as entering a doorway or when turning
around, stop and turn the handle bars to where you want to go, then apply the
power gently. This will make the scooter turn sharply. It will still go gently and
with complete stability. Practice in an open area until you are proficient.
Reversing requires attention. Be sure your ‘speed control dial’ is turned to ‘slow’
before you reverse. Push the left thumb reverse lever. Remember; when you
reverse you have to steer in the opposite direction of the way you want to go.
Practice is required, again use open space.
REMEMBER: If it is a tight turn, turn your steering column before applying power.
Steer wide of all corners and obstacles; please move slowly and with care.
WARNING NOTE: Do not turn off your scooter while it is in motion. Failure
to observe this warning may irreparably damage the main electronic speed
control unit or drive transmission. Always slow your scooter down to a
stationary position before you switch the scooter off.
Control Through Tight Spots
When you start using your scooter you will meet some obstacles that will require
some practice to drive through smoothly.
Here are some common problems, with tips that will help you master them
quickly. You will soon be in control through doors, up and down ramps, up and
over curbs, through grass and gravel, with surprising ease by following these
tips.
Control Through Doors
Approach an unfamiliar door slowly, sizing it up. Does it have a knob or a push
bar? Does it open towards you, or away? Think in terms of using the power of the
scooter to do the work for you! You need not strain.
12
Hold the doorknob or bar in one hand and apply power with the other hand
(remember that you can drive forward by using your left thumb to move the
throttle lever towards you). If the door is self-closing, you can go through,
allowing the door to close behind you. If the door is not self-closing, just stop
when you are clear of the door and push it closed.
If the door opens towards you, hold the knob or bar with one hand and gently let
the reverse power do the work. When the door is open wide enough, go ahead
quickly, leaving your hand on the door to keep it free of the scooter and letting go
as you pass the doorjamb. This is an easy technique. Practice makes perfect.
Remember; let your scooter do the work without wearing you out!
Control on Ramps
More and more buildings have ramps for wheelchair access. Some have a
change of direction in the middle, and good cornering is required. Make a wide
maneuver with your front wheel(s) around tight corners, so that your back wheels
follow a wide arc to stay clear of the corner.
If you stop while facing uphill, the automatic parking brake will hold you safe. To
start again, simply push the forward direction lever, the parking brake will release
and you will start to move.
Going down the ramp, keep the speed dial set on ‘slow’. This will keep you in a
safely controlled descent. If you wish to stop completely, release the control
lever, and you will come to a gentle stop.
Control Over Grass, Gravel and Inclines
The scooter performs admirably on grass, gravel and on hills. BUT YOU MUST
NOT EXCEED THE PARAMETERS ESTABLISHED IN THIS MANUAL. Please
refer to the ‘Rules for Safe Use' section. Safety must come first. If you are unsure
about a situation, avoid it.
Packed gravel, such as on driveways or roads, will present few problems. Loose,
deep gravel should be avoided, as well as loosely packed sand.
CAUTION: Because of the power of your scooter, you will be able to climb small
inclines. But the maximum gradient limit is 8 degrees. The reason for this is to
ensure good stability.
Always make certain your scooter is in full working order before attempting to
climb obstacles.
13
Never attempt to drive beyond the design capability of your scooter. Observe
weather conditions. Tires can slip on wet or icy conditions.
DO NOT DRIVE THROUGH DEEP WATER OR LEAVE YOUR SCOOTER
EXPOSED TO HEAVY RAIN (i.e., during or after a thunderstorm).
Only make a turn when all wheels are on or off the sidewalk. Failure to observe
this warning could result in the machine becoming unstable and toppling over.
Always lean forward when ascending curbs. This will enable you to climb easily
and eliminate any chance of instability.
PLEASE NOTE: The rear stability of your scooter is dependent on a number of
factors which you should consider before attempting to climb a steep slope or
other obstacle: a) your height; b) the angle of your backrest; c) your weight; and
d) the angle of slope or height of the obstacle you are attempting to climb. All of
these factors can affect the rear stability of your scooter. If you are unsure of your
capability to climb an obstacle, always think ‘safety first’.
REMEMBER SAFETY IS THE KEY TO ENJOYING YOUR
SCOOTER
14
Battery Charging & Maintenance
BATTERY CHARGING: Your scooter has a lot of power, so keeping it working to
its maximum potential means that its two batteries must be maintained with full
power. Nightly recharging, after use, will help you give them a longer life and will
ensure your scooter is always ready to go when you are.
BATTERIES: Your scooter batteries are virtually maintenance-free, because the
electrolyte is immobilized in a special form and will not leak out, even if the
battery is accidentally overturned.
Because your scooter batteries are sealed, they are most likely to be accepted
for transport on all aircraft. Please consult your carrier prior to departure, as they
will need advance warning that you wish them to carry batteries.
PLEASE NOTE: Each carrier reserves the right to carry what may be termed
“HAZARDOUS CARGO” Shoprider cannot be responsible for their final decision.
BATTERY CHARGER: The battery charger supplied is special to your scooter,
and may not be suitable for any other power mobility product. Use only the
charger supplied with your scooter; other makes of chargers may permanently
damage your scooter batteries, and would void the warranty.
CHARGING THE BATTERIES: Your scooter batteries will need to be recharged
when the battery state indicator located on the tiller console is reading in the far
left position. NOTE: The batteries will have a longer life if you do not use up all of
the battery’s power, and recharge as soon as the battery gauge reaches two
bars. Two bars represents time to recharge, rather than letting it go right over the
far left on the scale.
Charging Your Scooter's Batteries
1. Switch off your scooter and remove the key.
2. Take your off board charger that came with your scooter, and plug it into
any standard wall socket.
3. Plug the round tip into the scooter's charging receptacle. The receptacle is
located on the inside of the tiller, facing the seat. Flip up the safety cap and
carefully plug in the charger. Remember to make sure you line up the pins
when inserting.
15
4. Depending on the depth of the discharge, the minimum time to recharge
serviceable batteries fully will take overnight. Just plug in the scooter
before you go to sleep. Please note: that this time may increase as
batteries get older, although, the scooter may be considered ready to use
after 8 hours of charging. During periods without use (storage) it is wise to
charge the batteries monthly.
You will find that the distance your scooter can travel will gradually increase over
the first few weeks of use, as the batteries reach their optimum efficiency after
approximately 12 cycles of full discharge and full recharge.
FAILURE TO OBSERVE THIS INSTRUCTION CAN RESULT IN
OVERCHARGING THE BATTERIES.
A Guide to Safe and Lasting Batteries
1. For longest life your batteries should be recharged after use, preferably
overnight.
2. If your scooter is not used for a period of time, a refreshing charge should
be given every month. Never leave your batteries in a discharged
condition. This is particularly important to sealed batteries such as the
ones in your scooter.
3. If you scooter has been stored away for some time, recharge your
batteries before re-using it.
4. Every six months, check the connections on the batteries, making sure
they are tight and clean.
Batteries carry no warranty.
16
Inspection & Maintenance
To keep your Shoprider scooter in good working order, some home maintenance
can been done along with regular servicing by your Shoprider dealer.
CAUTION: Only qualified technical people should carry out service work.
SEAT UPHOLSTERY: A damp cloth and a mild soap will keep your seat and
backrest looking good. Do not use abrasive cleaners, as this will damage the
coating. Chemical cleaners can damage upholstery.
Ultra-violet light can also reduce the life of the upholstery coating material. This is
a normal ageing process, and cannot be guaranteed (see exclusion in the
Warranty terms section).
BODYWORK: The bodywork on your scooter can be lightly washed with mild
soap and water. Auto polish can be used to keep the paint in pristine condition.
Do not use abrasive cleaners or strong detergents, as this will fade the color.
CAUTION: Do not hose down your scooter. Water could be forced into the
electronics and cause permanent damage.
DO NOT store your scooter in damp conditions. This may affect the electronics if
left for very long periods of time.
ELECTRONICS: Servicing of the drive electronics and charger should only be
carried out by your local Shoprider service dealer. These units are sealed and
should not be opened. BROKEN SEALS WILL VOID YOUR WARRANTY.
You will find that the distance that your scooter can travel will gradually increase
over the first few weeks of use, as the batteries reach their optimum efficiency
after approximately 12 cycles of discharge and recharge.
WARNING
1. Do not smoke or use an open flame while your batteries are being
charged.
2. Do no use an extension cord unless absolutely necessary. Use of an
improper extension cord could result in a risk of fire and electric shock.
17
3. Do not use the charger if it has received a sharp blow, been dropped or
otherwise misused in any way. Take it to a qualified technician.
4. Do not dismantle the charger. This will void the warranty.
5. Do not switch off, unplug or interrupt the recharge cycle until the charging
cycle has completed. Make sure that the charger indicator light is green
before you unplug your charger.
FAILURE TO OBSERVE THIS INSTRUCTION CAN RESULT IN
OVERCHARGING THE BATTERIES.
DO NOT operate your scooter in extreme weather conditions, i.e. very heavy rain
or snow.
DO NOT drive through deep water. This could damage the main electronic
controller.
MOTOR BRAKES – If the motor brakes are functioning correctly, you will not be
able to push your machine when it is switched off or switched on with the speed
control throttle in the neutral position.
If your scooter can be pushed as described above, the motor brake(s) may be
faulty. Please do not use the scooter and contact your Shoprider dealer
immediately.
SAFETY NOTE: For your own safety, we recommend that you check the function
of your scooter brakes prior to a journey.
DRIVING BRAKE – When you drive your scooter and let go of the speed control
throttle, your scooter should reduce speed very quickly. If you notice a change in
the normal driving/slowing condition and your scooter does not slow down
quickly, please do not use your scooter and contact your Shoprider dealer.
TIRES – Your scooter comes with air filled tires. Check air pressure condition of
your tires regularly. Look for signs of wear, cuts and foreign objects lodged in the
tread. See next page for tire pressure information.
CAUTION: Your scooter has split wheel rims. DO NOT remove wheel bolts.
BATTERIES – Keep your batteries well charged (see Battery Charging section).
Keep batteries clean and in a dry frost-proof place. Keep battery terminals tight.
18
IMPORTANT: It is not possible to predict the life expectancy of your batteries.
This is mainly due to different workloads to which a battery may be subjected.
Some scooter users will use their scooter every day, and for long periods of time.
Their batteries will receive a near total discharge, and the life of their batteries
will be short (12 months or less in some cases). Other scooter users will use their
vehicles less frequently, putting their batteries through a less demanding
discharge lifestyle. These batteries will probably have a longer life (12 to 24
months or longer).
When you need to replace the batteries, always insist on the model fitted as
standard equipment to your scooter. If in doubt, consult your local Shoprider
authorized dealer.
Tire Pressure
The correct tire pressure should be between 15–30 PSI for FRONT and REAR
tires. Adjust tire pressure to reflect riders weight and comfort.
NOTE: On the tire itself it states a maximum tire pressure of 50 PSI. This is a
Maximum tire pressure and the tires should never be inflated to this pressure.
19
Trouble Shooting
If your scooter will not start:
1. Make sure that the key switch is turned on? If it is, the battery condition gauge
will be operating.
If the battery condition gauge fails to operate when the key switch is in the
“on” position, check the following:
1. Make sure the battery charger is not plugged into the wall outlet. This will
prevent drive.
If your scooter does not slow down, or the variable speed control does not
work:
1. Turn off the power ”on” key switch.
2. Inform your authorized Shoprider dealer.
CAUTION: If you find for any reason that your scooter doesn’t reduce speed
when you let go of the forward-reverse throttle, switch your scooter “off” with the
on/off key. The parking brake will activate immediately and stop your scooter. Be
aware that the scooter will stop very suddenly, so brace yourself with the
handlebars; sit back on your seat.
If you feel for any reason that your scooter is not driving correctly, or is making
an unusual noise, stop using the scooter. Be SAFE, Contact your Shoprider
dealer, who will be able to advise you.
GENERAL DESCRIPTION: The scooter controller system incorporates a
sophisticated microprocessor design. It is located under the cover of your
scooter. The scooter controller continually monitors the scooter system, and
ensures safe and reliable operation.
SAFETY CONDITIONS MONITORED INCLUDE
• Speed control system integrity
• Internal voltages and circuits
• Motor voltages and circuits
• Safety isolate relay
• Battery voltage
To ensure safety, the controller will not operate if the speed thumb lever (throttle)
is not in the neutral position.
20
Warranty
5 YEAR LIMITED WARRANTY
This warranty is extended to the original purchaser only. Your original receipt will
be necessary as proof of purchase before any warranty performance is rendered.
This warranty only covers failures due to defects in materials or workmanship
which occurs during normal use and does not cover damage that occurs in
shipment or failures which are caused by products not supplied by Eclipse
Medical Inc. or failures resulting from accident, misuse, abuse, neglect,
mishandling, misapplication, alteration, modification, commercial use, or by
anyone other than an authorized dealer, or damage that is attributable to acts of
God.
This warranty does not cover neglect or abuse, use of parts or changes not
authorized by Eclipse Medical Inc., or exceeding weight limit specifications as
outlined in your Product User Manual.
This warranty does not include labour charges.
This warranty does not include shipping charges incurred by the purchaser when
returning defective parts for repair/replacement.
Warranty service must be performed by an authorized Eclipse Medical Inc.
Dealer.
Do not return faulty/defective parts without written authorization.
This warranty applies to product purchased within Canada.
This warranty is void if the original serial number tag is removed from the
product or altered in any manner.
5 YEARS
2 YEARS
1 YEAR
6 MONTHS
FRAME
MOTOR, TRANSAXLE, BRAKE
WIRING, CONTROLLER, ELECTRONICS, SUSPENSION,
ELECTRIC SEAT
ALL OTHER ORIGINAL COMPONENTS SUCH AS WHEELS,
UPHOLSTERY, PLASTICS, RUBBER PARTS, PAINTED
SURFACES, MOTOR BRUSHES AND LIGHTBULBS.
21
Specifications
Shoprider 778EL
Dimensions: L x W x H
cm(in)
111.7 (44) x 57 (22.5) x 104 (41)
Total Weight
Kg (lb)
73 (160)
Battery Weight
Kg (lb)
2 x 11.4 (2 x 25)
Battery
12V 34Ah x 2
Charger
Off Board
24V / 3A
Front
2 x 8”
Rear
2 x 10”
hp
0.8
Max. Speed
km/hr (mph)
8 (5)
Climbing Angle
Degree (%)
8 (14)
km (mile)
38 (24)
kg (lb)
136 (300)
Tires
Motor
Driving Distance *
Weight Capacity
Suspension
No
Electric Elevating Seat
Yes
*Note: Maximum driving distance is based on a new fully charged battery depending on weight, terrain
and temperature.
**All specifications are subject to change without notice**
22
Options
CANOPY
Scooter Canopy
CANOPYRR
Optional weather shield for canopy
CANE1
Single Cane Holder
CANE2
Dual Cane Holder
OXYHOLDER Oxygen Holder
WALKHOLD
Walker Holder
WSCREEN
Windshield
ADAPTER
Adapter for second accessory on Canopy
Distributed by:
Eclipse Medical Inc.
130 – 725 Eaton Way
Delta, B.C.
V3M 6S5
Canada
Tel. (604) 540-0114
Fax. (604) 540-0172
www.eclipsemedical.com
23