1
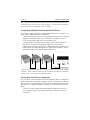
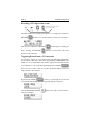
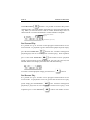
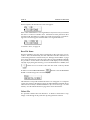
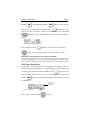
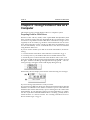
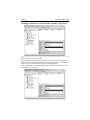
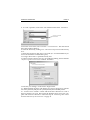
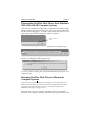
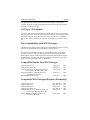
Instruction Manual
Instruction Manual
FireStore Instruction Manual • MANL-0863-01 • © 2001 Focus Enhancements Inc.
The Videonics logo, Thumbs Up, and Videonics Video TitleMaker are registered trademarks of
Focus Enhancements, Inc. FireStore is a trademark of Focus Enhancements, Inc. Product and
brand names may be trademarks or registered trademarks of their respective companies and are
hereby acknowledged. Subject to change without notice. This device is not to be used for the
unauthorized copying of copyrighted material.
Focus Enhancements, Inc. • 1370 Dell Avenue • Campbell, CA 95008 USA • 408-866-8300
About Radio Interference
This equipment has been tested and found to comply with the limits for a
Class A digital device, pursuant to Part 15 of the FCC Rules. These limits are
designed to provide reasonable protection against harmful interference in a
residential installation. This equipment generates, uses, and can radiate radio
frequency energy and, if not installed and used in accordance with the
instructions, might cause harmful interference to radio communications.
However, there is no guarantee that interference will not occur in a particular
installation.
If this equipment does cause harmful interference to radio or television
reception, which can be determined by turning the equipment off and on, the
user is encouraged to try to correct the interference by one or more of the
following measures:
Reorient or relocate the receiving antenna
Increase the separation between the equipment and receiver
Connect the equipment into an outlet on a circuit different from that to
which the receiver is connected
Consult the dealer or an experienced radio TV technician for help
You might find the following booklet, prepared by the Federal Communications Commission, helpful: “How to Identify and Resolve Radio-TV Interference Problems.” It is available from the U.S. Government Printing Office,
Washington, D.C. 20402. Ask for stock number 004-000-00345-4.
Contents
Chapter 1 • Introduction
.............1
In a Hurry? ..................................................... 1
Helpful Hints ................................................. 1
What is a DV Direct-to-Disk Interface? ..... 1
What is FireStore? ......................................... 1
Basic Applications ......................................... 2
Equipment ...................................................... 3
Chapter 2 • QuickStart
.................4
Connections .................................................... 4
Power On/Off ............................................... 5
The Display .................................................... 6
Front Panel Functions .................................. 6
Normal Mode ................................................ 6
Shift Mode ...................................................... 8
Alt Mode ......................................................... 9
Chapter 3 • Connections
........... 12
Connecting DV Video Devices ................. 12
DV Input ....................................................... 13
DV Output .................................................... 13
Connecting a FireWire Disk Drive ........... 13
Connecting Multiple FireWire
Disk Drives ................................................ 14
Connecting FireStore to a Computer ....... 14
Connecting FireStore to a Battery
Power Supply ........................................... 15
Chapter 4 • Recording
............... 17
Recording a DV Input Stream .................. 17
Triggering Record From a DV
Camcorder ................................................. 18
Record a Single Frame (Still Rec) ............. 19
Triggering Record From the
GPI Port ..................................................... 19
Chapter 5 • Playback
................. 21
Standard Play ............................................... 21
Navigation Between Clips ......................... 21
Fast Forward Play ....................................... 22
Fast Reverse Play ........................................ 22
Standard Reverse Play ............................... 23
Single Frame Forward and Backward ..... 23
Chapter 6 • Display Modes and
the Setup Menu ........................... 25
LCD Display Mode ..................................... 25
Setup Menu .................................................. 25
GPI Default Function ................................. 26
Set Time and Date ....................................... 27
LCD Backlight On/Off ............................... 27
FireWire Slave Mode .................................. 28
Record File Format ..................................... 28
Lock/Unlock Front Panel .......................... 29
Chapter 7 • Disk and
File Utilities .................................................. 30
Format Disk .................................................. 30
Check Disk ................................................... 31
Base File Name ............................................ 32
Delete File ..................................................... 32
Disk Space Remaining ................................ 33
Chapter 8 • Using FireStore Files
on a Computer ............................. 34
Preparing FireWire Disk Drives ............... 34
Formatting a New FAT32 FireWire Disk
Drive For the First Time ......................... 35
Creating a Partition on an Unknown
Volume Type (Win 98 or ME) ................ 35
Creating a Partition on an Unknown
Volume Type (Win 2000) ........................ 37
Getting FireStore Recorded Clips
Onto Your Computer .............................. 40
Mounting FireWire Disk Drives to
Windows 2000, 98SE and ME ................ 40
Dismounting FireWire Disk Drives from
Windows 2000, 98SE and ME ................ 43
Mounting FireWire Disk Drives to
Macintosh .................................................. 43
Dismounting FireWire Disk Drives from
Macintosh .................................................. 45
FireStore File Formats ................................ 45
Raw DV (.dv) File Format ......................... 46
AVI Type 2 File Format .............................. 46
AVI Type 1 File Format .............................. 47
File Compatibility with NLE Packages ... 47
Compatible Render-Free NLE
Packages .................................................... 47
Compatible NLE Packages (Requires
Rendering) ................................................. 47
Timecode ...................................................... 48
VIDEONICS FIRESTORE
PAGE 1
Chapter 1 • Introduction
Congratulations on your purchase of Videonics FireStore™. With
FireStore, you can record and playback DV video directly to/from
virtually any FireWire (IEEE-1394 compliant) Hard Disk Drive.
Files are recorded in an "edit-ready" file format for compatibility
with most Mac and PC based DV editing programs.
In a Hurry?
If you want to get started quickly, see the Quick Start section, Chapter 2.
Helpful Hints
FireStore is a sophisticated video production tool. Some of the words and
concepts used in this manual may be new to you. It is assumed that owners of
FireStore already have a relatively in-depth knowledge of the DV video production process.
Check the Focus Enhancements website (www.FOCUSinfo.com) regularly for
updates.
For More Information...
...send in your registration card so we can keep you informed of new developments. Note that Focus Enhancements does not sell its mailing list. Your
name and address will remain confidential.
What is a DV Direct-to-Disk Interface?
A DV Direct to-Disk Interface is a device that allows you to record/playback
DV video directly to/from a FireWire hard disk drive without using a computer. Video is input or output as a DV Video Stream through the box which
writes/reads a DV Data Stream from a FireWire hard disk drive.
What is FireStore?
FireStore is a DV Direct-to-Disk Interface that has many capabilities. With
FireStore you can:
• Input or output DV video from/to many DV devices including mixers,
camcorders and decks.
• Capture clips to hard disk at the acquisition stage - there is no need to
capture later.
• Simultaneously record to disk while recording to your camcorder's tape.
PAGE 2
VIDEONICS FIRESTORE
• Record clips to disk in an "edit-ready" file format such as AVI Type 1, AVI
Type 2 or .dv.
• Connect your FireWire disk directly to your computer or connect it via
FireStore which allows mount and dismount of the drives without re-cabling or computer re-boots.
• Jump from clip to clip without spooling through tape when in playback
mode.
• As well as video, record and playback embedded DV audio in either 2-ch
(16-bit, 48kHz) or 4-ch (12-bit, 32kHz) formats.
• Record, play and navigate using FireStore's VTR style controls.
• Record and recall a single frame of DV video.
• Slow playback down or speed it up by 1 frame per second increments.
• Use trick playback modes such as up to 30X/-30X fast-forward and rewind speeds, reverse play, loop clip and loop entire disk.
• Remote control FireStore via FireWire (for triggering record/pause) from
a DV based camcorder or GPI port.
• Daisy-chain up to 8 FireWire (IEEE-1394) hard drives together for extremely
long, uninterrupted record times.
Basic Applications
FireStore can be used both in the acquisition stage of production, the editing/
post production stage and the presentation stage. FireStore is most useful in
the following applications:
• Record DV video live to disk at the acquisition stage. Not only will you
have an exact copy of your camcorder's tape footage on disk with the same
timecode, audio and video information, it will be possible to quickly review shot footage back through your camcorder without risking damaging the tape in your camcorder's tape transport. This "confidence recording" will save time and reduce costly re-shoots during production.
• Clips are recorded to disk in "edit-ready" file formats such as AVI Type 1,
AVI Type 2 or .dv. This will allow you to get your footage onto a computer
(Mac or PC) and view or edit it quickly. The FireWire disk drive can either
be connected directly to your computer (without FireStore) or through
FireStore which allows you to mount/un-mount any connected drives without re-cabling or re-booting. This also allows you to capture footage to
disk without tying up your computer.
• Playback DV video clips that were recorded to a connected FireWire hard
disk drive from FireStore to any DV video device such as a mixer,
camcorder, CG (titler) or deck. Use FireStore's random access capabilities
VIDEONICS FIRESTORE
PAGE 3
to navigate quickly from clip to clip without having to spool forward and
backward through tape. Use FireStore's trick playback modes such as multispeed fast forward, incremental 1 frame per second slow motion and reverse play to present DV video in industrial, presentation or scientific applications.
Equipment
Your FireStore Package comes with:
• FS-1 FireStore Unit
• 6-pin to 6-pin FireWire cable
• Power supply
• This manual
• Product registration card.
You may need to purchase cables to connect more than one hard disk drive to
FireStore at once. You may also need to purchase a 4-pin to 4-pin FireWire
cable for connecting DV video devices. Your Focus Enhancements dealer can
help you identify the cables you need.
PAGE 4
VIDEONICS FIRESTORE
Chapter 2 • QuickStart
Whether you’re a video expert looking for just the basic steps or a
beginner who wants instant gratification, this chapter will have you
recording or playing back DV video in minutes!
This chapter describes just the basics. Many features and applications are
skipped or mentioned only briefly. For more information, or if you encounter
problems, refer to the table of contents to locate a more complete explanation
elsewhere in the manual.
(B)
(A)
Connections
(B)
(C)
Rear Panel: Connect the power supply (C) to a working wall outlet and connect the other end to FireStore's POWER jack.
Connect FireStore's "TO HDD" 6-pin FireWire port to the 6-pin FireWire port
(A) on your FireWire hard disk drive. If using external power on your FireWire
hard disk drive, connect the unit's power supply (ensure it is switched off
before doing this).
Connect a DV (IEEE-1394) compatible device to FireStore's 4-pin "DV In/Out"
port (B). If you are connecting a camcorder and wish to record from tape,
select your camcorder to "VCR" or "VTR' mode. If you wish to record live
video, select you camcorder to "CAMERA" mode.
Note: On certain FireWire hard disk drives, it is possible to power the drive from
FireStore's FireWire port. It is only possible to power one FireWire hard disk drive
from FireStore's bus. See your disk drives documentation for more information.
VIDEONICS FIRESTORE
PAGE 5
Note: If you are using FireStore for playback, you must set your camcorder to VTR
mode (or an other mode that lets you input a DV source).
Note: FireStore does not have analog video or audio inputs or outputs. DV video
must first pass through a Digital to Analog (D to A) converter before being displayed
on an external monitor. Most DV devices (such as camcorders, VTRs and mixers)
include D to A converters.
Power On/Off
Once all items are connected, switch the power switch at the back of the
FireStore unit to "ON".
The green power LED on the front panel will light and the LCD display should
also glow. FireStore will then go through a brief boot-up period. The following message will appear on the LCD display during boot-up.
When ready, the LCD display will read one of the following two messages.
(A)
(B)
If you see message (A), FireStore is ready to use.
If you see message (B), first check the cable connection between the FireStore
unit and disk drive. Also check to see if there is power connected to the disk
drive (this will be indicated by a power status light or the sound of the disk
spinning). If your disk drive appears not to be functioning, try a different
drive. If you have established that the drive is working, you may need to
format the drive in order to use it with FireStore. This can be done on FireStore
itself if the disk is a FAT32 volume. If not, see Chapter 8.
To format a drive on FireStore, simply hold down the SHIFT/ALT button for
two seconds. This button will flash. Then press the HDD button. The following message will appear on the LCD display:
WARNING: FORMATTING A DRIVE WILL ERASE ALL INFORMATION!
To begin formatting the drive, press the PLAY button. To exit press the STOP
button. During formatting, FireStore's LCD screen will read "Formatting...".
PAGE 6
VIDEONICS FIRESTORE
Once formatting is complete, the LCD will display the following screen:
You are now ready to use FireStore.
The Display
The default FireStore LCD screen consists of the following information:
Function
Symbol
Function
Description
Disk or Volume
Number
Track Number
Timecode or
time remain
Hour Minute Second
(HH) (MM)
(SS)
Timecode
Frame
(FF)
Front Panel Functions
FireStore's front panel allows you to perform most of the product's functions.
FireStore also provides multiple operations when the unit is in one of three
modes; NORMAL, SHIFT and ALT.
Normal Mode
In NORMAL mode, FireStore's buttons carry out the function that is listed on
the button itself. In NORMAL mode, functions include fast rewind, play, fastforward, pause, stop, record, previous track, next track, hard disk mode and
change display mode. Details of each button's function are described below.
In NORMAL mode, the SHIFT/ALT button will not be illuminated.
VIDEONICS FIRESTORE
PAGE 7
Rewind: Initiates -2X FireStore rewind speed. Subsequent
presses will result in varying speed increases
up to -30X.
Play: Play initiates forward playback on FireStore.
Fast Forward: Initiates 2X forward speed. Subsequent
presses will result in varying speed increases up to
30X.
Stop: First press puts FireStore into Pause mode. The last
frame will appear on the screen. A second push will put
FireStore into Stop mode. A blank gray screen will appear
on your output monitor.
Record: First press of REC by itself puts FireStore into record
Pause mode. A second press of REC starts recording. When
REC and PLAY are pressed simultaneously, recording begins immediately .
Shift/Alt: Press the SHIFT/ALT button once to put
FireStore into SHIFT mode giving each button an alternative function. SHIFT/ALT button will illuminate when
pressed. Holding button for 2 seconds will put FireStore
into ALT mode giving each button yet another function.
This button will flash when in ALT mode. Press SHIFT/
ALT again to exit to NORMAL mode in either state.
Back Index: Press this button to return to the
beginning of the current clip when in PLAY mode
and the previous track when in STOP mode.
Forward Index: Press this button to advance to the
beginning of the next clip when in PLAY and STOP
modes.
HDD: Press this button to mount the connected
drives onto a computer when connected. The disk
drives will bypass FireStore altogether. When
PAGE 8
VIDEONICS FIRESTORE
pressed again, connected hard drives will dismount
from the computer and return to FireStore control.
Mode: Pressing this button alters the LCD display to either
display current clip timecode or time remaining per
clip.
Shift Mode
When in NORMAL mode, you access FireStore's SHIFT mode by pressing the
SHIFT/ALT button once. The button will remain illuminated while in SHIFT
mode. Anytime a button is pressed, the button will follow the function that is
labeled directly below that particular button.
Shift
Functions
FireStore will remain in SHIFT mode until the SHIFT/ALT button is pressed
again. When the button is no longer lit, it is back in NORMAL mode.
Note: In order to access the following SHIFT functions, FireStore' SHIFT/ALTs
button must be ON (not FLASHING or OFF.)
In SHIFT mode, the
SHIFT/ALT button
will be ON.
If FLASHING, FireStore is in ALT mode - see pg. 9. If OFF, FireStore is in NORMAL mode - see pg. 6).
1 FRM
Back 1 Frame: When this button is pressed, FireStore
will go back one frame. If the button is pressed during PLAY
mode, FireStore will go into PLAY-PAUSE mode. FireStore
must be in PLAY mode to use this feature.
Play: Same as NORMAL PLAY. See pg. 7.
VIDEONICS FIRESTORE
1 FRM
PAGE 9
Forward 1 Frame: When this button is pressed, FireStore
will move forward one frame. If the button is pressed during PLAY mode, FireStore will go into PLAY-PAUSE mode.
FireStore must be in PLAY mode to use this feature.
Stop: Same as NORMAL STOP. See pg. 7.
STILL REC
Still Rec: When this button is pressed, FireStore will
record one single frame of incoming video. This
single frame will be saved as part of a clip on
FireStore. Additional presses will add more frames to the
clip. To end press STOP.
DISK
Back Index Disk: This button returns FireStore to the
beginning of the current disk drive. If at the beginning
of the current disk, pressing this button returns
FireStore to the beginning of the previous disk.
DISK
Forward Index Disk: This button advances FireStore to
the beginning of the next disk drive.
Check Disk: Pressing this button initiates Check Disk
on all connected disk drives to FireStore. You will
be asked "Check Disk? Y or N" Press PLAY to accept or
STOP to exit. This may take several minutes.
Lock / Unlock Keypad: Press and hold button for two seconds to lock front panel keypad. Hold for two seconds to
unlock. Mode key will flash in "Lock" mode.
Alt Mode
When in NORMAL mode, you access FireStore's ALT mode by pressing the
SHIFT/ALT button down for two seconds. The key will flash on and off
when in ALT mode. Anytime a button is pressed, the button will follow the
function that is labeled in italics below that button.
PAGE 10
VIDEONICS FIRESTORE
Alt Key
Functions
FireStore will remain in ALT mode until the SHIFT/ALT button is pressed
again. When the button is no longer flashing, it is back in NORMAL mode.
Note: In order to access the following ALT functions, FireStore's SHIFT/ALT button must be FLASHING (not ON permanently or OFF. If ON- PERMANENTLY,
FireStore is in SHIFT mode - see pg. 8. If OFF, FireStore is in NORMAL mode - see
pg. 6).
In ALT mode, the
SHIFT/ALT button
will flash.
- 1 FRM
Decrease Playback 1FPS: Slows down FireStore playback
by 1 frame per second increments. It is adjustable between
15 frames per second to 1 frame per second.
Reverse Play: Pressing this button will play the current
clip or disk in reverse at either 30 frames per
second (NTSC) or 25 frames per second (PAL).
+ 1 FRM
Increase Playback 1FPS: Increases FireStore playback by 1
frame per second increments. It is adjustable between 1 frame
per second and 15 frames per second.
LOOP
Loop: Specifies FireStore's default playback ability. Loop
mode allows you to select between playing back the selected
clip, playing back the entire disk(s), looping the current clip
or looping the entire disk(s). Once set, FireStore will
remain in the selected loop mode until changed to another.
ALT
No Function.
VIDEONICS FIRESTORE
PAGE 11
DISK REMAIN
Disk Remain: Displays the amount of recording still available on the connected drive in minutes and in disk space. It
also lists the total available space on the drive. To exit, return to NORMAL mode and press the STOP button.
BASE FILE
Base File Name: Displays the base file name of the current
clip. For more on clip names, see pg. 32. To exit, return to
NORMAL mode and press the STOP button.
ALT
Format Disk: Initiates format on current disk. You will be
asked "Format Disk? Y or N". Press PLAY to accept or STOP
to exit. Formatting may take several minutes. WARNING:
FORMATTING WILL DESTROY ALL INFORMATION ON
THE CURRENT DISK DRIVE!
ALT
Delete Clip: Deletes the current clip. You will be asked "Delete Clip? Y or N". Press PLAY to accept or STOP to exit.
WARNING: A DELETED CLIP IS NOT RECOVERABLE!
PAGE 12
VIDEONICS FIRESTORE
Chapter 3 • Connections
This chapter focuses on the different methods of connecting FireStore to
other equipment. This includes connecting FireStore to DV video equipment,
FireWire disk drives, computers, power sources and remote control devices.
Connecting DV Video Devices
DV Video
In/Out
FireStore will accept just about any DV video device as either an input or as
an output device. This could include a DV video camera/camcorder, DV
VTR, DV mixer or DV character generator. The single 4-pin FireWire connector on FireStore allows 25Mb/s, IEEE-1394 compliant DV video signals (includes audio, video, other information and sometimes timecode) to be input
to or output from FireStore.
Compatible DV camcorder and VTR formats include DV, miniDV, DVCam,
DVCPro, Digital 8 and Professional DV. These are 25Mb/s, 4:1:1 (NTSC) or
4:2:0 (PAL) DV devices. FireStore will not work with DV based 50Mb/s or
100Mb/s devices such as DVCPro50 and DVCProHD or SDI based digital
devices such as BetacamSX, Digital Betacam, D-1 or D-9. FireStore also has
no analog input or outputs. You can however input or output analog video
to FireStore via an external A to D/D to A converter.
Check the Focus Enhancement's website (www.FOCUSinfo.com) for an update of qualified DV devices.
DV Input
Use FireStore's "DV In/Out" 4-pin connector to connect DV source devices.
These source devices may include DV based camcorders, VTRs, mixers or
VIDEONICS FIRESTORE
PAGE 13
character generators. You may use either a standard 6-pin to 4-pin or a
standard 4-pin to 4-pin FireWire cable for connecting DV video devices.
Once connected, it is possible to record video from the source device to the
connected FireWire hard disk drive (see Chapter 4).
DV Output
Once footage has been recorded to hard disk using FireStore, it is then possible to play it back just like using a VTR or Digital Disk Recorder (DDR). DV
video is output through the same "DV In/Out" 4-pin connector on FireStore
that was used as an input. You can connect DV based camcorders, VTRs,
mixers, character generators or DV to analog converters to FireStore in order
to record to tape or preview what is recorded to disk.
Note: It is only possible to connect one (1) DV video source to FireStore at a time.
Connecting a FireWire Hard Disk Drive
It is possible to connect just about any FireWire (IEEE-1394) hard disk drive
to FireStore. Focus Enhancements generally recommends that you use a
FireWire disk drive that is audio/visual capable. This basically means any
hard drive that is fast enough to read or write at least 7MB/s. FireStore will
also work with IEEE-1394 drive kits that put a FireWire front end on virtually
any ATA 100 or IDE hard drive.
It is also essential that the disk drive has a relatively fast access time (at most
about 10-12 milliseconds). Focus Enhancements highly recommends that you
use a hard drive that has been qualified for use with FireStore. You can check
the current list of qualified drives on our website: www.FOCUSinfo.com or
calling our technical support department at (408) 370 9963.
Disk Drives connect to FireStore via a 6-pin to 6-pin FireWire cable (supplied).
Plug the disk drive into the "To HDD" port on the back of FireStore.
FireWire Disk
Drive Interface
PAGE 14
VIDEONICS FIRESTORE
Note: If you are using a FireWire disk drive that can be powered from a computer's
FireWire bus, you can also power it from FireStore. (one disk drive per FireStore)
Check your hard drive specifications for more details.
Connecting Multiple FireWire Hard Disk Drives
It is possible to daisy chain up to eight FireWire disk drives to FireStore. To
daisy chain multiple hard drives to FireStore:
1. Shut down FireStore and any connected FireWire disk drives. Using the
supplied 6-6 FireWire cable, connect FireStore's "To HDD" connector
to one of the FireWire disk drives two FireWire ports*.
2. Using another 6-6 FireWire cable, simply connect another FireWire
disk drive to the spare 6-pin FireWire connector on the first drive.
3. Repeat Step 2 for up to eight drives. Additional power supplies will be
needed when more than one disk drive is connected to FireStore. Power
up FireStore and any connected FireWire disk drives.
* Note: Every FireWire disk drive has two 6-pin connectors for use in daisy chaining
situations. Either of these connectors can be connected to a computer (or FireStore)
while the other is free to daisy chain additional drives.
Connecting FireStore to a Computer
It is possible to connect FireStore and its attached disk drives to a FireWire
capable Macintosh or Windows computer system. The purpose of this feature is to allow for quick and easy mount or dismount of the attached FireWire
disk drives to a computer without re-cabling. To connect FireStore to a computer:
1. Ensure you have loaded the required FireWire disk drive drivers on
your computer (consult your FireWire hard drive manual for more information).
VIDEONICS FIRESTORE
PAGE 15
Connecting FireStore to a Computer (cont)
2. Shut down your computer, FireStore and any connected FireWire disk
drives.
3. Using a 6-6 FireWire cable, connect FireStore's "To Computer" connec
tor to a 6-pin FireWire port on your computer. This may be located on a
PCI slot or on the front or rear of your computer (consult your computer
manual for more information).
4. If you haven't done so, connect your FireWire disk drive(s) to FireStore
(see pages 13-14 for more information).
5. Power up FireStore, any connected disk drives and your computer system (ensure you have loaded the appropriate FireWire drivers on the com
puter before use. Consult your disk drives documentation for more information)
6. Once FireStore has booted up, press the "HDD" key. You will be asked
"Goto HDD mode?" Press Play for Yes or Stop for No. The connected
drives will then mount to your computer system and bypass FireStore altogether.
7. To dismount the drives from your computer and return to FireStore,
press the "STOP" button. On a Macintosh and some Windows based com
puter system, it is necessary to first dismount the drive by dragging it to
the Trash icon (Mac) or performing a Stop device procedure (Windows) to
exit (see pages 43 and 45 for more information).
Connecting FireStore to a Battery Power Supply
It is possible to connect FireStore to an external battery supply. The requirements for an external battery are:
.
PAGE 16
VIDEONICS FIRESTORE
Connecting FireStore to a battery power supply (cont)
FireStore Only:
7-15V DC, min. 500mA. - max 9A
FireStore & one low power drive:
7-15V DC, min. 2A - max 9A
FireStore features a 2.5mm power jack on its back panel. It is center pin (tip)
positive and the sleeve (shield) is negative (ground). See diagram below.
VIDEONICS FIRESTORE
PAGE 17
Chapter 4 • Recording
This chapter focuses on the different ways with which you can record a clip
using FireStore. It is assumed that you have properly connected a FireWire
drive to FireStore and that you are now familiar with the buttons and modes.
If you need more information on connecting devices to FireStore, see Chapter
3. For more information on different modes and buttons, see the QuickStart
information in Chapter 2 or preceding chapters.
Recording a DV Input Stream
Connect at least one FireWire hard drive and a DV source to FireStore with
their associated power supplies. Once connected, power up the DV source
followed by FireStore and the connected FireWire disk drive.
Note: If you are using a DV camcorder, VTR or mixer, it may be useful to connect an
external video monitor to that device's analog output in order to monitor what is
being recorded. FireStore does not have an analog output for monitoring.
If FireStore is ready to use, you should see one of the following displays on
the LCD screen:
If you see the "No Disk" screen displayed (shown below), first check to see if
there is power supplied to the disk drive and that all cable connections are
secure (see Chapter 3 for information on cabling to FireStore). If the unit still
does not respond, you may need to format your disk drive. See Chapter 8 for
details.
Ensure your DV source device is outputting a DV signal. If you are using a
camcorder either set the camera to "CAMERA" mode to output a live signal
or into "VTR or VCR" mode to play back a pre-recorded tape. If you are using
a deck, press "PLAY" on that deck in order to initiate playback.
Note: All camcorders and decks are different. It may be necessary to set the DV
source device into a specific mode in order to output a DV signal. Consult your
device's user manual for more information.
Once you have established that you have a DV source output, you are ready
to record. In FireStore's default mode, it is possible to initiate record in two
different ways. First, you can start recording on FireStore by pressing the
REC and PLAY buttons simultaneously.
PAGE 18
VIDEONICS FIRESTORE
Recording a DV input stream (cont)
Simultaneously press PLAY and
REC to start recording
The other method of recording with FireStore is to simply press FireStore's
RECORD
(
) button once. The Record Pause LCD screen will appear:
With the press of FireStore's RECORD
begin. Pressing the RECORD
(
( ) button again, recording will
) button a second time, will return
FireStore to Record Pause.
Triggering Record from a DV Camcorder
It is possible to trigger record on FireStore using the REC/REC-PAUSE button on your DV camcorder. This is done using FireStore's FIREWIRE SLAVE
MODE. To access the FireWire Slave Mode, simply select the SETUP mode
on your FireStore. You can do this by pressing FireStore's MODE
(
)
button for two seconds. After two seconds, the default SETUP screen will
display which is shown below.
By pressing the MODE
(
)
button, cycle through the screens until
you reach SLAVE MODE. The following LCD display will appear.
Press the FORWARD INDEX
lowing LCD display
(
) button once and you will see the fol-
VIDEONICS FIRESTORE
PAGE 19
You are now in FireWire Slaved mode. FireStore will automatically go into
REC PAUSE mode. To exit, hold down the MODE
(
) button for
another two seconds and reselect LOCAL control.
Record a Single Frame (Still Rec)
It is possible to record a single DV frame with FireStore in the REC STILL
mode. In REC STILL mode, FireStore will capture the current frame and save
it in a clip. Each sequential press will add another frame to that clip. To
) button once. This button
Every time you press the RECORD (
) button,
access this mode, press the SHIFT/ALT
will stay illuminated.
(
FireStore will capture the current frame (and any additional frames) and save
it to disk in a clip. During capture, the LCD will display the following screen:
It will have the same clip name structure (see pg. 27, "Set Time and Date") as
standard video clips. To create a new clip, simply press FireStore's STOP
(
) button followed by the RECORD STILL sequence again. To exit this
mode, simply press the SHIFT/ALT
(
) again.
Triggering Record from the GPI Port
It is possible to trigger record using FireStore's GPI port. To access FireStore's
default GPI settings, press the MODE
(
)
button for about two
seconds. After two seconds, the default SETUP screen will display which is
shown below.
When the GPI is triggered, FireStore will cycle between pause and un-pause.
to cycle to the other GPI function modes, press the FORWARD INDEX
(
) button. Other modes are Index (New File) which ends the
PAGE 20
VIDEONICS FIRESTORE
Triggering Record from the GPI Port (cont)
current clip while in record mode and then creates a new clip and continues
recording. It is also possible to trigger a Record Snapshot (Still Rec) using
FireStore. Other LCD screens are shown below:
Note: More than 1,000 stills on a single disk may slow down FireStore access times
(this number will vary from disk drive to disk drive).
CAUTION: As a general rule, some or all clips may be lost if your FireStore is
unplugged or power is cut to the unit prior to a recording session finishing. Ensure
that FireStore is in STOP mode before powering down the unit.
VIDEONICS FIRESTORE
PAGE 21
Chapter 5 • Playback
This chapter focuses on the different playback modes that are available
within FireStore. Playback modes include standard play, loop play, reverse
play, fast forward, fast rewind and slow playback.
Standard Play
Connect at least one FireWire hard drive and a DV device to FireStore with
their associated power supplies. Once connected, power up the DV source
followed by FireStore and the connected FireWire hard drive.
Note: If you are using a DV camcorder, VTR or mixer, it may be useful to connect an
external video monitor to that device's analog output in order to monitor what is
being recorded. FireStore does not have an analog output for monitoring.
If FireStore is ready to use, you should see the following display on the LCD
screen:
If you see the "No Disk" screen displayed (shown below), first check to see if
there is power supplied to the disk drive and that all cable connections are
secure (see Chapter 3 for information on cabling to FireStore). If the unit still
does not respond, you may need to format your disk drive. See Chapter 8 for
details.
Note: If you are using a DV camcorder, VTR or mixer, it may be necessary to switch
that unit's input to DV Line in. Consult your User Manual for details.
In order to playback a clip, simply press FireStore's PLAY
once. To Pause the clip, press FireStore's STOP
(
(
) button
) once and a second
time to go into Stop mode.
Navigation Between Clips
To navigate to other clips, press FireStore's BACK INDEX
(
) and
PAGE 22
FOWARD INDEX
VIDEONICS FIRESTORE
(
) buttons.
It is possible to do this in Play, Pause
and Stop modes. The track number will update as you navigate through each
clip. When you reach the end of a disk or volume, FireStore skips across to
that next disk or volume and the disk or volume number will update.
Disk or Volume Number
(up to 8)
Track Number (up to 9,999)
Fast Forward Play
It is possible for up to 30 times normal playspeed with FireStore in fast
forward mode. To playback at greater than normal playback speed, simply
press the FAST FORWARD
(
) button once.
FireStore will begin 2X
playback (plays back at twice the speed of normal play). Each sequential
press of the FAST FORWARD
(
) will further increase playback
speeds. The increments are 2X, 3X, 4X, 5X, 8X, 10X, 12X, 15X, 18X, 21X, 25X
and 30X and the LCD display will reflect this with the following:
To return to normal playback simply press the PLAY
(
) button.
Fast Reverse Play
It is possible for up to 30 times reverse playspeed with FireStore in fast
reverse mode. To playback in reverse at greater than normal reverse play
speed, simply press the REWIND
(
) once.
FireStore will begin 2X
playback (or plays back at twice the speed of normal reverse play). Each
sequential press of the REWIND
(
) button will further increase
VIDEONICS FIRESTORE
PAGE 23
reverse playback speeds. The multiples are -2X,-3X, -4X, -8X, -10X, -12X, 15X, -18X, -21X, -25X and -30X and the LCD display will reflect this with the
following:
To return to normal playback simply press the PLAY
(
) button.
Note: Some lower performance hard drives may not be able to reach some higher fast
forward and rewind speeds.
Standard Reverse Play
It is possible to playback video from FireStore in reverse at normal speeds (25
fps in PAL and 30 fps in NTSC). To begin reverse play, hold down the SHIFT/
ALT
(
) button for two seconds until it begins to FLASH. FireStore is
now in ALT mode. Then press the PLAY
(
) button. Reverse play will
begin and the following LCD display will show:
To exit FireStore's ALT mode, press the SHIFT/ALT
(
) button again
(the SHIFT/ALT button will stop Flashing). To return to normal play, press
the PLAY
(
) button or to stop playback, press the STOP (
)
button.
Single Frame Forward and Backward
It is possible to move forward and backward frame by frame with FireStore.
To go into this mode, press FireStore's SHIFT/ALT
(
) button once to
enter the SHIFT mode. The key should light up, but not FLASH. By pressing
the REWIND
(
) or FAST FORWARD (
) button, FireStore
PAGE 24
VIDEONICS FIRESTORE
Single Frame Forward and Backward (cont)
will enter PAUSE mode (if you are in Stop, Pause or Play modes). The following LCD screen will display:
Pressing the REWIND
(
ing the FAST FORWARD
) button, will move back one frame.
(
Press-
) button will move forward by one frame.
Each sequential press will move either forward or backward one frame as many
times as it is pushed. To enter play mode, simply press the PLAY
(
)
button and playback will begin. To exit this state, simply press the FAST
SHIFT/ALT
(
light will be off).
) button (when it is out of SHIFT/ALT mode, the key
VIDEONICS FIRESTORE
PAGE 25
Chapter 6 • Display Modes and the
Setup Menu
This chapter focuses on the different display modes and setup options that
are available in FireStore. This includes the LCD display modes as well as
user preference modes such as GPI default action, set time/date, LCD backlight status, slave mode, record file type and lock/unlock front panel.
LCD Display Mode
There are two display modes possible with the FireStore LCD. They are standard timecode counter and time remaining per clip. It is possible to toggle
(
)
between both of these by pressing FireStore's MODE
button once.
The display will toggle between the following two LCD displays:
Standard Timcode Counter
Display
Time Remaing per Clip
Counter
Setup Menu
FireStore has a user setup menu which allows the user to define various preferences for custom operation. To enter FireStore's setup menu, simply hold
(
)
down FireStore's MODE
button for two seconds. Once you have
entered this menu, the following LCD display will show:
To scroll through the various setup functions, simply scroll through the menu
by pressing the MODE
(
(
) button. When finished in the Setup Menu,
)
hold the MODE
button for two seconds and your preferences
will be stored. All changes to the setup menu will be saved even if power is
shut off on the unit.
PAGE 26
VIDEONICS FIRESTORE
GPI Default Function
FireStore's GPI interface allows you to trigger several commands using the
GPI port on the rear of the unit. The GPI port is made up of a standard 2.5mm
tip, ring sleeve mini jack that is used for transmitting standard serial commands to the FireStore unit. In default mode, the GPI trigger gives you control of the following default actions from a simple contact closure.
1. GPI Disabled - No functionality from the GPI port.
2. Pause/Unpause - Selecting this mode allows the user to toggle between
triggering PAUSE and UN-PAUSE of playback or record on FireStore. The
following LCD screen will appear when this option is selected:
3. Index (New File) - Selecting this mode allows the user to create or start a
new file when in record mode. This allows the user to break up continual
record sessions into manageable sequences. The following LCD screen will
appear when this option is selected:
4. Record Snapshot - Selecting this mode allows the user to capture single
frames of video with each sequential press of the contact closure. Each clip
will be saved as a separate file on the hard disk. The following LCD screen
will appear when this option is selected:
VIDEONICS FIRESTORE
PAGE 27
Set Time and Date
In order to create unique file names using FireStore, it is necessary to set a
master clock on the unit. Example file names on FireStore would be:
20010625-130408.dv
or
20010625-130408.avi
These file names refer to the date and time recording of the particular clip
began. In the case of the above example, this is June 16th. 2001 at 2:25pm and
34 seconds. Every time a new clip begins recording, the current date and time
is recorded as the file name. To set the date and time, enter the Setup Menu as
described on page 25. Toggle through to the Date and Time Setup Menu by
pressing the MODE
play:
Press the PLAY
(
(
) button. The following LCD screen will dis-
) button to scroll between the various set date and
time settings. Use the BACK INDEX
(
(
) and FORWARD INDEX
)buttons to select the appropriate date and time.
LCD Backlight On/Off
It is possible to either have FireStore's LCD backlight on or off. To set the
backlight on or off, enter the Setup Menu as described on page 25. Toggle
through to the LCD Backlight Setup Menu by pressing the MODE
button. Press the FORWARD INDEX
(
)
(
)
button to select the LCD
backlight to on or off. The following two LCD screens will display for each
state:
LCD Backlight is On.
LCD Backlight is Off.
PAGE 28
VIDEONICS FIRESTORE
FireWire Slave Mode
It is possible to control the RECORD and RECORD PAUSE functionality of
FireStore using a DV based digital camcorder that features a FireWire (i.Link/
IEEE-1394) interface.
Note: Check the Focus Enhancements website (www.FOCUSinfo.com) for a complete list of qualified camcorders.
The purpose of the FireWire SLAVE mode is to enable triggering of RECORD
and RECORD PAUSE on FireStore with the simple press of the RECORD and
RECORD STANDBY button on most DV camcorders. FireStore will begin
recording when RECORD is pressed on the camcorder and PAUSE recording
when RECORD STANDBY is pressed on the camcorder. FireStore will make
the recorded clip its own file on the attached FireWire disk drive. Any subsequent presses of the RECORD button on the camcorder will create a new file
on the disk. FireStore will remain in this mode until it is returned back to
LOCAL control. LOCAL control will return all control back to FireStore's
front panel.
To set the Slave mode, enter the Setup Menu as described on page 25. Toggle
between LOCAL and SLAVE modes by pressing the MODE
(
) but-
ton. The following LCD screens will display:
Record Control from FireStore Front
Panel.
Record Control Slaved to DV Camcorder.
Note: It is generally necessary to also record to the camcorder's tape in order for
FireWire Slave mode to work.
To activate FireWire SLAVE mode, select the SLAVE option and hold the
MODE
(
) button for two seconds.
FireStore will automatically go
into REC PAUSE mode and display the following LCD screen.
Record File Format
It is possible to select which file format FireStore will record clips to. Users
can choose between Raw DV (.dv), AVI Type 1, AVI Type 2 or AVI Type 2C
(specifically for Canopus DV Storm users). To select the file type that is cor-
VIDEONICS FIRESTORE
PAGE 29
rect for you, check the particular editing appliance you plan to use your clips
with. Generally, Raw DV files are useful with QuickTime based applications
while AVI Type 1 and AVI Type 2 are used with Windows based applications.
Note: Check the Focus Enhancements website (www.FOCUSinfo.com) for a complete list of compatible editing packages as well as suggested file formats for different
uses.
To select a particular record file format, enter the Setup Menu as described on
page 25. Toggle through to the Record File Menu by pressing the MODE
(
) button. Press the FORWARD INDEX (
) button to select
one of the three record file formats. The following LCD screens will appear:
Records Files in Raw DV (.dv) format.
Records Files in AVI Type 1 format.
Records Files in AVI Type 2 format.
Records Files in AVI Type 2C (Canopus)
format.
Lock / Unlock Front Panel
Separate to the Setup Menu is the Lock/Unlock front panel feature on
FireStore. To lock the front panel, press FireStore's SHIFT/ALT
(
)but-
ton once to enter the SHIFT mode. The key should light up, but not FLASH.
Then press the MODE
(
) button to toggle between locked and un-
locked mode. When LOCKED appears, FireStore's front panel will become
inactive and remain in the current state (e.g. Loop Play). To un-lock the front
panel, repeat the steps from above.
PAGE 30
VIDEONICS FIRESTORE
Chapter 7 • Disk and File Utilities
This chapter focuses on the different disk operation and control utilities on
FireStore as well as information regarding files. Areas covered include disk
formatting, check disk, base file name, delete file and disk space remaining.
Format Disk
FireStore works with the FAT 32 disk format. If your disk does not conform
to this standard it will be necessary to format the disk. You can do this on a
Windows based computer system or you can do it on FireStore itself (FAT32
formatting CANNOT be done on a Macintosh). If your disk was originally
setup to be used on a Macintosh (or other platform), please go to Chapter 8.
Note: Focus Enhancements highly recommends that your selected FireWire disk drive
be used exclusively for recording files with FireStore. Disk fragmentation and files
not recognized by FireStore can cause drops in performance and operational problems. Whenever possible, we recommend that a full disk format be carried out on the
FireWire disk drive prior to use.
WARNING: FORMATTING A DRIVE WILL ERASE ALL DATA! BACK UP
ANY VALUABLE DATA BEFORE DOING THE FOLLOWING TASKS.
To format a drive on a Windows system, connect the FireWire disk drive to a
Windows 98 SE, Windows ME or Windows 2000 based system with an operational OHCI compliant FireWire port. Also ensure that the particular FireWire
hard drive drivers have been loaded on the system (consult your FireWire
disk drives manual for more information). Select the particular drive from
My Computer (usually labeled E:, F: or G: drive) and right mouse click. From
the menu select Format... Follow the onscreen menu to carry out a complete
drive format as a FAT 32 volume ( it is recommended that you do a full format). See page Chapter 8 of this manual for more detailed information of
formatting using Windows.
It is also possible to perform a FAT 32 disk format using FireStore. In a lot of
cases this is a lot simpler than formatting on a computer .
To format an attached drive, press FireStore's SHIFT/ALT
(
) button
for two seconds until it begins to FLASH. FireStore is now in ALT mode.
Then simply press FireStore's HDD
LCD screen will display:
(
) button and the following
VIDEONICS FIRESTORE
Press FireStore's PLAY
(
PAGE 31
(
) button to begin formatting or the STOP
) button to cancel. Formatting can take up to several minutes
depending on the drive.
formatting:
The following LCD screen will display during
When complete, FireStore's LCD screen will display
Note: If FireStore is unable to format the drive, it may be necessary to do this on a
computer. See Chapter 8 for more information.
Check Disk
FireStore's CHECK DISK function allows the user to check the connected
FireWire disk drives for problems. To check an attached FireWire disk drive,
) button once to enter the SHIFT mode.
)
The button should light up, but not FLASH. Press the HDD (
press FireStore's SHIFT/ALT
(
button to activate CHECK DISK. The following LCD screen will display:
Press FireStore's PLAY
(
(
) button to begin check disk or the STOP
) button to cancel. Check Disk can take up to several minutes
depending on the disk drive. The following LCD screen will display during
check disk:
PAGE 32
VIDEONICS FIRESTORE
When complete, the default LCD screen will appear:
If the connected disk drive is too fragmented, it may be necessary to reformat
the drive or switch too another drive. Information on the particular drive
will still be OK, but further recording may result in lost footage. The following LCD screen will appear when the disk is too fragmented for use:
To format a drive, see page 30.
Base File Name
FireStore identifies each clip on the LCD display in the order clips were recorded. This is determined by the date and time based file name that was
created using FireStore's internal clock (see "Setting Time and Date" on page
27 for more information). This file name is known as the BASE FILE NAME.
It is possible to see this name on the FireStore LCD display for the currently
selected clip by doing the following. Press and hold FireStore's SHIFT/ALT
(
) button for two seconds to enter the ALT mode.
FLASH. Press the FORWARD INDEX
(
This key should
) button to activate BASE FILE
NAME. The following LCD screen will display:
This file name corresponds with the file name as it will appear on a computer
system. For instance, this file may appear as either 20010219-141058.dv (if it is
a Raw DV file format) or 20010219-141058.avi (if it is an AVI Type 1 or 2 file
format). See "Record File Format on page 28 for more information.
Delete File
It is possible to delete files from FireStore. To delete a selected file or clip,
simply scroll through to the particular clip using FireStore's BACK
VIDEONICS FIRESTORE
INDEX
(
PAGE 33
) and FORWARD INDEX (
selected, press and hold FireStore's SHIFT/ALT
) buttons. Once a track is
(
) button for two sec-
onds to enter the ALT mode. This key should FLASH. Press the MODE
(
) button to activate DELETE FILE. The following LCD screen will
display:
Press FireStore's PLAY
(
(
) button to delete the track or the STOP
) button to cancel. Deleting a file can take a couple of seconds.
WARNING: A DELETED FILE IS NOT RECOVERABLE!
Note: Continually deleting a file (e.g. continuously recording, then deleting, then rerecording, then deleting etc.) can result in disk fragmentation and slower performance. Whenever possible, limit the amount of times a file is deleted after recording.
Disk Space Remaining
It is possible to see the disk space and recording time remaining on the currently selected FireWire disk drive. To display disk space and recording time
remaining, press and hold FireStore's SHIFT/ALT
(
) button for two
seconds to enter the ALT mode. This key should FLASH. Press the BACK
INDEX
(
) button to activate DISK REMAIN. The following LCD screen
will display:
Recording Time
Remaining on Disk
(HH:MM:SS)
Disk Space Remaining
Total Disk Space
Available
To exit, press FireStore's STOP
(
) button.
PAGE 34
VIDEONICS FIRESTORE
Chapter 8 • Using FireStore Files on a
Computer
This chapter focuses on using FireStore files on a computer system.
Preparing FireWire Disk Drives
FireStore works with any audio/visual capable IEEE-1394 (FireWire) disk
drive. FireStore requires that any attached disk drive is formatted as a FAT
32 volume. It is possible to format a disk drive on FireStore as long as it was
originally a FAT 32 volume (e.g. the drive came formatted for use on a Windows based computer system, consult your disk drive documentation first
for more information). Focus recommends that a new drive be formatted
using FireStore before use.
If you are unsure whether your disk can be used with FireStore, do the following:
1. Connect all items to FireStore as described in "Connections" on pg. 4.
2. Connect power to your FireWire disk drive if needed and turn "ON".
3. Switch the power switch at the back of the FireStore unit to "ON". The
green power LED on the front panel will light and the LCD display s h o u l d
also glow. FireStore will then go through a brief boot-up period. The following message will appear on the LCD display during boot-up.
When ready, the LCD display will read one of the following two messages.
(A)
(B)
If you see message (A), FireStore is ready to format.
If you see message (B), first check your cables between the FireStore unit and
disk drive are connected. Also check to see if there is power connected to the
disk drive (this will be indicated by a power status light or the sound of the
disk spinning). If your disk drive appears to not be functioning, try a different one. If you have established that the drive is working, you may need to
format the drive as a FAT 32 volume. See "Creating a Partition on an Unknown Volume Type" on pg. 35.
VIDEONICS FIRESTORE
PAGE 35
Formatting a New FAT32 FireWire Disk Drive for the First
Time
If you have established that the connected FireWire disk drive is a FAT32
volume, it is highly recommended that you carry out a fresh format on that
drive before using it with FireStore EVEN IF the drive is brand new. To format a connected drive on FireStore, simply hold down FireStore's SHIFT/
ALT
(
) button for two seconds. Then press the HDD (
)
button. The following message will appear on the LCD display:
WARNING: FORMATTING A DRIVE WILL ERASE ALL INFORMATION!
To begin formatting the drive, press the PLAY button. To exit press the STOP
button. During formatting, FireStore's LCD screen will read "Formatting...".
Once formatting is complete, the LCD will display the following screen:
You are now ready to use FireStore.
Creating a Partition on an Unknown Volume Type (Win98
or ME)
If the FireWire disk drive you are using came formatted for Macintosh or
other system, you must first create a useable partition on that drive. It is
necessary to do this even if you plan on only using FireStore files with a
Macintosh. Using a FireWire equipped Windows 98 or ME system, do the
following:
1. Ensure your computer system has a working OHCI compliant IEEE-1394
PCI card or connection.
2. Power up your computer and FireWire disk drive (if necessary). Ensure
the appropriate FireWire disk drive drivers are already loaded onto your computer (see your FireWire disk drives documentation for more information).
Connect your FireWire disk drive to a 6 pin FireWire port.
PAGE 36
VIDEONICS FIRESTORE
Creating a Partition on an Unknown Volume Type (cont'd)
3. From the Start Menu, select Programs -> MS Dos Prompt. The following
window should open on your computer:
4. At C:\WINDOWS>, type fdisk and then press the Enter key on your
computer's keyboard. Answer "Y" to "Enable Large Disk Support?".
5. The DOS prompt window will now display 5 menu items. Select "Change
current fixed disk drive" (option 5) followed by the Enter key.
6. As seen below, you should see a list of two or more hard drives.
VIDEONICS FIRESTORE
PAGE 37
The computer's main disk drive will be labeled Disk 1 (consult your
computer's documentation or an expert if you are unsure). Additional drives
will be listed Disk 2, 3, 4 etc. Locate your FireWire disk drive (look for the
drive that has a similar capacity to your FireWire disk drive if multiple drives
are connected). At "Enter Fixed Disk Drive Number", select Disk 2 (if applicable).
WARNING: ENSURE YOU HAVE THE CORRECT DRIVE SELECTED. SELECTING THE WRONG DRIVE COULD RESULT IN LOSS OF DATA!
7. You will now see the same menu as Step 5. This time, select "Create Primary DOS Partition" (the default). Be sure have the right disk drive selected
and then press the Enter key. This could take some time.
8. When asked "Do you wish to use the maximum available size for the Primary
DOS partition?", answer "Y" and press the Enter key. This could take some
time.
9. When the partitioning is complete, press the Esc key TWICE. You will be
prompted to restart your PC. Ignore this message. Press Esc once more to
exit fdisk. At the prompt, type "exit" to close the MS-DOS prompt window.
10. From My Computer, select the FireWire disk drive and right click the mouse
button. From the menu, select Format. Choose Full from the Format Type
and then click Start to begin. This could take some time.
11. You have now created a volume which will allow FireStore to create a
FAT 32 volume of its own. Disconnect the FireWire drive from your computer and connect it to FireStore. Follow the steps in "Formatting a New FAT32
FireWire Disk Drive for the First Time" on page 35.
Creating a Partition on an Unknown Volume Type (Win 2000)
If the FireWire disk drive you are using came formatted for Macintosh, you
must first create a useable partition on that drive. It is necessary to do this
even if you plan on only using FireStore files with a Macintosh. Using a
FireWire equipped Windows 200 system, do the following:
1. Ensure your computer system has a working OHCI compliant IEEE-1394
PCI card or connection.
2. Power up your computer and FireWire disk drive (if necessary). Ensure
the appropriate FireWire disk drive drivers are already loaded onto your computer (see your FireWire disk drives documentation for more information).
Connect your FireWire disk drive to a 6 pin FireWire port.
3. From the Start Menu, select Programs -> Settings -> Control Panel. From
Control Panel, double click on Administrative Tools. Then double click on Computer Management.
4. In the Storage Sub Directory, click on Disk Management as shown on the
following page:
PAGE 38
VIDEONICS FIRESTORE
Creating a Partition on an Unknown Volume Type (cont)
5. The "Write Signature and Upgrade Disk Wizard" will Open. To Start the
Wizard, click Next in the Window.
6. Select the FireWire disk drive from the list (look for the drive that has a
similar capacity to your FireWire disk drive if multiple drives are connected).
Click Next to continue followed by Finish when prompted.
7. The FireWire disk drive will then be listed without a drive letter and show
as "unallocated". See below:
VIDEONICS FIRESTORE
PAGE 39
8. To create a partition, click on the area marked "unallocated". See below:
Click on area marked
"Unallocated"
9. From the Action menu, select All Tasks -> Create Partition. This will launch
the Create Partition Wizard.
10. Start the Wizard by clicking Next. Choose Primary Partition followed by
Next.
11. Enter the amount of disk space to be used (it is recommended that you
choose the maximum available disk space).
12. Assign a drive letter or path followed by Next.
13. Choose FAT32 as the File System to Use under Formatting. Ensure that the
"Perform a Quick Format" box is checked. See Below:
14. Review your settings. Click Finish to begin format.
15. When finished, the drive will display in Computer Management with the
size of the partition (GB), the file system (FAT32) and a Healthy Status.
16. You have now created a volume which will allow FireStore to create a
FAT 32 volume of its own. Disconnect the FireWire drive from your computer and connect it to FireStore. Follow the steps in "Formatting a New FAT32
FireWire Disk Drive for the First Time" on page 35.
PAGE 40
VIDEONICS FIRESTORE
Getting FireStore Recorded Clips onto Your Computer
Once you have recorded clips to your FireWire disk drive using FireStore, it
is possible to use those clips in most DV based NLE systems. Traditionally,
in order to get footage into your NLE system, it was necessary to capture or
digitize that footage utilizing a video capture card. Using FireStore recorded clips, it is possible to skip this capture stage by simply connecting
the FireWire disk drive to your computer via an OHCI compliant IEEE-1394
(FireWire) compliant PCI card or connection. FireWire disk drives that were
used with FireStore can be connected to any computer system that will read
a FAT 32 volume. This includes Windows 98SE, Windows ME, Windows
2000 and Mac OS9 and later (excluding OS10 presently). FAT32 volumes
will not work with Windows NT and older Macintosh based operating
systems. Check the Focus Enhancement's website (www.FOCUSinfo.com)
for more information.
In order for you to use FireStore recorded FireWire disk drives on a computer, you must have an active IEEE-1394 connection on your computer.
You also must have loaded any required FireWire disk drive drivers onto
your computer system (Consult your FireWire disk drive documentation
for more information).
Simply connect your FireWire disk drive to your computer system utilizing
a standard 6-pin to 6-pin FireWire cable and connect power to the drive if
necessary (some FireWire disk drives receive power from the computer's
FireWire connection. Consult your FireWire disk drive documentation for
more information). See below:
Once you have connected your FireWire disk drive to your computer, the
computer will automatically mount the disk drive to the computer's
desktop.
Mounting FireWire Disk Drives to Windows 2000,
98SE and ME Computer Systems
On a Windows based computer system, simply double click the My Computer icon on the top left hand corner of the desktop. You will see the
following window:
VIDEONICS FIRESTORE
PAGE 41
Locate your FireWire disk drive. This will probably be labeled (E:), (F:), (G:)
etc. (drive C: is usually your computer's main disk drive). Once located,
double click on the FireWire disk drive. (If you have trouble locating the
FireWire disk drive, right mouse click each drive and select Properties from
the menu. Click the Hardware tab which will list the drive type). Once opened,
you should see the following window:
PAGE 42
VIDEONICS FIRESTORE
Mounting FireWire Disk Drives to Windows 2000,
98SE and ME Computer Systems (cont)
The FireWire disk drive contains several different files. Clips can appear as
AVI Type 1, AVI Type 2, AVI Type 2 Canopus or .dv. Each clip also features
a text file that lists information about the clip itself. These are automatically
created during recording. Below, we can see the different files on the disk:
Clip Log Text File Folder
Raw DV (.dv) Clip File.
A larger than 2GB .dv file
(just over 9 minutes of
recording) is split into
two with the first 2GB
segment labeled -01 and
preceding 2GB segments
labeled -0X.
AVI Type 1, AVI Type 2 or
AVI Type 2 Canopus Clip
File.
.dv Clip File
A larger than 2GB AVI
Type 1, AVI Type 2 or AVI
Type 2 Canopus file (just
over 9 minutes of
recording) is split into
two with the first 2GB
segment labeled -01 and
preceding 2GB segments
labeled -0X.
From the example above, we can see that .dv clip files appear with a QuickTime
icon. AVI Type 1, AVI Type 2 and AVI Type 2 Canopus all use the AVI icon.
The FAT32 file system has a limitation where any particular file cannot exceed 2GB in size. This equates to roughly 9 minutes of recording time. When
clips are being recorded to FireStore that exceed 9 minutes in length, FireStore
automatically creates a new file without dropping any frames. The two clips
will have the same primary file name, however, the last two digits will be
different. The first 2GB part of the clip will be labeled with "-01" after the
primary file name. The second 2GB segment will be labeled with a "-02".
Additional 2GB segments will be labeled with a "-0X" number (where X is the
sequence number).
VIDEONICS FIRESTORE
PAGE 43
Dismounting FireWire Disk Drives from Windows
2000, 98SE and ME Computer Systems
Once you have completed working with your disk drive on a Windows 2000,
Windows 98SE or Windows ME computer system, you must first dismount
the drive before unplugging it. To do this, simply click on the Stop Device icon
at the bottom right side of the Windows task bar. See Below:
Windows Stop Device
Button
Once clicked, your computer system will display the following message:
Select the message by clicking on it. Your computer will now dismount the
disk drive and display the following message:
It is now possible to unplug the connected FireWire disk drive from your
computer system.
Mounting FireWire Disk Drives to Macintosh
Computer Systems
Note: Even if your FireWire disk drive was bought for use on a Macintosh, you
MUST first format the drive as a FAT 32 volume on a Windows based computer
system for it to work with FireStore. See page "Creating a Partition on an
Unknown Volume Type" on pages 35-39.
On a Macintosh, start your computer and simply connect your FireWire
disk drive to the computer utilizing a standard 6-pin to 6-pin FireWire cable
PAGE 44
VIDEONICS FIRESTORE
receive power from the computer's FireWire connection. Consult your
FireWire disk drive documentation for more information. Ensure the
required FireWire disk drive drivers have also been loaded onto you computer system (consult your FireWire disk drive's documentation for more
information).
When mounted, your FireWire disk drive should appear on the computer's
desktop:
Computer Main
Disk Drive
FireWire Disk Drive
(marked with "PC"
label).
Once you have located your FireWire disk drive on the desktop, double click
the disk icon to open it up. Once opened, you will see the following:
.dv Clip File
A larger than 2GB .dv file
(just over 9 minutes of
recording) is split into
two with the first 2GB
segment labelled -01 and
following 2GB segments
labelled -0X.
AVI Type 1, AVI Type 2 or
AVI Type 2 Canopus Clip
File.
A larger than 2GB AVI
Type 1, AVI Type 2 or AVI
Type 2 Canopus file (just
over 9 minutes of
recording) is split into
two with the first 2GB
segment labelled -01 and
following 2GB segments
labelled -0X.
Clip Text Log Text File
Folder
VIDEONICS FIRESTORE
PAGE 45
From the example, we can see that .dv clip files appear with a QuickTime
icon as do AVI Type 1, AVI Type 2 and AVI Type 2 Canopus.
The FAT32 file system has a limitation where any particular file cannot exceed 2GB in size. This equates to roughly 9 minutes of recording time. When
clips are being recorded to FireStore that exceed 9 minutes in length, FireStore
automatically creates a new file without dropping any frames. The two clips
will have the same primary file name, however, the last tow digits will be
different. The first 2GB part of the clip will be labeled with "-01" after the
primary file name. The second 2GB segment will be labeled with a "-02".
Additional 2GB segments will be labeled with a "-0X" number.
Dismounting Disk Drives from Macintosh Computer Systems
Once you have completed working with your disk drive on a Macintosh computer system, you must first dismount the drive before unplugging it. To do
this, simply select the disk drive on the computer's desktop. It will be marked
with a PC symbol. Once selected, drag the drive into the trash. This will then
dismount the particular disk drive. See Below:
FireStore File Formats
When a computer program captures industry standard raw DV data from a
FireWire port on a Macintosh, Windows or Linux platform it can choose to
store that data in any number of different ways on the hard drive. Over the
years a group of formats have evolved that are well documented and agreed
upon by manufacturers.
PAGE 46
VIDEONICS FIRESTORE
FireStore File Formats (cont)
FireStore also records DV clips to your FireWire disk drive in what we refer
to as an "edit-ready" file format. This allows you to use recorded clips instantly in most DV based edit systems. Files are recorded in one of four different formats. These are RawDV (.dv), AVI Type 1, AVI Type 2 or AVI Type
2 Canopus. Follows is a brief description of these file types.
Raw DV (.dv) File Format
During playback aDV video camera sends ‘raw DV’ out over the Fir eWire
connection to whatever device is listening on that FireWire path. Each frame
of DV data (exactly 120,000 bytes for NTSC) is self contained. It contains a
single frame of video, and contains 1/30 (1/25 in PAL) second worth of
audio data. The format is strictly defined and agreed upon by all major
manufacturers. The format describes where the information goes, and is
designed to withstand some loss of data during transit without becoming
totally unusable. It also includes timecode information for each frame, and
some auxiliary data about the recording.
A raw DV file captured on a hard drive, then, is a file that contains exactly
the same bytes that came in through the FireWire plug. That exact same file
can be sent out the FireWire plug back to the camera or VCR for playback.
Needless to say a raw DV file is the simplest and most ef ficient method for
storing DV data on a hard drive.
T ypically, this sort of file has a ‘.dv’ file type extension.
AVI Type 2 File Format
AVI was developed by Microsoft and in many ways is similar to QuickTime.
It is also a wrapper for an assortment of time based media. The technology
has morphed from the old Video For Windows tools into the newer
DirectShow and NetShow toolsets.
The format AVI-DV-Type2 specifies how a raw DV data stream should be
stored in a file. Like the QuickTime specification for the storage of DV, each
DV frame has (120,000) bytes is stored in the file. Also, the audio data in each
frame is identified and copied to another place in the file. The AVI format
includes data at the start and end of a file that provides an index into that
file. The index points to every video frame and audio chunk in the file.
The Interleaved in AVI refers to the spacing and/or duration of the video
and audio chunks in the file. FireStore writes 16 intact ‘raw DV’ frames into
the file, then writes an audio chunk that contains the audio from those same
16 frames. 16 more DV frames are written, then another 16 frames worth of
audio, etc.
VIDEONICS FIRESTORE
PAGE 47
The AVI format also allows the inclusion of other types of data in the
wrapper. Typically an entry identifying the source timecode of the starting
DV frame is added to the file.
AVI Type 1 File Format
A variant of the AVI format has been specified by Microsoft for use with DV
data. It removes the requirement that the audio data be separated and placed
elsewhere in the file. Other than that, the format still allows for an index to
the raw DV frames, and timecode and reel information as part of the wrapper.
File Compatibility with NLE Packages
Check the Focus Enhancements website (www.FOCUSinfo.com) for an up to
date list of compatible Non-Linear Editing system packages.
NLE packages qualified at the time of writing include those listed below.
Two lists are shown, one that shows files that will work in the particular
NLE package without rendering and files that can be imported, but require
rendering later. (see pages 46-47 for an explanation of file types and pages
28-29 to select a particular format on FireStore):
Compatible Render Free NLE Packages
Adobe Premiere 6.0
Apple Final Cut Pro 2.0
Canopus DV Storm w/ Adobe Premiere 6.0
Use Canopus RealTime DV Codec
Pinnacle DV500 w/ Adobe Premiere 6.0
Use Pinnacle AVI Codec
Ulead Media Studio Pro 6.0
AVI Type 2
AVI Type 2
AVI Type 2C
Win
Mac
Win
AVI Type 2
Win
AVI Type 1
Win
Compatible NLE Packages (Requires Rendering)
Adobe Premiere 6.0
Adobe Premiere 6.0
Adobe Premiere 6.0
Apple Final Cut Pro 2.0
Canopus DV Storm w/ Adobe Premiere 6.0
Use Canopus RealTime DV Codec
Matrox RT2500 w/ Adobe Premiere 6.0
Use Matrox RT Codec
Raw DV (.dv)
Raw DV (.dv)
AVI Type 2
Raw DV (.dv)
AVI Type 2
Win
Mac
Mac
Mac
Win
AVI Type 2
Win
PAGE 48
VIDEONICS FIRESTORE
Timecode
Like audio and video data, timecode may also be part of the DV video
stream. It is possible to record source device timecode as part of a particular
clip on FireStore. This timecode will then be available for later use in an
NLE package that is able to extract the timecode. No setup procedure is
necessary to record incoming timecode on FireStore. If the timecode is
present, it will be recorded to the file.
In the example below, a clip that was recorded on FireStore and then imported to Adobe Premiere shows the clip duration on the left and the source
timecode on the right.
Clip Duration.
Source Timecode.
FireStore's LCD display will not display source timecode. It simply acts as a
timecode counter for each particular clip.
VIDEONICS FIRESTORE
PAGE 49
PAGE 50
VIDEONICS FIRESTORE
VIDEONICS FIRESTORE
PAGE 51
PAGE 52
VIDEONICS FIRESTORE
VIDEONICS FIRESTORE
PAGE 53