1
BW-DOS Version #30 - User Manual#
By BEWESOFT (Released 12/95)
Table of Contents
•
•
•
•
•
•
•
•
•
•
•
•
•
•
•
•
•
•
•
•
•
•
•
•
•
•
•
•
•
•
•
•
•
•
•
•
•
•
•
•
•
•
•
•
•
•
•
•
BW-DOS Version #30 - User Manual
INTRODUCTION
SYNTAX DEFINITIONS
SYSTEM STRUCTURE
DISKS AND DIRECTORIES
DIR (internal command)
DIRS (Internal command)
CWD (Internal command)
Dn: (Internal function)
CREDIR (Internal command)
DELDIR (Internal command)
AUTOCWD (Resident command)
DOSDRIVE (Resident command)
CHKDSK (External command)
CHVOL (External command)
PROTECTION, ERASING, AND RENAMING
RENAME (Internal command)
ERASE (Internal command)
PROTECT / UNPROTECT (Internal command)
UNERASE (External command)
COPYING
TYPE (Internal command)
COPY (external command)
BACKUP (external command)
MOVE (external command)
FORMATTING AND RAMDISKS
FORMAT (external command)
RAMDISK (resident command)
XLRDISK (resident command)
RAMBOX (resident command)
SPECIAL COMMANDS
CAR (internal command)
BASIC (internal command)
RUN (internal command)
VERIFY (external command)
BOOT (external command)
BATCH FILES AND HARDCOPY
-file (internal function)
PRINT (internal command)
PAUSE
IF/ELSE/ENDIF (external commands)
XBAT (external command)
NEWED
Comments (internal function)
DATE AND TIME
DATE/TIME (external command)
CLOCK (resident command)
RTIME8 / ARGSRTC (Resident commands)
•
•
•
•
•
•
•
•
•
•
•
•
•
•
•
•
•
•
•
•
•
•
•
•
•
•
•
•
•
•
•
•
•
•
•
•
•
•
•
•
•
THE MENU
MENU (external command)
OTHER COMMANDS
XFSIO (external command)
KEYBUFF (resident command)
ARGSPRN (resident command)
FOR PROGRAMMERS
LOAD (internal command)
SAVE (External command, low memory)
BLOAD
OFFLOAD (External command, see description)
MEM (external command)
DUMP (external command)
MDUMP (External command, low memory)
DISASS (external command)
HEXEDIT (external command)
MEMEDIT (external command, low memory)
CUT (external command)
UTILITY PROGRAMS
DIRMAST (external programm)
MSDOS (External program, bootable)
MSINI (External program)
RECOMMENDED UTILITY
SuperArc / SuperUnArc (version 2.4) by Robert Puff
Super Packer (version #0) by Jiri Bernasek (BEWESOFT)
CleanUp (version #4) - this one is (C) 1994 FTe
BW-DOS FUNCTIONS IN BASIC
TECHNICAL INFORMATIONS
DOS LOADABLE FILES
TABLE IN PAGE 7
THE COMTAB TABLE
DISK FORMAT
FORMAT OF DIRECTORIES
BATCH FILES AND HARDCOPY
COMPATIBILITY
MEMORY
BATCH FILES AND HARDCOPY
INTERRUPTS
DISK FORMAT
OLDER BW-DOS VERSIONS
ERRORS
INTRODUCTION#
BW-DOS is a disk operating system for 8-bit ATARI computers with at least 48kB RAM, and at
least one disk drive. It is designed to be compatible with SpartaDOS, and to use as little memory
as possible. In addition, several small bugs known from SpartaDOS are not in BW-DOS, especially
problems with XF 55# BW-DOS may be used separately, or as a "junior version" for SpartaDOS
users.
BW-DOS may be freely used and distributed under following conditions:
• Only the whole and unchanged master disk may be distributed,
• It may not be sold, excepting little costs in PD services,
• When used as a part of another software package, the whole package may be marked with a
"(C)", sold etc.; in this case it's possible to exclude files from BW-DOS, but all distributed files
still must be unchanged, and an information where the whole BW-DOS is available must be
included.
BW-DOS uses disk format compatible with SpartaDOS. This means that it is possible to use BWDOS disks under SpartaDOS, and SpartaDOS disks under BW-DOS in full (including booting). Most
of CIO commands and other features are compatible too, so lots of programs written for SpartaDOS
will work under BW-DOS without of problems. Any disk with capacity up to 16 megabytes is possible,
single file may be up to 8 megabytes long. BW-DOS is a command driven system - it is more flexible
than a common DUP menu. An advanced menu program is available too. Up to 5 files may be
open at the same time, and five disk drives are supported (1, 2, 3, 4 and 8). This is enough for
most of programs. BW-DOS does not use the RAM under OS-ROM (XL/XE machines only), so it is
compatible with software which uses this memory space, such as popular Turbo Basic, and others.
The MEMLO value is $1EE4 (BW-DOS version #30); this value may only be changed by resident
commands. Don't think that it is too high - BW-DOS is much more complicated than - for example Atari DOS 2, and besides of this, when you set other DOSes to 5 files open at the same time, and 5
disk drives, you'll get MEMLO far above $2000. Because of limited memory space, BW-DOS doesn't
support some of the functions known from SpartaDOS as internal functions. They are supported by
external and resident commands. Atari DOS 2 disks are only supported by the menu program. If you
have found a bug in BW-DOS, you can write to the author. Send only serious letters, please! (I'll not
answer others.) The address is:
Jiri Bernasek (BEWESOFT) Na Hrebenkach 42 150 00 Praha 5 Czech Republic
If you have found some spelling or other errors in this manual, please forgive them... (I'm not very
good on English.)
SYNTAX DEFINITIONS#
In this manual there are examples, and syntax definitions for several commands. When it is between
another text, it is written like: "example". Don't forget that you need to press the <RETURN> key after
every command line. Following syntax is used in the examples and definitions:
<KEY> - This tell you that you need to press specified key.
"..." (three dots) means "and so on".
UPPER CASE LETTERS, and other characters such as numbers etc. must be written exactly as
shown in the manual.
lower case letters - It must be substituted by corresponding parameter, for example name of the file
you want to work with.
[parameter] - This means that the parameter may be used, but if you needn't it, you can simply skip
this one, and type rest of the example. (Don't type the characters "[" and "]" !)
(ON|OFF) - This tell you that you need to type "ON", or "OFF" (not both).
name - Name of a file or directory. Names can be up to 8 characters long, and may contain upper
case letters, numbers, and the "_" character. Any character, which is not allowed in the name, will
terminate the whole specification of a file. You can also use wild cards: "\*" means that the rest of
name may be any, and "?" means that a single character may be any. This is not possible while
creating a new file or directory! Most of commands will work with the first selected file while using
wild cards, but a few commands will work with every selected files (see descriptions for single
commands). For example "A\*" will select files with any name which begins with "A", "?A\*" is for
every files with "A" at second place, and "TE?T" will select for example "TEST", "TEXT" etc.
ext - extension part of filename. It may be up to three characters long, and it shows type of the file.
The extension may be any, but it is recommended to use standard extensions which are easy to
understand, and some programs supports them automatically. Standard extensions are for example
"COM" for a machine code program, "BAT" for a batch file, "BAS" for a program in Atari Basic, "TXT"
for a text file, "DOC" for a documentation file (in fact a text file), "PIC" for a picture, and so on. It is
recommended to use no extensions for directories.
Dn: - The specification of a disk drive, where "n" is number of the drive. You can also type simply "D:"
for drive #
device: - Specification of device, which is not a disk drive. For example "E:" for screen editor, "C:" for
tape recorder, "P:" for printer etc.
filename - Full name of a file - it is "name[.ext]". While writing a file, you can add "/A" after filename to
add the new file at the end of old file with the same name. (Without of "/A" the new file will replace the
old one.) A filename with wild cards in it may be also called as "filter".
path - Specification of directory, in which the wanted file is. There are two kinds of path - Absolute:
">[name][>name]...", and relative: "[<][<]...[name][>name]...". See explanation later in this manual for
more details.
file - This means full specification of file to work with. The syntax is "[Dn:][path>]filename".
Every numbers are entered as hexadecimal numbers (without of the "$" identificator). File positions
are up to 6 digits long, while memory adresses and sector numbers are up to 4 digits long.
SYSTEM STRUCTURE#
In general, BW-DOS is divided into two parts:
1. Resident part (the DOS itself) is loaded while booting, and it stay in the memory to provide
basic functions of the system. (Like every other DOSes.) The resident part come from a file
with extension "DOS", and it contains two large routines: Command Processor (CP), and File
Management System (FMS). CP is the program which is waiting for your commands, executing
some of them, and loading nonresident programs for the rest. FMS is used by every other
programs (including the CP) to get access to files on the disk; it is organizing every data written
on the disk.
2. Nonresident part is divied into several small programs made to provide more functions. Such
a program must be loaded from disk every time you want to use it, so you need to keep these
programs on every disks where you need to use them, or on a disk in another drive (or in a
RamDisk).
The structure described above results in two kinds of commands in the CP:
• Internal commands are fully executed by the CP, so you can use these on any disk, and you can
return to Basic (or other program if possible) later, without of data loss.
• External commands are executed by additional programs loaded from disk, so you need to
have them on the disk you are working with, or on a disk in another drive (or RamDisk) - in this
case you must type "Dn:" before the command, or use the "DOSDRIVE" function (see later).
Every use of an external command results in data loss from user memory, so you can't restart
any program without of loading it from disk again. Most of other programs (like programming
languages, editors etc.) may be loaded in the same way as external commands - simply by
typing name of the program. (If there is no "COM" extension, you must type the real extension
too!)
• Third kind of BW-DOS commands are resident commands. They are in fact external commands,
but there is one important difference: When you'll start a resident command, a part of the
command's program will stay in memory - like resident part of the DOS do - and it will provide
more "internal" functions. Note that this will increase the MEMLO value, so it's possible that
some programs will not work then (because of collision in memory). Every resident commands of
BW-DOS may be also removed from memory by starting them again with parameter "OFF" (for
example "RAMDISK OFF"). But remember that you can only remove the LAST installed resident
command! (So, if you have for example installed CLOCK, and then RAMDISK, and you want
to remove CLOCK later - you must remove RAMDISK first, then you can remove CLOCK, and
then install RAMDISK again.) Once you've installed a resident command, which have no remove
ability (a non BW-DOS one), you can remove every resident commands installed at that moment
only by booting the system up again.
Commands may use parameters (for example filenames); you need to type parameters after the
command name (on the same line), separated by the space character. The line with a CP command
may be up to 64 characters long. Every BW-DOS commands may be aborted by pressing the <ESC>
key while the program is waiting for an answer from the user, or while displaying something in an
endless loop.
IMPORTANT Never change a disk if there is a file open on it. That is while a batch file from the
disk is working, while the HardCopy function is sending output into a file on the disk, while you are
editing a file with HEXEDIT etc. In addition, while a file is open in write or update mode, don't press
<RESET> and don't turn the computer off.
DISKS AND DIRECTORIES#
Every disk under BW-DOS have its name (Volume), and main directory. There may be almost
unlimited number of other directories, each placed in another one like a file. Viewed from a directory,
every directories which are in it are "subdirectories", and viewed from a subdirectory, the directory
in which it is may be called "parent directory". BW-DOS directories may contain up to 1424 files or
directories, but it is recommended to keep this number less than 100, because the access to long
directories is slow. Besides of this, while working with SpartaDOS, only SpartaDOS X (version 4.x) is
able to use BW-DOS directories in full - other versions will work only with the first 126 files (the rest
will be invisible).
Working directory is directory, where all the files will be searched when no path is specified, or where
the relative path have its begin. For each disk drive there is working directory, which is independent
of another drives. Every disk change, <RESET>, jump through DOSINI vector, or booting up will set
the main diectory as working.
The path is used to specify in which directory the wanted file (or directory) is. Path is simply a list
of directories you need to go through from working directory to the target directory. Single names
(including filename after the path) are separated by the ">" character. There are two kinds of path:
Absolute and relative. Absolute path begins with a single ">" character, and it begins in main
directory, while relative path have no ">" at its begin, and it begins in working directory. In addition,
at the begin of relative path there can be any number of "<" characters - each one tell BW-DOS to
go into parent directory. For example ">DATA>TEXTS>filename" means that the file is in directory
"TEXTS", which is in directory "DATA" in main directory. "MUSIC>filename" means that the file is
in directory "MUSIC", which is in the working directory. "<BASIC>filename" means that the file is in
directory "BASIC", which is in the same directory, where the working directory is.
Special directory is "DOS" in the main directory. Every files for reading (or programs for starting),
which are not in working directory, are searched in the "DOS" directory too. This works only when
no path is specified! It is recommended to place external commands, the DOS itself, and other
commonly used "read only" files in this directory to provide a simple access never mind the working
directory. Besides of this, it's a very good idea to create separate directories for different file types,
such as Basic programs, texts etc. (When you'll save everything to the main directory, it'll become
very long soon - the access will be slow, and the listing will be almost unreadable.)
DIR (internal command)#
DIR [Dn:][path>][filename]
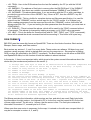
This command show contents of the specified directory. When no filename is specified, every files
will be listed. This listing starts with the volume name of the disk, and name of the listed directory.
It shows for each file filename, length, and date/time when the file was created. Directories are
indicated by "<DIR\>" listed instead of length. At the end of listing you'll see number of free sectors on
the disk. The listing looks like this:
Volume:
TESTS
Directory: MAIN
DOS
<DIR> 11-06-94 16:01
TEST1
BAS
1231 11-06-94 16:32
573 FREE SECTORS
DIRS (Internal command)#
DIRS [Dn:][path>][filename]
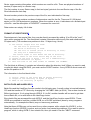
This command provides the same function as "DIR", but the listing is in Atari DOS 2 style now.
Directories are indicated by "DIR" in inverse video instead of extension. Note that length of files is
in sectors now (one sector contains 128 bytes in Single or Medium density, or 256 bytes in Double
density). The file in fact occupies a few sectors more; they are used for internal informations for the
FMS. The star before filename means that the file is protected. Every numbers in this listing (file
length and number of free sectors) are only 3 digits long; any number greater than 999 will be shown
as "999". This listing looks like this:
* DOS
DIR 000
* TEST1
BAS 010
573 FREE SECTORS
CWD (Internal command)#
CWD [Dn:]path
This command will set the directory specified by path as working directory.
Dn: (Internal function)#
You can change current drive number by typing the new "Dn:" instead of command. This drive
number will be used when no "Dn:" is specified. Note that this only works in the CP!
CREDIR (Internal command)#
CREDIR [Dn:][path>]name
This command will make a new directory specified by "name". Note that you can't make a directory
with the same name as a file in the same directory.
DELDIR (Internal command)#
DELDIR [Dn:][path>]name
This is the command for deleting directories. You can only delete an empty directory - if there are any
files or directories in it, you need to remove them first. Never try to delete the working directory!
AUTOCWD (Resident command)#
AUTOCWD [Dn:]path
When you are working with a program, which is protected against the <RESET> key (for example
ATMAS II), you can't load/save your files after <RESET> easily, because the working directory was
changed by the <RESET> to main directory. To prevent this problem, install AUTOCWD before
starting the program. This command will do the same job as the "CWD" command after every
<RESET> (or jump through DOSINI vector).
DOSDRIVE (Resident command)#
DOSDRIVE n
This command provides easy access to external commands placed for example in a RamDisk. With
"DOSDRIVE" installed, you can call the external commands without of typing "Dn:" before each one.
Every files for reading (and programs for starting) with no path specified will be searched on the
drive "n" first (working, and then "DOS" directory). When the file isn't on your DOS-drive, then it'll be
searched on the originally specified drive.
CHKDSK (External command)#
CHKDSK [Dn:]
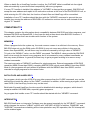
This command will display a little info about the disk. It contains volume name, two internal numbers
(sequential and random - used for disk identification), size of sectors, and total/free disk capacity in
bytes. The listing looks like this:
Volume: TESTDISK
Bytes/sector: 128
Total bytes:
92160
Bytes free:
73344
21 138
CHVOL (External command)#
CHVOL [Dn:]name
This command will change the volume name of disk.
PROTECTION, ERASING, AND RENAMING#
Every file or directory may be protected. (This state is indicated by the "\*" character before filename
in the listing from "DIRS" command.) Protected files may not be changed or erased (but they can be
renamed!), protected directories only may not be erased.
RENAME (Internal command)#
RENAME file filename
This command allows you to rename a file specified by "file" parameter to new name "filename". You
can use wild cards in both the names to rename a set of files, and to leave specified characters in
the name unchanged. (For example when you have files "TEST" and "BEST", after the command
"RENAME ?EST ????S" you'll get files "TESTS" and "BESTS".)
Use wildcards only if you know exactly, what are you doing! When you'll change two filenames in a
directory to be the same, you can't work with the second one anymore, and the only thing you can do
is to erase such a "double file".
You can't rename directories with this command.
ERASE (Internal command)#
ERASE file
This is the command for erasing files. When you'll use wildcards, you can erase several files with one
command, but better don't do it... Protected files and directories are invisible for this command.
PROTECT / UNPROTECT (Internal command)#
PROTECT file
UNPROTECT file
The "PROTECT" command is protecting files, "UNPROTECT" is unprotecting files - that's clear. With
wildcards you can (un)protect set of files. Both the commands can (un)protect directories too.
UNERASE (External command)#
UNERASE file
This command will try to restore specified file(s) after erasing them. This may be possible, because
the files are not really erased by the "ERASE" command - they are only marked as free disk space to
be used for other files in future. The unerasing process may be impossible if you saved anything to
the disk after erasing the file; in this case even contents of a sucessfully unerased file may be wrong.
It's better to make a serious decision before erasing a file, because the unerasing process will never
be 100% safe!
Don't use the UNERASE version older than #2 (the one with no version number included) - it
contained a bug.
COPYING#
If you want to copy files to another disk with only one disk drive, you need to use the menu program.
TYPE (Internal command)#
TYPE file
This command shows contents of a textfile (for example batch files). Since BW-DOS version #30,
there isn't any limit on line length.
COPY (external command)#
COPY [Dn:][path>][filename] [Dn:][path>][filename[/A]]
This is the main command for copying files; it'll copy file(s) specified by the first parameter to file(s)
specified by the second one. You can use any I/O device instead of "Dn:" (for example "COPY K: P:";
most of these devices will ignore any filenames).
When copying disk files, you can use wild cards in both the filenames to copy a set of files, and save
them with another names (see "RENAME" command). When no filename is specified, every files in
directory will be copied (first parameter), or the files will get their original names (second parameter).
NEVER try to copy a file to itself - this is the easiest way how to destroy a file!
On the other I/O devices you can use wild cards and filenames also (with "COPY" version #2),
but only in the case that your device handler supports filenames and directory reading. When the
directory-listing supplied by the handler contains only one file, and the file isn't longer than free
memory, then "COPY" will never open more than one file at a time - this is prepared for a future
"Turbo tape" system.
Examples: "COPY >DOS> D8:" - Copy the whole directory DOS to drive 8 (RamDisk). "COPY E: file"
- Create a new textfile. Press <CONTROL>+<3> when you've entered the whole contents for new
file. "COPY file P:" - Send file(s) to the printer.
BACKUP (external command)#
BACKUP Dn: file [/S[max.sector][/D(S\|M\|D\|X)]][/Lmax.len.]
BACKUP file Dn: [/F[X]]
BACKUP Dn: Dn: [/S[max.sector][/D(S\|M\|D\|X)]][/F[X]]
This command is there for making backup copies of whole disks. The first syntax is for copying the
whole disk into file(s), second syntax is for restoring the disk back from file(s), and the third syntax is
for copying directly from one disk to another. Filenames may not contain any extensions; if there is
any, it will be overwritten. BACKUP will add its own extensions (serial number of the file).
While copying from a disk (that is: not from file), it'll copy the whole contents of a BW-DOS
compatible disk (only sectors marked as "in use" in the bitmap) unless you'll use the "/S" parameter.
With "/S" it'll copy the whole disk exactly, so you can copy almost anything in this way. (Boot-software
etc.) After the "/S" parameter you can add number of the last sector to copy (this may be useful for
nonstandard disks, such as non 40 tracks disks, or a RamDisk). BACKUP tests the density of copied
disk automatically, but sometimes it may fail (especially with Single sided Double density on the XF
551, or with a RamDisk) - in this case you need to add "/D" followed by a single letter density code:
S=Single M=Medium D=Double X=Double sided Double density. For nonstandard disks you may
need to type both maximum sector and density (for sector length setting).
While copying into file(s), BACKUP will divide the whole data into files with length depending on disk
capacity. When you need to have the backup files shorter (for example if you want to copy them
later), you need to add the "/L" parameter followed by maximum file length. While copying to a whole
disk, you can add "/F" to format the disk before writing (in the same format as the source disk had)
- this only works for standard Single, Medium, Double, or Double sided Double density disks; other
disks such as hard disks or RamDisks must be formatted already. When you add "X" after the "/F"
parameter, it'll use the high speed format on XF 55# After formatting, the program will skip empty
sectors while writing (to increase speed). Every unfinished copy is marked in a special way, so when
you try to boot such a disk, you'll get a warning message. The current version #2 is improved a little,
so it should recognize density in the "/S" mode also on other drives than XF 55#
MOVE (external command)#
MOVE file [Dn:][path]
This command allows you to move a file or subdirectory into another directory on the same disk
quickly. The greatest difference between "COPY" and "MOVE" is that MOVE removes the file from
source directory, and is much faster. It also doesn't need any free sectors on the disk, because it only
moves the filename into an other directory - without of copying the file itself.
FORMATTING AND RAMDISKS#
FORMAT (external command)#
FORMAT [Dn:]
This is the main command for formatting disks, and installing BW-DOS. (Formatting must be the first
thing done on a new disk.) The drive number specified as a parameter is used for searching DOS
files, NOT for formatting! The program will ask you for necessary things, and then format the disk.
This program may not be controlled from a batch file. RamDisks may not be formatted in this way.
• !!!WARNING!!!* Formatting will erase every data on the disk - never mind if they are protected or
not - and it may not be unerased anymore. The only protection against this is to place the write
protect tab on your disk.
The first question is which DOS version you wish to install on the formatted disk. You'll get a little
menu with every DOS files found on the disk (files "X\*.DOS" in directory "DOS", and in the main
directory) - select the correct one, or press <N> for none. It is possible to install any version of BWDOS, or any disk based version of SpartaDOS 2.x and later. Next questions are for drive number,
density, volume name, and if use the XF 551 high speed format or not. Note that you can only
select a density, which is supported by your drive. (That is: Atari 810 - Single; Atari 1050 - Single or
Medium; expanded Atari 1050 - Single, Medium, or Double; XF 551 - Single, Medium, Double, or
Double sided Double density; other drive - see manual for the drive.)
Now insert the disk you want to format, make sure that it is REALLY the disk you want to format, and
press <RETURN> to format it. If the disk was formatted in the same density already (without of errors
of course!), and you want to clear it only, press <B> - in this case the FORMAT program will skip
physical formatting.
If an error appear while formatting, you'll get a chance to try it again, but better use another disk - the
first one is probably bad.
After formatting it'll create BW-DOS disk structures, and if you've selected a DOS, it'll create the
directory "DOS" and install the DOS file there.
The last question is if you want to format another disk.
RAMDISK (resident command)#
RAMDISK n[E][F] [file]
RamDisk driver version #2. This resident command sets up an emulated disk drive using a 130XE
compatible RAM expansion (up to 1MB). This means that you can use your extra memory in the
same way as a disk drive - excepting formatting and booting. It's clear that every files from such a
RamDisk will be lost if you turn the computer off, or if you use a program, that is using extra memory
for other purposes.
The "n" parameter is the number of RamDisk drive. (BW-DOS only supports drives 1, 2, 3, 4, and
8.) If you add "F", the RamDisk will be formatted (without of "F" it'll format only when the previously
existing format was invalid). Without of "F", you can mostly re-install the driver (even after a re-boot)
without of destroying the contents of your RamDisk. (The parameter "N" used with older version of
the driver is still possible, and will be ignored.)
The "E" parameter will cause that it will not use 130XE compatible banks (only for machines with
more than 128kB memory), so it'll not collide with 130XE software.
When the RamDisk collide with your software with the "E" parameter too, and you know that there
are some memory banks left, you need to use the configuration file. This file may be between 1 and
64 bytes long, and it contains the values which must be stored at $D301 to get different banks in the
area of $4000-$7FFF. (16kB - 1024kB RamDisk is possible)
To re-format an existing RamDisk, change its configuration, or change the drive number, simply start
this command again.
Note that the resident part of RamDisk driver uses a part of extra RAM for itself, so any collision in
the extra RAM may cause a lock up of SIO operations.
XLRDISK (resident command)#
XLRDISK n[N]
This command works like the "RAMDISK" command, but it uses the RAM under OS-ROM as the
RamDisk. It works on every XL/XE machines, independent of RamDisk installed by the "RAMDISK"
command. (This one does not support the "E" parameter, and the configuration file.) Size of this
RamDisk is 14kB, and it'll be formatted each time you run this command, unless you use the "N"
parameter.
Note that you can use this RamDisk only when you know that it'll not cause a collision in the RAM
under OS-ROM. It is O.K. with every programs working under SpartaDOS 2.x or 3.x.
A little problem with the screen may be caused by this driver. It results in a little horizontal lines
flasing on the screen during SIO operations, but it may not cause any damage.
RAMBOX (resident command)#
RAMBOX n[F]
This command provides the same function as "RAMDISK", but it uses the memory contained in the
"RAMBOX" cartridge (by JRC, Czech republic). The parameter "E" and the configuration file isn't
supported. Possible sizes of the RAMBOX memory are 32-4096kB.
SPECIAL COMMANDS#
CAR (internal command)#
CAR
This command will jump to a program in cartridge, or to internal Basic (if enabled - only XL/XE). If
you've not used an external command since you leaved the cartridge, your data (Basic program) will
not be lost.
BASIC (internal command)#
BASIC (ON\|OFF)
This command can turn the internal Basic (XL/XE) on or off. With Basic off you have more free
memory, and several programs works in this mode only. This command works only with no cartridge
installed, and it'll allways erase data from user memory (Basic program).
RUN (internal command)#
RUN [address]
This command will start a program at given adress. With no parameter it'll restart the last loaded
program, or the last program started with this command.
This command is there for advanced users and programmers; a "RUN" with a wrong adress results in
a system lock up, and it may even cause a data loss.
The "RUN" command may be used by everyone for a few purposes: "RUN" - Restart the last loaded
program (but first look into the manual for your program to know if is it possible, or not); "RUN E477"
- The same as turning the computer off and on, but this is much better for the hardware, and it will not
erase data in RamDisk; "RUN E471" - This will jump to the Self test program, or to the menu of QMEG operating system (if installed).
VERIFY (external command)#
VERIFY (ON\|OFF)
With this command you can swith the "Write with verify" function on or off. The common state is
"OFF" - this means that the sectors written to a disk are not verified. It allows the drive to write
quickly. If you turn this function "ON", it'll read every sector after writing it, and compare the data. This
results in a very slow writing; it may only be useful while using bad quality disks. (Better buy good
disks!)
BOOT (external command)#
BOOT file
With this command you can specify a file to be loaded, while the system is booted up (when you turn
the computer "on" with the disk in drive 1). Commonly it is a DOS file, but other files may be booted
too - see the conditions below.
The common use of this command is installing the DOS on a disk that was previously formatted with
no DOS, or with an older version. To install a DOS on a disk, you should copy the "X\*.DOS" file (the
"DOS" directory is recommended), and then use the "BOOT" command to install it.
The booting process is done by a little loader, which is in sectors 1-3 on every BW-DOS (or
SpartaDOS 2.x and later) disks. The file which is booted must be in the "DOS loadable" format, and
it must contain a RUN adress. If there are not at least two bytes between end of file, and end of
physical data sector (that is in Basic: "IF 128\*INT((LNGTH+127)/128)-LNGTH<2"), then two zero
bytes must be added as an EOF mark. The booted file may not be loaded into the area of $2E00$317F, where is the loader itself. Note that the loader is different from the one found on SpartaDOS
disks a little bit: If you are booting from a SpartaDOS disk, then no segments in the file - excepting
the first one - may begin with the $FFFF header. Besides of this, the SpartaDOS loader is not fully
compatible with the XF 551 disk drive.
When you'll erase the file specified to be booted, an attempt to boot such a disk may give almost any
result.
BATCH FILES AND HARDCOPY#
-file (internal function)#
-file
This syntax will start a batch file. Batch file is in fact a text file, which contains a list of commands to
be executed. Standard extension for a batch file is "BAT". When you start a batch file, the computer
will read commands not from the keyboard, but from the batch file! This works not only in the CP, it
works in most of other programs too (for example Atari Basic). There are of course exceptions - for
example the menu program, several text editors etc.
You can use batch files in two ways: * When you need to execute several "time eating" programs,
put their list into a batch file, start it, and then you can for example go to the lunch - the computer will
work on its own. * You can use batch files to write a simple "programs" for some tasks, for example to
install RamDisk and copy selected external commands there etc.
A batch file named "STARTUP.BAT" (in main directory, or in the directory "DOS") will be executed
every time you boot the system. It is good to place commands for system configuration in such a file.
Since BW-DOS supports no "AUTORUN.SYS" file, you need to put a name of such a program into
"STARTUP.BAT". When the file "STARTUP.BAT" doesn't exist, BW-DOS will jump to cartridge (if
any) after booting.
For example, I need to do following things after booting the system: Install RamDisk, turn the internal
Basic off, switch to directory "ATMAS" (and install "AUTOCWD"), and run ATMAS II macroassembler,
which is in main directory under the name "ATMAS.COM". The file "STARTUP.BAT" will be following:
RAMDISK 8
BASIC OFF
CWD >ATMAS>
AUTOCWD >ATMAS>
XBAT >ATMAS
Every error message in the CP will stop any batch file to prevent problems. The batch file will be also
aborted by starting another one.
PRINT (internal command)#
PRINT device:
PRINT file
PRINT
The first and the second syntax will start the HardCopy function, the third syntax will stop this
function.
HardCopy function allows you to copy all the screen output from almost every programs to a
specified device or file. It doesn't work with programs, which are not using CIO for screen output - for
example the menu program.
This function is there especially for printing output from programs on a printer, but you can copy the
output to any file/device.
PAUSE#
PAUSE
This command may be used in a batch file only. It will wait for the <RETURN> key; the <ESC> key
will stop the batch file. The "PAUSE" command is there to allow disk changes.
Don't forget, that you may not change a disk, on which is the working batch file.
IF/ELSE/ENDIF (external commands)#
IF
ELSE
ENDIF
These commands may be used in a batch file only. It will ask the user, which block of commands
should be executed.
The syntax of such a part of batch file is:
IF
the question
commands...
ELSE
commands...
ENDIF
It will display the line with question, and wait for an answer <Y> or <N>. If the answer is <Y>, then
all the commands between "IF" and "ELSE" will be executed; if the answer is <N>, then every
commands between "ELSE" and "ENDIF" will be executed. (The <ESC> key will stop the batch file.)
When there are no commands for the answer <N>, the "ELSE" command may be excluded.
It is possible to make much more complicated structures by starting another batch files inside an "IF",
"ELSE", "ENDIF" block - but there isn't any way to return back into the first batch file, you can only
start it from begin again.
XBAT (external command)#
XBAT file [parameters]
This command will start a program (like the CP), but stop a batch file first. This may be necessary for
starting some programs from a batch file - There are few programs which may not run with a batch
file at the same time, because of collision in IOCB 5. (See technical notes for more info.)
NEWED#
NEWED file [parameters]
This command starts the specified program, with the I/O redirection routines of BW-DOS temporary
disabled. (The batch file and HardCopy will be "paused" when the specified program works.) This
should be used while installing a new "E:" handler, such as the XEP 80, or different screen-output
speeders.
Comments (internal function)#
;any comments
You can add lines with comments into a batch file; such a line must begin with a ";" character.
If you are a SpartaDOS user, you probably noticed that there is no "XDIV" command. That's because
the HATABS table is in its original state while no batch file or HardCopy function is active.
This means that you can start programs - which needs the "XDIV" in SpartaDOS - directly, and with
the "XBAT" command you even can start such a program from a batch file. (In a limited fashion, you
can also use "NEWED" to start some programs with a batch file "paused" only.)
DATE AND TIME#
Every files and directories have its date and time in BW-DOS - it is the date/time when they were
created. To provide this information while creating a file, there is a clock in BW-DOS.
Because of little memory available for the DOS, the BW-DOS's clock is not a real one - it only keeps
the date/time information, without of changing it. This means, that every files will get the same date/
time till you enter a new value.
If you want to have a real clock in BW-DOS, you need to use some of the resident commands that
are designed for this purpose.
DATE/TIME (external command)#
DATE
TIME
These commands will display the current date/time from BW-DOS's clock, and allows you to enter a
new value. Press <RETURN> to leave it unchanged.
CLOCK (resident command)#
CLOCK ON
This is a software clock for BW-DOS. If you've entered the correct date/time (with "DATE" and "TIME"
commands), then every files and directories will get the real time when they are created.
While installed, this clock will get the date/time from old clock; while removed (or a re-boot), the new
date/time will be lost. This clock is based on the VBI interrupt, so it is possible that a few programs
will stop it. It works on both PAL and NTSC machines.
RTIME8 / ARGSRTC (Resident commands)#
RTIME8 [/R]
ARGSRTC [/R]
Both the commands are drivers for a hardware real-time-clock. Such a device (mostly a cartridge,
with a backup battery in it) gives the correct date/time information to the system without of a need to
re-enter the information after each re-boot.
"RTIME8" works with the R-Time-8 cartridge (by ICD), while ARGSRTC is designed for ARGS RTC/P
V2 cartridge (by ARGS).
With the "/R" parameter a reduced version will be installed. It allows only reading from the clock,
setting a new date/time isn't possible in this mode. This option saves your memory-space.
THE MENU#
MENU (external command)#
MENU [Dn:][/S(E\|N\|S\|D\|0)][/B(Y\|N)][/Q(Y\|N)]
The menu program is a comfortable tool for operations with many selected files, for copying between
two disks with only one disk drive, and for converting files from Atari DOS 2 format to BW-DOS and
back.
Every commands in the menu - excepting these ones for subdirectories - works on Atari DOS 2
compatible disks too. This function is only supported by the menu program, so it is NOT available
in any other part of BW-DOS. Following Atari DOS 2 compatible formats are supported: Single
density (DOS 2.0, DOS 2.5, BiboDOS, and others), Enhanced (Medium) density (DOS 2.5), and
Double density (BiboDOS, and others). Note that in Atari DOS 2 alike systems there are different
conditions for filenames, so when you are converting files to Atari DOS 2, make sure that there is no
"_" character, and that the first character of the name is not a number.
While working with the menu, you'll see disk directory on your screen. It shows the same information
as the listing provided by "DIR" command in the CP. If you are working with an Atari DOS 2 disk,
there is no date/time information, and the length of files is not exact. Above the directory there is the
current drive number and path. A little arrows on the top and bottom edge of the directory shows that
the directory continues outside your screen. The menu program can work with max. 255 files in a
directory.
The cursor is on the left edge; you can move it with <up> and <down> keys, and with <SPACE> you
can select or deselect single files. Selected files are shown in inverse video, and when you select a
command later, it'll be executed for every selected files. (When no files are selected, it'll be executed
for a file pointed by the cursor.)
At the bottom of your screen there is a command menu with another cursor in it. Use keys <left>
and <right> to move this cursor, and press <RETURN> to start the selected function. (Description of
single functions later.) To select a command quickly, you can move the cursor where you want with a
single keystroke - see the descriptions for correct keys.
The last thing on your screen to explain is the line between directory listing, and the command menu.
Here the menu will ask you for everything what's necessary. While selecting from a menu here,
you can use the <left>, <right>, and <RETURN> keys, or simply hit the first letter of the wanted
selection. While entering a filename or path, you can use the keys <DELETE>, <CONTROL>+<left>,
<CONTROL>+<right>, <CONTROL>+<DELETE>, <CONTROL>+<INSERT>, and <RETURN> in
the same way as in standard system editor; in addition you can use the <CONTROL>+<CLEAR>
combination to clear the line and start typing again.
New disk <F>
This function allows you to select another drive number to work with; you'll see the working directory
of selected drive. Use this function when you want to work with another drive, or when you've
changed the disk in drive (you'll see main directory in this case).
The current path to working directory (before executing this command) will be saved. Later, this path
will be used as a default while copying files to the corresponding drive.
Disk info <Z>
With this function you can look at a little info about the disk. It gives the same listing as "CHKDSK"
command in the CP.
Sub dir <T>
This function allows you to go into a subdirectory. You need to place the cursor to a subdirectory first.
Up dir <Y>
This is the function to go into the parent directory. The cursor will be placed on the directory you
came from.
Make dir <N>
With this command you can create new subdirectories.
Del. dir <D>
The "Del. dir" command allows you to delete a subdirectory. It is only possible when the subdirectory
is empty.
Copy <C>
This is the main function for copying files using the menu. You'll be asked for destination drive and
path, and then every selected files will be copied here. If you was working with the destination drive
before the last use of "New Disk" function, or if you was copying to that drive already, then you'll get a
default path to confirm or edit. The destination path may be up to 231 characters long (it scrolls when
neccessary).
If you select the same drive number, you'll be asked if is it the same disk - when your answer will be
"No", then the menu program will ask you for changing source and destination disks, so you can copy
from one disk to another with only one drive. When you are copying to the same disk, you must copy
into other directory!
In the case that a file with the same name already exists in the target directory, a little menu appears.
You can overwrite the old file, skip the file, or abort the copying. This feature may be turned off when
neccessary (see "Setup").
Erase <E>
This is the function for erasing files. Protected files may not be erased.
Rename <R>
This function gives new names to files. You can select more files, and then enter a filter as a new
name to rename more files by single command (see description of "RENAME" command).
Protect <P>
Unprotect <U>
Functions for protecting and unprotecting files or directories. A protected file may not be changed or
erased.
View text <V>
This function will copy the file pointed by cursor to the screen. It is the best way how to read small
documentation files while working with the menu.
Make text <I>
With this function you can make small documentation files. Press <CONTROL>+<3> when you've
finished the whole text. (This command will provide the same function as "COPY E: file" in the CP.)
Ainit <A>
This is the command for formatting Atari DOS 2 compatible disks. You'll be asked for drive number
and density, and after the last confirm the disk will be formatted. The format created by this command
may be used under several DOS 2 alike systems, but BW-DOS may not use it (only the menu can).
• !!!WARNING!!!* Formatting will erase every files on the disk, never mind if they are protected or
not.
Exit <Q>
This is the selection to quit the menu, and return back to CP.
Setup <S>
With this function you can select the order, in which the files will appear on your screen. Files may
be sorted by its extension and name, by its name and extension, by its length, by the date and time
they were created, or you can leave the directory in the same order as on the disk (this may be useful
when the directory is already sorted - by the Directory master - or it can save a few seconds when the
directory is very long).
Second question allows you to turn on/off the sound signal that accompanies errors, and other
important messages. The last question is for turning on/off the menu-selection before overwriting a
file - see "Copy").
All the selections may be also done from the CP, using parameters while starting the menu. "Dn:"
specifies drive number the menu will start with, and the rest is similar to the "Setup" function ("/S" is
sorting of directories, "/B" is the bell function, and "/Q" controls the question before overwriting a file.)
Select <INSERT>
Deselect <DELETE>
These functions will select or deselect every files specified by entered filter.
OTHER COMMANDS#
XFSIO (external command)#
XFSIO n[n][n][n]
This resident command provides fast communication with the XF 551 disk drive. You must enter drive
number(s) of the XF 551 drive(s) in your system while installing this command.
The fast communication is 2.5 times faster than the standard, but it may only save some time when
the disk is formatted in the fast mode - see "FORMAT" and "BACKUP" commands.
The keyboard is disabled during fast SIO operations to prevent problems.
KEYBUFF (resident command)#
KEYBUFF ON
This resident command is a buffer for 32 keystrokes. This means that you can type up to 32
characters (or other keys) on the keyboard while the computer is busy, and these characters will
become to the screen later, when when the computer will be ready to get it.
When the buffer is full, and you try to type the 33rd character, you'll hear a noise sound, and the last
character will be ignored. You can clear the buffer any time by pressing <SHIFT>+<CONTROL>
+<SPACE> (This may be useful for example when you just typed a command, but then an error
message appear on the screen).
ARGSPRN (resident command)#
ARGSPRN [/(N\|C\|L\|CL)]
This is a driver for the printer port of the ARGS RTC/P V2 cartridge (by ARGS). The parameter
changes the conversion of the ATASCII EOL character: "/N" is no conversion (for graphics print,
or when your software already contains a conversion), "/C" sends the CR character (like other
printer-interfaces do; you must set the "Auto-feed" feature to "on" on your printer), "/L" sends the LF
character (the default; hopefully it will work with most of printers), and "/CL" sends both CR and LF
(this is the correct PC-compatible mode, but it needs a few bytes more in memory, and it may also
cause problems with graphics print).
FOR PROGRAMMERS#
Commands described in this chapter are there for advanced users and programmers, so don't worry
if you don't understand.
Some of external commands described in this chapter are marked as "low memory". This means that
the commands are loading into the area of $480-$6FF, and they are not using the memory areas of
$80-$FF, and MEMLO-MEMHI. Such a commands allows you to work with data or machine code
programs in the main memory without of problems.
LOAD (internal command)#
LOAD file
This command will simply load a DOS loadable file (program), but don't start it. Any INIT or RUN
adress will be ignored.
SAVE (External command, low memory)#
SAVE file start end [/A]
This will save the memory area specified by "start" and "end" adresses as a DOS loadable file. With
the "/A" parameter it will add another segment to an existing file.
The difference between "/A" as a part of filename or as a separate parameter is that the separate "/A"
will not place another $FFFF header into the file.
BLOAD#
(External command, low memory)
BLOAD file adress [length]
This is the command for loading data files (non DOS loadable) into memory. When no length is
specified, the whole file will be loaded.
OFFLOAD (External command, see description)#
OFFLOAD file [offset] [/(Q\|L)]
This command is displaying structure of a DOS loadable file. The starting and ending adress, and the
file position of the data block (after the header) will be displayed for each segment.
With the "/L" parameter it'll really load the file into memory, and with "/Q" it'll ask you for each
segment if load it or not. When an offset is specified, it will be added to loading adress of each
segment.
This command works like the commands marked as "low memory" only while loading a file; while
starting its work, this command uses a memory area starting at $6000.
MEM (external command)#
MEM [/M]
This command shows current MEMLO and MEMHI values. With the "/M" parameter it'll show the
whole memory map (it'll only read SMEMLO (see COMTAB), MEMLO ($2E7), MEMHI ($2E5), and
MEMTOP ($6A), other adresses are allways the same).
DUMP (external command)#
DUMP file [position[ length]] [/A]
This command will display contents of specified file as hexadecimal and ATASCII listing. With the "/
A" parameter it'll change non printable characters (0-$1F and above $80) to printable ones - use this
while printing the listing (see the "PRINT" command).
When a position is specified, the listing will start from this position; with the length parameter it'll only
display specified number of bytes.
Press <CONTROL>+<1> to stop the listing for a while, or <ESC> to abort this command.
MDUMP (External command, low memory)#
MDUMP adress [length] [/A]
This command works in the same way as "DUMP"; it displays contents of memory.
DISASS (external command)#
DISASS file [position]
This command will list contents of specified file as an assembler listing. With a position specified, it'll
start from this position. Press <CONTROL>+<1> to stop the listing for a while, or <ESC> to abort this
command.
If you want to display a program code from memory, you need to save it to a disk file first. A RamDisk
is very good for this purpose. For example to display a program code from memory area $8000$9000 using a RamDisk installed as drive 8, you need to type:
SAVE D8:TEMP.DAT 8000 9000
DISASS D8:TEMP.DAT 6
HEXEDIT (external command)#
HEXEDIT file [position]
This command allows you to edit contents of a file. With a position specified, the editing will start from
this position.
It'll display position in the file and the old value, and you can enter new value (hexadecimal of
course), or just press <RETURN> to leave it unchanged. Press <ESC> to quit this command.
Note that the only legal way to quit "HEXEDIT" is the <ESC> key! Because the edited file is open all
the time you are working with "HEXEDIT", it may be corrupted by pressing <RESET> or turning the
computer off before "HEXEDIT" finish its work.
It is possible to set the position greater than the length of file - in this case no old value will be
displayed; once you'll enter any value, the file will get a new length. When you set the position far
after the end of file, the part of file between old and new data will not be physically stored (nonallocated sectors) - it'll get a physical sector at the time of first access to such a place. Files with nonallocated sectors may not be read or copied in a normal way, because allocating a sector in a readonly mode isn't allowed.
MEMEDIT (external command, low memory)#
MEMEDIT adress
This command works in the same way as "HEXEDIT"; it allows you to edit contents of memory. Use
this only if you know exactly, what are you doing - it is possible to cause the system to be corrupt, or
even to lock up with this command.
CUT (external command)#
CUT file1 file2 position [length]
This command will save specified part of "file1" as "file2". When no length is specified, it'll save the
maximum length - that is between "position" and the end of file.
It is possible - for example - to divide DOS loadable files into single segments using "OFFLOAD" and
"CUT", to cut off binary file headers from data files ("CUT file1 file2 6") etc.
UTILITY PROGRAMS#
There are two utility programs on the BW-DOS master disk: "Directory master", and "Micro
SpartaDOS". They may be distributed separately, but this chapter from the manual must be included.
DIRMAST (external programm)#
DIRMAST [Dn:][path] [/Q]
This program allows you to change order of files in directory, and to add comments. It'll work with
the directory specified as a parameter; with the "/Q" parameter it'll wait for changing the disk before
starting its work.
It'll display the whole directory (including erased files). You can move the cursor over the directory; to
change order of files, simply pull a file out from the directory to left side of the screen, move it where
you want, and insert it back into directory.
Special commands may be executed by pressing letter keys:
•
•
•
•
•
•
<T> - change time for a single file;
<D> - change date;
<C> - create a line with comment;
<E> - delete a comment line, or an erased file;
<ESC> - abort the program;
<Q> - save the new directory.
Characters displayed before the filename are following:
•
•
•
•
•
•
" " - a normal file;
"\*" - a protected file;
">" - a subdirectory;
"\"" - comment line,
"=" - erased file,
"?" - other (unknown) file status.
Note: Don't use the comment lines too much, because such a lines may cause troubles with
programs like "COPY", "MENU" etc. Never use control codes (for example <CONTROL>+<right>,
<CONTROL>+<DELETE>, <TAB> etc.) in a comment line, because it'll cause terrible effects while
listing such a directory. In addition, better don't use inverse video and graphics characters, because
they may not be printed on a printer.
MSDOS (External program, bootable)#
MSDOS
The file "MSDOS.COM" contains the program called "Micro SpartaDOS version 2.3". This program is
there for loading games and other programs, which needs a very low MEMLO value. It can only run a
DOS loadable file; no other support for the loaded program will be provided.
Micro SpartaDOS may be used in two ways: * As an utility program. Simply start it by typing
"MSDOS" in the CP, when you need to start - for example - a game. To get back into BW-DOS, you
need to boot it again. * As a separate DOS. Copy the file "MSDOS.COM" to the disk with games, and
install it with the "BOOT" command. Then you can simply boot the disk.
When you've started Micro-SpartaDOS, you'll see the main directory of disk in drive # If you've not
used the "MSINI" program, you'll see only protected files. To see every files, press <ESC>. If there is
a file "MSDOS.DAT" in the directory (see "MSINI"), then you'll see user defined names instead of the
disk directory.
You need to select the program to be started now - by pressing a letter key. When you select a
subdirectory, a new menu will appear. Press "<" key to go into the parent directory, or ">" to go into
the main directory. Use the ">" key when you've changed the disk.
When the file is selected, it'll turn the internal Basic off (you needn't to hold the <OPTION> key down
while booting), clear the memory, and the selected program will be started.
It'll try to use a high speed communication with the XF 551 or Speedy 1050 drives. If you want to
disable this (a few programs doesn't work with the high speed loading), add <SHIFT> to the letter key
while selecting the program. When you have a problems while starting the Micro-SpartaDOS, try to
hold the <SHIFT> key down - this will disable the high speed loading at all.
If you press the <RESET> key while a program started by Micro-SpartaDOS is working, it'll boot
again - never mind if the program was protected against <RESET>, or not. It's clear, that this function
can not work with really every programs!
MSINI (External program)#
MSINI
This program provides the file "MSDOS.DAT" for the Micro-SpartaDOS. It'll ask you for the path, and
then you can enter any names for every files in the directory. You can skip files - which you want
not to be displayed - with the <ESC> key. At the end a new file "MSDOS.DAT" will be stored in the
directory.
Names in the "MSDOS.DAT" file may be up to 35 characters long, and may contain almost every
ATASCII characters.
Note that this program works only with drive number 1 - because the Micro-SpartaDOS itself works
with drive 1 too.
RECOMMENDED UTILITY#
There are lots of useful utility programs available from different sources; most of them works fine
under BW-DOS. I want to mention a few programs, which are really useful in my opinion, and which I
tested with BW-DOS.
SuperArc / SuperUnArc (version 2.4) by Robert Puff#
"SuperArc" allows you to pack lots of files which you need not at the moment, and put them into a
single file. You'll save lots of disk space while storing files in this way.
When you need any of such a files later, you can depack it to its original form with the "SuperUnArc".
Both the programs are available for example on Mega Magazine number 7.
Super Packer (version #0) by Jiri Bernasek (BEWESOFT)#
This program allows you to pack DOS loadable files (especially games). You'll get a file much shorter
than the original, with exactly the same program in it!
This program is available for example on Mega Magazine 7.
CleanUp (version #4) - this one is (C) 1994 FTe#
This program is a part of SpartaDOS toolkit, which was released as ShareWare. With this program
you can fix several problems which may cause on BW-DOS disks.
Note that the "Directory master" program may cause invalid filenames (comment lines), or (when
used under SpartaDOS) the bad directory length; both the errors are not fatal. The format of BWDOS RamDisks may be reported as bad by the "CleanUp" program.
Unfortunately, this program contains a bug. To prevent problems, you should press <RESET>
immediatelly after leaving "CLEANUP" (under both BW-DOS and SpartaDOS).
BW-DOS FUNCTIONS IN BASIC#
This chapter shows, how to use the functions of BW-DOS in your own programs written in Basic. In
other programming languages the commands (mostly) are not very different.
This chapter is there for programmers, so don't worry, when you don't understand.
OPEN #iocb,aux1,aux2,"Dn:[path>]filename"
This command will open specified IOCB for access to the specified file on disk. The value of "aux1"
may be:
Mode
4
6
8
9
12
Function
Reading from the file.
Reading the directory listing.
When the "aux2" value is greater
than 127, the listing will be in
the same format as provided by
"DIR" command in the CP; with
"aux2" less than 128 it'll be in
the format of "DIRS" command.
You may not open more than one
directory listing at the same time.
Writing to the file. If the file exists
already, it'll be replaced by the
new file. When "/A" is added
to the filename, it'll work in the
same way as the mode 9.
Append. The new data written to
the file will be added at the end
of an existing file. When the file
doesn't exist, it'll be created first.
Update. Data may be readed
from and written to the file as
necessary.
When you'll add 16 to the "aux1" value, you'll get direct access to the directory specified by "path";
the filename will be ignored. With 32 added to "aux1", you'll get the direct access to the subdirectory
specified by "filename". (See the next chapter for information on the internal directory format.) This
doesn't work with the mode 6.
When you are opening a directory for direct access in mode 8, 9, or 12, and the directory doesn't
exist, it'll provide the "CREDIR" function first. The position in directory data will be set to 23 (after the
first block) in every modes excepting the mode 9 - if you want to read/write the first block, then you
must use POINT.
• !!!WARNING!!!* Use the direct access to directory only when you know exactly, what are you
doing! With this mode it's possible to destroy the whole directory structure on a disk by a single
"OPEN" command!
GET #iocb,variable
PUT #iocb,variable
INPUT #iocb,variable
PRINT #iocb,variable
These commands are sending data to the specified IOCB, or receiving data from the IOCB.
Note: It is much faster to send data as one large block. This may be done by CIO commands 7 and
11 in the assembler, or by commands "BGET" and "BPUT" in Turbo Basic.
CLOSE #iocb
This is the command for closing files. Every file must be closed after use.
X=POS:Y=0:POINT #iocb,X,Y
or
Y=16*iocb:X=INT(POS/65536):POKE 846+Y,X:POS=POS-65536*X
X=INT(POS/256):POKE 845+Y,X
POKE 844+Y,POS-256\*X
XIO 37,#iocb,PEEK(842+Y),PEEK(843+Y),"Dn:"
In this way you can set the position in a file (the "POINT" function); the position is simply serial
number of the byte in file. When the file is opened in mode 8, 9, or 12, then you can set the position
after the end of file too - see the description of "HEXEDIT" command for more information.
The first method works only for positions less than 32768, while the second method may be used for
any position up to 8 megabytes. The IOCB must be opened first.
Y=16*iocb:XIO 39,#iocb,PEEK(842+Y),PEEK(843+Y),"Dn:"
LNGTH=PEEK(844+Y)+256\*PEEK(845+Y)+65536\*PEEK(846+Y)
This command will provide the information how long is the file, for which the IOCB is opened.
NOTE #iocb,X,Y:POS=X+65536*Y
With this command you'll get the current position in a file, for which the IOCB is opened. (This may be
done in the same way as the previous command too, the XIO command code is 38.)
XIO 32,#iocb,0,0,"Dn:[path>]filename filename"
This command will provide the same function as the "RENAME" command in the CP. The space
character between old and new filename may be replaced by any character, which is not allowed in
the filename - for example ","
The IOCB must be closed before this operation.
Following commands will provide the same functions as several CP commands - as listed. The IOCB
used for such a command must be closed first.
XIO
XIO
XIO
XIO
XIO
XIO
XIO
XIO
33,#iocb,0,0,"Dn:[path>]filename" =
35,#iocb,0,0,"Dn:[path>]filename" =
36,#iocb,0,0,"Dn:[path>]filename" =
40,#iocb,4,0,"Dn:[path>]filename" =
40,#iocb,4,128,"Dn:[path>]filename"=
42,#iocb,0,0,"Dn:[path>]name"
=
43,#iocb,0,0,"Dn:[path>]name"
=
44,#iocb,0,0,"Dn:path"
=
the "ERASE" command
the "PROTECT" command
the "UNPROTECT" command
load and run a program
the "LOAD" command
the "CREDIR" command
the "DELDIR" command
the "CWD" command.
The last function may not be (easily) used from Basic. The settings for CIO are:
ICCMD = 47
ICBAL/H = adress of the string "Dn:"
ICBLL/H = adress of the output buffer
It will provide the information similar to the "CHKDSK" command; the result in output buffer will be
allways 17 bytes long:
0:
1:
2,3:
4,5:
6-13:
14:
15:
16:
Version of disk format
Size of sectors. (0 means 256.)
Number of every sectors
Number of free sectors
Volume name
Sequential number
Random number
Allways 0 (reserved for compatibility with SpartaDOS).
More functions are available for assembler programmers. The file "BWDFUNCT.BAS" (in the main
directory on the BW-DOS #30 master disk) shows, how to use some of these functions from Basic.
TECHNICAL INFORMATIONS#
This chapter is there to provide more information for programmers, so don't worry, when you don't
understand.
DOS LOADABLE FILES#
DOS loadable files may be also called as "binary files" or "segment(ed) files". Such a file is built from
any number of segments - the minimum is one segment.
Each segment contains header, and data block. The header provides the information, how long the
data block is, and where it should be loaded into memory. The header may be 4 or 6 bytes long;
the long header contains an identification code $FFFF followed by the short header. Every header
contains two adresses (2 bytes each), which points to the first and to the last byte in memory used for
the data block. The first segment must have the long (6 bytes) header; for other segments the short
header is recommended.
When the file contains an executable program in machine code, INIT and RUN adresses may be
defined. An INIT adress is defined by a segment, which is loading at the adress $2E2; adress for the
RUN definition is $2E0. A subroutine at the defined adress will be executed immediatelly after loading
the segment with INIT; the whole program will be started at the RUN adress while an EOF mark is
found. When no RUN adress is defined, BW-DOS will use starting adress of the first segment as a
RUN adress.
TABLE IN PAGE 7#
In the (memory-) page 7 there is a little table, that shows version of the DOS, and allows machine
code programs to use a few special functions:
• $700: There is allways the character "S" to provide the best compatibility with SpartaDOS.
Many programs will determine by this adress, if they can use advanced SpartaDOS (BW-DOS)
functions.
• $701: There is allways the number $32 to provide the best compatibility with SpartaDOS.
• $703 (two bytes): There are the letters "BW" when any version of BW-DOS is installed.
• $705: BW-DOS version. $10 is for version #0x, $13 is for version #3x etc.
• $706 (two bytes): Adress of the "GETTD" routine. This routine reads the date and time from BWDOS's clock, and store it into "DATER" and "TIMER" in the "COMTAB".
• $708 (two bytes): Adress of the "SETTD" routine. This routine reads the date and time from
"DATER" and "TIMER" in the "COMTAB", and store it into BW-DOS's clock.
• $70A (two bytes): Adress of "CONVDC" routine. This routine will convert a 24-bit binary number
from "DECIN" in the "COMTAB" to the 8 characters long ASCII text in the "DECOUT".
• $70C (three bytes): There is an instruction, which jumps to the SIO routine defined by "LSIO"
in the "COMTAB". (This is provided for compatibility with BiboDOS.) Any changes done to this
adress may not change function of BW-DOS.
THE COMTAB TABLE#
This table allows machine code programs to get parameters from the CP, and to use many other
features of BW-DOS. Adress of this table is stored in the "DOSVEC" vector (at $0A); numbers in
the following description are relative positions in the table. Bytes, which are not mentioned in the
description, are reserved for compatibility with several SpartaDOS versions; such a bytes may not be
changed by any program!
• -21: DWARM - This value will be stored to the adress 8 before starting a cartridge. It provides the
information if the memory was changed by an external command (zero), or not ($FF).
• -19: DECOUT - This is an output buffer for the "CONVDC" routine. It contains up to 8 characters
long decimal representation of the number from "DECIN"; spaces may be added at the begin.
(This adress is compatible with SpartaDOS X only.)
• -10: LSIO - There is the adress of main BW-DOS's SIO routine. This routine is used by BWDOS for every disk operations; it have the same inputs and outputs as the standard SIO in
ROM ($E459). After booting, this adress points to $E459; it may be changed by commands like
RAMDISK, XLRDISK, RAMBOX, XFSIO etc. * -8: ECHOFLG - This is the index into "HATABS"
for the HardCopy function; there is the value $FF, when the HardCopy function is not active.
It is possible to get information, if the HardCopy function is active, by reading this byte. * -7:
BATFLG - It is the same as "ECHOFLG"; this flag is used for batch files. * -6: DECIN - Input
for the "CONVDC" routine (3 bytes). (This adress is compatible with SpartaDOS X only.) * -2:
WRTCMD - There is the SIO command used for every write operations. It is "P" for writting
without of verify, or "W" for writting with verify. (Any other value may cause big troubles.) This
byte is changed by the "VERIFY" command. It is recommended to use the SIO command from
this byte for all write operations in every programs. * +0: COMTAB - At this point, there is an
instruction for starting the CP. You can use the instruction "JMP ($0A)" under any DOS; it will
allways start a CP, DUP menu, or something like that. * +3: CRNAME - Here is an instruction,
which jumps to the "CRNAME" routine. This routine will get the next parameter from command
line in "LBUF", add a "Dn:" if none was specified, and place the result in "COMFNAM" * +6:
DIVIO - here is the adress of "DIVIO" routine. This routine may be used to start a batch file or
the HardCopy function. Before starting this routine, the complete filename ("device:" or "Dn:
[path>]filename") must be placed in "COMFNAM", and the "Y" register must be set to 0 for the
HardCopy function, or 1 for a batch file. This routine will return any errors in the "Y" register and
"N" flag in the same way as CIO or SIO. (That's different from SpartaDOS 3.x) * +8: XDIVIO
- There is the adress of "XDIVIO" routine. This routine may be used to stop a batch file or the
HardCopy function. Before starting this routine, the "Y" register must be 0 for the HardCopy
function, or 1 for a batch file. * +10: BUFOFF - This is the position of next character in "LBUF"
for the "CRNAME" routine. * +13: DATER / +16: TIMER - This is the main variable for date and
time (3+3 bytes). It is in the format "day, month, year; hour, min., sec." This variable is used by
"GETTD" and "SETTD" routines, and while creating a file.
• +19: ODATER / +22: OTIMER - This variable is in the same format as "DATER" and "TIMER"; it
is used while copying files (see "TDOVER").
• +25: TDOVER - This flag determines if the new created file will get the current date/time from
BW-DOS's clock (0), or the date/time from "ODATER" and "OTIMER" ($FF). It is used especially
while copying files to carry the date/time information. (Don't forget to clear this flag after use.)
• +26: TRUN - Here is the RUN adress from the last file loaded by the CP (or with the XIO 40
command).
• +30: SMEMLO - The address of first byte in memory after the BW-DOS itself. If the "MEMLO"
value is different, then there are resident commands between "SMEMLO" and "MEMLO".
• +32: INCOMND - This adress determines, if you are working with the CP or with a cartridge, to
provide the correct function of the <RESET> key. If there is $FF, then the <RESET> key will
jump to the CP.
• +33: COMFNAM - This is a buffer for complete device and filename specification; it is used for
output from the "CRNAME" routine, and as input for the "DIVIO" routine. It is 28 bytes long.
When reading parameters from the command line with the "CRNAME" routine, this buffer will
allways start with "Dn:" - if you are looking for other parameters than filenames, you must start at
COMFNAM+3.
• +61: RUNLOC - There is stored the adress, which will be used by the "RUN" command without
of parameter. This adress is changed by loading a program, or by "RUN" with a parameter.
• +63: LBUF - This is the buffer for command line (and for "DIR", "DIRS", and "TYPE" commands);
there will be stored the whole command line before executing it. This buffer is 64 bytes long.
DISK FORMAT#
BW-DOS uses the same disk format as SpartaDOS. There are four kinds of sectors: Boot sectors,
Bitmaps, Sector maps, and Data sectors.
Boot sectors are sectors 1, 2, and 3 on every disks. These sectors are allways 128 bytes long, and
contains a small program, which is started while you turn the computer on - this program is loading
DOS (or other file specified by the "BOOT" command). The Boot loader is not the same on BW-DOS
and SpartaDOS disks, but the function of both the loaders is almost identical.
In the sector 1, there is an important table, which gives to the system several informations about the
whole disk (the numbers are positions in the sector 1):
7: Allways $80. This byte is used as an identification of SpartaDOS compatible di
9: Sector, where is the first Sector map of the main directory. (2 bytes)
11: Number of every sectors on the disk. (2 bytes)
13: Number of free sectors. (2 bytes)
15: Number of Bitmaps.
16: Sector used for the first Bitmap. (2 bytes)
18: The starting sector-number for searching a free sector for a file; commonly it
20: Starting sector for allocating directories - see the previous explanation. Whi
22: Volume name of the disk. (8 bytes) This name - together with the sequential an
30: Number of tracks; when the bit D7 is set, then the drive is double sided.
31: Size of sectors (excepting Boot sectors). Possible values are 128, or 0 (for 2
32: Version of disk format. BW-DOS (and every SpartaDOS versions 2.x and later) us
33-37: Reserved for different SpartaDOS versions.
38: Sequential number of the disk. This number is incremented every time you're ma
39: Random number of the disk. This number is created while formatting the disk.
40: Sector, where is the first Sector map of file specified for booting. (2 bytes)
42-47: Reserved for different SpartaDOS versions.
The Bitmap contains the information, which sectors are free, and which are used. Each byte holds
the information for eight sectors - the highest bit D7 is for the first, and the lowest bit D0 for the last
of these eight sectors. The bit set to 1 means, that the sector is free. The first byte contains the
information for sectors 0-7, second byte for 8-15 etc.
When more than one sector is necessary for the map, it is stored on the disk as a compact block (it
may be for example in sectors 4, 5, and 6).
Sector maps contains information, which sectors are used for a file. There are physical numbers of
sectors (2 bytes each) in a Sector map.
The first number in every Sector map (in fact two bytes!) points to the next Sector map of the file.
Zero indicates the last map.
Second number points to the previous map of the file; zero indicates the first map.
The rest of the map contains numbers of data sectors used for the file. There are 62 (128 bytes/
sector) or 126 (256 bytes/sector) numbers. When the number is zero, it indicates a non allocated part
of the file - see the description of "HEXEDIT" command for more info.
Data sectors are simply full of data.
FORMAT OF DIRECTORIES#
Directories are in fact special files; they may be directly accessed by adding 16 or 32 to the "aux1"
value while opening the file. The directories contains information about every files and subdirectories,
23 bytes each. (The numbers are positions in this - 23 bytes long - block.)
0: The status. Single bits are used:
D0: The file is protected.
D3: Block in directory is used.
D4: The file is erased (block in directory is free).
D5: Flag for a subdirectory.
The status equal to zero means the end of directory.
1: Sector, where is the first Sector map of the file.
3: Length of the file (3 bytes - not for a subdirectory).
6: Name and extension (11 bytes).
17: Date and time in the same format as "DATER" and "TIMER".
The first block is different; it contains an information about the directory itself. When you want to read
or write this block using BW-DOS, you must use the POINT function - every OPEN in direct mode will
set the file position to 23.
The information in the first block is this:
1: Sector, where is the first map of parent directory.
3: Length of the directory in bytes (3 bytes).
6: Name of the directory (8 bytes).
BATCH FILES AND HARDCOPY#
Batch files and the HardCopy function works in the following way: A small routine is inserted between
CIO and the handler of "E:" device by changing the "HATABS" table (at $31A). This routine checks all
Editor input/output, if is it going through IOCB 0. If it is OK, another handler will be used to get data
from a Batch file, or to send data to the HardCopy device.
Every batch files are accessed through IOCB 5, and the HardCopy function uses IOCB 4. These
IOCBs are modified to look like a closed IOCB, so a CLOSE command (done by many programs
automatically - for example the Basic) may not cause any problems.
Note that these IOCBs may not be used for any other purpose, while a batch file (IOCB 5), or the
HardCopy function (IOCB 4) is active; such an action may cause big problems. If you want to start a
program, which is using IOCB 5, from a batch file, then you need to use the "XBAT" command.
When no batch file or HardCopy function is active, the "HATABS" table is modified into its original
state automatically to provide the best compatibility with every programs.
If a new "E:" handler is installed (the address in "HATABS" is changed by a program), BW-DOS will
accept the new address and repair its I/O redirection routines at the time of first DIVIO/XDIVIO call, or
while entering the CP. After that, the function of batch files and HardCopy will be re-enabled.
Installation of new "E:" handlers should be done with the "NEWED" command to prevent the new
handler from storing the address of BW-DOS's I/O redirection routines into its code instead of the
original "E:" handler.
COMPATIBILITY#
This chapter contains the information about compatibility between BW-DOS and other programs, and
between BW-DOS and SpartaDOS. A few lines are also written about older BW-DOS versions. It
may be useful, when there are troubles with function of the system.
MEMORY#
When a program locks the system up, the most common reason is a collision in the memory. Since
BW-DOS does not use the RAM under OS-ROM, it may not cause any collision in this area (as
known from SpartaDOS), but still there may be collisions caused by too high value of "MEMLO".
To look at the "MEMLO" value, use the "MEM" command. The MEMLO value provided by BW-DOS
itself is low enough for almost every programs, but it is increased by every resident commands, so
this may cause problems. In general, the best way to get a program working is to remove every
resident commands.
The maximum value of "MEMLO" is different for single programs. External commands of BW-DOS
needs the MEMLO less than $3000, excepting MSDOS.COM, which needs MEMLO less than $2500.
Most of other programs will work without of problems with the MEMLO less than $2000; see the
manuals for single programs for the correct value.
BATCH FILES AND HARDCOPY#
Any program, which uses the IOCB 5 for any other purpose than the CLOSE command, may not be
started from a batch file without of the "XBAT" command. In addition, while running a program, which
uses IOCB 4, the HardCopy function may not be used.
Both batch files and HardCopy functions must be disabled while starting a program, which doesn't
accept a modified HATABS table, especially game programs.
Any program that installs a new "E:" handler should be started with the "NEWED" command.
INTERRUPTS#
BW-DOS itself uses no interrupts. Problems may be caused especially by the "KEYBUFF" command,
which changes the vectors "VVBLKI" at $222 and "VKEYBD" at $208. In addition, "RAMDISK" and
"XLRDISK" commands are disabling all the interrupts before any SIO operation; the DLI interrupt will
not be enabled again.
The commands mentioned here, especially the "KEYBUFF" command, may not be used with some
programs - especially games.
DISK FORMAT#
BW-DOS is using the same disk format as SpartaDOS versions 2.x and later. Other disks - for
example Atari DOS 2, MYDOS, DOS XE and others - including SpartaDOS #x disks, may not be
used under BW-DOS.
Only SpartaDOS X (versions 4.x) can work with BW-DOS directories in full; older versions of
SpartaDOS can only work with short directories, max. 126 files each.
The menu program supports Atari DOS 2 compatible disks too. You can use every disks created
with Atari DOS 2.0 or DOS 2.5; other disks may be only used if they are compatible with this format.
In addition, you can use Double density disks similar to the DOS 2.0 format - for example the ones
created with BiboDOS or the "AINIT" command in SpartaDOS. Disks without of file number in data
sectors - for example MYDOS high capacity disks, or BiboDOS 6.4 double sided disks - may not be
used.
BW-DOS #30 is handling the allocation pointers in the bootsector in a different way than older
versions or SpartaDOS do. This may result in using different physical sectors for a file compared to
these DOSes. Both the versions are fully compatible.
OLDER BW-DOS VERSIONS#
Four older BW-DOS versions exists: #00, !!0, #20, and #2# #00 is the basic version; !!0 is identical to
the basic version excepting the message after boot. The status 3 (last byte read) wasn't supported,
a new "E:" handler wasn't allowed, the command "TYPE" was limited to 64 characters per line, and
the allocation pointers was handled just like SpartaDOS do. The version #20 supports the status 3
and new "E:" handlers, but it contained a bug and was replaced by a corrected version #2# Both the
versions #2x wasn't released.
Some external commands were improved or added since the last release (#00 and !!0): MENU,
RAMDISK, DIRMAST, MOVE, RTIME8, ARGSRTC, ARGSPRN, BACKUP, COPY, DOSDRIVE,
NEWED, RAMBOX, UNERASE, and TYPE. The command "NEWED" works under BW-DOS #20 and
later only.
ERRORS#
This chapter gives a list of Error codes (in decimal and hexadecimal numbers), and their descriptions.
Every Error codes less than 128 have its origin in other programs (for example Basic), so there is no
connection between such Errors and BW-DOS.
Not every listed errors have its origin in BW-DOS. There are also errors caused by CIO, SIO, and
other device drivers. (For example screen, tape recorder etc.)
The first two codes are not errors - BW-DOS returns these codes when everything is OK. You'll
encounter these codes only while programing CIO calls in assembler or something like that.
Error code
Hex
1
$01
3
$03
128
$80
129
$81
130
$82
131
132
$83
$84
133
$85
Result
Description
This code is
returned by all
device handlers
when no error
occurs.
Last byte read
This code is
returned by BWDOS instead of
the code 1 ("OK"),
in the case that
the last byte of
the file was read.
Next reading will
return the errorcode 136 ("End
of file") - except
that you're working
in the "update"
mode (aux1=12).
This code will not
be returned in the
directory-listing
mode (aux1=6).
This code have no
connection with the
error 3 returned
by Basic or other
programs.
BREAK abort.
The user did press
the <BREAK> key
during an input/
output operation.
IOCB already open. This error is
probably caused
by a mistake in
program.
Nonexistent device. The specified
device does not
exist. Please check
if the corresponding
handler is installed.
If you are accessing
a disk file, try to add
"Dn:" before the
filename - this is
allways necessary
while accessing a
file from your own
programs.
IOCB write only.
Invalid CIO
command.
IOCB not open.
OK
134
135
$86
$87
136
$88
137
$89
138
$8A
139
$8B
140
$8C
141
$8D
142
143
$8E
$8F
144
$90
Bad IOCB number.
IOCB read only.
These errors may
be caused by a
mistake in program.
End of file.
This is not a real
error; this code
indicates, that there
are no more bytes
left to read in the
file.
Truncated record. The line in a file is
longer than buffer
for it; this may
occur while reading
an incorrect type of
file.
Device timeout.
The device is
not connected
correctly, it is
turned off, or it
doesn't exist.
Check drive
number while
accessing a disk
drive.
Device NAK.
The device didn't
understand. This
may occur for
example while
using programs
for modified drives
with a standard disk
drive.
Serial frame error. This error may be
caused by tape
recorder, or by
damaged input/
output device,
computer, or
cables.
Out of screen.
The position of
cursor is out of
screen.
Serial bus overrun.
Checksum error.
These errors may
be caused by tape
recorder, or by
damaged input/
output device,
computer, or
cables.
Device done error. The device can't
execute the
command. The
145
$91
146
$92
147
$93
148
$94
150
$96
151
$97
152
$98
156
$9C
most common
reasons are: Write
protect tab placed
on the disk while
writting; a non
formatted disk, or
no disk in the drive;
bad sector on the
disk.
Illegal screen
The selected
mode.
screen mode
doesn't exist.
Function not
This error may be
implemented.
caused by actions
like reading data
from the printer
or writting to the
keyboard.
Insufficient RAM. The selected
screen mode needs
more memory than
available.
Bad disk format.
The disk is not
a BW-DOS
compatible disk.
You can only use
disks created with
the "FORMAT"
command in BWDOS, or with
SpartaDOS 2.x and
later.
Directory not found. A directory
specified in the
path doesn't exist.
May not replace.
A new opened
file have the
same name as a
subdirectory in the
same directory,
or a new created
subdirectory have
the same name
as another file/
subdirectory in the
same directory.
Bad load file.
The file is not a
DOS loadable
program-file.
Cartridge error.
The "CAR"
command didn't
found any cartridge,
or a wrong
parameter was
160
$A0
161
$A1
162
$A2
163
$A3
164
$A4
165
$A5
166
$A6
used in the "BASIC"
command.
Drive number error. The specified
number of disk
drive is not
supported. BWDOS only supports
drives 1, 2, 3, 4,
and 8.
Too many files
The number of files
open.
open at the same
time is too high.
BW-DOS may open
5 files at the same
time, but only one
of them may be
a directory listing
(aux1=6).
Disk full.
There are no more
sectors left on the
disk, so you need
to use anoter one.
The part of file,
which was written
before this error, is
not completed, so it
must be erased.
Illegal wild card.
A wild card was
used while creating
a new file or
directory.
File protected.
The file may not be
changed, because
it is protected.
Bad filename.
Please check the
file specification.
Bad file position
The file position
given to the POINT
function is greater
than 8 megabytes,
or it is greater
than length of file
when it is open in
a read only mode
(aux1=4). This
error may also
occur when you
try to copy a file,
which contains
non-allocated
sectors. While
working with Atari
DOS 2 comaptible
disks using the
167
$A7
168
$A8
169
$A9
170
$AA
menu program,
this error indicates
that the file-number
in a sector is
incorrect. This may
be caused by a
non-compatible
disk format, or
by a corrupt disk
structure.
Directory not empty The directory
specified in
the "DELDIR"
command is not
empty, so it may
not be deleted.
Not implemented. BW-DOS didn't
understand the
command code.
Please check the
command code
for CIO, or the
XIO command.
This error may
also occur while
trying to use a few
special functions of
SpartaDOS, which
are not supported
by BW-DOS.
Directory full.
There is no more
space for a new file
in directory. BWDOS directories
may contain up
to 1424 files, but
it is much better
to divide such a
large number of
files into several
subdirectories. Atari
DOS 2 compatible
disks (supported by
the menu program
only) may contain
up to 64 files.
File not found
The specified file
(or directory in
the direct mode)
doesn't exist. This
error may also
occur while trying to
erase a protected
file or subdirectory,
or to rename a
subdirectory.