1
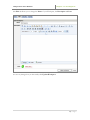
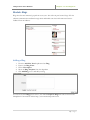
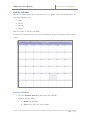
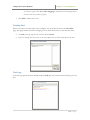
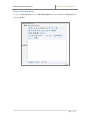
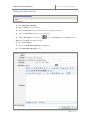
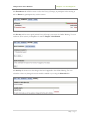
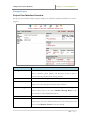
User Guide Chapter 14 Workspaces SharpSchool User Manual Chapter 14: Workspaces Table of Contents About Workspaces .......................................................................................................................... 5 About this Guide .............................................................................................................................. 5 Who Should Use this Guide ............................................................................................................. 5 Vital Information ............................................................................................................................. 5 Module ......................................................................................................................................... 5 Security ......................................................................................................................................... 5 Activity ......................................................................................................................................... 6 Accessing Workspaces ..................................................................................................................... 6 Configuring Workspaces .................................................................................................................. 6 Security ........................................................................................................................................ 6 Edit Workspaces Homepage........................................................................................................ 7 Module: Blogs .................................................................................................................................. 9 Adding a Blog ............................................................................................................................... 9 Module Calendar ........................................................................................................................... 10 Adding a Calendar ..................................................................................................................... 10 Module: Chat ................................................................................................................................. 12 Adding a Chat ............................................................................................................................ 12 Viewing Chat.............................................................................................................................. 13 Chat Logs ................................................................................................................................... 13 Editing Chat ............................................................................................................................... 14 Module: Custom Data Table .......................................................................................................... 15 Module: Evaluation ....................................................................................................................... 20 Adding an Evaluation ................................................................................................................. 20 Viewing an Evaluation ............................................................................................................... 20 Taking a Survey .......................................................................................................................... 21 Adding a Question .................................................................................................................... 22 Chart .......................................................................................................................................... 23 Edit Evaluation ........................................................................................................................... 23 Module: File ................................................................................................................................... 24 2|Page SharpSchool User Manual Chapter 14: Workspaces Adding a File .............................................................................................................................. 24 Viewing a File............................................................................................................................. 24 All Versions ................................................................................................................................ 25 Adding a Comment .................................................................................................................... 25 Module: Folder .............................................................................................................................. 26 Adding a Folder.......................................................................................................................... 26 Module: Forum .............................................................................................................................. 27 Adding a Forum ......................................................................................................................... 27 Module: Link .................................................................................................................................. 28 Module: Form Template................................................................................................................ 29 Adding a Form Template ........................................................................................................... 29 Module: Gallery ............................................................................................................................. 32 Adding a Gallery ........................................................................................................................ 32 Module: Meeting Room ................................................................................................................ 33 Adding a Meeting Room ............................................................................................................ 33 Editing a Meeting Room ............................................................................................................ 34 Adding an Online Meeting......................................................................................................... 35 Managing a Online Meeting ...................................................................................................... 36 Module: Note ................................................................................................................................ 38 Adding a Note ............................................................................................................................ 38 Commenting on a Note ............................................................................................................. 38 Module: Project ............................................................................................................................. 39 Adding a Project ........................................................................................................................ 39 Manage Project ......................................................................................................................... 40 Task List ..................................................................................................................................... 42 Module: Vote................................................................................................................................. 48 Adding a Vote ............................................................................................................................ 48 View Vote .................................................................................................................................. 49 Edit Vote .................................................................................................................................... 49 Report Tab ................................................................................................................................. 49 Module: Wiki ................................................................................................................................. 50 3|Page SharpSchool User Manual Chapter 14: Workspaces Adding a Wiki............................................................................................................................. 50 Module: Workflow ........................................................................................................................ 51 Adding a WorkFlow ................................................................................................................... 51 Module: Workspace ...................................................................................................................... 52 View Workspace ........................................................................................................................ 53 Edit Workspace.......................................................................................................................... 53 Display Setting ........................................................................................................................... 54 4|Page SharpSchool User Manual Chapter 14: Workspaces About Workspaces SharpSchool’s Workspaces is a secure online portal where teachers and administrators can communicate in a password protected environment. This tool features all of SharpSchool’s standard collaborative modules, such as calendars, photo galleries and discussion forum as well as content authoring and document sharing modules such as Content pages, files, folders and the knowledge repository. About this Guide Many modules in the Workspaces perform and operate in the same manner as the ones available through the live site. For these sections, this manual will cross reference other SharpSchool manuals. Items that are specific only to the Workspaces will be detailed in this manual. Who Should Use this Guide This guide is intended for administrators and teachers at the organization. This area of SharpSchool is not recommended for parent, student or community usage. Vital Information The Workspaces can be likened to a virtual teachers’ lounge. Here teachers, staff, administrators and board members can collaborate and communicate in a secured environment away from external influences. Administrators also have the ability to password protect specific items in the workspaces from other staff members. This is enabled through the security tab in the workspaces, we will return to this topic later in the manual. Module The modules available within the workspaces are seen in other places in SharpSchool’s system. The modules here however are only for use within the workspaces. Calendar events from the main school or district calendar can be pushed into individual workspace calendars as well as to other calendar pages on your site. Security Via the security module available in the Workspaces, administrators and workspace authors can configure who has reading and writing access to the module. This is important in situations where specific items in the workspaces are intended for only certain individuals. For example, a district site may have an area of the workspaces intended for School Board Members only. 5|Page SharpSchool User Manual Chapter 14: Workspaces Activity The activity tab allows administrators to determine what activities have been performed on the workspaces. This is especially important if several individuals are participating in a group workspace activity. Accessing Workspaces By default, only users with logins to SharpSchool’s solution have access to the workspaces. The workspace link is provided via the Published Links on your site. For ease of use, you may wish to add the Workspaces link elsewhere (for example, in a Quick Links box or via a teacher specific page on the school or district site). Configuring Workspaces Security SharpSchool provides a flexible, powerful, and easy to use security system. Each object within the server can have its own set of permissions. Permissions are defined as a privilege granted to a particular user or group on a particular object or group of objects. A privilege is an action that can take place on an object. The privileges common to all objects are read, create, delete and/or write. Other privileges may include the ability to create a comment, to vote and to upload a file. To access the permissions settings, click on the Security tab. To learn more about Security on SharpSchool you can refer to Chapter 1: SitePublish. 6|Page SharpSchool User Manual Chapter 14: Workspaces Configuring Workspaces Landing Page The View tab displays all the objects in the workspace. New objects can be added from the Add New Item dropdown menu. To open any object, click on the object name. To delete an object, select the checkbox next to the name and from the dropdown menu at the bottom, choose Delete Selected. To move an object, select the checkbox and from the dropdown menu, choose Move Selected. In the window that opens, locate the destination of the objects. Customizing the View You can customize the view of the workspace by clicking on the Customized View icon located in the top right of the workspace opposite the Details heading. As you can see there are three different States that you can set your modules to. When you first create your item it is set to Normal. If you set an item to Featured, a larger version of the icon is placed in a Featured Items area at the top of the workspace. If you choose Hidden the item will not be visible in your workspace to regular users but it will still be visible to administrators. 7|Page SharpSchool User Manual Chapter 14: Workspaces The Edit tab allows you to change the Name of your Workspace, the Description and Icon. To save any changes that you have made, click Update Workspace. 8|Page SharpSchool User Manual Chapter 14: Workspaces Module: Blogs Blogs have become immensely popular in recent years. This is due in part because blogs offer the ultimate communication medium through which individuals can share information and receive feedback from an audience. Adding a Blog 1. 2. 3. 4. 5. From the Add New Item dropdown select Blog Enter in the Blog Name Fill in a Description Select the Blog Template from the dropdown Click Add Blog to save and add your blog To learn more about Blogs please refer to the manual Chapter 9: Blogs that can be found on the SharpSchool CustomerNet website http://customernet.sharpschool.com. 9|Page SharpSchool User Manual Chapter 14: Workspaces Module Calendar Calendars are used to keep track of events that occur over a period of time. The calendar object can be opened in different views: Daily Weekly Monthly Yearly Click on an event to view the event details. You can use the navigation links at the top of the calendar to navigate through days, weeks, months or years. Adding a Calendar 1. From the Add New Items drop down menu select Calendar 2. Fill in the following fields: Name: Calendar name. Color: Choose the color of the calendar. 10 | P a g e SharpSchool User Manual Chapter 14: Workspaces Default View: From the dropdown choose the default view from the choices of Day List View, Weekly Grid View, Monthly Grid View, Yearly Grid View, and Event List View. This is the view users will see when first viewing the calendar. Description: Fill in a description for your calendar. Approval: If you require a calendar administrator to approve events published on the calendar, click this box. Calendar Owner: Click on the button to select a user to be calendar owner. This person will also be a calendar administrator and will be able to approve events added by non-administrators if the approval box is checked. Default Filters: Check any filters to display in the dropdown on the calendar page. Users will then be able to search the calendar for the fields you select. Custom Filters: If you have created any custom filters, you can check them to display on the calendar page. Users will then be able to search the calendar for the fields you select. Merged Calendars: Click on Select calendars to pull events from other calendars from your site or other sites on your domain. 3. Click Create Calendar To learn more about Calendars please refer to the manual Chapter 4: Calendars that can be found on the SharpSchool CustomerNet website http://customernet.sharpschool.com. 11 | P a g e SharpSchool User Manual Chapter 14: Workspaces Module: Chat Users can communicate by means of instant messaging through the chat object in Workspaces. Adding a Chat 1. From the Add New Item dropdown menu on the workspace, select Chat. 2. Fill in the following fields: o Name - This is the name that will be used in the workspace. o Description - This description will be visible when you open the workspace. o Moderation- Select this option if you would like the Chat Room to be moderated. If the moderation option is selected, choose the person who you would like to have as moderator for the chat room (Moderators can be changed at any time). o Log option - Select the respective radio button to choose whether or not 12 | P a g e SharpSchool User Manual Chapter 14: Workspaces you want to log the chat. (When Chat Logging is enabled, all of the messages from the chat room are saved in a log file) 3. Click Add to add the chat room. Viewing Chat When a user clicks on a chat object in the workspace, the system directs them to the View Chat page. This page contains an instant messaging console, which allows users to chat with each other. To send a message type into the textbox and click Send. Users can change their font color via the color picker box on the bottom right of the chat. Chat Logs If the chat logs option has been enabled (under the Edit tab), this section contains all the logs for the chat. 13 | P a g e SharpSchool User Manual Chapter 14: Workspaces Editing Chat This section allows you to edit the same options that are available on the add chat screen: Name - This is the name that will be used in the workspace. Description - This description will be visible when you open the workspace. Moderation- Select this option if you would like the Chat Room to be moderated. If the moderation option is selected, choose the person who you would like to have as moderator for the chat room (Moderators can be changed at any time). Log option - Select the respective radio button to choose whether or not you want to log the chat. (When Chat Logging is enabled, all of the messages from the chat room are saved in a log file) Click the Update button to save any changes. 14 | P a g e SharpSchool User Manual Chapter 14: Workspaces Module: Custom Data Table The Custom Data Table is available exclusively within SharpSchool Workspaces. You are able to use this feature to create and store things like an Address Book, Contact List, Book List, Inventory List or many other kinds of items that you would use in a database. Adding a Custom Data Table 1. Select Custom Data Table from the Add New Item dropdown menu 2. Type in the Name 3. Fill in the Description 4. Click Add Data Table Another option to add a Custom Data Table to your workspace is by importing the data from and XML file. This can only be done when you are adding the table to your workspace. 1. Select Custom Data Table from the Add New Item dropdown menu. 2. Click on Import Custom Data Table. Note: Your file must be in XML format as specified in the View Example File which is located beside the Choose File button. 3. Click Browse and locate your XML file on your computer. 4. Click Import Custom Data Table to import your data. 15 | P a g e SharpSchool User Manual Chapter 14: Workspaces Data Management The Data Management tab displays your table and allows you to add a record, edit an existing record or delete a record. Add Record To add a new record to your table click Add Record. Fill in the fields and then click Submit. Note: Not all data tables will contain the same fields as the example. Edit Record Click on the Name of the record that you would like to edit. Change the information that is necessary and then click Submit. 16 | P a g e SharpSchool User Manual Chapter 14: Workspaces Delete Record To delete a record that is in your table click on the Delete icon beside the name of the record. Table Information The Table Information tab allows you to edit the table information that is displayed on the Data Management tab. If you make any changes, click the Update Table Information button when you are complete. Name: The name of the table. Description: The description of the table. Unique Columns: Set certain columns in your table to be unique. (i.e. username, firstname, lastname) Searchable Columns: Allows you select the columns that are searchable in your table. You can enter in the column name or click on the to choose a column from the dropdown menu. Default Sort Column: From the dropdown menu, select the column that you would like to use to sort your table. Table Structure The Table Structure tab allows you to define what columns are in your table to be filled out. You can search, add, and remove columns as well as edit the properties of existing columns. 17 | P a g e SharpSchool User Manual Chapter 14: Workspaces Find Table Column If you have a table that contains a lot of information then you can use the built in search function to locate the column. Simply type in the name and click Search. To view all the columns again click View All. Delete Column To delete a column click the delete button beside the Column Name in the Action column. Add Column To add a column, click the button in the top right. Next you will need to enter in a Column Name, Display Name, select a Data Type from the dropdown menu. If required enter in a Default Value, choose whether to Allow Nulls and then to save click Add Column. Edit Column To edit an existing column simply click on the Column Name, make the appropriate changes and then click the Update Column button to save your changes. List Display Layout The list display layout will allow users to customize the way that the Data Management tab displays. If you leave this area blank it will display all columns and allow you to sort the columns by clicking on the column header. 18 | P a g e SharpSchool User Manual Chapter 14: Workspaces Add List Columns To add a column click on located in the top right of the page. Once you have completed filling out the form below click Add Column. Column Name: Choose your Column Name from the dropdown menu. . Title: This field will allow you to change the column header name. Allow Sorting: You can choose to allow the column heading sort the table. Assign Column Maximum Width: Set the maximum width for the column. This will ensure that the column never expands beyond your set width. Column Header Alignment: Change the alignment of the column heading. Allow Column Header to Wrap: This option lets the heading text wrap if the text in the column heading is too large to fit in the column. Column Data Alignment: Change the alignment of the data that is in the column. Allow Column Data to Wrap: Set the column data to wrap to multiple lines if the data is too large to fit in the column. Edit List Columns You can edit your list column by clicking on the name of the column. Delete List Columns You can delete a list column by clicking on the delete button beside the name of the column name. 19 | P a g e SharpSchool User Manual Chapter 14: Workspaces Module: Evaluation Users can add Evaluations to the workspace. These surveys can have different types of questions, from multiple choice questions to essay type questions. Adding an Evaluation 1. From the Add New Item dropdown menu on the workspace, select Evaluation. 2. Fill in the required fields: o Name - This is the name that will be used in the workspace. o Description - This description will be visible when you open the evaluation. 3. Click the Create Evaluation button. Viewing an Evaluation The View Evaluation section displays all the questions in the evaluation. Users can click on the following links: Take Survey – This link allows you to fill out the survey. Add Question – Add another question to the survey. Survey Submission - Allows you to see who has filled out the survey, when they filled it out and how often they did so. Export Survey - This allows you to export the survey questions to other surveys. 20 | P a g e SharpSchool User Manual Chapter 14: Workspaces Import Survey - this allows you to import survey questions from other surveys Chart - this charts the results that have been obtained Random Sort Questions – When checked off and if there are multiple questions this option will display the questions in a random order. Random Select Questions – You can use this option to randomly select a single question to display if you have multiple questions. Taking a Survey 1. Click Take Survey on the View Evaluation page. 2. Answer the questions provided. 3. Click the Submit button to submit the answer. 4. Click the Cancel button to return to the View Evaluation page without submitting your answers. 21 | P a g e SharpSchool User Manual Chapter 14: Workspaces Adding a Question 1. Click on the Add Question link on the View Evaluation page. 2. Select the Question Type: o Multiple Choice - This allows a user to select a single answer for the question. o Multiple Selection - This provides checkboxes for the user to select o Short Answer - This provides a textbox for the user to type an answer in 3. Type in the Question. 4. Set the Answer. If the question type is multiple choice or multiple selection, the different options are added here. 5. Set the Points for the answers. If assigning scores to the answer does not make sense in the context of the question or the context of the survey, just leave the score at 0. 6. Fill in the Feedback. 7. Click on the Add Question button to add the question to the survey. 22 | P a g e SharpSchool User Manual Chapter 14: Workspaces Chart The charts displays the statistics of the questions answered in pie-chart form. Edit Evaluation This section allows you to edit the following fields: Name - This is the name that will be used in the workspace. Description - This description will be visible when you open the evaluation. Click the Update Evaluation to save any changes. 23 | P a g e SharpSchool User Manual Chapter 14: Workspaces Module: File Users can add different types of files onto the workspace. These files can then be opened by other members who have access to the workspace. Adding a File 1. From the Add New Item dropdown menu on the workspace, select File. 2. Fill in the required fields: o Name - This is the name that will be used in the workspace. o File - Click Browse to locate and select the file that you wish to add. o Description - This description will be visible when you open the file. 3. Click the Add File button. Viewing a File When a user clicks on a file, they are taken to the View File page. This section also displays any comments made on the file. Click on the File Name to open the file itself. Click on the lock icon to lock or unlock the file. A locked file cannot be edited. 24 | P a g e SharpSchool User Manual Chapter 14: Workspaces All Versions This page lists all the versions for the file, and it identifies which version is currently in use. It also displays any comment on the file. You can Add New Revisions to the file. You can also Add comments to the file. These comments are visible under the View File page as well. Adding a Comment Comments can be added to files for other users to see. To add a comment: 1. Click on the Add Comment link on the View File page. 2. Fill in the comment into the text area provided. 3. You can add attachments with the comment by clicking on the Add Attachment link. 4. Click the Preview button to view how the comment looks. 5. Click the Post button to post the comment under the file. To learn more about adding files, please refer to the Chapter 10: Document Container manual that can be found on the SharpSchool CustomerNet website http://customernet.sharpschool.com. 25 | P a g e SharpSchool User Manual Chapter 14: Workspaces Module: Folder Users can add folders in the workspace to better organize items. Other objects can then be added to the folders. This allows you to efficiently organize files, links and other resources. Adding a Folder 1. From the Add New Item dropdown menu on the workspace, select Folder. 2. Fill in the required fields: Name - This is the name that will be used in the workspace. Description - This description will be visible when you open the folder. 3. Click the Create Folder button. For more information about folder use in the SharpSchool solution please refer to Chapter 10: Document Container that can be found on the SharpSchool CustomerNet website http://customernet.sharpschool.com. 26 | P a g e SharpSchool User Manual Chapter 14: Workspaces Module: Forum The forum is an excellent tool for conducting quick and detailed discussions on various topics with many individuals participating at once. Here you can establish course topics, provide sections for discussion, or simply answer questions all in an organized environment. Adding a Forum 1. From the Add New Item dropdown menu on the workspace, select Forum. 2. Fill in the required fields: Name - This is the name that will be used in the workspace. Description - This description will be visible when you open the folder. 3. Select if this Forum is going to be Enabled. If the forum is not enabled, it will not be usable until it has been set to Enabled. 4. Click the Add Forum button. To learn more about Forums please refer to the manual Chapter 5: Discussion Forum that can be found on the SharpSchool CustomerNet website http://customernet.sharpschool.com. 27 | P a g e SharpSchool User Manual Chapter 14: Workspaces Module: Link Users can add links onto the workspace. If a user clicks on a link, they will be automatically redirected to it. To add a link: 1. From the Add New Item dropdown menu on the workspace, select Link. 2. Fill in the required fields: o Link Name - This is the name that will be used in the workspace. o Web Address (URL)- This is the web page to which the user will be redirected. when they click on the link. 3. Click the Add Link button. To learn more about adding links, please refer to the Chapter 10: Document Container manual that can be found on the SharpSchool CustomerNet website http://customernet.sharpschool.com. 28 | P a g e SharpSchool User Manual Chapter 14: Workspaces Module: Form Template Form Templates are templates that are used as a standardized form from which individual form instances can be generated. They can also be copied and changed to create other new form templates. The form template acts as a master copy of the form and individual submissions are copies of the template. Any changes made to the form template will result in a change to all future submissions for that form. Adding a Form Template 1) Select Form Template from the Add New Item dropdown menu. 2) Enter a Name for your form. This will be the display name for your form. 3) Select a Locale. 4) To add the template to one or more categories, click the icon to the right of the Category field. A list of categories and subcategories will appear. 5) The Template Content area is the body of your form. The Rich Text editor grants you the ability and freedom to design the form as you choose. You may design and customize the form to your specifications. 29 | P a g e SharpSchool User Manual Chapter 14: Workspaces 6) The On Submission area gives options which allow you to control how the form submissions are saved. Save data to default location will save the form submissions in the Form Builder along with the template. 7) The After Submission area allows the author of the form template to specify what a user sees after the form has been submitted. By default, the form will reload the page that the form was accessed from. 8) You can select Send email notification to specified users or addresses to send an email with the form contents each time the form is submitted. To notify people with user accounts on the site, click on to open the user picker. When the pop-up window appears, select the groups and/or site users that should be emailed when the form is submitted and click your desired users, select . Once you have added . To send notifications to people who do not have an account on the site, simply type their email addresses in the Email Addresses field with a semi-colon, comma or new line between each address. 9) Once the information has been filled out, you can click the Validation Check button to ensure that all the input fields have been configured correctly. If any fields require additional configuration, a message will be displayed above the Rich Text editor area, detailing the necessary changes. Complete the configurations and click the Validation Check button again. If the Successful indication text appears, then you know the form is valid. Note: A validation check is automatically carried out when you click the Next button. 10) When you have finished configuring the form, click Next to proceed. If your form passes validation, you will now be brought to the next page. 30 | P a g e SharpSchool User Manual Chapter 14: Workspaces 11) Check any fields you wish to be mandatory. Users cannot submit a form unless all of the mandatory fields are populated. You can also enter in a customized Error Message to display when each of the Mandatory fields is not filled out on submission. 12) Click Publish Form Template to create the new form template. This will create the first version of your form template. To continue editing the form template before publishing, click Back to return to the editor page. Pitfall: Clicking Cancel will return you to the workspaces page and exit the form template creation process! If this is the first version of your form that means that your form template will disappear completely! To learn more about Form Templates please refer to the manual Chapter 15: Forms Engine that can be found on the SharpSchool CustomerNet website http://customernet.sharpschool.com. 31 | P a g e SharpSchool User Manual Chapter 14: Workspaces Module: Gallery Photo Gallery allows you to create multiple albums with dynamic features such as the ability to view pictures as slideshows, and allowing for moderated comments. These galleries are a great way to capture and showcase activities and events that occur at your school or district. Adding a Gallery 1) Select Gallery from the Add New Item dropdown menu. 2) Enter in the Name. 3) Fill in a Description. 4) Click Create. To learn more about the Photo Gallery please refer to the manual Chapter 3: Photo Gallery that can be found on the SharpSchool CustomerNet website http://customernet.sharpschool.com. 32 | P a g e SharpSchool User Manual Chapter 14: Workspaces Module: Meeting Room The meeting room is a legacy module that is no longer supported. You are welcome to use the meeting room to experiment with its functionality and use the module as you wish, but as the module is no longer supported, if you have any difficulties with the meeting room, SharpSchool can only provide limited support. Adding a Meeting Room 1) From the Add New Item dropdown menu select Meeting Room. 2) Enter in a Name. 3) Fill in the Description. 4) Click Create Meeting Room. 33 | P a g e SharpSchool User Manual Chapter 14: Workspaces Editing a Meeting Room To edit your Meeting Room, click on Edit Meeting Room, change the Name or Description and then click Update. 34 | P a g e SharpSchool User Manual Chapter 14: Workspaces Adding an Online Meeting 1) Click Add Online Meeting. 2) Enter a Subject for your meeting. 3) Select the Duration in hours and minutes from the dropdown menus. 4) Choose the Start Date and time for your meeting. 5) Add any Participants by clicking on , select the Group(s) and/or User(s) and click Add, then click OK in the popup window. 6) Fill in a Description. 7) Type in an Audio Phone Number (if applicable). 8) Click Add Online Meeting to save. 35 | P a g e SharpSchool User Manual Chapter 14: Workspaces Managing a Online Meeting From the meeting View tab allows you can choose to Join the Meeting, Enroll or Unenroll from the meeting, view your meeting details, and Add Files. The Edit tab allows a user to change the Online Meeting information. Once you have made your changes to the meeting click Update Online Meeting. 36 | P a g e SharpSchool User Manual Chapter 14: Workspaces The Enrollment tab will allow users to select the User(s)/Group(s) to participate in the meeting as well as Delete any participants they wish to remove. The Security tab lets users specify which User(s)/Group(s) can access the Online Meeting. You can read more about security in SharpSchool’s manual Chapter 1: SitePublish. The Activity tab shows users the changes that have happened to the Online Meeting. You can subscribe to have any changes that were made be emailed to you using the Subscribe link. 37 | P a g e SharpSchool User Manual Chapter 14: Workspaces Module: Note Notes is an excellent resource if you a user needs to quickly type in an idea or reminder for a task to complete. Adding a Note 1) From the Add New Item dropdown menu select Note 2) Type in the Title. 3) Fill in the Note. 4) Click Add Note. Commenting on a Note 1) Click Add Comment. 2) Type in the Subject. 3) Fill in the Message. 4) If you wish to add an Attachment you can do so by clicking on Browse, locating the file on your computer and clicking Open. 5) Click Post Comment to post the comment. 38 | P a g e SharpSchool User Manual Chapter 14: Workspaces Module: Project Large projects can often become a muddled mess. It’s tough to keep track of all the different components, dates, and tasks. With the project module, teachers and administrators can easily plan, delegate and track a project so that it doesn’t get bogged down in confusion. Adding a Project 1. From the Add New Item dropdown menu on the workspace, select Project. 2. Fill in the required fields: Name – Name of your project. Description – Description of your project. Status – Designate the current state of the project by selecting Pending, On Target, Caution, Critical or Complete. This status can be changed as needed throughout the project’s lifespan. Start Date - Date the project started or will start. Target Date - Originally predicted date of completion. Mission - The purpose of the project Goals – Define specific goals for the project in this section. Objectives - Specific objectives that need to be completed. Initiatives - Initiatives needed to start the project Include a Calendar option – Inserts a calendar for the use of all project members. Include Online Meeting option - Allows the members to conduct online meetings Include Discussion Forum option - Allows the members to participate in an online forum. 3. Click the Add Project button. 39 | P a g e SharpSchool User Manual Chapter 14: Workspaces Manage Project Project User Interface Overview The project user interface will allow project members to collaborate and share information as well as progress. ITEM DESCRIPTION Workspace This tool features all of SharpSchool’s standard collaborative modules, such as calendars, photo galleries and discussion forum as well as content authoring and document sharing modules. My Tasks List of tasks that are assigned to you for the project. Events Calendar that can be used as a collaboration tool to show events for the project such as meeting dates and major tasks due dates. Online Meetings Online meetings can be used for collaborating on different types of projects. Please refer to the section Module: Meeting Room in this user manual for more detailed information. Members Shows a list of members that are participating in the project. Forums The forum is an excellent tool for conducting detailed discussions on various topics. For more detailed information about forums please refer to the section Module: Forums in this user manual. 40 | P a g e SharpSchool User Manual Milestones Chapter 14: Workspaces This is a list of milestones that are in your project. To get more information about the milestone click the Name. Task Lists Task Lists will be shown here. If you want to get further details about what tasks are on the list click on the Name. Tasks Shows a list of tasks that are part of the project with the status of the task and who it has been assigned too. You can get more details about the task by clicking on its Name. Recently Visited Items This is a history of items that have been recently worked on or viewed. You can see the changes made to the item by clicking on the Name. Allows you to edit your projects basic information. Once you have completed any changes click on Edit Project at the bottom. Deletes the project. Note: Once you have clicked Yes to confirm the deletion the project will be permanently deleted. Allows you to create Tasks Lists for your project. Type in a Name and Description and then click Add Task List. 41 | P a g e SharpSchool User Manual Chapter 14: Workspaces Task List To view your task list, click on the name of the list under Task Lists from the Overview page. You can edit your task list by clicking and then change the Name and/or Description. When your changes are complete, click Edit Task List. If you need to delete your task list click the button. Adding New Milestone To add a new milestone to your task list, click and fill out the Name and Description and then click Add Milestone. Editing a Milestone To edit a milestone click on the name of the milestone and then click on the button, fill out the form which is similar in the screenshot above and when finished click Edit Milestone. 42 | P a g e SharpSchool User Manual Chapter 14: Workspaces Deleting a Milestone If you need to delete your milestone click the button once you have clicked on the name of the milestone. Adding a New Task To add a new task to your task list click on the button. Name: Name of your task. Assigned To: Assigns user(s) to this task. Priority: Choose from the dropdown menu whether this task has a low, medium, high, or no priority. Status: Select the status of this task from the dropdown menu. Milestone: From the dropdown menu select the Milestone that is available. Note: If no milestones have been created, use the steps provided on the previous page to create one. Start Date: Select the start date of the task. Due Date: Select the due date of the task. Instructions: This is where you can include any instructions for the task. Comments: If you want to add comments you can enter them here. When the fields have been filled out, click Add Task. 43 | P a g e SharpSchool User Manual Chapter 14: Workspaces Managing a Task You can manage a task by clicking on the name of the task and then adding attachments, links removing attachments and links, as well as editing, moving and deleting the task all together. To add an attachment, click Add Attachment, to add a link click Add Link and if you want to delete an attachment or link simply check the box beside the item and click Delete. Editing a Task You can edit an existing task by clicking on the button, making changes to the form below and then clicking on Edit Task. 44 | P a g e SharpSchool User Manual Chapter 14: Workspaces Move a Task You can move a task to another project that is available within the workspaces. To do this click on the button, then from Select Destination click Browse. Beside the name of the item click Select and then back on the move task click Move to Here. 45 | P a g e SharpSchool User Manual Chapter 14: Workspaces Delete a Task If you need to delete your task click the button once you have clicked on the name of the task. New Task Group A Task Group is where you can create multiple tasks to be completed as a group that is part of your overall project. You can create a New Task Group by clicking on the link, filling out the form below and then click on Add Group. Name: Name of the task group. Description: Description of the group. Default Milestone: From the dropdown menu select a default milestone to attach your group to. Task Group Interface You can edit your task group information by clicking on the button and then after making the necessary changes on the form click Edit Group. To delete your task group click on the button. You can add another task group within this group by clicking on the button, filling out the form and then clicking Add Group. 46 | P a g e SharpSchool User Manual Chapter 14: Workspaces To add a new task click on the button, fill out the form and then click on Add Task. 47 | P a g e SharpSchool User Manual Chapter 14: Workspaces Module: Vote A vote is a poll with a single question. Users can add polls to workspaces or submit answers to polls already posted. Adding a Vote 1. From the Add New Item dropdown menu in the workspace, select Vote. 2. Fill in the required fields: o Name – Name of the poll. o Question – Question being asked. o Answer Options –Possible poll answers and options. If you need more than 5 answers for the poll, click Add Answer. Allow multiple answers: Allow users to select multiple answers. Randomize answer order: Randomizes answer display order. Allow user to enter own answers: Adds an Other option users can use to type in an answer. o Display Options – You can change what the submit button text will be, choose how you want to show poll results to the voters, and whether to display results as a bar or pie chart. o Additional Options Security Measure – Allows you to add that a CAPTCHA to your poll that will require guest users to verify they are real people and not spam bots. Repeat Voters – Choose if you wish to allow guests to have multiple votes, block by cookie, or block by cookie and IP address. For the latter two scenarios, guests will not be allowed to vote once the system has logged them as having voted once. Deadline – If you would like you vote to close on a certain date then from the dropdown menu select Close On and then specify the date and time. 3. Click the Poll button to create your poll. 48 | P a g e SharpSchool User Manual Chapter 14: Workspaces View Vote When users click on a vote object, the system directs them to the View Vote page. This page allows users to select their answer. Click the Submit button to submit your answer. Edit Vote This page allows the users to change the same options that are available on the Add Vote page. For more details on these options, see the previous page. When you have finished with your changes, click Update Poll. Report Tab The report tab will allow you to view the results of your vote/poll as a bar or pie chart. It will also allow you to export the results to a .CSV file that is readable in Excel. From here you can also reset your results if you would like to restart the poll with no data. 49 | P a g e SharpSchool User Manual Chapter 14: Workspaces Module: Wiki The introduction of the wiki has revolutionized the way we view, share, and create content. The traditional method of content creation is a slow, time-consuming process that results in a static document. Wikis, on the other hand, can grow quite rapidly and produce a dynamic, living document that can constantly evolve as new information is introduced. Adding a Wiki 1. From the Add New Item dropdown menu on the workspace, select Wiki. 2. Fill in the required fields: Name: The name of the wiki. Description: A description of the wiki you are creating. Date Format: Choose a preferred format for the date. Mode: Dominant: Displays the wiki in full screen mode in your browser window without your page theme. Inline: Displays your wiki using the current page theme CSS: This dropdown menu contains different color schemes that control every page of the wiki. You can choose from Default, Green and Pink. Content Editor: You can use this dropdown menu to select to use either the Built-in Wiki Editor or the Rich Text Editor 3. Click the Create Wiki button. To learn more about Wiki Pages please refer to the manual Chapter 11: Wiki Page that can be found on the SharpSchool CustomerNet website http://customernet.sharpschool.com. 50 | P a g e SharpSchool User Manual Chapter 14: Workspaces Module: Workflow A workflow consists of a sequence of logically connected steps. It is a sequence of operations, declared as work for a person, a group of persons, an organization, and contains one or more simple or complex mechanisms. Adding a WorkFlow 1) Select Workflow from the Add New Item dropdown menu 2) Fill in the Name. 3) Enter a Description. 4) Click Create. To learn more about the Workflow, please contact [email protected]. Alternatively, a manual on Workflow will be available on the SharpSchool CustomerNet website http://customernet.sharpschool.com in the near future. 51 | P a g e SharpSchool User Manual Chapter 14: Workspaces Module: Workspace Users can add a workspace within the Workspace. This will allow a district or school to be able to have a workspace for a specific grade or department or even for individual users. To add a workspace: 1. From the Add New Item dropdown menu select Workspace. 2. Fill in the required fields: o Name - This is the name that will be used in the workspace. o Description - This description will be visible when you open the workspace. 3. Click the Next button. 4. Choose a template and then click Create Workspace. The templates that you can choose from will add the appropriate modules to the workspace for you to use automatically. If you want to create your own simply leave it as Blank Workspace Template. To see what each template does simply select the workspace and on the right hand side a description of what it contains will be displayed. 52 | P a g e SharpSchool User Manual Chapter 14: Workspaces View Workspace The View Workspace tab displays all the objects in the workspace. New objects can be added from the Add New Item dropdown menu. To open any object, click on the object name. To delete an object, select the checkbox next to the name and from the dropdown menu at the bottom, choose Delete Selected. To move an object, select the checkbox and from the dropdown menu, choose Move Selected. Then click Browse, locate the destination you desire and click Select. Then click Move to Here. Edit Workspace The edit workspace section allows you to edit the same options as on the Add Workspace page: Name - This is the name that will be used in the workspace. Description - This description will be visible when you open the workspace Click the Update button to save any changes. 53 | P a g e SharpSchool User Manual Chapter 14: Workspaces Display Setting The Display Setting tab allows users to change the look and feel of the workspace. Data Columns: Users can choose the following check box options to Hide the Last Modified column, Hide the User column, and Hide the Size column. Default Sort: Will allow a user to specify whether to default sort by Name, Modified, User or Size and whether to sort in Ascending or Descending order. Maximum File Upload Size: Users can select to leave the default setting at 1024000 KB = 100 MB or you can select the Set maximum size to, and enter in your size in KB. Note: 1 MB=1024KB Once you have made your changes click Update Settings. 54 | P a g e