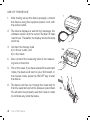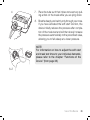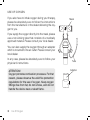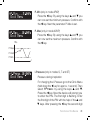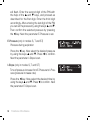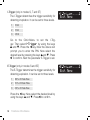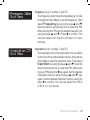
1
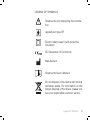
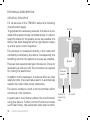
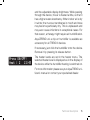
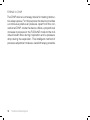
HOFFRICH TER User´s Manual CPAP - AUTO - BILEVEL - BILEVEL ST20 TREND II Quality makes the Difference SERIAL NUMBER HOFFRICHTER GmbH delivers all its systems with a serial number in order to ensure traceability. The serial number is indicated on the type label on the bottom of the system. Please always specify the serial number in inquiries and complaints. CONFORMITY The device complies with the requirements of the Directive 93/42/EEC. 2 Info TABLE OF CONTENTS Legend of Symbols ................................................ 5 Safety Instructions ................................................. 6 Power Supply ...................................................... 10 Standby Mode ..................................................... 11 Intended Use ....................................................... 12 Contraindications ................................................. 13 Technical Description ........................................... 14 General Remarks .............................................. 14 TREND II CPAP ................................................ 16 TREND II AUTO ............................................... 17 TREND II BILEVEL ........................................... 19 TREND II BILEVEL ST20 .................................. 20 Notes Prior to First Use ........................................ 22 Views................................................................... 24 Front View ........................................................ 24 Back View......................................................... 25 Scope of Delivery ................................................. 26 Optional Accessories ........................................... 27 Use of the Device ................................................. 28 Use of Oxygen ..................................................... 30 Filter Change ....................................................... 32 Table of Contents 3 Cleaning .............................................................. 33 Cleaning the Mask ............................................ 33 Cleaning of the Therapy Tube ............................ 33 Cleaning the Device .......................................... 34 Cleaning the Head Gear .................................... 34 Alarm Functions of the Device .............................. 35 Power Failure .................................................... 35 Mask Alarm....................................................... 36 Pressure Alarm ................................................. 36 Wake Alarm ...................................................... 37 Functions of the Device ........................................ 38 Info-Menu ......................................................... 39 Patient-Menu .................................................... 44 Clinic-Menu ...................................................... 56 Troubleshooting ................................................... 69 Display Messages ................................................ 72 Service ................................................................ 75 Preparing the Device for a Different Patient ........ 76 Disposal............................................................... 77 Device .............................................................. 77 Packaging......................................................... 77 Technical Data ..................................................... 78 4 Table of Contents LEGEND OF SYMBOLS Observe the accompanying documentation Applied part type BF Electric safety class II (with protective insulation) CE Declaration of Conformity Manufacturer Observe the User´s Manual Do not dispose of the device with nor mal domestic waste. For information on the proper disposal of the device, please contact your responsible customer service. Legend of Symbols 5 SAFETY INSTRUCTIONS Before using your respiratory therapy device for the first time, please thoroughly read these User´s Manual. Keep these User´s Manual at a safe place for immediate consultation, if necessary. For the period stipulated by law, HOFFRICHTER GmbH warrants that the product is free from any defects provided it is used as intended. HOFFRICHTER GmbH is not liable for any damage and consequential damage nor for any effects on the safety, reliability and performance of the device, if: • manipulations, modifications, expansions, adjustments, repairs and maintenance measures are carried out by persons not authorized by us to do so • use is made of accessories and spare parts which come from other manufacturers and have not been released by us for use with the point • the device is used in a way that is different from that described in the User´s Manual • the hygiene and cleaning instructions contained in these User´s Manual fail to be observed 6 Safety Instructions In order to prevent potential hazards, please follow the instructions below: • Exclusively use the device for your own therapy, which must have been prescribed by a physician. • Use accessories only which have been recommended and offered by your specialized dealer. • Regularly test the alarm function of your device (from page 35). • Always ensure that the small hole in the mask or in the adapter between the mask and the tube is unobstructed so that the exhaled air that is loaded with CO2 can escape. • Never set up the device in a compartment of a cabinet nor under your bed. • Please make sure air can circulate around the device and the power plug is readily accessible. • Do not place the device in the vicinity of radiators. • Ensure that the device is positioned horizontally. This is particularly necessary if a humidifier is connected. • If you receive oxygen with your therapy, please follow all fire protection and safety regulations with regard to the use of oxygen. Safety Instructions 7 • • • • • 8 Mobile use of the device is permitted only in a parked vehicle. Immediately see your physician if, while using the device, you develop one or more of the following symptoms: dryness of the mucous membranes in nose and throat, frontal sinus complaints, earache, a running nose, hypersensitivity of the skin, oversensitiveness, loss of voice, disturbances of orientation or memory. Immediately notify your specialized dealer if the device fails to function properly. Never place the respiration therapy device in the vicinity of other equipment or devices, such as defibrillators, diathermy equipment, mobile phones, microwave, remote-controlled toys, etc. Electromagnetic fields greater than 3 V/m may affect the operation of the device. When connecting the device to a DC supply source, please only use the optional connection cable listed under optional accessories and do not use the device with a PC. Safety Instructions To maintain electrical safety, please observe the following instructions: • Do not put the device into operation if its housing and/or cables are damaged. • Do not open the housing. Notify your specialized dealer of any disturbances and failures. • Protect the device from water and moisture. • Never operate the device in moist rooms nor in a bathroom. • Do not place a vessel filled with fluid on the device. • Be absolutely sure not to seize the device if it has fallen into water. • Do not set up the device in the vicinity of water vessels (bath tubs). • Before cleaning the device, always disconnect the power plug. Safety Instructions 9 POWER SUPPLY TREND II has an internal switched mode power supply unit with a wide range input of 100 - 240 V~, 50 - 60 Hz. This allows connection to all energy supply networks in the world. It is also possible to operate the de vice with a direct voltage of 24 V DC, e.g. for mobile use in a truck or mobile home. When connecting the device to a DC supply source, please only use the optional connection cable and do not use the device with a PC. 10 Power supply STANDBY MODE The device is in the standby mode as long as the turbine is turned off. The standby mode is indicated by the illuminated display showing date and time. Power consumption in this mode is approx. 5 W. In the standby mode, the device TREND II may remain continuously switched on without posing any risk. Standby Mode 11 INTENDED USE The TREND II is intended for treating breathing disfunction especially for nighttime sleep apnea in patients with a weight of 30 kg and higher. The device generates a continuous positive airway pressure in order to keep the upper respiratory tract unobstructed. The device is not suitable for being used with patients who need artificial respiration. This therapy device is no life-preserving system. The treatment pressure is applied through a breathing mask. This breathing mask must be provided with an exhalation valve in order to ensure that the exhaled air is discharged. Do not wear the breathing mask while the therapy device is turned off because, otherwise, you might rebreathe exhaled air. Please also follow the manufacturer’s instructions on use of the breathing mask. 12 Intended Use CONTRAINDICATIONS Respiratory therapy may be contraindicated in patients with the following preexisting diseases: • Bullous lung diseases • Pneumothorax • Very low blood pressure • Air accumulation after open craniocerebral trauma or other head injuries In case of an inflammation of the paranasal sinuses or the middle ear, it might be indicated to stop the therapy. Please consult your physician. Devices which have been fitted with an AquaTREND uni humidifier may not be used with additives such as medication or aroma oils in the humidifier water. Contraindications 13 TECHNICAL DESCRIPTION GENERAL REMARKS For all devices of the TREND II series the following characteristics apply. To generate the necessary pressure, the device is provided with an electronically controlled blower. In order to keep the stress for the patient as low as possible, the blower has been designed with a high reserve capacity and a quick control response. Air inlet Filter Control unit The pressure is measured directly in the mask and constantly controlled by the device. Consequently, the breathing work for the patient is as easy as possible. There are two separate tubings in the device. One is for respiratory air and one is for the convection air required for cooling the electronics. In addition to the mask alarm, the device offers an-other safety function, the power failure alarm. It automatically restarts the motor after power restoration. The device contains a built-in microcontroller which controls all of its functions. A quartz alarm clock further adds to the comfort when using the device. Further comfort functions include a soft start ramp, the automatic start-stop function 14 Technical Description Blower Pressure sensor Connector measuring tube Air outlet and the adjustable display brightness. While passing through the device, the air is heated a little, so that it has a higher water absorbency. When indoor air is dry in winter, the mucous membranes in mouth and nose may become particularly dry. This is unpleasant and may even cause infections in exceptional cases. For that reason, a therapy might require air humidification. AquaTREND uni a clip-on humidifier is available as accessory for all TREND II devices. If necessary, just click the humidifier onto the device. Remove it by pressing its release button. .!00EH !/ L = =<L?@ The heater levels are set in the heater menu. The selected heater level is displayed as in the display of the device while the humidifier heating is switched on. For more information please see your AquaTREND uni User`s manual or contact your specialized dealer. Technical Description 15 TREND II CPAP The CPAP device is a therapy device for treating obstructive sleep apnea. For this purpose the device provides a continuous positive air pressure. Apart from the conventional CPAP-mode the device offers a proportional increase in pressure in the FLEXLINE mode to the individual breath flow during inspiration and a pressure drop during the expiration. This intelligent method of pressure adjustment makes a careful therapy possible. 16 Technical Description TREND II AUTO Within a certain pressure range the device automatically controls the therapy pressure depending on the occurrence of respiratory events. In sleep phases with no events the therapy pressure is lowered. Starting obstructive events are treated effectively with a slight pressure increase. For a high therapy comfort the therapy pressure should always be only as high as necessary and as low as possible. The device can recognize the following respiratory events: • Obstuctive apnea • Hypopnea • Central apnea • Snoring • Normal respiration • Increased airway resistance The identification of the different respiratory events is achieved via 3 channels: 1. Measurement of any constriction of the respiratory tract 2. Detection of flow limitations by measuring the flow 3. Detection of snoring with the help of sound detection Technical Description 17 The combined analysis of all results facilitates a very precise differentiation between obstructive and central events. The device adjusts the therapy pressure according to the detected events as described below: • Increase of pressure for obstructive events • Decrease of pressure for central events and normal respiration In addition, the pressure increase can be adjusted in 5 levels according to special requirements and to the individual patient comfort. These settings are performed by the physician with the help of the PC software TRENDset. In addition to normal APAP and CPAP mode the device offers the FLEXLINE mode, a pressure increase which is proportionate to the individual respiration flow during inspiration and a pressure decrease during expiration. 18 Technical Description TREND II BILEVEL The device has two different adjustable pressure levels. A higher level for inspiration and a lower level for expiration. Trigger device The respiration trigger detects the patients efforts to breath in and out and signals these efforts to the control device. A flow-based trigger is integrated which can be set separately for inspiration and expiration. While the pressure increases during inspiration it decreases during expiration. In connection with an optimum slope adjustment this results in a ventilation which is very comfortable for the patient and which gives the patient the impression as if the device is following the natural respiration without delay. NOTE: During the expiration phase a negative pressure (vacuum) will not be created. Technical Description 19 TREND II BILEVEL ST20 The device has two different adjustable pressure levels. A higher level for inspiration and a lower level for expiration. Trigger device The respiration trigger detects the patients efforts to breath in and out and signals these efforts to the control device. A flow-based trigger is integrated which can be set separately for inspiration and expiration. While the pressure increases during inspiration it decreases during expiration. In connection with an optimum slope adjustment this results in a ventilation which is very comfortable for the patient and which gives the patient the impression as if the device is following the natural respiration without delay. In the device are the modes S-, ST- and T-mode integrated. S-mode Spontaneous trigger – the change from one pressure level to another is triggered by starting respiration of the patient only. A decline in pressure to the set lower pressure level also occurs once the inspiration flow ends. 20 Technical Description ST-mode Spontaneous breathing and Time – as long as the patient is breathing independently the device is operating in the S-mode. Once the patient stops breathing the device automatically switches into the T-mode and provides respiration for the patient in the prescribed safety frequency. The delay time after which the device switches into the T-mode can be set. T-mode Time respiration with prescribed, set inspiration time. If the trigger function is deactivated the patient is ventilated according to the set parameters. If the trigger function is activated the device accepts only spontaneous trigger signals in the expiration phase. NOTE: During the expiration phase a negative pressure (vacuum) will not be created. Technical Description 21 NOTES PRIOR TO FIRST USE Never turn the device on if you kept it in a very cold environment. Wait for approx. 1 hour until its temperature compensation is completed. Regularly check the air filter cassette and regularly exchange it as described on page 32. Never use the device without air filter. Clean your mask system regularly and check all accessory parts, particularly the therapy tube, the mask and the head gear. We recommend that you wash your face before going to sleep, in order to remove fat and cosmetics from your skin. This increases the service life of the mask and helps to prevent irritations of the skin. Make sure the measurement tube is unobstructed at all times. Avoid ingress of water into the measurement tube during cleaning. If water droplets should have accidentally entered the measurement tube they must be carefully and thoroughly removed. 22 Notes Prior to First Use Please strictly observe the following setup instructions: • Do not place the device in the vicinity of a heating source. Air circulation – particularly that below and behind the device – must not be impaired by furniture, curtains or cushions. • Set up the device next to your bed. Place it on a firm and flat surface of your bedside cabinet. • Do not place the device in a way that it is exposed directly by sunlight or UV light. • During mobile use, the device must also be placed on a firm and flat base, which must have an edge to protect the device from falling off. Notes Prior to First Use 23 VIEWS FRONT VIEW 5 4 3 1 2 HOFFRICH TER 6 7 9 10 24 Views 8 11 1 2 3 4 5 6 7 Program keys Filter cassette Display Heater LED Info key Heater key Release button for accessories 8 Measuring tube connection 9 Air outlet 10 Contact socket for humidifier 11 ON/OFF key BACK VIEW TER RICH 13 HOFF 12 14 12 DC Input 24 V DC 13 RS232 interface 14 Power connection 230 V AC Views 25 SCOPE OF DELIVERY 1 2 3 4 1 5 6 7 2 6 3 5 4 7 26 Scope of Delivery Therapy device User’s manual Power cord Therapy tube (1.80 m) incl. measuring tube Stoppers Carrier bag Replacement filter cassette without frame cover Art. - No.: TREND II CPAP ........................................0000 2061 TREND II AUTO .......................................0000 2062 TREND II BILEVEL ...................................0000 2063 TREND II BILEVEL ST 20 .........................0000 2064 User´s manual ..........................................5000 0201 Power cord ..............................................3110 0015 Therapy tube, measuring tube and stoppers ...........................................0000 7116 Carrier bag ..............................................0000 2437 Filter cassette ..........................................0000 2058 A breathing mask that has been specially adjusted for the individual patient is required for start-up and use of the device in the domestic area, in addition to the therapy device with power cord, and therapy tube. OPTIONAL ACCESSORIES Art. - No.: AquaTREND uni .......................................0000 2073 Car cable .................................................0000 9212 12 V to 24 V converter .............................0000 7133 Replacement filter cassette with frame cover .............................................0000 2057 Optional Accessories 27 USE OF THE DEVICE 1 After having set up the device properly, connect the device using the supplied power cord, with the socket outlet. ICHTER HOFFR 1. 2. The device displays a welcoming message, the software version and the current number of treatment hours. Thereafter, the display shows the date and time. 3. Connect the therapy tube a) to the air outlet, and b) to the mask. 4. 3a Also connect the measuring tube to the measuring tube connection. 5. Put on the mask. If you have selected the automatic mode, the device will start on your first breath. In the manual mode, press the ON/OFF key to start the device. 6. The device will then run through the mask test for the time selected and at the pressure prescribed. You should now properly seat the mask in order to eliminate any potential leaks. 28 Use of the Device 3b HOFFRICHTER 7. 4 HOFFRICHTE R Place the tube such that it does not exert any pulling action on the mask while you are lying down. 8. Breathe deeply and calmly only through your nose. If you have activated the soft start function, the device initially reduces the pressure after completion of the mask test and will then slowly increase the pressure automatically to the prescribed value, allowing you to fall asleep at a lower pressure. HOFFRICHT ER NOTE: For information on how to adjust the soft start and mask test times to your individual demands, please refer to the chapter “Functions of the Device” (from page 38). 6+7 Use of the Device 29 USE OF OXYGEN If you also have to inhale oxygen during your therapy, please be absolutely sure to follow the instructions from the manufacturer or the dealer delivering the oxygen to you. Mask If you supply the oxygen directly into the mask, please use a non-kinking tube that consists of a medically approved material. Please consult your local dealer. You can also supply the oxygen through an adapter which is mounted to the air outlet. Please consult your local dealer. In any case, please be absolutely sure to follow your physician’s instructions. ATTENTION! Oxygen promotes combustion processes. For that reason, please observe the valid fire protection regulations for the use of oxygen. Keep oxygen fittings free from fat, do not smoke, and do not handle the device near a naked flame. 30 Use Of Oxygen Tube Adapter ATTENTION! If you are using oxygen together with the device, the oxygen supply must always be deactivated as long as the device is in the standby mode or while it is turned off. • • • • Always turn on the device first and only then the oxygen supply. Turn off the oxygen supply before turning off the device. Activate “Auto OFF” as described on page 52. Whenever you use the device, check the tube connections for proper seating beforehand. Use Of Oxygen 31 FILTER CHANGE If the filter is polluted or the display shows the message Change Filter the filter cassette must be changed. 1. To change the cassette, pull it out of the device. 2. Separate filter cassette and filter frame cover by pulling them apart. 3. Replace the filter cassette. 4. Mount the filter frame cover onto the new filter cassette. Make sure the upper part (slit) and the filter cassette (pin) are in the correct position. @ ;$ $*#!%(/!. 1 HOFFRICHTE R To set back the message proceed as described in the chapter “Patient-Menu” on page 46. 2 NOTE: Never operate the device without filter cassette. Only and exclusively use original HOFFRICHTER filter cassettes. Otherwise, the warranty for the respiratory therapy device will become extinct. 4 32 Filter Change CLEANING CLEANING THE MASK For reasons of hygiene the mask must be cleaned on a daily basis: 1. Separate the mask from the therapy tube. 2. Use mild soap water (don´t use other additives) for cleaning, thoroughly rinse with clear water and let the mask dry in air, protected for direct sunlight. CLEANING OF THE THERAPY TUBE For reasons of hygiene the therapy tube must be cleaned on a weekly basis. Make sure the measuring tube is unobstructed at all times. Avoid ingress of water into the measuring tube during the weekly cleaning. If water droplets should have accidentally entered the measuring tube they must be carefully and thoroughly removed. 1. Close the measuring tube tightly with the stoppers before cleaning (see page 26). 2. Use mild soapy water for cleaning, thoroughly rinse with clear water, and let the tube dry in air. 3. Remove the two stoppers from the measuring tube after cleaning. Cleaning 33 NOTE: If water should stay in the measuring tube it could adulterate the pressure measuring or delay the control. Both could affect an optimal therapy. CLEANING THE DEVICE For reasons of hygiene the device must be cleaned on a weekly basis: 1. Disconnect the power plug. 2. Wipe the device with a cloth slightly moistened with soapy water. Then use a dry cloth to wipe the device dry. You do not have to disinfect the device or parts of the device chemically or thermally. CLEANING THE HEAD GEAR Clean the head gear as required: 1. Disconnect the head gear from the mask. 2. Clean the head gear as described in the head gear manufacturer’s User’s manual. 34 Cleaning ALARM FUNCTIONS OF THE DEVICE POWER FAILURE +3!.%(1.! !0/./1.%*! If a power failure at night would go unnoticed as a result the patient would breathe used air from the therapy tube all night. To avoid this the device is equipped with an alarm mechanism that warns you if power or a fuse fail at night. You will be woken up with an acoustic signal so you can take the mask off your face and breathe fresh air. The alarm is turned off by pushing the ON/OFF key. After power supply is re-established the motor starts automatically and the display will show the following message: Checking the power failure function NOTE: To check the power failure alarm, the device must have been connected to the power cord and turned on for at least half an hour. Use the device with running blower and then pull the power plug out of the wall socket. Now the acoustic warning signal should sound. Check once a month if the signal sounds long enough (reference value: at least 3 minutes). After pushing the control key or turning on the power supply again the signal will stop. Alarm Functions of the Device 35 MASK ALARM This alarm function is activated only if the automatic function is turned to “OFF” or “Start”. If the mask has slipped off your face or if the tube is pulled off the device, the device is not turned off automatically, but emits a visual and audible alarm.. 0'(.)MMMMMM<;0 $!'0'H Check Mask Alarm Use the device with running turbine in the manual mode (automatic function “OFF” or “Start”). The mask is open but not applied to your face. After a short time, an audible signal is emitted. PRESSURE ALARM If during the therapy a hardware error occurs or the pressure becomes too high (e.g. due to a bent measuring tube) the device will generate an alarm sound and turn off the blower. The alarm is turned off by pushing the ON/OFF key and the therapy can be continued after solving the error. 36 Alarm Functions of the Device .!00/++$%#$ =@ 5 ;D =<L >> WAKE ALARM The device is provided with a comfortable integrated alarm clock. Using the program keys, you can activate and deactivate this alarm clock at any time. The alarm clock emits an alarm at the programmed wake time. Press the ON/OFF key once to stop the alarm for the next 5 minutes (can be set with the help of the PC software) and twice to deactivate it completely. The alarm clock function may have been deactivated through the software. Please contact your specialized dealer or service technician for activating these functions. Alarm Functions of the Device 37 FUNCTIONS OF THE DEVICE You can program the functions of the device with the following three keys: = program key = program key = enter key The display has two lines. Using the and keys, you can select the line to be displayed. The triangular symbol preceding the line indicates that this line has been selected. NOTE: If you do not press any key for 30 seconds while programming, the programming mode is automatically exited for safety reasons. Unless the changed value is confirmed with the enter key when the programming mode is exited, the original value remains as it is. f you select the line Exit Menu and then press the key, programming is ended. 38 Functions of the Device The device has three different menus: 1. Info-Menu In this menu the set parameters can be displayed. 2. Patient-Menu In this menu the patient can change settings. 3. Clinic-Menu In this menu, only a physician or service technicians can change settings. Use the key for scrolling within the menus. The sequence of the menu structure is shown in the table on page 40. INFO-MENU By pressing the info key i you get to the Info-Menu. By pressing the key and you can see the next parameters. To exit the Info-Menu select the line Exit Menu and then press the key. If you do not press any keys for 30 seconds the device will automatically switch back to the operating mode. The chart on the next page shows which parameters are available for the different devices. Functions of the Device 39 TREND II CPAP TREND II AUTO TREND II BILEVEL TREND II BILEVEL ST20 Therapy Therapy Therapy Therapy Filter Filter Filter Filter Ramp Ramp Ramp Ramp P-Ramp P-Ramp P-Ramp P-Ramp Mode Mode Mode Mode Pressure Pressure Pressure Pressure FLEX-Level FLEX-Level I-Pressure I-Pressure P-Start E-Pressure E-Pressure P-Min I-Slope I-Slope P-Max E-Slope E-Slope I-Trigger Trigger E-Trigger I-Trigger E-Trigger Frequency Inspiration Delay Time 40 Functions of the Device Q$!.,5MMMMMMMM<=>$ 4%/!*1 Therapy Shows the total therapy time of the device Q%(/!.MMMMMMMMMM<=>$ 4%/!*1 Filter Shows the time since the last filter change Q),MMMMMMMMMMMM@;)%* 4%/!*1 Ramp Shows the remaining time of the soft start ramp Q ),MMMMMM? @$ 4%/!*1 P-Ramp Shows the ramp start pressure Q+ !MMMMMM%(!2 4%/!*1 Mode Shows the selected mode Q.!00MMMMMMB @$ 4%/!*1 Pressure Shows the selected therapy pressure Q !2!(MMMMMMMM> 4%/!*1 FLEX-Level (only in mode FLEX) Shows the selected FLEX-Level Q /./MMMMB @$ 4%/!*1 P-Start (only in mode APAP) Shows the selected start pressure Functions of the Device 41 P-Min (only in mode APAP) Shows the selected minimum pressure Q % *MMMMMMMM@ ;$ 4%/!*1 P-Max (only in mode APAP) Shows the selected maximum pressure Q 4MMMMMM<; ;$ 4%/!*1 I-Pressure (only in modes S, T and ST) Shows the selected inspiration pressure Q .!00MM<; ;$ 4%/!*1 E-Pressure (only in modes S, T and ST) Shows the selected expiration pressure Q.!00MMMMA ;$ 4%/!*1 I-Slope (only in modes S, T and ST) Shows the selected inspiration slope Q(+,!MMMMMMMMMMMM>0 4%/!*1 E-Slope (only in modes S, T and ST) Shows the selected expiration slope Q(+,!MMMMMMMMMMMM>0 4%/!*1 Trigger (only in mode T) Shows if the inspiration trigger is activated or not Q.%##!.MMMMMMMMMM 4%/!*1 I-Trigger (only in modes S, T and ST) Shows the selected inspiration trigger threshold Q .%##!.MMMMMMMMMM= 4%/!*1 42 Functions of the Device Q .%##!.MMMMMMMMMM= 4%/!*1 E-Trigger (only in modes S and ST) Shows the selected expiration trigger threshold Q.!-1!*5MM<=,) 4%/!*1 Frequency (only in modes T and ST) Shows the selected number of breaths per minute Q *0,%./%+*MM>>N 4%/!*1 Inspiration (only in modes T and ST) Shows the ratio of inspiration time proportionate to the entire breath Q!(5%)!MMMMMM>0 4%/!*1 Delay Time (only in mode ST) Shows the delay for switching from S-mode to T-mode Functions of the Device 43 PATIENT-MENU Press and hold the enter key (at least 1 second) to move to the programming mode. The Patient-Menu will now appear on the display. TREND II CPAP TREND II AUTO TREND II BILEVEL TREND II BILEVEL ST20 Wake Time Wake Time Wake Time Wake Time Delete Filter Delete Filter Delete Filter Delete Filter Ramp Mask Ramp Ramp Mask Test Ramp Mask Test Mask Test Automatic Mask Test Automatic Automatic Brightness Automatic Brightness Brightness Date Brightness Date Date Time Date Time Time Time 44 Functions of the Device Q'!% )!MM;BL;; 4%/!*1 Wake Time In this menu item you can set and change the wake time. After pressing the key again the hour of the wake time will start flashing. Now you can change it by using the and keys. After pressing the key again the minute of the wake time will start flashing. Now you can change it by using the and keys. Pressing the key again ends the input and you get back to the menu. Changing the wake time will automatically activate the alarm clock. .!00EH (.) ;BL;; .!00EH =@ 5 ;D <=L =; .!00EH (.)(+' After leaving the menu the alarm clock can be activated and deactivated with the help of the and keys. Press to activate the alarm function. The display briefly shows the wake time allowing you to verify it. After that a bell symbol in front of the time display shows that the wake alarm function is activated. Press to deactivate the wake alarm function. The bell symbol disappears. Functions of the Device 45 Delete Filter In this menu item the filter counter can be reset. This function should be used at every filter change so that always a current value is displayed. To reset the filter counter, go to the Patient-Menu (press the key for approx. 1 second), then select Delete Filter with the keys and . Press the key. The system will now ask you whether you are sure that you want to perform a reset. Press the key to perform the reset. Now the filter counter is reset to zero. If you do not want to reset the filter counter, leave the menu by using the keys and or wait until the system leaves the menu item automatically. 46 Functions of the Device Q!(!/! %(/!. 4%/!*1 Q0'MMMMMMMMMMMMMM+0! 4%/!*1 Mask (only in modus CPAP and APAP in TREND II AUTO) In this menu item the type of mask can be chosen. This is important for the correct function of the therapy device It can be chosen between Nose and Nose/Mouth. • Choose Nose for all nasal masks and pillow masks. • Choose Nose/Mouth for all nasal/mouth masks. Functions of the Device 47 Ramp Whenever the blower has been started, the microcontroller of the device checks whether a soft start ramp has been programmed. While the programmed time elapses, the soft start function increases the pressure from an adjustable initial ramp pressure (P-Ramp) up to the pressure prescribed, thus allowing you to fall asleep more easily. In particular if you are not yet used to the respiration therapy the soft start can help you get accustomed to the device and fall asleep easily. The device allows delay times ranging from zero (the prescribed therapy pressure is applied at once) to 60 minutes (the prescribed therapy pressure is built up within 60 minutes). The initial ramp pressure (P-Ramp) can be set by health professionals within a range from 4 hPa to the pressure prescribed. To set the ramp, first go to the Patient-Menu (press the key for approx. 1 second), then select Ramp with the key and . Press the key. Now select the desired time by using the key and . Press to confirm. 48 Functions of the Device Q),MMMMMMMMMMMM@;)%* 4%/!*1 TREND II CPAP, TREND II AUTO I-Pressure E-Pressure TREND II BILVEL, TREND II BILEVEL ST20 Functions of the Device 49 Mask Test This parameter determines the time when the device performs a mask test. Put on the mask and start the device. To ensure that the mask is tight while the pressure slowly increases in the soft start ramp even with higher pressures, you can program a mask testing time from 5 to 90 seconds in 5-second intervals. This mask test is carried out before the ramp is started. It checks whether the mask is tight even under the maximum therapy pressure. If the FLEXLINE mode is switched on, the pressure is raised by 1 hPa at FLEX-Level 1, 2 hPa at FLEX -Level and 3 hPa at FLEX-Level 3 (TREND II CPAP and TREND II AUTO). If the APAP mode is switched on, the pressure is raised to the max. pressure (TREND II AUTO) and in the devices TREND II BILEVEL and TREND II BILEVEL ST20 the pressure in the modes S, ST and T is raised to the I-Pressure. To set the mask test, first go to the Patient-Menu (press the key for approx. 1 second), then select Mask Test with the keys and . Press the key. Now select the desired time by using the keys and . Press to confirm. 50 Functions of the Device Q0'!0/MMMMMM>;0 4%/!*1 Mask Test TREND II CPAP, TREND II AUTO Mask Test I-Pressure E-Pressure TREND II BILVEL, TREND II BILEVEL ST20 Functions of the Device 51 Automatic The automatic mode provides three settings (OFF, Start/Stop, Start). Auto OFF (with mask alarm) If you set “Auto OFF” the device must be turned on in the evening and off in the morning with the ON/OFF key. If the mask slips off your face or a leak occurs while you are asleep, a visual and audible warning is emitted. 2. Auto Start / Stop If you set “Auto Start/Stop”, you must simply put the mask on your face. Once you start breathing, the turbine of the device is turned on. If you take the mask off, the turbine is automatically turned off after a delay time of 5 seconds. In the automatic mode, the turbine is turned off even if the mask or the tube slips off unnoticed during the night. 3. Auto Start (with mask alarm) The third option that can be selected is the “Auto Start” mode. In this mode, the turbine is also turned on once you put the mask on your face. However, the turbine will not be turned off if the mask or the tube slips off unnoticed during the night. It can only be turned off by pressing the ON/OFF key. 1. 52 Functions of the Device 0'(.)MMMMMM<;0 $!'0'H 1/+*0'H =@ 5 ;D ==L <@ Q1/+MMMMMMMMMMMM/./ 4%/!*1 NOTES: The automatic function can be deactivated in the TREND II BILEVEL ST20 with the PC software from the medical staff. The device can be switched on or off in every mode by pressing the ON/OFF key. Q.%#$/*!00MM<;;N 4%/!*1 Brightness In this menu item you can set the brightness of the display. To do so go to the Patient-Menu (hold down the key for approx. 1 second). Then select Brightness by using the key and . After pressing the key the currently set brightness will flash and can then be adjusted by using the keys and in intervals of 10 %. Press for accepting the selected brightness. If no key is pressed for 15 seconds the device will select the brightness previously set by you. After pressing any key the brightness will automatically switch to 100 % for better visibility. Functions of the Device 53 Date Use this menu item to set the date. To do so go to the Patient-Menu (hold down the key for approx. 1 second). Then select Date by using the keys and . After using the key the year will flash and can be set by using the keys and . After using the key again the month will flash and can be set by using the keys and . After using the key again the day will flash and can be set by using the keys and . Press the key again to accept the set date. 54 Functions of the Device Q/!MMMM=@ 5 ;D 4%/!*1 Q%)!MMMMMMMMMMMM<>L;; 4%/!*1 Time Use this menu item to set the time. To do so go to the Patient-Menu (hold down the key for approx. 1 second). Then select Time by using the keys and . After pressing the key the hour will flash and can be set by using the key and . After pressing the key again the minutes will flash and can be set by using the keys and . Press the key again to accept the set time. With its built-in battery, the internal clock has a reserve power of 8 years without connection to the external power supply. Functions of the Device 55 CLINIC-MENU In addition to the parameters in the Clinic-Menu, in the Clinic-Menu parameters relevant for the therapy can be set. This menu is used only by health and service professionals. In the Clinic-Menu the following patient and device relevant data can be shown and changed. Enter the PIN code for parameters, which are marked with a * shown on page 57 for prevention of wrong parameter settings. Your physician and specialized dealer know this PIN. Please do not try to find out the PIN. If you are in doubt as to whether the set parameters are correct, please consult your physician. 56 Functions of the Device TREND II CPAP * Mode * Pressure TREND II AUTO * Mode * Pressure TREND II BILEVEL * Mode * Pressure TREND II BILEVEL ST20 * Mode * Pressure * FLEX-Level * FLEX-Level * P-Start * P-Min * P-Max Mask * I-Pressure * E-Pressure * I-Slope * E-Slope * I-Trigger * E-Trigger * I-Pressure * E-Pressure * I-Slope * E-Slope * Trigger * I-Trigger * E-Trigger * Frequency Ramp P-Ramp Mask Test Automatic Brightness Language P-Unit Turbine Filter Therapy Standby Delete Filter Date Time Wake Time Ramp P-Ramp Mask Test Automatic Brightness Language P-Unit Ramp P-Ramp Mask Test Automatic Brightness Language P-Unit * Inspiration * Delay Time Delete Filter Turbine Filter Therapy Standby Automatic Date Time Wake Time Delete Filter Date Time Wake Time Brightness Language P-Unit Turbine Filter Therapy Standby Ramp P-Ramp Mask Test Turbine Filter Therapy Standby Delete Filter Date Time Wake Time Functions of the Device 57 Mode The devices can be operated in different modes. See the chart on the page below, which modes are available for your device. Q+ !MMMMMM%(!2 4%/!*1 For changing the mode go to the Clinic-Menu (hold down the key for approx. 1 second). Then select Mode by using the keys and . Press the key. Now the device will prompt you to enter the PIN. The first digit is flashing. Enter the first digit of the PIN with the help of the and keys. After pressing the key the second digit will flash. Enter the second digit of the PIN with the help of the and keys, and proceed as described for the first digit. Enter the third digit accordingly. After entering the last digit of the PIN you can switch between the modes by pressing the key. Leave the menu once the desired mode is selected. The device will then save the new mode. TREND II CPAP TREND II AUTO TREND II BILEVEL TREND II BILEVEL ST20 58 Functions of the Device CPAP FLEX • • • • • • AUTO BILEVEL S • • • BILEVEL ST BILEVEL T • • Q.!00MMMMMMB @$ 4%/!*1 Q !2!(MMMMMMMM> 4%/!*1 Pressure (only in modes CPAP and FLEX) For changing the pressure go to the Clinic-Menu (hold down the key for approx. 1 second). Then select Pressure by using the keys and . Press the key. Now the device will prompt you to enter the PIN. The first digit is flashing. Enter the first digit of the PIN with the help of the and keys. After pressing the key the second digit will flash. Enter the second digit of the PIN with the help of the and keys, and proceed as described for the first digit. Enter the third digit accordingly. After entering the last digit of the PIN you can set the pressure by using the keys and . Then confirm the selected pressure by pressing the key. FLEX-Level (only in mode FLEX) The value of pressure increase and pressure decrease depends on the value of the breathing flow, the set FLEX-Level and the set therapy pressure. The three FLEX-Levels (1-3) are for individual adjustment to the patients requirements: • FLEX-Level 1 low pressure support (Pmax 1 hPa) • FLEX-Level 2 medium pressure support (Pmax 2 hPa) • FLEX-Level 3 high pressure support (Pmax 3 hPa) Functions of the Device 59 For changing the FLEX-Level go to the Clinic-Menu (hold down the key for approx. 1 second). Then select FLEX-Level by using the keys and . Press the key. Now the device will prompt you to enter the PIN. The first digit is flashing. Enter the first digit of the PIN with the help of the and keys. After pressing the key the second digit will flash. Enter the second digit of the PIN with the help of the and keys, and proceed as described for the first digit. Enter the third digit accordingly. After entering the last digit of the PIN you can set the FLEX-Level by using the keys and . Then confirm the selected level by pressing the key. P-Start (only in mode APAP) You have to activate the Clinic-Menu first for changing the start pressure. Then select P-Start by using the keys and . Press the key. Now the device will prompt you to enter the PIN. By using the keys and you can now set the start pressure. Confirm with the key. Next the parameter P-Min is set. 60 Functions of the Device Q /./MMMMB @$ 4%/!*1 P-Min (only in mode APAP) Press the key. By using the keys and you can now set the minimum pressure. Confirm with the key. Next the parameter P-Max is set. Q % *MMMMMMMM@ ;$ 4%/!*1 P-Max (only in mode APAP) Press the key. By using the keys and you can now set the maximum pressure. Confirm with the key. Q 4MMMMMM<; ;$ 4%/!*1 hPa P-Max P-Start P-Min Q .!00MM<; ;$ 4%/!*1 t I-Pressure (only in modes S, T and ST) Pressure during inspiration For changing the I-Pressure go to the Clinic-Menu (hold down the key for approx. 1 second). Then select I-Press« by using the keys and . Press the key. Now the device will prompt you to enter the PIN. The first digit is flashing. Enter the first digit of the PIN with the help of the and keys. After pressing the key the second digit Functions of the Device 61 will flash. Enter the second digit of the PIN with the help of the and keys, and proceed as described for the first digit. Enter the third digit accordingly. After entering the last digit of the PIN you can set the pressure by using the keys and . Then confirm the selected pressure by pressing the key. Next the parameter E-Pressure is set. E-Pressure (only in modes S, T and ST) Pressure during expiration Q.!00MMMMA ;$ 4%/!*1 Press the key. Now select the desired pressure by using the keys and . Press to confirm. Next the parameter I-Slope is set. I-Slope (only in modes S, T and ST) Time of pressure increase from E-Pressure to I-Pressure (pressure increase rate) Press the key. Now select the desired time by using the keys and . Press to confirm. Next the parameter E-Slope is set. 62 Functions of the Device Q(+,!MMMMMMMMMMMM>0 4%/!*1 Q(+,!MMMMMMMMMMMM>0 4%/!*1 E-Slope (only in modes S, T and ST) Time of pressure decrease from I-Pressure to E-Pressure (pressure decrease rate) Press the key. Now select the desired time by using the keys and . Press to confirm. I-Pressure E-Pressure 0.3s I-Slope Q.%##!.MMMMMMMMMM 4%/!*1 0.3s E-Slope Trigger (only in mode T) Activate the Clinic-Menu to set the trigger. Then select Trigger by using the keys and . Press the key. Now the device will prompt you to enter the PIN. Pressing the key again changes the setting from “OFF” to “ON” and vice versa. Functions of the Device 63 I-Trigger (only in modes S, T and ST) The I-Trigger determines the trigger sensitivity for detecting inspiration. It can be set to three levels. 1 10 ml 2 15 ml 3 25 ml Q .%##!.MMMMMMMMMM= 4%/!*1 Go to the Clinic-Menu to set the I-Trigger. Then select I-Trigger by using the keys and . Press the key. Now the device will prompt you to enter the PIN. Now select the desired level by pressing the keys and . Press To confirm. Next the parameter E-Trigger is set. E-Trigger (only in modes S and ST) The E-Trigger determines the trigger sensitivity for detecting expiration. It can be set to three levels. 1 60 % of Peak flow 2 70 % of Peak Flow 3 80 % of Peak flow Press the key. Now select the desired level by using the keys and . Press to confirm. 64 Functions of the Device Q .%##!.MMMMMMMMMM= 4%/!*1 Q.!-1!*5MM<=,) 4%/!*1 Q *0,%./%+*MM>>N 4%/!*1 Frequency (only in modes T and ST) The frequency determines the breathes per minute. Activate the Clinic-Menu to set the frequency. Then select Frequency by using the keys and . Now the device will prompt you to enter the PIN. After entering the PIN set the desired frequency by using the keys and . Press to confirm. You can set values from 5 bpm to 30 bpm in 1 bpmintervals. Inspiration (only in modes T and ST) The inspiration ratio is the inspiration time in relation to the time of the entire breath interval. Activate the Clinic-Menu to set the inspiration ratio. Then select Inspiration by using the keys and . Now the device will prompt you to enter the PIN. After entering your PIN press the key again. Set the desired inspiration ratio by using the keys and . key again. Set the desired inspiration ratio by using the keys to confirm. You can set values from 20 % to 80 % in 1 %-intervals. Functions of the Device 65 Delay Time (only in mode ST) The delay time is the time after which the device switches from S-mode into T-mode in the event of breath failure. Activate the Clinic-Menu to set the delay time. Then select Delay Time by using the keys and . Now the device will prompt you to enter the PIN. After entering your PIN press the key two times. Set the desired delay time by using the keys and . Press to confirm. You can set values from 0 sec to 20 sec in 1 sec-intervals. Language The device can emit display messages in German (DEU), English (ENG), Greek (ELL), Spanish (SPA), French (FRA), Italian (ITA), Dutch (NLD), Turkish (TUR), Polish (PLK) and Portuguese (POR). Further languages in preparation. For changing the language go to the Clinic-Menu (hold down the key for approx. 1 second). Then select Language by using the keys and . Press the key. Each time you press the key another language will appear. Leave the menu once the desired language is selected. The device will then save the new language. 66 Functions of the Device Q!(5%)!MMMMMM>0 4%/!*1 Q*#1#!MMMMMMMM 4%/!*1 Q *%/MMMMMMMMMM). 4%/!*1 P-Unit The device can show the pressure in the pressure units hectopascal (hPa), millibar (mbar), and centimeters of water (cmH2O) . For changing the pressure unit go to the ClinicMenu (hold down the key for approx. 1 second). Then select P-Unit by using the keys and . Press the key. Each time you press the key another pressure unit will appear. Leave the menu once the desired pressure unit is selected. The device will then save the new unit. NOTE: When changing the pressure unit from hPa or mbar to cmH2O, the pressure will slightly change. Conversion: 1 hPa ≙ 1 mbar ≙ 1.02 cmH2O Example: At 8 cmH2O the pressure is 7.8456 hPa/mbar. Functions of the Device 67 Turbine This menu item shows the total operating time of the turbine, the filter, and the therapy time. Turbine The counter indicates the total turbine running time. Q1.%*!MMMMMMMM<=>$ 4%/!*1 Filter The counter indicates the operating hours of the filter since the last reset. Q%(/!.MMMMMMMMMM<=>$ 4%/!*1 Therapy The counter indicates the operating time with the therapy pressure applied. Q$!.,5MMMMMMMM<=>$ 4%/!*1 Standby This counter indicates the time the device was connected to the mains supply. Q1.%*! Q/* 5MMMMMMMM<=>$ !*92!.(00!* To display the counter go to the Clinic-Menu (hold down the key for approx. 1 second). Then select Turbine by using the keys and . Press the key. Each time you press the key, you see the next counter. 68 Functions of the Device TROUBLESHOOTING Problem Possible cause Remedy Pain in nose, paranasal sinuses or ears Inflammation of the paranasal sinuses or the middle ear Stop therapy and contact your physician Unpleasent feeling of too high pressure Unwellness with prescribed high pressure values If you think there is a mistake, consult a physician Pressure tolerance not completely acquired yet Relax, use or alter the soft start function Dryness and irritation of nose and throat Air too dry Device probably without air humidifier; consult a physician and consider prescription of retrofitting a humidifier Return of original sleep apnea symptoms Different physical condition and different conditions of living Inform the attending physician Device failure Return the device to the service to have it checked Air escaping from between the mask and the skin of your face Check the mask for proper positioning Irritation of the eyes or dry eyes Replace the mask if its material has become brittle Troubleshooting 69 Problem Possible cause Remedy Cold nose Room temperature too low Increase the room temperature, run the tube under the blanket Running nose, urge to sneeze Reaction to the air flow Increase the air humidity in the room or set the humidifier to a higher level Common cold Consult a physician Wrong mask size Inform the attending physician Head gear too tight Head straps loosened Allergic reaction Inform the attending physician Filter dirty Exchange filter Air inlet obstructed Check the device for proper setup Radiator in the vicinity of the device Increase the distance between device and radiator Device defective Notify the service Reddening of the skin in the area of the mask; swelling of the skin Air sensed to be too warm No air flow Water in the measuring tube Remove the water 70 Troubleshooting Problem Possible cause Remedy Very low air flow Soft start function active Reduce soft start time Air ducts clogged Check the air inlet Measuring tube not connected or clogged Check the measuring tube Device leaky Return the device to the service to have it checked Blower constantly at maximum speed Water in the measuring tube Remove the water Therapy pressure not steady Water in the measuring tube Remove the water Device defective Notify the service Measuring tube bent Check for bends Troubleshooting 71 DISPLAY MESSAGES The sections below describe the most important display messages. All further messages will be clear from their context. You have 45 sec left for seating the mask properly. Once this time has elapsed, the device starts with the soft start function or the therapy. There will be 10 min and 45 sec left until the full therapy pressure is reached. The mask has slipped off your face or you failed to put the mask on your face while the automatic mode was turned off and the blower was running. You pressed the key during operation. There will be a message that you will be wakened at 07.00 o´clock. There will be 1 min and 18 sec left until the alarm clock will waken you again. The wake alarm has been initiated. Press the ON/OFF key once to initiate the slumber phase. Press the key once again to turn off the alarm clock completely. 72 Display Messages C ;$ 0'!0/MMMMMMMM?@0 @ ;$ ),MMMMMMMMMMMMMM<;L ?@ 0'(.)MMMMMM<;0 $!'0'H .!00EH (.) ;BL;; @ ;$ (1)!.MMMMMMMMMM<L <C @ ;$ '!(.);BL;; @ ;$ '!(.) .!00EH (.)(+' .!00/++$%#$ =@ 5 ;D =<L >> 1/+*0'H =@ 5 ;D ==L <@ +3!.%(1.! !0/./1.%*! You have pressed the ON/OFF key and stopped the slumber phase. You pressed the key in the normal operating mode. There will be a message that the alarm clock has been turned off. The therapy pressure is too high and the turbine switches off. The automatic function is turned on. You will be requested to put on the mask and to breathe through the nose. After the line voltage has been restored, the turbine restarts automatically. /$ +# !"!/ There has been an error during the system start after switching on the voltage supply. Contact your dealer. 1.%*!+""MMMMMM?0 =@ 5 ;D ;BL ;< You have taken down the mask or the mask has slipped off your face while the automatic function was activated. The turbine will turn off after 4 seconds. *2(% H The PIN you have entered is wrong. Please enter the correct PIN. Display Messages 73 There has been an error during the system start after switching on the voltage supply. Contact your dealer. The Clinic-Menu has been activated. The Patient-Menu has been activated. Change filter. 74 Display Messages !)+.5 !"!/ (% *%!*1 /%2! /%!*/!*1 /%2! @ ;$ $*#!%(/!. SERVICE Although all parts of the device have a very long service life, the device should be checked from time to time. We urgently recommend a technical service through our authorized customer service, since only they have the necessary tools and measuring instruments. In between service intervals you yourself can contribute to increasing the service life and to maintaining proper and reliable functioning. 1. Please observe the cleaning instructions from page 33. 2. Check the system at regular intervals. Proceed according to the following check list: • Visually check whether the device is damaged and/or dirty on its outside • weekly check of the alarm function “Power Failure” (see page 35) • weekly check of the alarm function “Mask Alarm” (see page 36) Service 75 PREPARING THE DEVICE FOR A DIFFERENT PATIENT If the patient using the device changes, the device must be hygienically prepared by a specialized dealer or by the manufacturer. The necessary procedure is described in detail in the appropriate hygiene plan. 76 Service DISPOSAL DEVICE For information on the proper disposal of the device, please contact your responsible customer service. PACKAGING You can return the packaging to your marketing partner or dispose it separately with your normal domestic waste. Disposal 77 TECHNICAL DATA Dimensions (W x D x H) Mass Power supply Pressure range 215 x 195 x 105 mm approx. 2.3 kg 100 V ~ … 240 V ~, 50 ... 60 Hz, 24 V DC / 2.1 A 4…20 hPa (mbar) Max. limit pressure in the event of error < 30 hPa (CPAP-APAP) < 40 hPa (BILEVEL-BILEVEL ST20) Power consumption 24 V DC power supply max. 50 W 50 W standby <5W <5W at 12 hPa (without humidifier) 10 W 12 W at 12 hPa (with humidifier, level 5) 30 W 33 W Short time pressure variance 10 bpm 15 bpm 20 bpm 4 hPa ± 0.10 ± 0.17 ± 0.25 8 hPa ± 0.10 ± 0.17 ± 0.25 12 hPa ± 0.10 ± 0.17 ± 0.25 16 hPa ± 0.10 ± 0.17 ± 0.25 20 hPa ± 0.10 ± 0.17 ± 0.25 All values in the table in hPa Values determined with and without AquaTREND uni Long time pressure variance Display accuracy pressure Average noise level < 0.3 hPa 0.5 hPa < 26 dB(A) at 10 hPa Operation in a distance of 1 m [corresponds to an sound power level of 34 dB(A)] 78 Technical Data Air delivery volume Operating temperature Storage temperature Rel. air humidity (operation and storage) Operating altitude (altitude above MSL) Filtration efficiency up to 1 μm Air Outlet > 170 l/min at 4 hPa therapy pressure > 160 l/min at 8 hPa therapy pressure > 150 l/min at 12 hPa therapy pressure > 130 l/min at 16 hPa therapy pressure > 120 l/min at 20 hPa therapy pressure + 5 °C ... + 40 °C - 20 °C ... + 70 °C 15 ... 95 % - 400 m ... 3500 m (1060 hPa ... 700 hPa) 99.5 % 22 mm, conus (acc. to ISO 5356-1) CE mark according to EC Directive 93/42/EEC, device in compliance with MDD, Class IIa Technical specifications are subject to technical modifications. Technical Data 79 HOFFRICHTER GmbH Mettenheimer Straße 12 / 14 19061 Schwerin Germany Phone: +49 385 39925 - 0 Fax: +49 385 39925 - 25 E-Mail: [email protected] www.hoffrichter.de TER RICH HOFF TREND II-eng-1009-04