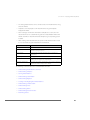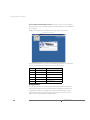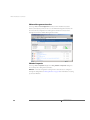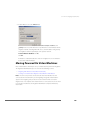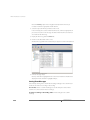
1
VERSION 1.0
VMware VirtualCenter
User’s Manual
VMware, Inc.
3145 Porter Drive
Palo Alto, CA 94304
www.vmware.com
Please note that you will always find the most up-to-date technical documentation on our Web site at http://www.vmware.com/support/.
The VMware Web site also provides the latest product updates.
Copyright © 2003-2004 VMware, Inc. All rights reserved. Protected by one or more of U.S. Patent Nos. 6,397,242
and 6,496,847; patents pending. VMware, the VMware boxes logo, GSX Server and ESX Server are trademarks of
VMware, Inc. Microsoft, Windows, and Windows NT are registered trademarks of Microsoft Corporation. Linux is
a registered trademark of Linus Torvalds. All other marks and names mentioned herein may be trademarks of
their respective companies. Revision 20040319 Item: VC-ENG-Q303-004
Table of Contents
Introducing VMware VirtualCenter ______________________________ 11
Introducing VMware VirtualCenter __________________________________12
About This Manual ______________________________________________13
Intended Audience ___________________________________________13
Document History ____________________________________________13
Conventions _________________________________________________14
Abbreviations ________________________________________________14
Understanding the Components ___________________________________14
Managed Components ________________________________________15
Software Components _________________________________________15
Organizational Components ____________________________________17
Functional Components _______________________________________18
Access Privileges Components __________________________________19
Operations Overview ____________________________________________22
Understanding Virtual Machines and Hosts _________________________24
Understanding Templates ______________________________________24
Cloning Virtual Machines _______________________________________27
Understanding Customization ___________________________________28
Understanding Migration ______________________________________29
Creating and Configuring New Virtual Machines _____________________31
Understanding Scheduled Tasks _________________________________31
Understanding Events _________________________________________31
Understanding Alarms _________________________________________31
Understanding the User Interface ________________________________32
Performing Actions ___________________________________________33
VMware VirtualCenter Requirements ________________________________34
VirtualCenter Management Server Requirements ____________________34
VirtualCenter Client Requirements ________________________________35
VirtualCenter Database Requirements _____________________________35
VirtualCenter Managed Hosts Requirements ________________________35
VirtualCenter Virtual Machine Requirements ________________________35
VirtualCenter Virtual Machine Guest Operating Systems Requirements ___36
VirtualCenter Licensing Requirements _____________________________36
VirtualCenter VMotion Requirements _____________________________37
VirtualCenter Template Requirements _____________________________39
3
VirtualCenter Guest Operating System Customization Requirements _____40
Technical Support Resources ______________________________________43
The VMware Web Site _________________________________________43
VMware Newsgroups __________________________________________43
VMware Community __________________________________________43
Reporting Problems ___________________________________________43
Viewing System Logs and Reports ________________________________45
Installing VMware VirtualCenter _________________________________ 49
Installing VMware VirtualCenter ____________________________________50
Preparing for the VirtualCenter Database _____________________________50
Configuring Oracle 8i Connection to Work Locally ___________________50
Configuring Oracle 8i Connection to Work Remotely _________________51
Configuring a SQL Server ODBC Connection ________________________52
Configuring the Microsoft Access Database ________________________53
Installing the VirtualCenter Product _________________________________54
Installing VMware VirtualCenter __________________________________54
Uninstalling VMware VirtualCenter __________________________________61
Modifying a VirtualCenter Installation ________________________________63
Starting VMware VirtualCenter __________________________________ 67
Starting VirtualCenter ____________________________________________68
Starting or Stopping VMware VirtualCenter ___________________________68
Getting Started with VirtualCenter Users ___________________________69
Starting the VirtualCenter Management Server ______________________69
Restarting the VirtualCenter Management Server ____________________69
Restarting the VirtualCenter Agent _______________________________70
Stopping the VirtualCenter Management Server _____________________71
Starting the VirtualCenter Client ____________________________________71
Starting the VirtualCenter Client and Logging On ____________________71
Stopping the VirtualCenter Client and Logging Off ___________________73
Adding Licenses ________________________________________________74
Navigating in the VirtualCenter Client _______________________________75
Selecting Objects _____________________________________________76
Monitoring Objects ___________________________________________78
Performing Actions on Objects __________________________________79
4
www.vmware.com
Working with the VirtualCenter Client ____________________________ 81
Working with the VirtualCenter Client _______________________________82
Introducing the VirtualCenter Client Window _________________________83
Menu Bar ___________________________________________________84
Popup Menus _______________________________________________85
Console Menu _______________________________________________85
Navigation Bar _______________________________________________86
Toolbar _____________________________________________________87
Status Bar ___________________________________________________88
Panel Section ________________________________________________88
Understanding the Information Elements ____________________________90
Symbol Information Elements ___________________________________91
Attribute Elements ____________________________________________91
List Elements ________________________________________________93
Chart Elements ______________________________________________93
Accessing Properties and Settings __________________________________95
VMware VirtualCenter Settings __________________________________96
VMware Management Interface _________________________________98
VMotion Properties ___________________________________________98
Virtual Machine Resources ______________________________________99
Virtual Machine Control Panel ___________________________________99
Schedule Task Properties ______________________________________100
Template Properties __________________________________________101
New Task Wizard for Resource Settings ___________________________101
Alarm Properties ____________________________________________102
Working with Farms __________________________________________ 103
Working with Farms ____________________________________________104
Working with VirtualCenter Farms _________________________________104
Adding a Farm ______________________________________________104
Removing a Farm ____________________________________________105
Working with Farm Groups _______________________________________106
Adding a Farm Group ________________________________________106
Moving a Farm to a Farm Group ________________________________107
Removing a Farm Group ______________________________________107
5
Working with Hosts __________________________________________ 109
Working with Hosts ____________________________________________ 110
Understanding Host States _______________________________________ 111
Adding a Host to a Farm _________________________________________112
Connecting to a Host ___________________________________________ 115
Moving Hosts Between Farms ____________________________________ 117
Automatically Reconnecting a Host ________________________________ 117
Removing a Host ______________________________________________ 117
Allocating Host Resources _______________________________________ 119
Configuring a Host _____________________________________________ 122
Connecting with Virtual Machines ______________________________ 123
Connecting with Virtual Machines _________________________________ 124
Adding and Removing Virtual Machines ____________________________ 124
Adding Existing Virtual Machines to VirtualCenter ___________________ 124
Removing Virtual Machines from VirtualCenter _____________________125
Returning a Virtual Machine to VirtualCenter _______________________ 125
Removing Virtual Machines from the Disk _________________________ 126
Changing Virtual Machine Power States _____________________________ 126
Understanding Virtual Machine Power States ______________________ 127
Understanding Transitional Power States _________________________ 128
Manually Powering a Virtual Machine On and Off ___________________ 129
Scheduling a Power State Change for a Virtual Machine ______________ 130
Answering a Pending Question ___________________________________ 133
Working with Virtual Machine Groups ______________________________ 135
Adding a Virtual Machine Group ________________________________ 136
Adding Virtual Machines to a Virtual Machine Group ________________ 136
Moving Virtual Machines from a Virtual Machine Group ______________ 137
Removing a Virtual Machine Group ______________________________ 137
Migrating Virtual Machines ____________________________________ 139
Migrating Virtual Machines _______________________________________ 140
Understanding the Migration Options ______________________________ 140
Understanding Migration with VMotion __________________________ 141
Understanding Migration _____________________________________ 142
Migrating Powered Off Virtual Machines ____________________________ 144
Migrating a Powered Off Virtual Machine Manually __________________ 144
Creating a Scheduled Task to Migrate a Virtual Machine ______________ 145
6
www.vmware.com
Enabling VMotion ______________________________________________148
Moving Powered On Virtual Machines ______________________________149
Migrating with VMotion a Virtual Machine Manually _________________150
Creating a Scheduled Task to Migrate a Virtual Machine with VMotion ___152
Creating New Virtual Machines ________________________________ 155
Creating New Virtual Machines ____________________________________156
Creating Virtual Machines Using the New Virtual Machine Wizard _________156
Completing the New Virtual Machine with Custom Settings __________161
Installing a Guest Operating System and VMware Tools _________________166
Installing a Guest Operating System in a Virtual Machine _____________167
Installing VMware Tools _______________________________________168
Working with Templates ______________________________________ 169
Working with Templates _________________________________________170
Understanding Templates _______________________________________170
Preparing for Templates _________________________________________175
Specifying an Upload Directory for Templates ______________________177
Using a GSX Server or Workstation Virtual Machine as a Template ______178
Using an ESX Server Golden Image as a Template ___________________179
Using an Unmanaged ESX Server Virtual Machine as a Template _______179
Using a Managed Existing ESX Server Virtual Machine as a Template ____180
Importing Templates ___________________________________________180
Importing a Managed Virtual Machine as a Template ________________180
Importing a Non-Managed Virtual Machine as a Template ____________184
Cloning a Template _____________________________________________188
Deleting a Template ____________________________________________189
Editing a Template _____________________________________________190
Copying Virtual Machines _____________________________________ 191
Creating Customizable Virtual Machines ____________________________192
Creating Virtual Machines from a Template __________________________192
Manually Deploying Virtual Machine from a Template _______________193
Creating a Scheduled Task to Deploy a Template ___________________199
Creating Virtual Machines by Cloning an Existing Virtual Machine _________204
Manually Cloning a Virtual Machine _____________________________205
Creating a Scheduled Task to Clone a Virtual Machine _______________208
7
Customizing Guest Operating Systems __________________________ 215
Customizing Guest Operating Systems _____________________________ 216
Preparing for Guest Customization _________________________________ 216
Installing the Microsoft Sysprep Tools ____________________________ 217
Installing the VMware Open Source Components ___________________ 218
Beginning the Guest Customization Process _________________________ 219
Entering the Guest Customization Wizard from the Template Deployment
Process ____________________________________________________ 220
Entering the Guest Customization Wizard from the Cloning Process ____ 221
Customizing New Guest Operating Systems _________________________ 222
Customizing a Windows Guest Operating System __________________ 222
Customizing a Linux Guest Operating System ______________________ 228
Completing a Guest Operating System Customization _________________ 232
Completing Linux Guest Operating System Customization ____________ 232
Completing Windows Guest Operating System Customization ________ 232
Editing an Existing Virtual Machine Configuration _________________ 235
Editing the Configuration of Existing Virtual Machines __________________ 236
Beginning to Edit the Virtual Machine Configuration ___________________ 236
Changing Hardware Configuration of a Virtual Machine ________________ 238
Changing DVD/CD-ROM Drive Configuration ______________________ 239
Changing Floppy Drive Configuration ____________________________ 239
Changing Generic SCSI Device Configuration ______________________ 240
Changing Hard Disk Configuration ______________________________ 241
Changing Memory Configuration _______________________________243
Changing (NIC) Ethernet Adapter Configuration ____________________ 244
Changing Parallel Port Configuration _____________________________ 245
Changing SCSI Controller Configuration __________________________ 246
Changing Serial Port Configuration ______________________________ 247
Changing Video Configuration _________________________________ 248
Changing Virtual CPU Configuration _____________________________ 249
Adding Hardware to a Virtual Machine ______________________________ 250
Adding a DVD/CD-ROM Drive __________________________________ 250
Adding a Floppy Drive ________________________________________ 252
Adding a Generic SCSI Device __________________________________ 253
Adding the Hard Disks ________________________________________ 254
Adding a (NIC) Ethernet Adapter ________________________________ 257
Adding a Parallel Port _________________________________________258
8
www.vmware.com
Adding a Serial Port __________________________________________260
Changing Virtual Machine Options _________________________________265
Changing General Settings ____________________________________265
Changing Power State Options _________________________________266
Changing Advanced Settings __________________________________267
Manually Changing Virtual Machine Resources Settings ________________267
Changing CPU Settings _______________________________________268
Changing Memory Settings ____________________________________269
Changing Disk Settings _______________________________________270
Changing Network Settings ____________________________________271
Creating a Scheduled Task to Change a Virtual Machine Resource Settings __271
Working with Scheduled Tasks _________________________________ 275
Working with Scheduled Tasks ____________________________________276
Understanding Scheduled Tasks ___________________________________276
Creating a Scheduled Task _______________________________________277
Rescheduling a Task ____________________________________________281
Removing a Scheduled Task ______________________________________282
Working with Alarms and Events _______________________________ 283
Working with Alarms and Events __________________________________284
Working with Events ____________________________________________284
Viewing All VirtualCenter Events ________________________________285
Viewing Selected VirtualCenter Events ___________________________285
Sorting Event Messages _______________________________________286
Exporting Events ____________________________________________287
Working with Alarms ___________________________________________287
Preparing for email message SMTP Alarm Notification _______________289
Preparing for SNMP Alarm Notification ___________________________290
Creating Alarms _____________________________________________291
Editing Alarms ______________________________________________296
Removing Alarms ____________________________________________298
9
Working with the VirtualCenter Data ____________________________ 301
Working with the VirtualCenter Data _______________________________302
Viewing Navigation Bar Tasks _____________________________________ 304
Viewing Navigation Bar Templates _________________________________ 306
Viewing Navigation Bar Events ____________________________________ 307
Viewing Navigation Bar Inventory _________________________________ 308
Understanding the Inventory Panel ______________________________ 308
Understanding the Information Panel ____________________________ 309
Understanding the Summary Tabs _________________________________ 309
Viewing the Farm Summary Tab ________________________________ 310
Viewing the Host Summary Tab _________________________________ 311
Viewing the Virtual Machine Summary Tab ________________________ 313
Viewing the Farms Tab __________________________________________ 314
Viewing the Hosts Tab __________________________________________ 315
Viewing the Virtual Machines Tab __________________________________ 316
Viewing the Events Tab __________________________________________ 317
Viewing the Alarms Tab _________________________________________319
Viewing the Permissions Tab _____________________________________ 320
Viewing the Console Tab ________________________________________ 321
Viewing the Performance Tab _____________________________________ 322
Viewing Summary Performance Charts ___________________________ 322
Viewing Individual Charts _____________________________________ 323
Configuring Performance Measurement Intervals ___________________ 329
Setting Access and Permissions ________________________________ 331
Setting Access and Permissions ___________________________________ 332
Understanding Users and Groups __________________________________ 332
Using the Hierarchy to Apply Access Rights _______________________ 336
Planning Access Permission ______________________________________ 340
Assigning Access Permissions _____________________________________ 340
Changing Access Permissions _____________________________________ 342
Removing Access Permissions ____________________________________ 343
Glossary ____________________________________________________ 345
Glossary _____________________________________________________ 346
Index ______________________________________________________ 351
10
www.vmware.com
1
CHAPTER 1
Introducing VMware
VirtualCenter
11
VMware VirtualCenter User’s Manual
Introducing VMware VirtualCenter
VMware VirtualCenter is a system management application that deploys, monitors,
and manages virtual machines that are distributed across multiple hosts running ESX
Server. The VirtualCenter client provides a means, through any personal computer
running a Microsoft Windows operating system, to monitor and manage all your
virtual machines, their associated VMware hosts and the host’s resources.
The VirtualCenter management server collects and stores persistent data in a
dedicated database that contains per-system and environmental information. The
VirtualCenter management server automatically executes user-specified scheduled
tasks, such as powering on, or moving powered-off virtual machines. VirtualCenter
with VMotion moves a virtual machine from one host to another, while the virtual
machine continues operation. This form of migration with VMotion, occurs without
service interruption on the virtual machine.
VirtualCenter is virtual infrastructure management software that centrally manages an
enterprise's virtual machines as a single, logical pool of resources. VirtualCenter
provides the central point of control for workload management, provisioning and
availability. It simplifies IT so companies leverage their storage, network, and
computing resources to control costs and respond faster to changing business
demands.
VMware VirtualCenter exploits the benefits of a virtual infrastructure. With
VirtualCenter, an administrator can manage thousands of Windows NT, Windows
2000, Windows Server 2003, Linux and Netware servers from a single point of control.
The VirtualCenter interface provides a powerful overview of all the virtual resources in
a data center. From the VirtualCenter interface, administrators can perform:
• Continuous Workload Consolidation — Monitor and optimize the utilization
of data center resources to minimize unused capacity while maintaining
application service levels, by adjusting the resources dedicated to each software
service.
• Instant Provisioning — Reduce server-provisioning time from weeks to tens of
seconds, allowing administrators to respond immediately to requests for IT
services. Using server templates, administrators can ensure that new servers are
fully consistent with current build and security policies.
• Zero-Downtime Maintenance — Safeguard business continuity 24/7, with no
service interruptions for hardware maintenance, deployment, or migration. Use
VMotion to move running operating systems and their applications off a system
12
www.vmware.com
C H A P T E R 1 Introducing VMware VirtualCenter
that needs maintenance, and then transfer them back when maintenance
completes.
This chapter contains the following topics:
• About This Manual
• VMware VirtualCenter Requirements
• Understanding the Components
• Operations Overview
• Technical Support Resources
About This Manual
This manual, the VMware VirtualCenter User’s Manual, describes how to install,
configure, and use VMware VirtualCenter to provision, migrate, monitor and manage
the virtual machines through the single VMware VirtualCenter interface using virtual
farms and groups for organizational ease of operation.
Intended Audience
The information presented in this manual is written for system administrators who are
experienced Windows or Linux system administrators and who are also familiar with
virtual machine technology.
Document History
VirtualCenter User’s Manual, Revision 20040329, Item No. VC-ENG-Q303-004
This manual is revised with each release of the product or when deemed necessary. A
revised version can contain minor or major changes.
Release
Date
Description
First Release 1.0
December 5, 2003
PDF, HTML on web, PDF on CD, Help, Printed
Release 1.0, editorial updates
January 6, 2004
PDF, HTML on web
Release 1.0.1
March 29, 2004
PDF, HTML on web, Help
To view the most current version of the manual, refer to the VMware Web site:
www.vmware.com/support/vc
13
VMware VirtualCenter User’s Manual
Conventions
The following conventions are used in this manual.
Style
Purpose
Blue
Cross references, links
Courier
Commands, filenames, directories, paths, user input
Semi-Bold
Interactive interface objects, keys, buttons
Bold
Items of highlighted interest, terms
Italic
Variables, parameters
Blue italic
Web addresses
Abbreviations
The following abbreviations are used in the graphics in this manual.
Abbreviation
Description
VC
VirtualCenter
UI
VirtualCenter client
server
VirtualCenter management server
database
VirtualCenter database
farmn
VirtualCenter farms
hostn
VirtualCenter managed hosts
VM#
virtual machines on a managed host
user#
users with access permissions
dsk#
storage disk for the managed host
datastore
storage for the managed host
SAN
SAN type datastore shared between managed hosts
tmplt
template
Understanding the Components
VirtualCenter components are discussed in the following sections:
• Managed Components
• Software Components
• Organizational Components
• Functional Components
• Access Privileges Components
14
www.vmware.com
C H A P T E R 1 Introducing VMware VirtualCenter
Managed Components
VirtualCenter monitors and manages the listed components:
• Virtual machines — A virtualized x86 personal computer environment in which
a guest operating system and associated application software can run. Multiple
virtual machines can operate on the same host machine concurrently.
Virtualization platforms are VMware products, such as ESX Server, GSX Server,
or Workstation. These are used to create the virtual machines in the form of a set
of configuration and disk files that together perform all the functions of a
physical machine. Through the virtualization platform, you run the virtual
machines, install operating systems and run applications, and configure the
virtual machines, which includes identifying the virtual machine’s resources,
such as storage devices.
• Hosts — The physical computers on which the virtualization platform software,
such as ESX Server, is installed. It hosts the VirtualCenter virtual machines.
When VirtualCenter refers to a host, this means the physical machine on which
the virtual machines are running.
Note: All virtual machines within the VirtualCenter environment are physically
on ESX Server hosts. The term host used in this manual, means the ESX Server
host that has virtual machines on it.
• Datastores — The physical and logical storage locations for the virtual machine
files.
Software Components
VMware VirtualCenter monitors and manages all the virtual machines and hosts
registered with VirtualCenter. To perform these functions, VirtualCenter provides:
• VirtualCenter client — A user interface that runs locally on a Windows
machine.
The VirtualCenter client runs on a machine with network access. This can be on
the same machine as the VirtualCenter server or on another machine with
network access. The VirtualCenter client requires a computer monitor for access
to the graphical user interface.
• VirtualCenter management server — A service that acts as a central
administrator for VMware servers connected on a network, to direct actions
upon the virtual machines and the virtual machine hosts. VirtualCenter
management server provides the central working core of VirtualCenter.
15
VMware VirtualCenter User’s Manual
VirtualCenter management server runs on a machine as a service. It can also, and
typically is, another server machine in the network. It receives direction through
the VirtualCenter client and executes actions upon the identified hosts and
virtual machines.
• VirtualCenter agent — Installed on each virtual machine host, it collects,
communicates, and executes the actions received from the VirtualCenter
management server.
VMotion is a feature that is activated by the VirtualCenter agent. It enables
moving running virtual machines from one ESX Server to another without
service interruption. It requires licensing on both the source and target host. The
VirtualCenter management server centrally coordinates all VMotion activities.
• VirtualCenter database — A persistent storage area, for maintaining status of
each virtual machine and user managed in the VirtualCenter environment. This
can be local or remote to the VirtualCenter management server machine.
The figure below illustrates the relationships of the VirtualCenter installed
components. Refer to Abbreviations on page 14 for a description of abbreviations.
VMware VirtualCenter Installed Components
16
www.vmware.com
C H A P T E R 1 Introducing VMware VirtualCenter
Organizational Components
Organizational components assist in the handling of the potentially hundreds of
virtual machines. They can be renamed to represent their organization purposes, for
example, they can be named after company departments or locations or functions.
The organizational components are:
• Server Farms — The top level structure for the VirtualCenter management
server. Only one Server Farms object exists for each VirtualCenter management
server. Server Farms can contain multiple farm groups and farms.
• Farm Groups — An optional grouping structure, its hierarchically contained
within the Server Farms structure. The VirtualCenter management server
supports multiple farm groups. Farm groups can contain other farm groups and
farms.
• Farm — The main structure under which hosts and their associated virtual
machines are added to the VirtualCenter management server. VirtualCenter
management server supports multiple farms.
Note: A host can be managed by only one farm at a time.
Note: All operations between hosts and virtual machines occur within a single
farm. For example, hosts and virtual machines are not moved between farms.
• Virtual Machine Groups — An optional grouping structure, it contained within
a farm. VirtualCenter management server supports multiple virtual machine
groups. Virtual machine groups contain virtual machines and other virtual
machine groups.
All the VirtualCenter components, the hosts, the virtual machines, and the
organizational groupings of server farms, farms, and farm groups are contained within
the VirtualCenter environment.
17
VMware VirtualCenter User’s Manual
The figure below illustrates the hierarchy of the VirtualCenter organizational
components. Refer to Abbreviations on page 14 for a description of abbreviations.
VirtualCenter Organizational Components
Functional Components
The functional components group the monitoring and managing tasks. The
functional components are:
Inventory — Provides a view of all the monitored objects in VirtualCenter. Monitored
objects include: Server Farms, farms, farm groups, hosts, virtual machines, and virtual
machine groups.
Scheduled Tasks — Provides a list of activities and a means to schedule those
activities.
Templates — Provides a means to import virtual machines and store them as
templates for deploying at a later time to create new virtual machines.
Alarms — Provides a means to create and modify a set of alarms that you define.
Alarms are applied to an object and contain a triggering event and a notification
18
www.vmware.com
C H A P T E R 1 Introducing VMware VirtualCenter
method. Alarms do not have a navigation toolbar option. Alarms are viewed through
the Alarms tab for each object.
Events — Provides a list of all the events that occur in the VirtualCenter environment.
Use the Navigation option to display all the events. Use an object specific panel to
display, only events relative to that object.
The figure below illustrates the relationship of the VirtualCenter functional
components. Refer to Abbreviations on page 14 for a description of abbreviations.
VirtualCenter Functional Components
Access Privileges Components
Each VirtualCenter user logs on to the VirtualCenter service through the VirtualCenter
client. Each VirtualCenter user is identified to the VirtualCenter as someone who has
assigned rights and privileges to selected objects, such as farms and virtual machines,
within the VirtualCenter environment. VirtualCenter itself has full rights and privileges
on all hosts and virtual machines within the VirtualCenter environment. VirtualCenter
passes on only those actions and requests from a VirtualCenter user that the
VirtualCenter user has permissions to perform.
19
VMware VirtualCenter User’s Manual
VirtualCenter grants access to each VirtualCenter object, farm, farm group, virtual
machine, and virtual machine group. To do this, VirtualCenter assigns a role and a user
(or group) to each object.
Individual permissions are assigned through VirtualCenter by pairing a user and a role
and assigning this pair to a VirtualCenter object.
• Users and Groups — Created through the Windows domain or Active Directory
database. VirtualCenter registers users and groups as part of the assigning
privileges process.
• Roles — A VirtualCenter pre-defined set of access rights and privileges. There
are four roles. Each subsequent role includes the privileges of the previous role.
The types of roles that can be paired with a user and assigned to an object are:
• Read Only User — Users assigned this role for an object are allowed to view the
state of virtual machines, hosts, farms, and groups.
With this role, view virtual machines, hosts, farms farm groups, and virtual
machine group attributes, that is, all the tab panels in VirtualCenter — except
the Console tab. You cannot view the remote console for a host. All actions
through the menus and toolbars are disallowed. A Read Only User role can view
the templates and scheduled tasks but not perform any actions with them.
• Virtual Machine User — Users assigned this role for an object are allowed to
perform power operations on virtual machines.
With this role, connect with a remote console and view the states of virtual
machines. You cannot modify the configuration of hosts or virtual machines.
• Virtual Machine Administrator — Users assigned this role for an object are
allowed to add, remove, or modify objects. With this role you:
• Connect/disconnect host devices, migrate and migrate with VMotion, clone,
remove and configure virtual machines
• Create, import, and deploy templates
• Add and remove hosts from farms
• Create, remove, or modify farms, farm groups, and virtual machine groups and
their content.
• VirtualCenter Administrator — Users in this role are allowed to change
privileges for an object.
With this role, add, remove, and set access rights and privileges for all the
VirtualCenter users and all the virtual objects in the VirtualCenter environment.
20
www.vmware.com
C H A P T E R 1 Introducing VMware VirtualCenter
The figure below illustrates the three users and their respective access to VirtualCenter
objects. Refer to Abbreviations on page 14 for a description of abbreviations.
VirtualCenter Access Control
21
VMware VirtualCenter User’s Manual
Operations Overview
Typical VirtualCenter operations are focused around managing virtual machines on
multiple hosts.
The figure below illustrates a VirtualCenter operation overview. Refer to Abbreviations
on page 14 for a description of abbreviations.
Working VirtualCenter Environment
Note: For the remainder of this manual, the term VirtualCenter refers to the
VirtualCenter client, unless explicitly specified otherwise.
There are several options for adding virtual machines to VirtualCenter:
• Register a host with virtual machines.
• Create virtual machines.
The list below describes some of the key process options.
• A Virtual machine can be created from scratch using the New Virtual Machine
wizard. After creating a virtual machine, a guest operating system must be
installed.
• An existing virtual machines can be used as source for new templates using the
New Template wizard.
22
www.vmware.com
C H A P T E R 1 Introducing VMware VirtualCenter
• An existing virtual machines can be cloned to create new virtual machines using
the Clone wizard.
• Templates can be deployed as new virtual machines using the Template
Deployment wizard.
• When creating a new machine from either a template or as a clone, the new
virtual machine can be customized using the Guest Customization wizard. This
wizard customizes a virtual machine that already has a guest operating system
installed.
• After creating a new virtual machine, irrespective of the method used to create
it, it can be edited using the Virtual Machine Control Panel.
Action
Requires
New Virtual Machine
No previous condition
Create Template
Existing virtual machine registered with VirtualCenter or local to
VirtualCenter management server
Deploy Template
Existing template in template upload repository or on datastore of
registered host.
Clone Existing Virtual Machine
Existing registered virtual machine
Guest Customization
Triggered from deploy template or clone wizards. Requires existing guest
operating system in original source virtual machine.
Edit Existing Virtual Machine
Completed virtual machine. Virtual machine can be result of either New
Virtual Machine wizard or Deploy or Clone wizards.
The following sections introduce the essential VirtualCenter tasks:
• Understanding Virtual Machines and Hosts
• Understanding Templates
• Cloning Virtual Machines
• Understanding Customization
• Understanding Migration
• Creating and Configuring New Virtual Machines
• Understanding Scheduled Tasks
• Understanding Events
• Understanding Alarms
• Understanding the User Interface
• Performing Actions
23
VMware VirtualCenter User’s Manual
Understanding Virtual Machines and Hosts
Hosts are added to the VirtualCenter environment through an Add Host wizard. When
VirtualCenter adds a host, it automatically discovers and registers all the virtual
machines on that host. Each host is associated with a specific farm. Select a farm
object to enable the Add Host wizard menu option.
The figure below illustrates the process of adding virtual machines to VirtualCenter
control. Refer to Abbreviations on page 14 for a description of abbreviations.
Adding a Host to a Farm and Performing Automatic Discovery of Virtual Machines
Understanding Templates
A template is a golden image of a virtual machine. The template typically includes a
specific operating system and configured components which provide virtual
counterparts to hardware components. VirtualCenter uses templates to create new
virtual machines.
Creating a Template
You create templates from existing virtual machines. These virtual machines can be
either:
• Virtual machines located on any VirtualCenter registered host.
• Virtual machines stored on a disk local to the VirtualCenter management server.
Virtual machines local to the VirtualCenter management server can be virtual
machines created by supported versions of ESX Server, GSX Server, or
Workstation. Refer to VirtualCenter Template Requirements on page 39 for
additional information.
24
www.vmware.com
C H A P T E R 1 Introducing VMware VirtualCenter
Note: Optionally, create templates from GSX Server and Workstation virtual
machines. Only virtual machines created by ESX Server version 2.0 or greater can
be managed by VirtualCenter.
In addition, create templates by making a copy (cloning) of an existing template.
When you create a template, VirtualCenter provides an option to store the template at
one of two locations:
• Datastore — The original datastore location of the source virtual machine. The
original virtual machine is the template. This option works best with a shared
datastore between hosts on a farm. This option is typically used for creating
templates from virtual machines on registered ESX Server hosts.
• Template upload directory — Located on the VirtualCenter management
server machine. It contains copies of the original virtual machine virtual disks.
Specify a directory local the VirtualCenter management server as the template
upload directory. Typically used when creating templates from non-ESX Server
virtual machines which must also be stored locally to the VirtualCenter
management server.
The figure below illustrates the two methods for storing templates in VirtualCenter.
Refer to Abbreviations on page 14 for a description of abbreviations.
Creating a Template
25
VMware VirtualCenter User’s Manual
Deploying a Template
When you deploy a template, you create a new virtual machine from the template. If
the template is in the template upload directory, place the new virtual machine on
any VirtualCenter managed host.
If the template is stored on the datastore of a host, place the new virtual machine only
on another host that has access to the datastore. Only those hosts that share the
datastore are listed as Deploy a Template wizard target host choices.
The figure below illustrates the process for deploying a template to create a new
virtual machine. Refer to Abbreviations on page 14 for a description of abbreviations.
Deploying a Template
26
www.vmware.com
C H A P T E R 1 Introducing VMware VirtualCenter
Cloning Virtual Machines
A clone is a copy plus customization of a virtual machine. When you create a clone,
VirtualCenter provides an option to customize the guest operating system of that
virtual machine. Store clones on any host within the same farm as the original virtual
machine.
The figure below illustrates the process for cloning an existing virtual machine to
create a new virtual machine. Refer to Abbreviations on page 14 for a description of
abbreviations.
Creating a Clone
27
VMware VirtualCenter User’s Manual
Understanding Customization
When creating a virtual machine by either deploying a template or cloning an existing
virtual machine, an option is provided to customized the guest operating system
installed on that template or existing virtual machine.
Customizing Windows guest operating system options include:
• Join workgroups and domains
• Network interface configuration
• Domain suffix, security ID (SID) change
Customizing Linux guest operating system options include:
• Host name
• Domain suffix
• Network interface configuration
28
www.vmware.com
C H A P T E R 1 Introducing VMware VirtualCenter
Understanding Migration
Migration is the act of moving a virtual machine from one host to another. There are
two types of migration.
• Migration with VMotion — Moving a powered on virtual machine between
hosts on a farm. Moving a powered on virtual machine, allows to virtual machine
to continue performing transactions without interruption. This functionality
requires activation of VMotion on both the source and target host. The figure
below illustrates migrating a powered on virtual machine from one host to
another using VMotion. Refer to Abbreviations on page 14 for a description of
abbreviations.
Performing a Migration with VMotion
29
VMware VirtualCenter User’s Manual
• Migration — Moving a powered off virtual machine between hosts on a farm.
The figure below illustrates the process for migrating a powered off virtual
machine from one host to another. Refer to Abbreviations on page 14 for a
description of abbreviations.
Performing Migration of a Powered Off Virtual Machine
30
www.vmware.com
C H A P T E R 1 Introducing VMware VirtualCenter
Creating and Configuring New Virtual Machines
In addition to providing multiple methods for moving, migrating, deploying, and
cloning virtual machines, VirtualCenter also incorporates the creation capabilities of
the virtualization platforms. Through the New Virtual Machine wizard and the Virtual
Machine Control Panel create new virtual machines from scratch and made
configuration modifications to them once they are created.
Understanding Scheduled Tasks
Create scheduled tasks to automatically perform operations at specified times.
Configure the tasks to occur once or routinely. Apply tasks to groups, farms, or
individual virtual machines. The Scheduled Tasks panel lists all planned for and user
defined actions within the VirtualCenter environment. Create, modify, or remove tasks,
as needed. The New Task wizard provides the following task options:
• Deploy a virtual machine from a template
• Clone an existing virtual machine
• Change the power state of a virtual machine
• Migrate a virtual machine
• Migrate a virtual machine with VMotion
• Change resource settings of a virtual machine
Understanding Events
VirtualCenter events are logged in the VirtualCenter database. Each event panel
displays the events relevant to the selected VirtualCenter object. With the Events
option in the navigation bar selected, the Events panel displays all the events for the
current session. With a farm or host selected, only the events that occurred on that
farm or host appear in the Events panel.
Understanding Alarms
Alarms are preconfigured actions that can be triggered when selected events occur.
Apply alarms to any VirtualCenter object. View, modify, and remove an existing alarm
through the Alarms tab of the object where the alarm was defined.
31
VMware VirtualCenter User’s Manual
Understanding the User Interface
The VirtualCenter client display is typical to Windows screens. It has a menu bar, a
shortcut navigation bar, a navigation specific toolbar, and a display area. For the
Inventory navigation item, the display area is divided into:
• Inventory panel — Displays an inventory list of all the managed VirtualCenter
management server objects.
• Information panel — Displays the tab specific content for the selected object
in the inventory panel. For the Tasks, Templates, and Events Navigation items, the
display area shows a list of scheduled tasks, templates, and events, respectively.
menu bar
navigation bar
toolbar
information panel tabs
farm
host
virtual machine
inventory panel
information panel
VirtualCenter User Interface
32
www.vmware.com
C H A P T E R 1 Introducing VMware VirtualCenter
Performing Actions
Performing an action through VirtualCenter involves:
• Starting and logging on to the VirtualCenter client.
• Adding or selecting a virtual machine, host, farm, or group.
• Selecting the desired action from the corresponding menu for the virtual
machine, host, farm, or group, and answering the prompts from the task wizard
screens.
The figure below illustrates the process flow for typical VirtualCenter activities. Refer to
Abbreviations on page 14 for a description of abbreviations.
VMware VirtualCenter Process Flow
33
VMware VirtualCenter User’s Manual
VMware VirtualCenter Requirements
The VirtualCenter client and VirtualCenter management server are both Windows
executables that can optionally run in a virtual machine.
The following sections describe additional, component-specific requirements.
• VirtualCenter Management Server Requirements
• VirtualCenter Client Requirements
• VirtualCenter Database Requirements
• VirtualCenter Managed Hosts Requirements
• VirtualCenter Virtual Machine Requirements
• VirtualCenter Virtual Machine Guest Operating Systems Requirements
• VirtualCenter Licensing Requirements
• VirtualCenter VMotion Requirements
• VirtualCenter Template Requirements
• VirtualCenter Guest Operating System Customization Requirements
VirtualCenter Management Server Requirements
The VirtualCenter management server must have:
• Administrator privileges on the installing system to install the VirtualCenter
management server. The VirtualCenter management server installation adds
VirtualCenter as a Windows service.
• Windows 2000 Server, Windows 2000 Advanced Server, Windows XP
Professional, or Windows Server 2003 (Web, Standard, and Enterprise).
• Minimum 1GB RAM (Recommended 2GB).
• Minimum Pentium IV 2.0Ghz processor.
• Minimum 1 10/100Mbps NIC (1Gbps NIC recommended).
• Windows Script version 5.6 or later. If you do not have this version, VirtualCenter
installer automatically updates to Windows Script version 5.6.
• Disk space sufficient on the machine to support the VirtualCenter database and
the template upload directory.
The VirtualCenter management server may run on the same machine as the
VirtualCenter client, or may be installed separately on another Windows system. It can
also installed in a virtual machine.
34
www.vmware.com
C H A P T E R 1 Introducing VMware VirtualCenter
VirtualCenter Client Requirements
The VirtualCenter client must have:
• .NET Framework version 1.1. If you do not have this version, VirtualCenter
automatically updates to .NET Framework version 1.1.
• Windows 2000 (all versions), Windows XP Professional, Windows XP Home
Edition, Windows Server 2003, Windows 98, Windows 98 SE, Windows ME, or
Windows NT4 (SP6a required).
• Minimum 256MB RAM.
The VirtualCenter client can be installed on multiple Windows systems and access the
VirtualCenter management server through the network.
VirtualCenter Database Requirements
The VirtualCenter database must have one of the following compatible database
formats:
• Microsoft Access (default)
You do not need to have a Microsoft Access database installed to use this option.
VirtualCenter stores the database in Microsoft Access format.
• Microsoft SQL Server 2000
• Microsoft SQL Server 7
• Oracle 8i
Note: VMware recommends using the Microsoft Access Database only for
demonstration environments and proof of concepts. This database is not
recommended for production deployments. Rather, for production environments, use
either the SQL Server or Oracle database.
VirtualCenter Managed Hosts Requirements
The VirtualCenter registered and managed hosts must be running the following
virtualization platform:
• VMware ESX Server, version 2.0.1
VirtualCenter Virtual Machine Requirements
In VirtualCenter virtual machines, the guest operating systems must use SCSI hard
disks (though CD-ROM drives can be configured as IDE).
35
VMware VirtualCenter User’s Manual
VirtualCenter Virtual Machine Guest Operating Systems
Requirements
VirtualCenter virtual machines must be installed with one of the following guest
operating systems:
• Windows 2000 Server
• Windows 2000 Advanced Server
• Windows XP Professional
• Windows Server 2003, Web Edition
• Windows Server 2003, Standard Edition
• Windows Server 2003, Enterprise Edition
• Red Hat Enterprise Linux AS 3.0
• Red Hat Advanced Server 2.1
• SUSE LINUX Enterprise Server 8
VirtualCenter Licensing Requirements
There are three elements to VirtualCenter licensing, each of which has a separate set
of license keys with a different set of policies.
VirtualCenter management server — Requires one license for each VirtualCenter
Server. VirtualCenter Server licenses are perpetual. A license key is requested the first
time VirtualCenter client connects to the VirtualCenter management server, not
during installation.
VirtualCenter agent licenses — Requires one license that comes in assorted
configurations for each registered host. Managed CPU licenses are perpetual. The
license configurations are typically in combinations of pairs, for example 2, 4, 8, and 16
CPU licenses. Hosts cannot be partially licensed. For example, you cannot use 4 CPUs
worth of licenses on an 8-way system; this configuration requires 8 CPU licenses.
Additional licenses can be added through the VirtualCenter client.
Any time you add a host to VirtualCenter, VirtualCenter automatically applies an
appropriate number of managed CPU licenses towards that host. The number of
licenses applied depends on the number of CPUs on the host.
VMotion CPU licenses — Requires one license for each CPU for each registered host
to be VMotion-enabled. VMotion CPU licenses are perpetual. As with the managed
CPU licenses, hosts cannot be partially VMotion licensed. For example, an eight CPU
server requires eight licenses. Additional licenses can be added through the
VirtualCenter client.
36
www.vmware.com
C H A P T E R 1 Introducing VMware VirtualCenter
Whenever you add a host to VirtualCenter, and there are sufficient VMotion CPU
licenses available, VirtualCenter prompts you to VMotion-enable the new host. If you
select Yes, VirtualCenter checks that no virtual machines are running on the host. The
host is then VMotion-enabled, and the appropriate number of licenses are applied by
VirtualCenter.
Whenever you remove a host from VirtualCenter, the VMotion licenses are released.
The VMotion licenses must be reapplied when the host is re-registered with
VirtualCenter.
VMotion licenses are not intended to be mobile. The only legitimate circumstance
under which you should move a license are when you are:
• Deprecating and replacing a VMotion-enabled host.
• Repurposing a VMotion-enabled host to run services in a new farm.
• Exercising a one-time transfer of VMotion licenses.
VirtualCenter VMotion Requirements
If you wish to have VirtualCenter perform a migration with VMotion of your virtual
machines, you must also have and activate the VirtualCenter VMotion Module. You
must activate each host. Activation requires a specific VMotion license for each host.
In addition, the ESX Server hosts you are planning to migrate between must meet the
following requirements. Complete these requirements before you attempt to perform
a VMotion migration.
• The hosts must share a storage area network (SAN) infrastructure.
• Configure all of your ESX Server hosts to use a single Virtual Machine File System
(VMFS) volume.
The virtual machine’s disks have to be on a VMFS that is accessible by both
source and target hosts.
The shared VMFS access mode VMFS setting should be public.
Set the size of the VMFS volume sufficiently large, and spanning enough LUNs, to
store all of the virtual disks for your virtual machines.
Ensure that all VMFS volumes on your ESX Server hosts use volume names, and
that the virtual machines use the volume names for specifying the virtual disks.
• Ensure that the CPUs in the VMotion hosts (CPU0 and CPU1) match, for example
are both P4. The vendors for CPU0 and CPU1 must match each other.
• The virtual machine configuration file should not reside on a VMFS located on
the shared datastore.
37
VMware VirtualCenter User’s Manual
• VMotion does not currently support the migration of clustered applications, raw
or undoable virtual disks. If you have clustered applications, or raw or undoable
disks, store the disks on separate VMFS volumes from the virtual machines you
plan to migrate using VMotion.
• VMotion requires a Gigabit Ethernet network between virtual machines.
VMotion requires the setup of a private, Gigabit Ethernet migration network
between all of the VMotion-enabled hosts. When VMotion is enabled on a host,
configure a unique network identity object for the host and connect it to the
private migration network.
• Configure a TCP/IP address on an extra network adapter card (NIC) sufficient to
support migration.
The minimum number of NICs is two — one is dedicated to the host and one is
dedicated for sharing between the virtual machines and VMotion. The preferred
minimum number is three — one is dedicated to the host, one (or more) are
dedicated to the virtual machines, and one is dedicated to VMotion activity.
38
www.vmware.com
C H A P T E R 1 Introducing VMware VirtualCenter
The figure below illustrates the possible NIC configurations that support VirtualCenter.
Refer to Abbreviations on page 14 for a description of abbreviations.
VMotion Network Card Configuration Options
VirtualCenter Template Requirements
Virtual machines to be used as source for VirtualCenter templates must have been
created by one of the following virtualization platforms:
• Workstation version 4.x
• GSX Server version 2.5.x
• ESX Server version 2.x
If you have older virtual machines that you plan to include in the VirtualCenter
environment, you must upgrade your Workstation, GSX Server, or ESX Server to the
supported version level and upgrade the virtual machines to the supported version
39
VMware VirtualCenter User’s Manual
level. Refer to your Workstation, GSX Server, or ESX Server documentation for
additional information.
Note: To be registered with VirtualCenter, the host must be running ESX Server
version 2.0.1, though virtual machines can have been created with ESX Server version
2.0, then imported into a host running ESX Server version 2.0.1.
The virtual disks of virtual machines to be used as source for VirtualCenter templates
have the following requirements:
• Workstation or GSX Server virtual machine’s directory path and configuration file
must be local to VirtualCenter management server.
The path must refer to a drive letter corresponding to a local file system.
Specifically, it cannot be a network share that is mapped as a local drive.
• ESX Server virtual machines must be registered with VirtualCenter.
Remove the ESX Server host from VirtualCenter after you have created the
template, if needed.
• ESX Server golden images can have their configuration file refer to virtual disks
with relative paths. Then have the virtual disks reside under the same directory as
the configuration file.
• Only SCSI virtual disks are allowed. IDE virtual disks cannot be imported as a
template.
Note: Windows XP and Windows Server 2003 virtual machines created through
Workstation or GSX Server default to IDE disks. Refer to your Workstation or GSX
Server documentation for information on creating virtual machines with SCSI
disks.
VirtualCenter Guest Operating System Customization
Requirements
To use the guest customization wizard, the virtual machine and the guest operating
system, Windows or Linux, must meet the requirements listed in the following
sections:
• Virtual Hardware Requirements for Guest Customization
• Windows Requirements for Guest Customization
• Linux Requirements for Guest Customization
40
www.vmware.com
C H A P T E R 1 Introducing VMware VirtualCenter
Virtual Hardware Requirements for Guest Customization
Guest customization requires that the source virtual machine used to create the clone
or templates has the following:
• VMware Tools installed.
• At least one Network Interface Card (NIC) configured.
When a virtual machine is cloned or used for a template, the new virtual
machine has the exact same number and type of NICs. For example, AMD
VLance/PcNet versus high-performance VMware vmxnet. This cannot be
changed during the deployment and/or guest customization process.
• SCSI disks.
The default configuration for VMware Workstation and GSX Server creating a
Windows XP or Windows Server 2003 virtual machine is IDE disks. If the source
virtual machine was created using VMware Workstation or GSX Server, with
Windows XP or Windows Server 2003 guest operating systems, be sure the nondefault SCSI disks were specified.
VirtualCenter customization operates on the disk attached to the virtual SCSI
node with the lowest address on the SCSI controller with the lowest index. As a
result, it is a requirement to make sure that the guest operating system that is
being customized resides on a disk attached as SCSI 0:0 node in the virtual
machine configuration.
For Windows guest operating systems: Both the active partition (the partition
containing boot.ini) and the system partition (the partition containing the
system directory, for example \WINNT or \WINDOWS) are on the same virtual
disk and attached the SCSI 0:0 virtual SCSI node.
Note: It is not a requirement that active and system partitions be the same
partition.
For Linux guests: The virtual disk containing the system partition (the partition
containing the /etc. directory) must reside on the SCSI 0:0 node.
Windows Requirements for Guest Customization
Guest customization of a Windows guest operating system can occur if:
• The guest operating system is not a primary or backup domain controller.
• The clone or template has one of the following Windows versions installed:
• Windows 2000 Server or Advanced Server
• Windows XP Professional
41
VMware VirtualCenter User’s Manual
• Windows Server 2003, Web, Standard, or Enterprise Editions
Note: A Windows XP Home operating system guest customization is not
supported.
• The Microsoft Sysprep tools are installed on the VirtualCenter management
server.
Refer to Installing the Microsoft Sysprep Tools on page 217 for information on
installing the Microsoft Sysprep tools.
Microsoft Sysprep tools have certain requirements and impose certain
restrictions on the source machine, please refer to the Microsoft Sysprep
documentation for additional information.
Linux Requirements for Guest Customization
Guest customization of a Linux guest operating system can occur if:
• The clone or template has one of the following Linux versions installed:
• Red Hat Enterprise Linux AS 3.0
• Red Hat Advanced Server 2.1
• SUSE LINUX Enterprise Server 8
• The clone or template has a root volume formatted with ext2 or ext3 file system.
Note: A default installation of SUSE LINUX Enterprise Server 8.0 formats the disk
using the ReiserFS file system, which is not supported. If you would like to
customize your SUSE virtual machines, be sure to format the disk using an ext2
or ext3 file system during the installation of the guest operating system.
• The VMware Open Source Components installed on the VirtualCenter
management server.
Refer to Installing the VMware Open Source Components on page 218 for
additional information.
42
www.vmware.com
C H A P T E R 1 Introducing VMware VirtualCenter
Technical Support Resources
There are several resources available for researching and finding solutions for issues
and concerns. The following sections describe the options.
The VMware Web Site
The latest technical support and troubleshooting notes are available on the VMware
Web site at:
www.vmware.com/support
VMware Newsgroups
The VMware newsgroups are primarily forums for users to help each other. You are
encouraged to read and post issues, work-arounds and fixes. While VMware personnel
may read and post to the newsgroups, they are not a channel for official support.
For a listing of all current newsgroups and the topic areas they cover, see:
www.vmware.com/support/newsgroups.html
VMware Community
The VMware community is a set of moderated discussion forums hosted on the
VMware Web site and is open to users of all VMware products. VMware technical staff
regularly monitor the forums to learn about your issues and feedback, and help
facilitate discussions when appropriate.
To participate in the community:
1. Go to:
www.vmware.com/community
2. Create a user account.
Reporting Problems
These guidelines describe the information you may be asked to provide when
reporting problems.
Be sure to register your serial number. If you are requesting support directly from
VMware, then report your problems using the support request form on the VMware
Web site at:
www.vmware.com/requestsupport
When requesting support from VMware, run the /usr/bin/vm-support script
on the service console and save the resulting vpx-<date>-<unique-
43
VMware VirtualCenter User’s Manual
xnumber>.tgz file. This script collects and packages all relevant VirtualCenter
system and configuration information and VirtualCenter log files. This information can
be used to analyze the problem you are encountering.
If a virtual machine exits abnormally or crashes, please save the log file
(vmware.log in the same directory as your .vmx file) and any core files (core or
vmware-core in that directory). Also, please save the virtual machine’s
configuration (.vmx) file and any other information that might help reproduce the
problem.
Be sure to record a description of your physical hardware and of the software
(operating system and applications) that was running in the virtual machine. This
information may be required when requesting support.
A problem in the VMkernel normally causes the machine to display an error screen for
a period of time and then reboot. If you specified a VMware core dump partition
when you configured your machine, the VMkernel also generates a core dump and
error log. More serious problems in the VMkernel can freeze the machine without an
error screen or core dump.
In either of these cases, when reporting problems directly to VMware describe the
steps you took in the period before this failure (including any information listed in
point 1 above, if applicable). Include this information in your support request, along
with the contents of /var/log/messages from the service console. Also include
the core dump and error log, if any. These can be found in files named vmkernelcore.<date> and vmkernel-log.<date> in the /root directory after you
reboot your machine.
The following files can give you additional information about a problem that you are
seeing. However, they are mainly intended to be used by VMware personnel for
debugging.
• VirtualCenter server log
The VirtualCenter server log file can be found in a temporary directory and has a
name of the form vmware-vpxd-[user]-[pid].log. For example,
<system drive>:\winnt\Temp\vmware-vpxd-Administrator1024.log
<system drive>:\winnt\Temp\vmware-vpx-SYSTEM-1024.log
<system drive>:\Windows\Temp\vmware-vpx-SYSTEM-1024.log
• Serverd logs on ESX Servers
44
www.vmware.com
C H A P T E R 1 Introducing VMware VirtualCenter
The serverd log files can be found in the /tmp directory on the ESX Servers and
has a name of the form vmware-serverd-[user]-[pid].log. For
example, /tmp/vmware-serverd-root-1024.log.
• VMotion history and vmkernel logs
In the event that VMotion fails, these logs are useful in addition to the
VirtualCenter and serverd logs. The VMotion history can be found in the file /
proc/vmware/migration/history. The vmkernel logs can be found in
/var/log/vmkernel.
If so requested by VMware Technical Support, refer to the VMware VirtualCenter
Settings for additional information.
1. From the VirtualCenter client, open the VMware VirtualCenter Settings,
Advanced tab.
Select File > VMware VirtualCenter Settings. When the dialog box appears, select
the Advanced tab.
2. Record the information in the server.options field. Click OK.
Viewing System Logs and Reports
Use the System Logs and Availability Report options to view the following log files
and report through the management interface:
• VMkernel warnings and serious system alerts, the data for which is gathered
from /var/log/vmkwarning in the service console. For more information,
see Viewing VMkernel Warnings on page 46.
• VMkernel messages, the data for which is gathered from
/var/log/vmkernel in the service console. For more information, see
Viewing VMkernel Messages on page 46.
• Service Console messages, the data for which is gathered from
/var/log/messages in the service console. For more information, see
Viewing Service Console Logs on page 46.
• The availability report, which contains information and statistics about server
uptime and downtime. For more information, see Viewing the Availability Report
on page 47.
You should periodically check the VMkernel warning and alert messages for out of
memory errors, hardware failures and so on.
To view these log files and the availability report, complete the following steps.
1. Make sure you are logged into the management interface as the root user.
45
VMware VirtualCenter User’s Manual
2. Click options, then click System Logs.
3. Click the appropriate tab for the log file you want to view.
Log Files to Check When Things Go Wrong
VirtualCenter server log — The VirtualCenter server log file can be found in a
temporary directory and has a name of the form vmware-vpxd-[user][pid].log. For example:
C:\Documents and Settings\Administrator\Local
Settings\Temp\vmware-vpxd-Administrator-1024.log
C:\WINDOWS\Temp\vmware-VirtualCenter-SYSTEM-1024.log
C:\WINNT\Temp\vmware-VirtualCenter-SYSTEM-1024.log
Serverd logs on ESX Server hosts — The serverd log files can be found in the /tmp
directory on the ESX Server hosts and have a name of the form vmware-serverd[user]-[pid].log. For example: /tmp/vmware-serverd-root1024.log.
Migration history and vmkernel logs — In the event that migration fails, these logs are
useful in addition to the VirtualCenter and ESX Server serverd logs. The migration
history can be found in the file: /proc/vmware/migration/history. The
vmkernel logs can be found in: /var/log/vmkernel.
Viewing VMkernel Warnings
To view VMkernel warnings and serious system alerts, click the VMkernel Warnings
tab. This information is useful if you are experiencing problems with VirtualCenter or
your virtual machines. If your log contains any alerts, check the VMware Knowledge
Base at or contact your VMware support representative.
Viewing VMkernel Messages
To view the VMkernel message log, click the VMkernel Log tab. This information is
useful if you are experiencing problems with VirtualCenter or your virtual machines. If
your log contains any alerts, check the VMware Knowledge Base at or contact your
VMware support representative.
Viewing Service Console Logs
To view service console messages, click the Service Console Log tab.
This information is useful if you are experiencing problems with VirtualCenter or your
virtual machines. If your log contains any alerts, check the VMware Knowledge Base at
or contact your VMware support representative.
46
www.vmware.com
C H A P T E R 1 Introducing VMware VirtualCenter
Viewing the Availability Report
To view the server availability report, click the Availability Report tab. The availability
report contains useful information about server uptime and downtime. This includes
detailed statistics regarding uptime history and an analysis of downtime.
47
VMware VirtualCenter User’s Manual
48
www.vmware.com
2
CHAPTER 2
Installing VMware
VirtualCenter
49
VMware VirtualCenter User’s Manual
Installing VMware VirtualCenter
This chapter describes how to install VMware VirtualCenter on your system. Included
are the installation requirements and information about the installation process.
To install VirtualCenter, run a single installer package that contains both the
VirtualCenter client and VirtualCenter management server. You can install only the
VirtualCenter client, only the VirtualCenter management server, or both on a single
Windows system.The VirtualCenter agent installation is handled automatically by the
VirtualCenter management server. The VirtualCenter client package includes online
help and documentation for administrators and users.
This chapter contains the following topics:
• Preparing for the VirtualCenter Database
• Installing the VirtualCenter Product
• Uninstalling VMware VirtualCenter
• Modifying a VirtualCenter Installation
Preparing for the VirtualCenter
Database
VirtualCenter supports three types of database formats:
• Microsoft Access (default)
• Microsoft SQL Server 2000, Microsoft SQL Server 7
• Oracle 8i
Each database requires some configuration adjustments in addition to the basic
installation. The following sections describe these configuration adjustments.
The installation preparation topics are covered in the following sections:
• Configuring Oracle 8i Connection to Work Locally
• Configuring Oracle 8i Connection to Work Remotely
• Configuring a SQL Server ODBC Connection
• Configuring the Microsoft Access Database
Configuring Oracle 8i Connection to Work Locally
If you are planning to use an Oracle database as your VirtualCenter database, and you
are going to have VirtualCenter access the database locally.
50
www.vmware.com
C H A P T E R 2 Installing VMware VirtualCenter
To prepare an Oracle database to work locally with VirtualCenter:
1. From the Oracle database machine install and prepare Oracle:
a. Install Oracle8i and create a database (VirtualCenter).
b. Download Oracle ODBC 8.1.5 from the Oracle Web site.
c. Install Oracle ODBC driver 8.1.5 through the Oracle Universal Installer
(directions are provided with the driver).
d. Increase the number of open cursors for the database. Add the entry
open_cursors = 300 to the
C:\Oracle\ADMIN\VPX\pfile\init.ora file.
2. Connect Oracle locally:
a. Create a new tablespace specifically for VirtualCenter using the following SQL
statement:
CREATE TABLESPACE vpx DATAFILE
'C:\Oracle\ORADATA\VPX\vpx.dat' SIZE 500M;
b. Create a user for accessing this tablespace through ODBC:
CREATE USER vpxAdmin IDENTIFIED BY vpxadmin DEFAULT
TABLESPACE vpx;
c. Allow that user CONNECT and DBA privileges:
GRANT CONNECT, DBA to vpxAdmin;
d. Create an ODBC connection to the database using the following settings:
Data Source Name: VMware VirtualCenter
TNS Service Name: VPX
User Id: vpxAdmin
Configuring Oracle 8i Connection to Work Remotely
If you are planning to use an Oracle database as your VirtualCenter database, and you
are going to have VirtualCenter access the database remotely.
To prepare an Oracle database to work remotely with VirtualCenter:
1. Install the Oracle client on the VirtualCenter management server machine.
2. Connect Oracle remotely:
a. Download and install the ODBC driver 8.1.57.
b. Edit the tnsnames.ora file located at
C:\Oracle\Ora81\NETWORK\ADMIN.
c. Use the Net8 Configuration Assistant to add the following entry:
51
VMware VirtualCenter User’s Manual
VPX =
(DESCRIPTION =
(ADDRESS_LIST =
(ADDRESS=(PROTOCOL=TCP)(HOST=vpxd-Oracle)(PORT=1521))
)
(CONNECT_DATA =
(SERVICE_NAME = VPX)
)
)
HOST =
Where HOST is the host to which the client needs to connect.
Configuring a SQL Server ODBC Connection
When you install VirtualCenter management server, you have the option to establish a
connection with a SQL Server database. The following procedure describes the
procedure to configure a SQL Server ODBC connection. If you use the SQL Server
authentication method, supply the same username, password, and ODBC system DSN
in the wizard that you used to configure the ODBC.
To prepare a SQL Server database to work with VirtualCenter:
1. Create a SQL Server database using Enterprise Manager on the SQL Server.
2. Create a SQL Server database user with database operator (DBO) rights.
The default database for the DBO user is what you defined in step 1.
3. Open the Windows ODBC Data Source Administrator.
Select Settings > Control Panel > Administrative Tools > Data Sources (ODBC).
4. Select the System DSN tab.
5. Modify an existing SQL Server ODBC connection:
a. Select the SQL Server ODBC DSN you want to modify.
b. Select the appropriate ODBC connection from the System Data Source list.
Click Configure.
c. Proceed with step 7 for creating a new SQL Server ODBC DSN connection.
6. Create a new SQL Server ODBC connection:
a. Select Create New Data Source. Click Add.
b. Select a New Data Source to SQL Server. Click Finish.
7. Specify an ODBC DSN name.
Type the name in the Name field. For example, VMware VirtualCenter.
52
www.vmware.com
C H A P T E R 2 Installing VMware VirtualCenter
8. Optionally, specify an ODBC DSN description.
Type the description in the Description field.
9. Select the DSN server name from the Server drop-down menu.
Where local means local host.
Type the SQL Server machine name in the field if you cannot find it in dropdown menu.
10. Configure the SQL Server authentication screen. Click Next.
11. Select an authentication option.
Use either of the authentication methods:
• If you are using local SQL Server, select Windows NT authentication.
• If you are using remote SQL Server, select SQL Server authentication. You can
also choose Windows NT authentication.
12. Enter your SQL Server login and password.
Refer to your database administrator for this information.
13. Configure the default database. Click Next.
14. Select the database.
Select from the Change the default database to menu. Click Next.
15. Complete the process. Click Finish.
16. Verify the database source.
From the ODBC Microsoft SQL Server Setup menu. Select Test Data Source.
If the test data source is acceptable, click OK. If it is not acceptable, return and
reconfigure any incorrect items.
17. Close the ODBC Data Source Administrator. Click Close.
Configuring the Microsoft Access Database
If you find that the database performance is slow, increase the buffer size.
To adjust the performance of the Microsoft Access database:
1. Open the Windows ODBC Data Source Administrator.
Select Settings > Control Panel > Administrative Tools > Data Sources (ODBC)
2. Select the System DSN tab.
3. Select ODBC Mircosoft Access Setup. Click Options.
53
VMware VirtualCenter User’s Manual
4. Increase the buffer size. Then click OK.
The default value is 2048. Change it to 8192.
5. Restart the VirtualCenter management server, if it is running.
Refer to Starting or Stopping VMware VirtualCenter on page 68 for information
on starting and restarting the VirtualCenter management server.
Installing the VirtualCenter Product
VMware VirtualCenter installs three components:
• VirtualCenter client — A user interface that runs locally on a Windows host
with network access to the VirtualCenter management server.
• VirtualCenter management server — A service that acts as a central
administrator for VMware servers connected on a network, to direct actions
upon the virtual machines and the virtual machine hosts. VirtualCenter
management server is the central working core of VirtualCenter.
Note: An ESX Server host can only be registered with one VirtualCenter
management server. If you try to register an ESX Server host that it is already
registered with a different VirtualCenter management server, an error message
appears and you are prevented from adding the host to the additional
VirtualCenter management server.
• VirtualCenter database — A database dedicated to the VirtualCenter
processes. It is installed when the VirtualCenter management server is installed.
• VirtualCenter agent — An agent installed on each ESX Server host to be under
VirtualCenter control. It coordinates the actions received from the VirtualCenter
management server.
Installing VMware VirtualCenter
Note: Install and use only one VirtualCenter management server to control all, or
specific groups of, ESX Server hosts. Do not have multiple VirtualCenter management
servers controlling the same ESX Server host. Instead, install multiple copies of the
VirtualCenter client. From each VirtualCenter client, you can access any networked
VirtualCenter management server.
Note: The VirtualCenter client does not store any persistent information on your
local machine.
54
www.vmware.com
C H A P T E R 2 Installing VMware VirtualCenter
To install a VirtualCenter component on your client, server, or host:
1. Download the VirtualCenter installer file from the VMware secure Web site to a
local drive.
www.vmware.com
Contact your VMware representative for information on the location of the
secure Web site.
2. Run the installer.
Double-click the VMware installation icon or select Start > Run and enter the
location of the installer in the Run window.
The VirtualCenter installer prepares to install the components. Your InstallShield
may appear while this is happening.
3. Verify you are installing the VirtualCenter product. Click Next.
4. Accept the VMware license terms.
Click the Accept button, then click Next.
5. Enter your customer identification information.
Enter your user name, company name, and select the appropriate user
application status radio button. Then click Next to continue the installation.
55
VMware VirtualCenter User’s Manual
6. Select the type of installation setup.
The choices are:
• Client — Installs the VirtualCenter client and VirtualCenter database
components on the local machine.
• Server — Installs the VirtualCenter management server component on the
local machine.
• Custom — Allows you to select which items to install and where, within the
network, they are to be installed.
Click the appropriate radio button. Then click Next to continue the installation.
If you selected Client, skip to step 11.
If you selected Server, skip to step 8.
If you selected Custom, proceed with the next step.
56
www.vmware.com
C H A P T E R 2 Installing VMware VirtualCenter
7. Customize the installation.
a. Select the VirtualCenter component to install.
Click the down arrow next to the appropriate component and select from the
drop-down menu.
If you unselect an item, its icon changes to an X. The Space and Change
buttons are grayed, if the VirtualCenter management server is not selected.
b. Make adjustments for available disk space.
Click the Space button from the Custom Setup screen. In the Disk Space
Requirements screen, click and drag column headers to view all columns as
needed.
If a volume line is highlighted, click OK, return to the previous screen, and
select to install either the client or the server, as both do not fit in the available
disk space.
57
VMware VirtualCenter User’s Manual
Click OK to return to the Custom Setup screen.
c. Change location, as needed.
Click the Custom button from the Custom Setup screen. In the Change
Current Destination Folders screen.
Browse to find the appropriate location. Click OK to return to the Custom
Setup screen.
After your selections are made, click OK to return to the Custom Setup screen.
d. Complete the Custom Setup screen. Click Next.
8. If you are installing the VirtualCenter management server: Set up the
VirtualCenter database.
Select whether to have the VirtualCenter create a database, or to create either a
custom SQL Server or Oracle database. The options are:
58
www.vmware.com
C H A P T E R 2 Installing VMware VirtualCenter
• Use Access database — VirtualCenter automatically creates a Microsoft
Access database.
This is a file in Microsoft Access format.
• Use a custom SQL Server database connection — VirtualCenter prompts for
DSN information then configures the database.
Supported versions are: SQL Server 7, SQL Server 2000, or SQL Server 2003
• Use a custom Oracle database connection — VirtualCenter prompts for DSN
information, a username, and a password, then configures the database.
The supported version is: Oracle 8i
The VirtualCenter database can be remote to the VirtualCenter management
server. The VirtualCenter database user is configured as the initial Administrative
user.
You must already have installed and configured the database application. Refer
to Preparing for the VirtualCenter Database on page 50 for additional
information.
9. To create a Microsoft Access database: click the Use Access database button,
then click Next.
10. To create an Oracle or SQL Server database connection: perform the
following:
a. Click Use custom SQL or Oracle database connection, then click Next.
b. Manually create a new System DSN. Click Add. Set the name to VMware
VirtualCenter.
59
VMware VirtualCenter User’s Manual
c. Provide a username and a password.
d. If an existing custom connection is already present, click Cancel to quit the
ODBC Data Source Administrator.
VirtualCenter checks that the connection is valid before it allows the
installation to continue.
For an Oracle database, connect through an Oracle driver. You must upgrade
the Oracle driver to version 8.1.7 for the Oracle 8.1.5 database. If you have not
already done so, refer to Preparing for the VirtualCenter Database on page 50
and perform the preparation steps before proceeding.
VirtualCenter then stores the VirtualCenter database information in the
registry.
For additional information on creating an ODBC data source, refer to your
Windows documentation.
11. Verify that you are ready to proceed with installation.
Click Install to continue the installation.
Progress messages appear while the installation proceeds. The VirtualCenter
installer installs the VirtualCenter management server, starts the VirtualCenter
database, performs a default access setup of the open database connectivity
(ODBC), registers and activates the VirtualCenter management server, and
installs the VirtualCenter client.
12. Close the installation wizard and, if prompted, restart your computer. Click Finish.
The selected VirtualCenter components are installed on your Windows machine.
60
www.vmware.com
C H A P T E R 2 Installing VMware VirtualCenter
Uninstalling VMware VirtualCenter
If both your VirtualCenter client and VirtualCenter management server are installed on
the same system, then you may uninstall one or both in the same step. During an
uninstall you are asked if you wish to preserve or remove the VirtualCenter database
and the .NET framework. You must have Administrator privileges to uninstall the
VirtualCenter management server. If you try to uninstall the VirtualCenter
management server while it is running, you must confirm that you really want to take
action, as it causes a disruption to any VirtualCenter clients connected to the service.
To uninstall VirtualCenter, choose either the VirtualCenter installer or the Windows
Add/Remove tool.
Uninstalling through the VirtualCenter installer:
1. As Administrator on the Windows system, run the installer.
Double-click the VMware installation icon or select Start > Run and enter the
location of the installer in the Run window.
2. Accept the VirtualCenter Installer. Click Next.
3. Select the Remove option.
Click the appropriate radio button, then click Next.
4. Verify ready to proceed with uninstallation. Click Remove.
VirtualCenter displays a progress screen as it proceeds with the uninstallation.
The VirtualCenter database retains any existing content.
61
VMware VirtualCenter User’s Manual
5. Select to remove the VirtualCenter database and settings or not.
Click Yes to remove all traces of VirtualCenter. Click No to retain the VirtualCenter
database and settings in preparation for a reinstallation.
6. Close the installation wizard. Click Finish.
Uninstalling through the Windows Add/Remove tool:
1. As Administrator on the Windows system, click through the Windows system to
the Add/Remove Programs.
Select Start > Control Panel > Add/Remove Programs. Scroll through the list of
installed programs and select VMware VirtualCenter.
2. Confirm that you want to remove the program. Click Yes.
3. Select to remove the VirtualCenter database and settings or not.
Click Yes to remove all traces of VirtualCenter. Click No to retain the VirtualCenter
database and settings in preparation for a reinstallation.
4. Close the installation wizard. Click Finish.
62
www.vmware.com
C H A P T E R 2 Installing VMware VirtualCenter
Modifying a VirtualCenter Installation
Modifying and reinstalling an existing VirtualCenter component is not supported at
this time. However, if you have installed a VirtualCenter component on a system, you
can later install a different component for the first time.
To modify the VirtualCenter installation:
1. Run the VirtualCenter installer.
Double-click the VMware installation icon or select Start > Run and enter the
location of the installer in the Run window.
2. Specify the type of modification you are performing.
Click the appropriate radio button, then click Next to continue.
3. If you selected Modify, change the installation options for the VirtualCenter
management server and/or VirtualCenter client.
63
VMware VirtualCenter User’s Manual
If you are adding a VirtualCenter client, skip to step 7.
If you are adding a VirtualCenter management server, proceed with the next
step.
If you are removing a VirtualCenter component, refer to Uninstalling VMware
VirtualCenter on page 61.
4. If you are installing the VirtualCenter management server: Set up the
VirtualCenter database.
Select whether to have the VirtualCenter create a database, or to create either a
custom SQL Server or Oracle database. The options are:
• Use Access database — VirtualCenter automatically creates a Microsoft
Access database.
This is a file in Microsoft Access format.
• Use a custom SQL Server database connection — VirtualCenter prompts for
DSN information then configures the database.
Supported versions are: SQL Server 7, SQL Server 2000, or SQL Server 2003
• Use a custom Oracle database connection — VirtualCenter prompts for DSN
information, a username, and a password, then configures the database.
The supported version is: Oracle 8i
The VirtualCenter database can be remote to the VirtualCenter management
server. The VirtualCenter database user is configured as the initial Administrative
user.
64
www.vmware.com
C H A P T E R 2 Installing VMware VirtualCenter
You must already have installed and configured the database application. Refer
to Preparing for the VirtualCenter Database on page 50 for additional
information.
5. To create a Microsoft Access database: click the Use Access database button,
then click Next.
6. To create an Oracle or SQL Server database connection: perform the
following:
a. Click Use custom SQL or Oracle database connection, then click Next.
b. Manually create a new System DSN. Click Add. Set the name to VMware
VirtualCenter.
c. Provide a username and a password.
d. If an existing custom connection is already present, click Cancel to quit the
ODBC Data Source Administrator.
65
VMware VirtualCenter User’s Manual
VirtualCenter checks that the connection is valid before it allows the
installation to continue.
For an Oracle database, connect through an Oracle driver. You must upgrade
the Oracle driver to version 8.1.7 for the Oracle 8.1.5 database. If you have not
already done so, refer to Preparing for the VirtualCenter Database on page 50
and perform the preparation steps before proceeding.
VirtualCenter then stores the VirtualCenter database information in the
registry.
For additional information on creating an ODBC data source, refer to your
Windows documentation.
7. Verify that you are ready to proceed with reinstallation. Click Install.
The screen title reflects the choice to repair or modify the installation of
VirtualCenter on this machine. Click Install.
VirtualCenter displays a progress screen as the reinstallation proceeds. The
VirtualCenter database retains any existing content.
8. Close the installation wizard. Click Finish.
66
www.vmware.com
3
CHAPTER 3
Starting VMware
VirtualCenter
67
VMware VirtualCenter User’s Manual
Starting VirtualCenter
This chapter describes how to start, stop and move around in VirtualCenter. In
addition, as licensing is required to add a host, this chapter describes how to add
licenses.
You need only a Read Only User role assigned to the farm, host, or virtual machine to
view objects in VirtualCenter. However, you need VirtualCenter Administrator role to
add or change licenses.
This chapter contains the following topics:
• Starting or Stopping VMware VirtualCenter
• Starting the VirtualCenter Client
• Adding Licenses
• Navigating in the VirtualCenter Client
Starting or Stopping VMware
VirtualCenter
When you install VirtualCenter, it is registered as a single Windows service that
appears in the Windows Services list. The VirtualCenter management server is an
automatically started Windows Service. You should not ever need to shut down the
VirtualCenter management server.
The VirtualCenter management server continues to function and perform its
monitoring and managing activities in the background. This means that even when
you are not logged on to the VirtualCenter client, the VirtualCenter management
server continues its monitoring and scheduled activities.
The VirtualCenter database is configured during installation. Applying changes to the
VirtualCenter database after the VirtualCenter management server is started might
cause a temporary disruption to other users accessing the same VirtualCenter
management server.
All the VirtualCenter activities are specified through the VirtualCenter client and
performed by the VirtualCenter management server.
To monitor and manage the VirtualCenter activities:
1. Start the VirtualCenter client.
2. Log on to the VirtualCenter management server.
68
www.vmware.com
C H A P T E R 3 Starting VMware VirtualCenter
The starting and stopping topics are covered in the following sections:
• Getting Started with VirtualCenter Users
• Starting the VirtualCenter Management Server
• Restarting the VirtualCenter Management Server
• Restarting the VirtualCenter Agent
• Stopping the VirtualCenter Management Server
Getting Started with VirtualCenter Users
When VirtualCenter is installed, the Administrator user installing VirtualCenter is
assigned VirtualCenter Administrator privileges for the VirtualCenter environment.
Permissions for all other VirtualCenter users need to be explicitly set by a VirtualCenter
Administrator.
VirtualCenter supports user groups. Users may belong to one or more groups, to allow
aggregate security assignments. Users assume the roles assigned to any group of
which they are members. Refer to Assigning Access Permissions on page 340 for
additional information on assigning access permission and roles to users and groups.
Starting the VirtualCenter Management Server
The VirtualCenter management server starts automatically when you start the
Windows machine on which it is installed. It also restarts each time the VirtualCenter
host is rebooted. When the VirtualCenter client appears, the baseline bar of the
VirtualCenter client window indicates the VirtualCenter management server you are
currently logged onto.
To verify the VirtualCenter management server is running, check your Windows
Services:
1. Select Start > Control Panel > Administrative Tools > Services > VMware
VirtualCenter Service.
2. Under the VMware VirtualCenter Services Properties, on the General tab, view
the service status.
Restarting the VirtualCenter Management Server
To restart the VirtualCenter management server through your Windows Services:
1. Select Start > Control Panel > Administrative Tools > Services > VMware
VirtualCenter Service.
2. Under the VMware VirtualCenter Services Properties, on the General tab, click
Start.
69
VMware VirtualCenter User’s Manual
3. Close the Properties box, click OK.
When Windows completes powering off of the process, close the Properties
dialog box.
4. Start your VirtualCenter client and select the VirtualCenter management server.
The VirtualCenter management server restarts automatically.
Restarting the VirtualCenter Agent
The VirtualCenter is installed on each ESX Server host automatically. It is started
automatically. If for some reason it stops, it must be restarted.
To restart the VirtualCenter agent:
1. From the VirtualCenter client, display the inventory panel to display the virtual
machine.
Click the Inventory option in the navigation bar. Expand the inventory as
needed, and click the appropriate virtual machine.
2. Display the host properties dialog box.
From the main menu, host right-click pop menu, or Summary tab button, select
Host Properties.
3. Select the Advanced tab. Click Restart.
70
www.vmware.com
C H A P T E R 3 Starting VMware VirtualCenter
Stopping the VirtualCenter Management Server
The VirtualCenter management server is a Windows service, so you should go
through your Windows interface to select the service and stop it.
Note: You should never have to stop the VirtualCenter management server. It is best
for VirtualCenter management server to have continuous operation. Continuous
operation ensures that all monitoring and task activities are performed as expected.
To stop the VirtualCenter management server:
1. Select Start > Control Panel > Administrative Tools > Services > VMware
VirtualCenter Service.
2. Under the VMware VirtualCenter Services Properties, on the General tab, click
Stop.
Starting the VirtualCenter Client
This section describes starting and stopping the VirtualCenter client, and logging on
to a VirtualCenter management server.
Starting the VirtualCenter Client and Logging On
VirtualCenter management server supports multiple VirtualCenter client logons. The
VirtualCenter client may be installed on any machine that has networked access to
the VirtualCenter management server.
To start a VirtualCenter client session:
1. Log on to your Windows system.
The first time you start the VirtualCenter client, log on as the administrator.
By default, administrators are allowed to log on to VirtualCenter. Administrators
here are defined to be either:
• Members of the local Administrators group, if the VirtualCenter management
server is not a domain controller.
• Members of the domain Administrators group, if the VirtualCenter Server is a
domain controller.
If the host is not a domain controller, log on as either <local host name>\<user>
or <user>, where <user> is a member of the local Administrators group.
If the host is a domain controller, you must log on as <domain>\<user>, where
<domain> is the domain name for which the host is a controller and <user> is a
member of that domain's Administrator group.
71
VMware VirtualCenter User’s Manual
2. Launch the VirtualCenter client.
Double-click a shortcut or select the application through Start > Programs >
VMware > Vmware VirtualCenter.
3. When you start the VirtualCenter client, log on to the VirtualCenter server.
Enter or select the VirtualCenter management server name, your username and
your password for that VirtualCenter management server. Click Connect to
continue.
The default localhost location is the local Windows PC where you started the
VirtualCenter client. Using the LocalHost in the logon screen, the VirtualCenter
client assumes the VirtualCenter management server is located on the same
host as the VirtualCenter client. Alternatively, click the Server list arrow and select
from the list of available VirtualCenter servers. Or type the name of the
VirtualCenter management server on your network. An IP address or a name are
acceptable.
The default for the username field is the user currently logged on. To change the
username when you log on, highlight the name and type over it, as you do in
any other Windows logon dialog box.
If you do not log on to a VirtualCenter management server, the VirtualCenter
client displays its interface. However, you cannot access any hosts or virtual
machines without logging on to a VirtualCenter management server.
72
www.vmware.com
C H A P T E R 3 Starting VMware VirtualCenter
4. Locate and apply the VirtualCenter licenses, if needed.
If your VirtualCenter management server does not have its licenses installed yet,
the licensing screen appears.
To make licenses available to the VirtualCenter management server:
a. Click the Add License button and browse to locate the license file.
b. Click Open on the browse screen.
c. Click OK on the browse screen.
d. Click Close on the Licensing screen.
Refer to Adding Licenses on page 74 for additional information.
The VirtualCenter client screen appears. The screen settings match those of your
last session.
Note: If this is the first time you have logged onto the VirtualCenter management
server, an empty Inventory screen appears. Proceed to adding a farm to begin
monitoring and managing your virtual machines through VirtualCenter. Refer to
Working with Farms on page 103 for additional information.
Stopping the VirtualCenter Client and Logging Off
Stopping the VirtualCenter client does not stop the VirtualCenter management server.
To stop a VirtualCenter client session:
1. Click the close box (X) in the upper right corner of the VirtualCenter client
window or select File > Exit.
The VirtualCenter client shuts down. The VirtualCenter client is logged out from
the VirtualCenter management server. The VirtualCenter management server
73
VMware VirtualCenter User’s Manual
continues to run all its normal activities in the background. Any scheduled tasks
are saved and performed by the VirtualCenter management server.
Adding Licenses
Licenses are required for various activities within your VirtualCenter environment.
These activities include:
Starting the VirtualCenter management server — One license is required for each
instance of the VirtualCenter management server.
Adding a host connection — One license is required for each CPU in each host. If a
host is removed from the VirtualCenter environment, the corresponding license is
released, and is available for another host.
Migrating (VMotion) a virtual machine — One license is required for each CPU in
the migration host. Performing migration with VMotion requires two hosts: the target
and the source machine. Both host must have VMotion licenses.
The VirtualCenter client licensing provides:
• A license inventory window that reports on license usage.
• An uploading license keys window.
Note: The migration process has additional requirements. Refer to Enabling VMotion
on page 148 for information.
To add your licenses to VirtualCenter:
1. Copy your license file to a location accessible by VirtualCenter client.
You received the license file when you purchased VirtualCenter. The file is a plain
text file.
Place all your VirtualCenter licenses into one text file, if convenient, or keep the
licenses in separate files. If you use separate files, you need to follow this
procedure for each license file.
74
www.vmware.com
C H A P T E R 3 Starting VMware VirtualCenter
2. From the VirtualCenter client, open the License window.
Select Help > Enter Serial Number.
3. Select the license key file.
Click Browse and locate the license key file. Click OK on the browse window.
VirtualCenter adds the licenses to the VirtualCenter database.
Note: Adding non-evaluation licenses removes all previously installed
evaluation licenses.
4. Close the Licensing window. Click Close.
You are now ready to add hosts and perform migrations.
Navigating in the VirtualCenter Client
This section describes common Windows practices that affect the VirtualCenter client.
For detailed information on the windows and options in the VirtualCenter client, refer
to Working with the VirtualCenter Client on page 81.
Briefly, the VirtualCenter client is divided into two areas.
• A heading area with a main menu, navigation bar, and toolbar.
• A data area which displays different information depending upon the option
selected in the navigation bar.
The navigation bar options divide VirtualCenter’s primary tasks into:
Inventory — Divided into two subpanels, the inventory panel and the information
panel. This navigation bar option displays all the objects contained within
VirtualCenter. Through selecting objects in either of the two subpanels, you perform
and specify actions.
Tasks — Displays an information panel that lists all the tasks scheduled to occur.
75
VMware VirtualCenter User’s Manual
Template — Displays an information panel that lists all the templates available for
deploying. This list includes templates that are stored in the template upload
directory, as well as templates that are stored on the same datastore as their source
virtual machine.
Events — Displays an information panel that lists all the events that have occurred in
the VirtualCenter.
The navigation topics are covered in the following sections:
• Selecting Objects
• Monitoring Objects
• Performing Actions on Objects
Selecting Objects
VirtualCenter objects are farms, groups, hosts, and virtual machines. Selecting an
object does the following:
• Allows you to view the status of the object.
• Enables the menus so you can select actions to take upon the object.
To select an object:
1. Select the appropriate navigation bar option. The options are Inventory, Tasks,
Templates, and Events.
2. Drill through the hierarchy in the inventory panel until you see the icon for the
object, then click it.
When you select an object is selected, the object label in the inventory panel backfills
and the information panel updates its display to reflect the data for the selected
object.
76
www.vmware.com
C H A P T E R 3 Starting VMware VirtualCenter
To view an object menu: Select the appropriate object and select the appropriate
action from the Menu bar. Alternatively, right click on the object. A popup menu with
the object’s available actions appears.
For each type of object, such as farm, host, or virtual machine, in the inventory panel, a
corresponding default tab appears in the information panel. For example, if you select
a host in the inventory panel, the information panel displays Summary, Virtual
Machines, Performance, Events, and Alarms tabs. If you select a farm, the information
panel displays Summary, Virtual Machines, Hosts, Performance, Events, Alarms, and
Permissions tabs.
Multiple selection has limited support in the information panel.
The inventory panel and information panel share a single selection list. Selecting an
object in one panel deselects any other object in the other panel.
Menu actions, from either the menu bar or a popup menu, apply to the currently
selected object. If no object is selected, the menu action is not available. A popup
menu can appear only for a selected object. Refer to Popup Menus on page 85 for
additional information on the popup menu options.
77
VMware VirtualCenter User’s Manual
To change the name of an object: Press F2 on a selected item, or click on the text of
a selected item and type the new name.
Monitoring Objects
Monitoring a host or a virtual machine requires that it has been added to the
VirtualCenter environment. Refer to Adding a Host to a Farm on page 112 for
information on adding objects to your VirtualCenter management server.
To check the status of an object:
1. Start the VirtualCenter client.
Refer to Starting or Stopping VMware VirtualCenter on page 68.
2. Select the Inventory option in the navigation bar. The options are Inventory,
Tasks, Templates, and Events.
• If you select the Tasks, Templates, or Events options, the information panel
displays the scheduled tasks, available templates, and all events that have
occurred on the VirtualCenter management server.
• If you select the Inventory option, drill through the inventory panel lists to
view individual objects such as hosts, farms, and virtual machines.
78
www.vmware.com
C H A P T E R 3 Starting VMware VirtualCenter
3. Click on the object to view it.
When you select an object is selected, the object label in the inventory panel
appears in blue and the information panel updates its display to reflect the data
for the selected object.
4. Click the appropriate tab in information panel.
The data corresponding to the object and tab selected appears. Click through
the tabs to view the information about the object, as needed.
Performing Actions on Objects
This section describes only the basic process for performing tasks in the VirtualCenter
client. This section does not describe specific settings and conditions. Refer to the
chapter specific to the task you wish to perform for additional information.
To view an object, you must have a role of Read Only User or greater assigned to that
object. To take action on an object, you must have Virtual Machine User, Virtual
Machine Administrator, or VirtualCenter Administrator role assigned to you for that
object. Refer to Setting Access and Permissions on page 331 for additional
information on permissions with VirtualCenter objects.
There are three methods for taking actions upon objects in VirtualCenter:
• Selecting the action from the menu bar at the top of the VirtualCenter window.
Refer to Menu Bar on page 84 for information on the menu bar options.
79
VMware VirtualCenter User’s Manual
• Scheduling the action through the Scheduled Tasks panel.
Refer to Creating a Scheduled Task on page 277 to information on scheduling
tasks.
• Selecting the action from the object popup menu or button.
The following procedure describes how to select the action from the object
menu or button.
To perform an action on a VirtualCenter object:
1. Start the VirtualCenter client
2. Connect to the appropriate VirtualCenter management server.
3. Select the object you want to view or upon which you want to perform an
action.
Drill through the hierarchy in the inventory panel until you see the icon for the
object, then click on it. An object can be selected in the inventory panel or the
information panel.
If the object is not in the view:
• Verify you are logged onto the correct VirtualCenter management server.
• Add the host to VirtualCenter control. Refer to Working with Hosts on
page 109 for information.
4. Select the appropriate menu option:
Once an object is selected:
• Select a menu option from the main menu.
• Right-click on the object and select from the popup menu.
5. Follow the VirtualCenter prompts.
Depending upon the action you selected, either the view in the information
panel changes or a wizard prompts for information to complete the transaction.
The wizard includes the option to schedule the action for a later time.
80
www.vmware.com
4
CHAPTER 4
Working with the
VirtualCenter Client
81
VMware VirtualCenter User’s Manual
Working with the VirtualCenter Client
The VirtualCenter client provides mechanisms for interacting with the VirtualCenter
management server. Conceptually, the VirtualCenter client display combines the
simplicity of Windows Explorer (navigating groups and lists of objects) with the more
sophisticated capabilities of Windows Task Manager and the Microsoft Management
Console (selecting and charting performance information).
This chapter describes the specific layout of the VirtualCenter client. Refer to Working
with the VirtualCenter Data on page 301 for descriptions on viewing and interpreting
the data displayed in the VirtualCenter client.
You need only a Read Only User role assigned to the farm, host, or virtual machine to
perform the activities described in this chapter.
This chapter contains the following sections:
• Introducing the VirtualCenter Client Window
• Understanding the Information Elements
• Accessing Properties and Settings
82
www.vmware.com
C H A P T E R 4 Working with the VirtualCenter Client
Introducing the VirtualCenter Client
Window
The default VirtualCenter client layout is a single window with a menu bar, a
navigation bar, a toolbar, a status bar, a panel section, and popup menus.
menu bar
navigation bar
tool bar
information panel tabs
farm
host
group
virtual machine status bar
inventory panel
popup menu
information panel
VirtualCenter Client Layout
The VirtualCenter client areas are covered in the following sections:
• Menu Bar
• Popup Menus
• Console Menu
• Navigation Bar
• Toolbar
• Status Bar
• Panel Section
83
VMware VirtualCenter User’s Manual
Menu Bar
The menu bar provides access to all commands and operates in a manner consistent
with other Windows applications. The table below lists all the options available from
these five menus. The menu bar options are:
File Menu — Similar to the File menu in most applications with two exceptions.
A Print option is not available on the File menu. To print use either the Print Screen
mechanism in Windows to take a copy of the VirtualCenter window, or export the
VirtualCenter data to another format and print from another application.
A Save option is not available. The VirtualCenter client is similar to a browser. Most user
manipulations are persistent in the display of the VirtualCenter data.
Edit Menu — Displays options relevant to the selected object.
VMs (Virtual Machine) Menu — Enabled only when a virtual machine is selected in
the inventory panel.
View Menu — Controls which panels are visible.
Help Menu — Displays the online help options and the licensing option.
File Menu
Edit Menu
VMs Menu
View Menu Help Menu
New > Farm Group
Remove
Shut Down Guest
Inventory
Help Topics
New > Farm
Rename
Suspend after running script
Tasks
User Manual
New > Virtual Machine Group
Virtual Machine Resources Resume and run script
Templates
Guest Operating System Install
Guide
New > Add Host
Host Configuration
Power On and run script
Events
VMware on the Web > VMware, Inc.
Home Page
New > Virtual Machine
Properties
Restart Guest
Toolbar
VMware on the Web > Online
Support
New > Deploy Virtual Machine
from Template
Power On
Status Bar
VMware on the Web > Register
Now
New > Alarm
Power Off
Check for Updates on the Web
New > Template
Suspend
Edit Licensing Information
New > Scheduled Task
Resume
About VMware VirtualCenter
New > Add Permission
Reset
Host Connect
Install VMware Tools
Host Disconnect
Migrate
Custom Attributes
Clone
VMware VirtualCenter Settings
Start Virtual Machine Console
84
www.vmware.com
C H A P T E R 4 Working with the VirtualCenter Client
File Menu
Edit Menu
VMs Menu
View Menu Help Menu
Export Events
Exit
Popup Menus
Popup menus provide direct access to many of the menu bar options. Popup menus
are available from most objects in both the inventory panel and the information
panel.
To view a popup menu: Right-click the selected object or press Shift+F10 keys.
Console Menu
The console of a powered-on virtual machine is available through VirtualCenter.
To view the virtual machine console: Select the Inventory Navigation button,
select a powered on virtual machine in the inventory panel, then click the Console tab
in the information panel.
Console pop out icon
85
VMware VirtualCenter User’s Manual
To pop out the virtual machine console: Click the pop out icon in the navigation
bar. A copy of the Console window separates from the VirtualCenter client. Additional
menus appears.
Additional menu options are available from the pop out Console window.
Additional Console menu
The popout virtual machine Console has the following menu items. The embedded
Console has similar, but not all of the external Console menu items.
File
Exit
Edit
VM
Properties
Power On
Preferences
Power Off
Suspend
Resume
Reset
Install VMware Tools
Navigation Bar
The navigation bar provides shortcut buttons that load the matching toolbar and
panel into the VirtualCenter client window. Similar to the Outlook shortcut bar, the
navigation bar combines and displays associated tasks and information. When a
button has been selected, it remains depressed to indicate the current view. The
buttons represent the VirtualCenter functional areas:
86
www.vmware.com
C H A P T E R 4 Working with the VirtualCenter Client
Inventory — Displays tasks and data related to viewing the status of and managing
virtual machines, hosts, farms, and groups.
Tasks — Provides tasks and data related to scheduling tasks.
Templates — Provides tasks and data related to using templates.
Events — Provides tasks and data related to viewing current events.
To change the look of the navigation bar: Right-click in the navigation bar and
select the appropriate option.
Navigation Bar and Associated Menu
Toolbar
The toolbar provides buttons for the most commonly used actions.
To view/hide a toolbar: Select View > Toolbars.
back/forward
task list
clone
pop out console
power state
migrate
add permission
VirtualCenter Client Toolbar Icons and Associated Actions for the Inventory Option
87
VMware VirtualCenter User’s Manual
The toolbar options that appear differ depending upon the navigation bar option
selected. The toolbar options for each navigation bar option are listed in the table
below, with the matching main menu option for each navigation bar option.
Navigation Bar
File
Edit
Inventory
Add > VM
Power Off
Add > Farm
Suspend
Add > Host
Power On
Add > Task
Restart
Add > Template
Migrate
Add > Alarm
Clone
Add Permission
Tasks
New Scheduled Task
VMs
Console
Properties
Remove
Templates
New Template
Clone this Template
New VM from Template
Events
Export Events
Status Bar
The status bar appears at the bottom of the window. It displays the status of the
connection between the VirtualCenter client and the VirtualCenter management
server.
To hide or view the Status bar: Select View > Status bar.
Panel Section
The panel section is the primary information and action display area.
The content of this display area varies, depending upon the navigation bar selected.
The content of the panel section for Tasks, Templates, and Events is a simple list. The
content of the panel section for Inventory [of virtual machines, hosts, farms, and
groups] is divided into two panels: the inventory panel and the information panel.
• Inventory panel — Displays a hierarchical list of VirtualCenter objects when the
Inventory option is selected from the navigation bar. The displayed list includes
Server Farms, farm groups, farms, hosts, virtual machine groups, and virtual
machines.
• Information panels — Display lists and charts. There are various information
panels. There is one panel each for the Tasks, Templates, and Events navigation
bar options. There are multiple panels for the Inventory option, these are divided
88
www.vmware.com
C H A P T E R 4 Working with the VirtualCenter Client
into tabbed elements that vary, depending upon the object selected in the
inventory panel.
The table below lists the tabbed panel options available for each inventory panel
object.
Inventory
Object
Farms Summary
Virtual
Hosts PerforMachines
mance
Events Alarms Console Permissions
Server Farms X
Farm Group
X
Farm
X
Host
X
VM Group
Virtual
Machine
X
X
X
X
X
X
X
X
X
X
X
X
X
X
X
X
X
X
X
X
X
X
X
X
To select an object: Single-click the appropriate object in either the Inventory option
or on the information panel.
To view a popup menu: Right-click the appropriate object.
panel menu
resizing bar
open/close toggle
status line
logon information
VirtualCenter Client Panel Adjustments
89
VMware VirtualCenter User’s Manual
To close or open a panel: Click the arrow in the panel menu bar. When the panel is
hidden, the panel menu bar is a strip along the side of the VirtualCenter client
window.
While the inventory panel is hidden, you cannot change the selected object.
To resize a panel: Click on a resizing panel side, and drag it to an appropriate size.
Your choices for the panels are persistent across VirtualCenter client sessions. If you
run multiple VirtualCenter client sessions using different usernames, the settings from
the last session to quit determine the values for the next VirtualCenter client session.
Understanding the Information
Elements
The information elements include the symbols, attributes, lists, and charts. The
information elements are covered in the following sections:
• Symbol Information Elements
• Attribute Elements
• List Elements
• Chart Elements
90
www.vmware.com
C H A P T E R 4 Working with the VirtualCenter Client
Symbol Information Elements
Monitoring data appears in the form of tables and charts, and uses color, icons, and
timelines for easy viewing and analysis.
propagated state
ascending sort
color coding
filter selection menu
Inventory Panel Handling of Color Coding and Filtering Lists
Color coding — Depending upon the location of the colored icon, the color
indicates status or power state. The color options are red, yellow, and green. Color
conditions are propagated up the hierarchy.
Icons — Used in conjunction with color mapping to add a visual representation of
the associated text. Icons for virtual machine power states are the same as those used
with other VMware virtualization platform products, such as ESX Server.
Attribute Elements
Attributes are the resources that are being monitored and managed for all the hosts
and virtual machines in your VirtualCenter environment. Attributes status and states
appear on the various inventory panels.
Custom attributes — These attributes can be used to associate user-specific metainformation with virtual machines and hosts. Once you have created the attributes, set
the value for the attribute on each virtual machine and/or host as appropriate. This
value is stored with VirtualCenter and not with the virtual machine or host. Then use
91
VMware VirtualCenter User’s Manual
the new attribute to filter information about your virtual machines and hosts. If you no
longer need the custom attribute, remove it. A custom attribute is always a string.
To add a custom attribute:
1. Select the Inventory option of the navigation toolbar.
2. Open the Custom Attributes dialog box.
Select File > Custom Attributes.
3. Add a custom attribute, click Add.
The attribute is added to the list of virtual machine characteristics.
4. Change the attribute name as needed.
Click in the Name field and type the name you want to assign to the attribute.
5. Enter the values for the custom attribute.
selected object
92
enter value for the new attribute
New Attribute column
www.vmware.com
C H A P T E R 4 Working with the VirtualCenter Client
a. Select the object one level up the hierarchy that contains the objects to which
you wish to apply the attribute. For example, if you want to enter attribute
values for hosts, select the farm and the Hosts tab for a list of hosts.
b. For each host or virtual machine, click in the new attribute’s column.
In the information panel, the new attribute is added to the header.
c. Type the attribute value that is appropriate for each host or virtual machine.
List Elements
Sort any list by clicking in the column label heading. A triangle in the column head
shows the sort order as ascending or descending.
The Virtual Machines tab for Virtual Machines provides a means to filter for selected
virtual machines. A filter is sorted by a key word. Select which columns to search for
the keyword.
To sort a list: Click on a column heading to sort the list by entries in that column. The
current selection does not change.
To change ascending or descending: Click the triangle in the column heading.
To select items in a list: Click on an individual item. Press Shift-click or Ctrl-click to
select multiple items. All lists can be sorted.
To view or remove columns in a list: Right-click the column header and select the
column name from the list.
To filter the view of virtual machines: Click the arrow to view a list of attributes from
which to select. Type text directly into the filtering field to specify search criteria. The
Filter field does not support boolean expressions or special characters. Click Ok to
display only those virtual machine that match the criteria. Click Clear to change the
filter.
To remove a filter: Click Clear, or delete the entry in of the filtering field and click OK.
VirtualCenter displays the full list of available items.
To select columns to search for the filtering keyword: Right-click in the contains:
field and select or deselect the appropriate column names. Filtering is inclusive, not
exclusive. If the keyword is found in any of the selected columns, the line item is
included in the list.
Chart Elements
Each chart contains data relative to the selected object in the inventory panel. The
charts display the data across time.
93
VMware VirtualCenter User’s Manual
Each resource has a summary graph and one graph per instance of that resource. For
example, the CPU Usage resource has one graph per CPU and net usage has one
graph per NIC. View only one set of resource graphs at a time.
Note: The graphs for a virtual machine show the shares allocated to that virtual
machine as a percentage of the host CPU.
To view the large version of a chart: Click on the thumbnail and the larger version
appears in the information panel.
thumbnail graphs for each attribute
selected resource detail graph shares allocated pull-down menu
customize graph view
Information Panel Chart View Elements
To configure the increments of time: Click on the pull-down menu and select the
appropriate increment. The options are:
Past Hour —Displays the status of the item in one minute intervals
Day — Displays the status of the item in five minute intervals
Week — Displays the status of the item in one hour intervals
Month — Displays the status of the item in one day intervals
Year — Displays the status of the item in one month intervals
94
www.vmware.com
C H A P T E R 4 Working with the VirtualCenter Client
To customize the graph view: Click the Customize Chart button and select from the
options.
The graph options vary, depending upon the resource selected. In the example above
the options divide into the representation of the data in the primary chart.
Accessing Properties and Settings
There are five sets of properties and settings dialog boxes. Each set makes
adjustments to the corresponding VirtualCenter environment. These are described in
the following sections:
• VMware VirtualCenter Settings
• VMware Management Interface
• VMotion Properties
• Virtual Machine Resources
• Virtual Machine Control Panel
• Schedule Task Properties
• Template Properties
• New Task Wizard for Resource Settings
• Alarm Properties
95
VMware VirtualCenter User’s Manual
VMware VirtualCenter Settings
To access the VMware VirtualCenter settings, select File > VMware VirtualCenter
Settings.
Note: Changes to this setting apply to the current VirtualCenter management server
only. If you log out and log on to another VirtualCenter management server, the
settings are specific to that VirtualCenter management server only.
This dialog box has three tabs:
• Performance — Lists the interval settings used to collect performance data that
appears on the Performance tab in the information panel.
• Templates — Displays the field for specifying the template upload directory.
This directory stores templates that are not stored on a shared datastore.
96
www.vmware.com
C H A P T E R 4 Working with the VirtualCenter Client
• Advanced — Lists a variety of fields.
The Advanced tab fields are:
• instance.id — Generates unique MAC addresses and UUIDs for virtual
machines.
In some cases, it is possible to have more than one VirtualCenter running in the
same company. Each of these VirtualCenters must have its own unique
instance.id. By default, an ID value is generated randomly. However, this
value is editable. The only requirement is that it be a unique number from 0 to
63.
• snmp.receiver.n.name/snmp.receiver.n.port/snmp.receiver.n.community
— Used for alarm notification. Refer to Preparing for SNMP Alarm Notification on
page 290 for information on setting these values.
• mail.sender/mail.smtp.sender/mail.smtp.port — Used for alarm notification.
Refer to Preparing for SNMP Alarm Notification on page 290 for information on
setting these values.
• host.reconnectThreshold — Specifies how long, in minutes, VirtualCenter
should continue to try to connect automatically to a host. The default value is 30
minutes.
• server.options — Used for advanced debugging and troubleshooting. Use this
field only when directed by VMware technical support.
To view a tool tip on each field: Drag your mouse over a data field.
97
VMware VirtualCenter User’s Manual
VMware Management Interface
Selecting a host > Host Configuration activates a link in VirtualCenter, starts a
browser, and requests permission to access the VMware Management Interface for
the selected host. Configuration and management of ESX Server hosts is done
through the ESX Server VMware Management Interface.
VMotion Properties
Selecting a host > Properties displays the <host_machine> Properties dialog box.
The host Properties dialog box has two tabs:
VMotion — Provides configuration settings for the selected host are configured
through this dialog. Refer to Enabling VMotion on page 148 for information on setting
up a host for VMotion.
98
www.vmware.com
C H A P T E R 4 Working with the VirtualCenter Client
Advanced — Provides an option to restart the host’s VirtualCenter agent.
Virtual Machine Resources
Selecting a host > Virtual Machine Resources displays the Virtual Machine Resource
dialog box. This is a list of all the virtual machines running on the selected host and
the percentage of resources allocated to the virtual machine. Refer to Allocating Host
Resources on page 119 for information on allocating host resources to virtual
machines.
Virtual Machine Control Panel
Selecting a virtual machine > Properties displays the Virtual Machine Control Panel.
This dialog box has three tabs:
• Hardware — Use this tab to add hardware elements to your virtual machine.
• Options — This tab lists some general virtual machine settings, actions to take
during a power state change, and actions taken for debugging during a process
• Resources — Use this tab to modify the resource shares on the host of a virtual
machine. The modifiable resources are CPU, memory, disk, and network.
99
VMware VirtualCenter User’s Manual
Refer to Editing an Existing Virtual Machine Configuration on page 235 for more
information about editing the configuration of a virtual machine.
Schedule Task Properties
Selecting Tasks Navigation > task > Edit > Properties displays the Scheduled Task
Properties dialog box. From this box modify the time, date, and frequency of a
scheduled activity.
100
www.vmware.com
C H A P T E R 4 Working with the VirtualCenter Client
Template Properties
Selecting Templates Navigation > template > Edit > Properties displays the
Template Properties dialog box. From this box change the name and description of
the template.
New Task Wizard for Resource Settings
Selecting the New Task > Change resource settings of a virtual machine >
Assigning Resources configures CPU and memory resource allocation for a virtual
machine in a host.
101
VMware VirtualCenter User’s Manual
Alarm Properties
Selecting File > New > Alarm displays the Alarm Properties dialog box for creating
and modifying alarms.
102
www.vmware.com
5
CHAPTER 5
Working with Farms
103
VMware VirtualCenter User’s Manual
Working with Farms
This chapter describes how to perform VirtualCenter farm-related tasks.
You need a Virtual Machine Administrator role assigned to the Server Farm to perform
the activities described in this chapter.
This chapter contains the following sections:
• Working with VirtualCenter Farms
• Working with Farm Groups
Working with VirtualCenter Farms
A farm is the primary organizational structure used in VirtualCenter. A farm contains
hosts and virtual machines. All actions taken upon hosts are virtual machines are
applied within their farm. Within a farm monitor and manage virtual machines
separately from their hosts and use VMotion. You cannot perform migration with
VMotion between farms. The VirtualCenter farm topics are covered in the following
sections:
• Adding a Farm
• Removing a Farm
Adding a Farm
To add a farm:
1. From the VirtualCenter client, display the inventory panel and select the
appropriate farm group or Server Farm.
Click the Inventory option in the navigation bar. Expand the inventory as
needed,.
2. Add a new farm.
Select the Server Farms icon in the inventory panel. From the main or right-click
popup menu, select New Farm.
104
www.vmware.com
C H A P T E R 5 Working with Farms
A new farm is added to the hierarchy. Type in a useful name.
Removing a Farm
To remove a farm:
1. From the VirtualCenter client, display the inventory panel and select the
appropriate farm.
Click the Inventory option in the navigation bar. Expand the inventory as
needed, and click the appropriate farm.
2. Remove the farm.
Select the appropriate farm. From the main or right-click popup menu select
Remove.
3. Confirm that you want to remove the farm. Click Yes.
VirtualCenter removes all virtual machine groups, hosts, and virtual machines,
within the farm from the managed inventory. In addition all the associated tasks,
alarms, and events are also removed. Assigned CPU and migration licenses are
returned to available status. Virtual machines that were on the host remain on
the host.
105
VMware VirtualCenter User’s Manual
Working with Farm Groups
A farm group is an organizational feature. Farm groups can be added only to the
Server Farms top level and to other farm groups. Hierarchically, farm groups contain
farms or other farm groups. Use farm groups to organize farms into logical entities. For
example, group all the systems that support a functional group, such as Sales or
Finance; or that support a location, such as the Building 12 site or the San Francisco
site. The farm group topics are covered in the following sections:
• Adding a Farm Group
• Moving a Farm to a Farm Group
• Removing a Farm Group
Adding a Farm Group
To add a farm group:
1. From the VirtualCenter client, display the inventory panel.
Click the Inventory option in the navigation bar. Select the appropriate icon
either Server Farms or another farm group.
2. Select New Farm Group.
With the object highlighted select New Farm Group from the main or right-click
popup menu. VirtualCenter adds a New Group to the Inventory hierarchy.
106
www.vmware.com
C H A P T E R 5 Working with Farms
Moving a Farm to a Farm Group
To move a farm to a farm group:
1. From the VirtualCenter client, display the inventory panel.
Click the Inventory option in the navigation bar. Select the appropriate icon
either Server Farms or another farm group.
2. Click and drag the farm to the farm group.
Removing a Farm Group
Removing a farm group removes all its contents from the VirtualCenter environment.
The contents include any other farms, hosts, and virtual machines.
To remove a farm group:
1. From the VirtualCenter client, display the inventory panel.
Click the Inventory option in the navigation bar.
2. Remove the farm group.
Select the appropriate farm group and select Remove from the main or rightclick popup menu.
3. Confirm that you want to remove the farm group. Click Yes.
107
VMware VirtualCenter User’s Manual
VirtualCenter removes the selected farm group and all items contained within it
from the hierarchy and the VirtualCenter environment. Any assigned CPU and
migration licenses return to available status.
108
www.vmware.com
6
CHAPTER 6
Working with Hosts
109
VMware VirtualCenter User’s Manual
Working with Hosts
This chapter describes how to perform host-related tasks.
You need a Virtual Machine Administrator role assigned to the farm containing the
host to perform the tasks described in this chapter.
This chapter contains the following sections:
• Understanding Host States
• Adding a Host to a Farm
• Connecting to a Host
• Moving Hosts Between Farms
• Automatically Reconnecting a Host
• Removing a Host
• Allocating Host Resources
• Configuring a Host
Only ESX Server hosts that have virtual machines running on them are registered with
VirtualCenter. All hosts are added to VirtualCenter farms.
All virtual machines on hosts (managed and running) are automatically discovered
and imported into VirtualCenter.
A virtual machine is removed from VirtualCenter management server only when
either the virtual machine, the host with the virtual machine, or the farm with the
virtual machine is explicitly removed through the VirtualCenter client.
When you add multiple hosts, VirtualCenter identifies any naming conflicts that exist
between virtual machines and alerts the system administrator, who can then decide
upon a course of action. Configure the virtual machine display names. The name can
be up to 80 characters long, and can contain alphanumeric characters and the
underscore (_) and hyphen (-) characters. The name must also be unique across all
virtual machines within a virtual machine group.
When VirtualCenter connects to a host, it does so as a privileged user. The individual
VirtualCenter user does not necessarily need to be an administrative user on the host.
Refer to Setting Access and Permissions on page 331 for information on setting up
VirtualCenter users.
A host can be managed by only one instance of the VirtualCenter management
server.
110
www.vmware.com
C H A P T E R 6 Working with Hosts
Understanding Host States
Actions taken upon a host require that the host be in specific power states. Whenever
a power operation is performed on a host, the host power state changes. While the
state is in transition, the state field displays a term that describes the transition.
The figure below illustrates states, transitions and state changing commands for a
host. Refer to Abbreviations on page 14 for a description of abbreviations.
Host Power State Changes
111
VMware VirtualCenter User’s Manual
Adding a Host to a Farm
Virtual machines exist on hosts within the network. Hosts are added to the
VirtualCenter environment. The VirtualCenter management server automatically
discovers and adds all the virtual machines contained within that host to the
VirtualCenter environment.
The figure below illustrates the process for adding a host to VirtualCenter. Refer to
Abbreviations on page 14 for a description of abbreviations.
Adding Host to VirtualCenter Environment with Automatic Discovery of Virtual Machines
A host can be added to only one VirtualCenter management server.
To add a host:
1. From the VirtualCenter client, display the inventory panel and select the
appropriate farm.
Click the Inventory option in the navigation bar. Expand the inventory as
needed, and click the appropriate farm.
112
www.vmware.com
C H A P T E R 6 Working with Hosts
2. Start the Add Host wizard.
Select the appropriate farm, and select New Host from the main or right-click
popup menu.
3. Confirm proceeding with the Add Host Wizard. Click Next.
4. Enter the host connection settings.
Type the name of the ESX Server host in the Hostname field. Enter the username
with a role level of VirtualCenter Administrator and password for the selected
host. Click Next to continue.
Refer to your ESX Server documentation for information on changing the port
number if needed.
113
VMware VirtualCenter User’s Manual
VirtualCenter does the following:
• Connects to the host.
• Verifies that the host is not already being managed. If it is already being
managed on another farm, VirtualCenter displays an information message.
• Reads the number of CPUs on the host and allocates the appropriate number
of licenses. The number of CPUs is stored in the VirtualCenter database and is
verified upon each host reconnect and VirtualCenter start-up.
• Verifies that the host version is supported. If it is not, VirtualCenter checks if
the current version can be upgraded. If the host version can be upgraded,
VirtualCenter prompts you to perform an upgrade.
• Imports existing virtual machines.
5. Enable VMotion for the host, as needed.
To enable VMotion:
Click Yes. Enter the network adapter, IP address, and gateway for the host.
This is the information for the migration network, including which NIC it uses,
and its IP address and gateway. The migration network should be a separate
network.
If VMotion is enabled, VirtualCenter checks for a migration license and adds it
to the host information.
To leave VMotion disabled:
Click No.
Click Next to continue.
Refer to Enabling VMotion on page 148 for additional information.
114
www.vmware.com
C H A P T E R 6 Working with Hosts
6. Complete the Add Host wizard, click Finish.
Connecting to a Host
To connect to a host:
1. From the VirtualCenter client, display the inventory panel and select the
appropriate host.
Click the Inventory option in the navigation bar. Expand the inventory as
needed, and click the appropriate host.
2. If needed, add the appropriate host to the VirtualCenter.
Refer to Adding a Host to a Farm on page 112.
115
VMware VirtualCenter User’s Manual
3. Connect to the appropriate host.
Select the appropriate host icon in the inventory panel, and select Connect from
the main or right-click popup menu.
VirtualCenter displays text indicating the transitional state for the host until it
verifies and adjusts the licensing as needed and completes the connection.
When the host is connected to VirtualCenter, the statuses of the virtual
machines on that host are updated.
116
www.vmware.com
C H A P T E R 6 Working with Hosts
Moving Hosts Between Farms
Hosts and virtual machines can be on only one farm at a time. To move a host from
one farm to another, you must remove the host from the current farm, then add it to
the new farm. When you add the host to the new farm, the virtual machines
associated with the host are also moved to the new farm.
Automatically Reconnecting a Host
VirtualCenter automatically tries to reconnect to a host, if the connection is lost.
Define how long VirtualCenter tries to re-establish the connection.
To configure automatic host reconnection:
1. From the VirtualCenter client, open the VMware VirtualCenter Settings dialog
box, and select the Advanced tab.
Select File > VMware VirtualCenter Settings. When the dialog box appears,
select the Advanced tab.
2. Enter a value in minutes in the host.reconnectThreshold field. Click OK.
Removing a Host
Removing a host from VirtualCenter breaks the connection and stops all monitoring
and managing functions of that host and of all the virtual machines on that host. If
you want to keep any of the virtual machines on a host in the VirtualCenter system,
you must first move the virtual machines to another host. Removing a host from
VirtualCenter control does not remove the virtual machines from the host or
117
VMware VirtualCenter User’s Manual
datastore. It removes only VirtualCenter’s access to the host and virtual machines on
that host.
The figure below illustrates process for removing a host from VirtualCenter. Refer to
Abbreviations on page 14 for a description of abbreviations.
Removing a Host
To remove a host:
1. From the VirtualCenter client, display the inventory panel and select the
appropriate host.
Click the Inventory option in the navigation bar. Expand the inventory as
needed, and click the appropriate host.
Note: The host can be in a connected or disconnected to VirtualCenter state
when you remove it.
2. Select Remove.
Select the appropriate host icon in the inventory panel and select Remove from
the main or right-click popup menu.
118
www.vmware.com
C H A P T E R 6 Working with Hosts
3. Confirm that you wish to remove the host and all its associated virtual machines.
Click Yes to remove the host. Click No to keep the host.
If you click Yes, VirtualCenter removes the host and associated virtual machines
from the VirtualCenter environment. VirtualCenter then returns all associated
CPU and migration licenses to available status.
Note: Removing the host does not power off or alter any of the virtual
machines on the host. It only removes the host from VirtualCenter control.
Allocating Host Resources
Through a selected host option view the Virtual Machine Resources dialog box. The
Virtual Machine Resources dialog box lists all the virtual machines currently installed
on the host. Use this dialog box to make adjustments to all the host’s virtual machines
in a single view. Refer to Manually Changing Virtual Machine Resources Settings on
page 267 to view resource settings for individual virtual machines.
To adjust the allocation of resources for each virtual machine on the host:
1. From the VirtualCenter client, display the inventory panel and select the
appropriate host.
Click the Inventory option in the navigation bar. Expand the inventory as
needed, and click the appropriate host.
2. Select the host whose resources you wish to reallocate.
3. Select the Virtual Machine Resources option.
This can be found on the Edit main menu, on the host right-click menu, and in
the host Summary tab commands list.
4. Select the CPU, memory, disk I/O, or network allocation to adjust.
Click the CPU, Memory, Disk I/O, or Network tab.
119
VMware VirtualCenter User’s Manual
5. Select the virtual machine value to adjust.
a. Click the row representing the virtual machine whose allocation you are going
to adjust.
b. Click in the column of the value and edit.
Once in edit mode, keyboard navigation between editable fields applies. This
includes arrow keys, Tab and Shift keys. Enter commits the changes.
Shares and Shares Value columns — Entitle a virtual machine to a relative
fraction of the host’s physical resource. For example, a virtual machine that has
twice as many shares as another is generally entitled to consume twice as many
resource, subject to the virtual machines assigned and respective minimum and
maximum constraints, provided that the virtual machines are both actively using
the resource they have been allocated.
Alternatively, to set a numeric value for shares, the value can also be set to low,
normal, or high. By default, all shares for all VMs are set to normal. What these
values mean in terms of the number of shares is a function of the virtual
machine’s specific configuration.
Increasing the number of shares allocated to a virtual machine dilutes the
effective value of all shares.
A virtual machine may under-utilize its allocation by idling when it is not busy.
This extra time is not wasted; rather it is shared among virtual machines that
remain active. Thus, a virtual machine may receive more than its allocation of the
system.
Refer to your VMware ESX Server User’s Manual for additional information.
120
www.vmware.com
C H A P T E R 6 Working with Hosts
Min% and Max% columns — Set absolute guarantees for minimum and
maximum CPU and memory.
If a minimum CPU or memory reservation is set on a virtual machine, that virtual
machine receives at least the specified minimum percentage of a processor or
MB of memory, regardless of changes in the total number of shares in the
resource.
If the system does not have enough unreserved CPU time or memory available
to guarantee the minimum requirement of a virtual machine, that virtual
machine is not able to power on. A maximum reservation guarantees that a
virtual machine never receives more than specified maximum percentage of a
processor, even if extra time is available in the system. The maximum value for
CPU is configurable. The maximum value for memory is not configurable.
CPU minimums and maximums are percentages of a single CPU. So a
uniprocessor virtual machine range from 0 to 100%, and a 2P virtual machine
from 0 to 200%.
Memory minimum and maximum is in MB, and the maximum is always the
memory size of the virtual machine.
Traffic shaping and Kbps values — Found on the Network tab, it puts a cap on
the average and peak network bandwidth a virtual machine can use, as well as
how much traffic can be sent or received in a single burst.
6. Specify the new value for the allocation.
a. If needed, click in the column heading to view a sorted list of values.
b. Select the row where you want to make a change.
c. Click the value or empty field you wish to change. In some cases, a pull-down
menu appears.
121
VMware VirtualCenter User’s Manual
d. Select from the listed options or type a value in the field.
7. Close the Virtual Machine Resources screen. Click Close.
Configuring a Host
Host settings are controlled through the VMware management interface.
1. From the VirtualCenter client, display the inventory panel and select the
appropriate host.
Click the Inventory option in the navigation bar. Expand the inventory as
needed, and click the appropriate host.
2. If the host is not connected, connect it now.
Refer to Connecting to a Host on page 115.
3. Connect to the ESX Server management interface for the selected host.
a. Select the appropriate host icon in the inventory panel.
b. Start the VMware Management Interface select:
Edit > Properties or Summary > Commands > Edit Host Configuration
VirtualCenter automatically starts your default browser.
4. Accept the security alerts.
These are generated from your Windows environment and appears only if your
security settings require it.
5. Log on to the VMware Management Interface.
Enter the ESX Server host username and password.
6. Make adjustments to the host settings as needed. Refer to your ESX Server
documentation for information specific to modifying the host configuration and
using the ESX Server management interface.
122
www.vmware.com
7
CHAPTER 7
Connecting with Virtual
Machines
123
VMware VirtualCenter User’s Manual
Connecting with Virtual Machines
This chapter describes virtual machine and virtual machine group tasks, including
adding and removing a virtual machine to and from VirtualCenter, and powering on
and off virtual machines. Refer to the appropriate chapter for information on
deploying from a template, creating a clone from an existing virtual machine, creating,
deleting, migrating, customizing, and editing the configuration of a virtual machine.
You need a Virtual Machine Administrator role assigned to the virtual machine to
perform the activities described in this chapter.
This chapter contains the following sections:
• Adding and Removing Virtual Machines
• Changing Virtual Machine Power States
• Answering a Pending Question
• Working with Virtual Machine Groups
Adding and Removing Virtual Machines
Add virtual machines to VirtualCenter through their hosts. Remove virtual machines
from VirtualCenter control, and optionally from their host’s disk.
The adding and removing virtual machine topics are covered in the following
sections:
• Adding Existing Virtual Machines to VirtualCenter
• Removing Virtual Machines from VirtualCenter
• Returning a Virtual Machine to VirtualCenter
• Removing Virtual Machines from the Disk
Adding Existing Virtual Machines to VirtualCenter
When you add a host to VirtualCenter, VirtualCenter automatically discovers all the
virtual machines on that host and adds them to the VirtualCenter inventory. If a host is
disconnected, the already discovered virtual machines, continue to be listed as part of
VirtualCenter.
If a host is disconnected then reconnected any changes to the virtual machines on
that host are identified and VirtualCenter updates the list of virtual machines. For
example, if virtual machine3 is removed, and virtual machine4 is added. The new list
of virtual machines shows virtual machine4 and does not show virtual machine3.
124
www.vmware.com
C H A P T E R 7 Connecting with Virtual Machines
Refer to Adding a Host to a Farm on page 112 for information on adding a host and its
associated virtual machines.
Removing Virtual Machines from VirtualCenter
If a virtual machine is removed from VirtualCenter control, the link between the host
and the virtual machine is severed. The host and VirtualCenter no longer recognize
the virtual machine. However, the virtual machine remains on the datastore
connected to the host.
To remove a virtual machine:
1. From the VirtualCenter client, display the inventory panel.
Click the Inventory option in the navigation bar. Expand the inventory as
needed, and click the appropriate virtual machine.
2. Ensure that the virtual machine is powered down.
3. Remove the virtual machine from VirtualCenter, but not from the datastore.
Select the virtual machine in the inventory panel. From the main or right-click
popup menu, select Remove.
4. Confirm that you want to remove the virtual machine from VirtualCenter. Click
OK.
VirtualCenter removes references to the virtual machine and no longer tracks its
condition.
Note: Using the Remove option removes the virtual machine only from
VirtualCenter. It does not remove the virtual machine from its datastore. Refer to
Removing Virtual Machines from the Disk on page 126 for information about the
Remove From Disk option.
Returning a Virtual Machine to VirtualCenter
If you have removed a virtual machine from a VirtualCenter, but did not remove it
from the host’s datastore, and you wish to return it to VirtualCenter, refer to your ESX
Server documentation and follow the procedures for adding an existing virtual
machine to an ESX Server.
125
VMware VirtualCenter User’s Manual
Removing Virtual Machines from the Disk
Through VirtualCenter, remove individual virtual machines from the datastore.
To remove a virtual machine from VirtualCenter and the datastore:
1. From the VirtualCenter client, display the inventory panel.
Click the Inventory option in the navigation bar. Expand the inventory as
needed, and click the appropriate virtual machine.
2. Ensure that the virtual machine is powered down.
3. Select Remove From Disk from the virtual machine main or right-click popup
menu.
Note: This removes all the files for the selected virtual machine, including the
configuration file and the virtual disk files.
4. Confirm removing the virtual machine from VirtualCenter and the datastore.
Click OK.
VirtualCenter removes the virtual machine from its datastore entirely.
Changing Virtual Machine Power States
There are several options for a virtual machine power state. Each virtual machine
power state change has a different effect on the guest operating system in the virtual
machine.
There are also several access points for making changes to these power states.
Manually select a power state change by selecting the virtual machine then the
power option from either the main menu or the right-click popup menu. Alternatively,
Schedule a power state change through the Tasks option in the navigation bar.
The power state topics are covered in the following sections:
• Understanding Virtual Machine Power States
• Understanding Transitional Power States
• Manually Powering a Virtual Machine On and Off
• Scheduling a Power State Change for a Virtual Machine
126
www.vmware.com
C H A P T E R 7 Connecting with Virtual Machines
Understanding Virtual Machine Power States
The basic power state options include:
• Power on — Powers up the virtual machine and the guest operating system if
the guest operating system is the type that automatically starts up on system
boot.
• Power off — Powers down the virtual machine. The virtual machine does not
attempt to gracefully shut down the guest operating system.
• Suspend — Pauses the virtual machine activity. All transactions are frozen until
you issue a Resume command.
• Resume — Allows virtual machine activity to continue, and releases the
Suspended state.
• Reset —Powers down the virtual machine and restarts it.
The following power options perform extra functions in addition to the basic virtual
machine power operations. These operations require that VMware Tools are installed
in the virtual machine.
• Shut down guest — Shuts down the guest operating system. Allows the virtual
machine to continue running if that is the type of guest operating system. If the
guest operating system automatically powers off its host, then the virtual
machine also powers off.
• Suspend after running script — Executes a virtual machine script, then places
the virtual machine into Suspended mode. Refer to VMware Tools for
information on setting up scripts.
• Resume and run script — Releases the virtual machine from Suspended mode,
and executes a virtual machine script. Refer to VMware Tools for information on
setting up scripts.
• Power on and run script — Starts the virtual machine and executes a virtual
machine script. Refer to VMware Tools for information on setting up scripts.
• Restart guest — Shuts down and restarts the guest operating system. Does not
power off the virtual machine.
Toolbar power state buttons perform as follows:
• Power off — Performs a standard power off when VMware tools are not
installed or unavailable, and a Guest OS power off when VMware tools are
installed and available. A power off operation first displays a confirmation dialog
box indicating that the guest operating system does not be shut down properly.
127
VMware VirtualCenter User’s Manual
• Suspend — Performs a standard power on when a virtual machine is stopped,
and resumes with scripts when the virtual machine is suspended and Vmware
tools are installed and available. Performs a standard resume when VMware tools
are not installed or unavailable.
• Power on — Performs a standard suspend when tools are not installed, and
suspends with scripts when tools are installed and available.
• Reset — Performs a standard reset when tools are not installed, and restarts the
guest operating system when tools are installed and available. A reset operation
first displays a confirmation dialog box indicating that the guest operating
system is not shut down properly.
Note: The specific form of the power state action can be modified to include guest
operating system shut downs or not, and to include running scripts or not. Refer to
Changing Power State Options on page 266 for additional information.
Understanding Transitional Power States
Actions taken upon a virtual machine require that the virtual machine be in specific
power states. Whenever a power operation is performed on a virtual machine, the
virtual machine power state changes and all other commands are locked out until the
first command is completed.
128
www.vmware.com
C H A P T E R 7 Connecting with Virtual Machines
The figure below illustrates states, transitions, and state changing commands for
virtual machines. Refer to Abbreviations on page 14 for a description of abbreviations.
Virtual Machine Power State Changes
Manually Powering a Virtual Machine On and Off
Prior to performing any power state changing activity on a virtual machine, you must
have added the virtual machine to your VirtualCenter environment. Refer to Adding
and Removing Virtual Machines on page 124.
To manually change the power state of a virtual machine:
1. From the VirtualCenter client, display the inventory panel.
Click the Inventory option in the navigation bar. Expand the inventory as
needed, and click the appropriate virtual machine.
2. Choose the power option.
Through either the main or right-click popup menu, display the available
options. Or select the power options from the toolbar. If an option is not
currently available, it is dimmed.
129
VMware VirtualCenter User’s Manual
The following options include the basic virtual machine power operations:
• Power on
• Power off
• Suspend
• Resume
• Reset
Additionally, the following options involve running scripts around the power
operations:
• Suspend after running script
• Resume and run script
• Power on and run script
Two options affect the guest operating system only:
• Shut down guest
• Restart guest
Note: The specific form of the power state action can be modified to include
guest operating system shut downs or not, and to include running scripts or not.
Refer to Changing Power State Options on page 266 for additional information.
After the power option is selected, VirtualCenter displays messages in the
Summary tab indicating the transition modes.
Scheduling a Power State Change for a Virtual Machine
To make a scheduled task to change the power state of a virtual machine:
1. Display the Tasks panel.
Click the Tasks option in the navigation bar. The list of scheduled tasks appears.
2. Start the New Task wizard. Click New in the toolbar.
3. Confirm continuing with the New Task wizard. Click Next.
130
www.vmware.com
C H A P T E R 7 Connecting with Virtual Machines
4. Select the task to create.
Click the pull-down menu and select the Change the power status of a virtual
machine option. Click Next.
5. Select the power state to which to change the virtual machine.
Click the appropriate radio button. Click Next.
Note: The specific form of the power state action can be modified to include
guest operating system shut downs or not, and to include running scripts or not.
Refer to Changing Power State Options on page 266 for additional information.
131
VMware VirtualCenter User’s Manual
6. Select the virtual machine whose power state changes.
Select the virtual machine, then click Next.
7. Specify the timing of the task.
To see the calendar, click on the Later button and then the Date down arrow.
When you have set the date and time, click Next.
8. Confirm creating the task.
Optionally, specify an email address for notification when task is performed. Click
Finish.
VirtualCenter adds the new task to the scheduled task list and completes it at the
designated time. When it is time to perform the task, VirtualCenter first verifies
that the user who created the task still has permission to complete the task. If the
permission levels are not acceptable, a message is generated and the task is not
performed.
132
www.vmware.com
C H A P T E R 7 Connecting with Virtual Machines
Answering a Pending Question
When VirtualCenter is performing a task that for some reason requires input from you,
the Inventory Summary tab for the selected virtual machine displays Question
Pending as the status.
To answer a pending question for a virtual machine:
1. From the VirtualCenter client, display the inventory panel.
Click the Inventory option in the navigation bar. Expand the inventory as
needed,.
2. Identify a question pending.
Check the virtual machine in the inventory panel. If the virtual machine is
flashing, proceed.
3. Select the virtual machine, Summary tab.
The State: status displays a Question pending link.
133
VMware VirtualCenter User’s Manual
4. Open the Answer Question dialog.
Double-click the Question Pending link. Or alternatively, with the virtual
machine highlighted, select VMs > Answer Question.
5. Answer the question dialog that appears. For example:
134
www.vmware.com
C H A P T E R 7 Connecting with Virtual Machines
Working with Virtual Machine Groups
Virtual machine groups are organizational structures. They can be added only to the
virtual machine’s farm. Hierarchically, virtual machine groups contain virtual machines
or additional virtual machine groups.
The figure below illustrates the VirtualCenter organizational components. Refer to
Abbreviations on page 14 for a description of abbreviations.
Hierarchical Virtual Machine Groups
The virtual machine group topics are covered in the following sections:
• Adding a Virtual Machine Group
• Adding Virtual Machines to a Virtual Machine Group
• Moving Virtual Machines from a Virtual Machine Group
• Removing a Virtual Machine Group
135
VMware VirtualCenter User’s Manual
Adding a Virtual Machine Group
To add a virtual machine group:
1. From the VirtualCenter client, display the inventory panel.
Click the Inventory option in the navigation bar. Select the appropriate farm.
2. Add a new virtual machine group.
With the farm highlighted, from the main or right-click popup menu, select New
VM Group. VirtualCenter adds a New Group to the inventory panel.
Adding Virtual Machines to a Virtual Machine Group
When you create a virtual machine group, it is empty. Drag and drop the virtual
machines as needed to the new virtual machine group.
To add virtual machines to the virtual machine group:
1. From the VirtualCenter client, display the inventory panel.
Click the Inventory option in the navigation bar.
2. If needed, add the virtual machine group to the farm that contains the virtual
machines you wish to group.
3. Move the virtual machine to the virtual machine group.
Select the appropriate virtual machine and drag it to the virtual machine group.
136
www.vmware.com
C H A P T E R 7 Connecting with Virtual Machines
Moving Virtual Machines from a Virtual Machine Group
Moving a virtual machine from a virtual machine group does not remove the virtual
machine from the host, the farm, or VirtualCenter. It just removes it from the
organizational structure of the virtual machine group.
To remove a virtual machine from the virtual machine group:
1. From the VirtualCenter client, display the inventory panel.
Click the Inventory option in the navigation bar.
2. Move the virtual machines.
Select the appropriate virtual machines and drag them out to the farm or
another virtual machine group.
Moving virtual machines between virtual machine groups on the same farm
does not move them between hosts.
Removing a Virtual Machine Group
Removing a virtual machine group removes all its hierarchical contents from the
VirtualCenter environment. These contents includes any virtual machines contained
within the group. This process removes control of the virtual machines from
VirtualCenter and the host.
To remove a virtual machine group:
1. From the VirtualCenter client, display the inventory panel.
Click the Inventory option in the navigation bar.
2. Power down all virtual machines in the virtual machine group to be removed.
3. If needed, remove any virtual machines from the virtual machine group.
Select the virtual machine and drag it to the farm icon.
Note: Removing a virtual machine group removes the virtual machines,
contained within the virtual machine group, from VirtualCenter.
4. Remove the virtual machine group.
Select the appropriate virtual machine group, and from either the main or rightclick popup menu, select Remove.
137
VMware VirtualCenter User’s Manual
5. Select whether to remove the virtual machines in the virtual machine group.
If there are no virtual machines in the virtual machine group, VirtualCenter
removes the virtual machine group without a confirmation message.
a. Click the Remove VM Files check box.
If this box is selected the virtual machines are removed from the datastore.
If this box is not selected the virtual machines remain on the datastore.
b. Confirm that you want to remove the virtual machine group. Click Yes.
VirtualCenter removes the selected virtual machine group and all items
contained within it from the hierarchy and the VirtualCenter environment. Any
assigned CPU and migration licenses return to available status.
138
www.vmware.com
8
CHAPTER 8
Migrating Virtual Machines
139
VMware VirtualCenter User’s Manual
Migrating Virtual Machines
This chapter describes how to move a virtual machine from one host to another.
Moving a virtual machine from one host to another is called migrating. Migrating a
powered off virtual machine is a migration. Migrating a powered up virtual machine is
a migration with VMotion. Migration with VMotion requires VMotion licensing and
specific configuration. Refer to Installing VMware VirtualCenter on page 49 for
VMotion requirements. You cannot migrate a virtual machine when a virtual machine
is in a suspended state.
You need a Virtual Machine Administrator role assigned to both the hosts in the
migration to perform the activities described in this chapter.
This chapter contains the following sections:
• Understanding the Migration Options
• Migrating Powered Off Virtual Machines
• Enabling VMotion
• Moving Powered On Virtual Machines
Note: Copying a virtual machine is creating a new a virtual machine. It is not a form
of migration. Refer to Copying Virtual Machines on page 191 for additional
information.
Note: You cannot migrate a virtual machines with raw, clustered, undoable, or
append mode disks. You cannot migrate with VMotion, virtual machines with raw,
clustered, and non-persistent mode. You cannot migrate virtual machines with
undoable disks that have REDO logs. If you have clustered disks, you can store them
on separate VMFS volumes from the virtual machines prior to migrating them using
VMotion.
Note: Migrating occurs between hosts on the same farm.
Understanding the Migration Options
This chapter describes how to perform the two types of migration:
• Migration — Moving a powered off virtual machine.
• Migration with VMotion — Moving a virtual machine between hosts while the
virtual machine is powered on and performing transactions. This functionality
has specific requirements, including the activation of VMotion on both the
source and target host. When a migration with VMotion is performed, the
operations of the virtual machine can continue without interruption.
140
www.vmware.com
C H A P T E R 8 Migrating Virtual Machines
Virtual machines can be moved between hosts within the same farm. Virtual
machines cannot be moved between farms.
The migration general topics are covered in the following sections:
• Understanding Migration with VMotion
• Understanding Migration
Understanding Migration with VMotion
VMotion allows working processes to continue throughout a migration with VMotion.
During a migration with VMotion you move only the virtual machine configuration file
from host to host. The associated virtual disk remains in the same location on the SAN
storage that is shared between the two hosts. Once the configuration file is migrated
to the alternate host, the virtual machine is then managed by that new host.
When you move the configuration file, you also move the entire state of the virtual
machine to the new host, even while the data storage remains in the same location
on the SAN.
The state information includes the current memory content and all the information
that defines and identifies the virtual machine. The memory content includes
transaction data and whatever bits of the operating system and applications are in the
memory. The defining and identification information stored in the state includes all
the data that maps to the virtual machine hardware elements, such as BIOS, devices,
CPU, MAC addresses for the Ethernet cards, chip set states, registers, and so forth.
Migration with VMotion happens in four stages:
1. When the migration with VMotion is requested, VirtualCenter verifies that the
existing virtual machine is in a stable state with its current host.
2. The migration begins when VirtualCenter makes a baseline copy of the current
memory content and stores it on the target host.
3. When the baseline copy is complete, VirtualCenter copies the last changes in the
current memory content and copies the virtual machine state information to the
target host.
4. The virtual machine resumes its activities on the new host.
141
VMware VirtualCenter User’s Manual
The figure below illustrates the process of migration of powered on virtual machines
with VMotion. Refer to Abbreviations on page 14 for a description of abbreviations.
Migration with VMotion
Understanding Migration
Migration requires that the virtual machine being migrated is powered off prior to the
beginning the migration process. Migration is the process of moving a virtual
machine from one host to another. With a migration, you also have the option of
moving the associated disks from one host to another. A migration consists of the
steps:
1. A copy of the configuration file and the associated virtual disks are placed on the
new host and in the associated volume storage area.
142
www.vmware.com
C H A P T E R 8 Migrating Virtual Machines
2. The virtual machine is managed on the target host and unregistered on the
source host.
3. After the migration is completed, the old version of the virtual machine is
deleted from the source host.
The figure below illustrates the process for migration of powered off virtual machines.
Refer to Abbreviations on page 14 for a description of abbreviations.
Migration
If any error occurs during migration, the virtual machines revert to their original states
and locations.
143
VMware VirtualCenter User’s Manual
Migrating Powered Off Virtual Machines
Move virtual machines manually or set up a scheduled task to perform the migration.
The migration topics are covered in the following sections:
• Migrating a Powered Off Virtual Machine Manually
• Creating a Scheduled Task to Migrate a Virtual Machine
Migrating a Powered Off Virtual Machine Manually
To manually migrate a powered-off virtual machine:
1. From the VirtualCenter client, view the inventory panel to display the virtual
machine.
Click the Inventory option in the navigation bar. Expand the inventory as
needed, and click the appropriate virtual machine.
2. Ensure the virtual machine is powered off.
• If the virtual machine is on, power it off.
• If the virtual machine is in suspended mode you must first resume it then
power it off.
• If the virtual machine is in resumed mode, wait until it powers on, then power
it off.
3. Start the Migration wizard.
In the inventory panel, select the desired virtual machine. Then perform one of
the following:
• From the main or right-click popup menu, select the Migrate option.
• From the information panel Summary tab, click the Migrate to New Host
button.
• Drag and drop the virtual machine on the target host.
Note: If the template is stored on a shared SAN, you do not need to select a
different datastore for the migrated virtual machine.
The Migration wizard starts.
4. Confirm the Migration wizard. Click Next.
144
www.vmware.com
C H A P T E R 8 Migrating Virtual Machines
5. Select the target host for the virtual machine. Click Next.
6. Select a datastore for the virtual machine. Click Next.
7. Complete the wizard. Click Finish.
VirtualCenter moves the virtual machine, including the virtual disks, to the new
host. Event messages appears in the Events tab. The Summary tab updates the
status and state throughout the migration.
Creating a Scheduled Task to Migrate a Virtual Machine
This process sets up a scheduled task to migrate a powered off virtual machine.
VMotion is not used for this type of task.
To create a scheduled task that migrates a virtual machine:
1. Display the Tasks panel.
Click the Tasks option in the navigation bar. The list of scheduled tasks appears.
2. Start the New Task wizard. Click New in the toolbar.
145
VMware VirtualCenter User’s Manual
3. Confirm continuing with the New Task wizard. Click Next.
4. Select the task to create.
Click the pull-down menu and select the Deploy Virtual Machine from a
Templates option. Click Next.
5. Select the virtual machine to migrate. Click Next.
146
www.vmware.com
C H A P T E R 8 Migrating Virtual Machines
6. Select the target host for the virtual machine. Click Next.
7. Select a datastore for the virtual machine. Click Next.
8. Set the time and date when you want to migrate the virtual machine to be
migrated. Click Next.
147
VMware VirtualCenter User’s Manual
Click Later, then click the drop-down arrow to select a date from the displayed
calendar. A red circle indicates today’s date and a dark circle indicates the
scheduled date.
9. Confirm creating the task.
Optionally, specify an email address to receive notification when the task is
performed. Click Finish.
VirtualCenter adds the new task to the scheduled task list and completes it at the
designated time. When it is time to perform the task, VirtualCenter first verifies
that the user who created the task still has permission to complete the task. If the
permission levels are not acceptable, VirtualCenter sends a message to the log
and the task is not performed. Similarly, if the virtual machine is not in the correct
state, VirtualCenter sends a message to the log and the task is not performed.
Enabling VMotion
You must enable VMotion on both the target and the source host to support
migration with VMotion.
To enable a host for VMotion:
1. Ensure that the host is properly configured.
• Refer to VirtualCenter VMotion Requirements on page 37 for the list of
VMotion requirements.
• Refer to Adding Licenses on page 74 to ensure that you have sufficient
VMotion licenses.
2. From the VirtualCenter client, display the inventory panel to view the host.
Click the Inventory option in the navigation bar. Expand the inventory as
needed, and click the appropriate host.
3. Display the host properties dialog box.
From the main menu, right-click popup menu, or Summary tab button, select
Host Properties.
148
www.vmware.com
C H A P T E R 8 Migrating Virtual Machines
4. Enable VMotion. Select the VMotion tab.
To enable VMotion: Click Yes. Enter the network adapter, IP address, and
gateway for the host, if the fields are not pre-filled. This is the information for the
migration network, including which NIC it uses, and its IP address and gateway.
The migration network is preferably its own separate network.
To leave VMotion disabled: Click No.
Click OK.
If VMotion is enabled, VirtualCenter checks for a migration license and adds the
license to the host information.
Moving Powered On Virtual Machines
Move virtual machines manually or set up a scheduled task to perform the migration.
The migration with VMotion topics are covered in the following sections:
• Migrating with VMotion a Virtual Machine Manually
• Creating a Scheduled Task to Migrate a Virtual Machine with VMotion
Note: Disconnect any remote consoles that are external to VirtualCenter and
connected to the virtual machine you are migrating. Though the virtual machine
appears to be migrating, until you disconnect the external remote console, the
migration does not complete. If the virtual machine is connected to the console from
Console tab in VirtualCenter, the migration with VMotion completes without any
intervention.
149
VMware VirtualCenter User’s Manual
Migrating with VMotion a Virtual Machine Manually
To manually migrate a powered on virtual machine:
1. From the VirtualCenter client, display the inventory panel to view the virtual
machine.
Click the Inventory option in the navigation bar. Expand the inventory as
needed, and click the appropriate virtual machine.
2. Ensure that both the source and target hosts are VMotion-enabled, and using
the same SAN.
For each host, click the host. Select the Summary tab. Check the VMotion
Enabled field and the Datastores section. The VMotion Enabled field should say
Yes. Datastores on both hosts should list the same name.
Refer to VirtualCenter VMotion Requirements on page 37, Adding Licenses on
page 74, and Enabling VMotion on page 148 for additional information.
3. Display the inventory panel and select the appropriate farm.
Click the Inventory option in the navigation bar. Expand the inventory as
needed, and click the appropriate virtual machine.
150
www.vmware.com
C H A P T E R 8 Migrating Virtual Machines
4. Disconnect any peripheral devices connected to the virtual machine.
a. Select the virtual machine, power it down if it is powered on.
b. Select Edit > Properties to display the Virtual Machine Control Panel
c. Unselect the Connect box for each peripheral device. Peripheral devices
include floppy drives, CD-ROM drives, and serial and parallel devices.
d. Click OK.
5. Start the Migration with VMotion wizard.
In the inventory panel, select the desired virtual machine. Then perform one of
the following:
• From the main or right-click popup menu, select the Migrate option.
• From the information panel Summary tab, click the Migrate to New Host
button.
• Drag and drop the virtual machine on to the target host.
The Migration with VMotion wizard starts.
6. Confirm the Migration with VMotion wizard. Click Next.
7. Select the migration priority level.
Set the priority of the migration so ensure that sufficient CPU resources are
available on both the source and target hosts to perform the migration.
Click the appropriate button, then click Next.
8. Confirm the Migration with VMotion wizard. Click Finish.
VirtualCenter moves the selected virtual machine from the original host to the
target host. The virtual disks remain in the same location on the shared
datastore.
151
VMware VirtualCenter User’s Manual
Creating a Scheduled Task to Migrate a Virtual Machine with
VMotion
This process sets up a scheduled task to migrate a powered on virtual machine using
VMotion.
To create a scheduled task that hot migrates a virtual machine:
1. Display the Tasks panel.
Click the Tasks option in the navigation bar. The list of scheduled tasks appears.
2. Start the New Task wizard. Click New in the toolbar.
3. Confirm continuing with the New Task wizard. Click Next.
4. Select the task to create.
Click the pull-down menu and select the Deploy Virtual Machine from a
Templates option. Click Next.
5. Select the virtual machine to migrate. Click Next.
152
www.vmware.com
C H A P T E R 8 Migrating Virtual Machines
6. Select the target host for the virtual machine. Click Next.
7. Select a priority for the migration.
Set the priority of the migration so ensure that sufficient CPU resources are
available on both the source and target hosts to perform the migration. Click
Next.
153
VMware VirtualCenter User’s Manual
8. Set the time and date when you want the virtual machine to migrate. Click Next.
Click Later, then click the drop-down arrow to select a date from the displayed
calendar. A red circle indicates today’s date and a dark circle indicates the
scheduled date.
9. Confirm creating the task.
Optionally, specify an email address to receive notification when the task is
performed. Click Finish.
VirtualCenter adds the new task to the scheduled task list and completes it at the
designated time. When it is time to perform the task, VirtualCenter first verifies
that the user who created the task still has permission to complete the task. If the
permission levels are not acceptable, VirtualCenter sends a message to the log,
and the task is not performed. Similarly, if the virtual machine is not in the correct
state and VMotion is not enabled, VirtualCenter sends a message to the log, and
the task is not performed.
154
www.vmware.com
9
CHAPTER 9
Creating New Virtual
Machines
155
VMware VirtualCenter User’s Manual
Creating New Virtual Machines
This chapter describes how to create virtual machines through the New Virtual
Machine wizard. This wizard walks you through the steps required to define a virtual
machine. This chapter includes information on setting parameters based on the guest
operating system used and the resources allocated. After you create the virtual
machine, you must install the guest operating system.
You need a Virtual Machine Administrator role assigned to the host to perform the
activities described in this chapter.
This chapter contains the following sections:
• Creating Virtual Machines Using the New Virtual Machine Wizard
• Installing a Guest Operating System and VMware Tools
Creating Virtual Machines Using the
New Virtual Machine Wizard
New virtual machines are added to hosts. You must select a host to be able to start the
New Virtual Machine wizard.
To create a new virtual machine through the New Virtual Machine wizard:
1. From the VirtualCenter client, display the inventory panel.
Click the Inventory option in the navigation bar. Expand the inventory as
needed, and click the appropriate virtual machine.
2. Select the host and start the New Virtual Machine wizard.
In the information panel, select the host to which to add the new virtual
machine.
From the main or right-click popup menu, select the New Virtual Machine
option. Click Next.
156
www.vmware.com
C H A P T E R 9 Creating New Virtual Machines
3. Select whether to use a typical configuration or customize the configuration.
If you select Typical: the wizard prompts for:
• The guest operating system
• The virtual machine name and the location of the virtual machine’s files
• The network connection type
• Make a virtual disk larger or smaller than 4GB
Click the Typical radio button. Click Next. Proceed to step 4.
If you select Custom: in addition to the typical options, set the following:
• Store your virtual disk’s files in a particular location
• Allocate all the space for a virtual disk at the time you create it
• Set memory options that are different from the defaults.
Click the Custom radio button. Click Next. Proceed to Completing the New
Virtual Machine with Custom Settings on page 161.
157
VMware VirtualCenter User’s Manual
4. Select a group location for the new virtual machine.
5. Select the guest operating system to be used.
Click the guest operating system arrow and select the appropriate guest
operating system. Click Next.
This dialog box asks which operating system to install in the virtual machine. The
New Virtual Machine Wizard uses this information to select appropriate default
values, such as the amount of memory needed.
158
www.vmware.com
C H A P T E R 9 Creating New Virtual Machines
6. Specify a name for the virtual machine and datastore volume for the virtual disks.
a. Enter the virtual machine name to use.
The name you enter in the Virtual Machine Name field is the name that is
listed in the VMware Management Interface. Enter a useful name. The name
can be up to 80 characters long, and contains alphanumeric characters and
the underscore (_) and hyphen (-) characters. It should also be unique across
all virtual machines.
b. Enter or browse for the absolute path VirtualCenter is to use to store the
virtual machine files.
c. Scroll through and select the datastore on the host to use for storing the
virtual disk files.
d. Click Next.
This name becomes the name of the folder which stores the files associated with
this virtual machine. Each virtual machine should have its own folder. All
associated files, such as the configuration file and the disk file, are placed in this
folder.
Be sure that the entry in the Location field is unique. The default path and
filename are based on the chosen guest operating system. If other virtual
machines exist on this server, you must change the path to create a new, unique
directory for the new virtual machine. The Location field contains the name of
the configuration file. The directory specified also contains other virtual machine
files. Configuration files for virtual machines created with VirtualCenter use the
.vmx extension.
159
VMware VirtualCenter User’s Manual
7. Select Network Interface Card (NIC) to define the virtual network name to use.
Click Next.
8. If you are creating a new virtual disk, select the size of the virtual disk.
Enter the disk size. Click Next.
Note: A new virtual machine with a blank virtual disk is like a new computer
with a blank hard disk. You must install a guest operating system before use the
virtual machine.
VirtualCenter proceeds to create the virtual machine you specified using the
custom settings. You have completed the Create New Virtual Machine process.
Make the Virtual Disk Big Enough
The virtual disk should be large enough to hold the guest operating system and
all of the software that you intend to install, with room for data and growth.
160
www.vmware.com
C H A P T E R 9 Creating New Virtual Machines
You cannot change the virtual disk’s maximum capacity later. But, you can install
additional virtual disks later by using the Virtual Machine Control Panel.
For example, you need about 500MB of actual free space on the file system
containing the virtual disk to install Windows XP and applications such as
Microsoft Office inside the virtual machine.
Completing the New Virtual Machine with Custom Settings
This section describes the steps taken when the Customize option is selected in the
New Virtual Machine wizard. Refer to Creating Virtual Machines Using the New Virtual
Machine Wizard for information on beginning this process.
Note: This section is not describing the process of customizing a new virtual
machine that is being created by cloning an existing virtual machine or deploying a
template.
To use the New Virtual Machine wizard to finish creating a new customized virtual
machine:
1. Select the number of virtual processors (CPUs).
161
VMware VirtualCenter User’s Manual
2. Specify the memory allocation.
The dialog box shows the current available memory and typical memory
allocations. The default setting in the Guest size (for memory) field depends on
the guest operating system you have selected. You may need to change the
memory allocation to meet the demands of applications you plan to run in the
virtual machine. You may change this setting later, from the virtual machine’s
Memory tab in the management interface.
Enter the memory allocation for the new virtual machine. Click Next.
3. Select Network Interface Card (NIC) to define the network connection type. Click
Next.
162
www.vmware.com
C H A P T E R 9 Creating New Virtual Machines
4. Select I/O adapter type. Click Next.
5. Select a storage disk type for the new virtual machine. Click Next.
163
VMware VirtualCenter User’s Manual
6. If you are creating a new virtual disk, select the size of the virtual disk.
Enter the disk size. Click Next.
Note: A new virtual machine with a blank virtual disk is like a new computer
with a blank hard disk. You must install a guest operating system before use the
virtual machine.
Make the Virtual Disk Big Enough
The virtual disk should be large enough to hold the guest operating system and
all of the software that you intend to install, with room for data and growth.
You cannot change the virtual disk’s maximum capacity later. But, you can install
additional virtual disks later by using the Virtual Machine Control Panel.
For example, you need about 500MB of actual free space on the file system
containing the virtual disk to install Windows XP and applications such as
Microsoft Office inside the virtual machine.
164
www.vmware.com
C H A P T E R 9 Creating New Virtual Machines
7. Specify the virtual disk file name.
If you are using an existing disk, locate the virtual disk. If you are creating a new
disk, specify a location and name.
Note: Ensure that the path and file name are valid. Any errors in defining this
information results in a failure to create the new virtual machine. If possible, use
the default file location. This ensures that consistent naming is used for the
configuration file and disk files, and ensures that the disk file name uses the
datastore as a reference rather than the VMFS path.
8. If you do not select Advanced options, Click Finish.
9. If you select the Advance options, specify the virtual disk node type and mode.
Select the SCSI node.
Note: IDE disk type for the virtual disk is not supported.
165
VMware VirtualCenter User’s Manual
Select the device mode. The choices are:
• Persistent — Changes are immediately and permanently written to the disk.
• Undoable — Changes are not saved until the virtual machine is powered off
and you confirm to save the changes.
• Nonpersistent — Changes to the disk are discarded when you power off or
revert to the snapshot.
• Append — Changes are saved when you power off the virtual machine.
Choose one device node type and one mode type. Click Finish.
VirtualCenter proceeds to create the virtual machine you specified using the
custom settings. You have completed the process for creating a new virtual
machine.
Installing a Guest Operating System and
VMware Tools
This section describes the following:
• Completing the New Virtual Machine with Custom Settings
• Installing a Guest Operating System in a Virtual Machine
• Installing VMware Tools
Create your virtual machine with a blank (unformatted) SCSI virtual disk. Install an
operating system on this virtual disk just as you do on a new physical machine, using a
standard installation CD-ROM and formatting the virtual disk at the appropriate place
in the installation process.
Alternatively, install from image files. ISO image files of installation CD-ROMs and
floppy image files of any floppy disks can be used for the installation. Use the
VirtualCenter client to connect the virtual machine’s drives to the appropriate image
files before you begin the installation.
Once you start the virtual machine, the normal operating system installation takes
over. Answer the prompts that appear on the virtual machine console to install the
guest operating system.
After your guest operating system is installed, follow the directions below for installing
VMware Tools and the network driver.
166
www.vmware.com
C H A P T E R 9 Creating New Virtual Machines
Installing a Guest Operating System in a Virtual Machine
To install a guest operating system and other software, use the virtual machine
console, found on the Console tab for the Inventory option in the navigation bar.
Choose an installation method:
• Configure the virtual machine to connect to the host CD-ROM and boot an
operating system installation disk from it.
• Configure the virtual machine CD-ROM as a path to a networked ISO file and
boot from that.
CD-ROM drives are automatically created when new virtual machines are created. If
you are planning to install the guest operating system from an ISO image, use the
virtual machine control panel to change the CD-ROM option before powering on the
virtual machine. Refer to Changing Hardware Configuration of a Virtual Machine on
page 238 for information on using the virtual machine control panel.
Floppy devices are automatically created when new virtual machines are created.
However, the virtual machines start with the floppy device disconnected. Use the
virtual machine control panel to change the CD-ROM option before powering on the
virtual machine, if needed. Refer to Changing Hardware Configuration of a Virtual
Machine on page 238 for information on using the virtual machine control panel.
If you are installing Windows XP Professional, the floppy device needs to be
connected because the LSI Logic SCSI drivers install from a floppy or floppy image file.
To install the guest operating system over a CD-ROM drive:
1. Insert the installation CD-ROM for your guest operating system in the host’s CDROM drive.
2. Click Power On on the remote console toolbar to begin setting up your guest
operating system. For details on installing specific guest operating systems refer
to the VirtualCenter release notes and the Guest Operating System Installation
Manual which can be found at:
www.vmware.com/support/guestnotes/doc/index.html
To install the guest operating system over a network:
1. Prepare ISO image files of installation CD-ROMs and floppy image files of any
floppy disks needed for the installation.
2. The installation instructions in this section assume you are installing from
physical media. If you are using image files, connect the virtual machine’s CDROM or floppy drives to the appropriate image files before you begin installing
the guest operating system.
167
VMware VirtualCenter User’s Manual
Installing a Guest Operating System on a New Virtual Disk
When you are installing a guest operating system on a new virtual disk, you may see a
message warning you that the disk is corrupted and asking if you want to place a
partition table on the disk. This message does not mean there is any problem with
your physical hard disk. It simply means some data needs to be written to the file that
holds your virtual hard disk. All you need to do is respond Yes. You also need to
partition and format the virtual disk as you would with a new, blank hard drive.
Installing a Guest Operating System on a Previously Formatted Raw Disk
If you try to install a guest operating system on a raw or physical disk that was
formatted previously with a file system, you may see a No operating system
error when you power on the virtual machine. This message appears because the
boot order specified in the virtual machine’s BIOS defaults to the floppy disk, hard disk,
and then CD-ROM drive. Instead of booting from the installation CD-ROM, the virtual
machine tries to boot from the hard disk.
To work around this issue, do one of the following:
• Change the boot order in BIOS so the virtual machine boots from the CD-ROM
drive before it tries the hard disk. When the virtual machine boots, enter the BIOS
and change the boot order on the Boot menu.
• Zero out the first 64KB of the raw disk using dd or a similar utility.
Installing VMware Tools
It is very important that you install VMware Tools in the guest operating system. If you
do not install VMware Tools, the graphics environment within the virtual machine is
limited to VGA mode graphics.
With the VMware Tools SVGA driver installed, virtual machines support up to 32-bit
displays and high display resolution, with significantly faster overall graphics
performance.
Other tools in the package support time synchronization between the server and the
guest, automatic grab and release of the mouse cursor, copying and pasting between
the guest and the management workstation, and improved networking performance.
Note: Refer to your ESX Administration manual for specific instructions on installing
and configuring VMWare Tools.
168
www.vmware.com
10
CHAPTER 10
Working with Templates
169
VMware VirtualCenter User’s Manual
Working with Templates
This chapter describes creating and importing templates. A template is a golden
image of a virtual machine that can be used as a master copy to create and provision
new virtual machines. Create these golden images and add them as templates to
VirtualCenter.
VirtualCenter catalogs and manages the templates. VirtualCenter displays a list of
available templates with a name and a brief description.
The templates can be stored in a template upload directory which is a directory local
to the VirtualCenter management server or on a VMFS volumes in a SAN.
You need a Virtual Machine Administrator role assigned to the hosts where the
templates is deployed.
This chapter contains the following sections:
• Understanding Templates
• Preparing for Templates
• Importing Templates
• Cloning a Template
• Deleting a Template
• Editing a Template
Understanding Templates
A template is a golden image of a virtual machine. A template typically includes a
specified operating system and a configuration which provides virtual counterparts to
hardware components. Optionally, a template can include an installed guest
operating system and a set of applications. VirtualCenter uses templates to create new
virtual machines.
VirtualCenter uses virtual machine templates as a quick and consistent method for
adding new virtual machines to the VirtualCenter environment. There are two
processes for creating templates:
• Prepare a virtual machine for use as a template. This preparation includes
creating a virtual machine to be the template, and installing an operating system
or any applications that you want. Or alternatively, take an existing virtual
machine and place it on a host that VirtualCenter identifies as acceptable. Yet
another option is to create a clone of an existing virtual machine.
170
www.vmware.com
C H A P T E R 1 0 Working with Templates
• Test the virtual machine, power it on, then shut it down. The virtual machine
cannot be running when you create a template from it.
Templates are created from existing virtual machines. These virtual machines can be
either:
• Virtual machines located on any VirtualCenter managed host.
• Virtual machines stored on a disk local to the VirtualCenter management server.
Virtual machines local to the VirtualCenter management server can be virtual
machines created by supported versions of GSX Server, or Workstation.
The figure below illustrates creating a template from a managed virtual machine.
Refer to Abbreviations on page 14 for a description of abbreviations.
Creating a Template
Use an appropriate protocol, such as FTP, to copy all of the GSX Server, or Workstation
files to the directory accessible to the VirtualCenter management server. The source
virtual machine does not need to reside on a host within the VirtualCenter
environment, but it must be on a network location accessible to VirtualCenter.
171
VMware VirtualCenter User’s Manual
The figure below illustrates the process of creating a template from various virtual
machine sources. This includes, ESX Server golden images, as well as managed and
unmanaged virtual machines. Refer to Abbreviations on page 14 for a description of
abbreviations.
Importing a Template
In addition, you can create a template by making a copy (cloning) an existing
template.
172
www.vmware.com
C H A P T E R 1 0 Working with Templates
When a template is being created, VirtualCenter provides an option to store the
template at one of two locations:
• Datastore location — On the same host as the original virtual machine. Select a
datastore, if there are several available. The datastore does not need to be the
same datatstore as the original virtual machine. Use this option only if the
datastore is shared between hosts on a farm.
• Template upload directory — On the VirtualCenter management server
machine. A copy of the original virtual machine virtual disks are placed in the
directory you specify as the template upload directory.
After a template is created, it can be deployed to any host in the VirtualCenter
environment. Deploying a template includes selecting the appropriate template and
designating a VirtualCenter target host to receive the new virtual machine. The
deployed virtual machine is added to the farm where the host resides. Refer to
Creating Virtual Machines from a Template on page 192 for additional information on
deploying templates.
173
VMware VirtualCenter User’s Manual
The figure below illustrates creating a new virtual machine with customization from a
template. Refer to Abbreviations on page 14 for a description of abbreviations.
Deploying a Template
174
www.vmware.com
C H A P T E R 1 0 Working with Templates
Preparing for Templates
Templates are virtual machines that are can be used to deploy sets of virtual
machines. You create the template and import it into VirtualCenter. The virtual
machine to be used as the source for the template can have a configured operating
system and, optionally, a set of installed applications. The virtual machine must be
powered down and accessible to the VirtualCenter management server.
Note: Before you create a template verify that your system meets the requirements
for creating and using templates. Refer to VirtualCenter Template Requirements on
page 39.
The virtual machine to be used as a template can be:
• A new virtual machine you created just for use as a template.
• An existing virtual machine. This machine can be either of the following:
• A virtual machine you created by cloning a physical machine.
• A pre-existing virtual machine.
The virtual machine format can be:
• GSX Server or Workstation virtual machine.
The virtual disks and configuration files must be local to the VirtualCenter
management server.
• ESX Server virtual machine.
The host machine must be managed with VirtualCenter. After you create the
template, and you store the template in the template upload directory, you have
the option to unregister the ESX Server host.
When you create the template, you have the option to:
• Copy the virtual machine virtual disks to the template upload directory.
VirtualCenter refers to the template upload directory whenever it deploys a
virtual machine using the this template.
This method is useful when your source virtual machine is not located on a SANbased storage device.
• Copy the virtual machine disks to a VMFS volume.
This option is available if you are creating a template from a managed virtual
machine.
175
VMware VirtualCenter User’s Manual
• Reference the virtual machine, but keep it in its original location. This option is
not recommended.
This option is available for importing GSX Server or Workstation formatted virtual
machines. VirtualCenter refers to the original location whenever it deploys a
virtual machine using this template. This method is useful when your source
virtual machine is located on a SAN-based storage device.
The figure below illustrates the source virtual machine and datastore options for
creating templates. Refer to Abbreviations on page 14 for a description of
abbreviations.
Template Source options
176
www.vmware.com
C H A P T E R 1 0 Working with Templates
The preparing for templates topics are covered in the following sections:
• Specifying an Upload Directory for Templates
• Using a GSX Server or Workstation Virtual Machine as a Template
• Using an ESX Server Golden Image as a Template
• Using an Unmanaged ESX Server Virtual Machine as a Template
• Using a Managed Existing ESX Server Virtual Machine as a Template
Specifying an Upload Directory for Templates
When you import a template, you have the option to keep the source virtual machine
in its original location or have a copy placed into a host located within VirtualCenter.
When you import a template and select the upload directory option, the new
template is copied to the upload directory location. The upload directory must be in a
location relative to the VirtualCenter management server and local to the
VirtualCenter management server. It cannot be a network that is share-mapped as a
local drive.
When you create the template you must have Virtual Machine Administrator or
greater role permission on the host. When you deploy a template from the upload
directory, you must have Virtual Machine Administrator or greater role permission on
the target host.
Note: If you change the upload directory, all subsequently created templates are
stored in the new template upload directory. Templates stored in the old upload
directory continue to work.
Note: The template upload directory cannot reside on a network share.
To specify a location for importing templates:
1. From the VirtualCenter client, open the VMware VirtualCenter Settings dialog
and select the Templates tab.
Select File > VMware VirtualCenter Settings.
177
VMware VirtualCenter User’s Manual
2. Enter the template upload directory location. Click OK.
a. Scroll to the Template Upload Directory field.
b. Enter the full absolute path of the directory to use as the upload directory.
This path references a directory to which VirtualCenter has access.
The path is the location of templates upload directory. It must be a directory
local to VirtualCenter management server. It must not be a network share
mapped locally. It must be a valid directory path and the directory must exist.
Set the template upload directory before you create any templates.
Using a GSX Server or Workstation Virtual Machine as a
Template
To use a virtual machine that is already created and configured as a template:
1. Power down the virtual machine.
2. If you have a Workstation or GSX Server virtual machine:
• Upgrade the virtual machine to Workstation 4.0 or GSX Server 2.5, if needed.
• The source virtual machine must be local to the VirtualCenter management
server.
• If the source virtual machine is not local, you must copy the virtual machine to
a folder local to the VirtualCenter management server.
Using FTP in binary mode, copy the contents of the virtual machine folder. The
contents include, but are not limited to, the following files:
Virtual machine configuration file with a .vmx or .cfg extension.
178
www.vmware.com
C H A P T E R 1 0 Working with Templates
Virtual disk files with a .vmdk or .dsk extension. There could be several
virtual disk files. Copy all of them.
• The source virtual machine should not be available for use as an active virtual
machine.
3. Proceed to Importing Templates on page 180.
Using an ESX Server Golden Image as a Template
To use an existing ESX Server golden image as a VirtualCenter template:
1. Use your standard ESX Server processes to import the golden image and create
a virtual machine.
Refer to your ESX Server documentation for additional information.
2. If the ESX Server host is an unmanaged host, proceed to Using an Unmanaged
ESX Server Virtual Machine as a Template on page 179.
If the ESX Server host is a managed host, proceed to Using a Managed Existing
ESX Server Virtual Machine as a Template on page 180.
Using an Unmanaged ESX Server Virtual Machine as a Template
To use an existing unmanaged ESX Server virtual machine as a template:
1. Power down the virtual machine.
2. If you have a virtual machine that resides on an ESX Server host that is not
managed with VirtualCenter, perform the following:
• Upgrade to ESX Server 2.0.1.
Refer to your ESX Server documentation for additional information.
• Temporarily register the ESX Server host with the virtual machine that is the
source for the template.
You may need to adjust to your managed hosts to ensure you have sufficient
VirtualCenter licenses.
• Create the template, by selecting the Copy files to template upload
directory option.
Refer to Importing Templates on page 180 for information on creating the
template.
• Unregister the ESX Server host.
3. Proceed to Importing Templates on page 180.
179
VMware VirtualCenter User’s Manual
Using a Managed Existing ESX Server Virtual Machine as a
Template
To use a managed ESX Server virtual machine as a template:
1. Power down the virtual machine.
2. Proceed to Importing Templates on page 180.
Importing Templates
Once you have created a template virtual machine, perform the following to add it to
the VirtualCenter upload directory. Refer to the previous section, Preparing for
Templates on page 175, for information on creating a template virtual machine. If you
plan to store a template in the VirtualCenter upload directory, refer to Specifying an
Upload Directory for Templates on page 177 and define the upload directory location
before proceeding.
The importing template topics are covered in the following sections:
• Importing a Managed Virtual Machine as a Template
• Importing a Non-Managed Virtual Machine as a Template
Importing a Managed Virtual Machine as a Template
To import a template from a virtual machine that is managed with VirtualCenter:
1. Start VirtualCenter and log on to the VirtualCenter management server.
2. Choose a method for starting the New Template wizard.
From the inventory panel:
a. Click the Inventory option in the navigation bar.
The inventory panel and the information panel display the managed farms,
hosts, virtual machines information. The Inventory toolbar appears.
b. Expand the inventory as needed, and click the appropriate virtual machine.
c. Start the New Template wizard.
From the main or right-click popup menu select New Template from this
Virtual Machine.
From the Templates Navigation panel:
a. Click the Templates option in the navigation bar.
b. Click the New button in the Templates toolbar.
180
www.vmware.com
C H A P T E R 1 0 Working with Templates
c. Select An ESX Server virtual machine managed by VirtualCenter. Click Next.
d. Select the managed virtual machine to use as the source for the template.
Click Next.
3. Give the new template a name and description. Click Next.
181
VMware VirtualCenter User’s Manual
Enter a useful name and a brief description of the template. This description can
include the operating system, applications, versions, and intended uses for the
template. The name can be up to 80 characters long, and contain alphanumeric
characters and the underscore (_) and hyphen (-) characters. The name should
also be unique across all templates.
4. Select the type of virtual machine being imported.
The choices are Workstation 4.0, GSX Server 2.5.x, or ESX Server 2.x.
5. Specify the target location of the template files. Click Next.
The choices are:
• On the VMware VirtualCenter server — This option duplicates of the source
virtual machine disk files and places copies into the VirtualCenter upload
directory.
Copying the files can take some time. After the importing template process,
the source virtual machine is available for normal operations. Refer to
Specifying an Upload Directory for Templates on page 177 for information on
specifying and using the VirtualCenter upload directory.
Use this option if the source disk is not on a SAN. This option ensures the
template can be deployed to any managed host.
• In a VMFS datastore — This option adds a reference to the location of the
files.
The virtual machine disks are copied to the VMFS volume that you specify.
Use this option when the virtual disk resides in a VMFS volume on a SAN. This
ensures a rapid deploy of a new virtual machine because it is a local disk copy.
182
www.vmware.com
C H A P T E R 1 0 Working with Templates
6. If you selected In a VMFS datastore:
Select the VMFS datastore location in which to place the new template. Click
Next.
7. Complete the importing template process. Click Finish.
VirtualCenter displays the events log to show the status of the template creation.
VirtualCenter adds the configuration file data into the VirtualCenter database
and adds the template to the list of available templates. To view the list, click the
Templates option in the navigation bar.
Copying the source virtual machine to the template upload directory, can take a
long time, depending upon the size of the source virtual machine. Refer to the
Tasks panel to view the progress of creating the template.
183
VMware VirtualCenter User’s Manual
Importing a Non-Managed Virtual Machine as a Template
Note: You cannot create a template from a virtual machine that uses virtual disks
that are REDO logs of a base disk.
To import a template from a virtual machine that is not managed with VirtualCenter:
1. Start VirtualCenter and log on to the VirtualCenter management server.
2. Display the information panel of the templates function.
a. Click the Templates option in the navigation bar.
The information panel displays the list of current templates. The template
toolbar appears.
b. Start the New Template wizard.
Click New in the template toolbar.
3. Confirm adding a new template. Click Next.
184
www.vmware.com
C H A P T E R 1 0 Working with Templates
4. Select the type of source virtual machine.
Click A GSX Server or Workstation virtual machine. Click Next.
5. Locate the source virtual machine. Click Next.
Type or copy the full path to the source virtual machine configuration file. This
file has either a .vmx or a .cfg extension. The Browse option is available when
the VirtualCenter client is running on the same machine as the VirtualCenter
management server.
If you are not running the VirtualCenter client on the same machine as the
VirtualCenter management server, type in the path on the VirtualCenter
management server machine where the template source virtual machine is
located.
Note: This file must be in a folder or file system local to the VirtualCenter
management server.
Note: The source virtual machine should not use IDE virtual disks.
185
VMware VirtualCenter User’s Manual
6. Give the new template a name and description. Click Next.
Enter a useful name and a brief description of the template. Description
information can include for example, the operating system, applications,
versions, and intended uses for the template. The name can be up to 80
characters long, and contains alphanumeric characters and the underscore (_)
and hyphen (-) characters. It should also be unique across all templates.
7. Specify the target location of the template files. Click Next.
The choices are:
• On the VMware VirtualCenter server — This option duplicates of the source
virtual machine disk files and places copies into the VirtualCenter upload
directory.
Copying the files can take some time. After the importing template process,
the source virtual machine is available for normal operations. Refer to
Specifying an Upload Directory for Templates on page 177 for information on
specifying and using the VirtualCenter upload directory.
186
www.vmware.com
C H A P T E R 1 0 Working with Templates
Use this option if the source disk is not on a SAN. This option ensures the
template can be deployed to any managed host.
• In a VMFS datastore — This option adds a reference to the location of the
files.
The virtual machine disks are copied to the VMFS volume that you specify.
Use this option when the virtual disk resides in a VMFS volume on a SAN. This
ensures a rapid deploy of a new virtual machine because it is a local disk copy.
8. If you selected In a VMFS datastore:
Select the VMFS datastore location in which to place the new template. Click
Next.
9. Complete the importing template process. Click Finish.
VirtualCenter displays the events log to show the status of the template creation.
VirtualCenter adds the configuration file data into the VirtualCenter database
and adds the template to the list of available templates. To view the list, click the
Templates option in the navigation bar.
Copying the source virtual machine to the template upload directory can take a
long time, depending upon the size of the source virtual machine. Refer to the
Tasks panel to view the progress of creating a template.
187
VMware VirtualCenter User’s Manual
Cloning a Template
To clone an existing template to create an additional template:
1. From the VirtualCenter client, display the information panel of the Templates
function.
Click the Templates option in the navigation bar.
The information panel changes to display the list of current templates and the
template toolbar.
2. Select the appropriate template. Click the Clone toolbar button.
3. Confirm adding a new template. Click Next.
4. Give the new template a name and description. Click Next.
Enter a useful name and a brief description of the template. Description
information can include for example, the operating system, applications,
versions, and intended uses for the template. The name can be up to 80
characters long, and can contain alphanumeric characters and the underscore
(_) and hyphen (-) characters. It should also be unique across all templates.
5. Pass through the target location screen. Click Next.
The template files are always copied to the template upload directory.
6. Complete the importing template process. Click Finish.
VirtualCenter displays the Tasks inventory panel for reference and adds the
cloned template to the list in the information panel. The virtual disks are copied
to the template upload directory.
Refer to the Tasks panel to view the progress of the cloning operation.
188
www.vmware.com
C H A P T E R 1 0 Working with Templates
Deleting a Template
To delete an existing template:
1. From the VirtualCenter client, display the information panel of the templates
function.
Click the Templates option in the navigation bar.
The information panel changes to display the list of current templates and the
template toolbar.
2. Select the appropriate template. Click the Remove toolbar button.
3. Select whether to remove the template files from disk.
• Check Remove Template Files to remove template disk files from the
template upload directory.
• Uncheck Remove Template Files to leave the virtual disks in the physical
directory. This still removes the template from VirtualCenter control.
4. Confirm removing the template from the VirtualCenter database. Click Yes.
189
VMware VirtualCenter User’s Manual
Editing a Template
To change the template virtual machine:
1. Deploy the template.
2. Edit the resulting virtual machine.
3. Create a new template from the edited virtual machine.
To change the name and description of a template:
1. From the VirtualCenter client, display the templates function.
Click the Templates option in the navigation bar.
The information panel changes to display the list of current templates and the
template toolbar.
2. Select the appropriate template.
3. Select the Properties option to display the Template Properties dialog box.
Choose from either Edit > Properties or right-click > Properties.
Enter a useful name and a brief description of the template. The description can
include the operating system, applications, versions, and intended uses for the
template. The name can be up to 80 characters long, and contains alphanumeric
characters and the underscore (_) and hyphen (-) characters. The name should
also be unique across all templates.
Modify the template name or the template description. Edit the text as needed.
Click OK.
190
www.vmware.com
11
CHAPTER 11
Copying Virtual Machines
191
VMware VirtualCenter User’s Manual
Creating Customizable Virtual Machines
This chapter describes how to create a new virtual machine by deploying a template
by cloning an existing virtual machine. Both of these methods provide options to
customize the new virtual machine as you create it. The options are similar to those
options available when creating a virtual machine from scratch, but the method
varies. This chapter does not describe the customization options. Refer to Customizing
Guest Operating Systems on page 216 for detailed customization information. Refer
to Creating New Virtual Machines on page 155 for information on creating a virtual
machine from scratch.
You need a Virtual Machine Administrator role assigned to the farm where the
deployed or cloned virtual machines is located to perform the activities described in
this chapter.
This chapter contains the following sections:
• Creating Virtual Machines from a Template
• Creating Virtual Machines by Cloning an Existing Virtual Machine
Creating Virtual Machines from a
Template
A template is a golden image of a virtual machine. This image typically includes a
specified operating system and configuration which provides virtual counterparts to
hardware components. Optionally, a template can include an installed guest
operating system and a set of applications. VirtualCenter uses templates to create new
virtual machines. This is called deploying a template. Deploy a template to any host in
the VirtualCenter environment. The deploying process includes selecting the
appropriate template and designating a VirtualCenter target host to receive the new
virtual machine. When complete, the deployed virtual machine is added to the
inventory panel farm where the host resides.
192
www.vmware.com
C H A P T E R 1 1 Copying Virtual Machines
The figure below illustrates creating a customized virtual machine. Refer to
Abbreviations on page 14 for a description of abbreviations.
Deploying a Template
The deploying template topics are covered in the following sections:
• Manually Deploying Virtual Machine from a Template
• Creating a Scheduled Task to Deploy a Template
Manually Deploying Virtual Machine from a Template
To manually start the Template Deployment wizard:
1. Start VirtualCenter and log on to the VirtualCenter management server.
2. Choose a method for starting the Deploy Virtual Machine from Template wizard.
193
VMware VirtualCenter User’s Manual
From the inventory panel:
a. Click the Inventory option in the navigation bar.
The inventory panel and the information panel display the managed farms,
hosts, and virtual machine information. The Inventory toolbar appears.
b. Expand the inventory as needed, and click the target host.
This is the host on which the new virtual machine is located.
c. Start the Deploy Virtual Machine from Template wizard.
From the main or right-click popup menu, select Deploy Virtual Machine
from Template.
194
www.vmware.com
C H A P T E R 1 1 Copying Virtual Machines
d. Select the template to deploy.
From the templates panel:
a. Click the Templates option in the navigation bar.
b. Select the template to deploy.
c. Click the Deploy button in the templates toolbar.
195
VMware VirtualCenter User’s Manual
3. Confirm the start of the Deployment wizard. Click Next.
4. Specify the new virtual machine name. Click Next.
Enter a name for the new virtual machine. Click Next.
Note: The virtual machine name cannot exceed 40 characters.
5. Select the farm on which to deploy the new virtual machine. Click Next.
196
www.vmware.com
C H A P T E R 1 1 Copying Virtual Machines
6. Specify the host on which to deploy the new virtual machine. Click Next.
7. Select the datastore volume on which to store the new virtual machine
configuration file and virtual disks. Click Next.
Note: Select the location for the new virtual machine configuration and disk
files.
The virtual machine disk files must be placed on a VMFS partition. Select from
the list. Select the default location for the placement of the virtual machine
configuration file, if this option appears.
197
VMware VirtualCenter User’s Manual
8. Select the network interface card (NIC) to use for the new virtual machine. Click
Next.
9. Specify a resource allocation level. Click Next.
10. Select whether to customize the new virtual machine as it is deployed.
198
www.vmware.com
C H A P T E R 1 1 Copying Virtual Machines
The options are:
• Start the guest customization wizard — Opens the customization wizard.
Refer to Customizing Guest Operating Systems on page 216 for information
on using the Guest Customization wizard.
• Import customization from an XML file — Browse for and select an existing
.XML file with customization already defined.
Click Browse and select the appropriate XML file. Click Next.
• Do not customize the guest operating system — Proceeds with the current
deploy and does not make any additional changes to the guest operating
system.
Select the appropriate option and click Next.
11. Complete the Template Deployment wizard. Click Finish.
VirtualCenter displays the Tasks inventory panel for reference, makes a copy of
the template, applies changes as specified, and stores the new virtual machine
on the designated host location.
Creating a Scheduled Task to Deploy a Template
To deploy a virtual machine from a template as a scheduled task:
1. Display the Tasks panel.
Click the Tasks option in the navigation bar. The list of scheduled tasks appears.
2. Start the New Task wizard. Click New in the toolbar.
3. Confirm continuing with the New Task wizard. Click Next.
199
VMware VirtualCenter User’s Manual
4. Select the task to create.
Click the pull-down menu and select the Deploy Virtual Machine from a
Templates option. Click Next.
5. Select the template to deploy. Click Next.
6. Select virtual machine group in which to place new virtual machine. Click Next.
200
www.vmware.com
C H A P T E R 1 1 Copying Virtual Machines
7. Select a host on which to place new virtual machine. Click Next.
8. Specify a name for the new virtual machine. Click Next.
9. Select the datastore volume on which to store the new virtual machine
configuration file and virtual disks.
201
VMware VirtualCenter User’s Manual
Note: Select the location for the new virtual machine configuration and disk
files.
The virtual machine disk files must be placed on a VMFS partition. Select from
the list. Select the default location for the placement of the virtual machine
configuration file, if this option appears. Click Next.
10. Select the network interface card (NIC) to use for the new virtual machine. Click
Next.
11. Specify a resource allocation level. Click Next.
202
www.vmware.com
C H A P T E R 1 1 Copying Virtual Machines
12. Select whether to customize the new virtual machine as it is deployed. Click
Next.
13. Set the time and date when you want the virtual machine to be deployed. Click
Next.
Click Later, then click the drop-down arrow to select a date from the displayed
calendar. A red circle indicates today’s date and a dark circle indicates the
scheduled date.
14. Confirm creating the task.
Optionally, specify an email address for notification when task is performed. Click
Finish.
VirtualCenter adds the new task to the scheduled task list and completes it at the
designated time. When it is time to perform the task, VirtualCenter first verifies
that the user who created the task still has permission to complete the task. If the
permission levels are not acceptable, VirtualCenter sends a message to the log
files and the task is not performed.
203
VMware VirtualCenter User’s Manual
Creating Virtual Machines by Cloning an
Existing Virtual Machine
A clone is a copy plus customization of a virtual machine. When you create a clone,
VirtualCenter provides an option to customize the guest operating system of that
virtual machine. Store a clone on any host within the same farm as the original virtual
machine.
The figure below illustrates the creating a new customized virtual machine by cloning
an existing virtual machine. Refer to Abbreviations on page 14 for a description of
abbreviations.
Creating a Clone
204
www.vmware.com
C H A P T E R 1 1 Copying Virtual Machines
The cloning a virtual machine topics are covered in the following sections:
• Manually Cloning a Virtual Machine
• Creating a Scheduled Task to Clone a Virtual Machine
Manually Cloning a Virtual Machine
To manually start the Template Deployment wizard:
1. Start VirtualCenter and log on to the VirtualCenter management server.
2. Start the Clone a Virtual Machine wizard, from the inventory panel:
a. Click the Inventory option in the navigation bar.
The inventory panel and the information panel display the managed farms,
hosts, and virtual machine information. The Inventory toolbar appears.
b. Expand the inventory as needed, and click the source virtual machine.
c. Start the Clone a Virtual Machine wizard.
From the main or right-click popup menu, select Clone.
3. Confirm continuing with the Clone wizard. Click Next.
4. Select a target host for the clone. Click Next.
205
VMware VirtualCenter User’s Manual
5. Select a farm for the clone. Click Next.
6. Assign a name to the clone.
Enter a name. Click Next.
7. Select the datastore location.
206
www.vmware.com
C H A P T E R 1 1 Copying Virtual Machines
Select a location from list. Click Next.
8. Assign the network interface cards (NIC).
Select from the list, if there is more than one NIC. Click Next.
9. Specify the resource allocation level.
The resource allocating level tells VirtualCenter what percentage of the host
resources to make available to the new virtual machine.
Click the appropriate radio button. Click Next.
207
VMware VirtualCenter User’s Manual
10. Select whether to customize the new virtual machine as you create it.
Click the appropriate radio button. Click Next.
If you select the customization option, refer to Customizing Guest Operating
Systems on page 216 for description of the customization wizard and options.
If you decide not to customize the new virtual machine as part of the cloning
process, proceed to the next step.
11. Complete the Cloning a Virtual Machine wizard. Click Finish.
VirtualCenter displays the Tasks inventory panel for reference and makes a copy
of the virtual machine, applies changes as specified, and stores the virtual
machine on the designated host location.
VirtualCenter adds the new task to the scheduled task list, completes it at the
designated time. When it is time to perform the task, VirtualCenter first verifies
that the user who created the task still has permission to complete the task. If the
permission levels are not acceptable VirtualCenter sends a message to the log
and the task is not performed.
Creating a Scheduled Task to Clone a Virtual Machine
Create a virtual machine by cloning an existing virtual machine either from the main
menu, from a virtual machine menu, or as a scheduled task.
To create a scheduled task to clone a virtual machine:
1. Display the Tasks panel.
Click the Tasks option in the navigation bar. The list of scheduled tasks appears.
2. Start the New Task wizard. Click New in the toolbar.
3. Confirm continuing with the New Task wizard. Click Next.
208
www.vmware.com
C H A P T E R 1 1 Copying Virtual Machines
4. Select the task to create.
Click the pull-down menu and select Deploy Virtual Machine from a Templates.
Click Next.
5. Select the virtual machine to clone. Click Next.
6. Select a target host for the clone. Click Next.
209
VMware VirtualCenter User’s Manual
7. Select a farm for the clone. Click Next.
8. Assign a name to the clone.
Enter a name. Click Next.
210
www.vmware.com
C H A P T E R 1 1 Copying Virtual Machines
9. Select the datastore location.
Select a location from the list. Click Next.
10. Assign the network interface cards (NIC).
Select from the list, if there is more than one NIC. Click Next.
211
VMware VirtualCenter User’s Manual
11. Specify the resource allocation level.
The resource allocation level tells VirtualCenter what percentage of the host
resources to make available to the new virtual machine.
Click the appropriate radio button. Click Next.
12. Select whether to customize the new virtual machine as you create it.
Click the appropriate radio button. Click Next.
If you select the customization option, refer to Customizing Guest Operating
Systems on page 216 for description of the customization wizard and options.
If you decide not to customize the new virtual machine as part of the cloning
process, proceed to the next step.
212
www.vmware.com
C H A P T E R 1 1 Copying Virtual Machines
13. Set the time and date when you want the virtual machine to be deployed. Click
Next.
Click Later, then click the drop-down arrow to select a date from the displayed
calendar. A red circle indicates today’s date, and a dark circle indicates the
scheduled date.
14. Confirm creating the task.
Optionally, specify an email address for notification when task is performed. Click
Finish.
VirtualCenter adds the new task to the scheduled task list and completes it at the
designated time. When it is time to perform the task, VirtualCenter first verifies
that the user who created the task still has permission to complete the task. If the
permission levels are not acceptable, VirtualCenter sends a message to the log
and the task is not performed.
213
VMware VirtualCenter User’s Manual
214
www.vmware.com
12
CHAPTER 12
Customizing Guest
Operating Systems
215
VMware VirtualCenter User’s Manual
Customizing Guest Operating Systems
This chapter describes how to customize your guest operating systems. You
customize your guest operating system when you create a virtual machine in
VirtualCenter from a template or as a clone.
You need a Virtual Machine Administrator role assigned to the target host where the
virtual machine is located to perform the activities described in this chapter.
This chapter contains the following sections:
• Preparing for Guest Customization
• Beginning the Guest Customization Process
• Customizing New Guest Operating Systems
• Completing a Guest Operating System Customization
When a new virtual machine is deployed or cloned, starting the Guest Customization
wizard is an option.
Customizing Windows guest operating system options include:
• Join workgroups and domains
• Network interface configuration
• Domain suffix, security ID (SID) change
Customizing Linux guest operating system options include:
• Host name
• Domain suffix
• Network interface configuration
Preparing for Guest Customization
When you deploy a template or clone an existing virtual machine, you have the
opportunity to customize the new guest operating system. A Guest Customization
wizard guides you through the configuration options.
Before you run the Guest Customization wizard, that means, before you start the
Template Deployment or Clone wizards, if you intend to perform a Guest
Customization, perform the following:
• Verify that your system meets the guest customization requirements listed in
VirtualCenter Guest Operating System Customization Requirements on page 40.
216
www.vmware.com
C H A P T E R 1 2 Customizing Guest Operating Systems
• Install the required components on the Windows machine where the
VirtualCenter management server is installed.
Installing the components required to support guest operating system customization
are covered in the following sections:
• Installing the Microsoft Sysprep Tools
• Installing the VMware Open Source Components
Installing the Microsoft Sysprep Tools
If you plan to customize a Windows guest operating system, you must first install the
Microsoft Sysprep tools.
In the physical world, computers are typically deployed from disk image files created
using tools such as Ghost and DriveImage. To create an image of a Windows
computer, you typically run Microsoft Sysprep on the template computer and then
capture or creates an image from that computer. Sysprep prepares the template
computer for deployment by installing special software that reconfigures the
operating system on the next boot.
In VirtualCenter, you never have to run Sysprep manually on a virtual machine before
use the virtual machine as a template or the source of a clone operation.
VirtualCenter’s guest customization technology automatically performs the Sysprep
preparation step during deploy or cloning operation.
Manually running Sysprep in a template virtual machine or source virtual machine is
unnecessary, but harmless. VirtualCenter automatically runs Sysprep on the virtual
machine a second time, overriding and overwriting files and configuration settings
from the first Sysprep operation.
The following process must be performed once if you are going to customize virtual
machines with any of the supported Windows guest operating systems installed.
Refer to VirtualCenter Guest Operating System Customization Requirements on
page 40 for a list of the supported guest operating systems.
To install the Microsoft Sysprep tools:
1. Download the Sysprep package from the Microsoft Web site.
www.microsoft.com/windows2000/downloads/tools/sysprep/default.asp
Though the Sysprep version indicates Windows 2000, it works with both
Windows XP Professional and Windows Server 2003.
2. Run the Microsoft installer.
Q257813_w2k_spl_x86_en.exe
217
VMware VirtualCenter User’s Manual
3. Locate the directory to place the expanded files.
a. From the dialog box Browse to the default installation location:
C:\[VirtualCenter_installation_directory]\resources\
windows\sysprep\1.1
b. Click OK.
The expanded directory structure resembles the following:
...\resources\windows\sysprep\1.1\
...\resources\windows\sysprep\1.1\contents.txt
...\resources\windows\sysprep\1.1\docs\...
...\resources\windows\sysprep\1.1\tools\...
...\resources\windows\sysprep\1.1\samples\...
You are now ready to customize a new virtual machine with supported Windows
guest operating system as you clone an existing virtual machine or deploy a
template.
Installing the VMware Open Source Components
If you plan to customize a Linux guest operating system, you must first install the
VMware Open Source components on your VirtualCenter management server
machine. VMware has packaged these components into a separate package called
VMware Open Source Components, which you download from the VMware Web site.
Refer to:
www.vmware.com/download
Perform the following process once on the VirtualCenter management server to
support the Linux guest operating systems:
• Red Hat Enterprise Linux AS 3.0
• Red Hat Advanced Server 2.1
• SUSE LINUX Enterprise Server 8
To install the VMware Open Source Components:
1. On the machine running VirtualCenter management server, disable any antivirus application that interferes with Active Scripting.
VirtualCenter management server uses Windows Active Scripting to perform
some of its tasks. Certain anti-virus applications may disable active scripting or
block scripts from accessing system resources. When this happens, some
features of VirtualCenter behave unexpectedly or fail to work. In Norton
AntiVirus, the feature is called Script Blocker. in McAfee, it's known as
218
www.vmware.com
C H A P T E R 1 2 Customizing Guest Operating Systems
ScriptStopper. If you have one of these, or another anti-virus application that
interferes with Active Scripting, it is important that you disable these features on
the machine running VirtualCenter management server.
2. From your VirtualCenter management server machine, open a browser.
Perform this on every machine that has a VirtualCenter management server.
3. Locate, download, and start the VMware Open Source Components installer.
a. Go to the browser path:
www.vmware.com/download
b. Follow the link to the VirtualCenter download page.
c. Click the download link to the Open Source Components installer.
Answer the prompts to place the installer file on your system.
4. Start the Open Source Components installer.
Double-click on the VMware Open Source Components .exe file.
The VMware Open Source Components installer starts up and displays a
download dialog box.
5. Complete the installation.
Follow the installer instructions.
You are now ready to customize a new virtual machines with a supported Linux
guest operating system as you clone an existing virtual machine or deploy a
template.
Beginning the Guest Customization
Process
The Guest Customization wizard option appears during the virtual machine
deployment or cloning process.
The beginning the guest customization topics are covered in the following sections:
• Entering the Guest Customization Wizard from the Template Deployment
Process
• Entering the Guest Customization Wizard from the Cloning Process
219
VMware VirtualCenter User’s Manual
Entering the Guest Customization Wizard from the Template
Deployment Process
Add a new virtual machine to a host by deploying a managed template.
To start the guest operation system customization wizard:
1. From the VirtualCenter client Schedule Task panel, start the Template
Deployment wizard.
a. Display the Tasks panel, by clicking the Tasks option in the navigation bar.
The list of existing scheduled tasks appears.
b. Start the New Task wizard. Click New in the toolbar.
c. Confirm continuing with the New Task wizard. Click Next.
d. Select the task to create. Click the pull-down menu and select the Deploy a
virtual machine from Templates option. Click Next.
2. Proceed with the Template Deployment wizard screens.
Refer to Creating Virtual Machines from a Template on page 192 for more
detailed description.
a. Confirm continuing with the Template Deployment wizard. Click Next.
b. Select a template to deploy. Click Next.
c. Select a farm to which to deploy. Click Next.
d. Select a host to which to deploy. Click Next.
e. Specify a name for the new virtual machine. Click Next.
f. Select the storage location for the virtual machine configuration and disk files.
Click the appropriate volume from the displayed list of possible datastores.
Click Next.
g. Select the virtual networks for each of the virtual machine’s Network Interface
Cards (NICs).
Click the appropriate network from the pull-down menu. Click Next.
h. Set the resource priority for this virtual machine.
Click the appropriate radio button. Click Next.
220
www.vmware.com
C H A P T E R 1 2 Customizing Guest Operating Systems
3. Select whether to customize the new guest operating system.
Click Start the guest customization wizard. Click Next. Proceed to Customizing
New Guest Operating Systems on page 222.
Entering the Guest Customization Wizard from the Cloning
Process
A new virtual machine can be added to a host by cloning a existing virtual machine.
To start the guest operation system customization wizard:
1. From the VirtualCenter client Schedule Task panel, start the Clone wizard.
a. Display the Tasks log, by clicking the Tasks option in the navigation bar.
The list of existing scheduled tasks appears.
b. Start the New Task wizard. Click New in the toolbar.
c. Confirm continuing with the New Task wizard. Click Next.
d. Select the task to create. Click the pull-down menu and select the Clone an
existing virtual machine option. Click Next.
2. Proceed with the Clone wizard.
a. Select a virtual machine to clone. Click Next.
b. Select a host for the new clone. Click Next.
c. Specify a name for the new clone.
Type a name and click Next.
d. Select the volume on which to store the new clone’s files. Click Next.
e. Specify the network interface card (NIC) for the new clone. Click Next.
f. Specify the resource priority for the new clone. Click Next.
221
VMware VirtualCenter User’s Manual
3. Select whether to customize the new clone.
Click Start the guest customization wizard. Click Next. Proceed to Customizing
New Guest Operating Systems on page 222.
Customizing New Guest Operating
Systems
The customizing process varies, depending upon the guest operating system to be
used in the new virtual machine. Refer to VirtualCenter Guest Operating System
Customization Requirements on page 40 for a list of supported guest operating
systems.
The customizing guest operating system topics are covered in the following sections:
• Customizing a Windows Guest Operating System
• Customizing a Linux Guest Operating System
Customizing a Windows Guest Operating System
To customize a Windows 2000, Windows XP Professional, or Windows Server 2003
guest operating system while deploying a template or cloning a virtual machine:
1. Start the Guest Customization wizard.
You cannot start the Guest Customization wizard from a menu or toolbar option.
The Guest Customization wizard starts indirectly from the VirtualCenter
Template Deployment or Clone wizard.
• If you are deploying a template to create a new virtual machine. Refer to
Creating Virtual Machines from a Template on page 192.
222
www.vmware.com
C H A P T E R 1 2 Customizing Guest Operating Systems
• If you are cloning an existing virtual machine. Refer to Creating Virtual
Machines by Cloning an Existing Virtual Machine on page 204.
2. Confirm continuing with the Guest Customization wizard. Click Next.
3. Optionally, specify registration information.
The owner’s name and organization are for your reference purposes only. They
do not affect the functioning of the virtual machine.
Enter the name of a person, user, or group, and of the organization in the
appropriate fields. Click Next.
4. Specify a computer name for the virtual machine. Click Next.
The host, or computer name, is the name given to the particular instance of a
guest operating system. The operating system uses this name to identify itself on
the network. On Windows systems it is called the computer name. On most
other operating systems it is called the host name.
This is not the same as the virtual machine name. That was declared earlier in the
Clone or Template Deployment wizard.
223
VMware VirtualCenter User’s Manual
5. Specify a Windows license key for the new guest operating system. For Windows
Server operating systems, enter the license mode. Click Next.
6. Specify the password for the Administrator account.
If you specify a new administrator password and the source Windows virtual
machine or template already has one, then you must select the Delete all user
accounts option in step 11. Otherwise the old administrator password is not
changed.
Enter the password for the Administrative user. Enter it again in the Confirm
Password field. Click Next.
224
www.vmware.com
C H A P T E R 1 2 Customizing Guest Operating Systems
7. Specify a time zone. Click Next.
8. Select whether to use typical or customize network settings. Click Next.
The options are:
• Typical settings — VirtualCenter automatically configures all network
interfaces from a DHCP server.
• Custom settings — You specify the network settings.
225
VMware VirtualCenter User’s Manual
9. If you use custom network settings:
a. Select the network interface card (NIC) to customize. Click Next.
Optionally, select the NIC, then click Customize to make additional
specifications.
b. If you are customizing the NIC network properties, select the method and
enter the IP and DNS server addresses.
Click OK to close this dialog box and return the previous dialog box. Then click
Next on the Network Guest Customizations dialog box.
226
www.vmware.com
C H A P T E R 1 2 Customizing Guest Operating Systems
10. Join a workgroup or domain.
Enter the workgroup and domain identification information. Click Next.
11. Select additional guest operating system options.
The options are:
Generate New Security ID (SID) — This option is set to default.
Delete all user accounts — If you specify a new administrator password in step
6, and the source Windows virtual machine or template already has one, then
you must select the Delete all user accounts option here. Otherwise the old
administrator password is not changed.
Click the buttons to configure any desired options. Click Next.
227
VMware VirtualCenter User’s Manual
12. Optionally, save the customized options as an .xml file.
Specify a filename and location. Click Next.
VirtualCenter saves the customized configuration parameters in an .xml file.
Later, import these predefined customized parameters, when deploying a
template or cloning an existing virtual machine.
If the customization settings are saved to a file then the administrator password
of the Windows virtual machine and the domain administrator’s password, as
applicable, are stored in encrypted format in the .xml file.
13. Complete the Guest Customization wizard. Click Finish.
VirtualCenter closes the Guest Customization wizard and returns you to the
Deploy a Template or Clone a Virtual Machine wizard to complete that wizard.
Customizing a Linux Guest Operating System
To customize a Linux RedHat Advanced Server or Linux SuSe guest operating system
while deploying a template or cloning a virtual machine:
1. From the VirtualCenter Template or Clone wizard, start the Guest Customization
wizard.
This wizard starts as a subset of one of the following wizards:
• Deploying a template to create a new virtual machine. Refer to Creating
Virtual Machines from a Template on page 192.
• Cloning an existing virtual machine. Refer to Creating Virtual Machines by
Cloning an Existing Virtual Machine on page 204.
2. Confirm continuing with the Guest Customization wizard. Click Next.
228
www.vmware.com
C H A P T E R 1 2 Customizing Guest Operating Systems
3. Optionally, specify a hostname and domain suffix for this virtual machine. Click
Next.
The host, or computer name, is the name given to the particular instance of a
guest operating system. The operating system uses this name to identify itself on
the network. On Windows systems it is called the computer name. On most
other operating systems it is called the host name.
This is not the same as the virtual machine name. That name was declared earlier
in the Clone a Virtual Machine or the Deploy a Template wizard.
4. Select the network settings.
Select the appropriate radio button. Click Next.
• Typical settings — VirtualCenter automatically configures all network
interfaces from a DHCP server.
• Custom settings — You specify the network settings.
229
VMware VirtualCenter User’s Manual
5. If you use custom network settings:
a. Enter the DNS addresses.
Enter a DNS name. Click Add. Enter the DNS addresses. Click Next.
b. Select the Network Interface Card (NIC) to customize. Click Next.
Optionally, select the NIC, then click Customize to make additional
specifications.
230
www.vmware.com
C H A P T E R 1 2 Customizing Guest Operating Systems
c. If you are customizing the NIC network properties, select the method and
enter the IP and DNS server addresses.
Click OK to close this dialog box and return the previous dialog box. Then click
Next on the Network Customizations dialog box.
6. Optionally, save the customized options in an .xml file.
Specify a filename and location. Click Next.
VirtualCenter saves the customized configuration parameters in an .xml file.
Later, import these predefined customized parameters, when deploying a
template or cloning an existing virtual machine.
7. Complete the Guest Customization wizard. Click Finish.
VirtualCenter closes the Guest Customization wizard and returns you to the
Deploy a Template or Clone a Virtual Machine wizard to complete that wizard.
231
VMware VirtualCenter User’s Manual
Completing a Guest Operating System
Customization
Customization completes when the new virtual machine boots for the first time.
Windows guest operating system virtual machines, sometimes require a reboot after
the initial boot. Linux guest operating system virtual machines do not require a reboot
after the initial boot. The customization process does not complete until the guest
operating system boots, runs the finalization scripts, and reaches the logon screen.
If the new virtual machine encounters errors when booting for the first time, many of
those errors are reported in a system log. Customization errors seen after booting up
the customized virtual machine are logged in both Linux as well as Windows guest
operating systems. In Linux these are errors are logged to /var/log/boot.log.
In Windows they are written to the Event Viewer under Application Log.
Steps required to finalize guest operating system customization are covered in the
following sections:
• Completing Linux Guest Operating System Customization
• Completing Windows Guest Operating System Customization
Completing Linux Guest Operating System Customization
A customized Linux virtual machine does not need any additional reboots and is
operational as soon as the logon screen appears after the first boot. If configuration
errors occur, they are displayed on the virtual machine’s console screen while the
guest operating system is booting.
The customization process for a Linux guest does not modify the /etc/hosts file.
Some network environments, such as NIS, may require /etc/hosts to include an
entry for the new virtual machine's hostname. If that is the case, add the entry
manually.
For example, if the customized virtual machine is named myhost.mydomain.com
and has one NIC, which is assigned the static IP address 172.16.16.200, then add
the following line to the virtual machine's /etc/hosts file:
172.16.16.200 myhost.domain.com myhost
Completing Windows Guest Operating System Customization
When a customized virtual machine is powered on for the first time, its guest
operating system runs a set of scripts that finalize the customization and
232
www.vmware.com
C H A P T E R 1 2 Customizing Guest Operating Systems
configuration process. Depending on the guest operating system type, this process
may involve additional reboots which are automatically performed by the scripts.
The customization process installs scrips that run once in the target virtual machine
when it powers on (or boots) for the first time after being deployed or cloned. Those
scripts complete the customization process by performing final configuration
operations on the guest operating system.
After powering on for the first time, a customized Windows virtual machine
automatically reboots twice to finalize the configuration process. It becomes
operational when the logon screen appears after the second reboot. This process can
take several minutes, depending upon the speed and load of the host. If any errors
occur during the final configuration process, events are logged to the guest operating
system’s event database, and can be viewed using Program > Administrative Tools >
Event Viewer from the Windows Start menu.
If any of the information required in the configuration finalization process is not
correct, the guest operating system pauses when the new virtual machine boots and
waits for you to enter the correct information. This information includes:
• The computer name is not unique. The computer name must be unique for the
network on which the machine is deployed.
• The product key is incorrect.
• The user specified to join a domain that does not exist.
• The DHCP server for the network is not functioning properly.
To determine if the system is waiting for information check the virtual machine icon in
the inventory panel, if it is flashing, it is waiting for a response. Alternatively, check the
Status field in the virtual machine Summary tab. If it is displaying a link, the system is
waiting for a response. Refer to Answering a Pending Question on page 133 for
additional information.
233
VMware VirtualCenter User’s Manual
234
www.vmware.com
13
CHAPTER 13
Editing an Existing Virtual
Machine Configuration
235
VMware VirtualCenter User’s Manual
Editing the Configuration of Existing
Virtual Machines
This chapter describes how to edit or customize your existing virtual machines.
Perform these activities after you create the virtual machine and install the guest
operating system.
Note: When you create a virtual machine and install the guest operating system,
please install the VMware Tools. Installation of the VMware Tools is specific to the
guest operating system installed. Please refer to Installing VMware Tools on page 168
for information on installing the VMware Tools.
You need a Virtual Machine Administrator role assigned to the virtual machine in
order to perform the activities described in this chapter.
This chapter contains the following sections:
• Beginning to Edit the Virtual Machine Configuration
• Changing Hardware Configuration of a Virtual Machine
• Adding Hardware to a Virtual Machine
• Changing Virtual Machine Options
• Manually Changing Virtual Machine Resources Settings
• Creating a Scheduled Task to Change a Virtual Machine Resource Settings
Note: For comprehensive information about configuring the virtual machines, refer
to your ESX Server, GSX Server, and Workstation documentation.
Beginning to Edit the Virtual Machine
Configuration
In addition to customizing a virtual machine while you create it, you have the option
to customize the virtual machine after you create it. This section describes how to
customize an existing virtual machine. Refer to your VMware ESX Server
documentation for information about all the ramifications of specific customizations.
To customize an existing virtual machine:
1. From the VirtualCenter client, display the inventory panel and expand the
appropriate farm.
236
www.vmware.com
C H A P T E R 1 3 Editing an Existing Virtual Machine Configuration
Click the Inventory option in the navigation bar. Expand the inventory as
needed, and click the virtual machine to customize.
2. Power off the virtual machine.
Most of the virtual machine control panel options are not available if the virtual
machine powers on.
3. Display the virtual machine control panel.
Choose an editing method, from either the Edit menu, the object right-click
menu, or the Summary tab, select Edit Properties.
237
VMware VirtualCenter User’s Manual
4. Make changes and or additions as needed. Click OK.
Select items on the virtual machine control panel, and complete the wizards.
Refer to the appropriate section in this chapter for additional information. Refer
to your ESX Server, GSX Server, and Workstation documentation for
comprehensive information about configuring the virtual machines.
Changing Hardware Configuration of a
Virtual Machine
This section introduces the changes you can make to the virtual machine hardware.
The following sections describe how to change the configuration of existing virtual
hardware devices in a virtual machine:
• Changing DVD/CD-ROM Drive Configuration
• Changing Floppy Drive Configuration
• Changing Generic SCSI Device Configuration
• Changing Hard Disk Configuration
• Changing Memory Configuration
• Changing (NIC) Ethernet Adapter Configuration
• Changing Parallel Port Configuration
• Changing SCSI Controller Configuration
• Changing Serial Port Configuration
• Changing Video Configuration
238
www.vmware.com
C H A P T E R 1 3 Editing an Existing Virtual Machine Configuration
• Changing Virtual CPU Configuration
Changing DVD/CD-ROM Drive Configuration
To change the DVD/CD-ROM drive configuration:
1. From the VirtualCenter client, select the virtual machine to customize.
Click the Inventory option in the navigation bar. Expand the inventory as
needed, and click the appropriate virtual machine.
2. Display the virtual machine control panel, then select the DVD/CD-ROM Drive in
the Device panel.
In the Summary tab, click the Edit Properties button.
Click the Hardware tab. Click the DVD/CD-ROM object in the Device panel.
3. Make changes as needed.
Select the device status, connection or virtual device node for the virtual
machine to use. Click OK.
Changing Floppy Drive Configuration
To change the floppy drive configuration:
1. From the VirtualCenter client, select the virtual machine to customize.
Click the Inventory option in the navigation bar. Expand the inventory as
needed, and click the appropriate virtual machine.
2. Display the virtual machine control panel, then select the floppy drive in the
Device panel.
In the Summary tab, click the Edit Properties button.
239
VMware VirtualCenter User’s Manual
Click the Hardware tab. Click the floppy drive object in the Device panel.
3. Make changes as needed
Select the device status, connection device or floppy image for the virtual
machine to use. Click OK.
Changing Generic SCSI Device Configuration
To change the Generic SCSI Device drive configuration:
1. From the VirtualCenter client, select the virtual machine to customize.
Click the Inventory option in the navigation bar. Expand the inventory as
needed, and click the appropriate virtual machine.
2. Display the virtual machine control panel, then select the generic SCSI device
panel.
In the Summary tab, click the Edit Properties button.
Click the Hardware tab. Click the generic SCSI device in the Device panel.
240
www.vmware.com
C H A P T E R 1 3 Editing an Existing Virtual Machine Configuration
3. Make changes as needed.
Select the device status, connection, and node for the virtual machine to use.
Click OK.
Changing Hard Disk Configuration
To change the hard disk configuration:
1. From the VirtualCenter client, select the virtual machine to customize.
Click the Inventory option in the navigation bar. Expand the inventory as
needed, and click the appropriate virtual machine.
2. Display the virtual machine control panel, then select the hard disk in the Device
panel.
In the Summary tab, click the Edit Properties button.
Click the Hardware tab. Click the hard disk in the Device panel.
241
VMware VirtualCenter User’s Manual
3. Change the path to the hard disk.
Select the disk file, capacity, and disk information for the virtual machine to use.
Click OK.
4. Prepare to change the disk mode. Click Advanced.
5. Click the appropriate radio button to select a mode. Click OK.
The options are:
• Persistent
• Undoable
• Nonpersistent
• Append
242
www.vmware.com
C H A P T E R 1 3 Editing an Existing Virtual Machine Configuration
6. Close out the advanced virtual disk options panel. Click OK.
7. Close out the Virtual Machine Control Panel dialog box. Click OK.
Changing Memory Configuration
To change the memory configuration:
1. From the VirtualCenter client, select the virtual machine to customize.
Click the Inventory option in the navigation bar. Expand the inventory as
needed, and click the appropriate virtual machine.
2. Display the virtual machine control panel, then select memory in the Device
panel.
In the Summary tab, click the Edit Properties button.
Click the Hardware tab. Click the memory in the Device panel.
3. Make changes as needed.
Adjust the size of the memory allocated to the virtual machine guest operating
system. Click OK.
243
VMware VirtualCenter User’s Manual
Changing (NIC) Ethernet Adapter Configuration
To change the ethernet adapter (NIC) configuration:
1. From the VirtualCenter client, select the virtual machine to customize.
Click the Inventory option in the navigation bar. Expand the inventory as
needed, and click the appropriate virtual machine.
2. Display the virtual machine control panel, then select the NIC in the Device
panel.
In the Summary tab, click the Edit Properties button.
Click the Hardware tab. Click the NIC in the Device panel.
3. Make changes as needed.
Select the device status, adapter type, and network connection of the virtual
machine. Click OK.
244
www.vmware.com
C H A P T E R 1 3 Editing an Existing Virtual Machine Configuration
Changing Parallel Port Configuration
To change the parallel port configuration:
1. From the VirtualCenter client, select the virtual machine to customize.
Click the Inventory option in the navigation bar. Expand the inventory as
needed, and click the appropriate virtual machine.
2. Display the virtual machine control panel, then select the parallel object in the
Device panel.
In the Summary tab, click the Edit Properties button.
Click the Hardware tab. Click the parallel port in the Device panel.
3. Make changes as needed.
Select the device status and connection for the virtual machine to use. Click OK.
245
VMware VirtualCenter User’s Manual
Changing SCSI Controller Configuration
Note: Changing the SCSI controller may result in a virtual machine boot failure.
To change the SCSI controller configuration:
1. From the VirtualCenter client, select the virtual machine to customize.
Click the Inventory option in the navigation bar. Expand the inventory as
needed, and click the appropriate virtual machine.
2. Display the virtual machine control panel, then select the SCSI controller in the
Device panel.
In the Summary tab, click the Edit Properties button.
Click the Hardware tab. Click the SCSI controller in the Device panel.
3. Make changes as needed.
Select the device attributes for the virtual machine to use. Click OK.
246
www.vmware.com
C H A P T E R 1 3 Editing an Existing Virtual Machine Configuration
Changing Serial Port Configuration
To change the serial port configuration:
1. From the VirtualCenter client, select the virtual machine to customize.
Click the Inventory option in the navigation bar. Expand the inventory as
needed, and click the appropriate virtual machine.
2. Display the virtual machine control panel, then select the serial object in the
Device panel.
In the Summary tab, click the Edit Properties button.
Click the Hardware tab. Click the serial port in the Device panel.
3. Make changes as needed.
Adjust the device status, connection and I/O mode for the virtual machine
display. Click OK.
247
VMware VirtualCenter User’s Manual
Changing Video Configuration
To change the video configuration:
1. From the VirtualCenter client, select the virtual machine to customize.
Click the Inventory option in the navigation bar. Expand the inventory as
needed, and click the appropriate virtual machine.
2. Display the virtual machine control panel, then select the video object in the
Device panel.
In the Summary tab, click the Edit Properties button.
Click the Hardware tab. Click the video in the Device panel.
3. Make changes as needed.
Adjust the number of colors allocated to the virtual machine display. Click OK.
248
www.vmware.com
C H A P T E R 1 3 Editing an Existing Virtual Machine Configuration
Changing Virtual CPU Configuration
To change the virtual CPU configuration:
1. From the VirtualCenter client, select the virtual machine to customize.
Click the Inventory option in the navigation bar. Expand the inventory as
needed, and click the appropriate virtual machine.
2. Display the virtual machine control panel, then select the virtual CPUs in the
Device panel.
In the Summary tab, click the Edit Properties button.
Click the Hardware tab. Click the virtual CPUs in the Device panel.
3. Make changes as needed.
Adjust the number of processors allocated to the virtual machine display. Click
OK.
Note: Update the licensing to adjust to the new number of virtual CPUs. Refer
to Adding Licenses on page 74. If you configure a virtual machine to have two
CPUs, you must update the licensing accordingly or an error results. Do not
change the number of CPUs after you install the guest operating system. Not all
guest operating systems support Symetric Multi-Processor (SMP).
Default typical CPU configuration is for a single virtual CPU.
249
VMware VirtualCenter User’s Manual
Adding Hardware to a Virtual Machine
This section describes how the add hardware devices to an existing virtual machine.
Adding individual hardware devices is described in the following sections:
• Adding a DVD/CD-ROM Drive
• Adding a Floppy Drive
• Adding a Generic SCSI Device
• Adding the Hard Disks
• Adding a (NIC) Ethernet Adapter
• Adding a Parallel Port
• Adding a Serial Port
Adding a DVD/CD-ROM Drive
To add a DVD/CD-ROM drive to a virtual machine:
1. From the VirtualCenter client, select the virtual machine to customize.
Click the Inventory option in the navigation bar. Expand the inventory as
needed, and click the appropriate virtual machine.
2. Display the virtual machine control panel.
In the Summary tab, click the Edit Properties button.
3. Click the Hardware tab.
Select any device.
4. Start the Add Hardware wizard.
Click the Add button.
5. Select the DVD/CD-ROM device to add. Click Next.
250
www.vmware.com
C H A P T E R 1 3 Editing an Existing Virtual Machine Configuration
6. Select the connection type. Click Next.
7. Select device.
Select the type of device or select a type from the list.
8. Select a device node.
a. Click Advanced button in the Choose DVD/CD-ROM Device screen.
251
VMware VirtualCenter User’s Manual
b. Select the appropriate device node.
c. Click Back.
9. Complete the process. Click Finish.
Adding a Floppy Drive
To add a floppy drive to a virtual machine:
1. From the VirtualCenter client, select the virtual machine to customize.
Click the Inventory option in the navigation bar. Expand the inventory as
needed, and click the appropriate virtual machine.
2. Display the virtual machine control panel.
In the Summary tab, click the Edit Properties button.
3. Click the Hardware tab.
Select any device.
4. Start the Add Hardware wizard.
Click the Add button.
5. Select the floppy drive device to add. Click Next.
6. Select the type of floppy media.
Select the appropriate radio button. Click Next.
252
www.vmware.com
C H A P T E R 1 3 Editing an Existing Virtual Machine Configuration
7. Select the floppy device and whether to connect it when the virtual machine
powers on.
8. Complete the Add Hardware wizard. Click Finish.
Adding a Generic SCSI Device
To add a generic SCSI device to a virtual machine:
1. From the VirtualCenter client, select the virtual machine to customize.
Click the Inventory option in the navigation bar. Expand the inventory as
needed, and click the appropriate virtual machine.
2. Display the virtual machine control panel.
In the Summary tab, click the Edit Properties button.
3. Click the Hardware tab.
Select any device.
4. Start the Add Hardware wizard.
Click the Add button.
5. Select the generic SCSI device to add. Click Next.
253
VMware VirtualCenter User’s Manual
6. Make changes as needed.
Select a SCSI device. Select whether or not to connect the device when the
virtual machine powers on. Select a node. Click Finish.
Adding the Hard Disks
To add a hard disk to a virtual machine:
1. From the VirtualCenter client, select the virtual machine to customize.
Click the Inventory option in the navigation bar. Expand the inventory as
needed, and click the appropriate virtual machine.
2. Display the virtual machine control panel.
In the Summary tab, click the Edit Properties button.
3. Click the Hardware tab.
Select any device.
4. Start the Add Hardware wizard.
Click the Add button.
5. Select the hard disk device to add. Click Next.
254
www.vmware.com
C H A P T E R 1 3 Editing an Existing Virtual Machine Configuration
6. Select a disk type.
Select the appropriate radio button. Click Next.
7. If you select new virtual disk:
a. Select the new disk capacity. Click Next.
b. Specify the disk file name.
255
VMware VirtualCenter User’s Manual
Note: Ensure that the path and file name are valid. Any errors in defining this
information results in a failure to create the new virtual machine. If possible, use
the default file location. This ensures that consistent naming is used for the
configuration file and disk files, and ensures that the disk file name uses the
datastore as a reference rather than the VMFS path.
c. Specify Advanced options, if needed.
Click the Advanced button in the Specify Disk File screen. Make changes as
needed. Click Back.
d. Complete the process. Click Finish.
8. If you select existing virtual disk:
a. Specify the existing disk file.
b. Complete the process. Click Finish.
256
www.vmware.com
C H A P T E R 1 3 Editing an Existing Virtual Machine Configuration
9. If you select system LUN/disk:
a. Specify a physical disk.
b. Specify Advanced options, if needed.
Click the Advanced button in the Select a Physical Disk screen. Make changes,
as needed. Click Back.
c. Complete the process. Click Finish.
Adding a (NIC) Ethernet Adapter
To add a Ethernet adapter to a virtual machine:
1. From the VirtualCenter client, select the virtual machine to customize.
Click the Inventory option in the navigation bar. Expand the inventory as
needed, and click the appropriate virtual machine.
2. Display the virtual machine control panel.
In the Summary tab, click the Edit Properties button.
3. Click the Hardware tab.
257
VMware VirtualCenter User’s Manual
Select any device.
4. Start the Add Hardware wizard.
Click the Add button.
5. Select the ethernet adapter device to add. Click Next.
6. Make changes as needed. Click Finish.
Select the network interface card (NIC) and whether to connect the device when
the virtual machine powers on.
Adding a Parallel Port
To add a parallel port to a virtual machine:
1. From the VirtualCenter client, select the virtual machine to customize.
Click the Inventory option in the navigation bar. Expand the inventory as
needed, and click the appropriate virtual machine.
2. Display the virtual machine control panel.
In the Summary tab, click the Edit Properties button.
3. Click the Hardware tab.
Select any device.
4. Start the Add Hardware wizard.
Click the Add button.
5. Select the parallel port device to add. Click Next.
258
www.vmware.com
C H A P T E R 1 3 Editing an Existing Virtual Machine Configuration
6. Select the device type. Click Next.
7. If you selected a physical parallel port:
Select the port and whether to connect the device when the virtual machine
powers on. Click Finish.
259
VMware VirtualCenter User’s Manual
8. If you selected an output file:
Specify the output file name. Click Finish.
Adding a Serial Port
To add a serial port to a virtual machine:
1. From the VirtualCenter client, select the virtual machine to customize.
Click the Inventory option in the navigation bar. Expand the inventory as
needed, and click the appropriate virtual machine.
2. Display the virtual machine control panel.
In the Summary tab, click the Edit Properties button.
3. Click the Hardware tab.
Select any device.
4. Start the Add Hardware wizard.
Click the Add button.
5. Select the serial port device to add. Click Next.
260
www.vmware.com
C H A P T E R 1 3 Editing an Existing Virtual Machine Configuration
6. Select a serial port type. Click Next.
7. If you selected a physical serial port:
a. Specify the port.
261
VMware VirtualCenter User’s Manual
b. Specify advanced options, if needed.
Click the Advanced button in the Select a Physical Serial Port screen. Make
changes. Click Back.
c. Complete the process. Click Finish.
8. If you selected an output file:
a. Specify the output filename. Click Next.
262
www.vmware.com
C H A P T E R 1 3 Editing an Existing Virtual Machine Configuration
b. Specify advanced options, if needed.
Click the Advanced button in the Select a Serial Port Output File screen. Make
changes. Click Back.
c. Complete the process. Click Finish.
9. If you selected output to a named pipe:
a. Specify the named pipe. Click Next.
263
VMware VirtualCenter User’s Manual
b. Specify advanced options, if needed.
Click the Advanced button in the Specify Named Pipe screen. Make changes.
Click Back.
c. Complete the process. Click Finish.
264
www.vmware.com
C H A P T E R 1 3 Editing an Existing Virtual Machine Configuration
Changing Virtual Machine Options
The virtual machine settings allow you define actions that occur in various virtual
machine power states. The options are described in the following sections:
• Changing General Settings
• Changing Power State Options
• Changing Advanced Settings
Changing General Settings
To change the general settings of a virtual machine:
1. From the VirtualCenter client, select the virtual machine to customize.
Click the Inventory option in the navigation bar. Expand the inventory as
needed, and click the appropriate virtual machine.
2. Display the virtual machine control panel.
In the Summary tab, click the Edit Properties button.
3. View the general options. Click the Options tab.
4. Make changes as needed.
Click General in the Settings list. Enter the values in the fields as needed. Click
OK.
265
VMware VirtualCenter User’s Manual
Changing Power State Options
To change the setting for actions that occur when the power state of a virtual
machine changes:
1. From the VirtualCenter client, select the virtual machine to customize.
Click the Inventory option in the navigation bar. Expand the inventory as
needed, and click the appropriate virtual machine.
2. Display the virtual machine control panel.
In the Summary tab, click the Edit Properties button.
3. View the power options. Click the Options tab.
4. Make changes as needed.
Click Power in the Settings list. Select when to run VMware Tools scripts. Click
OK.
266
www.vmware.com
C H A P T E R 1 3 Editing an Existing Virtual Machine Configuration
Changing Advanced Settings
To change the advanced virtual machine settings:
1. From the VirtualCenter client, select the virtual machine to customize.
Click the Inventory option in the navigation bar. Expand the inventory as
needed, and click the appropriate virtual machine.
2. Display the virtual machine control panel.
In the Summary tab, click the Edit Properties button.
3. View Advanced options. Click the Options tab.
4. Make changes as needed.
Click the Advanced in the Settings list. Select process priorities and message
collecting options. Click OK.
Manually Changing Virtual Machine
Resources Settings
The Virtual Machine Control Panel provides a means to adjust the host resource
allocation for the selected virtual machine. Refer to Allocating Host Resources on
page 119 to adjust all the virtual machines currently installed on a particular host in a
single view.
267
VMware VirtualCenter User’s Manual
Each of the following sections describes adjusting the allocations of the referenced
resource:
• Changing CPU Settings
• Changing Disk Settings
• Changing Memory Settings
• Changing Network Settings
Changing CPU Settings
To change the resource allocation for the CPU of a virtual machine:
1. From the VirtualCenter client, select the virtual machine to customize.
Click the Inventory option in the navigation bar. Expand the inventory as
needed, and click the appropriate virtual machine.
2. Display the virtual machine control panel.
In the Summary tab, click the Edit Properties button.
3. View the resources options. Click the Resources tab.
4. Make changes as needed.
Click CPU in the Settings list.
Select resource settings, shares and scheduling affinity as needed. Click OK.
268
www.vmware.com
C H A P T E R 1 3 Editing an Existing Virtual Machine Configuration
Changing Memory Settings
To change the resource allocation for the CPU of a virtual machine:
1. From the VirtualCenter client, select the virtual machine to customize.
Click the Inventory option in the navigation bar. Expand the inventory as
needed, and click the appropriate virtual machine.
2. Display the virtual machine control panel.
In the Summary tab, click the Edit Properties button.
3. View the resources options. Click the Resources tab.
4. Make changes as needed.
Click memory in the Settings list.
Select settings and shares as needed. Click OK.
269
VMware VirtualCenter User’s Manual
Changing Disk Settings
To change the resource allocation for the disk of a virtual machine:
1. From the VirtualCenter client, select the virtual machine to customize.
Click the Inventory option in the navigation bar. Expand the inventory as
needed, and click the appropriate virtual machine.
2. Display the virtual machine control panel.
In the Summary tab, click the Edit Properties button.
3. View the resources options. Click the Resources tab.
4. Make changes as needed.
Click disk in the Settings list.
Select settings and shares as needed. Click OK.
270
www.vmware.com
C H A P T E R 1 3 Editing an Existing Virtual Machine Configuration
Changing Network Settings
To change the parameters of network traffic shaping:
1. From the VirtualCenter client, select the virtual machine to customize.
Click the Inventory option in the navigation bar. Expand the inventory as
needed, and click the appropriate virtual machine.
2. Display the virtual machine control panel.
In the Summary tab, click the Edit Properties button.
3. View the resources options. Click the Resources tab.
4. Make changes as needed.
Click network in the Settings list.
Enable or disable network traffic shaping, and adjust the rates. Click OK.
Creating a Scheduled Task to Change a
Virtual Machine Resource Settings
Changing the resource priority of the virtual machine differs from changing the
settings of specific host resources. The setting here specifies the relative allocation for
the virtual machine of all the hosts resources.
271
VMware VirtualCenter User’s Manual
To deploy a virtual machine from a template as a scheduled task:
1. Display the Tasks panel.
Click the Tasks option in the navigation bar. The list of scheduled tasks appears.
2. Start the New Task wizard. Click New in the toolbar.
3. Confirm continuing with the New Task wizard. Click Next.
4. Select the task to create.
Click the pull-down menu and select the Change resource settings of a virtual
machine option. Click Next.
5. Select the virtual machine whose resource settings you want to change.
Select the virtual machine. Click Next.
272
www.vmware.com
C H A P T E R 1 3 Editing an Existing Virtual Machine Configuration
6. Assign CPU and memory resource priority level for the virtual machine.
Click the appropriate radio button. Click Next.
7. Set the time and date when you want the virtual machine to be deployed. Click
Next.
Click on the Later radio button, then the drop-down arrow to select a data from
the displayed calendar. A red circle indicates today’s date and a dark circle
indicates the scheduled date.
8. Confirm creating the task.
Optionally, specify an email address for notification when task is performed. Click
Finish.
VirtualCenter adds the new task to the scheduled task list and completes it at the
designated time. When it is time to perform the task, VirtualCenter first verifies
that the user who created the task still has permission to complete the task. If the
permission levels are not acceptable, a message is generated and the task is not
performed.
273
VMware VirtualCenter User’s Manual
274
www.vmware.com
14
CHAPTER 14
Working with Scheduled
Tasks
275
VMware VirtualCenter User’s Manual
Working with Scheduled Tasks
This chapter describes how to schedule VirtualCenter tasks.
You need a Virtual Machine User role assigned to the farm to perform the activities
described in this chapter.
This chapter contains the following sections:
• Understanding Scheduled Tasks
• Creating a Scheduled Task
• Rescheduling a Task
• Removing a Scheduled Task
Understanding Scheduled Tasks
Configure selected VirtualCenter activities as scheduled task that are performed at a
designated time. The timing options include immediately, later, or on a recurring basis.
Scheduled tasks are performed in addition to manually driven activities.
Create a scheduled task through the New Task wizard, which displays the available
task options. After you select an option, the wizard displays the screens that are
relevant to the type of task you are scheduling. The New Task wizard ends when you
set the timing of the task. You can reschedule tasks.
If the directions of manually driven and scheduled activities conflict, VirtualCenter
performs whichever activity is due first. If a virtual machine is in an incorrect state to
perform any activity, manually or scheduled, VirtualCenter sends a message to the log
and does not perform the task.
When you create a scheduled task, VirtualCenter verifies that you have the correct
permissions to perform the actions on the relevant farms, hosts, and virtual machines.
Once the task is created, the task is performed even if the you no longer have
permission to perform the task.
Events are logged to the event log at start and completion of the tasks. Any errors that
occur during the task are also recorded in the event log. Refer to Working with Alarms
and Events for additional information on the events log.
Note: Do not schedule multiple tasks to be performed at the same time on the same
object. The results are unpredictable.
276
www.vmware.com
C H A P T E R 1 4 Working with Scheduled Tasks
Creating a Scheduled Task
To create a scheduled task:
1. From the VirtualCenter client, display the Tasks panel.
Click the Tasks option in the navigation bar.
The current list of scheduled tasks appears.
2. Start the New Task wizard.
Click New in the toolbar or select File > New > Scheduled Task.
3. Confirm continuing with the New Task wizard. Click Next.
4. Select the task to create.
Click the pull-down menu and select the appropriate option. Click Next.
5. Complete the task specific information.
The New Task wizard displays a series of screens that correspond to the screens
you see when you perform the task starting from the selected object. The
possible tasks that can be scheduled through the New Task wizard are:
• Deploy a virtual machine from a template
• Clone an existing virtual machine
• Change the power status of a virtual machine
• Migrate a virtual machine
• Migrate a virtual machine with VMotion
• Change resource settings of a virtual machine
Refer to the chapter that is appropriate for each option for specific information
on each task. Most of the scheduling processes differ from manually performed
277
VMware VirtualCenter User’s Manual
tasks only in that you must specify the virtual machine, host, or farm to which
the task applies, and specify the time to perform the task.
6. Specify the timing of the task.
Note: Select only one frequency type per task. To set more than one frequency
type, set up additional tasks.
The default frequency and scheduled time is Once and Now. The task starts
when you finish creating the task.
7. To schedule a one-time occurrence:
Set the Frequency to Once. Set the Start Time to Later. Type a clock time in the
Time field. View the calendar, click on the Date arrow. Click the left and right
arrows to view additional months. Click the month and select from the list. Click
the year, and click the up and down arrows. When you click the calendar date,
the calendar accepts the changed date and closes.
278
www.vmware.com
C H A P T E R 1 4 Working with Scheduled Tasks
8. To run the task after startup:
Click After Startup and enter the amount of the delay.
9. To run the task hourly:
Click Hourly. Then enter the start time after the beginning of the hour and the
interval, for example 15 minutes after every eight hours.
279
VMware VirtualCenter User’s Manual
10. To run the task daily:
Click Daily. Then enter the start time and interval. For example, enter 14:30 every
fourth day to run the task at 2:30 pm every four days.
11. To run the task weekly:
Click Weekly. Then enter the start time, day of the week, and interval. For
example, Tuesdays and Thursday, 14:30, every second week. You can select
multiple days of the week.
280
www.vmware.com
C H A P T E R 1 4 Working with Scheduled Tasks
12. To run the task monthly:
Click Monthly. Then enter the start time, day of the month, and interval. For
example, enter second Thursday of the month, 14:30 every third month. The last
day of the month defaults to the 28th, 30th, or 31st as appropriate for the month.
The last week of the month is the last week with a Monday in it.
13. Optionally, enter an e-mail address.
If you enter an e-mail address, VirtualCenter sends a notification message to the
addressee when the task is performed.
14. Complete the wizard. Click Finish.
VirtualCenter adds the task to the list in the Scheduled Tasks tab.
Rescheduling a Task
To reschedule a scheduled task:
1. From the VirtualCenter client, display the Tasks panel.
281
VMware VirtualCenter User’s Manual
Click the Tasks option in the navigation bar.
The list of scheduled tasks appears.
2. Select the appropriate task form the list.
Click Properties in the toolbar or select Edit > Properties.
3. Display the date and time, as appropriate.
Click in the Time field to change the time. Click the date field arrow to display the
calendar. Select the appropriate date and time. Click Finish.
Refer to Creating a Scheduled Task for more information on working with the
calendar.
VirtualCenter closes the calendar and returns to the Scheduled Task display. The
task is updated with the new date and time.
Removing a Scheduled Task
To remove a task that as been scheduled:
1. From the VirtualCenter client, display the Tasks panel.
Click the Tasks option in the navigation bar.
The list of scheduled tasks appears.
2. Select the appropriate task from the list. Select Edit > Remove.
VirtualCenter removes the task the scheduled task list.
3. Verify you want to remove the task. Click OK.
The task is deleted from the list of tasks.
282
www.vmware.com
15
CHAPTER 15
Working with Alarms and
Events
283
VMware VirtualCenter User’s Manual
Working with Alarms and Events
This chapter describes how to create and edit alarms, and how to view events. Events
are messages that report VirtualCenter activity. Alarms are notifications that occur in
response to selected events. Events are predefined by VirtualCenter.
You must have the role of VirtualCenter Administrator privileges to work with alarms.
You need only the role of Read Only User to view events.
This chapter contains the following sections:
• Working with Events
• Working with Alarms
View the events, alarms, and logs from three locations:
• Events panel — Displays all the events generated throughout VirtualCenter.
• Events tab in the inventory panel — Displays the events for the selected
VirtualCenter object. options include: farms, hosts, and virtual machines. Events
are not applied to groups. This is a subset of the list of messages in the Events
panel.
• Alarms tab in the inventory panel — Displays the list of alarms that are
activated upon designated events. Alarms can apply to groups, farms, hosts, and
virtual machines.
Working with Events
An event is any action that is of interest to VirtualCenter. Each event triggers an event
message. All event messages are archived in the VirtualCenter database. View event
messages from two locations:
• The Events option in the navigation bar displays all events that have occurred on
the VirtualCenter management server.
• An Events tab for farms, hosts, and virtual machines appears under the Inventory
option. These Events tab listings show only the events that occurred on or to the
selected farm, host, or virtual machine.
The most recent events appear at the end of a scrollable list. Messages are identified
by type: Information, Error, or Warning. Messages are also color coded. A shortened
event message appears in the description portion of the panel. An more detailed
version of a selected event message appears in the Event Details portion of the panel.
Typically, the Event Detail entry indicates the host or virtual machine on which the
284
www.vmware.com
C H A P T E R 1 5 Working with Alarms and Events
event occurred and describes the action that occurred. The object of the event is a
link to the object’s individual event page.
The actions available with Events are described in the following sections:
• Viewing All VirtualCenter Events
• Viewing Selected VirtualCenter Events
• Sorting Event Messages
• Exporting Events
Viewing All VirtualCenter Events
To view all VirtualCenter events, use the Events option in the navigation bar.
Viewing Selected VirtualCenter Events
Each VirtualCenter object in the inventory panel has an Events tab in the information
panel. Each event that appears is an object-specific subset of all the VirtualCenter
events.
To view the event messages and event detail for an object:
1. From the VirtualCenter client, display the inventory panel and expand the
appropriate farm.
285
VMware VirtualCenter User’s Manual
Click the Inventory option in the navigation bar. Expand the inventory as
needed, and click the appropriate virtual machine.
2. Select the object for which you want to view events.
In the inventory panel, select a virtual machine, host, or farm, as appropriate. If
you select a host, the event messages for all the virtual machines on that host
are included in the Event log.
3. Display the Events log. Click the Events tab.
4. View an event detail. Click on the event.
A full text message with links to related objects appears in the Event Details box.
5. Link to a message object.
Click any of the blue highlighted items in the Events Details box. VirtualCenter
displays the Events tab of the highlighted object.
Sorting Event Messages
Sort all lists by clicking in the column label heading. A triangle in the column head
shows the sort order as ascending or descending.
To sort a list: Click on a column heading to re-sort the list by the entries in that
column. The current selection does not change.
To change ascending or descending order: Click the triangle in the column
heading.
286
www.vmware.com
C H A P T E R 1 5 Working with Alarms and Events
To select items in a list: Click on an individual item. Use Shift-click or Ctrl-click to
select multiple items.
Exporting Events
VirtualCenter provides an option for exporting your events log file.
To export the events file:
1. From the VirtualCenter client, open the VirtualCenter Export Events dialog box.
Select File > Export Events.
2. Specify the range of messages and the type of messages to export.
a. Specify a File name and location for the exported file.
b. Indicate how far back from the current date and time to select the messages
to export by selecting the appropriate Time radio button.
c. Indicate the type of event message to include in the exported file by selecting
the appropriate Type radio button.
d. Click OK.
VirtualCenter makes a text file of the selected data and stores the file at the
specified location. The file contains Type, Time, and Description.
Working with Alarms
Alarms send notification messages when selected events occur to or on hosts or
virtual machines. Alarms indicate the status levels of an object, or collection of objects,
in the hierarchy. Alarms can be defined at all hierarchical levels, including farms,
groups, hosts and virtual machines.
287
VMware VirtualCenter User’s Manual
Alarms are inherited from parent levels, and cannot be changed or overridden at a
child level. Add new alarms to any object, and contribute to the collection of alarms
that are in force at any of its child levels.
When an alarm is created, VirtualCenter verifies the user permissions to perform the
actions on the relevant farms, hosts, and virtual machines. Once the alarm is created,
the alarm is performed even if the creating user no longer has permission to create
the alarm.
Alarms are applied to either hosts or virtual machines. Each alarm has a triggering
event and a notification method.
There are two kinds of alarm triggers:
• Percentage — Monitors host CPU usage, host memory usage, virtual machine
CPU usage, virtual machine memory, and virtual machine heartbeat
The triggering options are: Is Above (percent) and Is Below (percent). Default
monitor for virtual machine heartbeat is set to Is Below. Default monitor for all
other percentage options is set to Is Above.
• State — Monitor host state and virtual machine state
The triggering options are: Is (state) and Is Not (state)
There are several types of alarm notification methods:
• Send a notification email message
SMTP sends an email message. The SMTP must be ready when the email
message is sent. There are two ways to set SMTP: through VirtualCenter, or
through Microsoft Outlook Express. The VirtualCenter setup is not always
needed if the SMTP setting in Outlook Express is correct.
The VirtualCenter management server generates the subject and body text of
the email message. Only the To list (receiver) is required from user input. Specify
the email message address where the message should be sent. Separate the
names of multiple receivers with commas or semi-colons.
• Send a notification trap
The VirtualCenter management server is the default SNMP notification receiver.
An SNMP trap viewer is required to view a sent trap. The VirtualCenter
management server host must be configured to receive SNMP traps.
• Run a script
The user script command and its arguments need to be formatted into one
string.
288
www.vmware.com
C H A P T E R 1 5 Working with Alarms and Events
The user script is running as separate process and does not block the
VirtualCenter management server processes. But the script does run and
consume the resources on the VirtualCenter management server machine, such
as CPU and memory.
• Suspend the virtual machine
• Power off the virtual machine
• Reset the virtual machine
The actions available with alarms are described in the following sections:
• Preparing for email message SMTP Alarm Notification
• Preparing for SNMP Alarm Notification
• Creating Alarms
• Editing Alarms
• Removing Alarms
Preparing for email message SMTP Alarm Notification
If you are going to use email message to send SMTP notification, you need to:
• Define the SMTP and email message addressing information.
• Specify the email message address for those to receive the notification when
you create the alarm.
To define the SMTP and email message addressing information:
1. From the VirtualCenter client, display the VirtualCenter Settings, Advanced tab
dialog box.
Select File > VirtualCenter Settings > Advanced tab.
289
VMware VirtualCenter User’s Manual
2. Enter the SNMP and mail addressing, as appropriate. Click OK.
For email message notification set the SMTP server, SMTP port, and email
message sender.
• mail.sender — The email message address of sender, for example,
[email protected]
• mail.smtp.server — The DNS name or IP address of the SMTP gateway to use
for sending email message.
• mail.smtp.port — The port number for the SMTP gateway.
If the port value is empty, VirtualCenter uses the default port. The default port
is 25.
Scroll through the Advanced tab options. Enter data into the fields. Click OK.
Preparing for SNMP Alarm Notification
To use SNMP traps, you must configure:
• The VirtualCenter management server host.
• The SNMP receiver server to accept the traps from VirtualCenter.
When you create an alarm, only one trap is triggered and sent. The alarm parameters
include:
• Type — The state VirtualCenter is monitoring for the alarm. Options include:
Host CPU usage, Host Memory Usage, Host State, Virtual Machine CPU usage,
Virtual Machine Memory Usage, Virtual Machine State, Virtual Machine
Heartbeat
• Name — The name of the host or virtual machine that triggers the alarm.
• Old Status — The alarm status before the alarm was triggered.
290
www.vmware.com
C H A P T E R 1 5 Working with Alarms and Events
• New Status — The alarm status when the alarm is triggered.
• Object Value — The object value when the alarm is triggered.
To define the SNMP information:
1. From the VirtualCenter client, display the VirtualCenter Settings, Advanced tab
dialog box.
Select File > VirtualCenter Settings > Advanced tab.
2. Enter the SNMP and mail addressing, as appropriate.
Configure up to four receivers of SNMP traps. They must be configured in
numerical order, 1, 2, 3, and 4. Each SNMP trap requires a corresponding host
name, port and community. For example:
• snmp.reciever.1.name — The DNS name, and IP address of the SNMP
receiver.
• snmp.reciever.1.port — The port number of the receiver.
If the port value is empty, VirtualCenter uses the default port. The default port
is 162.
• snmp.reciever.1.community — The community identifier.
Scroll through the Advanced tab options. Enter the data into the fields. Click OK.
Creating Alarms
If you are going to use email message or SNMP notification, refer to Preparing for
email message SMTP Alarm Notification and define the address information before
you create your alarm.
291
VMware VirtualCenter User’s Manual
To create an alarm:
1. From the VirtualCenter client, display the inventory panel and expand the
appropriate object.
Click the Inventory option in the navigation bar. Expand the inventory as
needed, and click the appropriate object.
2. Display the alarm properties.
Select the object on which you want to apply the alarm.
3. Enter the alarm general information.
Specify a name for the alarm, the object to be monitored (host or virtual
machine), and whether to enable this alarm.
To define the alarm, but not have it active, uncheck the Enable box.
Click OK.
292
www.vmware.com
C H A P T E R 1 5 Working with Alarms and Events
4. Specify the triggering parameters for the alarm.
There are two kinds of triggers:
• Percentage — Monitors host CPU usage, host memory usage, virtual
machine CPU usage, virtual machine memory, and virtual machine heartbeat
The triggering options are: Is Above (percent) and Is Below (percent). Default
monitor for virtual machine heartbeat is set to Is Below. Default monitor for all
other percentage options is set to Is Above.
• State — Monitor host state and virtual machine state
The triggering options are: Is (state) and Is Not (state)
a. Click the Triggers tab.
b. Using the pull-down menus, indicate the type and condition of the state.
c. Optionally, define multiple conditions for the alarm triggering event. Click
Add. Enter the parameters for each condition.
d. Click OK.
293
VMware VirtualCenter User’s Manual
5. Specify the action to be taken when the alarm is triggered.
a. Click the Actions tab.
b. Select a transition state at which to notify.
Select at which transition state the alarm should be triggered. For example,
select to trigger the alarm when the CPU usage transitions from a 15% yellow
state to a 5% red state, as defined in the Triggers tab, and cause the alarm to
suspend the virtual machine.
c. Click the appropriate check box.
There are four different level changes: green to yellow, yellow to red, red to
yellow, and yellow to green. Attach an action for each level change.
d. Select a notification type and provide related information.
Click Add to add as many notifications as needed. The notification options are:
• Send an email message.
Provide the email message address for the notification recipient.
SMTP sends an email message. The SMTP must be ready when the email
message is sent. There are two ways to set SMTP: through VirtualCenter, or
through Microsoft Outlook Express. VirtualCenter setup is not always needed
if the SMTP setting in Outlook Express is correct.
VirtualCenter management server generates the email message subject and
body text. Only the “to” list (receiver) is required from user input. Specify the
email message address to which the message should be sent. Separate
multiple receivers with commas or semi-colons.
• Send a notification trap.
There is a default SNMP notification receiver, the VirtualCenter management
server. An SNMP trap viewer is required to view a sent trap. The VirtualCenter
management server host must be configured to receive SNMP traps.
294
www.vmware.com
C H A P T E R 1 5 Working with Alarms and Events
• Run a script.
Provide the path to the script to run.
The user script command and its arguments need to be formatted into one
string.
The user script is running in other process and does not block the
VirtualCenter management server from running. But the script does consume
the resources on the server, such as CPU and memory.
• Suspend the virtual machine.
This applies to a virtual machine alarm.
• Power off the virtual machine.
This applies to a virtual machine alarm.
• Reset the virtual machine.
This applies to a virtual machine alarm.
e. Complete the alarm. Click OK.
VirtualCenter verifies the configuration of the alarm and adds the alarm to the
list of alarms for the selected object.
295
VMware VirtualCenter User’s Manual
Editing Alarms
To edit an existing alarm:
1. From the VirtualCenter client, display the inventory panel and expand the
appropriate object.
Click the Inventory option in the navigation bar. Expand the inventory as
needed,.
2. Identify and select the object where the alarm is defined.
a. Select an object where the alarm is applied.
b. Display the Alarms list. Click the Alarms tab.
c. Click the linked object in the Defined in column.
VirtualCenter displays the Alarms panel for the object where the alarm was
defined.
296
www.vmware.com
C H A P T E R 1 5 Working with Alarms and Events
3. Display the alarm properties.
The entry in the Defined in column for the alarm must be This Object.
Select the alarm to edit. Select Properties from either the main or right-click
menu.
4. Edit the alarm general information, as needed. Click OK.
VirtualCenter verifies the configuration of the alarm and edits the alarm in the list
of alarms for the selected object.
297
VMware VirtualCenter User’s Manual
Removing Alarms
Remove alarms from the object in which they were defined. You cannot remove them
from a child level.
To remove an alarm:
1. From the VirtualCenter client, display the inventory panel and expand the
appropriate object.
Click the Inventory option in the navigation bar. Expand the inventory as
needed,.
2. Identify and select the object where the alarm is defined.
a. Select an object where the alarm is applied.
b. Display the Alarms list. Click the Alarms tab.
c. Click the linked object in the Defined in column.
VirtualCenter displays the Alarms panel for the object where the alarm was
defined.
298
www.vmware.com
C H A P T E R 1 5 Working with Alarms and Events
3. Display the alarm properties.
The entry in the Defined in column for the alarm must be This Object.
Select the alarm to edit. Select Properties from either the main or right-click
menu.
4. Remove an alarm.
Select the alarm and click Remove from the right-click menu.
Click Yes to confirm removing the alarm.
299
VMware VirtualCenter User’s Manual
300
www.vmware.com
16
CHAPTER 16
Working with the
VirtualCenter Data
301
VMware VirtualCenter User’s Manual
Working with the VirtualCenter Data
This chapter describes the scope of the VirtualCenter data presented in the
VirtualCenter client. This chapter describes the display of current data.
This chapter contains the following topics:
• Viewing Navigation Bar Tasks
• Viewing Navigation Bar Templates
• Viewing Navigation Bar Events
• Viewing Navigation Bar Inventory
• Understanding the Summary Tabs
• Viewing the Farms Tab
• Viewing the Hosts Tab
• Viewing the Virtual Machines Tab
• Viewing the Events Tab
• Viewing the Alarms Tab
• Viewing the Permissions Tab
• Viewing the Console Tab
• Viewing the Performance Tab
Access the general display of data and activity through the information panel. The
information panel is the visual center of your VirtualCenter monitoring activities.
Through the information panel, view status, resource usage, and performance
information about your hosts, virtual machines, and farms. View scheduled tasks,
available templates, and a list of events.
This information in one of two sets of panels.
• Navigation bar — Provides shortcuts to generalized areas of related activities.
The options are: Inventory, Tasks, Templates, and Events.
The Tasks, Templates, and Events options display a single information panel. The
Inventory option displays an inventory panel or an information panel. The
Inventory information panel displays a set of tabs. The displayed tabs depend
upon the object you select in the inventory panel.
When you select any other navigation bar, the information panel appears.
• Inventory tabs — A subset of the Inventory option. The Inventory tabs are a set
of panels that display task oriented information pertaining to the selected
302
www.vmware.com
C H A P T E R 1 6 Working with the VirtualCenter Data
VirtualCenter object. Each VirtualCenter object has its own set of tabs. The tab
options are: Summary, Farms, Hosts, Virtual Machines, Performance, Events,
Alarms, Console, and Permissions.
When you select the Inventory option in the navigation bar, an information
panel appears on the right side of the screen. When you select an object, (host,
virtual machine, group, or farm) from the inventory panel, the information panel
displays tabs corresponding to the selected object. This data appears until you
select a different object from the inventory panel.
The following table shows the available panels and their source mapping. Note that
you can use either the navigation bar and the information panel tabs to view events
information.
Panel
Source
Description
Alarms
Inventory panel
Lists the configured alarms for the selected object.
Console
Inventory panel
Displays a remote console to interact directly with the virtual
machine. Through the remote console you can take selected
actions upon the virtual machine.
Events
navigation bar
Lists the recent event messages for all objects managed by
VirtualCenter.
Events
Inventory panel
Lists the recent event messages that report on the status of the
selected farm, host, or virtual machine.
Farms
Inventory panel
Lists the farms assigned to the selected farm group.
Hosts
Inventory panel
Lists the hosts assigned to the selected farm.
Inventory
navigation bar
Provides access for managing all the Server Farms entities.
Performance
Inventory panel
Displays the performance charts for the selected host or virtual
machine resources. The charts for farms and hosts display
combined charts that show the usage of each resource.
Permissions
Inventory panel
Lists the users and groups that have permissions on the selected
object and at what level the permission was assigned.
Summary
Inventory panel
Displays a collection of data for the selected object.
Tasks
navigation bar
Provides access for managing scheduled tasks.
Templates
navigation bar
Provides access for managing templates.
Virtual
Machines
Inventory panel
Lists the virtual machines assigned to the selected farm or host.
Each navigation bar has a primary information panel and associated tab. The
Inventory option has an inventory panel from which you can select objects. Each
303
VMware VirtualCenter User’s Manual
selected object has its own set of associated information panel tabs. The following
table lists the possible tab views for each VirtualCenter object.
Inventory Object
Summary
Farms
Virtual Machines
Hosts
Performance
Events
Alarms
Console
Permissions
Server Farms
Farms
Alarms
Permissions
Farm Group
Farms
Alarms
Permissions
Farm
Summary
Virtual Machines
Performance
Events
Alarms
Host
Summary
Virtual Machines
Performance
Events
Alarms
Virtual Machines
Performance
Virtual Machine Group
Virtual Machine
Hosts
Summary
Performance
Alarms
Events
Alarms
Permissions
Console
Permissions
Viewing Navigation Bar Tasks
The Tasks option in the navigation bar displays the tasks that are scheduled to be
performed, and provides a means for you to create and edit scheduled tasks.
Navigation Bar > Tasks Button
The scheduled activities include:
• Create new task
• Edit task scheduled through the task properties
304
www.vmware.com
C H A P T E R 1 6 Working with the VirtualCenter Data
The type of scheduled tasks that can be created through the New Task wizard include:
• Deploy a virtual machine from a template
• Clone an existing virtual machine
• Change the power status of a virtual machine
• Migrate a virtual machine
• Change resource settings of a virtual machine
For more information on scheduled tasks, refer to Working with Scheduled Tasks on
page 275. The table below lists the possible attributes that appear in a Tasks panel list.
List Attribute
Description
Description
VirtualCenter object where the setting was made
Last Run
Date and time the task was last performed
Next Run
Date and time the task is to be performed next
Progress
Percentage of the task completed
305
VMware VirtualCenter User’s Manual
Viewing Navigation Bar Templates
The Templates option in the navigation bar displays the list of available templates and
provides the means to deploy, create, and clone new templates.
Navigation Bar > Templates Button
The template activities include:
• Create a new template
• Create new virtual machine from a template
• Clone a template
For more information on template, refer to Working with Templates on page 169. The
table below lists the possible attributes that appear in the Template panel list.
List Attribute
306
Description
Description
Explanation of action
Guest OS
Guest operating system in the virtual machine
Name
Name of object
Size
Size of the template, in MB
VMFS-based
Indicates if the template is on a shared datastore
www.vmware.com
C H A P T E R 1 6 Working with the VirtualCenter Data
Viewing Navigation Bar Events
An event is any action that is of interest to VirtualCenter. Each event triggers an event
message. All event messages are archived in the VirtualCenter database. Event
messages appear in two locations:
• Events option in the navigation bar — Displays all events that have occurred
on the VirtualCenter management server.
• Events tab for farms, hosts, and virtual machines under the Inventory
option — List the events that occurred on or to the selected farm, host, or
virtual machine.
Navigation Bar > Events Button
Events activities include:
• Sorting the list of event messages.
• Viewing the event details for a selected message.
• Linking to the Events tab for an object in an Event Detail message.
• Exporting events to a text file. The exported data can be a set of messages
selected by time, date, and type.
307
VMware VirtualCenter User’s Manual
For more information on events, refer to the chapter, Working with Alarms and Events
on page 283. The table below lists the possible attributes that can be displayed in an
Events panel list.
List Attribute
Description
Description
Text explanation of action
Time
Time event occurred
Type
Type of event that occurred
Viewing Navigation Bar Inventory
The Inventory option in the navigation bar displays an inventory panel and an
information panel. Each object in the inventory panel displays a particular set of tabs
in the information panel. The remainder of this chapter describes each of the
Inventory tab panels. The Inventory option display is divided into two panels:
inventory panel and the information panel.
The navigation bar topics are covered in the following sections:
• Understanding the Inventory Panel
• Understanding the Information Panel
Understanding the Inventory Panel
The inventory panel is located on the left side of the screen when you select the
Inventory option in the navigation bar. It has status icons for Server Farms, farm
groups, farms, hosts, virtual machine groups, and virtual machines. The inventory
panel has a popup view panel menu bar for close, dock, and float options.
The root of the inventory panel is a top-level group labeled Server Farms. All farms,
groups, hosts, and virtual machines fall within the Server Farms group. All of these
items are added to the VirtualCenter management server through the VirtualCenter
client.
Depending upon your user permissions, you may be able to see but not expand a
farm or group. You must be assigned the appropriate permissions levels before you
can view and take action upon objects managed by VirtualCenter.
308
www.vmware.com
C H A P T E R 1 6 Working with the VirtualCenter Data
Understanding the Information Panel
The information panel is the visual center of your VirtualCenter monitoring activities.
Through the information panel, view status, resource usage, and performance
information about your hosts, virtual machines, and farms. View scheduled tasks,
available templates, and a list of events.
Select the Inventory option in the navigation bar and the information panel appears
on the right side of the screen. Though using the docking feature it can be on the left
side of the screen. Select any other navigation bar icon and the information panel
appears.
The information panel for the Inventory option of the navigation bar has tabbed
divisions that vary depending upon the object selected in the inventory panel. If the
Inventory option in the navigation bar is selected, a status line is also displayed in the
information panel.
Select an object, (host, virtual machine, group, or farm) from the inventory panel, and
the information panel displays data corresponding to the selected object. This data
appears until you select a different object from the inventory panel.
Understanding the Summary Tabs
The Summary tab is available when you select a farm, host, or virtual machine object
from the inventory panel. The Summary tab information panel is grouped into
sections, depending upon the object type selected.
The Summary tab topics are covered in the following sections:
• Viewing the Farm Summary Tab
• Viewing the Host Summary Tab
• Viewing the Virtual Machine Summary Tab
309
VMware VirtualCenter User’s Manual
Viewing the Farm Summary Tab
The farm Summary tab displays information that applies to the hosts and virtual
machines within the farm.
Inventory > Farm > Summary Tab
The farm Summary tab content is described in the following table.
Section
Field
Description
Identification
Total Hosts
Number of hosts on the farm.
Disconnected Hosts
Number of disconnected hosts on the farm.
Total Virtual
Machines
Number of virtual machines on the farm.
Disconnected Virtual
Machines
Number of disconnected virtual machines on the
farm.
VMs Powered On
Number of virtual machines in a powered on state.
VMs Suspended
Number of virtual machine in a suspended state.
Total VMs Provisioned Number of virtual machines that have been created
by either cloning or deploying a template.
View tables For
310
Total VM Migrations
Number of times virtual machines that have been
migrated between host machines.
CPU, Disk, Memory,
Network
The resource whose data you wish to see.
www.vmware.com
C H A P T E R 1 6 Working with the VirtualCenter Data
Section
Field
Description
Hot List
Most active hosts —
Least active hosts
Where the hosts fit, relative to the critical ends of the
range.
Resource Contention all hosts
Percentage of time any host was in contention.
Resource Volatility
Percentage change in host utilization in the past
seven days.
all hosts
Viewing the Host Summary Tab
The host Summary tab displays information that applies to the host machine and its
resources.
Inventory > Host > Summary Tab
311
VMware VirtualCenter User’s Manual
The host Summary tab content is described in the following table.
Section
Field
Description
Identification
Manufacturer
Manufacturer of the host machine.
Model
Model type of the host machine.
Total Memory
Memory installed in the host machine.
Processor
Manufacturer, type, and speed of CPU.
VMotion Enabled
Whether or not the host machine is licensed for
VMotion.
Number of Virtual
Machines
Number of virtual machines currently located on the
host machine.
Number of Processors
Number of processors installed in the host machine.
Commands
Available Resources
CPU Usage
Memory Usage
312
Number of NICs
Number of NICs installed in the host machine.
Manage Virtual
Machine Resources
The Virtual Machine Resources panel for adjusting the
resource allocation for virtual machines on the host.
Change VMotion
Properties
The virtual machine Properties panel for adjusting the
VMotion status.
Edit Host
Configuration
Opens a Web browser to connect to the VMware
Management Interface. Requires that you log on.
Available Disk Space
Free disk space on all datastores available to the host
machine.
Memory Available to
New VMs
Unreserved memory on the host machine.
Virtual Machine
Percentage of CPU used by running virtual machines.
Other
Percentage of CPU used for other purposes.
System Total
Total percentage of CPU used on the host machine.
Virtual Machine
Percentage of memory used by running virtual
machines.
Other
Percentage of memory used for other purposes.
System Total
Total percentage of memory used on the host
machine.
Networks
List of networks accessible by the host machine.
Datastores
List of datastores accessible by the host machine.
www.vmware.com
C H A P T E R 1 6 Working with the VirtualCenter Data
Viewing the Virtual Machine Summary Tab
The virtual machine Summary tab displays information that applies to a virtual
machine and its resources.
Inventory > Virtual Machine > Summary Tab
The virtual machine Summary tab content is described in the following table.
Section
Field
Description
Identification
Hosted on
Host where virtual machine is currently located.
Status
Condition status of the virtual machine. options: Alert
(red), Warning (yellow), or OK (green).
State
Power state of the virtual machine. options: Powered on,
Powered Off, or Suspended.
Active Tasks
Transition status of any running task.
Commands
Guest OS
Operating system installed in the virtual machine.
VMware Tools
Indicates if VMware Tools are installed and/or current.
IP Address
Primary IP address assigned to this virtual machine.
DNS Name
DNS name assigned to this virtual machine, if any.
Power off/Suspend/
Reset this virtual
machine
Powers off, Suspend, or Reset the virtual machine now. If
powered off option is Power on.
313
VMware VirtualCenter User’s Manual
Section
Field
Description
Edit Properties
Opens the Virtual Machine Control Panel for editing the
configuration.
Launch VM Console
Opens the virtual machine Console. Remains blacked out
if the virtual machine is not powered on.
Migrate to New Host
Opens the Migration Wizard.
Clone this Virtual
Machine
Opens the Clone a Virtual Machine Wizard.
Create Template
Devices
Opens the Create a Template Wizard.
Installed and/or configured devices. Minimum: Memory,
Hard Disk, CPU, NIC.
Viewing the Farms Tab
The Farms tab is available when you select a farm group object from the inventory
panel of the navigation bar. The Farms tab displays information about the farms in the
group.
Inventory > Server Farms > Farms Tab
314
www.vmware.com
C H A P T E R 1 6 Working with the VirtualCenter Data
The Farms tab content is described in the following table.
List Attribute
Description
Name
Name of farm in the farm group or Server Farms.
Status
Condition of the farm.
Number of VMs
Number of virtual machines in the farm group or Server Farms.
Number of Hosts
Number of hosts in the farm group.
Viewing the Hosts Tab
The Hosts tab is available when you select a Farm object from the inventory panel of
the navigation bar. The Hosts tab displays information about the hosts in the farm.
Inventory > Farm > Hosts Tab
The Hosts tab content is described in the following table.
List Attribute
Description
Name
Name of host.
State
State of host, for example, powered on or connected.
Status
Condition of the host.
% CPU
Percentage of the CPU being used.
% Memory
Percentage of the memory being used.
315
VMware VirtualCenter User’s Manual
List Attribute
Description
Memory Size - MB
System memory.
CPU Count
System CPU Count.
NIC Count
Number of NICs.
Uptime
Uptime of system.
Viewing the Virtual Machines Tab
The Virtual Machines tab is available when you select a farm, host, or virtual machine
group object from the inventory panel of the navigation bar. The Virtual Machines
tab displays information about the status of virtual machines within the farm, host, or
virtual machine group selected. The Virtual Machines tab’s panel provides filtering
capabilities to view only selected virtual machines.
Inventory > Farm > Virtual Machines Tab
The Virtual Machines tab content is described in the following table.
List Attribute
316
Description
Name
Name of virtual machine.
State
State of virtual machine, such as, powered on or connected.
Status
Condition of the virtual machine.
% CPU
Percentage of the CPU being used.
www.vmware.com
C H A P T E R 1 6 Working with the VirtualCenter Data
List Attribute
Description
% Memory
Percentage of the memory being used.
Host
Host where virtual machine is currently resident.
Guest OS
Guest operating system in the virtual machine.
Memory Size - MB
System memory.
CPU Count
System CPU Count.
NIC Count
Number of NICs.
Uptime
Uptime of system.
IP Address
IP address of the virtual machine.
Tools Status
VMware tools available.
Path
Location of the virtual machine in the inventory.
DNS Name
DNS name used on the network.
UUID
UUID used on the network to uniquely identify this virtual machine.
Viewing the Events Tab
The Events tab is available when you select a farm, host, or virtual machine object
from the inventory panel of the navigation bar. The Events tab displays a filtered view
of the Events option. It displays only those events that occurred on the selected
object. Select an event displays to its details in the Event Details field. Click the link in
the Event Details field to shift the display to the linked object.
317
VMware VirtualCenter User’s Manual
Inventory > Virtual Machine > Events Tab
The Events tab content is described in the following table.
318
List Attribute
Description
Description
Text explanation of action.
Time
Time event occurred.
Type
Type of event that occurred.
www.vmware.com
C H A P T E R 1 6 Working with the VirtualCenter Data
Viewing the Alarms Tab
The Alarms tab is available when you select a Server Farms, farm group, host, virtual
machine group, or virtual machine object from the inventory panel of the navigation
bar. The Alarms tab displays the alarms that have been created for the selected object.
and the status of the alarm.
Inventory > Host > Alarms Tab
The Alarms tab content is described in the following table.
List Attribute
Description
Name
Name of object.
Status
Condition of the alarm.
Defined in
VirtualCenter object where the setting was made.
Defined for
VirtualCenter to which the setting applies.
Last triggered
Date and time the alarm was most recently triggered.
319
VMware VirtualCenter User’s Manual
Viewing the Permissions Tab
The Permissions tab is available when you select any object from the inventory panel
of the navigation bar. The Permissions tab displays the users and groups with their
associated permission roles assigned to the selected object.
Inventory > Virtual Machines > Permissions Tab
The Permissions tab content is described in the following table.
320
List Attribute
Description
User/Group
Name of user or group assigned the role.
Role
The role assigned to the user or group. options: Read Only User, Virtual
Machine User, Virtual Machine Administrator, and VirtualCenter Administrator.
Defined In
The VirtualCenter object where the permission user+role pair is assigned. If it is
not the current object, a link to the defined in object is displayed.
www.vmware.com
C H A P T E R 1 6 Working with the VirtualCenter Data
Viewing the Console Tab
The Console tab is available when you select a virtual machine object from the
inventory panel of the navigation bar. The Console tab displays a blank screen when
the virtual machine selected is not powered on. When the virtual machine is powered
on, the Console tab displays the running console of the virtual machine. When you
select the Console tab, a popout version of the console is also available by clicking on
the Console toolbar button.
Inventory > Virtual Machine > Console Tab
The Console window provides live access to the virtual machine console from within
the VirtualCenter client, and allows you to interact with the operations of the virtual
machine. A detachable virtual machine Console window can be operated
independently from the VirtualCenter client by selecting the appropriate virtual
machine from the inventory panel and clicking the Console option in the Inventory
toolbar. This separate console operates in addition to, not to the exclusion of, the
embedded console.
The behavior of the VirtualCenter client console is similar to but not an exact duplicate
of the Remote Console provided with the VMware platform products, such as ESX
Server and GSX Server. For example, the Quick-Switch mode, (for switching between
console windows), and the Snapshot and Full Screen options are not included in
VirtualCenter. The VirtualCenter client console does not provide access to selected
functions (such as power or configuration operations) of the virtual machine. These
tasks are handled through the VirtualCenter client.
321
VMware VirtualCenter User’s Manual
Viewing the Performance Tab
The Performance tab is available when you select a farm, host, virtual machine group,
or virtual machine object from the inventory panel of the navigation bar.
The Performance tab displays the selected object’s information in graph form.
Performance views show graphs for four primary attributes: CPU Usage, Memory
Usage, Net I/O Usage, and Disk I/O Usage.
Each attribute has a summary graph and one graph per instance of that attribute. For
example, the CPU Usage attribute has one graph per CPU. Net Usage has one graph
per NIC. Only one set of attribute graphs is viewable at a time.
Performance charts display in two forms:
• Summary charts — For each host or virtual machine in a farm or group.
• Individual charts — For a selected individual resource sharing the panel with
thumbnail resource charts for all charted resources: CPU, Memory, NIC, and Disk.
The Performance tab topics are covered in the following sections:
• Viewing Summary Performance Charts
• Viewing Individual Charts
• Configuring Performance Measurement Intervals
Viewing Summary Performance Charts
The Performance tab of a farm for a virtual machine group object displays a summary
chart for each host in the farm or each virtual machine in a virtual machine group.
The summary chart list of the total CPU, memory, disk, and network utilization over a
selected time range, along with the average utilization over that same time range.
Clicking on the charts links to the Performance tab of the selected host or virtual
machine and displays the selected resource as the main chart.
322
www.vmware.com
C H A P T E R 1 6 Working with the VirtualCenter Data
Inventory > Farm > Performance Tab
The Performance tab content is described in the following table.
List Attribute
Description
Name
Host or virtual machine name.
CPU%
Reports the percentage of CPU being used.
Memory M
Reports the percentage of usage in MBytes.
Disks KBps
Reports the number of bits per second of read and write activity to and from
the disk in KBytes per second.
Network bps
Reports the number of bits per second of input and output to each and all
network interface (NIC) cards.
Range
Selectable range of time to display in the charts. options include: day, week,
month, year.
Viewing Individual Charts
The Performance tab for hosts and virtual machines displays four thumbnail charts
and one expanded chart of the monitored resource for each selected host or virtual
machine.
The thumbnail charts at the top of the panel are the same as the summary charts.
Clicking a the summary chart displays an expanded version of that chart in the body
of the panel.
323
VMware VirtualCenter User’s Manual
Inventory > Host > Performance > CPU Chart
Performance Panel Legend
A legend at the bottom of the panel displays a key for:
• Chart Entries — Maps the line styles to the item they are representing
• Event Indicators — Triangles on the expanded chart indicate when significant
events occurred for the host or virtual machine. Review the Events panel to
locate the nature and condition of the event.
Performance Panel Range
Adjust the time increment by selecting from the Range pull-down menu. View or hide
the legend for the charts or not by toggling the Hide legend button.
Customize Chart Dialog
The Customize Performance Chart provides options that affect the display of the
chart. The chart options differ between hosts and virtual machines.
• The host customized chart options are:
All resources:
• Total utilization [line chart]
• Total utilization by virtual machine [stacked chart]
324
www.vmware.com
C H A P T E R 1 6 Working with the VirtualCenter Data
Disk and network only:
• Total utilization by device [stacked chart]
• Utilization for a single device [line chart]
• Utilization for device by virtual machine [stacked chart]
• The virtual machine chart options are:
All devices:
• Total utilization [line chart]
Disk and network only:
• Total utilization by device [stacked chart]
• Utilization for a single device [line chart]
Performance Panel Resource Charts
The performance panel displays the usage of the following resources:
• CPU — Chart reports the percentage of CPU being used. Calculated as a
percentage of shares of the entire CPU availability assigned to the virtual
machine.
325
VMware VirtualCenter User’s Manual
The CPU chart displays the percentage of combined CPU usage. If there is more
than one CPU the chart distributes the data based on the combined usage at
100%. The legend lists the values as a portion of the 100% total.
Note: If multiple virtual machines are sharing the same CPU or memory, the
usage line might step down or up as additional virtual machines are powered on
or off. If there is no contention for the CPU or memory, usage is reported as a flat
line.
The virtual machine CPU and memory usage chart has several lines on it. One
each designates the maximum and minimum percentage of the CPU or memory
allotted. A third line shows the percent usage of the CPU or memory.
The CPU chart displays the following information
• Usage: Percentage of CPU time used by the virtual machine (or by all virtual
machines on the host)
• Guarantee: Percentage of CPU time guaranteed to be available to the virtual
machine (not available on the host chart); value is determined by the min/
max/shares settings of this VM and all VMs currently running on the host
• Memory — Chart reports the memory usage in MBytes. Calculated as a
percentage of shares of the entire physical plus swap memory on the host
assigned to the virtual machine. Virtual machine memory maximum and
minimum usage is configurable.
The display is one chart per host. This does not include NUMA systems.
The memory chart displays the following information:
• Active: Memory recently used by the virtual machine (or by all virtual
machines on the host)
• Granted: Memory allocated to the virtual machine (or to all virtual machines
on the host)
• Disk — Chart reports the amount of read and write activity to and from the disk
in bytes per second.
The data is defined by shares of the disk resource per volume. There is no line to
show the percentage of the disk space read/write usage assigned to the virtual
machine.
Data is collected on each disk connected to the ESX Server host. This tracks the
VMFS traffic and access to the network share. For any disk, the reported data is
relative to the host selected in the inventory panel. Traffic with a disk that is due
to additional hosts attached to the disk is not included in the chart.
326
www.vmware.com
C H A P T E R 1 6 Working with the VirtualCenter Data
Host data appears in two aggregate charts, one for read activity and one for
write activity. With VMFS systems, separate charts display volume inbound read
traffic and volume outbound write traffic. Note logical volumes span partitions.
Note: Disk charts do not report percentage of occupancy, they do report read/
write activity.
The disk chart displays the following information:
• Total: Total I/O
• Reads: Disk reads, network traffic received
• Writes: Disk writes, network traffic transmitted
• Network — Chart reports the number of bits per second of input and output to
each and all network interface (NIC) cards.
Host aggregate chart reports all the network input and output per host. Network
input and network output usage are given separate charts reporting the usage
of the physical NIC based on the configuration of the virtual machines on that
host.
Virtual machine aggregate chart shows all the input and output activity per
virtual machine. The detail charts show the activity for each NIC for the virtual
machine.
The network chart displays the following information:
• Total: Total I/O
• Reads: Disk reads, network traffic received
• Writes: Disk writes, network traffic transmitted
327
VMware VirtualCenter User’s Manual
Performance Panel Display Delay
When VirtualCenter management server starts, it can take awhile to load the historical
statics from the database into memory. While the data is loading: the performance
charts are not viewable; the CPU and memory utilization columns in the Hosts and
Virtual Machines tabs are empty; and alarms do not fire. All other VirtualCenter
functions operate normally.
Inventory > Host > Performance > CPU Chart — Data Loading View
328
www.vmware.com
C H A P T E R 1 6 Working with the VirtualCenter Data
Configuring Performance Measurement Intervals
To configure performance intervals:
1. Start VirtualCenter.
2. Open the VirtualCenter Settings dialog and select the Performance tab.
3. Modify intervals and sampling values as needed. Click OK.
The charts in the Performance tabs reflects the adjusted values.
329
VMware VirtualCenter User’s Manual
330
www.vmware.com
17
CHAPTER 17
Setting Access and
Permissions
331
VMware VirtualCenter User’s Manual
Setting Access and Permissions
This chapter describes how to manage access to VirtualCenter managed objects for
users and groups.
You must have VirtualCenter Administrator permission to change the role permissions
assigned to any object in VirtualCenter.
This chapter contains the following sections:
• Understanding Users and Groups
• Planning Access Permission
• Assigning Access Permissions
• Changing Access Permissions
• Removing Access Permissions
Understanding Users and Groups
VirtualCenter has full access rights and privileges on all managed virtual objects, such
as, farms, farms groups, virtual machines, and virtual machine groups. VirtualCenter
access is not granted to users for hosts, templates, events, alarms, or scheduled tasks.
When a host is managed with VirtualCenter, VirtualCenter is granted privileges on the
host. VirtualCenter can move virtual machines to and from hosts, and perform
configuration changes needed to support virtual machines. Some configuration
conditions are not handled within VirtualCenter, but can be controlled through the
standard ESX Server interfaces: the VMware Management Interface, remote console,
or service console.
VirtualCenter registers any selected Windows domain or Active Directory user or
group as part of the assigning privileges process. By default all users who are
members of the Administrators group on the VirtualCenter management server
machine are granted VirtualCenter Administrator access. Users who are members of
the Administrator group can log on as individuals and have the appropriate access.
VirtualCenter grants access to each VirtualCenter object. To do this, VirtualCenter
assigns a role and a user (or group) to each object.
Individual permissions are assigned through VirtualCenter by pairing a user and a role
and assigning this pair to a VirtualCenter object.
• Users and Groups — Created through the Windows domain or Active Directory
database. VirtualCenter registers users and groups as part of the assigning
privileges process.
332
www.vmware.com
C H A P T E R 1 7 Setting Access and Permissions
• Roles — A VirtualCenter pre-defined set of access rights and privileges. There
are four roles. Each subsequent role includes the privileges of the previous role.
The types of roles that can be paired with a user and assigned to an object are:
• Read Only User — Users assigned this role for an object are allowed to view the
state of virtual machines, hosts, farms, and groups.
With this role, view virtual machines, hosts, farms farm groups, and virtual
machine group attributes, that is, all the tab panels in VirtualCenter — except
the Console tab. You cannot view the remote console for a host. All actions
through the menus and toolbars are disallowed. A Read Only User role can view
the templates and scheduled tasks but not perform any actions with them.
• Virtual Machine User — Users assigned this role for an object are allowed to
perform power operations on virtual machines.
With this role, connect with a remote console and view the states of virtual
machines. You cannot modify the configuration of hosts or virtual machines.
• Virtual Machine Administrator — Users assigned this role for an object are
allowed to add, remove, or modify objects. With this role you:
• Connect/disconnect host devices, migrate and migrate with VMotion, clone,
remove and configure virtual machines
• Create, import, and deploy templates
• Add and remove hosts from farms
• Create, remove, or modify farms, farm groups, and virtual machine groups and
their content.
• VirtualCenter Administrator — Users in this role are allowed to change
privileges for an object.
With this role, add, remove, and set access rights and privileges for all the
VirtualCenter users and all the virtual objects in the VirtualCenter environment.
333
VMware VirtualCenter User’s Manual
Read Only
User
Virtual
Machine
User
Virtual
VirtualCenter Access Permission
Machine
Administrator
Administrator
X
X
X
X
View farms, hosts, and virtual
machines
X
X
X
Perform power operations on virtual
machines
X
X
X
Access remote console
X
X
Add and remove hosts
X
X
Add, remove and move virtual
machines, including deploy
templates and clone existing virtual
machines
X
X
Add and remove farms, and groups
X
X
Add and remove templates, tasks
X
X
Change VirtualCenter Settings
including performance intervals,
template upload directory, and SNMP
and SMTP settings
X
Add and change licenses
X
Add and remove user permissions
The following table lists the VirtualCenter objects and the role required to perform
functions on each object. Permissions do not apply to hosts. Activities through
VirtualCenter apply to the virtual machines on a host. Permissions are applied to the
virtual machines or the farms and groups containing the virtual machines.
334
www.vmware.com
C H A P T E R 1 7 Setting Access and Permissions
Object Type
Action to be Taken
Minimum Role Required
Permissions
Read
Read Only User
Change permissions
VirtualCenter Administrator
Farm
Read
Read Only User
Modify
Virtual Machine Administrator
Groups
Read
Read Only User
Modify
Virtual Machine Administrator
Virtual Machines Read
Read Only Userr
Power Operations
Virtual Machine User
Connect Remote Console
Virtual Machine User
Configure
Virtual Machine Administrator
Connect/Disconnect Devices
Virtual Machine Administrator
Migration with VMotion
Virtual Machine Administrator on both
source and target machine
Migration
Virtual Machine Administrator on both
on the farm that contains the source and
target machine
Deploying Templates with or without
customization
Virtual Machine Administrator on target
machine
Cloning with or without customization Virtual Machine Administrator
Templates
Server Farms
Scheduling Tasks - Power Operations
Virtual Machine User
Scheduling Tasks - Deploying or
Migration
Virtual Machine Administrator
Viewing Events
Virtual Machine User
Read
Read Only User
Creating Templates
Virtual Machine Administrator on the
Server Farms
Deploying Templates with or without
customization
Virtual Machine Administrator on the
farm that contains the target machine
Changes through VirtualCenter
Settings, which includes performance
intervals, SNMP, SMTP, and template
upload directory
Virtual Machine Administrator on the
Server Farms
Adding or removing licenses
VirtualCenter Administrator on Server
Farms
Alarms
Virtual Machine Administrator on the
Server Farms
335
VMware VirtualCenter User’s Manual
Using the Hierarchy to Apply Access Rights
All VirtualCenter objects are contained within a hierarchy in VirtualCenter. Permissions
(role+user pairs) are inherited through the VirtualCenter object hierarchy. When a role
and user pair are assigned to an object, all objects that lay hierarchically under the
object inherit the same role+user assignments. For example, if a role+user pair is
assigned to a farm group, all members of the role+user pair have the access rights and
privileges assigned to all the objects contained in the farm group. Permissions can
also be explicitly assigned to any object in the VirtualCenter hierarchy.
If a user is not assigned to an object with a specific role, the user cannot see or take
action upon the object. Changes to a users permissions are implemented when the
user logs in. If the user is currently logged in, the old permissions continue until the
user exits and re-logs in. Objects created after a user’s login inherit the parent object’s
permissions.
The figure below illustrates a distribution of user permission. Refer to Abbreviations on
page 14 for a description of abbreviations.
Role + User Applied Across Server Farms
When an object is moved within the VirtualCenter hierarchy, the object assumes the
permission settings of its new parent object. Assigned permission pairs (role+user) are
inherited from parents objects. In the example, if VM2 is moved to Farm 2, User1 loses
336
www.vmware.com
C H A P T E R 1 7 Setting Access and Permissions
the VirtualCenter Administrator privileges, but keeps the Virtual Machine User
privileges.
The figure below illustrates changes in permission when a virtual machine moves to a
farm where the looses permissions that had been inherited. Refer to Abbreviations on
page 14 for a description of abbreviations.
Moving Virtual Machine Changing Role + User Status
If the object has explicit permissions that are less than the permissions at the new
location the higher level permission granted at the farm level applies. The lower level
explicit permission is removed. In the example, if VM3 moves to Farm 1, a flag
indicates an explicit permission exists. If the object is returned to its original location
or a location with matching role levels, VirtualCenter does not re-instate the explicit
assignment.
337
VMware VirtualCenter User’s Manual
The figure below illustrates the change in permissions when a virtual machine is
moved to a farm where the user has a higher level inherited permission. Refer to
Abbreviations on page 14 for a description of abbreviations.
Moving Virtual Machine Upgrades Role + User
338
www.vmware.com
C H A P T E R 1 7 Setting Access and Permissions
Using hierarchical inheritance, increase access permissions for users (or groups) as you
descend into the VirtualCenter object hierarchy. However, once you pair higher role
levels with a user (or group) at an object hierarchy level, you cannot reduce
permissions at lower levels of the hierarchy. For example, if a user (or group) is paired
with Virtual Machine Administrator role at a virtual machine group level, you cannot
reduce the same user+role to Read Only User for any of the virtual machines
contained within that virtual machine group.
The figure below illustrates when a permission level does not change through an
explicit role+user assignment. Refer to Abbreviations on page 14 for a description of
abbreviations.
Reducing Role + User Not Allowed Through Conflicting Hierarchy
339
VMware VirtualCenter User’s Manual
Planning Access Permission
For each object in the VirtualCenter hierarchy, determine what permissions you want
to grant for each VirtualCenter user and group. Typically, lower level permission roles
are assigned at higher level locations in the hierarchy. As you move down into the
branches of the hierarchy, users and groups permissions naturally start to differentiate:
some users and groups require higher permission roles in some branches, while other
users and groups require higher permission roles in other branches.
Note: Several users may access the VirtualCenter management server from different
VirtualCenter clients at the same time. VirtualCenter does not explicitly restrict users
with the same log on and password from accessing and taking action in VirtualCenter.
If users give conflicting directions the results, however, become unpredictable.
Remove users from a group in the Windows Domain Controller or Active Directory,
and they do not lose access to the VirtualCenter objects until they log out. Individual
permissions, or those granted as part of inclusion in another group, are not affected.
Remove users from the Windows Domain Controller or Active Directory, and they lose
permissions to all objects in the VirtualCenter system on their next attempts at login.
Users that are currently logged in and are removed from the Windows databases
retain their VirtualCenter permissions as long as they remain logged in. Once logged
out, they can no longer access the VirtualCenter system.
Change a user's name in the Windows Domain Controller or Active Directory, and the
existing user name becomes invalid in the VirtualCenter system.
Assigning Access Permissions
To assign a user or group role level permission:
1. Log on as a user with VirtualCenter Administrator role.
2. From the VirtualCenter client, display the inventory panel and expand the
appropriate object.
Click the Inventory option in the navigation bar. Expand the inventory as
needed, and click the appropriate object.
340
www.vmware.com
C H A P T E R 1 7 Setting Access and Permissions
3. With the appropriate object selected, view the Permissions panel, click
Permissions tab.
4. Start the Add Permissions sequence.
a. Right-click the Inventory option.
b. Select the object to add the user+role to.
c. Select Add Permission from the object’s right-click menu or the Edit menu.
5. Select the users or groups and the new permission for the object.
Choose a method to add users or groups:
• Enter a user or group name in the field.
341
VMware VirtualCenter User’s Manual
• Select the user or groups from the scrollable list.
Click Add.
6. Set the role for the selected user on the selected object.
• Select the user or group name from the permissions box.
• Click the radio button for the appropriate permission.
• Add as many users and groups with assorted permission roles as needed.
• Click OK.
VirtualCenter adds the permission to the list of permissions for the object.
The list of permissions references all users and groups that have roles assigned to
the object, and where in the VirtualCenter hierarchy the role is assigned.
Changing Access Permissions
To change the permission role for a user or group:
1. Log on as a user with the VirtualCenter Administrator role.
2. From the VirtualCenter client, display the inventory panel and expand the
appropriate object.
Click the Inventory option in the navigation bar. Expand the inventory as
needed, and click the appropriate object.
342
www.vmware.com
C H A P T E R 1 7 Setting Access and Permissions
3. With the appropriate object selected, view the Permissions panel, click
Permissions tab.
4. View the Change Access Rule dialog box.
Select the user permission to change. Select Properties from either the Edit or
right-click menu.
5. Select the appropriate role for the user or group.
Click the appropriate radio button in the Change Access Rule screen. Click OK.
Removing Access Permissions
To remove a permission role for a user or group:
1. Log on as a user with the VirtualCenter Administrator role.
2. From the VirtualCenter client, display the inventory panel and expand the
appropriate object.
343
VMware VirtualCenter User’s Manual
Click the Inventory option in the navigation bar. Expand the inventory as
needed, and click the appropriate object.
3. With the appropriate object selected, view the Permissions panel, click
Permissions tab.
4. Identify and select the object where the permission is defined.
a. Select an object to which the permission is defined.
b. Display the Permissions list. Click the Permissions tab.
c. Click the linked object in the Defined in column.
VirtualCenter displays the Permission panel for the object to which the
permission was defined.
5. Remove the permission setting.
Select the user permission to remove. Select Remove from either the Edit or
right-click menu. VirtualCenter removes the permission setting.
Note: There is no additional warning that the permission is going to be
removed.
344
www.vmware.com
18
CHAPTER 18
Glossary
345
VMware VirtualCenter User’s Manual
Glossary
Alarms — An entity that monitors one or more properties of a virtual machine, such
as CPU load. Alarms user green, red, and yellow color coding issue notifications as
directed by the configurable alarm definition.
Clone — The process of making a copy of a virtual machine. This process includes
the option to customize the guest operating system of the new virtual machine.
When a clone is created VirtualCenter provides an option to customize the guest
operating system of that virtual machine. Clones can be stored on any host within the
same farm as the original virtual machine.
Configuration — See Virtual machine configuration file.
Console See VMware Virtual Machine Console.
Custom networking — Any type of network connection between virtual machines
and the host that does not use the default bridged, host-only or network address
translation (NAT) networking configurations. For instance, different virtual machines
can be connected to the host by separate networks or connected to each other and
not to the host. Any network topology is possible.
Customization — The process of customizing a guest operating system in a virtual
machine as it is being either deployed from a template or cloned from another
existing virtual machine. Customization options include changing the new virtual
machine identification and network information.
Datastore — The storage locations for the virtual machine files.
Drag and drop— A feature of VMware VirtualCenter that allows you to move virtual
machines easily between groups.
Events — A message record of VirtualCenter activities. Through the Navigation
option all the events are displayed. Through an object specific panel, only events
relative to that object are displayed.
Farm — A required structure under which hosts and their associated virtual
machines are added to the VirtualCenter management server. VirtualCenter
management server supports multiple farms. A host can be managed only under one
farm.
Farm groups — An optional grouping structure, it is contained within the Server
Farms structure. The VirtualCenter management server supports multiple farm
groups. Farm groups can contain other farm groups and farms.
346
www.vmware.com
C H A P T E R 1 8 Glossary
Guest operating system — An operating system that runs inside a virtual
machine.
Headless — A program or application that runs in the background without any
interface connected to it. A running virtual machine that has no consoles connected
to it is running headless.
Host — The physical computer on which the VirtualCenter virtual machines are
installed.
Host-only networking — A type of network connection between a virtual
machine and the host. Under host-only networking, a virtual machine is connected to
the host on a private network, which normally is not visible outside the host. Multiple
virtual machines configured with host-only networking on the same host are on the
same network.
Inventory — Provides a view of all the monitored objects in VirtualCenter.
Monitored objects include: Server Farms, farms, farm groups, hosts, virtual machines,
and virtual machine groups.
Migration — Moving a powered off virtual machine between hosts.
Migration with VMotion — Moving a virtual machine that is powered on and has
met selected requirements, including the activation of VMotion on both the source
and target host. When a migration with VMotion is performed, the operations of the
virtual machine can continue without interruption.
New Virtual Machine wizard — A point-and-click interface for convenient, easy
creation of a virtual machine configuration. It prompts you for information,
suggesting default values in most cases. It creates files that define the virtual machine,
including a virtual machine configuration file and (optionally) a virtual disk or raw disk
file.
Nonpersistent mode — If you configure a virtual disk as an independent disk in
nonpersistent mode, all disk writes issued by software running inside a virtual
machine with a disk in nonpersistent mode appear to be written to disk but are in fact
discarded after the virtual machine is powered off. As a result, a virtual disk or raw disk
in independent-nonpersistent mode is not modified by VirtualCenter.
Persistent mode — If you configure a virtual disk as an independent disk in
persistent mode, all disk writes issued by software running inside a virtual machine are
immediately and permanently written to a virtual disk in persistent mode. As a result, a
virtual disk or raw disk in independent-persistent mode behaves like a conventional
disk drive on a physical computer.
347
VMware VirtualCenter User’s Manual
Preallocated disk — A type of virtual disk where all disk space for the virtual
machine is allocated at the time the disk is created. This is the default type of virtual
disk created by VirtualCenter.
Raw disk — A hard disk in a virtual machine that is mapped to a physical disk drive
or partition on the host machine. A virtual machine’s disk can be stored as a file on the
host file system (see Virtual disk) or on a local hard disk. When a virtual machine is
configured to use a raw disk, VirtualCenter directly accesses the local disk or partition
as a raw device (not as a file on a file system). It is possible to boot a previously
installed operating system on an existing partition within a virtual machine
environment. The only limitation is that the existing partition must reside on a local
IDE or SCSI drive.
Read Only User — A role where the user is allowed to view the inventory but not
allowed to perform any tasks.
Redo log — The file that stores the changes made to a disk in undoable or
nonpersistent mode. You can permanently apply the changes saved in the redo log to
a disk in undoable mode so they become part of the main disk files. For a disk in
nonpersistent mode, however, the redo-log file is deleted when you power off or reset
the virtual machine without writing any changes to the disk.
Resume — Return a virtual machine to operation from its suspended state. When
you resume a suspended virtual machine, all applications are in the same state they
were when the virtual machine was suspended.
Role — A VirtualCenter pre-defined set of access rights and privileges. There are four
roles, each subsequent role includes the privileges of the lesser role.
Scheduled Tasks — A VirtualCenter activity that is configured to occur at
designated times. The Tasks panel displays a list of and a means to schedule selected
activities.
Server Farms — The top level structure for the VirtualCenter management server.
There is only one Server Farms per VirtualCenter management server.
Supported partition A virtual disk partition that VMware Tools can prepare for
shrinking, such as one of the drives that comprise the virtual hard disk. You can
choose to not prepare certain partitions for shrinking.
Suspend — Save the current state of a running virtual machine. To return a
suspended virtual machine to operation, use the resume feature.
Template — A golden image of a virtual machine. This typically includes a specified
operating system and configuration which provides virtual counterparts to hardware
components. Optionally, a template can include an installed guest operating system
348
www.vmware.com
C H A P T E R 1 8 Glossary
and a set of applications. Templates are used by VirtualCenter to create new virtual
machines.
Template upload directory — A template upload directory is located on the
VirtualCenter management server machine. A copy of the original virtual machine
virtual disks are placed in the directory you specify as the template upload directory.
This is typically used for creating templates from non-ESX Server virtual machines that
are stored locally to the VirtualCenter management server.
Templates — Provides a list of and a means to import virtual machines and store
them as templates for deploying at a later time to create new virtual machines.
Unsupported partition A virtual disk partition that VMware Tools cannot prepare
for shrinking. Unsupported partitions include read-only drive partitions, partitions on
remote devices and partitions on removable devices such as floppy drives or CD-ROM
drives.
Virtual disk — A virtual disk is a file or set of files that appear as a physical disk drive
to a guest operating system. These files can be on the host machine or on a remote
file system. When you configure a virtual machine with a virtual disk, you can install a
new operating system into the disk file.
Virtual machine — A virtualized x86 PC environment in which a guest operating
system and associated application software can run. Multiple virtual machines can
operate on the same host machine concurrently.
Virtual Machine Administrator — A role where the user is allowed to perform all
the virtual machine management functions.
Virtual machine configuration — The specification of what virtual devices (disks,
memory size, etc.) are present in a virtual machine and how they are mapped to host
files and devices.
Virtual machine configuration file — A file containing a virtual machine
configuration. It is created by the New Virtual Machine Wizard. It is used by
VirtualCenter to identify and run a specific virtual machine.
Virtual Machine Control Panel — A point-and-click control panel used to view
and modify the resource settings of all the virtual machines on a host.
Virtual Machine Groups — An optional grouping structure, it is subset to a farm.
VirtualCenter management server supports multiple virtual machine groups. Virtual
machine groups contain virtual machines and other virtual machine groups.
Virtual Machine User — A role where the user is allowed to perform power
operations on virtual machines.
349
VMware VirtualCenter User’s Manual
VirtualCenter Administrator — A role where the user is allowed to set the
user+role permissions and controls the VirtualCenter licensing.
VirtualCenter client — A user interface that runs locally on a Windows machine.
The VirtualCenter client runs on a networked machine. This can be on the same
machine as the VirtualCenter server or another networked machine. The VirtualCenter
client requires a monitor for access to the graphical user interface.
VirtualCenter database — A persistent storage area, for maintaining status of
each virtual machine and user managed in the VirtualCenter environment. This is
located on the same machine as the VirtualCenter management server.
VirtualCenter agent — Installed on each virtual machine host, it coordinates the
actions received from the VirtualCenter management server.
VirtualCenter management server — A service that acts as a central
administrator for VMware servers connected on a network, to direct actions upon the
virtual machines and the virtual machine hosts. VirtualCenter management server is
the central working core of VirtualCenter.
VMotion — Enables moving running virtual machines from one ESX Server to
another without service interruption. It requires licensing on both the source and
target host. Feature that is activated by the VirtualCenter agent. The VirtualCenter
management server centrally coordinates all VMotion activities.
VMware Tools — A suite of utilities and drivers that enhances the performance and
functionality of your guest operating system. Key features of VMware Tools include
some or all of the following, depending on your guest operating system: an SVGA
driver, a mouse driver, the VMware guest operating system service, the VMware Tools
control panel and support for such features as shared folders, drag and drop in
Windows guests, shrinking virtual disks, time synchronization with the host, VMware
Tools scripts and connecting and disconnecting devices while the virtual machine is
running.
VMware Virtual Machine Console — Interface to a virtual machine that provides
access to one or more virtual machines on the local host or a remote host running
VirtualCenter. You can view the virtual machine’s display to run programs within it or
modify guest operating system settings. In addition, you can change the virtual
machine’s configuration, install the guest operating system or run the virtual machine
in full screen mode.
350
www.vmware.com
Index
A
access 342
assigning 340
inheritance 336
removing 343
users and groups 332
Access database 53
acting on objects 79
adding
CD ROM 250
DVD 250
ethernet adapter 257
existing virtual machines 124
farm groups 106
farms 104
floppy drive 252
hard disks 254
hardware 250
hosts 112
NIC 257
parallel port 258
SCSI drive 253
serial port 260
virtual machine groups 136
advanced settings 97, 267
alarms 18, 31, 284, 287
creating 291
editing 296
email notification 287
information panel 319
inventory tab 284
preparing SMTP notification 289
preparing SNMP notification 290
properties 102
removing 298
tab 303, 319
answering pending questions 133
assigning 340
permissions 340
attributes 91
availability report 47
C
CD ROM
adding 250
configuring 239
changing 342
access permissions 342
CPU resource settings 268
disk resource settings 270
memory resource settings 269
network resource settings 271
charts 93
CPU resource 325
disk resource 326
entries 323
event indicators 323
memory resource 326
network resource 327
cloning
customization 28
existing virtual machines 204
guest customization 221
manually 205
templates 188
cloning virtual machines 27, 208
color coding 91
columns in lists 93
components 14
installation 54
installing separately 63
configuring
CD ROM 239
CPU 249
DVD 239
ethernet adapter 244
floppy drive 239
hard disk 241
measurement intervals 329
memory 243
NIC 244
parallel port 245
SCSI controller 246
SCSI device 240
serial port 247
video 248
virtual machines 236, 349
connected host state 111
connecting hosts 115
351
Console
information panel 321
menu 85
tab 303, 321
control panel
virtual machine 349
virtual machines 99
CPU
configuring 249
licenses 74
licensing requirements 36
resource charts 325
drag and drop 346
creating
alarms 291
new virtual machine 156
scheduled task 277
virtual machines 31
virtual machines from templates 192
editing
alarms 296
templates 190
virtual machine configuration 31
virtual machines 236
custom attributes 91
customization
clones 28
deploy templates 220
hardware requirements 41
Linux 232
Linux guest operating system 228
Microsoft Sysprep tools 217
Open Source installation 218
requirements 40
templates 28
Windows 232
Windows guest operating system
222
Windows requirements 41
D
database
installation 50, 54
SQL Server 52
datastores 15
templates 24, 173
debugging
advanced settings 267
server.options settings 97
deleting
templates 189
deploy template 26, 192
customization wizard 220
disconnected host state 111
352
disks
raw 348
removing virtual machines 126
resource charts 326
virtual 349
virtual disk size in new virtual
machine 157
DVD
adding 250
configuring 239
E
email
notification option 289, 290
notification type 287
enabling
VMotion 148
ESX Server golden images
templates 179
ethernet adapter
adding 257
configuring 244
events 18, 31, 284, 286
chart indicators 323
exporting 287
information panel 307, 317
inventory panel 284
navigation bar 284, 303
navigation toolbar 75, 86
panel 284
tab 303, 317
viewing all 285
viewing selected 285
events options
navigation bar 307
executing actions 79
exporting
events 287
F
farm groups 17
adding 106
www.vmware.com
moving farms 107
removing 107
tabs 304
farms 17
adding 104
information panel 309, 314
moving to a farm group 107
removing 105
summary tab 309
tab 303, 314
tabs 304
files
location of virtual disk files 157
filtering lists 93
floppy drive
adding 252
configuring 239
G
general settings
virtual machine 265
golden image 170
ESX Server 179
groups
access 332
GSX Server
virtual machine as template 178
virtual machines as templates 175
guest customization
cloning 221
Linux 222, 232
starting wizard 219
Windows 222, 232
configuring 238
customization requirements 41
headless 347
hierarchy
permissions 336
host-only networking
defined 347
hosts 15, 24
adding 112
allocating resources 119
connecting 115
CPU licensing requirements 36
information panel 315
licenses 74
managing settings 122
reconnecting 117
removing 117
removing virtual machine files 125
resource shares 120
states 111
summary tab 311
tab 303, 315
tabs 304
VirtualCenter managed host requirements 35
I
icons 91
individual
performance charts 323
information panel 32, 88, 309
inheritance
access rights 336
guest operating system
customization requirements 40
customizing Linux 228
customizing Windows 222
defined 347
installing in new virtual machine 166
new virtual machine 156
VirtualCenter requirements 36
installation
components 54
database 50
Microsoft Access Database 53
Microsoft Sysprep tools 217
modifying 63
Oracle database 50
separate components 63
H
inventory 18
information panel 308
navigation bar 303, 308
navigation toolbar 75, 86
object tabs 304
tabs overview 302
hard disks
adding 254
configuring 241
hardware
adding 250
inventory panel 32, 88, 308
353
installation 63
events tab 284
L
licensing
adding licenses 74
requirements 36
Linux
completing guest customization
232
customizing guest 222, 228
lists 93
local Oracle database 50
logging on
VirtualCenter management server
71
logs 45
availability report 47
service console messages 46
VMkernel messages 46
VMkernel warnings 46
M
managed
virtual machine templates 180
virtual machines templates 180
manually
changing resource settings 267
cloning virtual machines 205
deploying templates 193
migrating with VMotion 150
memory
configuring 243
resource charts 326
size for virtual machine 162
menu
console 85
main 84
popup 85
Microsoft Access database 50, 53
Microsoft SQL Server database 50
Microsoft Sysprep tools 217
migrating with VMotion 149
migration 29, 140, 142
powered off virtual machine 144
migration with VMotion 29, 141
enabling 148
modifying
354
monitoring
objects 78
moving
powered on virtual machines 141
virtual machines 29, 142
virtual machines between virtual
machine groups 137
virtual machines to virtual machine
groups 136
N
navigating
VirtualCenter client 75
navigation bar
events option 284, 307
inventory option 308
options 304
overview 302
templates 306
navigation toolbar 32, 75, 86
network
custom networking 346
host-only 347
resource charts 327
new virtual machine wizard 156, 347
new virtual machines
from templates 192
Newsgroups 43
NIC
adding 257
configuring 244
non-managed
virtual machines as templates 184
notification
alarm options 287
run script option 288
SNMP trap 288
notification option
email 289
power off virtual machine 289
reset virtual machine 289
SMTP 289
SNMP 290
suspend virtual machine 289
O
objects 79
www.vmware.com
monitoring 78
renaming 76
selecting 76
viewing 76
ODBC connection 50
ODBC database 52
Open Source
installation 218
operating system
guest 347
Oracle
database 50
preparing database 50
P
panels
information 88
inventory 88
parallel port
adding 258
configuring 245
pending questions 133
percentage
alarm types 287
performance
individual charts 323
information panel 322, 323
measurement intervals 329
settings 96
summary charts 322
tab 303, 322
permissions 342, 343
assigning 340
information panel 320
inheritance 336
Read Only User 20, 333
tab 303, 320
users and groups 332
Virtual Machine Administrator 20,
333
Virtual Machine User 20, 333
VirtualCenter Administrator 20, 333
power off
notification option 289
toolbar 127
virtual machine manually 129
virtual machines 127
power on
run script 127
toolbar 127
virtual machine manually 129
virtual machines 127
power states
modifying options 266
transitional 128
virtual machines 126
preparing
Open Source installation 218
SMTP notification 289
SNMP notification 290
templates 175
properties
alarms 102
scheduled task 100
templates 101
VMotion 98
Q
question pending 133
R
raw disk
defined 348
Read Only User 19, 20, 333
reconnecting
hosts 117
redo log 348
reinstalling VirtualCenter 61
remote Oracle database 50
removing 343
access permissions 343
alarms 298
farm groups 107
farms 105
files from disk 126
files from hosts 125
hosts 117
scheduled task 282
virtual machine groups 137
virtual machines 125
VirtualCenter 61
renaming
virtual machine 265
renaming objects 76
requirements
355
guest customization 40
hardware customization 41
Windows guest customization 41
rescheduling
scheduled tasks 281
reset
notification option 289
toolbar 127
virtual machines 127
resource
change disk allocation 270
resource allocation
new virtual machine 161
resource settings
manually changing 267
schedule changes 271
resources
allocating hosts 119
change CPU allocation 268
change memory allocation 269
change network allocation 271
new task wizard 101
virtual machine settings 99
restarting
guest operating system 127
VirtualCenter agent 70
VirtualCenter management server
69
resume
defined 348
run script 127
virtual machines 127
roles 19, 20, 333, 340
S
scheduled task 18, 31, 208
change resource settings 271
creating 277
deploying templates 199
information panel 304
migrating powered off virtual
machine 145
migrating with VMotion 152
overview 276
power on or off virtual machine 130
properties 100
removing 282
rescheduling 281
356
script
notification option 288
SCSI controller
configuring 246
SCSI device
configuring 240
SCSI drive
adding 253
selecting objects 76
serial port
adding 260
configuring 247
Server Farms 17
tabs 304
service console messages 46
settings
hosts 122
new task wizard 101
timing for task 277
VMware VirtualCenter settings 96
shares
drag and drop 346
hosts resources 120
shut down
guest operating systems 127
SMTP
notification option 289, 290
settings 97
SNMP
notification option 288
settings 97
sorting 286
event messages 286
lists 93
SQL Server
preparing database 52
starting
guest customization 219
users 69
VirtualCenter 68
VirtualCenter client 68, 71
VirtualCenter management server
68
states
alarm type 287
hosts 111
www.vmware.com
unmanaged virtual machines 179
upload directory 24, 96, 173, 177
Workstation virtual machines 178
virtual machines 126
status bar 88
stopping
VirtualCenter management server
68, 71
summary
tab 303
summary tab 309
hosts 311
performance charts 322
virtual machine 313
supported partition 348
suspend
after script 127
defined 348
notification option 289
toolbar 127
virtual machines 127
symbols 91
timing
setting for scheduled tasks 277
toolbar 87
power off 127
power on 127
reset 127
suspend 127
tools
VMware Tools 350
Troubleshooting 43
U
uninstalling VirtualCenter 61
unmanaged virtual machines
templates 179
unsupported partition 349
Sysprep tools 217
upload directory 24, 173, 177
setting 96
system logs 45
user interface 32
T
users
access 332
starting VirtualCenter 69
Windows Active Directory 340
Windows Domain Controller 340
tasks 31
navigation bar 303, 304
navigation toolbar 75, 86
power on or off virtual machine 130
properties 100
setting timing 277
technical support resources 43
templates 18, 170
cloning 188
creating 24
customization 28
datastores 24
deleting 189
deploy 26
deploying 192
editing 190
ESX Server golden images 179
GSX Server virtual machines 178
information panel 306
managed virtual machines 180
navigation bar 303, 306
navigation toolbar 75, 86
non-managed virtual machines 184
properties 101
requirements 39
V
video
configuring 248
viewing
charts 93
lists 93
objects 76
VirtualCenter events 285
virtual disk
creating new virtual machine 160
defined 349
location 157
size 157
virtual hardware
guest customization 41
virtual machine
configuring hardware 238
creating new 156
defined 349
general settings 265
357
information panel 313
installing guest operating system
166
installing VMware Tools 168
migrating manually 144
migrating with VMotion 149
migrating with VMotion manually
150
modify power state response 266
new virtual disk 160
renaming 265
resource allocating new virtual
machine 161
resources 99
scheduling clone 208
scheduling migrating with VMotion
152
scheduling migration 145
summary tab 313
VirtualCenter managed virtual
machine requirements 35
Virtual Machine Administrator 19, 20,
333
virtual machine control panel 99, 236
defined 349
virtual machine groups 17
adding 136
moving virtual machines 136
removing 137
tabs 304
virtual machine name 159
Virtual Machine User 19, 20, 333
virtual machines 15, 24
adding to VirtualCenter 124
advanced settings 267
change CPU resource settings 268
change disk resource settings 270
change memory resource settings
269
change network resource settings
271
changing resource settings 267
cloning 204
configuring 236
control panel 99
creating 31
editing 31, 236
information panel 316
358
migration 142
migration with VMotion 141
power states 126
removing 125
removing from disk 126
schedule power on or off 130
tab 303, 316
tabs 304
use as templates 175
VirtualCenter Administrator 19, 20, 333
VirtualCenter agent
installation 54
restarting 70
VirtualCenter client 15, 32
installation 54
navigating 75
requirements 35
starting 71
window layout 83
VirtualCenter database 15
installation 54
requirements 35
VirtualCenter management agent 15
VirtualCenter management server 15
installation 54
licenses 74
licensing requirements 36
logging on 71
requirements 34
restarting 69
starting and stopping 68
stopping 71
VMkernel
messages 46
warnings 46
VMotion 15
enabling 148
licenses 74
licensing requirements 36
migrating manually 150
migrating powered on virtual
machine 149
migration 29
properties 98
requirements 37
scheduling migrating virtual
machine 152
www.vmware.com
VMware Open Source components 218
VMware Tools
defined 350
installing 168
VMware Virtual Machine Console 350
W
Windows
completing guest customization
232
customizing guest 222
Windows Active Directory 340
Windows Domain Controller 340
wizard
new virtual machine 347
Workstation
virtual machine as template 178
virtual machines as templates 175
359
360
www.vmware.com