Download WD SATA Internal Hard Drive Quick Install Guide
Transcript
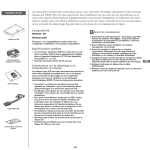
User Manual Internal Desktop SATA Hard Drive WD Service and Support Should you encounter any problem, please give us an opportunity to address it before returning this product. Most technical support questions can be answered through our knowledge base or e-mail support service at support.wdc.com. If the answer is not available or, if you prefer, please contact WD at the best telephone number shown below. Your product includes 30 days of free telephone support during the warranty period. This 30-day period starts on the date of your first telephone contact with WD technical support. E-mail support is free for the entire warranty period and our extensive knowledge base is available 24/7. To help us keep you informed of new features and services, remember to register your product online at https://www.wdc.com/register. Accessing Online Support Visit our product support website at support.wdc.com and choose from these topics: • Downloads - Download drivers, software, and updates for your WD product. • Registration - Register your WD product to get the latest updates and special offers. • Warranty & RMA Services - Get Warranty, Product Replacement (RMA), RMA Status, and Data Recovery Information. • Knowledge Base - Search by keyword, phrase, or answer ID. • Installation - Get online installation help for your WD product or software. Contacting WD Technical Support When contacting WD for support, have your WD product serial number, system hardware, and system software versions available. North America English Spanish 800.ASK.4WDC (800.275.4932) 800.832.4778 Europe (toll free)* 00800 ASK4 WDEU (00800 27549338) Europe Middle East Africa +31 880062100 +31 880062100 +31 880062100 Asia Pacific Australia China Hong Kong India Indonesia Japan Korea Malaysia Philippines Singapore Taiwan 1 800 42 9861 800 820 6682/+65 62430496 +800 6008 6008 1 800 11 9393 (MNTL)/1 800 200 5789 (Reliance) 011 26384700 (Pilot Line) +803 852 9439 00 531 650442 02 703 6550 +800 6008 6008/1 800 88 1908/+65 62430496 1 800 1441 0159 +800 6008 6008/+800 608 6008/+65 62430496 +800 6008 6008/+65 62430496 * Toll free number available in the following countries: Austria, Belgium, Denmark, France, Germany, Ireland, Italy, Netherlands, Norway, Spain, Sweden, Switzerland, United Kingdom. Kit Contents Congratulations on purchasing a WD SATA hard drive! This document was designed to aid in the quick installation of your new SATA hard drive. If you experience problems following these procedures or need further information regarding the installation and use of your drive, visit our website at support.wdc.com to search our online knowledge base for frequently asked questions and other common troubleshooting tips. ENG Compatibility Windows® 7, Windows Vista®, Windows XP, Windows 2000 Note: Compatibility may vary depending on your hardware configuration and operating system. WD Hard Drive System Requirements • SATA interface connector on motherboard, or SATA controller card (sold separately) installed in an available 32-bit PCI expansion slot (2.1- or 2.2-compliant). • 3.5-inch internal drive bay. Unpacking & Drive Handling Documentation Mounting screws WD hard drives are precision instruments and should be handled with care during unpacking and installation. Hard drives can be damaged by rough handling, shock and vibration, or electrostatic discharge (ESD). Be aware of the following precautions: • This product contains no user-serviceable parts; refer servicing to WD-authorized personnel only. • Do not unpack your hard drive until you are ready to install it. Your hard drive is packaged in an antistatic bag. • To avoid ESD problems, ground yourself by touching the metal chassis of the computer before handling the hard drive. Articles of clothing generate static electricity. Do not allow clothing to come in direct contact with the hard drive or circuit board components. • Handle the hard drive by its sides only. Avoid touching the circuit board components on the bottom of the hard drive. • Do not drop, shake, or knock down the hard drive. • Do not stack hard drives or stand your WD hard drive on its edge. -1- 1 Getting Started 1. Gather these materials and tools: WD hard drive kit; computer system manual; operating system manual and DVD or CD; SATA host controller drivers (if applicable); Phillips and flat-blade screwdrivers. 2. Before performing any hardware installation, back up your existing data. 3. Before handling the hard drive or any other components, discharge static electricity by touching the metal chassis of your computer or by using an anti-static wrist strap. 4. Locate and record your WD hard drive serial number, model number, and date code on the label on top of your drive. 5. Power off the computer and unplug the power cord. 6. Remove the system cover (refer to your system manual for instructions). 2 Set the Jumpers Figure 1 Default Standard configuration (no jumper added). Spread spectrum clocking disabled. SSC Enabled Spread spectrum clocking enabled (jumper on pins 1-2). PM2 Enabled PM2 enabled (jumper on pins 3-4). Controlled spinup via spinup command (ATA standard). OPT1 Enabled 1.5 Gb/s data transfer speed enabled (jumper on pins 5-6). Important: DO NOT change the default setting if you intend to use the drive in a desktop computer. Change the jumper settings ONLY if you intend to use the drive in an enterprise storage environment. For more information on these advanced settings, visit support.wdc.com. It is not necessary to add a jumper shunt on the drive for workstation/desktop use. For enterprise storage enviroments, use the following advanced settings: SSC Mode: spread spectrum clocking feature enabled or disabled. Default setting is disabled or no jumper shunt placed on pins 1–2. Adding the jumper to pins 1–2 enables the spread spectrum clocking feature. PM2 Enabled Mode: to enable power-up in standby (power management 2 or PM2) mode, place a jumper on pins 3–4. This mode enables controlled spinup by spinup command in accordance with ATA standard and is mainly for server/workstation environments operating in multiple-drive configurations. Note: The PM2 feature is not available on all WD SATA drives. Note: Jumper shunt not included. Important: PM2 mode requires a compatible BIOS that supports this feature. If PM2 is enabled and not supported by BIOS, the drive does not spin up and therefore is not detected by the system. Figure 2 OPT1: 150 MB/s data transfer speed enabled or disabled. Default setting is disabled. To enable 150 MB/s data transfer speed, place a jumper on pins 5–6. OPT2: reserved for factory use (pins 7–8). Mounting frame -2- 3 Install the Hard Drive Figure 3 SATA device plug power connector SATA power receptacle connector SATA device plug interface connector Standard SATA Connection Interface SATA receptacle interface connector SATA power receptacle connector WD SATA Cable Connection Interface 1. Slide the hard drive into an available 3.5-inch drive bay and secure the drive with the four mounting screws (two on each side). For proper grounding, install the screws in the hole positions (Figure 2). 2. Attach one end of the SATA cable to the SATA interface on the WD drive (Figure 3). SATA connectors are keyed to ensure proper insertion. 3. Connect the SATA power cable to the SATA interface on the drive (Figure 3). 4. Connect the SATA cable to the SATA connector on the motherboard or the SATA controller card (Figure 4). Note: If using a SATA controller card, be sure to follow the instructions that came with the card to install the SATA host drivers. 5. Verify all cable connections. Replace and secure the system cover. Reconnect the power cord and power on the computer. 6. Follow the instructions below for your Windows operating system. WD SATA cable 4 Acronis Note: WD SATA cable not included. ® True Image WD Edition Important: You can obtain the latest version of Acronis True Image WD Edition from our website (requires a WD drive serial number). To install your drive(s) without using this software, follow the “Alternate Instructions for Installing a Drive” on page 3. Figure 4 SATA cable connection Motherboard SATA cable Acronis True Image WD Edition is a software that assists you with your hard drive installation and management. Its features include cloning, drive migration, drive deployment, image backup, and recovery. In addition, Acronis True Image WD Edition allows you to create bootable recovery media and full drive image backups that can be used to recover your entire system or to simply restore a file or folder. For further information, download the software and its corresponding user manual at http://support.wdc.com/retailkit. SATA Motherboard Configuration Expansion slot SATA controller card SATA Controller Card Configuration -3- Partitioning/Formatting: 5 Alternate Instructions for Installing a Drive Note: In two separate windows, on the right side of the screen, a graphical representation of the partitions on the installed hard drives is displayed. The top window is for viewing a drive’s status, capacity, and file system. The bottom window displays a representation of the drives in the system beginning with the boot drive (drive 0). In almost all cases, you will want to work with the bottom window. 1. Locate the newly installed hard drive and right-click the long Unallocated banner device listing. 2. Click New Simple Volume from the menu. 3. The New Simple Volume Wizard appears. Click Next to continue. 4. Select the capacity of the first partition you want on this hard drive. If you want a single partition (single drive letter), leave the capacity the default value and click Next. 5. You may assign a drive letter that is not already in use by other devices, then click Next to continue. 6. Leave the allocation unit size at default and label the drive as desired. Select Perform a quick format and then click Next to continue. 7. Click Finish when done. Windows 7/Windows Vista Windows Vista has all the necessary tools to help you properly install a SATA drive. Depending on your configuration, follow the appropriate set of instructions below (Single Install or Adding a Second Drive). Note: Ensure your drive is detected by your SATA controller during bootup or in the SATA BIOS by disconnecting any other hard drives from the computer system until Windows has been completely installed on the desired hard drive. Single Install: If your SATA controller supports RAID, you may need to define your drive in a RAID Array before Windows can detect the drive, even if the motherboard or system drivers are being loaded correctly. This is true even if installing a single drive. Contact your system or RAID controller manufacturer for assistance on defining your drive in a RAID Array. 1. Insert the Windows Vista DVD into the DVD-ROM drive and restart the system. 2. Follow the onscreen prompts until the Where do you want to install Windows? screen displays. 3. Your hard drive is listed in the center window screen as “Disk 0 Unallocated Space.” –If you want a single partition (single drive letter), click Next to automatically partition and format your hard drive in NTFS. Windows Vista continues installing. –If you want multiple partitions on this hard drive, click Drive options (advanced) and skip to step 5 below. –If your hard drive is not detected, you may need to obtain third party SATA controller drivers from the SATA controller manufacturer. These drivers must be installed from a CD, DVD, floppy, or USB flash drive. 4. After clicking Drive options (advanced), click New to add a new partition to the hard drive. 5. Enter the capacity of the partition and click Apply. 6. Select the Disk 0 Unallocated Space and click New to add another new partition to the hard drive. 7. Enter the capacity of the partition and click Apply. 8. Repeat steps 6 and 7 until the desired amount of partitions is obtained, then click Next to continue installing Windows Vista on the first partition. Windows XP/Windows 2000 Windows XP/2000 has all the necessary tools to help you properly install a SATA drive. Depending on your configuration, follow the appropriate set of instructions below (Single Install or Adding a Second Drive). Note: Ensure your drive is detected by your SATA controller during bootup or in the SATA BIOS by disconnecting any other hard drives from the computer system until Windows has been completely installed on the desired hard drive. Single Install: If your SATA controller supports RAID, you may need to define your drive in a RAID Array before Windows can detect the drive, even if the motherboard or system drivers are being loaded correctly. This is true even if installing a single drive. Contact your system or RAID controller manufacturer for assistance on defining your drive in a RAID Array. 1. Insert the Windows XP or 2000 CD into the CD-ROM drive and restart the system. Note: You may need to press the F6 key to load the driver for the SATA controller before Windows can find a drive to which to install. See Answer ID 127 in the knowledge base at support.wdc.com for more information. 2. From the partitioning option screen, create the partition size you want by pressing C. Note that the FAT32 does not allow partitions larger than 32 GB. For more information about this limitation, please see Microsoft Article 184006 at support.microsoft.com. NTFS format, on the other hand, has no size limit on partition sizes. After the partition(s) have been created and formatted, continue with Windows installation. Adding a Second Drive: 1. Start Windows Vista and allow the operating system to boot to the desktop. Note: Be sure you are logged in as System Administrator. 2. Once Windows has fully booted up, left-click the Start button to access Disk Management. 3. Right-click Computer. 4. Left-click Manage. 5. When Computer Management opens, click Disk Management. -4- Adding a Second Drive: 1. Start Windows and allow the operating system to boot to the desktop. Note: Be sure you are logged in as System Administrator. 2. Once Windows has fully booted up, click the Start button, right-click My Computer, then click Manage. 3. When Computer Management opens, click Disk Management. 4. When Disk Management opens, the Initialize and Convert Disk Wizard may appear. Note: You must use this wizard to write a Signature to the drive. Otherwise, the drive will not work with Windows. If the wizard does not appear, you may need to manually complete this process following the steps below: a. Right-click on the name of the drive to be initialized. (Drives are numbered as follows: drive 0 being the boot drive and drive 13 represents all other drives. For CD-ROM drives, the first is CD 0, the second CD 1, etc.) b. Choose Initialize from the menu that appears. c. The next screen shows the drive you selected to initialize. Make sure the drive is checked and click Next. d. You will have the option to convert the drive from basic to dynamic storage. Leave this unchecked and click Next. e. Click Finish For more information about Basic and Dynamic storage, see Answer ID 282 at support.wdc.com. Partitioning/Formatting: Note: In two separate windows, on the right side of the screen, a graphical representation of the partitions on the installed hard drives is displayed. The top window is for viewing a drive’s status, capacity, and file system. The bottom window displays a representation of the drives in the system beginning with the boot drive (drive 0). In almost all cases, you will want to work with the bottom window. 1. Once the disk is initialized, right-click in the unallocated space. 2. Click on Create Partition from the menu. 3. The Create Partition Wizard appears. Click Next to continue. 4. On the next screen select either Primary or Extended Partition and click Next to continue. 5. You may assign a drive letter that is not in use by other devices if you wish, then click Next to continue. 6. Leave the allocation unit size at default and label the drive as desired. Select Perform a quick format and then click Next to continue. 7. Click Finish when done. -5- Regulatory Compliance Material Authorization (RMA). If it is determined that the Product may be defective, you will be given an RMA number and instructions for Product return. An unauthorized return (i.e., one for which an RMA number has not been issued) will be returned to you at your expense. Authorized returns must be shipped in an approved shipping container, prepaid and insured, to the address provided on your return paperwork. Your original box and packaging materials should be kept for storing or shipping your WD product. To conclusively establish the period of warranty, check the warranty expiration (serial number required) via support.wdc.com. WD shall have no liability for lost data regardless of the cause, recovery of lost data, or data contained in any Product placed in its possession. FCC Class B Information This device has been tested and found to comply with the limits of a Class B digital device, pursuant to Part 15 of the FCC Rules. These limits are designed to provide reasonable protection against harmful interference in a residential installation. This unit generates, uses, and can radiate radio frequency energy and, if not installed and used in accordance with the instructions, may cause harmful interference to radio or television reception. However, there is no guarantee that interference will not occur in a particular installation. Any changes or modifications not expressly approved by WD could void the user’s authority to operate this equipment. The following booklet, prepared by the Federal Communications Commission, may be helpful: How to Identify and Resolve Radio/TV Interference Problems. This booklet is Stock No. 004-000-00345-4 available from the US Government Printing Office, Washington, DC 20402. Limited Warranty WD warrants that the Product, in the course of its normal use, will be free from defects in material and workmanship for a period of three (3) years, unless otherwise required by law, and will conform to WD’s specification therefor. This limited warranty period shall commence on the purchase date appearing on your purchase receipt. WD shall have no liability for any Product returned if WD determines that the Product was stolen from WD or that the asserted defect a) is not present, b) cannot reasonably be rectified because of damage occurring before WD receives the Product, or c) is attributable to misuse, improper installation, alteration (including removing or obliterating labels and opening or removing external enclosures, unless the product is on the list of limited user-serviceable products and the specific alteration is within the scope of the applicable instructions, as found at support.wdc.com), accident or mishandling while in the possession of someone other than WD. Subject to the limitations specified above, your sole and exclusive warranty shall be, during the period of warranty specified above and at WD’s option, the repair or replacement of the Product. The foregoing warranty of WD shall extend to repaired or replaced Products for the balance of the applicable period of the original warranty or ninety (90) days from the date of shipment of a repaired or replaced Product, whichever is longer. The foregoing limited warranty is WD’s sole warranty and is applicable only to products sold as new. The remedies provided herein are in lieu of a) any and all other remedies and warranties, whether expressed, implied or statutory, including but not limited to, any implied warranty of merchantability or fitness for a particular purpose, and b) any and all obligations and liabilities of WD for damages including, but not limited to accidental, consequential, or special damages, or any financial loss, lost profits or expenses, or lost data arising out of or in connection with the purchase, use, or performance of the Product, even if WD has been advised of the possibility of such damages. In the United States, some states do not allow exclusion or limitations of incidental or consequential damages, so the limitations above may not apply to you. This warranty gives you specific legal rights, and you may also have other rights which vary from state to state. Visit support.wdc.com for additional terms and conditions. Western Digital 20511 Lake Forest Drive Lake Forest, California 92630 U.S.A. CSA Notice Cet appareil numérique de la classe B est conforme à la norme NMB-003 du Canada. This Class B digital apparatus complies with Canadian ICES-003. Underwriters Laboratories Inc. Bi-National UL Standard CAN/CSA-C22.2 No. 60950/UL 60950-1. Standard for Safety of Information Technology Equipment, including Electrical Business Equipment (File E101559). CE Compliance For Europe Verified to comply with EN55022:2006 for RF Emissions and EN55024:1998, A1:2001 + A2:2003, EN61000-3-2:2000, EN61000-3-3:1995 + A1:2001 for Generic Immunity as applicable. TUV NORD CERT GmbH IEC-950 (EN60950) Standard for Safety of Information Technology Equipment, including Electrical Business Equipment. EN60065. Standard of Safety for Audio, Video, and Similar Electronic Apparatus. Environmental Compliance (China) WD HDD ѻક ᳝↦ॅ䰽⠽䋼៤ߚ 䚼ӊৡ⿄ ݁Ӌ䫀 㘮⒈㘨㣃 㘮⒈㘨㣃䝮 (Cr VI) (PBB) (PBDE) O O O O O O O O O O X O O O O * ॄࠊ⬉䏃㒘ӊࣙᣀ᠔᳝ॄࠊ⬉䏃ᵓ (PCB) ঞ݊㞾ⱘߚゟ㒘ӊǃ䲚៤⬉䏃䖲఼ⱘᘏԧDŽ O 䪙 (Pb) ∲ (Hg) 䬝 (Cd) ⹀Ⲭ㒘ӊ (HDA) O O O ⺕༈㞖㒘ӊ (HSA) O O ᑻ偀䖒㒘ӊ (MBA) ॄࠋ⬉䏃㒘ӊ (PCA)* O O O Information furnished by WD is believed to be accurate and reliable; however, no responsibility is assumed by WD for its use nor for any infringement of patents or other rights of third parties which may result from its use. No license is granted by implication or otherwise under any patent or patent rights of WD. WD reserves the right to change specifications at any time without notice. Western Digital, WD, and the WD logo are registered trademarks in the U.S. and other countries; and Data Lifeguard and Data Lifeguard Tools are trademarks of Western Digital Technologies, Inc. Other marks may be mentioned herein that belong to other companies. © 2009 Western Digital Technologies, Inc. All rights reserved. 4779-705037-A00 Aug 2009 "O" ᣛ⼎䚼ӊⱘ˄໘Ѣৠ䋼ᴤ᭭㑻߿Ϟ˅ॅ䰽᳝↦⠽䋼䞣ԢѢ⬅ MCV ᷛޚ᠔ᅮНⱘ䯜ؐDŽ "X" ᣛ⼎䚼ӊⱘ˄໘Ѣৠ䋼ᴤ᭭㑻߿Ϟ˅ॅ䰽᳝↦⠽䋼䞣催Ѣ⬅ MCV ᷛޚ᠔ᅮНⱘ䯜ؐDŽ ᰒ⼎ "X" ⱘ᠔᳝ᚙމϟˈWD 䛑Փ⫼ϔϾܕ䆌ⱘܡ䰸DŽ Warranty Policy and Limitations No limited warranty is provided by WD unless your WD Product (Product) was purchased from an authorized distributor or authorized reseller. Distributors may sell Products to resellers who then sell Products to end users. See below for warranty information or obtaining service. No warranty service is provided unless the Product is returned to an authorized return center in the region (Americas, Europe-Middle East-Africa, or Asia Pacific) where the Product was first shipped by WD. Important: If your Product was originally purchased as a component integrated within a system by a system manufacturer, no limited warranty is provided by WD. Contact the place of purchase or the system manufacturer directly for warranty service. Obtaining Service WD values your business and always attempts to provide you the very best of service. If this Product requires maintenance, either contact the dealer from whom you originally purchased the Product or visit our product support Web site at support.wdc.com for information on how to obtain service or a Return -6-


