1
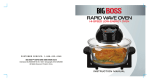
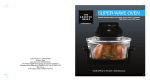
STAINLESS STEEL SUPER GRILL
with Grill, Waffle and Griddle Plates
Customer Service: 1-800-423-4248
Printed in China
Stainless Steel Super Grill ITEM NO.8147 SI.
THE SHARPER IMAGE® name and logo are registered trademarks.
Manufactured and Marketed by EMSON®. New York, NY 10001, USA
Under license.
© The Sharper Image. All Rights Reserved.
INSTRUCTION MANUAL
CONTENTS
IMPORTANT SAFEGUARDS................................................................ 3
UNPACKING - PACKAGE CONTENTS.................................................. 6
PARTS AND FEATURES...................................................................... 7
CHANGING PLATES ......................................................................... 11
HELPFUL TIPS .................................................................................. 12
USAGE - GRILL PLATE .....................................................................14
USAGE - GRIDDLE PLATE ................................................................ 17
USAGE - WAFFLE PLATE ................................................................. 19
CLEANING-MAINTENANCE .............................................................. 20
2
IMPORTANT SAFEGUARDS
IMPORTANT SAFEGUARDS
Before using the electrical appliance, the following basic precautions should
always be followed including the following:
1. Read all instructions.
2. Keep grill out of reach of children.
3. Before use check that the voltage of wall outlet correspond to the one shown on the
rating plate.
4. Do not operate any appliance with a damaged cord or plug or after the appliance
malfunctions, or is dropped or damaged in any manner. Return appliance to the nearest
authorized service facility for examination, repair or electrical or mechanical adjustment.
5. If the supply cord is damaged it must be replaced by the manufacturer or a authorized
service agent or a qualified technician in order to avoid a hazard.
6. Do not let cord hang over edge of table or hot surface.
7. Do not immerse plug, cord or housing into water due to the risk of electric shock.
8. Close supervision is necessary when your appliance is being used near children.
9. This appliance is not intended for use by persons (including children) with reduced
physical, sensory or mental capabilities, or lack of experience and knowledge, unless
they have been given supervision or instruction concerning use of the appliance by a
person responsible for their safety. Children should be supervised to ensure that they
do not play with the appliance.
10. Do not touch hot surfaces, use knobs or handles.
11. Do not place near hot gas or electric burner.
12. The use of accessory not recommended by the manufacturer may cause injuries to
persons.
13. Do not operate the appliance for other than its intended use.
14. Do not use outdoors.
15. Extreme caution should be used when moving any appliance containing hot oil
or liquid.
16. Always turn the unit by moving knob to OFF position before removing the plug
from the wall outlet.
17. Servicing and repair should only be conducted by a qualified technician.
3
4
WARNING: CAUTION HOT SURFACES: This appliance generates heat
and steam may escape during use. Proper precautions must be taken to prevent
the risk of burns, fires, or other injury to persons or damage to property.
CAUTION: This appliance is hot during operation and retains heat for some time after
turning off. Always use oven mitts when handling hot materials and allow metal parts
to cool before cleaning.
- Grill unit must be used with BOTH PLATES inserted on top and bottom at all times.
- Position the appliance so that it is never against a wall or in a corner, against curtains
or upholstery.
- Do not place anything on top of the appliance while it is operating or while it is hot.
IMPORTANT SAFEGUARDS
- Do not touch the hot appliance surfaces while the unit is on or while cooling.
- All users of this appliance must read and understand this User’s Manual before operating
or cleaning this appliance.
- If this appliance begins to malfunction during use, immediately unplug the cord. Do not
use or attempt to repair the malfunctioning appliance.
- Do not leave this appliance unattended during use.
SAVE THESE INSTRUCTIONS
FOR HOUSEHOLD USE ONLY.
No user-serviceable parts inside, contact qualified service personnel.
A short power supply cord is provided to reduce the hazards resulting from entanglement
or tripping over long cord.
Do not use extension cord as it can be pulled on by children causing the unit to tip over.
POLARIZED PLUG
This appliance has a polarized plug (one blade is wider than the other). To reduce the
risk of electric shock, this plug will fit in a polarized outlet only one way. If the plug
does not fit fully into the outlet, reverse the plug. If it still does not fit, contact a qualified
electrician. Do not attempt to modify the plug in any way.
5
UNPACKING - PACKAGE CONTENTS
PACKAGE CONTENTS:
GRIDDLE PLATE (1)
DRIP CUPS (2)
SCRAPER
MAIN GRILL UNIT
GRILL PLATES (2)
WAFFLE PLATES (2)
UNPACKING - BEFORE FIRST USE
Unpack the unit and remove all packaging materials. Before using the unit for the first
time, wipe the outside of the unit and cooking plates with a clean damp cloth to remove
any dust from shipping, dry it thoroughly. Refer to p.20 for complete cleaning instructions.
WARNING: Do not immerse the unit, cord, or plug in water or any other liquid. Do not
use abrasive cleansers.
NOTE: The first time you use your grill, it may emit a slight odor and you may see
some smoke coming off the plates. This is NORMAL. The odor and smoke will go
away after a few minutes.
6
PARTS AND FEATURES
PARTS AND FEATURES
1
300°F
150°C
4a
250°F
120°C
200°F
90°C
2
2
3
4b
4c
3
1
400°F
200°C
450°F
230°C
MIN
MAX
1. Easy Grip Cool Touch Handle-allows for easy opening and closing of grill unit.
2. Plate Release Buttons-press to release plates.
3. Hinge Switch-controls open/close positions.
4. Control Panel-includes 3 knobs:
4a-temperature control for open grill position
4b-open/off/closed grill positions
4c-heat control for closed grill position
4
7
2
OFF/ARRÉT
350°F
175°C
8
PARTS AND FEATURES
PARTS AND FEATURES
5
6
6
7
5. Griddle Plate-1 lower plate perfect for cooking breakfast.
6. Waffle Plate-2 plates for making waffles.
7. Grill Plate-2 plates for using as contact/open grill or sandwich press.
8. Drip Cups (2)-collect grease during cooking.
9. Scraper-use to safely clean the surface of the plates.
8
7
8
9
9
10
CHANGING PLATES
Refer to pp.7-10 for Parts Identification.
NOTE: Never leave unit plugged in while changing the plates. Always make sure to
cool the unit completely before changing plates. Between uses, clean the surface of
the plates with a damp cloth and wipe dry.
IMPORTANT: Grill unit must be used with BOTH PLATES inserted on top and bottom
at all times.
TOP PLATE RELEASE SWITCH
1. The unit must be in the full open position for plate change.
Open the unit to the flat position by pressing on the Hinge
Switch with one hand and moving the handle back with the
other hand.
2. Continue to push the open cover back until it rests flat and
aligns with the bottom plate. The unit will stay in this position BOTTOM PLATE RELEASE SWITCH
until you pull the handle back into the closed position.
3. Once the unit is in flat position, press on the top or bottom
Plate Release Switch located on the right side of the grill unit.
The plate will pop out slightly. Remove the plate by lifting it
out and up. Repeat for the remaining plate.
4. Choose the desired plates to be inserted. Insert one plate at a time. Make note that each
plate is labeled with “UPPER” and “LOWER” and should be inserted accordingly.
5. Align the metal brackets on the grill unit with the notches in the plate and slide the plate
into the brackets. Press down lightly to snap into place. Repeat for the remaining plate.
11
HELPFUL TIPS
Internal Food Temperatures Guide
This is a list of the internal temperatures that different foods must reach to kill bacteria.
These are not the temperatures to use to cook the food. You may also refer to the
markings on your meat thermometer.
When cooking poultry, always cook to the internal temperature of 170-180ºF. Another sign
for cooked poultry is when the juices run clear.
Fish is done when it looks opaque and flakes easily with a fork. Shellfish such as shrimp,
crab, or lobster will turn reddish pink on the outside and opaque on the inside.
Medium Rare Beef, Lamb or Veal
Fish and Shellfish
Medium Beef, Lamb or Veal
Ground Beef or Ground Pork
Pork
Ground Chicken or Ground Turkey
Well Done Beef, Lamb, Pork or Veal
Chicken Breast
Chicken Thighs or Wings
145ºF
145ºF
160ºF
160ºF
160ºF
165ºF
170ºF
170ºF
180ºF
12
HELPFUL TIPS
-For added flavor use marinade when cooking meats, poultry, fish and seafood. Refer to
bottle packaging for individual marinading instructions.
- Always discard the leftover marinade. If you wish to use marinade as a sauce or garnish,
save some of the marinade prior to adding it to the food to be marinaded.
- When using as a sandwich press, try using different varieties of breads for extra flavor.
Please note that breads with high sugar content will brown faster than others.
-You do not need to use any butter or oil on the plates when using the sandwich press,
the plates are non-stick. As an option, you may use flavored spreads to enhance the flavor
of the sandwich.
-Always remember to use wooden or plastic spatula to remove food to prevent damage to
the non-stick surface of the plates.
13
USAGE-GRILL PLATE
Refer to pp.7-10 for Parts Identification.
Can be used as an open and contact grill or a sandwich press. Perfect for meat, chicken, fish
and vegetables.
WARNING: Be careful when cooking foods with a high fat content, as they will
splatter while cooking. Protect the countertop if necessary.
IMPORTANT: Grill unit must be used with BOTH PLATES inserted on top and bottom
at all times.
NOTE: Most types of meat, poultry, and eggs must be cooked thoroughly to avoid
food poisoning. It is advised to use a meat thermometer.
COOKING WITH UNIT CLOSED (contact grill and sandwich press):
1. To switch plates, please refer to the CHANGING PLATES instructions on p.11.
2. Plug your grill into the wall outlet.
3. Turn the middle switch to
position. The indicator light will go on, indicating that
the power is on.
4. Turn the right control knob (
knob) to the desired heat setting (1-3).
5. When the desired temperature is reached, the indicator light will go on in the
chosen function control knob. NOTE: During cooking, the power light will cycle ON and
OFF while the thermostat keeps the unit at the right temperature.
6. Lift open the cover of the grill. Place desired food on the bottom half of the unit. Lower
the cover until it comes in contact with the food.
14
USAGE-GRILL PLATE
IMPORTANT: Always ensure the drip cup is placed under the drip spout when cooking
greasy foods, so it could drain. Shown below. Also use the drip cups if cooking with a
lot of oil, butter or margarine.
7. After about a few minutes, open the grill and check if the food needs to be cooked more.
If you are satisfied, remove the food using plastic or wooden spatula, otherwise lower the
lid again and wait for 1 minute. Use 1 minute increments when adding cooking time for
best results. Do not use metal utensils to lift the food off the grill as it may damage the
non-stick coating.
COOKING WITH UNIT IN FLAT POSITION (open grill):
The cover is fully open in this position. The upper plate is leveled with the lower plate,
creating one large cooking surface, allowing you to cook more food at once. You may also
insert the Griddle plate on the bottom if making eggs, pancakes, bacon, sausage and more.
Refer to p.11 for Changing Plates.
15
USAGE-GRILL PLATE
1. Plug your grill into the wall outlet.
2. Open the unit to the flat position by pressing on the Hinge Switch with one hand and
moving the handle back with the other hand.
3. Continue to push the open cover back until it rests flat and aligns with the bottom
plate. The unit will stay in this position until you pull the handle back into the closed position.
4. Turn the middle switch to
position. The indicator light will go on, indicating
that the power is on.
5. Turn the left control knob (
knob) to the desired temperature setting (200˚F,
250˚F, 300˚F, 350˚F, 400˚F and 450˚F).
6. When the desired temperature is reached, the indicator light will go on in the chosen
function control knob. NOTE: During cooking, the power light will cycle ON and OFF while
the thermostat keeps the unit at the right temperature.
7. Place desired food on both surfaces of the unit. NOTE: If not using the full open area of
both plates, place food on the bottom plate for cooking for best results.
IMPORTANT: Always ensure the drip cup is placed under the drip spout when cooking
greasy foods, so it could drain. Also use the drip cups if cooking with a lot of oil, butter
or margarine.
8. After a few minutes, check if the food needs to be cooked more, you may need to flip
the food over on the other side to ensure it cooks. Use 1 minute increments when adding
cooking time for best results. When done, remove the food using plastic or wooden spatula.
Do not use metal utensils to lift the food off the grill as it may damage the non-stick coating.
16
USAGE-GRIDDLE PLATE
USAGE-GRIDDLE PLATE
Refer to pp.7-10 for Parts Identification.
Can only be used on the bottom half of the grill (plate marked LOWER) with conjunction
with a grill plate as an open grill/griddle. Perfect for eggs, pancakes, bacon, sausage, french
toast and more.
WARNING: Be careful when cooking foods with a high fat content, as they will
splatter while cooking. Protect the countertop if necessary.
IMPORTANT: Grill unit must be used with BOTH PLATES inserted on top and bottom
at all times.
NOTE: Most types of meat, poultry, and eggs must be cooked thoroughly to avoid
food poisoning. It is advised to use a meat thermometer.
6. Turn the left control knob (
knob) to the desired temperature setting (200˚F,
250˚F, 300˚F, 350˚F, 400˚F and 450˚F).
7. When the desired temperature is reached, the indicator light will go on in the chosen
function control knob. NOTE: During cooking, the power light will cycle ON and OFF while
the thermostat keeps the unit at the right temperature.
8. Place desired food on both surfaces of the unit. NOTE: If not using the full open area of
both plates, place food on the bottom plate for cooking for best results.
IMPORTANT: Always ensure the drip cup is placed under the drip spout when cooking
greasy foods, so it could drain. Also use the drip cups if cooking with a lot of oil, butter
or margarine.
9. After a few minutes, check if the food needs to be cooked more, you may need to flip
the food over on the other side to ensure it cooks. Use 1 minute increments when adding
cooking time for best results. When done, remove the food using plastic or wooden spatula.
Do not use metal utensils to lift the food off the grill as it may damage the non-stick coating.
COOKING WITH UNIT IN FLAT POSITION (open grill/griddle):
The cover is fully open in this position. The upper plate is leveled with the lower plate,
creating one large cooking surface, allowing you to cook more food at once.
1. To switch plates, please refer to the CHANGING PLATES instructions on p.11.
2. Plug your grill into the wall outlet.
3. Open the unit to the flat position by pressing on the Hinge Switch with one hand and
moving the handle back with the other hand.
4. Continue to push the open cover back until it rests flat and aligns with the bottom
plate. The unit will stay in this position until you pull the handle back into closed position.
5. Turn the middle switch to
position. The indicator light will go on, indicating
that the power is on.
17
18
USAGE-WAFFLE PLATE
Refer to pp.7-10 for Parts Identification.
Can be used to make waffles (unit in closed position only).
1. To switch plates, please refer to the CHANGING PLATES instructions on p.11.
2. Plug your grill into the wall outlet.
3. Turn the middle switch to
position. The indicator light will go on, indicating that
the power is on.
4. Turn the right control knob (
knob) to the desired heat setting (1-3).
5. When the desired temperature is reached, the indicator light will go on in the
chosen function control knob. NOTE: During cooking, the power light will cycle ON and
OFF while the thermostat keeps the unit at the right temperature.
6. Lift open the cover of the grill. Carefully pour the batter into the two lower plates making
sure not to overfill the plates.
7. Close the cover. Wait approximately 3-5 minutes. Lift the cover and check for doneness.
Lower the cover if more cooking time is needed. If cooked, remove the waffles with a
wooden or plastic utensil.
8. Repeat the above steps for additional waffles.
19
CLEANING - STORAGE
CAUTION: Unplug from electrical outlet and allow to cool completely before
cleaning. DO NOT IMMERSE UNIT IN WATER OR ANY OTHER LIQUID.
- After you finished using the unit, make sure you turn OFF and unplug the unit and let it cool
completely.
- Remove and wipe the inside and the edges of the plates with damp paper towel or soft cloth.
Refer to p.11 for removing/changing plates.
- Use the provided scraper to remove any food residue from the
plates. When done with the scraper, wash it in warm soapy water.
- Should any remaining food particles be difficult to remove from
the plates, briefly soak plates in warm soapy water. Use a soft
sponge or paper towel to gently wipe off the residue.
- Empty the drip cups, wash in warm soapy water.
- Do not use any abrasive cleaners or padding when cleaning the inside or outside of the unit.
- Make sure to keep the unit clean of grease and oil. Wipe the outside of the unit with slightly
moistened cloth.
- Make sure that all the parts are completely dry before next use.
- Never store the unit while it is hot or still plugged in. Always unplug unit and allow to cool.
- Never wrap cord tightly around appliance. Do not put any stress on cord where it connects
to the unit, as this could cause cord to fray and break.
20