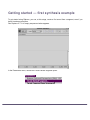
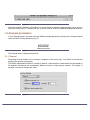
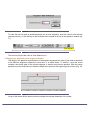
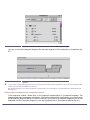
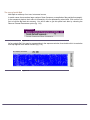
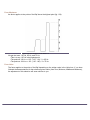
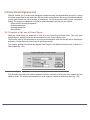
1
documentation
• Research reports
• Musical works
• Software
Diphone Studio
(v. 2.8)
User Manual
&
tutorial
First edition of the fourth version of the Diphone manual,
November 1999
Copyright© 1999, Ircam. All rights reserved.
This manual may not be copied, in whole or in part, without written consent of Ircam.
This manual was written by Guillaume Loizillon, en collaboration avec Xavier Rodet, Adrien Lefèvre, Gilles Racot,
Carl Faia, Dominique Virolle et Marc Battier and was produced under the editorial responsibility of Marc Battier,
Marketing Office, Ircam.
Diphone
Design : Xavier Rodet
Macintosh Programming : Adrien Lefèvre
Unix Programming : Thierry Galas, Philippe Depalle
Research assistants : Guillaume Bouriez, Marteen de Boer, Xavier Hosxe, Gilbert Nouno
SuperVP
Design : Philippe Depalle
Program : Philippe Depalle, Gilles Poirot, Chris Rogers, Jean Carrive
Pm
Design : Xavier Rodet et Guillermo Garcia
Program : Guillermo Garcia, Diemo Schwarz
Chant
Design : Xavier Rodet, Yves Potard
Program : Yves Potard, Gerhart Eckel, Francisco Iovino, Dominique Virolle
Sdif
Design : Xavier Rodet
Program : Dominique Virolle, Diemo Schwarz
ModRes
Design: Xavier Rodet
Program : Pierre-Francois Baisnee, Francesc Marti
This documentation corresponds to version 2.8 of Diphone (Macintosh version).
Apple Macintosh is a trademark of Apple Computer, Inc.
Diphone, SuperVP, ModRes, Sdif et Pm are trademarks of Ircam.
First edition of the fourth version of the manual, November 1999
Ircam
1, place Igor-Stravinsky
F-75004 Paris
Tel. 01 44 78 49 62
Fax 01 44 78 15 40
E-mail [email protected]
IRCAM Users group
The use of this software and its documentation is restricted to members of the Ircam software users’ group. For
any supplementary information, contact:
Département de la Valorisation
Ircam
Place Stravinsky, F-75004 Paris
Tel. 01 44 78 49 62
Fax 01 44 78 15 40
E-mail: [email protected]
Send comments or suggestions to the editor:
E-mail: [email protected]
Mail: Marc Battier,
Ircam, Département de la Valorisation
Place Stravinsky, F-75004 Paris
http://www.ircam.fr/forumnet
Contenu
The concept of Diphone ...................................................................................................... 1
Introduction ........................................................................................................................ 2
Getting started — first synthesis example........................................................................... 3
Flow chart of Diphone Studio .............................................................................................. 6
1
The Addan program ........................................................................................................ 7
1.1 Using Addan for the first time.................................................................................................................7
1.2 Presentation of the three phases of the analysis ................................................................................... 9
1.3 Reconfiguring the working environment (Choose Session option) ..........................................................9
1.4 Making a first analysis ........................................................................................................................ 10
1.5 Analysis parameters ............................................................................................................................ 15
1.5.1 General ............................................................................................................................................ 15
1.5.2 Analysis settings .............................................................................................................................. 16
1.5.3 Extract fundamental ......................................................................................................................... 17
1.5.4 Extract Partials................................................................................................................................. 19
1.5.5 Synthesis checking .......................................................................................................................... 21
1.6 Stepping through the analysis ............................................................................................................. 22
1.7 Process of altering the fundamental ..................................................................................................... 22
1.8 A first Diphone script........................................................................................................................... 24
2
The Diphone program ................................................................................................... 25
2.1 Elementary notions on the structure of the segment............................................................................ 26
2.2 Writing a script .................................................................................................................................... 27
2.2.1 Writing a script using the AudioSculpt markers ............................................................................... 28
2.2.2 Creating a script from the markers .................................................................................................. 28
2.2.3 Writing the Markers file directly........................................................................................................ 30
2.3 Creating a dictionary from a script....................................................................................................... 31
2.3.1 Creating and empty dictionary ..................................................................................................... 35
2.3.3 Sorting functions of the dictionaries ............................................................................................ 37
2.4 Creating sequences ............................................................................................................................. 38
2.4.1 The segment in the graphical representation of a sequence........................................................... 38
2.4.2 Construction of a sequence of several segments ........................................................................ 41
2.5.3 Controlling the display of the sequence window .......................................................................... 42
2.5.4 Manipulation of the segments in their graphical representation ...................................................... 43
2.5.5 Modifying the segments with the Inspector window......................................................................... 47
2.5.6 Articulations ................................................................................................................................ 49
2.5.7 Creating a segment from a sequence ......................................................................................... 51
2.5.8 Composite segment .................................................................................................................... 53
2.5.9 Help constructing a sequence: placing it on a temporal grid ........................................................... 56
2.5.10 Listening test of an additive sequence (Preview) ...................................................................... 58
2.5.11 Synthesising a sequence and listening to it ............................................................................... 60
2.6 Actions on the Bpf............................................................................................................................... 63
2.6.1 Types of Bpfs ................................................................................................................................... 64
2.6.2 Visualisation of Bpf points ........................................................................................................... 67
2.6.3 Zoom format and selection in the Bpf window ............................................................................. 70
2.6.4 Modifying the Bpf and multi-Bpf curves ....................................................................................... 77
2.7 Transfer and replacement of parameters from a segment to another .................................................. 87
2.8 How Direct Signal works ..................................................................................................................... 91
2.8.1 Example of the use of Direct Signal................................................................................................. 91
2.9 General principal of Chant .................................................................................................................. 93
2.9.1 What is a Fof (Formantic wave function)? ....................................................................................... 93
2.9.2 The parameters of a Fof .................................................................................................................. 94
2.9.3 The other elements of Chant ........................................................................................................... 94
2.10 Using Chant with Diphone................................................................................................................. 95
2.10.1 A sequence with Formantic Waveforms (patch 0) ......................................................................... 95
2.10.2 The parameters of Fof and Bpf ................................................................................................. 99
2.10.3 The available Chant dictionaries.................................................................................................. 100
2.10.4 The Export for Synthesis command and patches .................................................................... 102
2.10.5 Using the patches ................................................................................................................... 104
3
The Resan program .................................................................................................... 111
3.1 The analysis ..................................................................................................................................... 114
3.2 The synthesis .................................................................................................................................... 115
4
The menus ................................................................................................................. 116
4.1 The Diphone menus........................................................................................................................... 116
4.1.1 File ................................................................................................................................................. 116
4.1.2 Edit ............................................................................................................................................ 117
4.1.3 Plugins ........................................................................................................................................... 117
4.1.4 Parameters .................................................................................................................................... 117
4.1.5 Dictionary ....................................................................................................................................... 117
4.1.6 Sequence....................................................................................................................................... 118
4.1.7 Bpf ................................................................................................................................................. 118
4.1.8 Window .......................................................................................................................................... 119
4.2 The menus in Addan and Resan ....................................................................................................... 120
4.2.1 File ................................................................................................................................................. 120
4.2.2 Edit................................................................................................................................................. 120
4.2.3 Analysis ......................................................................................................................................... 120
4.2.4 Window .......................................................................................................................................... 121
5
Setting the preferences .............................................................................................. 122
5.1 Diphone preferences.......................................................................................................................... 122
5.2 Preferences for Addan and Resan .................................................................................................... 127
Index .............................................................................................................................. 129
The concept of Diphone
In speech, a diphone is defined as a transition between two phonemes. In a musical context, this could
be taken to mean not only a transition between two vocal sounds, but more generally a transition between
two sounds of any kind, whether instrumental, vocal, or recorded « sound objects ». As such, the
definition of a musical « diphone » could also be extended to include a single stable sound or silence.
The idea of synthesis using diphones was conceived in the late 1980s by Xavier Rodet, in an attempt to
address the problem of successfully synthesizing a musical phrase using both transient and stable
sounds.
Using traditional analog studio techniques, a series of transient and stable sounds can be concatenated,
or pieced together, by splicing small pieces of tape end to end. In today’s digital studios, this is done by
cross-fading. In both cases, the result usually can end up sounding far from convincing since the inner
contents of the spliced or faded sounds do not generally match. In Rodet’s system of « generalized
diphone control and synthesis », sounds are carefully analyzed, and it is the analysis data which is
« spliced » or « fad-ed » together by interpolating the values between neighboring segments of analysis
data. The resulting in-terpolated analysis can then be resynthesized, providing a much cleaner and more
natural result than could be obtained through simple tape-splicing or cross-fading.
Diphone was first implemented on UNIX workstations in 1988 by Xavier Rodet and Philippe Depalle using source-filter synthesis and, later, additive synthesis. There was only a very rudimentary graphical user
interface which allowed analysis data segments to be placed in a consecutive manner on the screen. The
first Macintosh version of Diphone, completed in 1996, was (and continues to be) programmed by Adrien
Lefevre.
1 - Diphone Studio - Manual
Introduction
Diphone Studio is a group of several applications.
Its main function is to provide a powerful control of sound synthesis.
Several analysis / synthesis models are accessible. They are integrated into Diphone Studio in the form
of external programmes called models or plugins. This is the list of them:
• The analysis and additive synthesis model called Additive;
• The resonance model used for analysis and synthesis using formantic wave functions (FOF). This
model is called Chant;
• A last model used for easier processing of external sound files, called Direct Signal.
The central application, Diphone, communicates with the analysis and synthesis programmes, Addan
and Resan, and uses their data to create interpolations.
This complex physical data become accessible in the form of graphical representations (Bpf curves,
slotted "tiles"...).
The user manipulates these elements as he wishes to finally obtain a musical sequence that is saved
onto the hard disk of the computer.
This manual corresponds to versions:
• 2.8 of the Diphone application
• 1.8 of the Addan application
• 1.0 of the Resan application (first public delivery of this application).
It is laid out in the following way.
• Analysis using the additive model: the Addan programme.
• Presentation of the Diphone program:
- Creation of scripts, dictionnaries and sequences
- The Direct Signal model
- The Chant model.
• The Resan program.
• Menus and preferences.
In Diphone, whichever the model used, the vast majority of manipulations remain similar for the user. In
this manual, a detailed review of the functions of the programme is made for the Additive model. Points
specific to the Direct Signal and Chant models are exposed, and cross-references are given for the
general manipulations.
2 - Diphone Studio - Manual
Getting started — first synthesis example
To get started using Diphone, you can, at this stage, create a first sound from a segment, even if you
haven't made any analyses.
Run Diphone 2.7.3. An empty sequence window appears.
In the Parameters menu, choose the Create Default Segment option.
3 - Diphone Studio - Manual
A segment definition window appears.
Check that the Additive option is chosen in the Model box. If this is not the case, click on the Model menu,
and choose Additive. Click OK. This window appears.
Click on the small triangle situated on the left-hand side of the instrument called Untitled Instrument.
4 - Diphone Studio - Manual
The segment which you have just created appears with the name Untitled Segment. Click on the segment
(Untitled Segment) and, while still keeping the mouse button down, drag it to the sequence window. This
operation is known under the name "drag and drop".
The segment immediately appears in the sequence window.
To listen to your first try, hit the space bar.
The result probably does not meet your expectations, but it has however enabled you to quickly work your
way through using Diphone. We will now give more detailed explanations on the functions of the
programme, and you will be able to discover its wealth.
5 - Diphone Studio - Manual
Flow chart of Diphone Studio
Audio
Procedures
Data
Audio
Audio file
Fichier audio
Procédures
Données
Direct Signal
Addan
Resan
Fondamentale
partiels
Fof
Filtres
Fundamental Partials
Script de
découpage
Fof Filters
+
Breakdown script
Diphone Import
via Plugin
Container
Création de segment
par défaut
Dictionnaires
Dictionaries
Séquences
Sequences
Creation of a default segment
Diphone Export
via Plugin
Synthèse
Fichier audio
6 - Diphone Studio - Manual
Diphone export
via Synthesis
Plug-in
Audio file
1 The Addan program
Addan is a synthesis programme that works on the additive model. Using this procedure, sound is
analysed as the addition of sinusoidal waves, each of which has a frequency, an amplitude and a phase,
each of these varying with time. The idea is to carry out a series of FFT analyses (decomposition of sound
into partials) on successive time windows. The parameters of these windows are set by the user to gain
optimal sound results. This type of analysis is well adapted to harmonic sounds (the partials follow an
arithmetic relationship) and with little noise.
☛
Despite being delivered as an autonomous application like Resan, Addan is an input module into
Diphone.
In carrying out this operation, you run Diphone without having to quit Addan. You may therefore navigate between
the two applications (or three if Resan is running) without wasting any time. If your computer has too little memory,
you may use virtual memory without any problem.
1.1 Using Addan for the first time
When you run Addan for the first time, the working environment looks like this:
A window entitled New Analysis appears. All the fields that should contain file names, are empty. This
window will be explained in detail in section 1.4.
In order to navigate easily in Addan, display the Toolbar window from the Window menu (fig. 1).
Figure 1
The Toolbar window that then appears, offers three tools (fig. 2).
Figure 2
By moving the mouse cursor onto each one of the icons (without clicking), the function of each bow
appears on the left, at the bottom of the window (fig. 3, 4, 5).
7 - Diphone Studio - Manual
Figure 3
Figure 4
Figure 5
☛
The role of each tool will be explained further in each of the following sections, as they become needed.
Each one of the functions of these tools can be found in the different application menus.
8 - Diphone Studio - Manual
1.2 Presentation of the three phases of the analysis
Additive analysis takes place in three phases:
Search for a fundamental frequency
Search for partials
Re-synthesis of sound using the data of the analysis.
The process makes three files that are distributed in the following default locations on your hard disk:
Starting with a named sound, sound.aiff for example, the following files will be created:
Extraction of the fundamental: sounf.F0 (F naught) in the folder :ImpExport:Fundamental
Extraction of the partials: sound.ADD in the folder :ImpExport:Partial
Re-synthesis: sound.synth.AIFF in the folder :ImpExport:Sound
1.3 Reconfiguring the working environment (Choose Session option)
You may adopt another configuration of the working environment in the Analysis menu, Choose Session
option (fig. 6).
Figure 6
A dialogue and navigation box appears, which enables you to choose a folder which will be the default
folder, and which will gather all the files created by analysis and synthesis.
9 - Diphone Studio - Manual
1.4 Making a first analysis
The main analysis window opens up when the programme is loaded. If this is not the case, choose the
New Analysis option in the File menu, or click on the left icon on the toolbar (fig 7, 8).
Figure 7
Figure 8
Figure 9 shows the main window of AddAn.
This window is split into three zones:
At the top: The tools zone, three of them. The one furthest on the right may be shaded which shows that
the operation is not available for the moment.
In the middle: The Organisation zone shows the progress of the analysis and the different files linked to it.
☛
At the bottom: More Settings enables the user to access the analysis parameters and to run the analysis.
If this part is masked, you may open it by clicking on the small triangle to the right of the More Settings indication.
10 - Diphone Studio - Manual
Figure 9
The first line of the organisation zone, Sound Input, enables you to choose a sound to be analysed. This
sound may be in the AIFF, AIFC or sd2 formats. It has to be monophonic.
By clicking on the folder icon (fig. 10), a sub-menu appears on the left-hand side (fig. 11).
Figure 10
11 - Diphone Studio - Manual
Figure 11
Choose File enables you to fetch the required sound where you want in the folders on you hard disk. The
default folder ImpExport:Sound is suggested, unless you have chosen another folder using the Choose
Session option (see previous section 1.3).
Choose Directory enables you to specify the default folder which is opened by the Choose File option.
Once you have selected the input sound, the speaker icon becomes active and you can listen to the
sound to be analysed. The information icon (I) displays different data on the chosen sound file (sampling
frequency, format, length).
Now tick the different analysis steps you would like to follow.
It is indeed possible to execute the three phases separately. This option is mostly used to first extract the
fundamental frequency only, in order to apply a few corrections before extracting the partials (See section
1.7).
If you have ticked the Extract Noise option, a sound file is created with the extension .noise.aiff, which
contains the extraction of the non-analysed noise. This file may be listened to in this form.
Once these choices have been made, click for a first time on the validation tool at the bottom of the
analysis window (fig. 12), or choose the Validate option in the Analysis menu.
12 - Diphone Studio - Manual
Figure 12
13 - Diphone Studio - Manual
Figure 13
When you have clicked once, the Validate button turns into a Run ? button (fig. 13). The names of the
different files produced by the analysis appear in their respective fields. If a name is underlined, it means
that the file already exists and that it will be re-written if the box stays ticked. You may now click on the
Run ? button to start the procedure. The desk window (fig. 14) appears and displays the progress of the
calculations that take more or less time depending on the size of the starting file and the analysis
parameters chosen. By clicking on the small triangle on the top left-hand side, you may visualise or mask
the details of the progression of the procedure. It is finished when the "Calcul took xmxs" message
appears (fig. 14).
14 - Diphone Studio - Manual
Figure 14
Once the analysis is finished, the speaker icon in the Synthesis Checking field becomes active, and you
may listen to the result. If it doesn't suit you, you then need to enter more detailed analysis parameters.
1.5 Analysis parameters
If it isn't already present, the menu witht the different settings appears by clicking on the triangle situated
under the More Settings indication (fig.15).
Figure 15
The General menu is displayed by default.
1.5.1 General
Processing Interval enables you to analyse a fragment of the sound only. You define in seconds the
starting point and the ending point.
The Delete intermediates files box is ticked by default. It shows that the intermediate files generated by
the analysis calculations are automatically deleted as soon as they become useless. You should, in
principle, not need to change this option.
Figure 16
15 - Diphone Studio - Manual
1.5.2 Analysis settings
Figure 17
The size of the window (Wind.size) of the signal should be chosen as a function of the pitch of the sound
to be analysed. In general, the lower the sound, the bigger the analysis window. The window should be
about 4 times the period of the fundamental (period = 1/f).
Example: if the fundamental frequency varies from 200 Hz to 500 Hz, the longest period is 1/200 s (point
where the fundamental is at its lowest), which is 0.005 s, so the size of the signal window should be at
least 0.02 s (= 0.005 * 4).
The risk however of making the window bigger is that certain fast changes in frequency will not be
detected for sounds which are complex and very perturbed sounds like consonants of the voice.
The size of the FFT window (FFT size expressed in number of samples) is automatically adjusted
compared with the size of the signal window.
The step size is set beforehand as a function of the stability of the sound to be analysed. The more stable
the sound, the bigger the step can be. Generally, the step size is chosen between 0.01 and 0.005 s. For
a stable sound, a bigger step may be chosen that will reduce the size of the sound file.
Opposite the Anl.Type indication, a pull-down menu (fig. 18) enables you to access the different shapes
of analysis windows.
In certain specific cases, it may be useful to change the window type.
Figure 18
☛
Generally, Hanning windows give the best frequency resolution, and Blackman the best spectral
dynamics. Hamming, which is the default setting, is a good compromise between the two.
In setting the analysis parameters, choose to modify the size of the window and the step first, before changing the
type of window.
16 - Diphone Studio - Manual
1.5.3 Extract fundamental
Figure 19
Extract fundamental is the stage at which you have to define the upper and lower limits between which
the fundamental frequency is searched for (Fund.min and Fund.max).
Setting the noise threshold: Noise thres enables you to determine from which difference in intensity
compared to the highest peak, a peak will be taken into account to calculate the fundamental frequency.
By reducing the value of Noise threshold, you are also reducing the number of peaks that are used to
search for the fundamental.
The fundamental frequency is calculated using the average time between peaks in the spectrum that
have a frequency smaller than Freq.max and an amplitude bigger than Noise thres.
Figure 20 is a picture taken from AudioSculpt which displays the peaks and the settings for Extract
Fundamental. Smooth Order smoothes the fundamental after calculation. You can set this value between
3 and 30 (a bigger or smaller value is displayed in red and is not taken into account). This value can help
trying to eliminate certain undesirable jumps in frequency. You are however advised to be careful in its
utilisation with large values. Pertinent jumps in frequency could indeed be eliminated.
The sub-menu Output enables you to choose the output format of the file F0. You have the choice
between the SDIF format (default) and the ASCII format. The latter insures backward compatibility with
certain other programmes. You may display the data with the command sdiftotext.
17 - Diphone Studio - Manual
Maximum frequency
limit of the Noise Threshold
Average jump
between peaks
biggest peak
Figure 20
18 - Diphone Studio - Manual
1.5.4 Extract Partials
Figure 21
You have the option to choose the number of partials you want:
• Either all the partials, by putting a tick in the All box.
• Either a specified number of partials, by leaving the All box unchecked. The first 40 partials are suggested, which is usually sufficient for realistic re-synthesis..
Reducing the number of partials makes the calculations faster, and reduces the size of the analysis file,
which is of course detrimental to the wealth of information from the analyses and the quality of the future
re-synthesis.
The Attack and Release settings of the window are used to get rid of step shaped jumps in amplitude,
which could be created when the amplitude varies round zero within a time that is smaller than the
threshold of the step size of the analysis windows.
The Attack setting corresponds to the length of the smoothing slope that is added before an abrupt jump
in amplitude.
The Release setting corresponds to the length of the smoothing slope that is added after an abrupt jump
in amplitude.
The Output sub-menu has the same function as for the extraction of the fundamental frequency.
Setting the Bandwidth for Sieve
The value of the Bandwidth for Sieve corresponds to a riddle or a research quantification around the exact
value of a supposed harmonic.
The value 0.5 that is given by default, makes searching for the right harmonic partials easier, by reducing
the masking effect which could be produced by the noise in the sound. It means that the search is led in
the zone between the top and bottom middle harmonic values (whether they are present or not).
Figure 22 to 24 illustrate different settings of this parameter.
19 - Diphone Studio - Manual
search bandwidth = 0.5
Figure 22
search bandwidth = 1
Figure 23
20 - Diphone Studio - Manual
search bandwidth = 0.1
Figure 24
By looking at the above figures, you will understand that the default setting of 0.5 is quite sufficient for a
lot of sounds. A higher value can in some rare instances give a solution to a difficult problem.
You must be careful not to use too big values, near to 1, which can create some problems for the software
of coherence between rows of harmonics for the partials of the analysed sound in the succession of steps.
1.5.5 Synthesis checking
Figure 25
Here, you may set the re-synthesis parameters. You are advised to keep the same number of partials as
the one used for the extraction of partials, as well as the same sampling frequency as used for the
analysed sound. The Apply with phases box indicates if the phase values are conserved or not when the
.ADD file is created.
21 - Diphone Studio - Manual
1.6 Stepping through the analysis
We saw previously that the three phases could be dissociated. This working mode is mainly designed so
the fundamental extraction can be performed first and separately, and corrected so that the extraction of
partials can be optimal. As well as manipulating the Addan programme, it is a good idea to have a good
knowledge and preliminary analytical listening of the sound to be analysed.
1.7 Process of altering the fundamental
The estimation of the fundamental can sometimes produce jumps in frequency, often situated at an
octave, or a random interval. These jumps can be a problem for the following steps of the additive
analysis. It is sometimes helpful to eliminate them.
In order to alter the fundamental in an acceptable way, the first operation has to be the extraction of the
fundamental and only that, so that corrections can then be made "by hand" to improve the extraction of
partials operation.
In the main window of Addan, after having loaded the sound to be analysed, tick the Extract fundamental
option only, and start the analysis. After this operation, a file with the extension.F0 file is created. You
must now run Diphone (fig. 26).
Figure 26
Once Diphone is opened, choose the Open option in the File menu (fig. 27).
Figure 27.(Diphone menu
Now open the son.F0 file which you have just extracted the fundamental from. It appears in the form of a
graph of a Bpf (fig. 28). A Bpf (Break Point Function) is a waveform defined in a discrete way by a group
of points linked to each others by segments. We will be discussing Bpfs again in section 2.6. For the
moment, we will we will make do with explaining only the tools that are needed for an alteration of the
fundamental.
22 - Diphone Studio - Manual
Figure 28
Using the pencil from the toolbar of the Bpf, you may modify the shape of the temporal evolution of the
fundamental.
Figure 29
Once this has been done, save the new waveform (option Save in the File menu) without modifying the
name or the destination folder. Now go back into Addan and follow the next steps in the analysis without
forgetting to invalidate the Extract fundamental box.
23 - Diphone Studio - Manual
1.8 A first Diphone script
Once you are pleased with the result of your analysis, you may create a first Diphone script inAddan.
The Create Diphone Script option in the Analysis menu as well as the icon on the right of the tools in the
main window are now valid (fig. 30, 31).
Figure 30
Figure 31
A window of this type appears (fig. 32).
Figure 32
For users who are already familiar with Diphone, this operation creates a dictionary, an instrument with
the name of the sound, and one segment only, the length of which is equal to the total length of the sound.
The container is saved with the extsension .cont (line 1). The type of analysis performed is specified (line
2), as well as the folders in which the .F0 and .ADD files are saved.
For new users, we advise you not to create this script just now and to go straight into Diphone. In the
following chapters, the notions specific to Diphone will be developed: script, segments, instruments of
dictionaries and containers.
24 - Diphone Studio - Manual
2 The Diphone program
When you open Diphone, two windows appear: an empty sequence window and an Inspector window,
also empty.
These will now be explained briefly.
As in Addan, you may open the toolbar from the Window menu (fig. 33).
Figure 33
The toolbar functions in the same way as for Addan (see section 1.1).
It offers you immediate access to Addan or Resan, to the creation of a new dictionary and a new
sequence, both empty. It also enables you to open the Inspector window, and the preferences window.
The working principal in Diphone is the construction of sequences formed by segments that are ordered
in instruments that make up the dictionaries. These three elements form the basis of the objects that the
user can manipulate.
A 4th element, the Container, collects the data that constitutes the dictionaries. The Containers are saved
onto the hard disk in the ImpExport:Container folder. These are locked files since they contain reference
information for the segments, such as the fundamental frequencies (.F0) and the analyses of the partials
(.ADD).
25 - Diphone Studio - Manual
2.1 Elementary notions on the structure of the segment.
A segment or "basic segment" is a temporal fragment from the group of parameters from the analysis. It
is defined by a certain number of key points chosen in the sound. The segment is represented graphically
by a tile shape (fig. 34) that can be partially fitted into other tiles that precede or follow it in time.
Figure 34
The beginning time (beg) and the end time (end) mark the limits of the segment.
The zones that fit into each other are called InterpBeg for the beginning, and InterpEnd for the end. It is
in these zones that the interpolations from segment to segment will be done.
One part of the segment is important to define: the centre. When you have determined the perceptually
most prominent instant in the length of sound to be segmented, choose it as the centre (ctr).
The segments are put together in sequences to constitute a musical phrase, and inversely, a musical
phrase (son.aiff) can be cut up into segments.
A sequence or a fragment of a sequence can be converted into composite segments (segment made up
of segments).
26 - Diphone Studio - Manual
2.2 Writing a script
The creation of segments is described in a script. A script is a text file that contains the co-ordinates of
the limits, the centre and the length of the interpolation zones.
The definition line for each segment in a script contains the instants of the beginning (beg), of the end
(end), of the centre (ctr), and of the length of the interpolation zones (InterpBeg and InterpEnd) (fig. 35).
Figure 35
Open an empty text file using the New Text option in the File menu in order to write a script.
This configuration corresponds to the hierarchy of the folders (Dictionary - Instrument - Segment) and the
values of the beginning time (beg), end time (end), of the centre (ctr) and of the interpolation zones for
the beginning (InterpBeg) and the end (InterpEnd) of each segment.
☛
You may edit a model of a script that you can then use by changing the definition names and values of
the segment each time you write a new script. You may choose the name you want for the dictionary. For
the instrument, you must take the exact name of the analysed file so that the procedure may access the
.F0 and .ADD files.
Diphone accepts a minimal definition of a segment. It completes the centre time and interpolation zones with
default values.
You just need to give the beginning and end times of the segment in the script (fig. 36).
Figure 36
27 - Diphone Studio - Manual
2.2.1 Writing a script using the AudioSculpt markers
A function in AudioSculpt enables you to locate the morphological articulations of the sound and to
identify them with markers: Markers. These markers are exploitable and exportable into Diphone, which
integrates them directly into its script.
Refer to the AudioSculpt documentation for a detailed explanation of the procedure for placing the
markers in a sound file. You may either use the automatic procedure Place Markers which determines
the location of each one depending on the peaks in the sound, or you may place them "by hand" directly
onto the sonagramme by hitting the Ctrl key and by clicking on the sonagramme at the desired location.
So that the script may function correctly, you must place three markers only to create an instrument with
one segment. They will be interpreted in the following way:
• marker 1: time of the beginning of the segment
• marker 2: time of the centre of the segment
• marker 3: time of the end of the segment.
If you use more than one segment, the following interpretation will be used:
• marker 1: time of the beginning of segment 1
• marker 2: time of the centre of segment 1
• marker 3: time of the centre of segment 2
• marker 4: time of the centre of segment 3
• marker 5: time of the centre of segment 4
• ...
last marker: time of the end of the last segment.
Using the Export Markers option, save the co-ordinates of the markers in the ImpExport:Markers folder.
2.2.2 Creating a script from the markers
Go back to Diphone.
In the Plugins menu, select Create Script From Markers (fig. 35).
Figure 37
The Script From Markers window appears. A list of Marker File Name containing six boxes is available
for entering the co-ordinates of the markers (fig. 36).
28 - Diphone Studio - Manual
Figure 38
In the first box, load the Marker file (folder icon) that you have just defined in AudioSculpt, and in the Script
box write the name of the script file to be created. If you replace the other boxes with other marker files,
a new instrument will be created for each instrument for the same dictionary.
Click on OK.
The conversion of the script file is finished, a warning informs you that the transfer was made correctly
(fig. 39).
Figure 39
A window with the name of the script appears (fig. 40). You will see how the different segment points have
been positioned.
29 - Diphone Studio - Manual
Figure 40
2.2.3 Writing the Markers file directly
It is possible that you may prefer to place your markers using an audio editor (Sound Designer, Peak...).
Using the editor of your choice, to write a Markers file with only one sound, locate the start, centre and
end times.
Write the definition of the markers in a text file by selecting File:NewText (or in the text editor of your
choice). Scrupulously respect the configuration of the text (fig. 41).
Figure 41
The number of and the link between markers corresponds to the definition given above.
Save this file with the name of the sound in ImpExport:Markers.
Now continue the creation of the script by following the procedure from the previous section.
30 - Diphone Studio - Manual
2.3 Creating a dictionary from a script
First of all, save the written script following one of the protocols described earlier into the folder
ImpExport:Script, or in a working directory that you have created.
From the script and all the analysis data, an instrument is created. An instrument collects all of the
segmentation of a sequence. The instruments are filed in a dictionary.
Part of the definitions of the dictionary are automatically placed in the Container. In the Plugins menu,
select Create Dictionary From Script (fig. 42).
Figure 42
A window then appears called Create Dictionary From Script. In the Script box, enter the name of the
script or load it from the folder where it is saved using the icon to the right of the name (fig. 43).
Figure 43
Adapt the model onto Additive.
The container takes the name of the dictionary defined in the script as the default name. If the container
already exists (name underlined), you will not be able to rewrite over it because it is locked. (If you are
sure of your actions, then you can put the file in the recycle bin by keeping the option key pressed. You
may also give it another name).
Click on OK. A message appears confirming the creation of the container (fig. 44).
If an error message appears instead, click on More Information to find out what the problem is.
31 - Diphone Studio - Manual
Figure 44
Note: Some of the possible problems: The container already exists. The script is not written properly.
(Reopen it and check the syntax and the name).
By opening the Instrument folder of the dictionary (triangle to the left of the small keyboard), you will
indeed find the icons of the segments you have created (fig. 43).
Figure 45
☛
The length of time that appears to the right of the segment may differ slightly from End - Beg as you defined them
in the script.
You may display the Inspector window by choosing the Show Inspector option in the Window menu (fig.
46), or by accessing the same function directly from the toolbar.
Figure 46
Inspector is a window that enables you to visualise the different parameters of the Diphone objects, and
to modify certain of them.
If, for example, you click on the graphical representation of segment 1 (fig. 45), the Inspector window will
show you the different key points of the segment (fig. 47).
32 - Diphone Studio - Manual
Figure 47
By clicking now on the triangle to the left of the segment icon, all of its parameters appear (fig. 48). They
will be useful for the following step: creating sequences (The parameters displayed in bold cannot be
modified).
33 - Diphone Studio - Manual
Figure 48
By default, the dictionary is created in the Dico&Seq folder.
34 - Diphone Studio - Manual
2.3.1 Creating and empty dictionary
You have the possibility to create an empty dictionary. This set-up can be useful if you want to collect in
one dictionary, the elements from several other dictionaries. The transfer process is done by simple copy
and paste or drag and drop of the elements.
Choose the New Dictionary option in the File menu (fig. 49), or access this same function directly from
the toolbar.
Figure 49
A dictionary window appears (fig. 50).
Figure 50
2.3.2 Creation of a segment with default parameters
This option creates a new segment that is not empty. It contains basic parameter data, depending on the
model. For the Additive model, the segment is made up of a user defined number of harmonics and a
fundamental without any temporal variation. This enables you for example to create simple waveforms
for electronic sounds. We will see later that this option will mostly be useful with the Chant model (see
"2.10 Using Chant with Diphone" on page 95).
In the Parameters menu, choose the Create Default Segment option (fig. 51).
Figure 51
35 - Diphone Studio - Manual
A segment definition window appears (fig. 52).
Figure 52
For the Additive model, you specify the number of harmonics (Number of Curves), the length of the
segment in seconds, and the number of points per Bpf (Sampling Rate).
☛
Click on OK.
Don't confuse the number of points of a Bpf with the sampling frequency of the sound.
A new dictionary appears (if no other was open and selected beforehand), which contains the new
segment (fig. 53).
Figure 53
36 - Diphone Studio - Manual
2.3.3 Sorting functions of the dictionaries
These two buttons (fig 54, 55) enable you to open (Expand all) or to close (Collapse all) all the elements
contained in the dictionary.
Figure 54 (left) et 55 (right)
You may also use an alphabetical sort of the instruments in the dictionary and the segments in the
instrument.
To sort the instruments: open the dictionary without selecting the instrument.
In the Dictionary menu, choose the Sort Dictionary option (fig. 56).
Figure 56
To sort the segments: Select an instrument in the dictionary.
In the Dictionary menu, choose the Sort Instrument option (fig. 57).
Figure 57
37 - Diphone Studio - Manual
2.4 Creating sequences
During this phase of the work, you enter the creation of sound and musical elements by manipulating the
parameters of the segments of a dictionary. Most manipulations are made by moving and modifying
graphical representations, those of the segments in the form of "tiles" and those of the parameters in the
form of Bpfs.
A certain number of these operations may also be made in the Inspector window. Finally, other operations
will appear in specialised windows (non graphical modification of the Bpf) or will be accessible using
buttons or dedicated menus.
2.4.1 The segment in the graphical representation of a sequence
To see the segment, you need to create a sequence. An empty sequence window is created by default
when Diphone is started up.
You may also create a new sequence with the File menu, New Sequence option, or with the dedicated
tool from the toolbar (fig. 58). A non-empty dictionary must of course also be loaded.
Figure 58
A window called Untitled Sequence 1 appears (fig. 59). It is separated into two big superimposed zones.
The top zone to place the segments, the bottom one for the parameters. You may show or hide this lower
part with the small triangle to the top left-hand side of the upper zone.
38 - Diphone Studio - Manual
Figure 59
From the dictionary window, drag the segment icon towards the upper part of the new sequence.
The graphical representation of the segment appears immediately (fig. 60).
39 - Diphone Studio - Manual
Figure 60
As for the dictionary, the Inspector window then gives you access to all the details on the segment. You
may change the name of the segment, and change its data in a manner described in the following
sections.
40 - Diphone Studio - Manual
2.4.2 Construction of a sequence of several segments
After having placed you first segment as explained in the previous section, you are now ready to move
on in the construction of your sequence. Reproduce the same operation by dragging the icon of the
second segment this time, behind the graphical representation of the first. A pink zone appears indicating
that you can let the mouse button go (fig. 61).
Figure 61
Once this is done, a second segment appears after the first (fig. 62). Go on in this fashion by placing other
segments before, after or in between those already placed.
Figure 62
You will notice that the window automatically scaled itself in time for al of the graphical representations
of the segments.
41 - Diphone Studio - Manual
2.5.3 Controlling the display of the sequence window
The chronometric bar at the bottom of the window is extensible or can be reduced. To do this, move the
cursor to chronometric bar, it will change into a double arrow. Press the mouse button, drag in an
extension direction, the markers stretch following your movement like a zoom (fig. 63).
Figure 63
For this same type of manipulation, you may also use the magnifying glass tool which you can select in
the tolls to the top left hand side of the sequence window. On the segment representation, select the zone
you would like to magnify keeping the mouse button pressed down (fig. 64).
Figure 64
☛
Now let go of the mouse button to operate the function.
The magnifying glass tool used with the option key on your keyboard enables you to invert the function and to
shrink the time scale. A small - (minus) sign appears in the center of the magnifying glass.
42 - Diphone Studio - Manual
2.5.4 Manipulation of the segments in their graphical representation
You may transform all the characteristics of the segment. To do this, two operational modes are available.
Intervention with the mouse on the graphical representation and/or writing the values directly using the
Inspector window. Certain parameters however are adjustable only in the Inspector window. We suggest
you always keep this window open when manipulating segments, even if you are working mostly in
graphical mode. After each manipulation, the Inspector window is updated. It enables you to understand
correctly the consequences of each operation.
1 Length of the segment
To modify the length of a segment, you only need to move you cursor near to the extremity of the segment
to be modified, a double arrow appears. By keeping the mouse button pressed, you just need to move
the cursor forwards or backwards to expand or reduce the length of the segment (fig. 65).
Figure 65
To the bottom left of the toolbar, a chronometric marker informs you of the position of the extremity of the
segment and of its position while it is moved. This value corresponds to the time axis, the beginning of
the sequence being instant 0.
The modification of the length is made simultaneously on the whole length of the segment and for each
limit proportionally to its distances to the middle of the segment.
2 Manipulation zones outside interpolation
Move the cursor towards one of the edges of the zone outside interpolation (after InterpBeg and before
InterpEnd). By holding the mouse button pressed down, if you move the mouse forward or backwards,
you move the limits of the hard zone, the one whose parameter values are not interpolated (fig. 66, 67).
43 - Diphone Studio - Manual
Figure 66
Figure 67
☛
Only the selected border changes position.
3 Moving the centre
Move the cursor onto the triangle representing the centre of the segment. Press on the option key of your
keyboard, the picture of the triangle is modified. Now move the mouse, still pressing the mouse button
down, to the desired location (fig. 68).
Let go of the mouse button, the centre will go back to its triangle shape in the new location.
44 - Diphone Studio - Manual
Figure 68
4 Moving segments
Select the segment to be moved, then press the option key. Then move the cursor onto a part of the
graphical representation of the segment to be moved. The pointer turns into a double arrow. By keeping
the option key pressed down, move the double arrow in the desired direction, a light imprint of the
segment follows the move (fig. 69). By using the chronometric markers at the bottom of the window, place
the segment at its new location by letting go of the option key on your keyboard.
Figure 69
☛
To move a group of segments, first select (with the shift key pressed down before the mouse button) the segments to be moved, then with the option key pressed down, move the group of segments.
Another access to controlling the move of the segments has been designed in Diphone: Glue Selection.
First select the relevant segments for the wanted extension (or narrowing) by clicking on it with the shift
key pressed down (or Select All if it is used on all the segments).
Select Glue Selection in the Sequence menu. A window appears in which you can specify in seconds,
the required spacing between the segments (fig. 70).
45 - Diphone Studio - Manual
Figure 70
To make the time as small as possible between two or more segments, enter the value 0 in the window
shown previously, or click directly on the dedicated icon situated at the top of the sequence window (fig.
71).
Figure 71
This tool can only set the value of Glue Selection to 0.
5 Changing the amplitude of the segment (Scaler)
The height of the graphical representation of the segment represents the scale of the relative amplitude
of the different segments compared to each other. It is called Scaler. To modify it, move the cursor
towards a horizontal edge of the relevant segment. A double vertical arrow appears. With the mouse
pressed, move the double arrow to make the height of the picture of the segment go up (or down) (fig. 72).
Figure 72
Let go of the mouse button when you have reached the required dimension of the scaler.
46 - Diphone Studio - Manual
2.5.5 Modifying the segments with the Inspector window
The Inspector window gives you another mode of access to the same settings as those talked about in
the previous section. You will no doubt have noticed that the modifications that you make with the mouse
on the graphical representations are immediately updated in the Inspector window.
You will also notice the presence of new parameters that you can access. Generally, you will only need
to click on the value to be modified. A black rectangle surrounds it, and you can then enter the new value
(fig. 74).
Figure 73
☛
You can of course not modify Original Length. It is used as a reference in case you want to go back to the original
length of the segment.
The Clip Begin, Clip End and Dilatation parameters, which are still being developed, are not recognised in this
version of Diphone.
Changing the name of a segment
You can change the name of a segment in order to avoid confusion in identity.
In the Segment box, type in the new segment name. The new name is immediately displayed in the
graphical representation of the segment.
The Next Ctr value
This value represents the distance between the centres of two segments which follow each other. If you
modify it, you then move the position of the following segment, without changing the position of the centre
itself.
47 - Diphone Studio - Manual
Types of modifications of the temporal parameters (Bpf Mode)
At the bottom of the Inspector window, the Bpf key gives you the possibility to choose several modes of
transformation of the temporal parameters. It is pre-set to Elastic by default (fig. 74).
Figure 74
Elastic: This modification expands or compresses all the temporal parameters proportionally to the
modification of the length of the segment in an elastic way.
For example, if the sound of the segment includes a vibrato, the period of the vibrato will vary
proportionally to the expansion or the compression of the length of the segment.
Hard: keeps the original parameters despite the modification in the length of the segment. The stretching
and compression take place for the interpolation periods. Unlike the Elastic mode therefore, the period of
the vibrato does not vary when the length of the segment is modified. You may try making some tests on
a speech sound so you can understand the difference between Elastic and Hard.
☛
Elastic Reverse and Hard Reverse make the same type of modifications as Elastic and Hard but with an
inversion of the time axis.
You may also access the temporal parameter modification modes by selecting the Select Mode To option in the
Sequence menu.
48 - Diphone Studio - Manual
2.5.6 Articulations
Articulations are the graphs used when interpolating of the data from one segment to another. They are
represented by default beneath the sequence by a cross showing the position of the middle of the
interpolation section (fig. 75).
Figure 75
By keeping the mouse button down on the cross, a pull-down menu appears which suggests a list of
transition graphs (fig. 76).
Figure 76
Select the graph by moving the arrow to the chosen one. The picture of articulation replaces that of the
cross initially applied.
You may create your own transition graphs yourself. The User icon validates this selection.
To create a personalised graph, choose the Edit option in the transition window.
An editing window appears (fig. 77).
49 - Diphone Studio - Manual
Figure 77
With the pencil, you may freely draw the waveform of your choice. The left-hand column shows you the
eight predefined articulation curves. You can use them as a starting point or as a way of distortion. To do
this, click on one of these shapes. By keeping the button of the mouse pressed down, move the cursor
back into the drawing zone, and distort the curve.
You can save this new waveform (Save), or load other curves that you have already constructed (Load).
50 - Diphone Studio - Manual
2.5.7 Creating a segment from a sequence
You have the option to create a segment from the entire contents of a sequence, but also from a fragment
of your choice, selected in the sequence.
First case
The sequence window having been activated, select the Create Segment From Sequence option in the
Parameters menu (fig. 78).
Figure 78
A new dictionary window appears (fig. 79).
Figure 79
You can rename the dictionary from the menu File:Save as... and by placing it in the Dico&Seq folder, or
in a folder that you have created yourself if you have made your own environment. You can also use the
copy and paste procedure and place the instrument in any other open dictionary.
Second case
You can also create a segment from a selected part of the sequence.
Select the Selection button in the upper part of the sequence window, and select the chosen part from
the graphical representation of the segment (fig. 80).
51 - Diphone Studio - Manual
Figure 80
The sequence window having been activated, select the menu Parameters:Create Segment From
Selection (fig. 81) which has substituted itself to the option Create Segment From Sequence. Now
proceed in the same way as described earlier for the first case.
Figure 81
☛
These two operations must not be confused with the creation of a Composite segment (see following section).
52 - Diphone Studio - Manual
2.5.8 Composite segment
A composite segment is a segment that contains a sequence, i.e. several segments. The graphical form
and the direct manipulation on the graphical representation of a composite segment are identical to the
ones of a basic segment. The biggest difference with the operations, already explained for the creation
of segments from a sequence, is that the composite segment always enables you to find individual
segments that compose it.
Visually, a composite segment is different from a basic segment because its name is always written in
italics in the sequence window, as well as in the dictionary where its icon is modified (Two small linked
segments).
Creating a composite segment
In a dictionary window, click on the name of an instrument. It will go black (fig. 82).
Figure 82
In the Dictionary menu, select the Create Composite Segment option (fig. 83).
Figure 83
The composite segment appears in a list of segments of the instrument. Its icon is slightly modified and
it is named Untitled Segment by default (fig. 84). You can rename it in the Inspector window.
53 - Diphone Studio - Manual
Figure 84
☛
This composite segment is empty for the moment.
Now select in the sequences window the segments which make up the composite sequence. Now click
and drag the segments onto the icon of the composite segment in the dictionary (fig. 85).
Figure 85. Source: Segments that make up the composite segment
Let go of the mouse button. The composite segment then appears complete with the segments that make
it up inside the dictionary (fig. 86).
54 - Diphone Studio - Manual
Figure 86. Destination in the dictionary for the creation of the composite segment
You can now use this composite segment like any other segment in the construction of a sequence (fig.
87).
Figure 87
☛
If you create a composite segment from several instruments and several dictionaries, this composite segment will
reference the data from different containers.
Be careful therefore if you want to delete a container that your hard disk has recognised all the dictionaries that
depend on it.
Return to basic segments of a composite segment
In the sequence window, double click on the graphical representation of a composite segment. The
segments that make it up appear immediately. You can then make all the modifications you want following
the procedures described earlier. In order to conform it once more as a composite segment, click on the
dedicated tool Out Composite Segment, to the top right-hand side of the sequence window (fig; 88).
55 - Diphone Studio - Manual
Figure 88
2.5.9 Help constructing a sequence: placing it on a temporal grid
The sequence can be organised following the markers of a temporal grid whose metric can be
parameterised.
To make the grid appear, select the Show Grid option in the Sequence menu (fig. 89).
Figure 89
The temporal grid appears in the sequence (fig. 90).
Figure 90
The grid is positioned by default on the first synchronous pulse on the centre of the first segment. You
can then place the segments on the temporal grid by arranging the position of the segments.
To change the metric of the temporal grid, select the Set Grid Step in the Sequence menu. The Sequence
Grid Step window appears (fig. 91).
56 - Diphone Studio - Manual
Figure 91
Indicate the grid step size in seconds and click on Apply.
The Snap Selection to Grid option of the Sequence menu enables you to automatically position yourself
on the centre of each segment on the nearest grid step. Figure 92 shows a positioning on a grid with a
step size of 1.5 seconds.
Figure 92
57 - Diphone Studio - Manual
2.5.10 Listening test of an additive sequence (Preview)
A control listening test of the positioning of an additive segment is available from the toolbar at the top of
the sequence window (fig. 93).
Figure 93
The next two buttons, to the right of the Play key, correspond respectively to Play a segment or a selection
in a loop, Pause and Stop. These same four functions are also found in the Sequence (fig. 94).
Figure 94
The Low quality remark is there to remind you that this listening is only done for tests and not for listening
that gives all of the sound information on the sequence. The synthesis does indeed only take the first
three partials into account by default.
The number of partials and the sampling frequency can however be modified and determined in the Edit
menu, Preferences option, or by displaying the preferences directly from the main toolbar. Choose the
Additive tab in the preferences (fig. 95). Make your adjustments in the right-hand side of the window
(Preview).
58 - Diphone Studio - Manual
Figure 95
59 - Diphone Studio - Manual
2.5.11 Synthesising a sequence and listening to it
To listen to the sequence with better quality sound, you have to first synthesise the sequence. The Export
for Synthesis button in the tools of the sequence window enables you to access this operation (fig. 96).
Figure 96
An Additive Synthesis window appears (fig. 97).
Figure 97
The synthesis can be done on part of the sequence. Adjust the values of the beginning and end by ticking
the Processing interval box and by entering values in seconds.
60 - Diphone Studio - Manual
You can determine the number of partials with which the synthesis is done, either with all the partials (All
box ticked) or with the number of partials you want (the first n).
In the Fund.File, Partial file and Sound boxes, the name of the F0 and ADD files are specified with the
name of the sequence by default. The folder icons enable you to choose the save destinations.
The Delete Intermediate files bow insures the intermediate files from the synthesis are automatically
deleted.
Run the synthesis process by clicking on OK.
When the synthesis is finished, you can listen to the created file by clicking on the Play/Stop last synthesis
button in the sequence window (fig. 98).
Figure 98
To listen to the sequence or part of a sequence that is older than the one which has just been analysed,
use the Open Movie&Sound option from the File menu (fig. 99).
Figure 99
61 - Diphone Studio - Manual
You may want to save the sequence already at this stage before continuing any further in the
manipulation of the segments.
Save the sequence from the File menu, option Save As…. Name it by putting it in the Dico&Seq folder
for example. You are advised to end the name with .seq.
62 - Diphone Studio - Manual
2.6 Actions on the Bpf
First of all, remember that Bpf means Break Point Function, i.e. a sampled waveform.
These operations will enable us to modify the parameters of the segments. These parameters are
accessible in the lower part of the sequence window (fig. 100).
Figure 100
☛
You can display or mask this list of parameters by clicking on the triangle situated to the left of the
Parameters
We will discuss, in the next sections, the Bpf from the Additive model. The segments from other models such as
Direct Signal or Chant, will have a different series of parameters. Manipulations however stay the same.
63 - Diphone Studio - Manual
2.6.1 Types of Bpfs
There are two Bpfs:
• The simple Bpf that have one waveform only, for example the fundamental or the energy.
• The multi-Bpfs are made up of a group of curves, like the values of the different partials. You will note
that the multi-Bpfs, because of their size, must be loaded into memory by clicking on the icon of the
hard disk situated to their right (fig. 101).
Figure 101
The waveforms of each Bpf use units relative to the type of each parameter. Here are those of the
Additive model (fig. 102).
Parameters
Fundamental
Transposition
Energy
Gain
Frequency of partials
Amplitude of partials
Phase of partials
Scaler
Original Fundamental
Units
Hertz
semitone
linear
decibels
Hertz
linear
2 pi radians
without unit
Hertz
Type
Bpf
Bpf
Bpf
Bpf
multi-Bpf
multi-Bpf
multi-Bpf
Bpf
Bpf (non modifiable)
Figure 102
Fundamental
Transposition
Energy
Gain
Frequency of partials
Amplitude of partials
Phase of partials
Scaler
Original Fundamental
Evolution of the fundamental frequency with time
From the default value of 0 (zero), it enables the transposition by a semitone or less of all the values of the pitches of the
segment.
General intensity curve with time
Absolute level of the segments
All the partials from the analysis of the segments
Amplitude of the partials from the analysis of the segments
Phase of the partials from the analysis of the segments
Relative level of the segments
Original path of the fundamental. This parameter is not modifiable, but it can be used for example to restore the original
path after modifications of the fundamental that are not wanted (see "2.7 Transfer and replacement of parameters from a segment to another" on page 87).
64 - Diphone Studio - Manual
By clicking on the triangle in front of the name of a parameter, the trace of a Bpf appears (fig. 103).
Figure 103
If you have more than one segment in your Bpf, you can observe the superposition of curves in the
interpolation zone. You can run the interpolation of the displayed parameter by clicking on the button
dedicated to that function (fig. 104). The new curve after interpolation appears and you can immediately
listen to the result.
65 - Diphone Studio - Manual
Figure 104
By selecting Show Separation Marks from the Sequence menu (fig. 103), you can visualise the markers
of the beginnings of segments and beginnings of interpolation zones (fig. 104).
Figure 105
Figure 106
66 - Diphone Studio - Manual
2.6.2 Visualisation of Bpf points
Access through the sequence window opens with a graph of the Bpf. These traces are not the Bpfs but
their images that you select to obtain the Bpf to be modified. By moving the cursor near to the trace of
the Bpf to be selected, a blue box surrounds the trace (fig. 107).
Figure 107
☛
Double-click this bow, the edition window of the Bpf appears (fig. 108).
The opening of the Bpf in the edition window cannot be done if the interpolation has not been run.
Figure 108
You can now operate on this curve from this window. The modifications will automatically be displayed in
the sequence window.
67 - Diphone Studio - Manual
The modification tools are accessible directly from the icons situated at the top of the window, or by
opening the Bpf menu (fig. 109) or by clicking on the dedicated tool at the top of the Bpf window (fig. 110).
Figure 109
Figure 110
68 - Diphone Studio - Manual
To access the points making up the Bpf, choose the Show Points option in the Bpf menu. Each point that
makes up the curve then appears (fig. 111).
Figure 111
69 - Diphone Studio - Manual
2.6.3 Zoom format and selection in the Bpf window
The horizontal axis shows time. The vertical axis shows the unit of the specific parameter displayed in
the Bpf (Hertz for the fundamentals or the pitch of the partials, decibels for the gain or energy etc). You
can modify the scaling of the representation of these two axes by placing the mouse on the measuring
units axis at the bottom or to the right of the window. The arrow changes into a standard symbol for
changing the size of the window (double arrow). Change the scale by keeping the mouse button pressed
down and by dragging (fig. 112, 113). Let go of the mouse button when you have reached the desired
format.
Figure 112
Figure 113
It is sometimes necessary to visualise the Bpf after the expansion of the vertical scale, to crop the image
by using the scroll bar to the right of the picture.
70 - Diphone Studio - Manual
To go back to the initial representation of the traces of the Bpf in a scale (horizontal or vertical), take the
arrow tool and double-click the scaling axis to be initialised.
To make a zone bigger following one dimension only (vertical or horizontal), move the cursor to the scale
to be changed, press on the shift key, click on the scale bar and select the area to be made bigger
(fig. 114).
Figure 114
Using the magnifying glass
To make the representation of the curves bigger in a Bpf window, select the magnifying glass button from
the tools of the Bpf window (fig. 115).
Figure 115
From a corner of the zone that you choose, drag the magnifying glass to obtain the boundaries of the
zone you want to make bigger (fig. 116).
71 - Diphone Studio - Manual
Figure 116
The selected zone then occupies the whole surface of the window (fig. 117).
Figure 117
To go back to a less narrow visualisation, click in the window with the magnifying glass while holding the
option key down. The magnifying glass appears with the - (minus) sign in its centre.
72 - Diphone Studio - Manual
The case of multi-Bpfs
Multi-Bpfs ar made up of not one, but several curves.
In certain cases, there can be a large number of them (frequency or amplitude of the partials for example).
In the sequence window, their name is followed by an icon representing a hard disk. Click on this icon
first to load the Bpf data into memory. You will be able to get this space back later by choosing the
Remove External Parameters option (fig. 118).
Figure 118
As for a simple Bpf, first open its representation in the sequence window, then double-click it to make the
multi-Bpf appear in the edition window (fig. 119).
Figure 119
73 - Diphone Studio - Manual
Often, due to the number of curves, it is essential to immediately choose an appropriate scale of
visualisation, as explained earlier (fig. 120).
Figure 120
The sub-menu View to the top right-hand side of the Bpf window is now accessible. It is shaded in the
case of a simple Bpf. The All Curves option is selected by default (fig. 121).
Figure 121
In the All Curves mode, you can make no modification in the multi-Bpfs. It is used for visualisation only.
To modify the multi-Bpfs, first choose the Back Curves option in this same menu (fig. 121).
Figure 122
74 - Diphone Studio - Manual
☛
The curves then appear in pale blue and you can select particular curves in the multi-Bpfs.
If the multi-Bpf is large, you may have to wait until Diphone has finished its calculations for each curve, starting
with the lowest one. The progress of the calculations is shown on the toolbar (fig. 123).
Figure 123
You can now move the cursor on the Bpfs and see the trace of each curve appear, with red lines around
it (fig. 124).
Figure 124
By clicking, you select the highlighted curve. It appears again in dark blue (this is not very easy to see if
the curves are very close together). If you now choose One Curve in the View sub-menu, the trace of the
curve appears on its own in the Bpf window (fig. 125).
75 - Diphone Studio - Manual
Figure 125
☛
If you use the pencil to correct the trace of a curve in the multi-Bpfs, One Curve mode is selected automatically
from the Back Curves mode.
76 - Diphone Studio - Manual
2.6.4 Modifying the Bpf and multi-Bpf curves
The pencil and the rubber
The simplest procedure for modifying the Bpf is to use the pencil and rubber tools. Display a curve in the
Bpf window, and choose whether to visualise the points on the Bpf (fig. 126).
Figure 126
Now draw directly on the curve. The new values are taken into account immediately.
If you would like to draw a straight line, horizontal or oblique, use the pencil in combination with the option
key on you keyboard. A small line appears next to the pencil (fig. 127).
Figure 127
☛
All actions on the Bpf can be cancelled using the Undo option in the Edit menu.
To go back to the initial state of the saved sequence, use Revert in the File menu.
The series of manipulations that we will talk about now enable you to apply automatic functions to a Bpf.
They are accessible by clicking on the different tools situated at the top of the Bpf window, or through the
Bpf menu (Only a few functions are available from the Bpf menu).
77 - Diphone Studio - Manual
Applying a constant value
Figure 128
This function applies a constant value to a Bpf, over its whole duration. The adjustment window enables
you to specify the value to be applied. The unit (Hertz, dB, etc.) is automatically fixed depending on the
parameter represented by the Bpf: Hertz in this example (fig. 129).
Figure 129
If you are working on a multi-Bpf, the Treat Curve bow allows you to choose the number of curves the
constant value is applied to.
In the Value box, enter the value you want. Click Apply, and the trace of the Bpf becomes a line with a
constant value.
Scaling (Scale)
Figure 130
With this function, you can modify the spacing between the points of the curve on the vertical axis. The
adjustment window presents several options: Zero, Minimum, Middle, Maximum and the Value box, so
that you can define the value from which the scaling factor is applied (fig. 131).
78 - Diphone Studio - Manual
Figure 131
In the following examples, we will take different factors (Scale Ratios) and observe the results obtained
with a Bpf with three different frequency zones: 100 Hz, 110 Hz and 125 Hz. Figure 132 shows the
starting curve.
Figure 132. starting curve
79 - Diphone Studio - Manual
From zero
the factor will be applied to all the points on the Bpf. For a factor of 2, the values of the trace become:
200 Hz, 220 Hz, 250 Hz (fig. 133).
Figure 133: From zero, scale ration = 2
From minimum
The factor is applied to the points of the Bpf from the lowest point.
Figure 134: From Minimum, Scale Ration = -1
The values 100 Hz, 110 Hz and 125 Hz become respectively 100 Hz, 90 Hz, and 75 Hz.
• 100 Hz (the minimum) remains unchanged.
• The points at 110 Hz => 100 - (110 - 100) = 90 Hz
• The points at 125 Hz => 100 - (125 - 100) = 75 Hz
80 - Diphone Studio - Manual
From Middle
The factor applies to the points of the Bpf round the average value, between the highest point and the
lowest point (fig. 135).
Figure 135. From Middle, Scale Ratio = 2
The middle is now considered as an axis for the calculation.
☛
We obtain the following middle points of the Bpf: (125 - 100) / 2 = 112.50 Hz.
• The points at 100 Hz => 112.5 - (112.5 - 100) * 2 = 87.50 Hz
• The points at 110 Hz => 112.5 - (112.5 - 110) * 2 = 107.50 Hz
• The points at 125 Hz => 112.5 - (125 - 112.5) * 2 = 137.50 Hz
The middle being 112.5 Hz, the points at 100 Hz and 110 Hz being below, and 125 Hz above the middle value, the
calculation for the first two cases is: their double differences with the middle, and for the third case, the double of
the spacing with respect to the middle.
81 - Diphone Studio - Manual
From Maximum
the factor applies to the points of the Bpf above the highest point (fig. 136).
Figure 136. From Maximum, Scale Ration = 2
We get the trace: 125 Hz, 95 Hz, and 75 Hz.
• This is to say, 125 Hz is the highest point.
• The points at 110 Hz => 125 - (125 - 110) * 2 = 95 Hz
• The points at 100 Hz => 125 - (125 - 100) * 2 = 75 Hz
From Value
The factor applies to the points of the Bpf depending on the written value in the Value box. If you have
followed the demonstrations for the selections given earlier (from Zero, Minimum, Middle and Maximum),
the adjustment of this selection will seem obvious to you.
82 - Diphone Studio - Manual
Translation of a Bpf
Figure 137
With this function, you will apply a translation by a constant value on the vertical axis. The unit is of course
variable depending on the parameter displayed by the Bpf. Enter a positive or negative value in the Y
Translation box and click on the Apply box (fig. 138).
Figure 138
Operations specified with notes
Figure 139
These two procedures correspond to the same operations as when applying a constant value to a curve
or its translation. The difference is that it is not applied only to the Bpf showing pitch values. The units are
now either the name of the note and an octave number for Apply Constant Note (fig. 140), or semitones
for Note Transpose (fig. 141).
Figure 140
83 - Diphone Studio - Manual
Open the sub-menu Note to choose a note.
Figure 141
☛
These options are inaccessible if you are visualising a Bpf which doesn't have anything to do with pitch.
Filling in the blanks in a Bpf
This option is only accessible from the Bpf menu (fig. 142).
Figure 142
This function enables you to fill in automatically any blanks in a Bpf. You specify the minimum interval of
time for the calculation of the missing points (fig. 143).
Figure 143
After having clicked on Apply, the curve is immediately displayed in the Bpf window. This function is
mainly used for curves from multi-Bfp of a frequency of partials that are very often discontinuous after an
analysis.
84 - Diphone Studio - Manual
Eliminating the curves from a multi-Bpf
This function is accessible only from the Bpf menu (fig. 144). It only applies to multi-Bpfs.
Figure 144
You can specify in the adjustment window the lowest number and highest number curve you wish to keep
(fig. 145).
Figure 145
Creating a new Bpf
This function enables you to create a new Bpf that is not generated from a parameter. You may then
substitute it to the Bpf of a parameter by copying and pasting it.
In the File menu, choose the New Bpf option (fig. 146).
Figure 146
85 - Diphone Studio - Manual
A configuration menu appears (fig. 147).
Figure 147
Specify the length of the Bpf (Length) and the number of points (Sampling Rate).
☛
Click on OK.
Do not confuse the number of points of a Bpf with the sampling frequency of the sound.
86 - Diphone Studio - Manual
2.7 Transfer and replacement of parameters from a segment to another
This group of manipulations, which is very easy to access, constitutes one of the most powerful modes
of transformation of sounds in Diphone. You can, for example, apply the contents of the pitch of partials
of an instrument to another, while conserving the latter's fundamental and the intensity of its partials. It
may also be interesting to substitute a fundamental path from one segment to another…
Several methods are possible:
From the sequence window, open the graphical representation of a parameter and drag and drop it onto
the graphical representation to be modified (fig. 148).
Figure 148
87 - Diphone Studio - Manual
The new values for this parameter of the destination segment are immediately updated (fig. 149).
Figure 149
☛
You obtain the same result by opening the two graphical representations of the segments in one window of the
Bpf (double-click the representation which is circle in blue) and by using the traditional copy and paste.
You can transfer the Bpf of a dictionary to the window of a sequence. Follow the same instructions as
given previously, by dragging and dropping from the name of the parameter in the dictionary window to
the segment in the sequence window (fig. 150, 151).
88 - Diphone Studio - Manual
Figure 150. Source in the dictionary
Figure 151. Destination, segment in a sequence
The transfer can at last be carried out from dictionary to dictionary. Still using the drag and drop
technique, move a parameter to its equivalent destination in another dictionary this time (fig. 152, 153).
89 - Diphone Studio - Manual
Figure 152: Source, source dictionary
Figure 153: Destination, destination dictionary
90 - Diphone Studio - Manual
2.8 How Direct Signal works
Diphone enables you to create and manipulate sequences using the segmentation principal, by taking
the actual sound signal as the main data. With this model, which doesn't require any preliminary analysis,
you will have access to a limited number of parameters. You will however be able to make very precise
editing. The majority of operations is similar to those described previously for the Additive:
• Script model of cutting up segments.
• Creating dictionaries.
• Creating sequences.
• Re-synthesis.
2.8.1 Example of the use of Direct Signal
Place the sound which you would like to work on in the Import-Export:Sound folder. Take note (with
AudioSculpt for example) of where the articulations of your sound sequence are.
Then write a script to cut the sequence up into musical segments, and start the process of creating the
dictionary (Create Dictionary From Script in the Plugins menu).
The creation window of the dictionary appears. Don't forget, in the Model pull-down menu, to attach it to
Direct Signal (fig. 154).
Figure 154
The dictionary that has been created presents a similar structure to those that were created with the
Additive model. The number of parameters for each segment is however reduced to three (fig. 155).
91 - Diphone Studio - Manual
Figure 155
☛
The creation of the sequence is then done in exactly the same way as what has been described for the
Additive model.
If you change the length of a sequence with the Bpf mode (in the Inspector window) set to Elastic, you will at the
same time modify the pitch of the segments. Transpose down to lengthen the time scale, and up to shorten it. This
transposition effect is relative to the proportion of compression or expansion.
The Signal and Gain parameters can be open and modified in the Bpf window. Scaler can only be
modified with the mouse on the graphical representation of the segment, or in the Inspector window. The
Bpf Gain enables you to profile the general dynamic envelope of the segment.
If you open the Bpf signal, you will get an amplitude versus time representation of the signal, equivalent
to the one found in traditional sound editors (Sound Designer, Peak…). To modify it, you will therefore be
able to use the pencil with all the risks that it represents on the deterioration of the signal. More interesting
manipulations of the dynamics are possible with modifications of scale ratios (Scale Ratio).
92 - Diphone Studio - Manual
2.9 General principal of Chant
Chant is a specialised library for the synthesis of sound. With the Resan analysis programme, you will be
able to integrate new elements into Chant.
The synthesis uses the Formantic Waves Function (Fof) method and banks of filters resonating in parallel
like in synthesisers using parallel formants used for speech synthesis.
The principal behind Chant is to synthesise a sound as a function of formantic parameters that describe
zones of dominant peaks in a particular spectrum. Most of this data is described as functions of time
defined by time-value points, i.e. Bpfs.
2.9.1 What is a Fof (Formantic wave function)?
Take an excitation e(t) and a linear filter with an impulse response in time h(t). The answer e(t)*h(t) gives
the signal s(t) (*:convolution operator). An Fof is the signal s(t), impulse response of the linear filter of the
two filters in series e and h.
If we apply these elements to the voice, e(t) is the representation of the opening of the glottis, and h(t)
that of a resonance of the vocal tract. Since the vocal tract has several resonances, we have several
filters hl(t)…hn(t). To each filter hi(t) which is excited by e(t), corresponds an Fof(t) si(t).
The voice is therefore modelled using the sum of Fof which are excited by the same impulses. In the
spectral domain, each Fof represents a formant (resonance of the vocal tract).
A Fof is therefore a sinusoid modulated in amplitude by a raised sinusoid for the length of the attack, then
followed by a decreasing exponential.
This is what the signal looks like when a Fof is triggered (fig. 156).
Figure 156
93 - Diphone Studio - Manual
…and the corresponding formant (fig. 157).
Figure 157
It is important to understand that a Fof is one (and only one) excitation, limited in time.
We will see further on that it is possible to listen to a Fof separately if a sufficiently low fundamental is
applied (In the order of 1 to 10 Hz for example).
2.9.2 The parameters of a Fof
In the Chant library, a Fof has 7 parameters controlled by Bpfs.
• The central frequency of the Bpf,
• The amplitude,
• The bandwidth,
• The time of excitation,
• The time at which attenuation starts,
• The time attenuation lasts for,
• The phase.
The idea with synthesis is to have as many Fof as formants we want to represent. We then obtain a bank
of Fof. When the bank is triggered, all the Fof are triggered simultaneously and added. To obtain a note,
you have to trigger the bank repeatedly at the repeat frequency, or the fundamental you want. A sound
can be easily synthesised that gives the impression of a pronounced vowel. You only need a bank of 3
to 5 Fof, parameterised to the formants of the vowel you want, and which are excited at a frequency
corresponding to the range of a voice (110 Hertz for example).
2.9.3 The other elements of Chant
Chant doesn't stop at Fof. First of all, it is possible to feed the output of a bank of Fof into a bank of
resonant filters, parameterised in the same way as the Fof.
You also have access to white noise which when filtered give breath sounds.
It is also possible to use audio files to filter them and to combine them with the noise or bank of Fof.
Managing the filters is done in the same way as for the Fof. Each filter has four parameters (frequency,
amplitude, bandwidth, correction), i.e. four Bpfs.
The breath sounds and the sound files are simpler objects than the banks. They each have one amplitude
Bpf only. They have to be connected onto a bank of filters.
94 - Diphone Studio - Manual
2.10 Using Chant with Diphone
This section will enable you to manipulate and to synthesise sequences from predefined segments and
by using Fof or filters. On many pints, the manipulations are similar to those of the Additive or Direct
Signal models. A big difference however is the introduction of patches. Chant in Diphone Studio offers a
list of combinations of objects configured into patches. The patches will be seen in detail in the following
section.
For the first examples, we will only use patch 0: Using a bank of Fof.
☛
Patch 0 is present by default during the Export for Synthesis operation.
In this first context, Diphone works in real time. You just need to press the space bar to hear the sound result. The
Export to Synthesis action is necessary in the following cases:
Keeping a sound on the hard disk.
Certain parameters that are very demanding in processor time.
Using other patches than patch 0.
2.10.1 A sequence with Formantic Waveforms (patch 0)
For a first approach, use the dictionary of predefined segments, supplied with the Diphone Studio kit
(Menu File:Open). This folder is found in Dico&Seq, and is called Chant-Base.dico (fig. 158).
Figure 158
☛
By opening Chant-Base.Dico and Empty Segments, you see a list of 16 segments containing 1 to 16
formants.
You can also create a new segment with the Create Basic Segment function. The creation window asks you the
number of Fof you would like.
(Start with one only so as to understand the principal properly). If you use this command, you will see a group of
parameters appear which is superior to those of the strict definition of an Fof. This process also creates the definition parameters of a filter. You can delete from the list of parameters those which you do not need for the moment
(Clear).
Drag the segment icon containing a Fof into the upper part of the sequence window. The segment
appears graphically, exactly like those already seen with the Additive or Direct Signal model. The lower
part of the window shows us, as usual, the parameters of the segment (fig. 159).
95 - Diphone Studio - Manual
Figure 159
☛
☛
By hitting space bar, you can immediately listen to the sound.
In Chant, the Preview (direct listening) only works with Patch 0 (work on the banks of Fof only).
Note on the Bpf: A large number of parameters of the Fof are expressed by the multi-Bpfs (shown by a hard disk
icon, to the right of their name in the sequence window). If you use segments made up of one Fof only, multi-Bpfs
will only display one curve. Don't however confuse these with simple Bpfs. In the edition window, don't forget to
change into Back Curves mode to access the modifications.
The first examples of manipulating Fof that will follow use a bank of only one Fof. This does of course not
give particularly rich sound results, but gives better clarity in the explanations of how to handle the traces
of the Bpf and to best approach the parameters and their effect on the sound obtained.
It is important to understand straight away the respective roles of the Fundamental and of Fof frequency.
• Fundamental corresponds to the number of excitations per second.
• Fof frequency represents the Fof's own pitch.
To better understand the consequences, try the following things:
Set the fundamental to one value only, 110 Hz for example.
96 - Diphone Studio - Manual
Now open the Fof frequency parameter. In the Bpf window draw a path with the pencil (keep the option
key pressed down to draw straight lines) from 200 to 900 Hz approximately.
Immediately listen to the sound result by hitting space bar.
You then hear a sound whose fundamental frequency doesn't vary, but whose spectrum slowly shifts
upwards. This may evoke a band-pass filter that moves, or the beginnings of a throat voice changing into
a nasal voice.
Now make the opposite experiment.
In a Bpf window draw the path of a fundamental with the pencil at about 100 to 900 Hz.
Set Fof frequency to about 200 Hz.
Listen to the result. This time, you get a glissando.
The third experiment now consists in simply setting the fundamentl to a very mow frequency, from 5 to
10 Hz. Leave the pitch of the Fof round 500 Hz. The result is that you hear the Fof "one by one".
The following figures are sonagrammes made with AudioSculpt, showing each of the previous examples.
Figure 160
You can see in this representation that the fundamental does not move. The spectral rays stay horizontal
during the whole length of the sound. A variation in intensity of the harmonic bands moves upwards.
97 - Diphone Studio - Manual
Figure 161
Here, you can easily see the glissando effect. The intensity of the harmonics stays stable.
Figure 162
Four Fof are visible here. The bandwidth is read on the vertical axis and time on the horizontal axis. The
intensity peak of the formant is situated in the darkest zone.
If you make the fundamental frequency too high, you make the number of calculations larger, and you therefore
make listening in real time a lot more difficult (cuts in the sound). This is due to the fact that the number of triggers
of banks of Fof goes up, a large quantity of redundancy occurs. You must then for perfect audition use the Export
to synthesis function (see next section).
98 - Diphone Studio - Manual
2.10.2 The parameters of Fof and Bpf
In order to fully understand the role of each parameter, you should keep the following diagram of an Fof
in mind.
Figure 163. List
of parameters
In the previous section, we explored the role of the first two parameters: Fundamental and Fof frequency.
Fof Amplitude: This amplitude scale won't accept negative values (these are interpreted as being equal
to zero). The resulting signal is normalised so that the maximum amplitude fits into 16 bits.
Fof Bandwidth: The bandwidth of Fof acts like that of a filter. The narrower it is, the more selective it is
and sensitive to excitations which fall in its bandwidth.
Fof Excitation Duration: The duration of the excitation should be understood as the duration that each
excitation impulse is maintained for. To hear the effect of this parameter properly, set the fundamental to
a low value. In the Bpf Fof Excitation Duration window, trace a curve varying from zero to a value less
than the period of the fundamental that is the inverse of the frequency of the fundamental (1/f).
Fof Attenuation Start: Gives access to the choice of the time of the beginning of the attenuation of the
impulse for each excitation.
Fof Attenuation Duration: Access to the attenuation time (which sets the attenuation slope) defined
from the attenuation time of the excitation.
Fof Phase: Gives access to controlling the phase of the Fof. The window of the Bpf Fof Phase is
graduated in radians. By default, the value of Bpf is constant and equal to zero. A curve enables you to
define an effect of phase rotation.
Scaler: Controls the relative level between segments. The access table of the Bpfs doesn't allow you to
modify this data from the creation of a segment. To change the value of Scaler, do it directly on the
representation of the segment in the sequence. Scaler modifies amplitudes, like in Additive.
When a bank of Fof has several Fof, two parameters can be added to the list in the Bpf table. These are
Frequency Warping and Fof Out Gain. Frequency warping enables the group transposition of all the Fof
which belong to a selected segment. The Bpf window of this parameter is measured in semitones. Fof
Out Gain is the output Gain of the Fof. Its value is measured linearly.
99 - Diphone Studio - Manual
2.10.3 The available Chant dictionaries
In the Dico&Seq folder, you have a group of folders whose names start with Chant (fig. 164).
Figure 164
These files are dictionaries of banks of Fof and of filters which are for you.
In the previous section, we have already exploited some of the resources of Chant-Base.dico.
If you now use the banks of more than one Fof, the graphical representations and the multi-Bpfs will
appear with the trace of all the curves of the parameters of each Fof. If, for example, you load the segment
5Fof from Chant-Base.dico, you will obtain the following multi-Bpfs for the Fof frequency parameter (fig.
165):
Figure 165
You may now have access to the pitch of each individual Fof by using all the modification procedures of
the Bpfs seen in the chapter on the Additive model.
All other parameters, except Fundamental, will consist in a number of curves equal to the number Fof in
the bank.
100 - Diphone Studio - Manual
Chant-Fof-Voyelles.dico enables you to try Chant with the banks of parameterised Fof depending on
the emission of vowels and the range of the voice.
To hear the low frequency excitation impulses go into the range of emission of the voice, trace in
Fundamental a curve from 10 to 196 Hz.
It is always surprising to hear simple impulses turn into the human voice…
Chant-Fof-Instruments.dico gives you a group of banks of Fof and of filters from the analysis of the
instrument sounds.
You can edit sequences with segments of the Fof from different instruments, and manipulate the multiBpf, for example the inversion of Fof frequency (using Scale Ration… in negative values)…
The replacement of multi-Bpf data by that of another Bpf can allow you to generate interesting sound
objects.
The replacement of Fof Frequency, for example, of the segment of a type of instrument by the Fof
Frequency of another instrument gives a hybridisation of sounds, where the character of both initial
sounds appears. To run the hybridisation of sounds, drag the Fof Frequency data from the segment folder
of your choice to the segment to be modified (The segment to be modified can just as well be in a
dictionary as in the sequence window).
Chant-Base-Filters.dico regroups simple banks of filters from 1 to 5 filters. To manipulate them, it is
necessary to understand the patches system (see next section).
Chant-Filter-Instruments.dico. Here you will find parameterised filters on the analyses of instruments.
They will be very useful if you want to perform the hybridisation of timbre.
101 - Diphone Studio - Manual
2.10.4 The Export for Synthesis command and patches
When entering the Export for synthesis procedure, you will notice that the opened window differs a lot
from that which is displayed by the Additive or Direct Signal models (fig. 166).
Figure 166
In the Export Settings zone on the right, appears a sketch of the current patch. It is set to 0 (zero) by
default. This patch corresponds to the simple work on the banks of Fof.
102 - Diphone Studio - Manual
By clicking on the small yellow arrows on the right of the indication of the Patch number, a pull-down menu
displays all the available patches (fig. 167).
Figure 167
The rectangle at the top is the legend of the symbols used for the representation of the structure of the
patches. The elements are: the Fof, the noise, the sound files. Every patch runs to the output (small
speaker).
The following section presents a few uses of the patches.
103 - Diphone Studio - Manual
2.10.5 Using the patches
We remind you that the Preview mode (Listening test) doesn't work with any other patch than patch 0.
You must therefore always use the Export to Synthesis command.
The banks of filters
The banks of filters are comparable to banks of Fof, but these are made to resonate with combinations
of different sources: white noise, sound files, Fof.
Open the Chant-Base-Filters.dico dictionary and place the first segment 1 Filter in a sequence window
(fig. 168).
Figure 168
The roles of the parameters of the filters are obvious and we will not detail them.
Noise Amplitude is necessary when using a patch with noise.
We will now detail a certain number of procedures using the patches.
104 - Diphone Studio - Manual
White noise in a bank of filters (patch 4)
As written previously, a bank of filters can be made to resonate with white noise.
Place a filter in the sequence window, set its length with the Inspector (for instance 6 sec) and prepare
its trajectory by varying its frequency and also its bandwidth by editing its two Bpfs.
Select the Export for synthesis option in the sequence window or in the Plug-in menu.
In the Export for synthesis window, select from the pull-down menu of the patches, patch 4 representing
the noise in the filter (fig. 169).
Figure 169
Note that the indication and the number of Filters box are shaded and inaccessible and replaced by
Number of Filters.
Execute the synthesis by clicking on OK.
☛
To modify the level of the white noise, use the Bpf Noise Amplitude.
Since the signal is normalised after synthesis, applying a constant value onto the white noise doesn't modify the
resulting sound.
Explore and modify the parameters of the multi-Bpfs (frequency, bandwidth… of each filter) and observe
the behaviour of the filters witht the white noise as the source.
Sound file in a bank of filters (patch 5)
Figure 170
If the previous example seems clear, using patch 5 will not be a proble.
After having prepared the sequence of filters, run the Export for synthesis option.
In the Filtering box write the name of the sound file you want to put through the filters (fig. 171).
105 - Diphone Studio - Manual
Figure 171
Click on Ok, the synthesis procedure starts.
After having listened to the result, you can change the characteristics of the filters as much as you like,
by controlling their Bpfs.
When the value of the bandwidth of the filters is small, the resonance of the filter can be longer than the
length of the segment and can be cut suddenly.
To make the synthesis longer without changing the length of the segment, use the More Time box of the
Do Synthesis part of the Export for synthesis window. The time in seconds written in that box is added to
the length of the synthesis.
106 - Diphone Studio - Manual
Bank of Fof in a bank of filters (patch 6)
Figure 172
If the two previous patches are clear to you, patch 6 should seem obvious to you.
A bank of filters is made to resonate by the signal from the bank of Fof.
Edit the sequence by drag and drop of the chosen segment to the chosen Fof.
Open the Chant-Base-Filters.dico dictionary, and select the parameters of the chosen bank of filters,
which you will find when you open the segment folder of your choice.
Drag the parameters and drop then on the segment icon that you have created (fig. 173, 174).
Figure 173. Source, the parameters of a filter
107 - Diphone Studio - Manual
Figure 174: destination: bank of Fof segment
In the sequence window, the list of parameters of the filter a re added to that of the bank of Fof (fig. 175).
108 - Diphone Studio - Manual
Figure 175
☛
Run the synthesis procedure by choosing patch 6.
Chant-Filters-Instruments.dico contains a group of filters founded on the analysis of musical instruments. You
can, with the Clear command (Edit menu), delete certain parameters which you don't have any use for.
109 - Diphone Studio - Manual
Sound file and noise in a bank of filters (patch 2)
Figure 176
Noise can be added to the signal of a sound file at the entrance of a bank of filters.
Patch 2 is a variant of patch 5 with access to the control of noise amplitude parameters, from the table of
parameters of the sequence.
In the Bpf Noise Amplitude window, apply the desired value by using Apply Constant Value… or draw a
curve with the tools from the toolbar.
Having selected patch 2, specify the name of the sound file in the Filtering field and run the synthesis
process by clicking on OK.
Combined sources in a bank of filters (patch 2)
Figure 177
In this patch, you can associate three elements in a bank of filters: Fof, noise and sound file.
This patch uses the different control elements that we saw in the previous examples: editing a sequence
of Fof, applying a bank of filters, setting the amplitude envelope of the noise, choosing the sound file, and
executing the synthesis.
We will not detail the other patches that offer different combinations of these same elements.
110 - Diphone Studio - Manual
3 The Resan program
As is the case with Addan, Resan is an application dedicated to analysis. Its link with Diphone functions
on the same principle as for Addan.
Resan makes an analysis using the method of Resonance models. On the output, we obtain banks of
Fof, or of parameterised filters depending on the resonance peaks of the analysed sound.
Resan performs series of iterative analyses that you can parameter and run selectively.
The format of the output file is the SDIF norm (Sound Description Interchange Format) which is being
more and more widely used, thereby allowing communication with a group of other programmes.
In Diphone, you apply the same procedures for cutting up segments into scripts, and constituting
Containers and dictionaries, as those defined from the files analysed by Addan or output by Direct Signal.
Manipulation, menus and toolbars in Resan are exactly the same as those in Addan).
The main window is made up of two tabs that enable you to navigate between choosing data for analysis,
and data for synthesis (fig. 178, 179).
111 - Diphone Studio - Manual
Figure 178
The lower part of the window details the different steps to go through for an analysis.
There are eight steps in the analysis. By default, steps 0 to 5 are suggested for the analysis.
112 - Diphone Studio - Manual
Figure 179
113 - Diphone Studio - Manual
3.1 The analysis
The controls of the analysis don't appear under the Synthesis tab anymore.
To run an analysis, display the analysis tab.
First, load a Preset, which will give you the parameters necessary for an analysis (fig. 180).
Figure 180
A pull-down menu appears and gives you the choice of 10 presets (fig. 181).
Figure 181
Depending on the nature of the initial sound, you can try several presets. The result of the synthesis will
allow you to choose the best-suited preset.
Under the analysis tab, enter the name of the file to be analysed or load it by clicking on the icon of a hard
disk.
Now click on the Validate button. The Generic Name field fills in with the name of the sound without its
extension.
The Validate option changes into the Run ? option (fig. 182).
114 - Diphone Studio - Manual
Figure 182
Click on Run ? to run the analysis.
3.2 The synthesis
Once the analysis has finished, click on the Synthesis tab. In the Input Fof File field (fig. 179), click on the
hard disk icon and go to the :ImpExport:Chant folder.
There, you will find a group of files created by the analysis and configure in the following way:
Generic Name. M1.FOF.SDIF, Generic Name. M2.FOF.SDIF […] Generic Name. Mn.FOF.SDIF where n
is equal to the number of steps in the analysis that has been run.
Choose one of these files (The quality of the analysis goes up as a function of the of the step number).
Click on Validate.
If you wish to, you can change the name of the default name of the file Sound Output. Click on Run ?.
Listen to the result. Once you are satisfied, you can return into Diphone to write a script and create a
dictionary that you can exploit with the Chant model.
115 - Diphone Studio - Manual
4 The menus
4.1 The Diphone menus
These menus are of course the basic way of accessing the commands in Diphone that we have just
explored.
4.1.1 File
New Text creates a new text window. This can be saved as a script.
New Bpf displays a dialogue window enabling you, after you have displayed the desired values and
clicked on Apply, to create a Bpf trace by using the pencil in the toolbar.
Once this Bpf curve has been drawn, you can save it in a file, or copy it (Copy command in the Edit menu)
to paste it in another already existing Bpf window.
New Console displays a new console in which appears the list of calculation operations for the synthesis
as well as different messages (Creating a dictionary and scripts, information on errors etc.).
New Bpf displays a new empty Bpf window. You can draw a new curve in it, and copy paste it into a
parameter of your choice.
New Dictionary enables the creation of a new dictionary (empty). Instruments can be created in it, and
instruments from other dictionaries can be installed in it.
New Sequence displays an empty sequence window. From the dictionaries, you can drag segments that
will make up a sequence. Name you sequence after having selected Save as from the File menu. A
sequence window is made up of two regions. The upper region corresponds to a graphical visualisation
of the segments, the lower region offers an access table of the parameters of the Bpfs and the multi-Bpfs.
Open… opens a dictionary, a sequence or a Bpf.
Open Movie&Sound enables you to open the Sound folder, and listen to .aiff files generated by synthesis.
If QuickTime is not installed, this command is the Play Sound.
Close closes the active window, situated in the foreground be it a dictionary or a sequence.
Save, Save as… enables you to save sequences and to given then a new name.
Revert enables you to revert back to the original state of a sequence or a dictionary, eliminating the
modifications made after its second save.
Page Setup… enables you to define the standard modification options for the print format of the
document.
Print… runs the printing of the console.
Activate Addan, Activate Resan loads the Addan or Resan applications without quitting Diphone.
Quit quits the Diphone application.
116 - Diphone Studio - Manual
4.1.2 Edit
Undo cancels the last operation.
Cut cuts and removes one (or several) selected segment and stores it on the clipboard so it can be pasted
elsewhere.
Copy copies one (or several) selected segment so you can paste it elsewhere. The difference with cut is
that the copied segment is not removed.
Paste pastes the cut or copied segment into the selected sequence.
Clear clears and removes the selected segment(s) permanently.
Select All selects all the segments present in the window of the sequence that is in the foreground.
Preferences… enables you to change the general configuration of Diphone (Environment, re-synthesis
parameters…).
4.1.3 Plugins
Create Script From Markers enables you to create a script from markers placed on a sound with
AudioSculpt.
Create Dictionary From Script enables you to create a dictionary from a script.
Set Plug-in Model gives a sub-menu allowing you to choose the analysis model. Three are available:
Additive, Direct Signal and Chant.
4.1.4 Parameters
Remove External Parameters deletes multi-Bpf data from memory when it has been visualised
graphically in a Bpf access table. The value in Kb corresponds to the amount of memory occupied by the
display of the Bpf that you are about to delete.
Create Default Segment enables you to create a new segment in the model of your choice. The basic
parameters a set by default. You can choose the number of partials or the Fof.
Create Segment From Sequence enables you to create a segment from the contents of a sequence or
from a selected part of the sequence.
4.1.5 Dictionary
The Dictionary menu is only accessible when the dictionary window is open.
Expand All selected: opens all the instruments and composite segments contained in the dictionary
window.
Collapse All selected: closes all the instruments and composite segments contained in the dictionary
window.
Sort If no instrument is selected: sorts the instruments in the Dictionary window in inverse alphabetical
order. If an instrument is selected: sorts the segments of an instrument in alphabetical order.
Create composite segment / create instrument: In a dictionary, if an instrument is selected, creates an
empty composite segment, which you will have to fill with segments from a sequence. If no instrument is
selected, creates a new instrument.
Play preview: plays a segment placed in the dictionary.
117 - Diphone Studio - Manual
4.1.6 Sequence
The Sequence menu is only accessible when the sequence window is active.
Show Parameters opens or closes the lower part of the window (parameters and visualisation of Bpfs)
of a sequence. An equivalent command exists, which is the zoom square at the top right-hand side of the
bar of the window.
Show Separation Marks: activates or disactivates the visualisation of the limits of each segment in the
sequence window.
Out Composite Segment re-forms a composite segment.
Show Grid: displays the temporal grid marks in a sequence.
Snap Selection to Grid: moves all the segments onto the temporal grid so that the centre of each
segment is positioned on nearest grid step.
Glue Selection: Moves each segment as near as possible to the next segment, within the beginning and
end zone limits of interpolation of each one. It is also possible to define a space between each segment
of the selection, by entering the length of this space in the dialogue box.
Set Selected Articulations To: gives all the different types of articulation that are usable to interpolate
the data of a segment to another segment. This list is also accessible by clicking and keeping the mouse
button down on the articulation symbol, directly in the sequence.
Concat Resampling: choose the sampling frequency of the parameters for synthesis. The value is by
default set to 100 Hz. (This sampling frequency corresponds to the number of points per second in a Bpf.
Don't confuse this with the sampling frequency of the sound file).
Play: plays the sound of the sequence in preview mode.
Play Loop: plays a segment, a sequence or part of a sequence in a loop.
Pause: pauses the sound, which can be played again by pressing play.
Stop: stops the sound and repositions the cursor at the beginning.
Export For Synthesis: gives access to the window running the current high quality synthesis.
Play Last Synthesis: plays the last synthesis to date, synthesised in high quality.
4.1.7 Bpf
This menu appears in the tool bar only when a Bpf window is open.
Show Points: displays the points of a curve.
View: opens a sub-display menu for the curves of a multi-Bpf.
One Curve: displays one curve only of a multi-Bpf. You can choose this curve either with the mouse, or
with the Current Curve option (see below).
Back Curves: Choose and edit a curve within a multi-Bpf.
All Curves: displays all the curves of a multi-Bpf and disables any editing.
Current Curve: choose the curve to be edited in a multi-Bpf.
Current Curve For All Editors: sets the default curve for editing when any Bpf window is opened.
118 - Diphone Studio - Manual
Apply Constant Value: specify a constant value for all the points of a Bpf.
Scale: modify the scaling ratio between the points of a Bpf curve.
Translate: translates all points of a Bpf curve.
Fill gaps: Re-calculates the missing points in a Bpf curve.
Crop on Curve: enables you to delete curves in a multi-Bpf.
Apply Constant Note: specify a constant value in the form of the name of a note or an octave number.
Note Transpose: specify the translation of a Bpf curve with a musical interval.
4.1.8 Window
Show Inspector, Show Toolbar: These two commands show or hide the Inspector and Toolbar
windows.
Anchor Toolbar: If selected, the toolbar will be anchored to the left, to hand side of the screen, beneath
the menu bar.
Unanchor Toolbar: If selected, the toolbar can be moved freely, and can be closed or masked using the
usual boxes of its title bar.
The windows present on the desk are listed in the lower part of the menu. The name of the active window
is ticked.
You can select the name of an inactive and hidden window, and make it active and appear in the
foreground.
119 - Diphone Studio - Manual
4.2 The menus in Addan and Resan
4.2.1 File
New Text creates a new text window.
New Console displays a new console in which a list of calculation operations appears for the analysis
and the synthesis, as well as different messages.
New Analysis displays a new analysis window.
Open opens an analysis configuration.
Open As Text opens an analysis configuration in the form as text.
Open Movie&Sound opens the Sound folder and enables you to play .aiff files generated by synthesis.
If QuickTime is not installed, this command becomes Play Sound.
Close closes the current analysis window.
Save, Save As… saves the analysis configurations under a new name.
Revert reverts back to the original state of the analysis, by eliminating the modifications made after its
last save.
Page setup… defines the standard modification options of the print format of the document.
Print… prints the console.
Activate Diphone loads Diphone without quitting Addan.
Quit quits Addan or Resan.
4.2.2 Edit
Undo cancels the last operation to date.
Cut cuts and removes a field in the analysis window and puts it on the clipboard so it can be copied
elsewhere.
Copy copies the contents or part of, in a selected field so you can paste it elsewhere. Unlike cut, the
copied field is not removed.
Paste pastes the copied or cut data into the selected field.
Clear permanently clears and removes the selected field(s).
Select All selects the whole contents of a field present in the analysis window.
Preferences… gives the general configuration of Addan.
4.2.3 Analysis
Choose Selection enables you to choose or to create a folder which will contain all the files from the
analysis. You can first insert the sound to be analysed.
Clear File Names deletes all the names of the files in the fields of the analysis window, except the name
of the sound to be analysed.
120 - Diphone Studio - Manual
Validate / Run ?. These two operations come one after the other. Validate places the default names in
the files F0, ADD, Synth and Noise. Once this is done, then Run ? option appears and enables you to run
the analysis.
Create Diphone Script creates a Diphone script containing an instrument and a segment.
4.2.4 Window
Show Toolbar. These two commands make the Inspector window and the toolbar appear or disappear
from the screen.
Anchor Toolbar. If selected, the toolbar will be anchored to the left, to hand side of the screen, beneath
the menu bar.
Unanchor Toolbar: If selected, the toolbar can be moved freely, and can be closed or masked using the
usual boxes of its title bar.
The windows present on the desk are listed in the lower part of the menu. The name of the active window
is ticked.
You can select the name of an inactive and hidden window, and make it active and appear in the
foreground.
121 - Diphone Studio - Manual
5 Setting the preferences
5.1 Diphone preferences
Figure 183: general preferences
Here, you can set the following:
• The use of the help balloons under the command buttons.
• Real time Display of the zooms.
• Display of an empty sequence window at startup.
• Confirmation with an alert window that you are quitting Diphone.
• Format of audio file generated with synthesis.
• Name of the Plugins folder in the general folder of Diphone.
122 - Diphone Studio - Manual
Environment preferences
Figure 184: Environment preferences
Here you can choose all the source or destination folders for the files used in Diphone.
The expression $USERHOME is the generic name, which defines the path of the Diphone folder.
$USERHOME is itself defined by DEFAULTWD. This path is locked.
You can however redirect the different files into folders of your choice.
123 - Diphone Studio - Manual
Preferences Additive
Figure 185: Preferences for Additive
The left-hand side of the window enables you to specify the parameters for the synthesis (Export to
Synthesis): Number of partials, sampling frequency, deleting intermediary files generated by the
synthesis.
The right-hand side enables you to set the values for immediate medium quality listening of the sequence
(Play button or Space bar).
124 - Diphone Studio - Manual
Preferences Chant
Figure 186: Preferences for Chant
Setting the parameters for Chant is similar to doing it for Additive. You will however notice in the righthand side (real-time listening) that the values are set to maximum quality. You can also specify here a
default sound file, which will be suggested to you if you use patches with sound files.
125 - Diphone Studio - Manual
Preferences Direct Signal
Figure 187: Preferences for Direct Signal
Setting the parameters for Direct Signal enables you to set two values only: quality of the synthesis,
quality of intermediate listening.
126 - Diphone Studio - Manual
5.2 Preferences for Addan and Resan
Figure 188: General preferences
Here, you will find similar options to those on the same preferences page for Diphone.
New Doc at Startup opens an analysis window when an application is loaded.
127 - Diphone Studio - Manual
Figure 189: Environment preferences
Settings are done in exactly the same way here as they are done for the equivalent window in Diphone
(see section "5.1 Diphone preferences" on page 122).
128 - Diphone Studio - Manual
Index
$USERHOME 1 2 3
Choose File 1 2
Choose Selection 1 2 0
Choose Session 9
Clear 1 2 0
Clear File Names 1 2 0
Close 1 1 6 , 1 2 0
Collapse All 1 1 7
Composite 5 3
Composite segment 5 2 –5 3
Composite segments 2 6
Concat 1 1 8
Container 3 1
Convolution 9 3
Copy 1 2 0
Create composite segment 1 1 7
Create Default Segment 1 1 7
Create Dictionary From Script 3 1 , 1 1 7
Create Diphone Script 2 4 , 1 2 1
Create instrument 1 1 7
Create Script From Markers 2 8 , 1 1 7
Create Segment From Selection 5 2
Create Segment From Sequence 5 1 , 1 1 7
Crop on Curve 1 1 9
ctr 27
Current Curve 1 1 8
Current Curve For All Editors 1 1 8
Cut 1 2 0
A
Activate Addan 1 1 6
Activate Diphone 1 2 0
Activate Resan 1 1 6
ADD 2 1
Addan 2 , 7 , 1 2 0
preferences 1 2 7
Additive 2 , 3 1
preferences 1 2 4
Additive Synthesis 6 0
AIFC 1 1
AIFF 1 1
All Curves 1 1 8
Amplitude of partials 6 4
Analysis settings 1 6
Anchor Toolbar 1 1 9 , 1 2 1
Apply Constant Note 8 3 , 1 1 9
Apply Constant Value 1 1 9
Apply with phases 2 1
Articulations 4 9
ASCII 1 7
Attack 1 9
AudioSculpt 1 7 , 2 8
markers 2 8
B
D
Back Curves 9 6 , 1 1 8
Bandwidth for 1 9
Banks of filters 1 0 4
basic segment 2 6
beg 2 7
Bpf 2 2 , 3 6 , 3 8 , 6 3 , 7 7
Bpf Gain 9 2
Bpf Mode 4 8
Break Point Function 2 2
DEFAULTWD 1 2 3
Depalle Ph. 1
Dico&Seq 3 4 , 1 0 0
Dictionary 3 1 , 3 6 –3 7
Diphone
preferences 1 2 2
Direct Signal 2 , 9 1
preferences 1 2 6
E
C
Calcul took xmxs 1 4
Carrive J. 2
Changing the amplitude of the segment 4 6
Changing the name of a segment 4 7
Chant 2 , 9 3 –9 4
preferences 1 2 5
Chant dictionaries 1 0 0
Chant-Base.dico 9 5
Chant-Base-Filters.dico 1 0 1 , 1 0 4
Chant-Filter-Instruments.dico 1 0 1
Chant-Fof-Instruments.dico 1 0 1
Chant-Fof-Voyelles.dico 1 0 1
Choose Directory 1 2
Edit 4 9
Elastic 4 8 , 9 2
Elastic Reverse 4 8
end 2 7
Energy 6 4
Environment
preferences 1 2 3
Expand All 1 1 7
Export 1 2 4
Export For Synthesis 1 1 8
Export for Synthesis 1 0 2
Extract fundamental 1 7
Extract Noise 1 2
129 - Diphone Studio - Manual - index
F
F0 1 7
FFT size 1 6
Fill gaps 1 1 9
Filtering 1 0 5
Flow chart 6
Fof 9 3 –9 4
Fof Amplitude 9 9
Fof Attenuation Duration 9 9
Fof Attenuation Start 9 9
Fof Bandwidth 9 9
Fof Excitation Duration 9 9
Fof frequency 9 6 –9 7
Fof Phase 9 9
Formant 9 3
Frequency of partials 6 4
From 8 2
From Maximum 8 2
From Middle 8 1
From minimum 8 0
From Value 8 2
From zero 8 0
Fund.max 1 7
Fund.min 1 7
Fundamental 2 2 , 6 4
Menu
Addan 1 2 0
Analysis 1 2 0
Bpf 1 1 8
Dictionary 1 1 7
Diphone 1 1 6
Edit 1 1 7 , 1 2 0
File 1 1 6 , 1 2 0
Parameters 1 1 7
Plugins 1 1 7
Resan 1 2 0
Sequence 1 1 8
Window 1 1 9 , 1 2 1
Menus 1 1 6
More Information 3 1
More Settings 1 0
More Time 1 0 6
multi-Bpf 73, 77
N
New 1 1 6
New Analysis 1 2 0
New Bpf 1 1 6
New Console 1 1 6 , 1 2 0
New Dictionary 3 5 , 1 1 6
New Doc at Startup 1 2 7
New Sequence 3 8
New Text 2 7 , 1 1 6 , 1 2 0
Noise 1 7
Noise thres 1 7
Note 8 4
Note Transpose 8 3 , 1 1 9
Number of Curves 3 6
G
Gain 6 4 , 9 2
General 1 5
Generic Name 1 1 4
Glue Selection 4 5 , 1 1 8
H
Hard 4 8
Hard Reverse 4 8
Hybridisation 1 0 1
O
One Curve 7 5 , 1 1 8
Open 1 1 6 , 1 2 0
Open As Text 1 2 0
Open Movie&Sound 6 1 , 1 2 0
Original Fundamental 6 4
Out Composite Segment 1 1 8
Output 1 9
I
Impulse response 9 3
Inspector 3 2
Inspector window 4 7
InterpBeg 2 6 –2 7
InterpEnd 2 6 –2 7
L
Lefevre A. 1
Length 8 6
Load 5 0
M
Macintosh 1
Magnifying glass 7 1
Markers 2 8
AudioSculpt 2 8
file 2 9
P
Page Setup 1 1 6
Paste 1 2 0
Patch 9 5 , 1 0 2 , 1 0 4
Pause 1 1 8
Peak 3 0 , 9 2
Pencil 7 7
Phase of partials 6 4
Play 1 1 8
Play Last Synthesis 1 1 8
Play Loop 1 1 8
Play preview 1 1 7
Plugins 2 8 , 3 1 , 1 2 2
Poirot G. 2
130 - Diphone Studio - Manual - index
Preferences 1 1 7 , 1 2 2
Preview 5 8
Print 116
Synthesis 1 1 5
T
Q
Toolbar 7
Translate 1 1 9
Translation 8 3
Transposition 6 4
Treat Curve 7 8
Quit 1 2 0
R
Release 1 9
Remove External Parameters 7 3 , 1 1 7
Resampling 1 1 8
Resan 2 , 9 3 , 1 1 1 , 1 2 0
preferences 1 2 7
Resonance model 1 1 1
Revert 1 1 6 , 1 2 0
Rodet X. 1
Rubber 7 7
Run ? 1 2 1
S
Sampling Rate 3 6 , 8 6
Save 5 0 , 1 1 6
Save as 1 1 6
Scale 7 8 , 9 2 , 1 1 9
Scale Ratio 7 9 , 9 2
Scaler 4 6 , 6 4 , 9 9
Scaling 7 8
Script 2 4 , 2 8
writing 2 7
Script From Markers 2 8
sd2 1 1
SDIF 1 7 , 1 1 1
sdiftotext 1 7
Segment 2 6
creating 5 1
Select All 1 2 0
Sequence Grid Step 5 6
Sequences 3 8
Set Grid Step 5 6
Set Plug-in Model 1 1 7
Set Selected Articulations To 1 1 8
Show Grid 5 6 , 1 1 8
Show Inspector 3 2 , 1 1 9
Show Parameters 1 1 8
Show Points 6 9 , 1 1 8
Show Separation Marks 6 6 , 1 1 8
Show Toolbar 1 1 9 , 1 2 1
Signal 9 2
Smooth Order 1 7
Snap Selection to Grid 5 7 , 1 1 8
Sort Dictionary 3 7
Sort Instrument 3 7
Sound Description Interchange Format 1 1 1
Sound Designer 3 0
SoundDesigner 9 2
Stop 1 1 8
Straight line 7 7
U
Unanchor Toolbar 1 1 9 , 1 2 1
Undo 1 2 0
UNIX 1
V
Validate 1 2 1
View 1 1 8
Virtual memory 7
W
White noise 1 0 5
Z
Zoom 7 0 , 1 1 8 , 1 2 2
131 - Diphone Studio - Manual - index